


 3390Likes
Thread: 55 Wagon Progress


Results 106 to 120 of 1865
 LinkBack URL
 About LinkBacks
-
11-01-2013 08:14 PM #106
 CHR Member

- Join Date
- Jun 2008
- Location
- Leonardtown
- Car Year, Make, Model: Walking
- Posts
- 1,228
The epoxy does discolor slightly, and I've found it is more tolerant of the heat if allowed to fully cure..
Didn't get much accomplished tonight but grinding on some plug welds.
I've had a few inquiries in the past as to my weld grinding process, so I thought I'd use the opportunity for another video.....
Grindingplugwelds.mp4 Video by rmccartney | Photobucket
.Robert
-
Advertising

- Google Adsense
- REGISTERED USERS DO NOT SEE THIS AD
-
11-02-2013 08:20 AM #107
CHR Member
- Join Date
- Jan 2006
- Location
- Constantine
- Car Year, Make, Model: 57 chevy 2 dr wagon
- Posts
- 9,476
As always Great workCharlie
Lovin' what I do and doing what I love
Some guys can fix broken NO ONE can fix STUPID
W8AMR
http://fishertrains94.webs.com/
Christian in training
-
11-02-2013 08:27 AM #108
CHR Member
- Join Date
- Sep 2013
- Location
- Portage
- Car Year, Make, Model: 31 A Coupe
- Posts
- 567
Iv'e followed your posts on the metal shaping sites, it's great to see them here.
Your tutorial style of posting is a great teaching aid to us amateurs! Thank's for taking the time to post!
I love the pic with all the vice grips lined up on the pinch weld! I never seem to
have enough clamping tools! LOL
Rich
-
11-02-2013 09:12 PM #109
CHR Member
- Join Date
- Jun 2008
- Location
- Leonardtown
- Car Year, Make, Model: Walking
- Posts
- 1,228
Thanks guys!
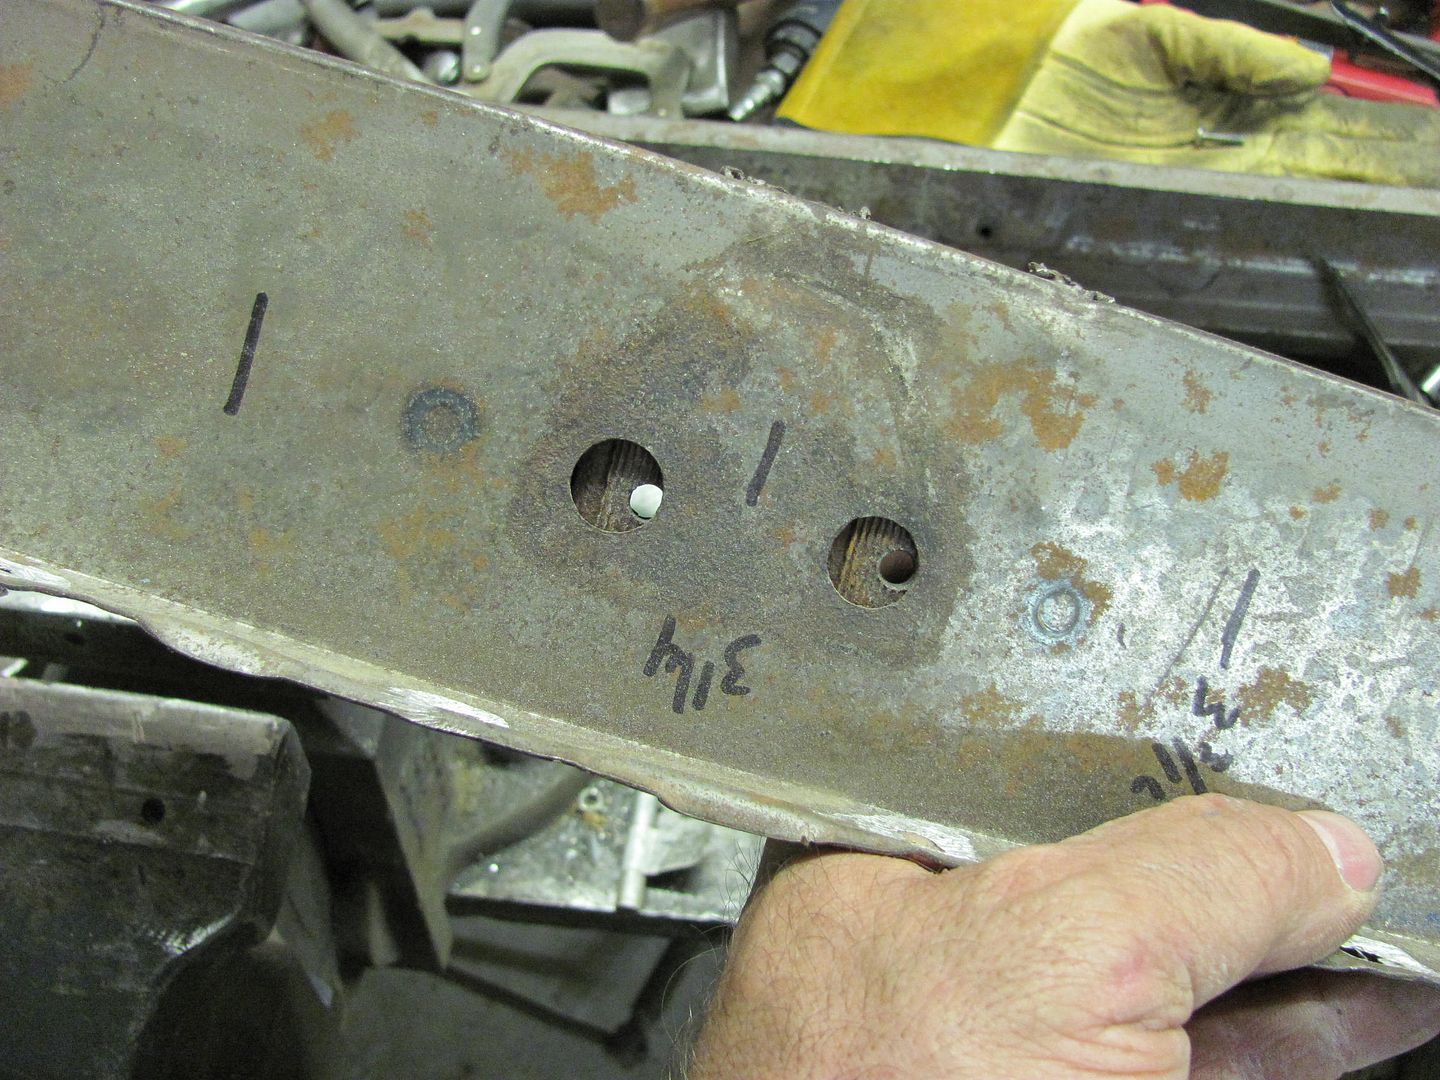
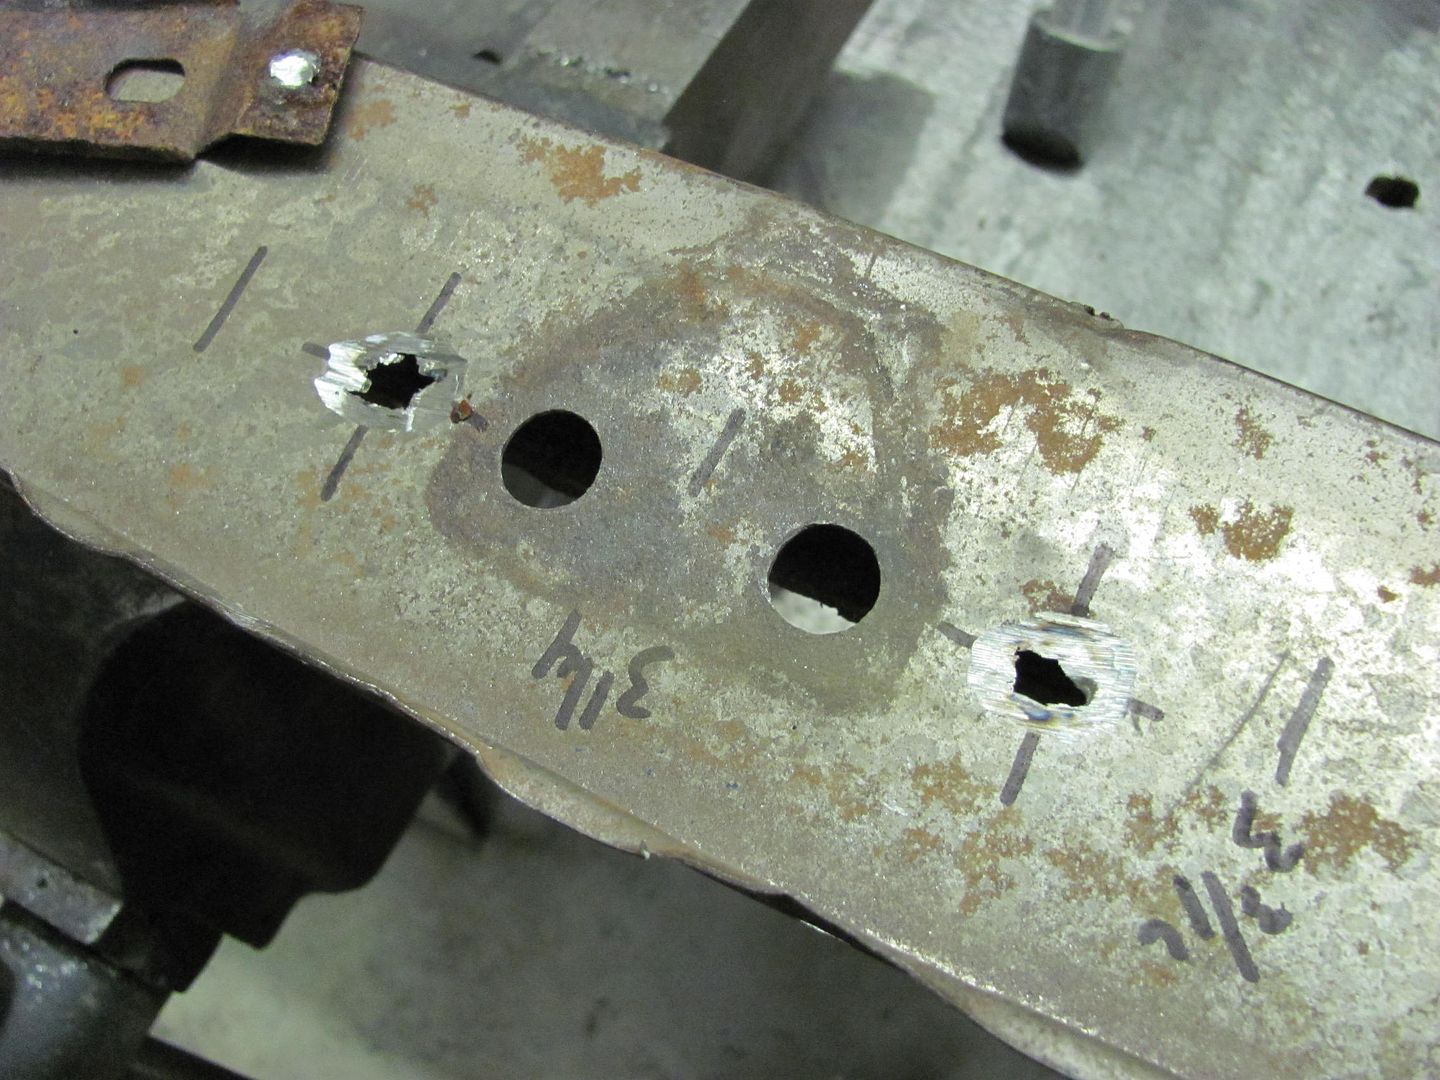
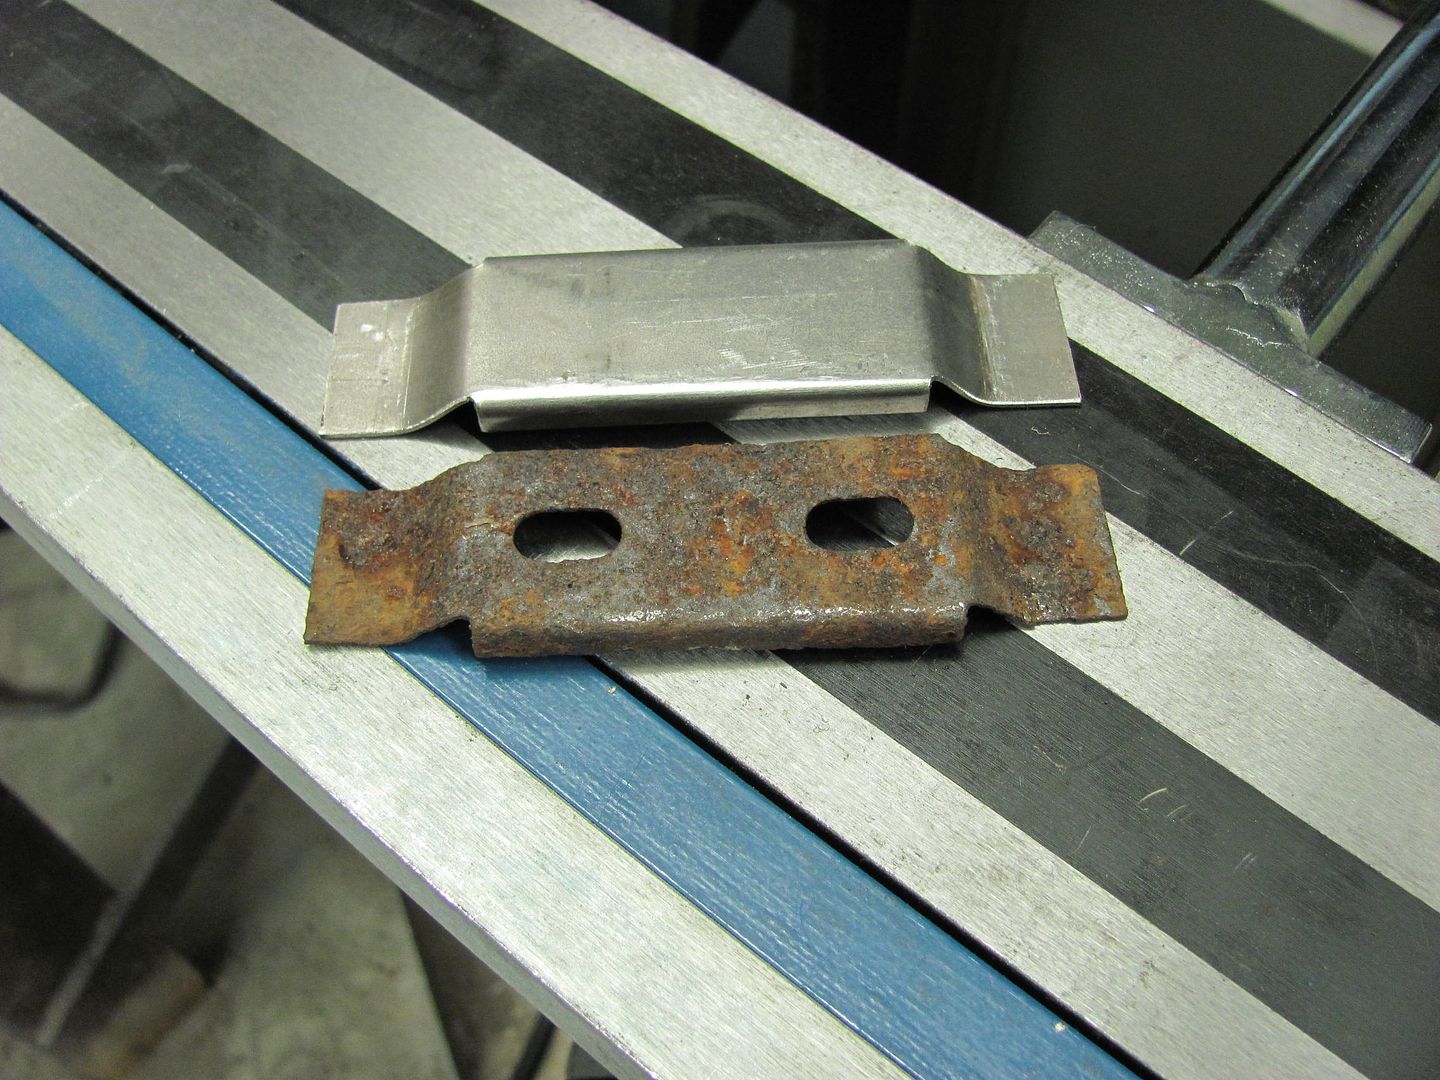
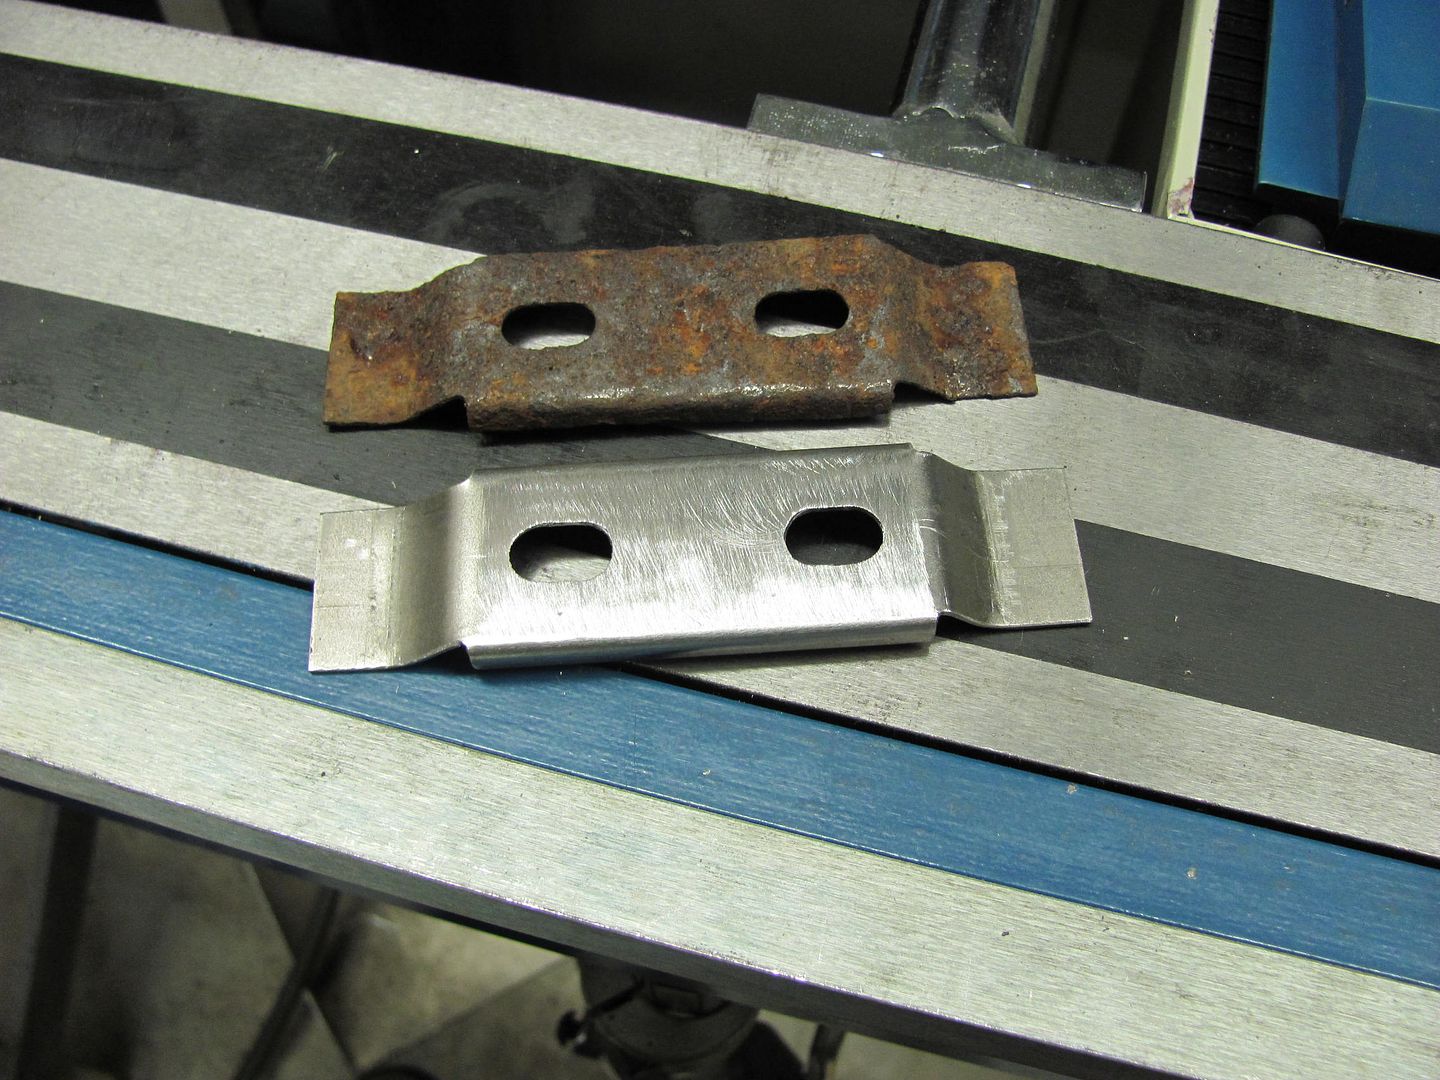
Tonights repair was to duplicate one of these mounting blocks for the lift gate's gas strut.
The good one...
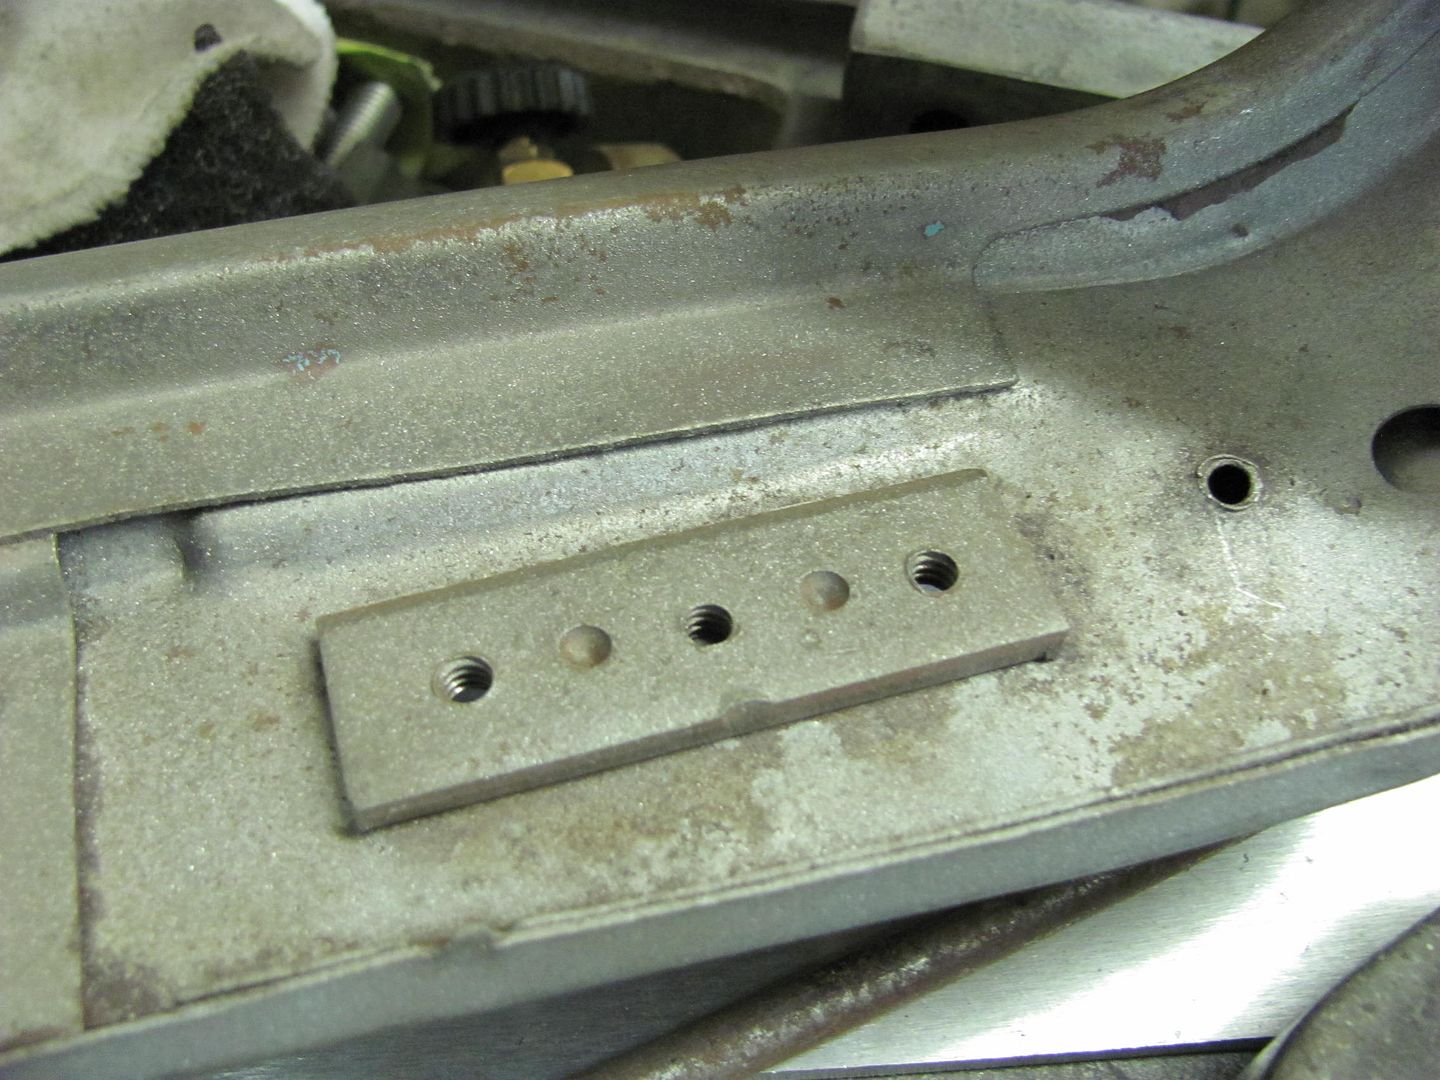
...not so good...
Used a hole saw to provide some radiused ends and the 3" cutoff wheel to cut out all the torn and ragged metal..

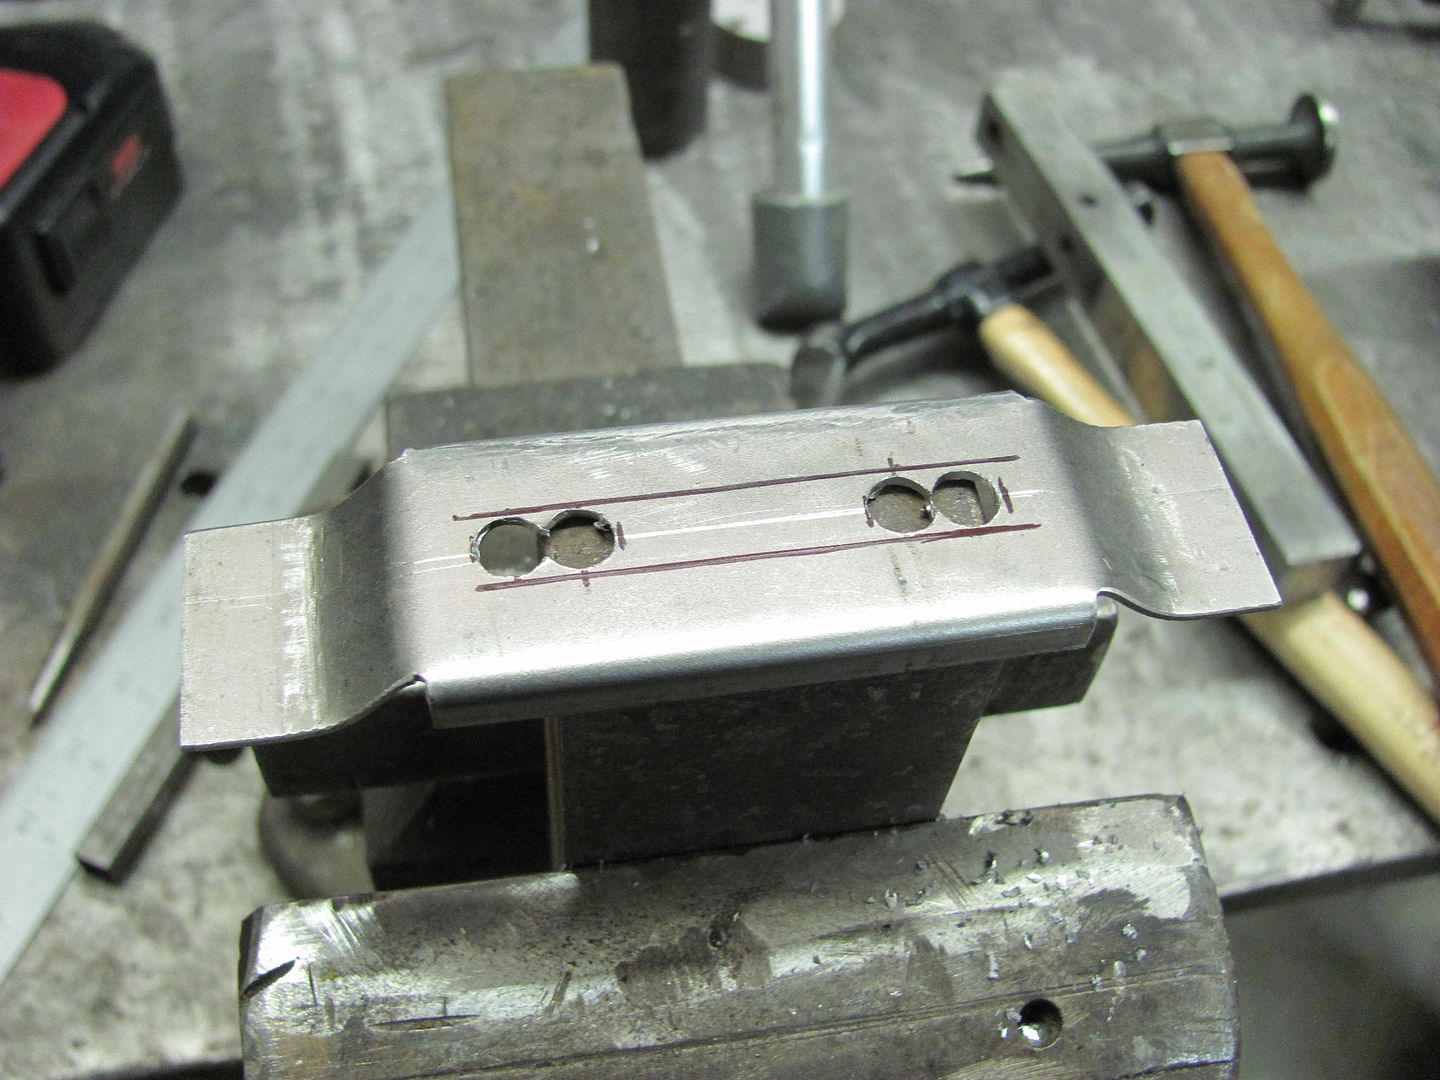
A piece of 19ga is tacked and welded....note the original color....
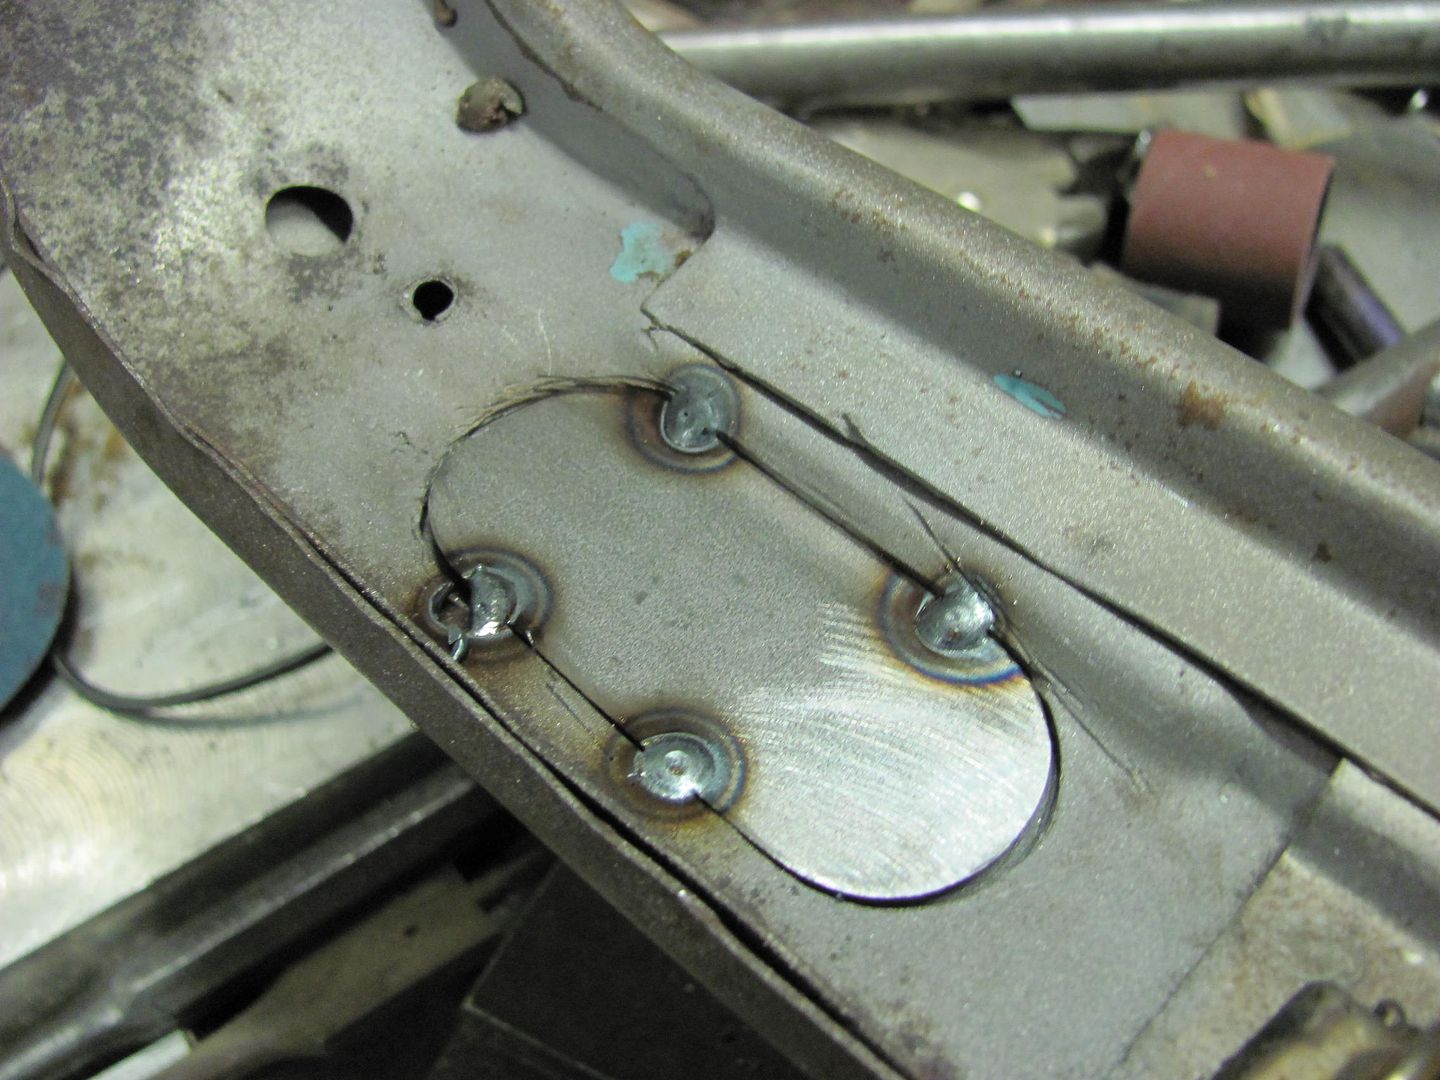

Cut out a piece from a steel angle, drilled and tapped the three 10-24 holes. This was bolted in place using anti-seize on the screw threads to prevent galling during the weld process.. then plug weld holes drilled and welded from the outside..
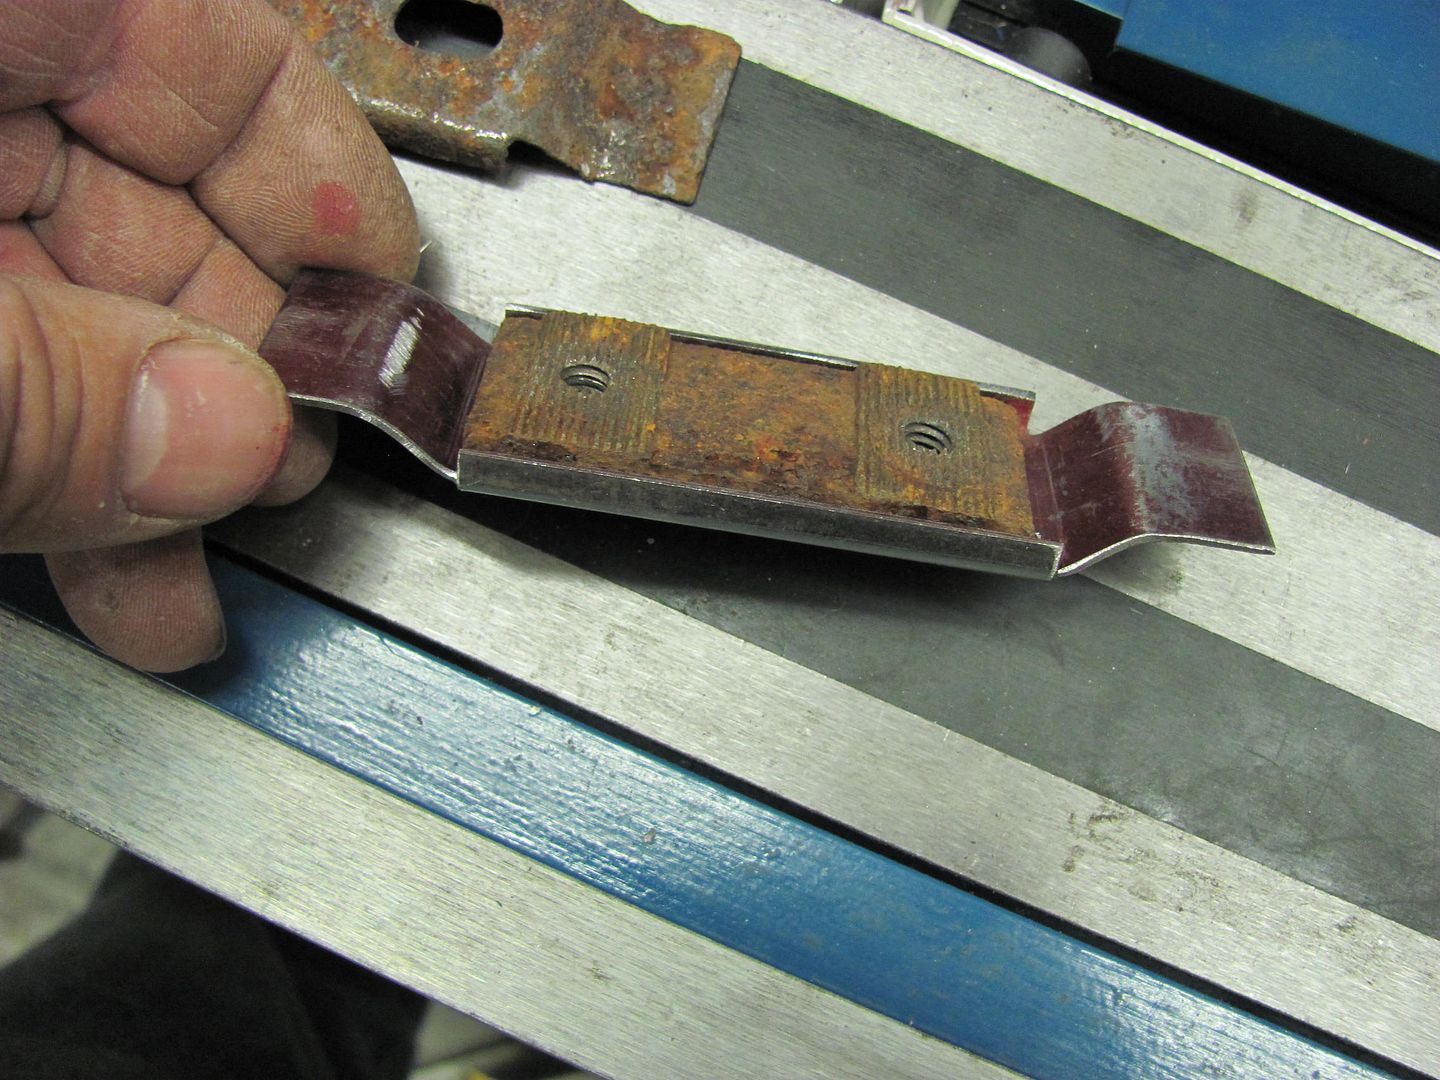
Plug welds cleaned up, checking the threads for burrs...
And for next time, we have one more piece to add while the bottom is still open, the floating nut plate for the tailgate latch....
Robert
-
11-03-2013 01:34 AM #110
CHR Member
- Join Date
- Sep 2007
- Location
- New Bedford
- Car Year, Make, Model: 34 Ford 3W Coupe Replica
- Posts
- 14,754
Once again you make it look so easy! And once again I gain some insight on what it takes! TIA...............
-
11-07-2013 08:11 PM #111
CHR Member
- Join Date
- Jun 2008
- Location
- Leonardtown
- Car Year, Make, Model: Walking
- Posts
- 1,228
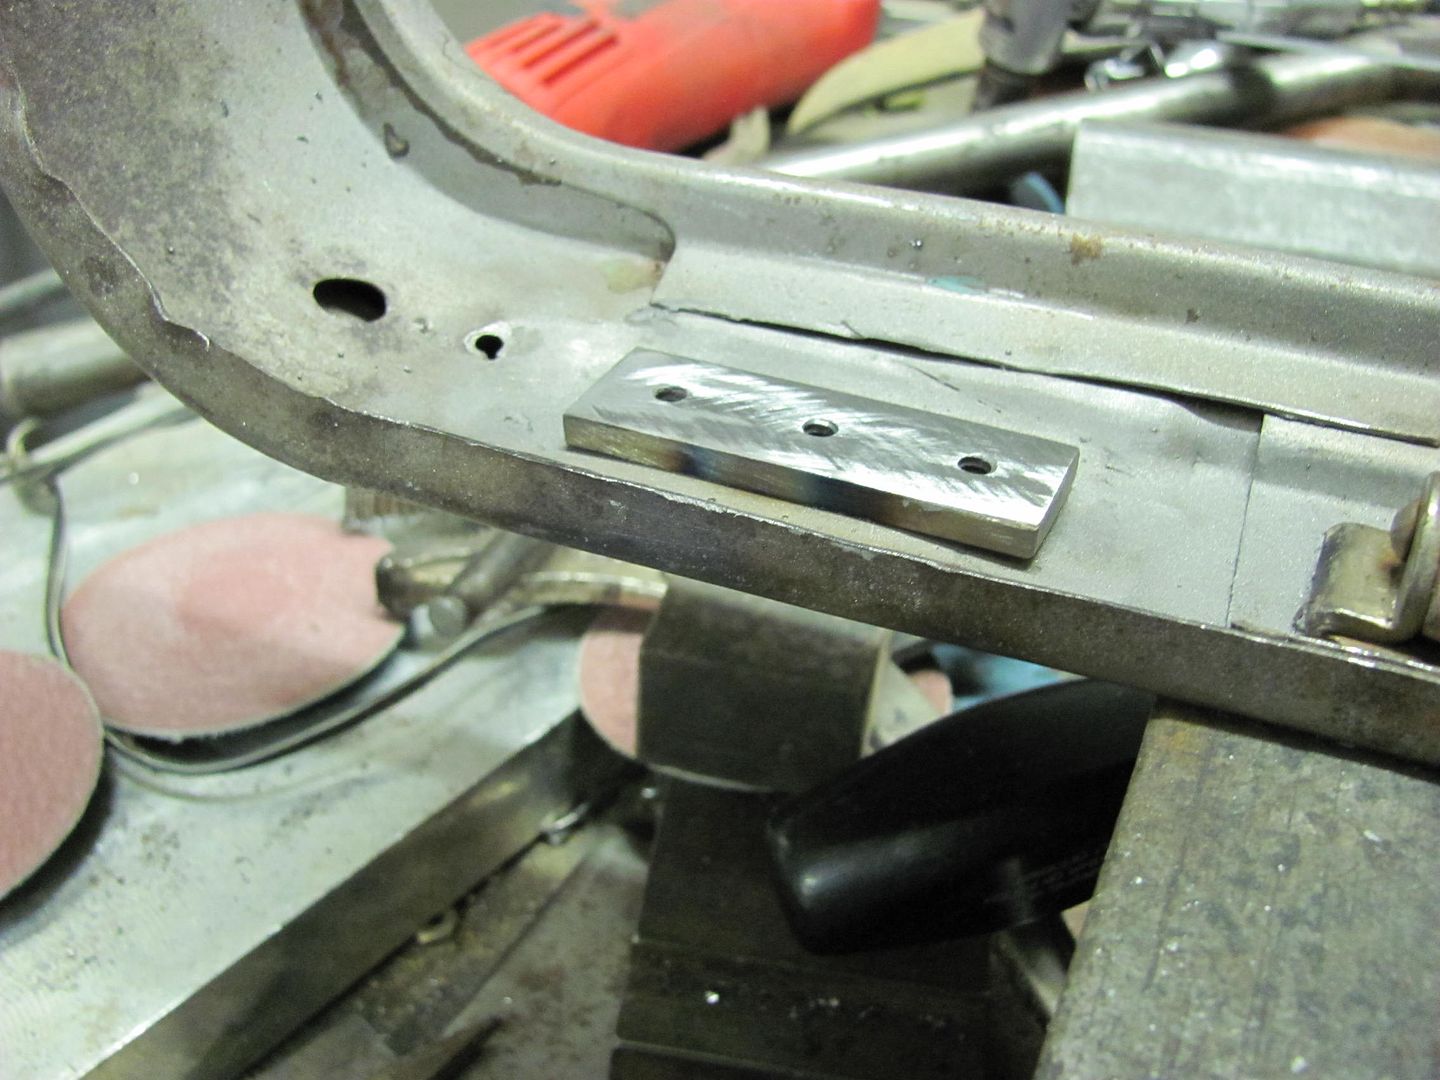
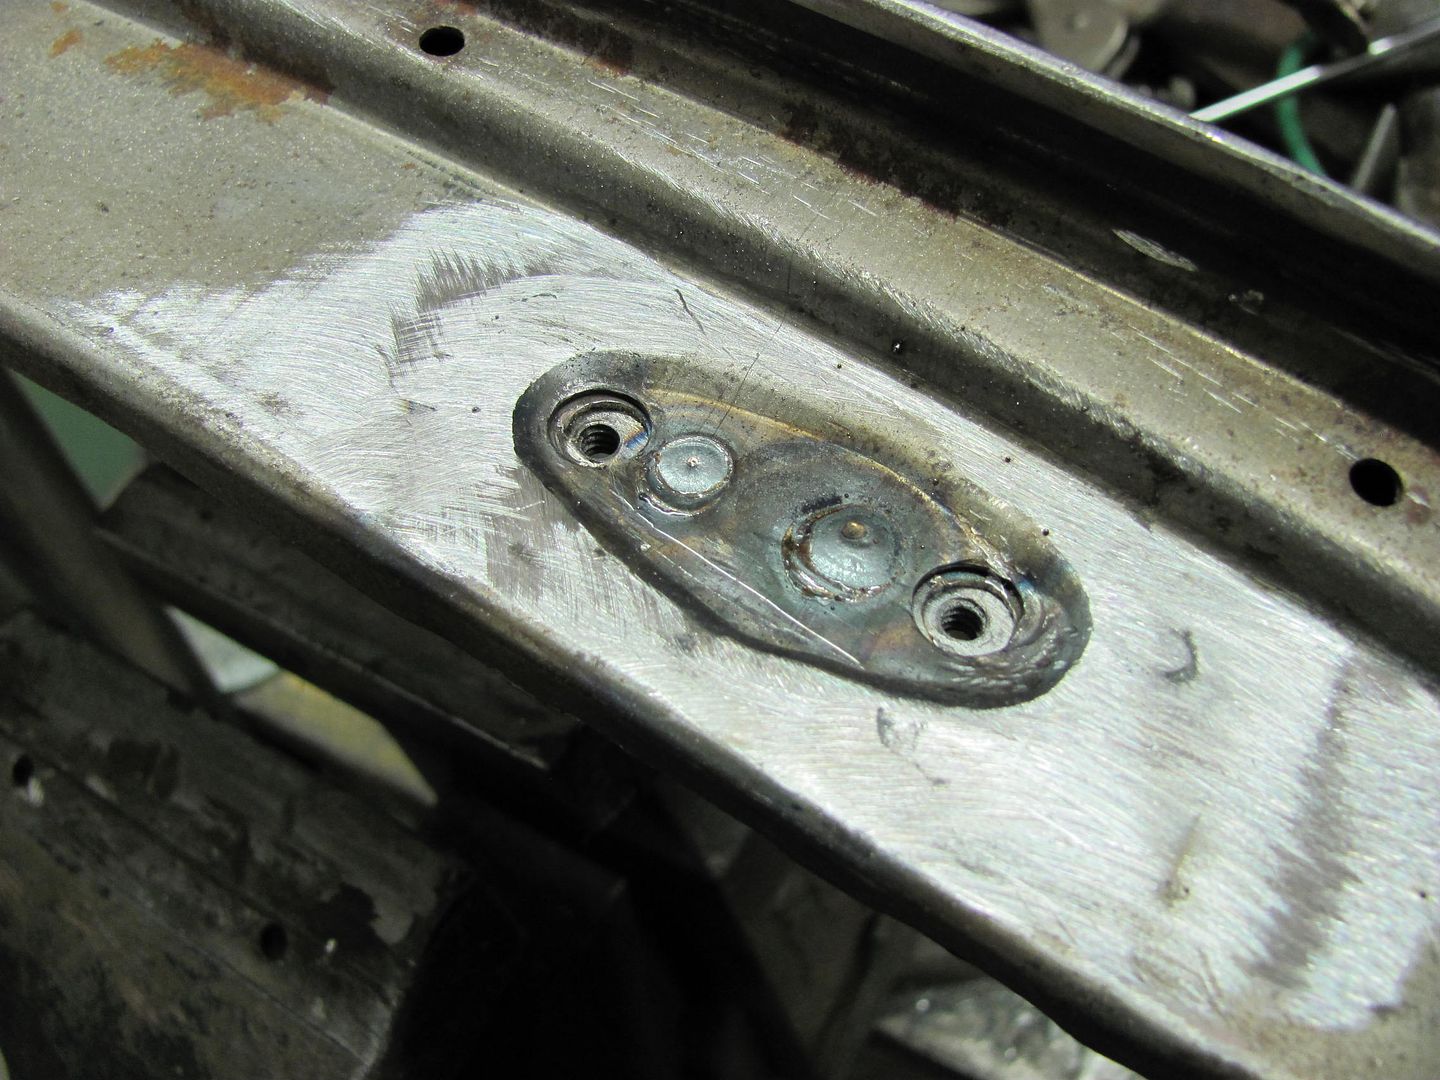
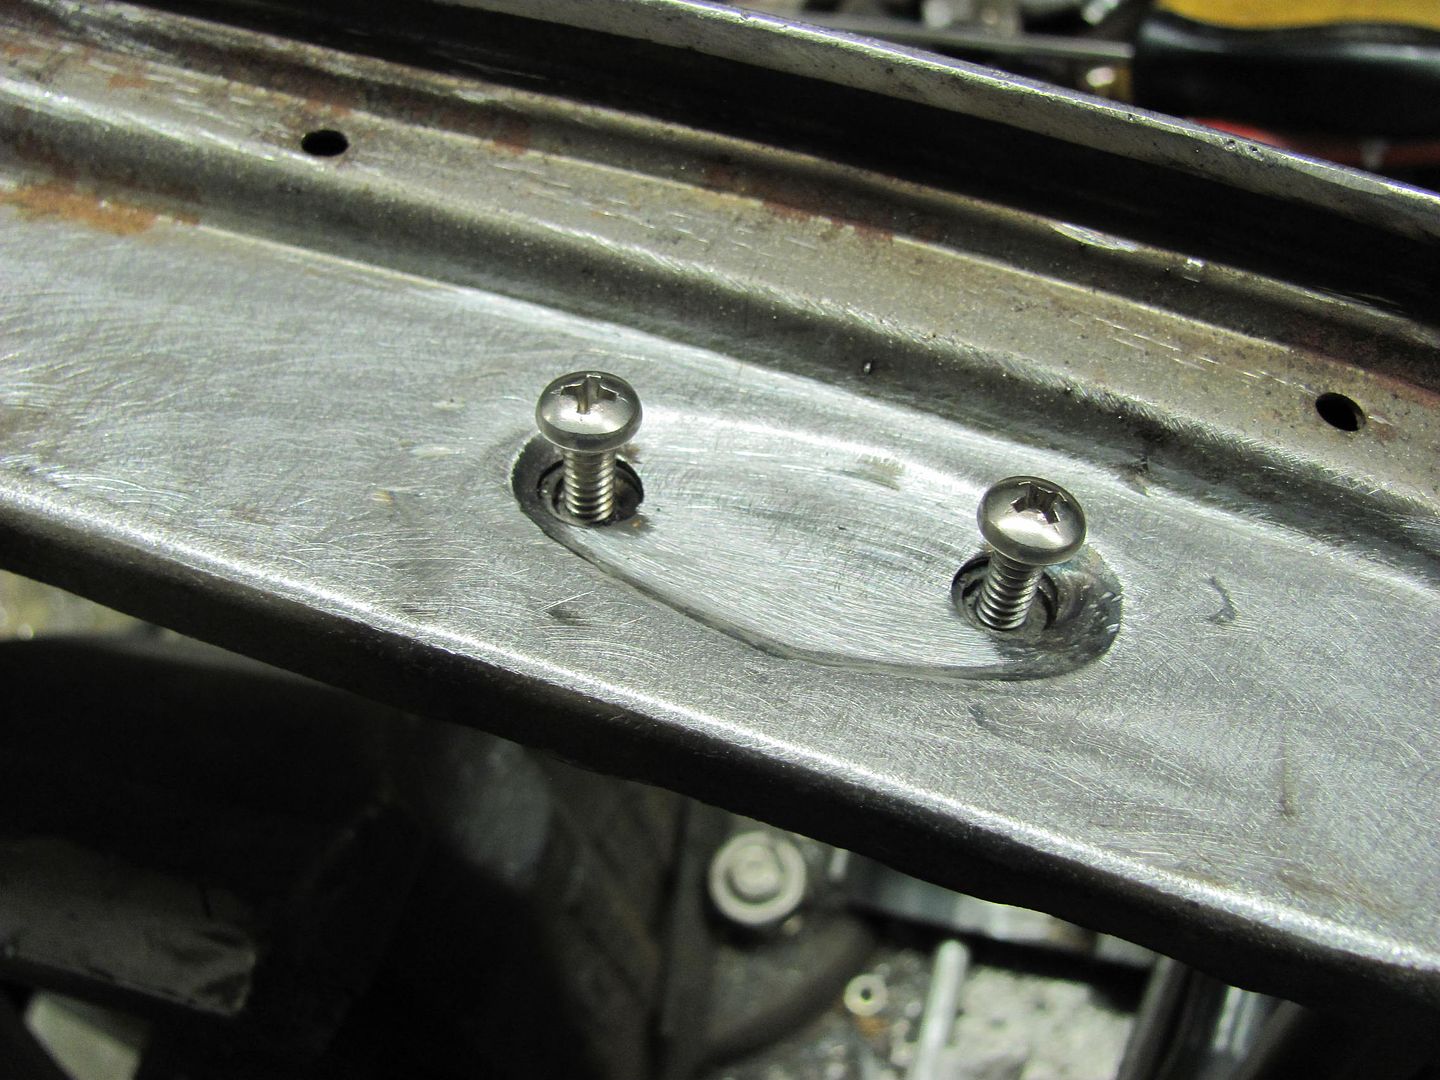
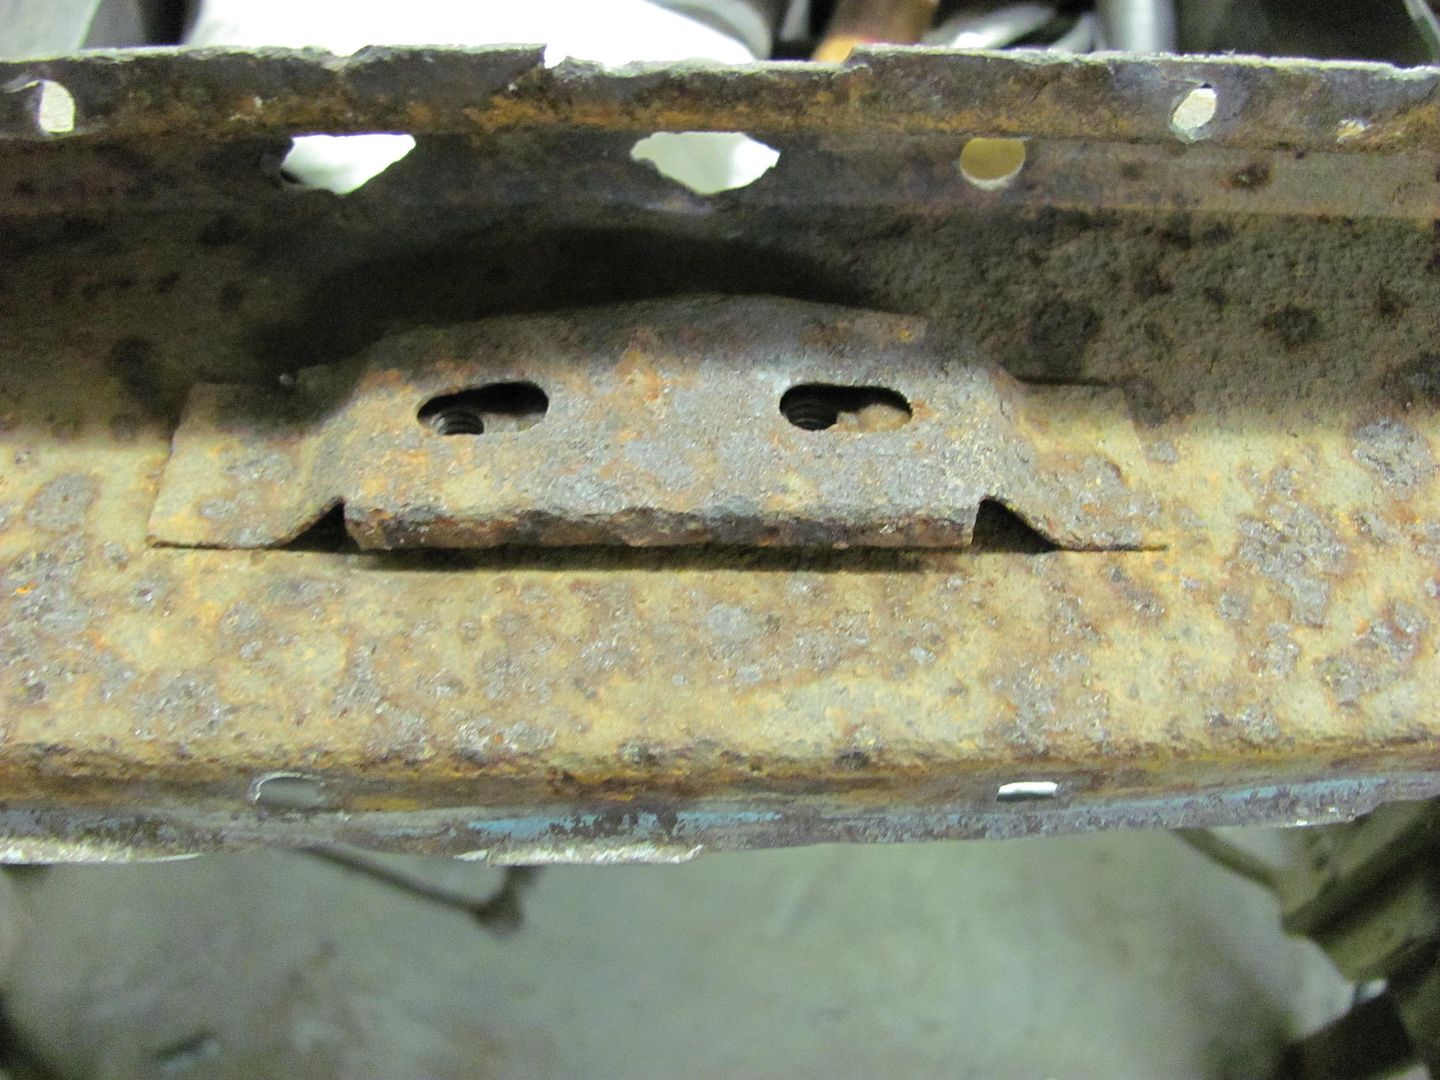
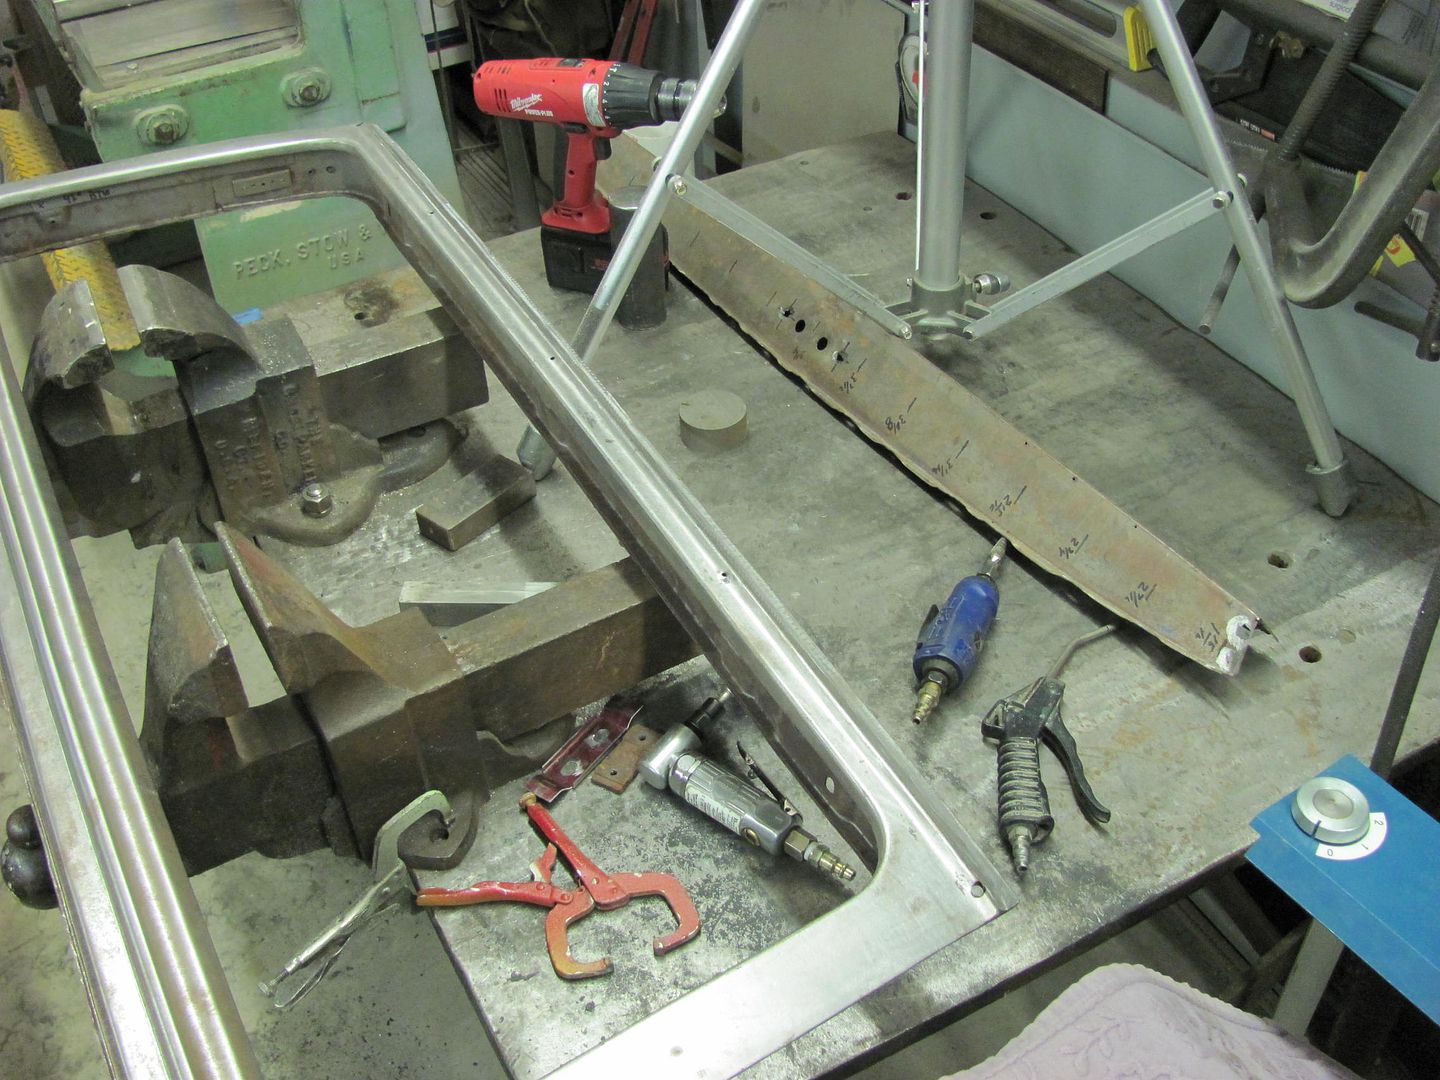
Moving on to the next task, removing the "cage nut" from the old piece...
This was a good opportunity to demonstrate using the cutoff wheel for removing spot welds...
RemovingSpotWelds.mp4 Video by rmccartney | Photobucket
Here's the cage removed, the spot weld removal method leaves it nice and intact for getting good measurements for the new one...
A fresh piece of 18ga and some red Dykem, and our new cage is underway....
Slots....

All ready for some media blasting and epoxy paint...Robert
-
11-08-2013 06:51 AM #112
CHR Member/Contributor
- Join Date
- Jul 2003
- Location
- Madison
- Car Year, Make, Model: '67 Ranchero, '57 Chevy, '82 Camaro,
- Posts
- 21,160
Nice work Robert!!!!
PS--if you wind up needing some cage nuts for the door hinges (or hinges) on a tri-five I've got some here I won't be using on my '57.Yesterday is history, tomorrow is a mystery, Live for Today!
Carroll Shelby
Learning must be difficult for those who already know it all!!!!
-
11-08-2013 01:56 PM #113
CHR Member
- Join Date
- Apr 2011
- Location
- Prairie City
- Car Year, Make, Model: 40 Ford Deluxe, 68 Corvette, 72&76 K30
- Posts
- 7,301
- Blog Entries
- 1
Great work! I just used the same method to make some slots in the trans mount for my Excursion. I have a long way to go before rebuilding any tail gate hatches though. Haha
Ryan
1940 Ford Deluxe Tudor 354 Hemi 46RH Electric Blue w/multi-color flames, Ford 9" Residing in multiple pieces
1968 Corvette Coupe 5.9 Cummins Drag Car 11.43@130mph No stall leaving the line with 1250 rpm's and poor 2.2 60'
1972 Chevy K30 Longhorn P-pumped 24v Compound Turbos 47RH Just another money pit
1971 Camaro RS 5.3 BTR Stage 3 cam, SuperT10
Tire Sizes
-
11-08-2013 08:02 PM #114
CHR Member
- Join Date
- Jun 2008
- Location
- Leonardtown
- Car Year, Make, Model: Walking
- Posts
- 1,228
Dave, thanks for the offer, but that's one of the few things on this car in good shape!
Ryan, one of those McGuyver moments!
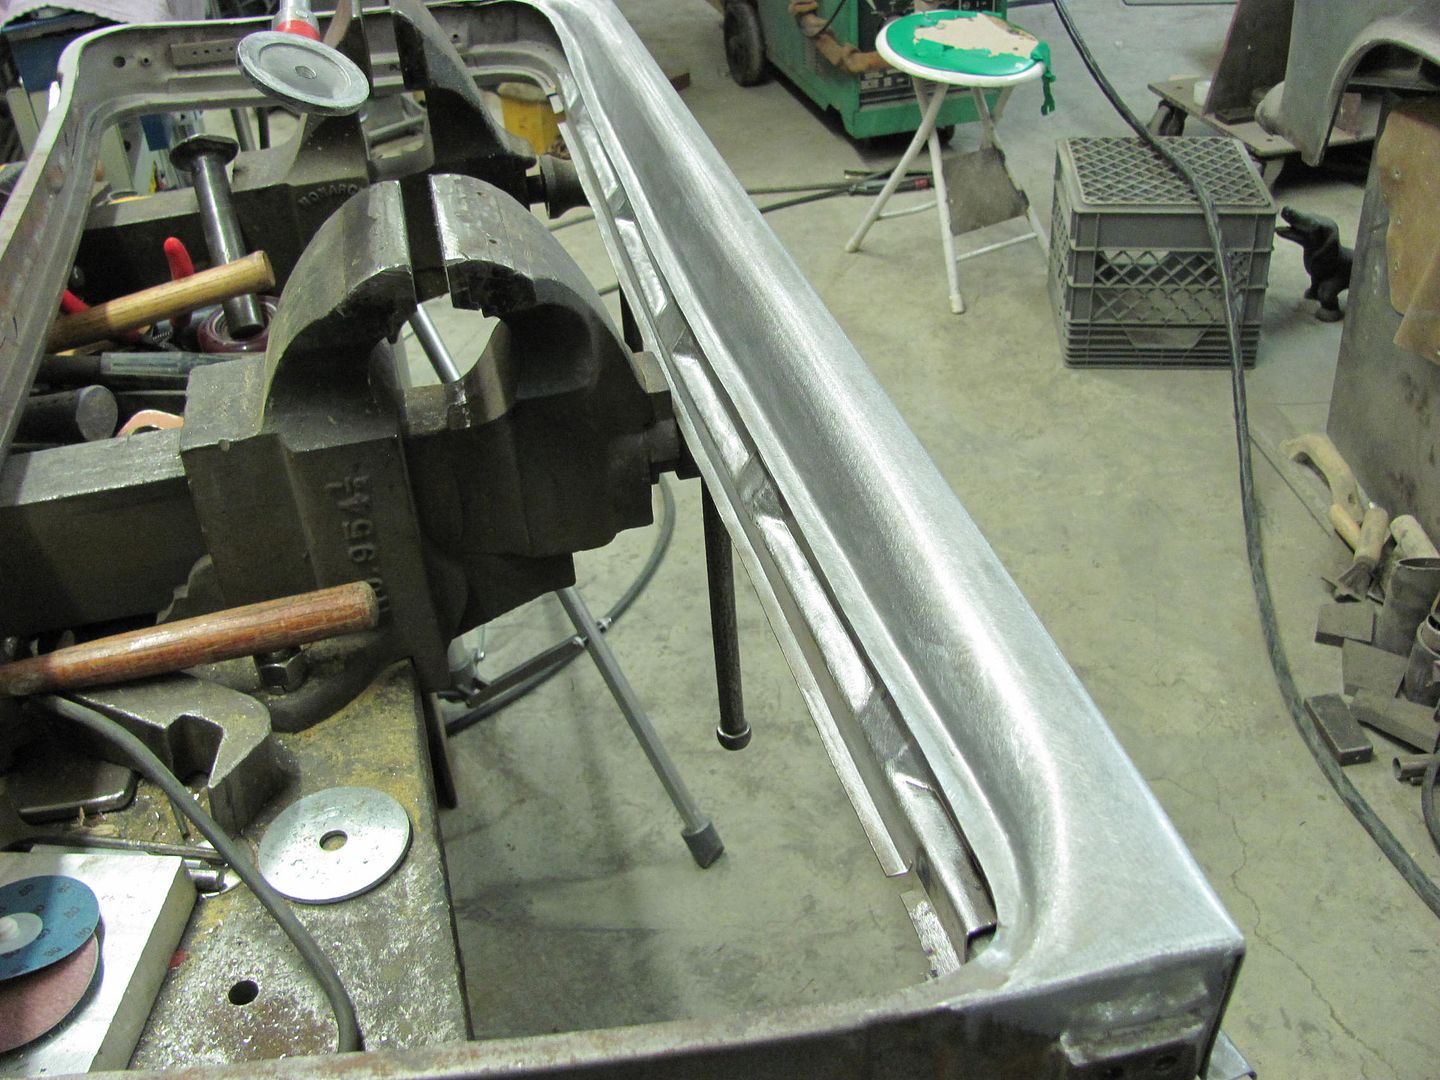
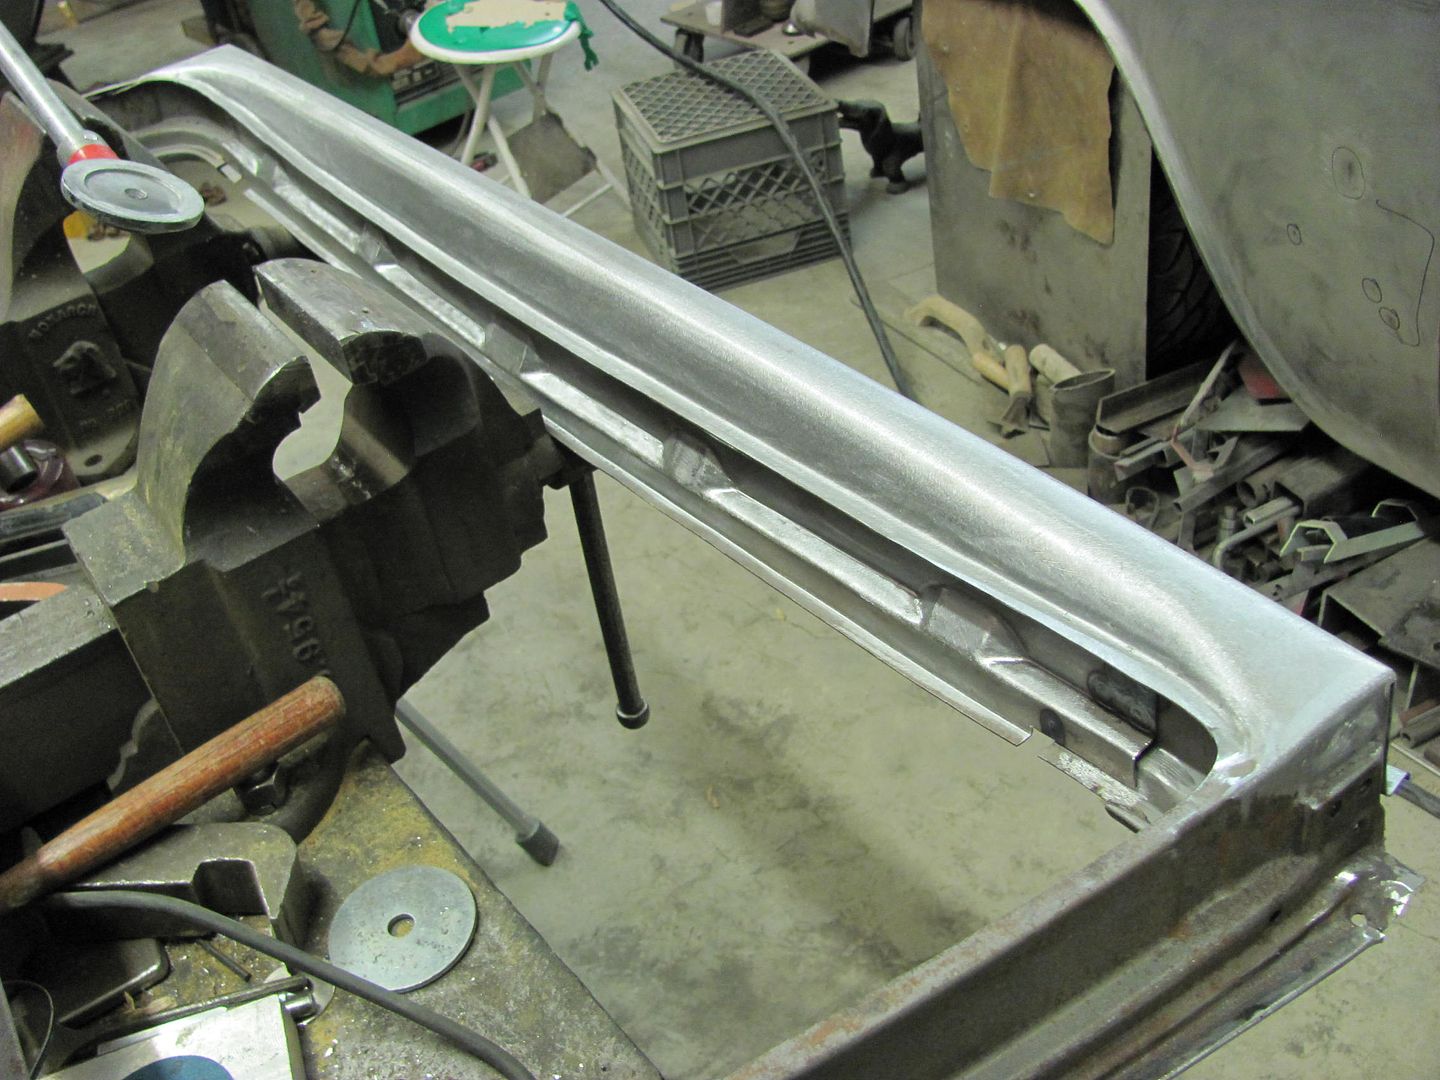
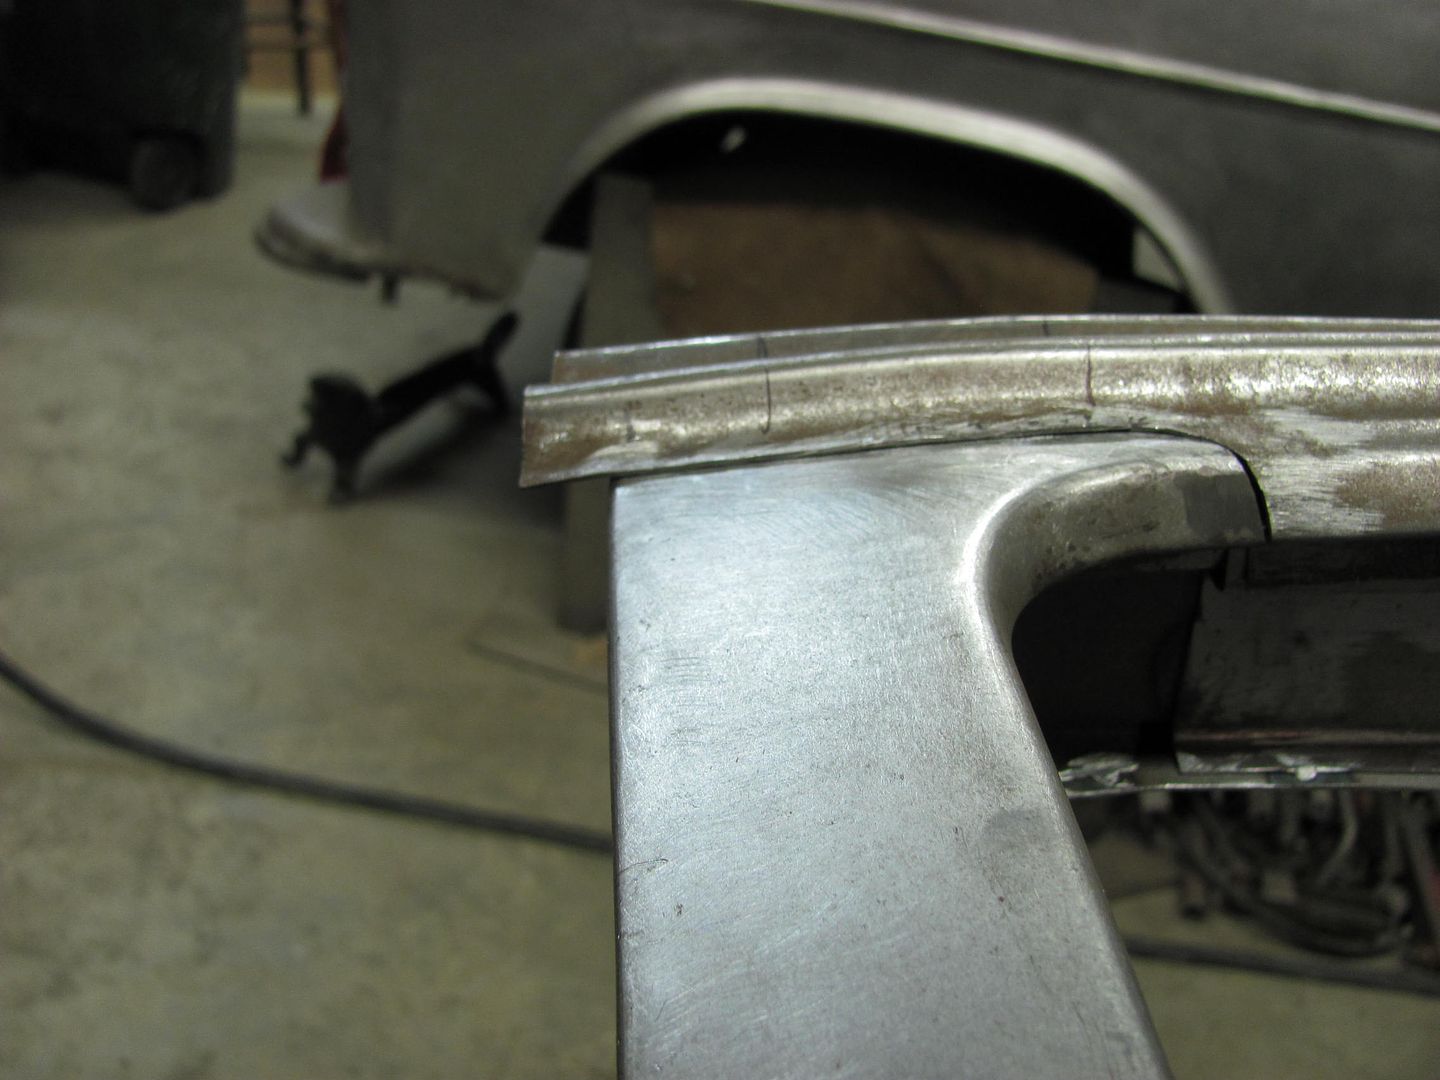
Tonight I trimmed the lower edge of the lift gate to get the final repair part fitted up.
Once both ends of the lift gate were trimmed, looking at the surface profile you can see we need a bit more crown at the ends of the repair part.
To add some crown, the lower flanges on the ends were folded flat and used the Erco to shrink the bottom flange.
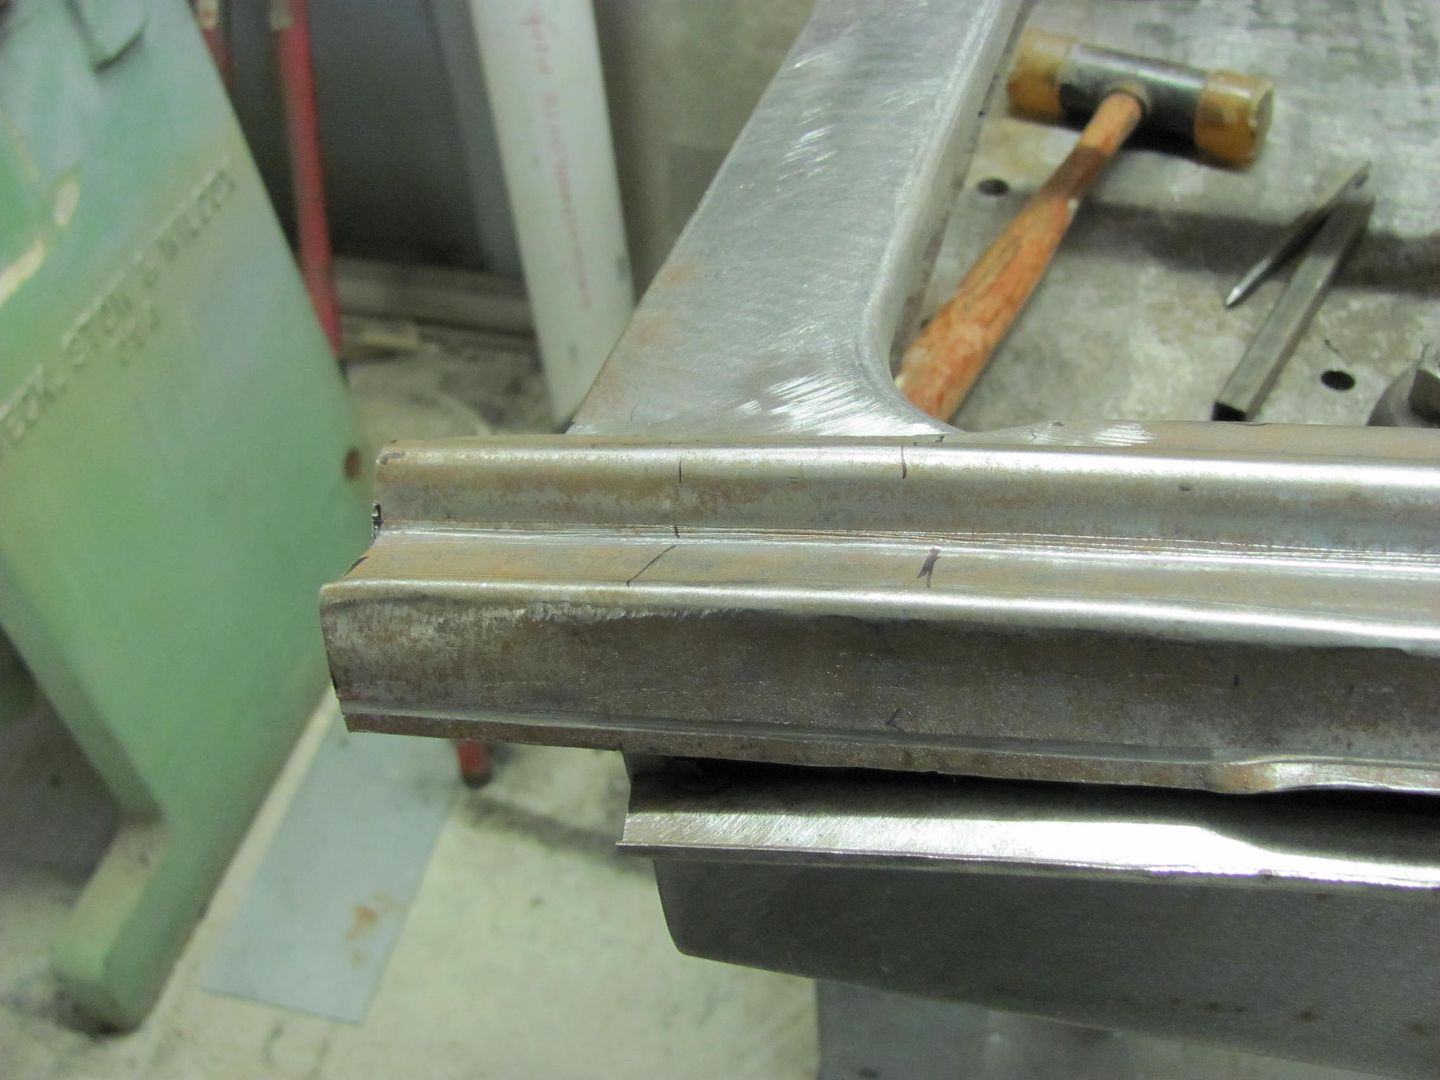
The multiple bends toward the top were another story, a 1/4 beading die lightly pushing into a skateboard wheel, and the ends were pushed in and pulled up while exiting. Here's the results...
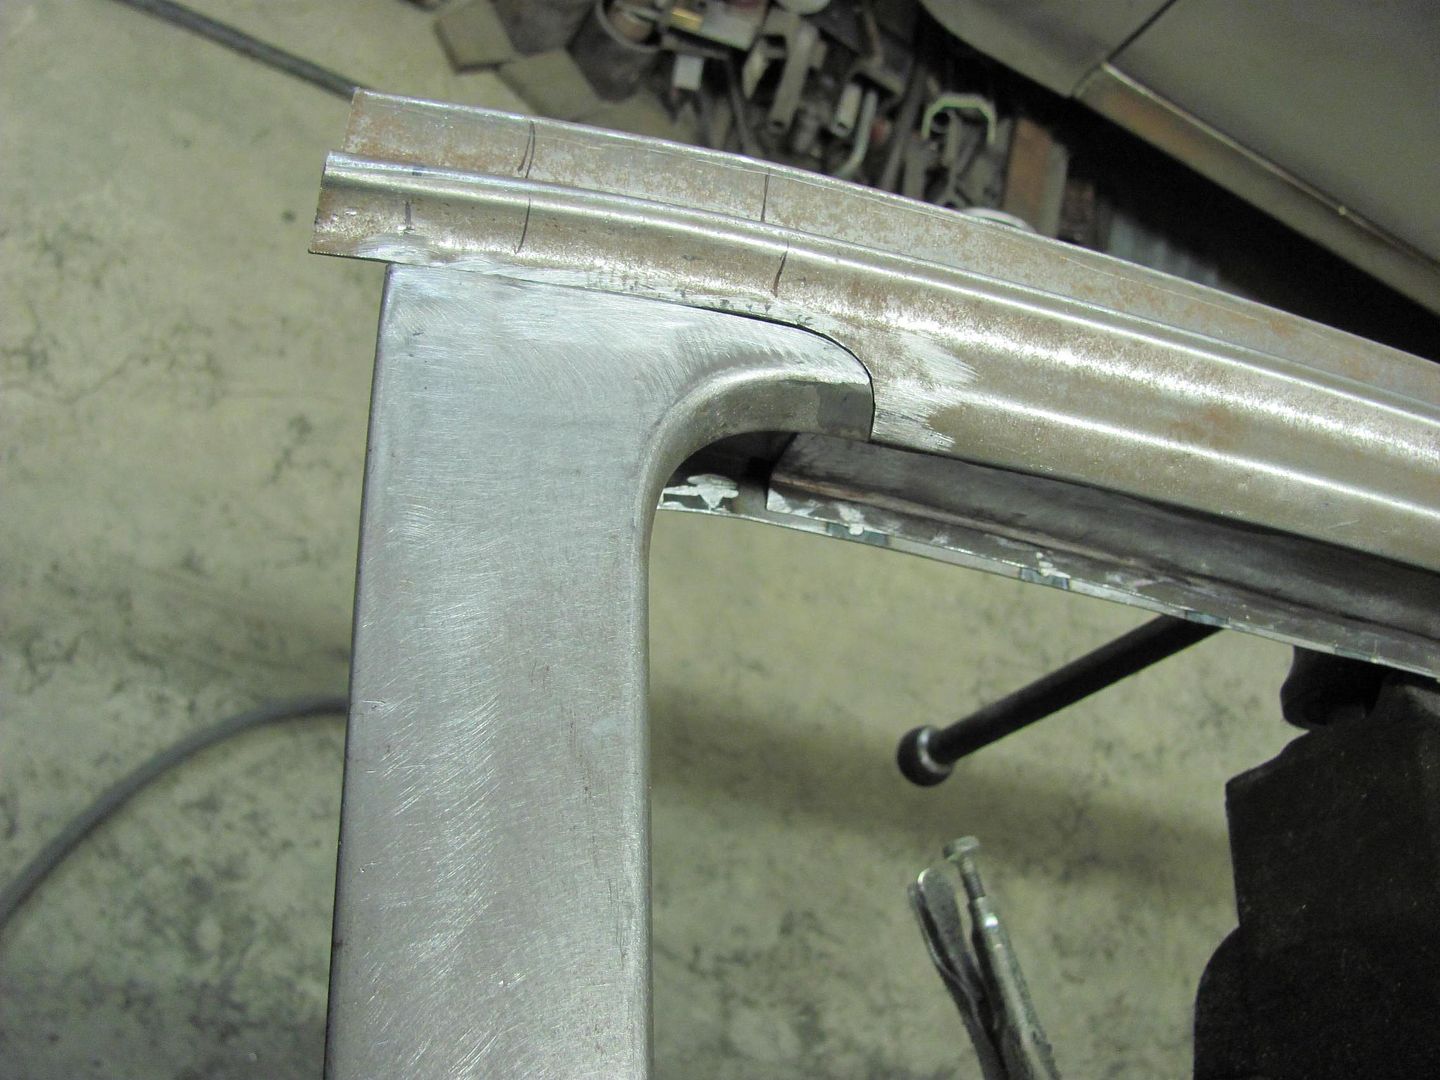

Oh yeah.....you can see the top of the welding table again!
Next task on the list will be to form/fold the ends..Robert
-
11-16-2013 08:55 PM #115
CHR Member
- Join Date
- Jun 2008
- Location
- Leonardtown
- Car Year, Make, Model: Walking
- Posts
- 1,228
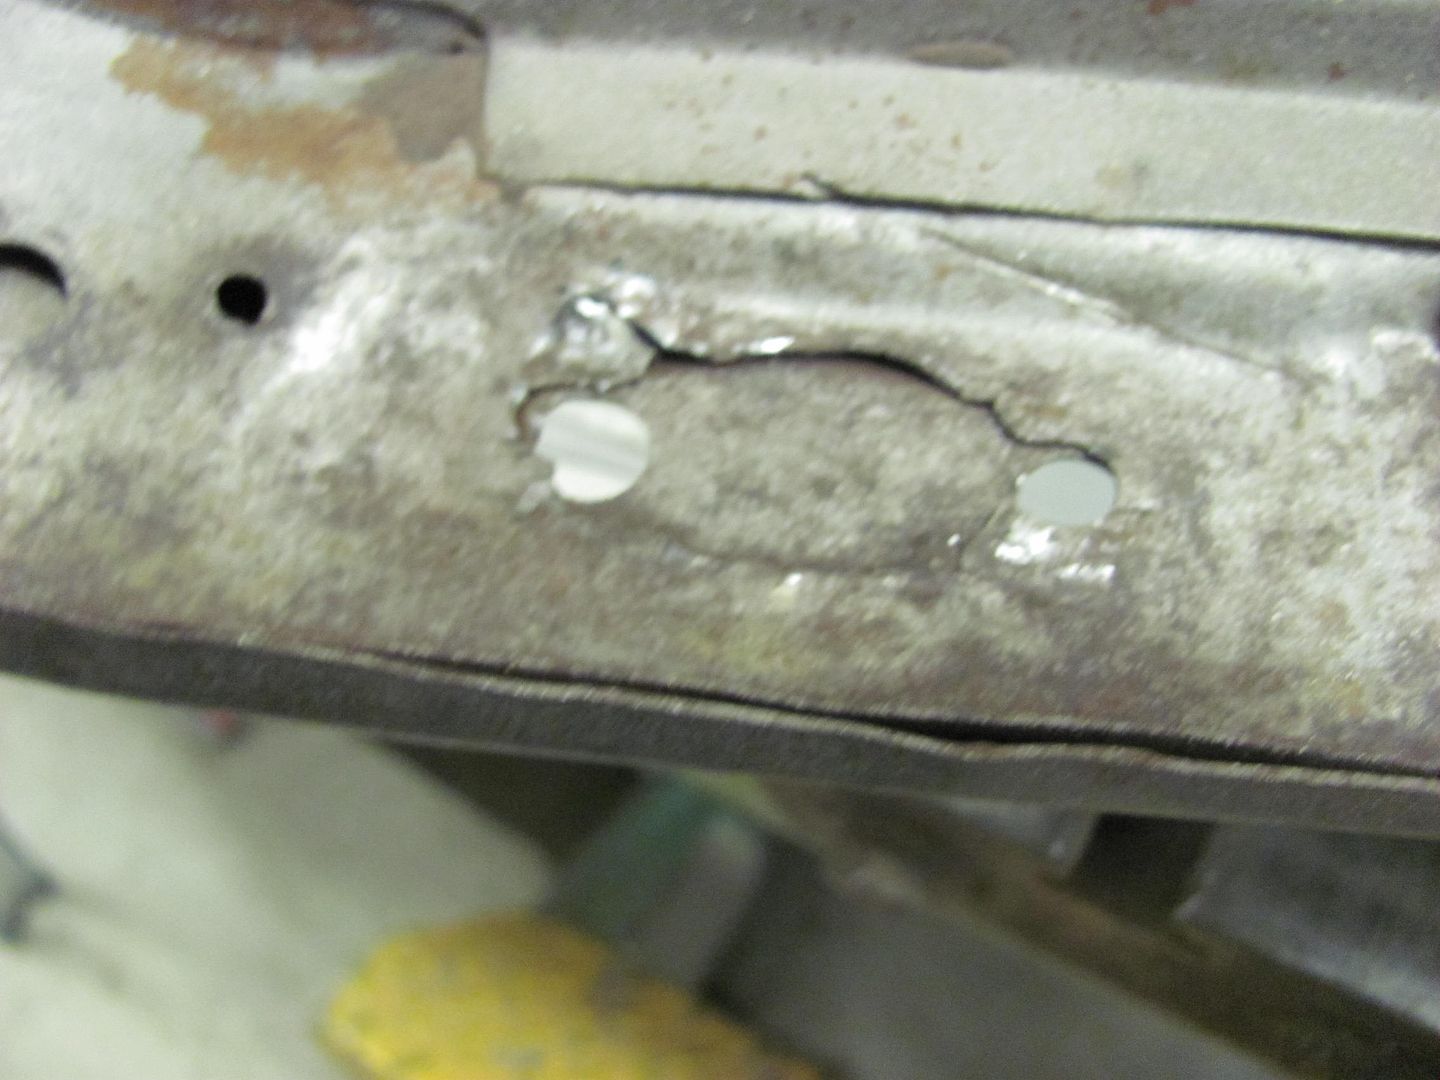
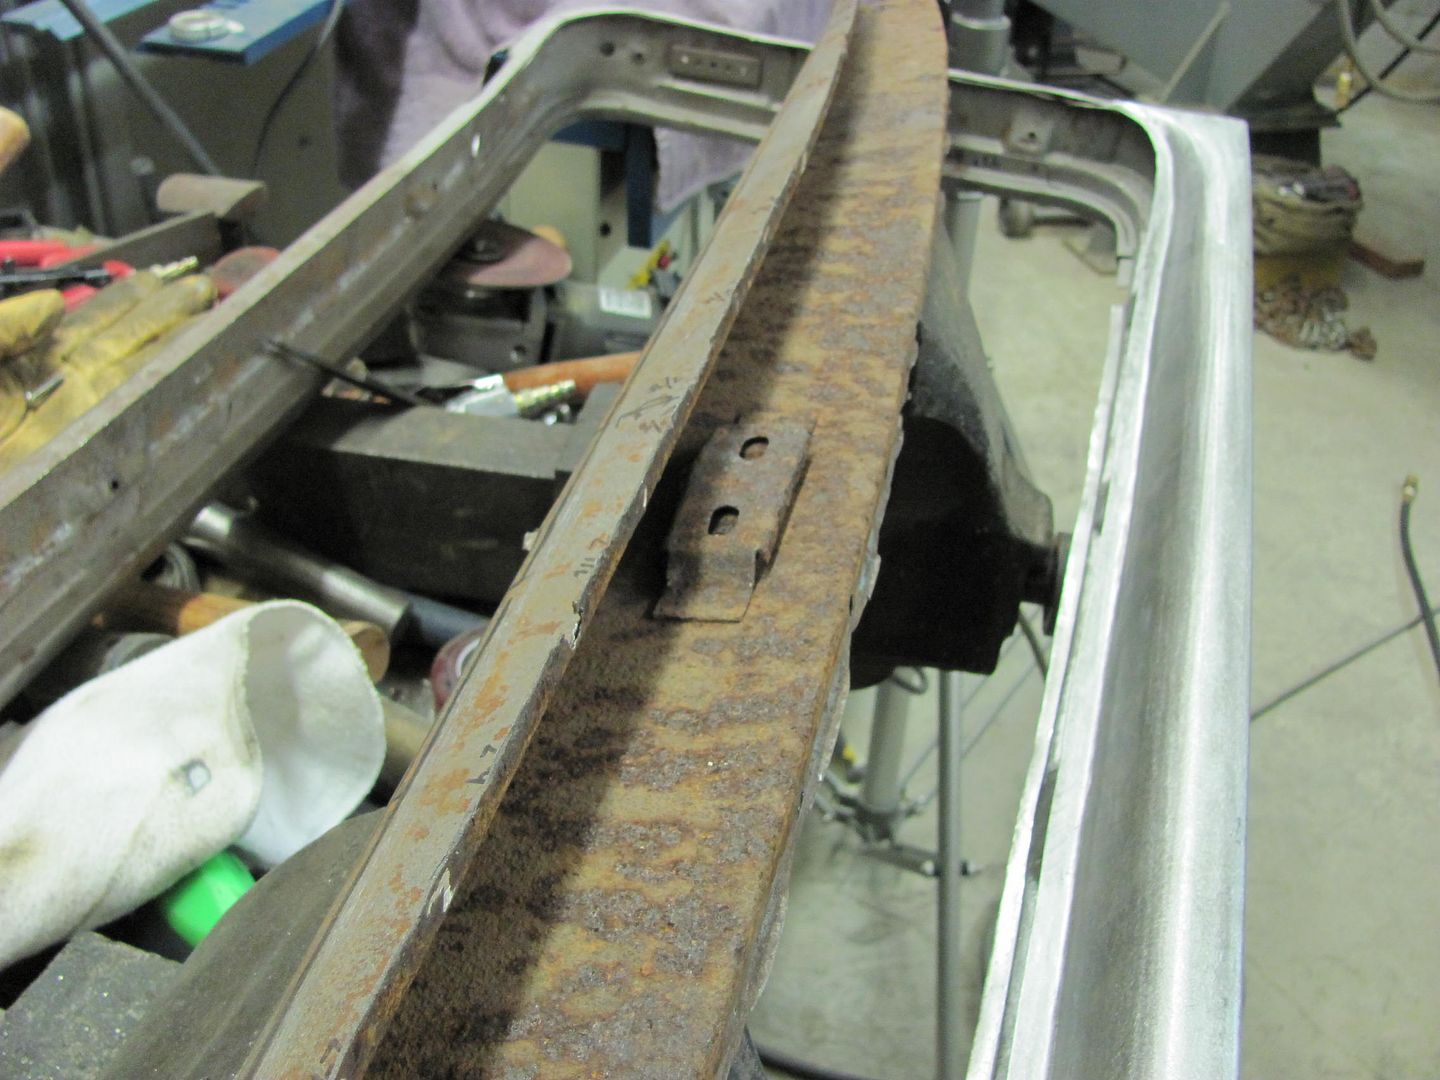
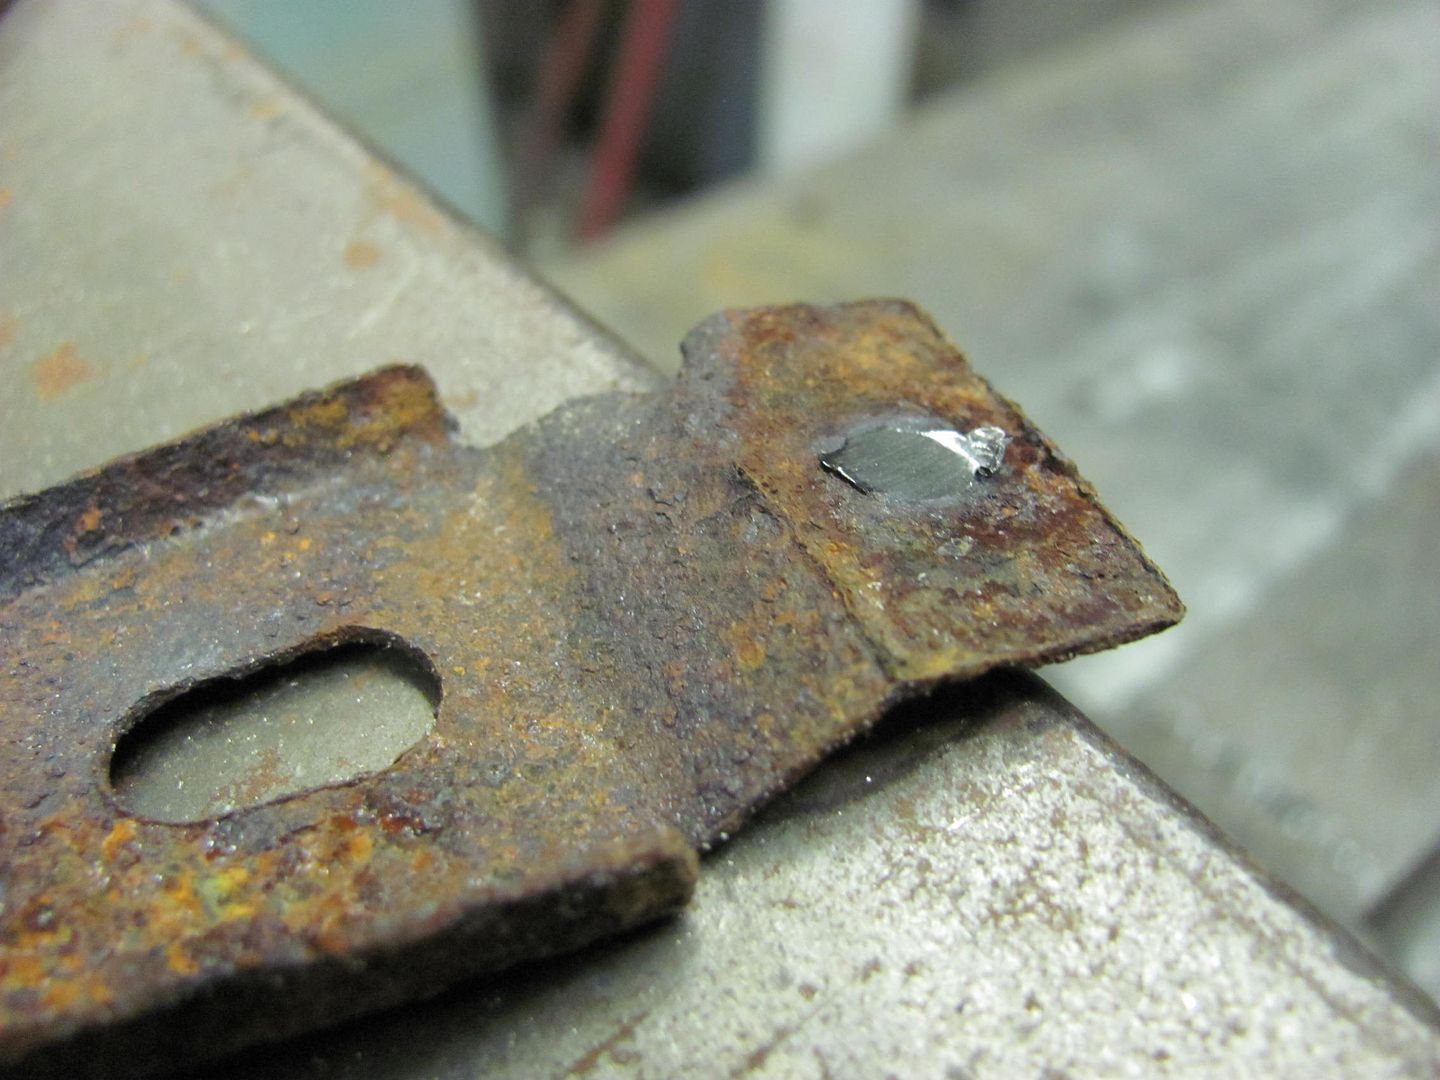
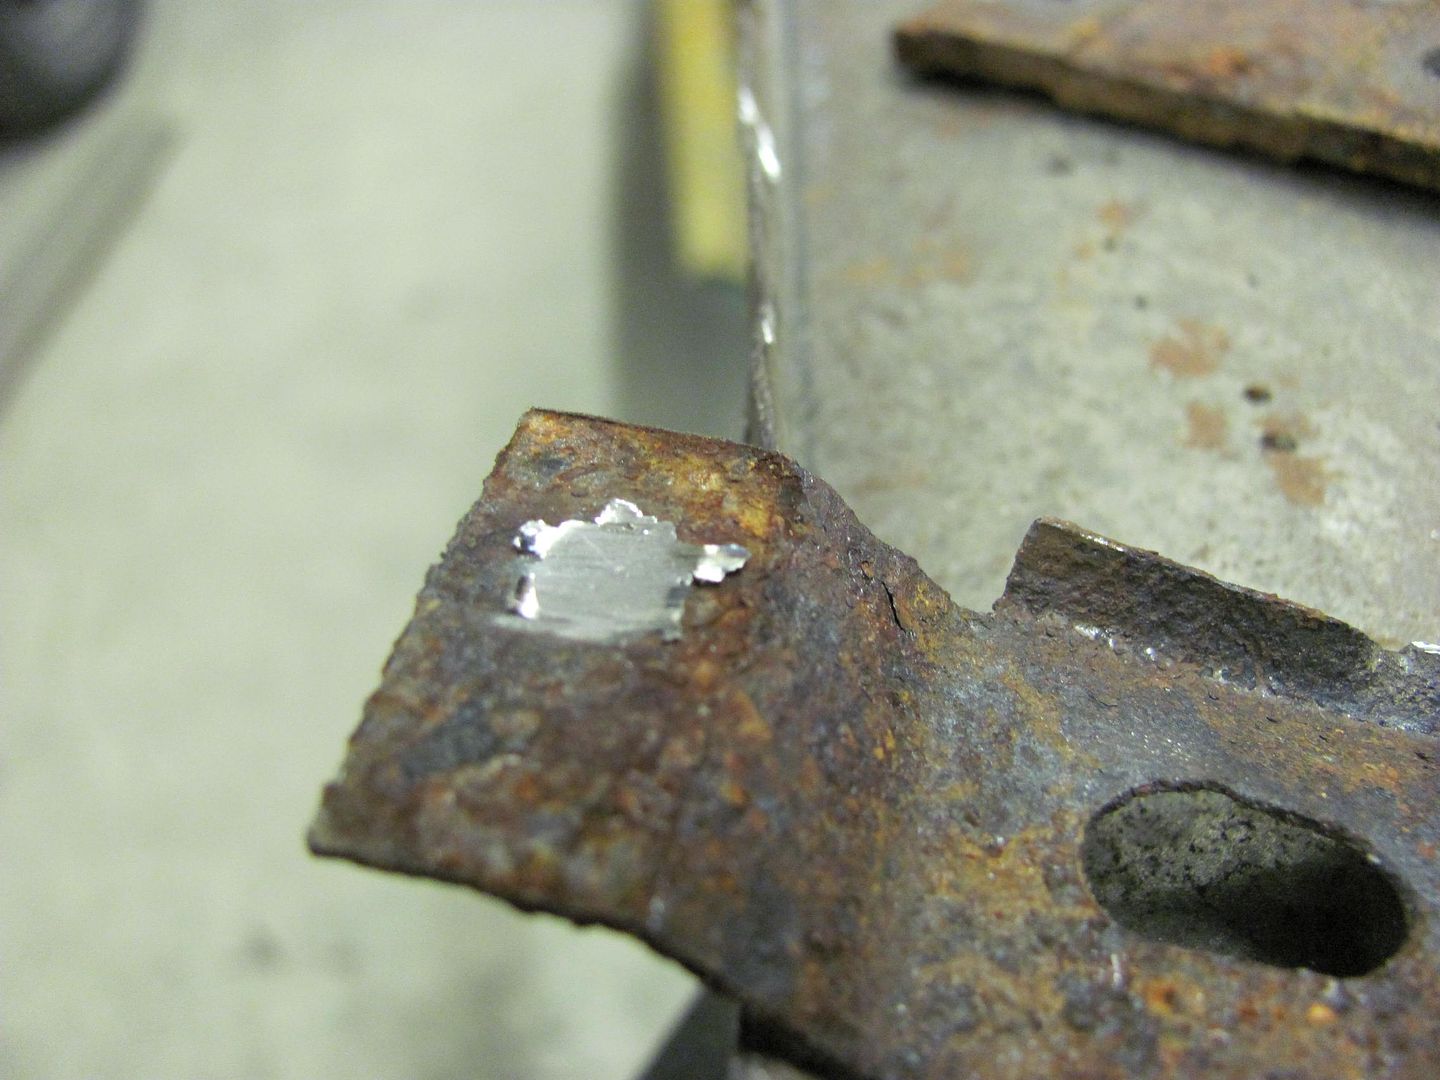
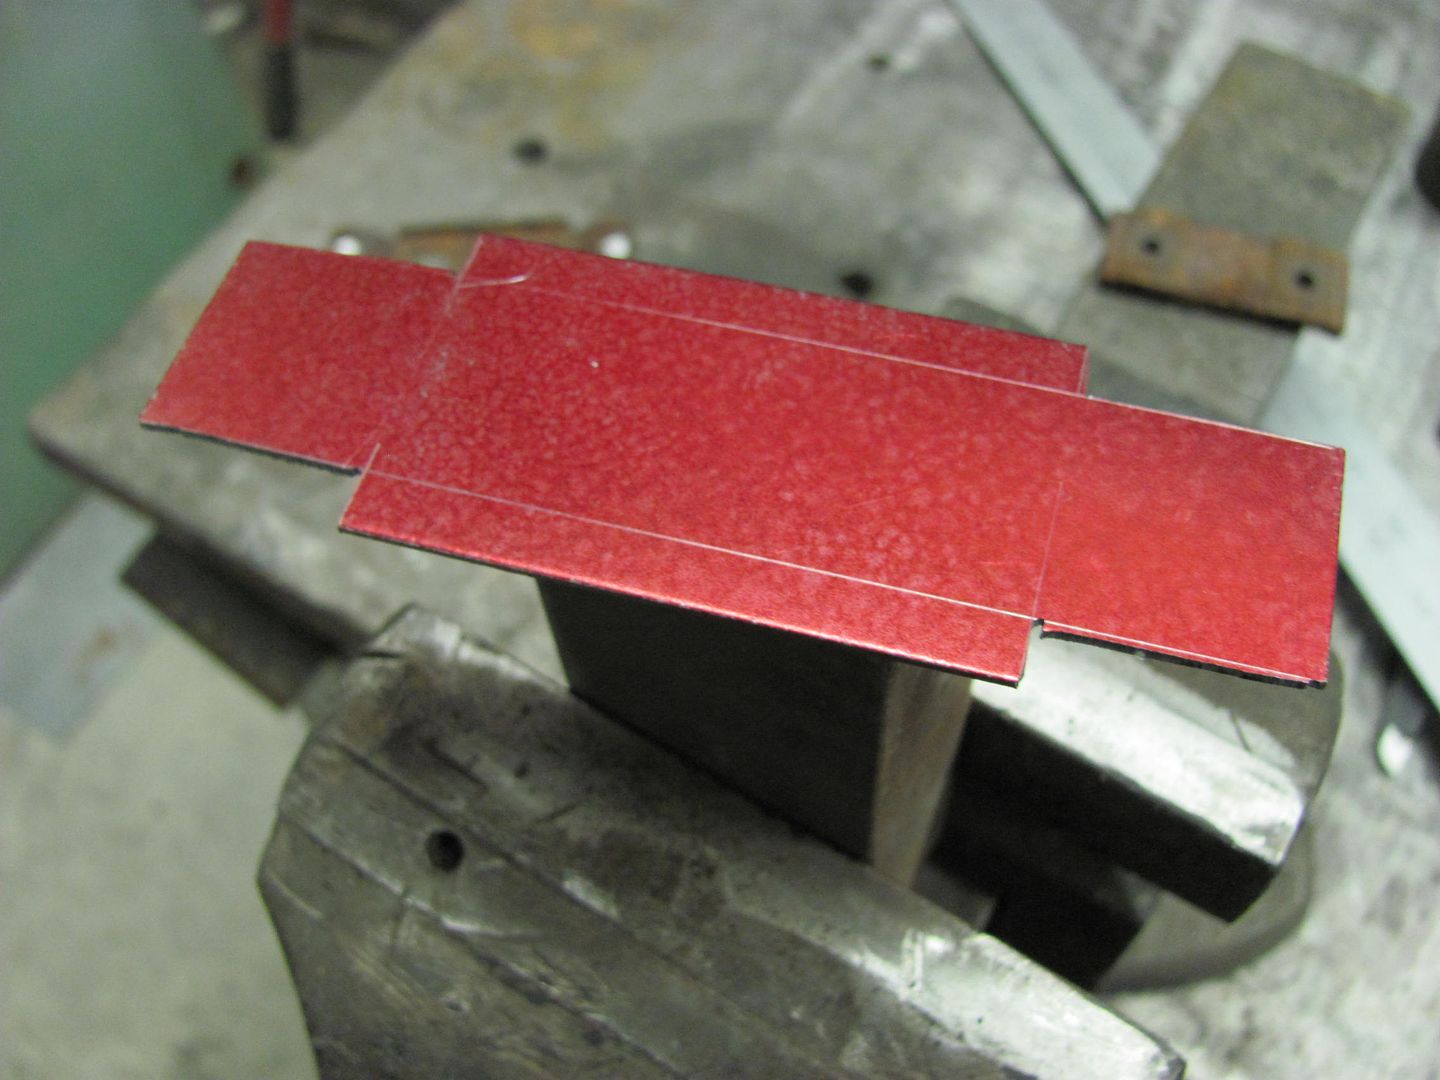
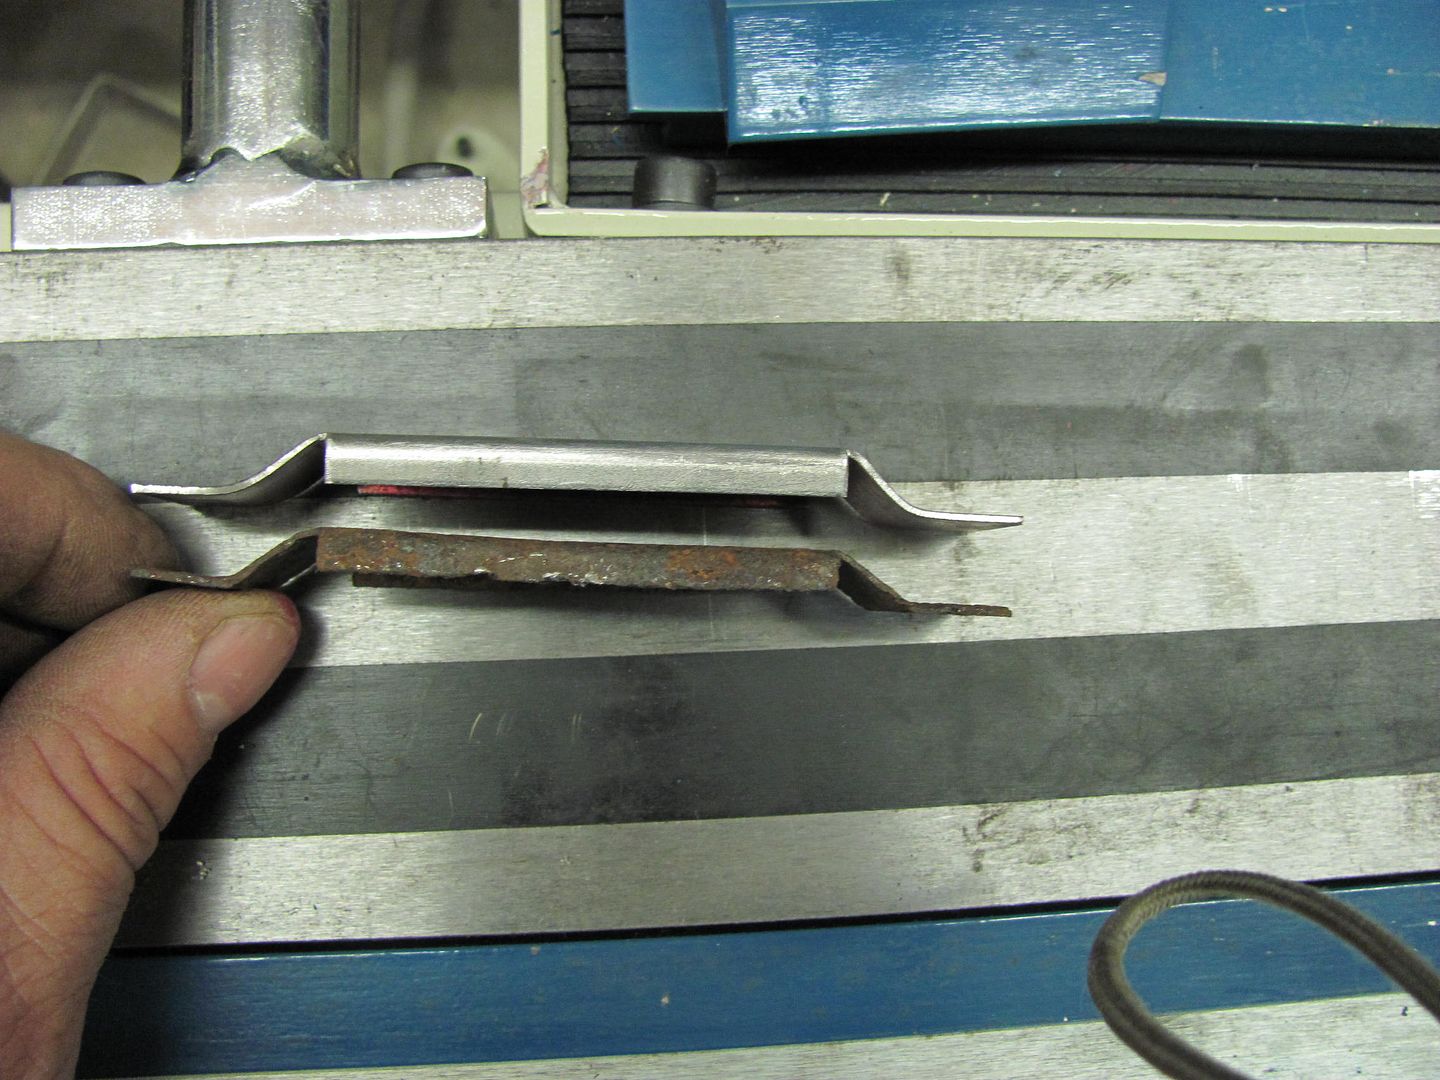
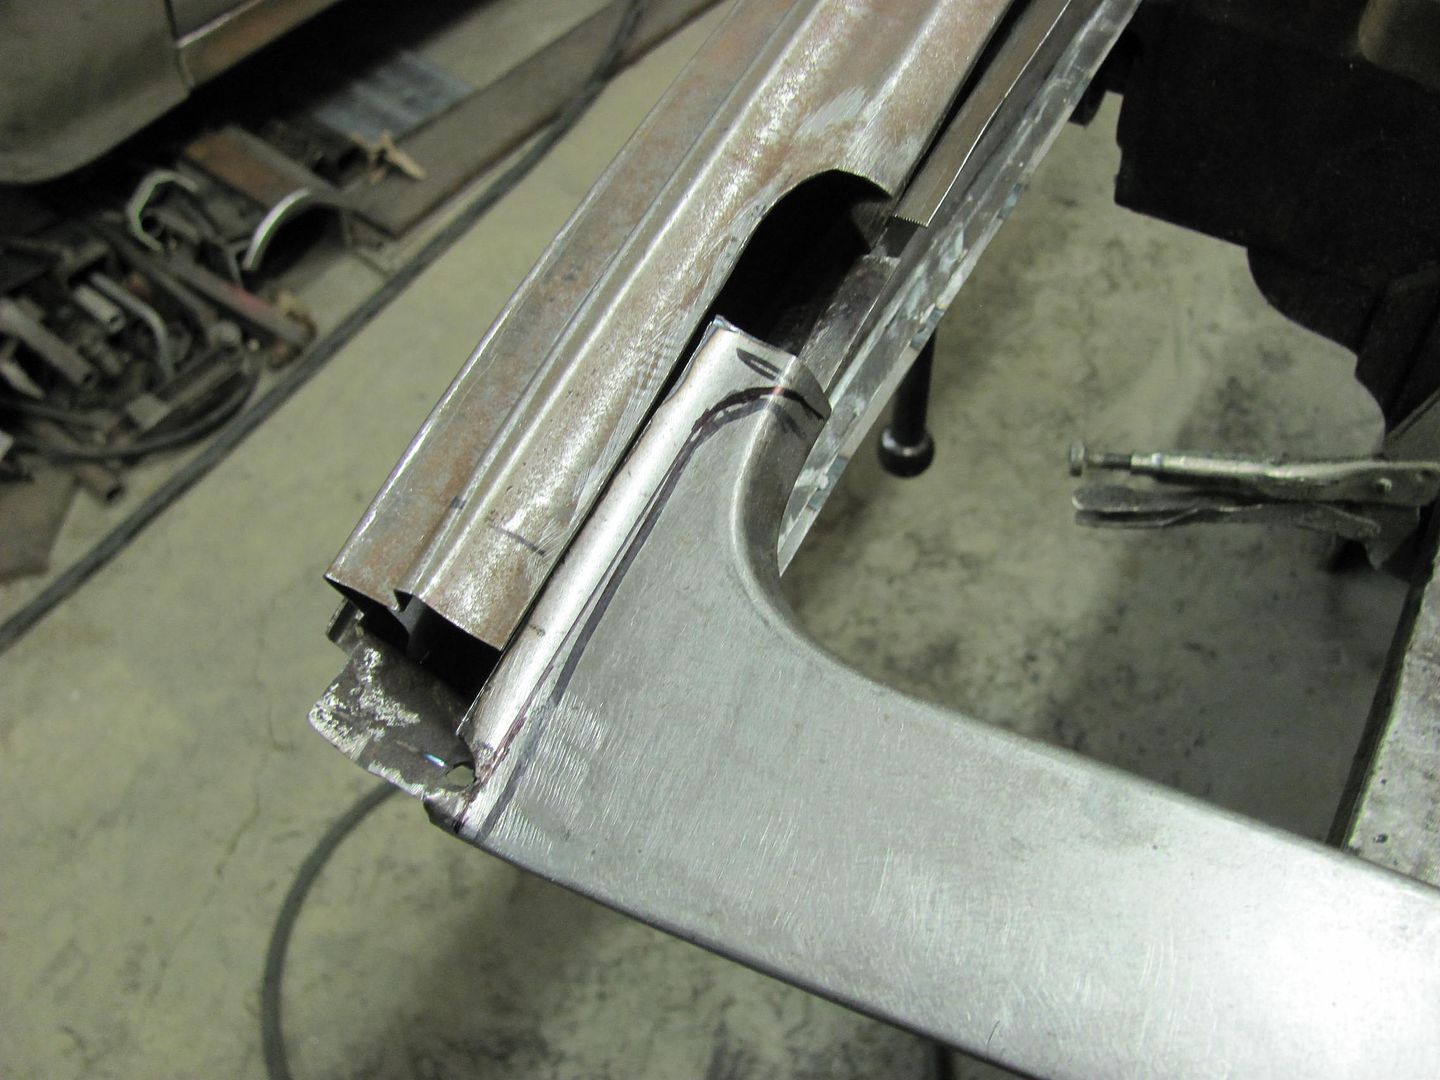
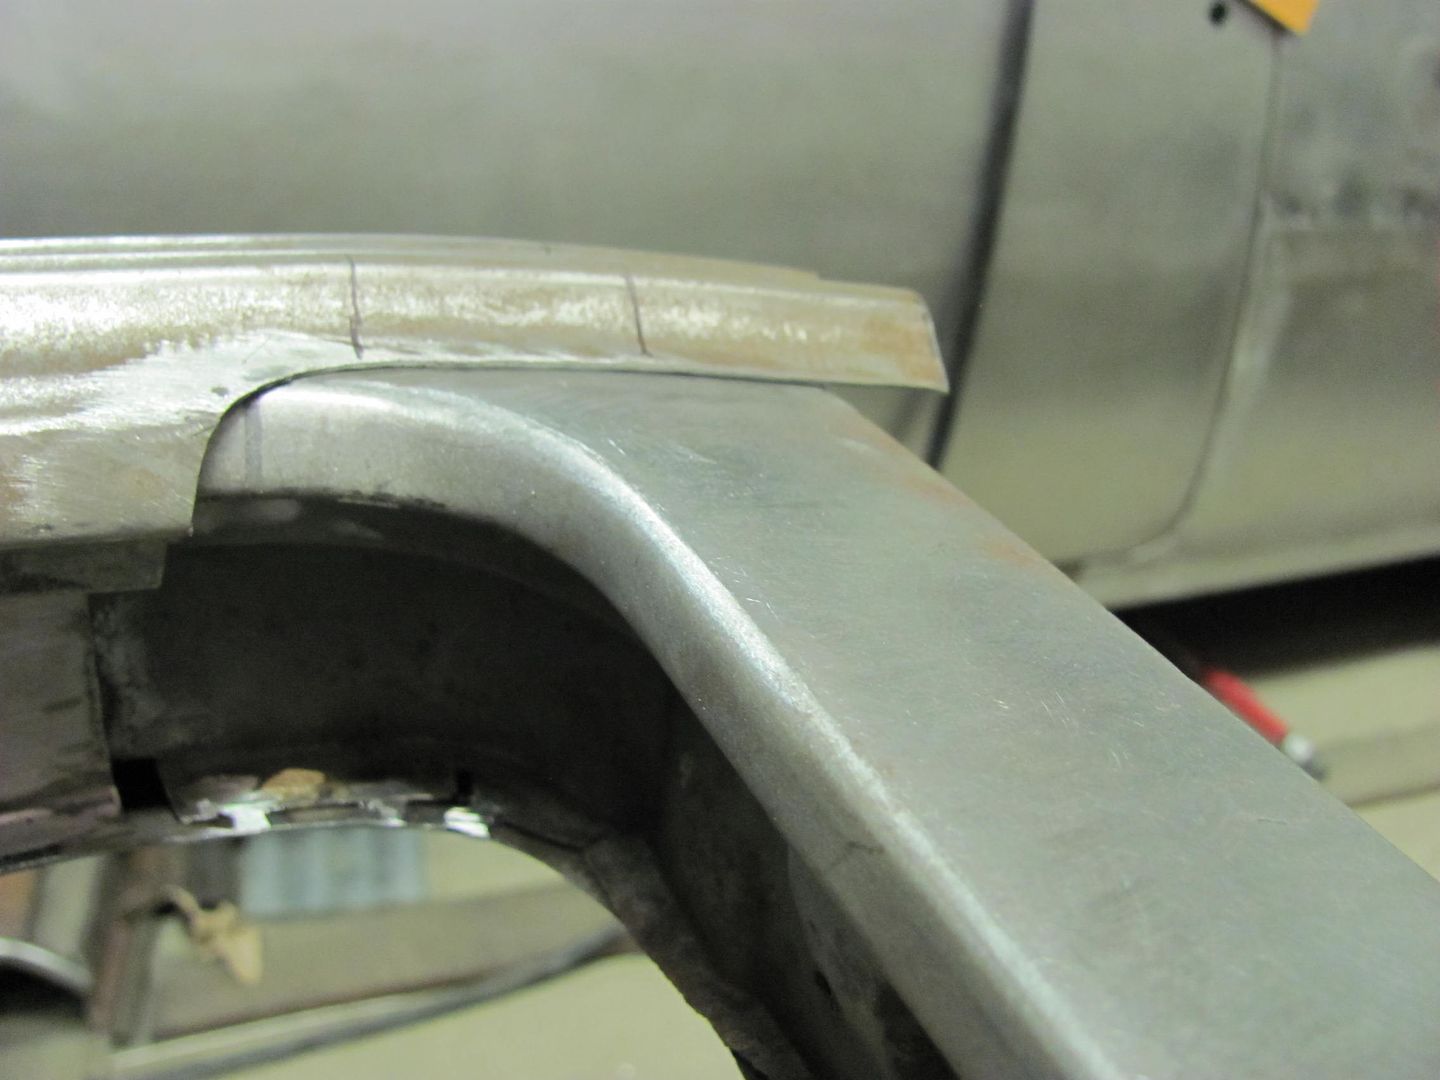
Another slight detour.... I need to stop looking for this stuff....or is it looking for me?
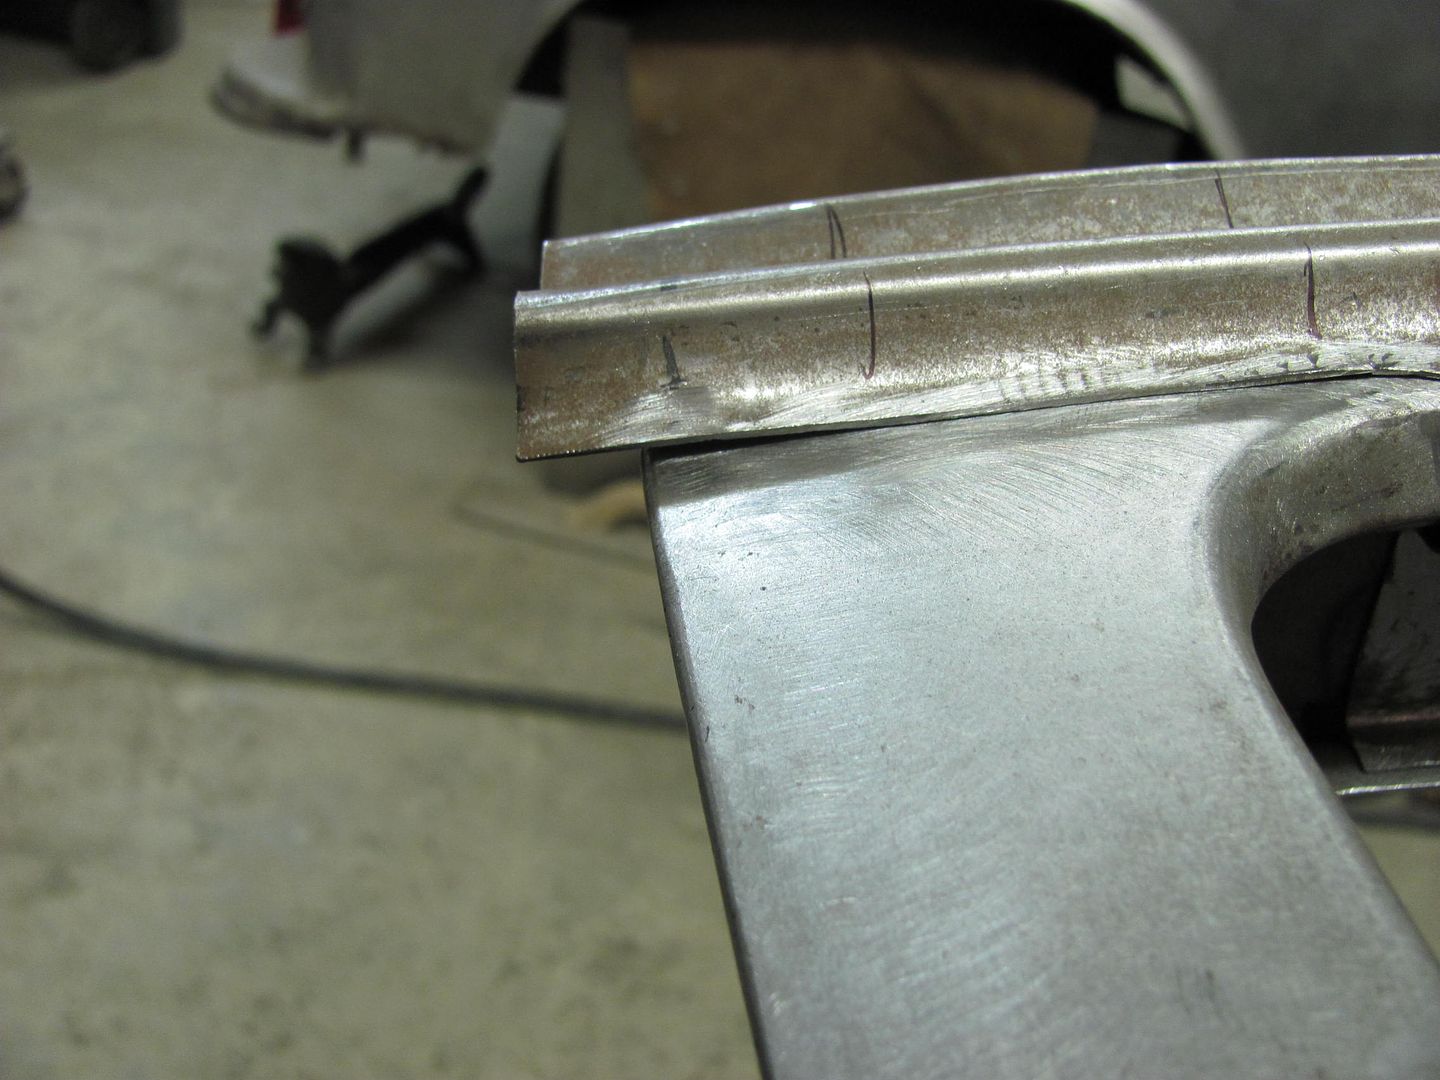
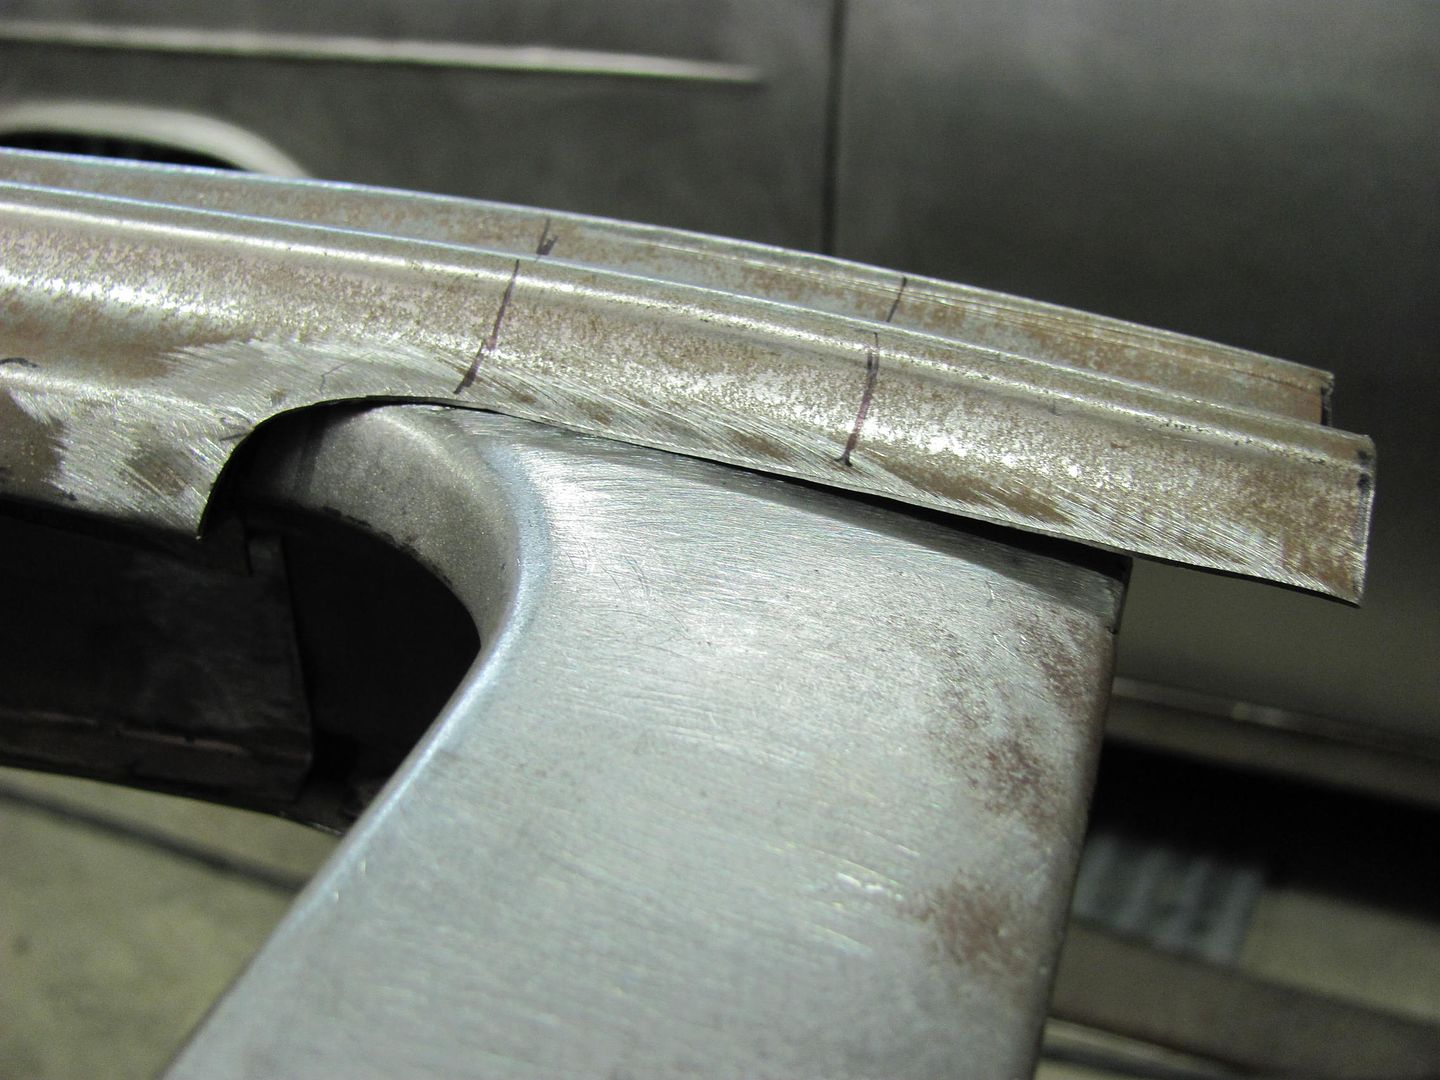
This pinch weld showed swelling between the two sheets, and a closer inspection showed some rather thick scale...
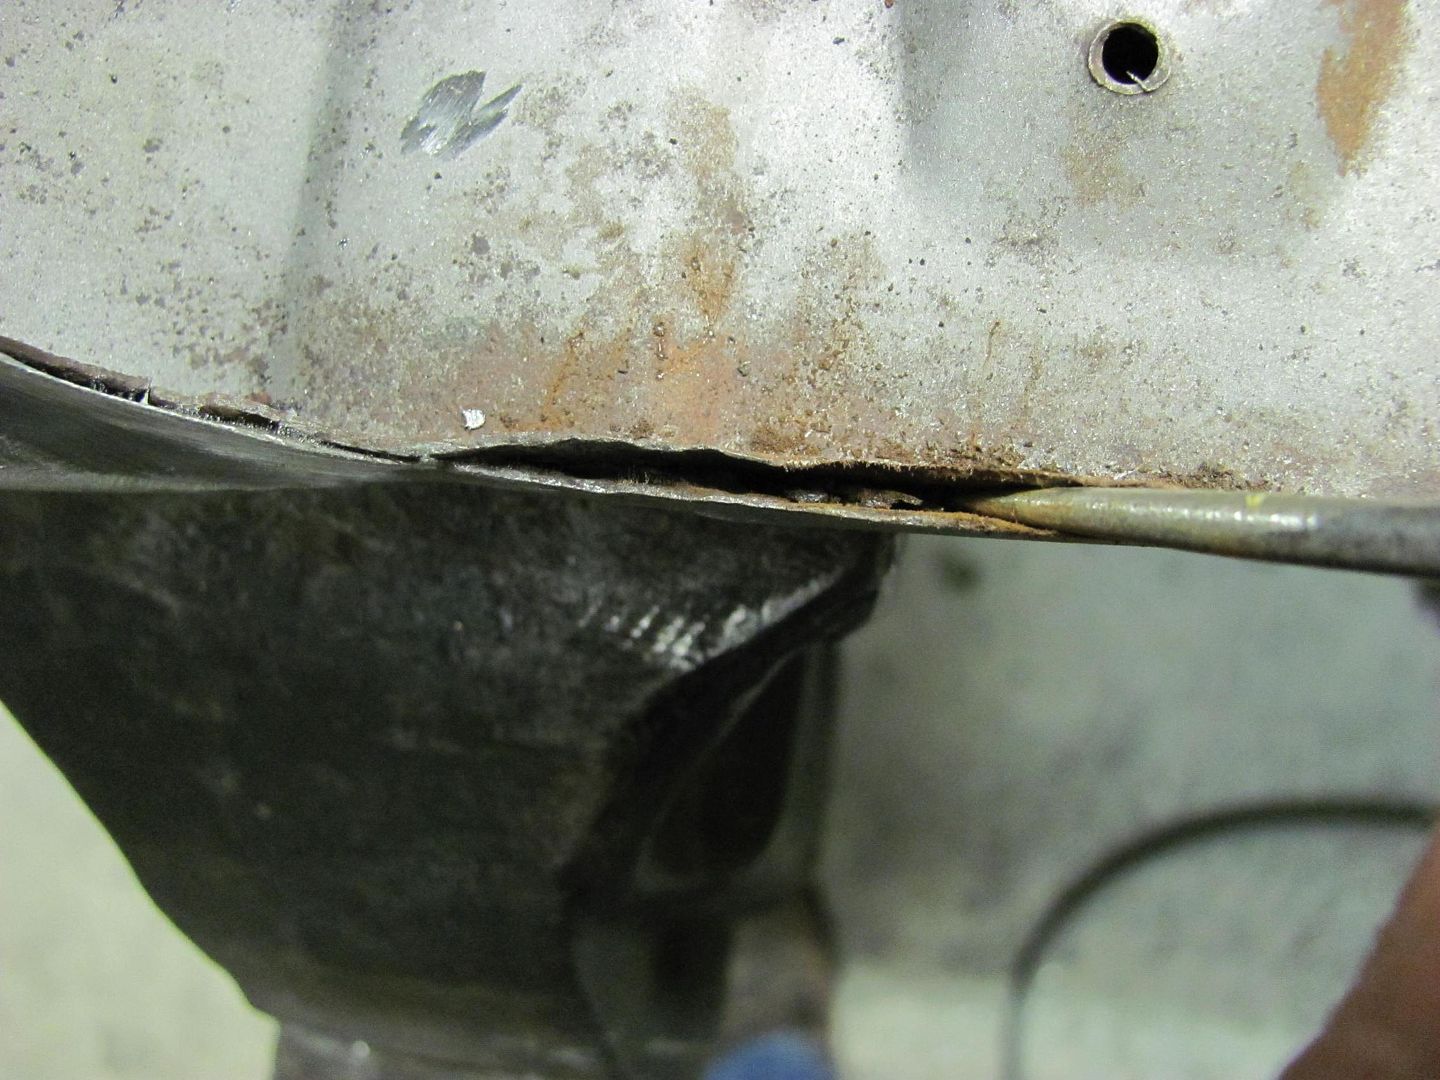
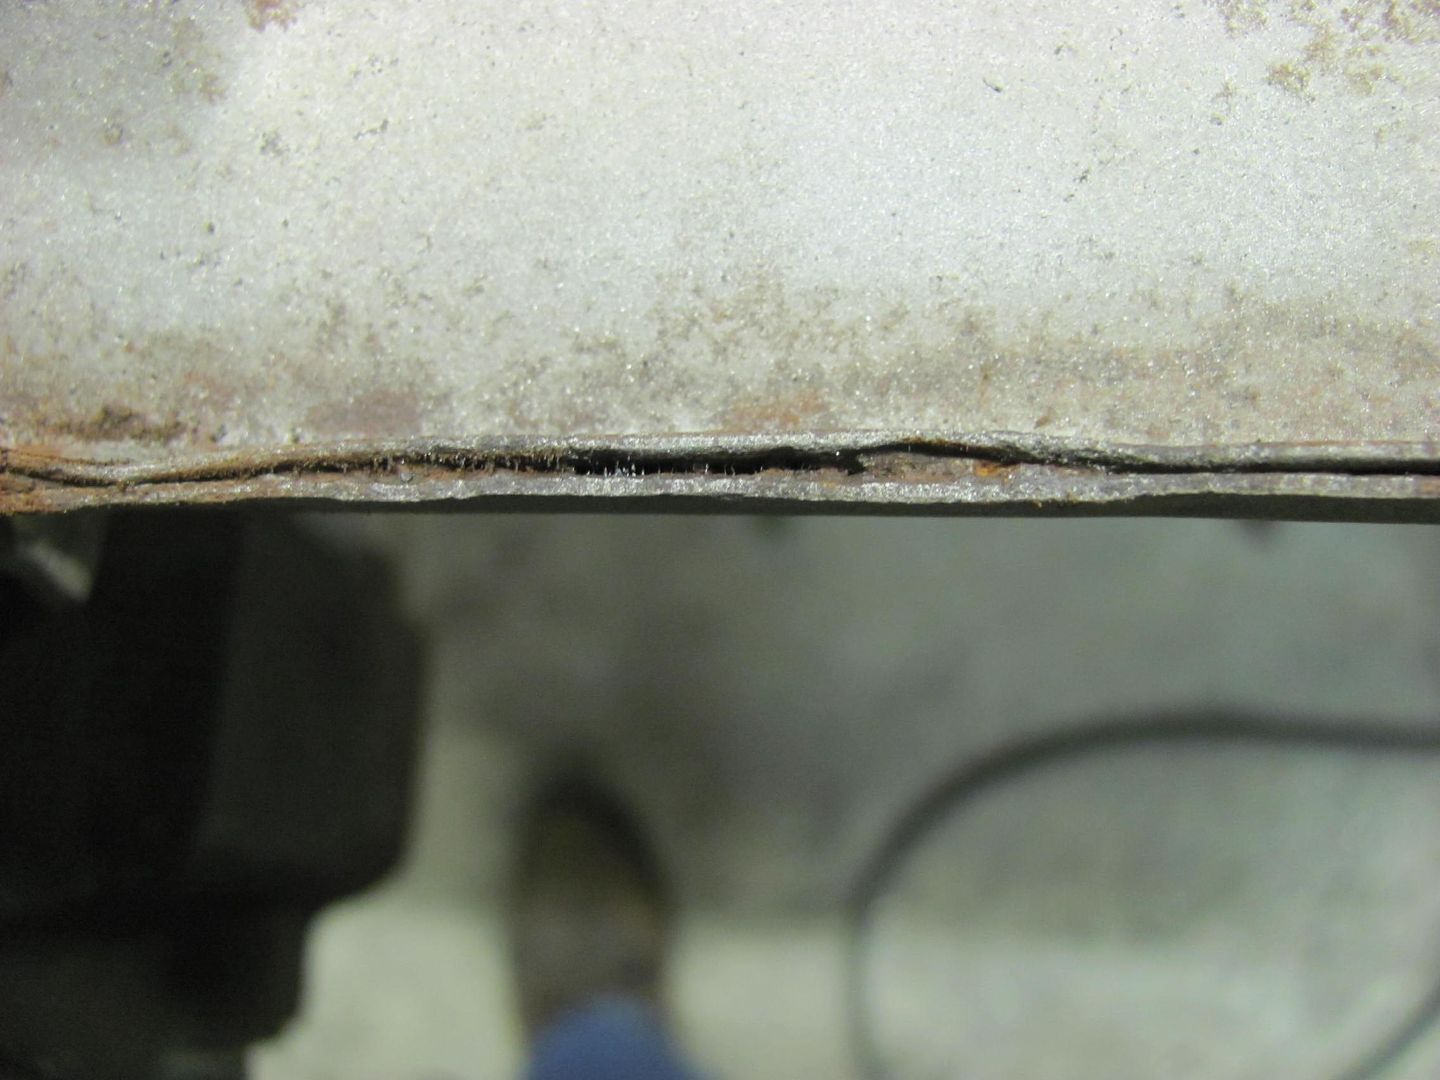
Out with the old...

Test fit of the new...
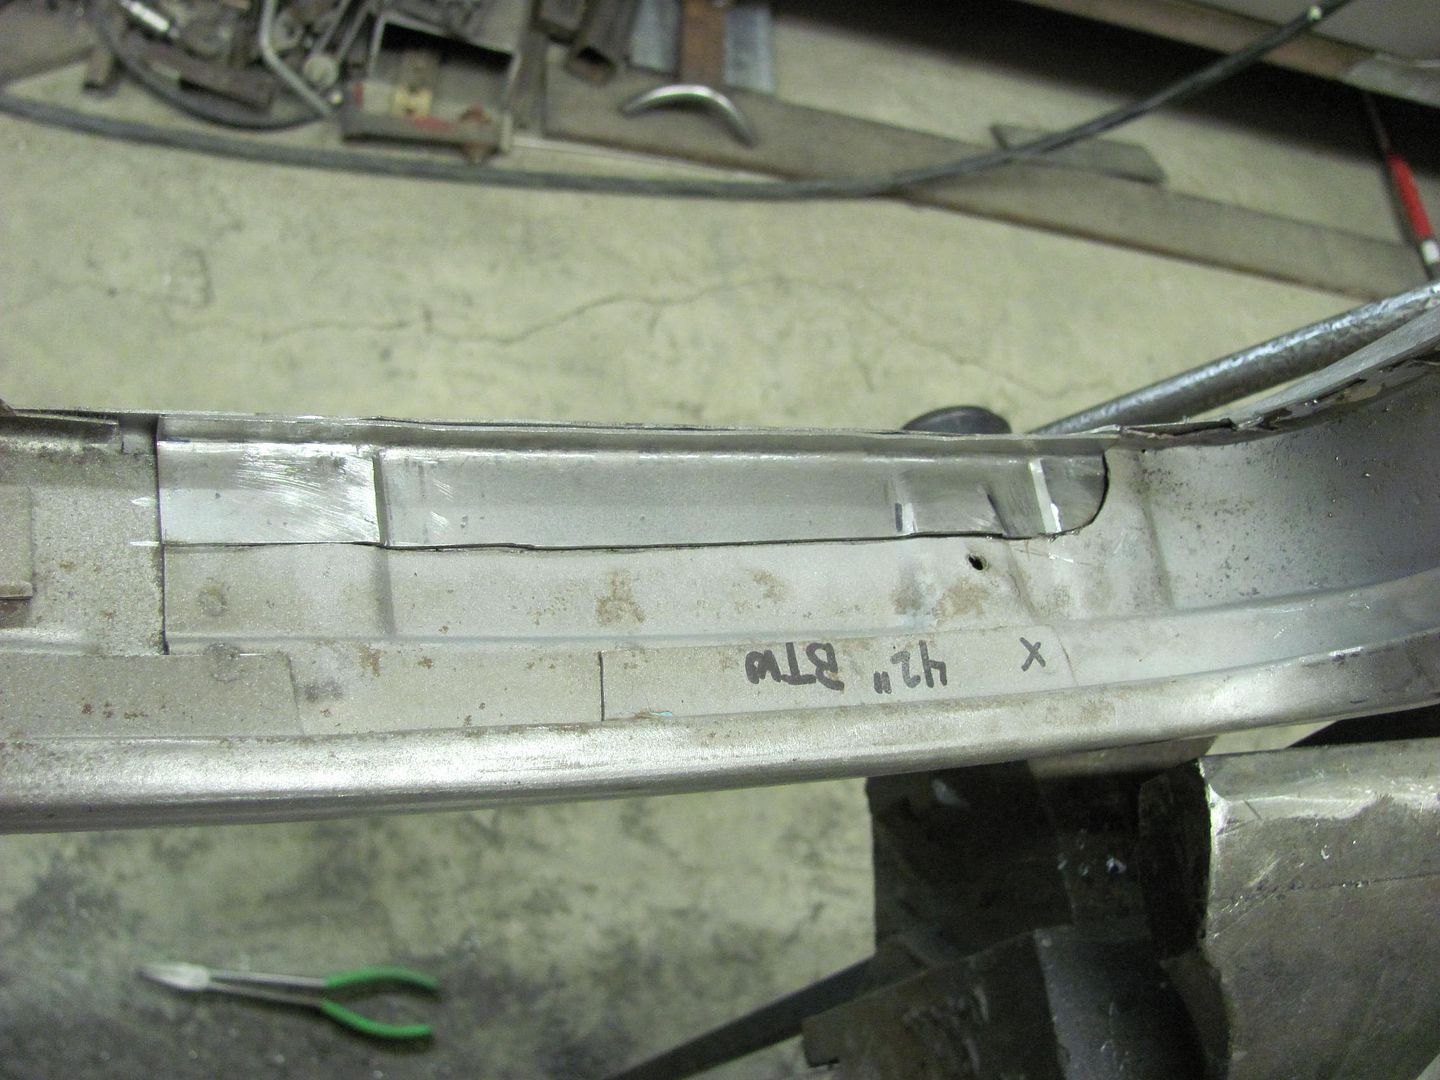
The exposed metal was media blasted, as was the inside of the newly made patch....and some epoxy primer added...
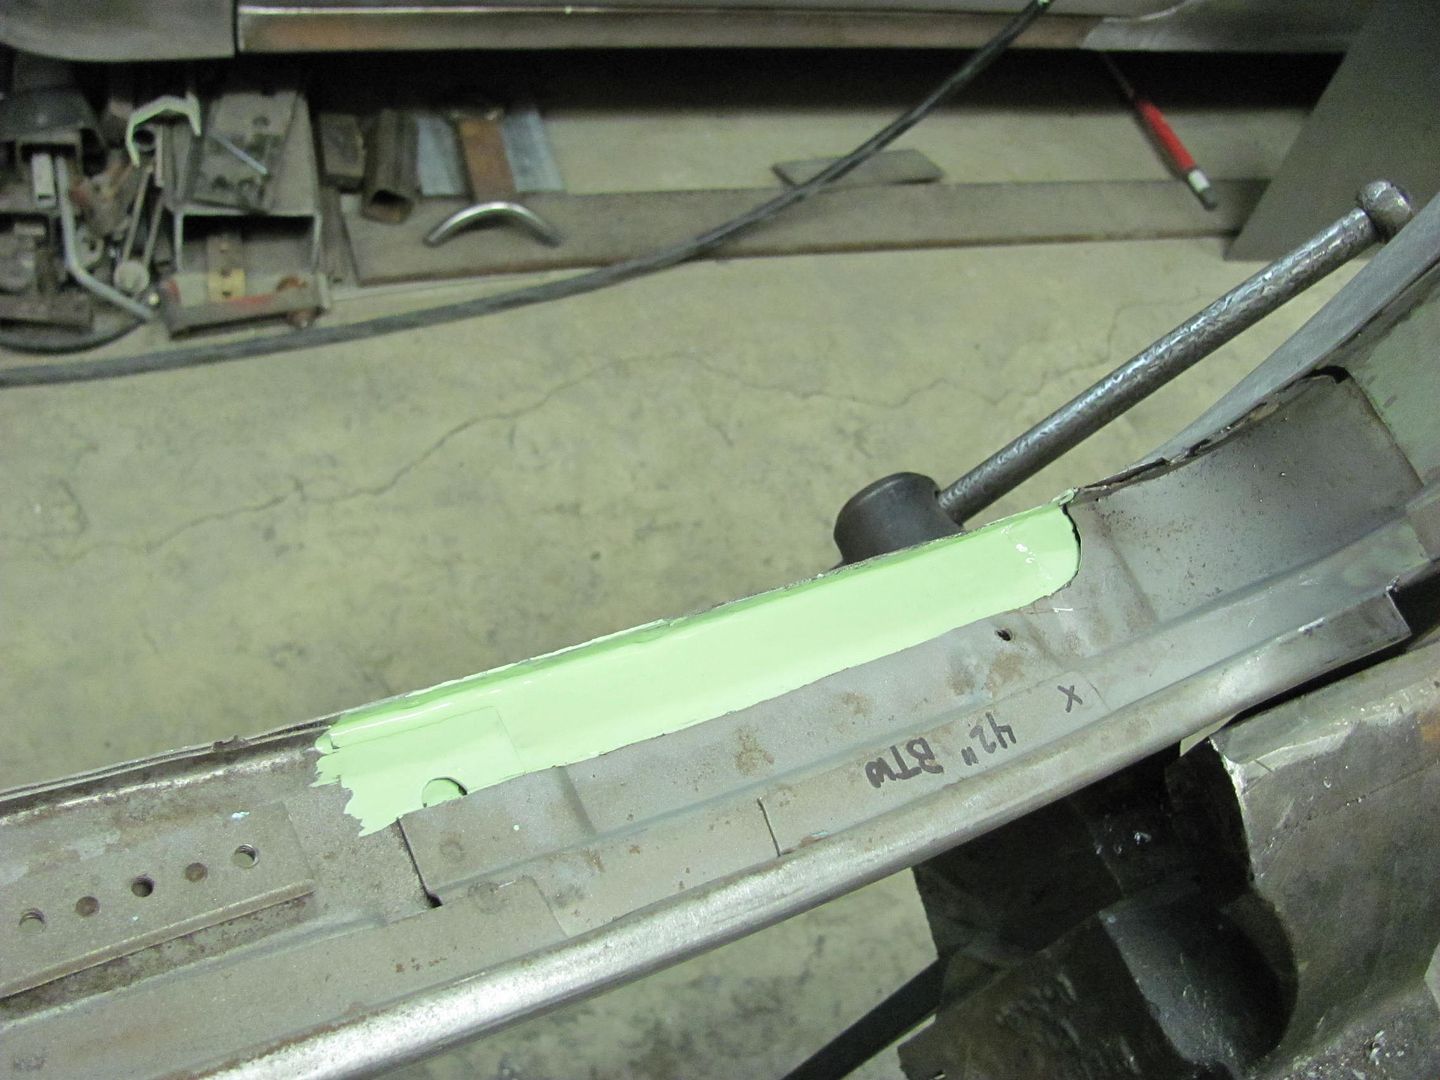
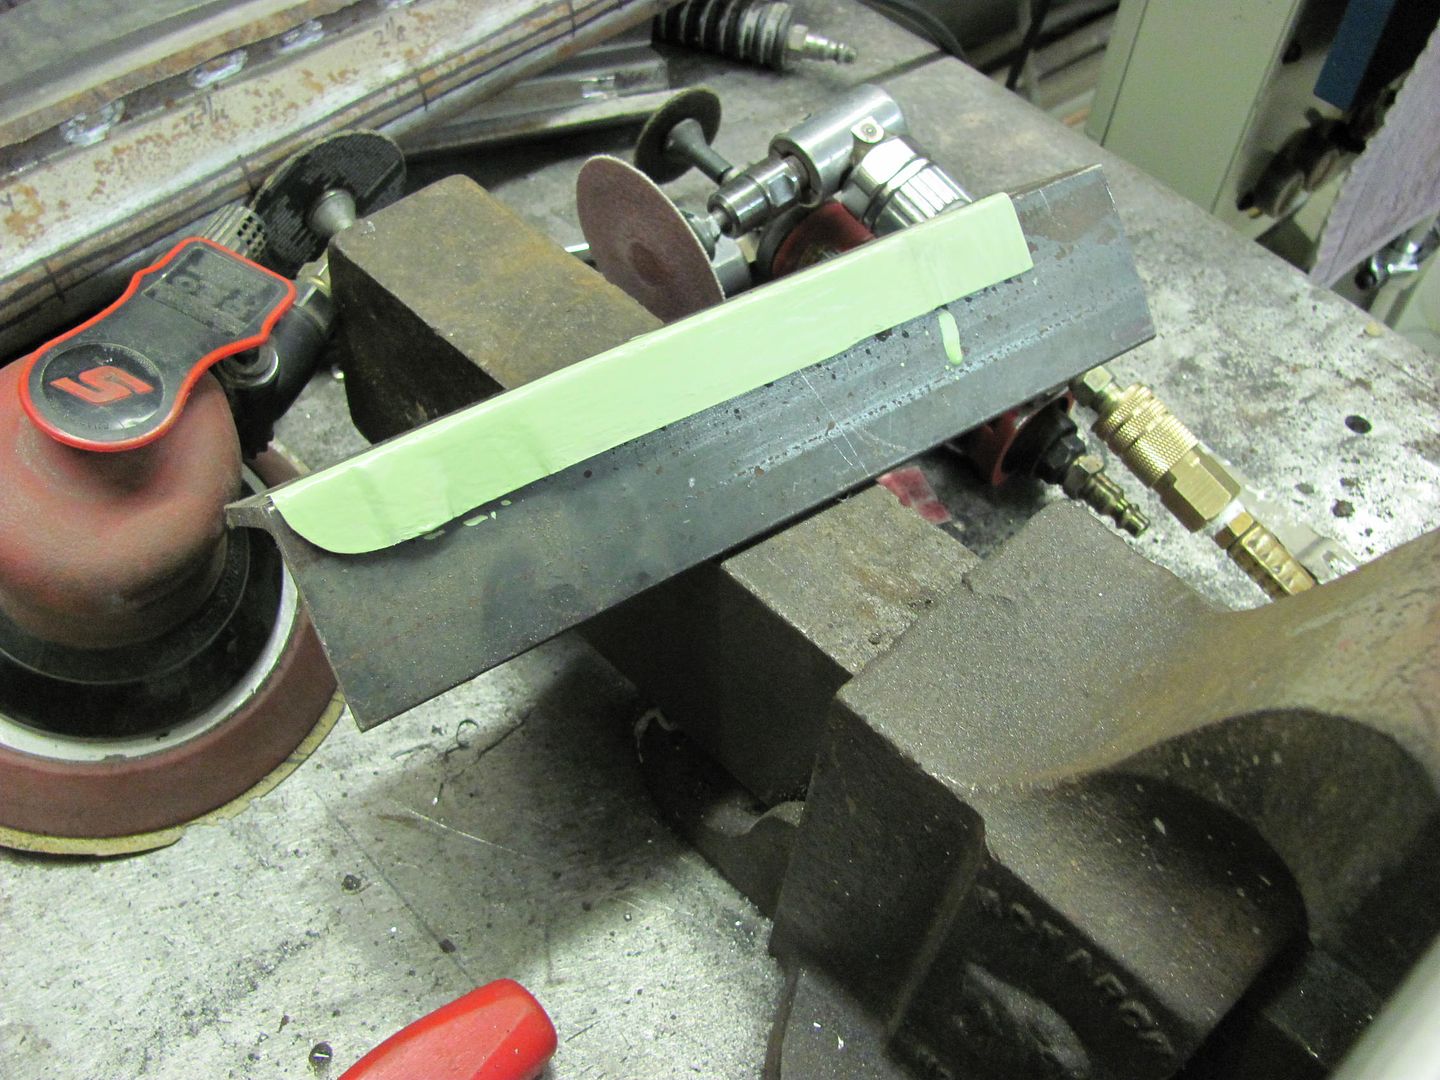
We'll let that dry and then get it welded in place.
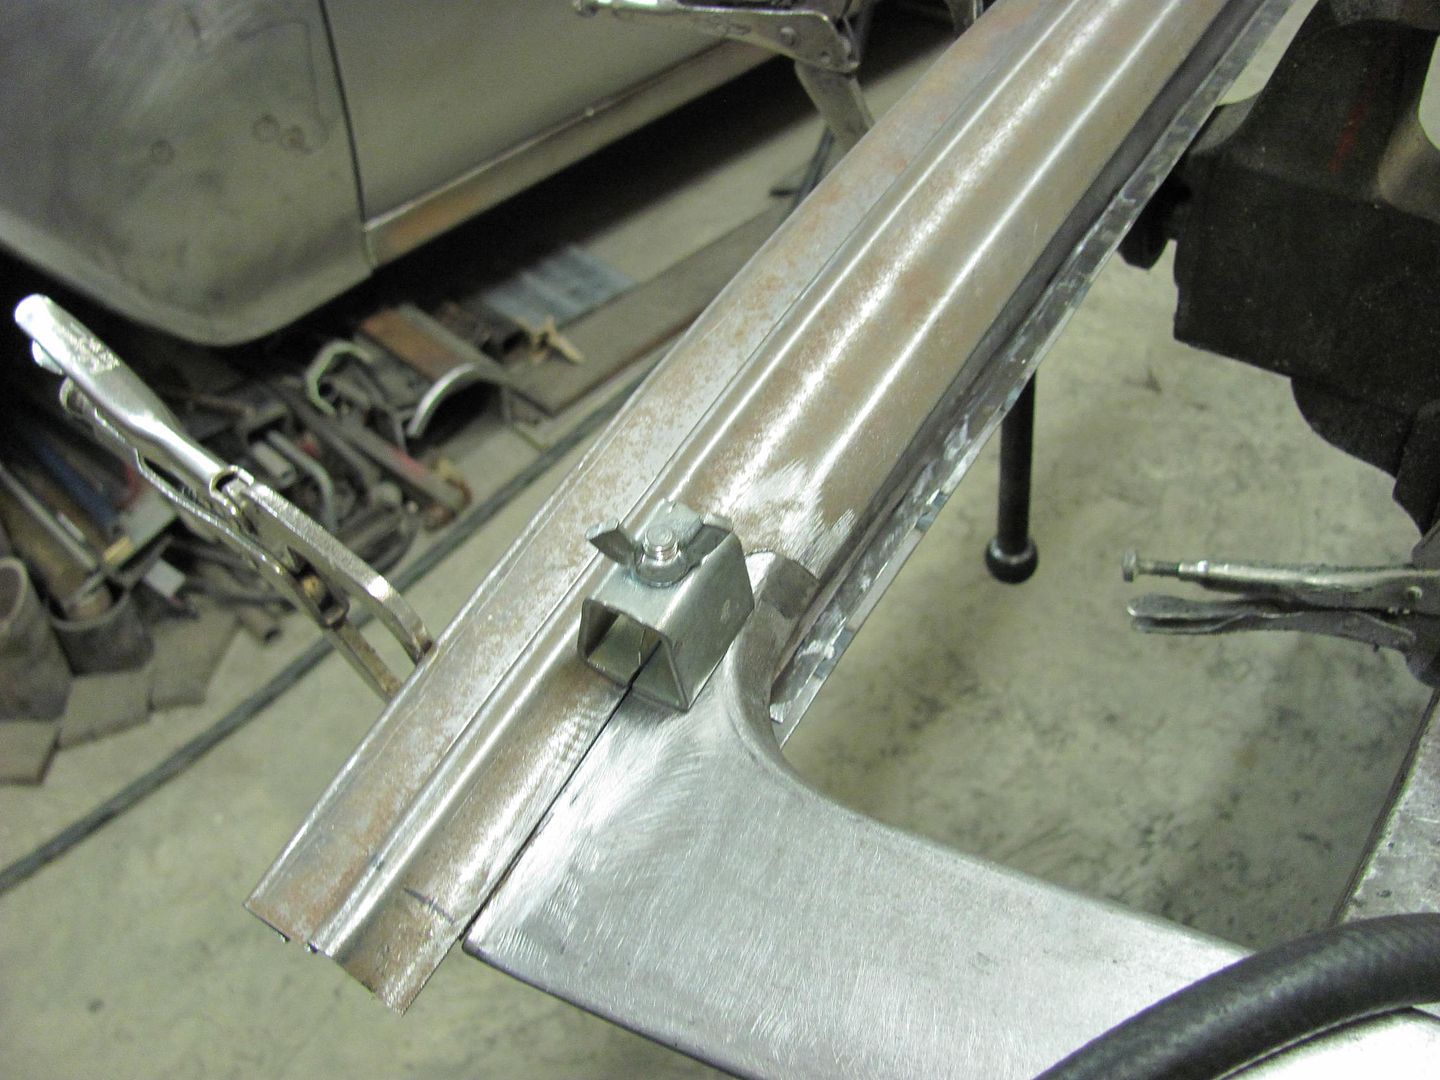
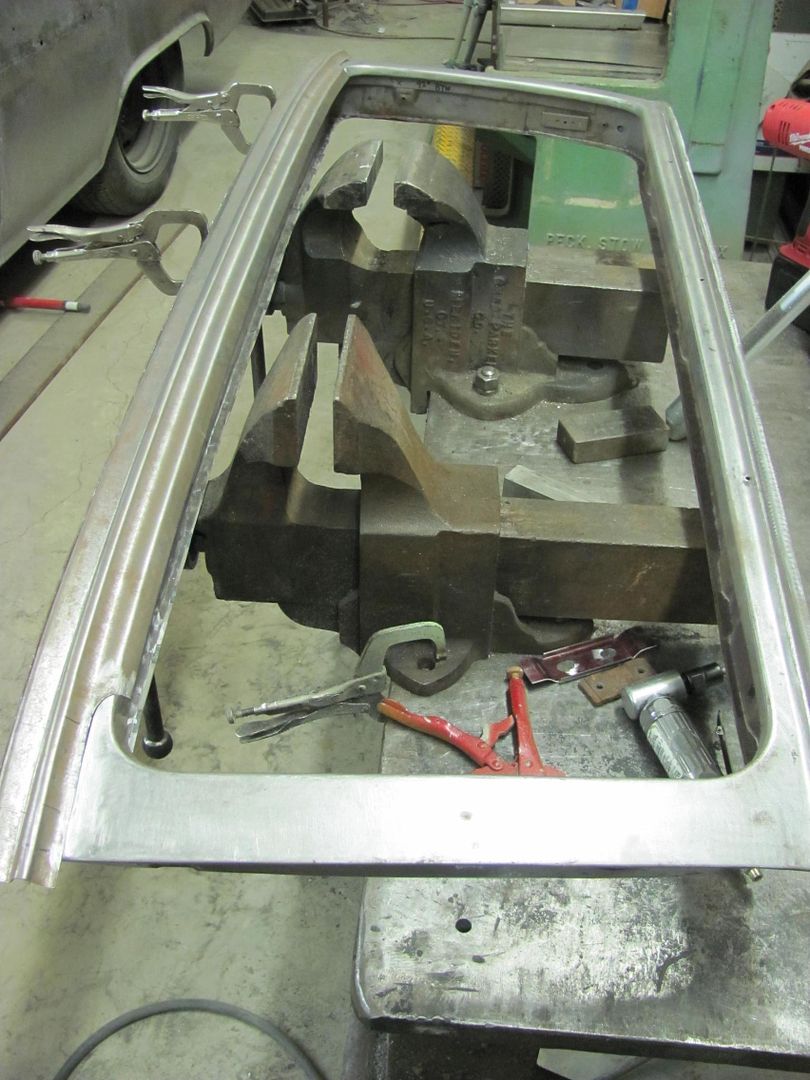
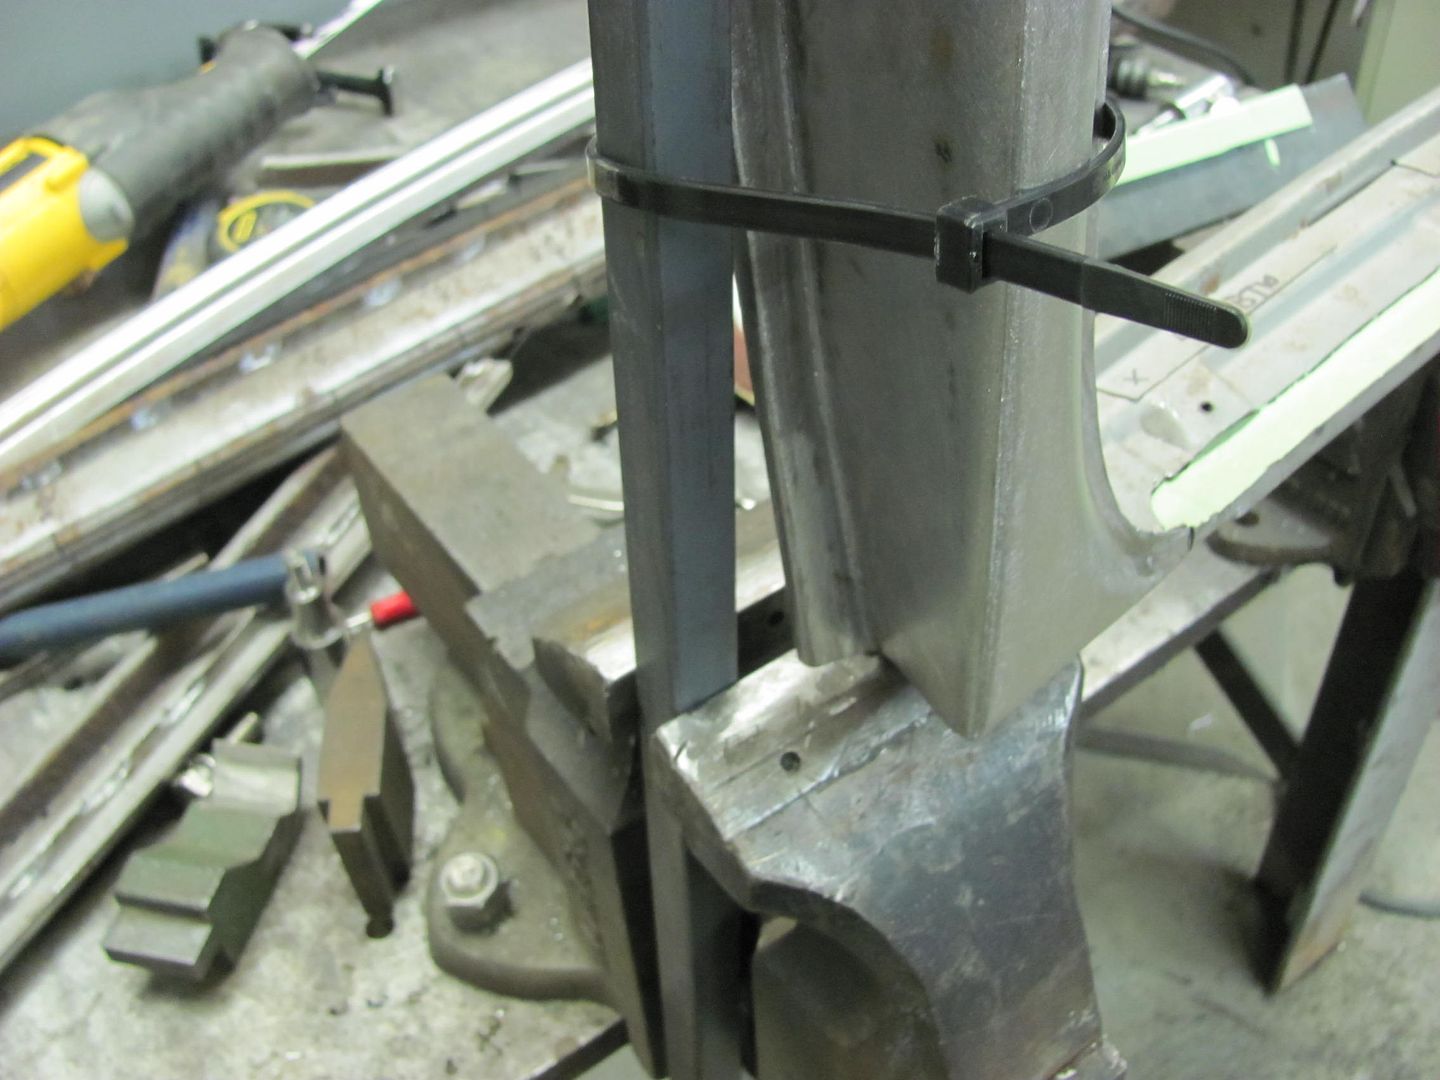
And just to show the makeshift clamping system for cutting, grinding, and painting in an awkward spot......

Robert
-
11-17-2013 03:24 AM #116
CHR Member
- Join Date
- Sep 2007
- Location
- New Bedford
- Car Year, Make, Model: 34 Ford 3W Coupe Replica
- Posts
- 14,754
Pretty cool.. 50 pounds of vice grips in the background replaced by a couple zip ties! LOL..
Were you using the 3" angle to form the piece also?
-
11-17-2013 05:33 AM #117
CHR Member
- Join Date
- Jun 2008
- Location
- Leonardtown
- Car Year, Make, Model: Walking
- Posts
- 1,228
I did have two pair of vice grips at the top, the zip ties were a fail-safe. The angle was just a painting fixture to hold it while I brushed on the epoxy.. The repair piece was cut out from one of the practice pieces used on the phenolic dies. Already had the flange bent so it worked well.Robert
-
11-17-2013 06:03 AM #118
CHR Member
- Join Date
- Sep 2007
- Location
- New Bedford
- Car Year, Make, Model: 34 Ford 3W Coupe Replica
- Posts
- 14,754
Thanks for the info Bob. And as always.. THANK YOU!
-
11-19-2013 02:01 PM #119
CHR Member
- Join Date
- Apr 2011
- Location
- Prairie City
- Car Year, Make, Model: 40 Ford Deluxe, 68 Corvette, 72&76 K30
- Posts
- 7,301
- Blog Entries
- 1
Great work, and I love your cupboards in the shop.Ryan
1940 Ford Deluxe Tudor 354 Hemi 46RH Electric Blue w/multi-color flames, Ford 9" Residing in multiple pieces
1968 Corvette Coupe 5.9 Cummins Drag Car 11.43@130mph No stall leaving the line with 1250 rpm's and poor 2.2 60'
1972 Chevy K30 Longhorn P-pumped 24v Compound Turbos 47RH Just another money pit
1971 Camaro RS 5.3 BTR Stage 3 cam, SuperT10
Tire Sizes
-
11-19-2013 03:21 PM #120
CHR Member
- Join Date
- Jun 2008
- Location
- Leonardtown
- Car Year, Make, Model: Walking
- Posts
- 1,228
They were a McMaster Carr purchase. Had all that wasted space on the side of the booth, so they came in handy for adding storage..Robert
 Reply With Quote

Posting Permissions
- You may not post new threads
- You may not post replies
- You may not post attachments
- You may not edit your posts

Even though I know he won't see this, I still want to wish a Happy Birthday to my best friend, Richard Moore aka techinspector1
Happy Birthday techinspector1