


 3390Likes
Thread: 55 Wagon Progress


Results 76 to 90 of 1865
 LinkBack URL
 About LinkBacks
-
07-19-2013 06:58 PM #76
 CHR Member

- Join Date
- Jun 2008
- Location
- Leonardtown
- Car Year, Make, Model: Walking
- Posts
- 1,228
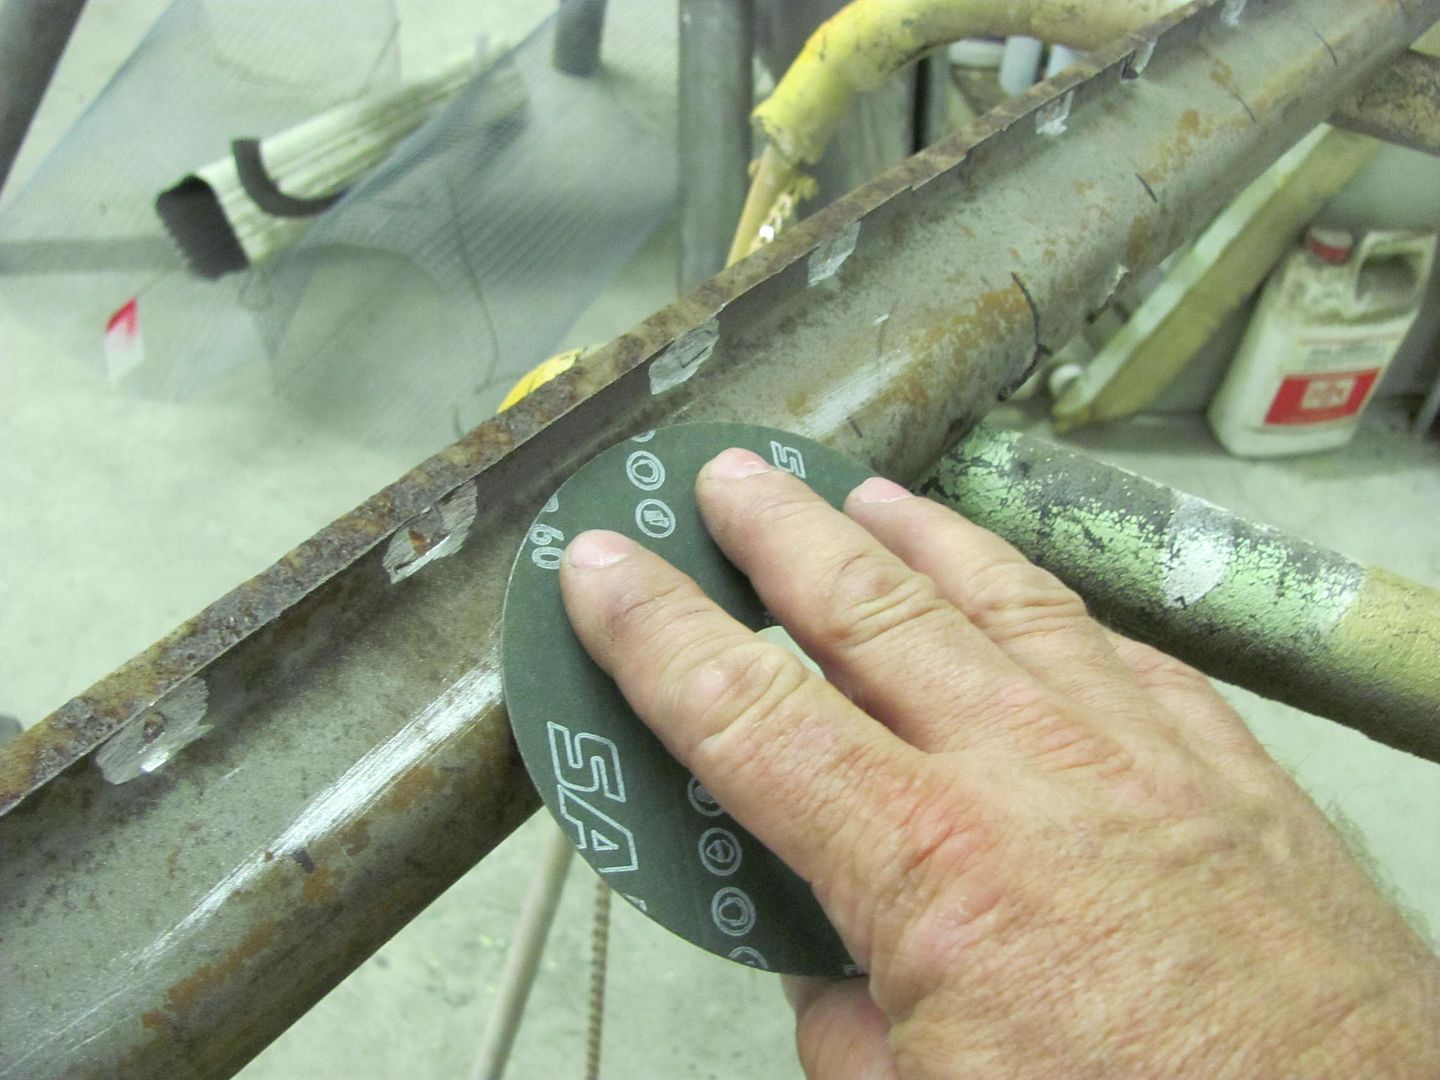
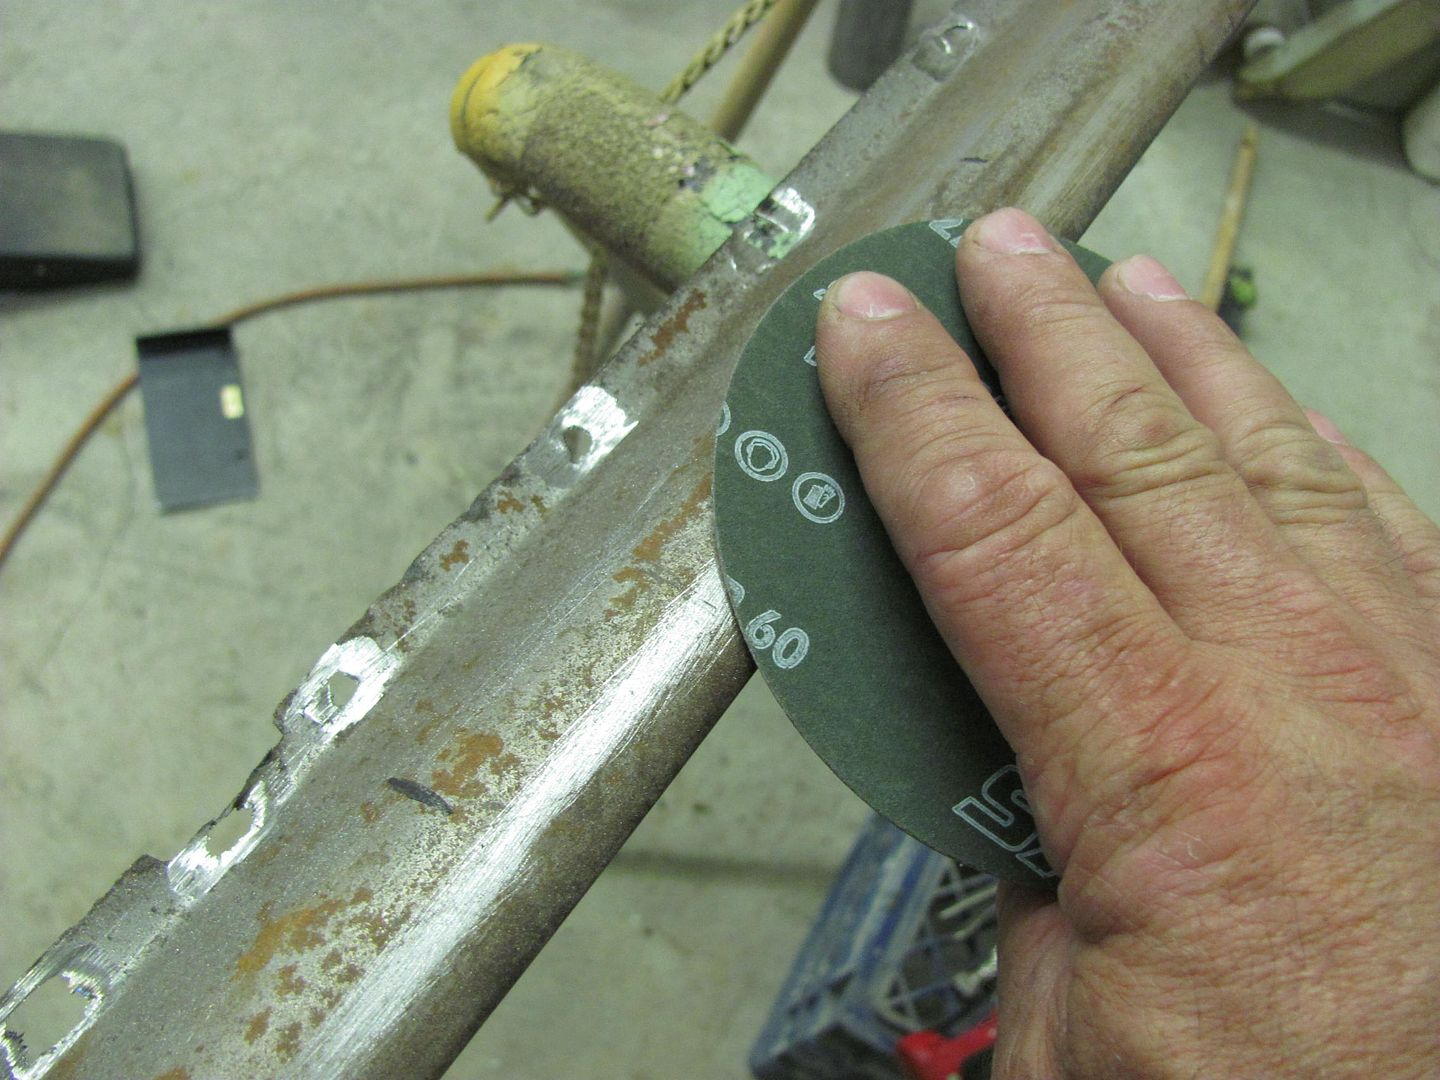
It seems every time I used one of those spot weld "hole saw" cutters, I ended up spending more time repairing what I had cut through too far, so I have been using this method since.
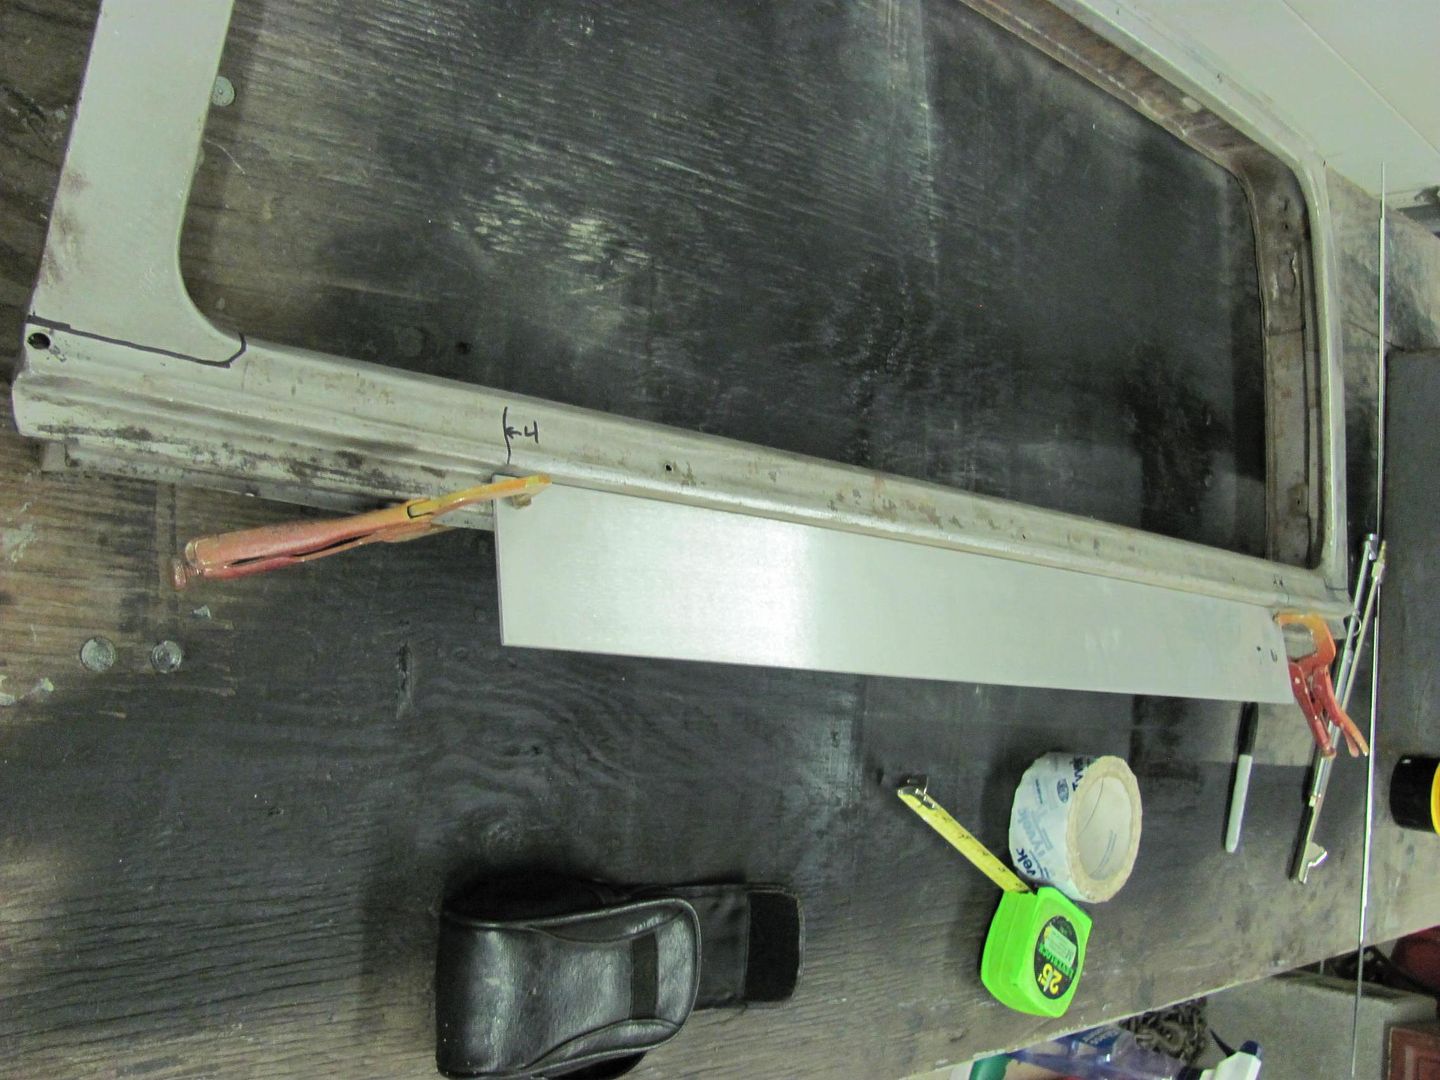
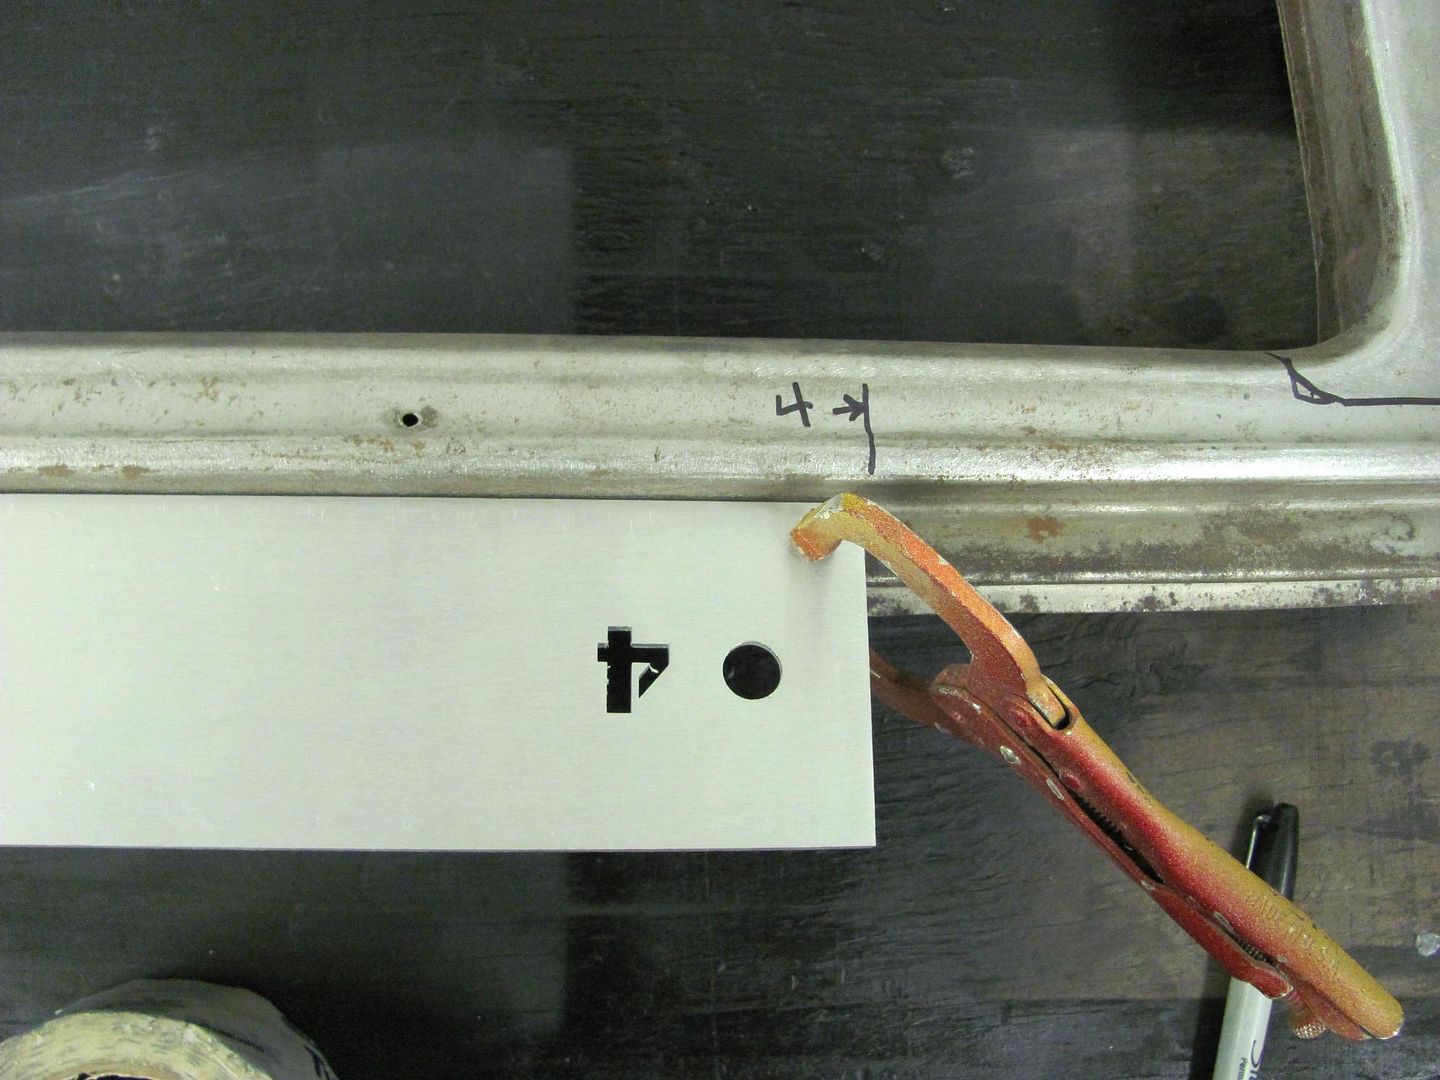
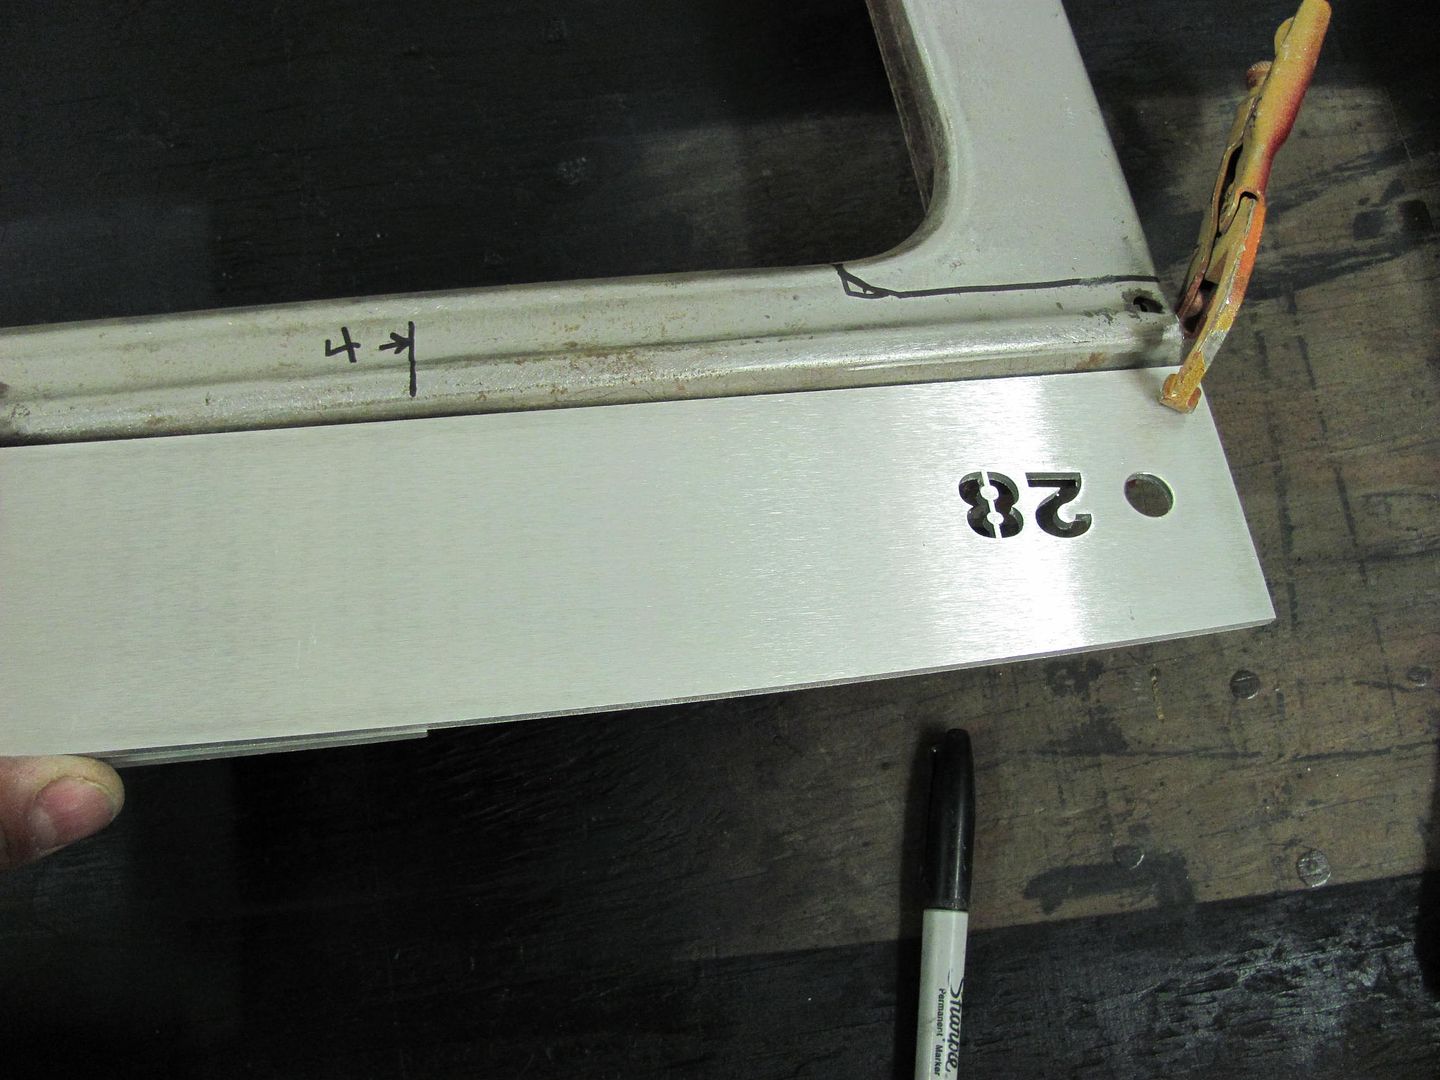
To start the layout on the new metal, I wanted to find the center of the radius along the window opening. By holding a sanding disc on the flats and scuffing, it showed the edges of the radius...
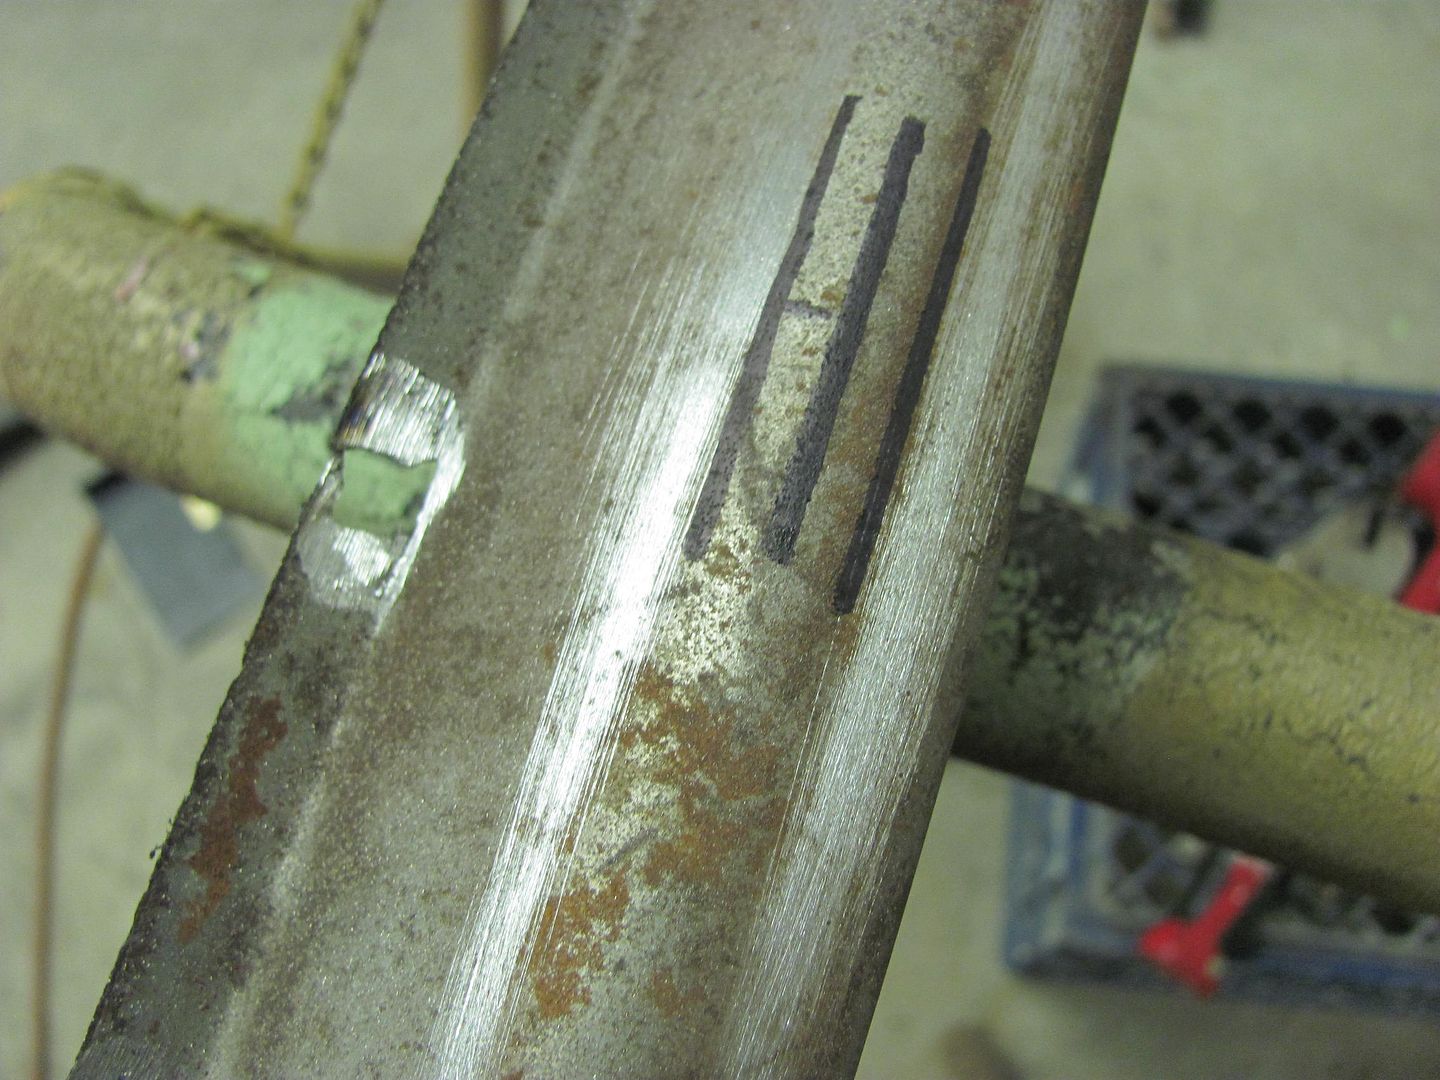
Then laid out a pattern to be able to measure from the bottom crease...
....and transposed it to the new sheet...
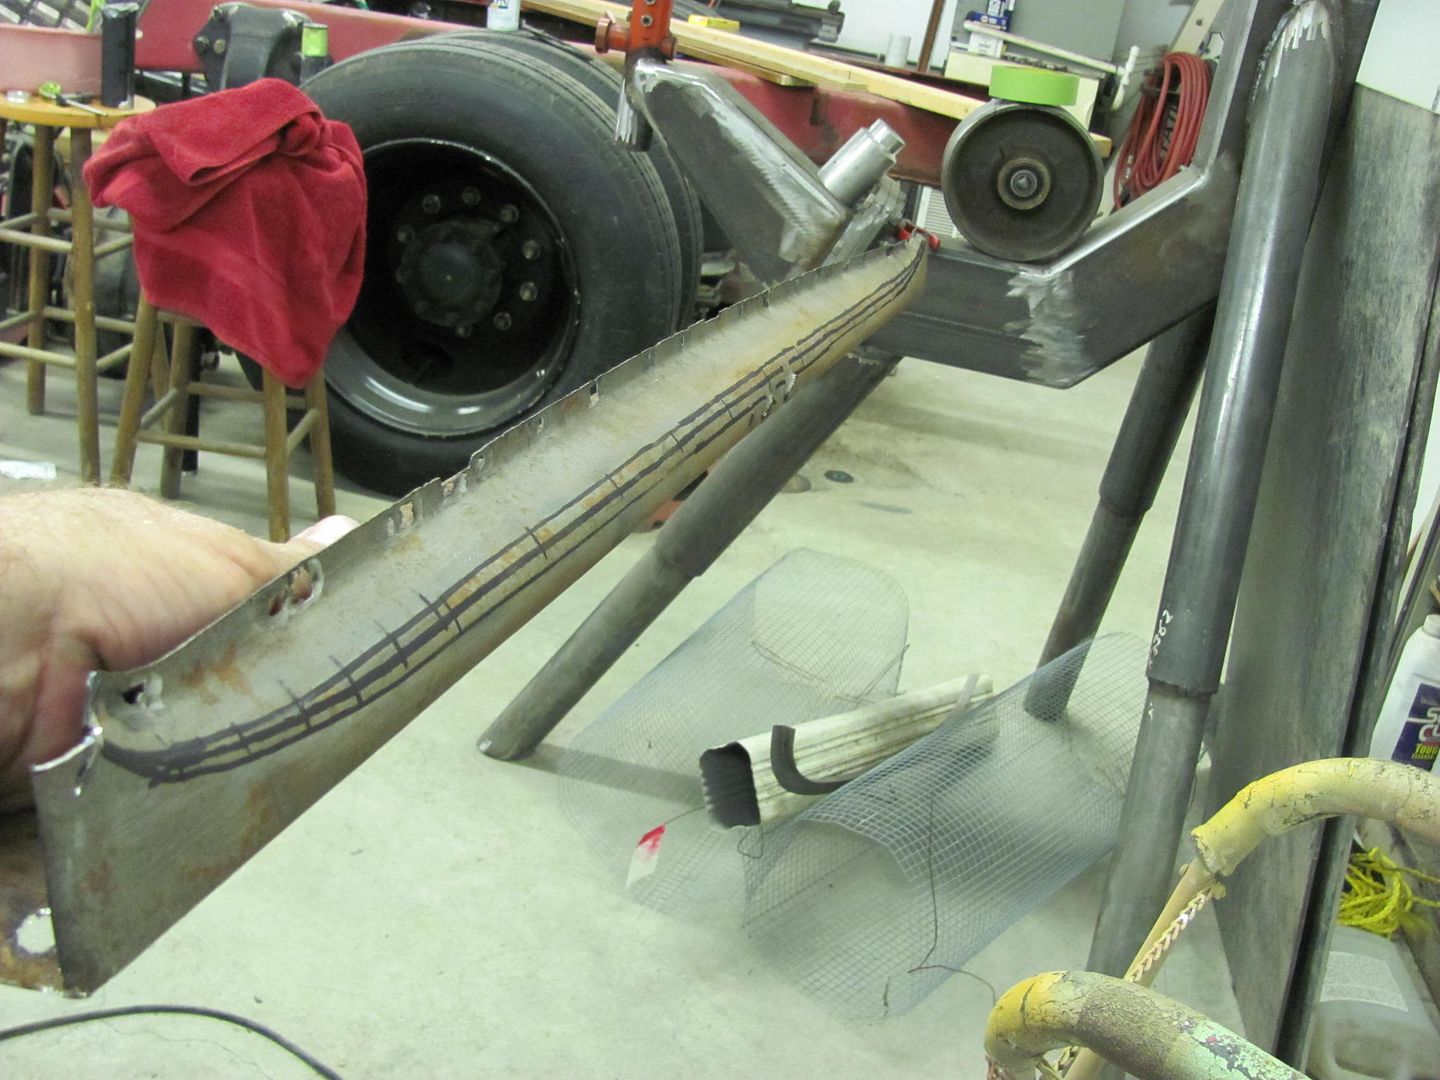
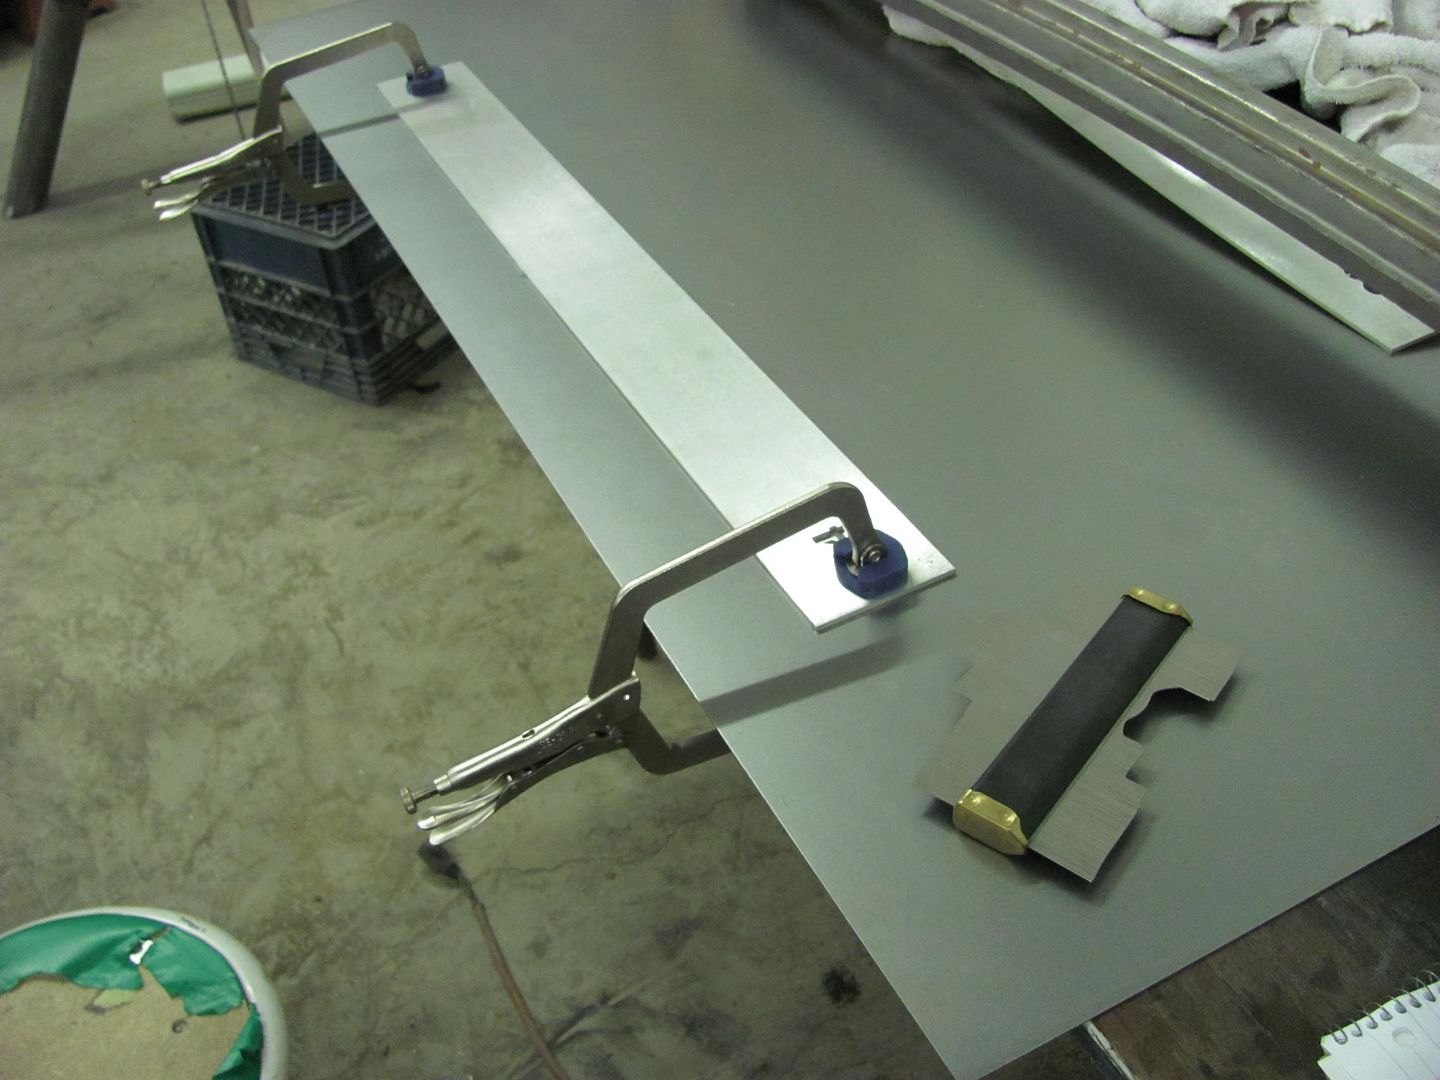
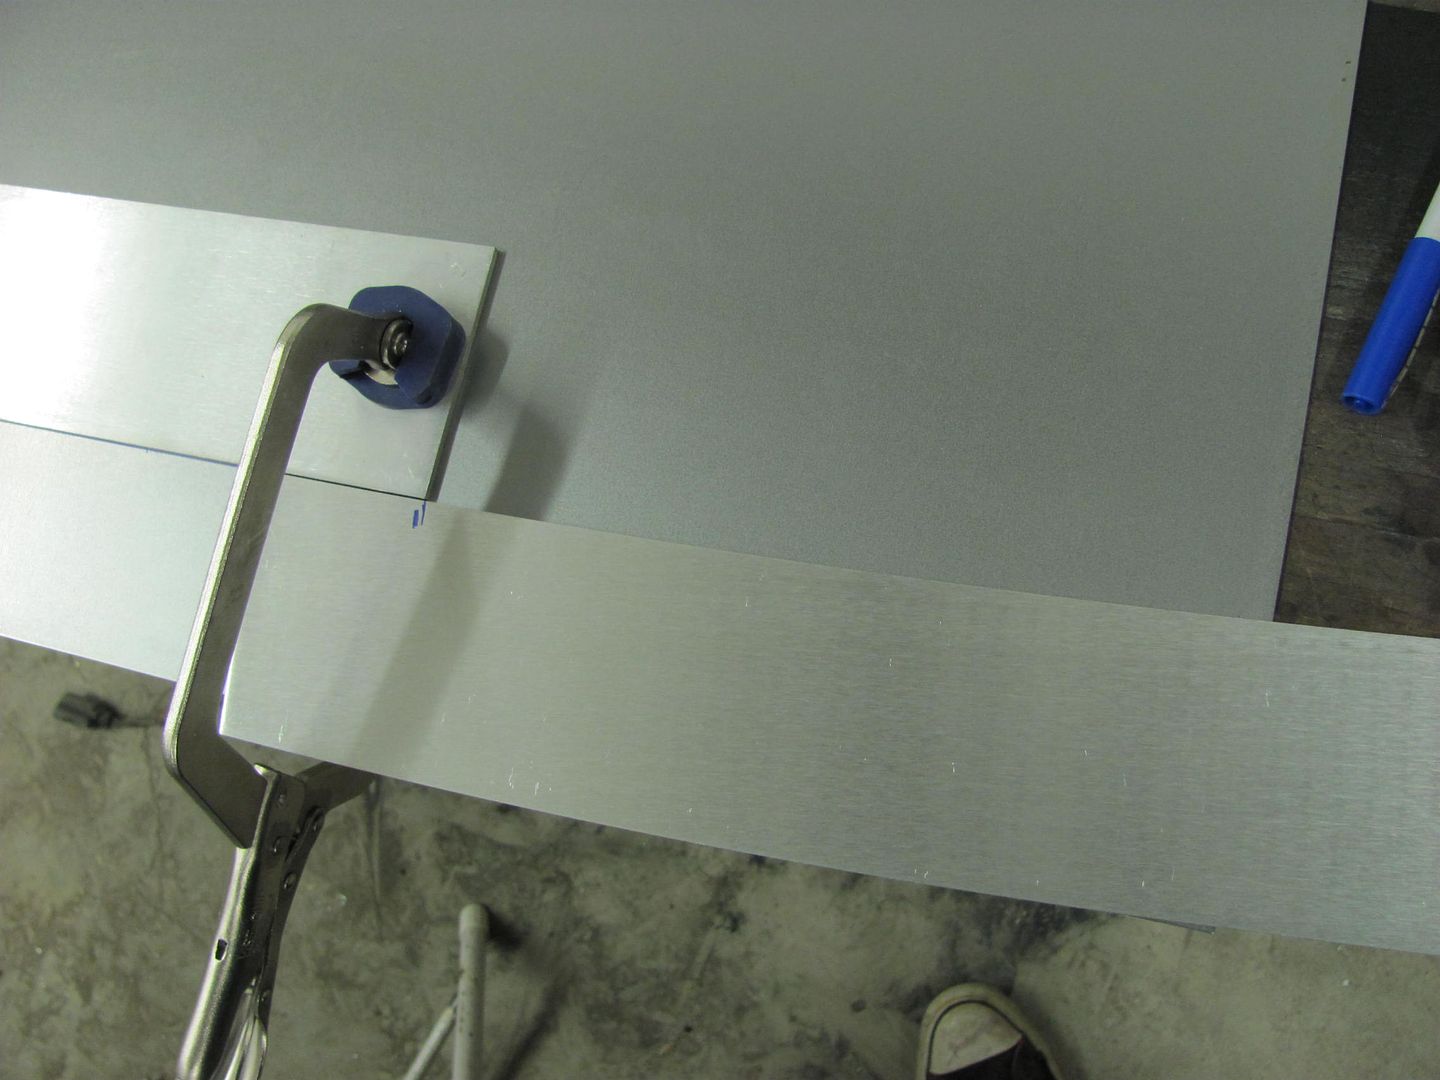
The top edge was trimmed to size and the tipping wheel used to fold over the welding flange...

Comparison....
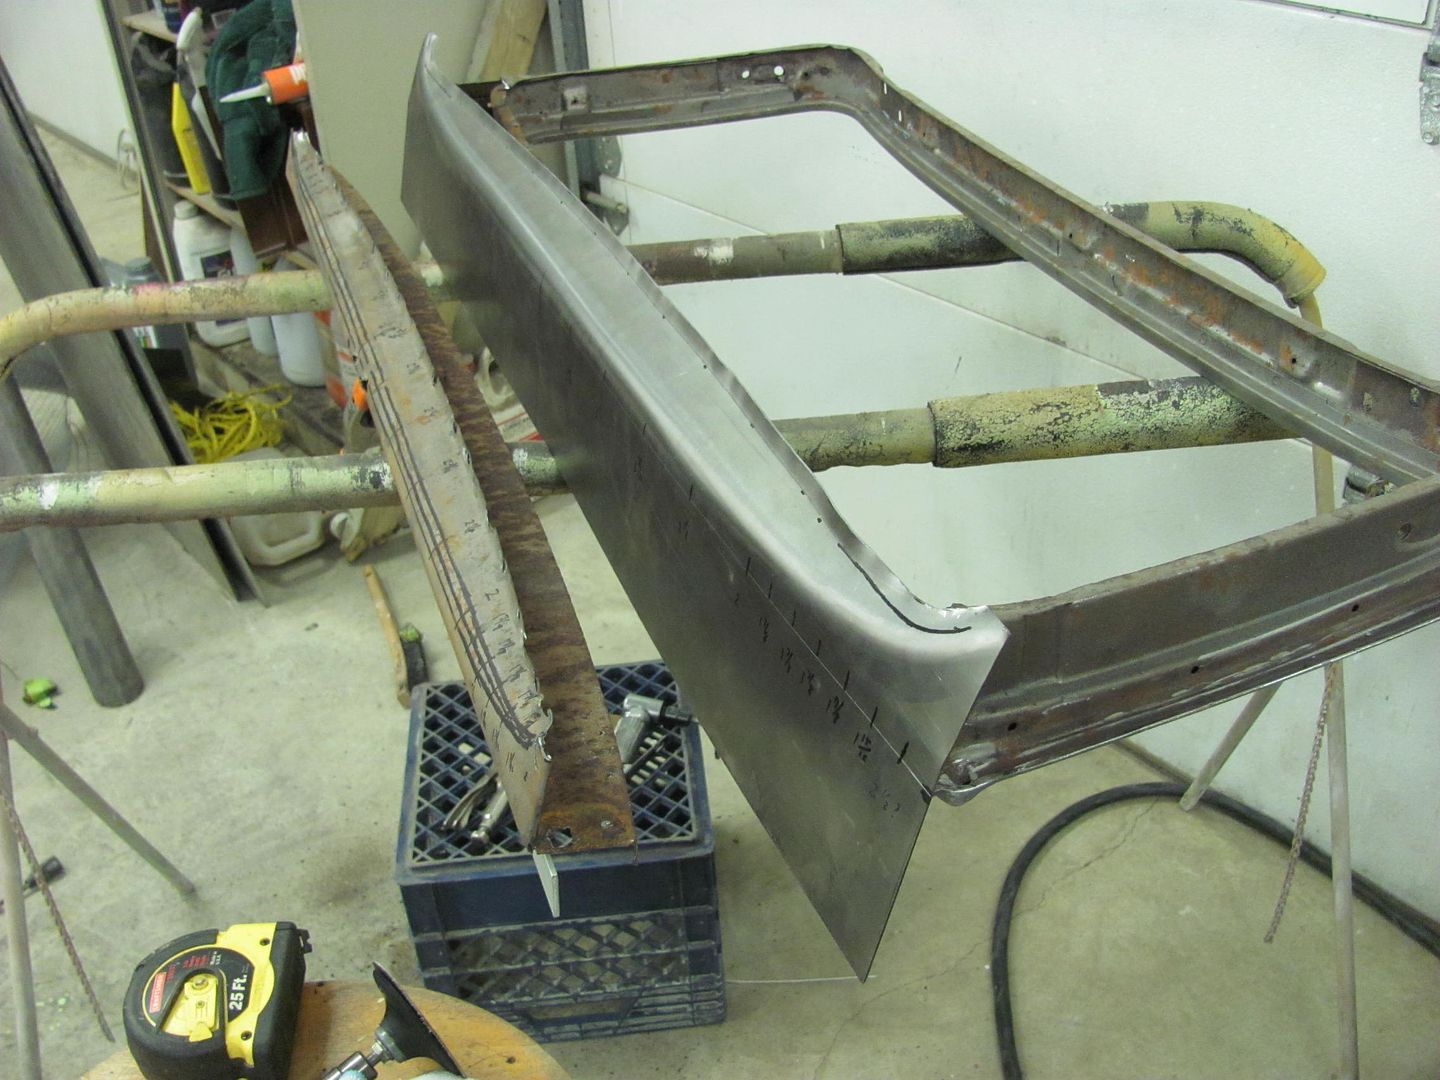
The bottom was marked with the tipping wheel and folded in the apron brake. Then trimmed to size, again using the tipping wheel to fold over the welding flange...
It's real close right now, just needs a bit of tweaking.

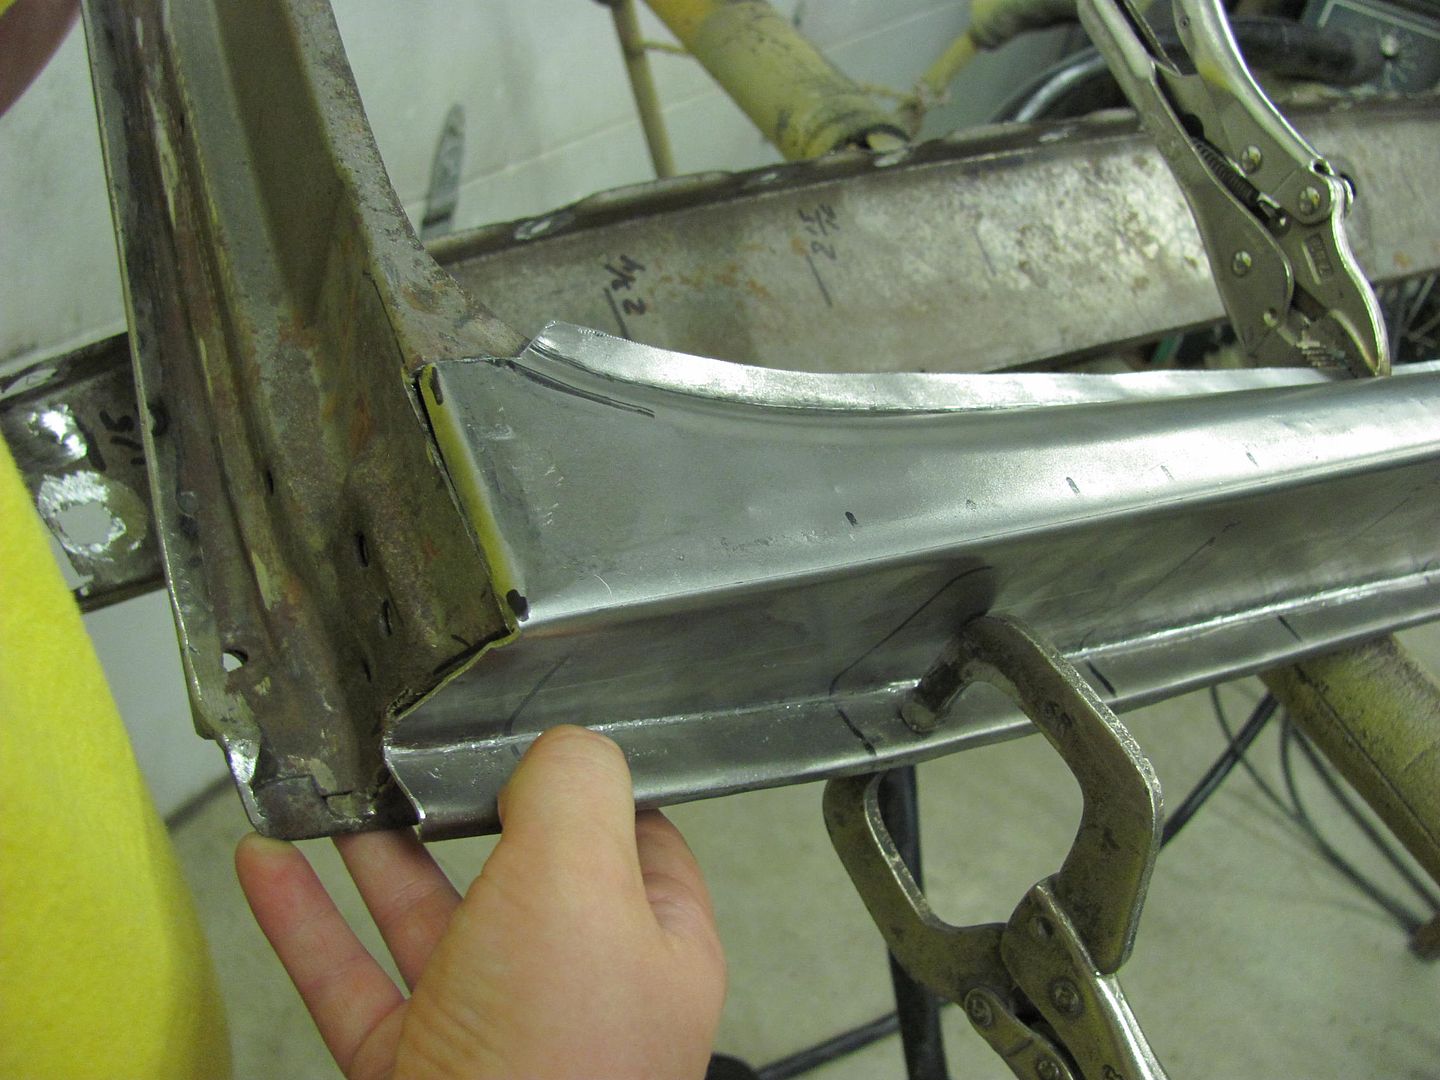
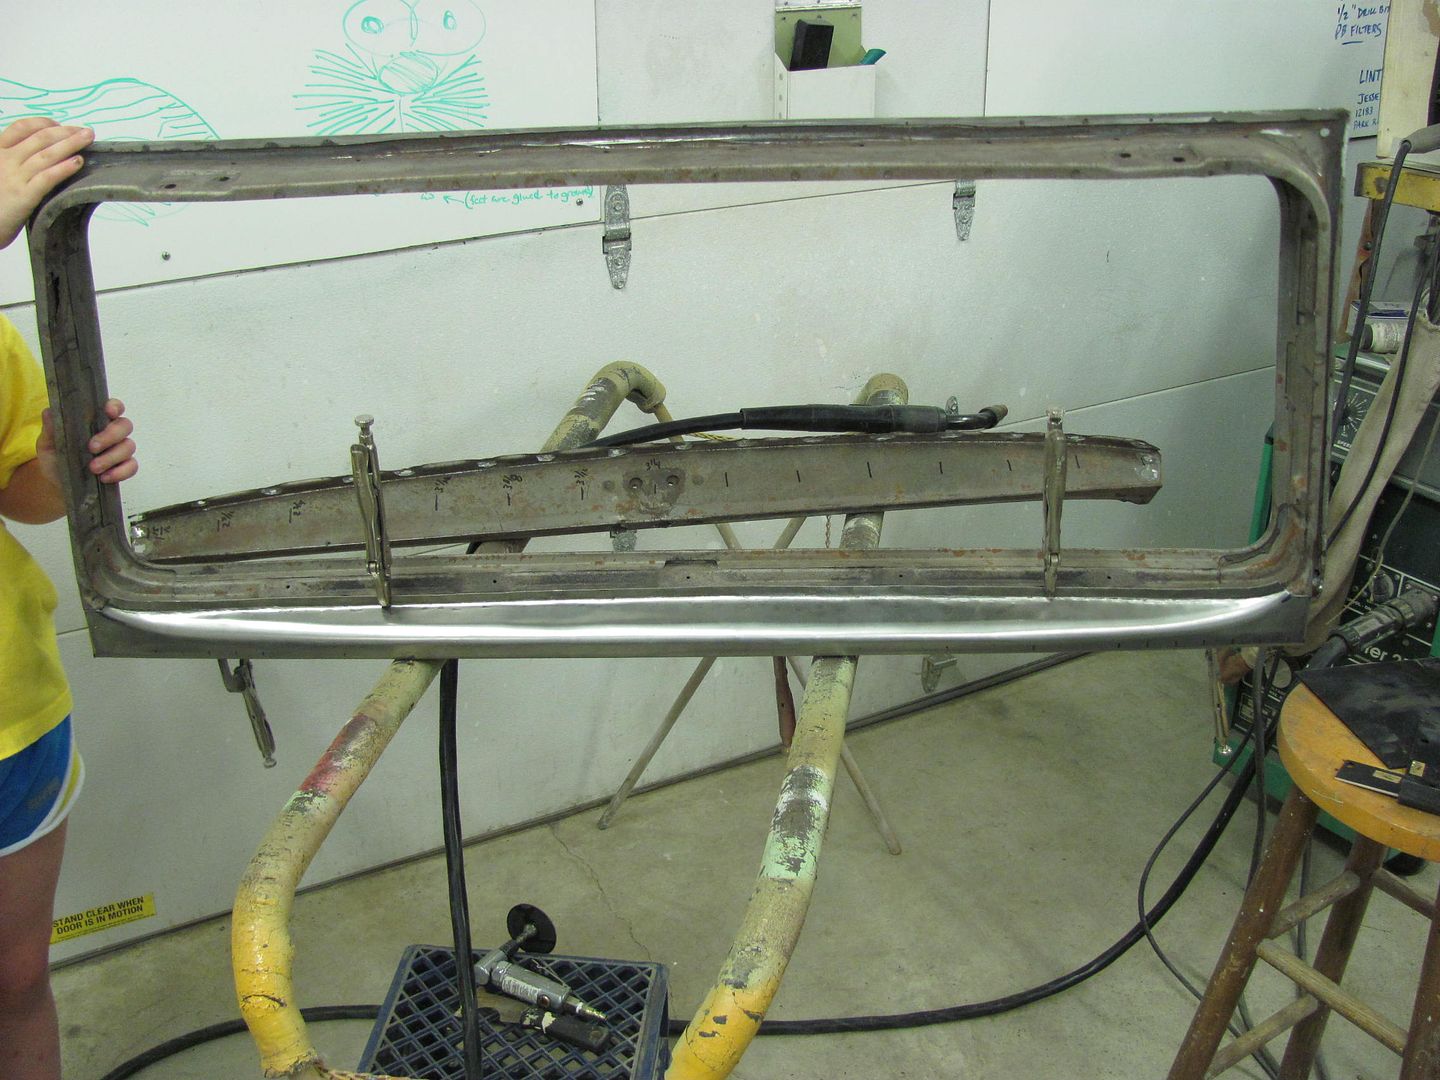

This was made using 18 ga, I think if I had the factory 19 ga metal it would have formed much easier..Robert
-
Advertising

- Google Adsense
- REGISTERED USERS DO NOT SEE THIS AD
-
07-20-2013 03:29 AM #77
CHR Member
- Join Date
- Sep 2007
- Location
- New Bedford
- Car Year, Make, Model: 34 Ford 3W Coupe Replica
- Posts
- 14,754
WOW... I still find that work to be amazing! Thanks for sharing also.
-
07-23-2013 02:20 PM #78
CHR Member
- Join Date
- Apr 2011
- Location
- Prairie City
- Car Year, Make, Model: 40 Ford Deluxe, 68 Corvette, 72&76 K30
- Posts
- 7,301
- Blog Entries
- 1
Holly cow! You do impeckable work! That is awesome!Ryan
1940 Ford Deluxe Tudor 354 Hemi 46RH Electric Blue w/multi-color flames, Ford 9" Residing in multiple pieces
1968 Corvette Coupe 5.9 Cummins Drag Car 11.43@130mph No stall leaving the line with 1250 rpm's and poor 2.2 60'
1972 Chevy K30 Longhorn P-pumped 24v Compound Turbos 47RH Just another money pit
1971 Camaro RS 5.3 BTR Stage 3 cam, SuperT10
Tire Sizes
-
09-18-2013 08:16 PM #79
CHR Member
- Join Date
- Jun 2008
- Location
- Leonardtown
- Car Year, Make, Model: Walking
- Posts
- 1,228
Thanks for the comments guys. Sorry for the long hiatus, been too many distractions...
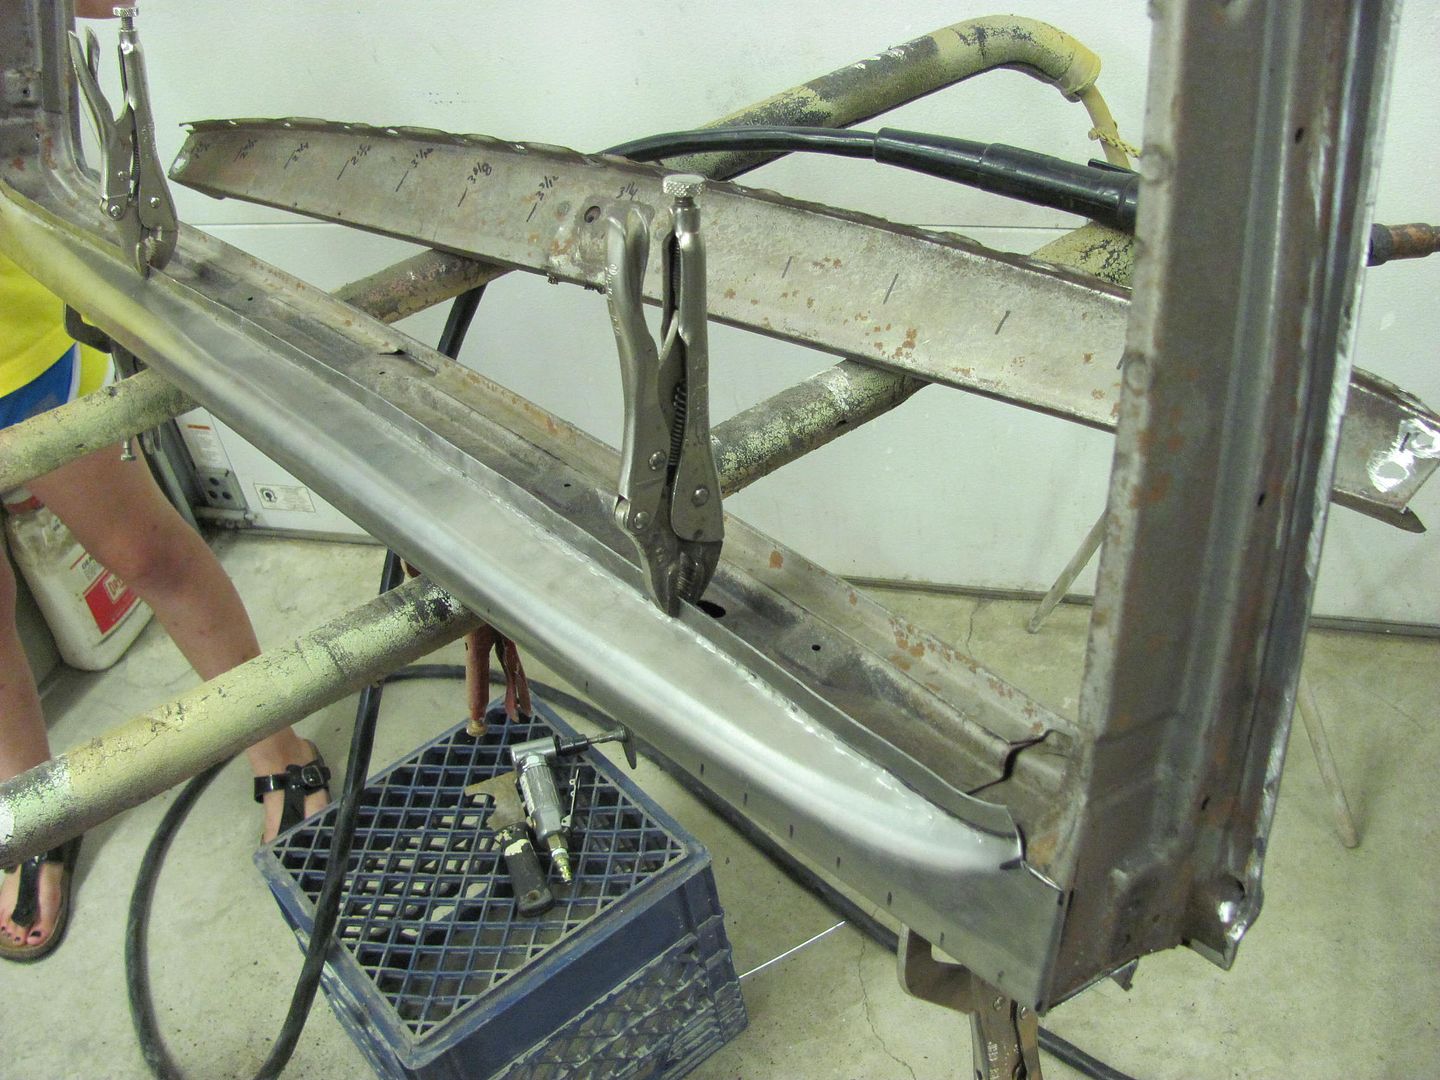
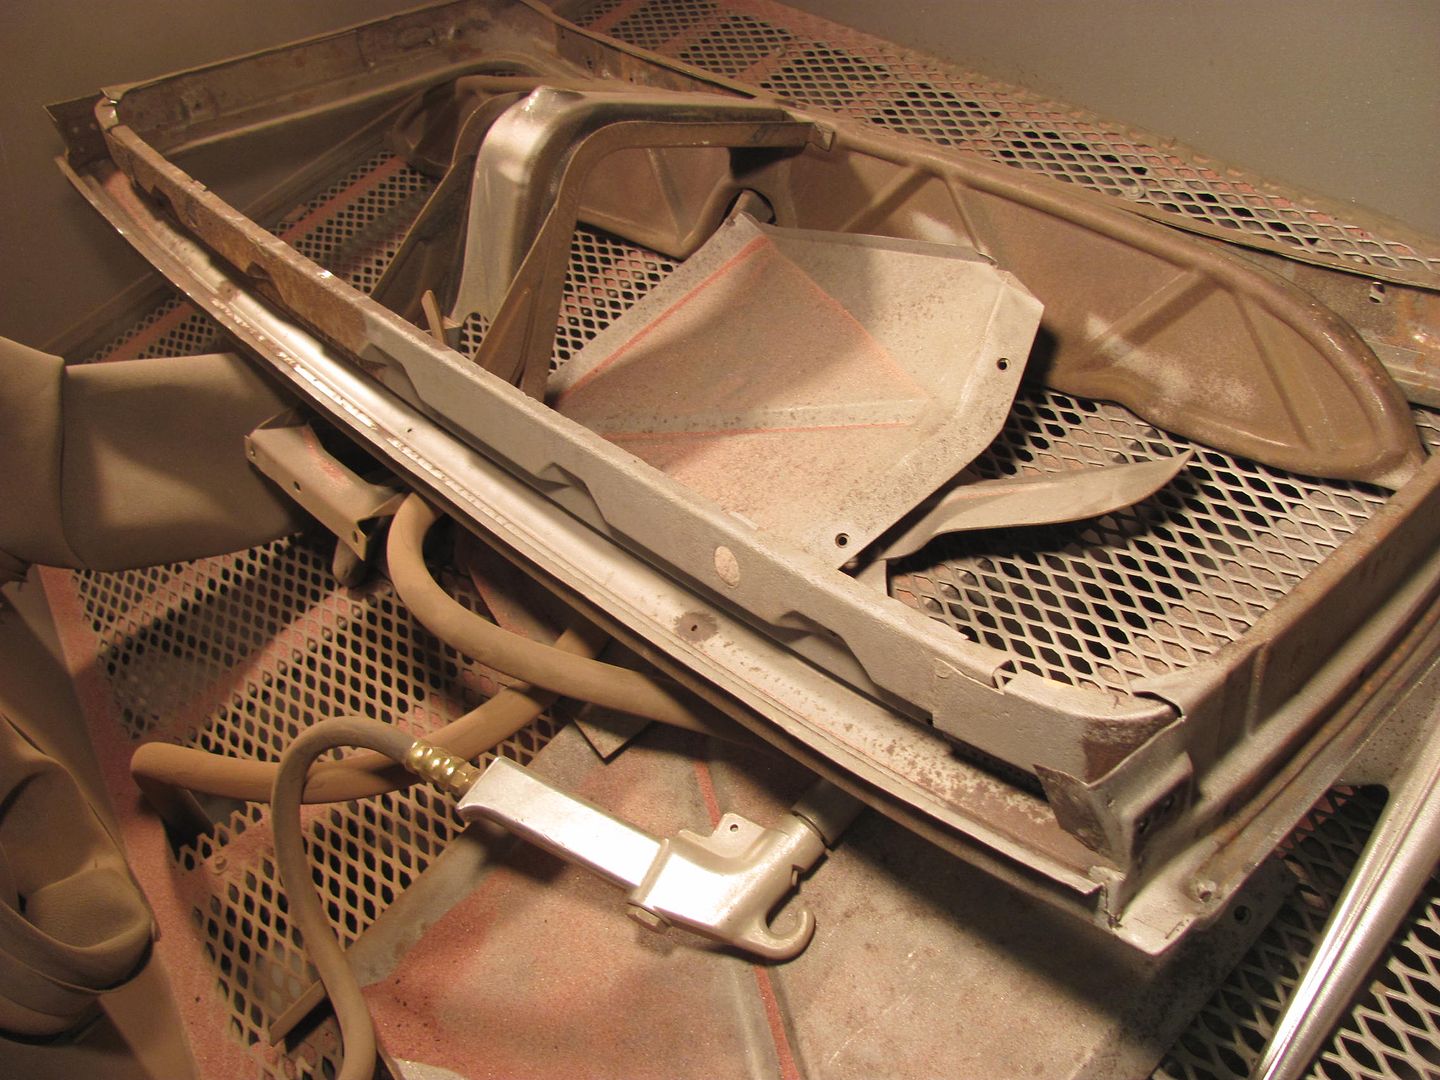
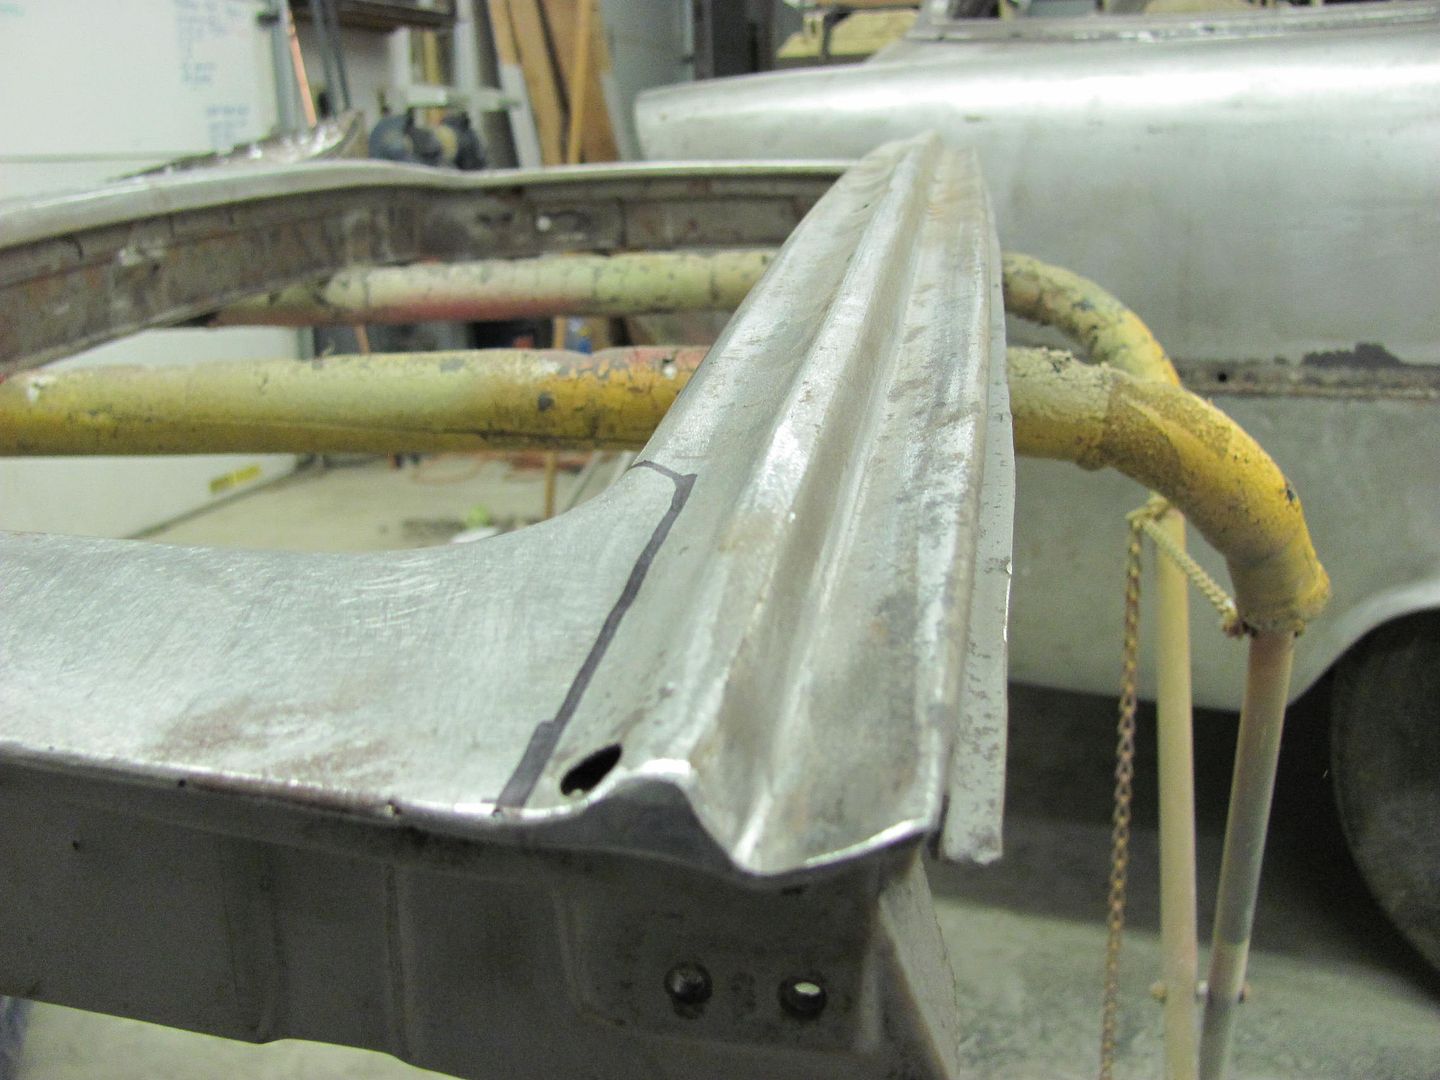
Media blasted the inside of the upper gate to clean it up before welding the new part on. Unfortunately this revealed more in the way of pits, through holes, etc., so it now looks like more fabrication....
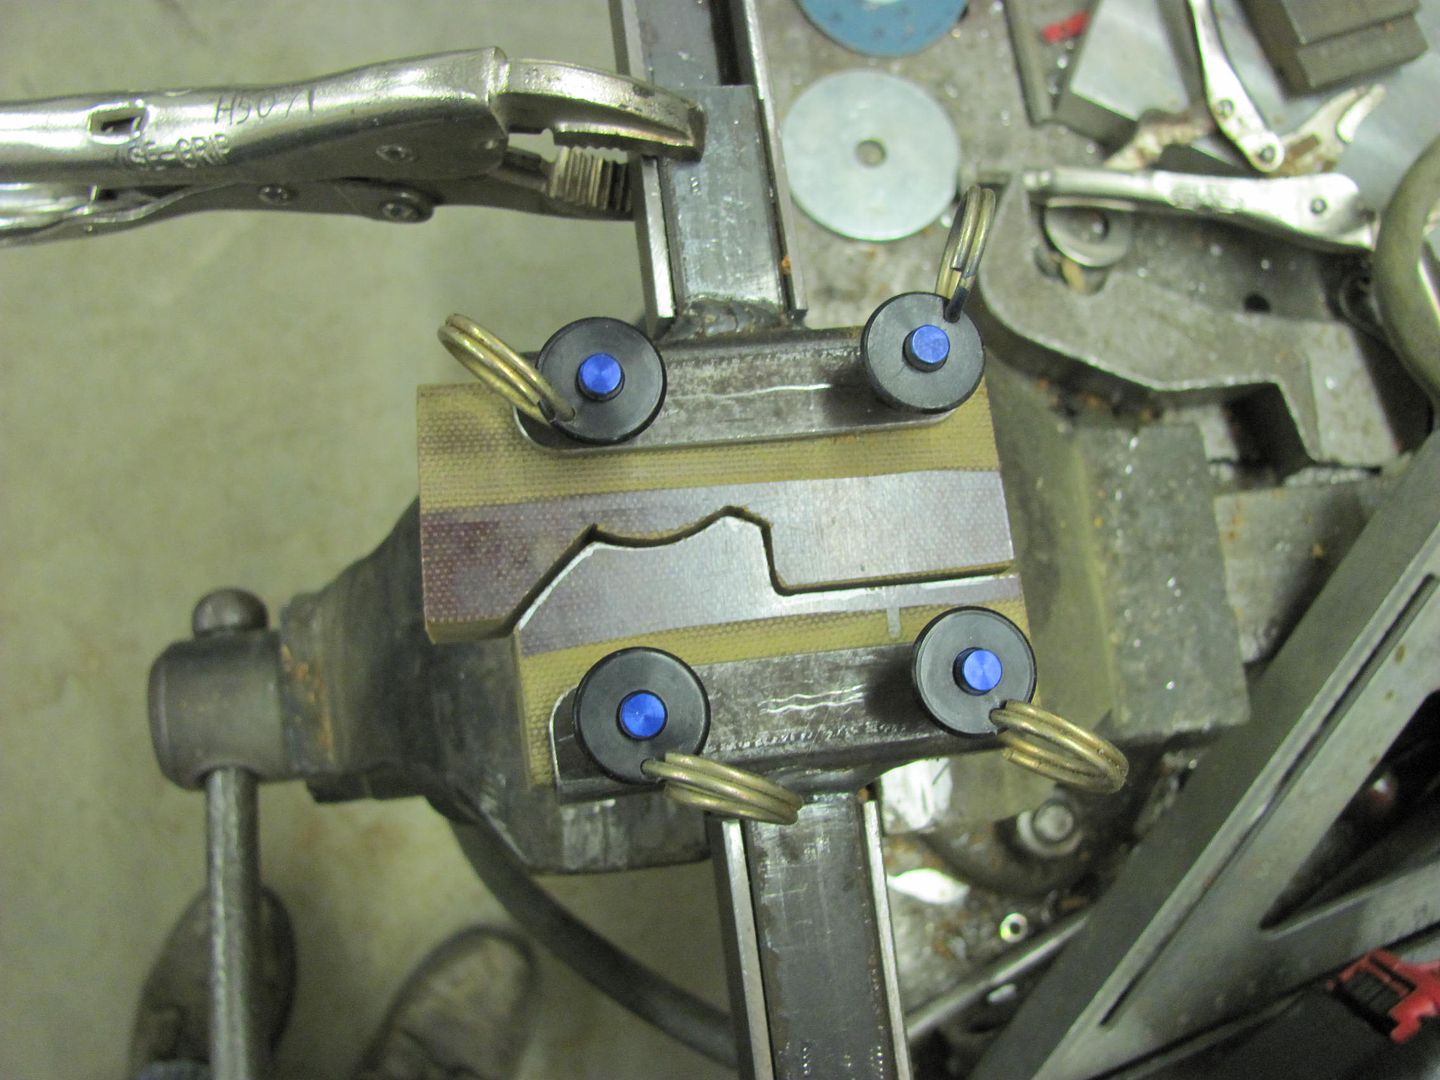
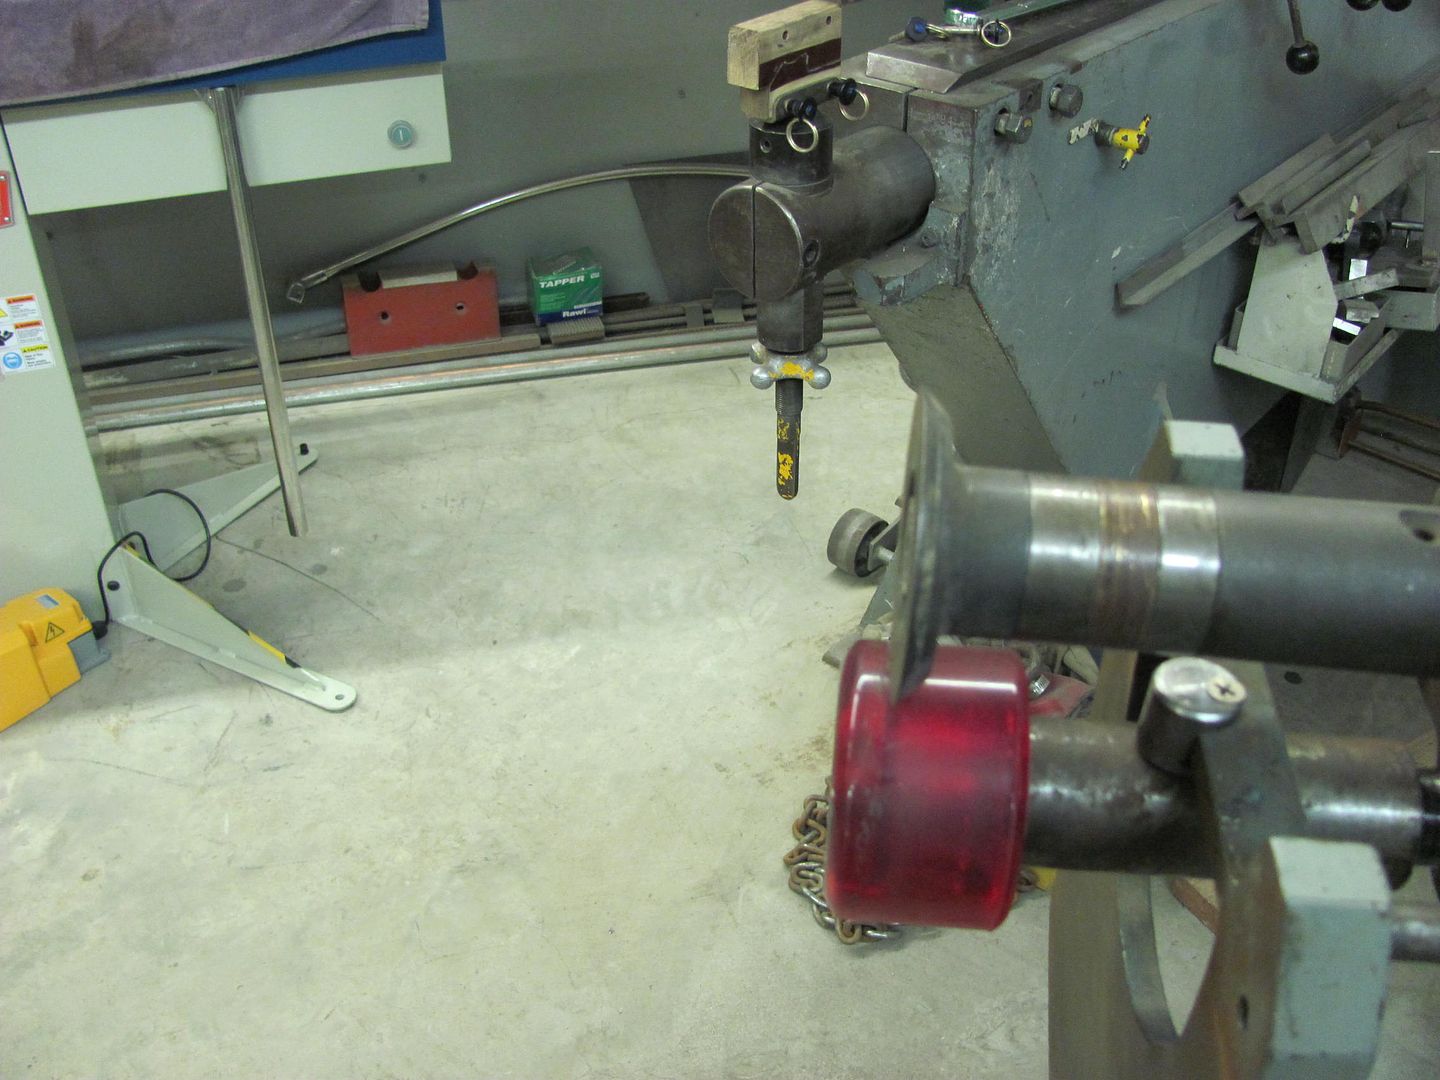
Time to attempt some dies for the Lennox. Tonight's choice is some 1" thick phenolic sheet...
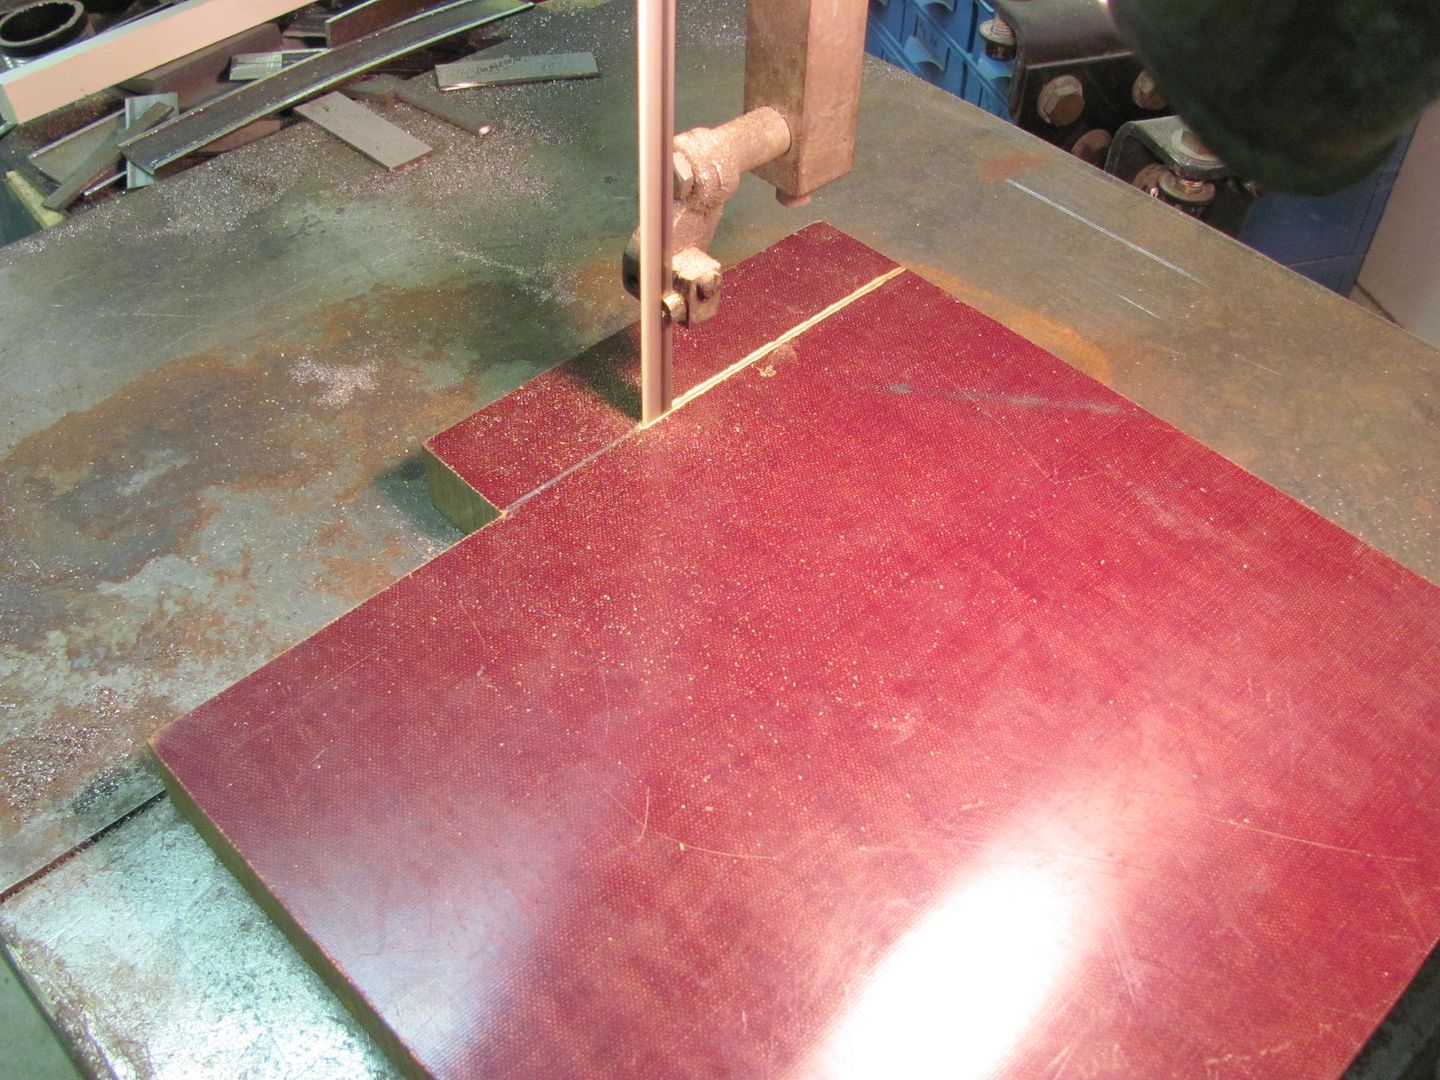
Here's the profile we're looking for...
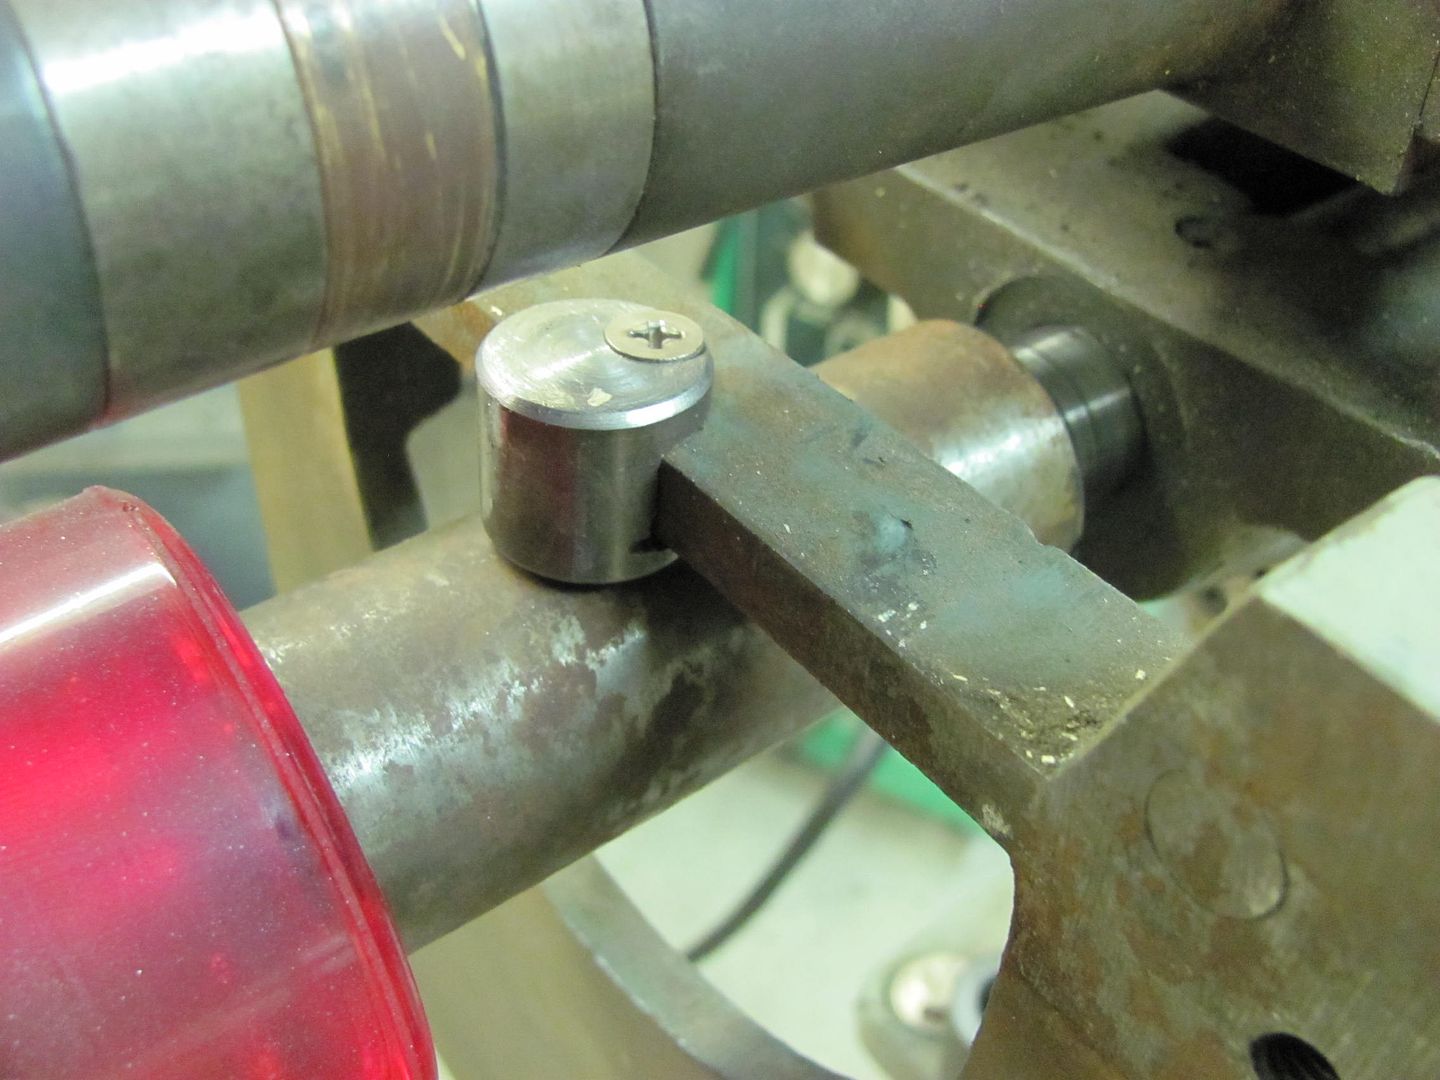
The dies installed in the holders....
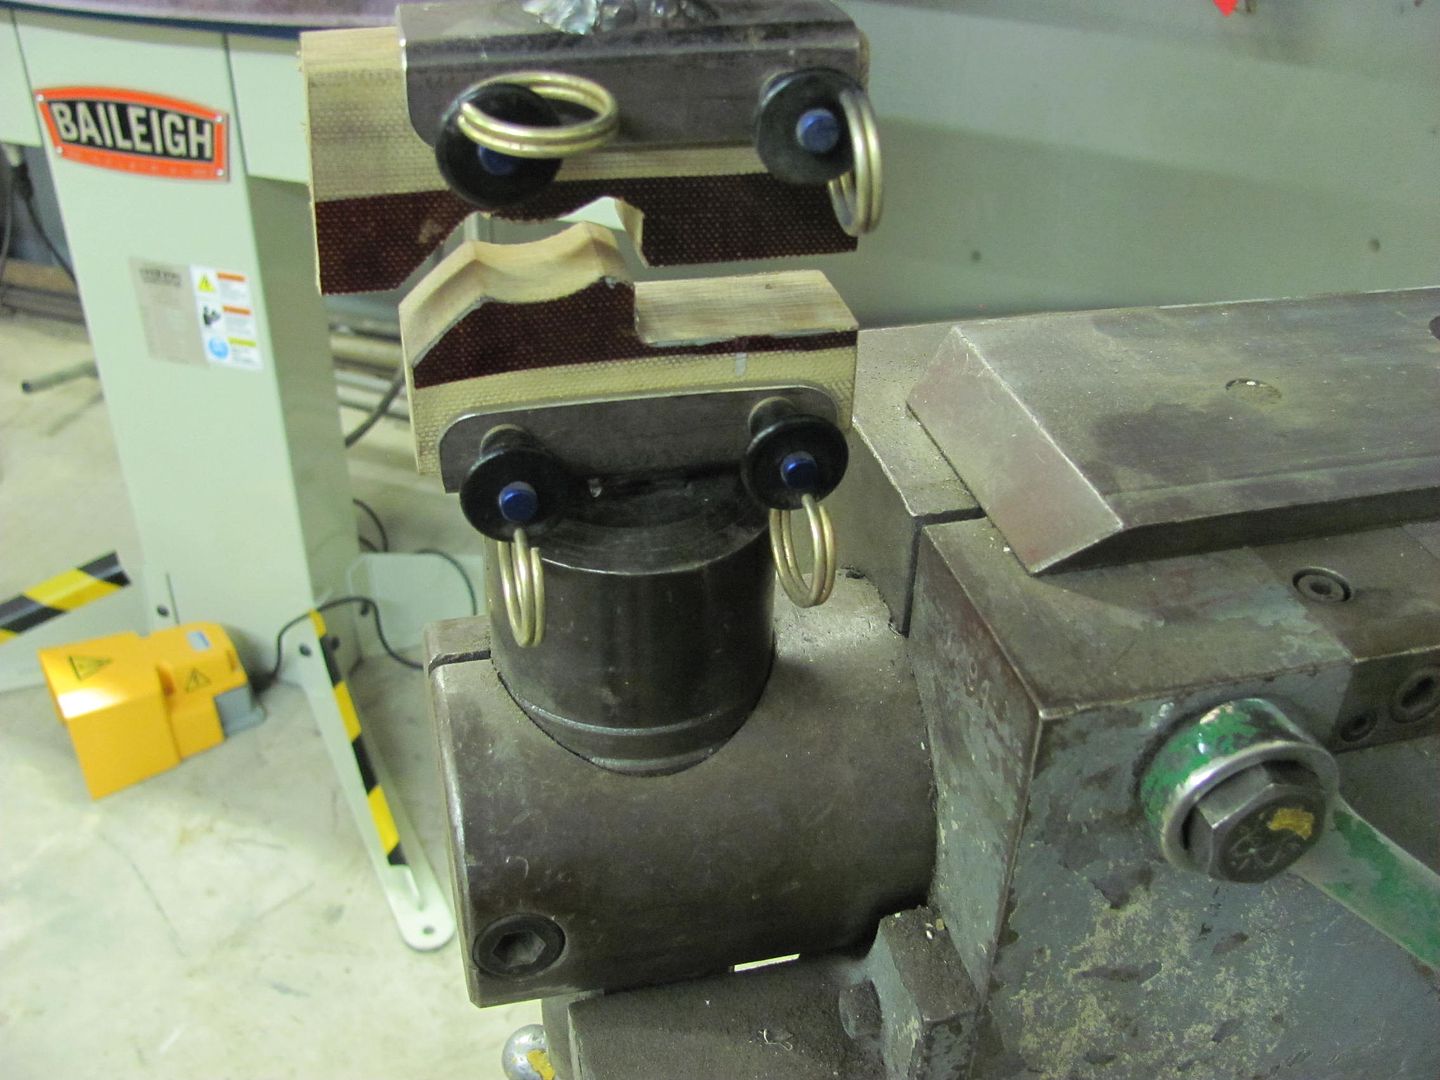
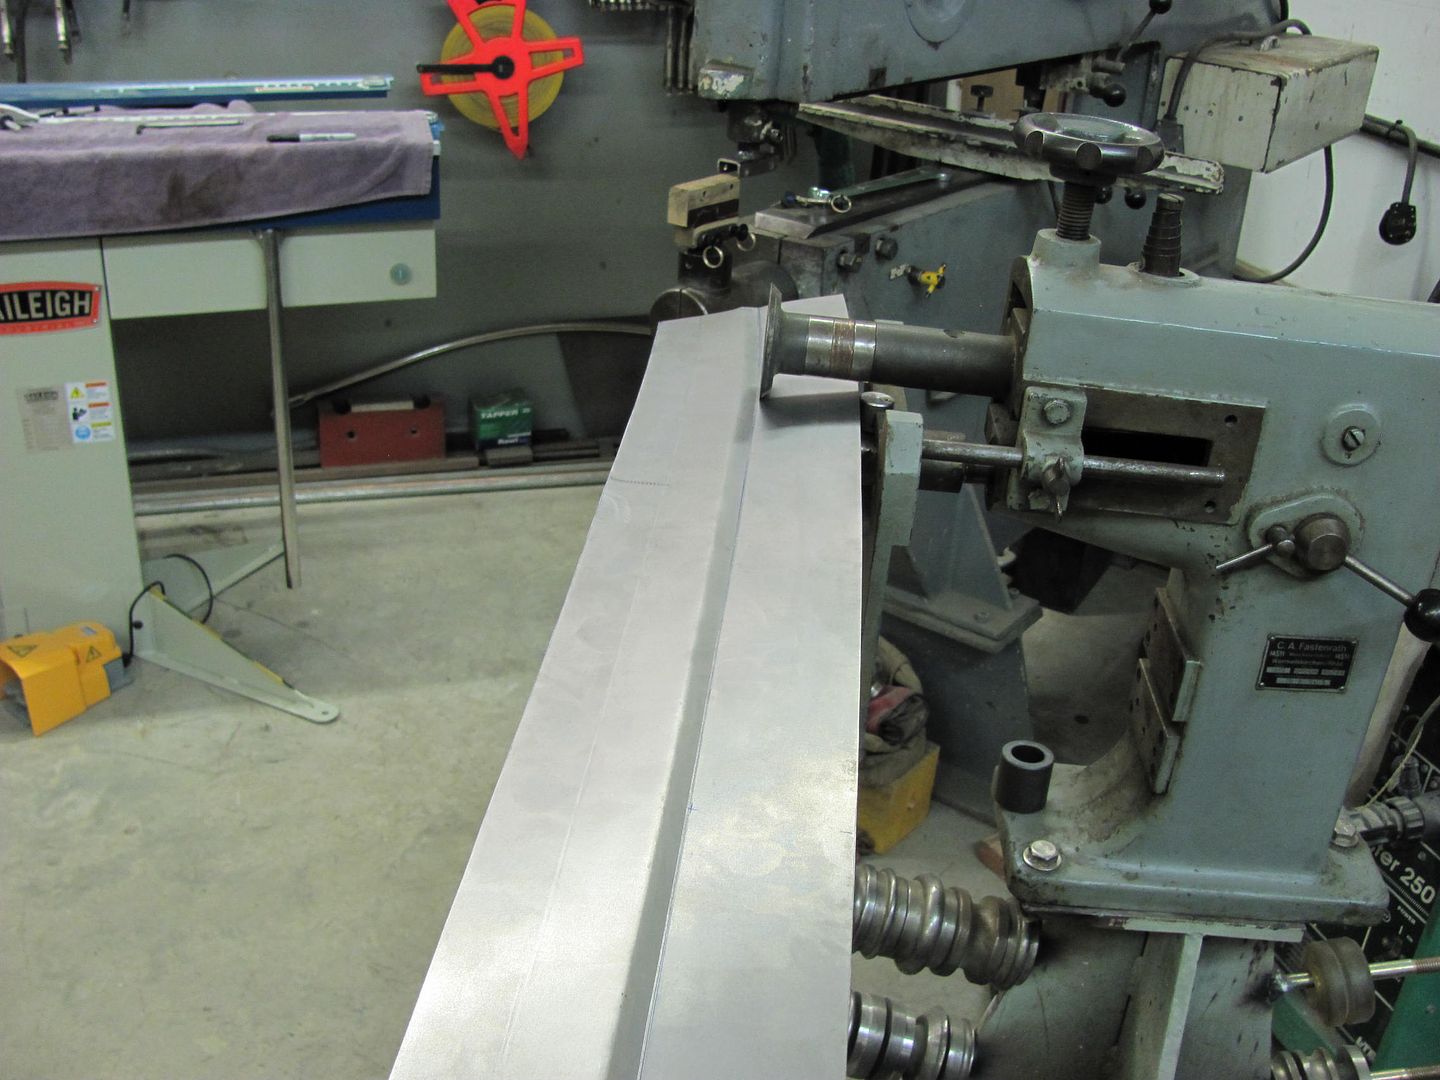
An offset bend was added to the sample 19ga in the brake, then the first of three passes.....

Final pass.....
Dies held up well....

Safety tip of the day, 3" roloc discs do a good job of shaping phenolic, so skin is no match.... (note thumb in above pic)
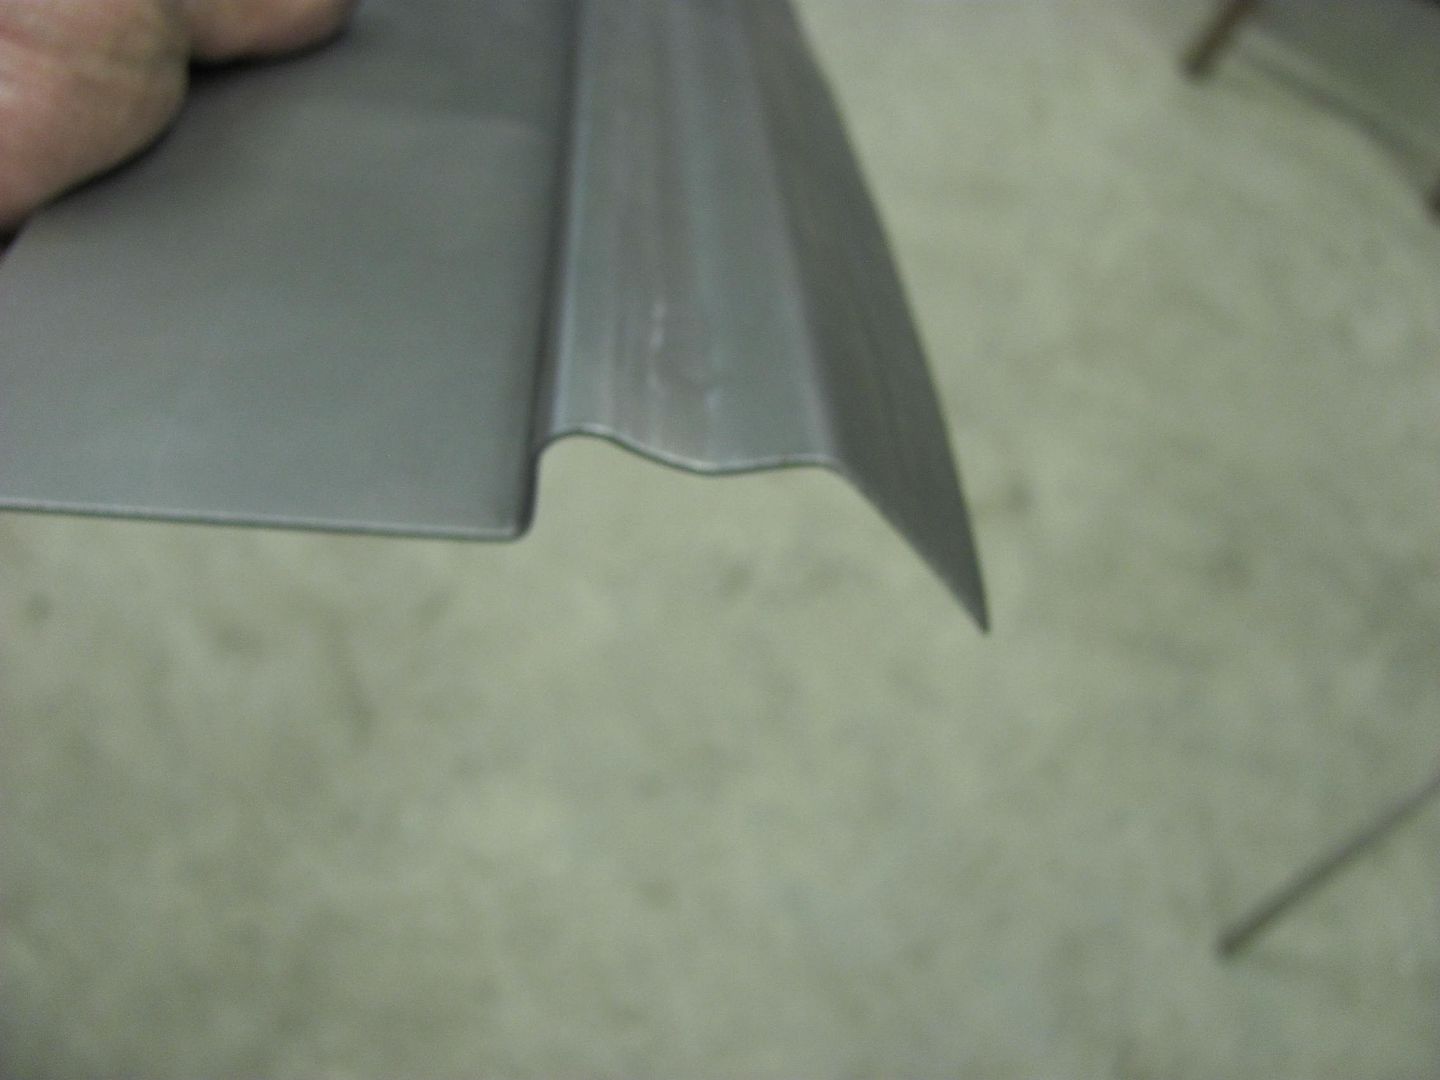
Where my "test sample" was made initially with straight bends in the brake, the actual piece on the lift gate is not straight, so the bends on the "good" piece will need to be bent using the tipping wheel.
The profile needs just a bit of tweaking, and I may try using a piece of metal inserted in a band saw blade cut to sharpen up some of the details.
Robert
-
09-18-2013 09:54 PM #80
CHR Member
- Join Date
- Feb 2007
- Location
- Santa Monica
- Car Year, Make, Model: 37 Ford tudor humpback
- Posts
- 1,988
Thanks, Robert! Every post is a Masters class in metal work and you always take time to take such great pics of it! Awesome!"It is not much good thinking of a thing unless you think it out." - H.G. Wells
-
09-19-2013 03:55 AM #81
CHR Member
- Join Date
- Sep 2007
- Location
- New Bedford
- Car Year, Make, Model: 34 Ford 3W Coupe Replica
- Posts
- 14,754
What R2 said!! I was happy to see this thread active again and want to thank you for all the detail(s) you provide for us, it is very much appreciated!
-
09-23-2013 02:02 PM #82
CHR Member
- Join Date
- Apr 2011
- Location
- Prairie City
- Car Year, Make, Model: 40 Ford Deluxe, 68 Corvette, 72&76 K30
- Posts
- 7,301
- Blog Entries
- 1
I have to agree! I know very little of sheet metal shaping and very much enjoy your useful posts. So thanks so much!Ryan
1940 Ford Deluxe Tudor 354 Hemi 46RH Electric Blue w/multi-color flames, Ford 9" Residing in multiple pieces
1968 Corvette Coupe 5.9 Cummins Drag Car 11.43@130mph No stall leaving the line with 1250 rpm's and poor 2.2 60'
1972 Chevy K30 Longhorn P-pumped 24v Compound Turbos 47RH Just another money pit
1971 Camaro RS 5.3 BTR Stage 3 cam, SuperT10
Tire Sizes
-
09-29-2013 05:28 PM #83
CHR Member
- Join Date
- Jun 2008
- Location
- Leonardtown
- Car Year, Make, Model: Walking
- Posts
- 1,228
Thanks for the comments fellas.
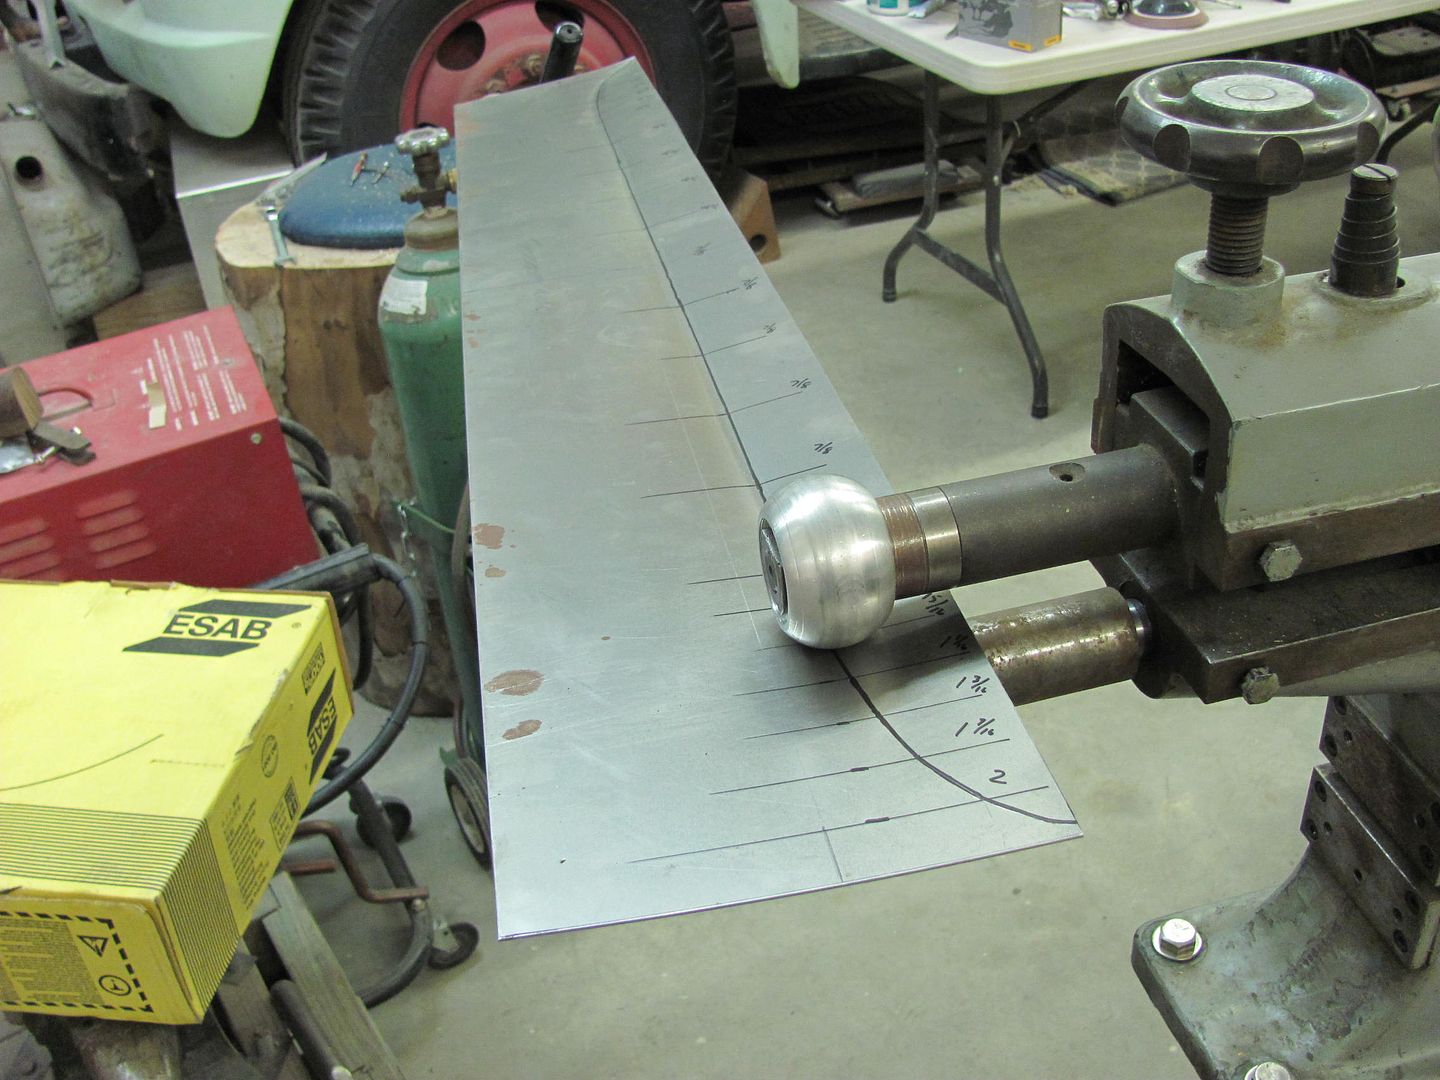
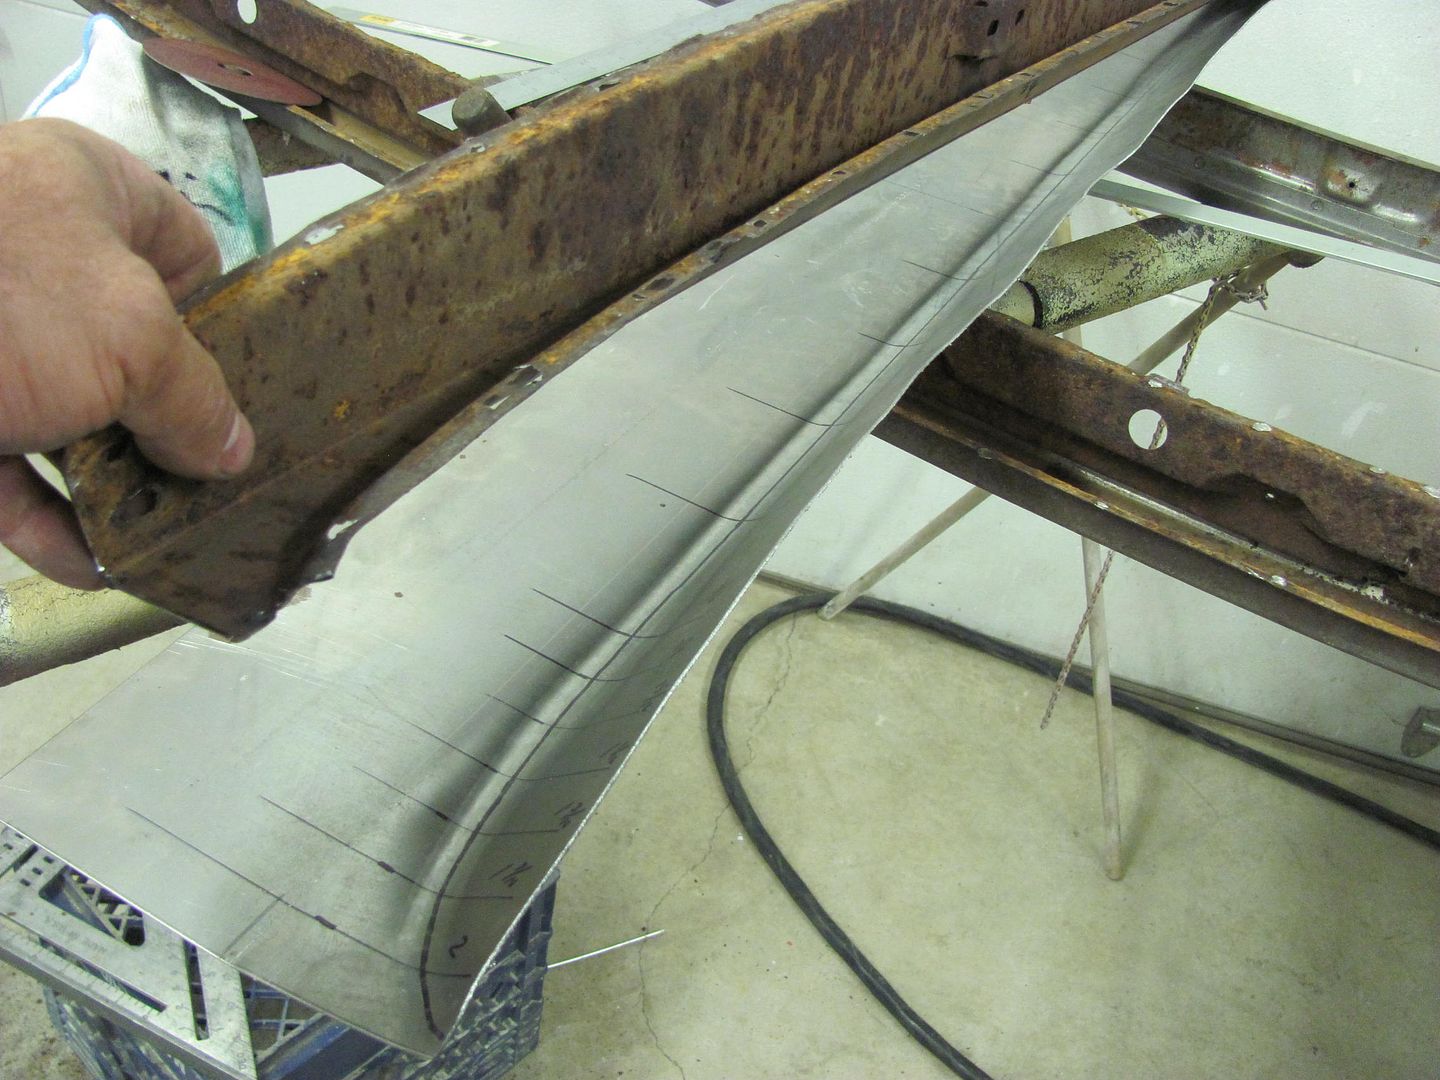
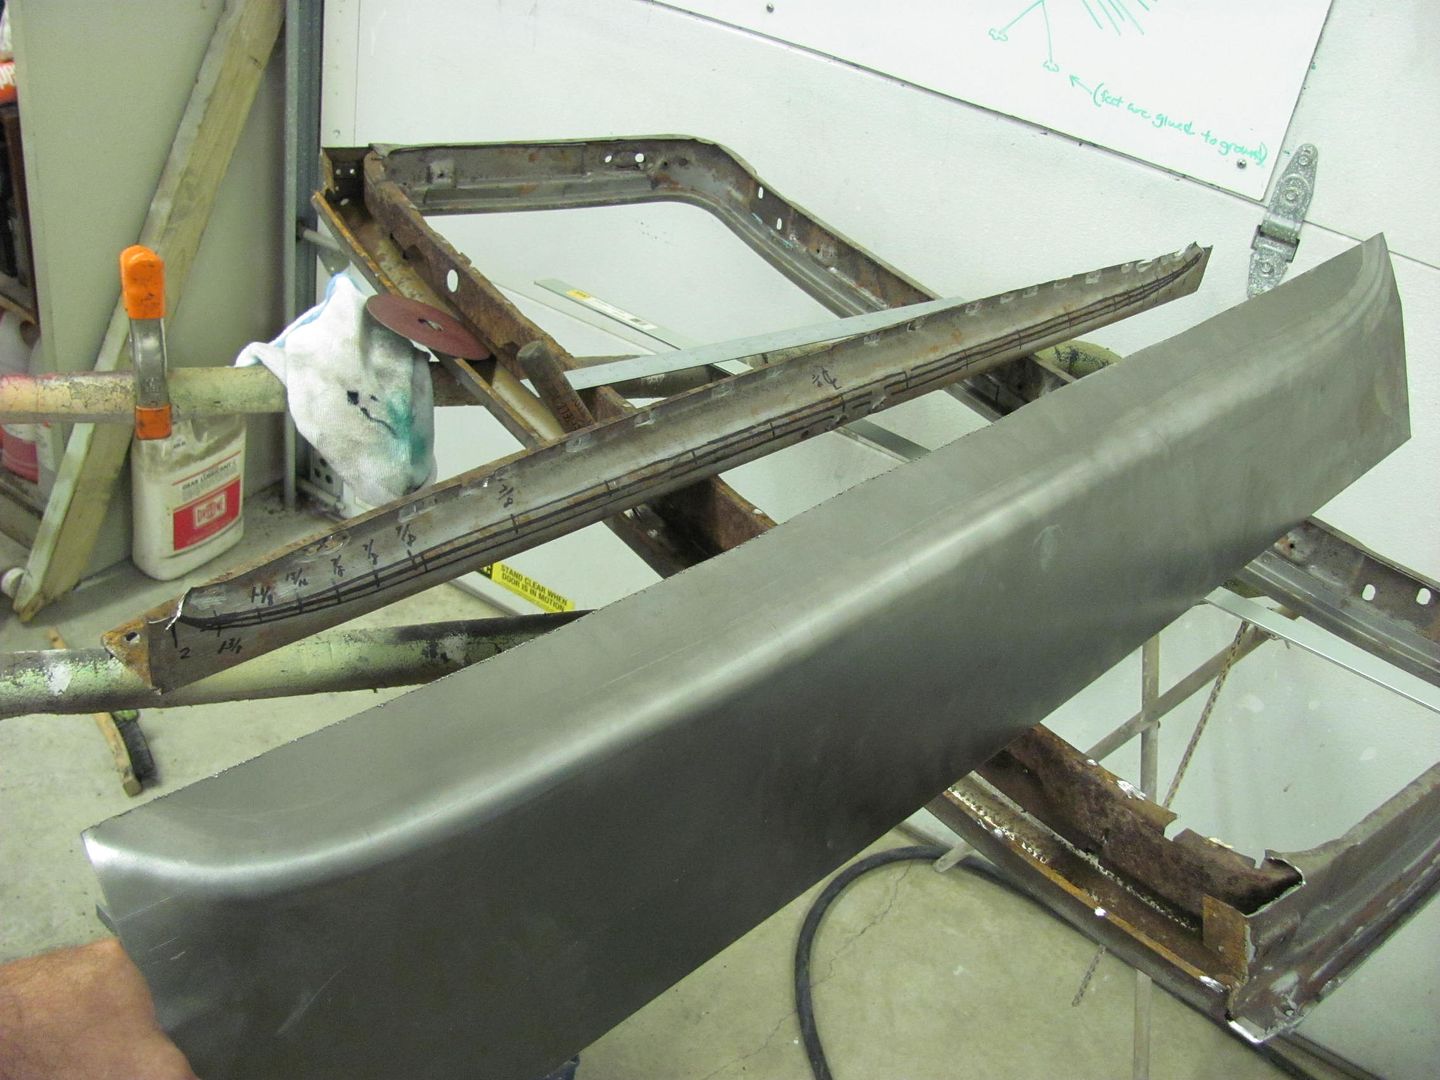
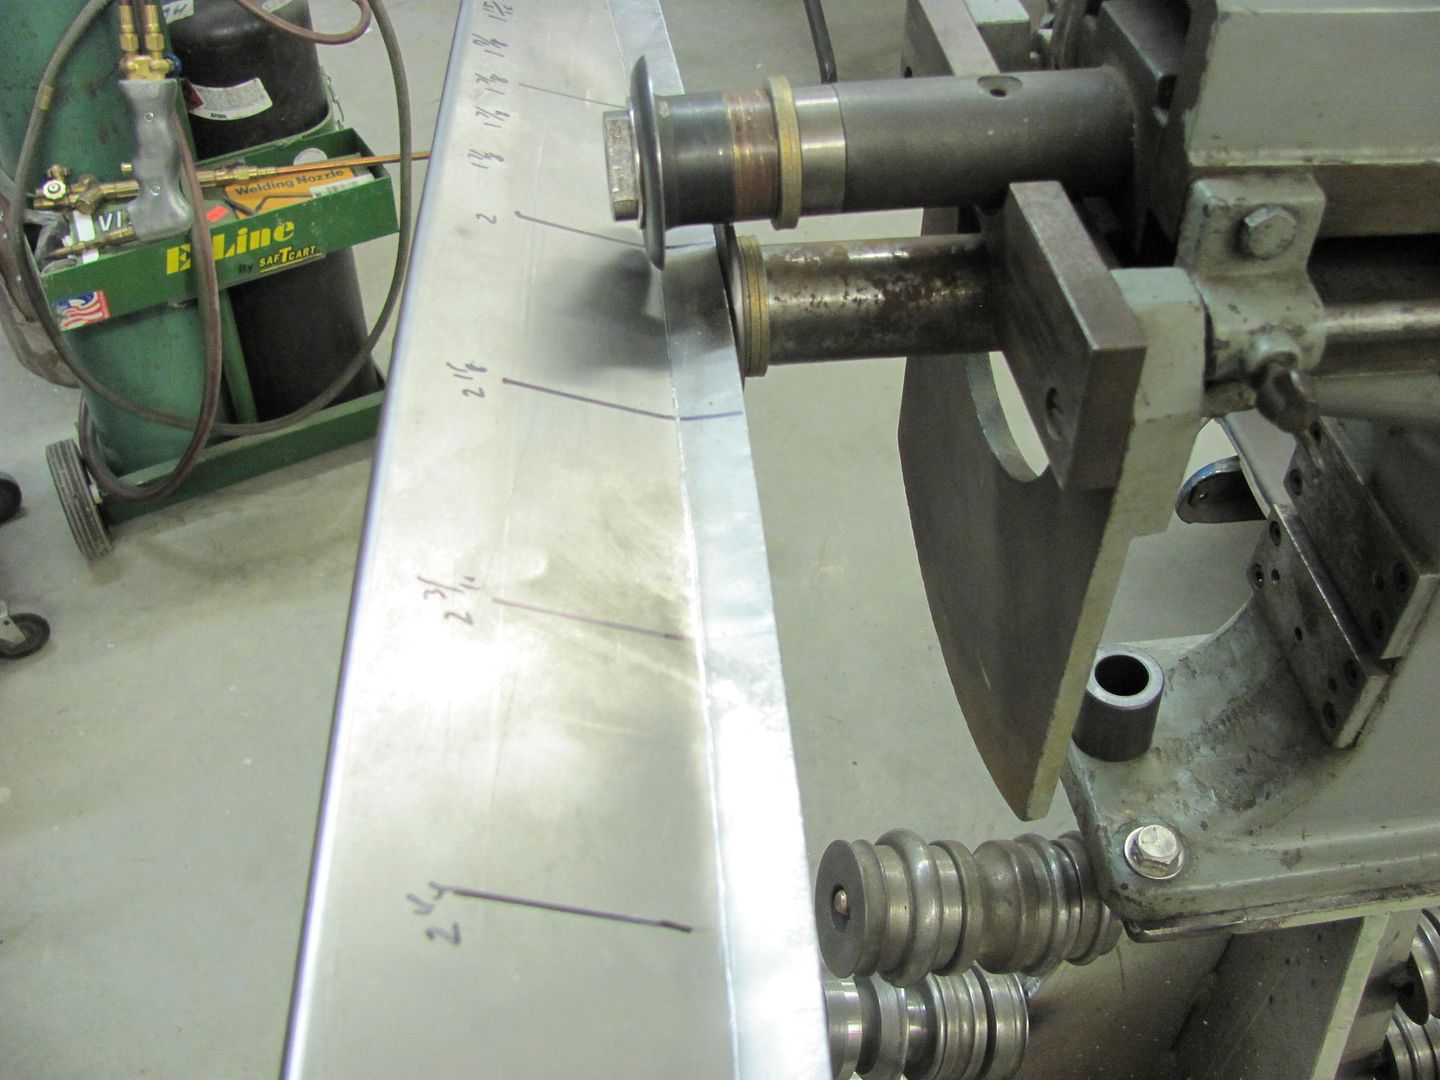
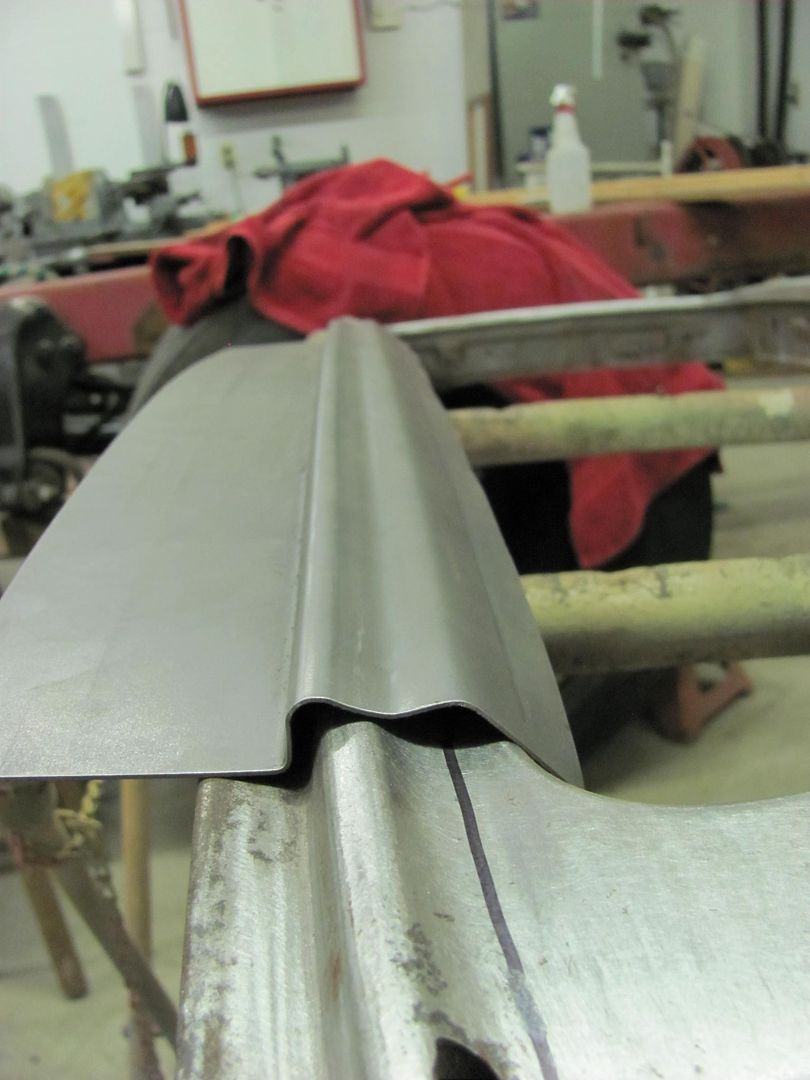
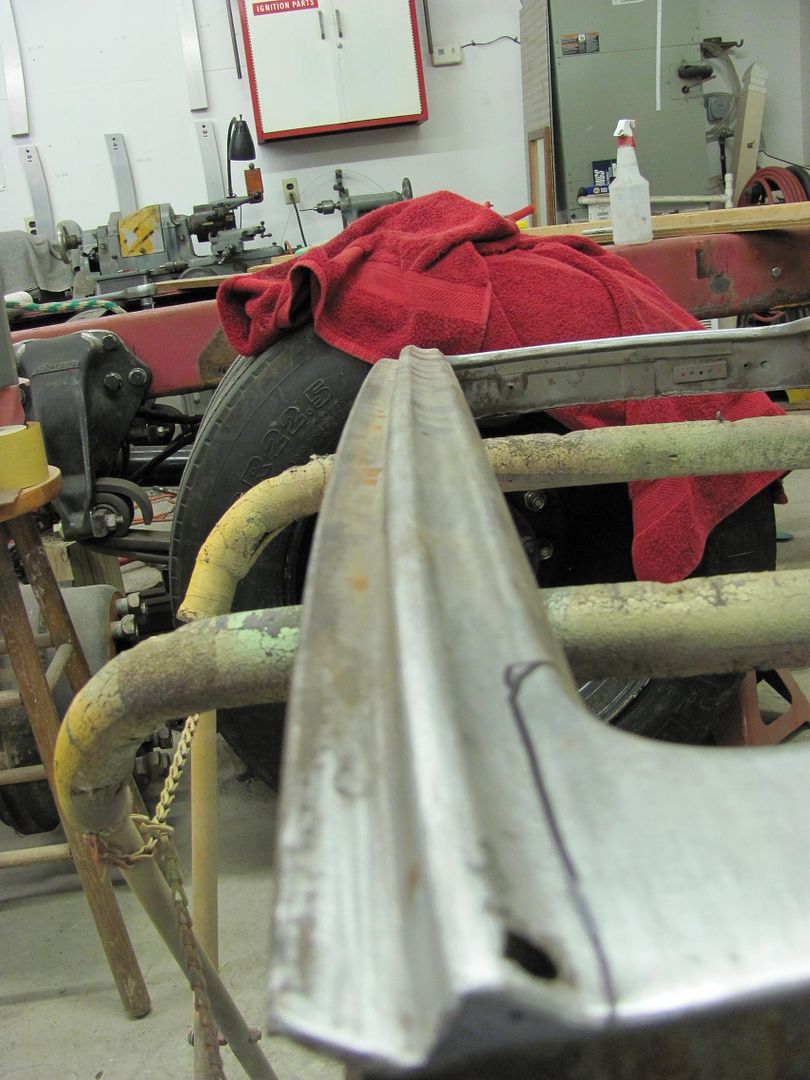
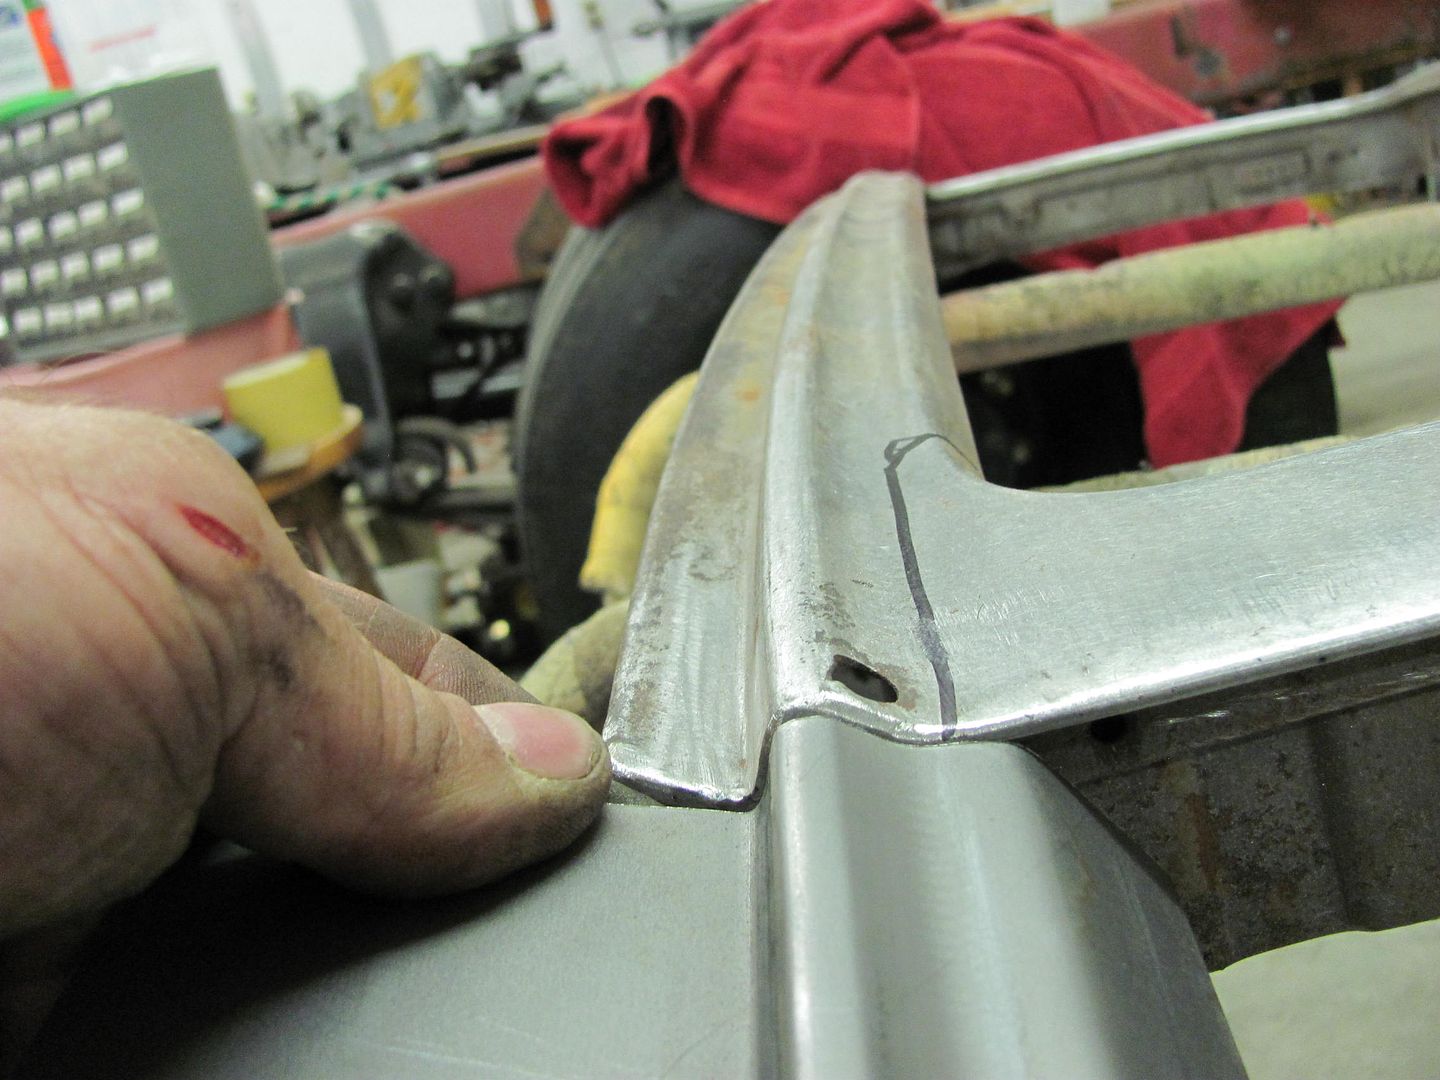
Checked the lower profile of the upper gate with radius sweeps to lay out the new piece...
Laying out the pattern on 19ga steel....
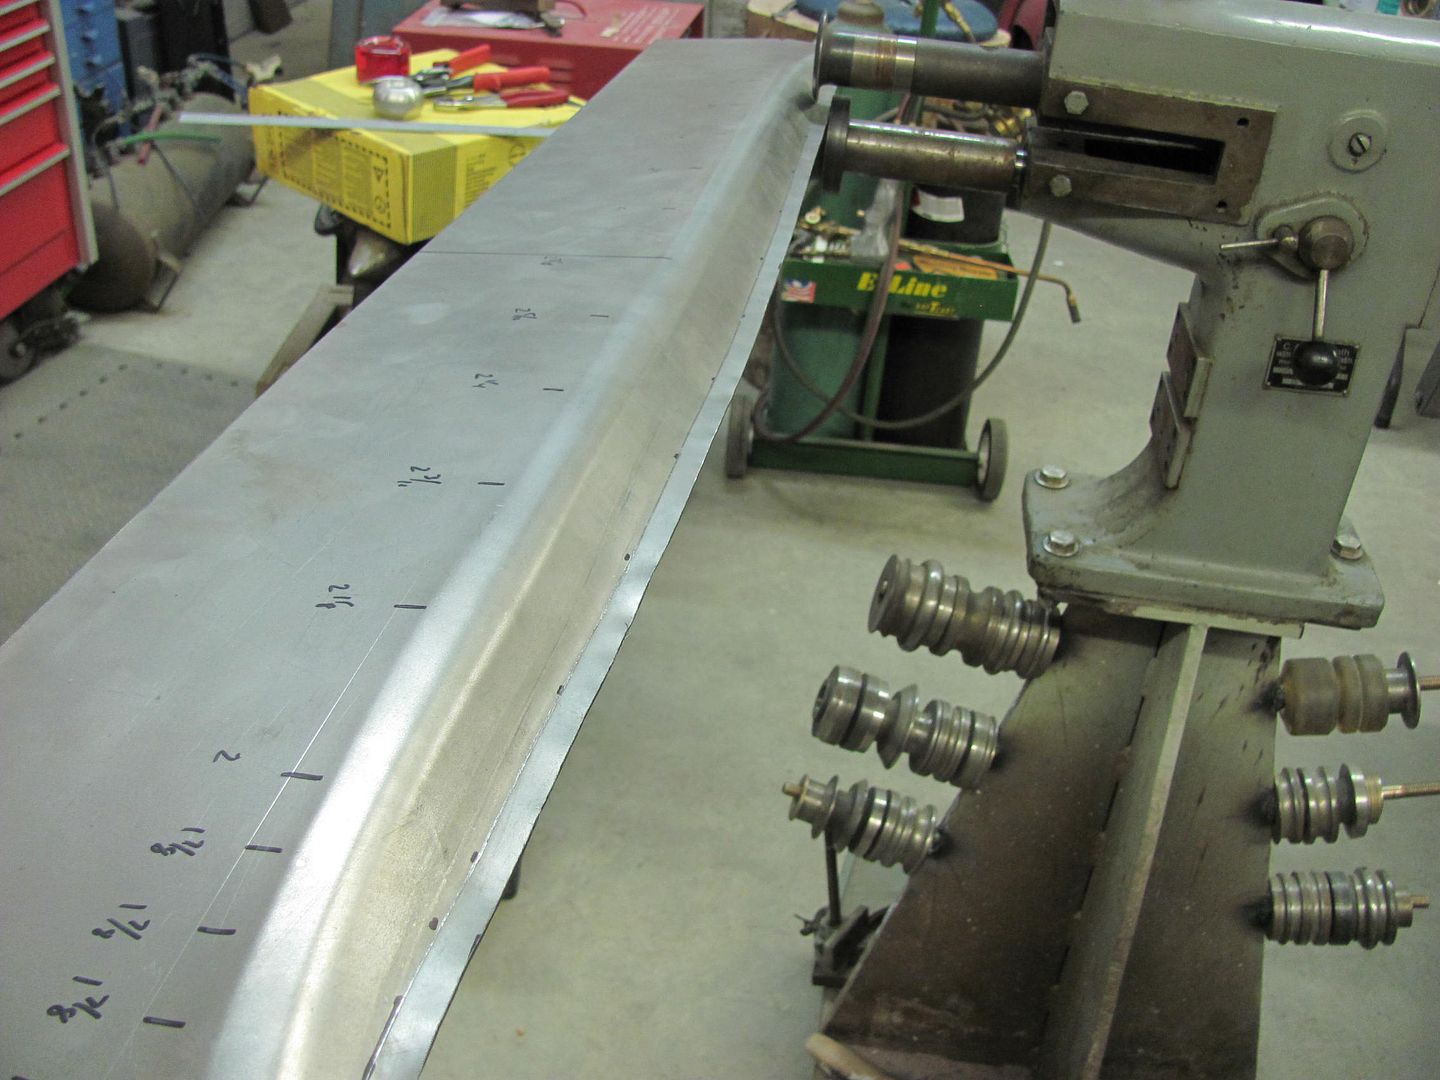
Tipping wheel in the bead roller...
......and a newly modified back stop, much better than the flat one.....
Offset added with the tipping wheel......
Then run through the Lennox.....
More tipping, then the step die used in place of skateboard wheel with the tipping wheel for the lower 1/4" fold...
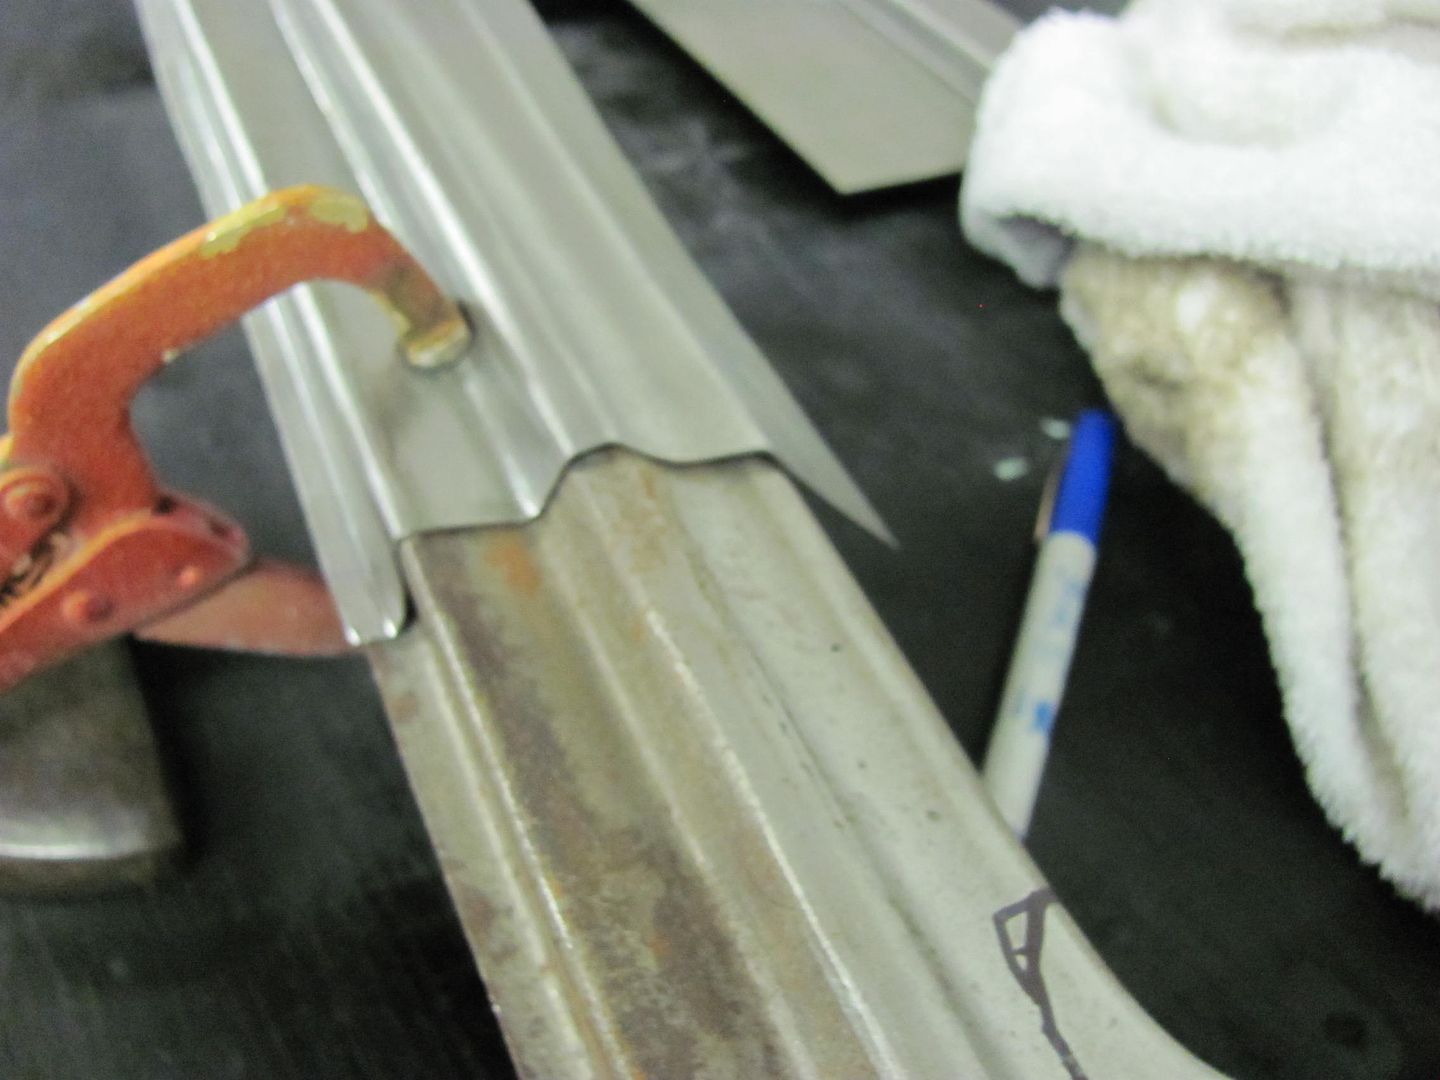

Still need to fold the top in the window opening, until next time...Robert
-
09-29-2013 05:53 PM #84
CHR Member
- Join Date
- Mar 2007
- Location
- festus
- Car Year, Make, Model: 48 Plymouth, 48,54 Heap
- Posts
- 3,407
Fantastic job, you should churn some of those panels out and sell them.1 Corinthians 1:27
-
09-29-2013 10:10 PM #85
CHR Member
- Join Date
- Mar 2009
- Location
- miami,coconut grove
- Car Year, Make, Model: 28rodster 292Y-block and HenryJ Olds V8
- Posts
- 262
Thank you,really enjoy see step by step on this type of fab work!
-
09-30-2013 07:51 PM #86
CHR Member
- Join Date
- Jun 2008
- Location
- Leonardtown
- Car Year, Make, Model: Walking
- Posts
- 1,228
Heck, I can hardly get this one finished Originally Posted by falconvan


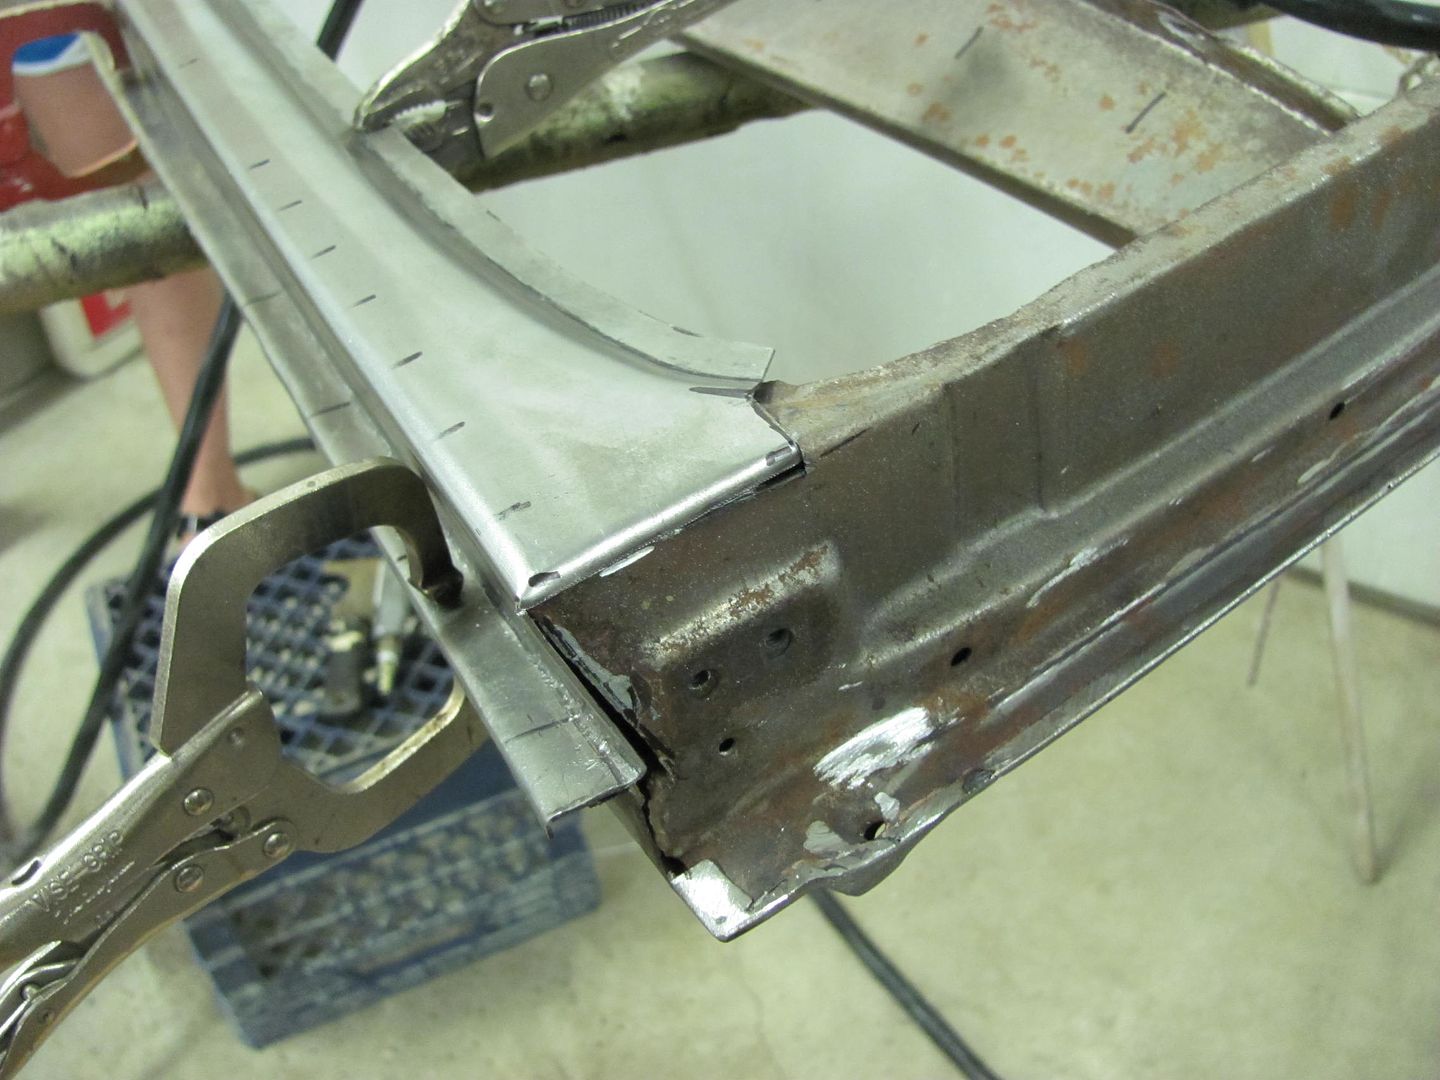
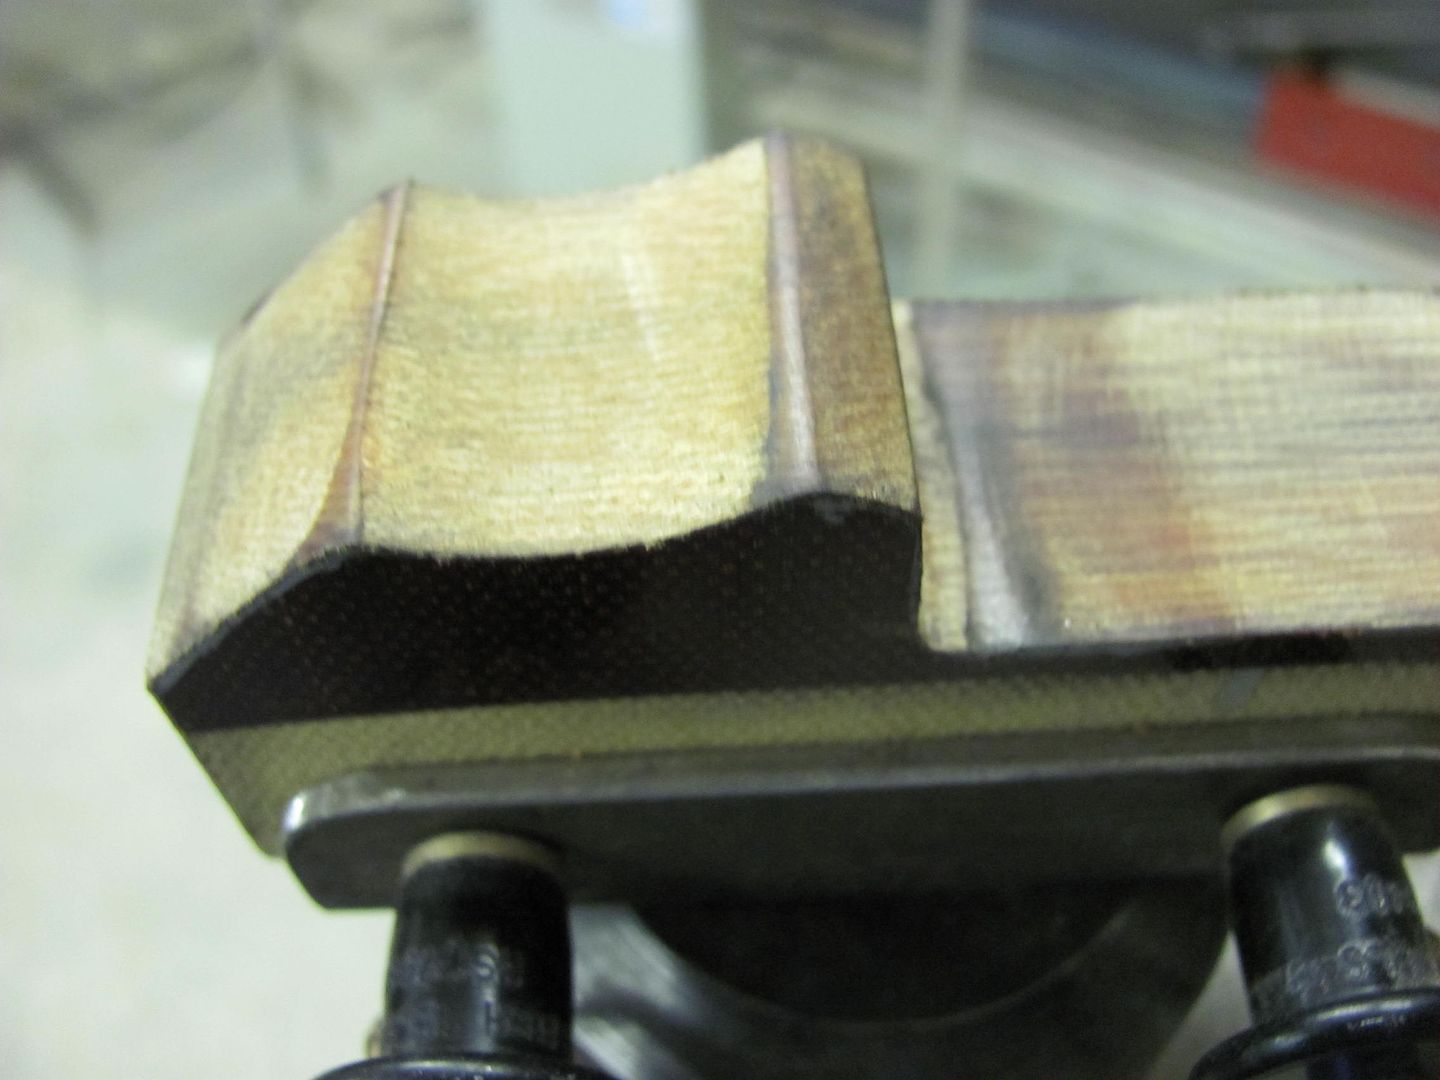
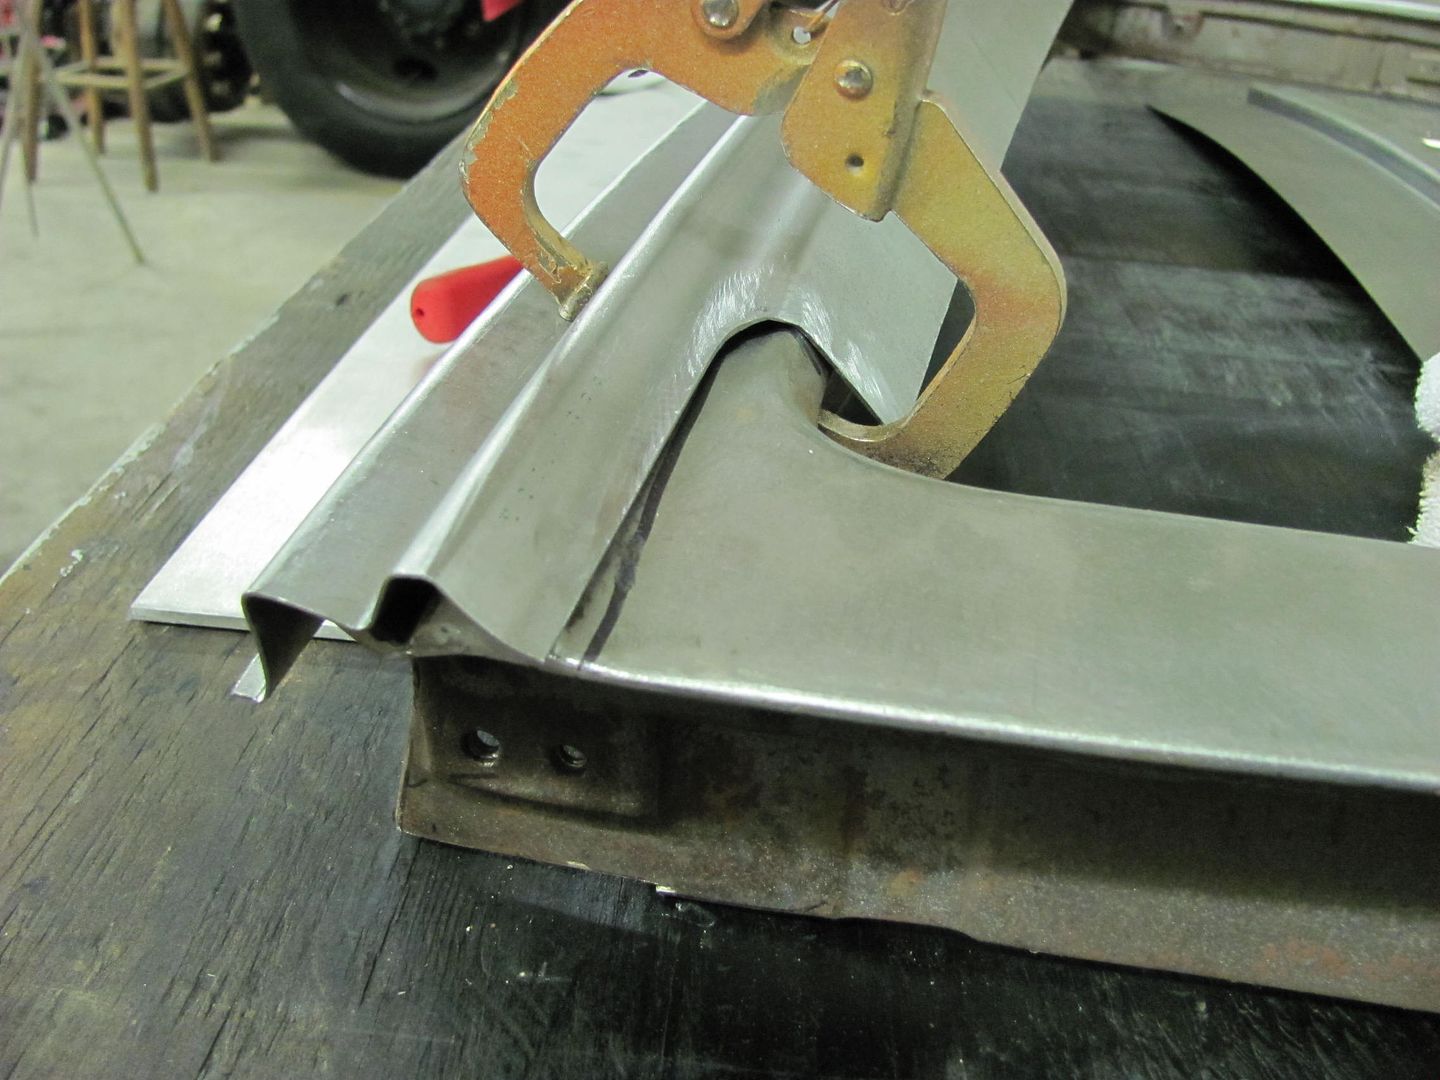
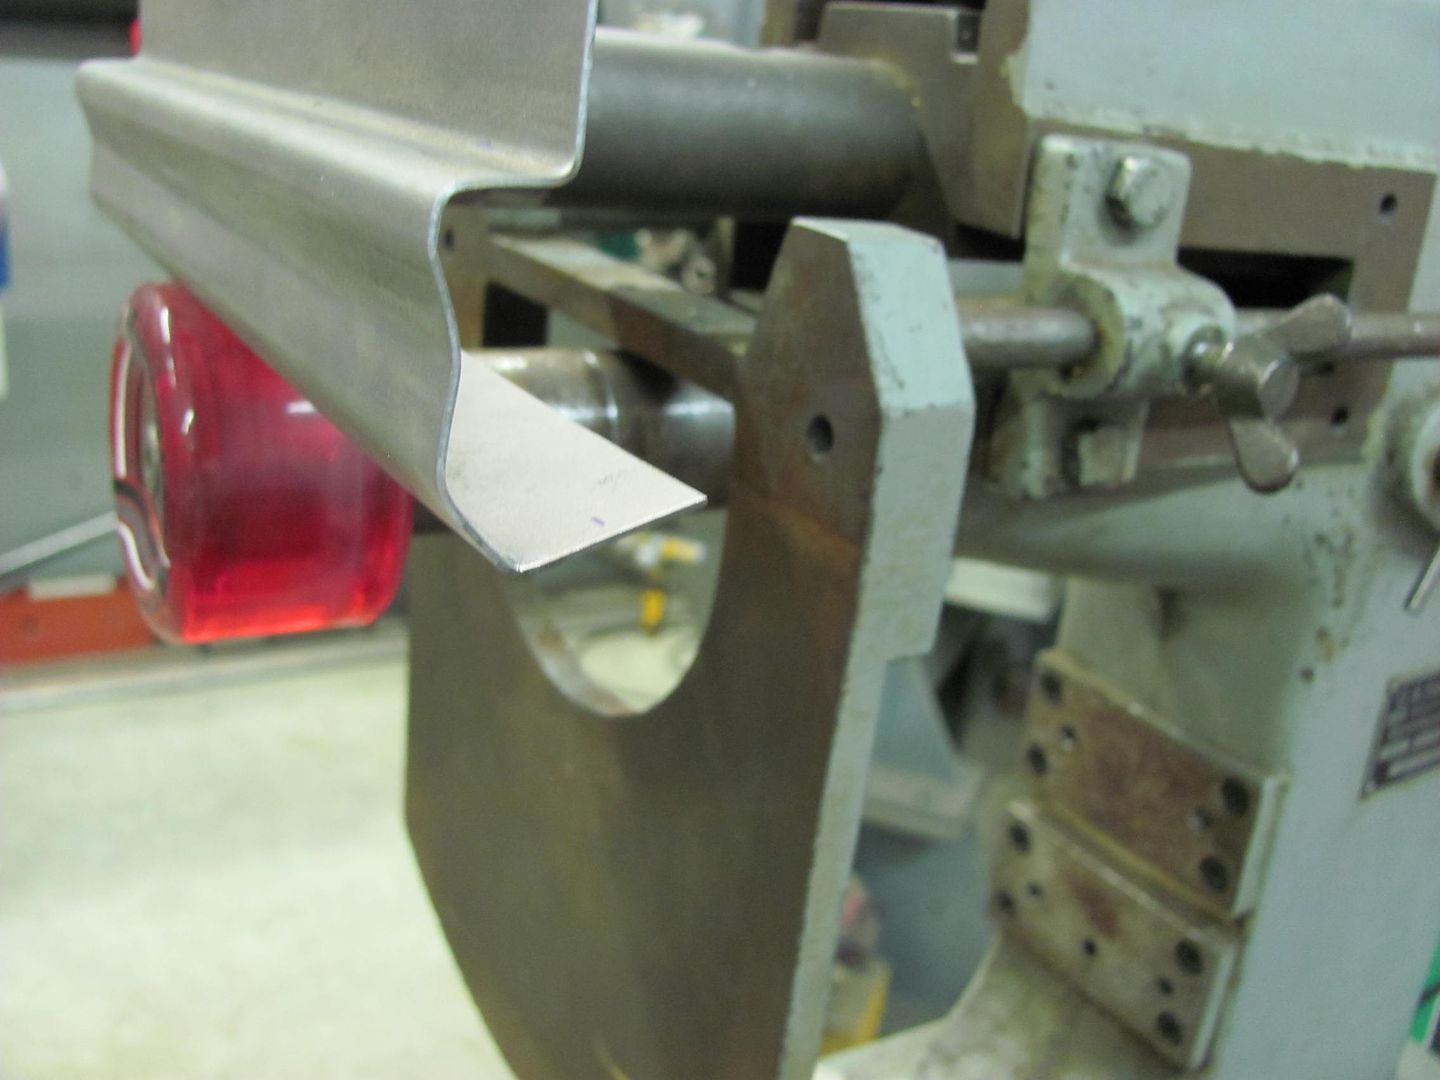
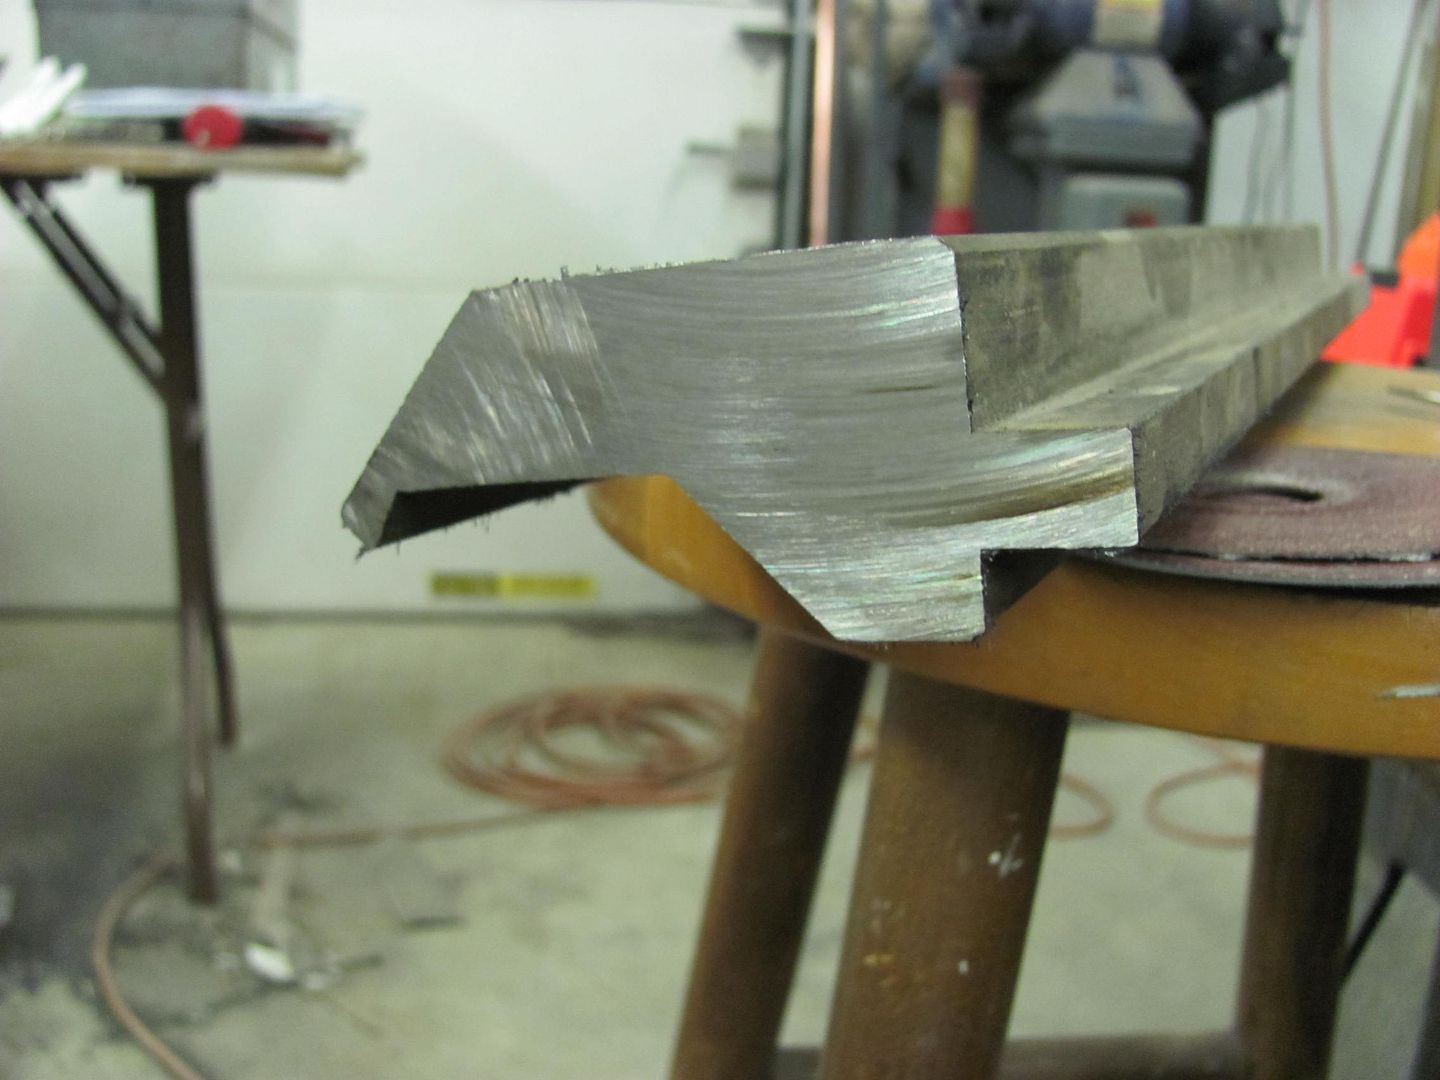
Tonight I made a small sample to test the fold of the window opening. I started off by producing a small pile of scraps.....about three tries unsuccessfully, then this one, beginning with using the bead roller tipping wheel....
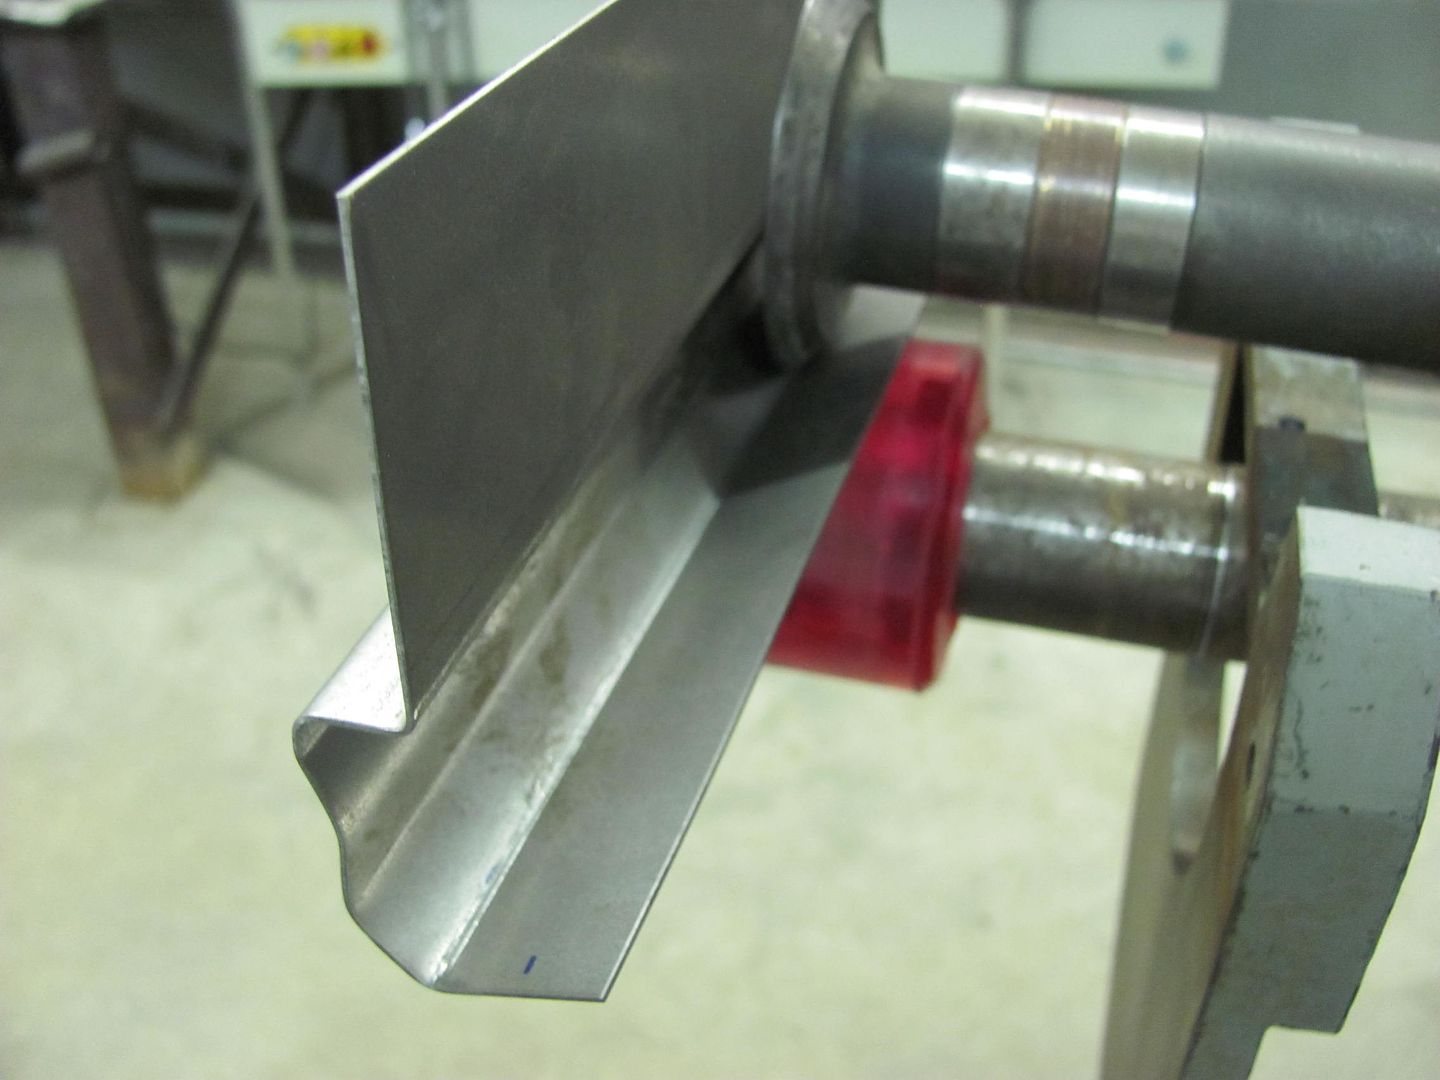
This is about as far as it would go, and with the good piece already having bends at the bottom, would be a bit less once tried on that piece. This will require a custom made "anvil" for some hammer action...
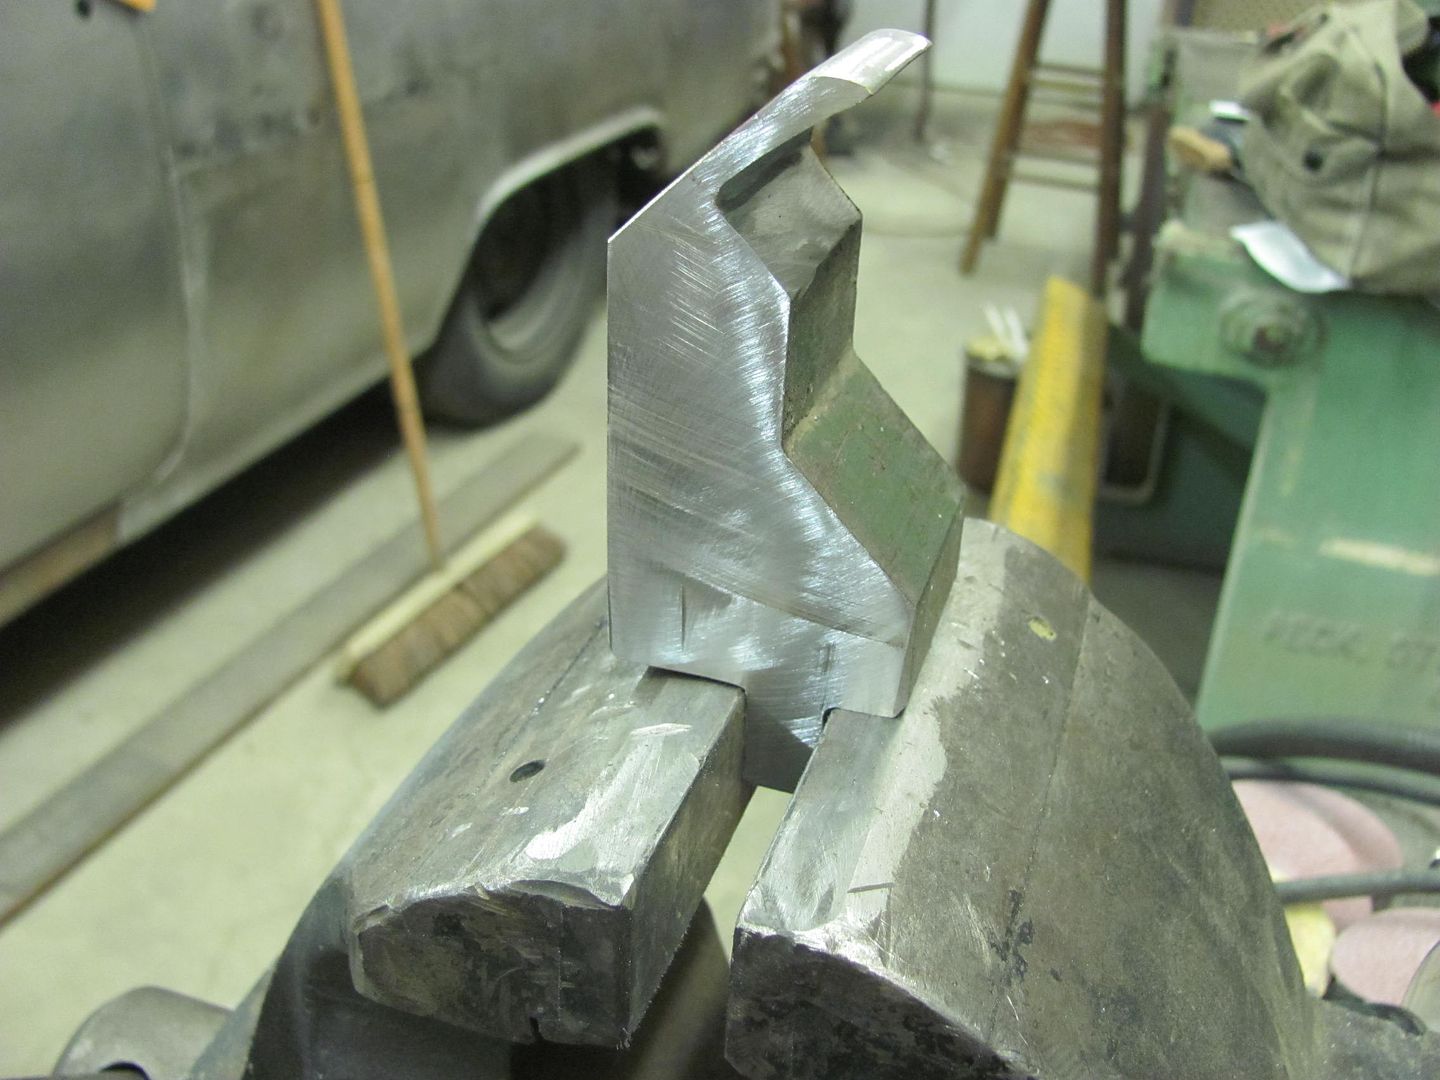
The donor:
As modified:
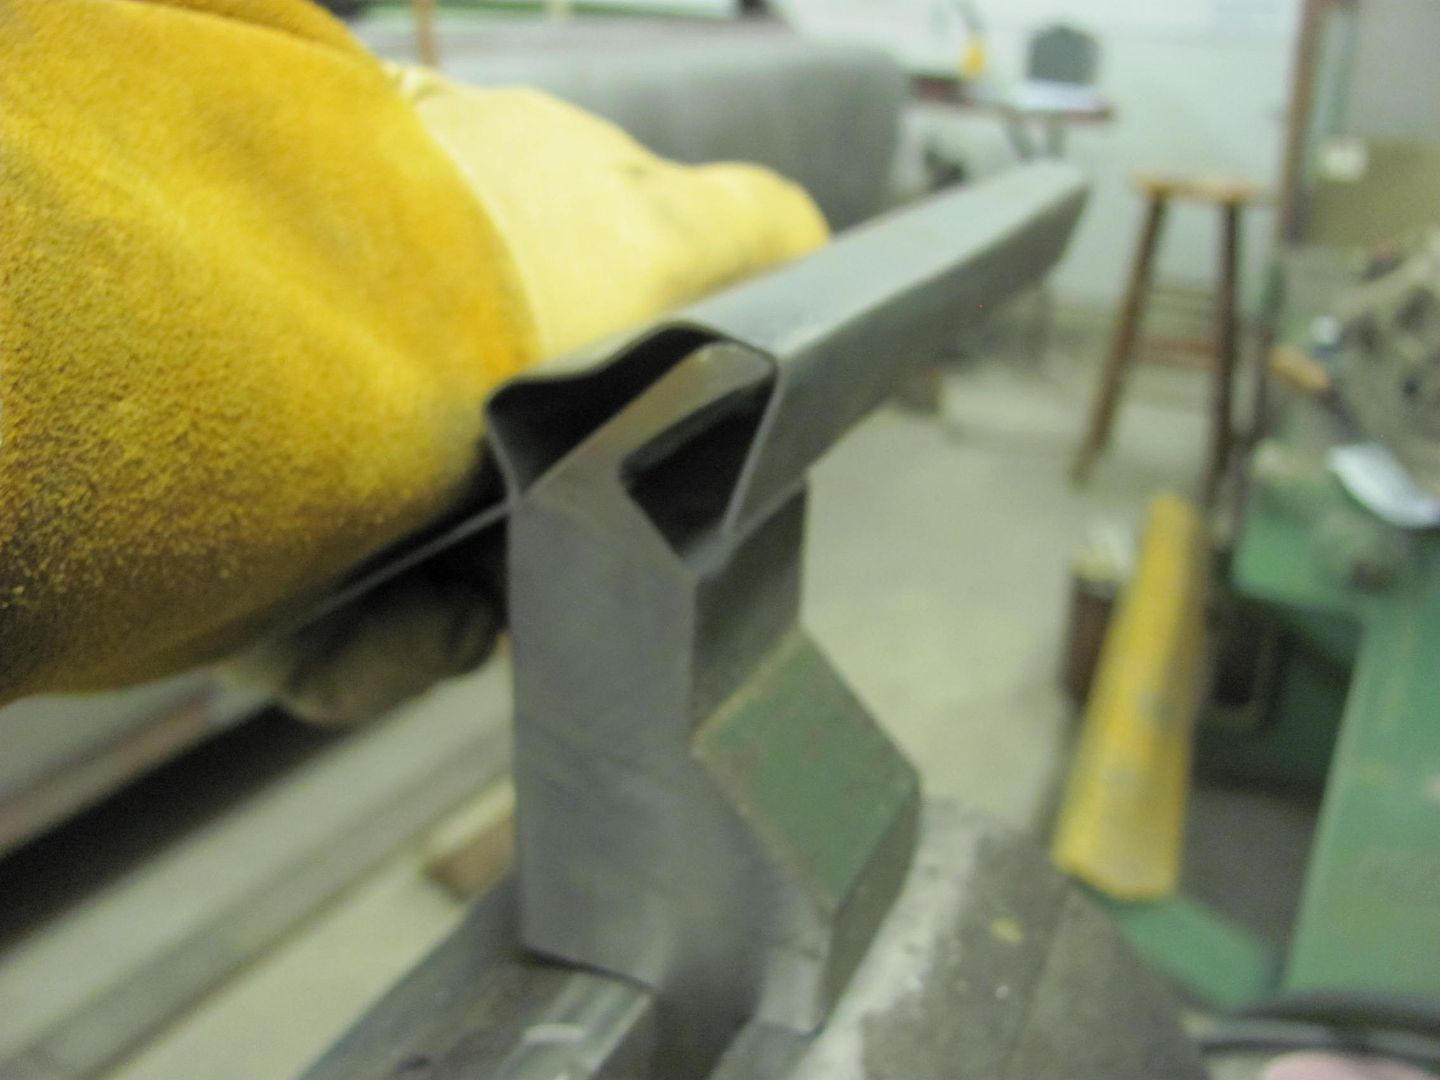
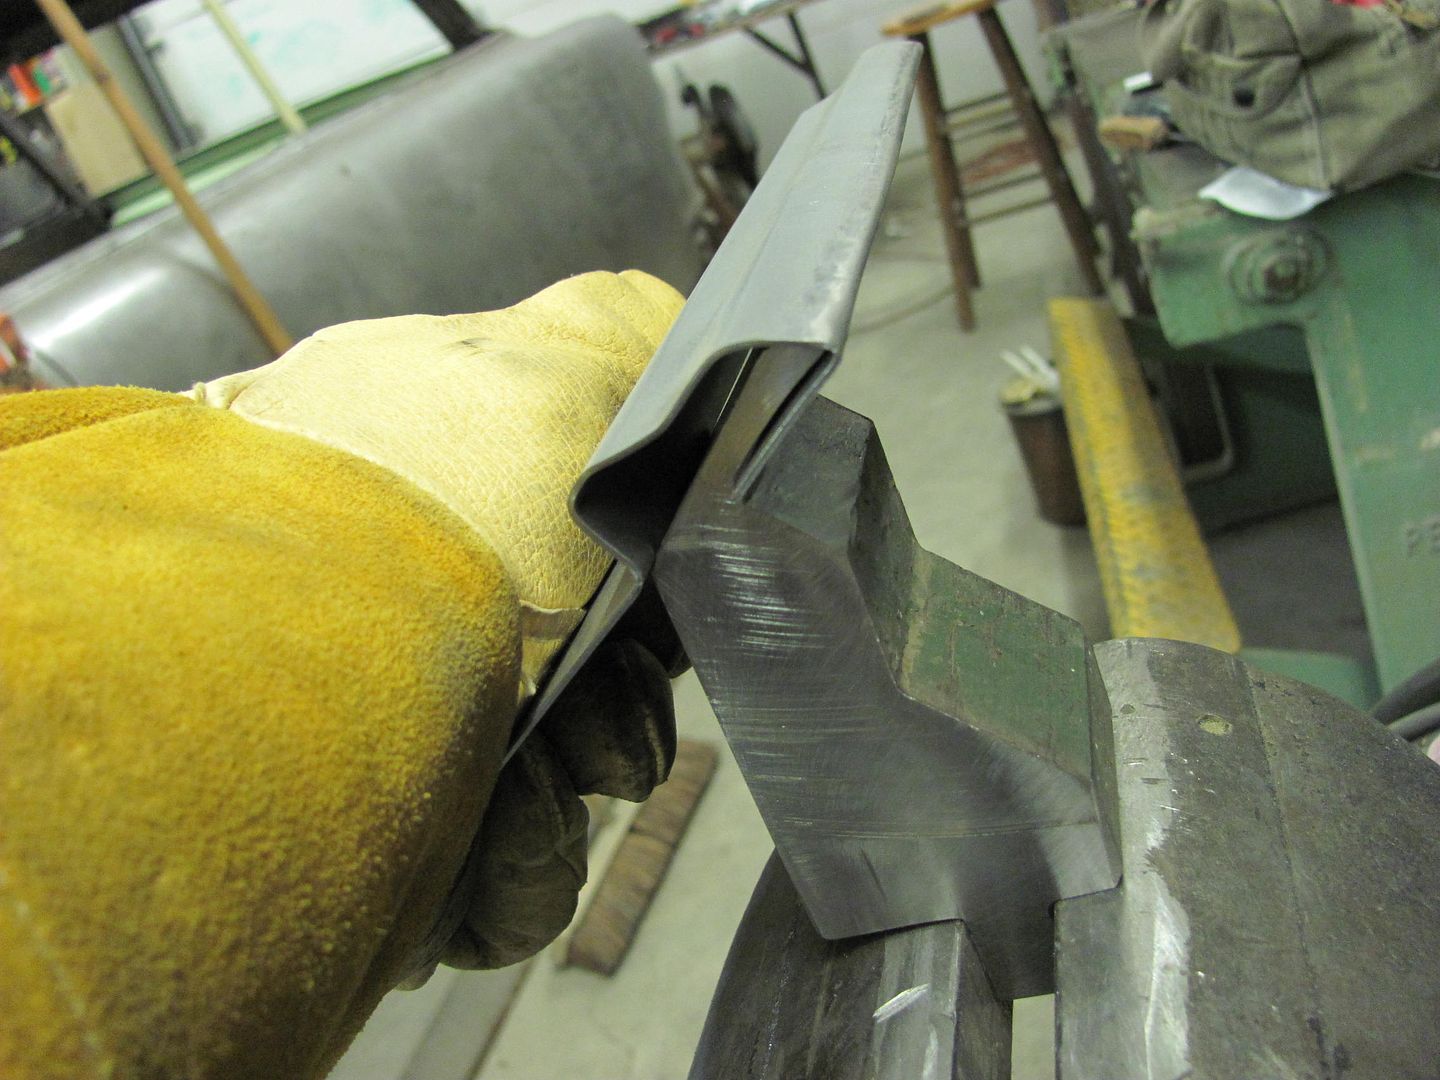
.....then for some manual tipping...
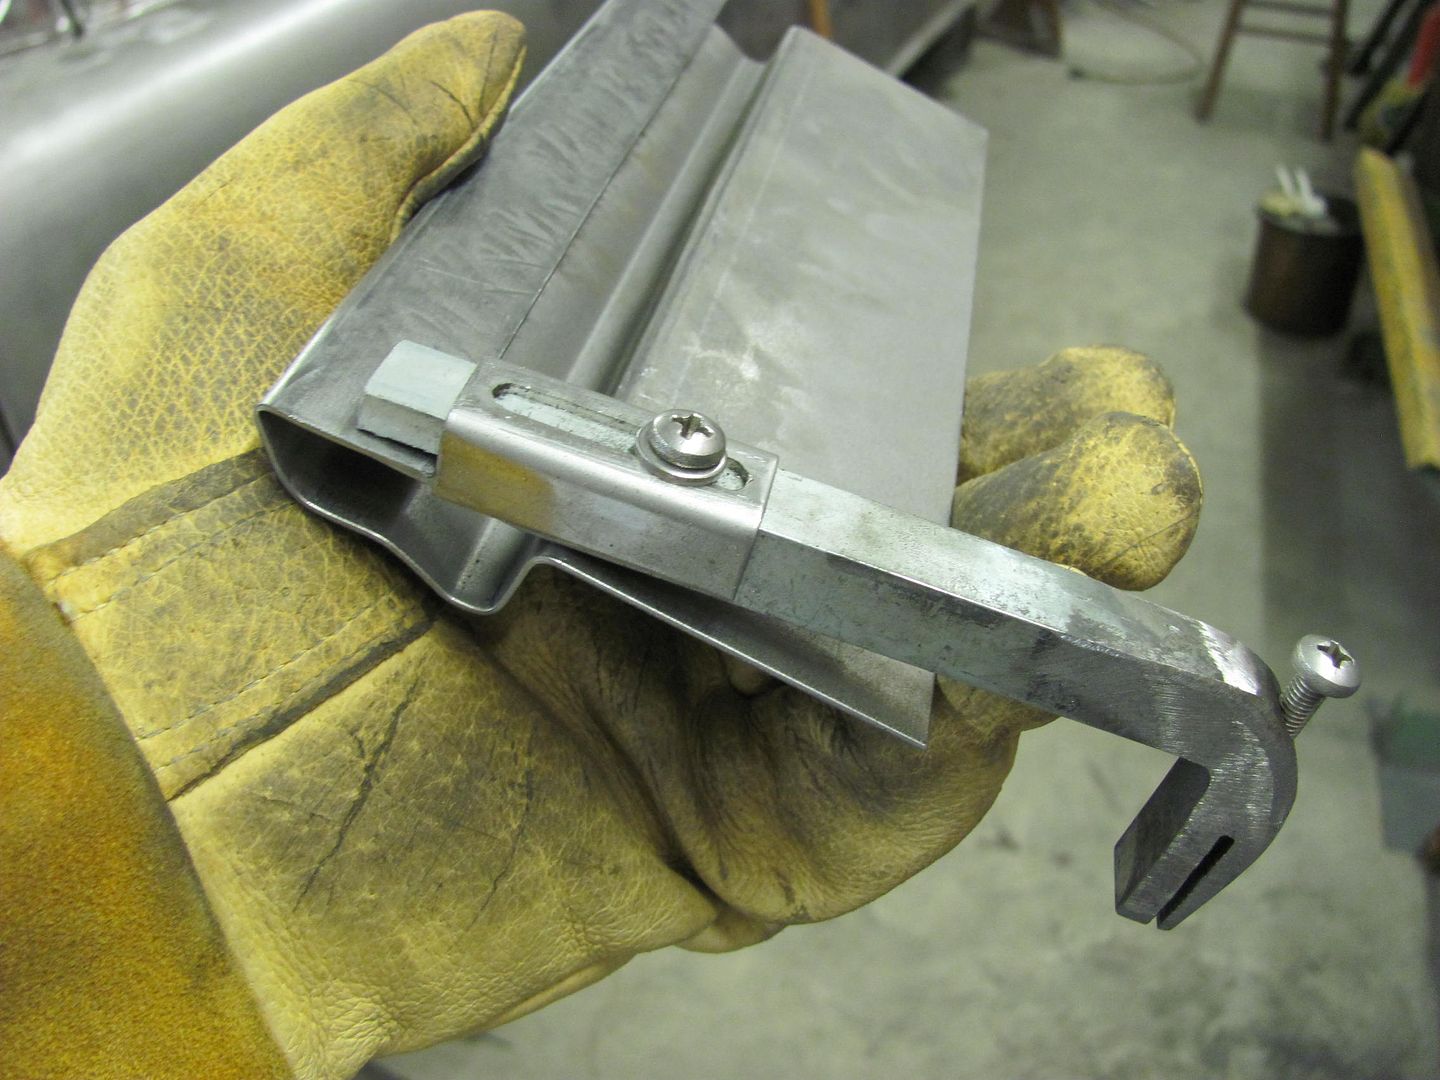
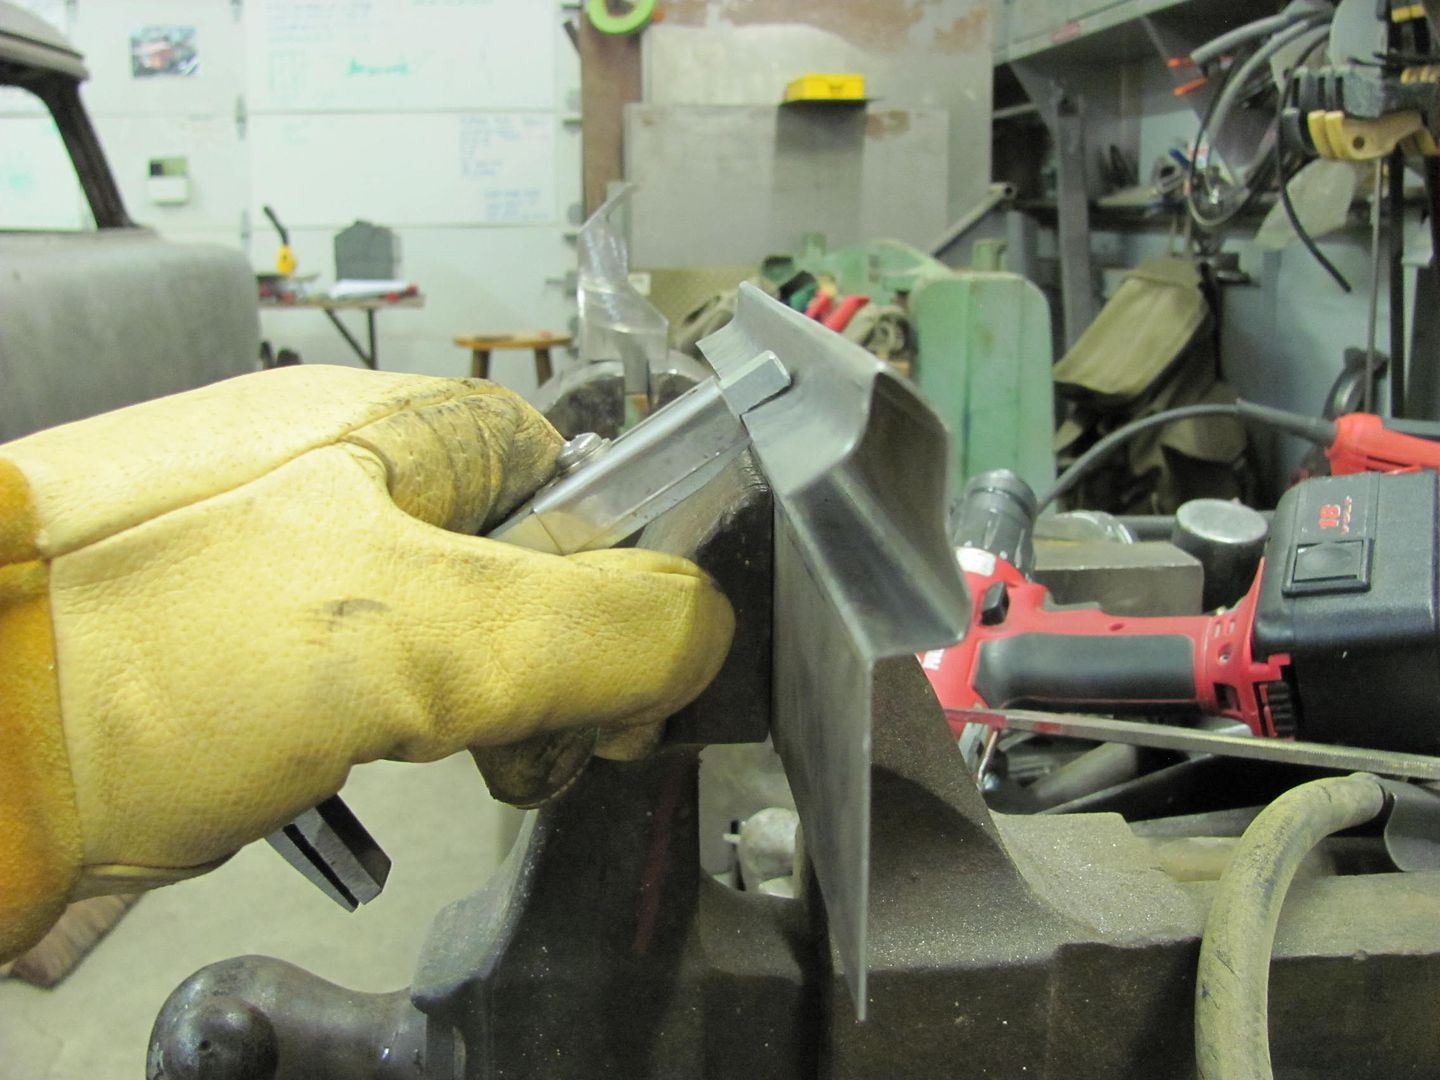
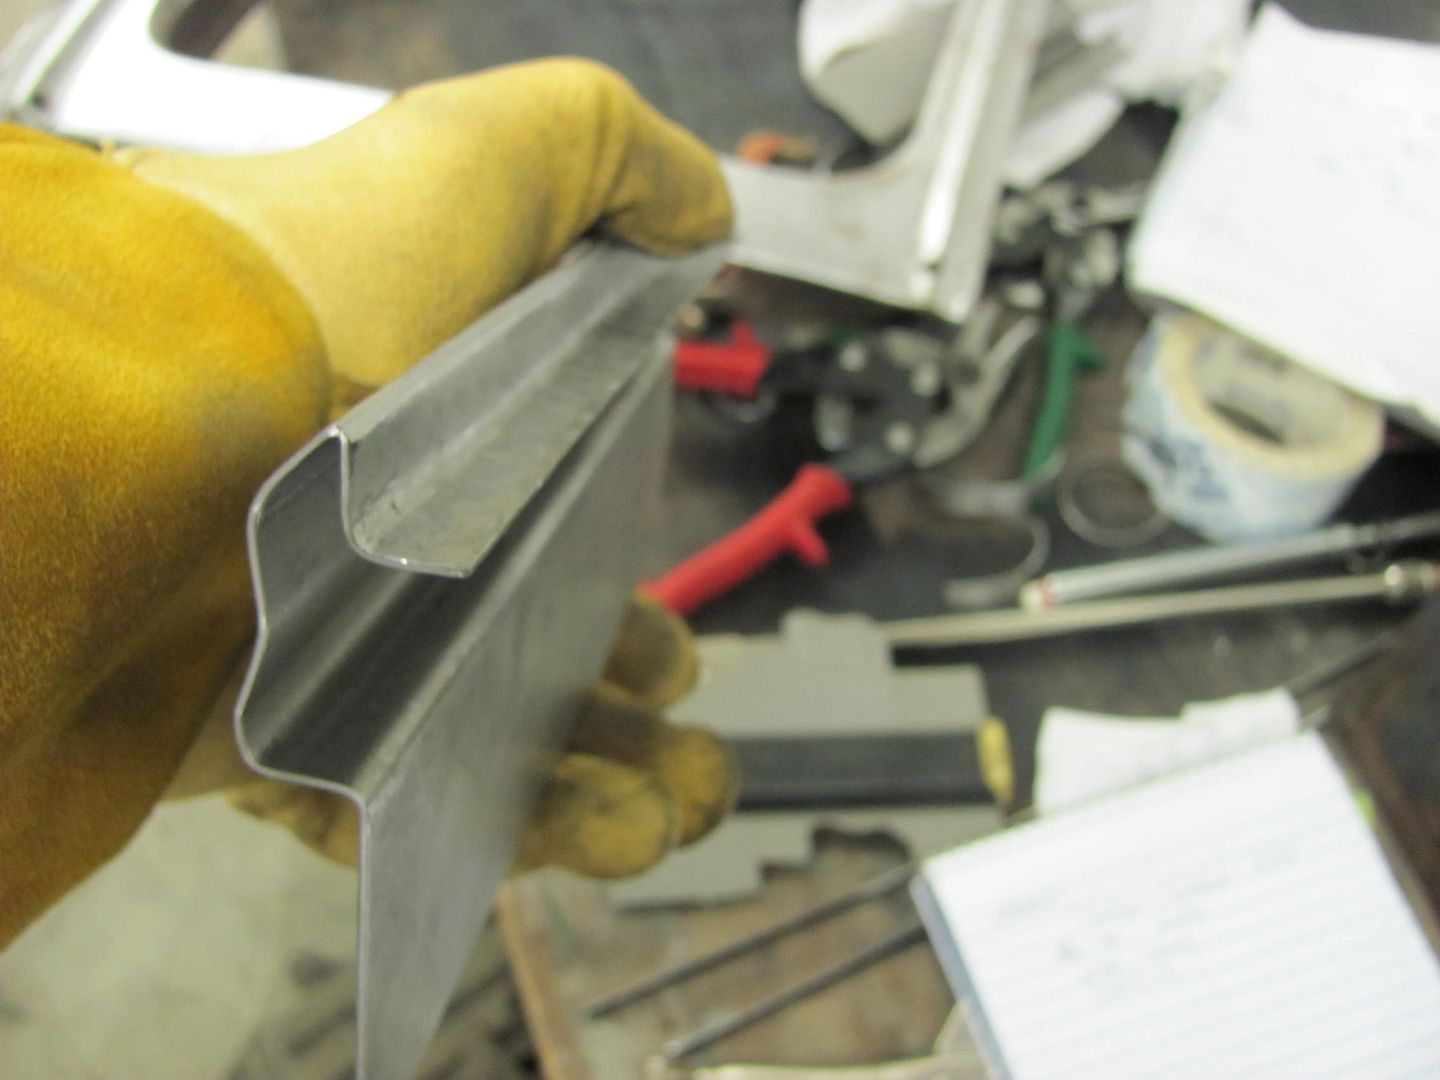
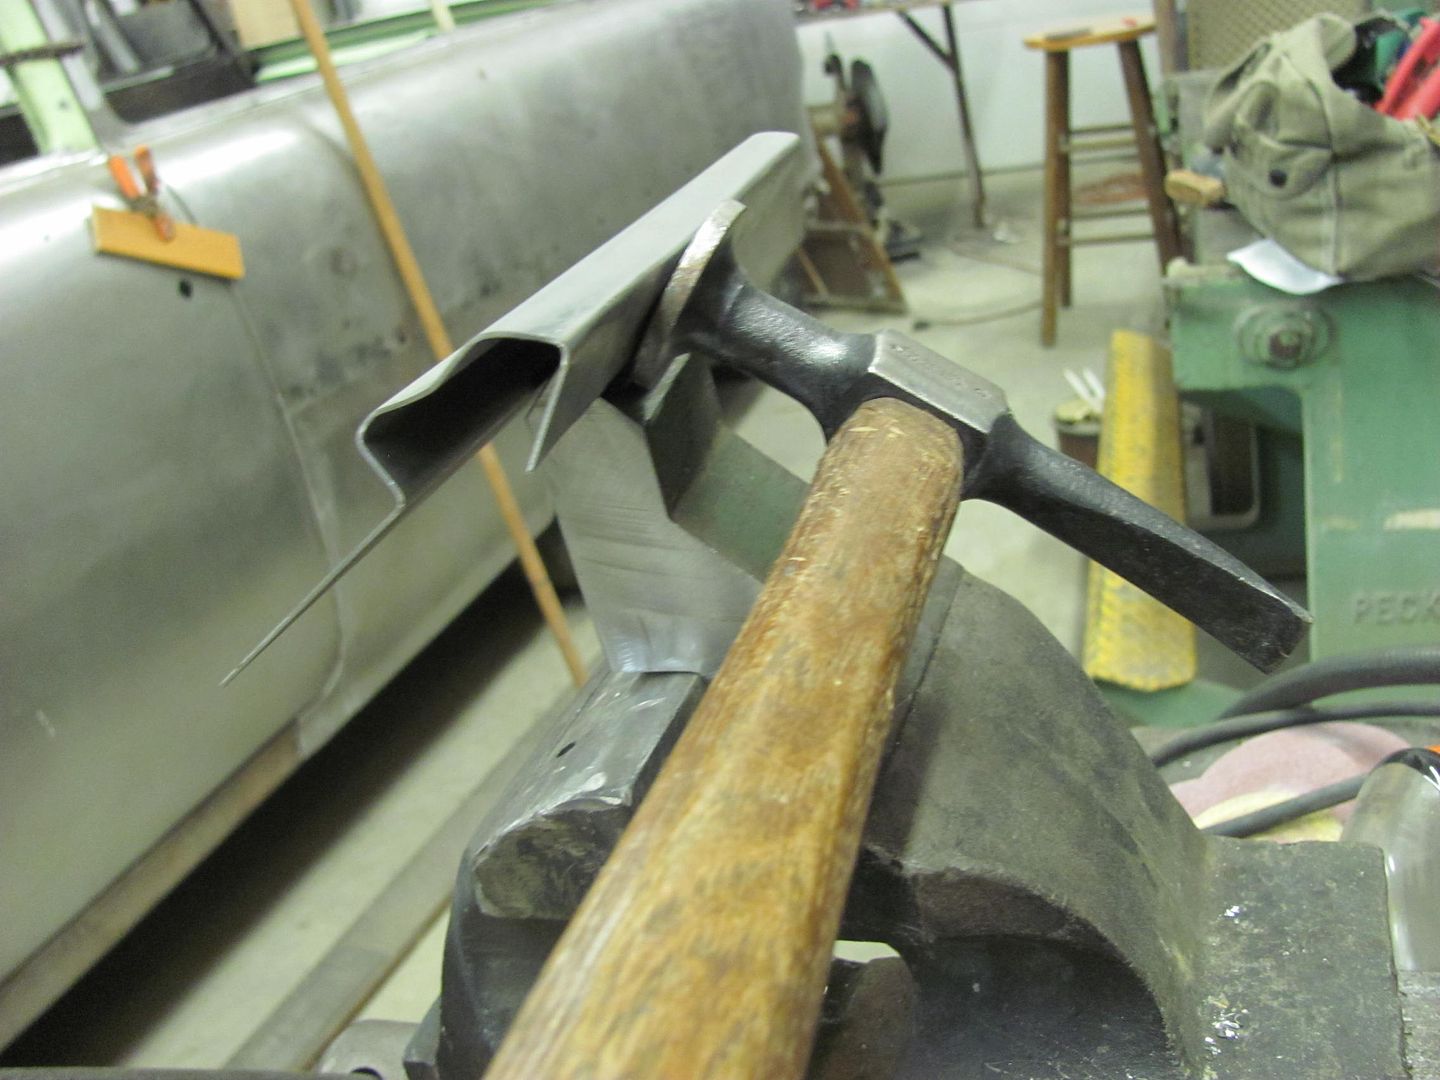
Comparison to the original....
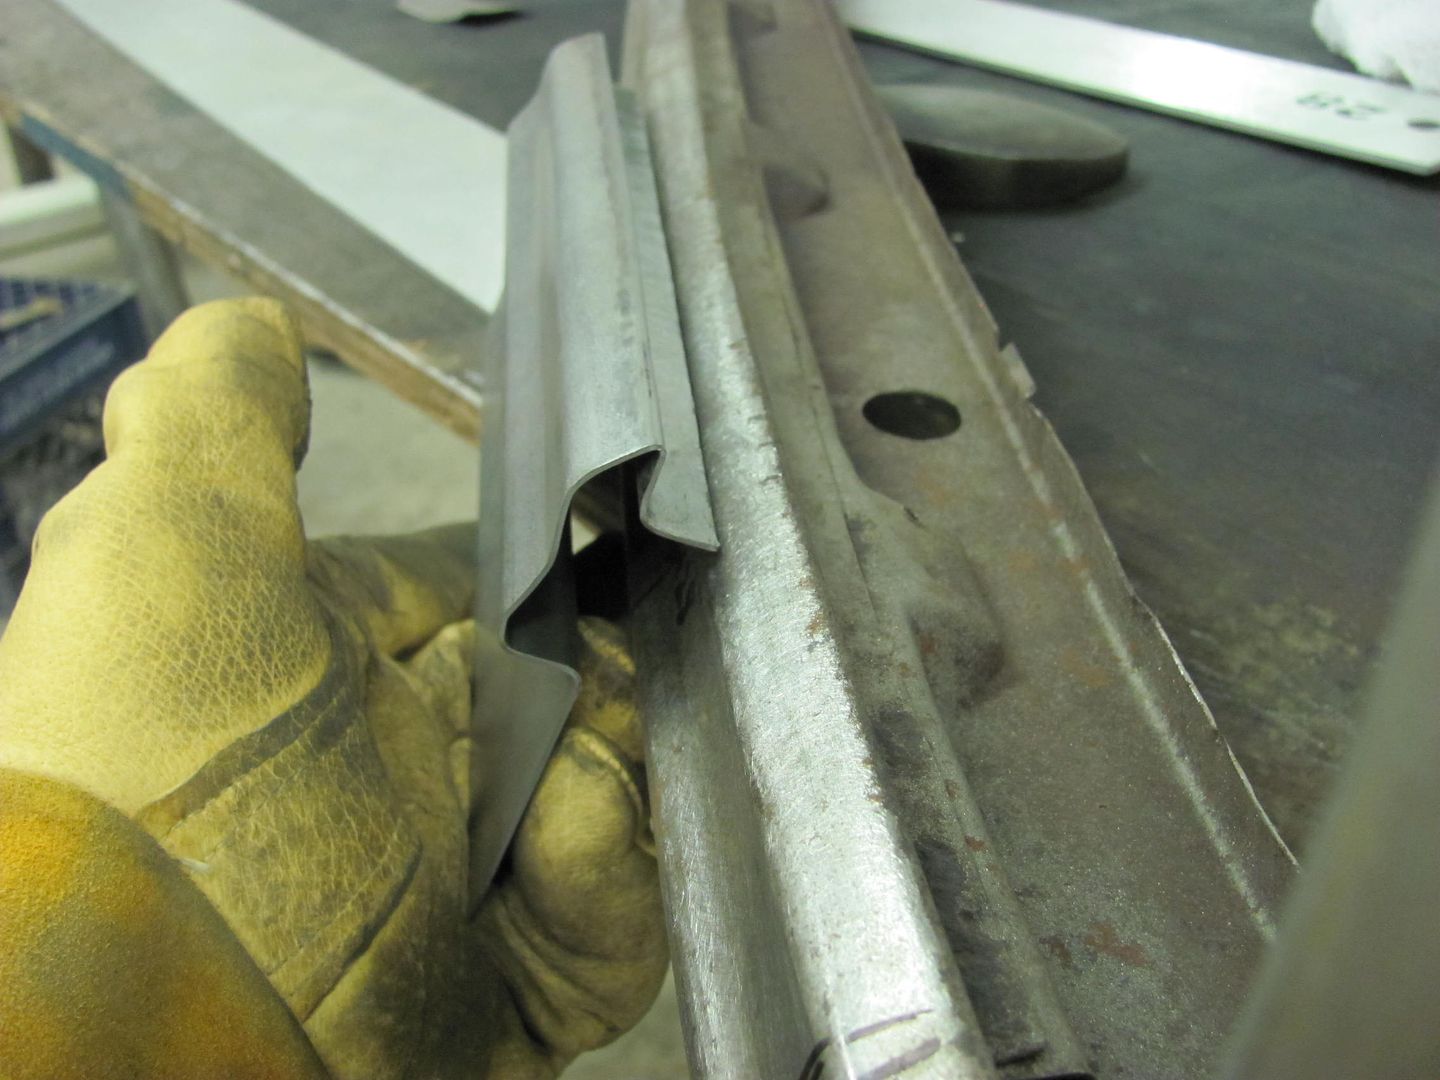

This looks close, next task will be to cut a sample out of the original and see how close we actually are...Robert
-
10-01-2013 04:29 AM #87
CHR Member/Contributor
- Join Date
- Sep 2007
- Location
- Gardner, KS
- Car Year, Make, Model: '33 HiBoy Coupe, '32 HiBoy Roadster
- Posts
- 11,245
Amazing! Thanks for sharing the tools made, too.Roger
Enjoy the little things in life, and you may look back one day and realize that they were really the BIG things.
-
10-01-2013 11:54 AM #88
CHR Member
- Join Date
- Apr 2011
- Location
- Prairie City
- Car Year, Make, Model: 40 Ford Deluxe, 68 Corvette, 72&76 K30
- Posts
- 7,301
- Blog Entries
- 1
I would have a pile of scrap all over if I were trying to make a compound curved everywhere piece as you are! Keep ait it sir!!!Ryan
1940 Ford Deluxe Tudor 354 Hemi 46RH Electric Blue w/multi-color flames, Ford 9" Residing in multiple pieces
1968 Corvette Coupe 5.9 Cummins Drag Car 11.43@130mph No stall leaving the line with 1250 rpm's and poor 2.2 60'
1972 Chevy K30 Longhorn P-pumped 24v Compound Turbos 47RH Just another money pit
1971 Camaro RS 5.3 BTR Stage 3 cam, SuperT10
Tire Sizes
-
10-01-2013 02:51 PM #89
CHR Member
- Join Date
- Feb 2010
- Location
- Pukekohe, New Zealand
- Car Year, Make, Model: '23 Ford T Roadster
- Posts
- 2,199
Simply amazing to be able to follow such a craftsman with outstanding skill and patience to not only manufacture his own patch panels but to make his own dies to be able to accomplish the job. Wow, I'm in awe of your skill sir, thank you for sharing.I maybe a little crazy but it stops me going insane.
Isaiah 48: 17,18.
Mark.
-
10-01-2013 04:55 PM #90
CHR Member/Contributor
- Join Date
- Mar 2005
- Location
- Tigard
- Car Year, Make, Model: 63 Nova SS
- Posts
- 2,591
Once again, the quality of craftsmanship represented here is just flat amazing Robert! Thanks for sharing. In so doing, you encourage others to take a bit of a plunge and try our hand at some fabricating.
Glenn"Where the people fear the government you have tyranny. Where the government fears the people you have liberty." John Basil Barnhil
 Reply With Quote

Posting Permissions
- You may not post new threads
- You may not post replies
- You may not post attachments
- You may not edit your posts

i've enjoyed the years here . made a lot of friends. most who have left. i see no reason to continue with this so hope to see you somewhere else. i dont think this site will ever be back. it's lived...
Dead!