


 3390Likes
Thread: 55 Wagon Progress


Results 181 to 195 of 1865
 LinkBack URL
 About LinkBacks
Hybrid View
-
03-15-2014 06:04 PM #1
 CHR Member

- Join Date
- Jun 2008
- Location
- Leonardtown
- Car Year, Make, Model: Walking
- Posts
- 1,228
Thanks for the comments guys.
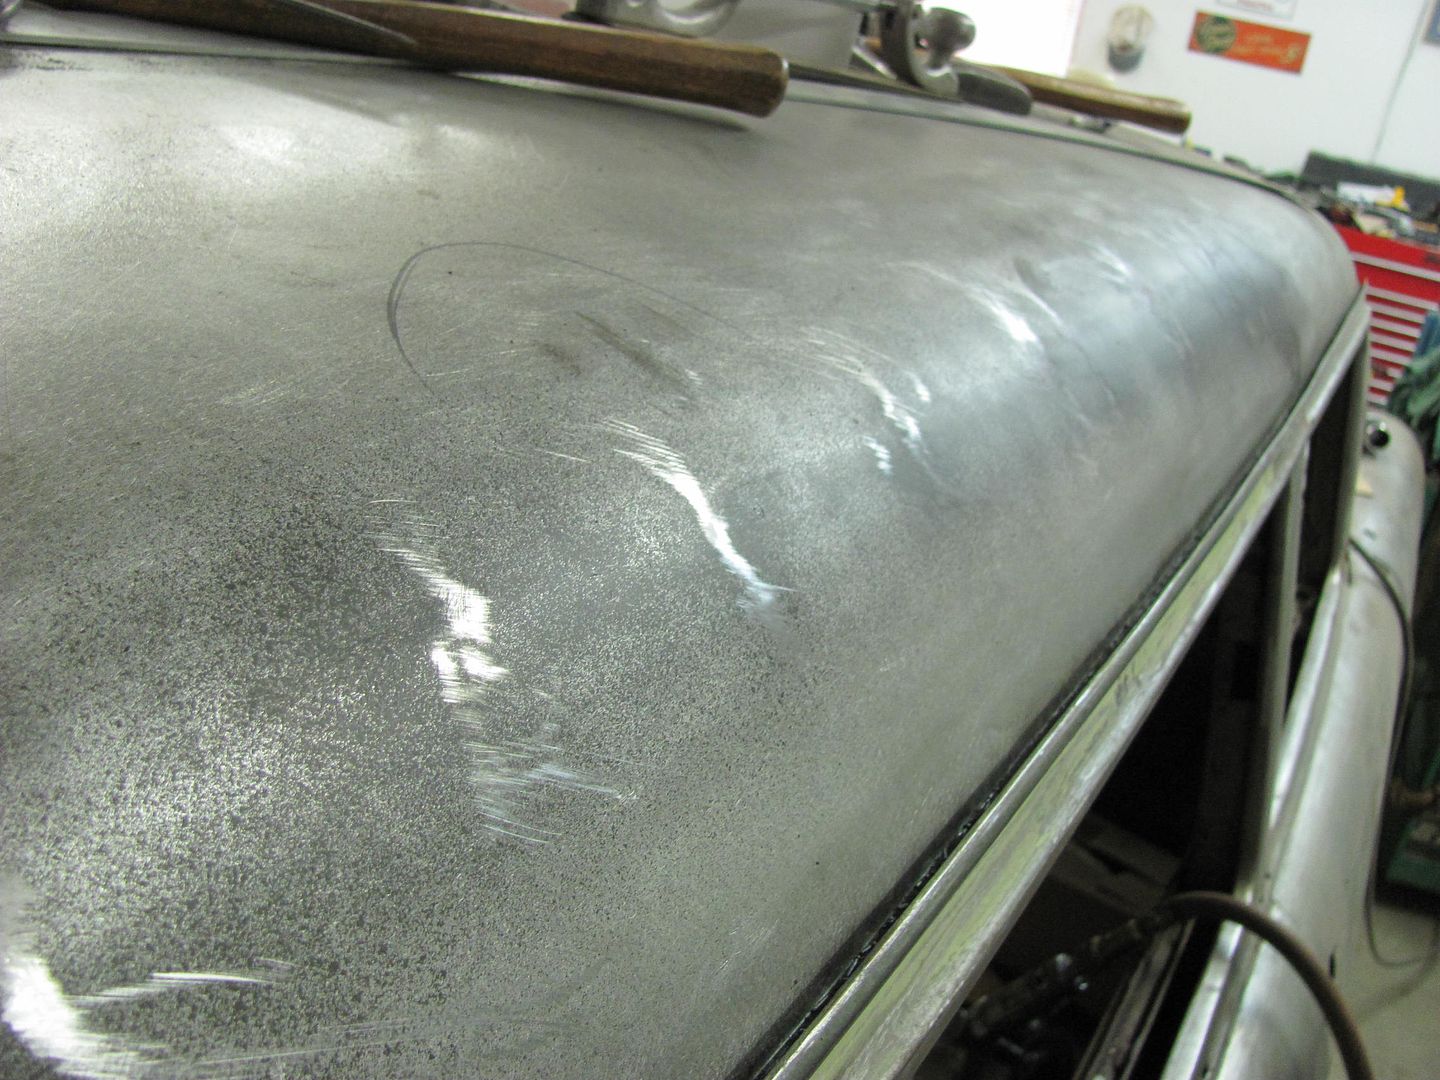
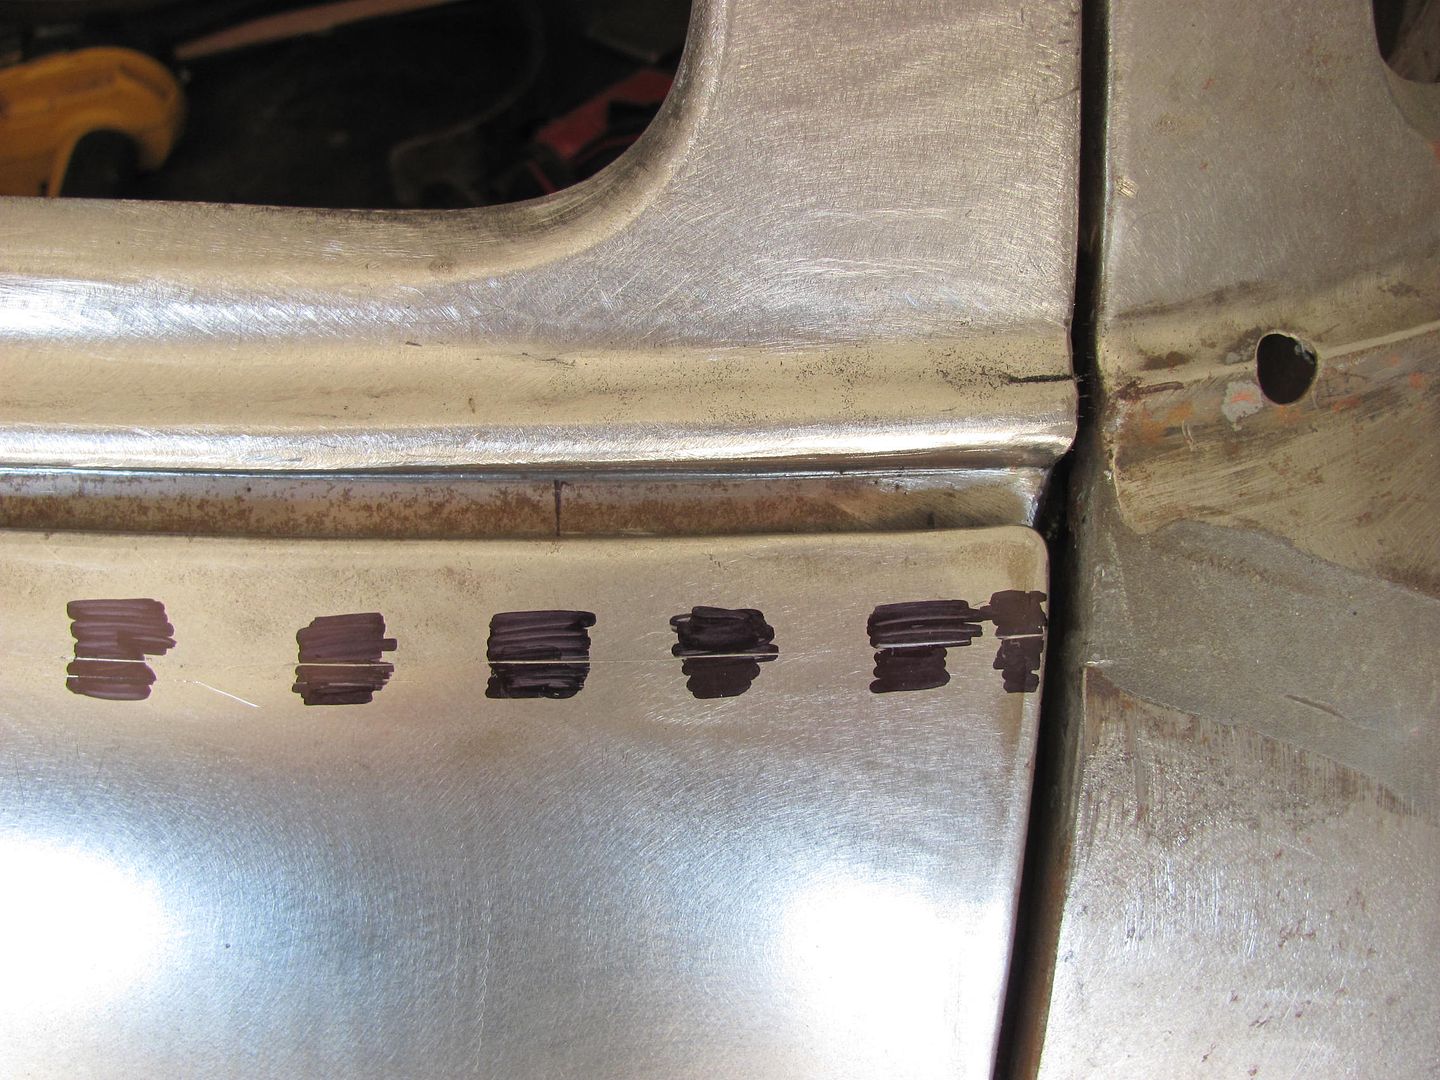
My nephew Chris stopped by to help this morning so we decided to work on the roof a bit. Added a guide coat and skimmed across it with the vixen file to show the high spots...
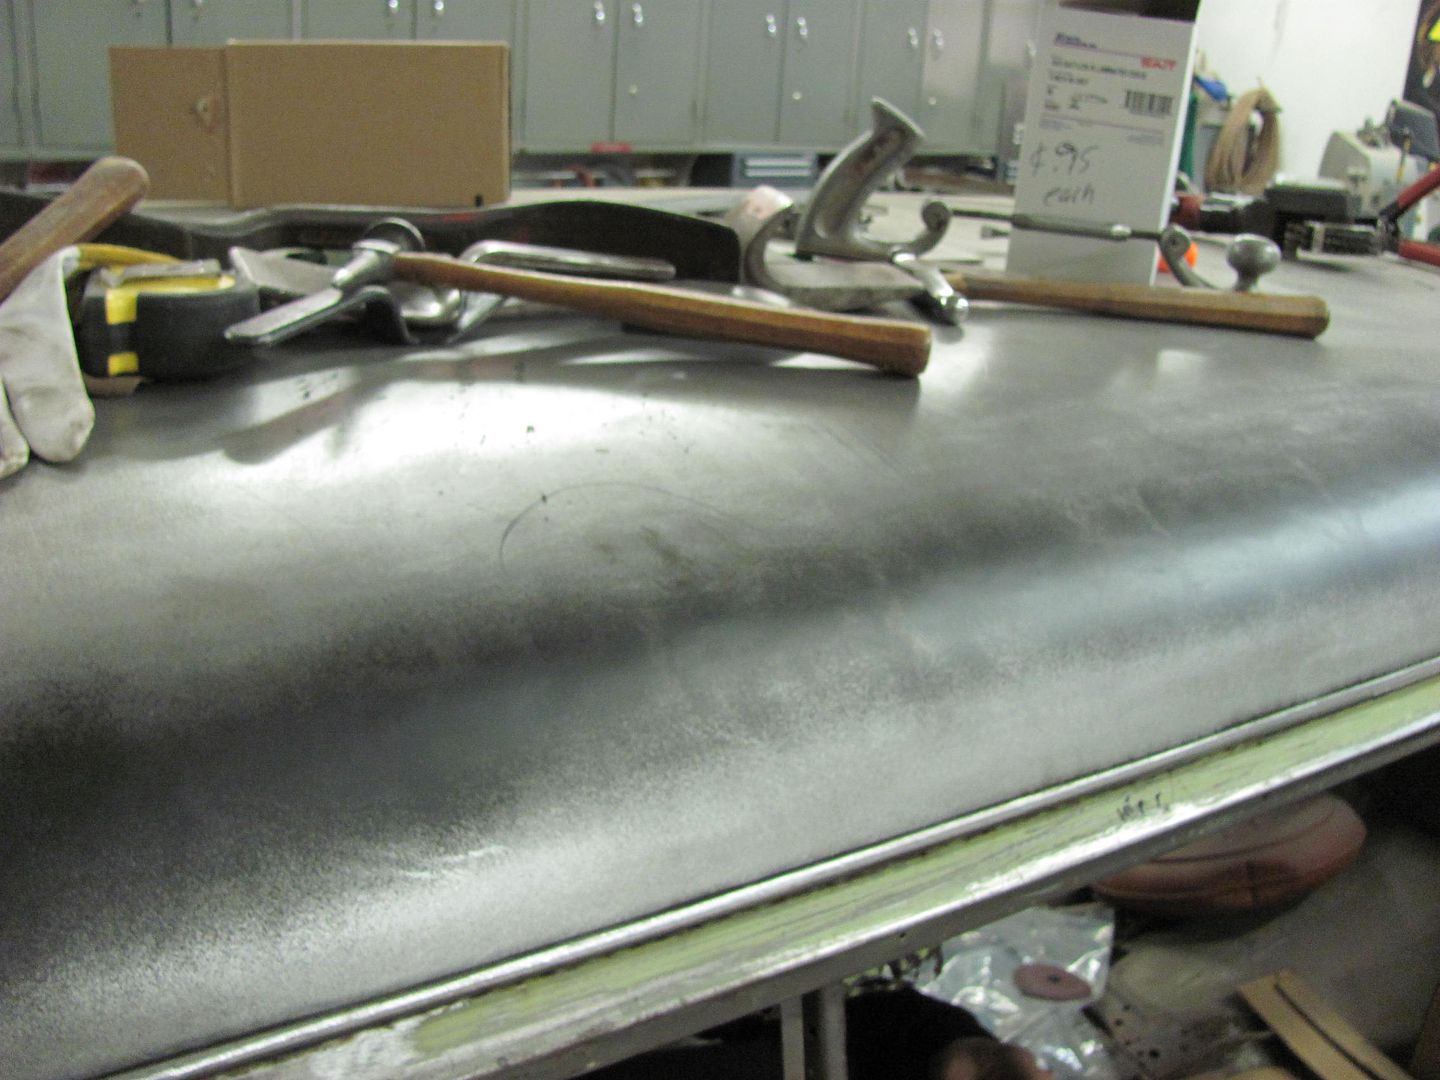
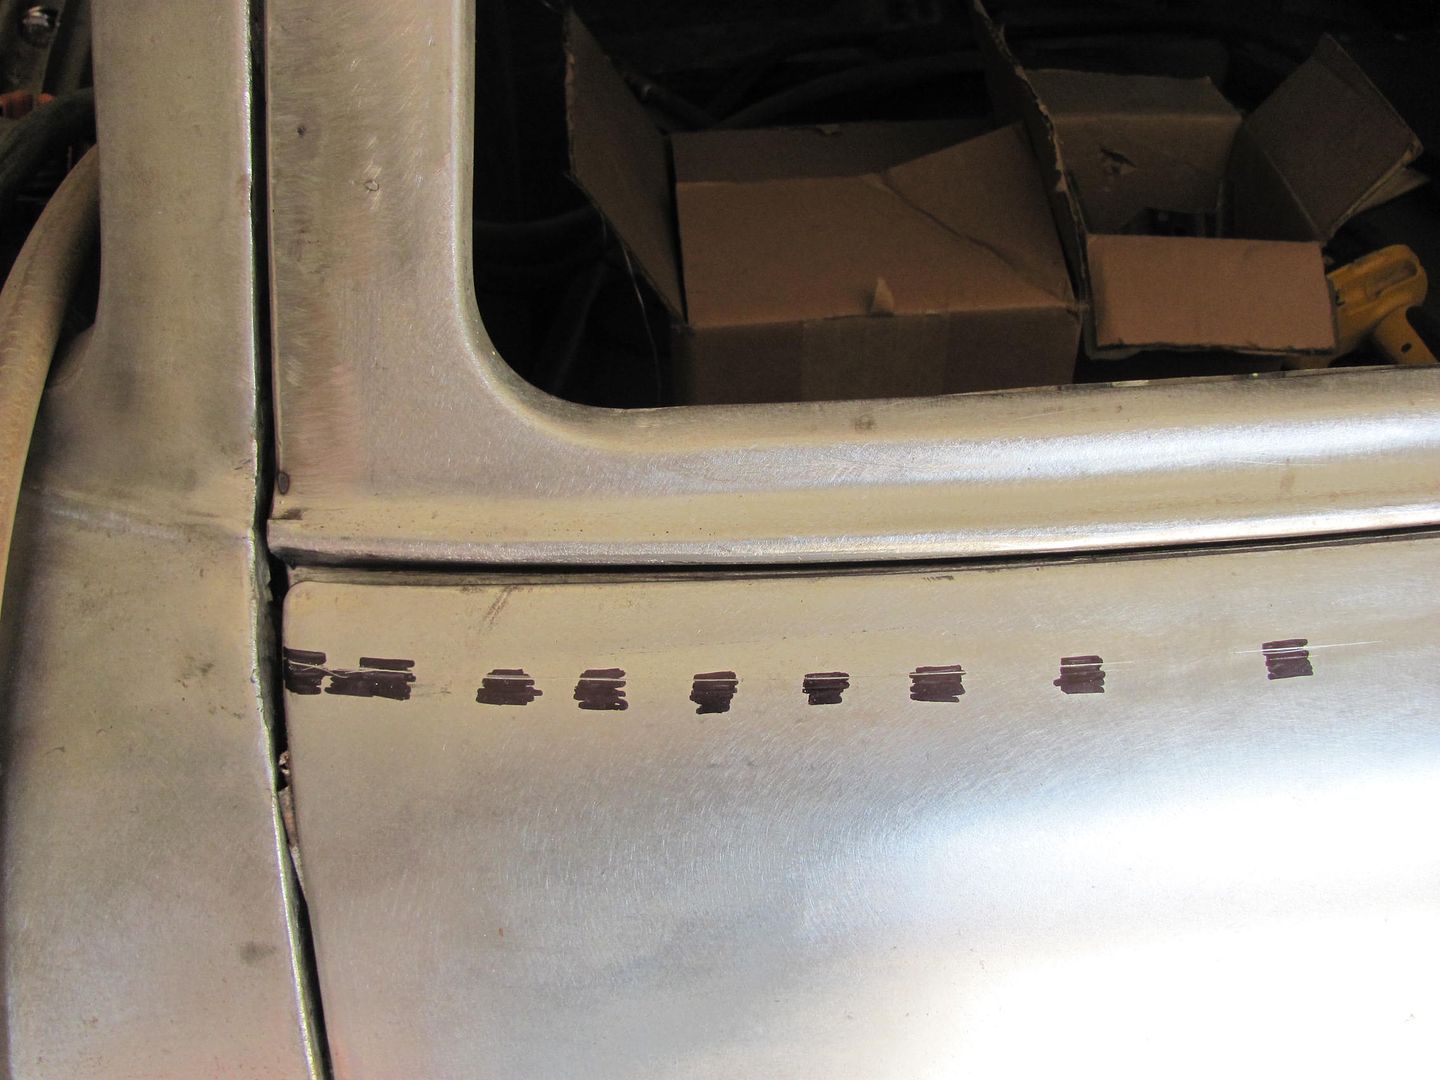
To help keep inside and outside guys on the same page, some reference marks were added from the door opening back, on inside and outside of the roof.
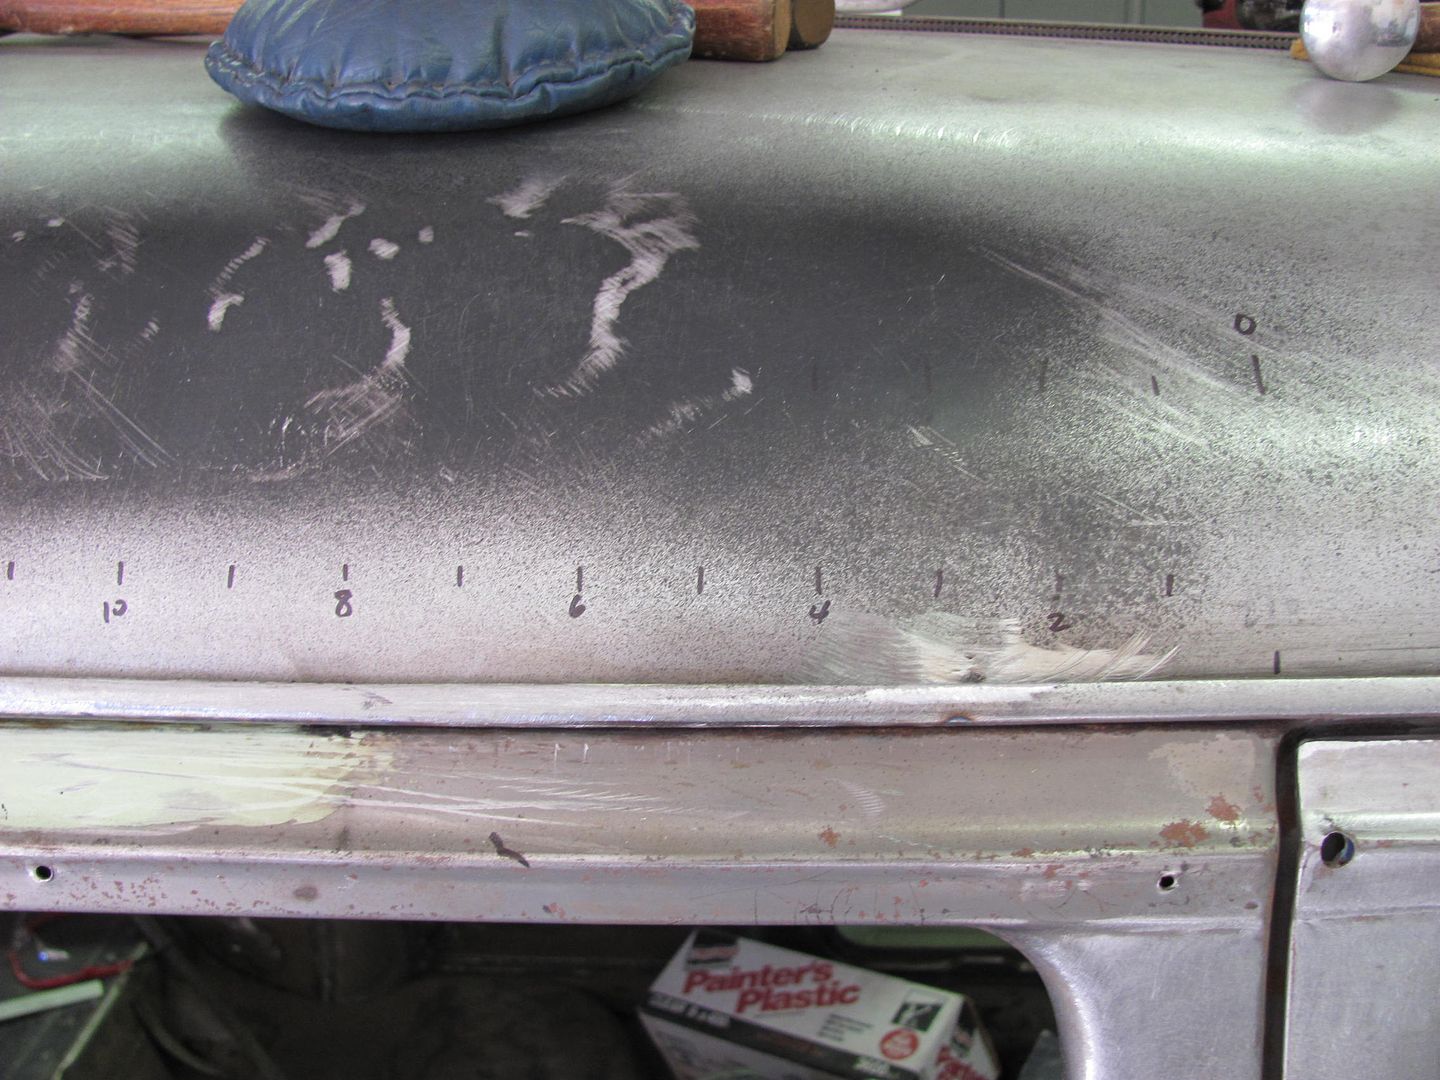
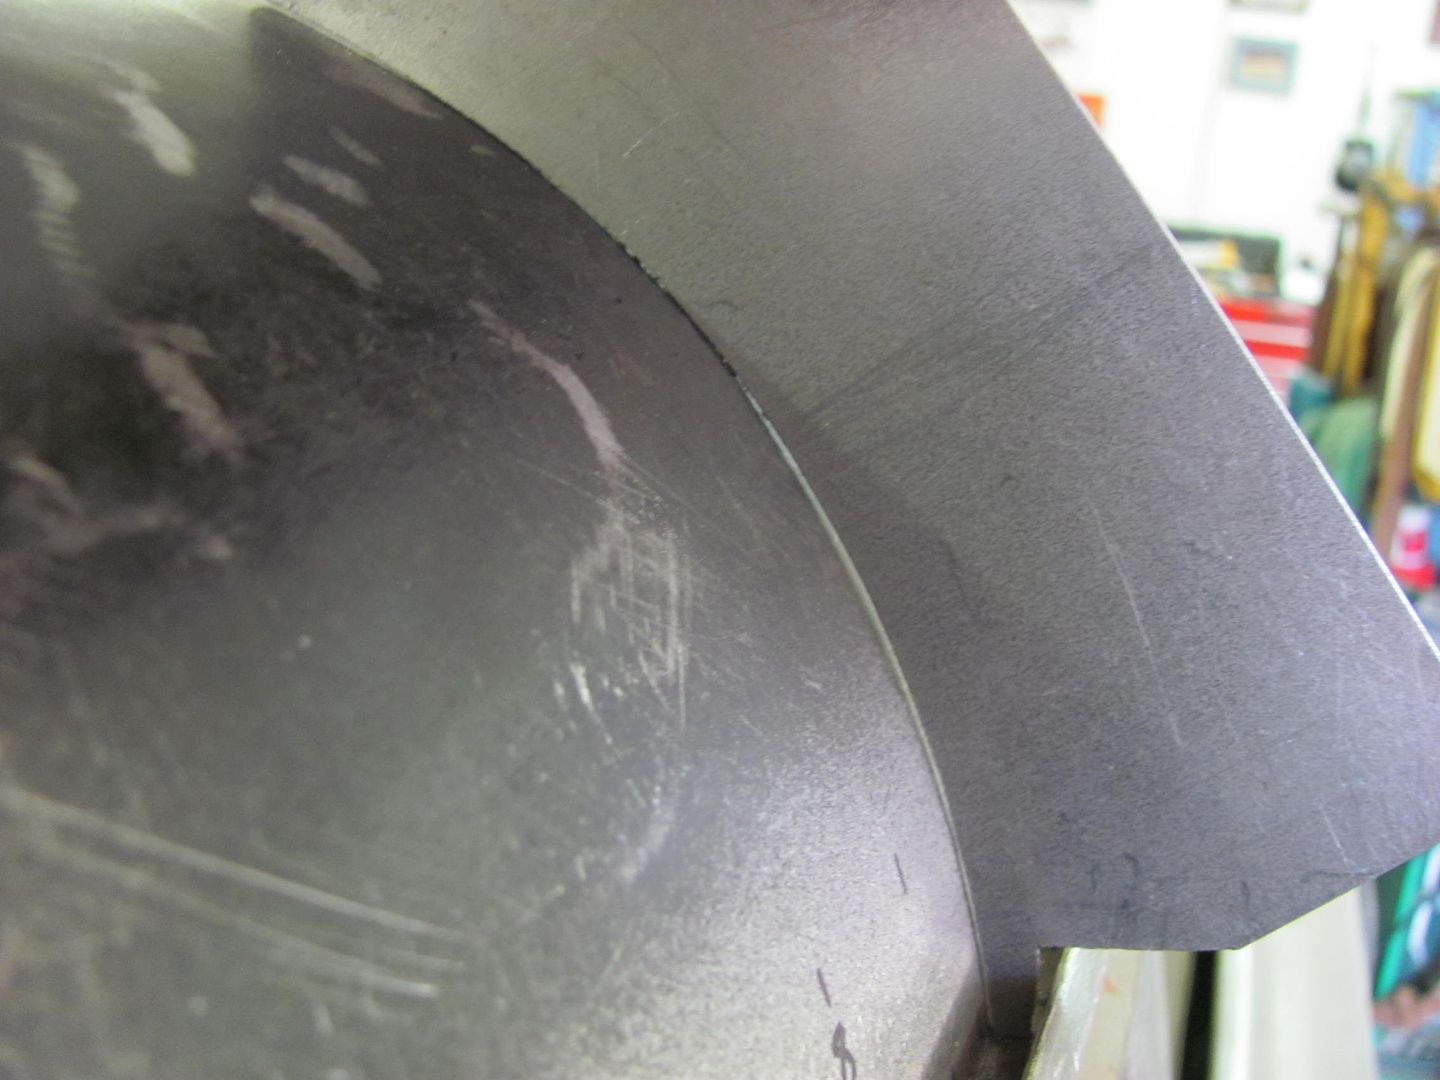
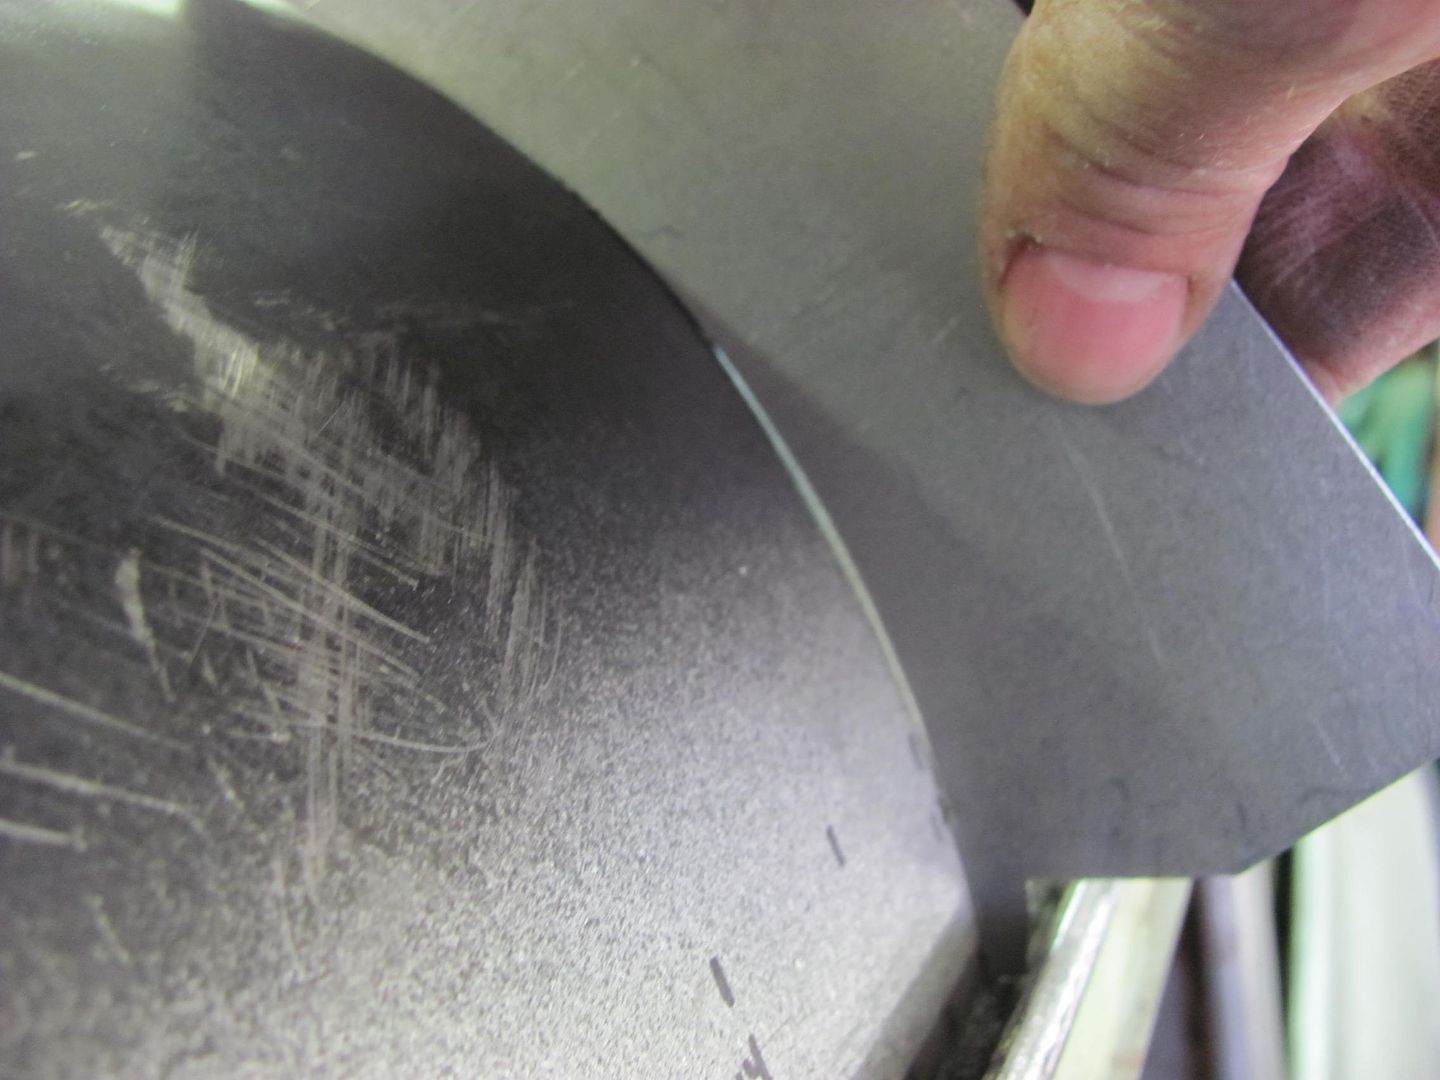
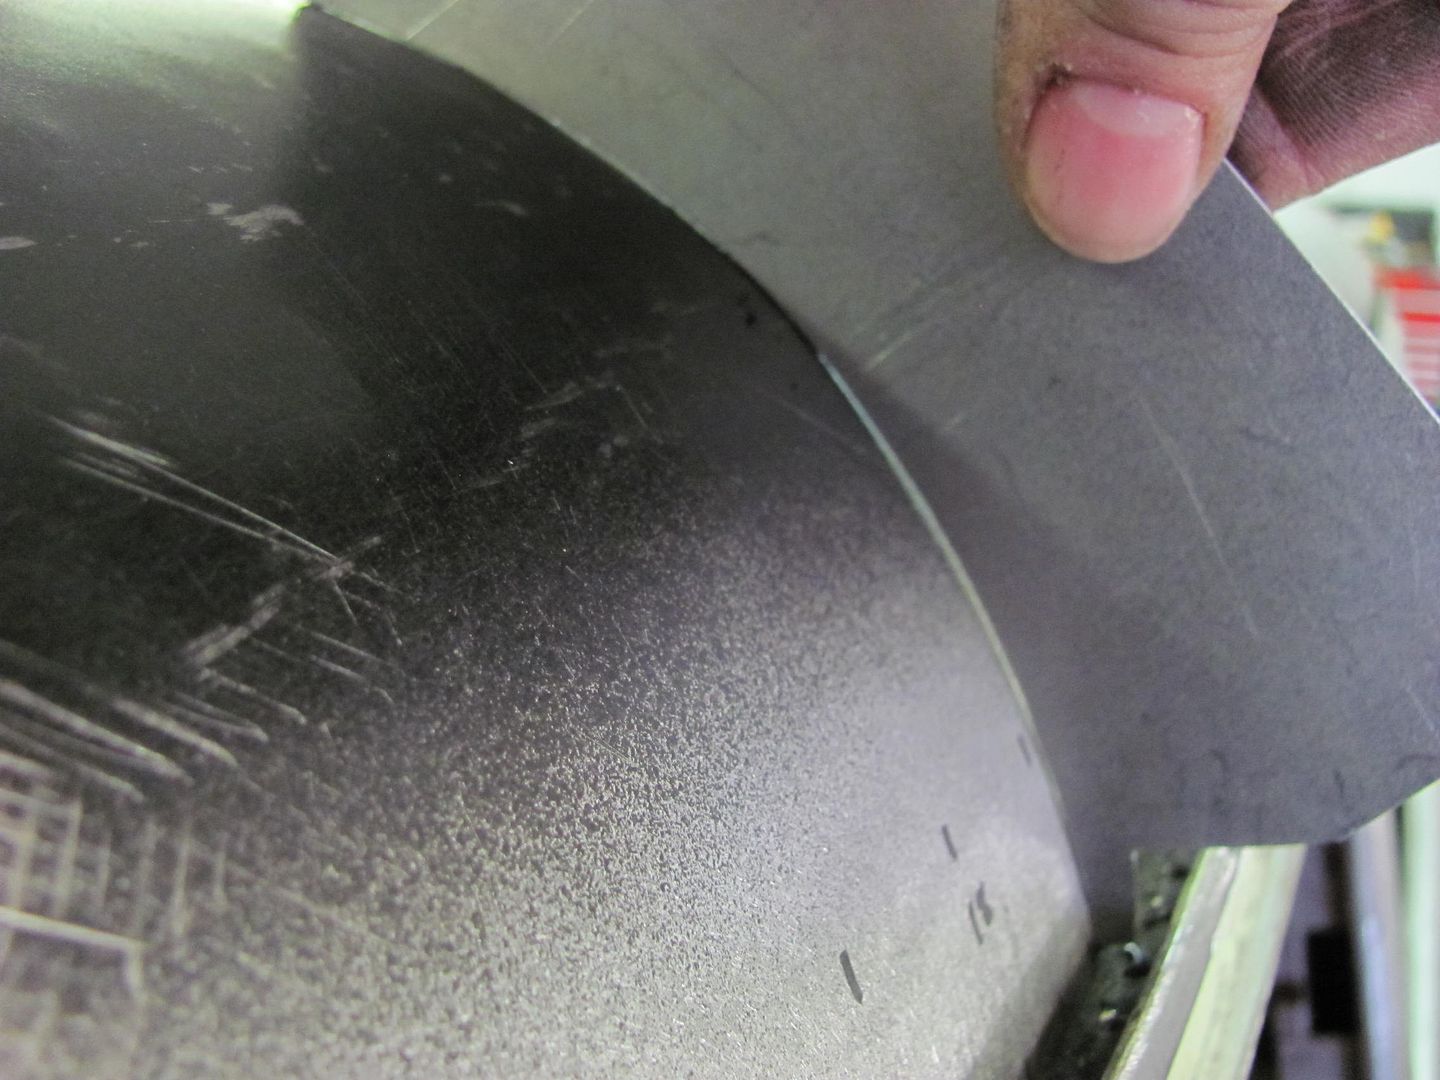
Worked the highs and lows, and thought we'd compare it to the other side. Making a profile template to match the good side...
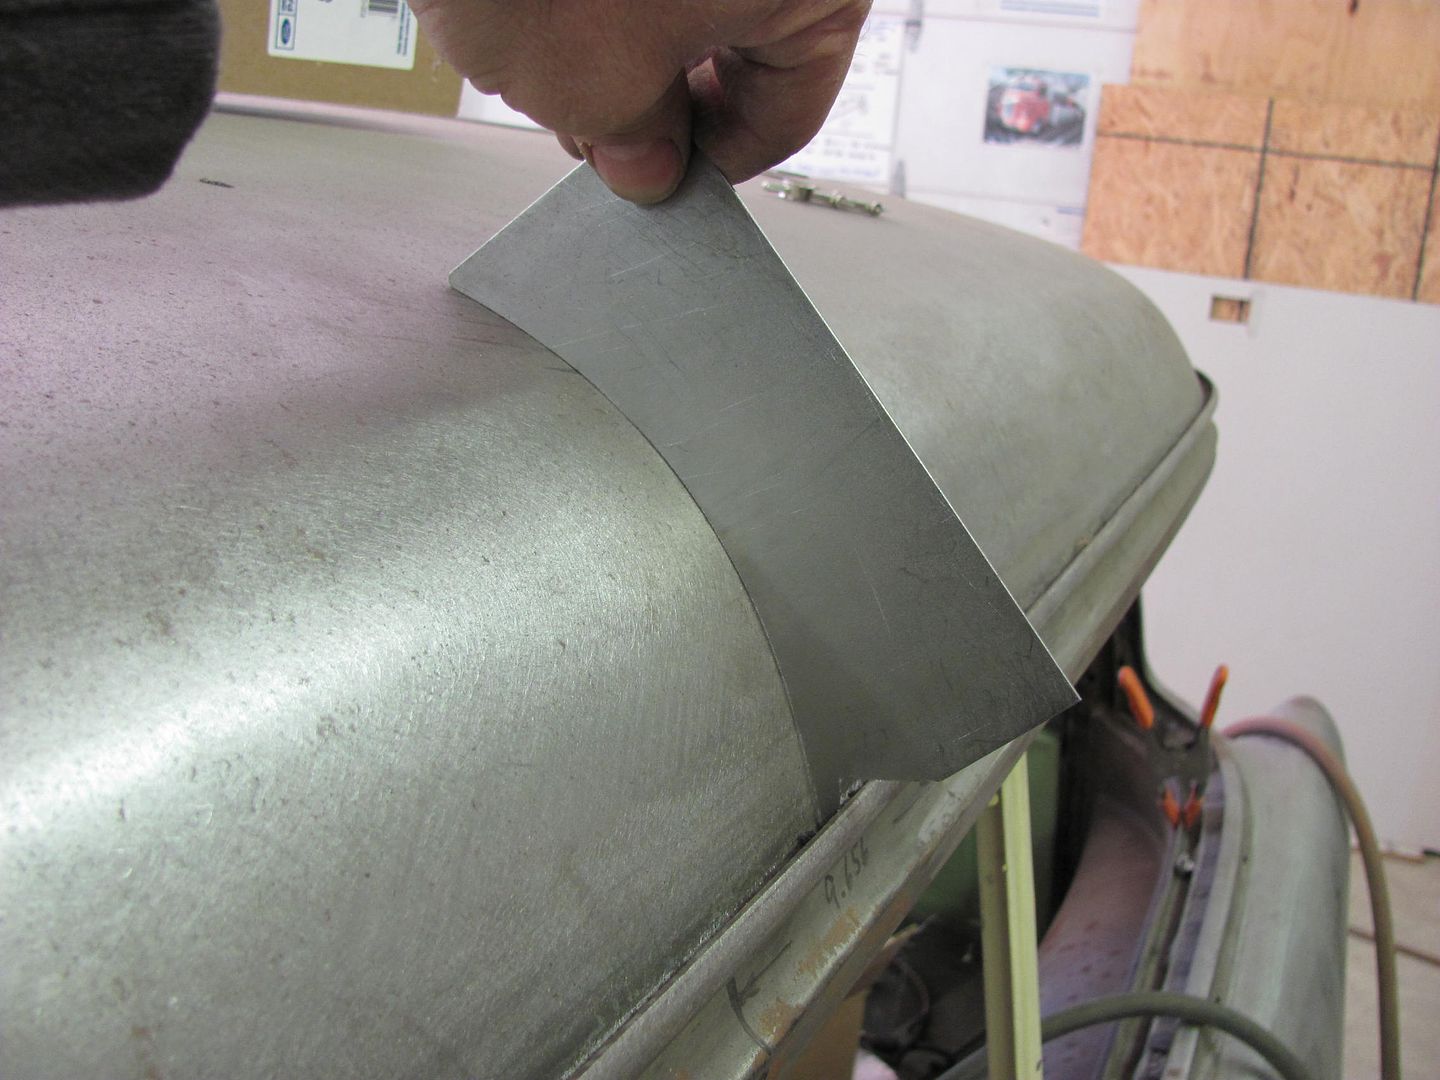
Shown at about 6, 12, and 18". We're getting close..
Robert
-
03-15-2014 06:20 PM #2
CHR Member
- Join Date
- Aug 2003
- Location
- Springfield
- Car Year, Make, Model: '66 Mustang, 76 Corvette
- Posts
- 5,444
In the latest issue of Rod & Custom, June2014, there is an article starting on page 66 of the repair of the door reveal on a 32 Pickup door. It had been hit by a fork truck and the repair had left much to be desired and since no one makes repo panels they decided to cut up another door for the patch panel. I have a sneaky hunch that you could have made one. Shame on Rod & Custom.Ken Thomas
NoT FaDe AwaY and the music didn't die
The simplest road is usually the last one sought
Wild Willie & AA/FA's The greatest show in drag racing
-
03-16-2014 01:47 AM #3
CHR Member
- Join Date
- Feb 2008
- Location
- Inglewood
- Car Year, Make, Model: 60 F100 truck
- Posts
- 6,339
Awesome stuff,Robert.. Love watching your work.. Inspires me to try a little harder on my own stuff.. Love it..Micah 6:8
If we aren't supposed to have midnight snacks,,,WHY is there a light in the refrigerator???
Robin.
-
03-16-2014 07:54 AM #4
CHR Member
- Join Date
- Mar 2013
- Location
- Seguin
- Car Year, Make, Model: 1940 Ford p/u 1937 Caddy Coupe
- Posts
- 782
Love your metal work !
-
03-16-2014 09:08 AM #5
CHR Member
- Join Date
- Feb 2008
- Location
- Caldwell
- Car Year, Make, Model: 34 ford 3 window/461 pontiac
- Posts
- 918
NTFDAY,
Just finished reading that article in RC and I feel the same way. I hated seeing that perfectly good 32 door cut up. I'm not a body man by any degree but I think I would have tried to machine some custom dollies or dies to get those reveals to shape. They were going to cut the damaged section out anyway and with it cut out they would have had better access to work on it.
Robert,
Thanks for making that template to check the good side to the other, will use that idea in my own project.
www.clubhotrod.com/forums/showthread.php?t=44081
-
03-17-2014 07:08 PM #6
CHR Member
- Join Date
- Jun 2008
- Location
- Leonardtown
- Car Year, Make, Model: Walking
- Posts
- 1,228
Guys, I'll agree that cutting up anything like that, especially a 32, should be a last resort. You would think a publication like Rod and Custom would have adequate contacts to find someone to duplicate that from fresh sheet metal. Not sure who they had doing the work (not a subscriber, no sneak peak for me...) but it sounds like they picked the wrong place to showcase for a magazine article, and likely had someone better qualified three blocks away..")
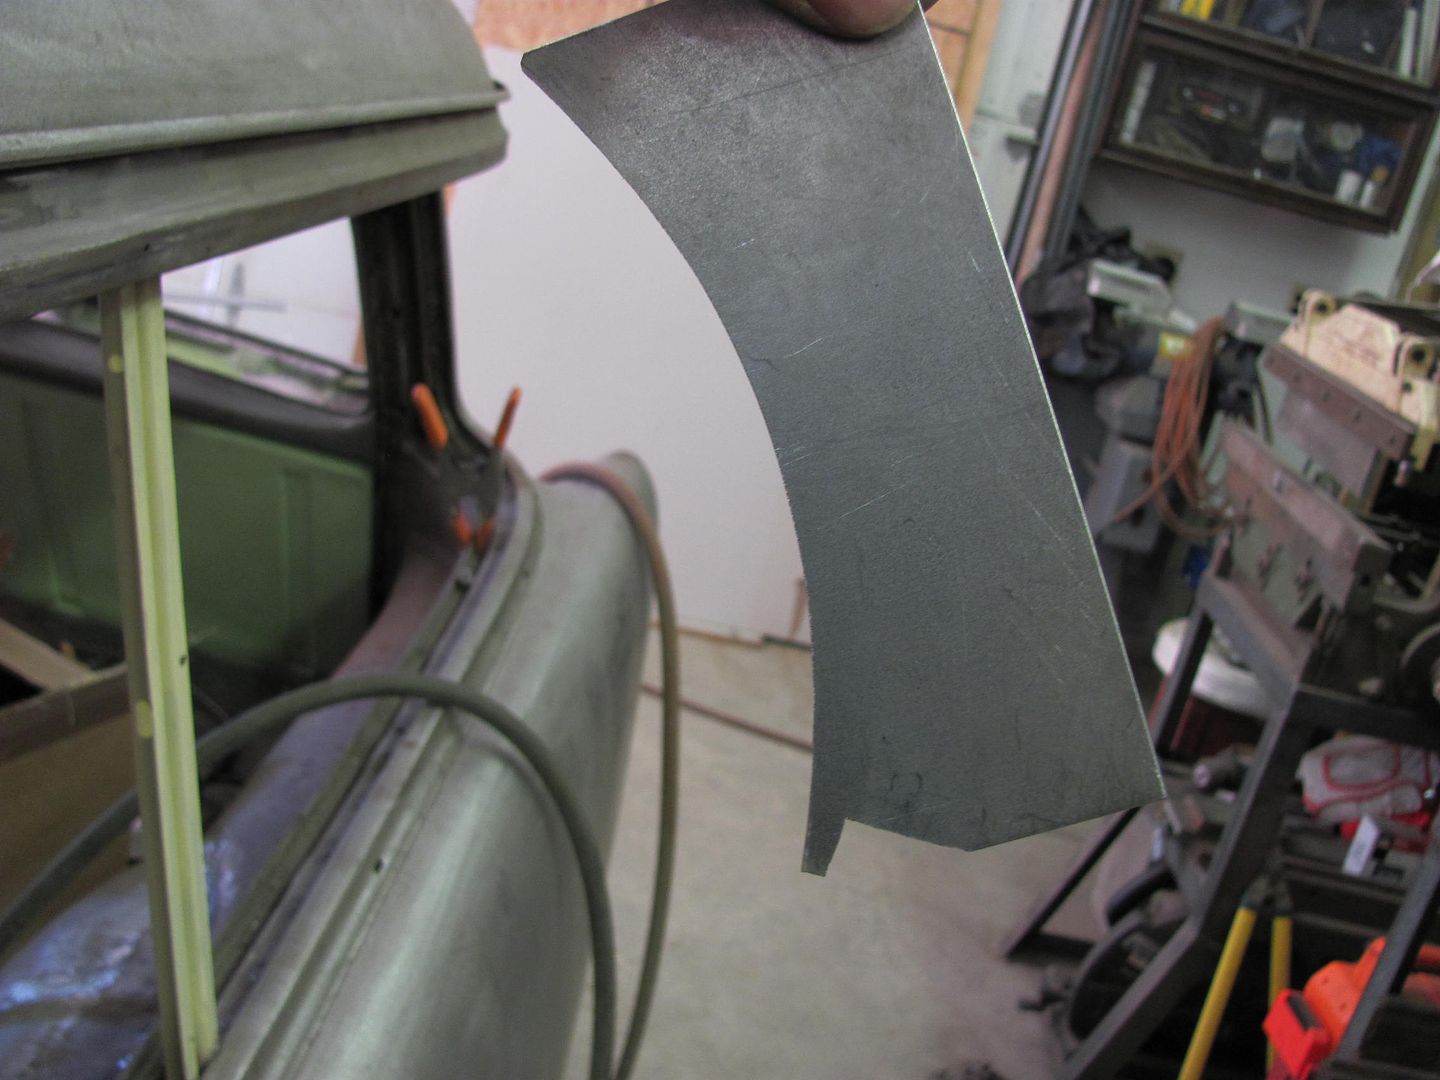
Jack, just to clarify, here's how I did the profile layout..
Start with a profile "blank" and span the profile you need to copy.
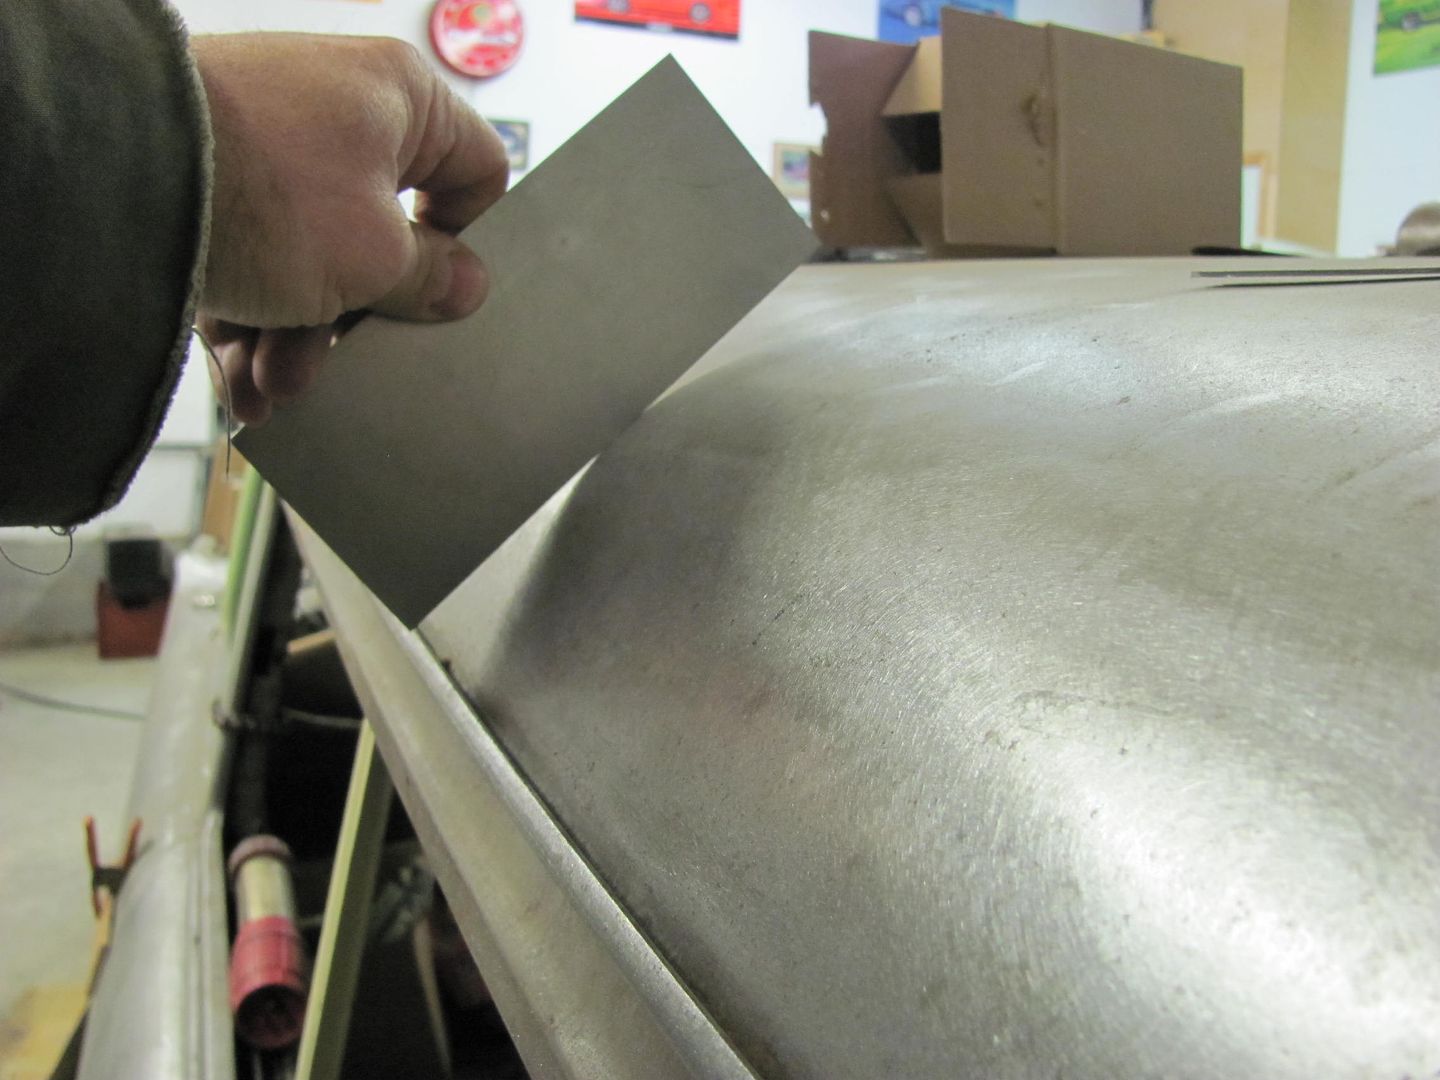
Using a compass, open up the span to insure it is wide enough to make the mark on the blank on both ends ...
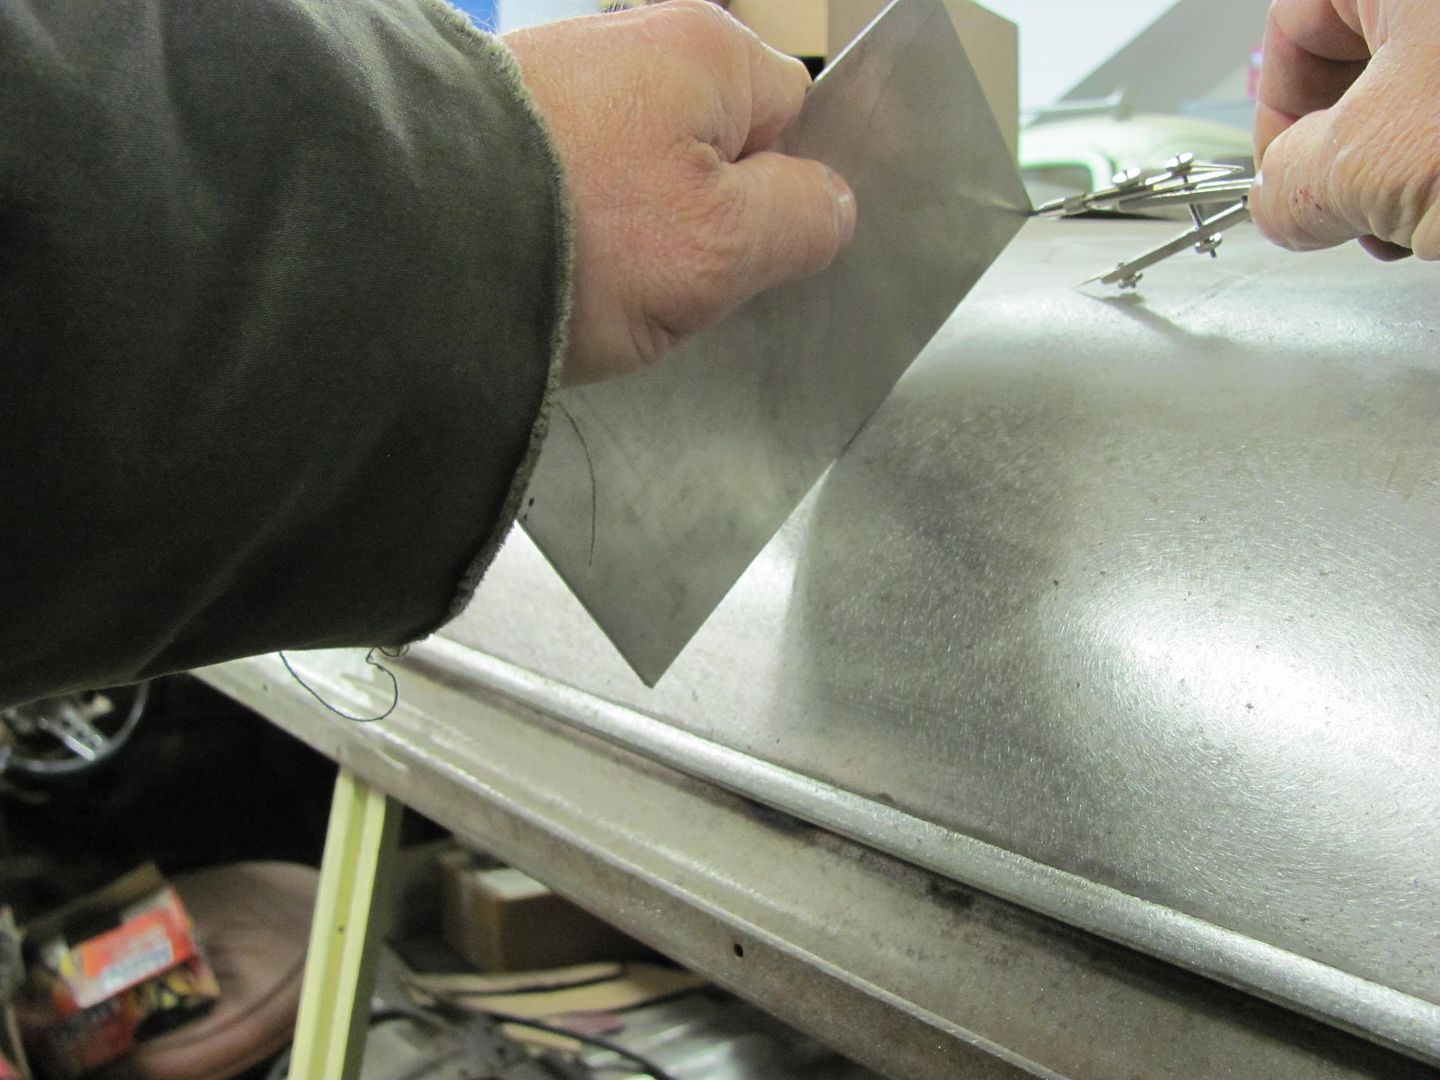
Don't rotate the compass as you move it, this will make the radius larger than the original. Keep it "locked" pointed in the same direction as you glide across the roof surface, leaving the profile to cut....
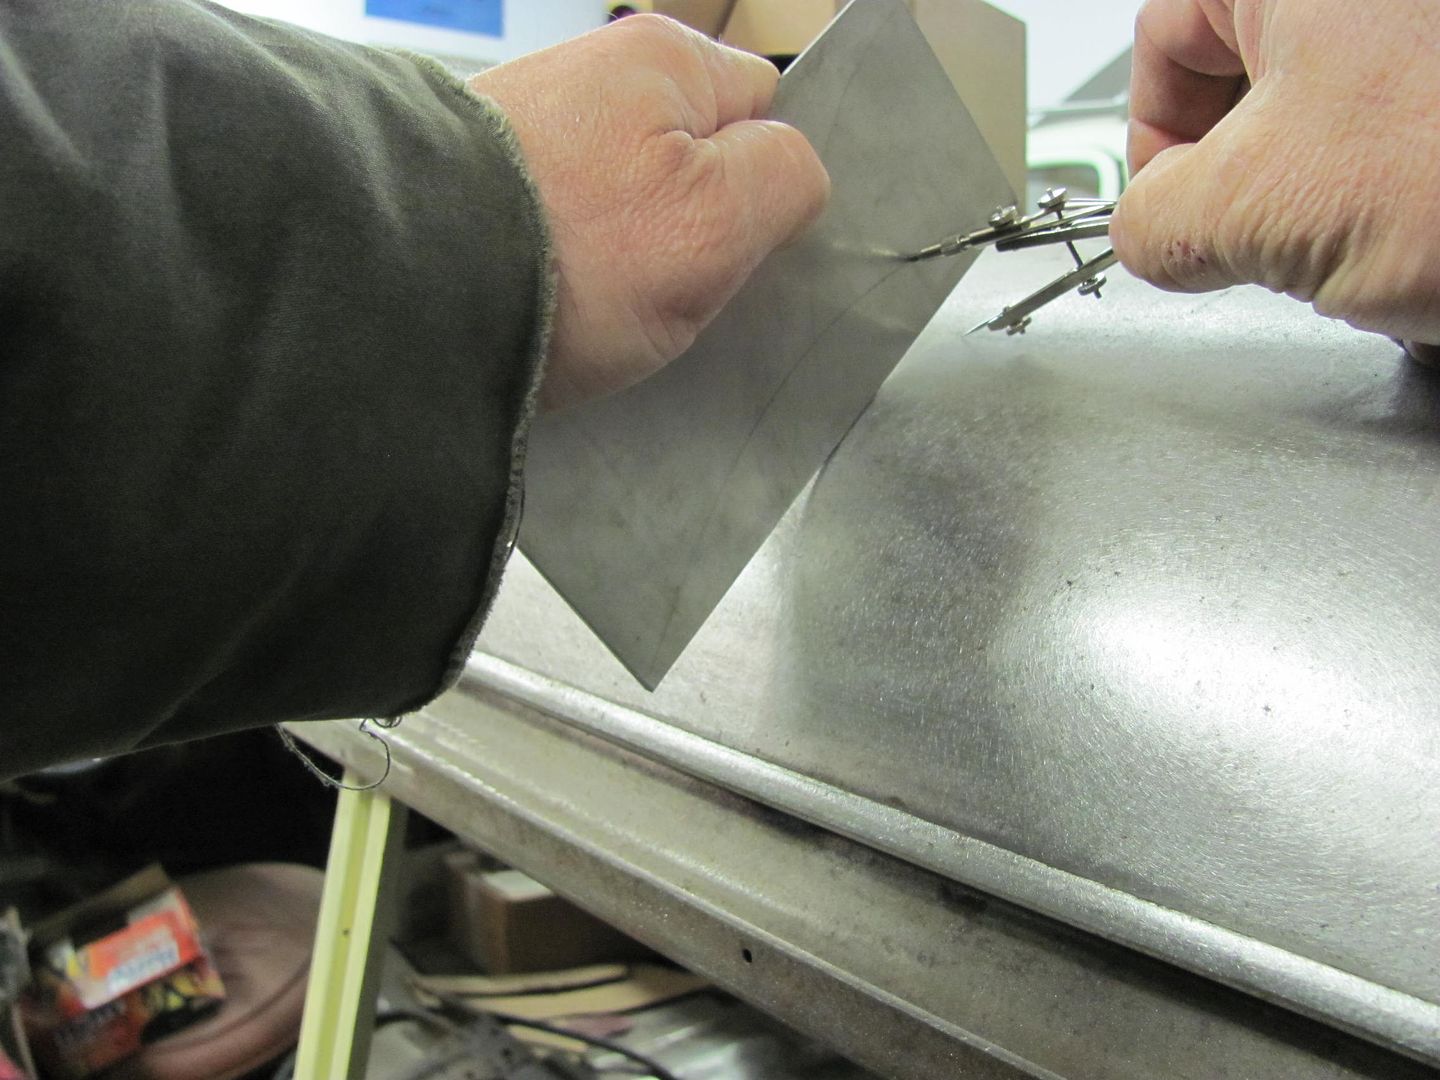
Cut with a band saw, jig saw, tin snips, whatever is easiest for you and most accurate. Test fit and adjust as needed.Last edited by MP&C; 03-17-2014 at 07:11 PM.
Robert
-
03-18-2014 08:04 AM #7
CHR Member
- Join Date
- Feb 2008
- Location
- Caldwell
- Car Year, Make, Model: 34 ford 3 window/461 pontiac
- Posts
- 918
Robert,
Thanks for that tip on how to make the template, especially the tip on not rotating the compass.
Jack.www.clubhotrod.com/forums/showthread.php?t=44081
-
03-18-2014 09:52 AM #8
CHR Member
- Join Date
- Jun 2008
- Location
- Leonardtown
- Car Year, Make, Model: Walking
- Posts
- 1,228
Many guys have those contour templates that will help out with making these, but for those that don't most all of us have a cheap compass from grade school (or our kids) that will serve the same purpose just as accurately..Robert
-
03-18-2014 11:27 AM #9
CHR Member
- Join Date
- Jan 2006
- Location
- Constantine
- Car Year, Make, Model: 57 chevy 2 dr wagon
- Posts
- 9,476
A block of wood the height of the tallest point will work also. Just hold the marker on the block and follow the contourCharlie
Lovin' what I do and doing what I love
Some guys can fix broken NO ONE can fix STUPID
W8AMR
http://fishertrains94.webs.com/
Christian in training
-
03-18-2014 04:28 PM #10
CHR Member
- Join Date
- Apr 2011
- Location
- Prairie City
- Car Year, Make, Model: 40 Ford Deluxe, 68 Corvette, 72&76 K30
- Posts
- 7,301
- Blog Entries
- 1
Thanks for that tip guys! I usually cut a piece of card board up until I get the correct shape. It usually takes a while.
Ryan
1940 Ford Deluxe Tudor 354 Hemi 46RH Electric Blue w/multi-color flames, Ford 9" Residing in multiple pieces
1968 Corvette Coupe 5.9 Cummins Drag Car 11.43@130mph No stall leaving the line with 1250 rpm's and poor 2.2 60'
1972 Chevy K30 Longhorn P-pumped 24v Compound Turbos 47RH Just another money pit
1971 Camaro RS 5.3 BTR Stage 3 cam, SuperT10
Tire Sizes
-
03-31-2014 07:39 PM #11
CHR Member
- Join Date
- Jun 2008
- Location
- Leonardtown
- Car Year, Make, Model: Walking
- Posts
- 1,228
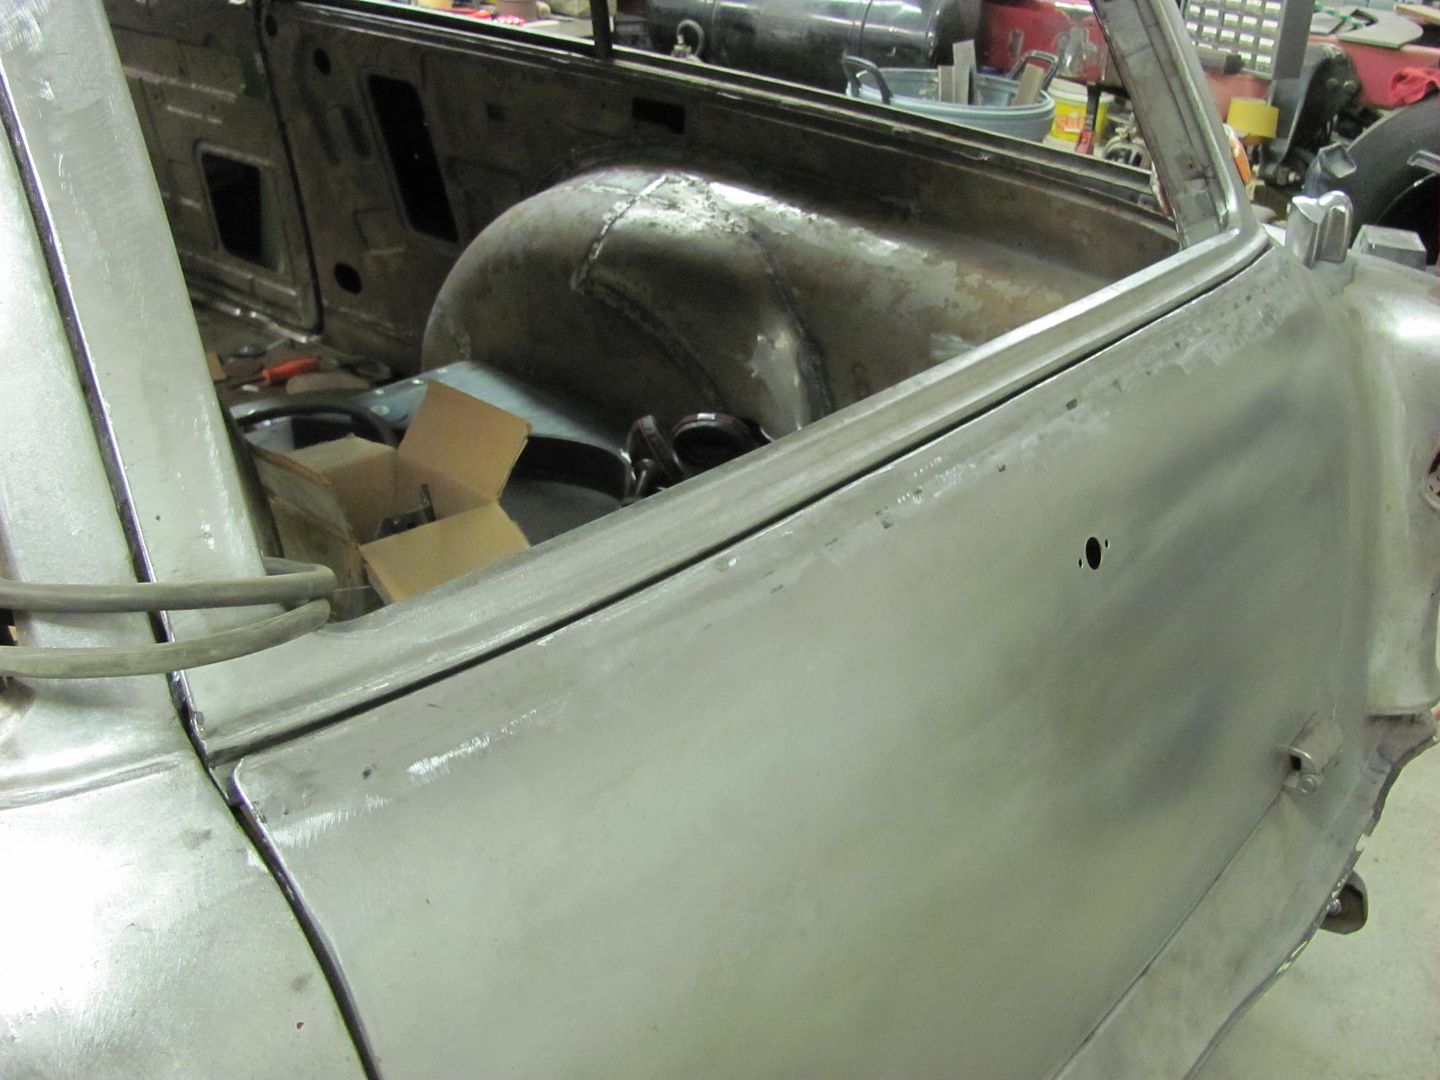
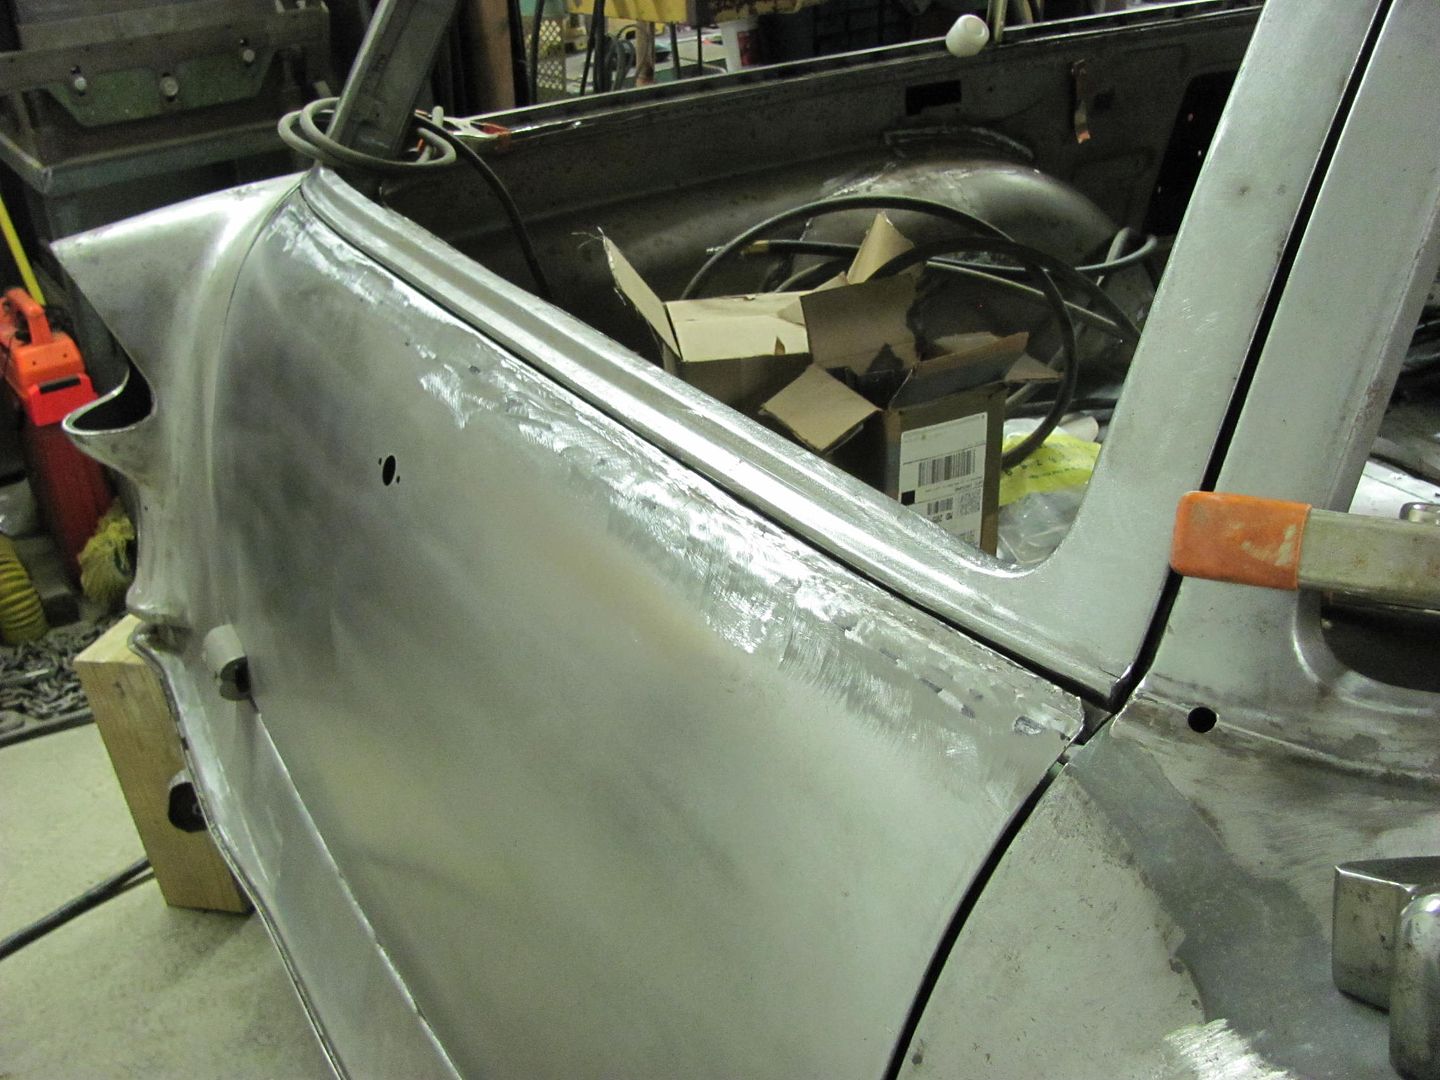
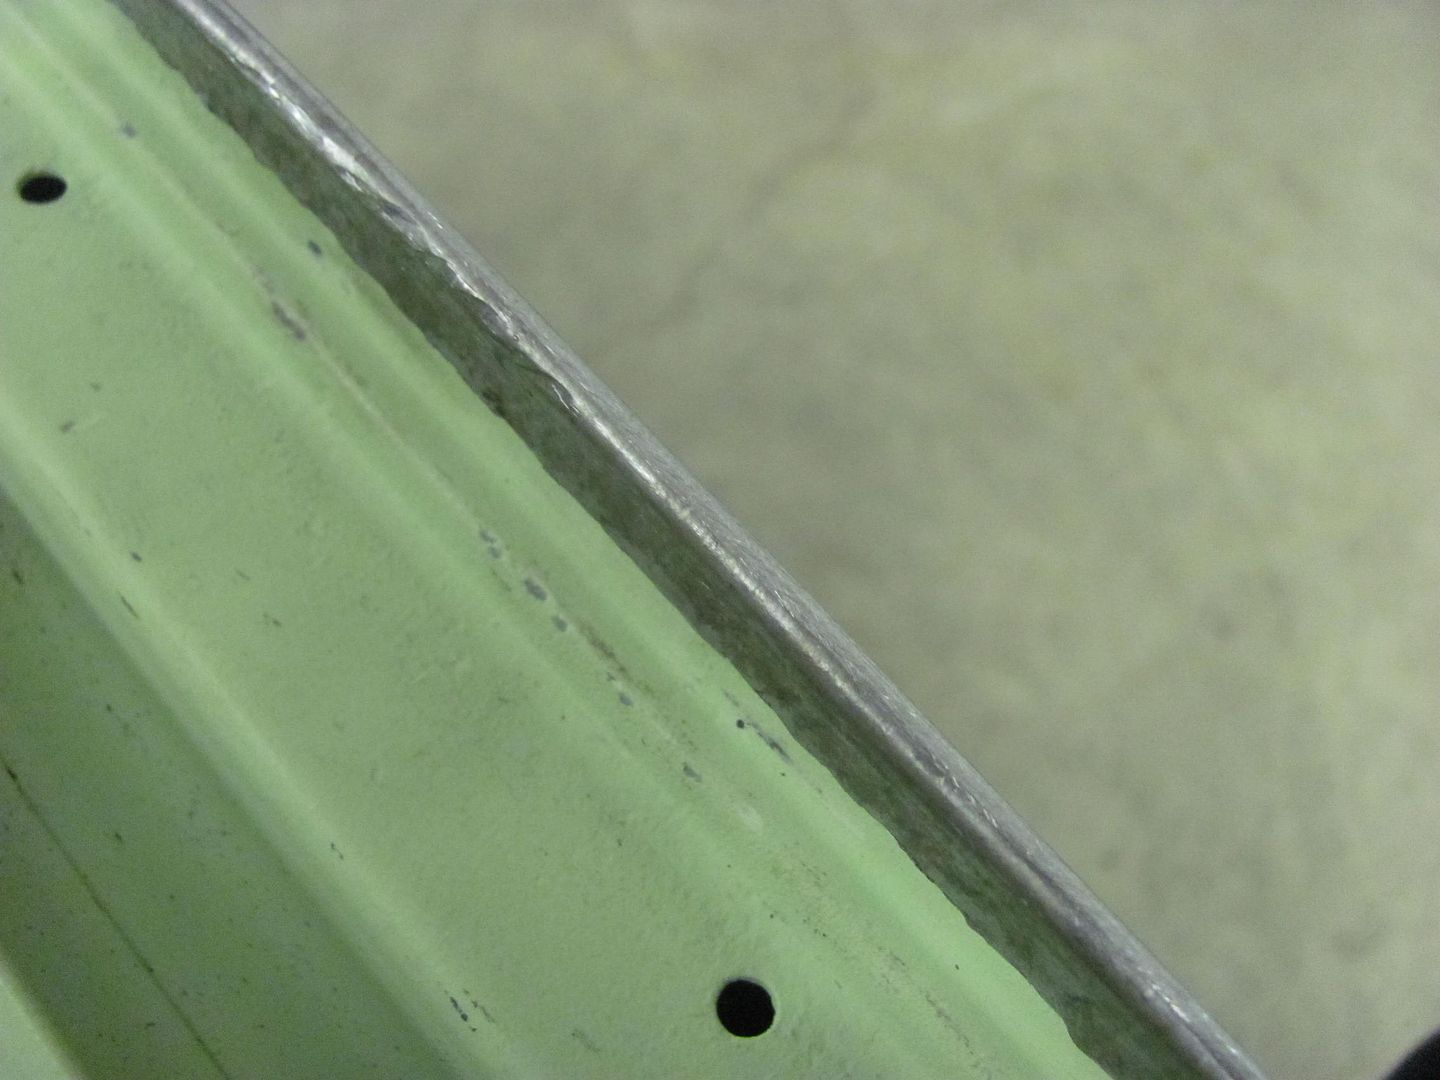
Trying to finalize the rear end of this car.. The tailgate skin didn't align too well to the upper lift gate, the gap was way out of whack. I guess this is what I get for installing the skin based on the old tailgate.
Note to self, don't fold door skins unless adjacent panel is there to set gaps..
Time to break out the door skin removal tool....
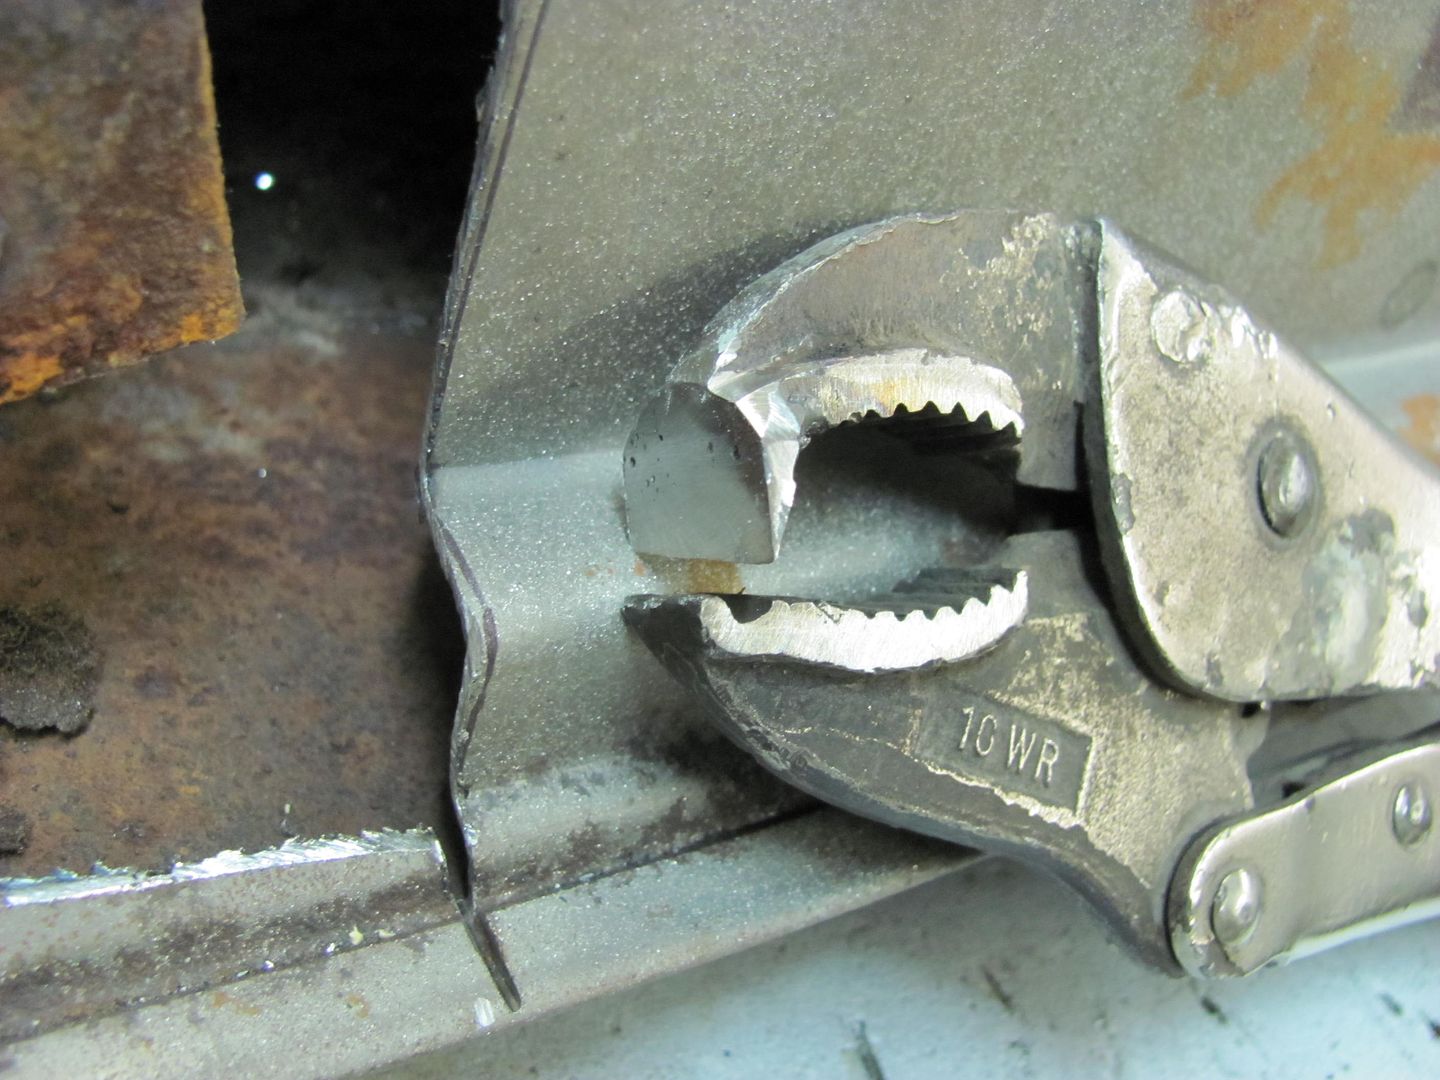
Flange unfolded....
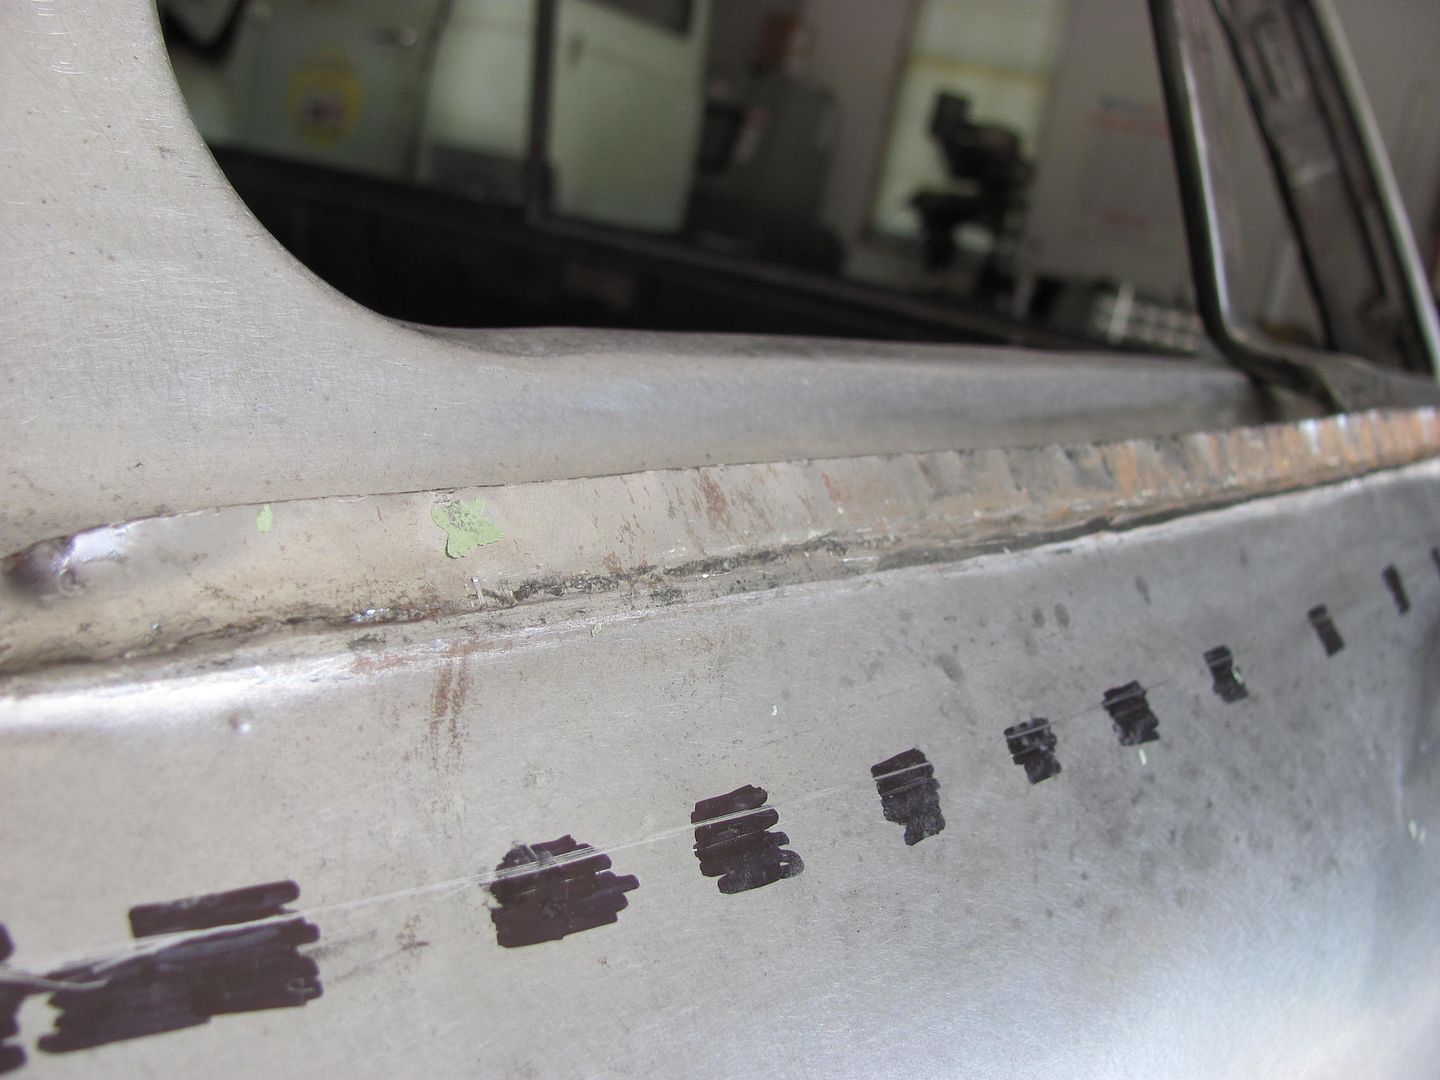
Spoon was slid between the skin and inner panel and body hammer used to flatten out the crease...
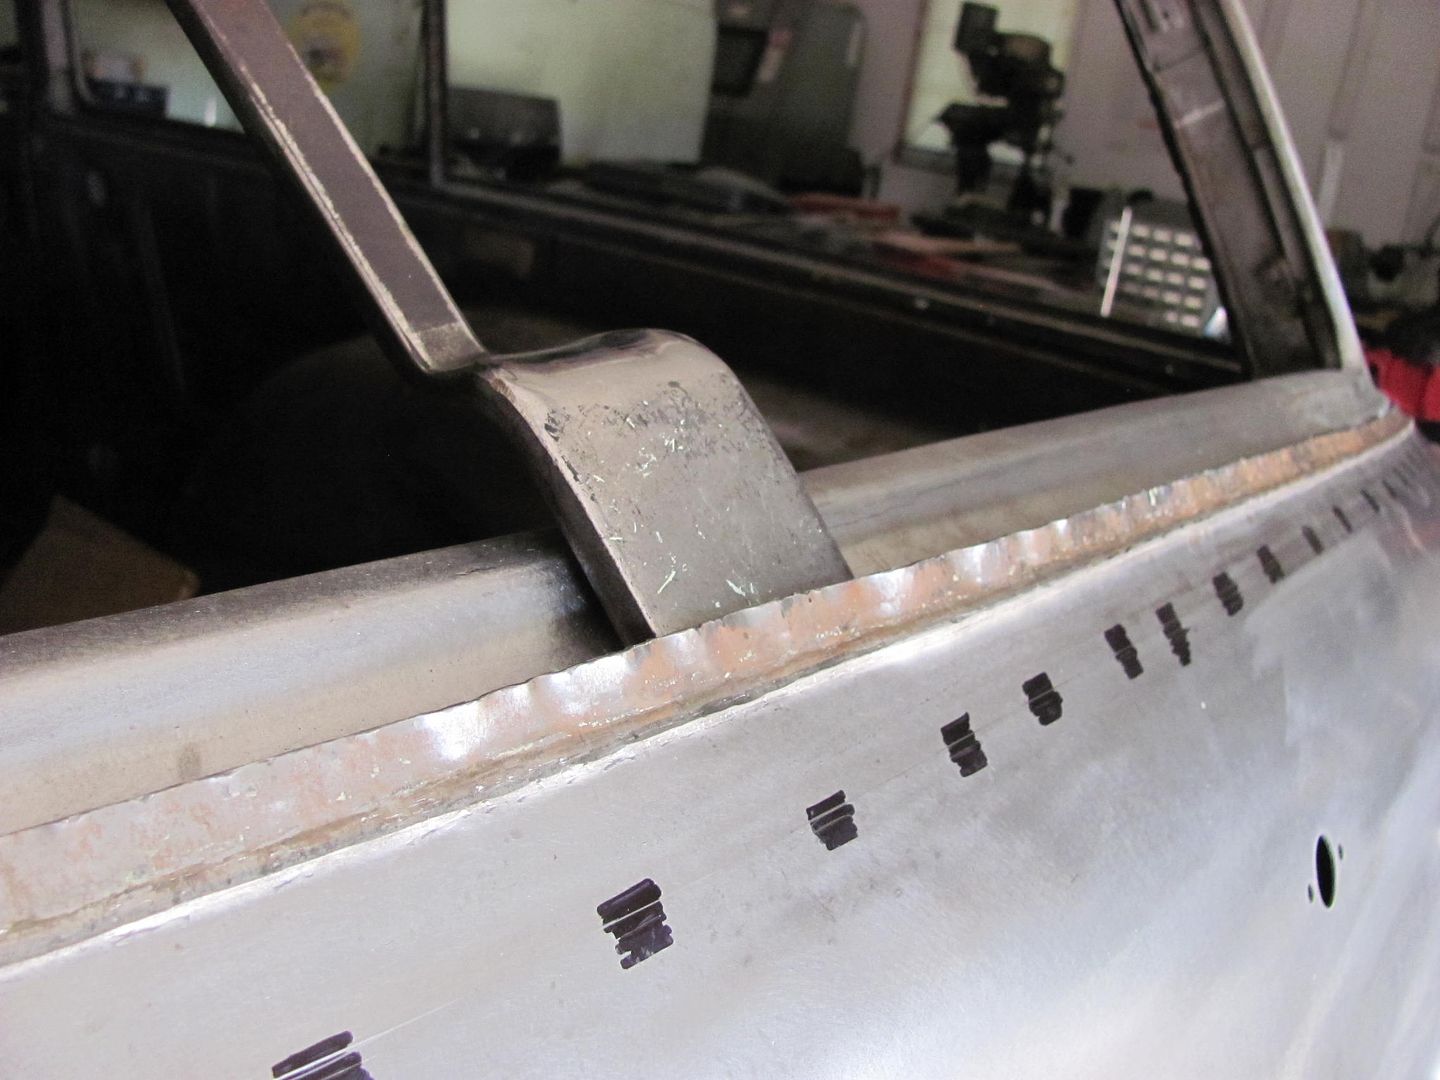
Right side flange is now a bit short, so added a strip of metal..
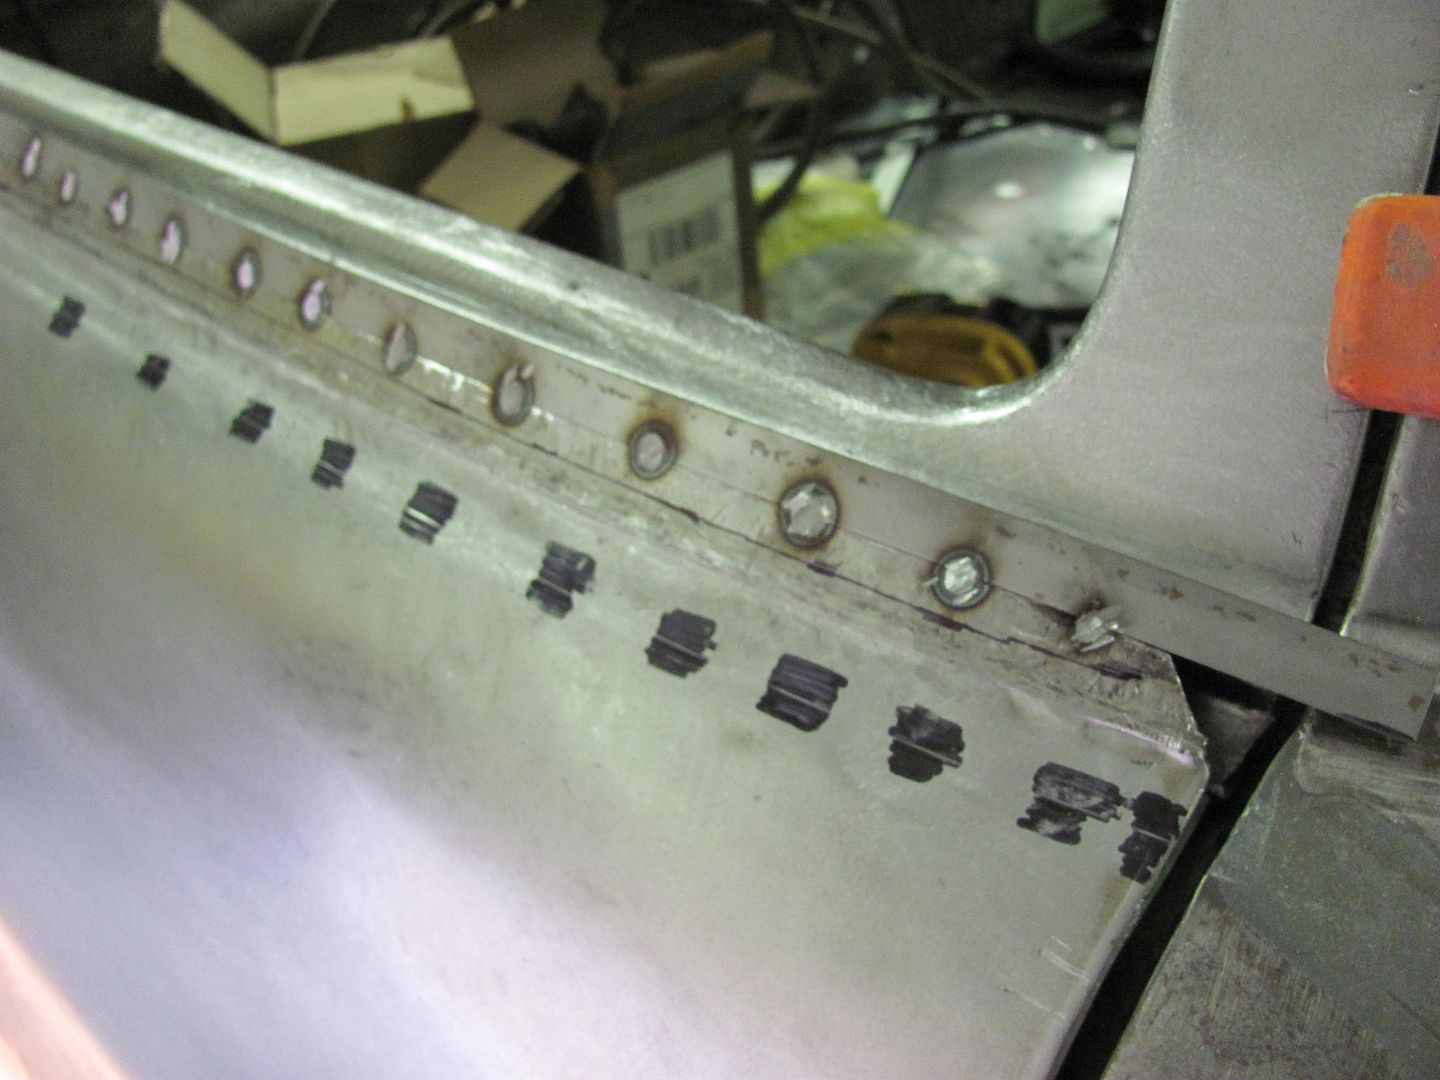
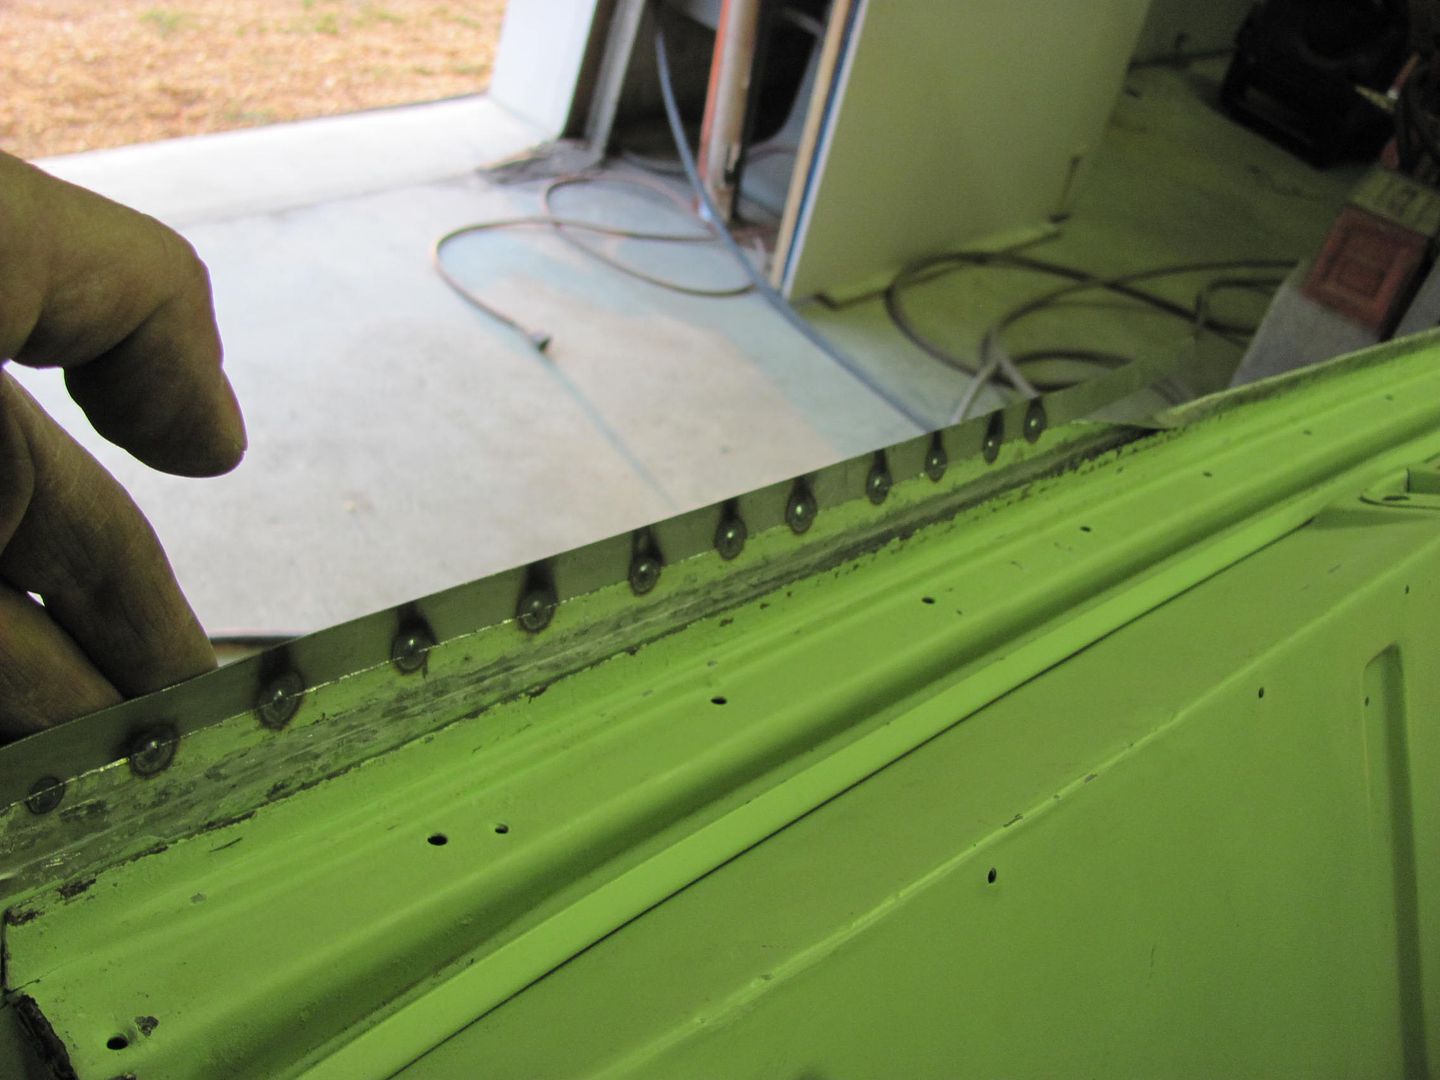
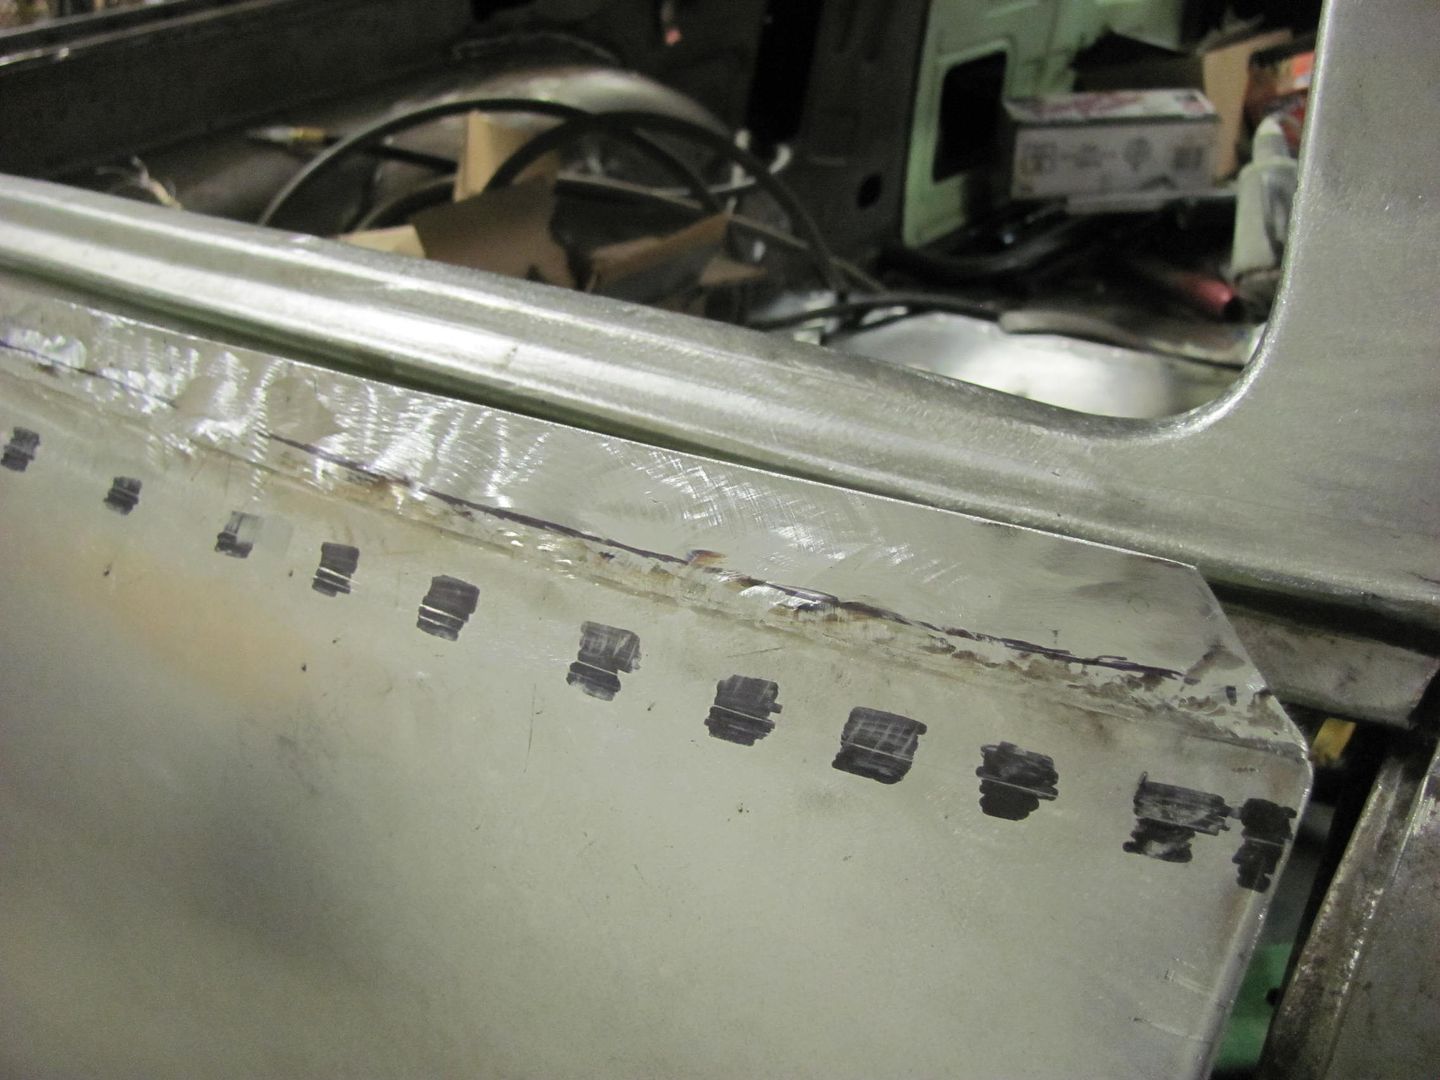
Flange re-folded, just needs some fine tuning and finishing the corners..
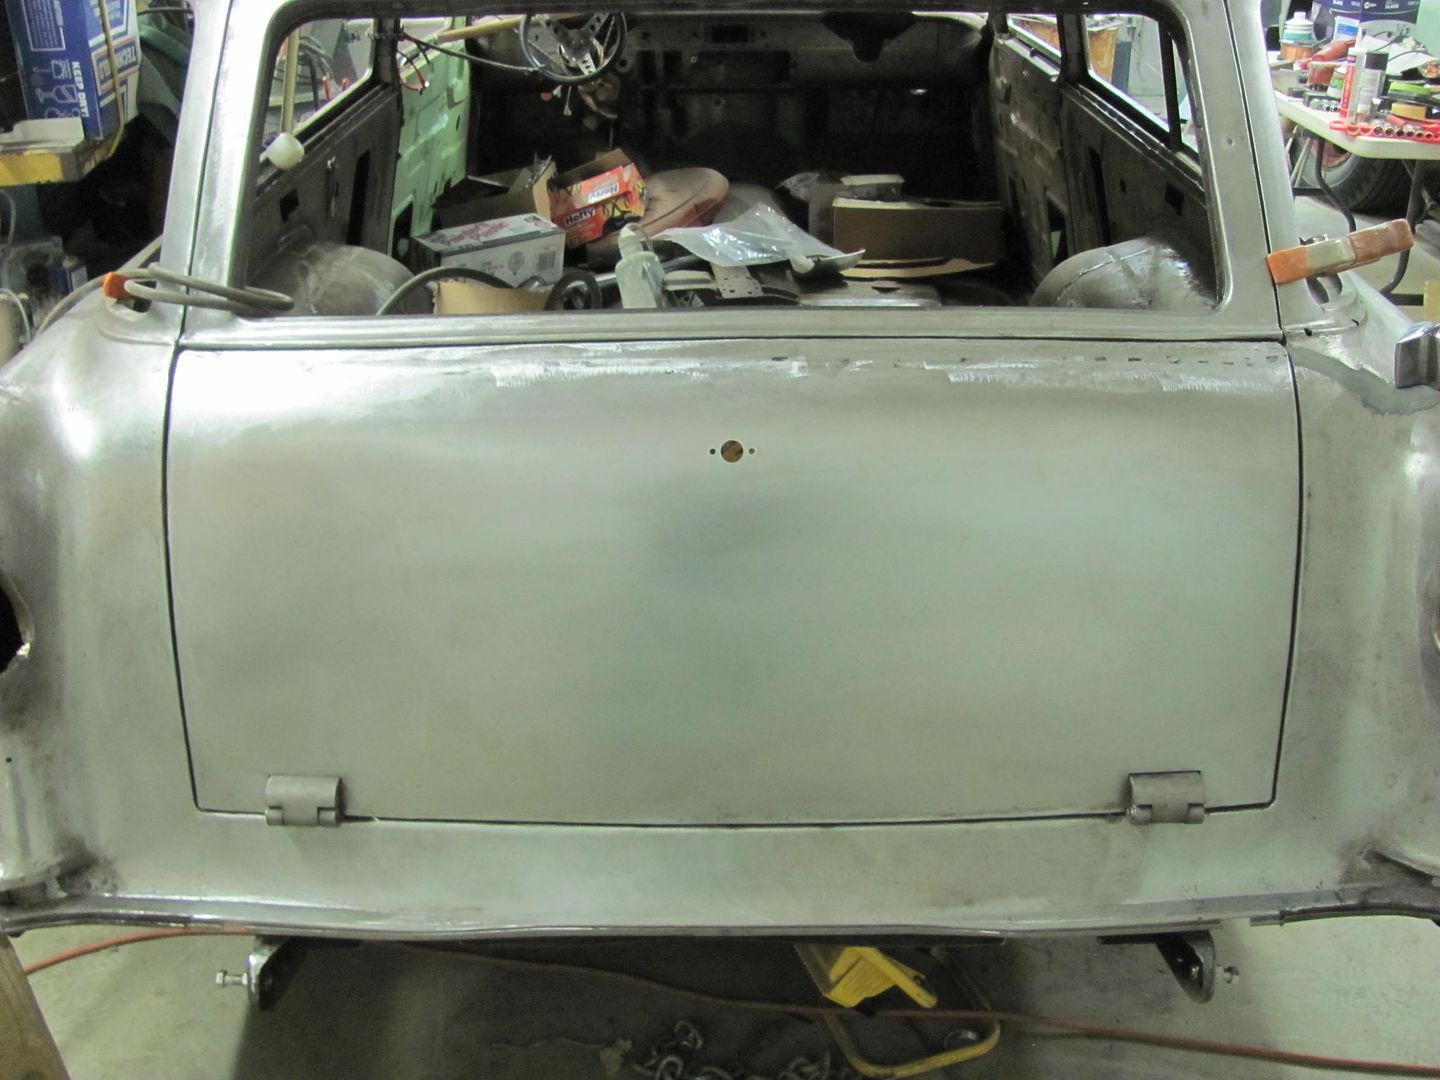
Much better...Robert
-
04-01-2014 10:25 AM #12
CHR Member
- Join Date
- Oct 2007
- Location
- Petaluma
- Car Year, Make, Model: 48 Ford F1
- Posts
- 9,795
Very nice work!" "No matter where you go, there you are!" Steve.
-
04-01-2014 11:41 AM #13
CHR Member
- Join Date
- Jan 2006
- Location
- Constantine
- Car Year, Make, Model: 57 chevy 2 dr wagon
- Posts
- 9,476
Do you now have to reflange it ??Charlie
Lovin' what I do and doing what I love
Some guys can fix broken NO ONE can fix STUPID
W8AMR
http://fishertrains94.webs.com/
Christian in training
-
04-01-2014 12:36 PM #14
CHR Member
- Join Date
- Jun 2008
- Location
- Leonardtown
- Car Year, Make, Model: Walking
- Posts
- 1,228
Yes, the re-flanging is done for the most part, just some tweaking of the gap in a couple tight spots..Robert
-
04-01-2014 02:36 PM #15
CHR Member
- Join Date
- Jun 2008
- Location
- Leonardtown
- Car Year, Make, Model: Walking
- Posts
- 1,228
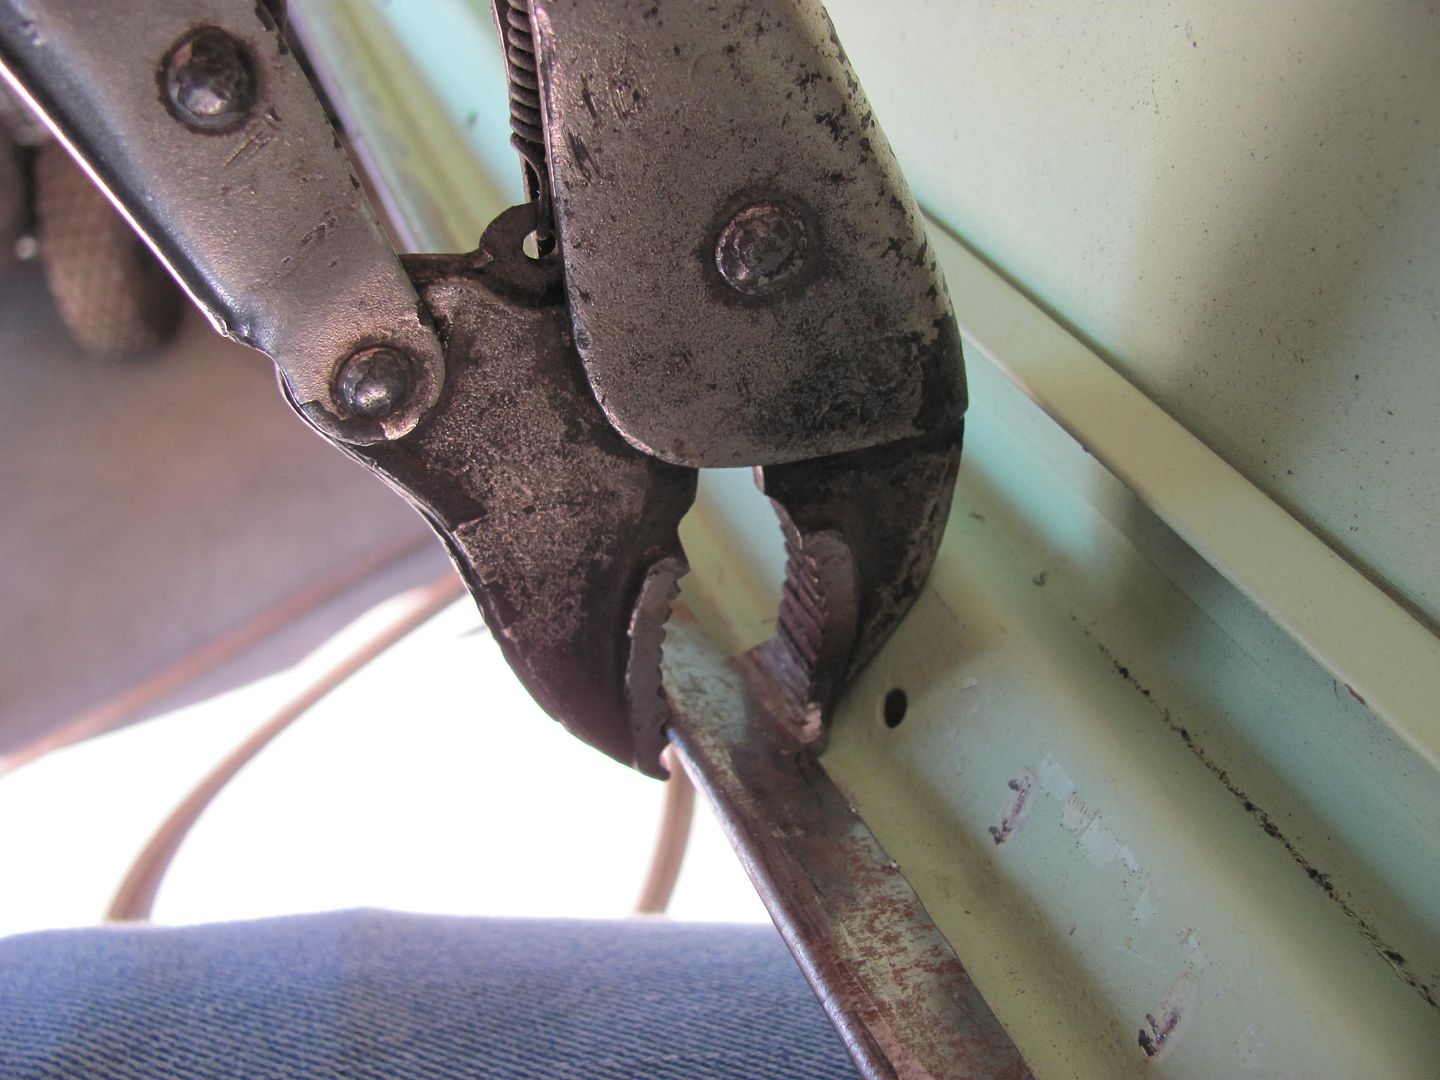
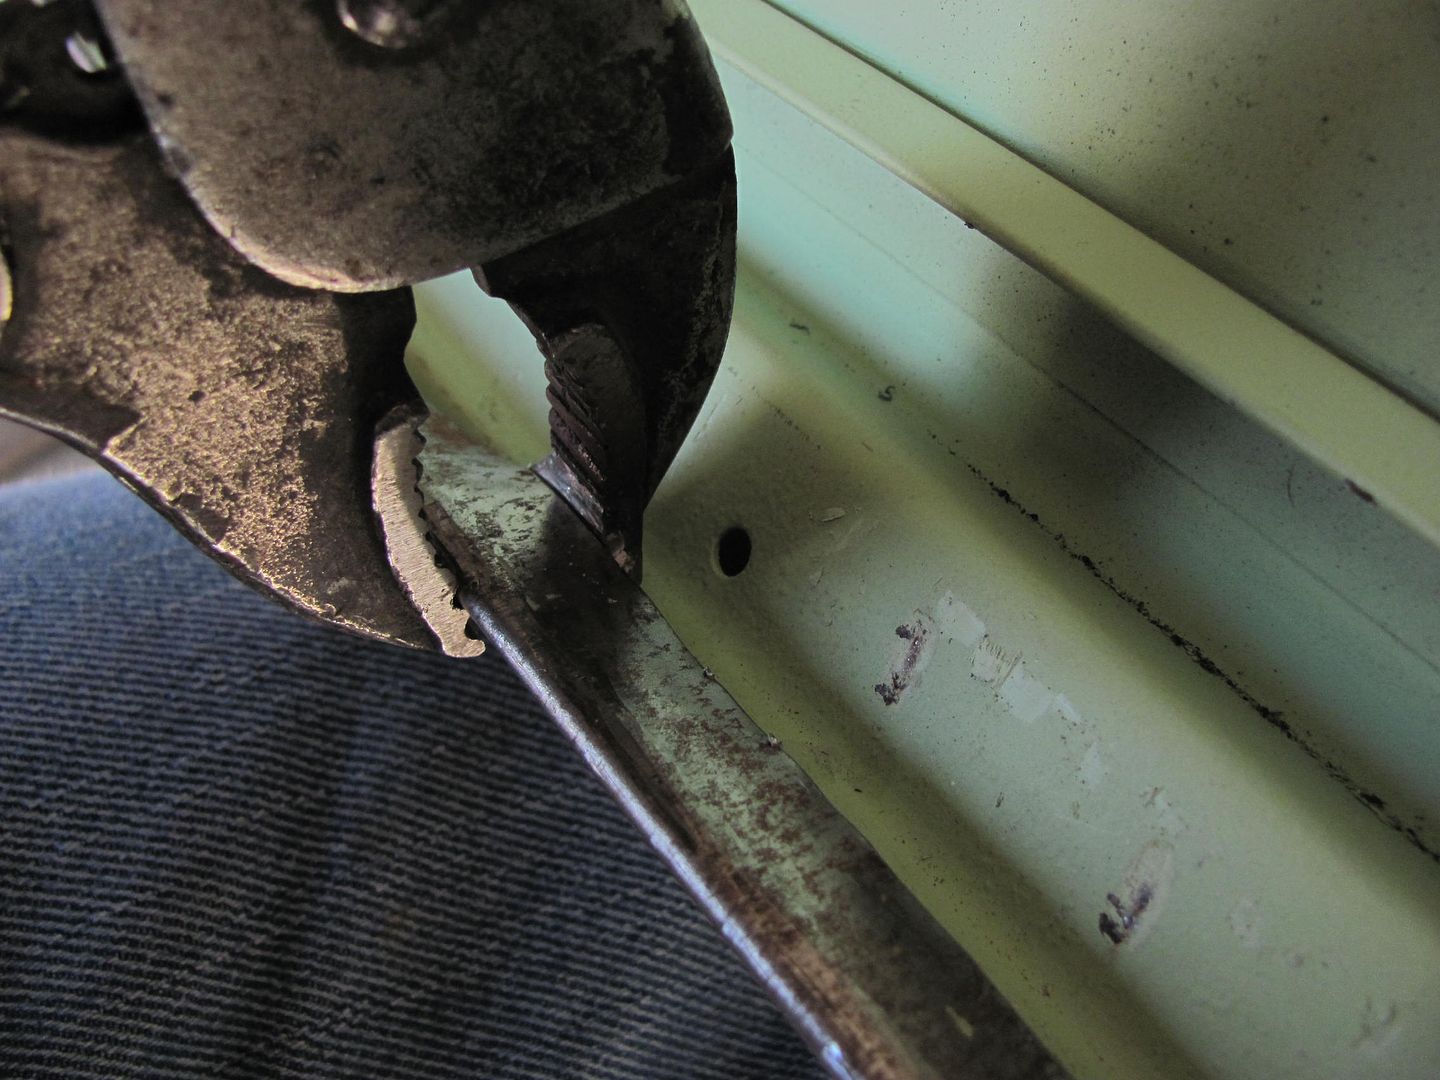
Here's the tools used to re-fold the flanges. (don't mind the hammer marks)
A mark was used on the front to indicate the new fold line. This press brake die was placed against the back side, and the flange tapped over. A flush tap against the face every now and then keeps the folded edge crisp..
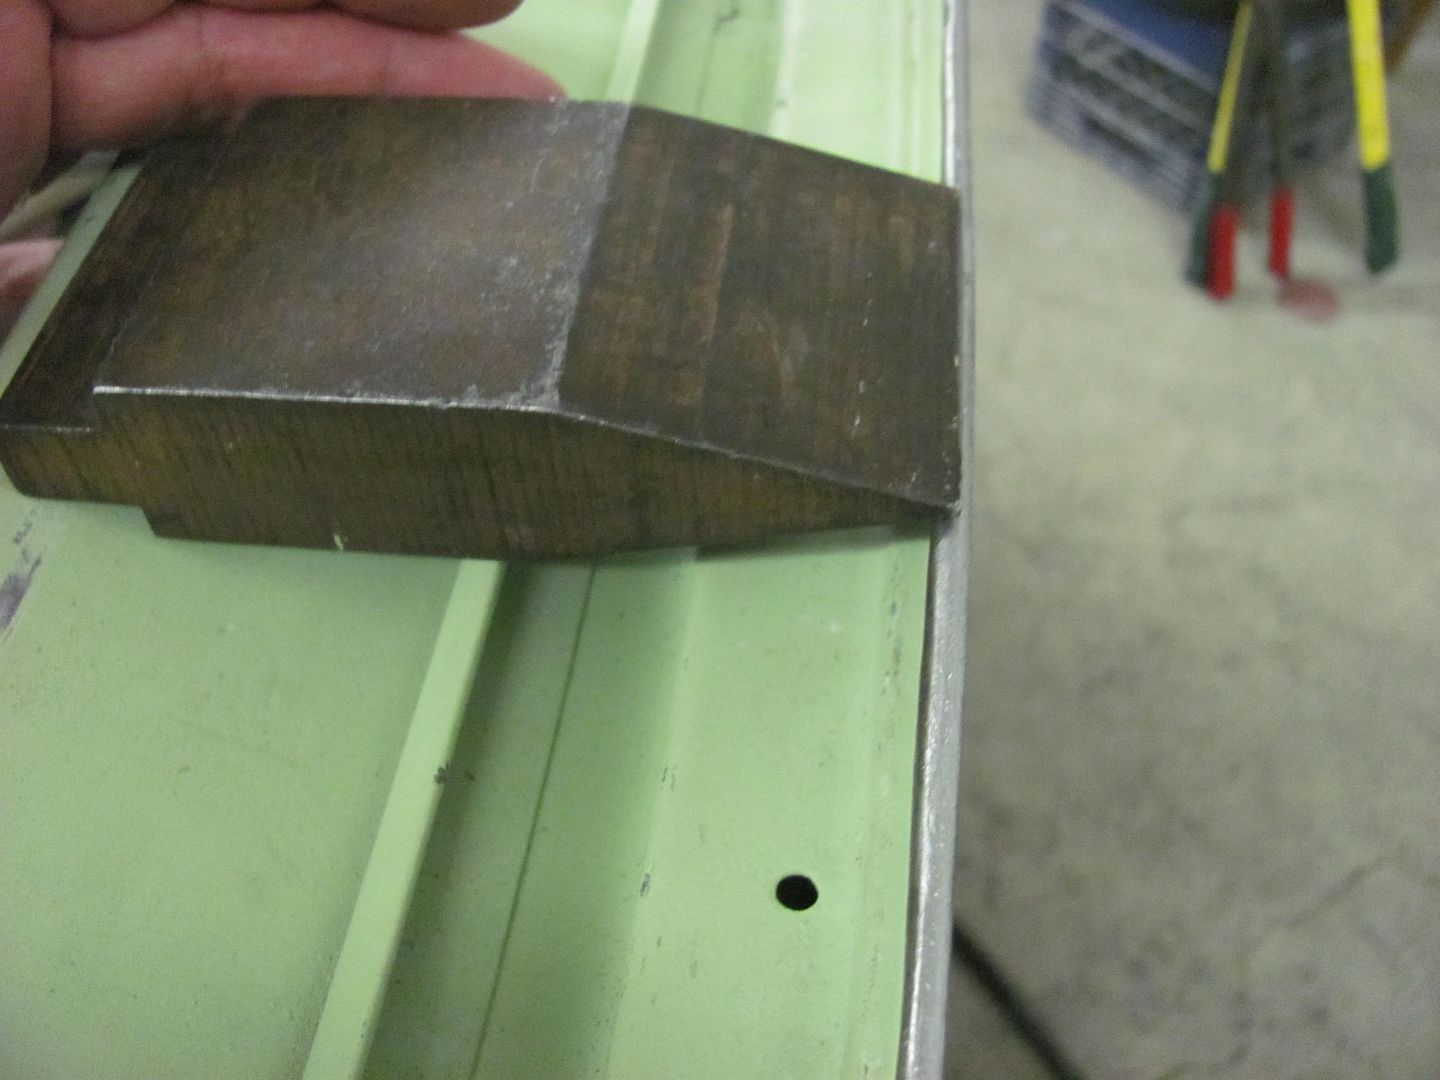
That took the flange over about 90 degrees, then this modified gooseneck die was used to take it over to about 135 degrees...
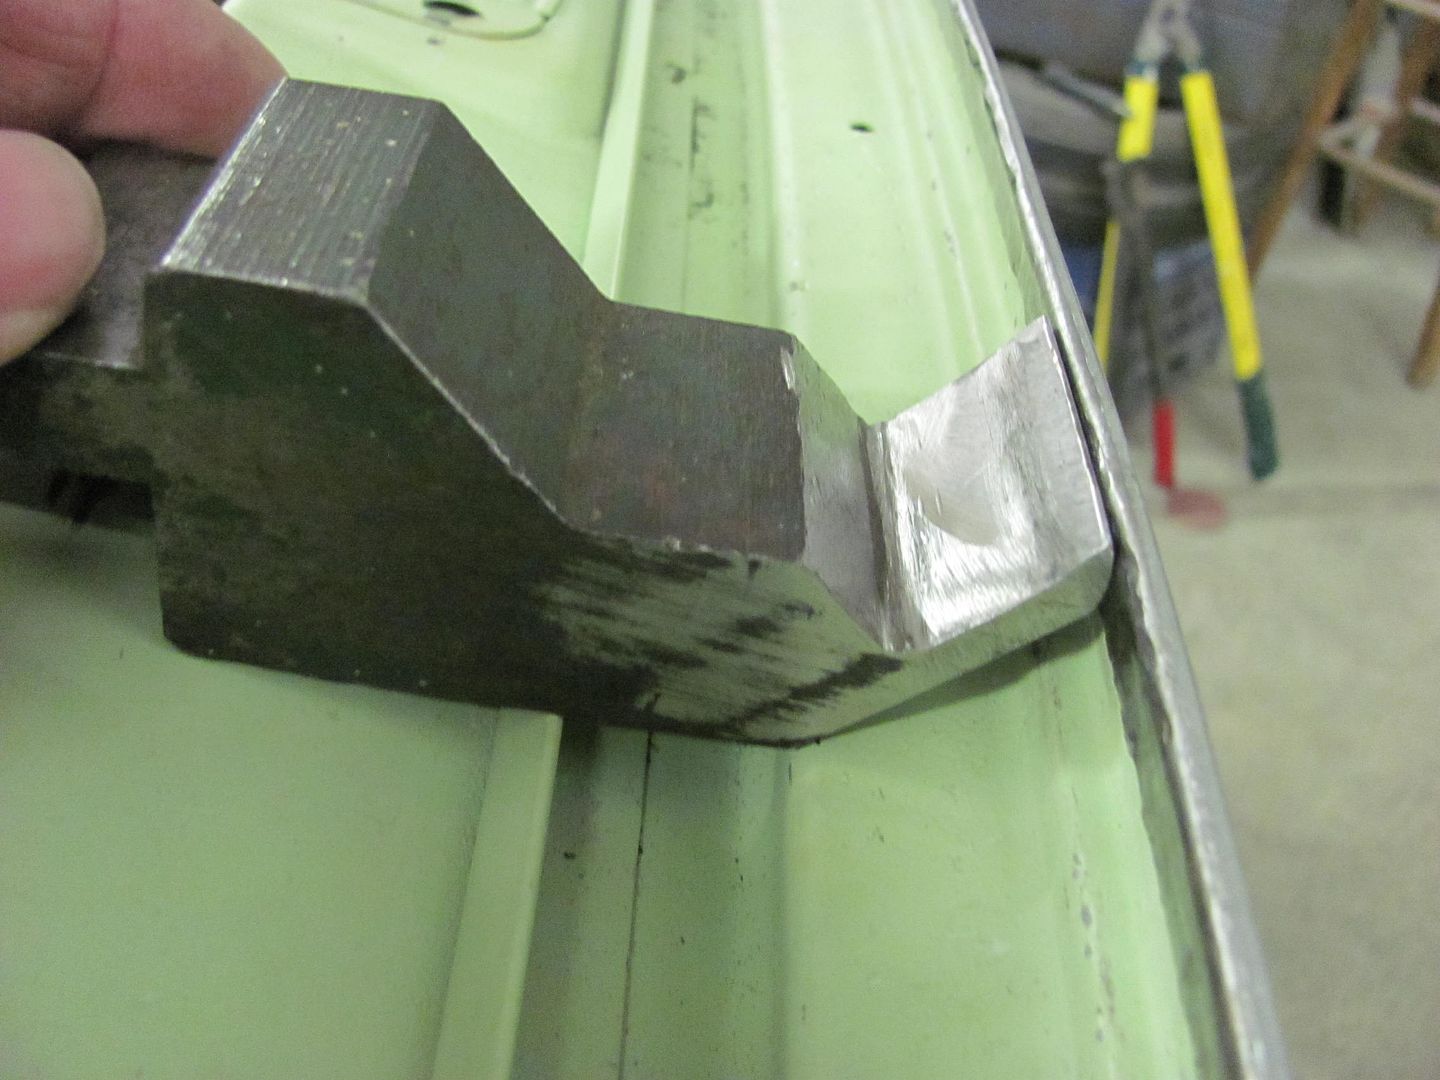
At this point the gate was closed to verify gaps. A door skin hammer on the inside and a dolly against the outside skin was used to complete the fold..Robert
 Reply With Quote

Posting Permissions
- You may not post new threads
- You may not post replies
- You may not post attachments
- You may not edit your posts

i've enjoyed the years here . made a lot of friends. most who have left. i see no reason to continue with this so hope to see you somewhere else. i dont think this site will ever be back. it's lived...
Dead!