


 3390Likes
Thread: 55 Wagon Progress


Results 151 to 165 of 1865
 LinkBack URL
 About LinkBacks
-
02-08-2014 08:20 AM #151
 CHR Member

- Join Date
- Apr 2011
- Location
- Prairie City
- Car Year, Make, Model: 40 Ford Deluxe, 68 Corvette, 72&76 K30
- Posts
- 7,301
- Blog Entries
- 1
Thanks for the info. I was just curious if we did it correctly. We pretty much did it the same way.Ryan
1940 Ford Deluxe Tudor 354 Hemi 46RH Electric Blue w/multi-color flames, Ford 9" Residing in multiple pieces
1968 Corvette Coupe 5.9 Cummins Drag Car 11.43@130mph No stall leaving the line with 1250 rpm's and poor 2.2 60'
1972 Chevy K30 Longhorn P-pumped 24v Compound Turbos 47RH Just another money pit
1971 Camaro RS 5.3 BTR Stage 3 cam, SuperT10
Tire Sizes
-
Advertising

- Google Adsense
- REGISTERED USERS DO NOT SEE THIS AD
-
02-08-2014 10:06 AM #152
CHR Member
- Join Date
- Jun 2008
- Location
- Leonardtown
- Car Year, Make, Model: Walking
- Posts
- 1,228
So we're either both right or both wrong..
Robert
-
02-09-2014 08:59 AM #153
CHR Member
- Join Date
- Apr 2011
- Location
- Prairie City
- Car Year, Make, Model: 40 Ford Deluxe, 68 Corvette, 72&76 K30
- Posts
- 7,301
- Blog Entries
- 1
I'm sure you're right and we were just lucky. HahaRyan
1940 Ford Deluxe Tudor 354 Hemi 46RH Electric Blue w/multi-color flames, Ford 9" Residing in multiple pieces
1968 Corvette Coupe 5.9 Cummins Drag Car 11.43@130mph No stall leaving the line with 1250 rpm's and poor 2.2 60'
1972 Chevy K30 Longhorn P-pumped 24v Compound Turbos 47RH Just another money pit
1971 Camaro RS 5.3 BTR Stage 3 cam, SuperT10
Tire Sizes
-
02-09-2014 04:01 PM #154
CHR Member
- Join Date
- Nov 2012
- Location
- Southern
- Posts
- 116
Thanks so much for taking the time to post this. I struggle with the smallest of rust repairs, and then see such a major repair done so well that it leaves me shaking my head. Posts like these encourages me to do more than I think I'm capable of. Thanks again.
-
02-16-2014 07:48 PM #155
CHR Member
- Join Date
- Jun 2008
- Location
- Leonardtown
- Car Year, Make, Model: Walking
- Posts
- 1,228
I'm just glad I'm so slow. Some of what you're seeing I wasn't capable of two years ago....
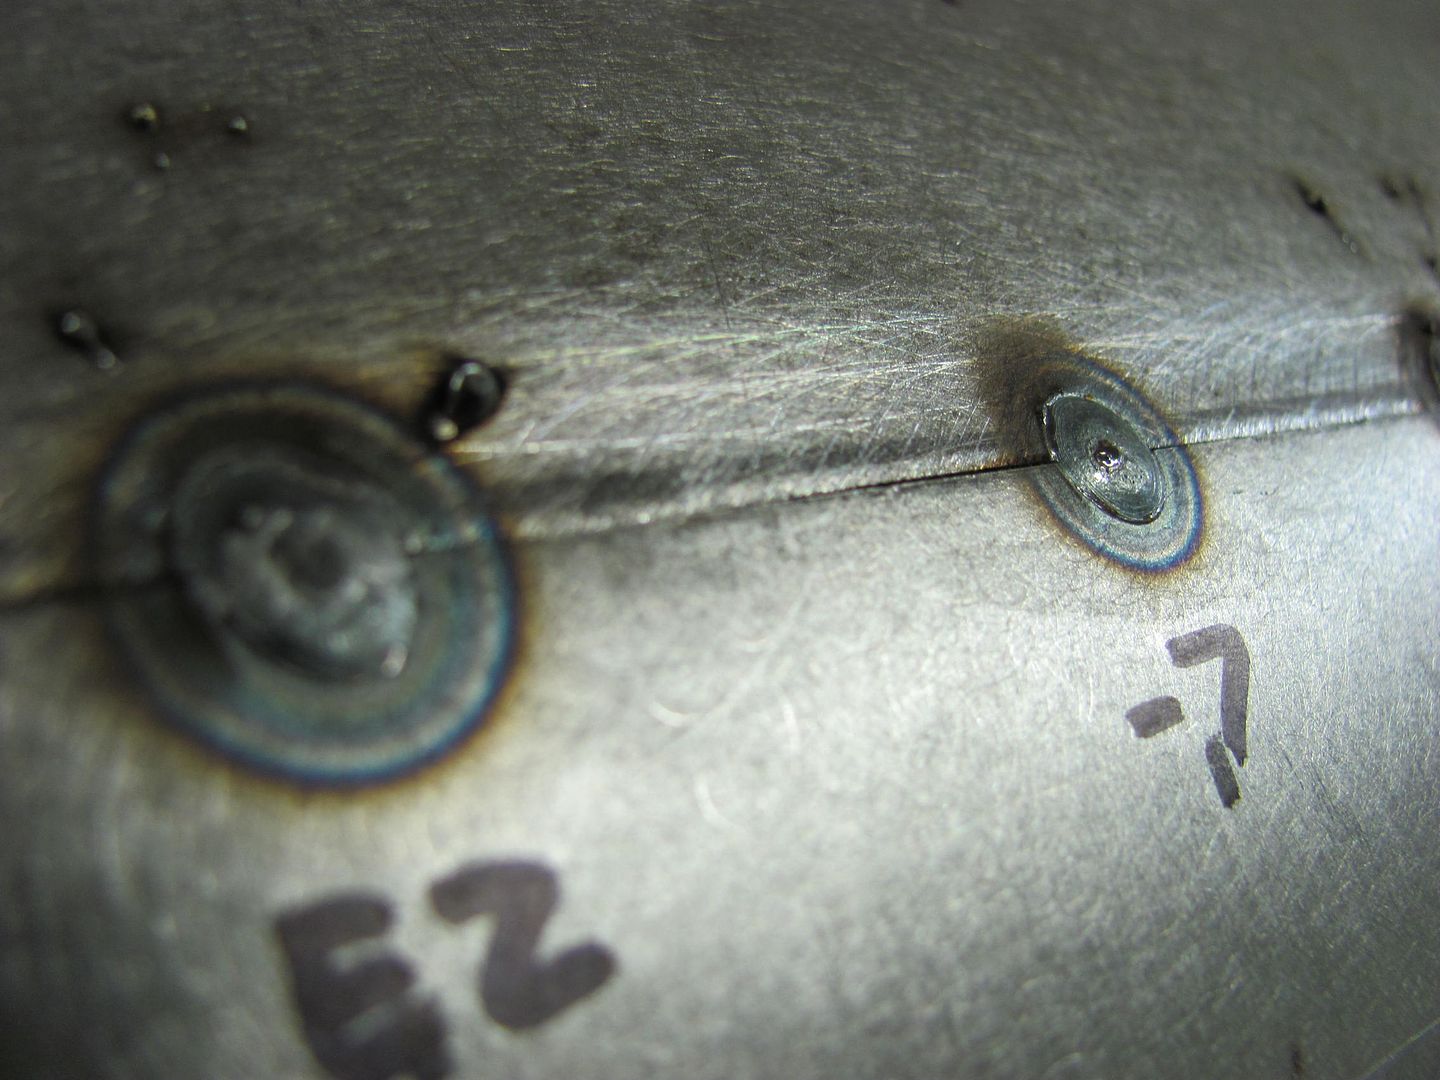
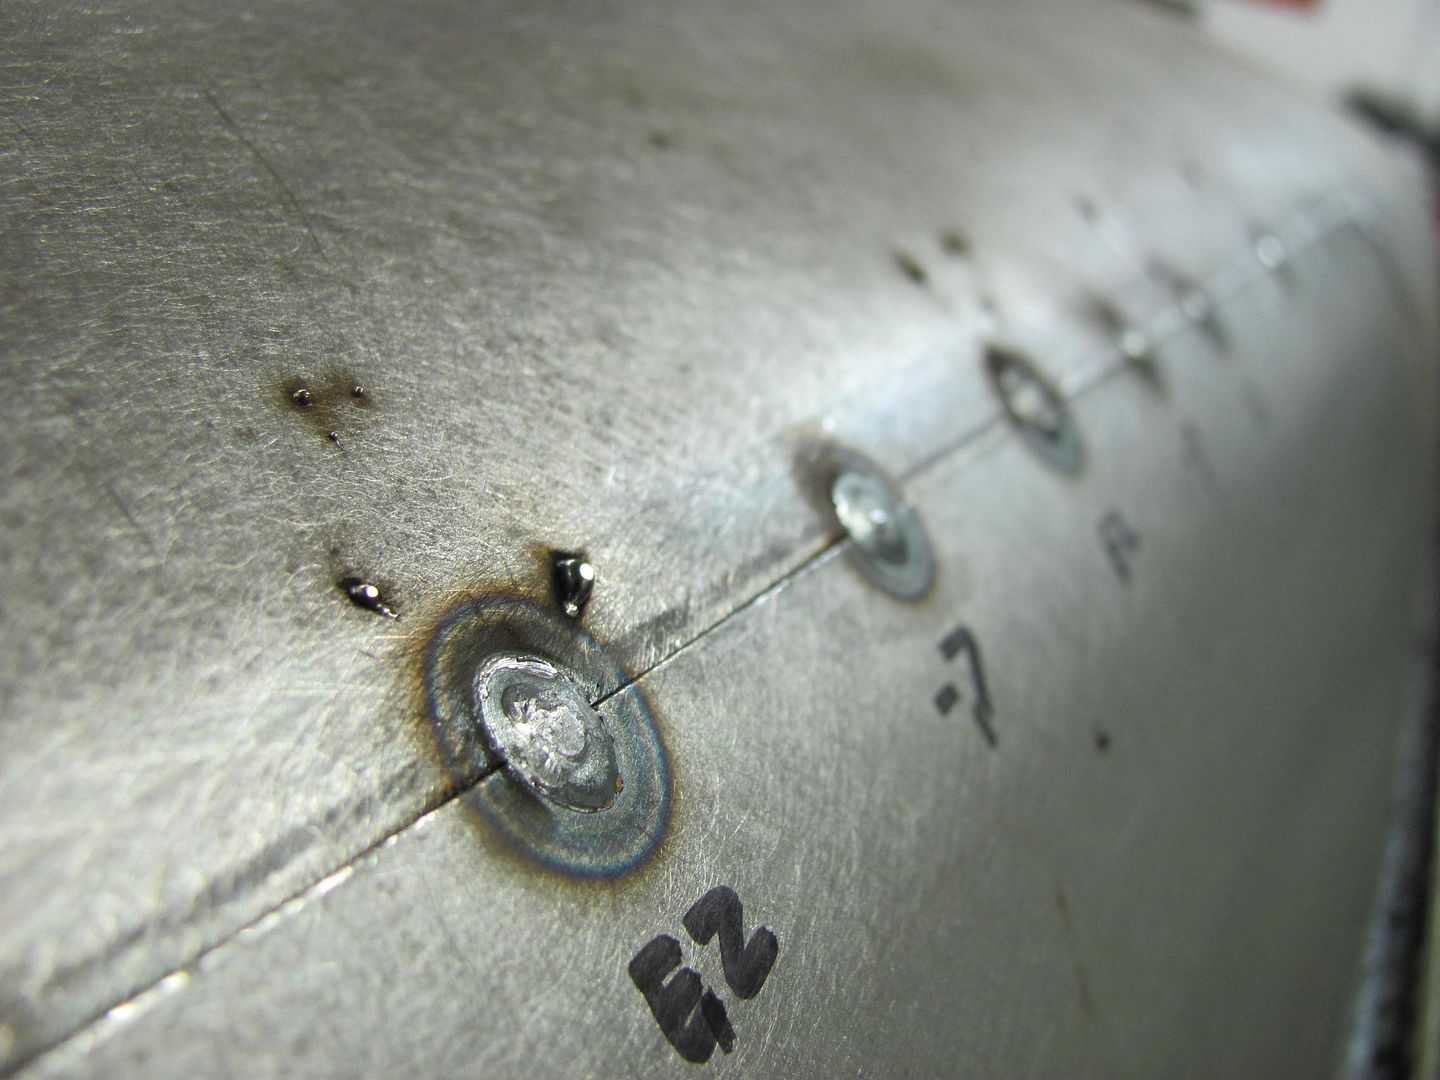
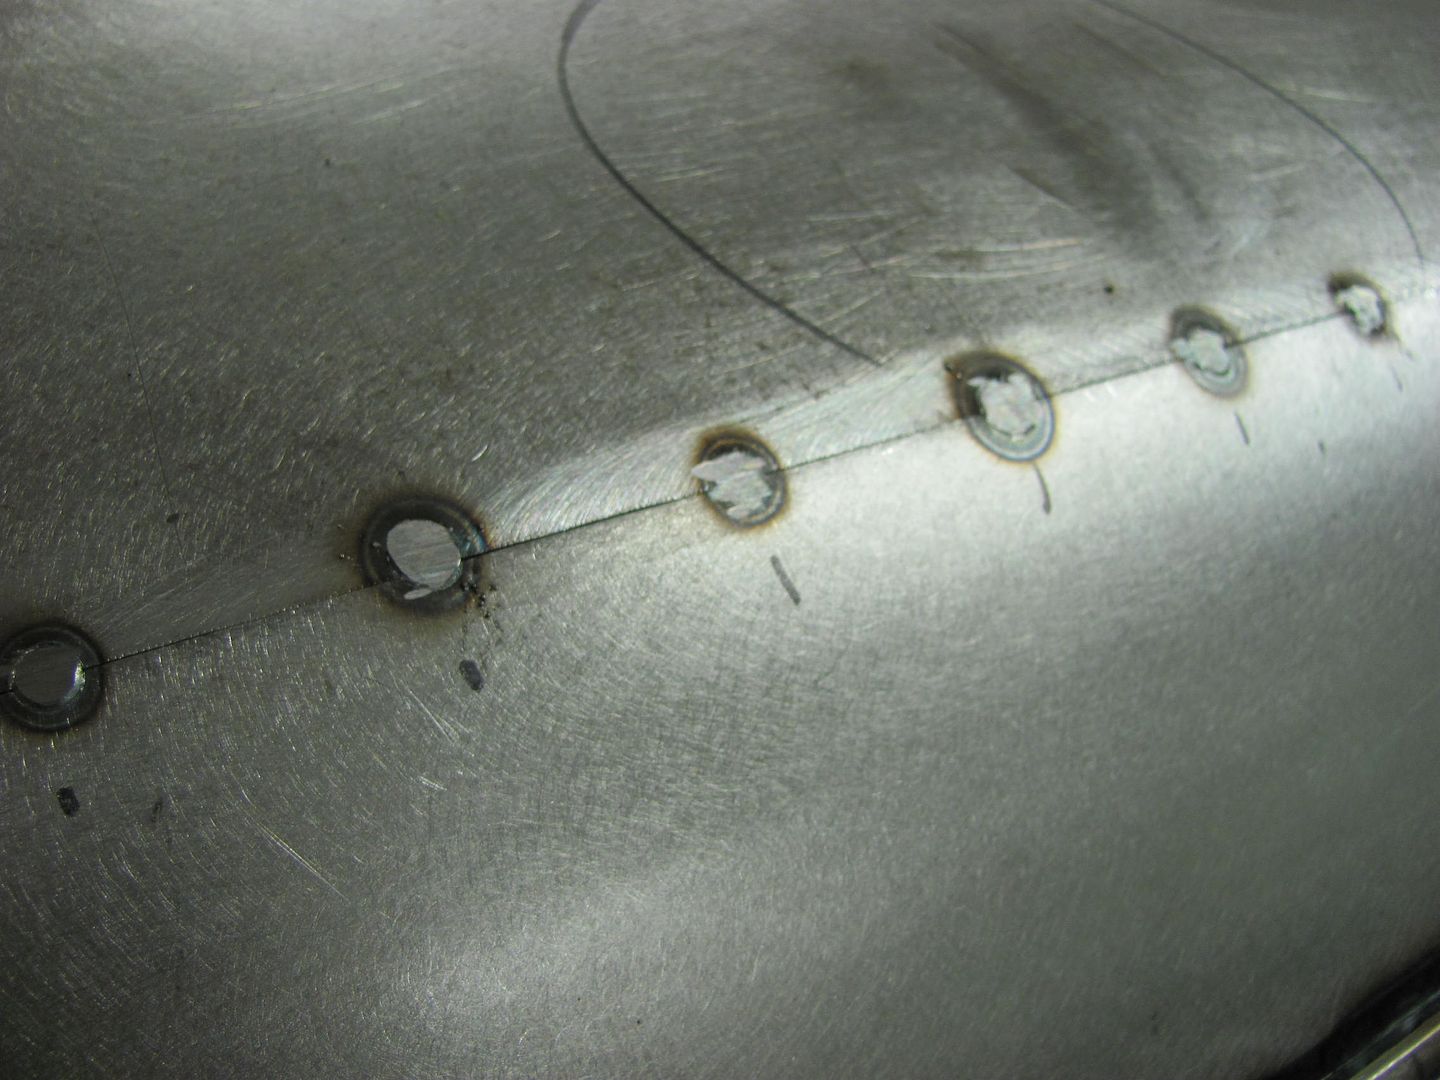
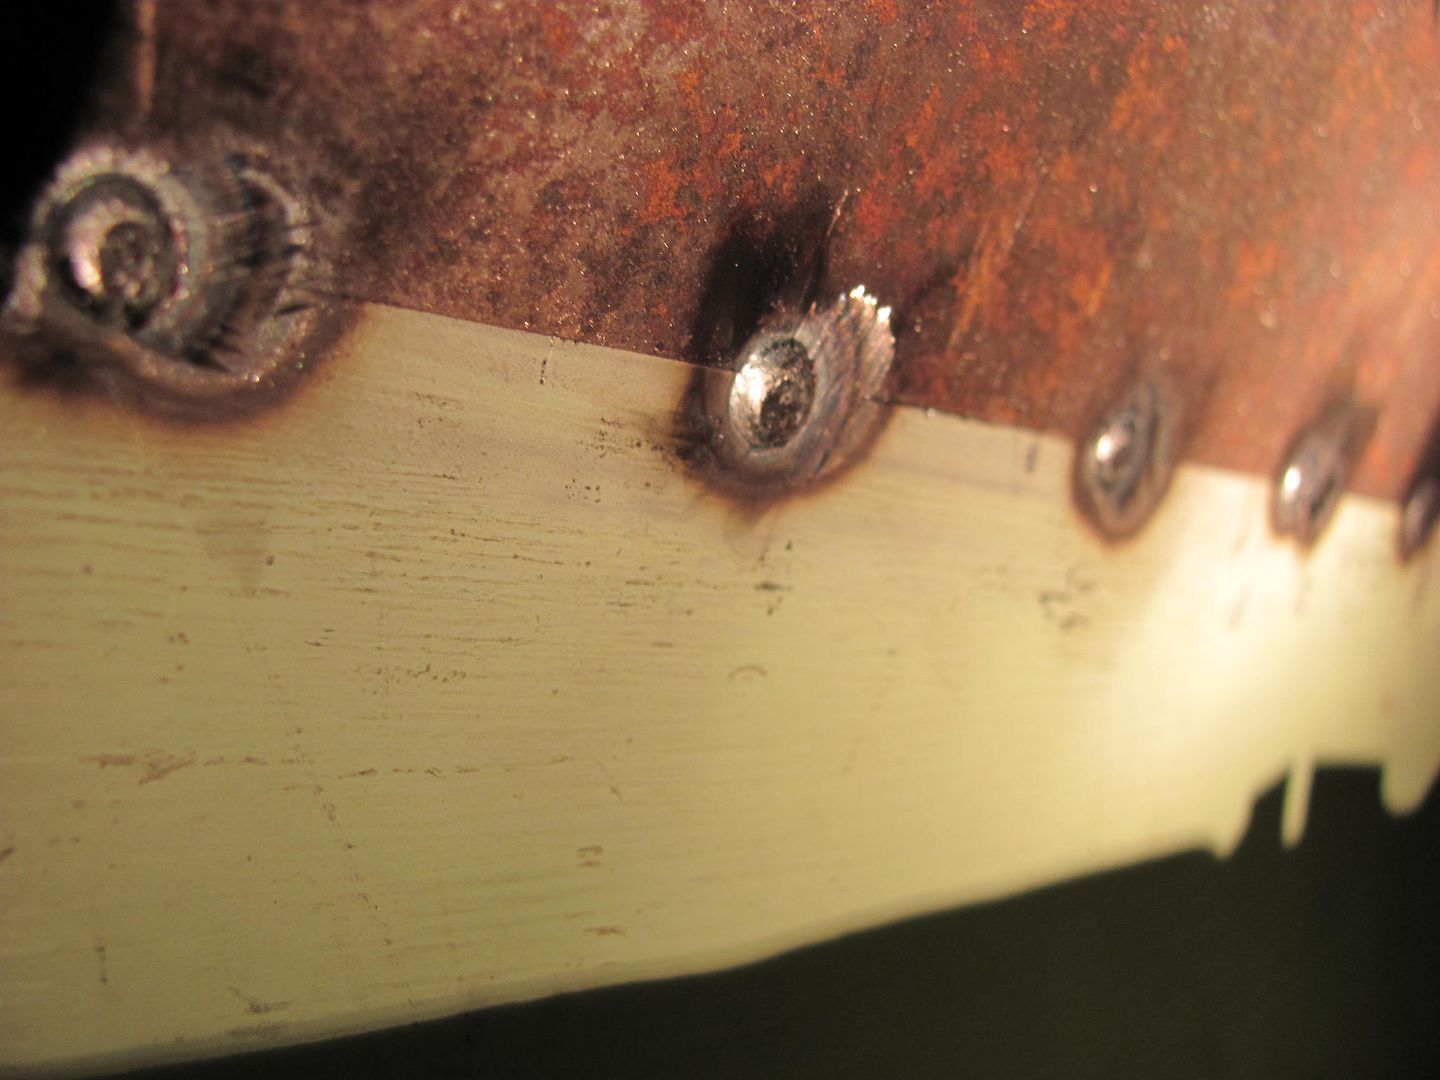
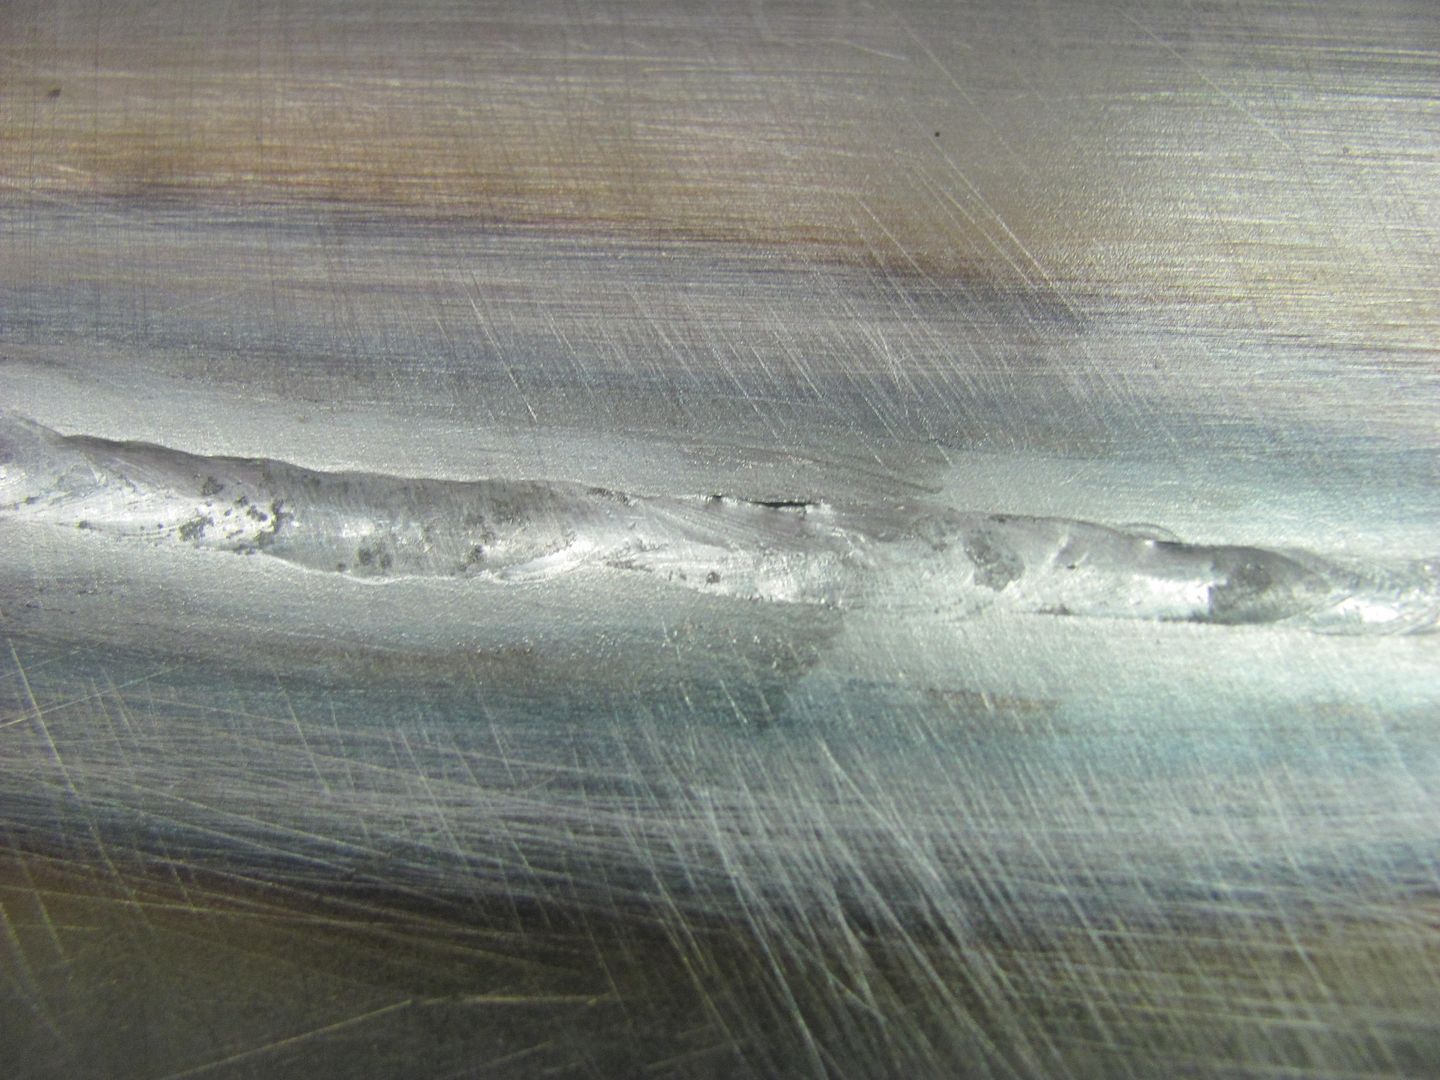
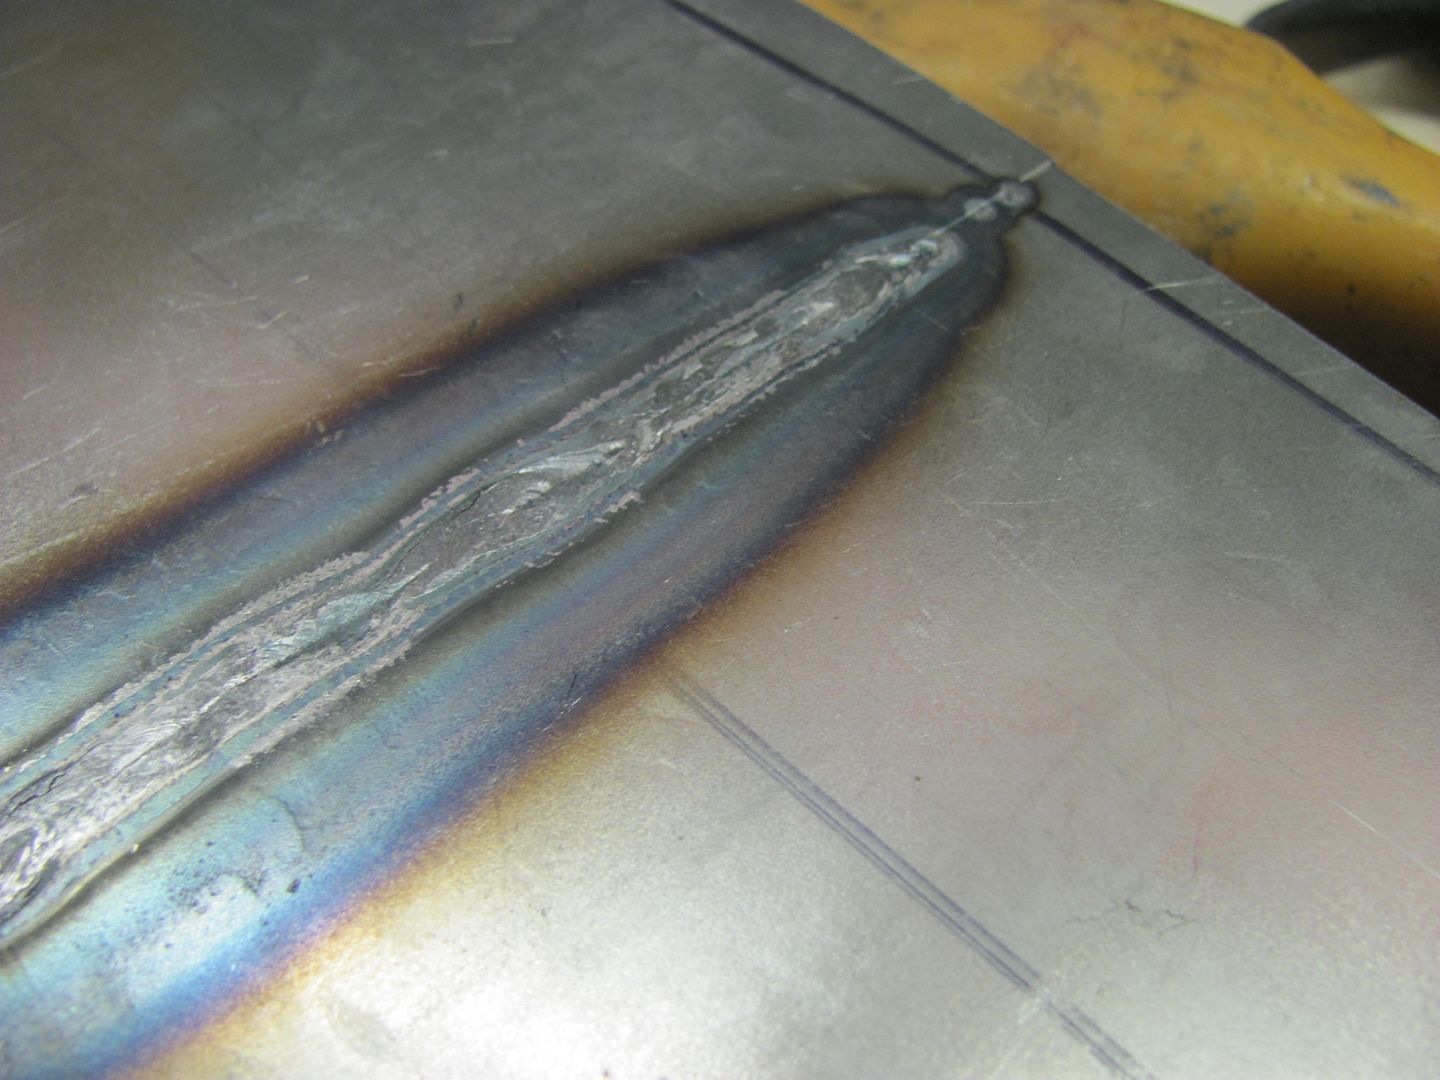
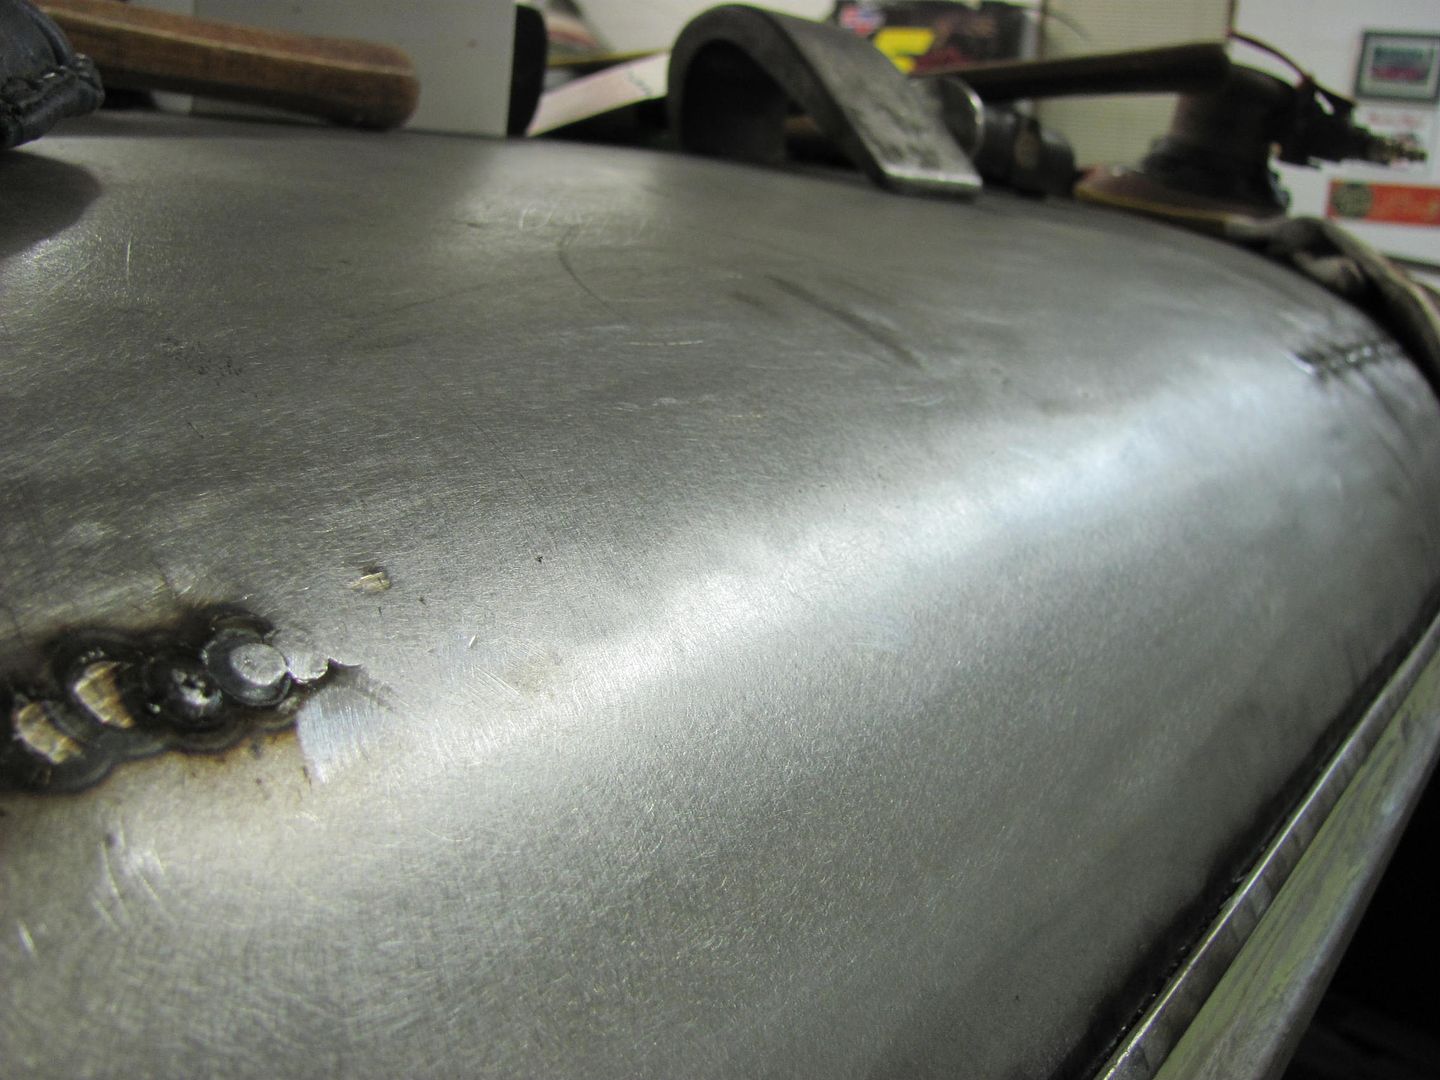
Well after a week in FL, time to get back in the shop.. I wasn't totally pleased with the .023 EZ grind, but in all fairness I think some of the issue is my welder. It never has been too keen on .023 wire, so looks like my BIL is going to get a new roll of wire for his Hobart.
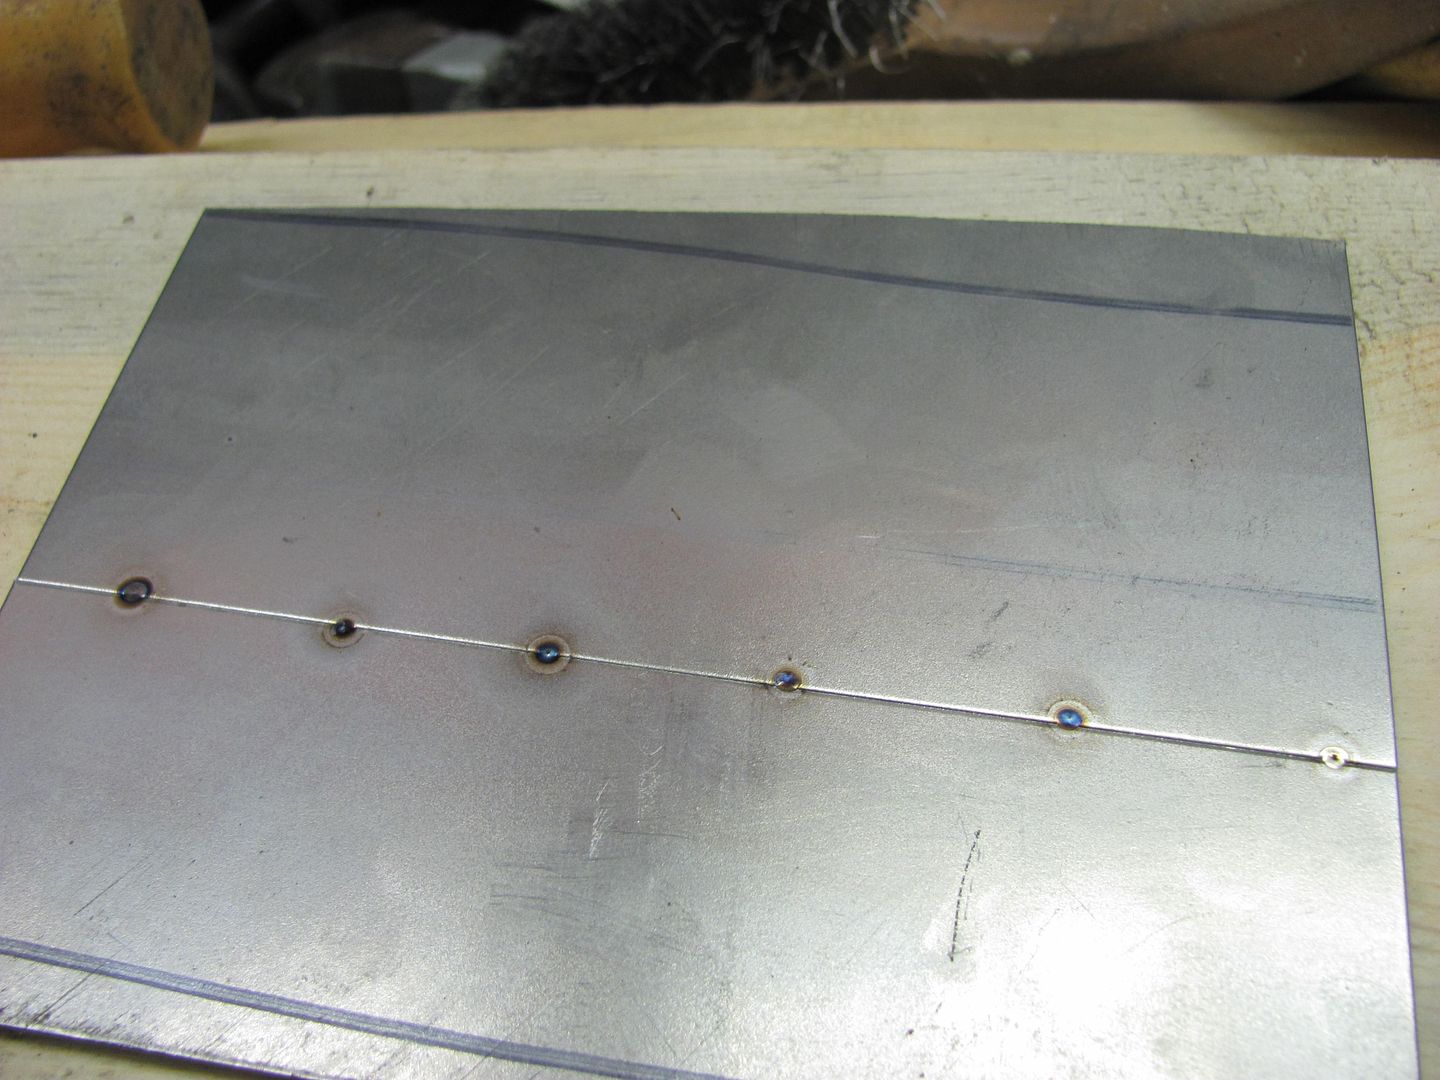
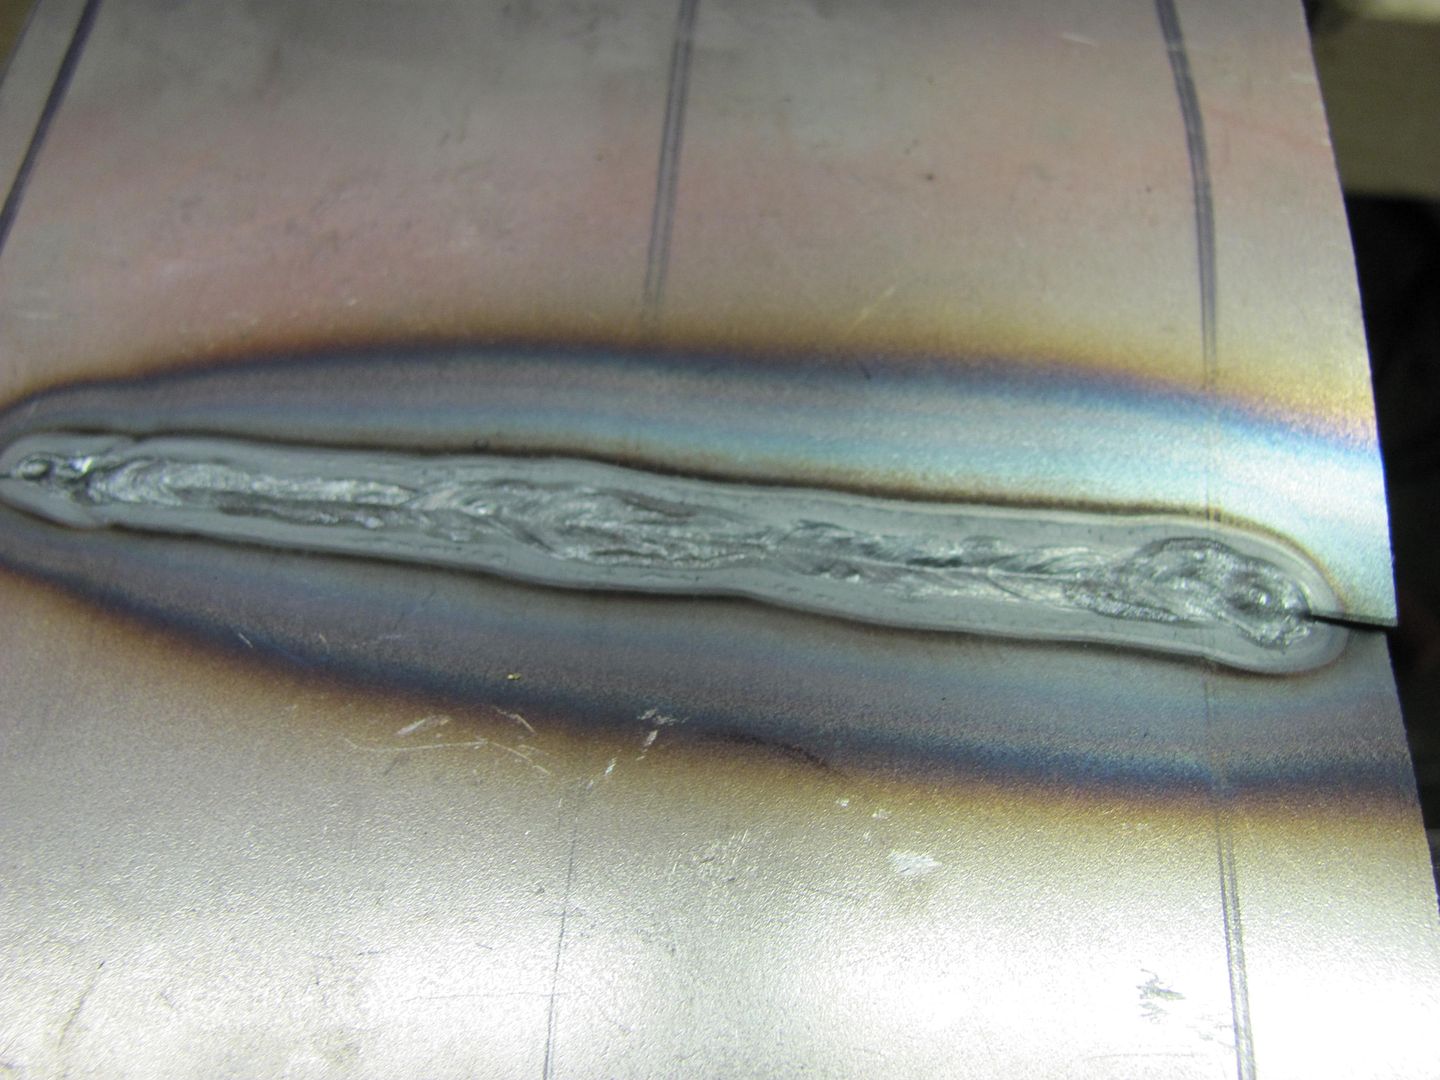
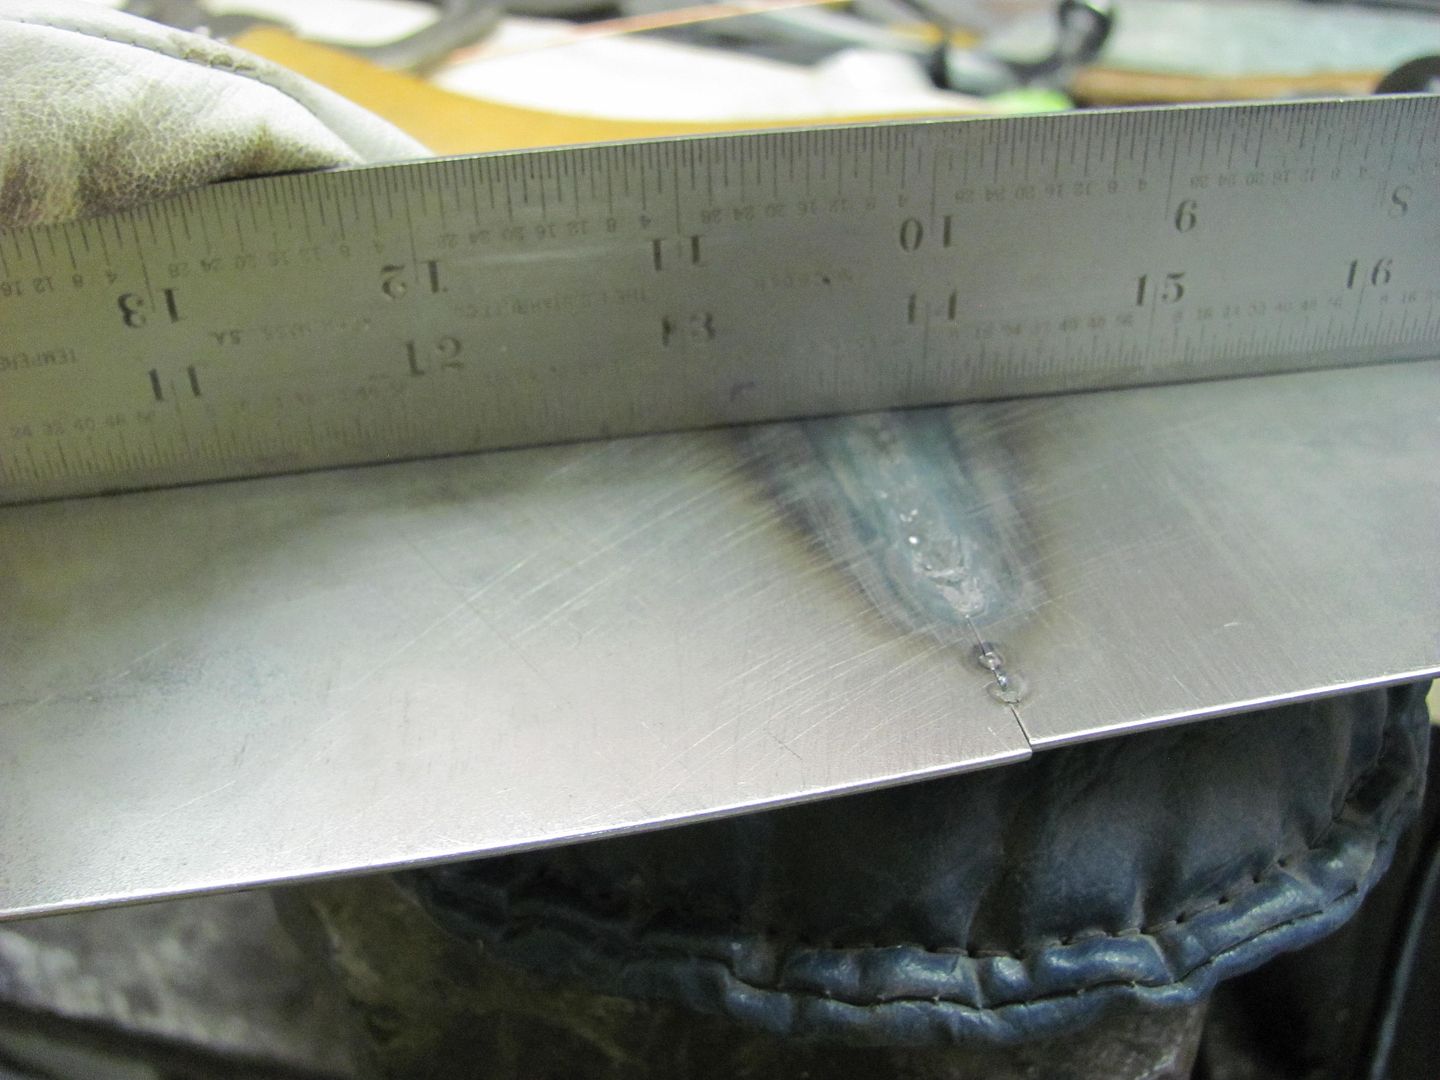
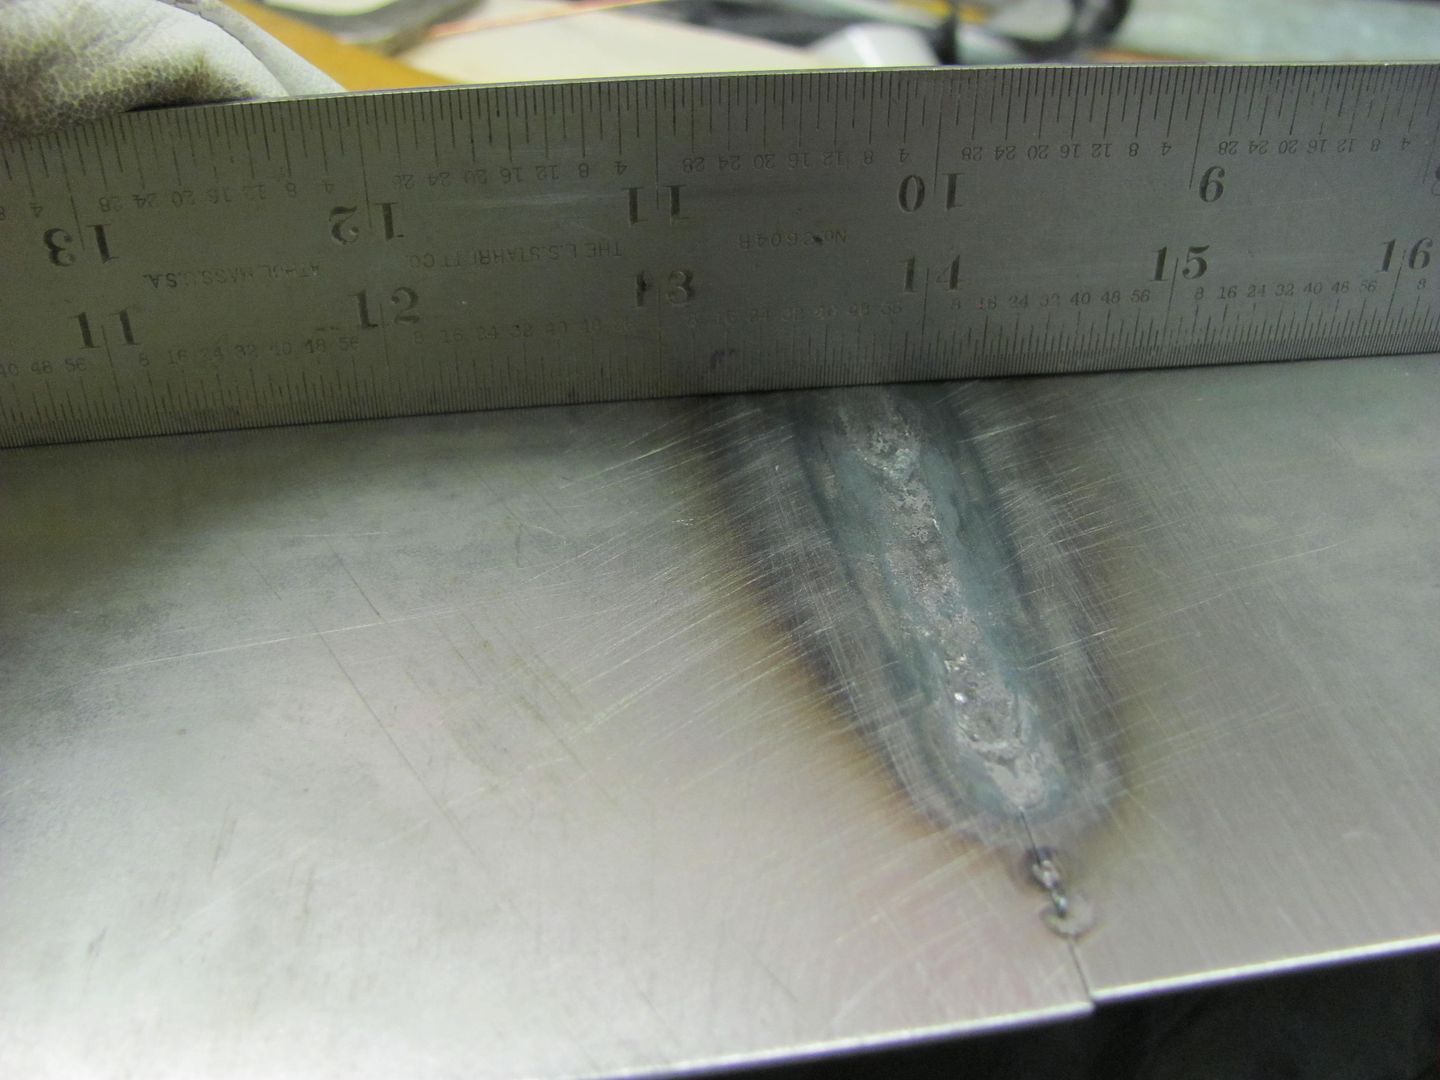
Put the .035 ER70S-7 back in, dialed in the settings for 3/16 thick steel, and ran some test welds...
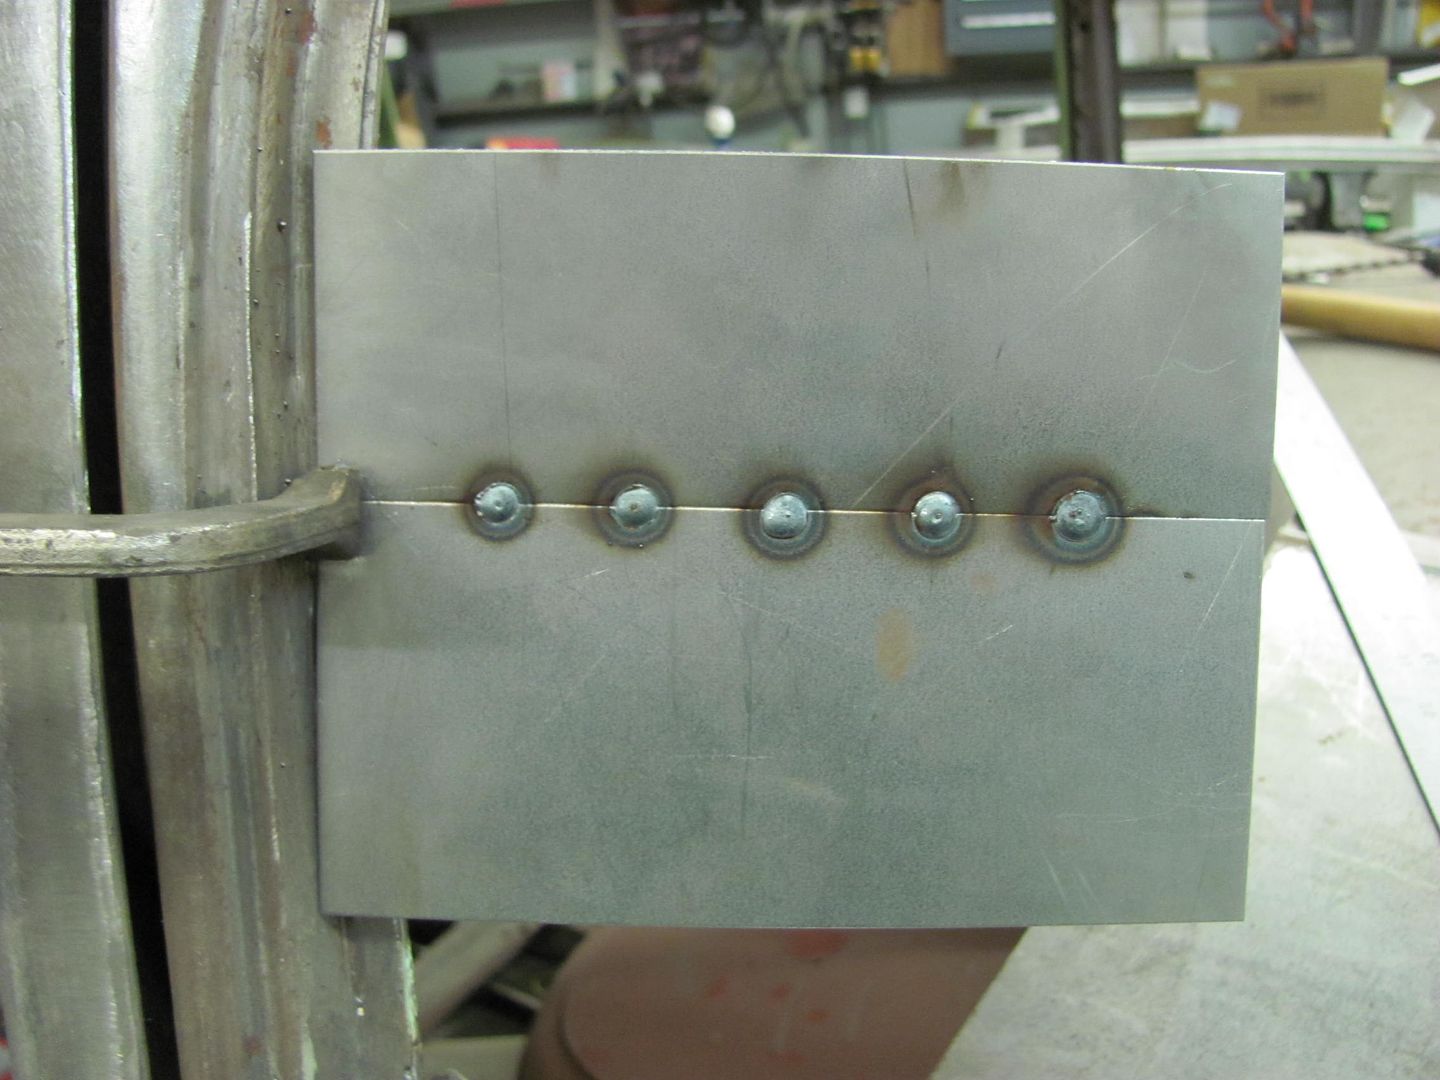
Front side....
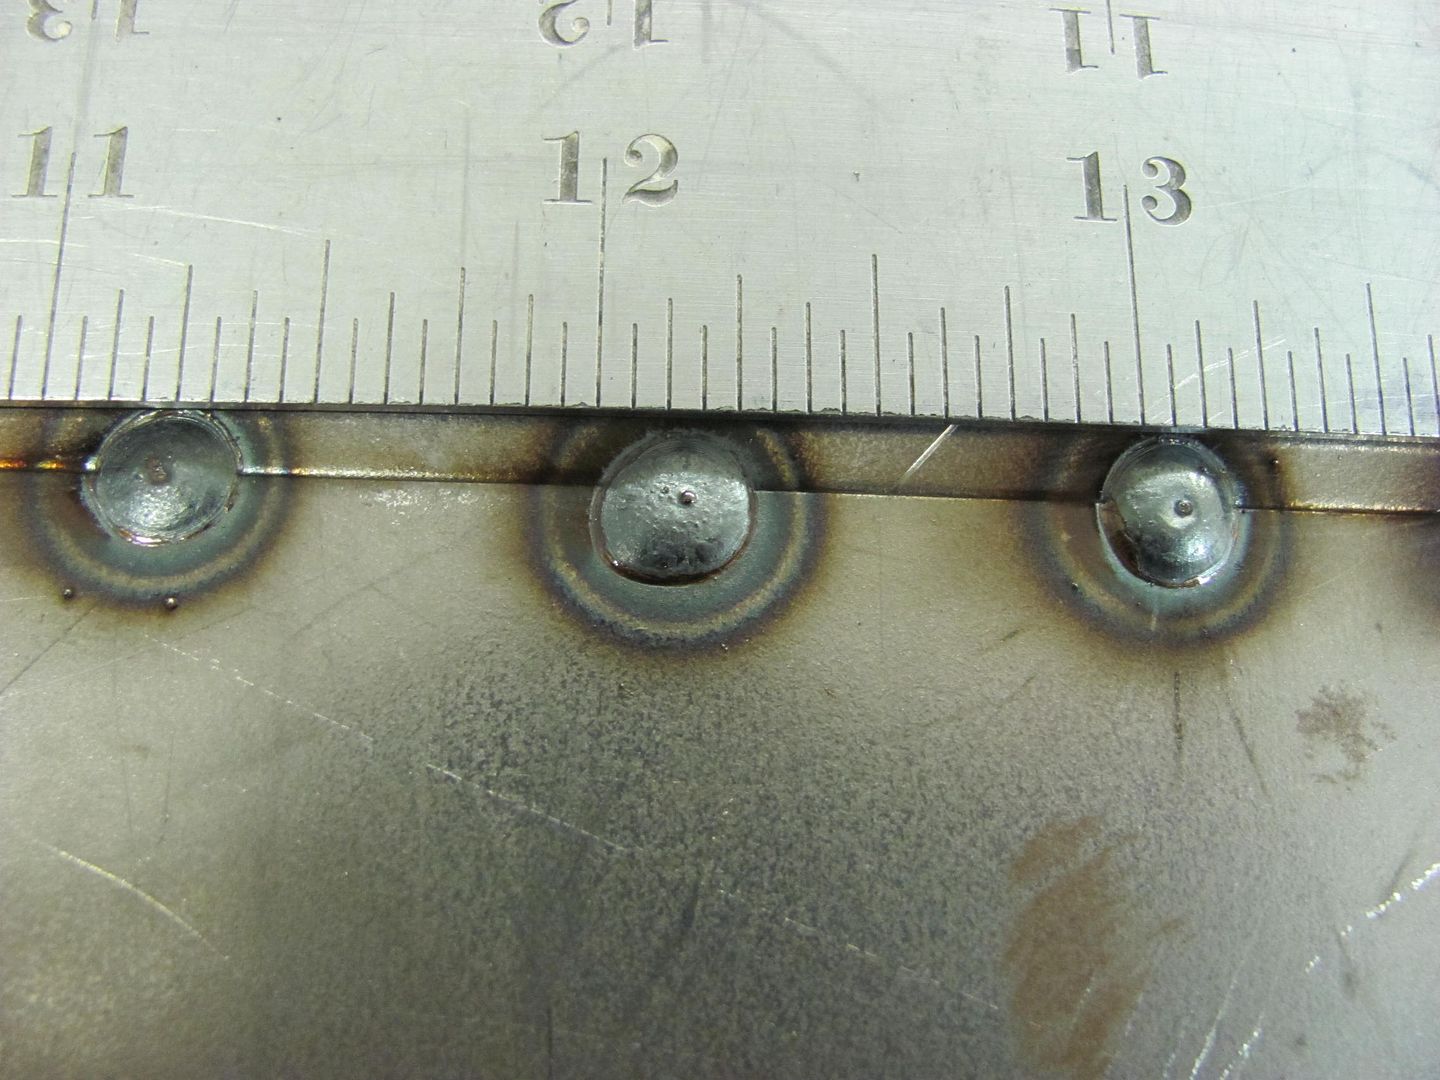
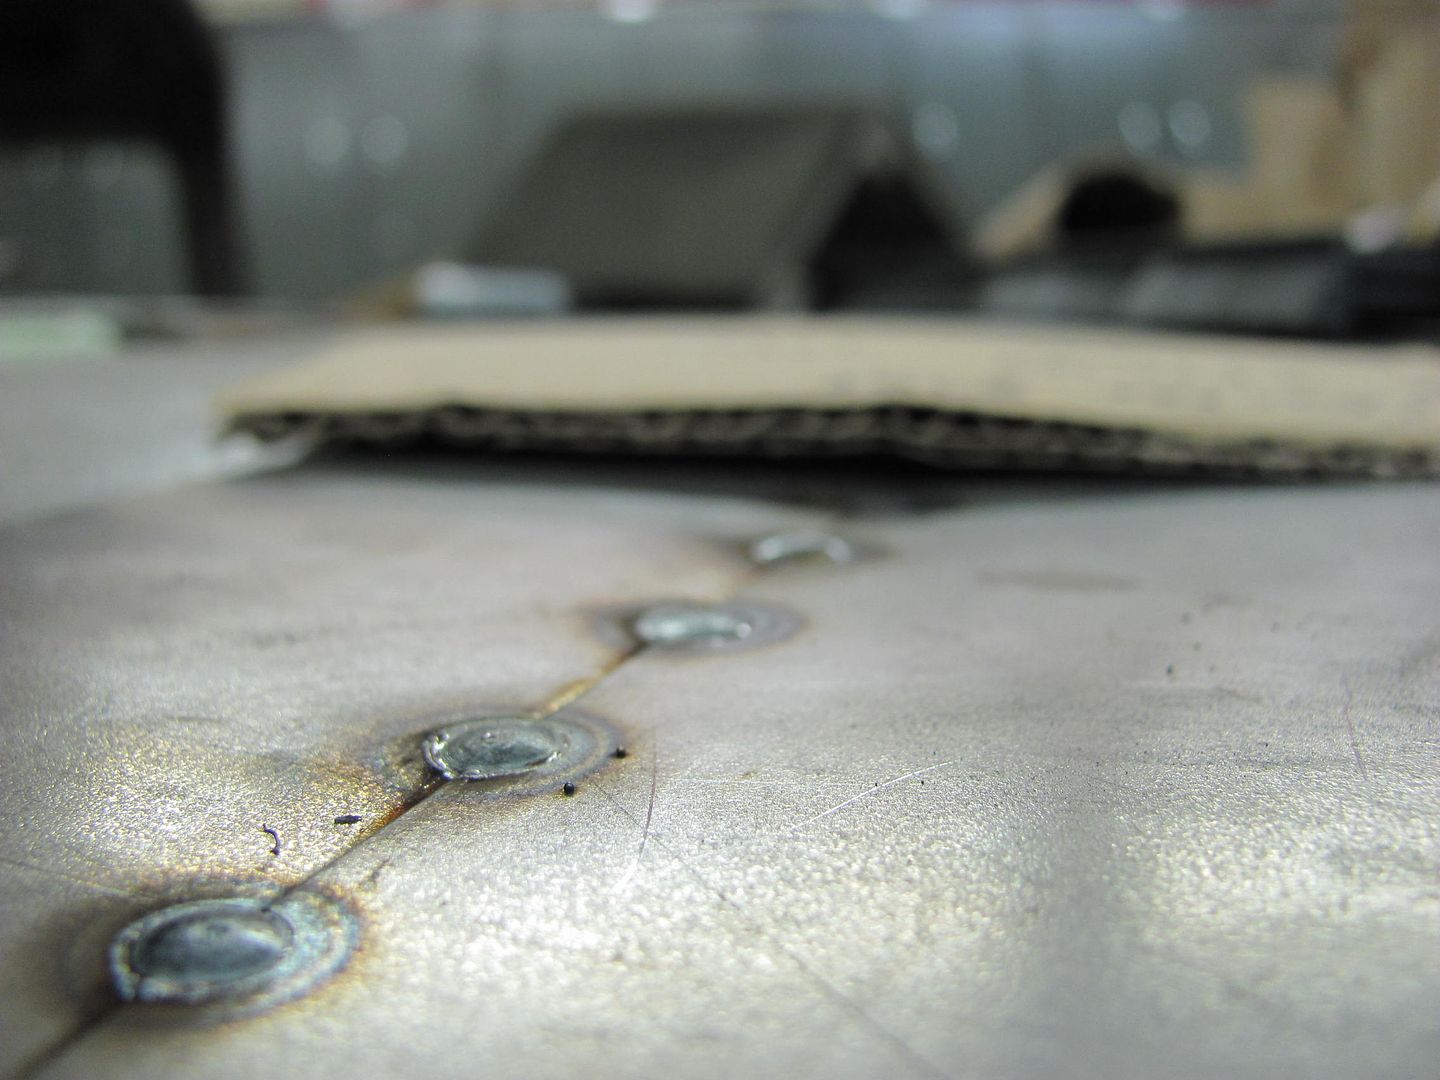
Rear side....

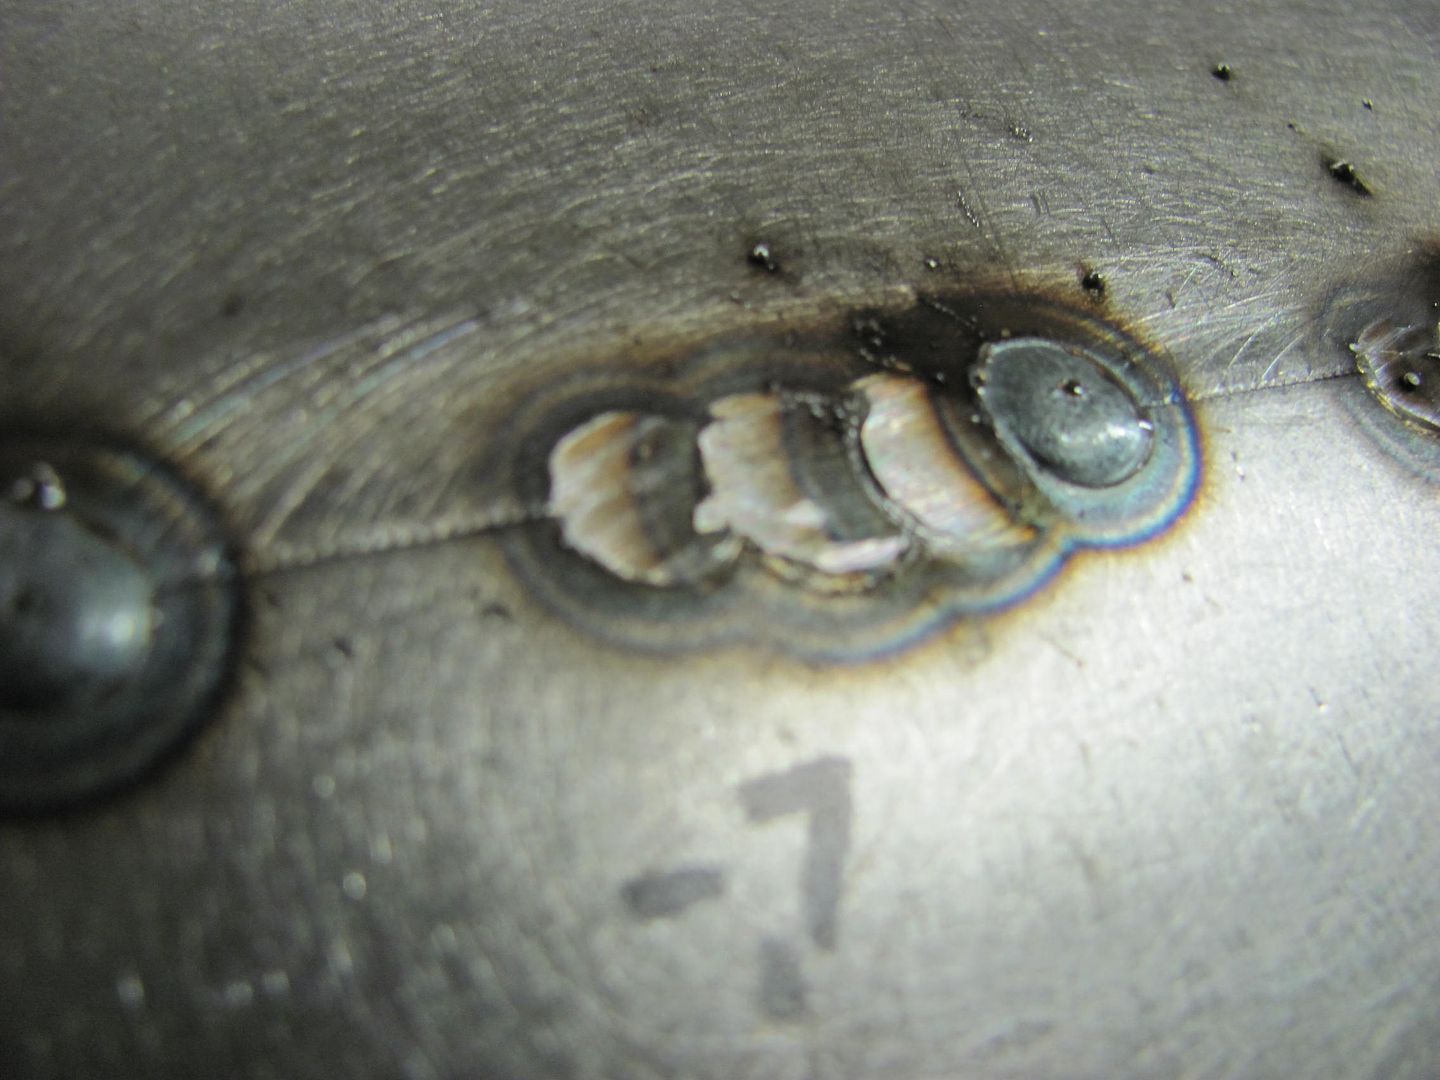
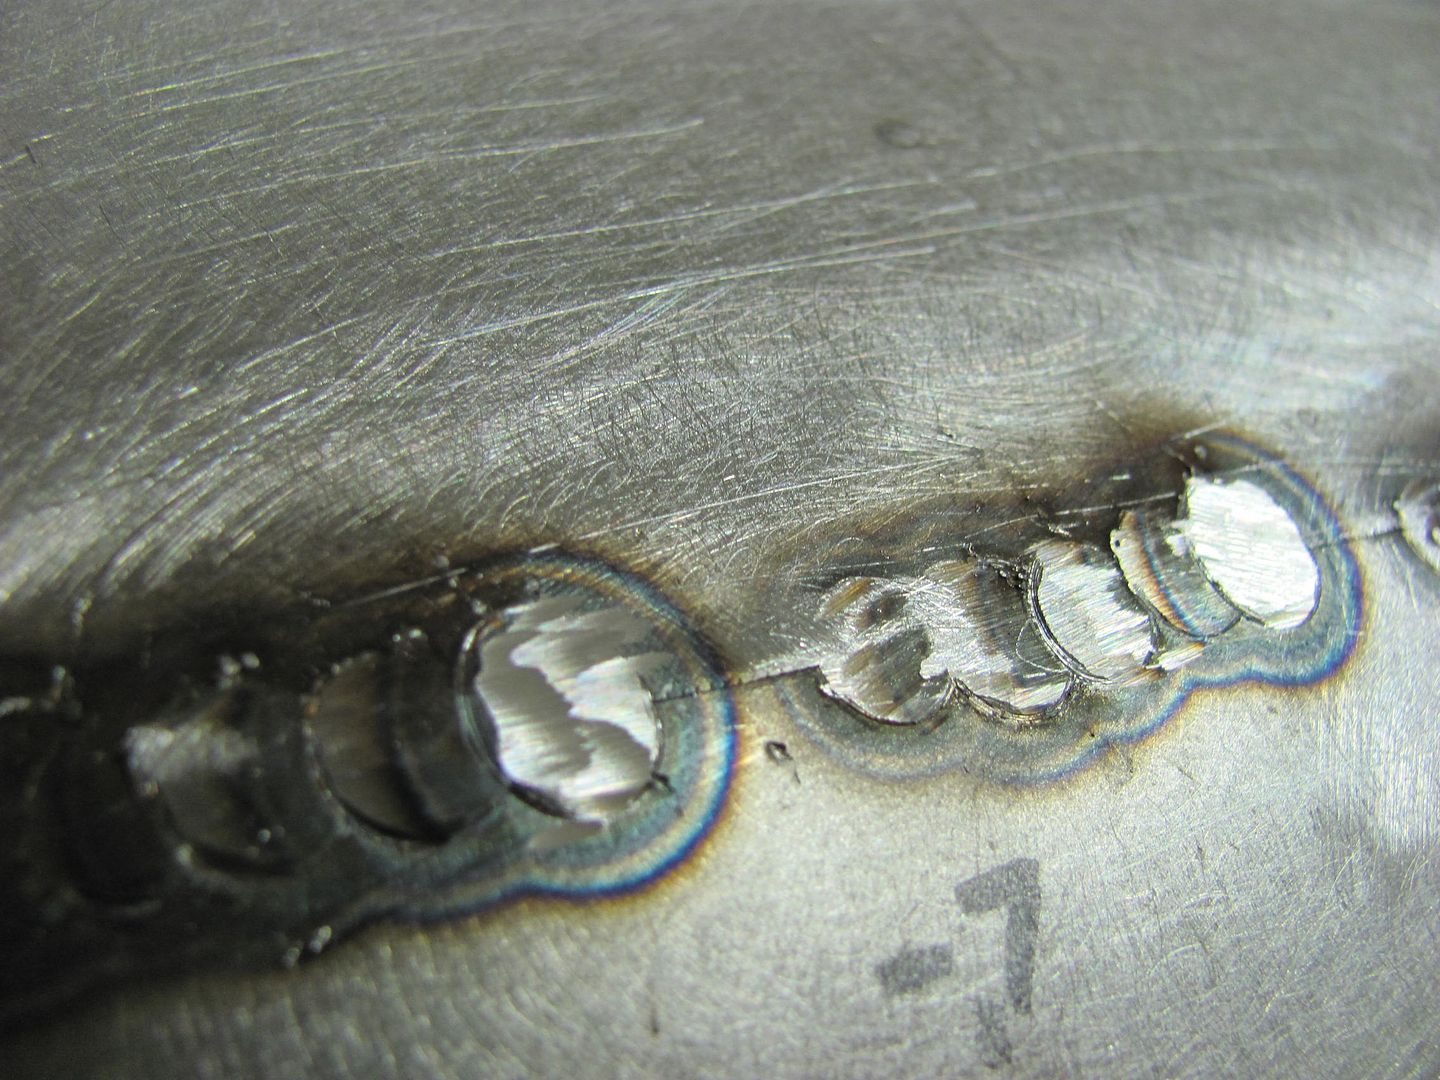
Comparing the EZ grind to the -7 shows less splatter...
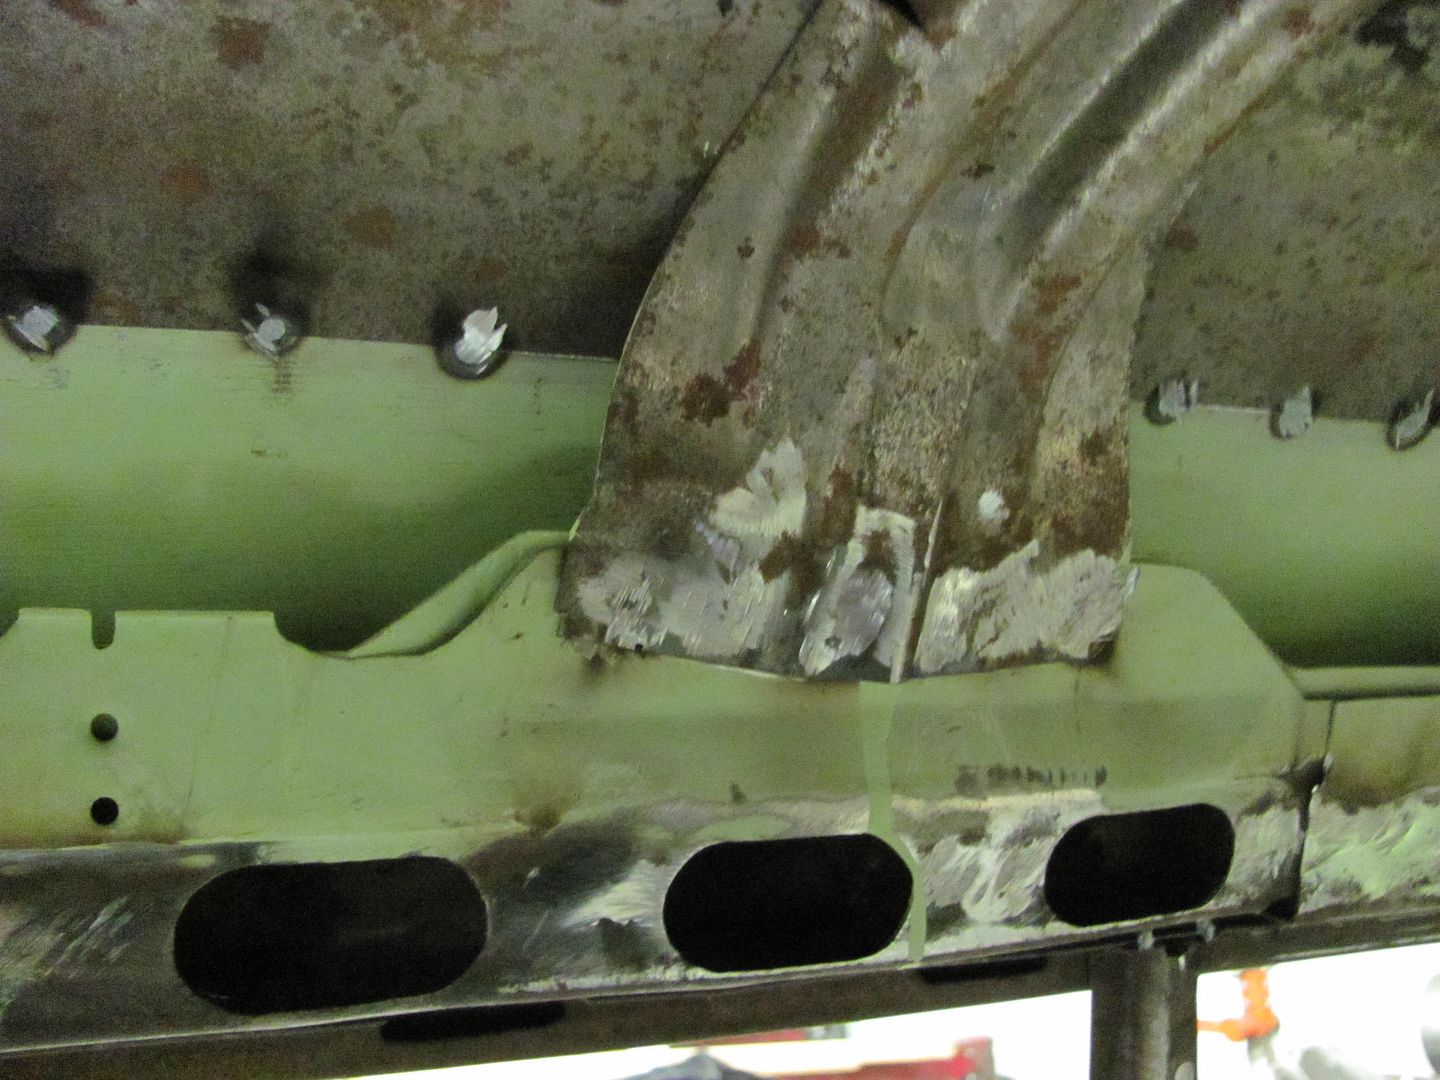
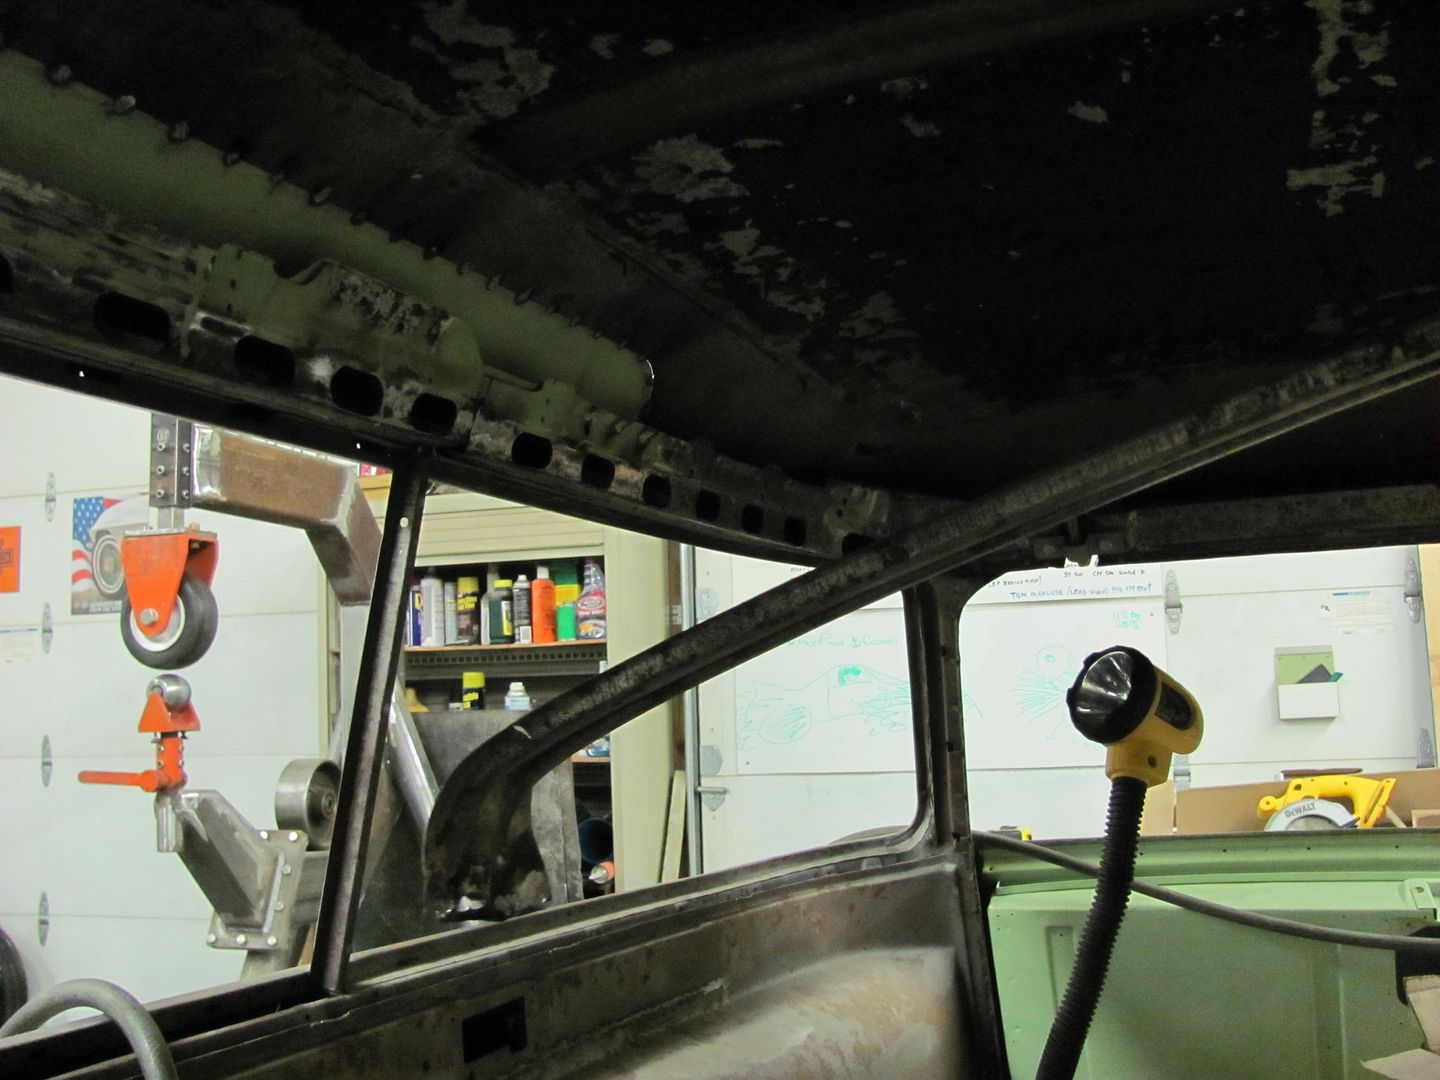
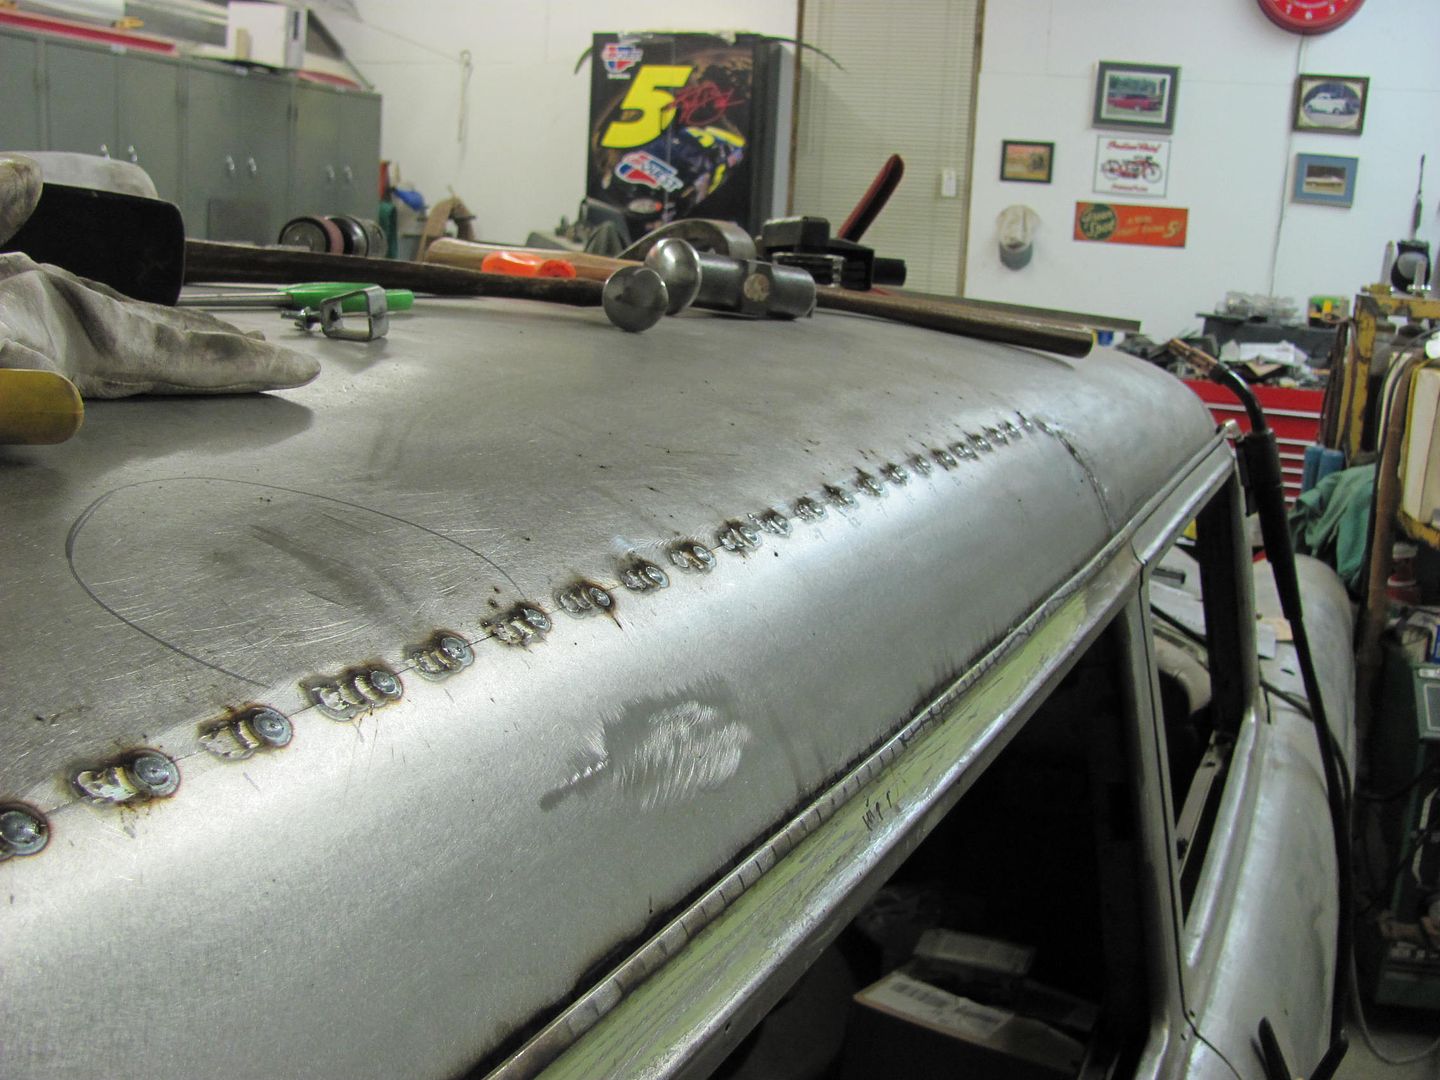
The roof cross member made part of the weld seam inaccessible, so it was removed on one end for planishing access...
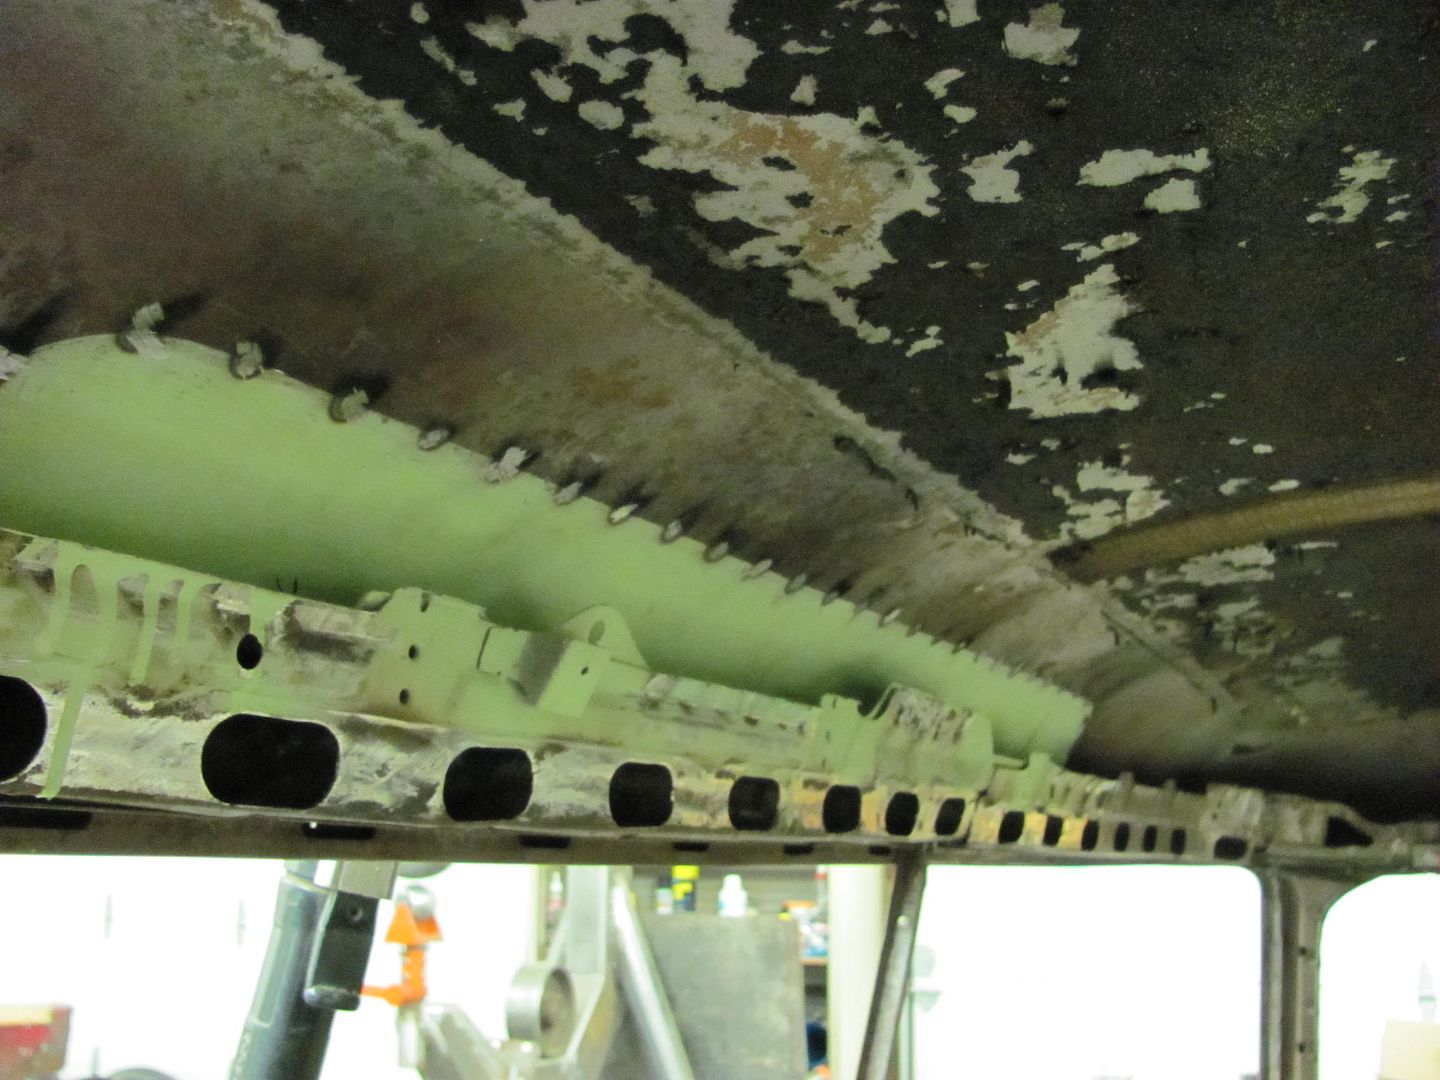
Welds ground down to just above panel surface...
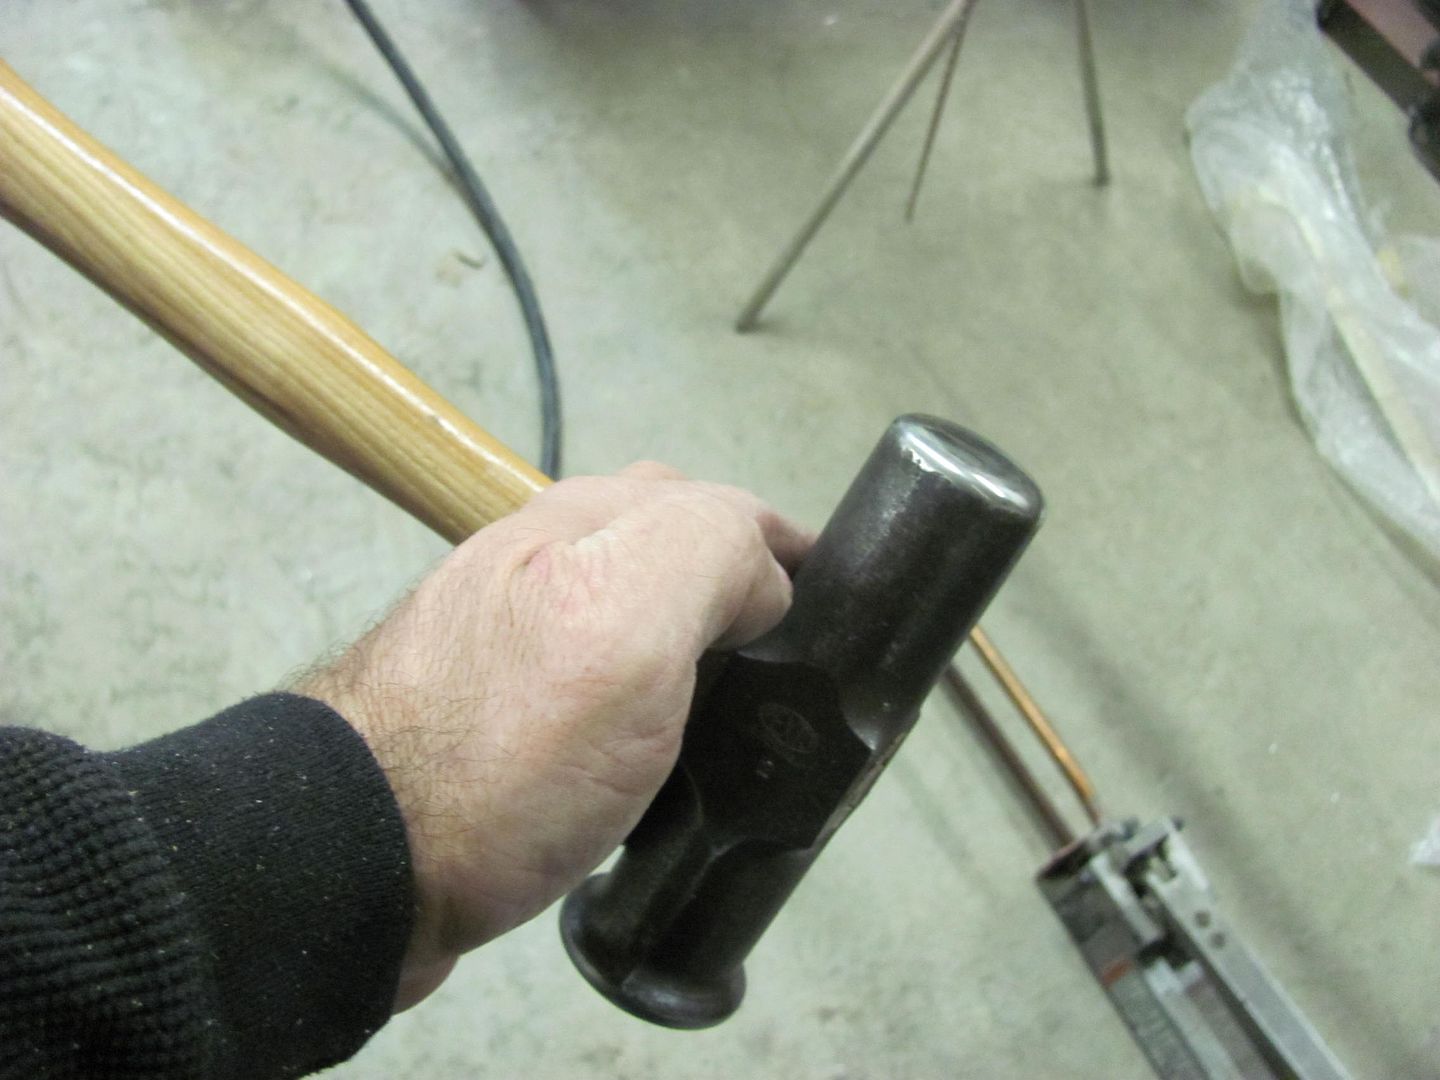
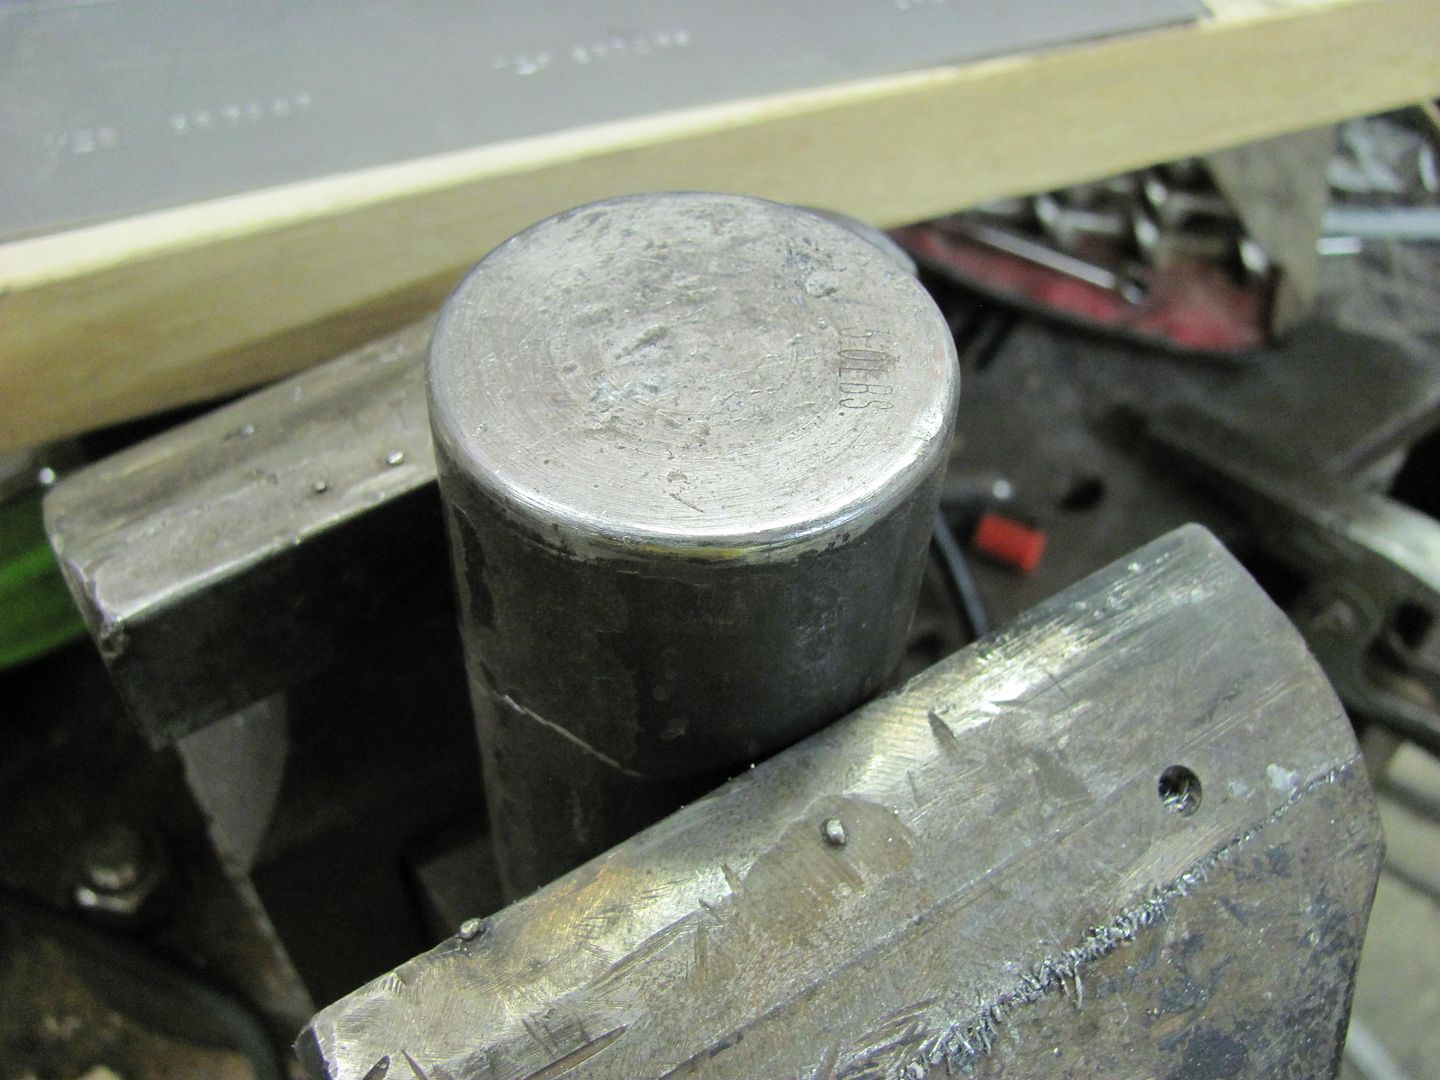
Our planishing implements this evening.... Low crown hammer and used the Pexto blocking hammer as a dolly...

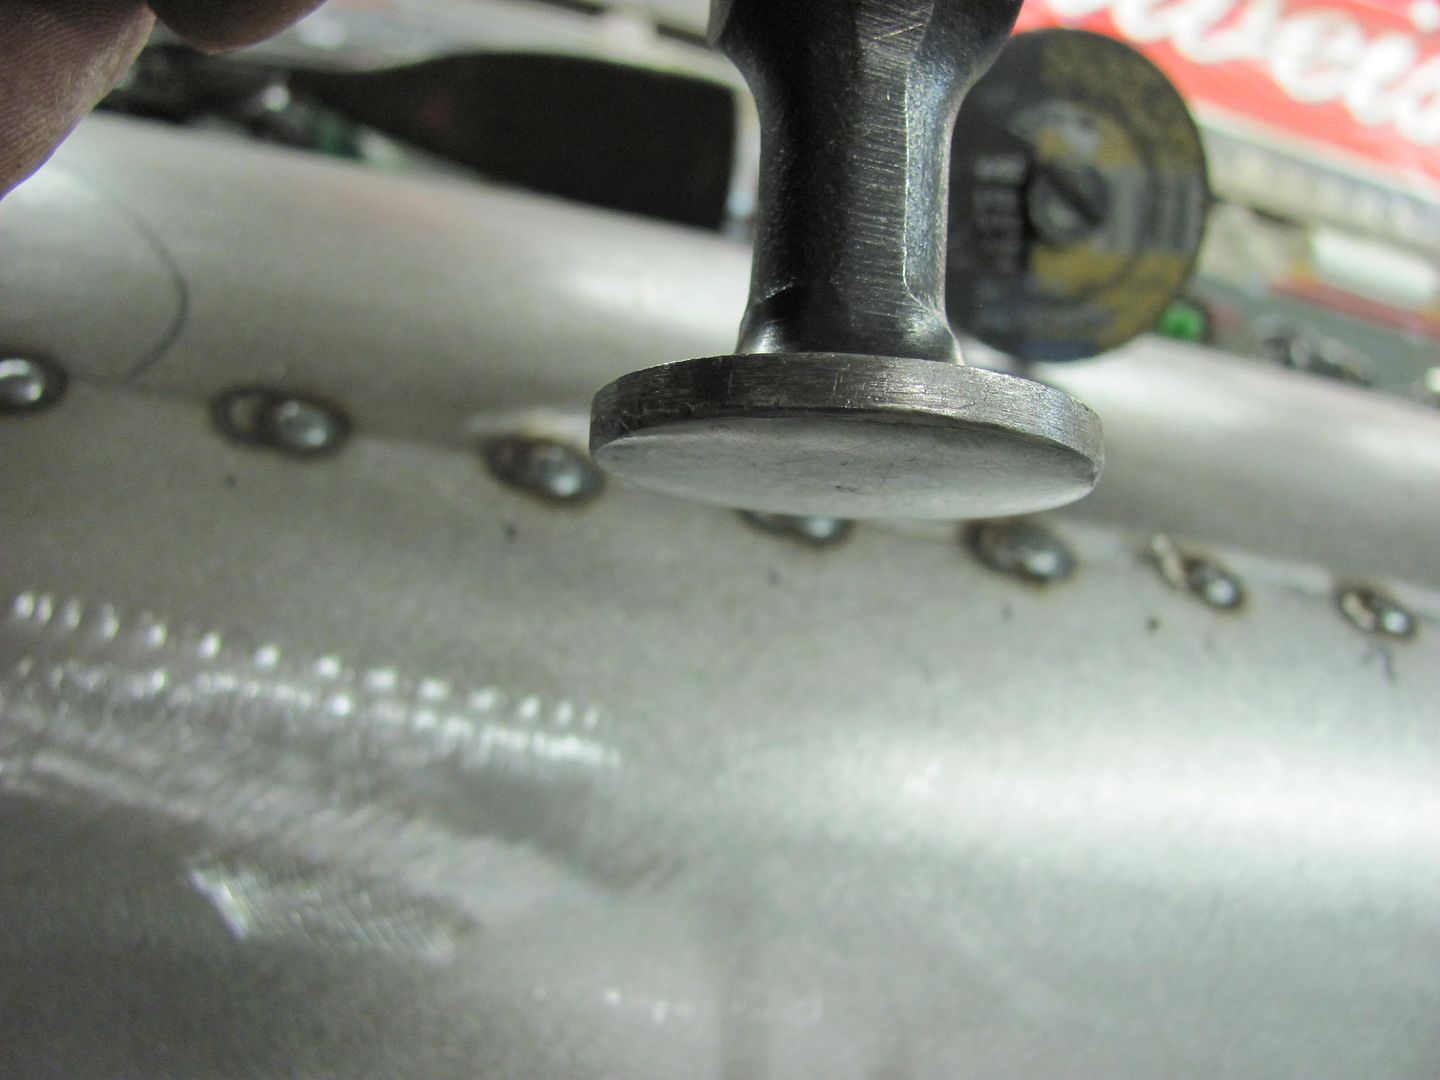
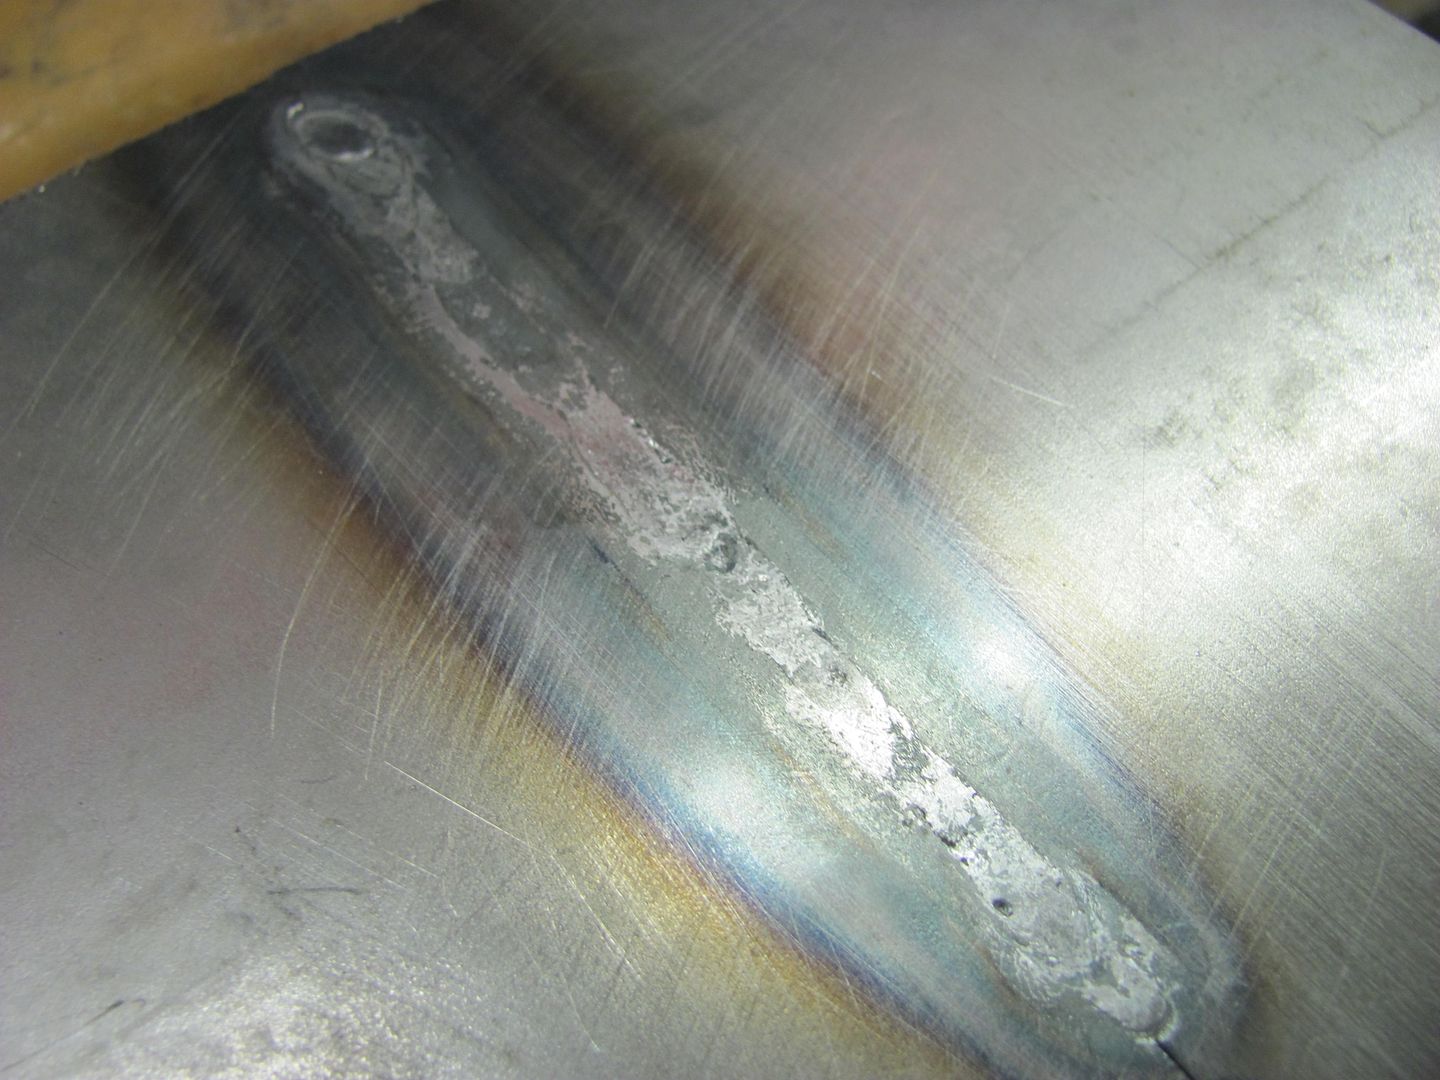
This shows the weld dots planished....

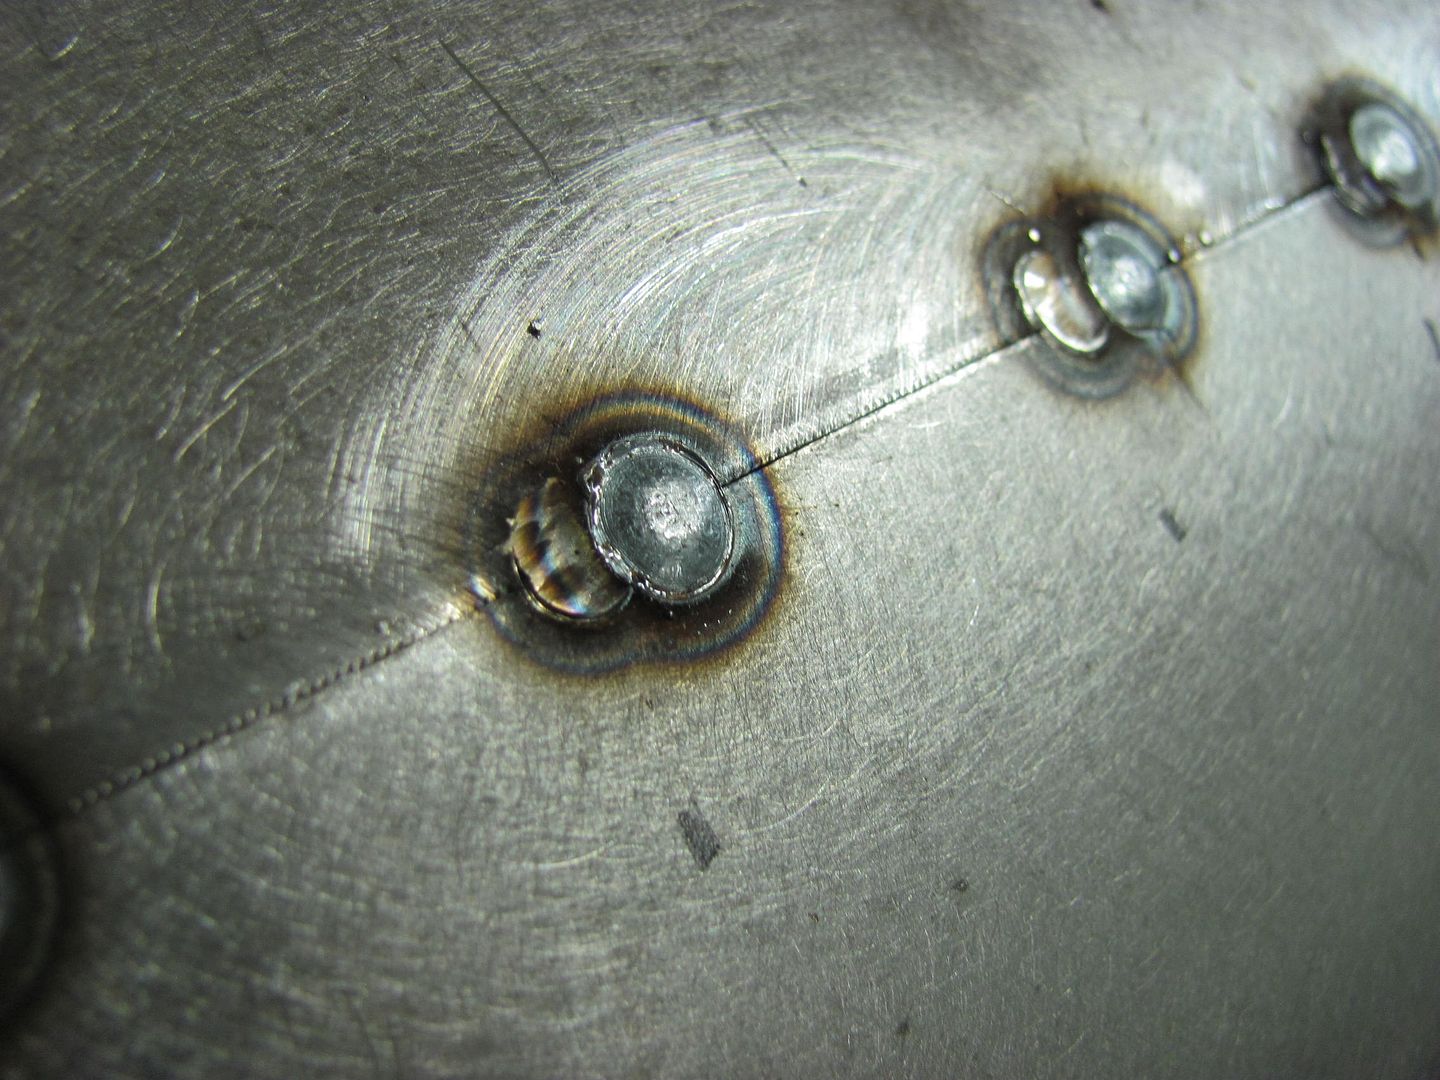
Full penetration welds.....
Weld, planish, grind, repeat.
We're about halfway done, hope to finish it up tomorrow...
Robert
-
02-16-2014 10:33 PM #156
CHR Member
- Join Date
- Oct 2007
- Location
- Petaluma
- Car Year, Make, Model: 48 Ford F1
- Posts
- 9,795
Fantastic detail and explanation, thank you!"  "No matter where you go, there you are!" Steve.
-
02-17-2014 04:36 AM #157
CHR Member
- Join Date
- Sep 2007
- Location
- New Bedford
- Car Year, Make, Model: 34 Ford 3W Coupe Replica
- Posts
- 14,754
So the "EZ" wire......... wasn't.. thanks for the heads up, it looks like the weld wasn't bad, just messy and you ended up with a bit larger puddle. Is that a fair statement?
As always the pictures make the repair look great. And thanks for sharing the info as always!
-
02-17-2014 05:20 AM #158
CHR Member/Contributor
- Join Date
- Sep 2007
- Location
- Gardner, KS
- Car Year, Make, Model: '33 HiBoy Coupe, '32 HiBoy Roadster
- Posts
- 11,245
Robert,
One thing I enjoy about your posts is that you take time to mention the details of setup, like here showing that when you changed back to the -7 wire you took time to run a test panel to "dial in" the welder. My "slam bam" approach is to install the spool, get it into the gun, start welding and adjust as I go which means the first few spots are not near as good, and often I'm finishing by the time I've got the welder "dialed in". You're posts are great teaching posts, and I thank you because I am one who enjoys the ever continuing learning process and improving techniques. The day that I think I know everything is the day I'd better find the dunce hat! Thanks for the lesson on perfection in process.
Roger
Enjoy the little things in life, and you may look back one day and realize that they were really the BIG things.
-
02-17-2014 06:19 AM #159
CHR Member
- Join Date
- Jun 2008
- Location
- Leonardtown
- Car Year, Make, Model: Walking
- Posts
- 1,228
Roger, it's a continual learning curve for all of us.. Believe me! On the welder setup, I normally have it pretty well dialed in from using the same stuff all the time, but I wanted to try the -7 again on a higher heat setting to try the difference. Never hurts to practice on some scraps to save any "aw fudges" on the good stuff..
 Originally Posted by 34_40

It's hard to place all the blame on the wire alone, as my welder has too large a liner for the .023 wire, where it tends to accordion, if you will. If you were to pull the wire at the end and trim it, then the machine has to fill the voids side to side before effectively pushing the wire out the end again. This is something I've known with my welder but was trying to minimize any heat on the roof panel. Comparatively, I'd say they are similar in flatness of weld, softness of weld, and the only difference being the slight extra splatter with the EZ. If someone has a smaller welder with the smaller liner, they would likely have better results than with the 25+ year old beast that I'm using. With either, I'd say you'll have better results than with the harder welds of the -6 wire. I never gave it much thought until someone asked the question of shrinking effects on the allmetalshaping site, but comparing both of the -7 and EZ to the -6 wire, I think the -7 and EZ may have slightly less shrinking effects as well. This may attribute to the harder weld of the -6 is "compressing" more than the other two.. Just a guess, I'm certainly no metallurgist to speak fluently on the matter...Robert
-
02-17-2014 06:25 AM #160
CHR Member
- Join Date
- Sep 2007
- Location
- New Bedford
- Car Year, Make, Model: 34 Ford 3W Coupe Replica
- Posts
- 14,754
Great info, thanks again!
-
02-17-2014 12:38 PM #161
CHR Member
- Join Date
- Feb 2010
- Location
- Pukekohe, New Zealand
- Car Year, Make, Model: '23 Ford T Roadster
- Posts
- 2,199
May I ask why you prefer using a mig welder and not a tig ? I realize the tig would be slower but you wouldn't need to do all the grinding etc. and I always was lead to believe mig welds are too hard to hammer and file compared to the tig welds. I too admire your work though and one thing I have learnt from you is I'm too darn impatient and not prepared to weld slowly.I maybe a little crazy but it stops me going insane.
Isaiah 48: 17,18.
Mark.
-
02-17-2014 07:00 PM #162
CHR Member
- Join Date
- Jun 2008
- Location
- Leonardtown
- Car Year, Make, Model: Walking
- Posts
- 1,228
You get used to something and you get reluctant to change. I will say that ER70S-6 does indeed have a harder weld, the -7 and the EZ grind aren't as bad, pretty comparable to the Tig really. I did recently do a test piece using Tig and fusion welding, but just aren't that comfortable yet to jump on the car roof with it. Something on the welding table is one thing, I guess I need to take a week and practice up!
Here's the sample I did:
Fusion welding:
This takes me a bit out of my comfort zone, as I normally pick up the MIG, but here we go. Separate halves tacked together:
Note the lack of/minimal amount of HAZ around the tacks. This was accomplished by held farther away from the panel, you see more blue HAZ surrounding the tack. Here holding the electrode as close as you can without touching and using a quick zap. If held farther away from the panel, you see more blue HAZ surrounding the tack. Here is the fusion weld, no filler added.

Back side.....
Then, using this anvil to planish out the weld and HAZ:
Results in this:
Front
Back
Nice and flat, no grinding required (in this case)
This method requires having an absolute tight joint, so fitment will be more time consuming, but just imagine all the time just saved over dressing out a MIG weld...
The little bit of undercutting on the back side is from just a bit too much heat, which is controlled by increasing the speed at which the torch is moving.Robert
-
02-17-2014 07:47 PM #163
CHR Member
- Join Date
- Jun 2008
- Location
- Leonardtown
- Car Year, Make, Model: Walking
- Posts
- 1,228
Well this evening was a short night, back to the day job tomorrow, so we'll have to call it early. Did get the bulk of the welding done. planished, and started to dress the welds. This will still need some final metal bumping, but I like this much better already!

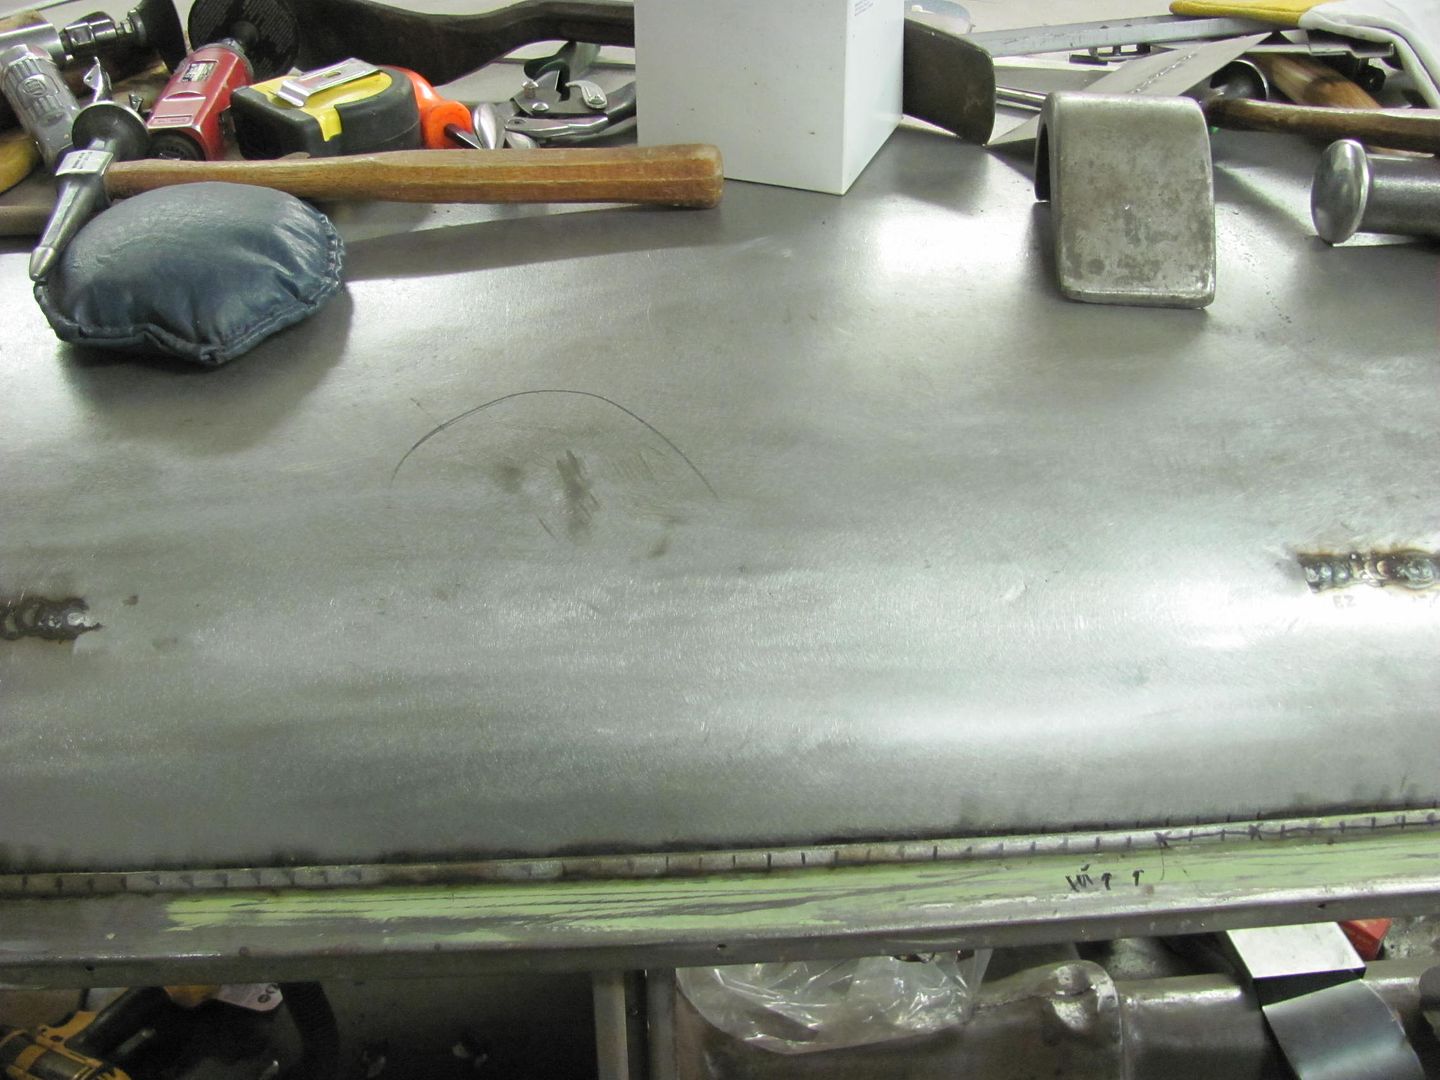
Sorry I didn't have as many in-process pictures, got in a rush this evening....until next time..Robert
-
02-18-2014 12:32 AM #164
CHR Member
- Join Date
- Feb 2008
- Location
- Inglewood
- Car Year, Make, Model: 60 F100 truck
- Posts
- 6,339
Nice job,Robert.. love looking at your work.. I have had enough experience at doing rebuilds,,but,, I tend to get a little bit slap happy,sometimes..i then end up spending too much time dressing things up.. hmmm....
Micah 6:8
If we aren't supposed to have midnight snacks,,,WHY is there a light in the refrigerator???
Robin.
-
02-18-2014 06:48 AM #165
CHR Member/Contributor
- Join Date
- Jul 2003
- Location
- Madison
- Car Year, Make, Model: '67 Ranchero, '57 Chevy, '82 Camaro,
- Posts
- 21,160
Great work as always! Goes to one of my favorite sayings I learned from my Dad, "If it was easy, everyone would be doing it."Yesterday is history, tomorrow is a mystery, Live for Today!
Carroll Shelby
Learning must be difficult for those who already know it all!!!!
 Reply With Quote

Posting Permissions
- You may not post new threads
- You may not post replies
- You may not post attachments
- You may not edit your posts

i've enjoyed the years here . made a lot of friends. most who have left. i see no reason to continue with this so hope to see you somewhere else. i dont think this site will ever be back. it's lived...
Dead!