


 3390Likes
Thread: 55 Wagon Progress


Results 31 to 45 of 1865
 LinkBack URL
 About LinkBacks
-
03-24-2013 07:32 PM #31
 CHR Member

- Join Date
- Feb 2007
- Location
- Santa Monica
- Car Year, Make, Model: 37 Ford tudor humpback
- Posts
- 1,988
Hey Robert, if you had the opposite problem on the lift gate and the gaps were too wide, how would you repair that?"It is not much good thinking of a thing unless you think it out." - H.G. Wells
-
Advertising

- Google Adsense
- REGISTERED USERS DO NOT SEE THIS AD
-
03-24-2013 07:36 PM #32
CHR Member
- Join Date
- Jun 2008
- Location
- Leonardtown
- Car Year, Make, Model: Walking
- Posts
- 1,228
You could use the same basic procedure to weld along the edge, then grind to flatten front and back sides, mark with compass and grind edge to set gaps.Robert
-
03-25-2013 06:48 AM #33
CHR Member
- Join Date
- Jan 2004
- Location
- Macomb
- Car Year, Make, Model: '32 Ford 3W Coupe, 383 sbc
- Posts
- 1,593
You metal work is very impressive. The sad thing is that your modifications are so subtle and so well done that most people won't be even realize what you did. Nice work!
Lynn
'32 3W
There's no 12 step program for stupid!
http://photo.net/photos/Lynn%20Johanson
-
03-25-2013 06:59 AM #34
CHR Member/Contributor
- Join Date
- Sep 2007
- Location
- Gardner, KS
- Car Year, Make, Model: '33 HiBoy Coupe, '32 HiBoy Roadster
- Posts
- 11,245
Robert, I know the most important point is for the gap to be consistent, but what do you use as your "ideal" gap width? I'm sanding out gaps on my 'glass body now. Originally Posted by MP&C

Roger
Enjoy the little things in life, and you may look back one day and realize that they were really the BIG things.
-
03-25-2013 07:58 AM #35
CHR Member
- Join Date
- Jun 2008
- Location
- Leonardtown
- Car Year, Make, Model: Walking
- Posts
- 1,228
Most times you'll have wider gaps to contend with, and in the case of a f/g car, adding material to a door edge is less of an option, so it's more about making the gaps consistent for less noticeable differences. Here's a thread on a car I didn't get a chance to finish, but shows some of the challenges with gaps and f/g. Quite a bit of work went into that, and a paint job went south because the owner's "project manager" (a nicer word for bitch boy) forced unrealistic demands in getting a paint job done when weather conditions didn't match the materials I had bought.
Progress Pictures, 1954 Vette - THE H.A.M.B.
So as you can see, Robert can screw up with the best of them..
With steel, you have more options in removal and adding material to adjust gaps. Depending on the paint, about 3/16 gap is what I shoot for. If you're looking at much more paint going on, i.e.: multi-coats that a Kandy finish would give, you may want to open them up a bit more....Robert
-
03-25-2013 11:03 AM #36
CHR Member/Contributor
- Join Date
- Sep 2007
- Location
- Gardner, KS
- Car Year, Make, Model: '33 HiBoy Coupe, '32 HiBoy Roadster
- Posts
- 11,245
Thanks for the reply. My gaps are almost all 1/16" or even less in places. I'm going basic black base coat/clear coat, so buildup shouldn't be an issue for me.Roger
Enjoy the little things in life, and you may look back one day and realize that they were really the BIG things.
-
03-25-2013 11:30 AM #37
CHR Member
- Join Date
- Apr 2011
- Location
- Prairie City
- Car Year, Make, Model: 40 Ford Deluxe, 68 Corvette, 72&76 K30
- Posts
- 7,301
- Blog Entries
- 1
Robert, very nice metal work! Do you plan to shave the inner seam on the front fenders on the 8 o'clock posiotion on the head light openings of the front fenders? On the widening a door gap, I always see pictures of a metal rod welded to the edge of doors or what ever. Is that metal rod a coat hanger or brazing rod of some sort?Ryan
1940 Ford Deluxe Tudor 354 Hemi 46RH Electric Blue w/multi-color flames, Ford 9" Residing in multiple pieces
1968 Corvette Coupe 5.9 Cummins Drag Car 11.43@130mph No stall leaving the line with 1250 rpm's and poor 2.2 60'
1972 Chevy K30 Longhorn P-pumped 24v Compound Turbos 47RH Just another money pit
1971 Camaro RS 5.3 BTR Stage 3 cam, SuperT10
Tire Sizes
-
03-25-2013 11:43 AM #38
CHR Member
- Join Date
- Jun 2008
- Location
- Leonardtown
- Car Year, Make, Model: Walking
- Posts
- 1,228
Roger, IMO 1/16 would be too tight and will result in paint chips as the body/doors/trunk lid flexes and moves around during road travel. On a positive note, at least they give you plenty of material to get the gaps set as you like...
Ryan, that will likely get done as well, but will wait until the front end comes apart again.. Re: the welding rod tacked on, I think you were likely looking at a TIG welding rod, which is copper coated steel. I haven't run into the need to fill a gap (yet) on steel, seems all of mine have been the other way around.Robert
-
03-25-2013 12:27 PM #39
CHR Member
- Join Date
- Jan 2006
- Location
- Constantine
- Car Year, Make, Model: 57 chevy 2 dr wagon
- Posts
- 9,476
In the past I used the striker end of a match book as a guide for gaps.Charlie
Lovin' what I do and doing what I love
Some guys can fix broken NO ONE can fix STUPID
W8AMR
http://fishertrains94.webs.com/
Christian in training
-
03-25-2013 01:40 PM #40
CHR Member/Contributor
- Join Date
- Sep 2007
- Location
- Gardner, KS
- Car Year, Make, Model: '33 HiBoy Coupe, '32 HiBoy Roadster
- Posts
- 11,245
I agree, I was simply saying that my door gaps are very, very tight, and wondering what the "ideal" gap would be. I've got the driver's door done about 1/3 of the way around, using a 5/32" drill bit as my "feeler gauge". I need to find one of those "Vixen" files. The Mill Bastard tooth is a bit light for the work I'm doing. Originally Posted by MP&C
Roger
Enjoy the little things in life, and you may look back one day and realize that they were really the BIG things.
-
03-25-2013 03:15 PM #41
CHR Member/Contributor
- Join Date
- Jul 2003
- Location
- Madison
- Car Year, Make, Model: '67 Ranchero, '57 Chevy, '82 Camaro,
- Posts
- 21,160
Paint stick and a penny is the gap I've always used, kind of an old saying around here. When doing body work, always seem to have a paint stick around, and on the good days even a penny in the pocket!!!!
Yesterday is history, tomorrow is a mystery, Live for Today!
Carroll Shelby
Learning must be difficult for those who already know it all!!!!
-
03-25-2013 03:27 PM #42
CHR Member/Contributor
- Join Date
- Sep 2007
- Location
- Gardner, KS
- Car Year, Make, Model: '33 HiBoy Coupe, '32 HiBoy Roadster
- Posts
- 11,245
Paint stick plus a penny thickness, right Dave? My paint sticks measure 5/32", plus a penny takes it to 0.21", just a hair over 13/64". I'm shaving the penny off my measurement. The important thing to me is a consistent gap. Originally Posted by Dave Severson
Roger
Enjoy the little things in life, and you may look back one day and realize that they were really the BIG things.
-
03-25-2013 04:02 PM #43
CHR Member/Contributor
- Join Date
- Jul 2003
- Location
- Madison
- Car Year, Make, Model: '67 Ranchero, '57 Chevy, '82 Camaro,
- Posts
- 21,160
That's a thick paint stick!!!! I like to stay somewhere's between 1/8" - 3/16" on driver's, tight side of 1/8" on trailered carsYesterday is history, tomorrow is a mystery, Live for Today!
Carroll Shelby
Learning must be difficult for those who already know it all!!!!
-
03-26-2013 07:09 PM #44
CHR Member
- Join Date
- Jun 2008
- Location
- Leonardtown
- Car Year, Make, Model: Walking
- Posts
- 1,228
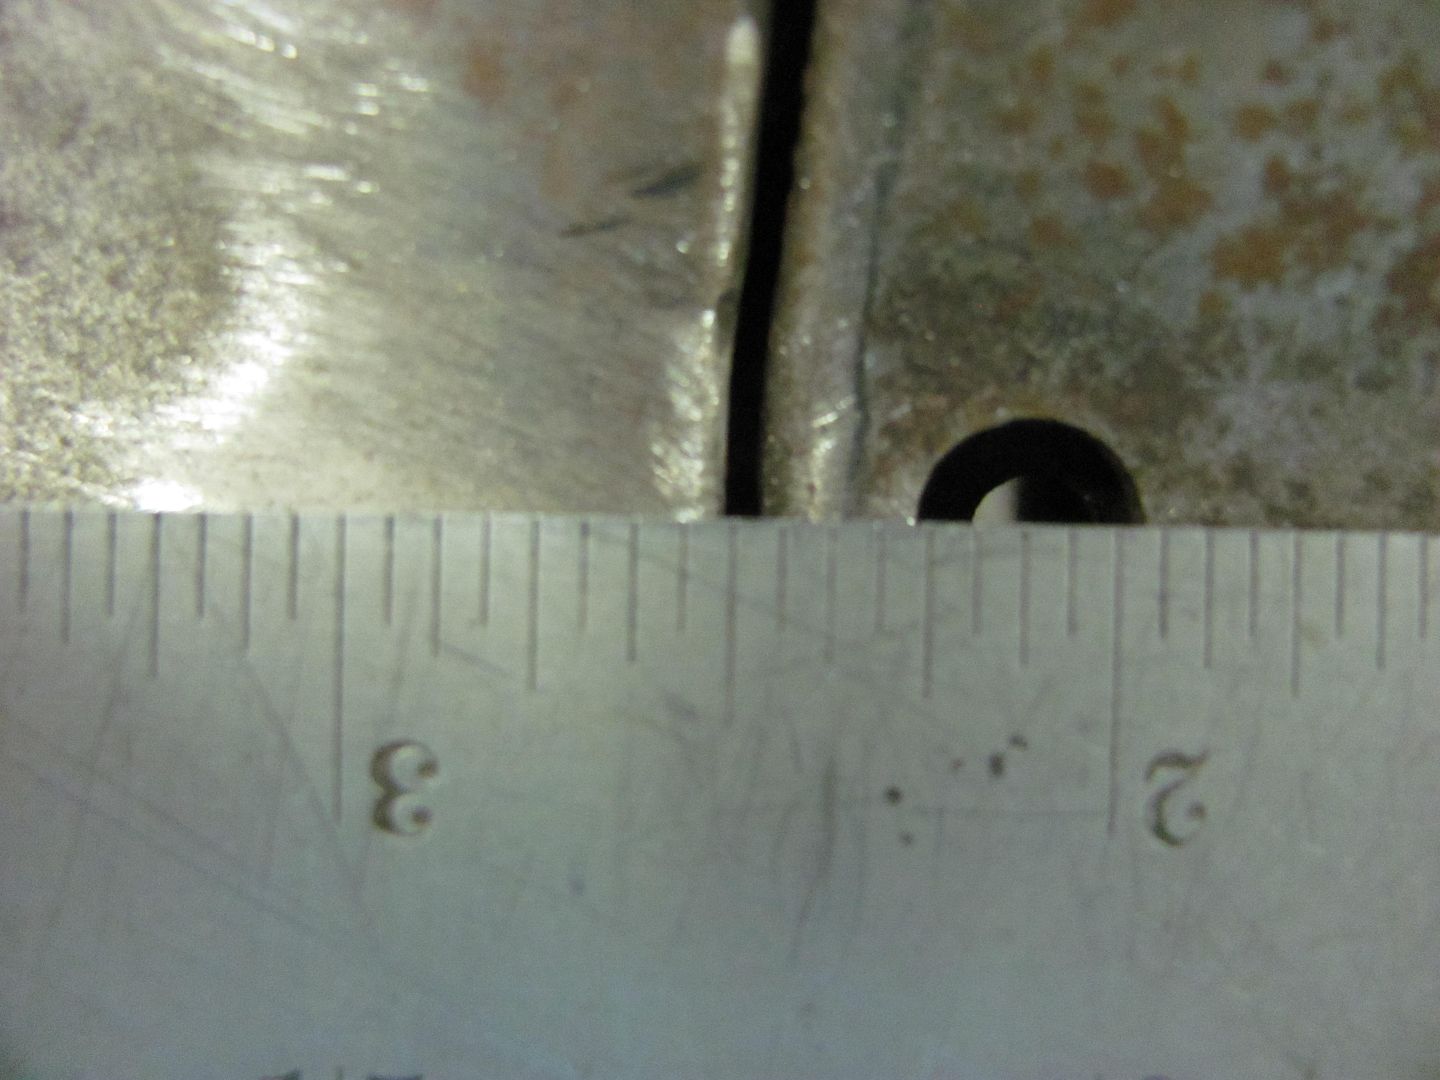
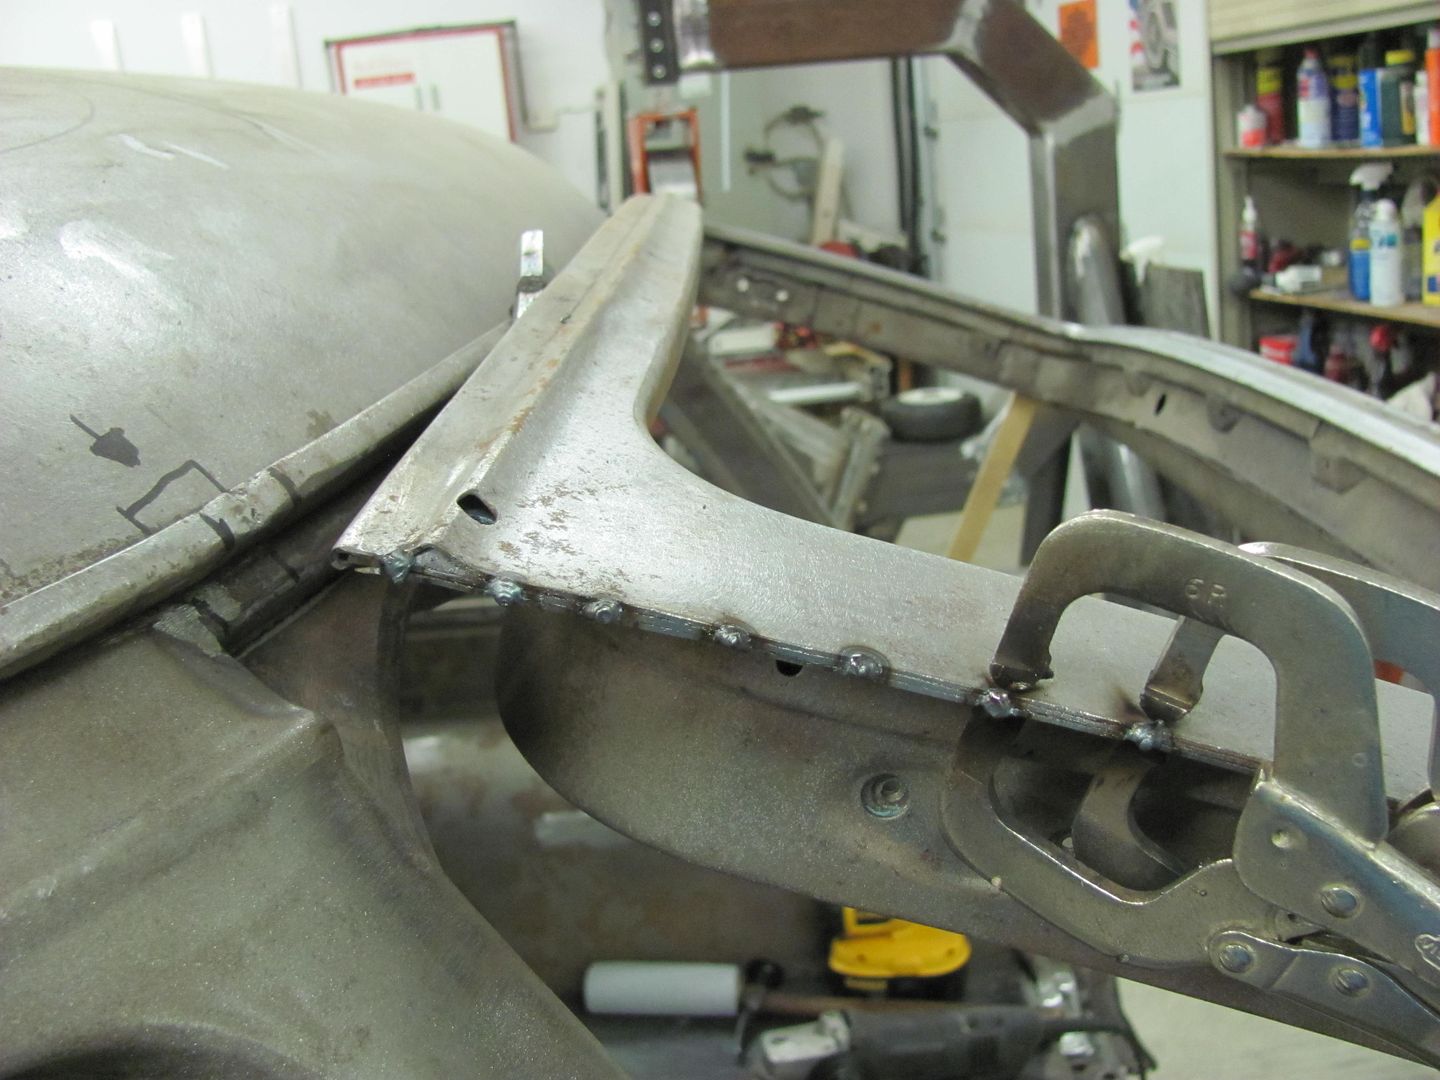
Continuing on to the driver's side, this one is a bit tighter at the bottom than the other, shows about 1/32 gap. Used the compass again to mark the cut line...
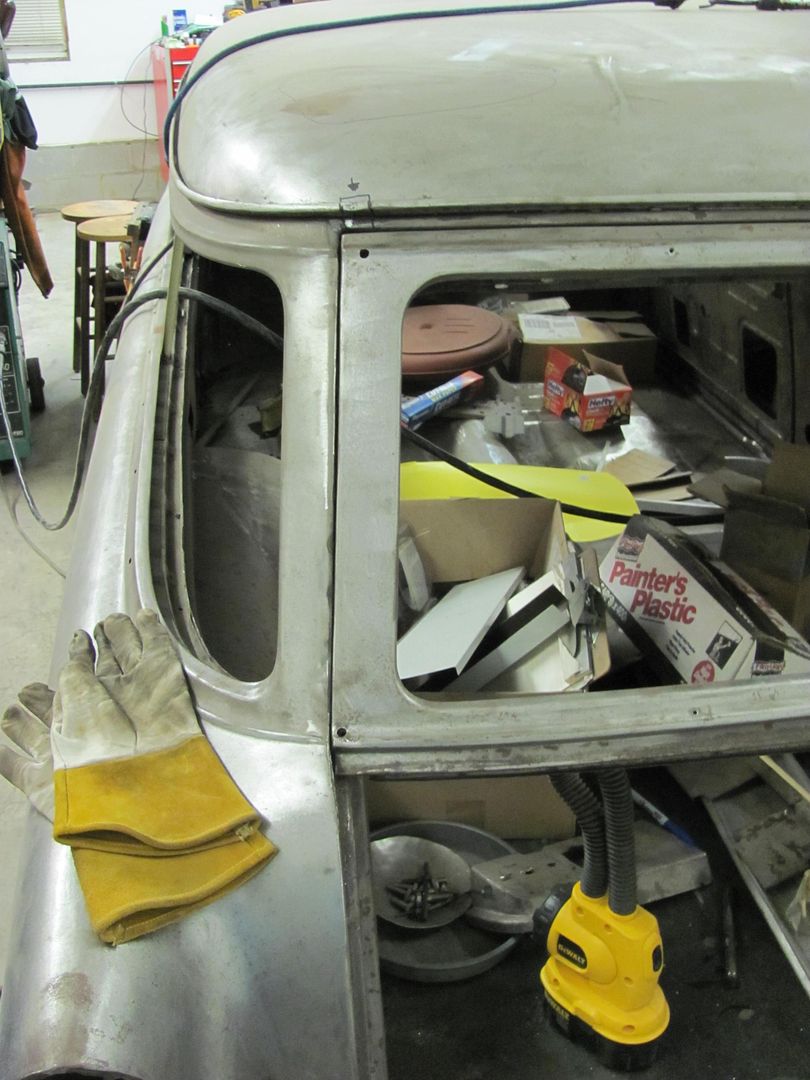
Tacked, welded, and welds dressed...
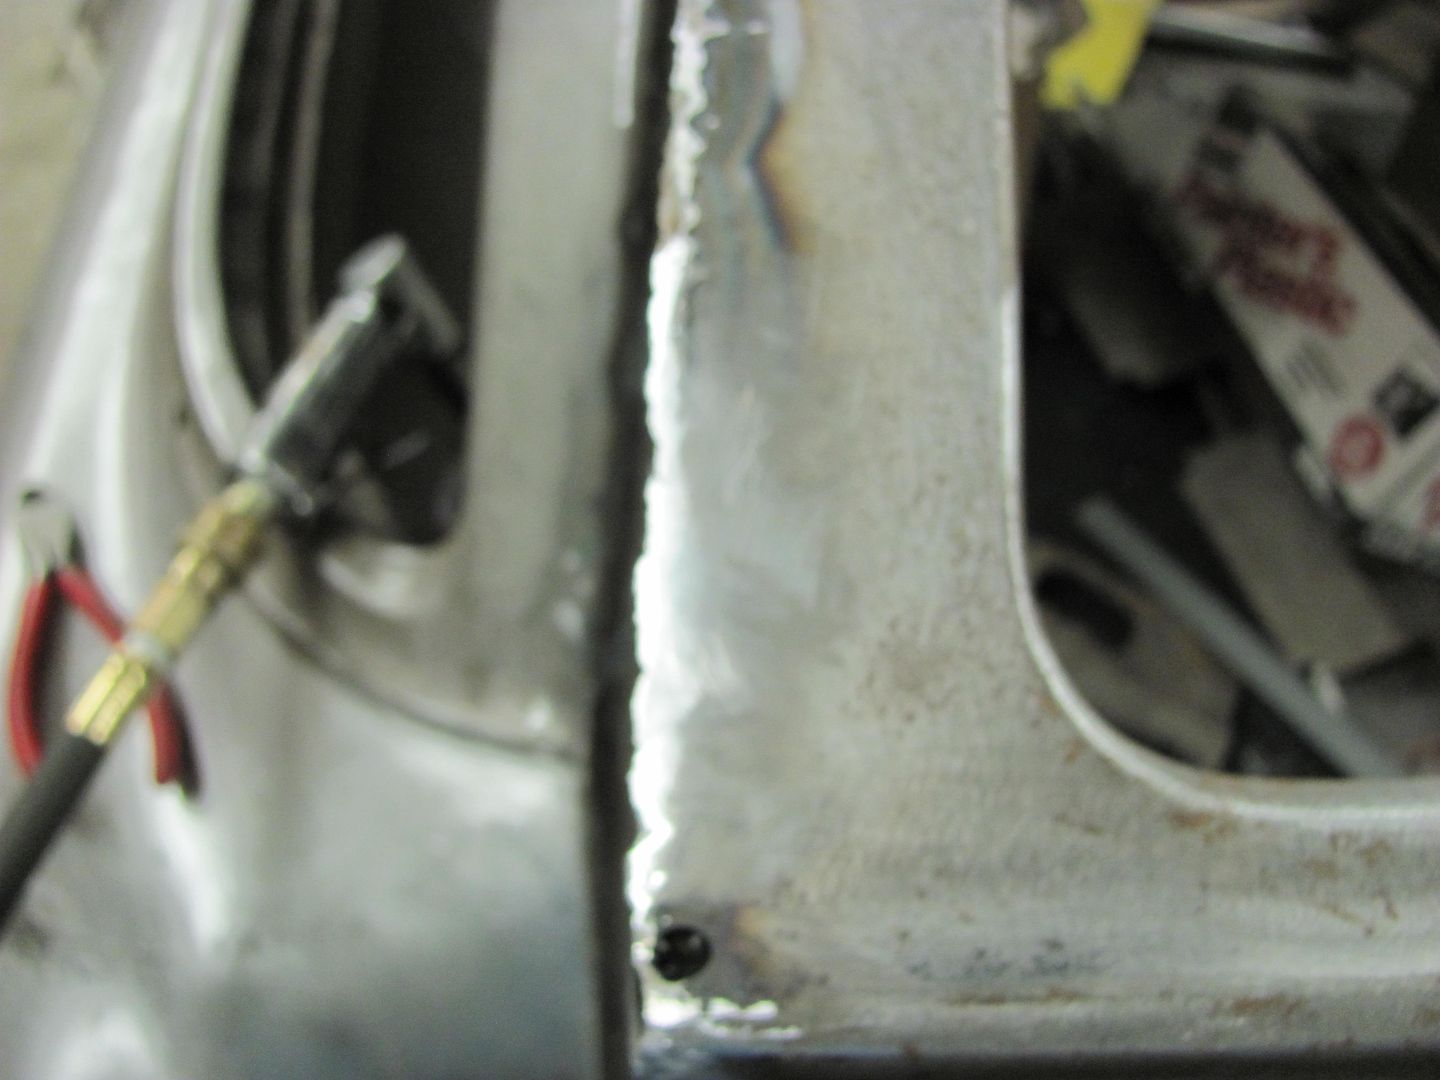
All finished for this evening, have a couple pin holes to fix, will get them when we do the top...
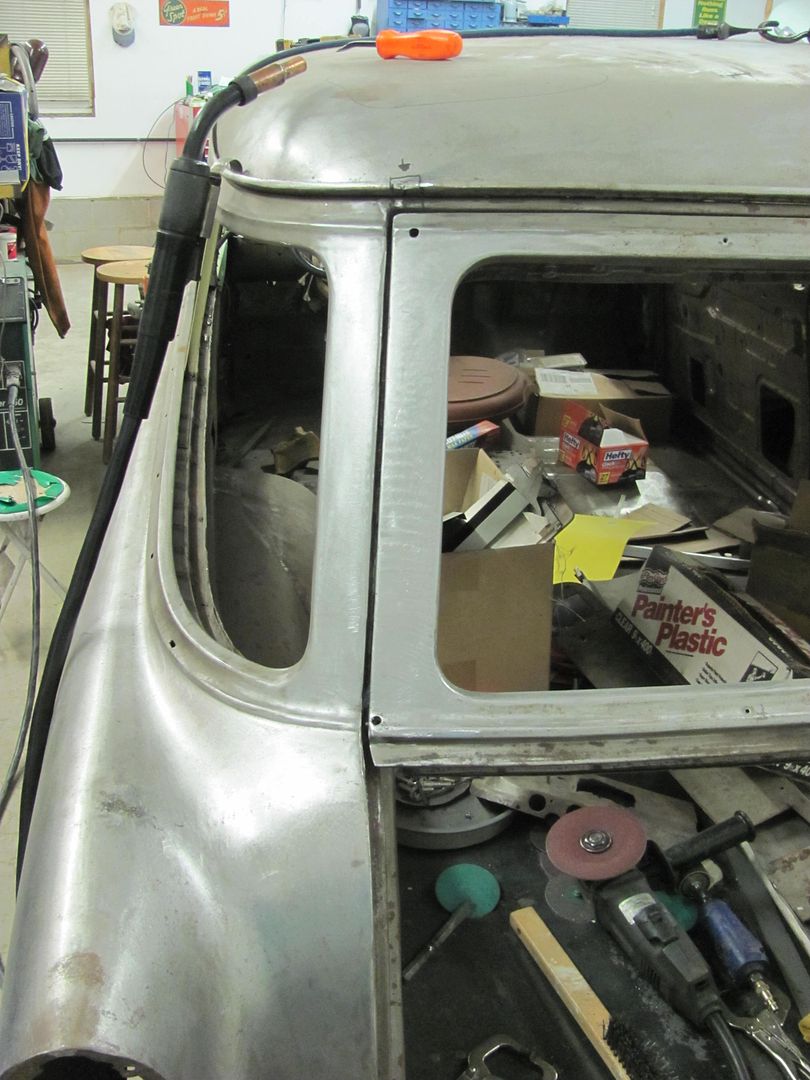
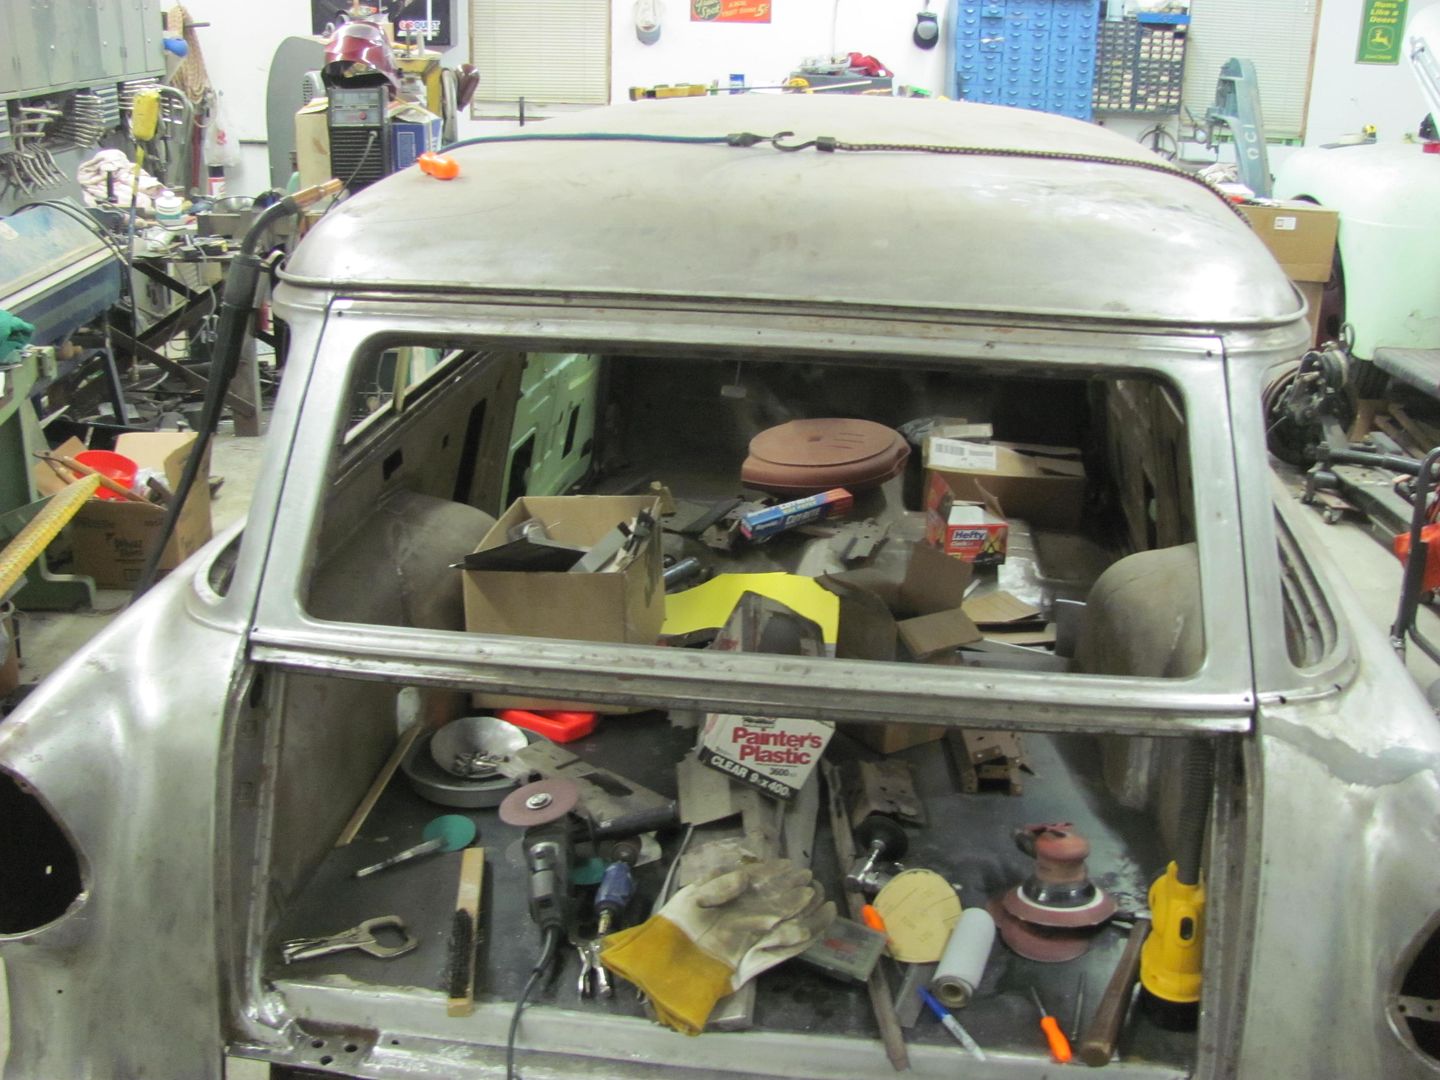
Measured the gap on both sides, it is right at 5/32", or to be more technical, one paint stick width....
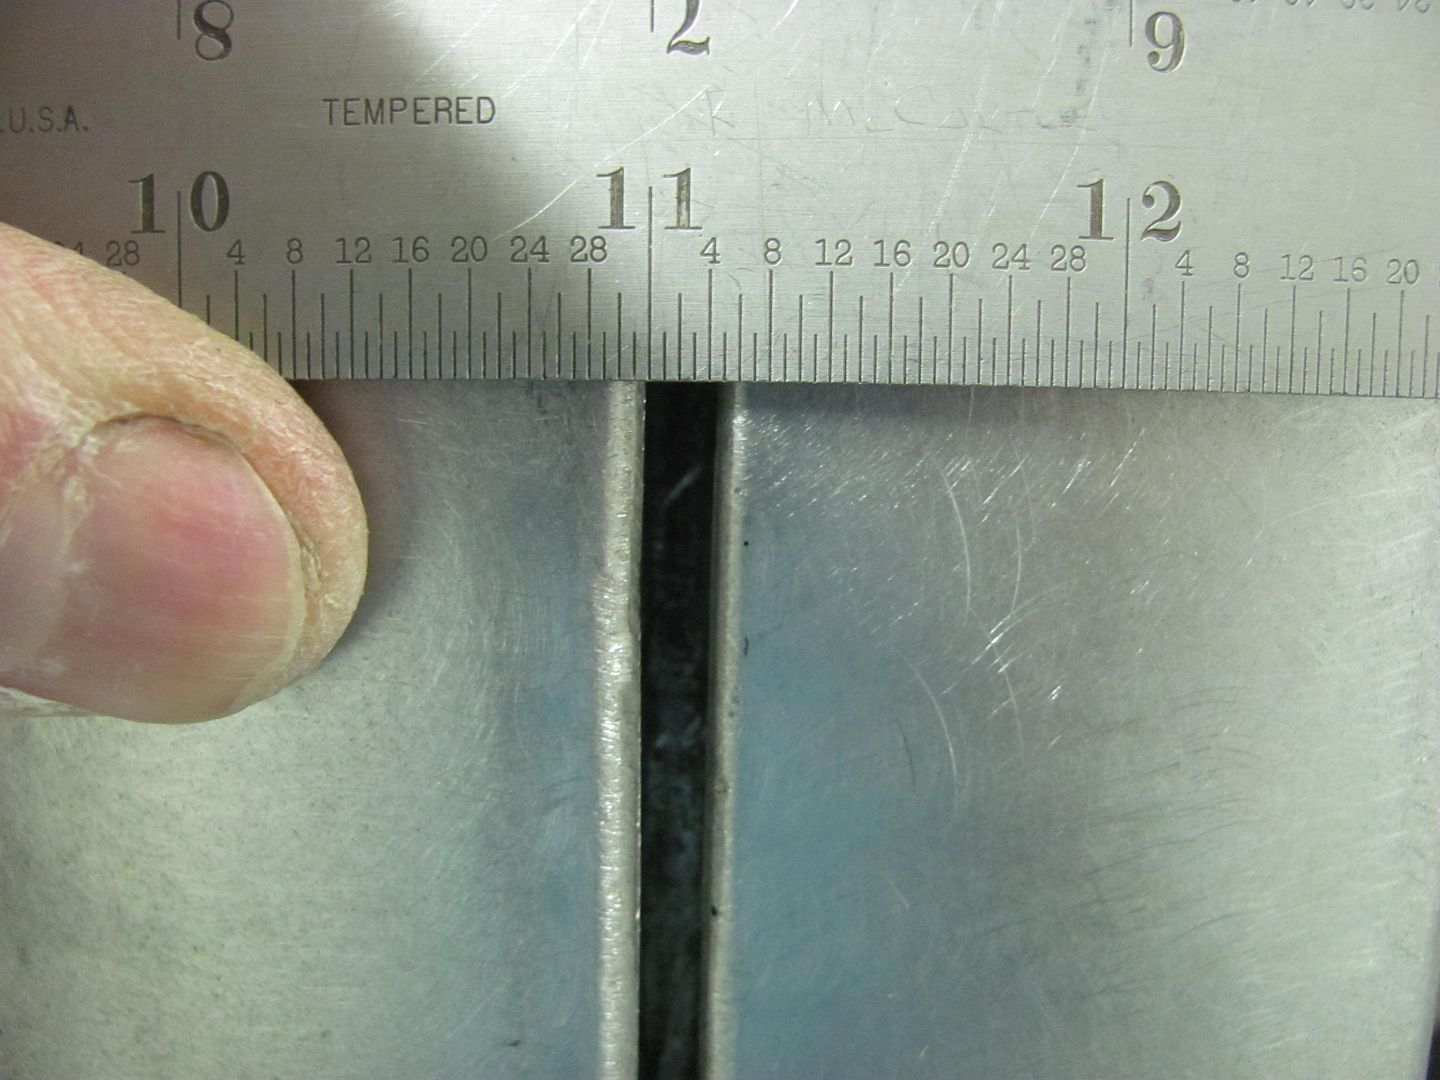

Robert
-
03-26-2013 07:33 PM #45
CHR Member
- Join Date
- Apr 2011
- Location
- Prairie City
- Car Year, Make, Model: 40 Ford Deluxe, 68 Corvette, 72&76 K30
- Posts
- 7,301
- Blog Entries
- 1
Wow, great work! Thanks for posting this. I never gave a thought to using a compass for this. That's a great idea!Ryan
1940 Ford Deluxe Tudor 354 Hemi 46RH Electric Blue w/multi-color flames, Ford 9" Residing in multiple pieces
1968 Corvette Coupe 5.9 Cummins Drag Car 11.43@130mph No stall leaving the line with 1250 rpm's and poor 2.2 60'
1972 Chevy K30 Longhorn P-pumped 24v Compound Turbos 47RH Just another money pit
1971 Camaro RS 5.3 BTR Stage 3 cam, SuperT10
Tire Sizes
 Reply With Quote

Posting Permissions
- You may not post new threads
- You may not post replies
- You may not post attachments
- You may not edit your posts

i've enjoyed the years here . made a lot of friends. most who have left. i see no reason to continue with this so hope to see you somewhere else. i dont think this site will ever be back. it's lived...
Dead!