


 3390Likes
Thread: 55 Wagon Progress


Results 1,531 to 1,545 of 1865
 LinkBack URL
 About LinkBacks
-
08-30-2020 09:41 PM #1531
 CHR Member

- Join Date
- Jun 2008
- Location
- Leonardtown
- Car Year, Make, Model: Walking
- Posts
- 1,228
Thanks for all the feedback guys!! Yeah, Brandon and the guys did a bang up job on the paint.. Will be turning some heads when Dana takes it out.
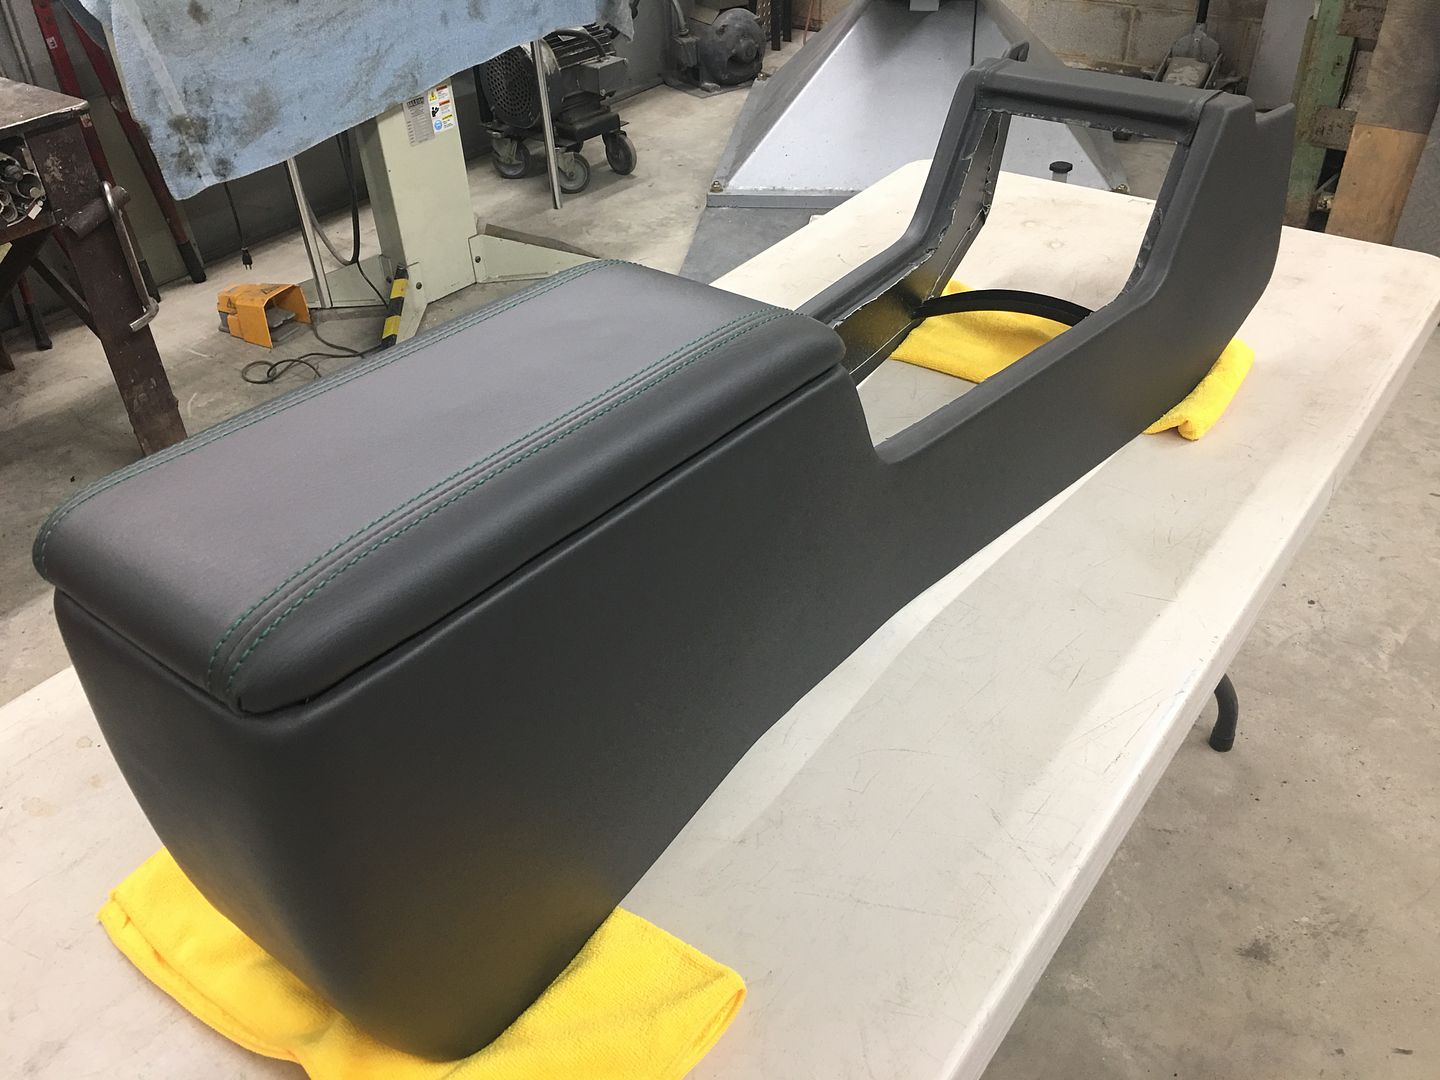
We stopped by the upholstery shop on Friday, they had the console ready...
Video:
https://www.youtube.com/watch?v=bfvtDpCNpCU
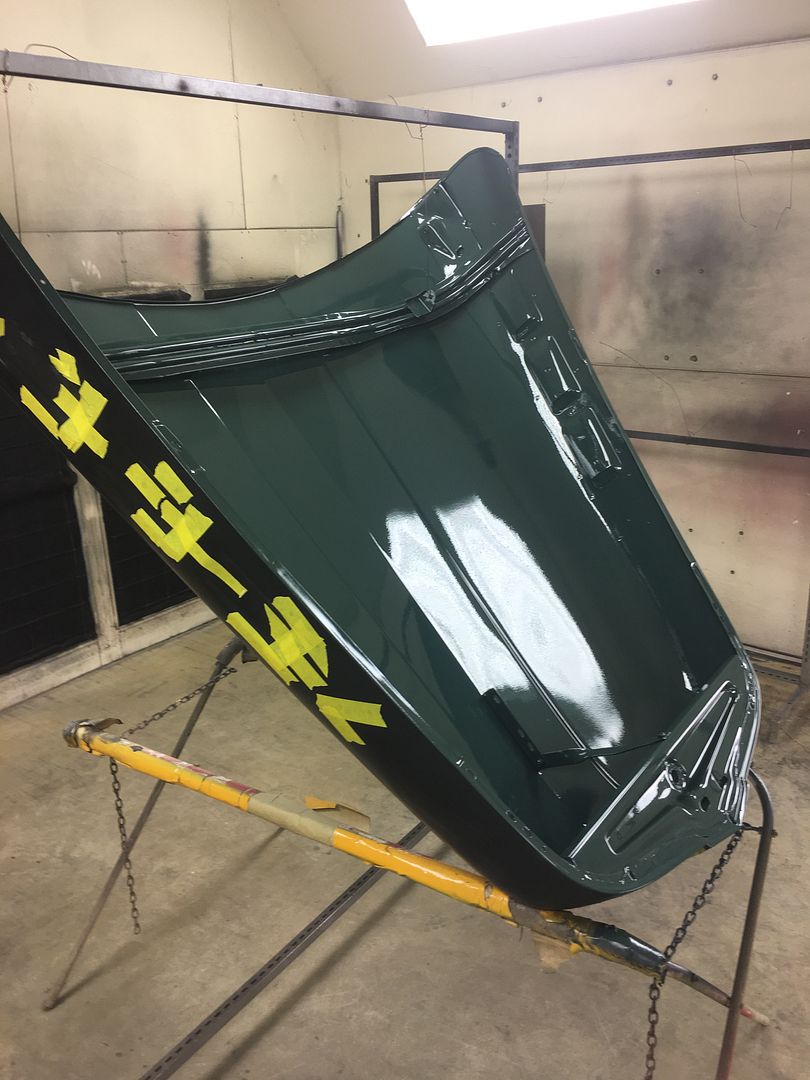
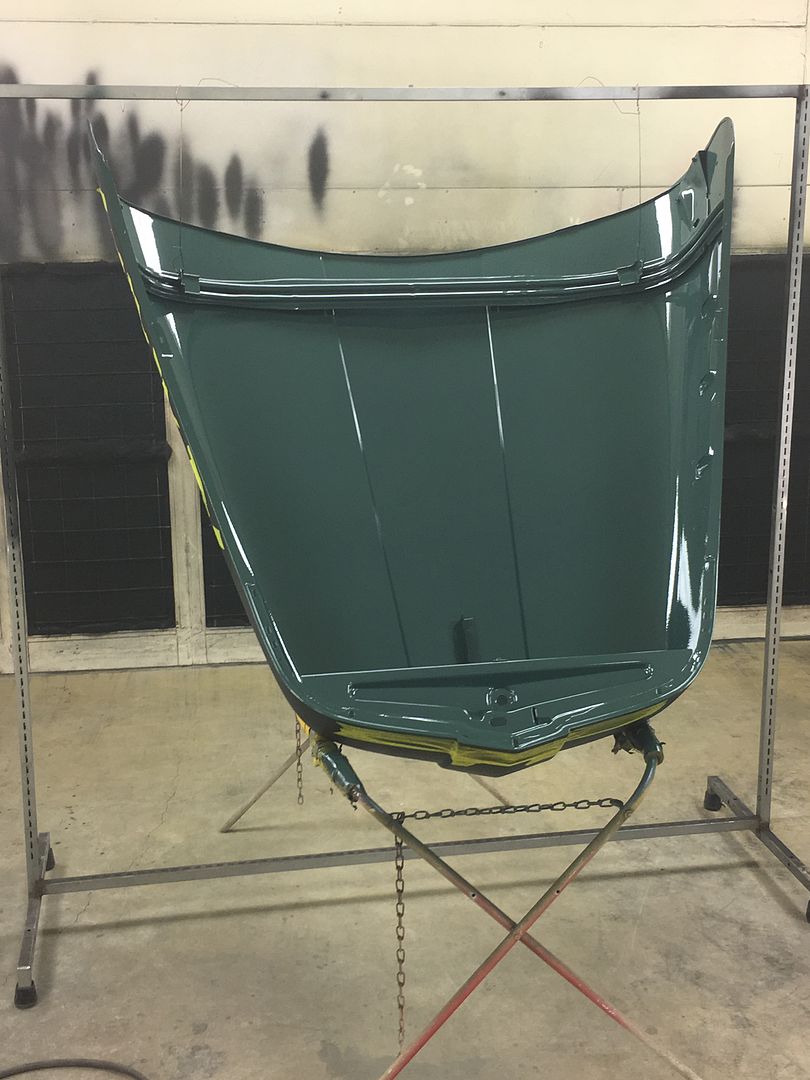
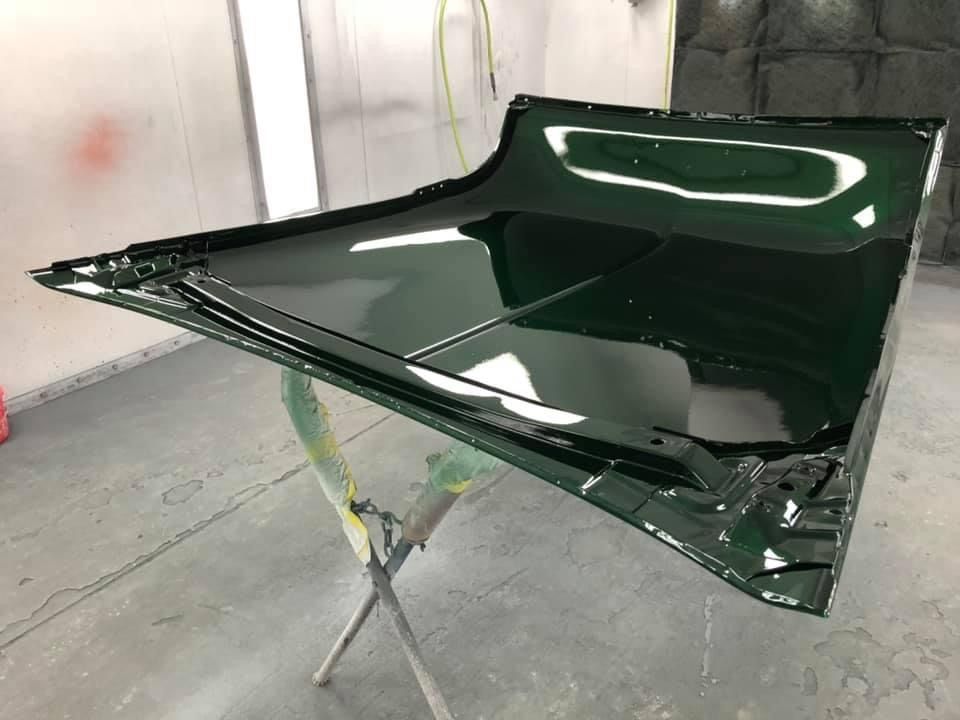
Playing catch-up here on the F7 hood, the inside of the crease was blocked using tape to keep the center line sharp, then brace welded in place and some epoxy touch ups done..
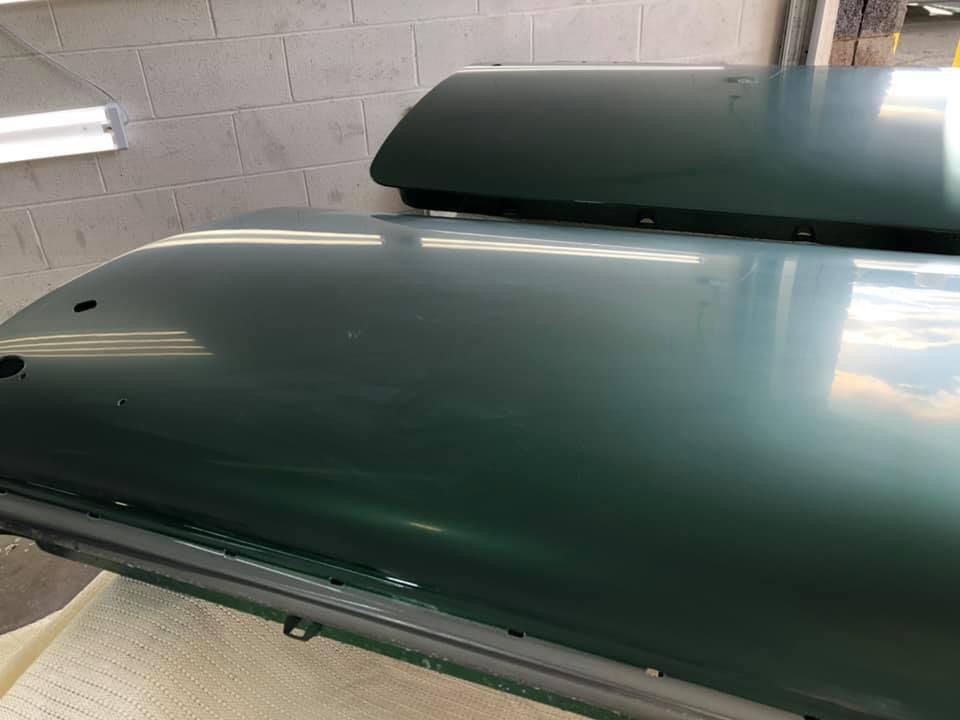
With the touch ups blocked, we're ready for some Epoxy/sealer, some PPG ESSS base, and my first time spraying SPI Universal... WooHoo! love this clear!!
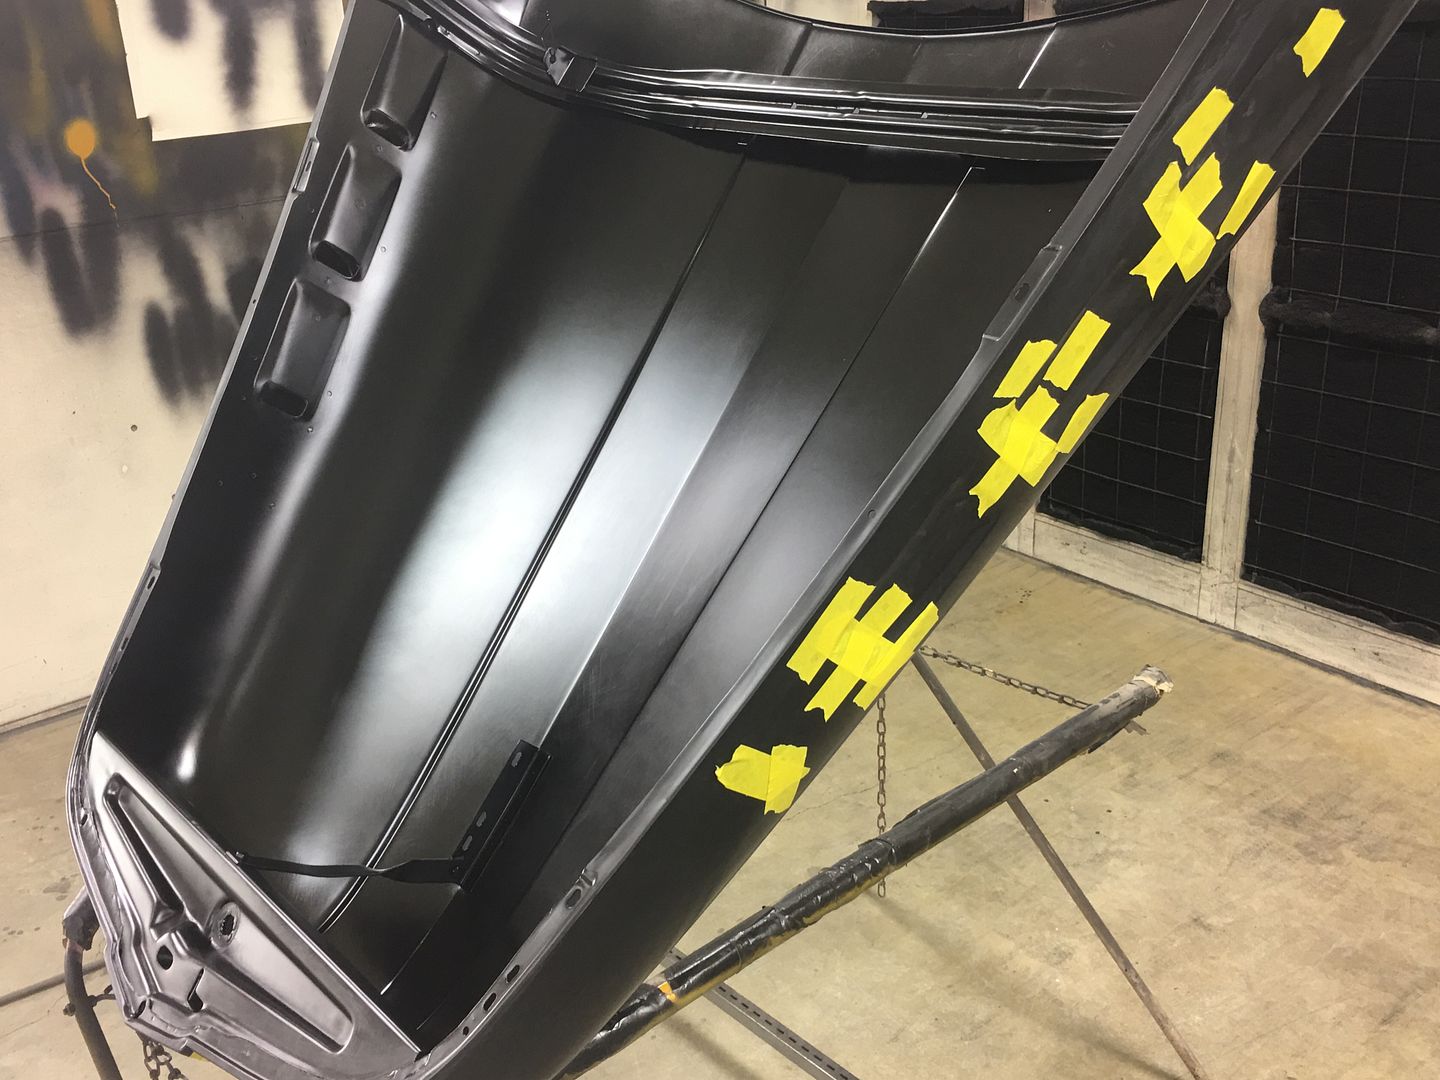
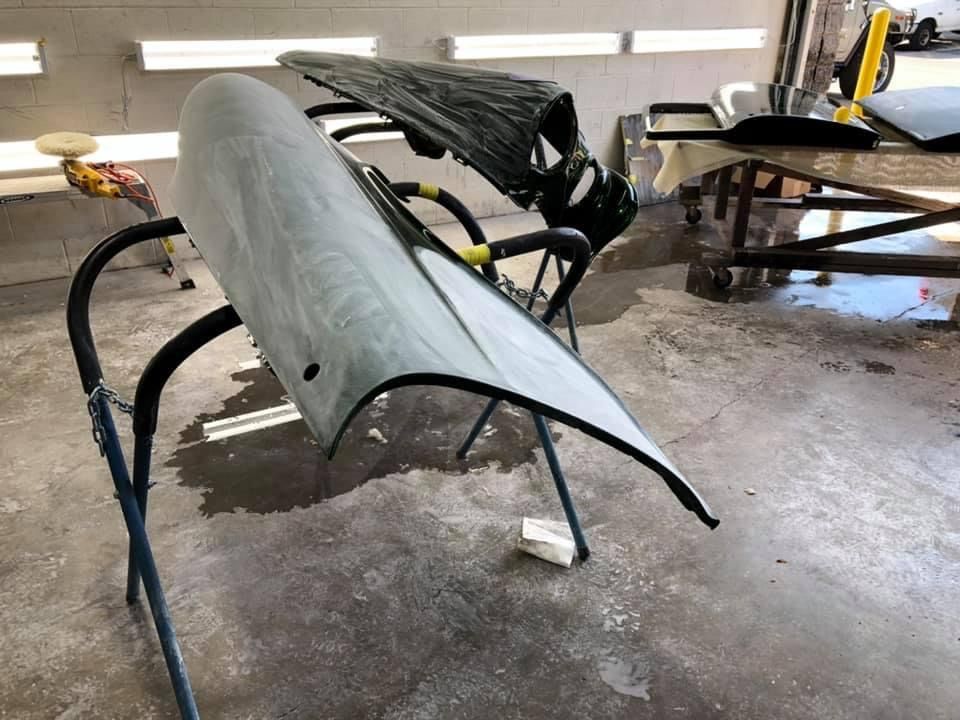
These Ford truck hoods can be a pain to get good paint coverage inside the nose.. So a couple pieces of TIG wire from our rack to the hood brackets hold it up in the air so we can get into the nose with the spray gun..
Robert
-
Advertising

- Google Adsense
- REGISTERED USERS DO NOT SEE THIS AD
-
08-31-2020 08:13 AM #1532
CHR Member
- Join Date
- Jan 2006
- Location
- Constantine
- Car Year, Make, Model: 57 chevy 2 dr wagon
- Posts
- 9,476
Progress WOW 10 characters or no postCharlie
Lovin' what I do and doing what I love
Some guys can fix broken NO ONE can fix STUPID
W8AMR
http://fishertrains94.webs.com/
Christian in training
-
10-04-2020 08:54 PM #1533
CHR Member
- Join Date
- Jun 2008
- Location
- Leonardtown
- Car Year, Make, Model: Walking
- Posts
- 1,228
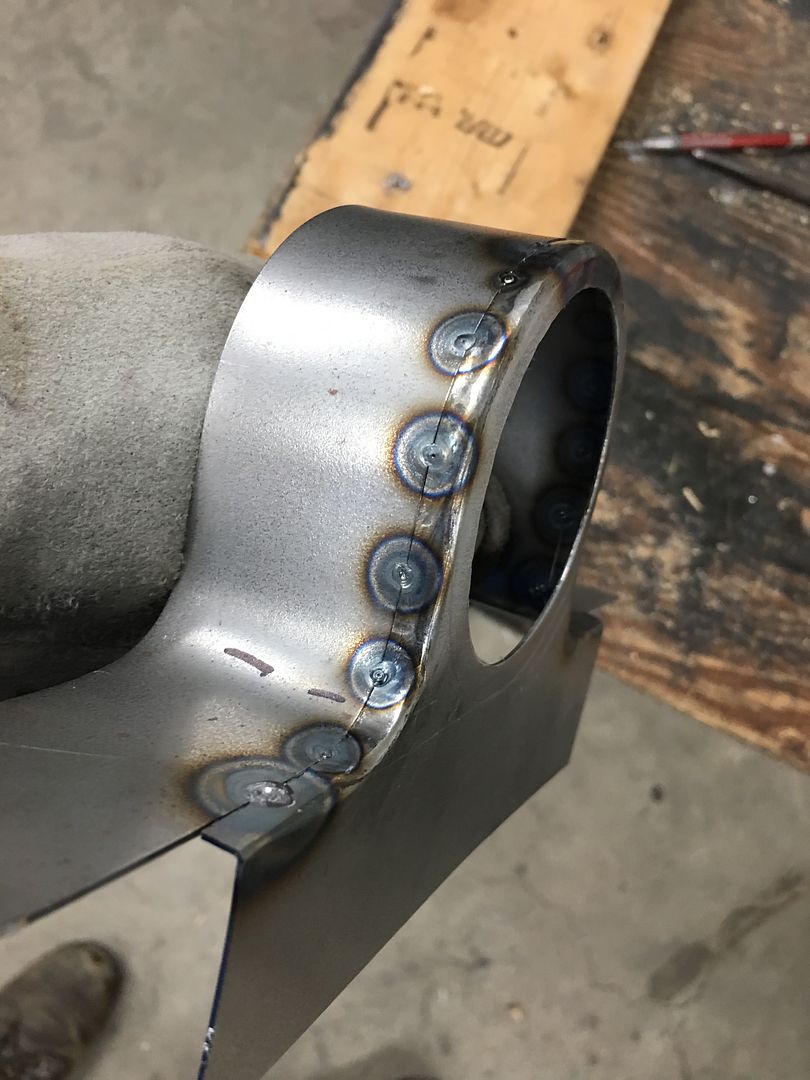
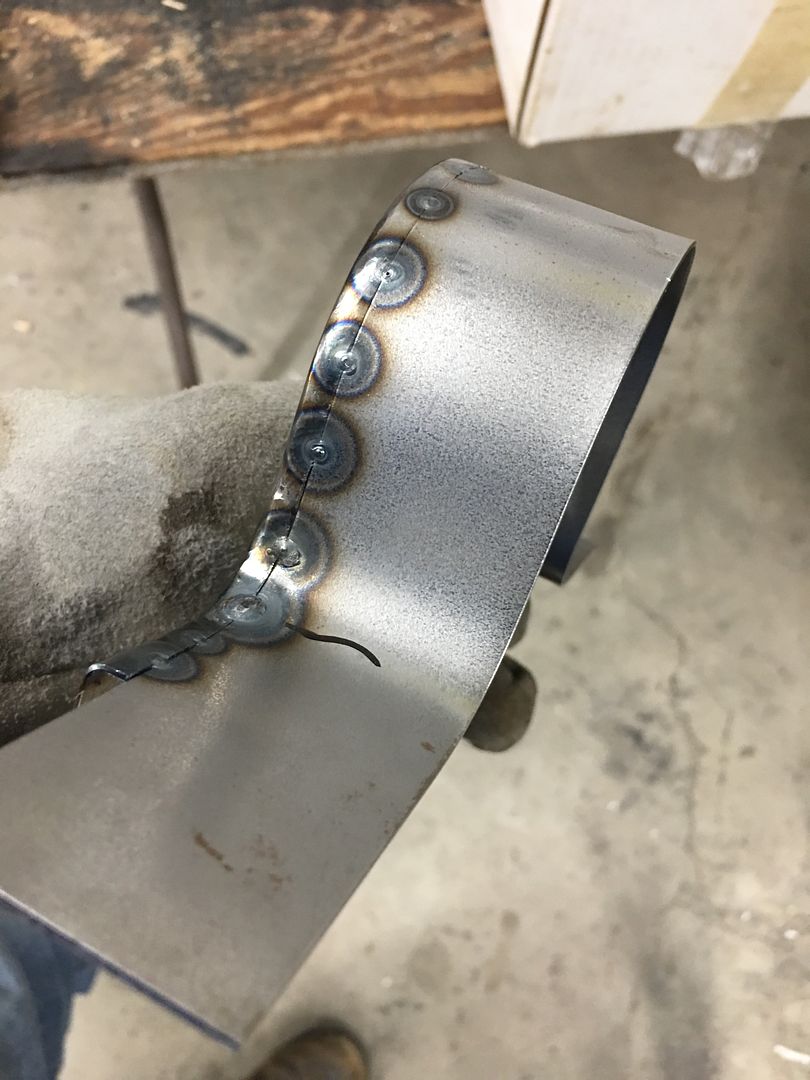
Some basic metalshaping . making a vent bracket for under the dash using a hammer and piece of pipe. Excuse the audio quality at the start, what you get for filming with an iPhone 6S. S stands for SUCKS... apparently the phone gets confused as to which of 3 microphones to use. We filmed the rest with a different phone..
Robert
-
10-05-2020 06:18 AM #1534
CHR Member/Contributor
- Join Date
- Sep 2007
- Location
- Gardner, KS
- Car Year, Make, Model: '33 HiBoy Coupe, '32 HiBoy Roadster
- Posts
- 11,245
Thanks for taking time to make that through the whole process! Nice!Roger
Enjoy the little things in life, and you may look back one day and realize that they were really the BIG things.
-
10-05-2020 07:16 AM #1535
CHR Member
- Join Date
- Jan 2006
- Location
- Constantine
- Car Year, Make, Model: 57 chevy 2 dr wagon
- Posts
- 9,476
Thanks for the demo.. I think if you were to put a shop towel or two in the pipe it wouldn't ring so. Having hearing aids I notice it moreCharlie
Lovin' what I do and doing what I love
Some guys can fix broken NO ONE can fix STUPID
W8AMR
http://fishertrains94.webs.com/
Christian in training
-
10-05-2020 07:45 AM #1536
CHR Member
- Join Date
- Jun 2008
- Location
- Leonardtown
- Car Year, Make, Model: Walking
- Posts
- 1,228
Part of the ring is a loose handle on that hammer.. but yeah, point taken! Keep it up and I'll need the hearing aids..Robert
-
10-05-2020 09:14 AM #1537
CHR Member
- Join Date
- Jun 2008
- Location
- Leonardtown
- Car Year, Make, Model: Walking
- Posts
- 1,228
I had a question on another site on the whys and hows… too good not to share here as well...
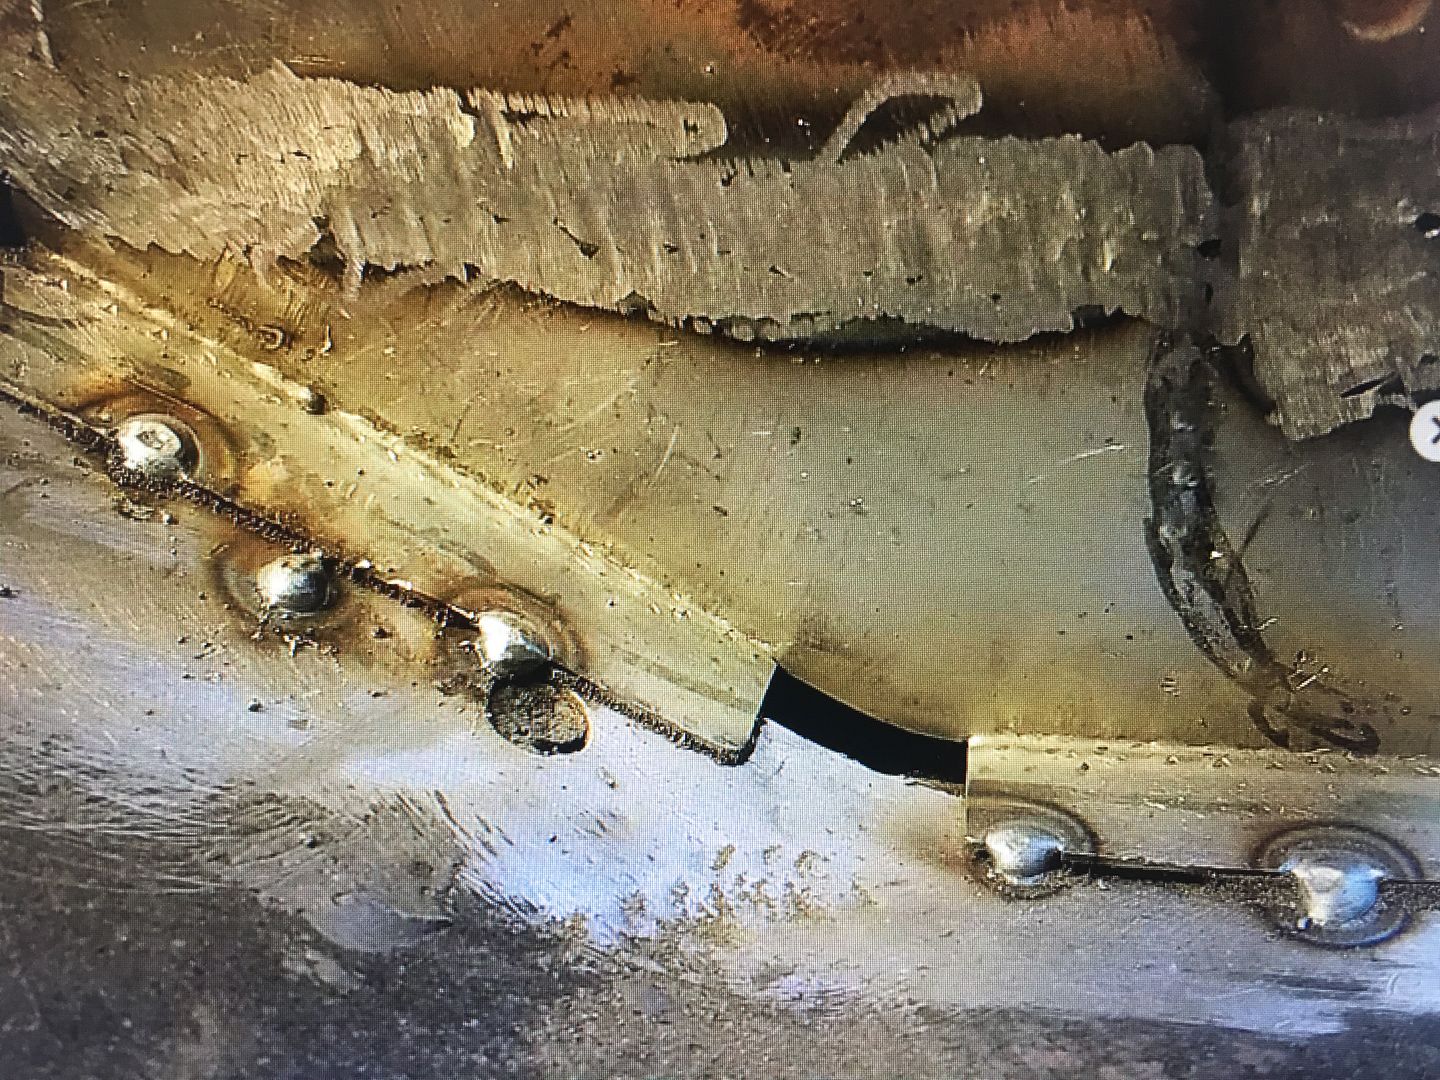
Nice show and tell on that Robert... just curious , why not just weld the face to the 2nd piece without tipping the edge over..then dressing the corners..
Greg, EXCELLENT question!!!!
When you place a weld on a corner, and for an example, lets say we are patching a lower fender right up to the door opening to repair some rust at the bottom of the fender.... you lose the ability to control the two perpendicular sides. Let's say you blow a hole and have to re-weld in a spot or two. Or things just get too hot, period. The heat and shrinking is bound to pull at the weld, and now you are pulling inward in two directions. The weld seam directly in the corner makes it near impossible to planish. So you'll find that in addition to having low spots on the outer surface, you also have altered the door to fender GAP with little hope of fixing it without filler.. By shaping your panel as you want it, and then tipping a flange that carries the seam into the perpendicular side, the crease helps to hold things from moving. And with the weld seam far enough away from the corner that you can hammer and dolly, any distortion can be corrected. With the brackets we made Saturday, this was easy as we just used the pipe once again, this time as a dolly/anvil to planish the TIG weld once completed.Robert
-
10-05-2020 10:19 AM #1538
CHR Member
- Join Date
- Jan 2005
- Location
- Doon, Ia
- Car Year, Make, Model: 53 Chevy 3100
- Posts
- 2,716
Awesome, his usual, you make it look so easy!Seth
God cannot give us a happiness and peace apart from Himself, because it is not there. There is no such thing. C.S.Lewis
-
10-07-2020 06:01 AM #1539
CHR Member
- Join Date
- Jun 2008
- Location
- Leonardtown
- Car Year, Make, Model: Walking
- Posts
- 1,228
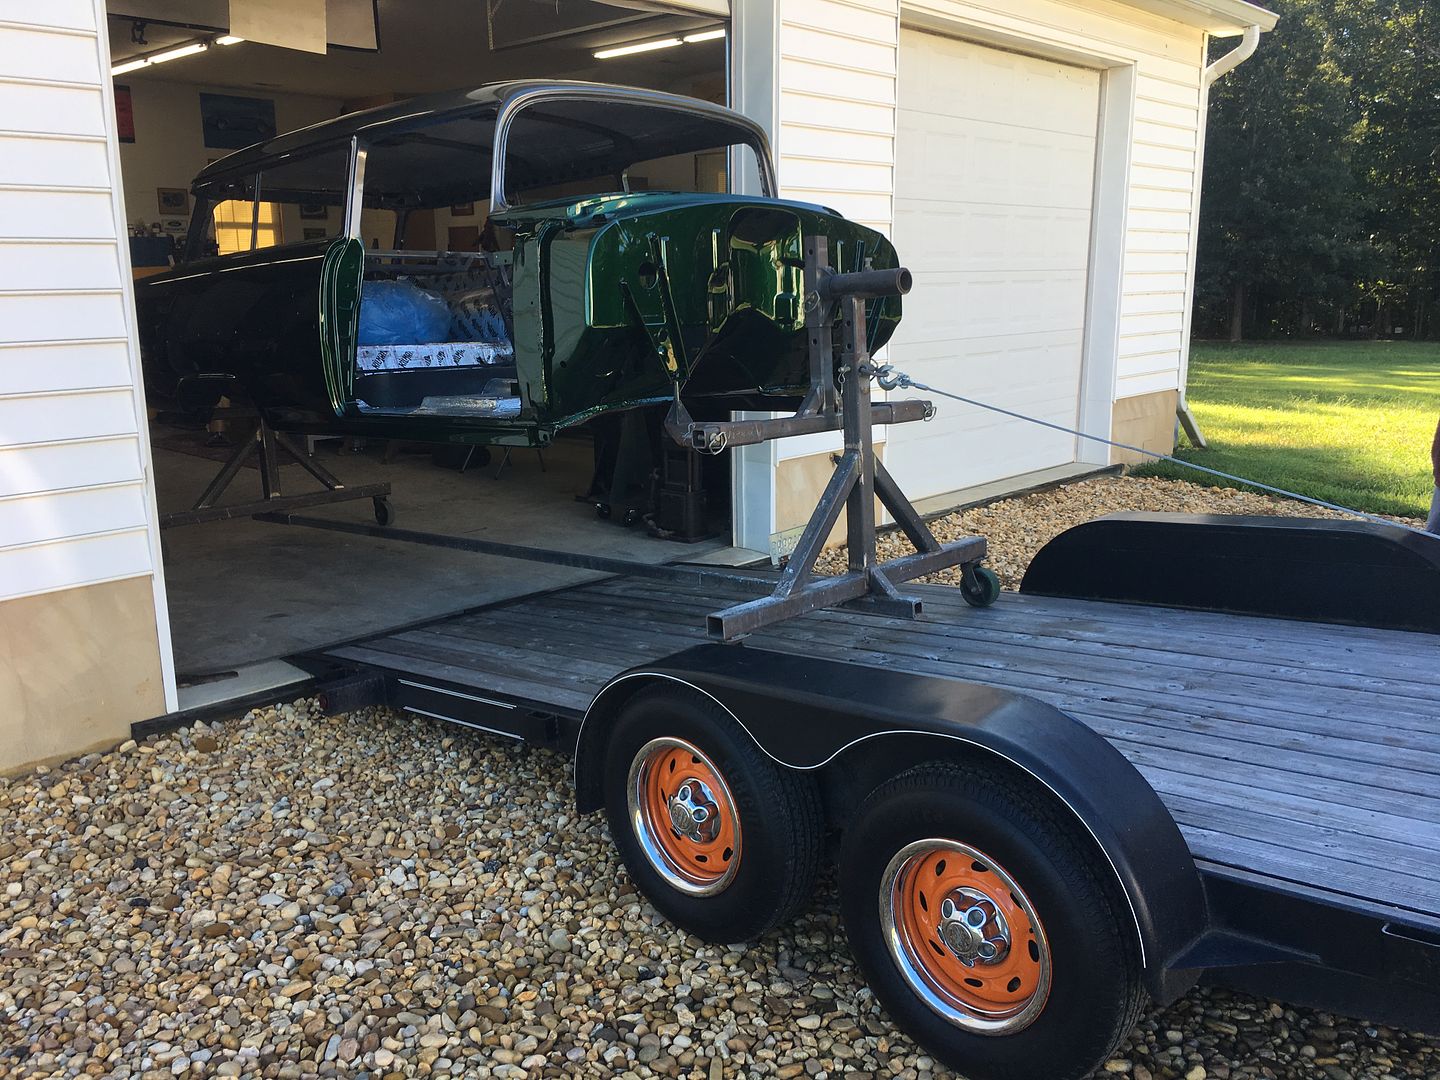
Well I think we're long overdue for a wagon update. Yes, it is back in the building....
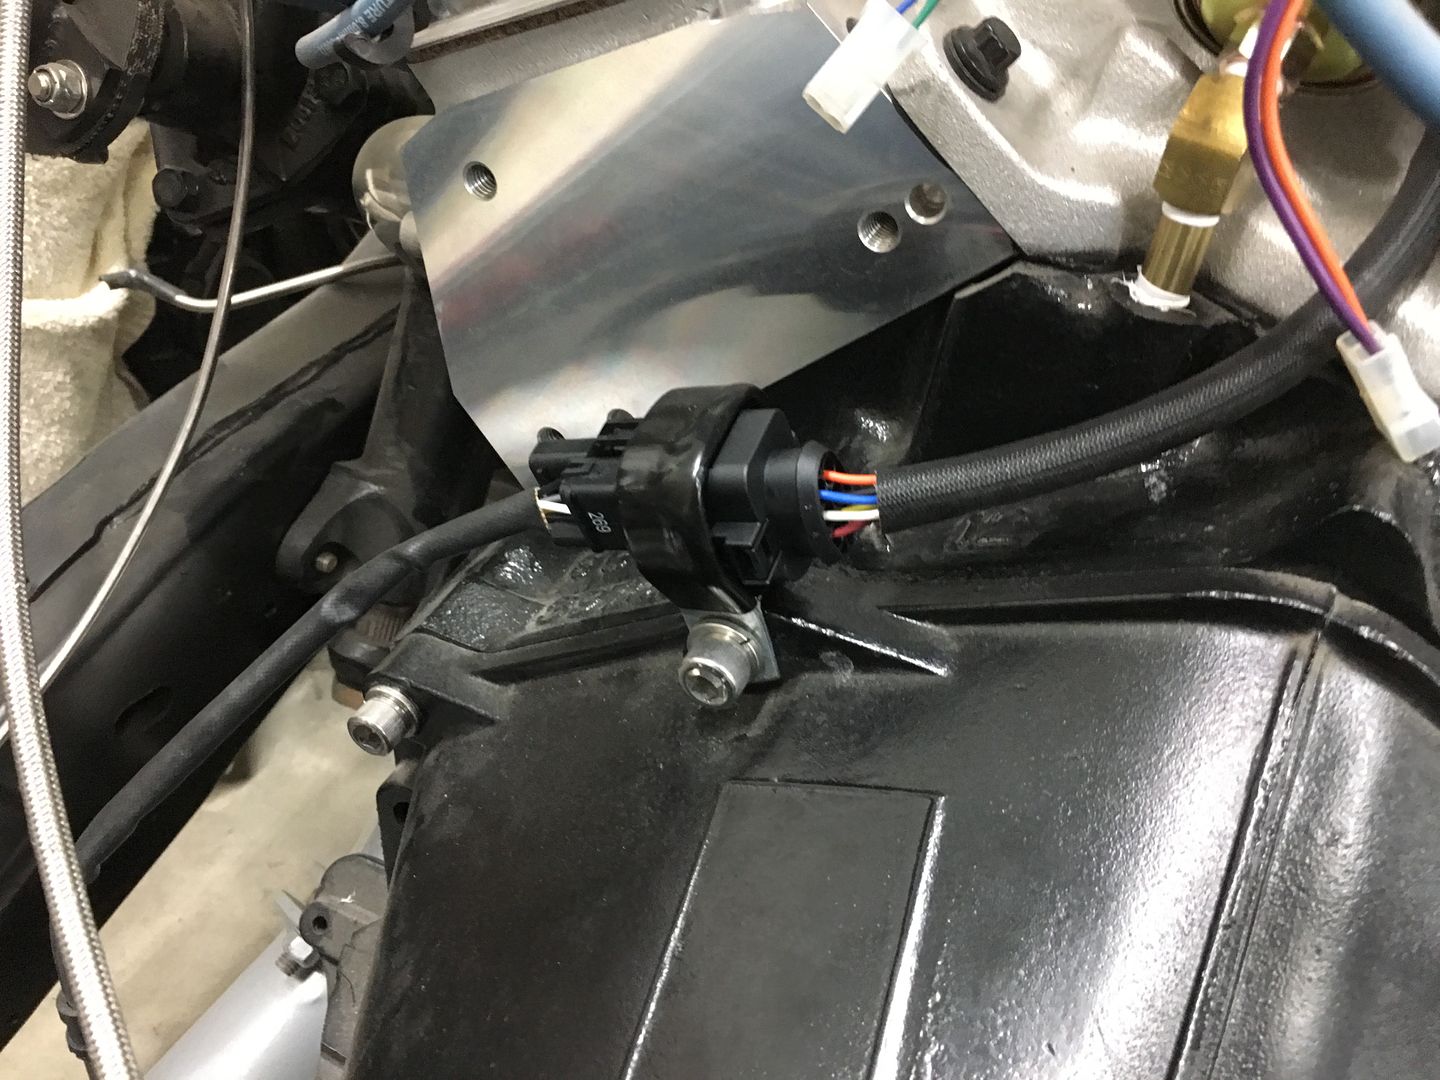
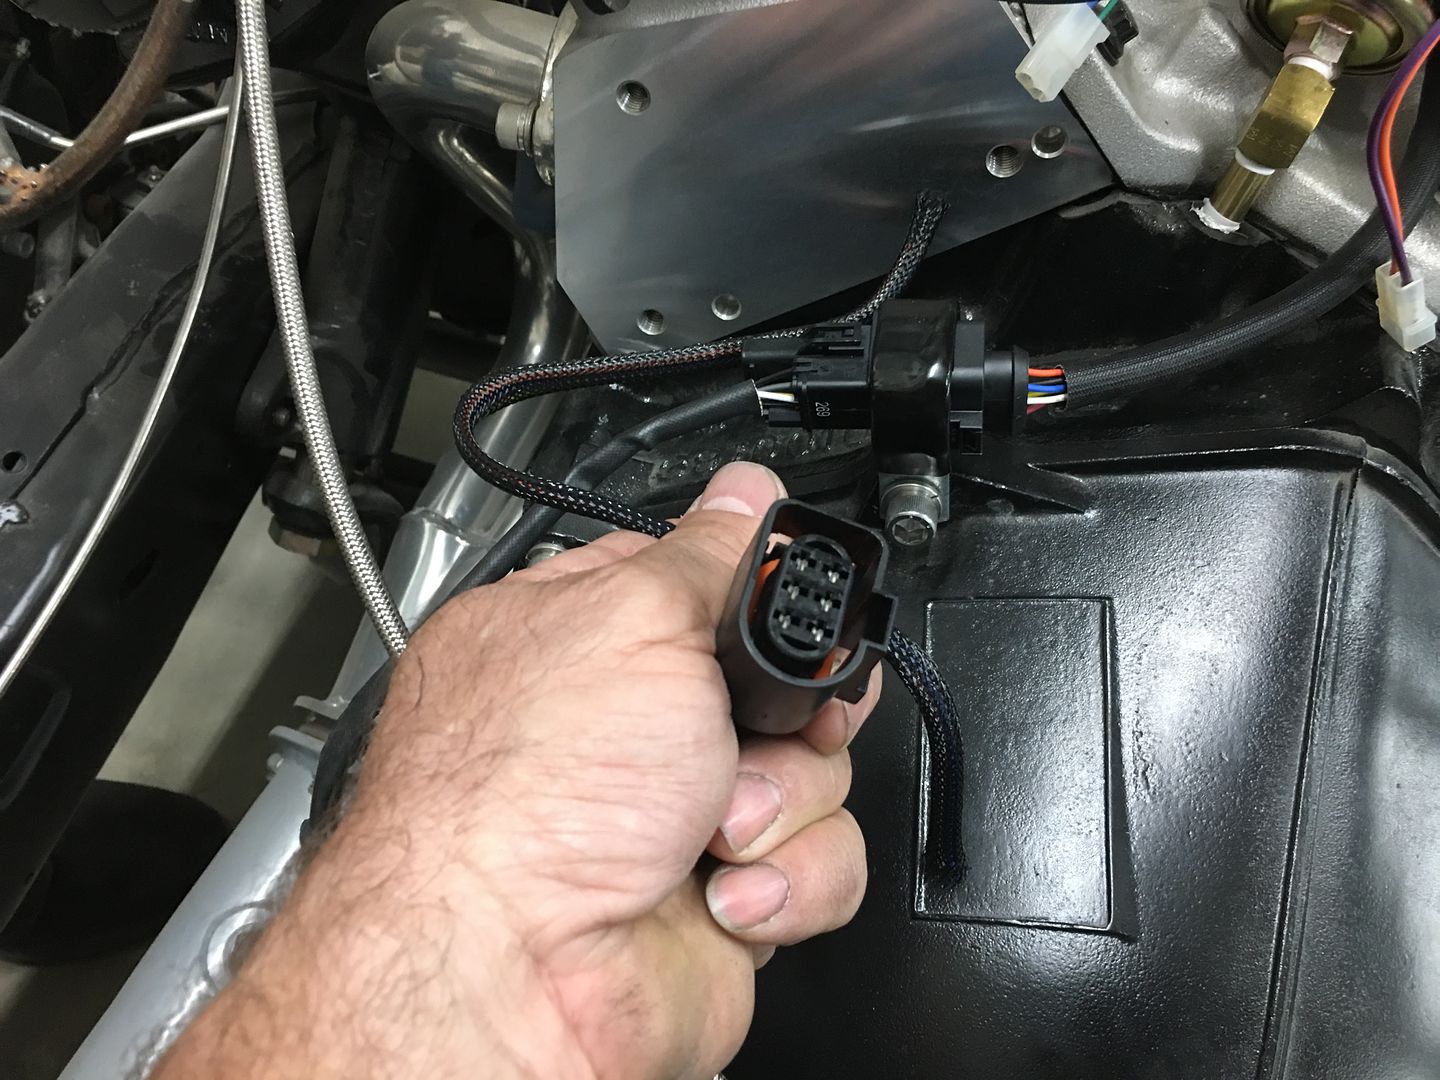
And we should be setting the body back on the chassis this weekend. We've been buttoning up some last minute things on the frame before a body makes accessibility more of a challenge. The cable for the O2 sensor up to the EFI was about two feet too long, so we ordered another connector and shortened it up a bit.
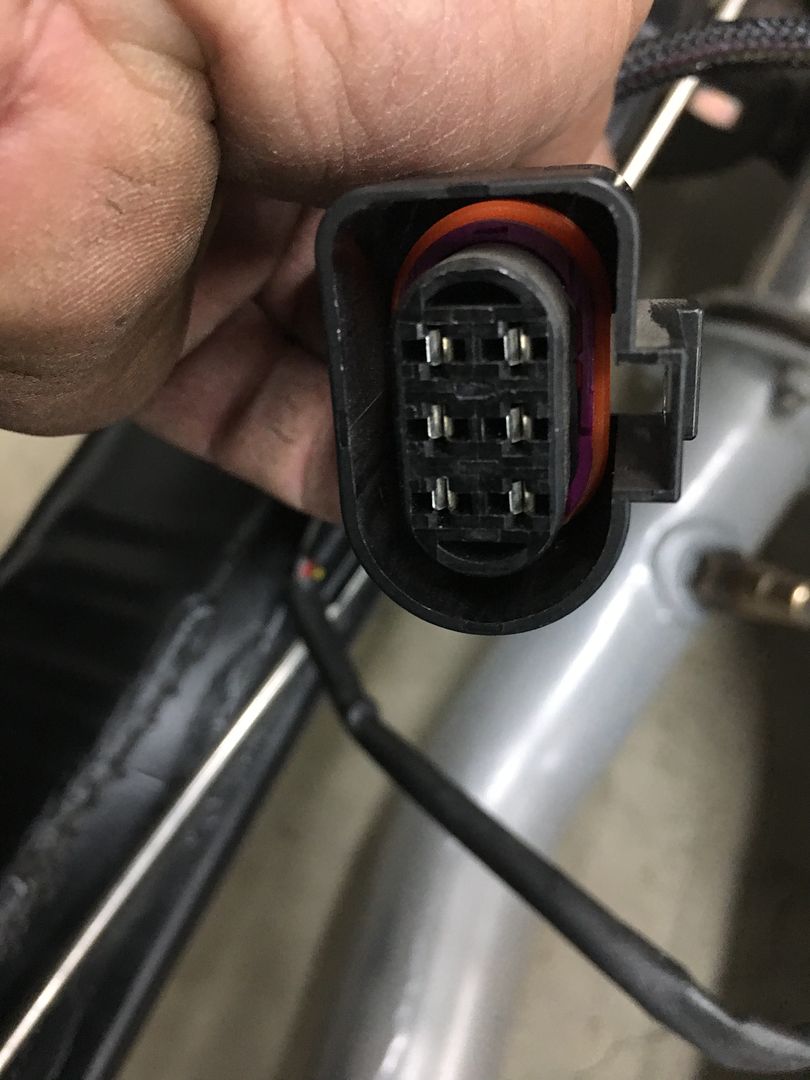
In order to better hold things from bouncing around, a large Adel clamp is "massaged" to better fit the shape of the Bosch connector, and yet remain loose enough to remove the connector if need be for any future troubleshooting needs..
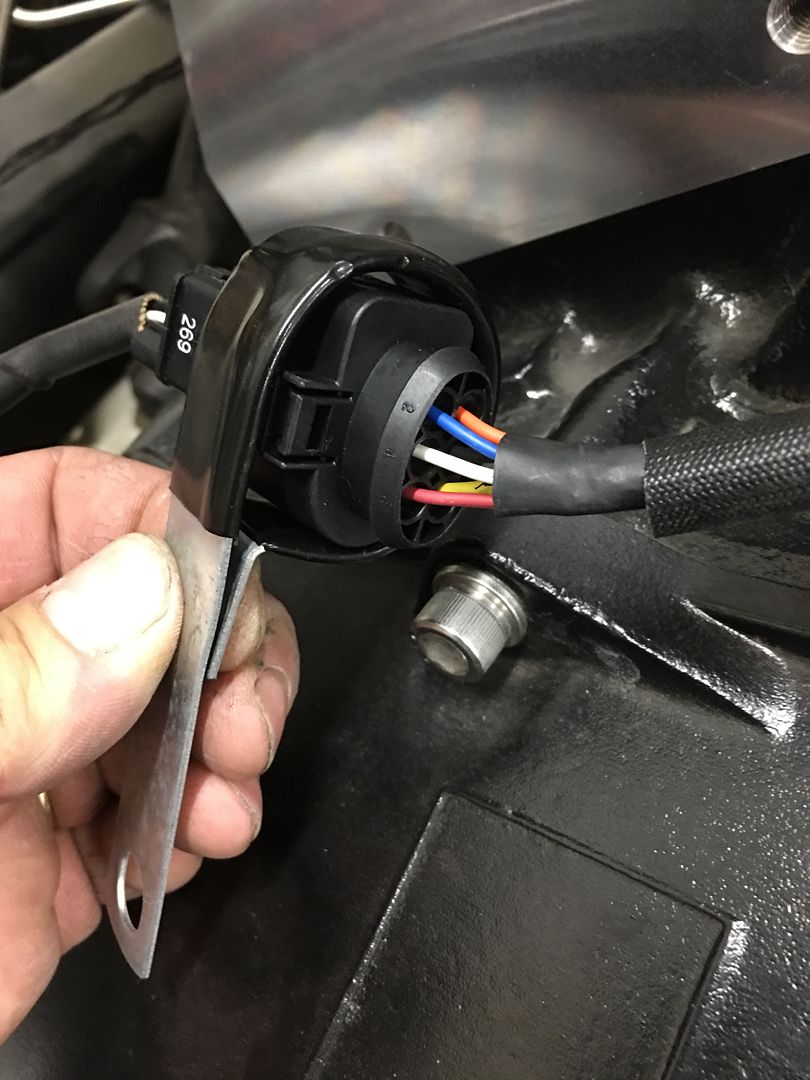

….and here's our leftover.
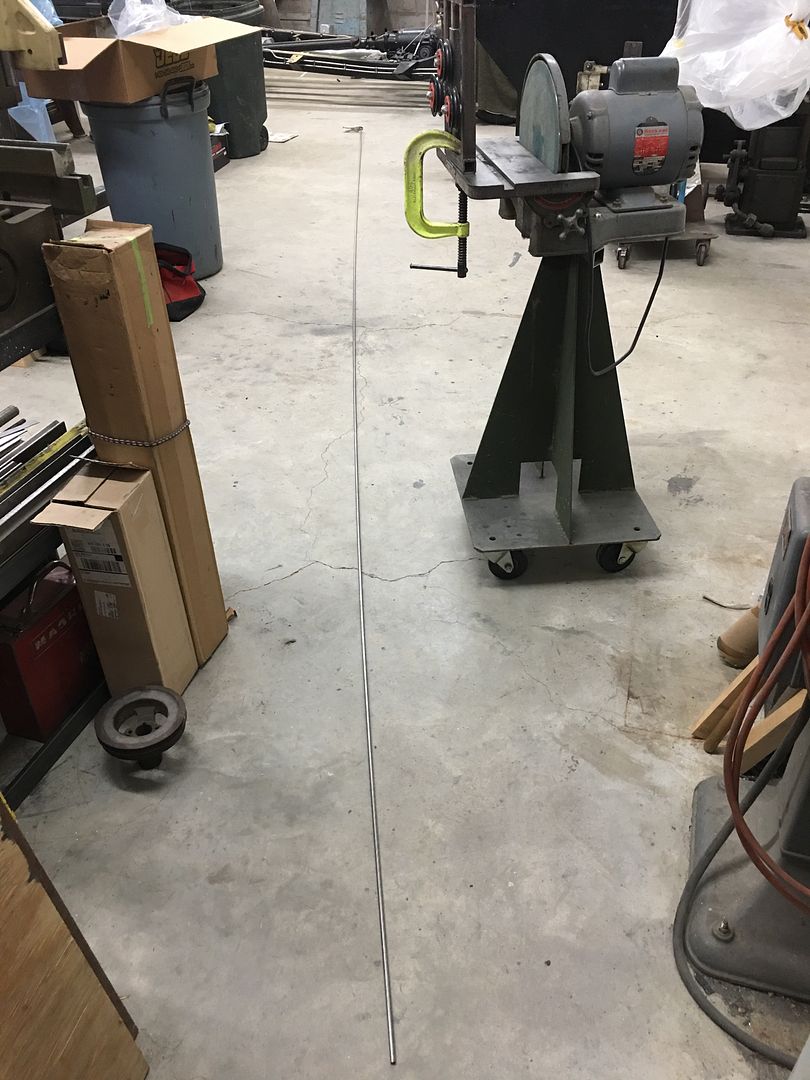
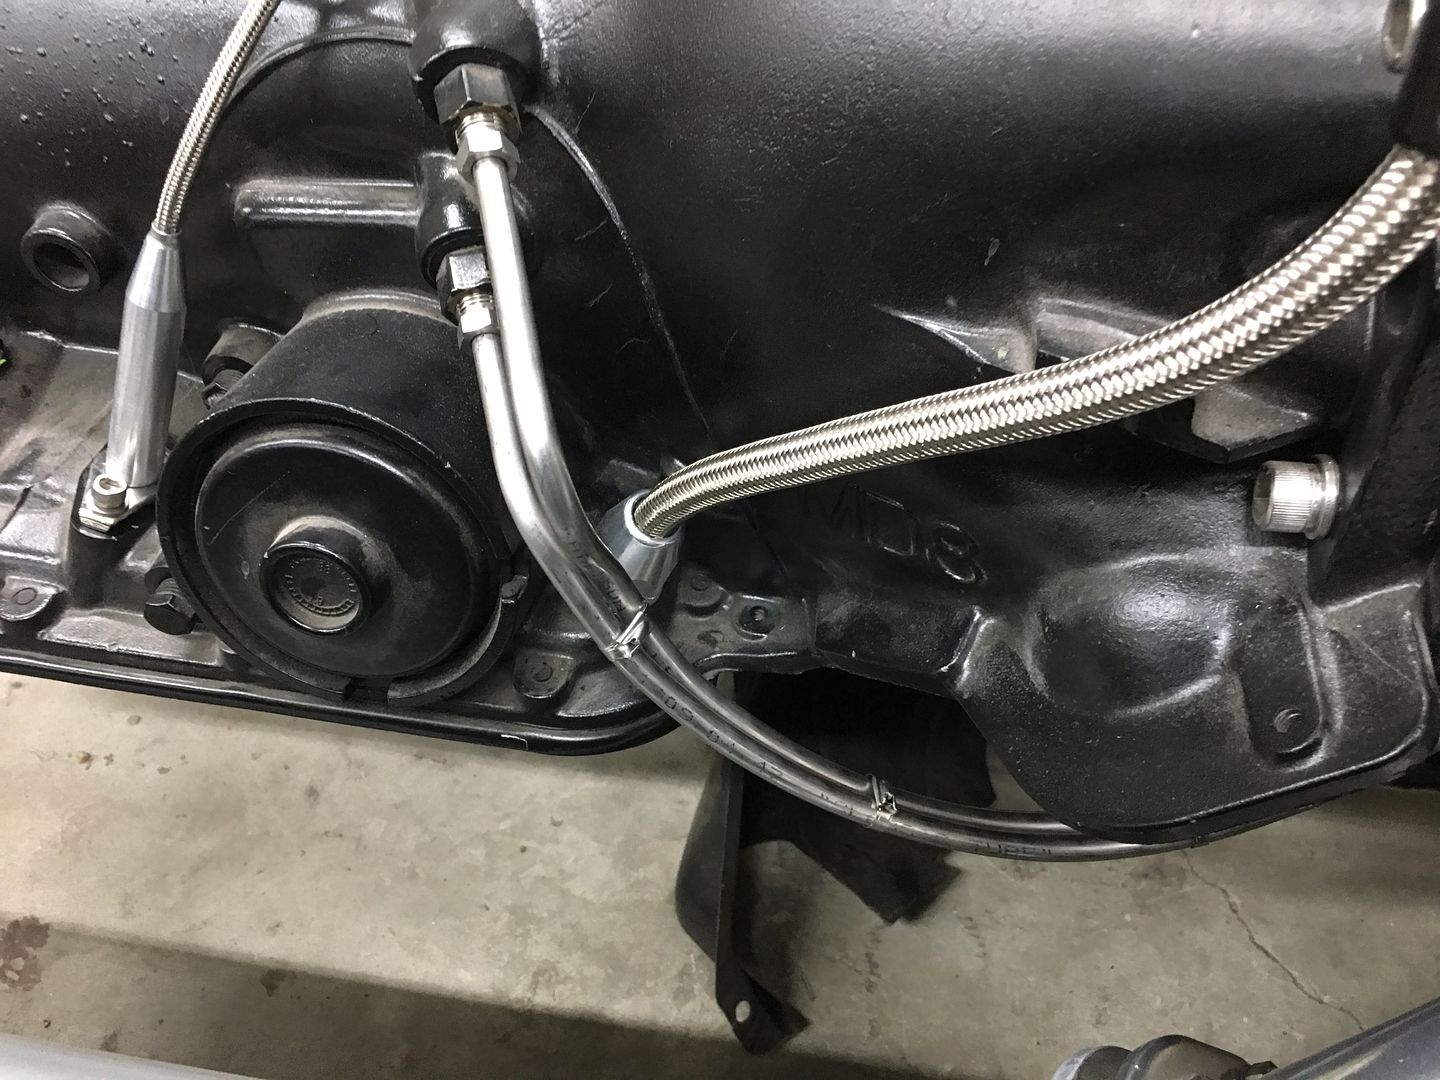
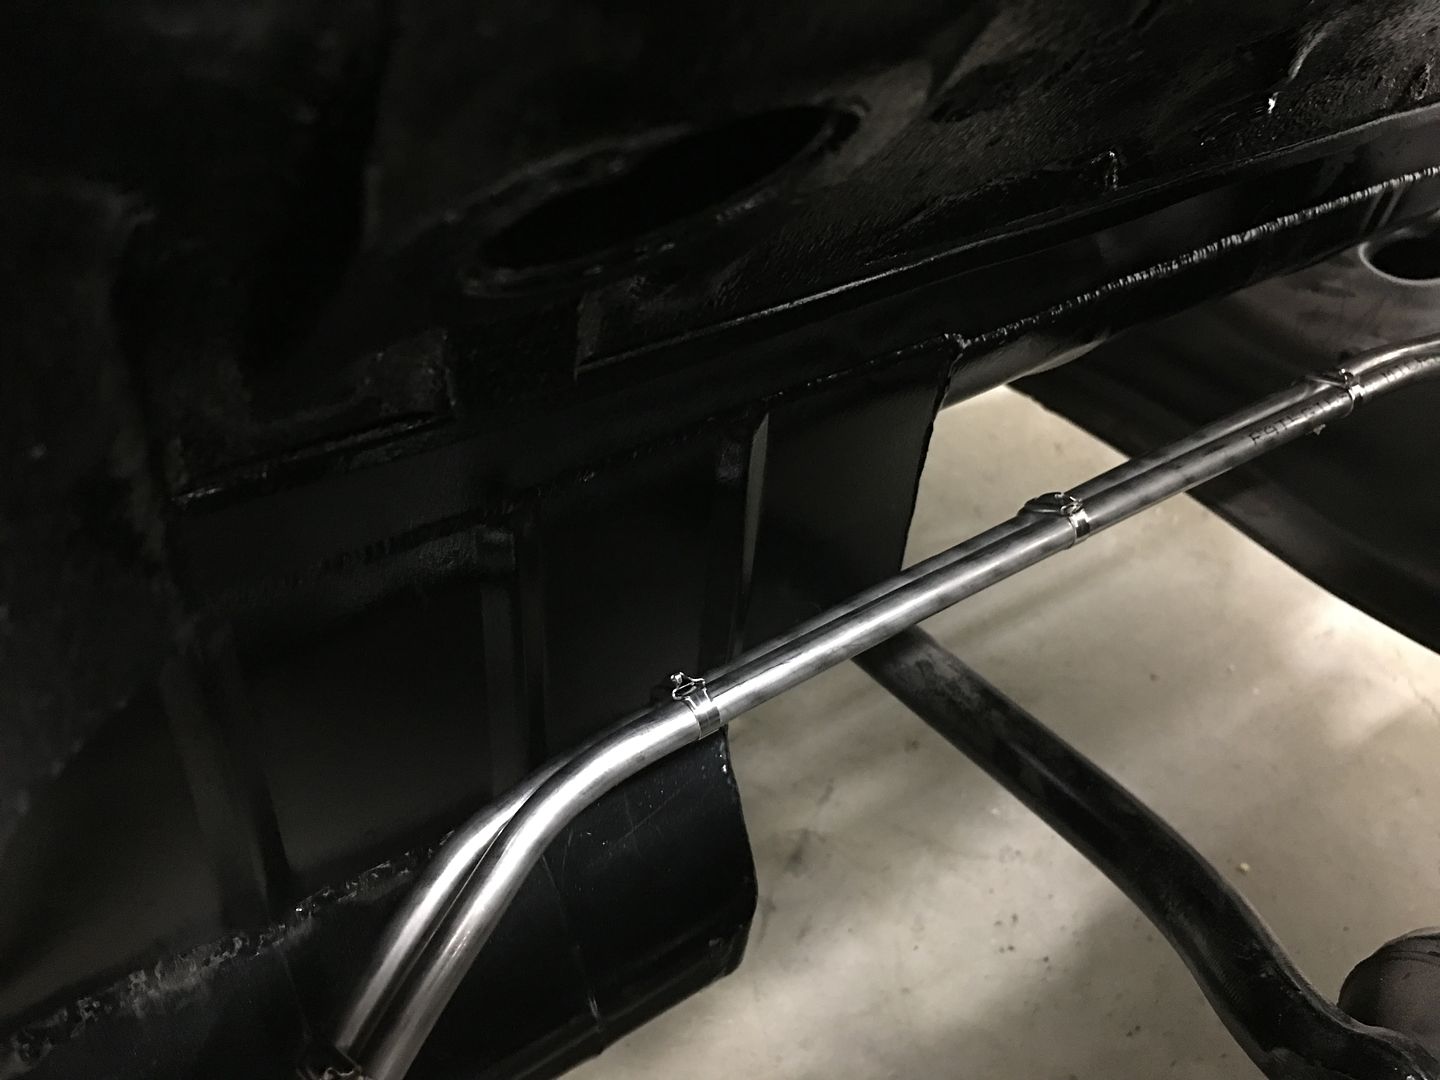
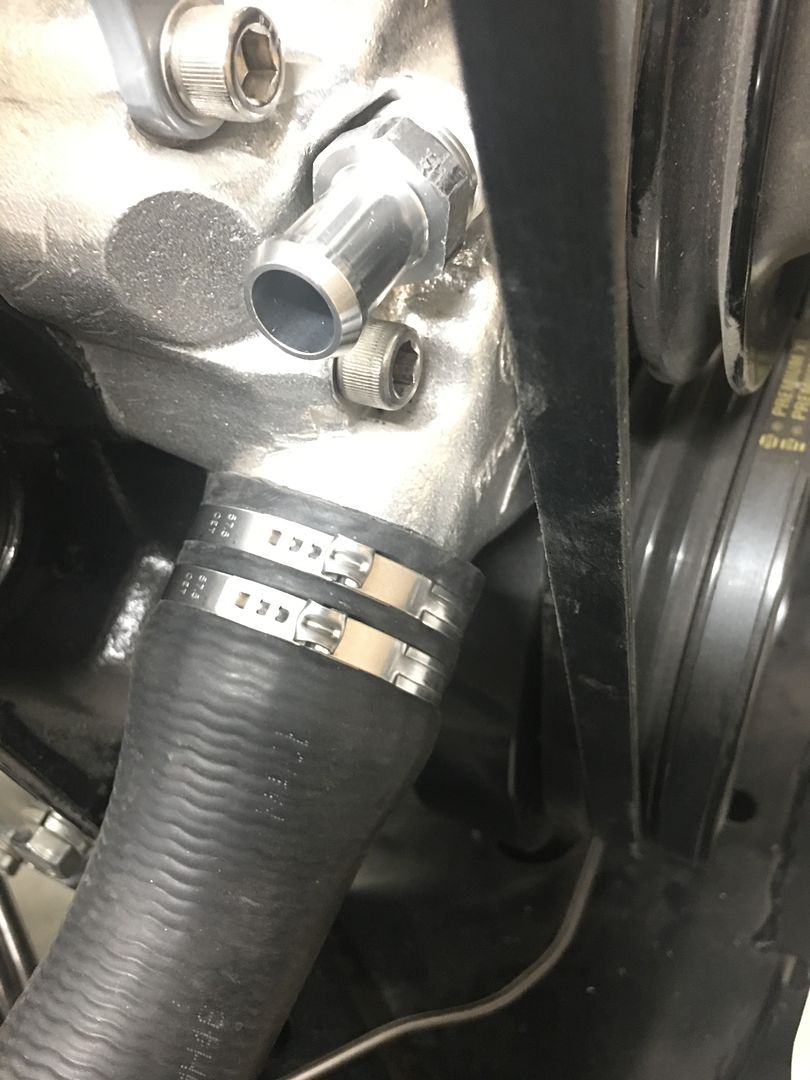
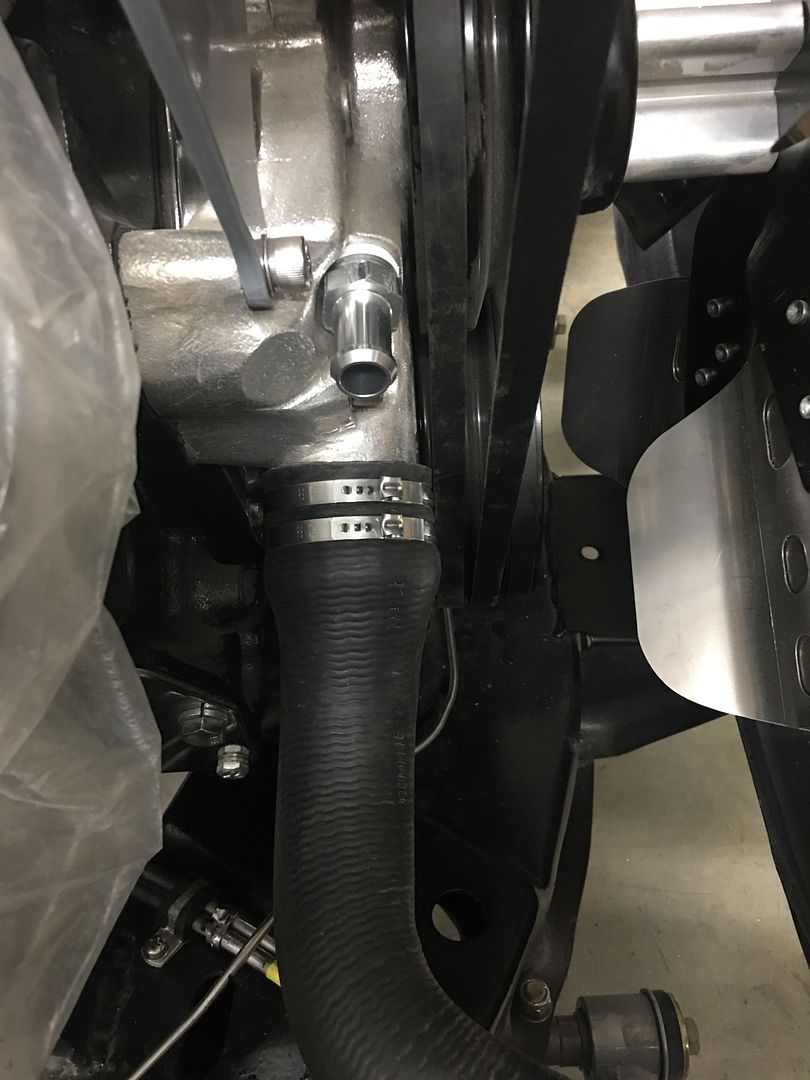
Next, we had transmission cooling lines to run, which means straightening a coil of stainless 5/16 line....
This should be straight enough....
We had to insure clearance around the inspection cover and starter, so those were temporarily installed...
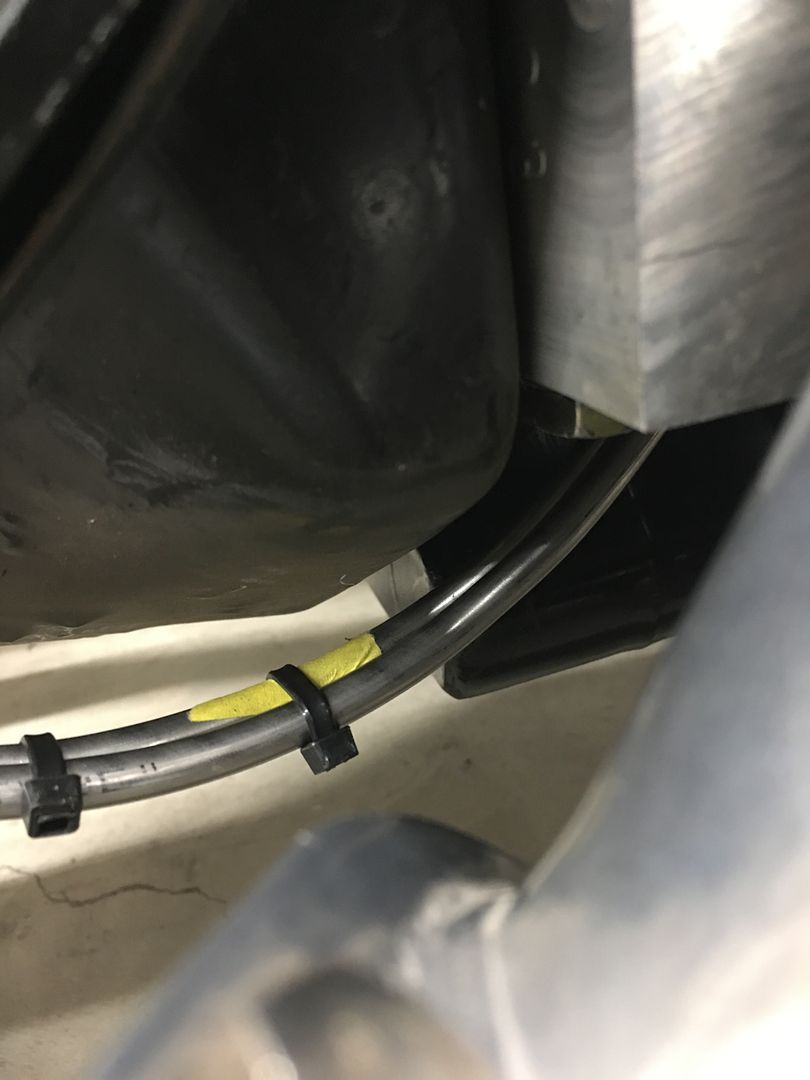
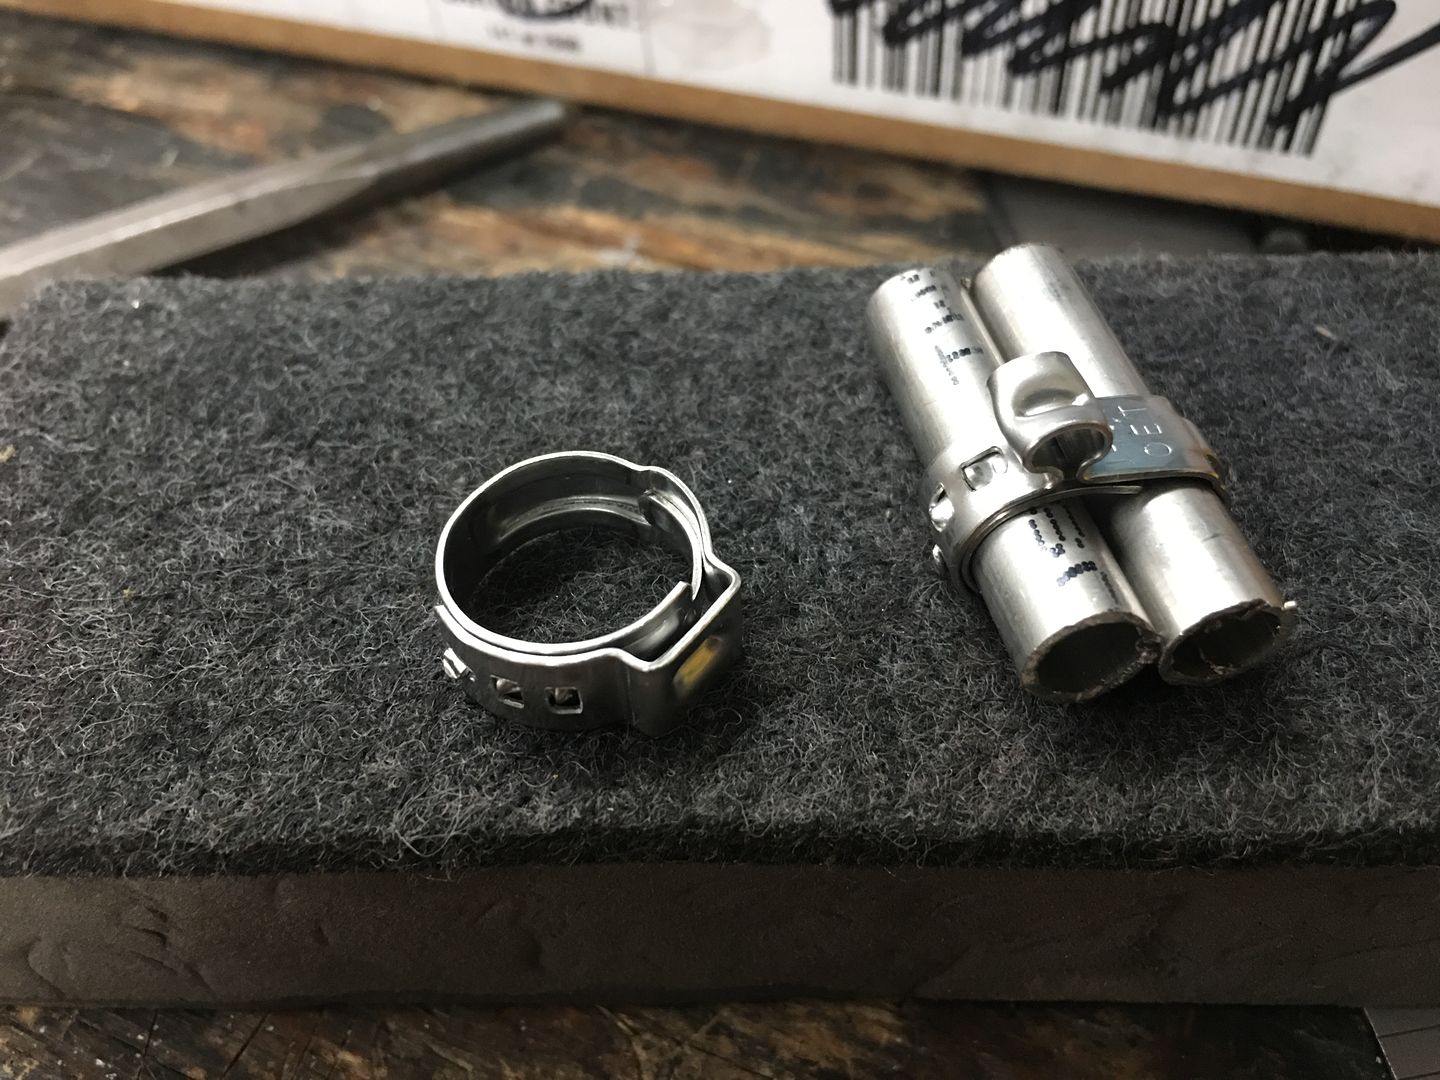
We found these fancy stainless "cable ties" at McMaster, but even using a banding tool to tension it, the "tang" retention allows it to loosen slightly before the tang locks in.
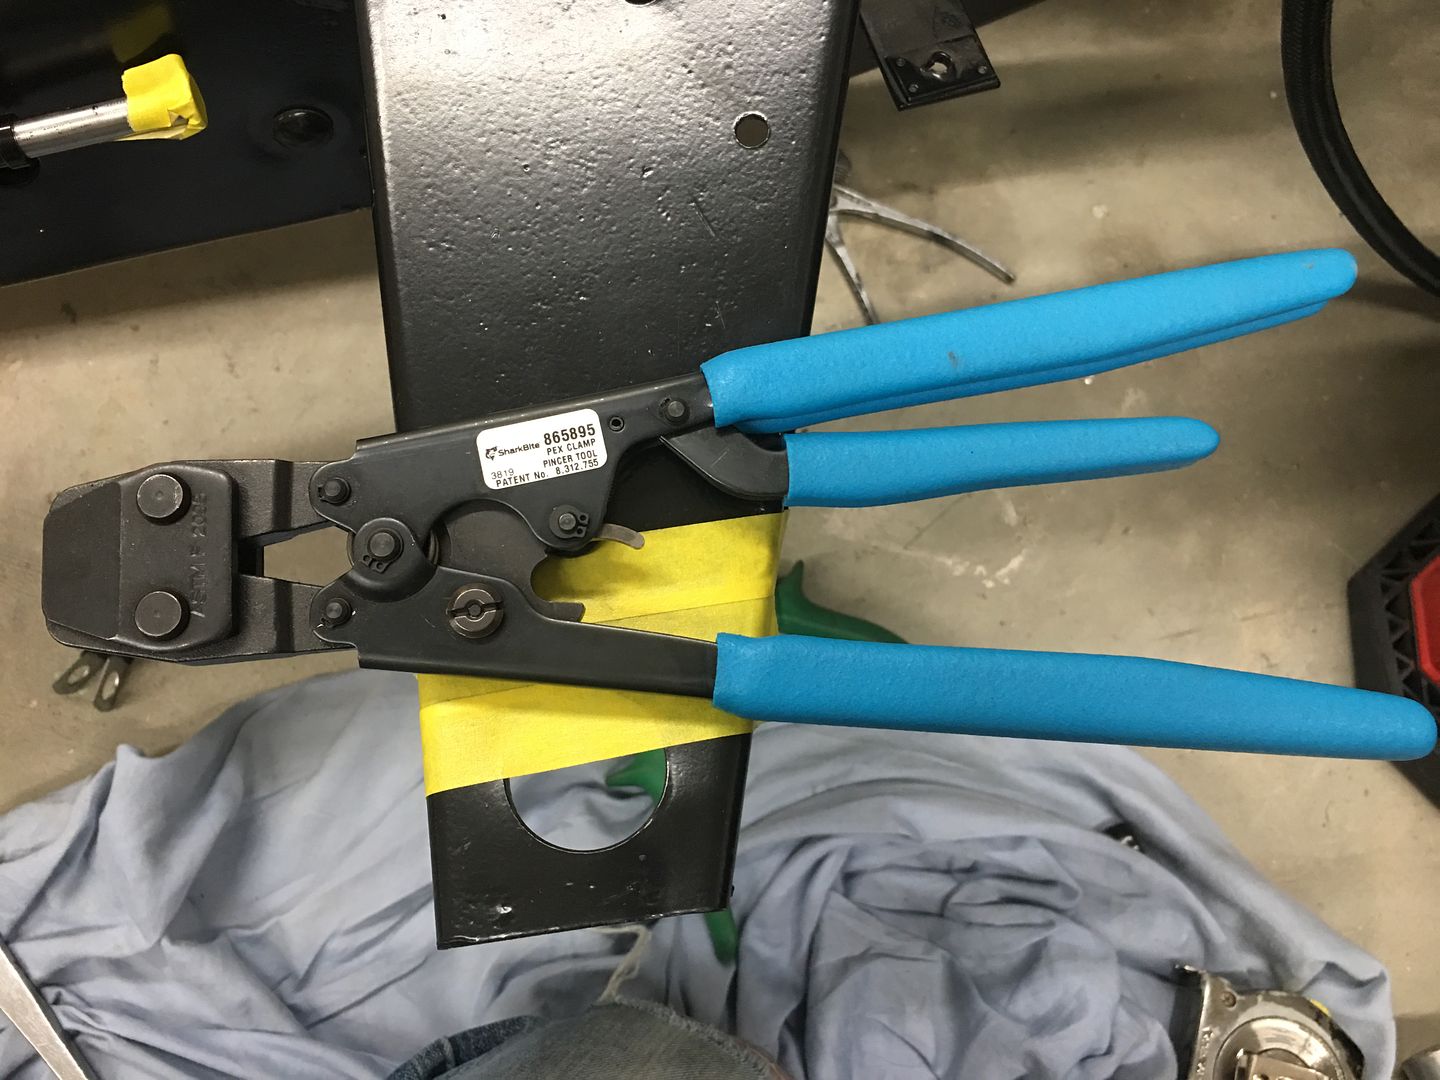
Since I had recently picked up a pair of Pex crimpers at a pawn shop for cheap, we thought we'd give those Oetiker clamps a shot for keeping things snug.. Looks like this may work!
Top side...
Bottom...
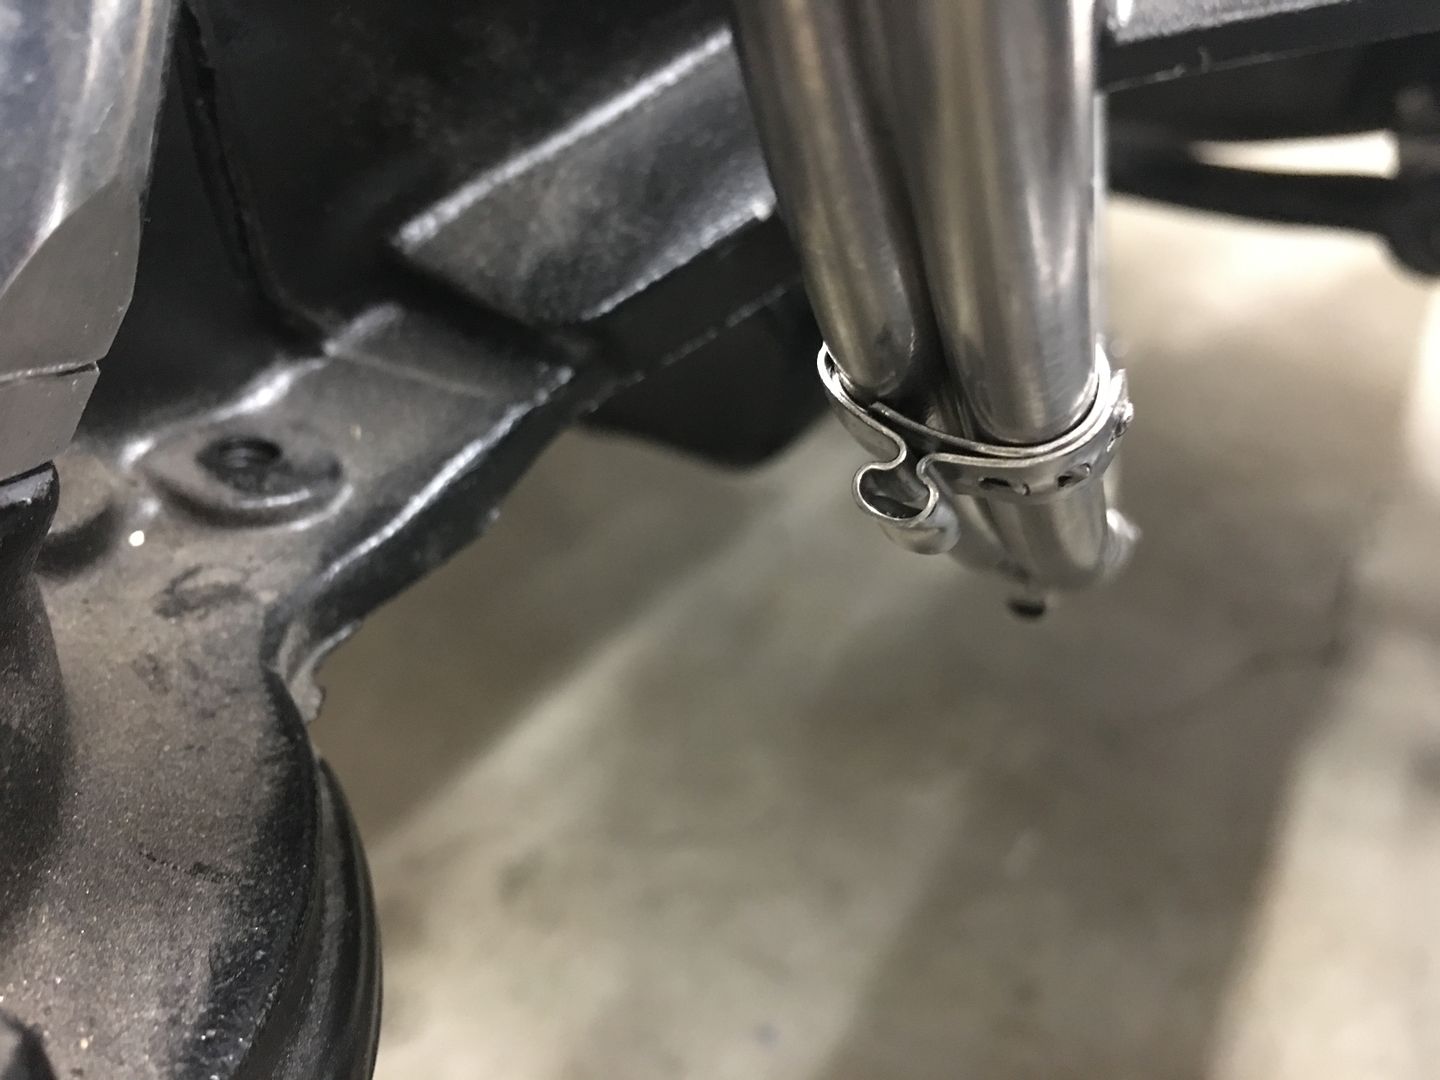
The crimpers/pliers we used... $15 at a pawn shop...
Running the radiator ends...
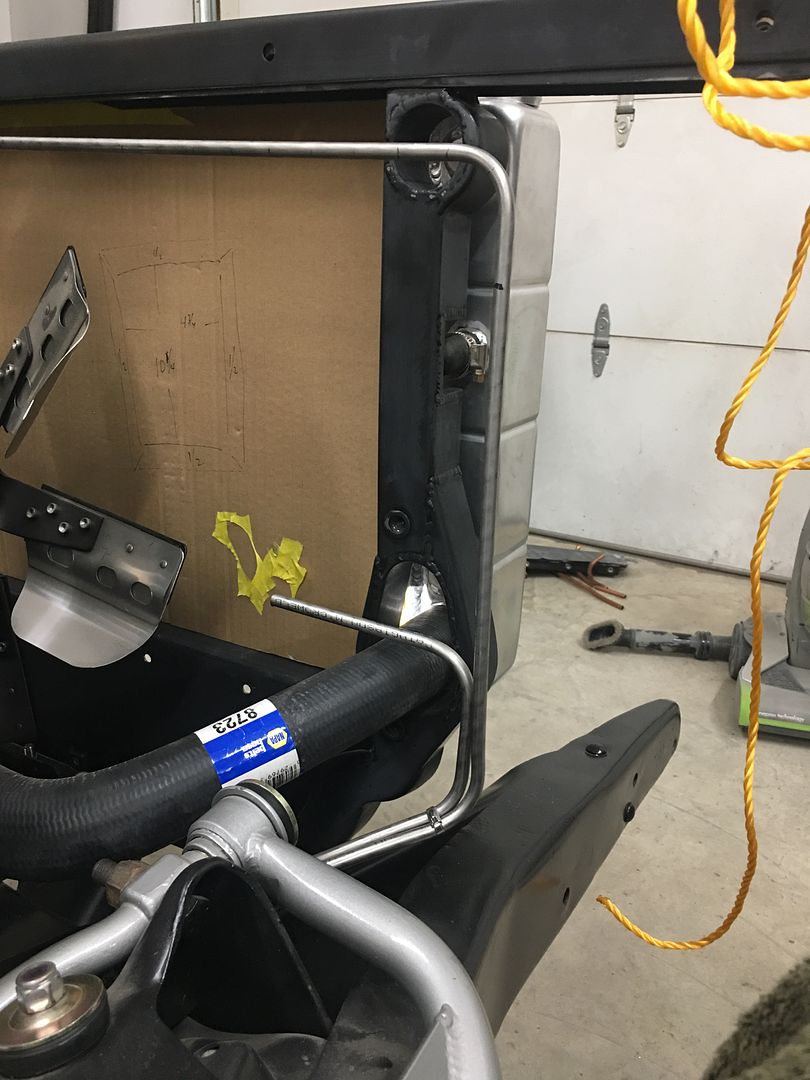
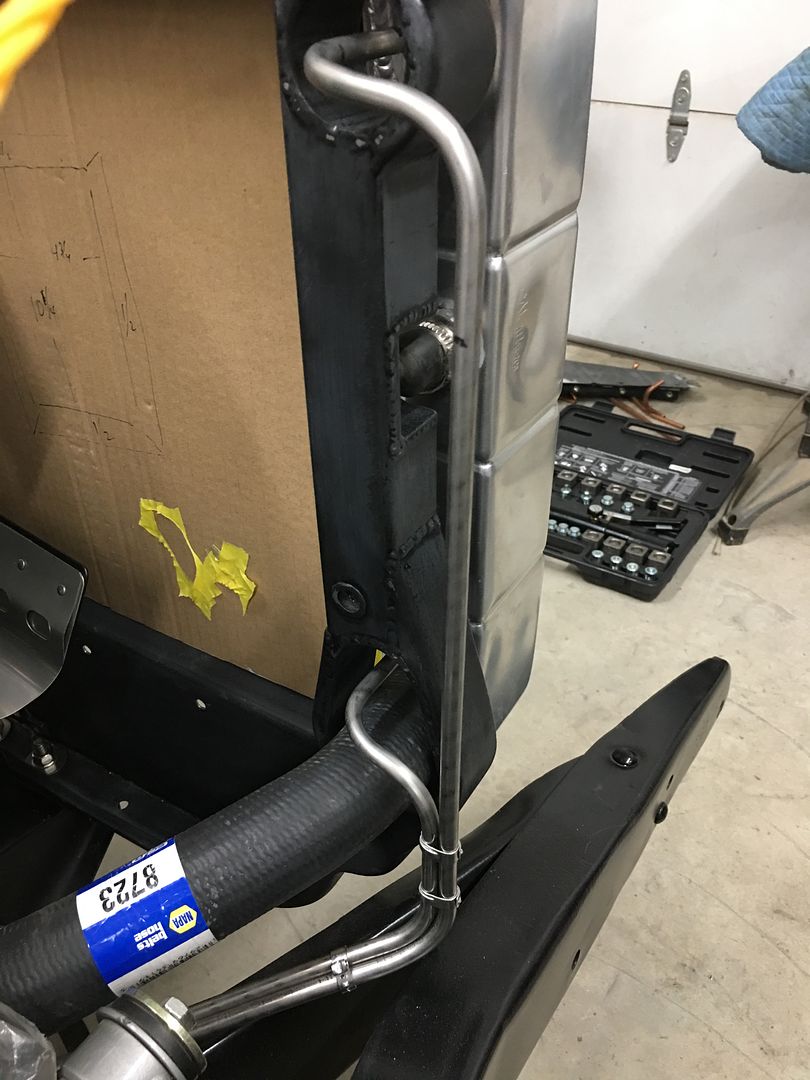
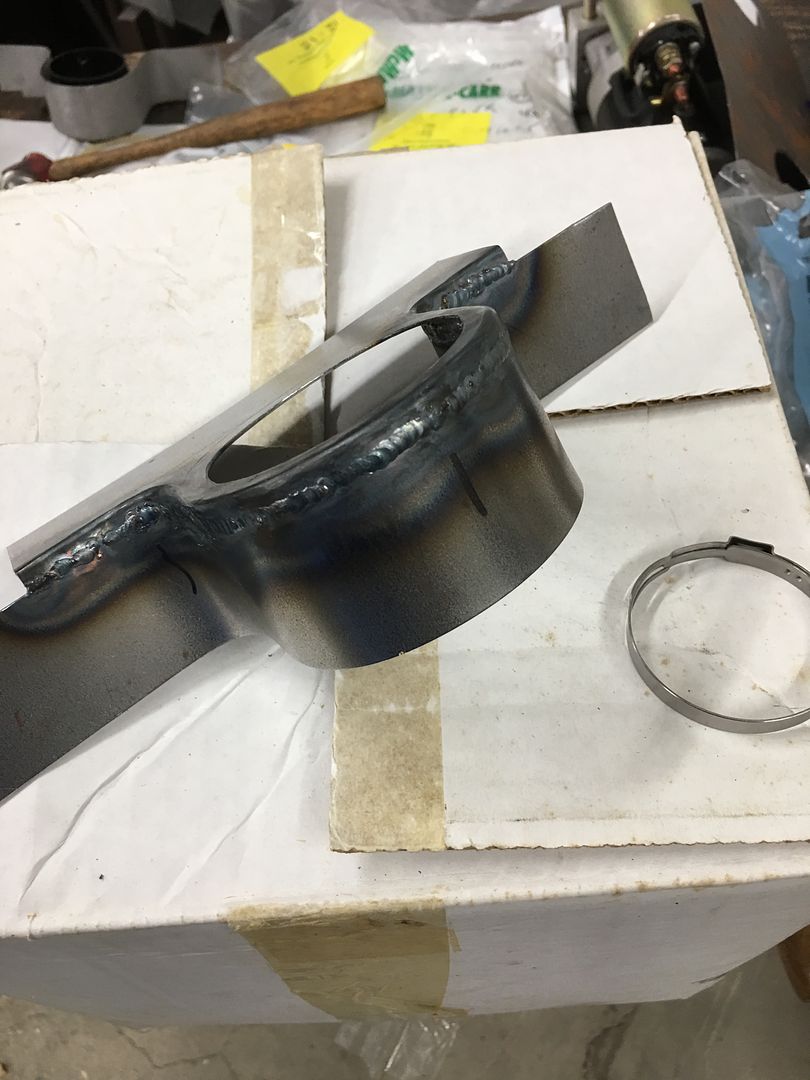
And then some other superfluous stuff, we got the second vent bracket welded up last night
And even though it's off in the near distance, it's about time to repaint the tag so DMV can register it to the car (1955 only had one plate in MD)...
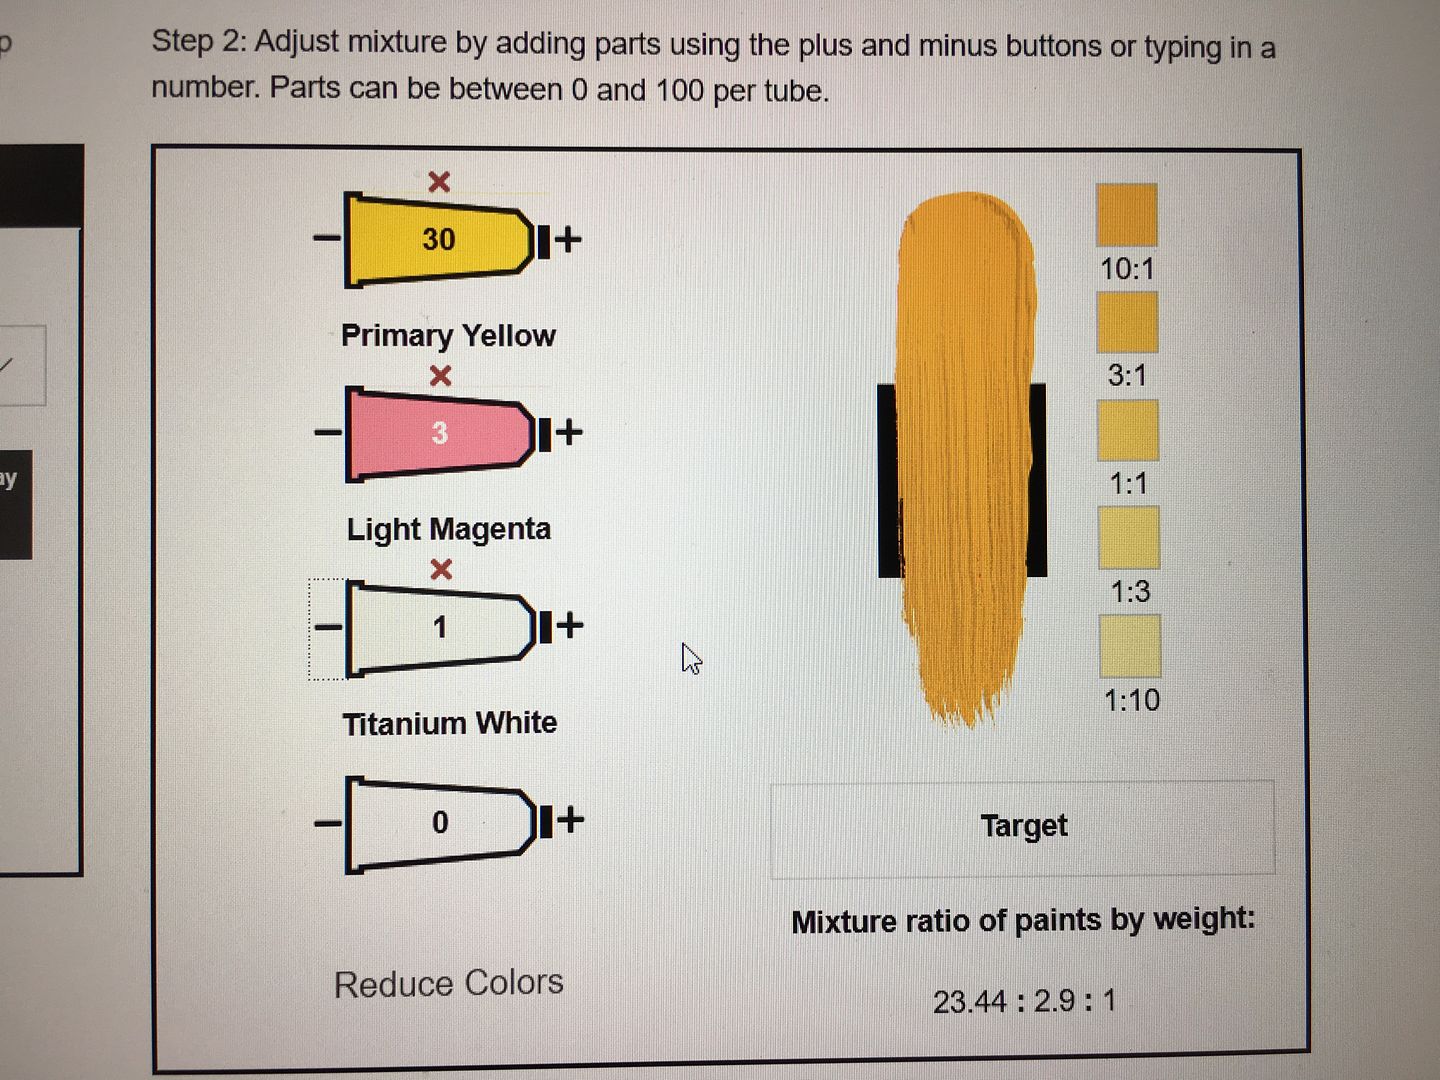
Thought I had some bus paint that was close, but looks a bit too light..
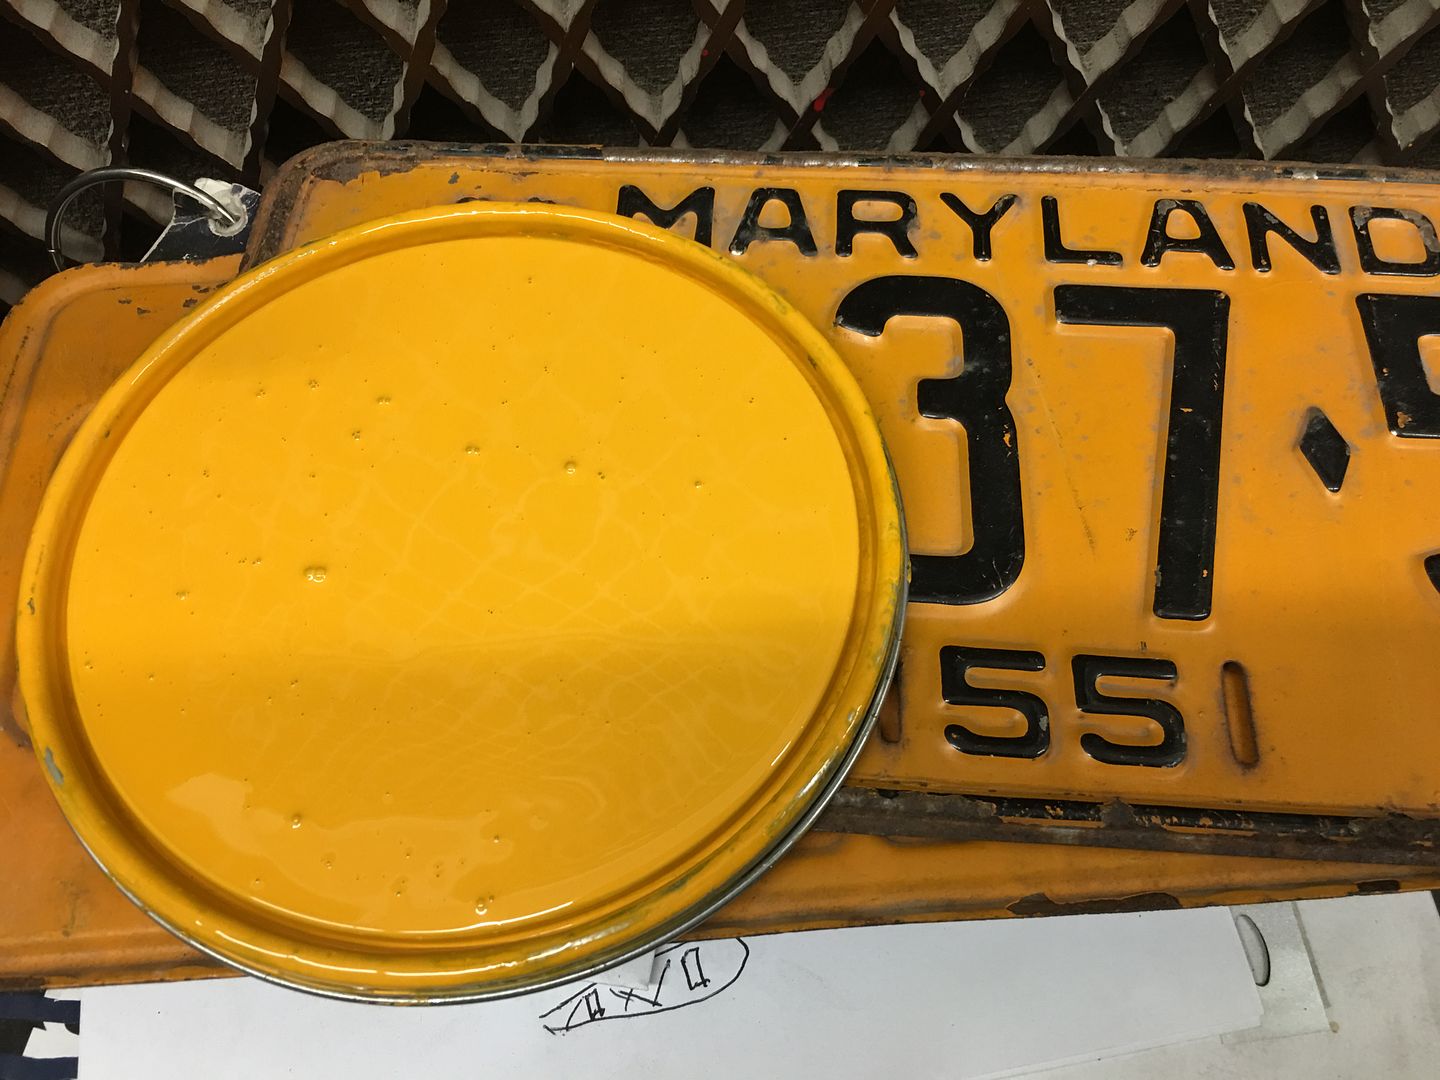
But playing with some mixing ratios online, I may be able to use some of my one shot lettering paint as a tint to get us much closer...
And since the rest of the bits are now being cut and buffed, we better get the body on the frame to make some room in the shop..
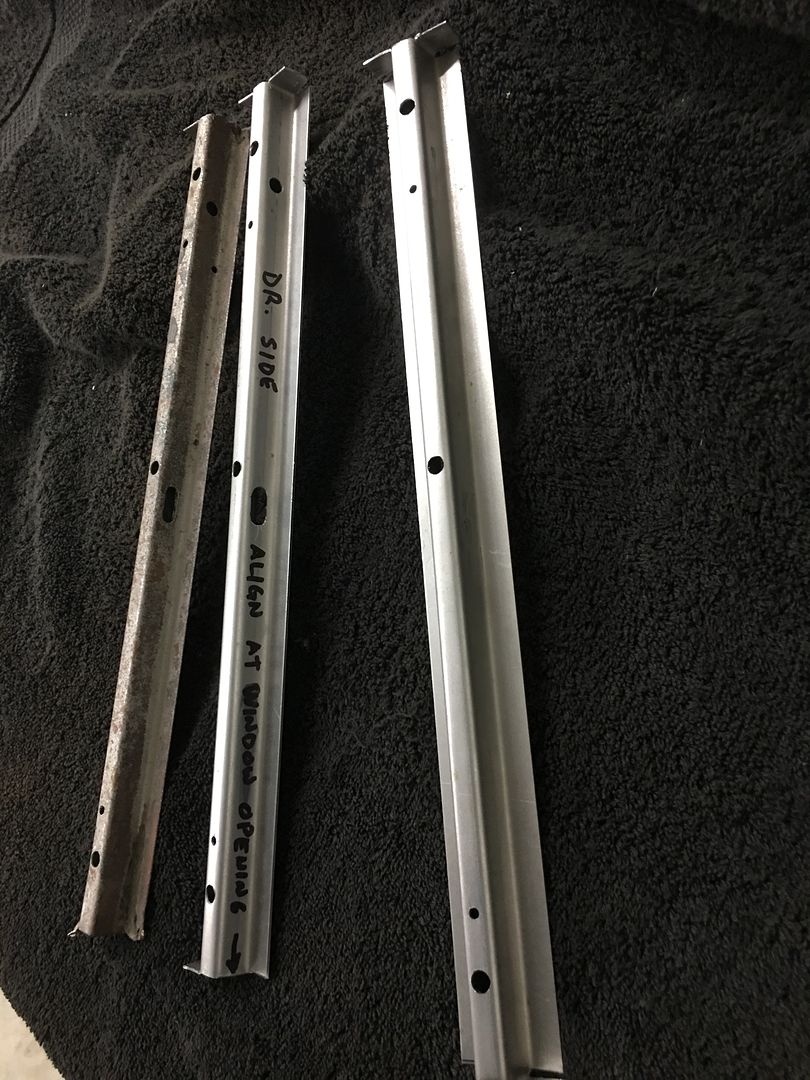
….and between all that, we made another set of window dividers, these going to Dallas for the restoration of a 57 wagon...
Robert
-
10-07-2020 10:11 AM #1540
CHR Member
- Join Date
- Jan 2006
- Location
- Constantine
- Car Year, Make, Model: 57 chevy 2 dr wagon
- Posts
- 9,476
Love it when things come togetherCharlie
Lovin' what I do and doing what I love
Some guys can fix broken NO ONE can fix STUPID
W8AMR
http://fishertrains94.webs.com/
Christian in training
-
10-08-2020 07:23 AM #1541
CHR Member
- Join Date
- Aug 2014
- Location
- Rochester
- Posts
- 27
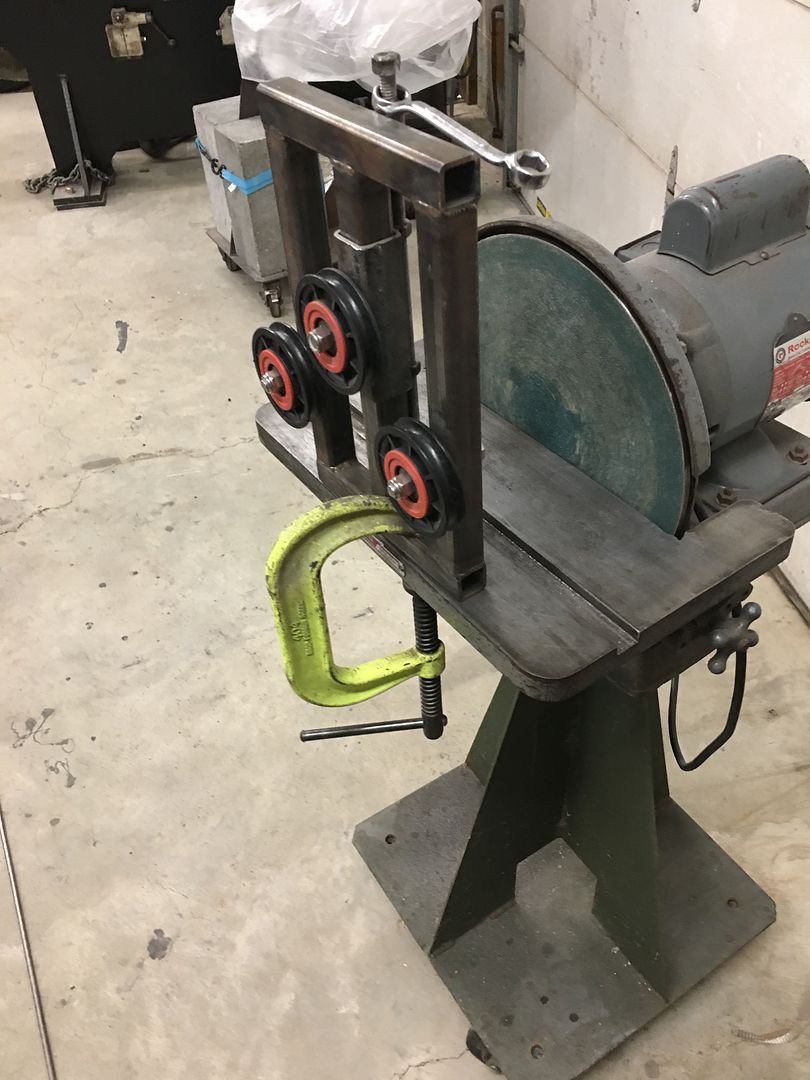
Your tubing straightener looks homemade. What did you use for the roller wheels? Originally Posted by MP&C

-
10-08-2020 07:25 AM #1542
CHR Member
- Join Date
- Aug 2014
- Location
- Rochester
- Posts
- 27
Opps. I didn't mean to copy the whole post.
Your tubing straightener looks homemade. What did you use for the roller wheels?
-
10-08-2020 07:32 AM #1543
CHR Member
- Join Date
- Jun 2008
- Location
- Leonardtown
- Car Year, Make, Model: Walking
- Posts
- 1,228
3" x 3/8 plastic pulleys in the hopes they would not mark up the SS tubing... The three were just under $50 from McMaster...
https://www.mcmaster.com/59475K51/
.Robert
-
10-08-2020 12:01 PM #1544
CHR Member
- Join Date
- Aug 2014
- Location
- Rochester
- Posts
- 27
Thanks for the link to the pulleys. It looks like I have another weekend project.
-
10-09-2020 05:25 AM #1545
CHR Member
- Join Date
- Jun 2008
- Location
- Leonardtown
- Car Year, Make, Model: Walking
- Posts
- 1,228
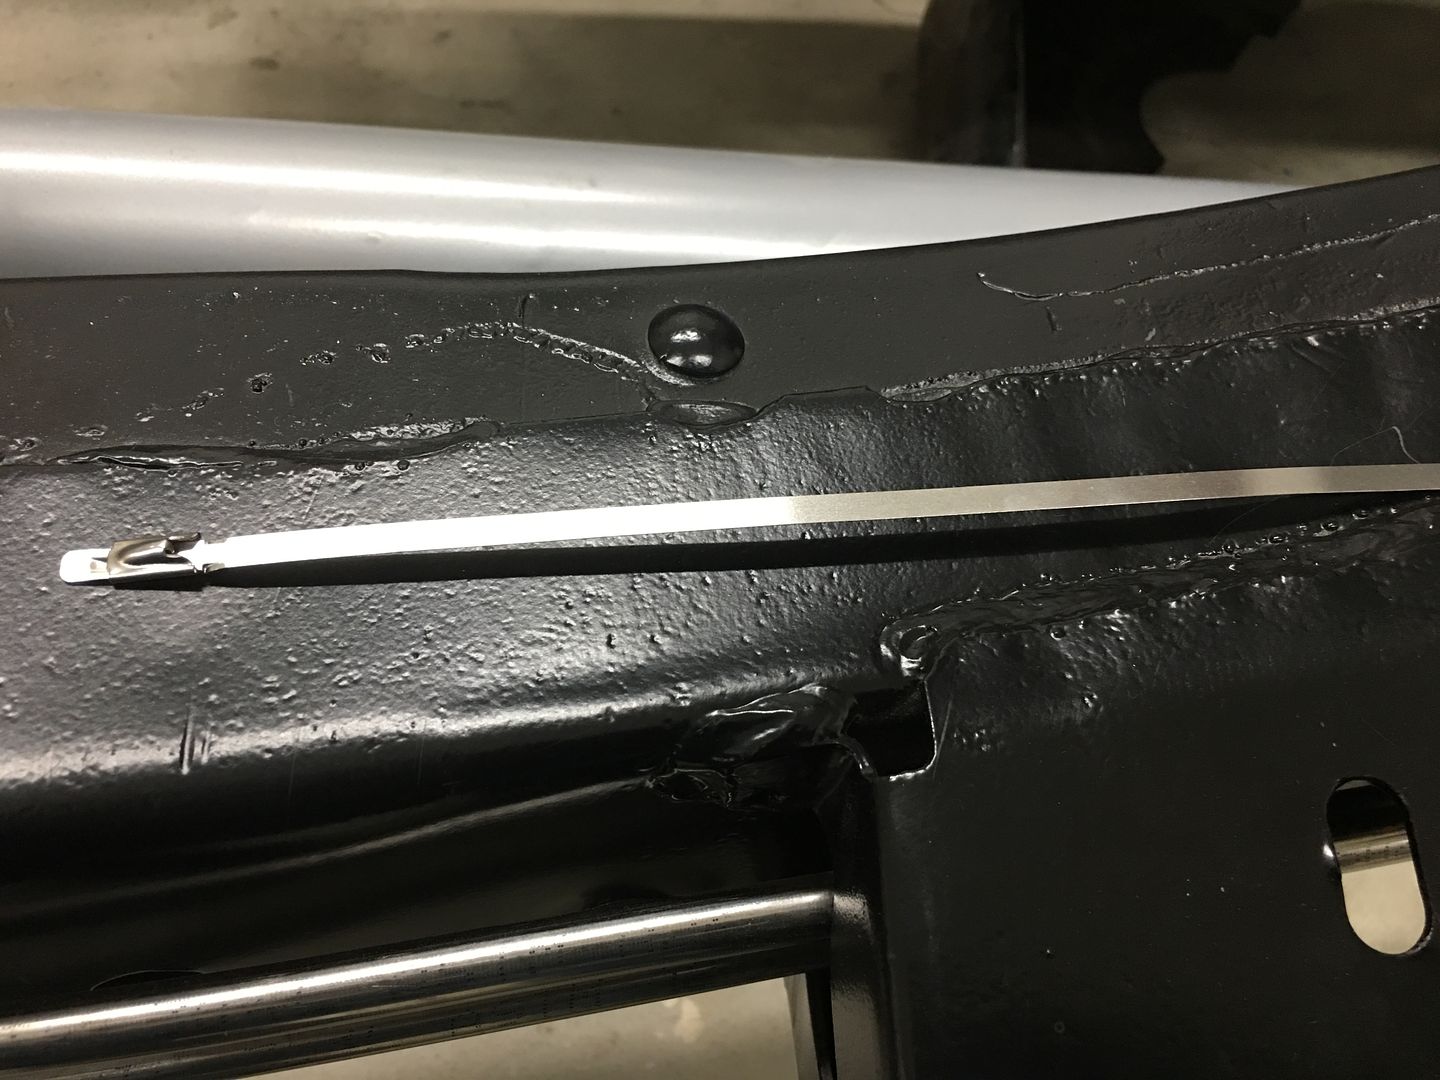
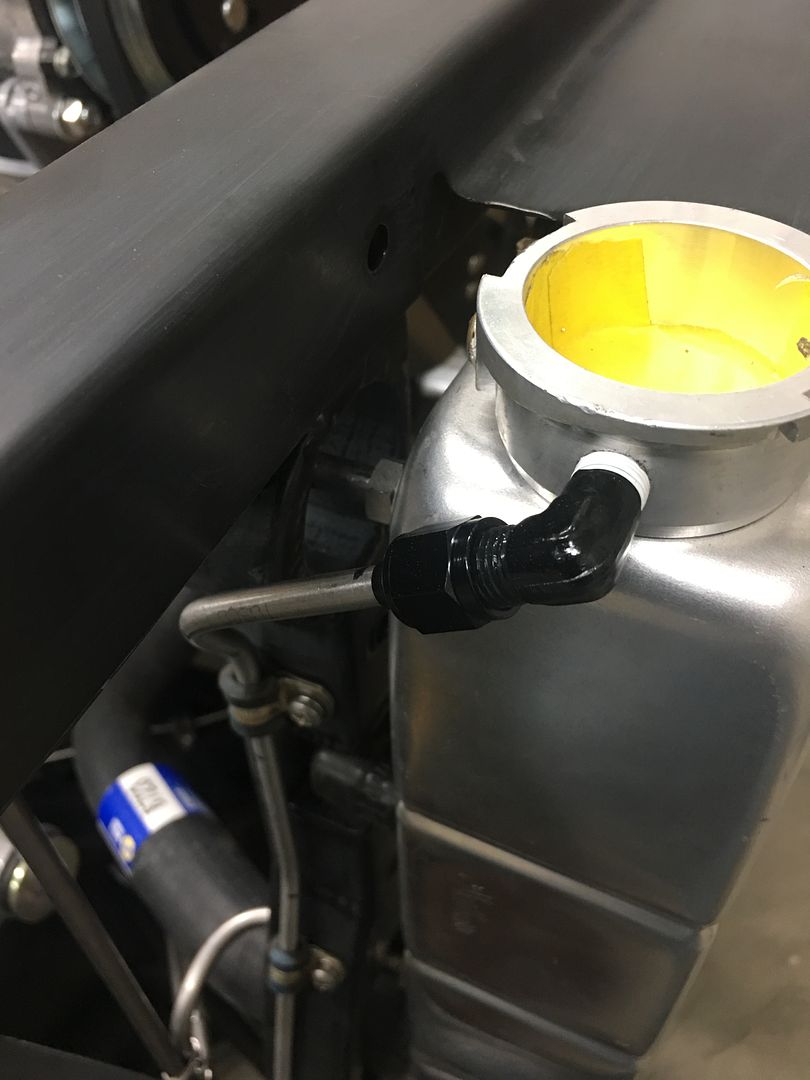
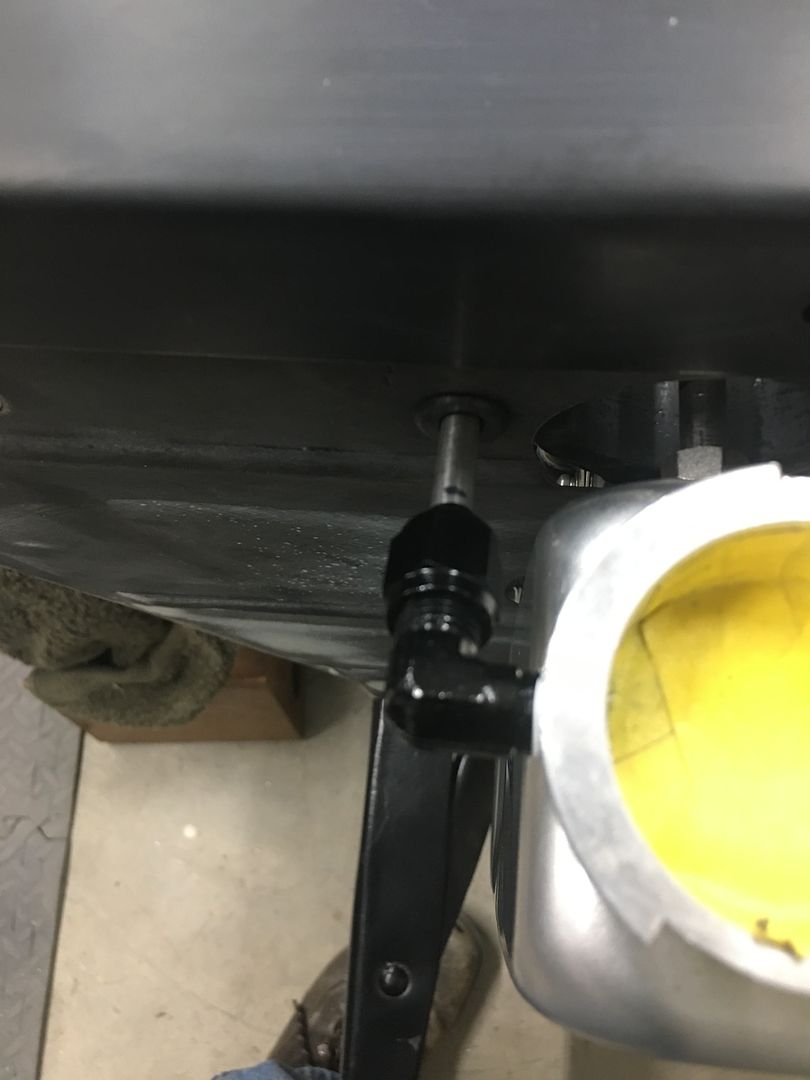
Last night we got some details crossed off the list, our radiator sits on the front side of the core support but the overflow can't stay on the front side as it would spew all over a painted splash pan. So we marked the core support baffle to align with our overflow AN fitting and as Jared was drilling the hole and installing the grommet, I got to bending some 1/4" stainless tubing. Now it will drain behind the frame rail...
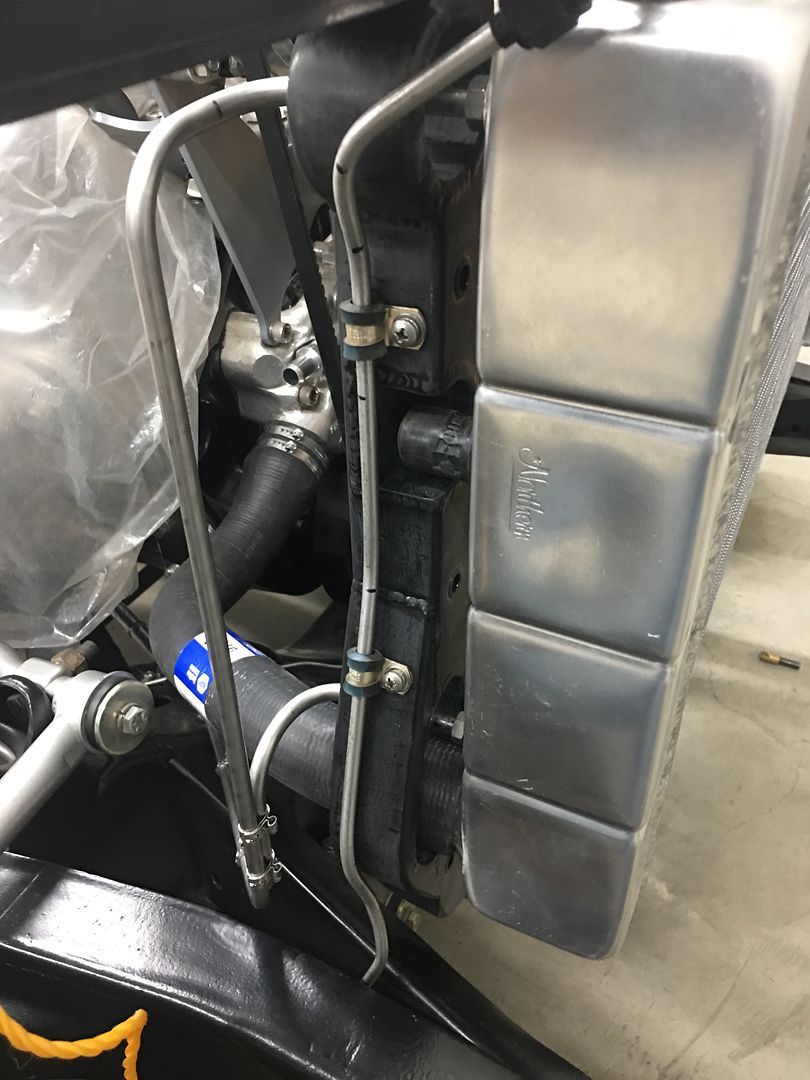
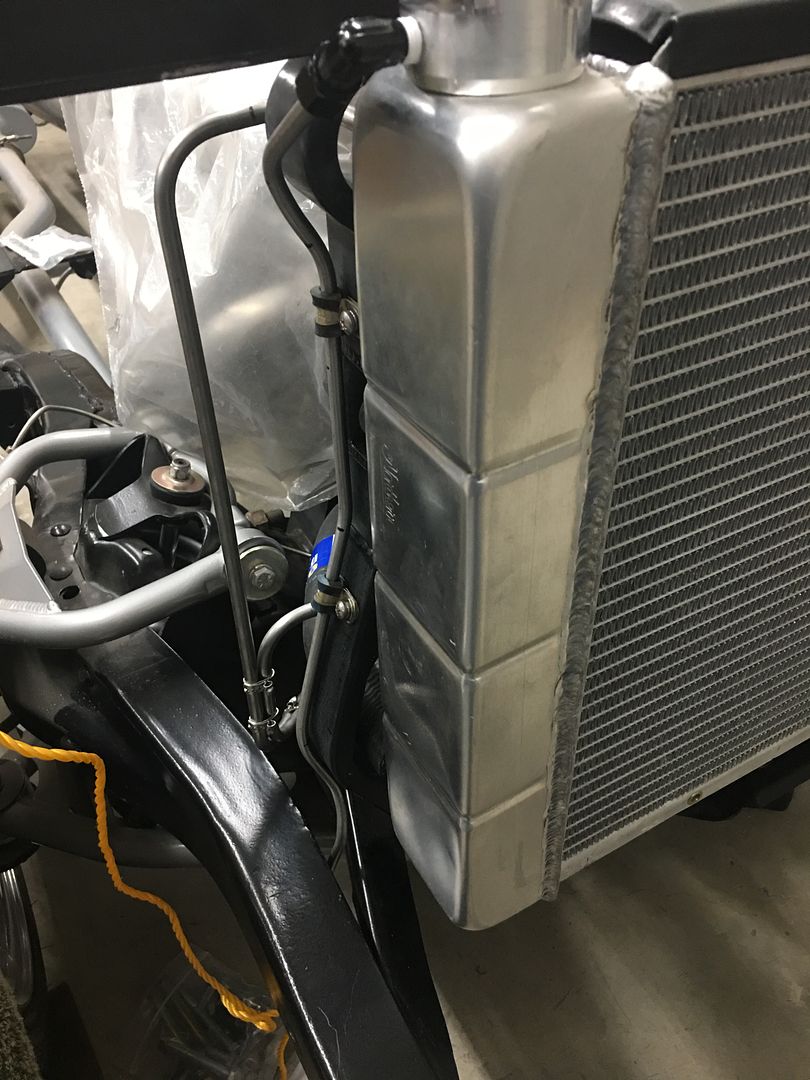

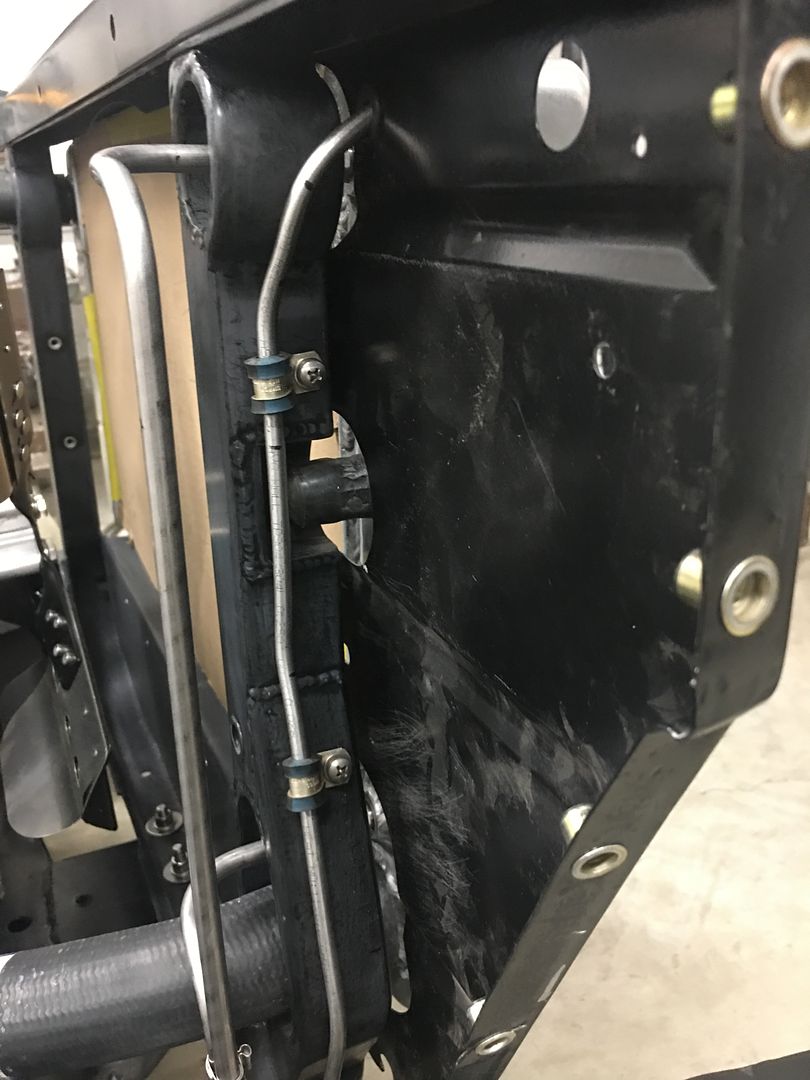
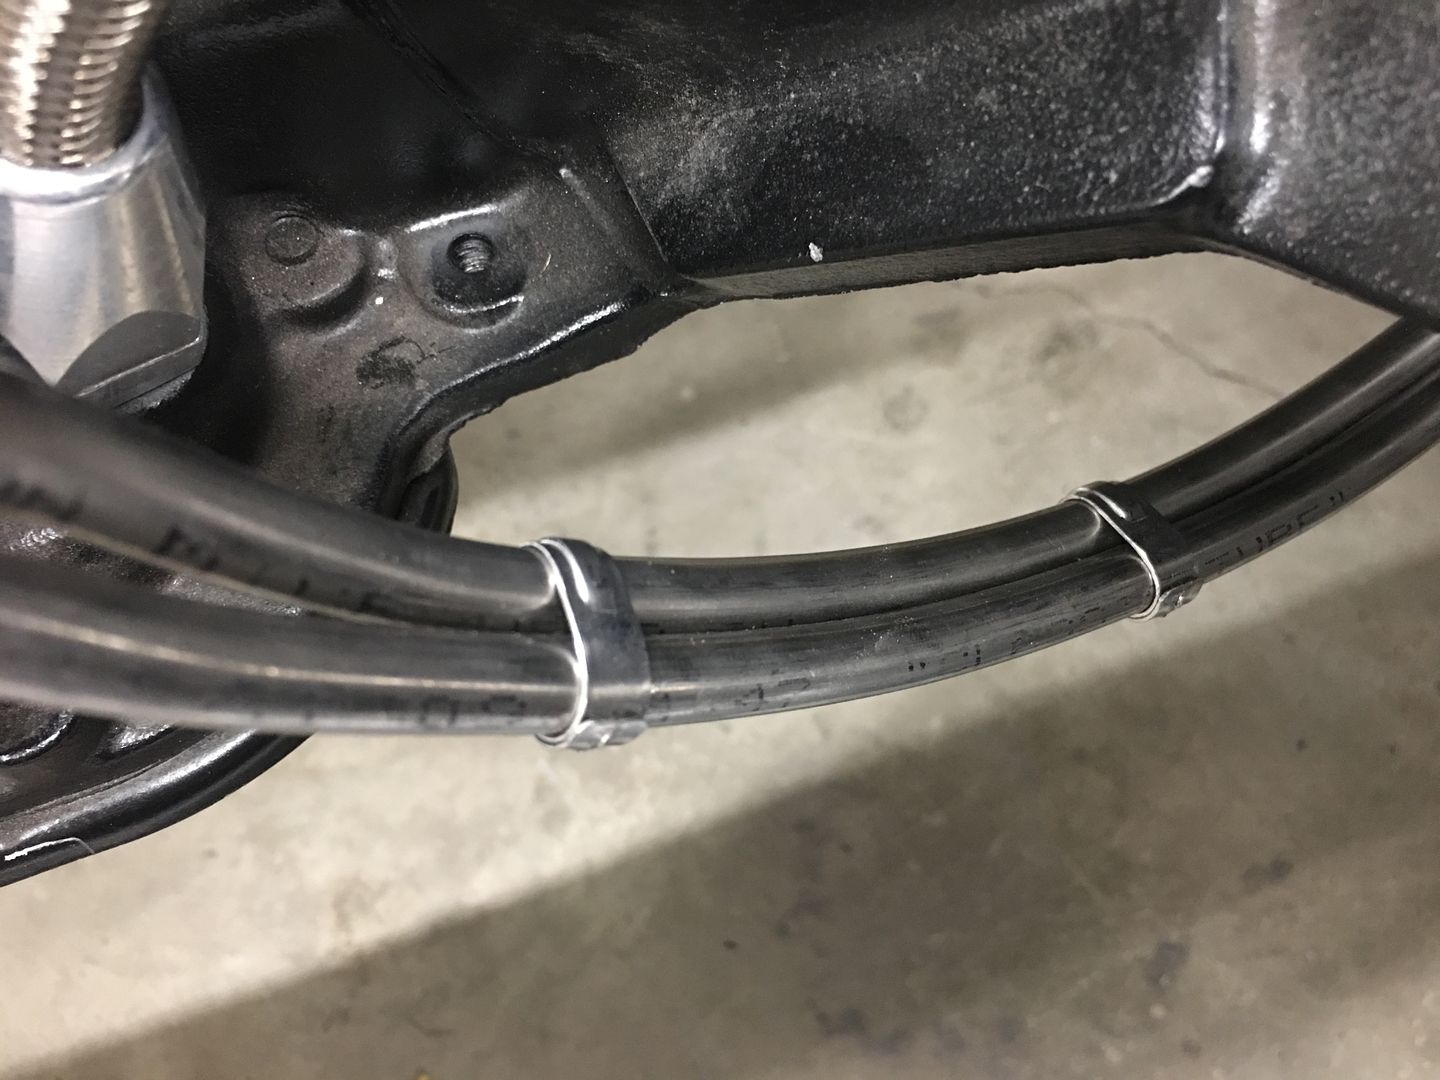
Since McMaster had made a delivery we got some of the Oetiker clamps installed. Yeah, I think I like this cleaner look...
My buddy Jeff Ford down in Aiken SC was working on installing a floor pan patch and had omitted the flange in the radius corner below the toe panel.
So in addition to busting his chops, we put together this video tutorial so he could do the next panel in one piece. Hope it helps someone else as well..
.Robert
 Reply With Quote

Posting Permissions
- You may not post new threads
- You may not post replies
- You may not post attachments
- You may not edit your posts

i've enjoyed the years here . made a lot of friends. most who have left. i see no reason to continue with this so hope to see you somewhere else. i dont think this site will ever be back. it's lived...
Dead!