


 747Likes

Results 391 to 405 of 1004
 LinkBack URL
 About LinkBacks
-
11-18-2014 11:53 AM #391
 CHR Member

- Join Date
- Apr 2009
- Location
- watford
- Car Year, Make, Model: 26T Coupe, 32 Roadster, 41 Willys Coupe
- Posts
- 2,363
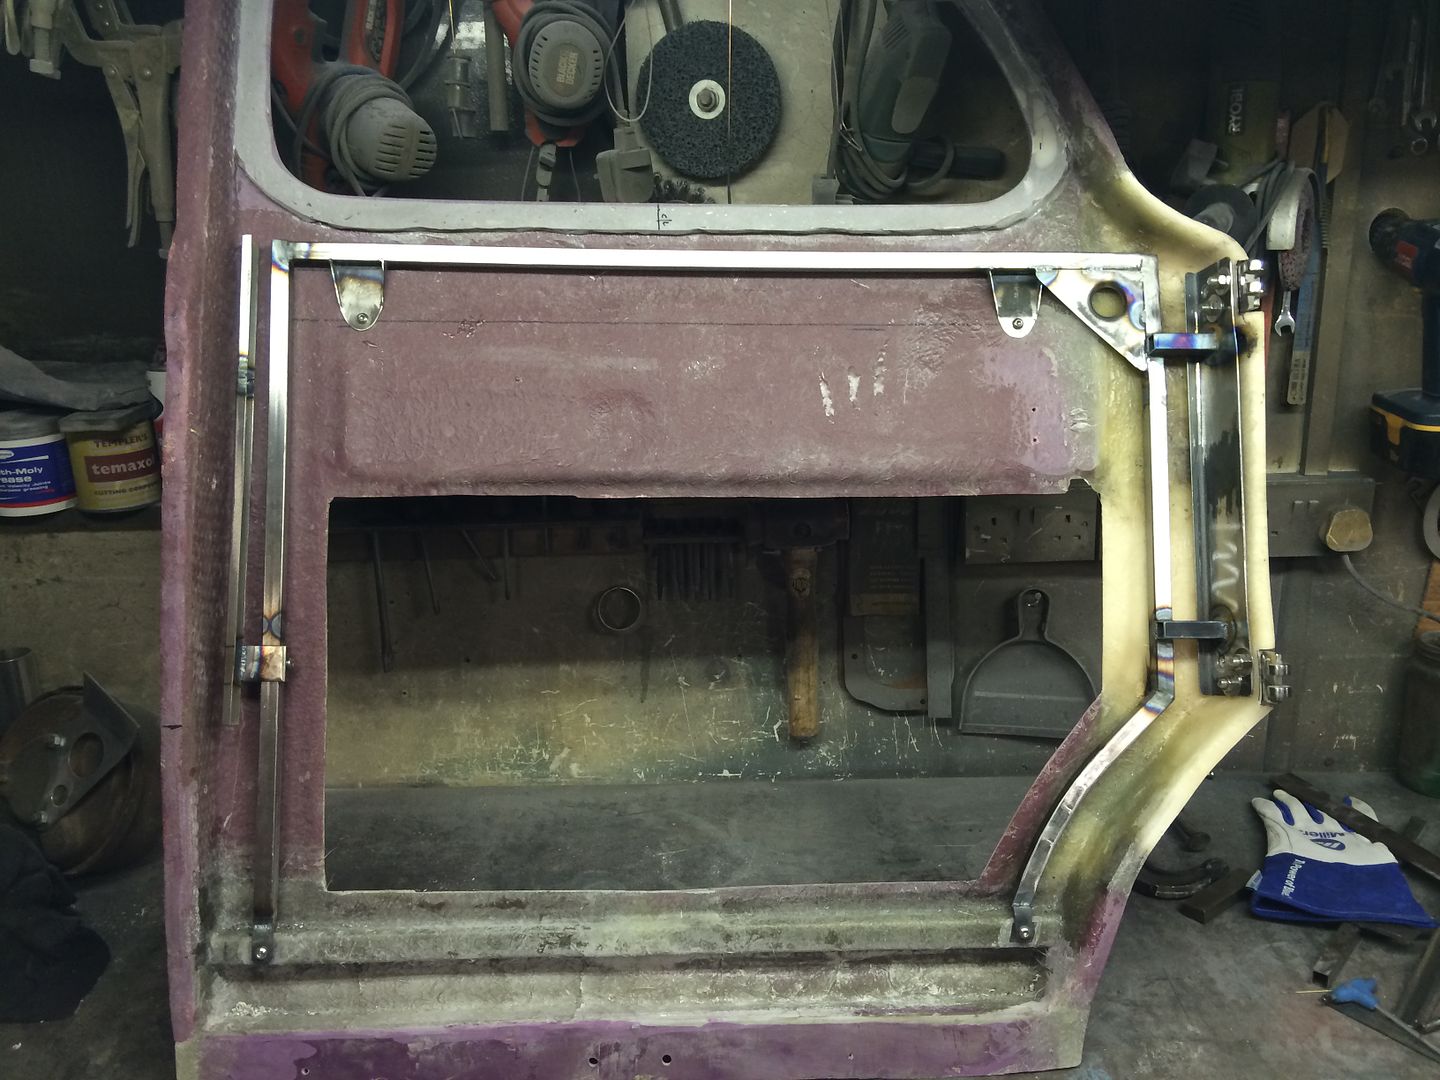
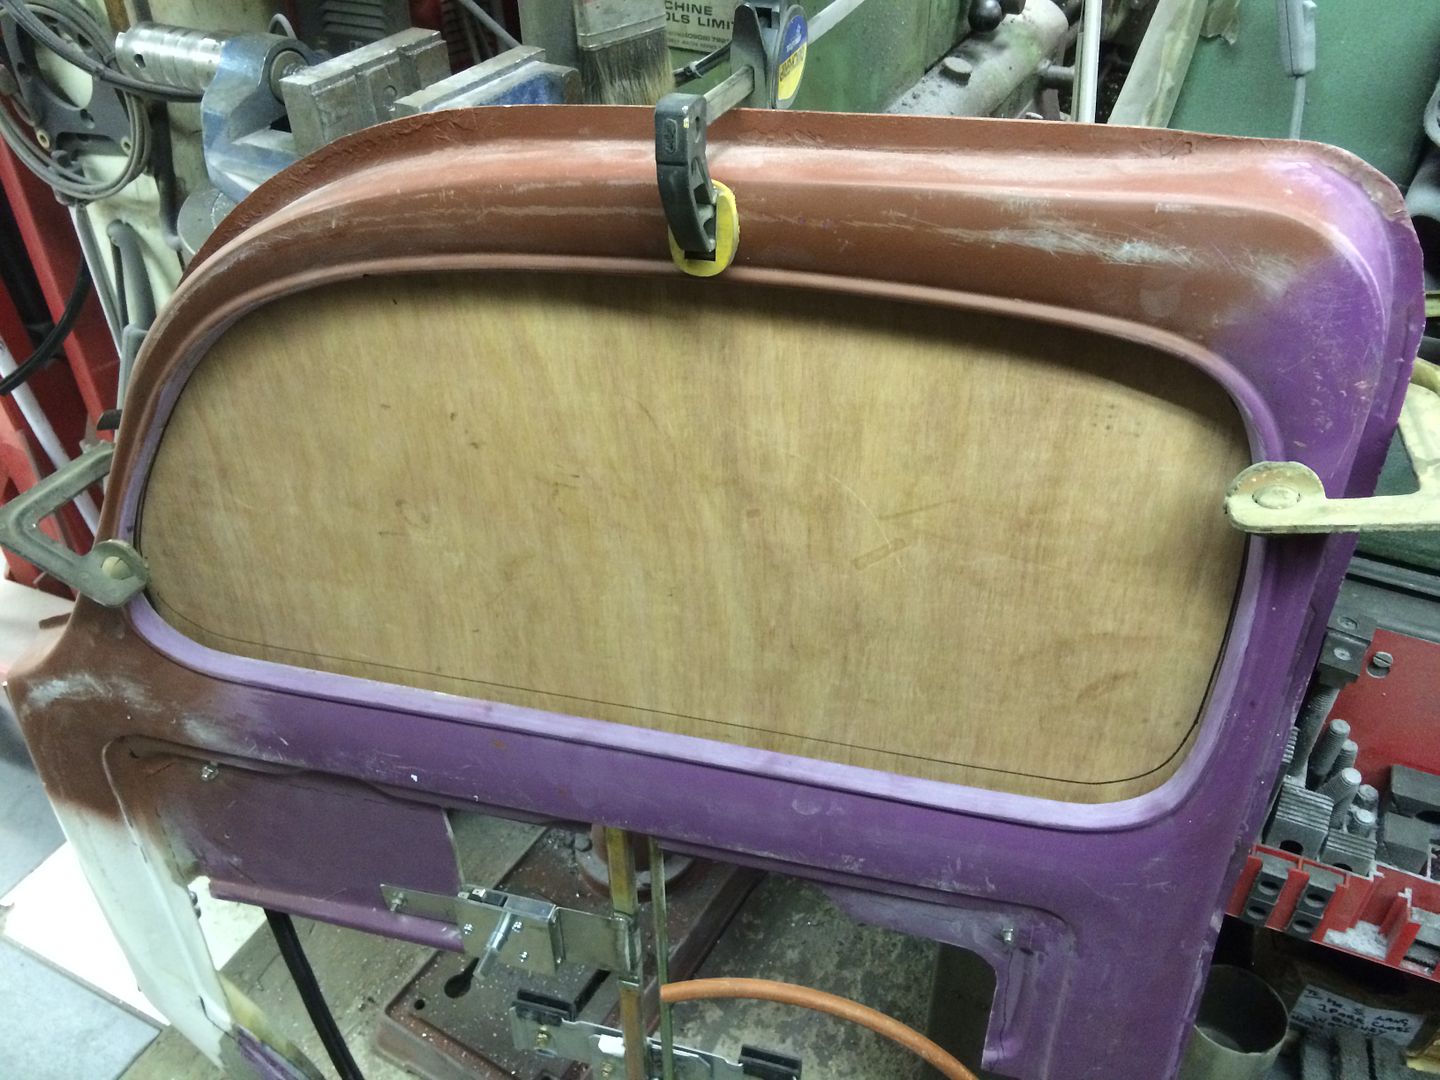
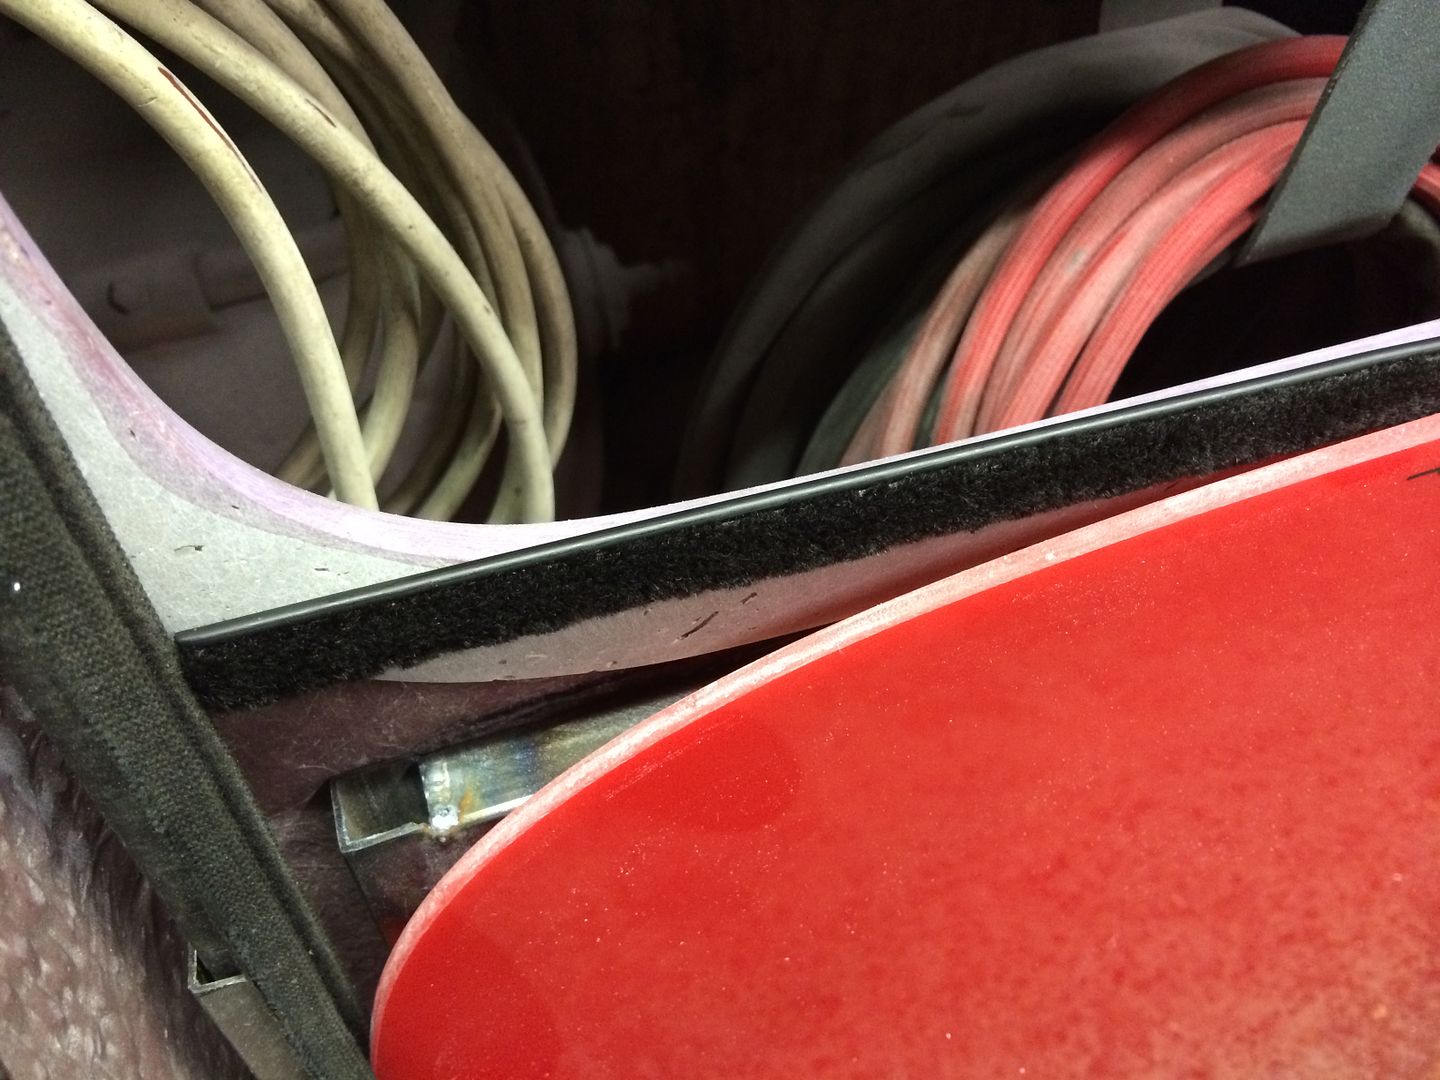
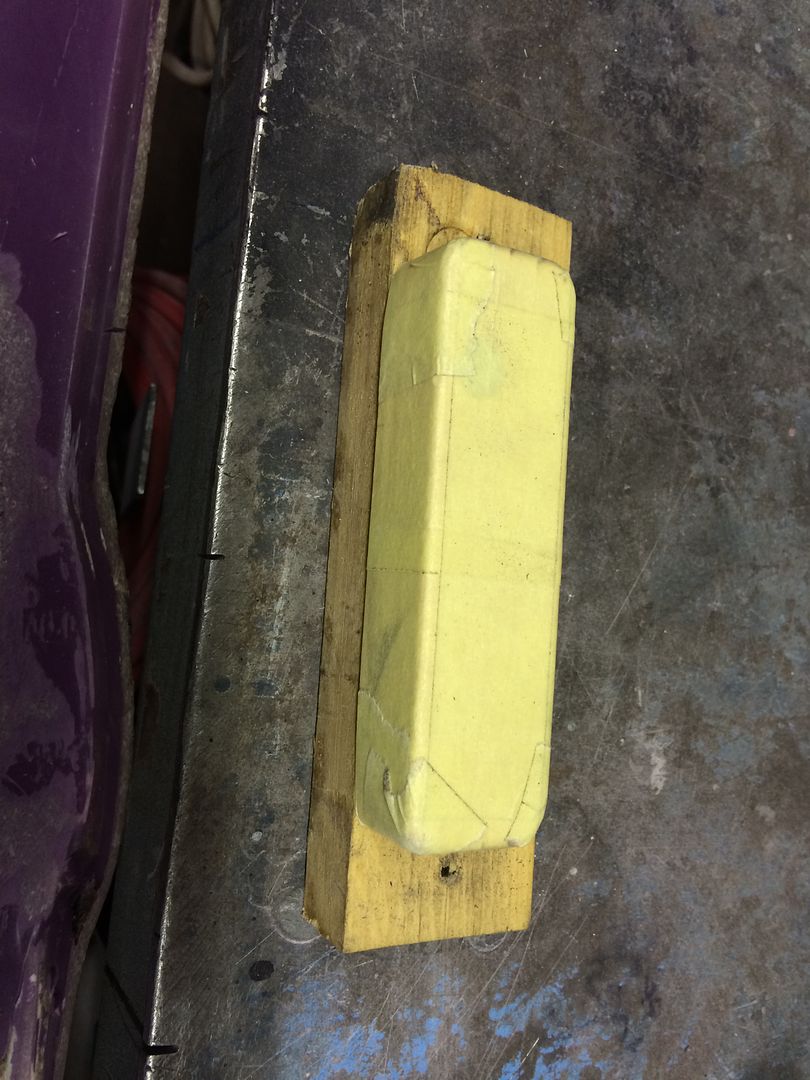
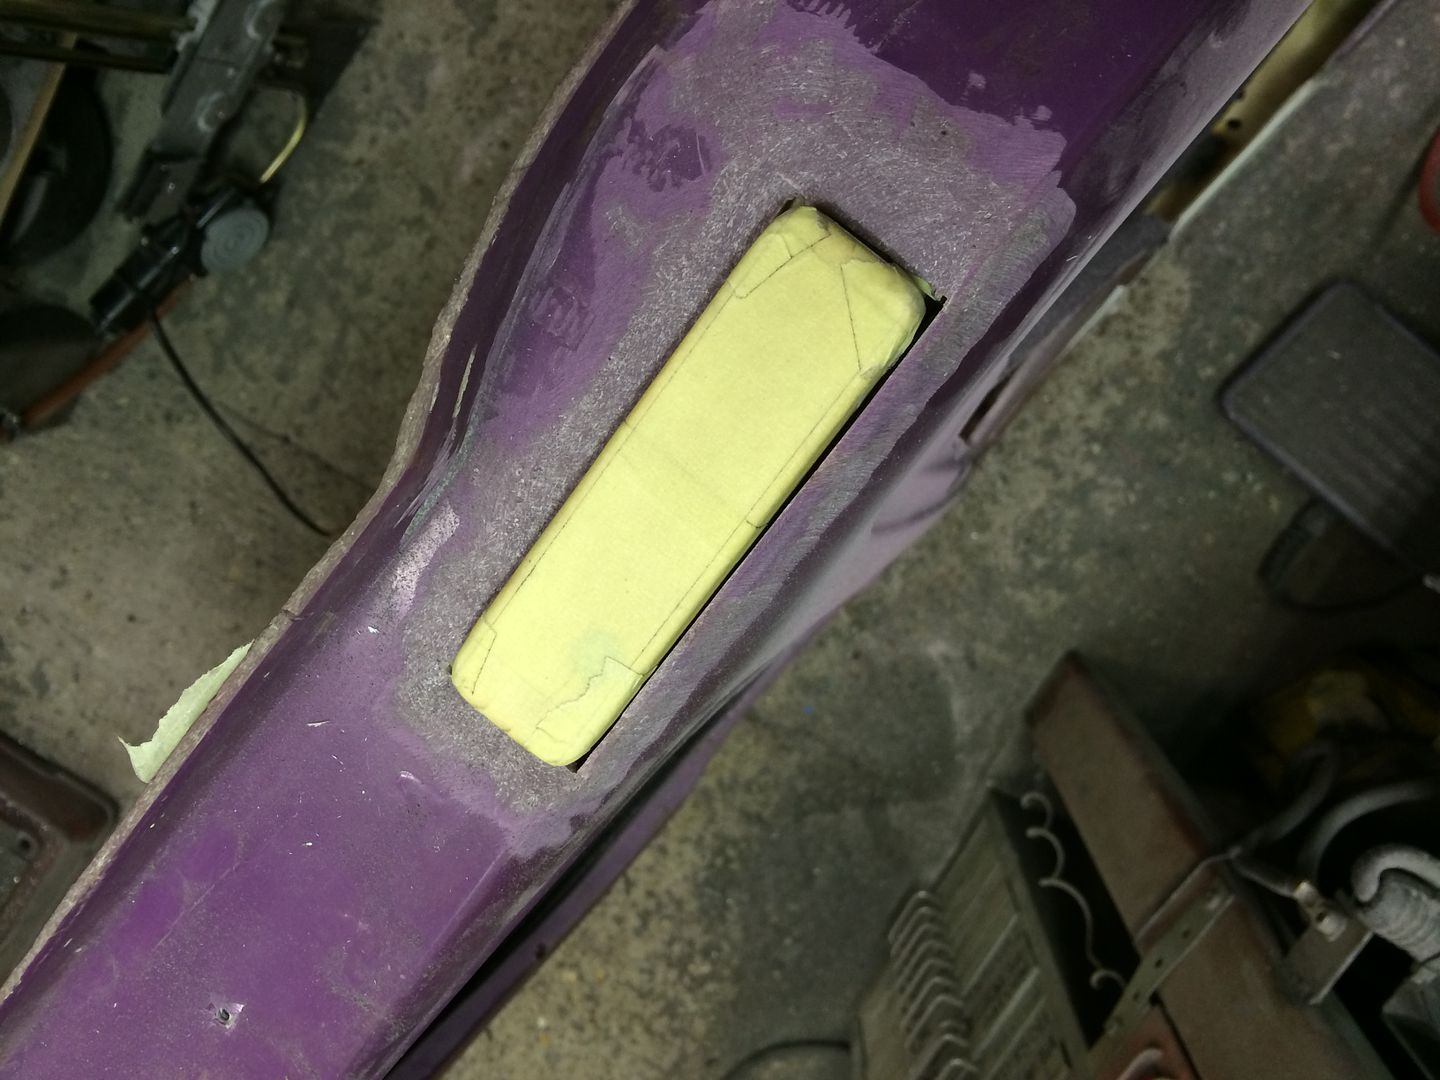
The door inners are now pretty much there now which left one last job before I start putting metal and windows in, the job was to put in a return to mount the whisker strips onto, this is one job I always do on a glass car as looking in the window opening there is nothing worse than seeing the door inards, it really spoils any nicely built car.
So around the opening was keyed up and I mixed up some chopped mat and resin, I call it strawberry but its also known as bridger, its basically small chopped fibreglass strands mixed in resin to form a paste, its very handy for certain jobs.
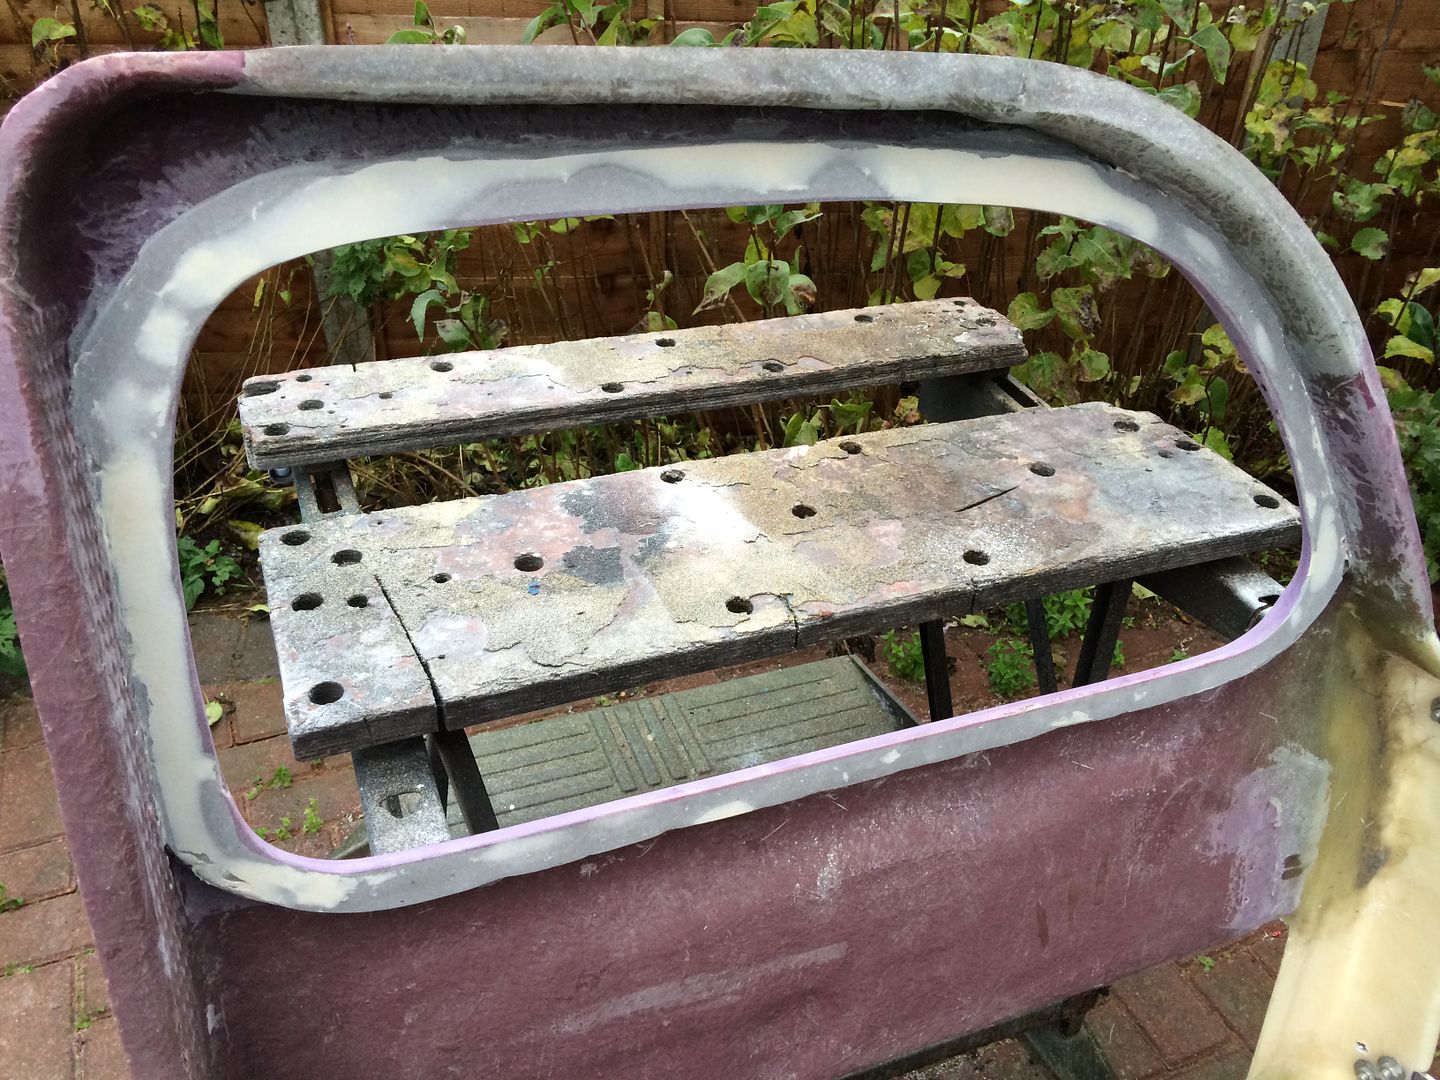
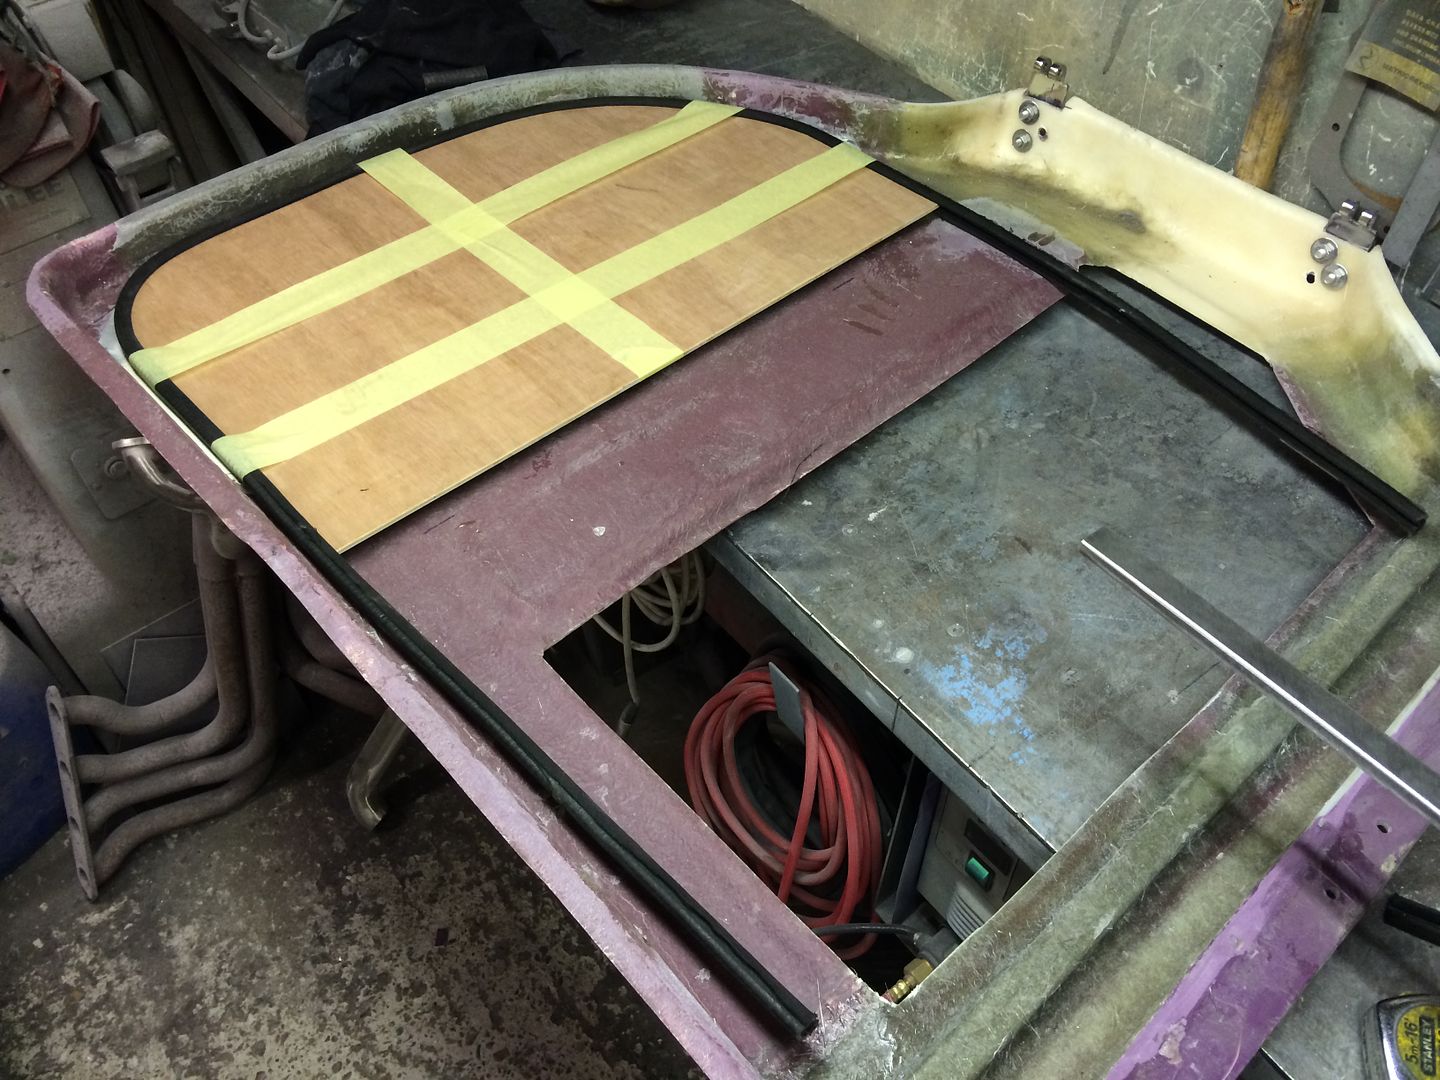
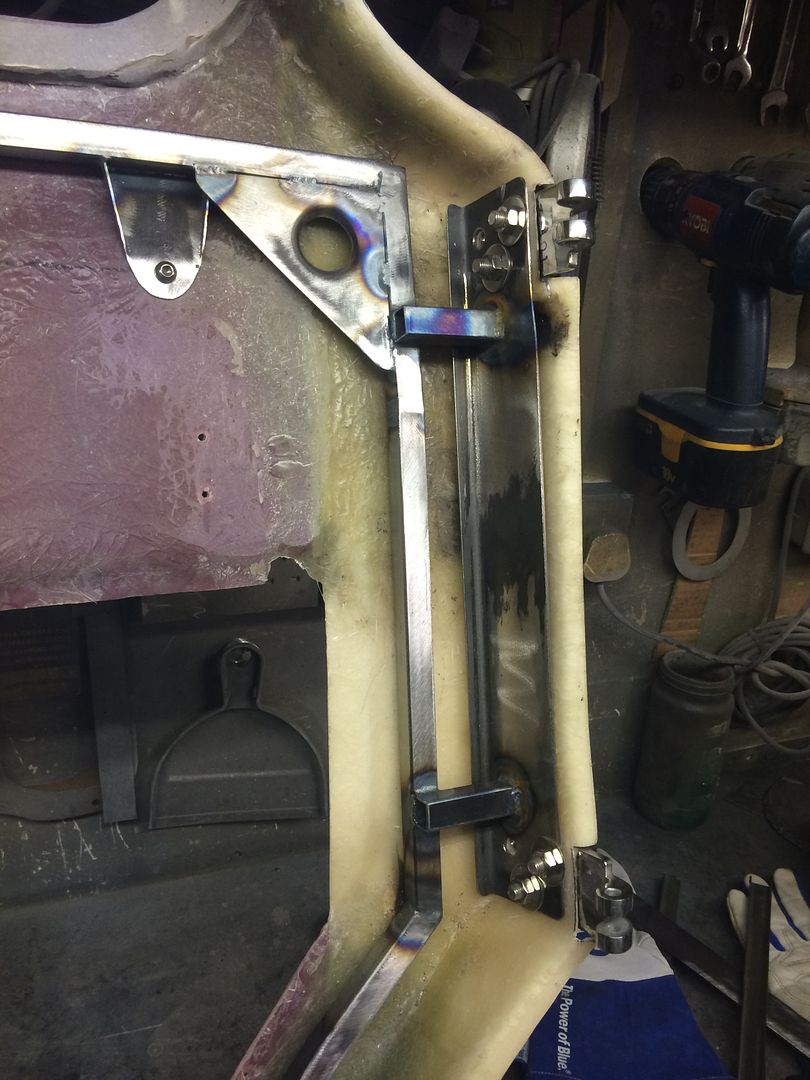
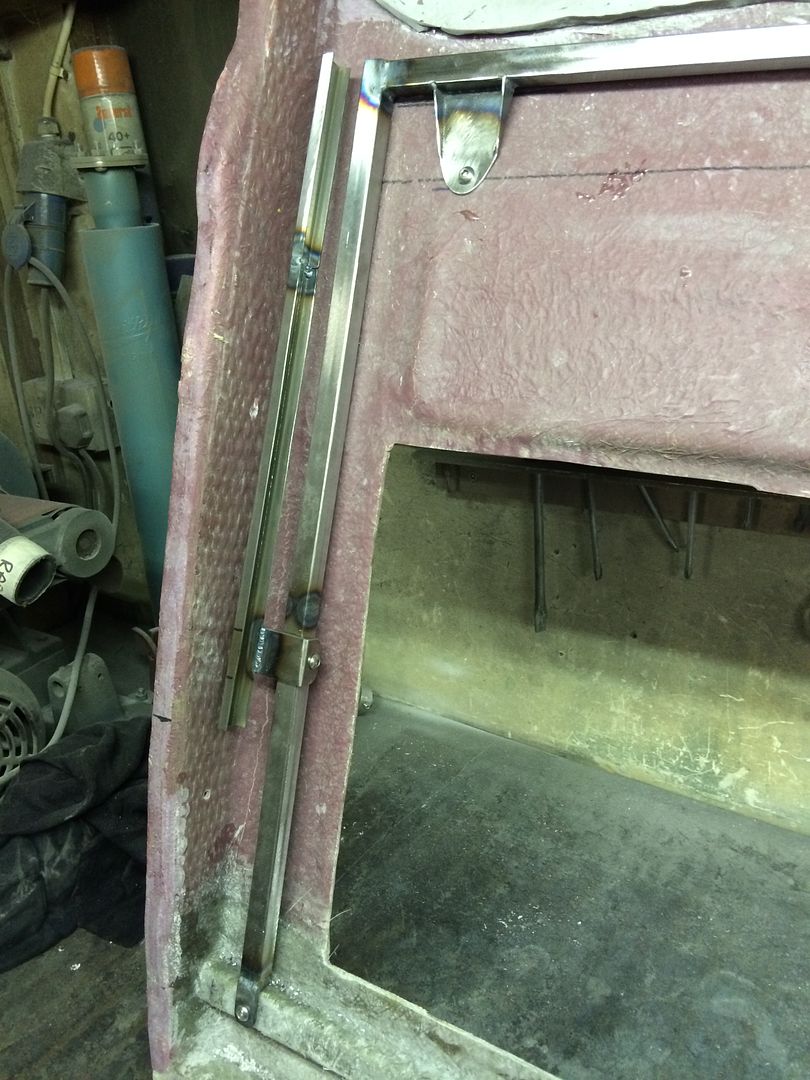
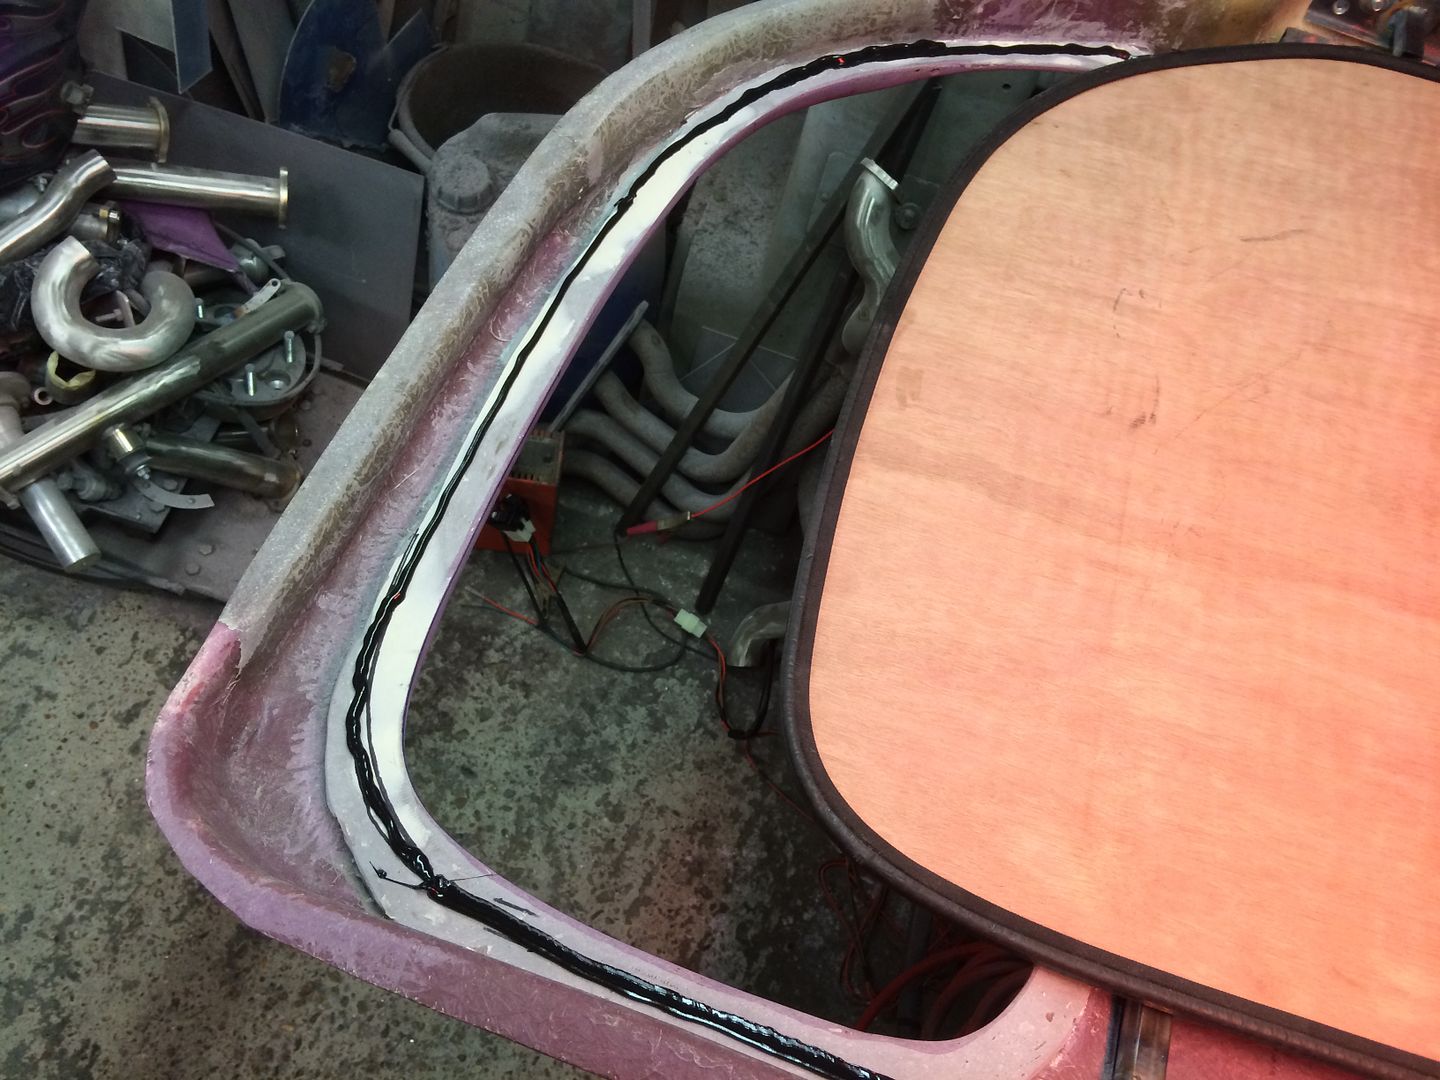
Next I started installing the window channel, to hold the channel I split a piece of 20mm x 1.6mm box in half which gave me 2 10mm deep channels, the felt window runner is a nice snug fit in this.
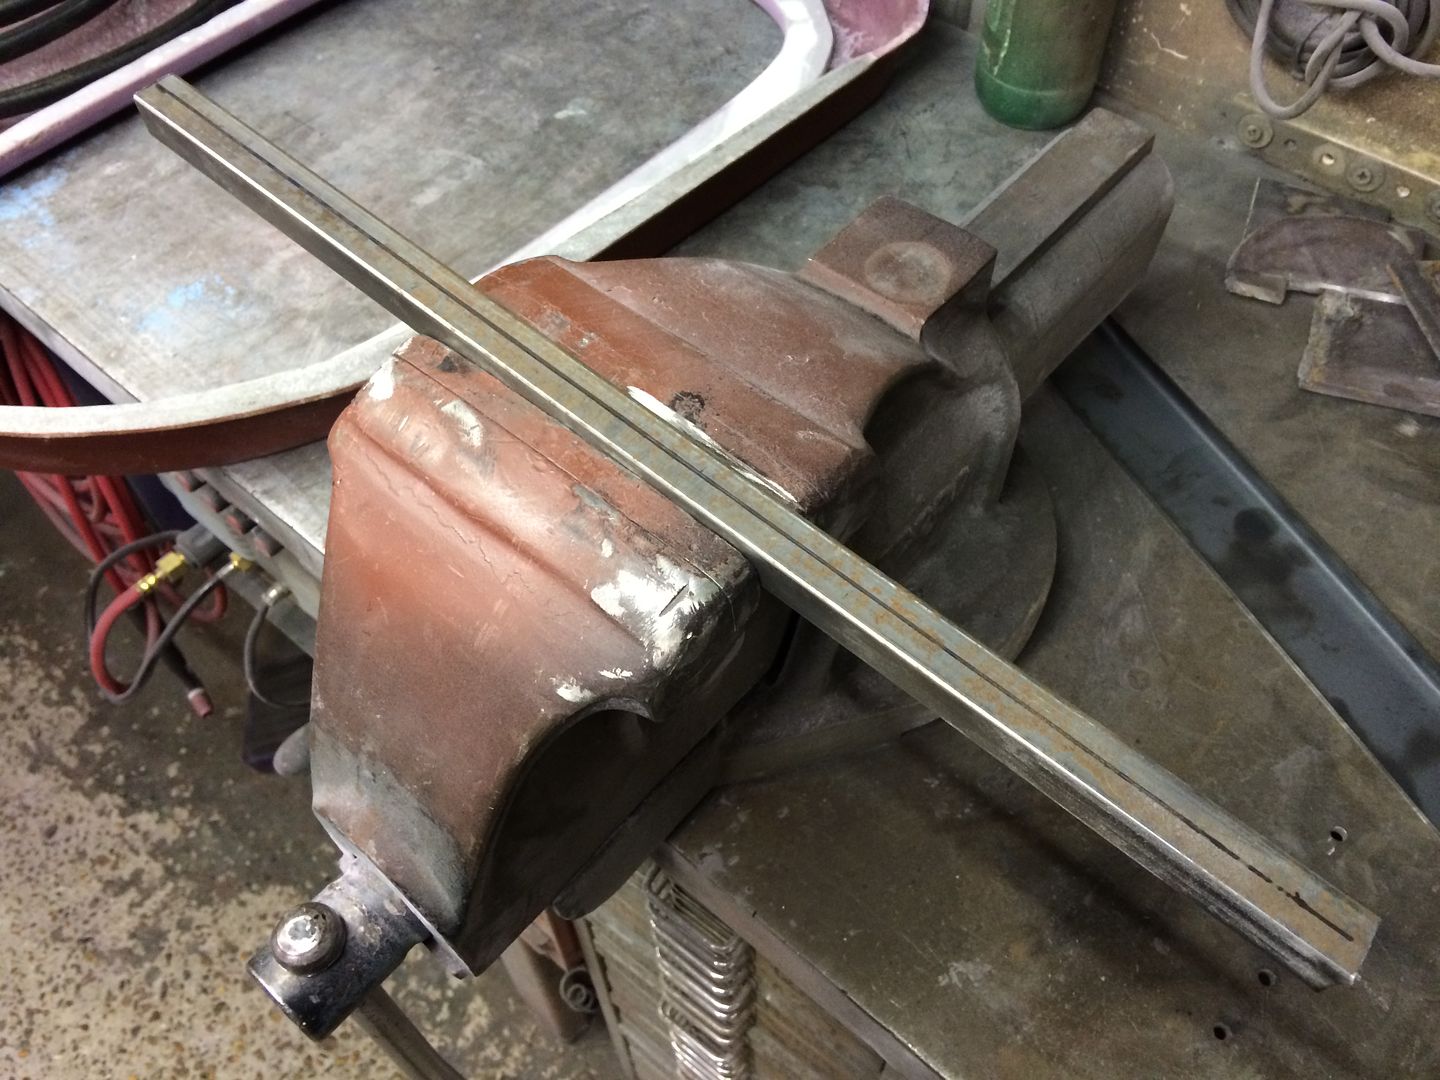
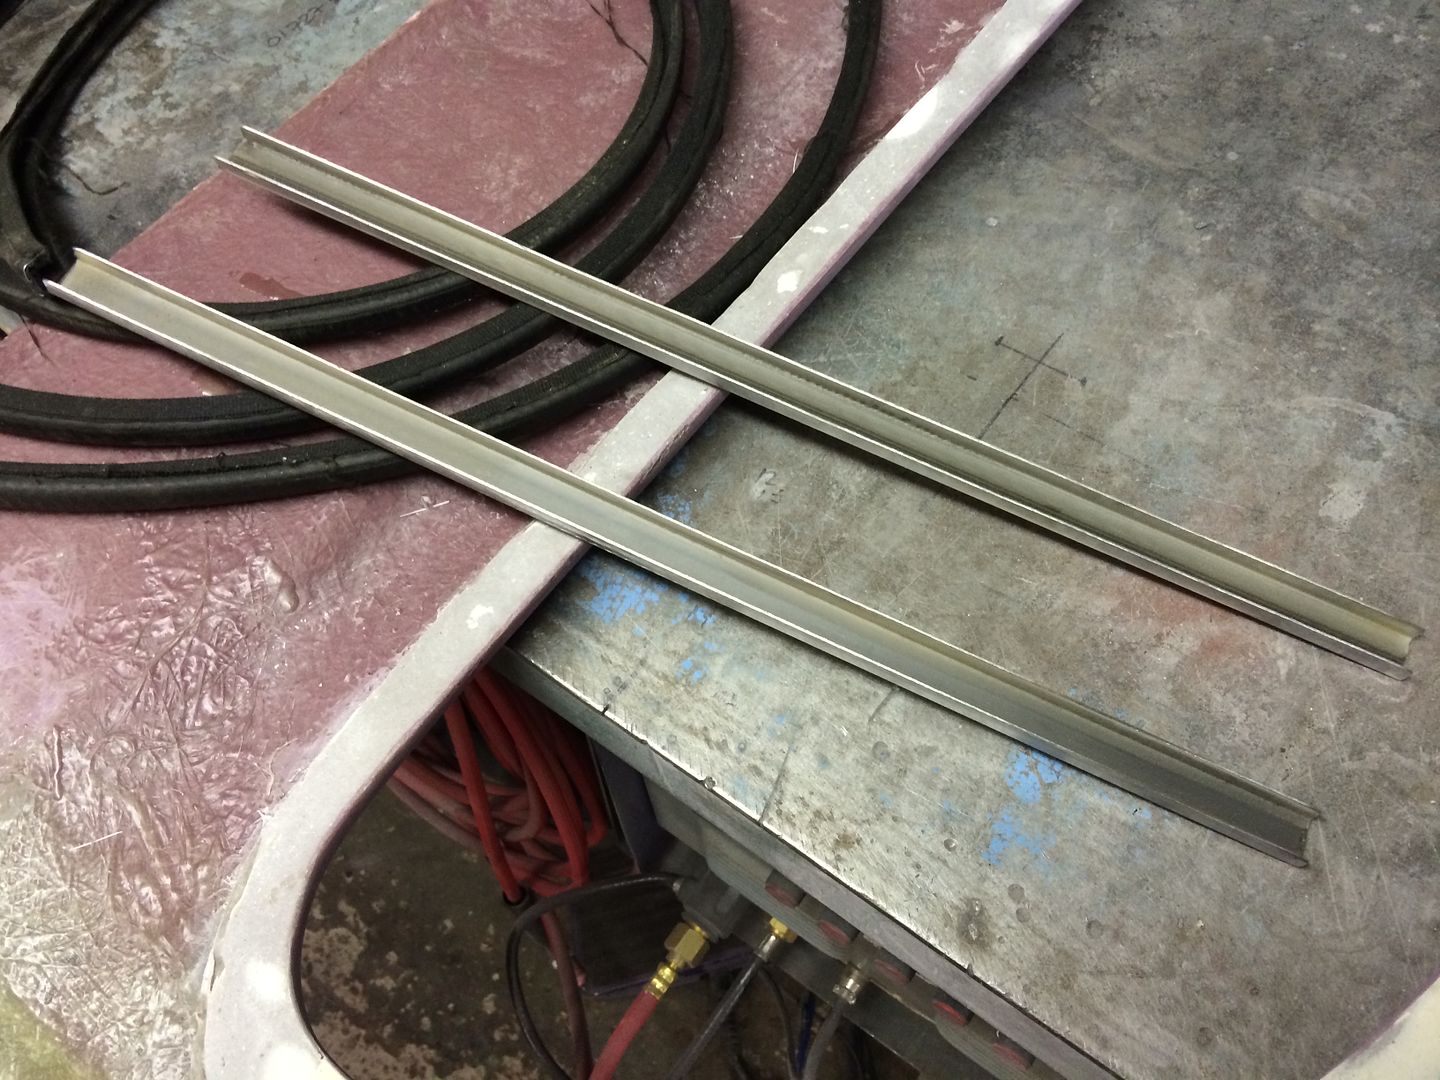

Next I cut some 5mm ply to shape as a window template and formed the felt channel around it.
.Its aweful lonesome in the saddle since my horse died.
-
Advertising

- Google Adsense
- REGISTERED USERS DO NOT SEE THIS AD
-
11-18-2014 04:56 PM #392
CHR Member/Contributor
- Join Date
- Sep 2007
- Location
- Gardner, KS
- Car Year, Make, Model: '33 HiBoy Coupe, '32 HiBoy Roadster
- Posts
- 11,245
Thanks for posting this detail, Steve! Looking forward to the next installment.Roger
Enjoy the little things in life, and you may look back one day and realize that they were really the BIG things.
-
11-18-2014 08:49 PM #393
CHR Member
- Join Date
- Apr 2011
- Location
- Prairie City
- Car Year, Make, Model: 40 Ford Deluxe, 68 Corvette, 72&76 K30
- Posts
- 7,301
- Blog Entries
- 1
Like Roger said, great details on this. I really like the idea of splitting that tube to hold the felt.Ryan
1940 Ford Deluxe Tudor 354 Hemi 46RH Electric Blue w/multi-color flames, Ford 9" Residing in multiple pieces
1968 Corvette Coupe 5.9 Cummins Drag Car 11.43@130mph No stall leaving the line with 1250 rpm's and poor 2.2 60'
1972 Chevy K30 Longhorn P-pumped 24v Compound Turbos 47RH Just another money pit
1971 Camaro RS 5.3 BTR Stage 3 cam, SuperT10
Tire Sizes
-
11-19-2014 11:53 AM #394
CHR Member
- Join Date
- Apr 2009
- Location
- watford
- Car Year, Make, Model: 26T Coupe, 32 Roadster, 41 Willys Coupe
- Posts
- 2,363
A bit more progress, started framing up.
.Its aweful lonesome in the saddle since my horse died.
-
11-19-2014 12:40 PM #395
CHR Member
- Join Date
- Apr 2009
- Location
- watford
- Car Year, Make, Model: 26T Coupe, 32 Roadster, 41 Willys Coupe
- Posts
- 2,363
I was gonna form it Ryan but I just looked at the box section on the bench and it seemed the obvious route to take. Originally Posted by 40FordDeluxe

.Its aweful lonesome in the saddle since my horse died.
-
11-19-2014 12:50 PM #396
CHR Member
- Join Date
- Apr 2009
- Location
- watford
- Car Year, Make, Model: 26T Coupe, 32 Roadster, 41 Willys Coupe
- Posts
- 2,363
Thanks Mark. Originally Posted by sharpmark
.Its aweful lonesome in the saddle since my horse died.
-
11-20-2014 10:38 PM #397
CHR Member
- Join Date
- Feb 2008
- Location
- Inglewood
- Car Year, Make, Model: 60 F100 truck
- Posts
- 6,339
Love it,Steve.. Looking good.. Gotta admit,,I never thought about using a 20mm box for that job..I have used a 20,or 25x 12mm ( I think),with one side cut off for a snug fitting window channel though.. The glass dropped into well..Micah 6:8
If we aren't supposed to have midnight snacks,,,WHY is there a light in the refrigerator???
Robin.
-
11-21-2014 12:38 PM #398
CHR Member
- Join Date
- Apr 2009
- Location
- watford
- Car Year, Make, Model: 26T Coupe, 32 Roadster, 41 Willys Coupe
- Posts
- 2,363
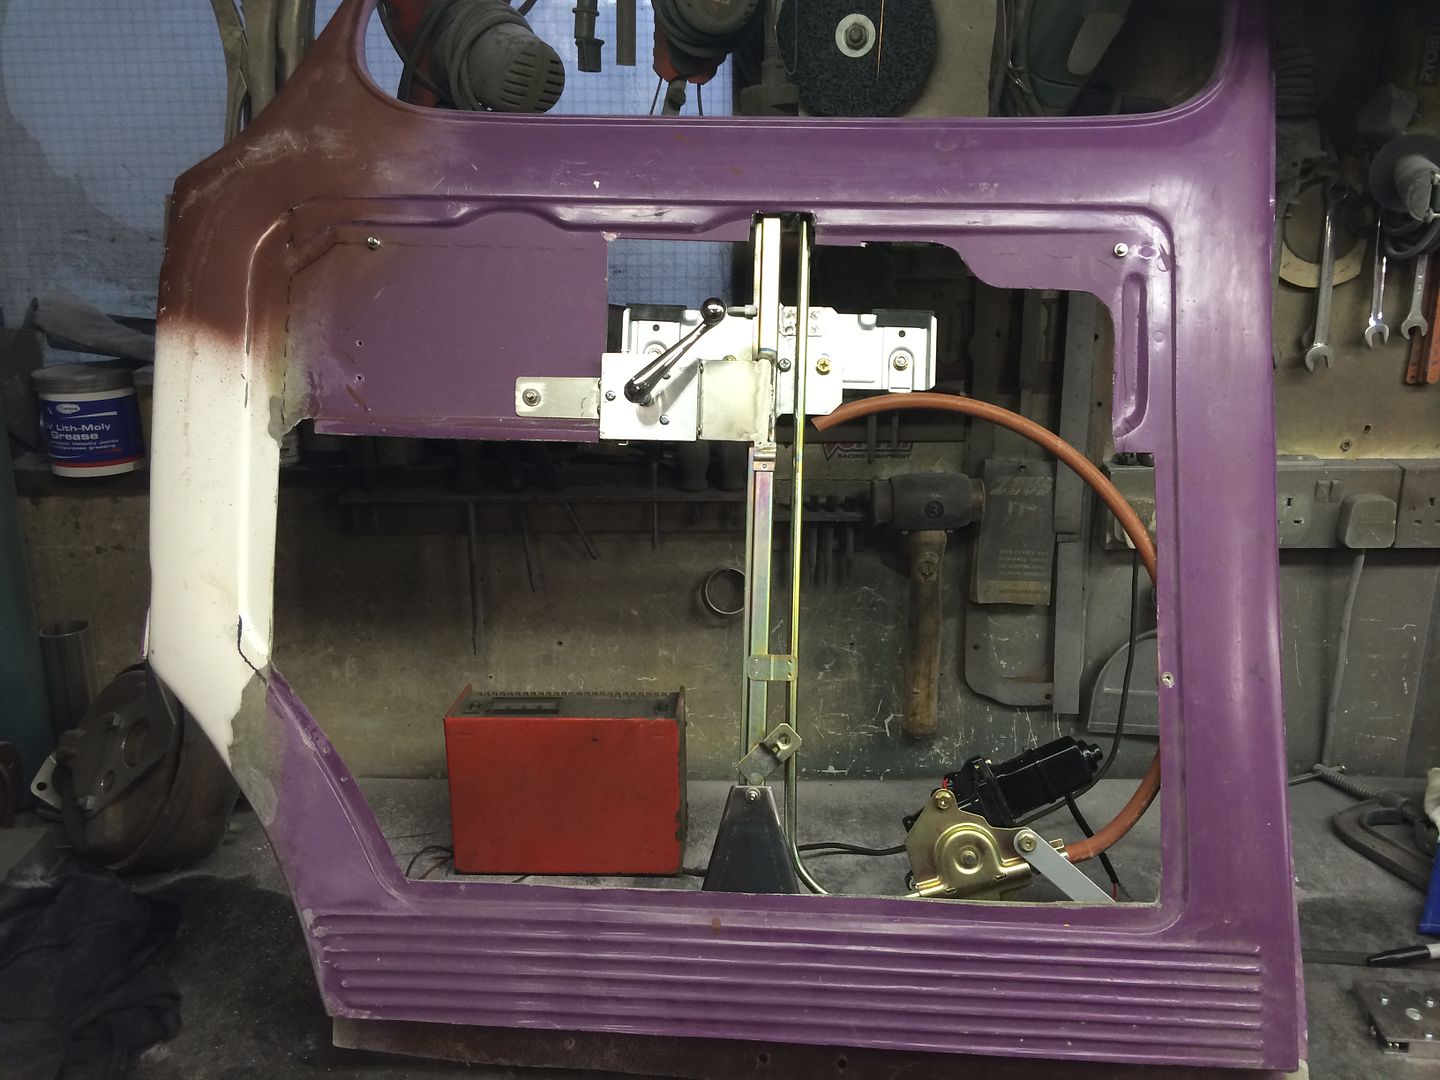
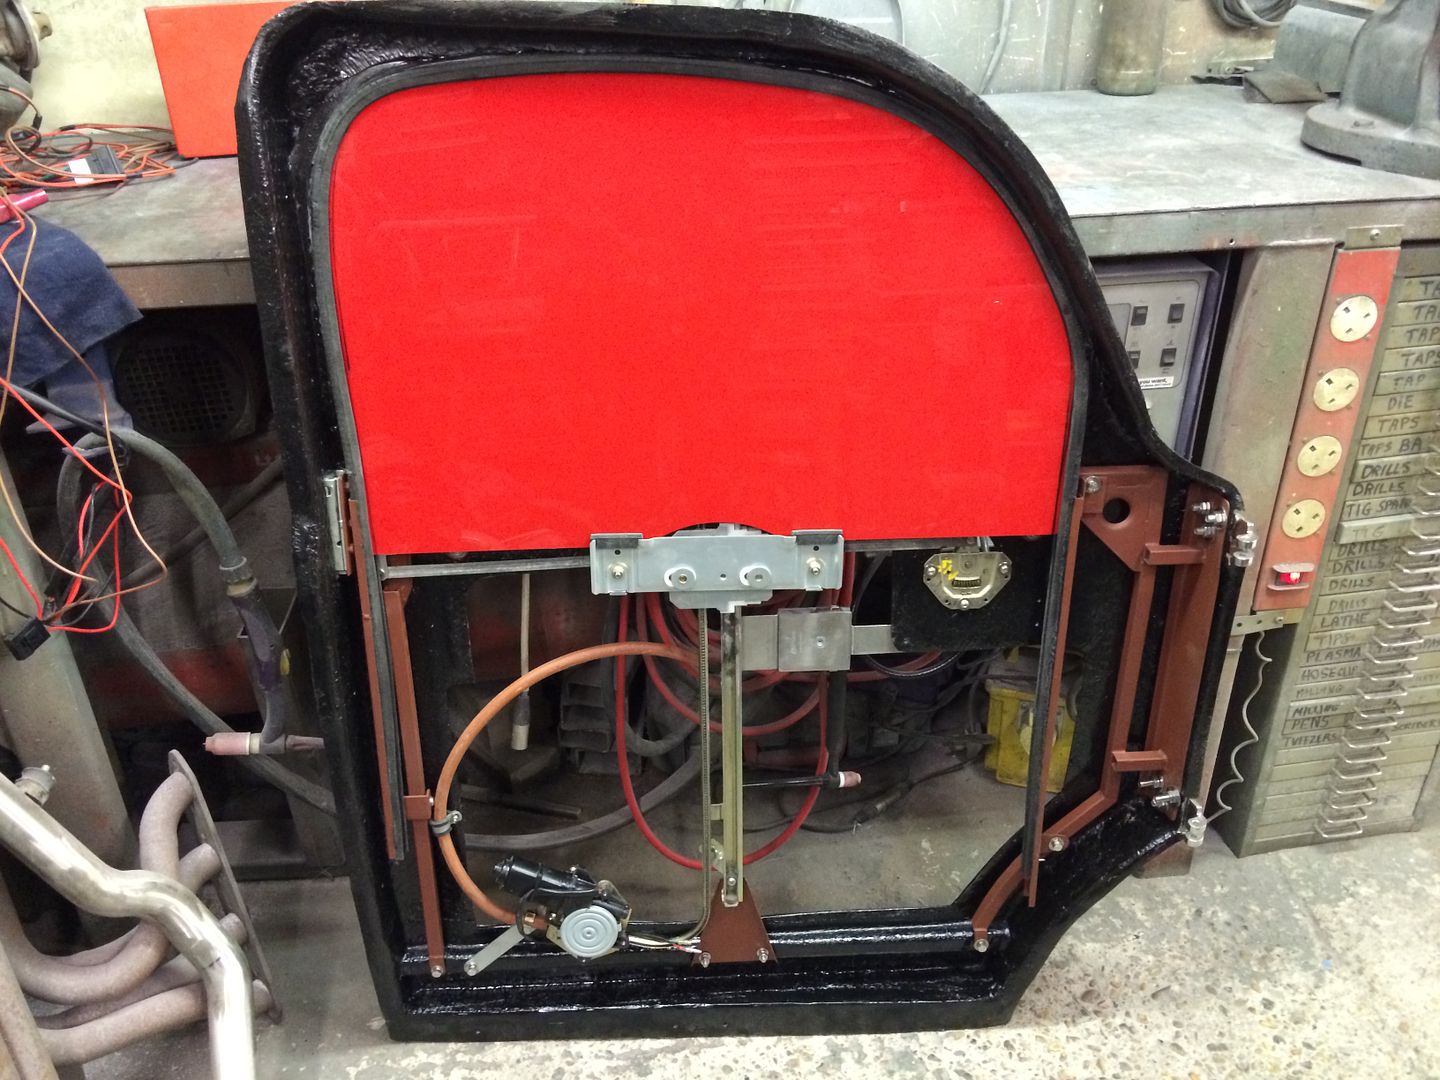
Bit more done to bore you all
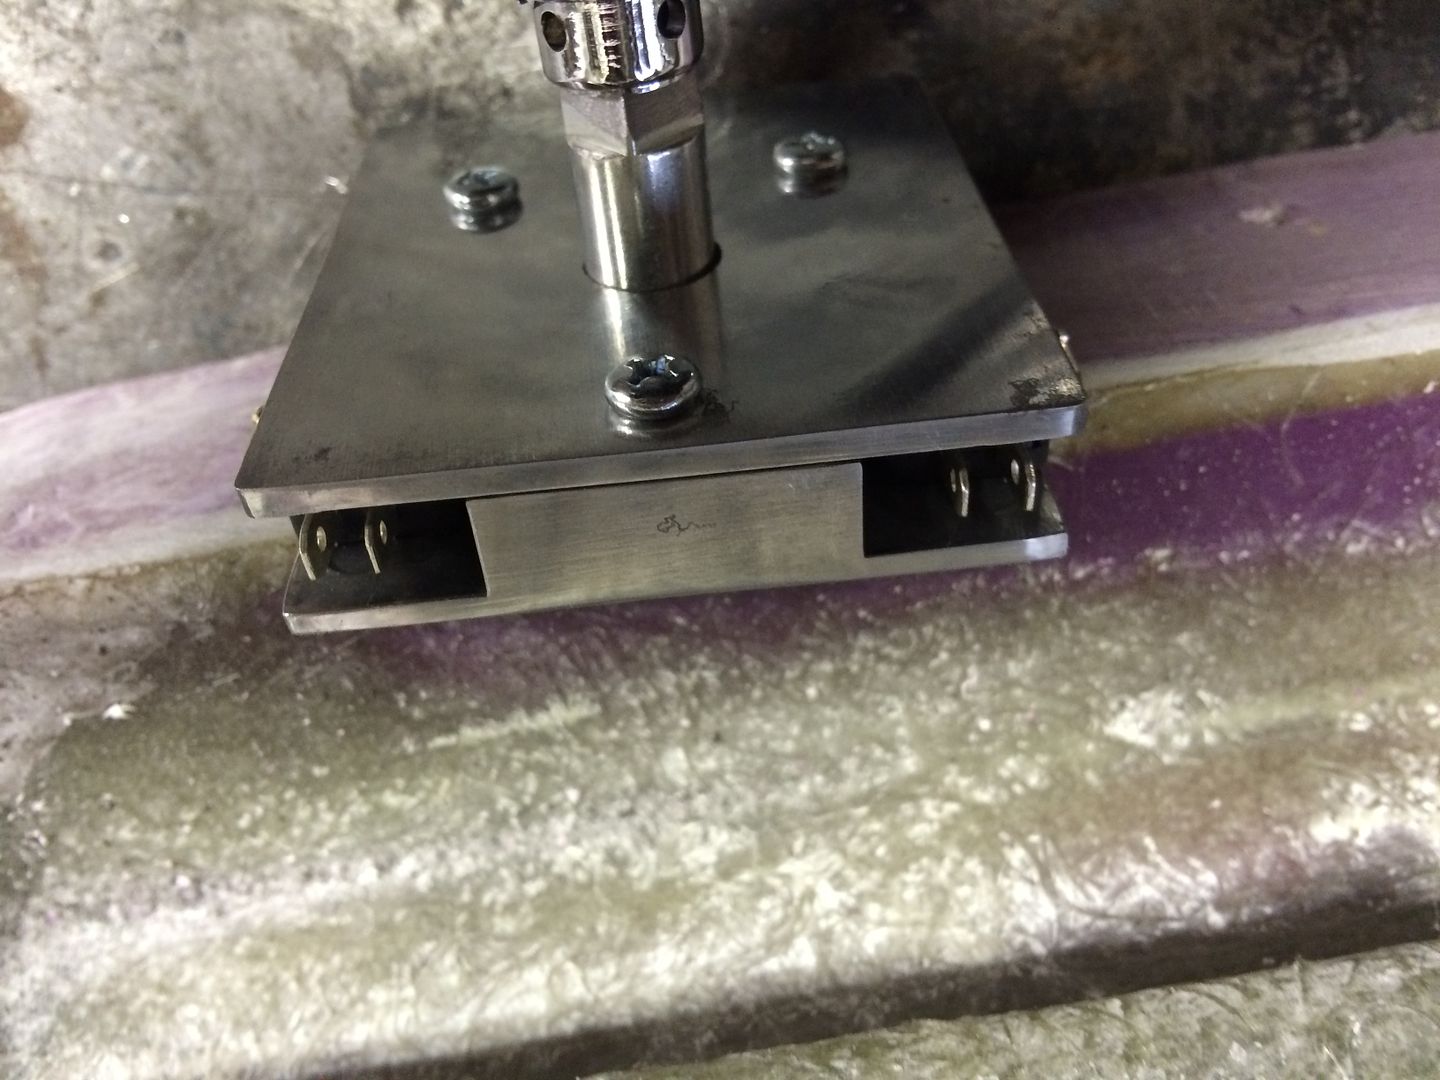
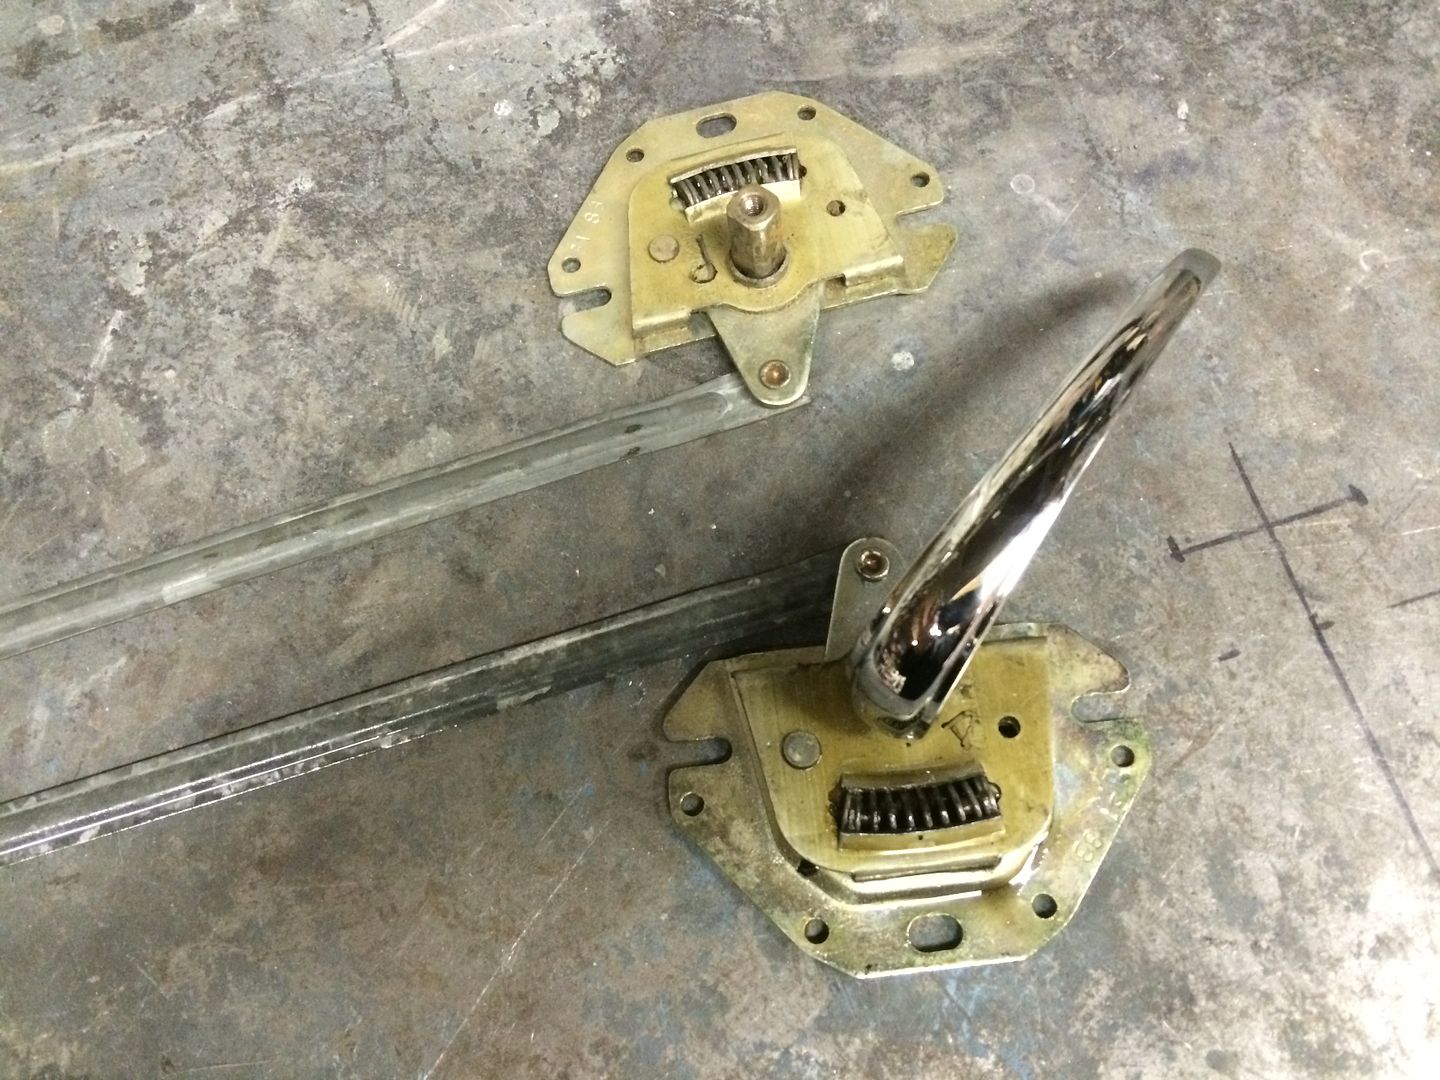
I usually like manual window winders in an old car but as I didn't have any VW winding mechanisms in stock I decided to use some electric units I stock, I guess as I sell and endorse these kits I really should use them as well !!!
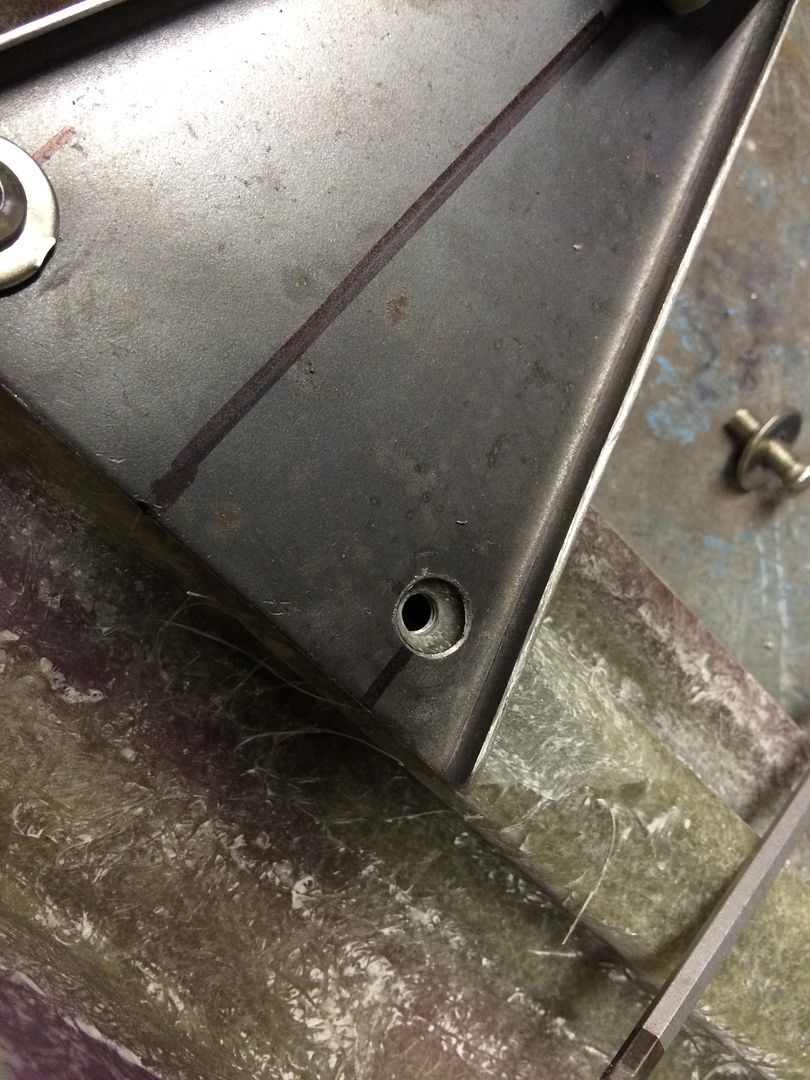
First job was to modify the top mount as it wasn't how I wanted it, Chopped it off and welded my version on.
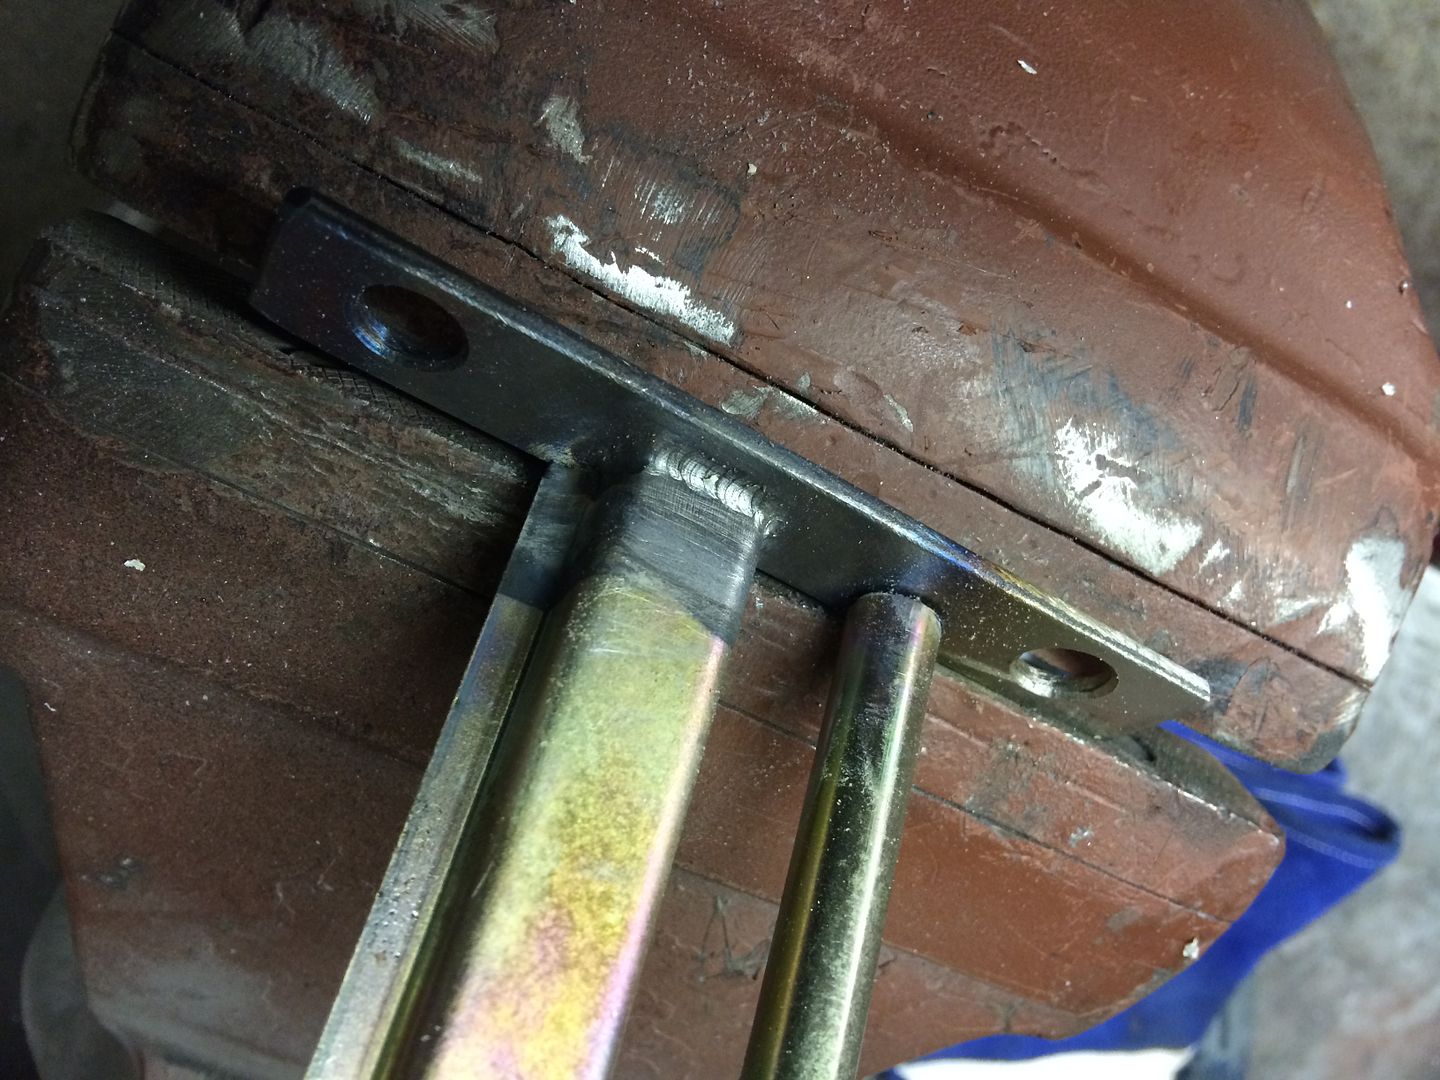
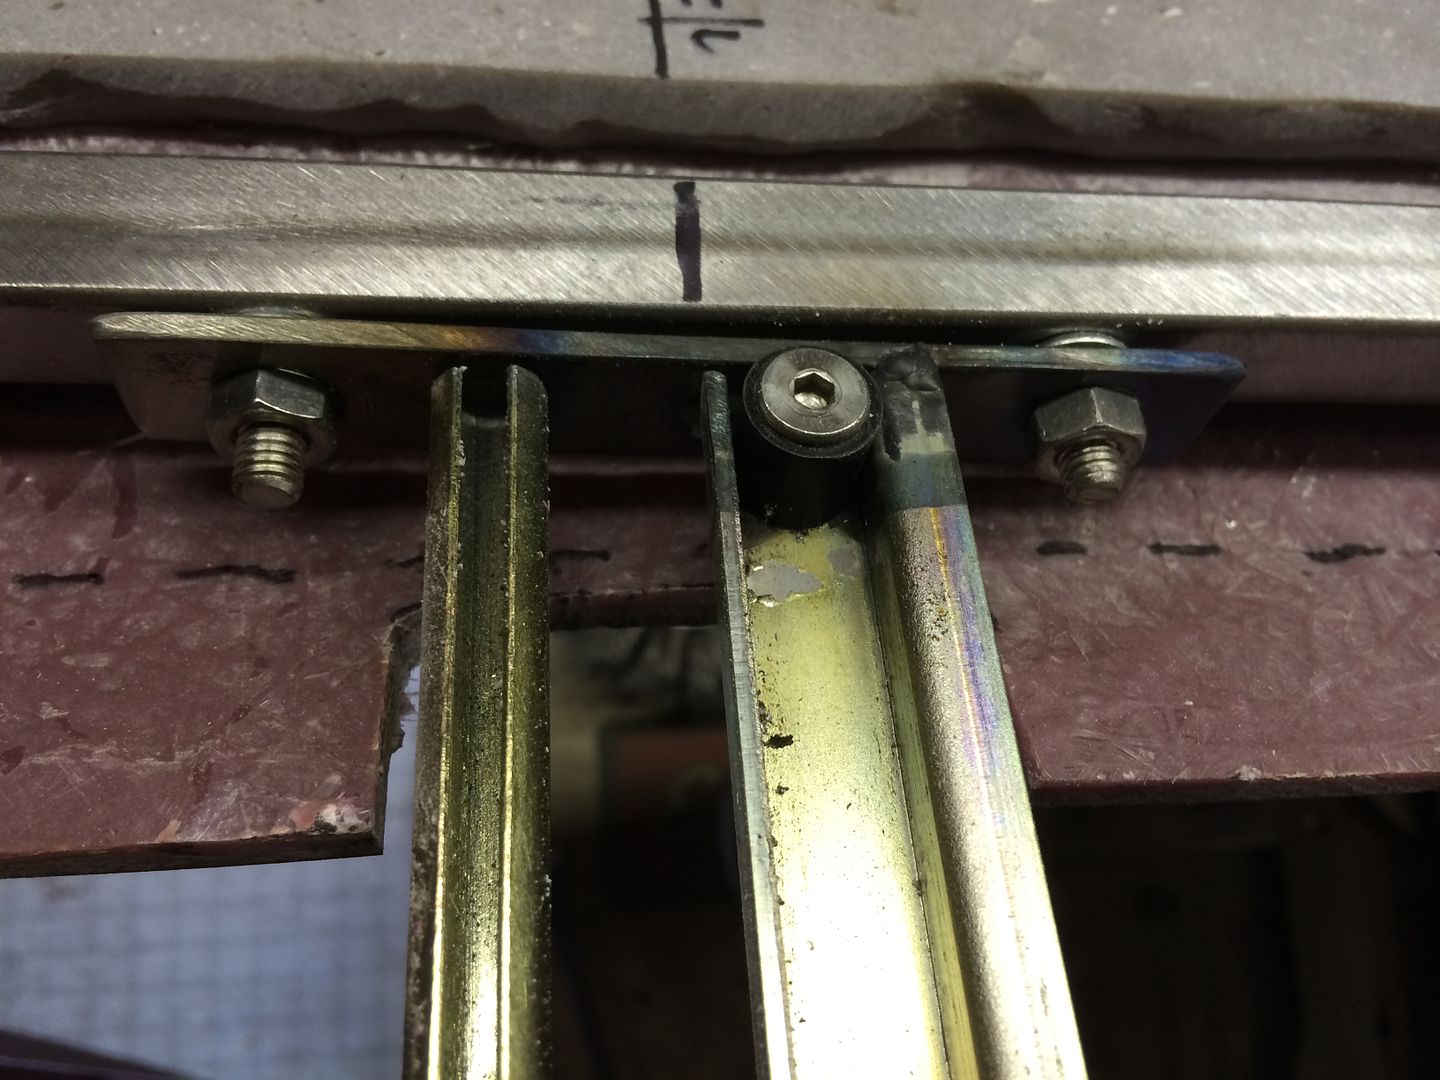
I modified the bottom mount to my liking also, all the holes are drilled 1/4" while I set it all up then I drill out to 3/8" to allow a bit of adjustment in all directions.
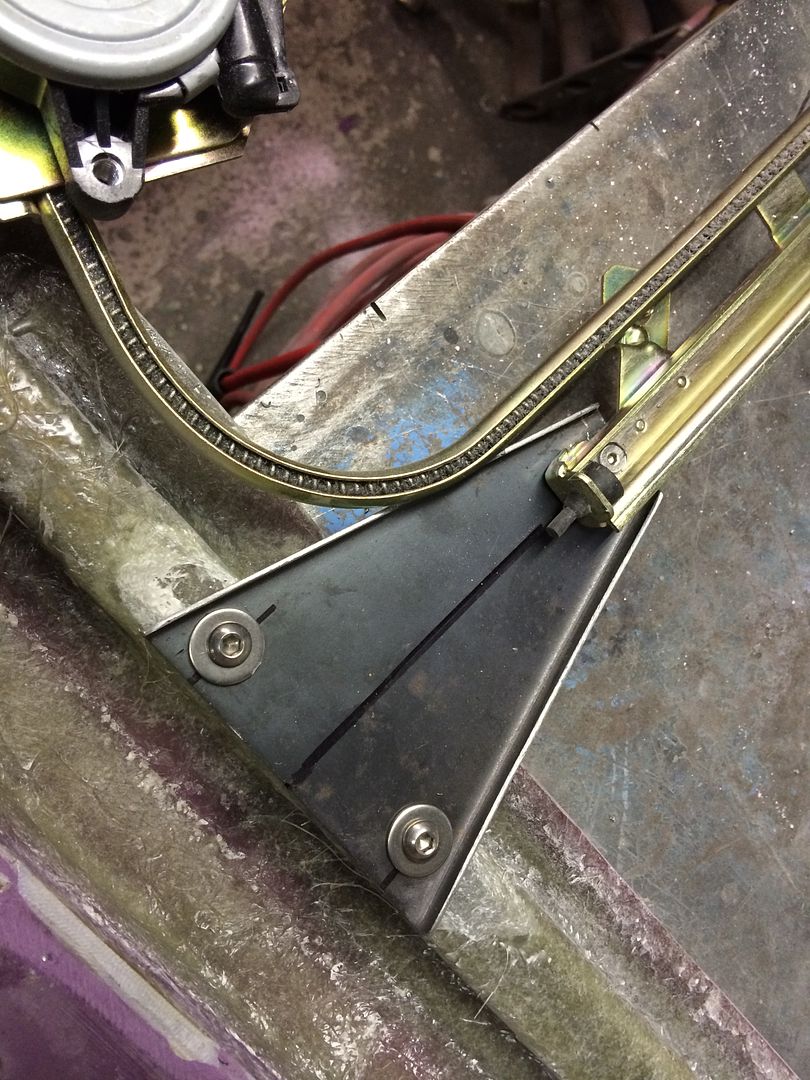
I also fixed a steady for the motor
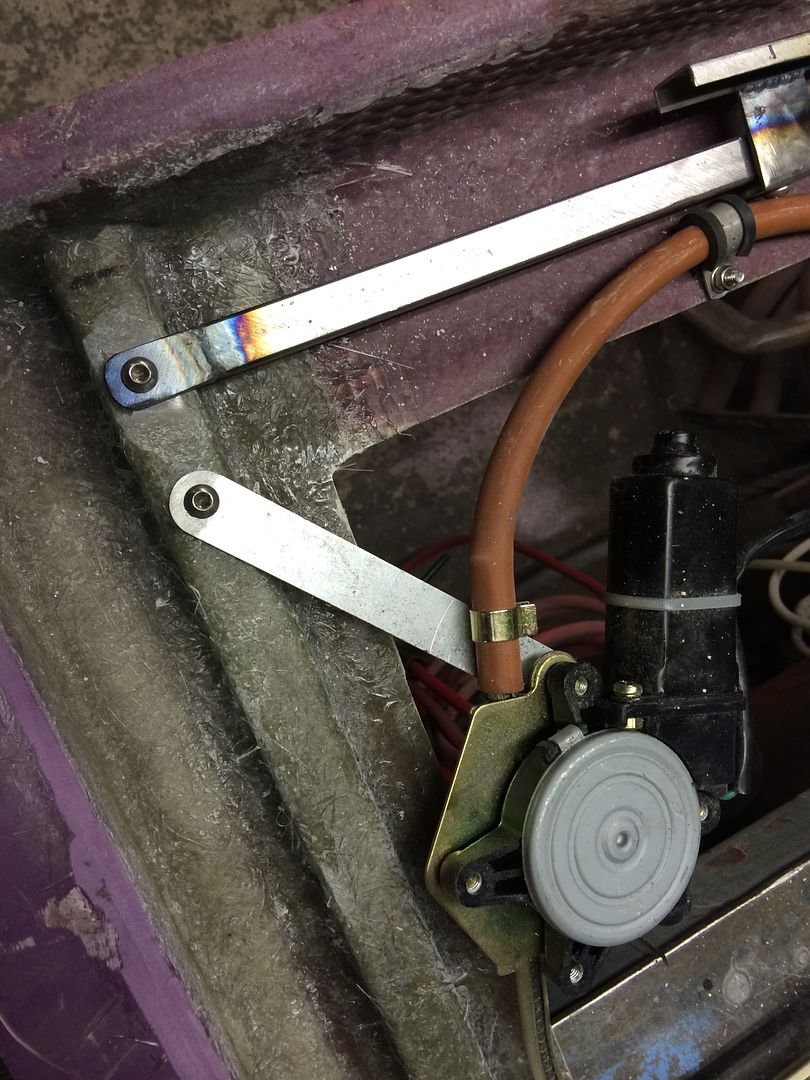
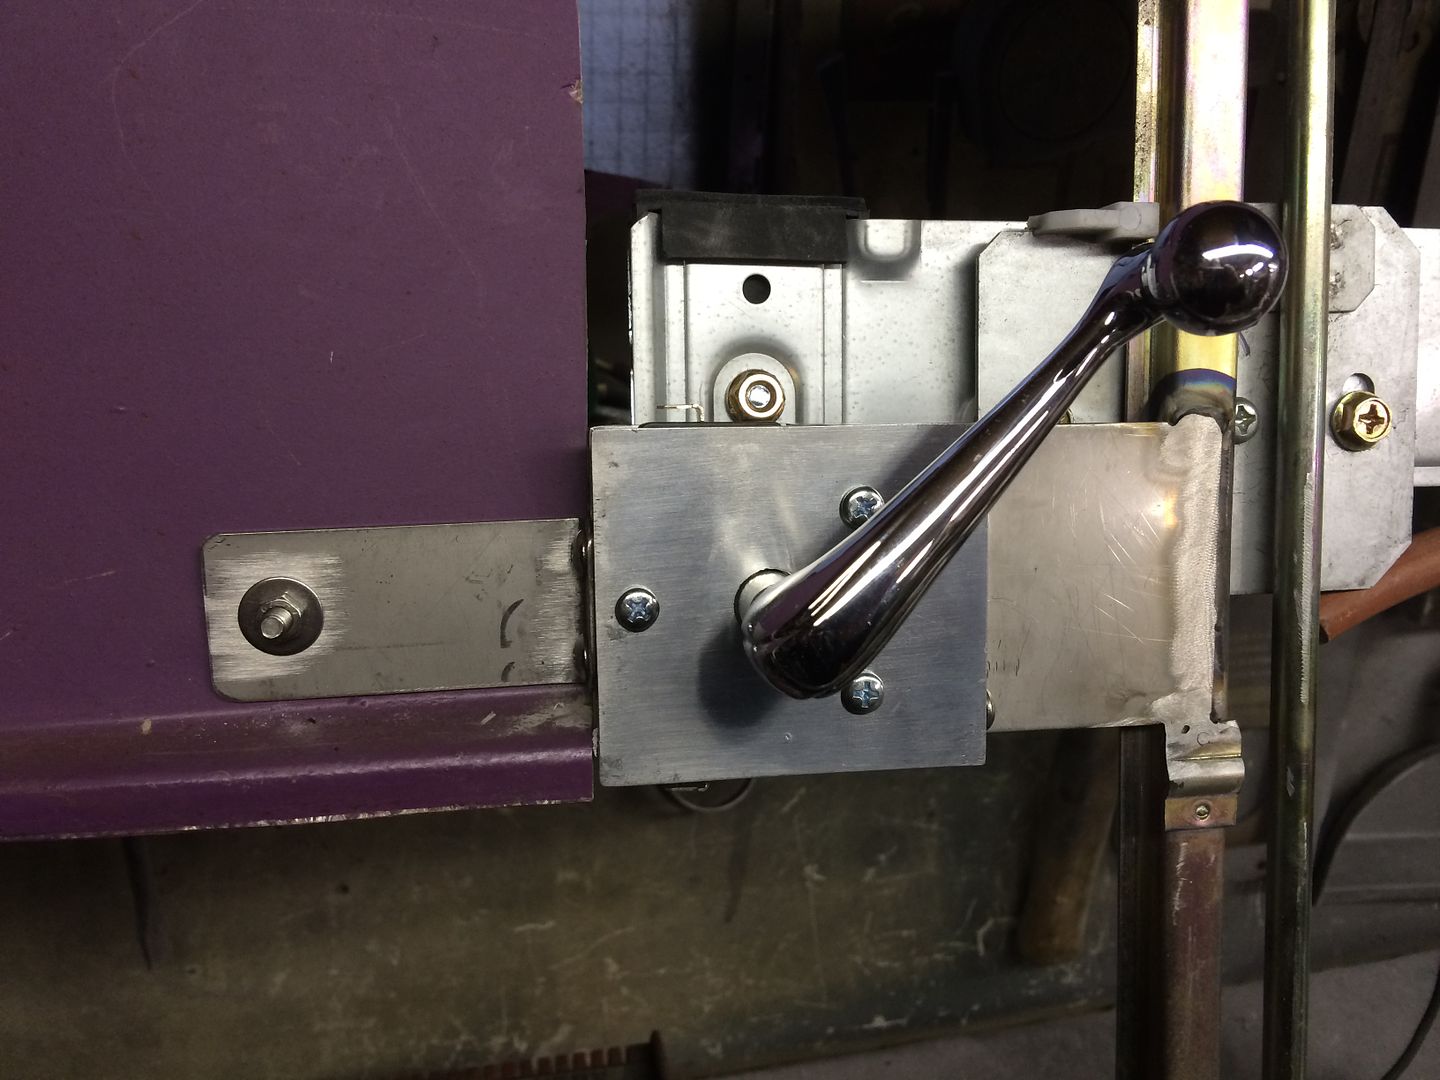
Heres the mechanism in place, Its really a great little kit that works great, comes with switches & wiring harness but I won't be using them as I don't want the look of modern switches.

This is a shot of the clamping system, A great idea that works
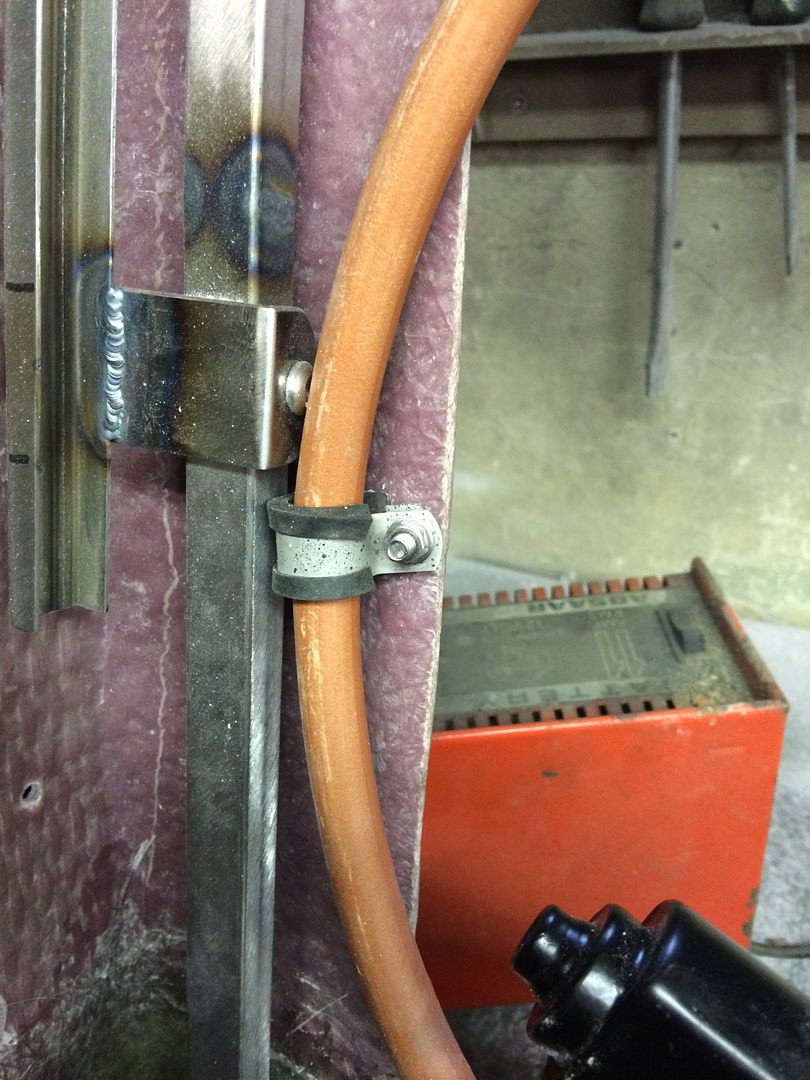
The top limit relies on the bracket I cut off so I spun up a buffer in the lathe for the end of the travel. also clipped up the exhaust tube.
Heres what i'm using in place of the modern rocker switches, they use micro switches for up & down action, i'm using 34 ford winder handles, modern windows with an old look.
Here the switches are mounted in simple brackets.
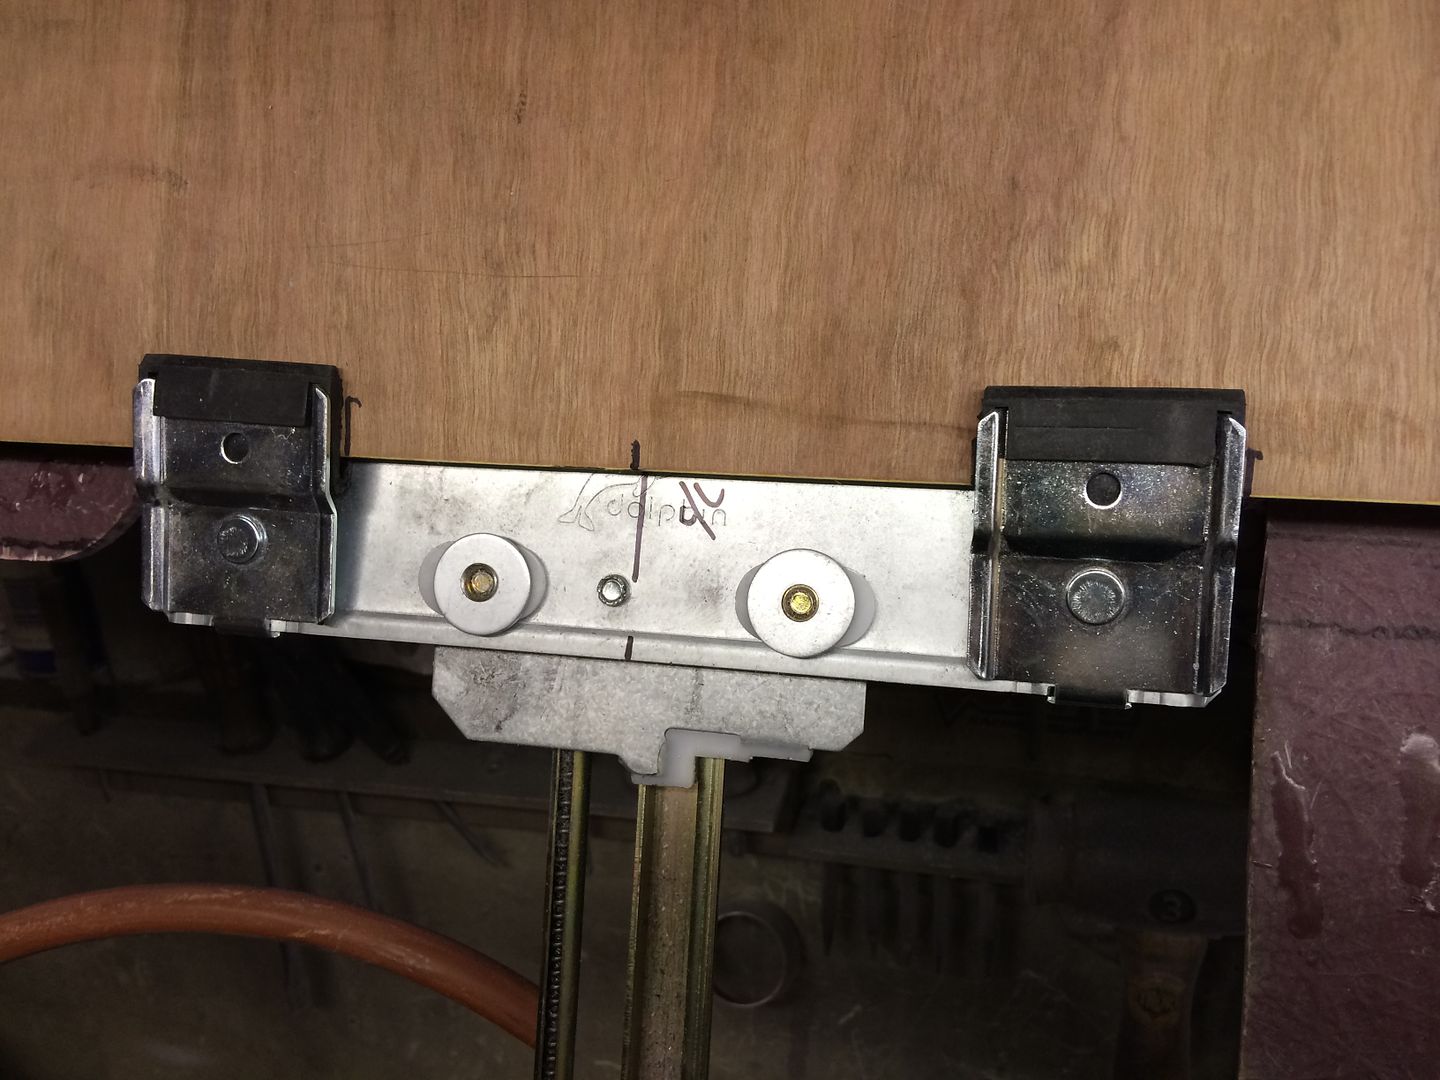
Next job was to bond in the window channel, using Polyeurathe Adhesieve Sealant, sticks anything like shit to a blanket !!!
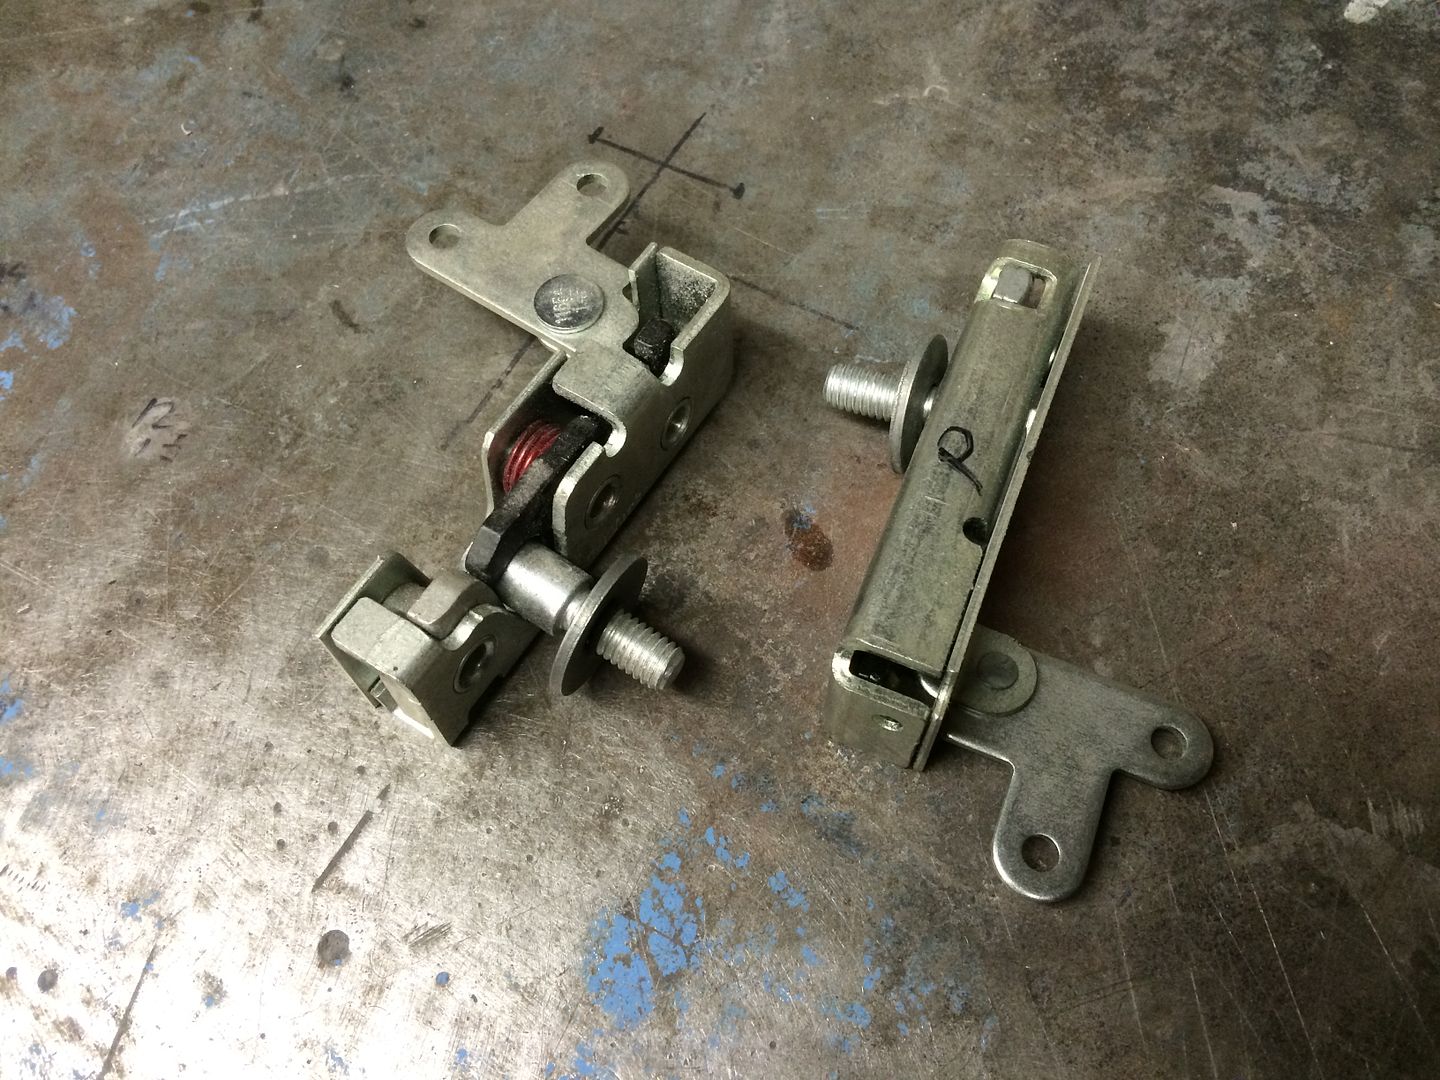
I found these door actuators on my shelf and they are just the right length and will take the 34 ford handles perfectly. Locks are some slim bearjaw locks I had kicking around.
.Its aweful lonesome in the saddle since my horse died.
-
11-21-2014 01:52 PM #399
CHR Member
- Join Date
- Feb 2010
- Location
- Pukekohe, New Zealand
- Car Year, Make, Model: '23 Ford T Roadster
- Posts
- 2,199
Very very nice work there Steve and you have made me rethink the way I am building the doors for the Bucket re frame wise, and I don't have windows to worry about. Thanks so much for taking the time to not only photograph what you are doing but your easy to understand explainations is so helpful, it is brilliant.I maybe a little crazy but it stops me going insane.
Isaiah 48: 17,18.
Mark.
-
11-22-2014 09:39 AM #400
CHR Member
- Join Date
- Apr 2009
- Location
- watford
- Car Year, Make, Model: 26T Coupe, 32 Roadster, 41 Willys Coupe
- Posts
- 2,363
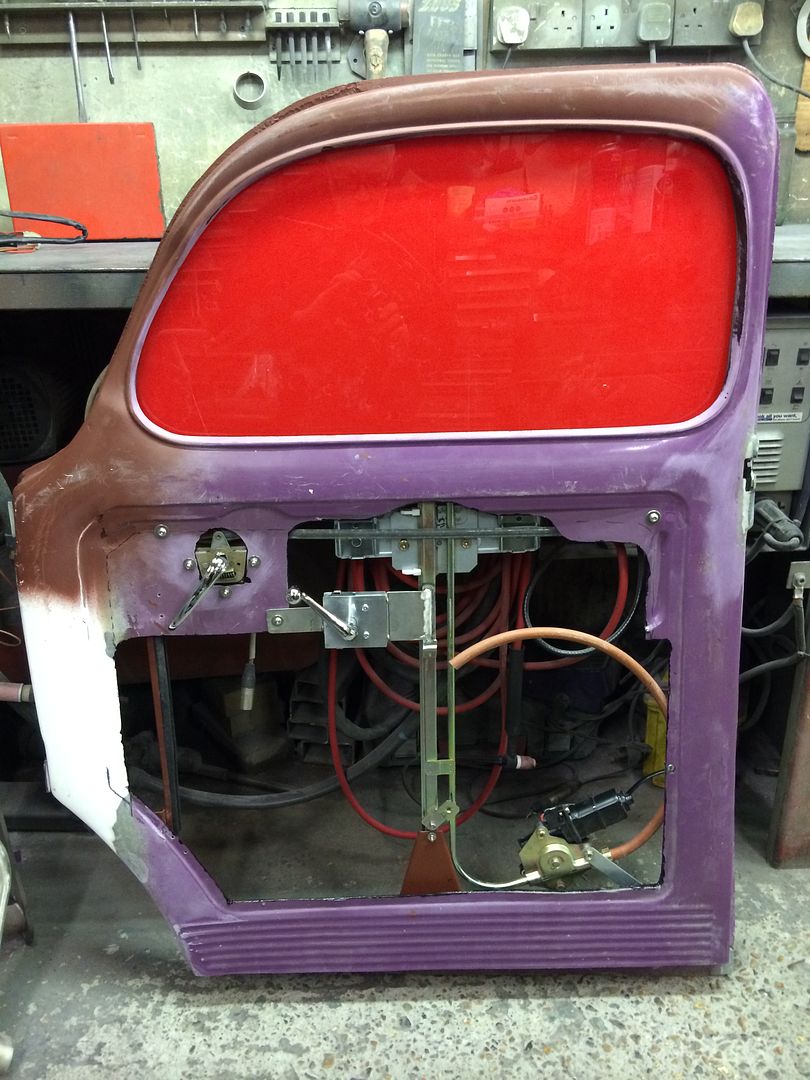
Had to knock off a bit earlier today as we have friends coming but I did get the windows all going up & down nice & smoothly
Also I knew space was tight for the bearjaw locks so had to form a slight bulge in the door jam to accommodate them, it will also make life easy for prospective customers as its a standard lock I keep in stock.
Hers a few pics and a short video
Video
https://www.youtube.com/watch?v=iV4EUvylKj4
Heres the whisker trim and where it will fit
Here the lock position and the bulge I formed, all done with a bit of shaped wood and masking tape


.Its aweful lonesome in the saddle since my horse died.
-
11-22-2014 09:48 AM #401
CHR Member
- Join Date
- Apr 2009
- Location
- watford
- Car Year, Make, Model: 26T Coupe, 32 Roadster, 41 Willys Coupe
- Posts
- 2,363
I'm glad it helped you Whip, makes it all worthwhile Originally Posted by Whiplash23T

.Its aweful lonesome in the saddle since my horse died.
-
11-25-2014 01:08 AM #402
CHR Member
- Join Date
- Apr 2009
- Location
- watford
- Car Year, Make, Model: 26T Coupe, 32 Roadster, 41 Willys Coupe
- Posts
- 2,363
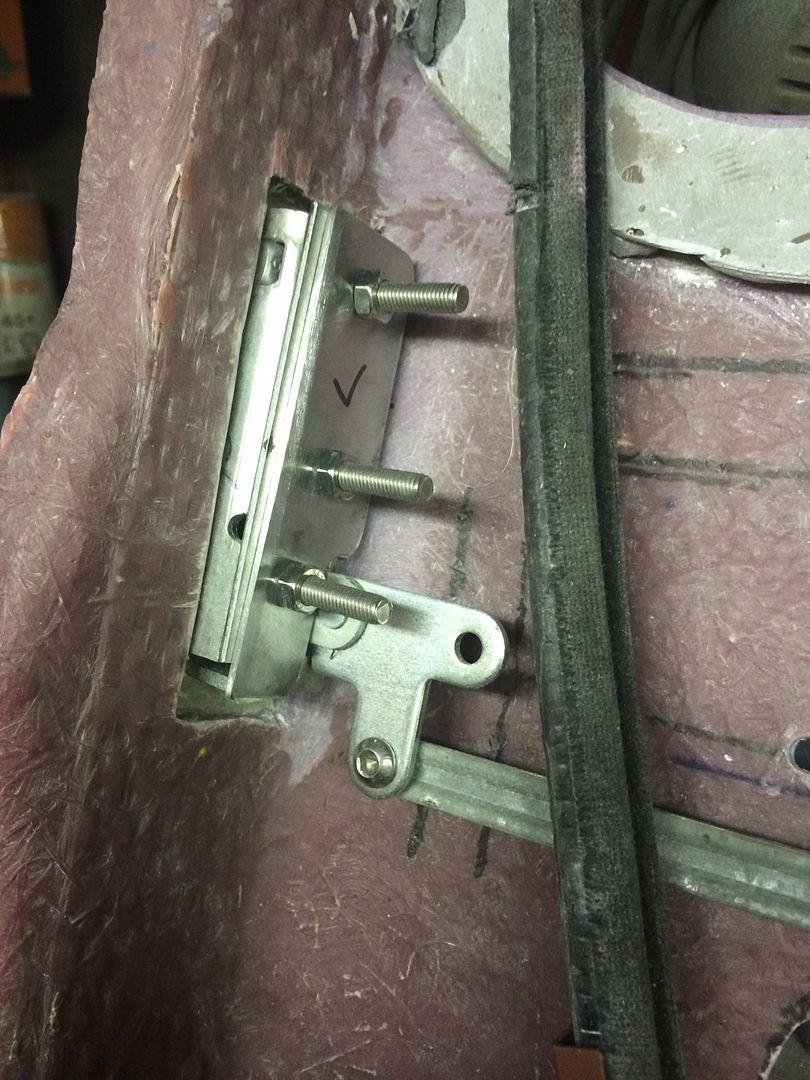
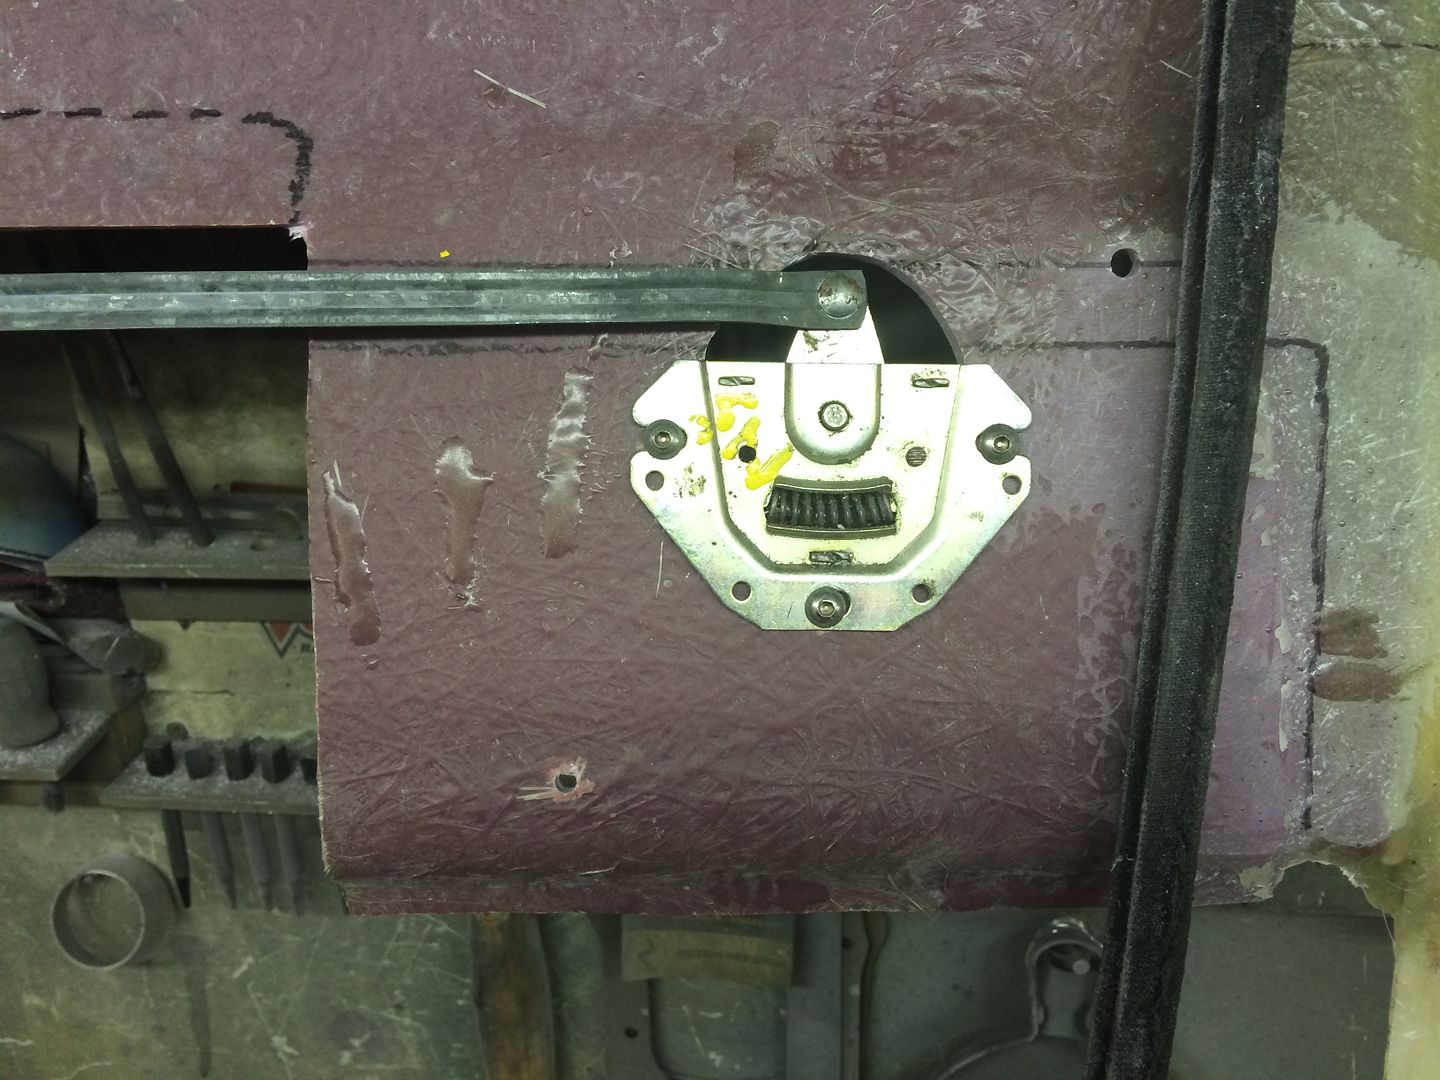
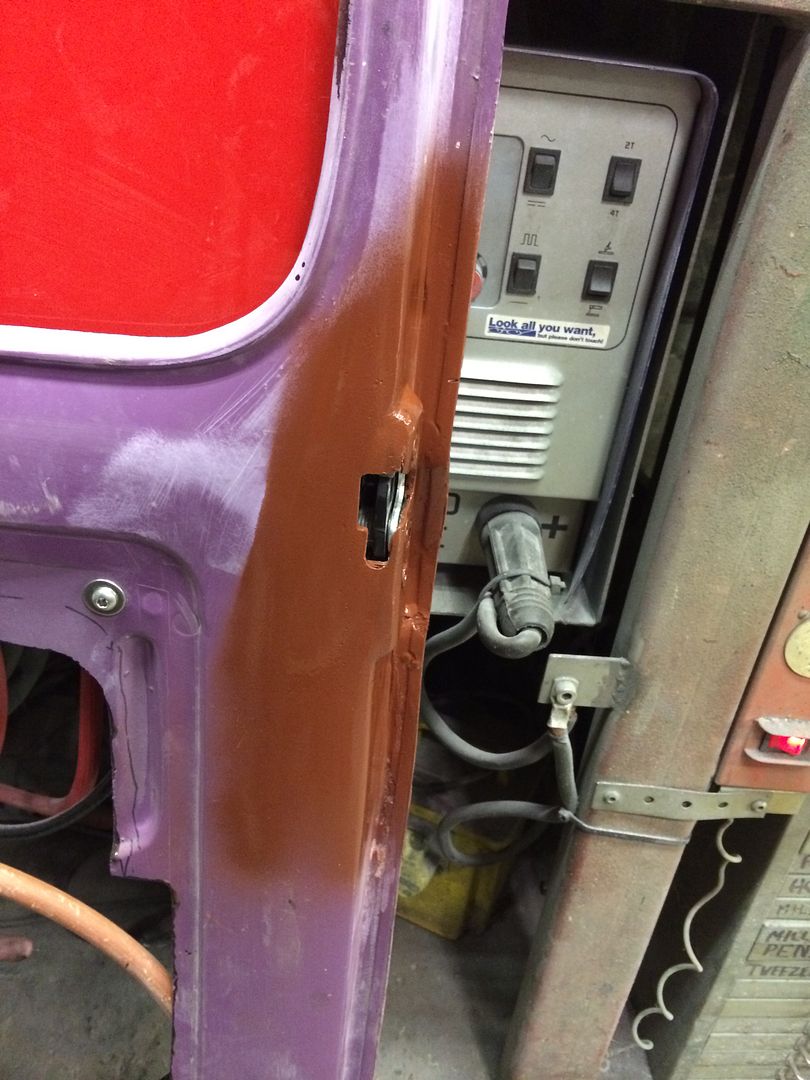
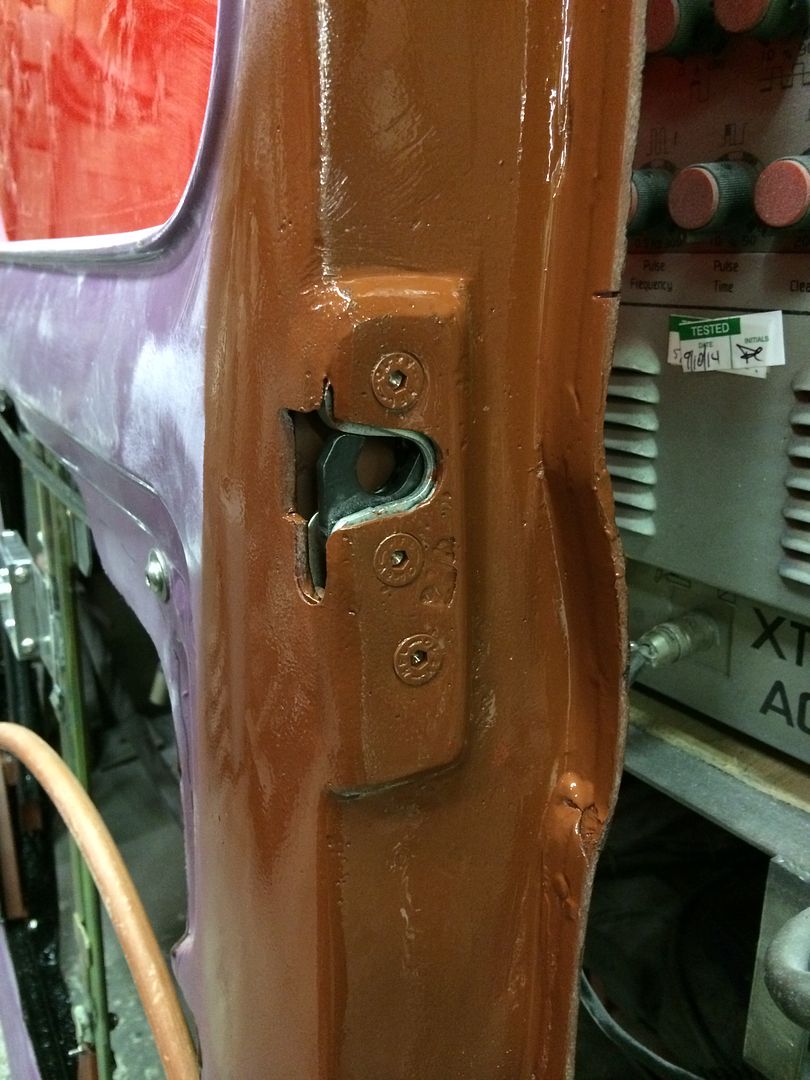
I got the lock in last night, space was pretty tight. I also got the handle actuator sorted also
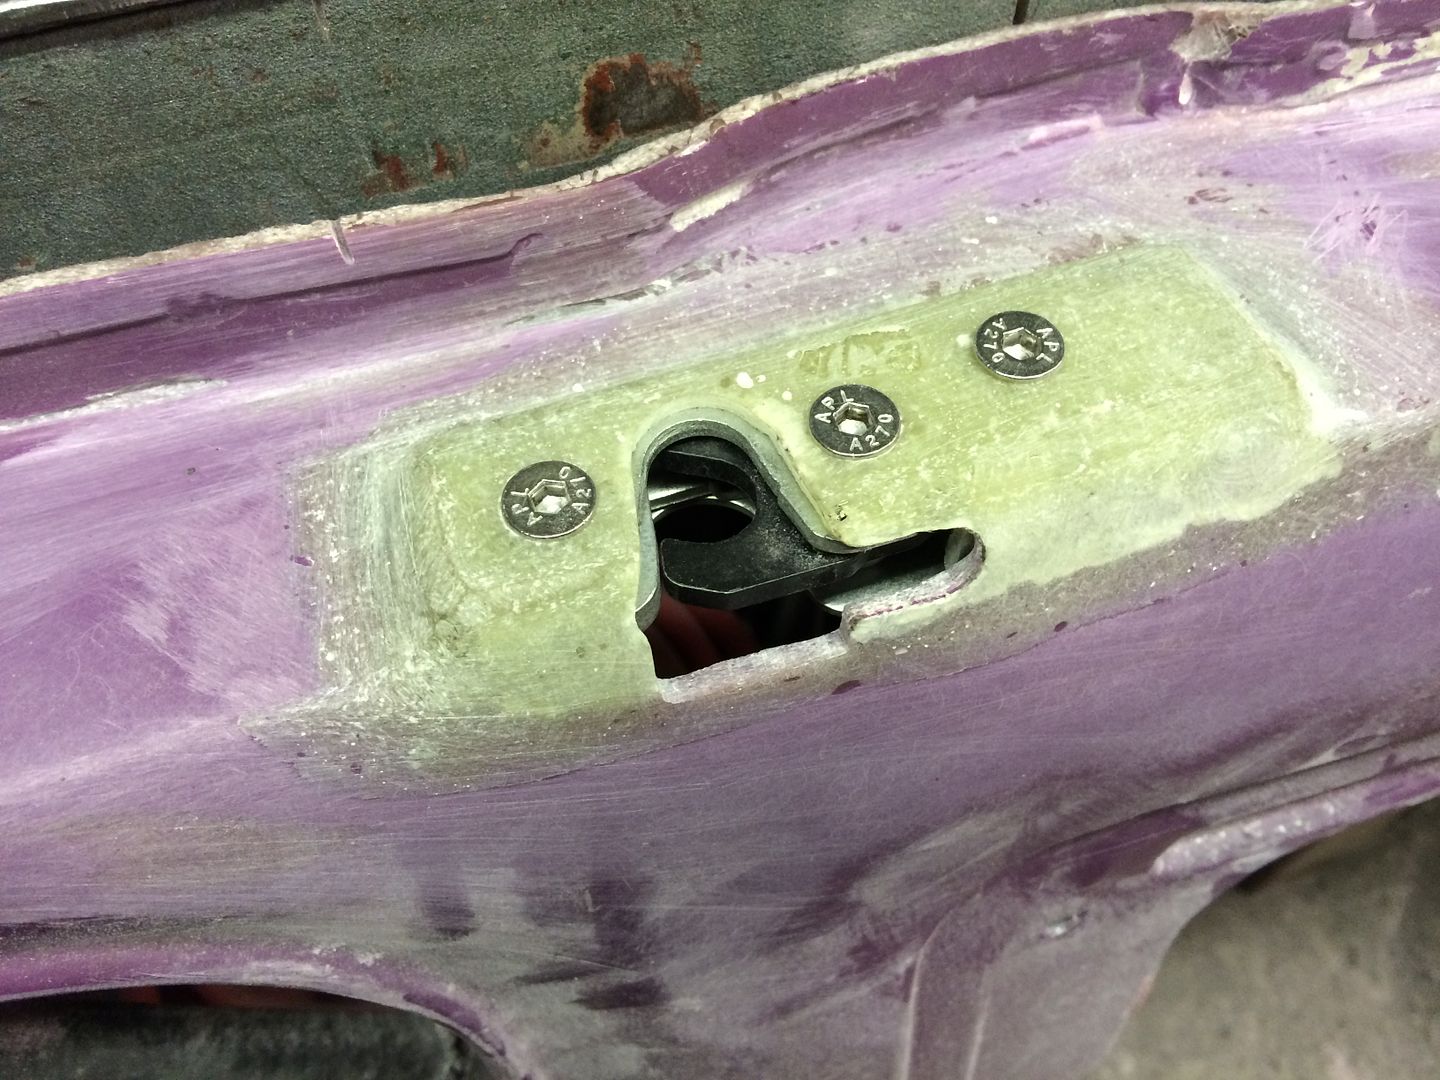
There is a plate that ties the lock into the frame which the nuts are welded to, forgot take a pic.

.Its aweful lonesome in the saddle since my horse died.
-
11-25-2014 11:29 AM #403
CHR Member
- Join Date
- Apr 2009
- Location
- watford
- Car Year, Make, Model: 26T Coupe, 32 Roadster, 41 Willys Coupe
- Posts
- 2,363
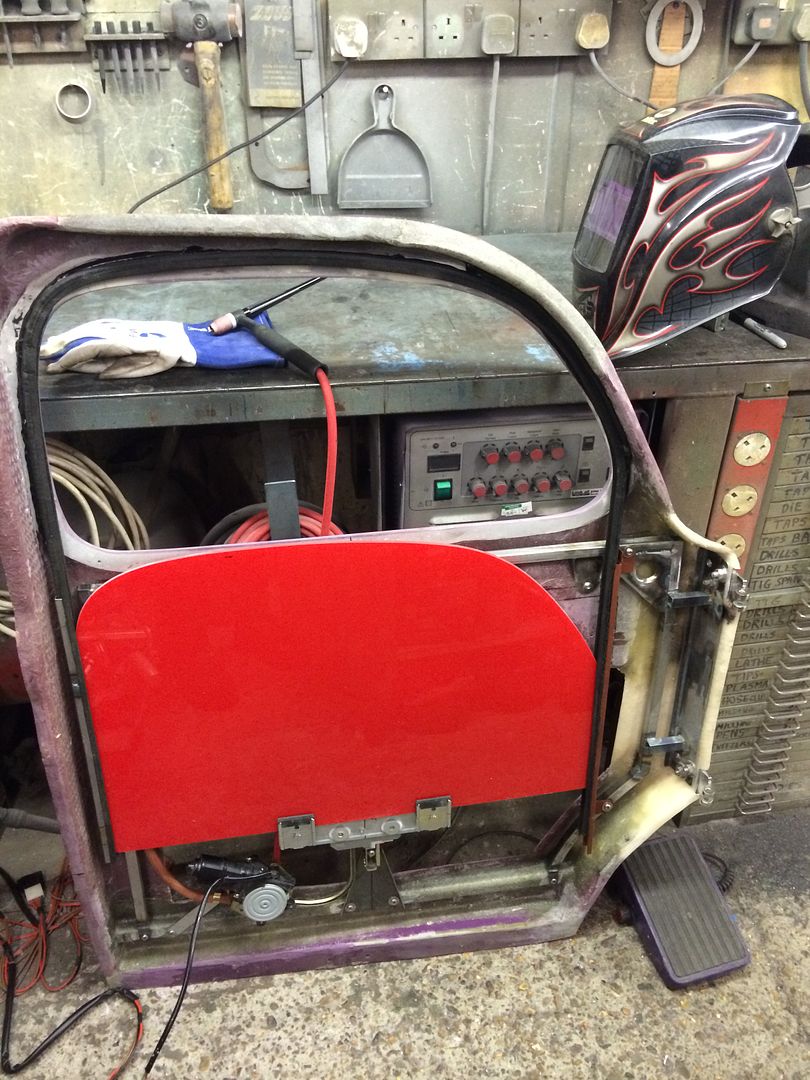
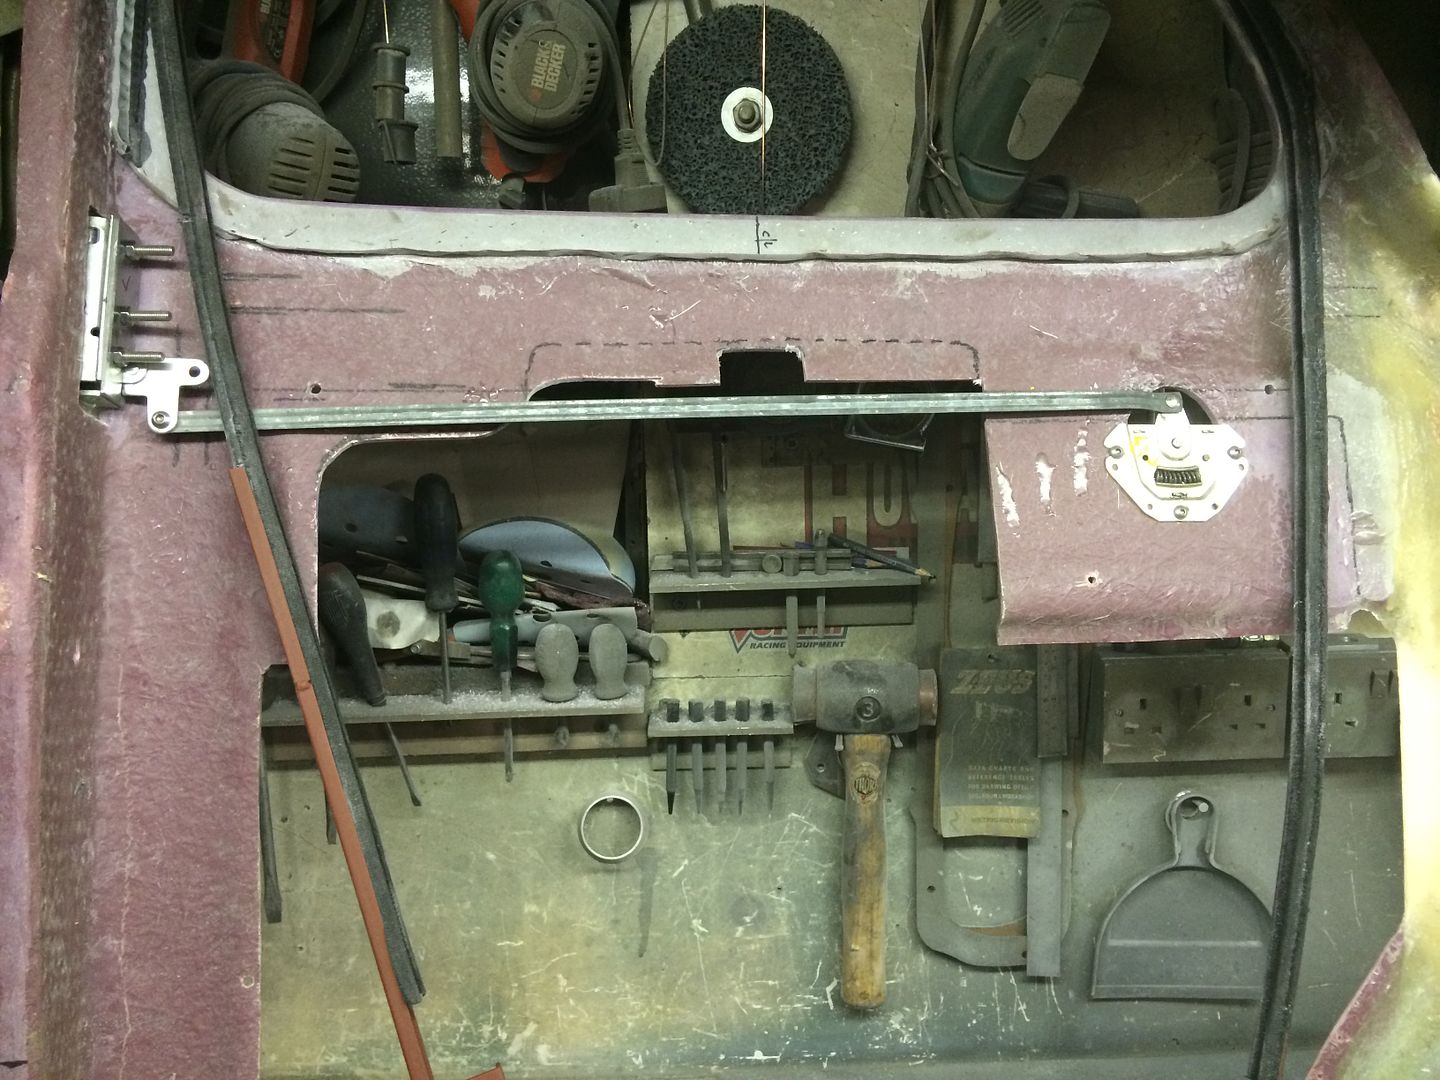
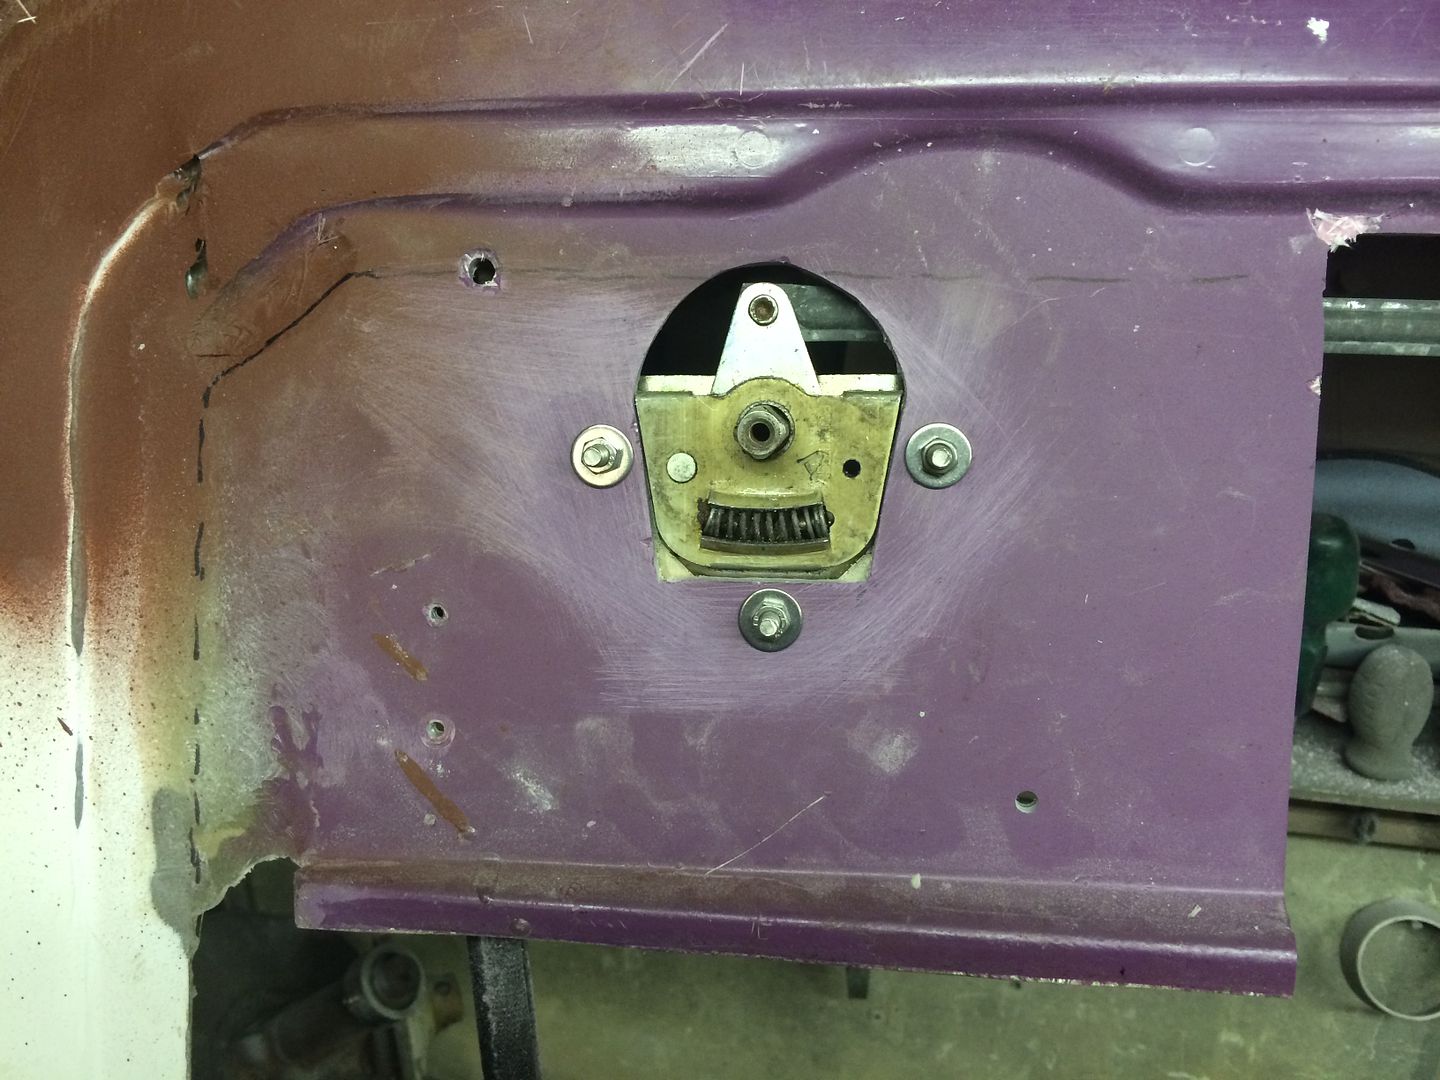
More progress, nearly there. I splashed some black epoxy on the inner last night to tidy it up and just fitted it up after tea, next job is to fit the striker on the door jamb and mount the outer door skin & outer handle.
Someone mentioned the raised door lock, they suggested it might catch the door jamb when opened It won't because its only raised 5/16" and the jamb has 1/2" of clearance
Hopefully tomorrow night the tinted acrylic will be here so I can fit the proper window
.Its aweful lonesome in the saddle since my horse died.
-
11-26-2014 12:29 PM #404
CHR Member
- Join Date
- Apr 2009
- Location
- watford
- Car Year, Make, Model: 26T Coupe, 32 Roadster, 41 Willys Coupe
- Posts
- 2,363
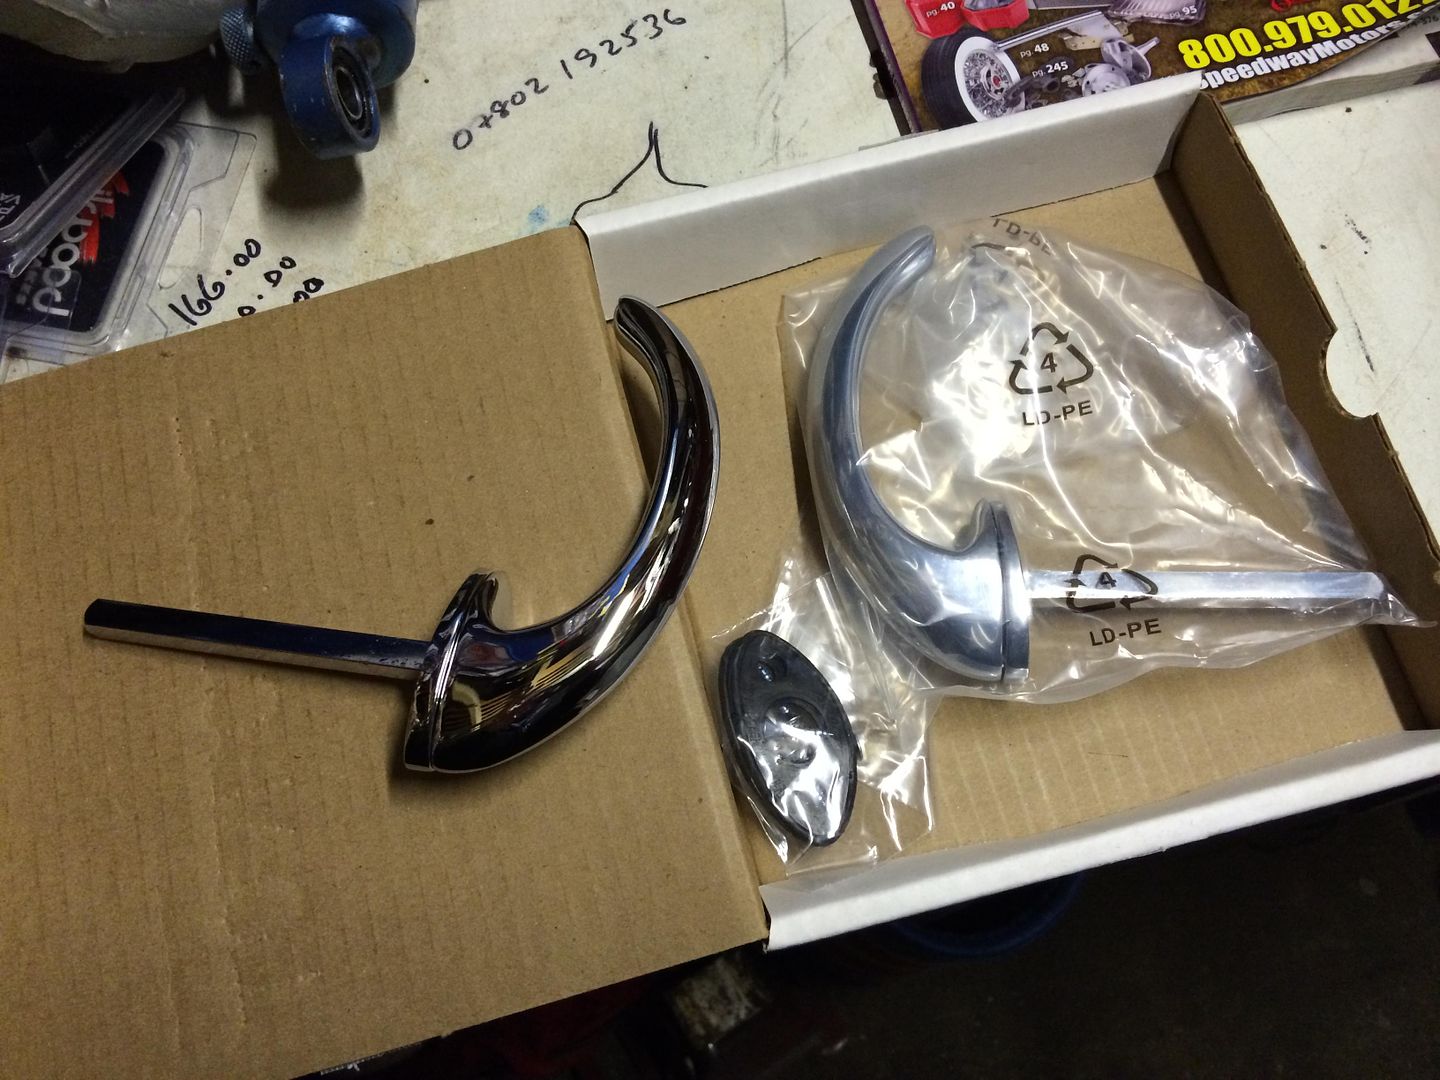
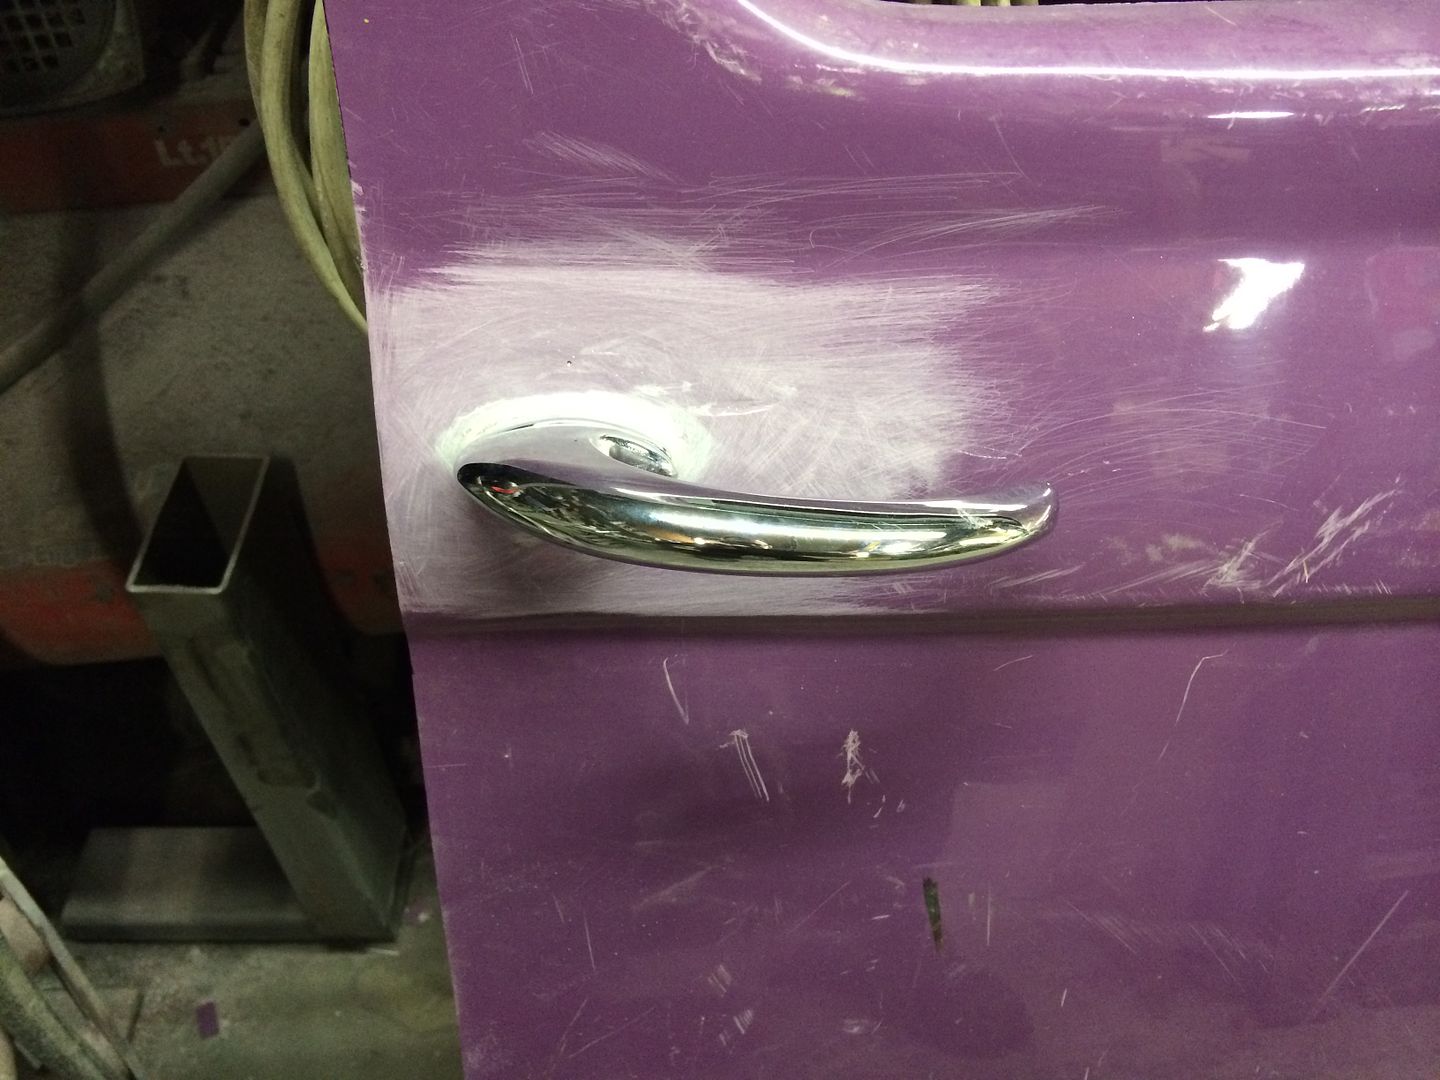
I can now get on with the next job fitting the outer handles as the Willys repro handles I ordered turned up today, They are specially made for glass bodys as the original Willys handle fits with a clip arrangement that doesn't work on glass bodys. Also my tinted acrylic showed up so need to cut that to shape also.
.Its aweful lonesome in the saddle since my horse died.
-
11-27-2014 11:30 AM #405
CHR Member
- Join Date
- Apr 2009
- Location
- watford
- Car Year, Make, Model: 26T Coupe, 32 Roadster, 41 Willys Coupe
- Posts
- 2,363
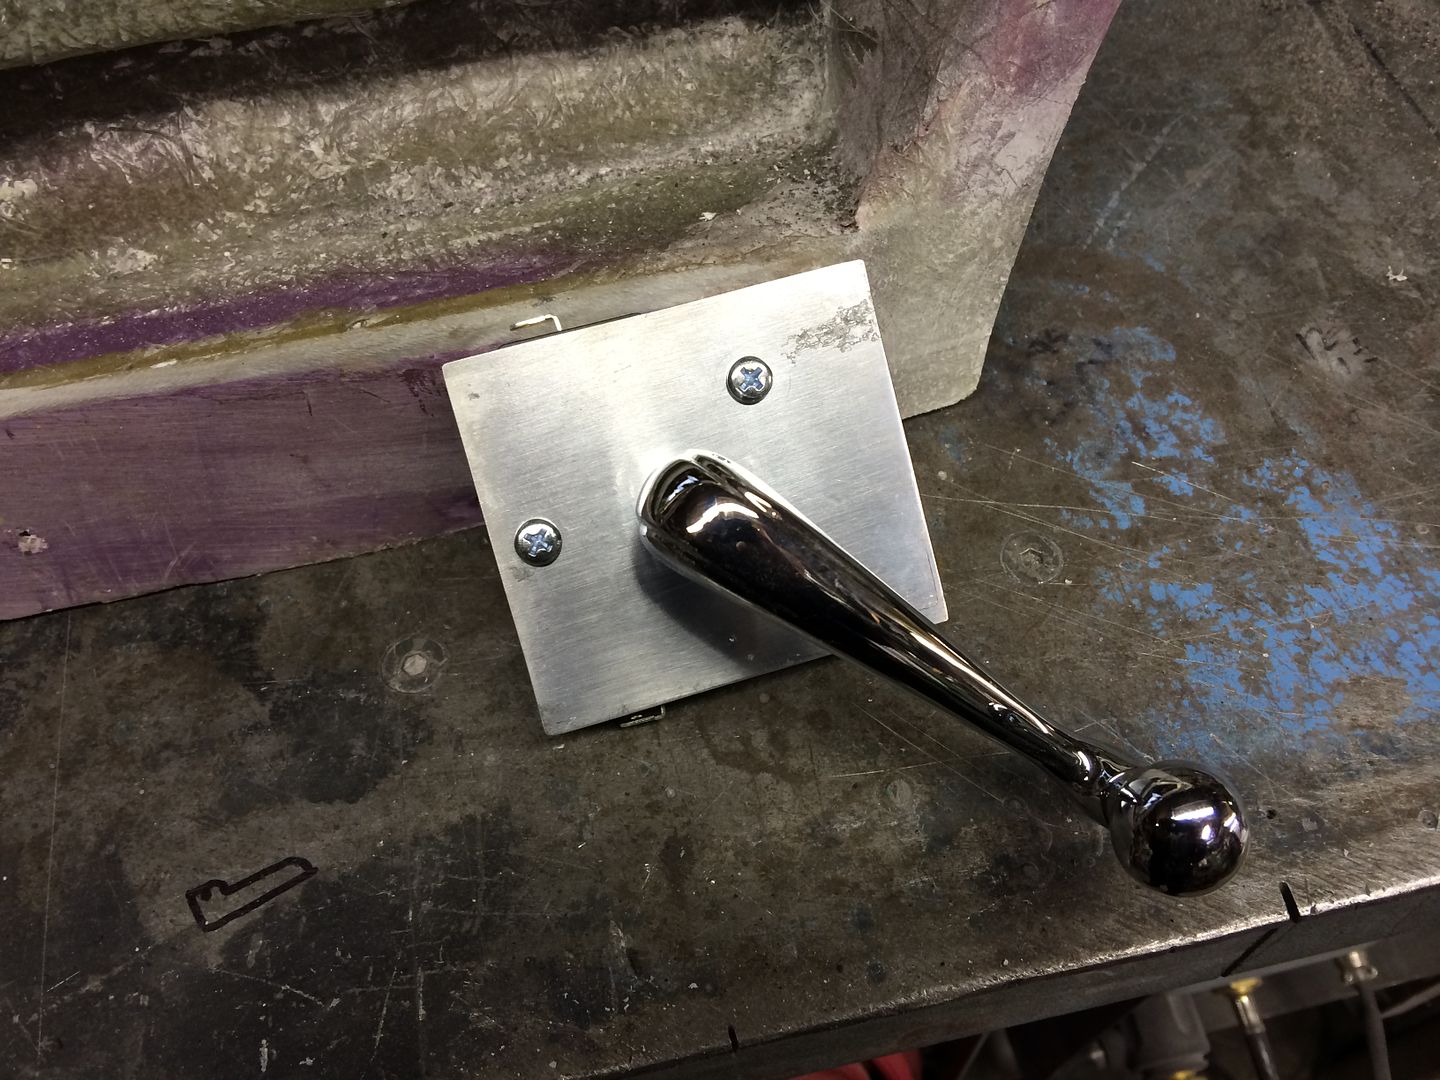
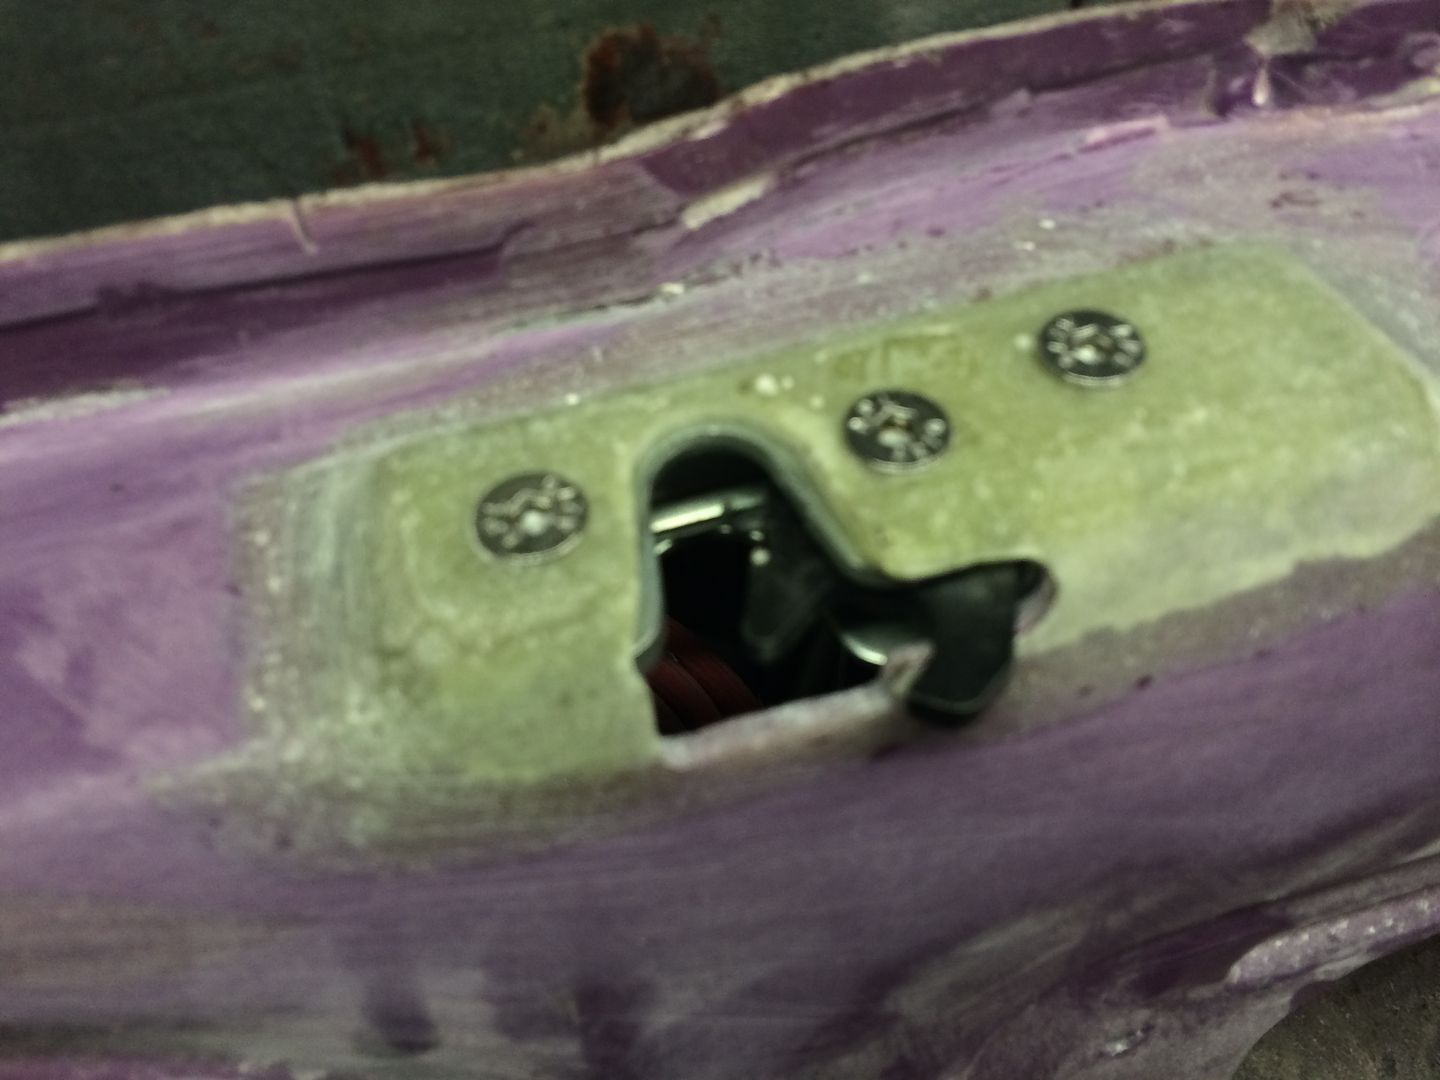
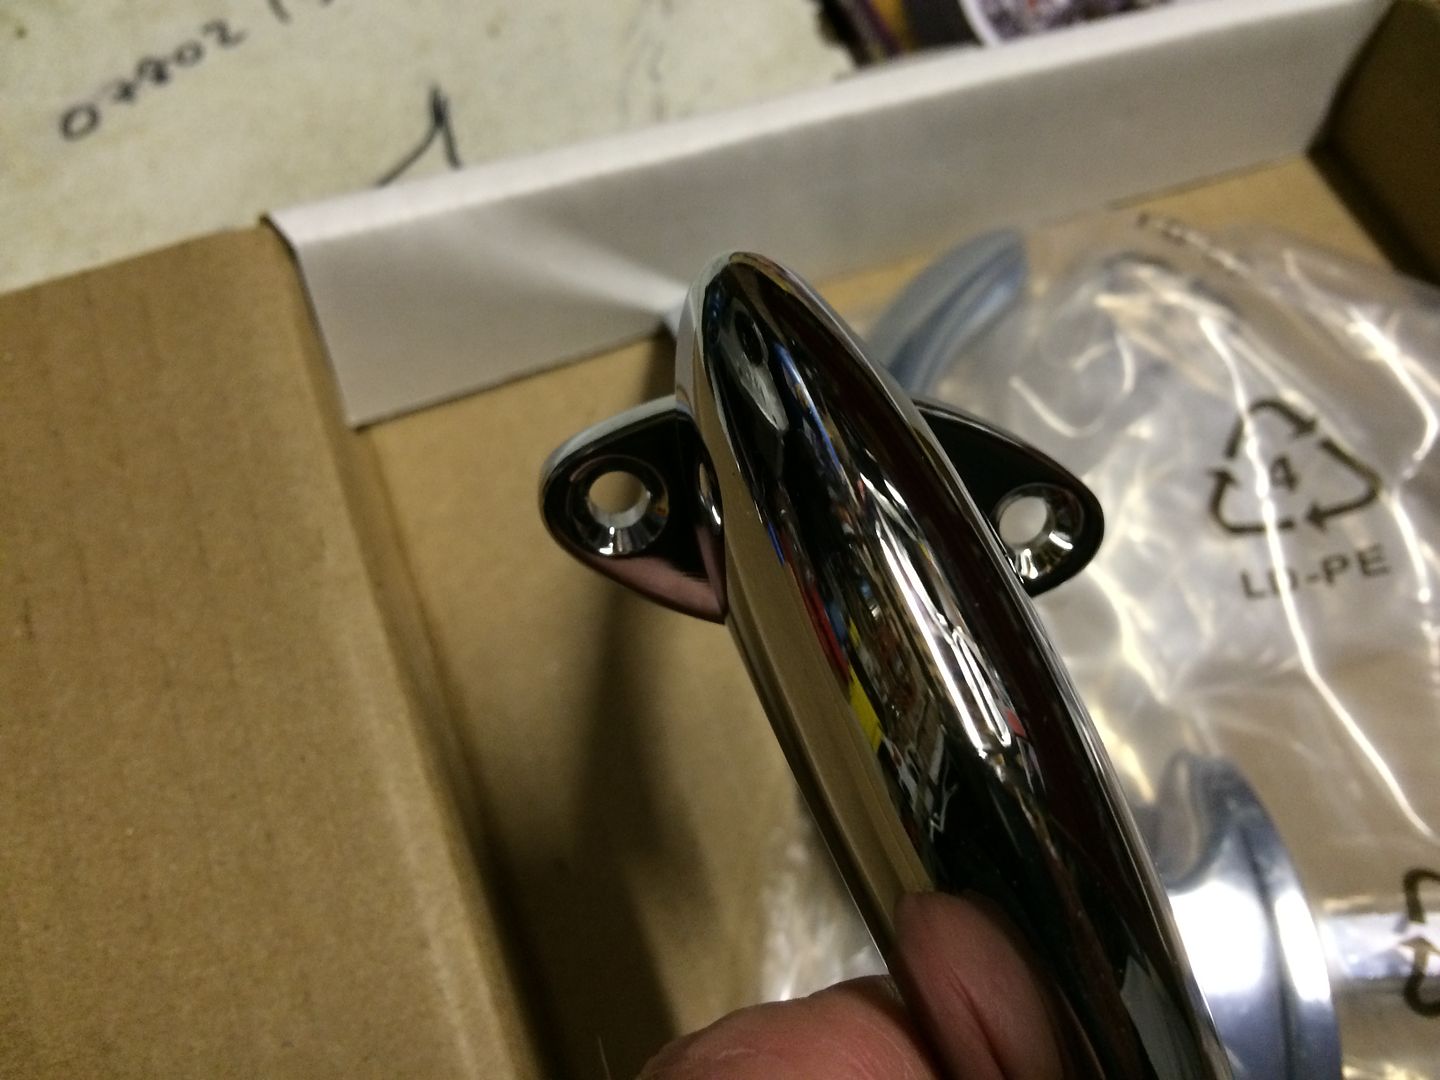
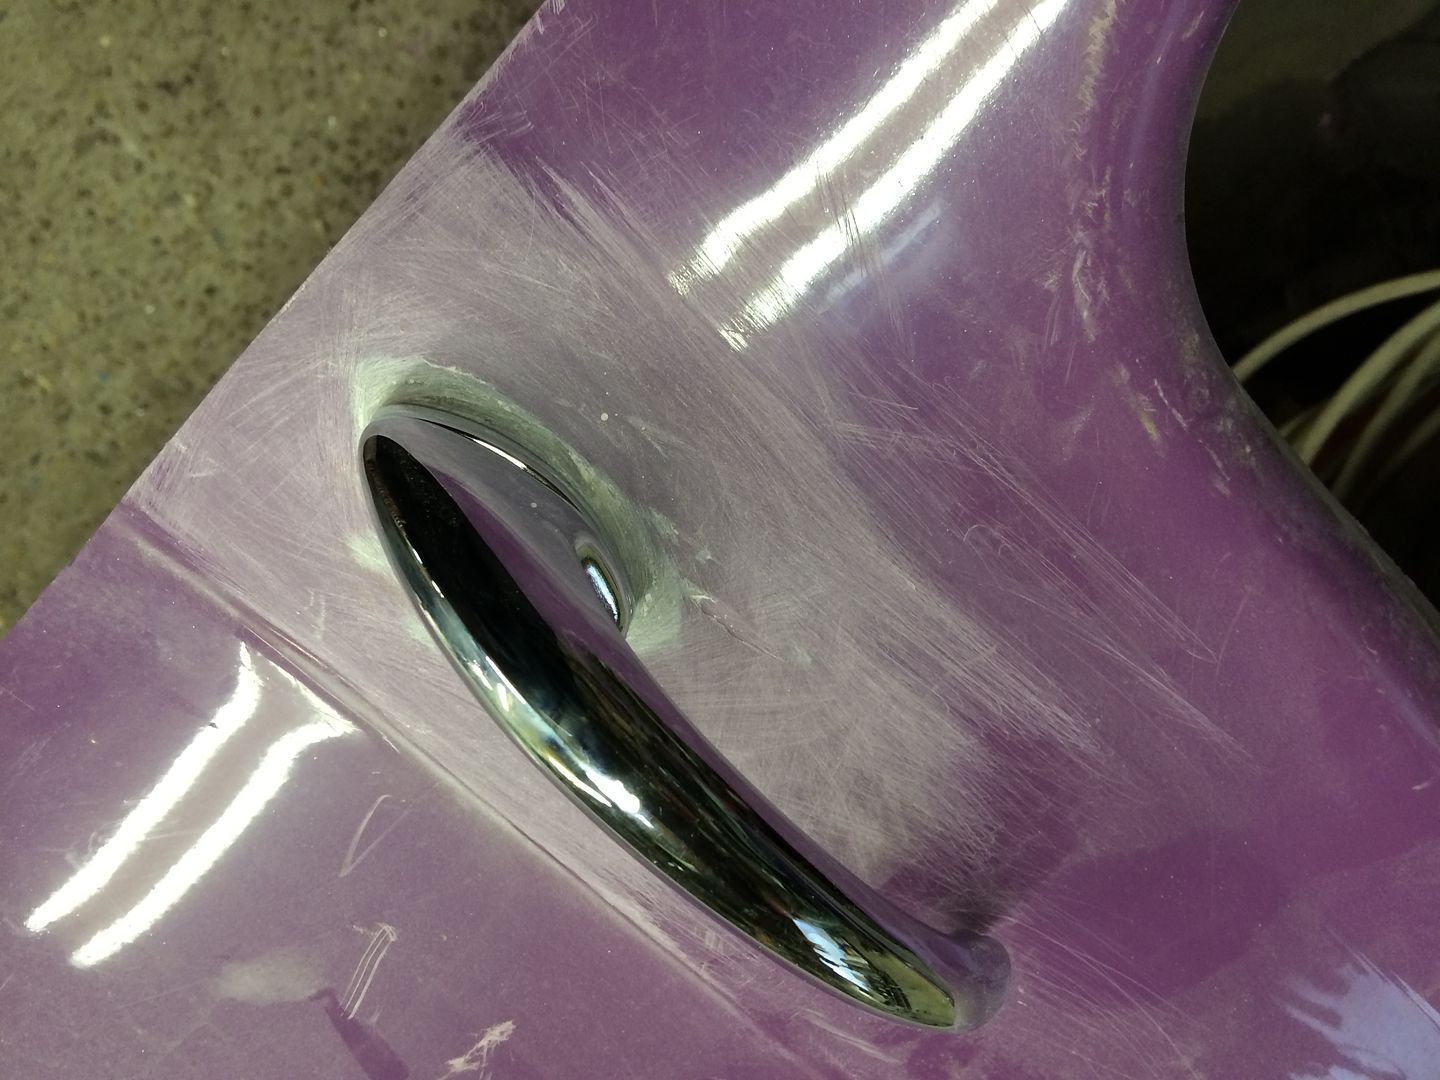
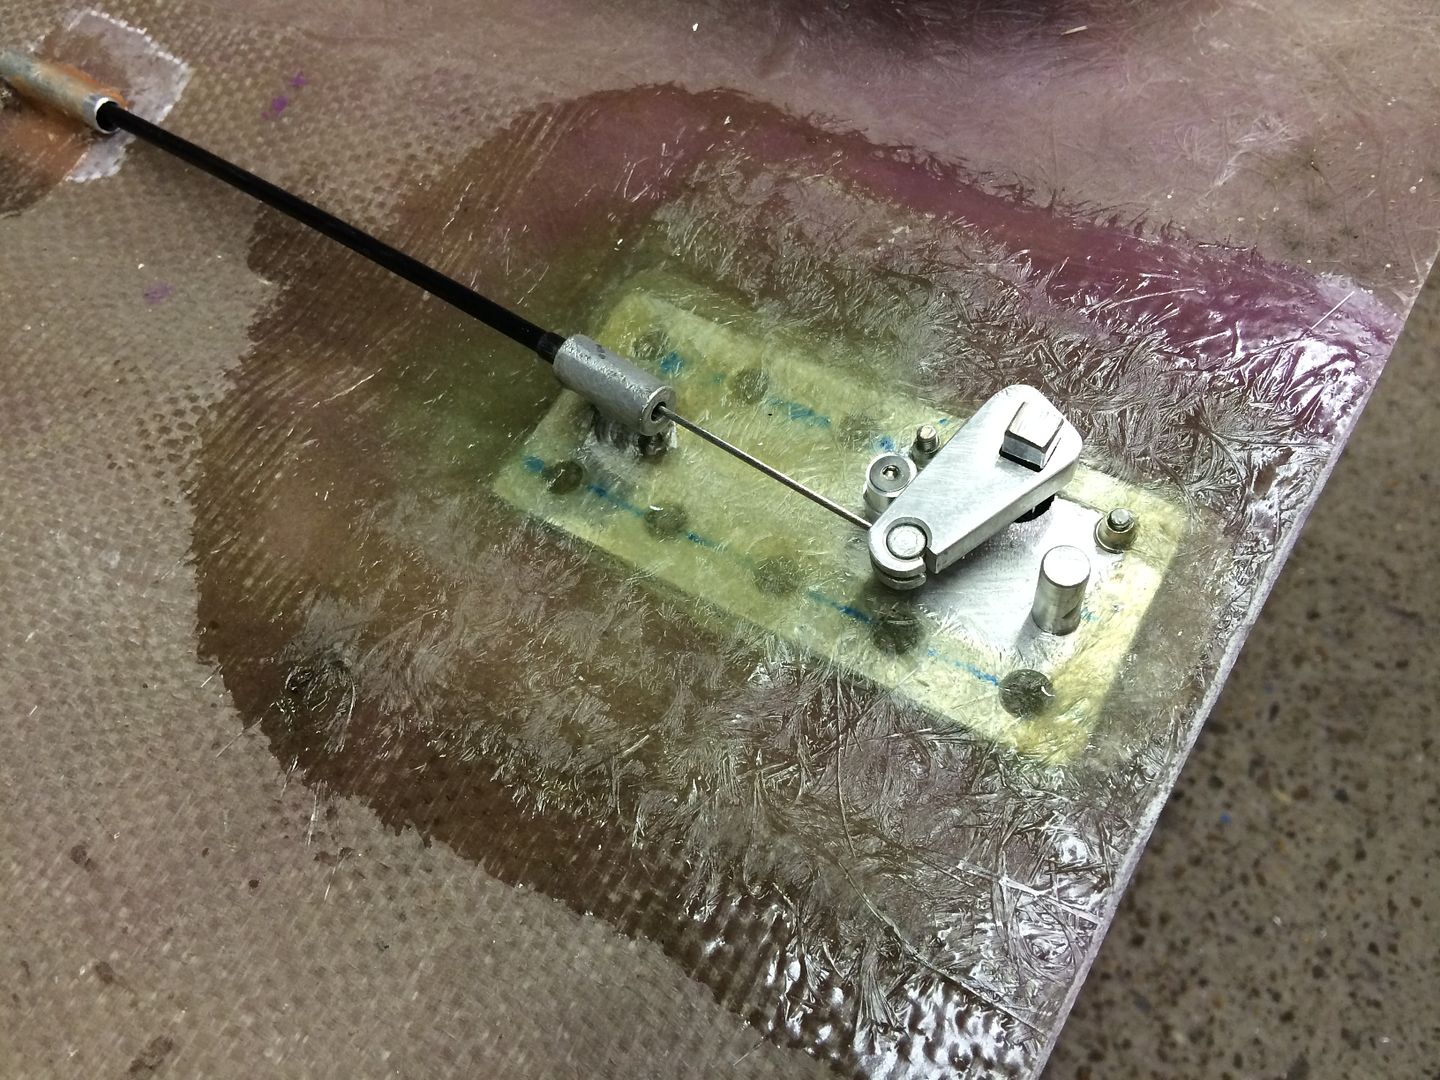
Last night saw the handles fitted, they operate stainless steel bicycle cables.
First thing to sort was the handle pad on the doors, the doors have the 1940 round pad but the handles are only available 41 shape so I had to build up the pad with GRP chopped paste.
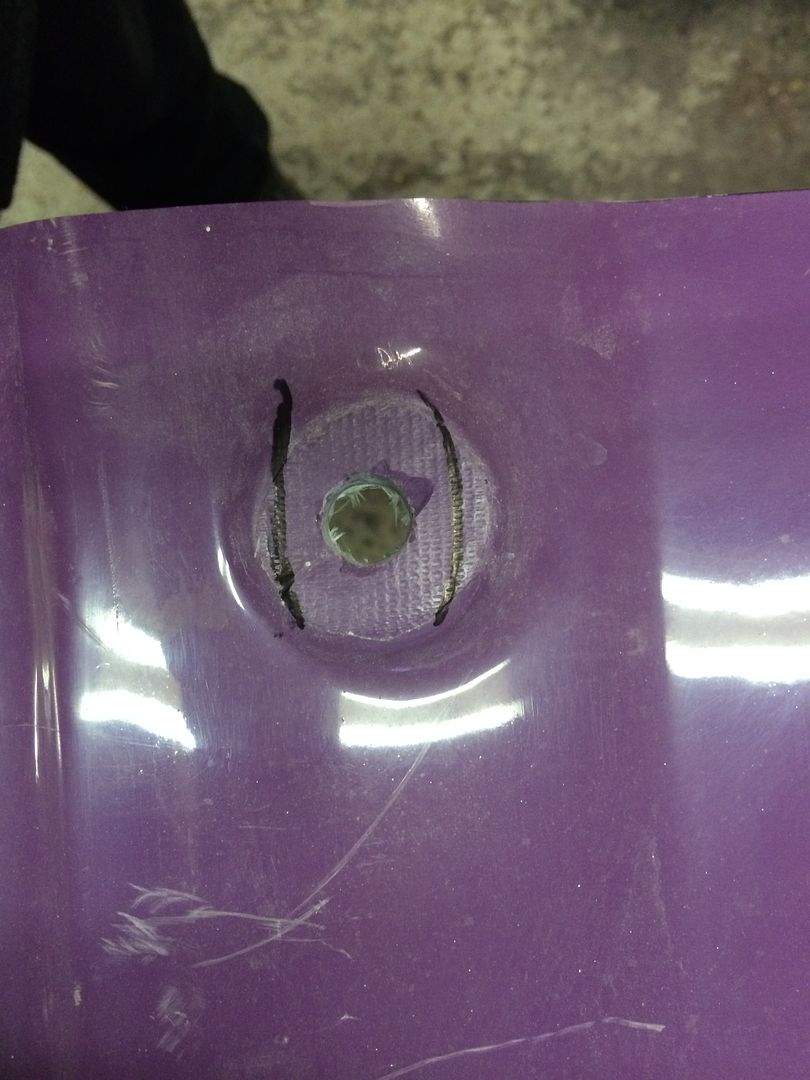
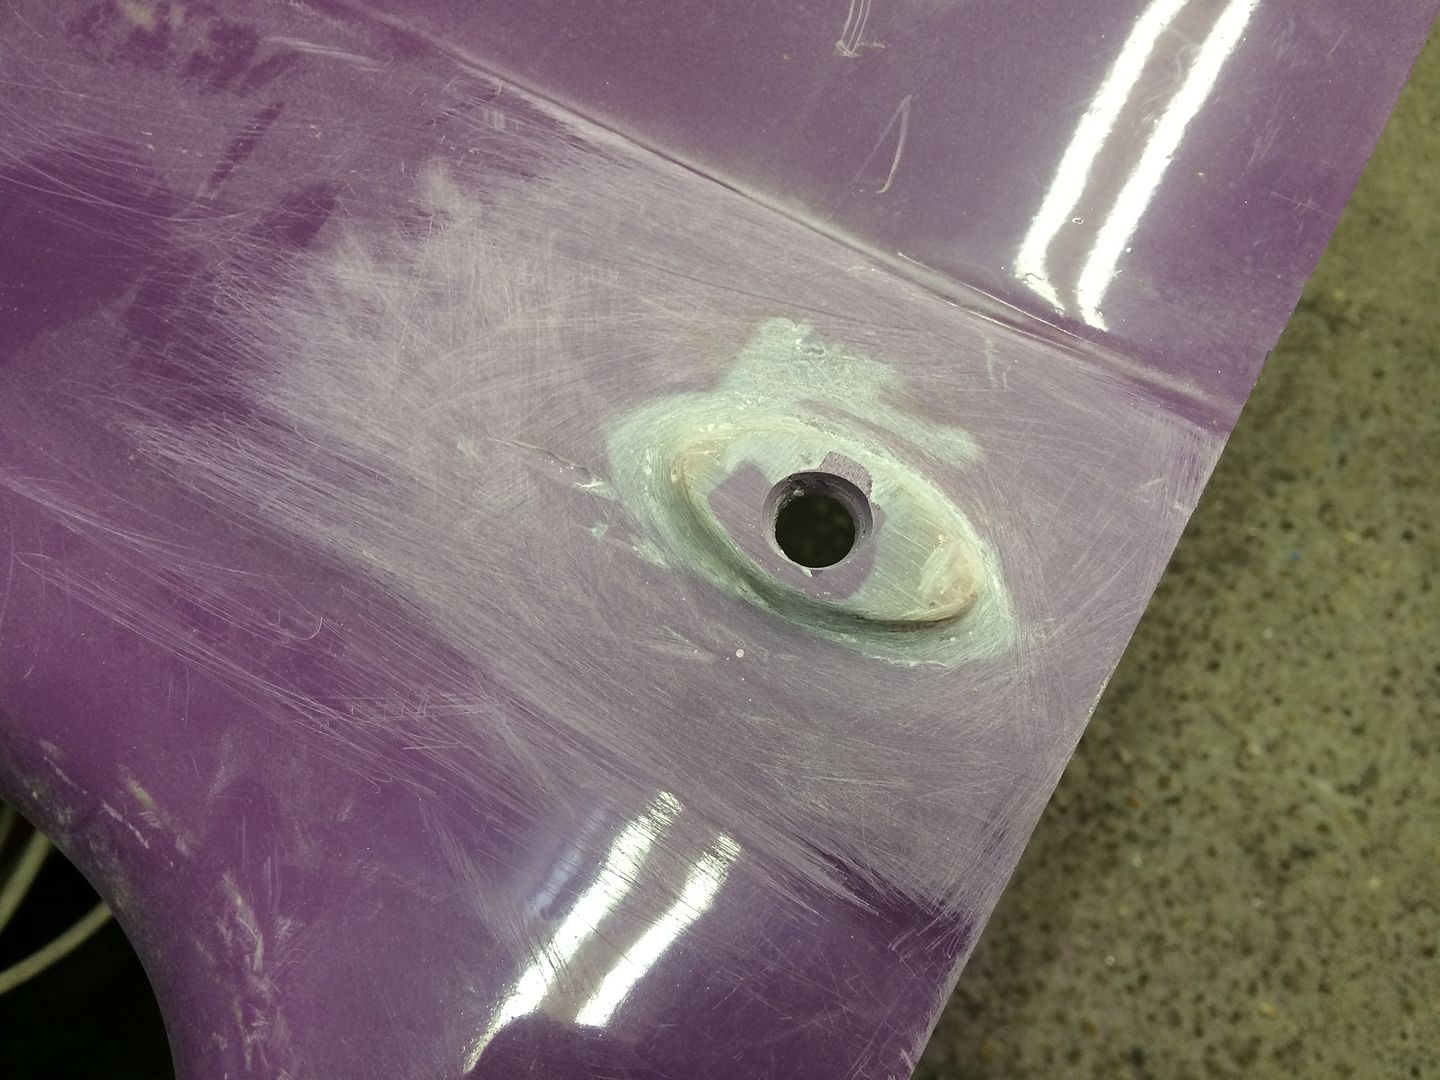
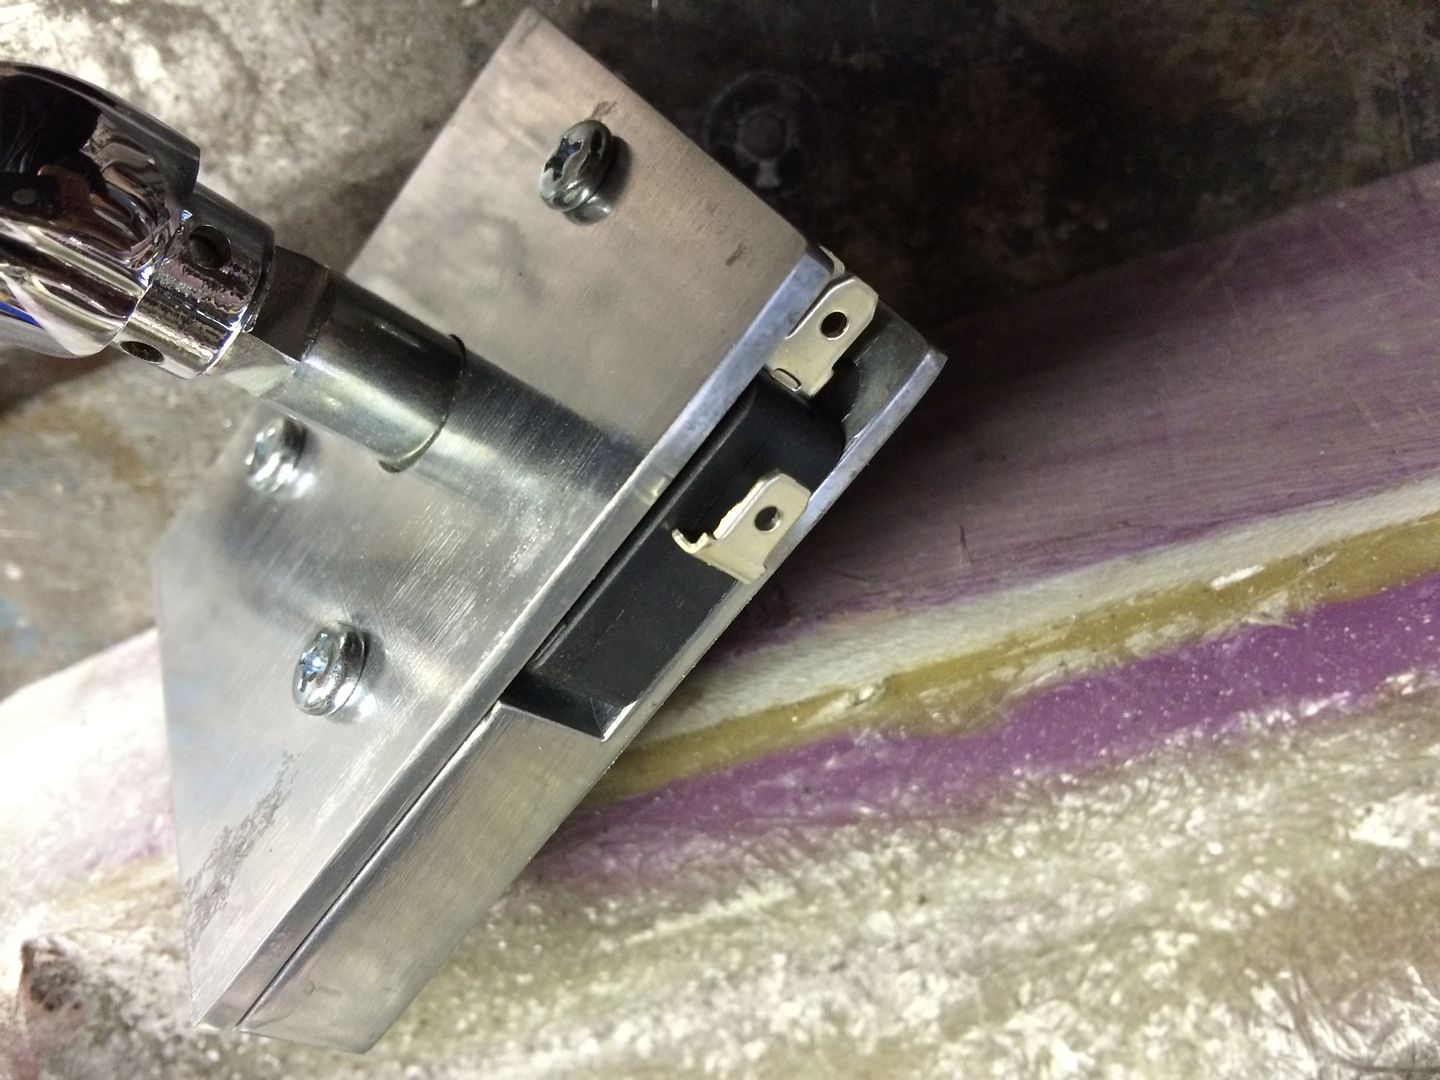
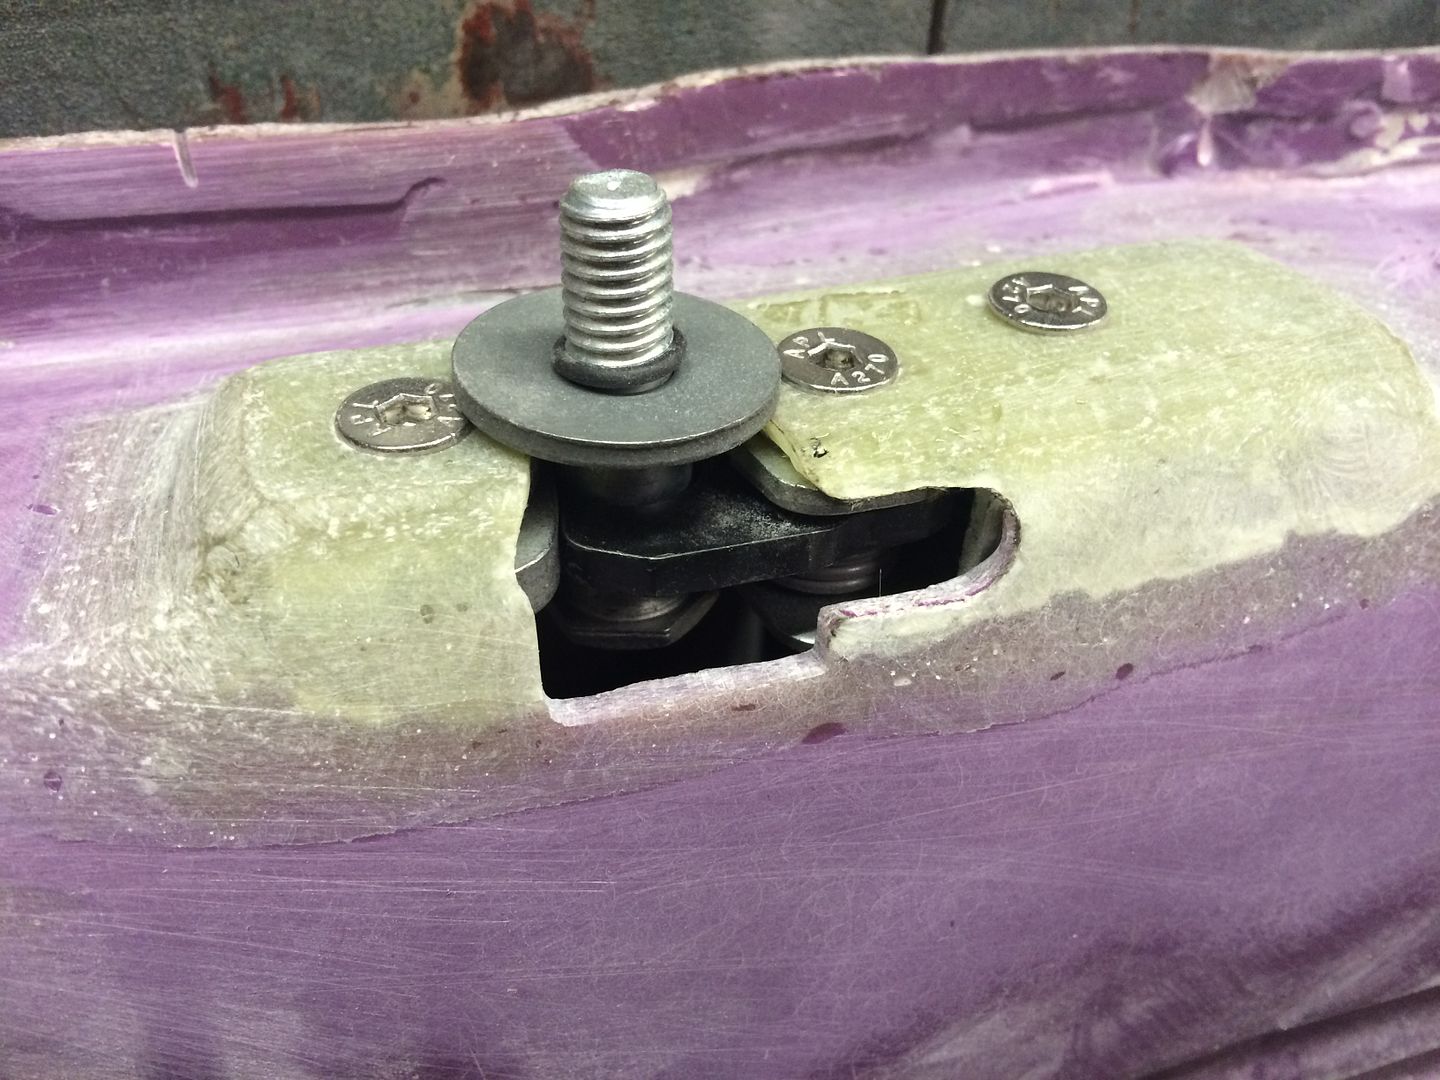
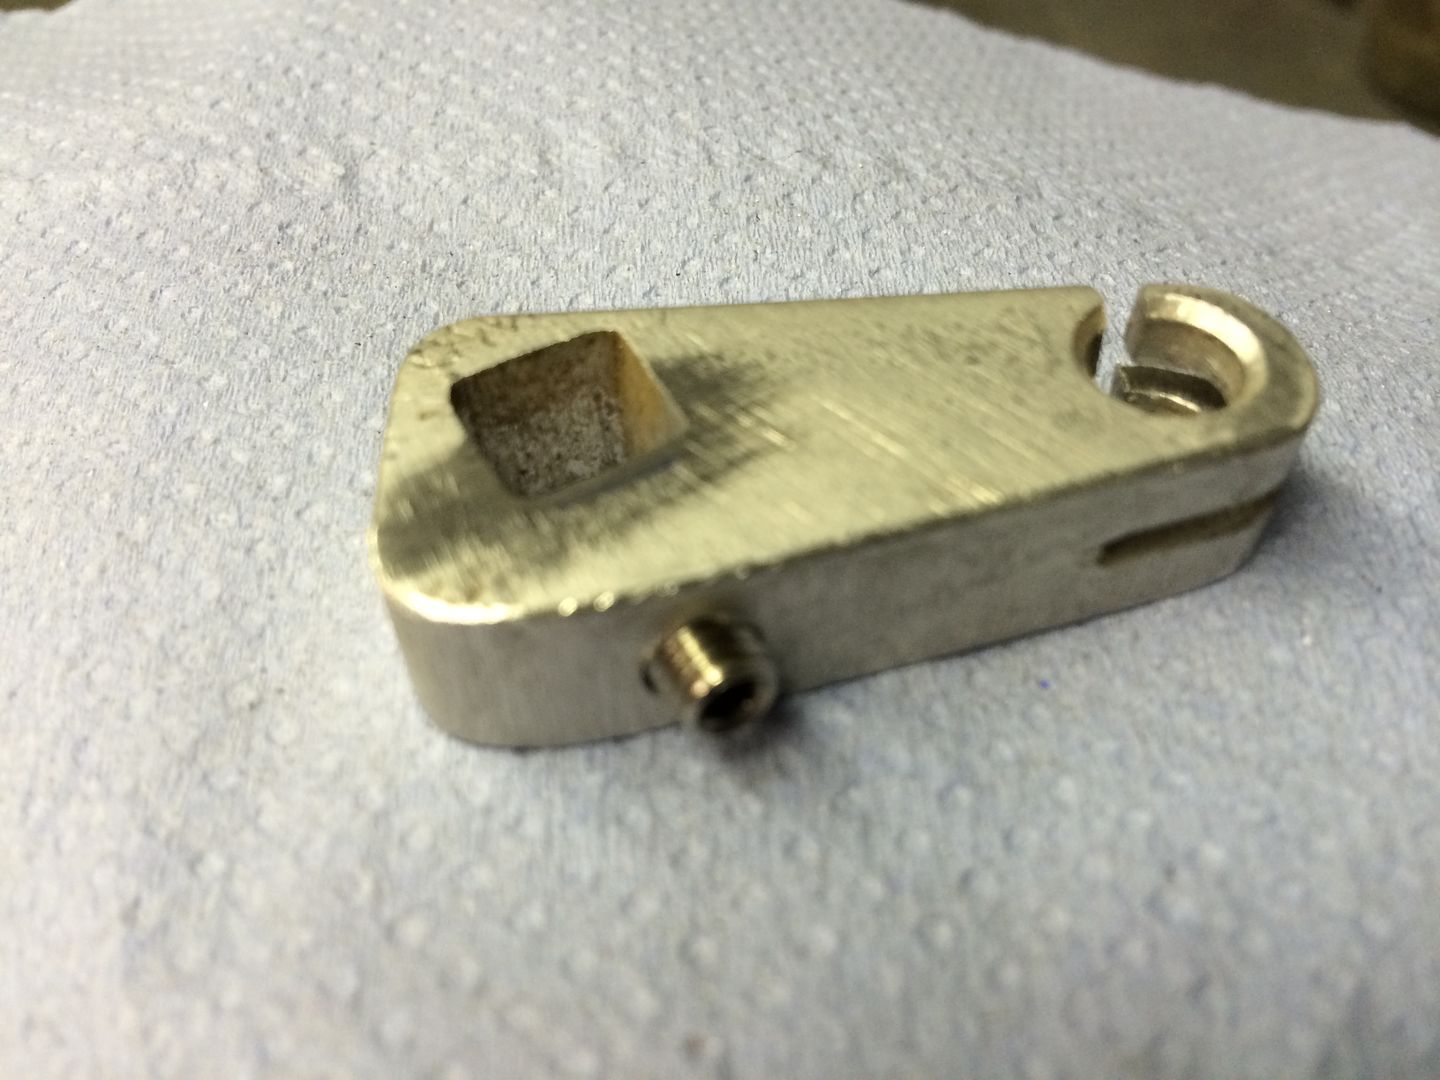
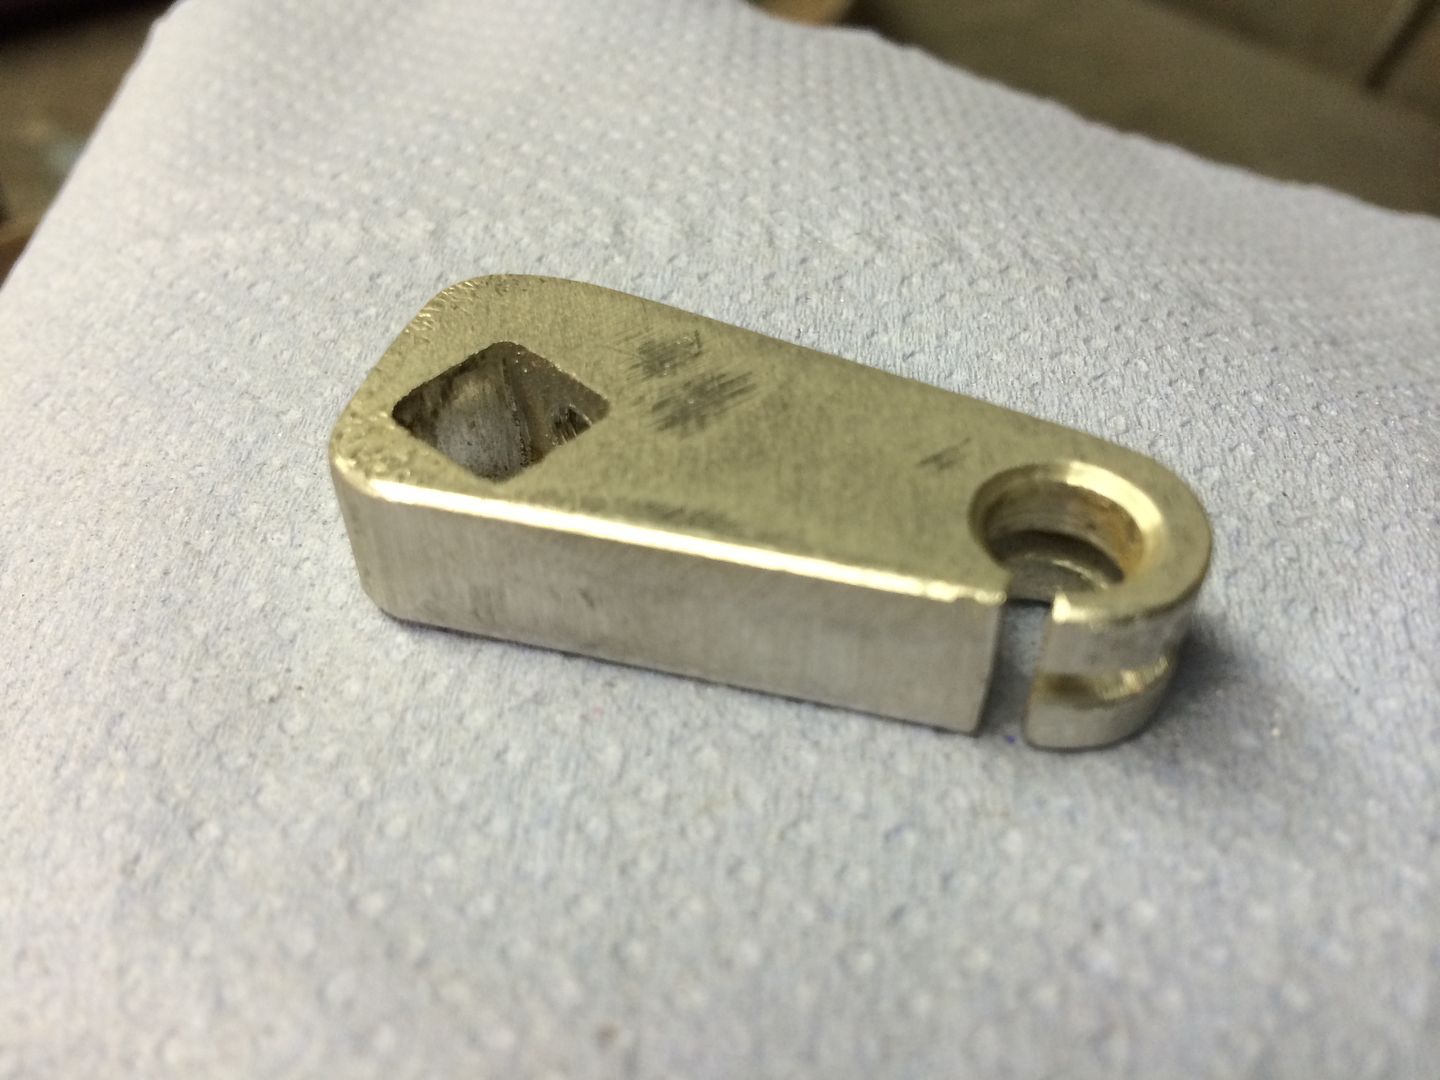
Next I prepped the inside for the strengthening plate I had planned, I personally wouldn't fit the handle without a plate behind. The plate is 16swg aluminium, I spun up a piece to hold the outer cable and a bit more 1/8" plate for a riser, I did it aluminium for no other reason other than I don't weld much aluminium and fancied a change.
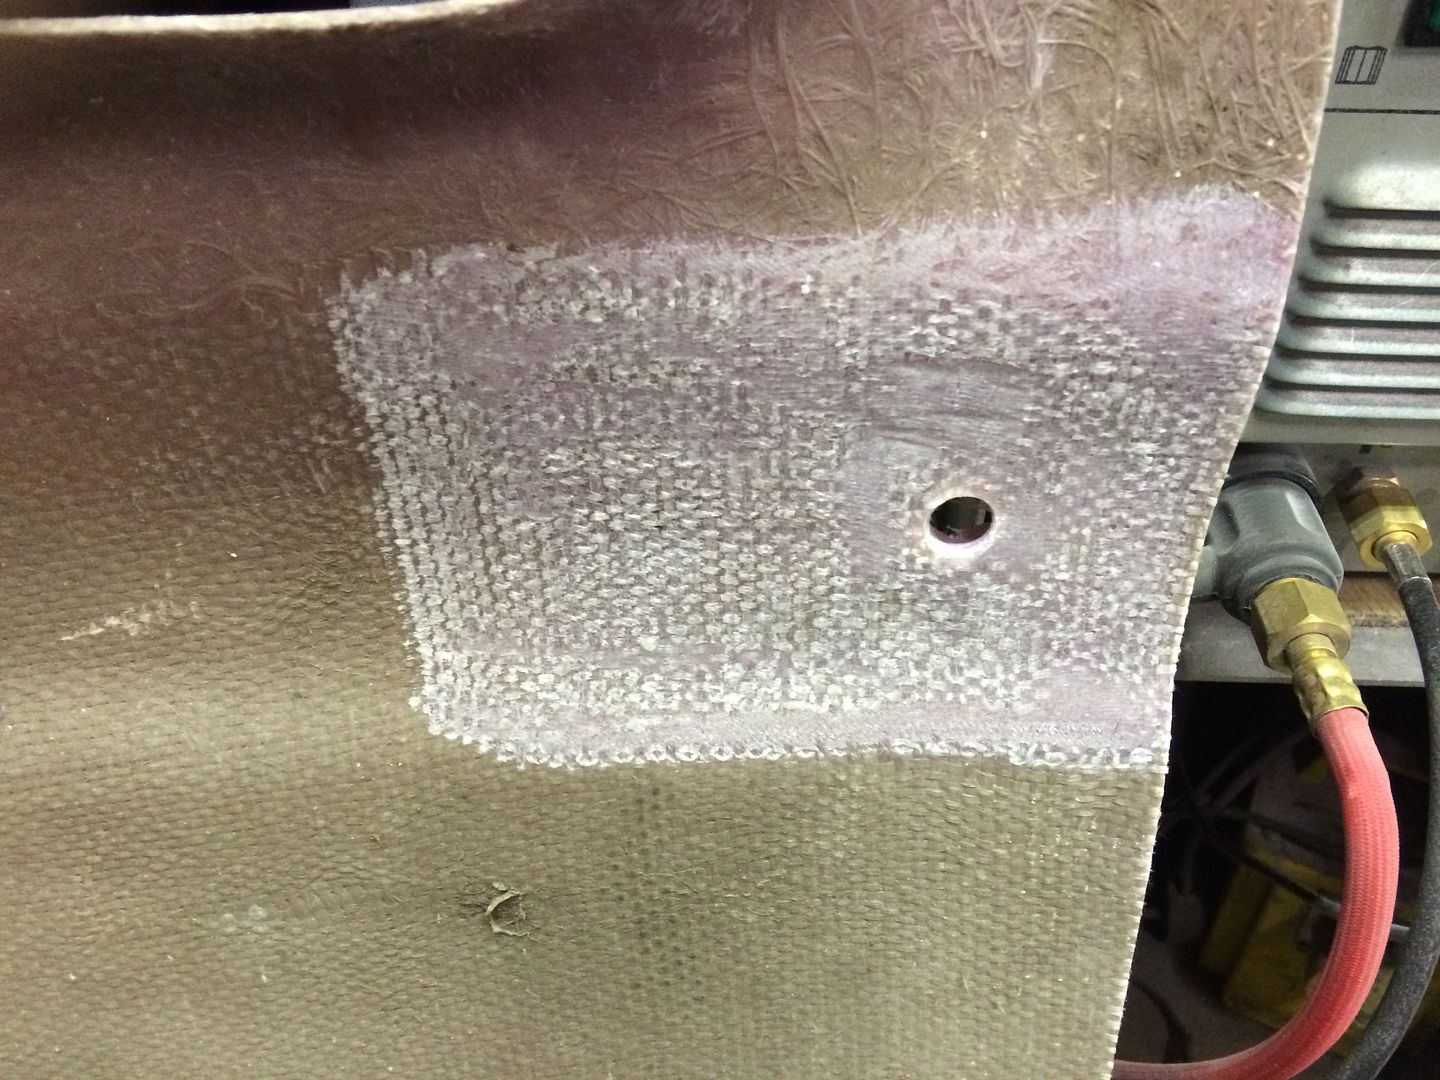
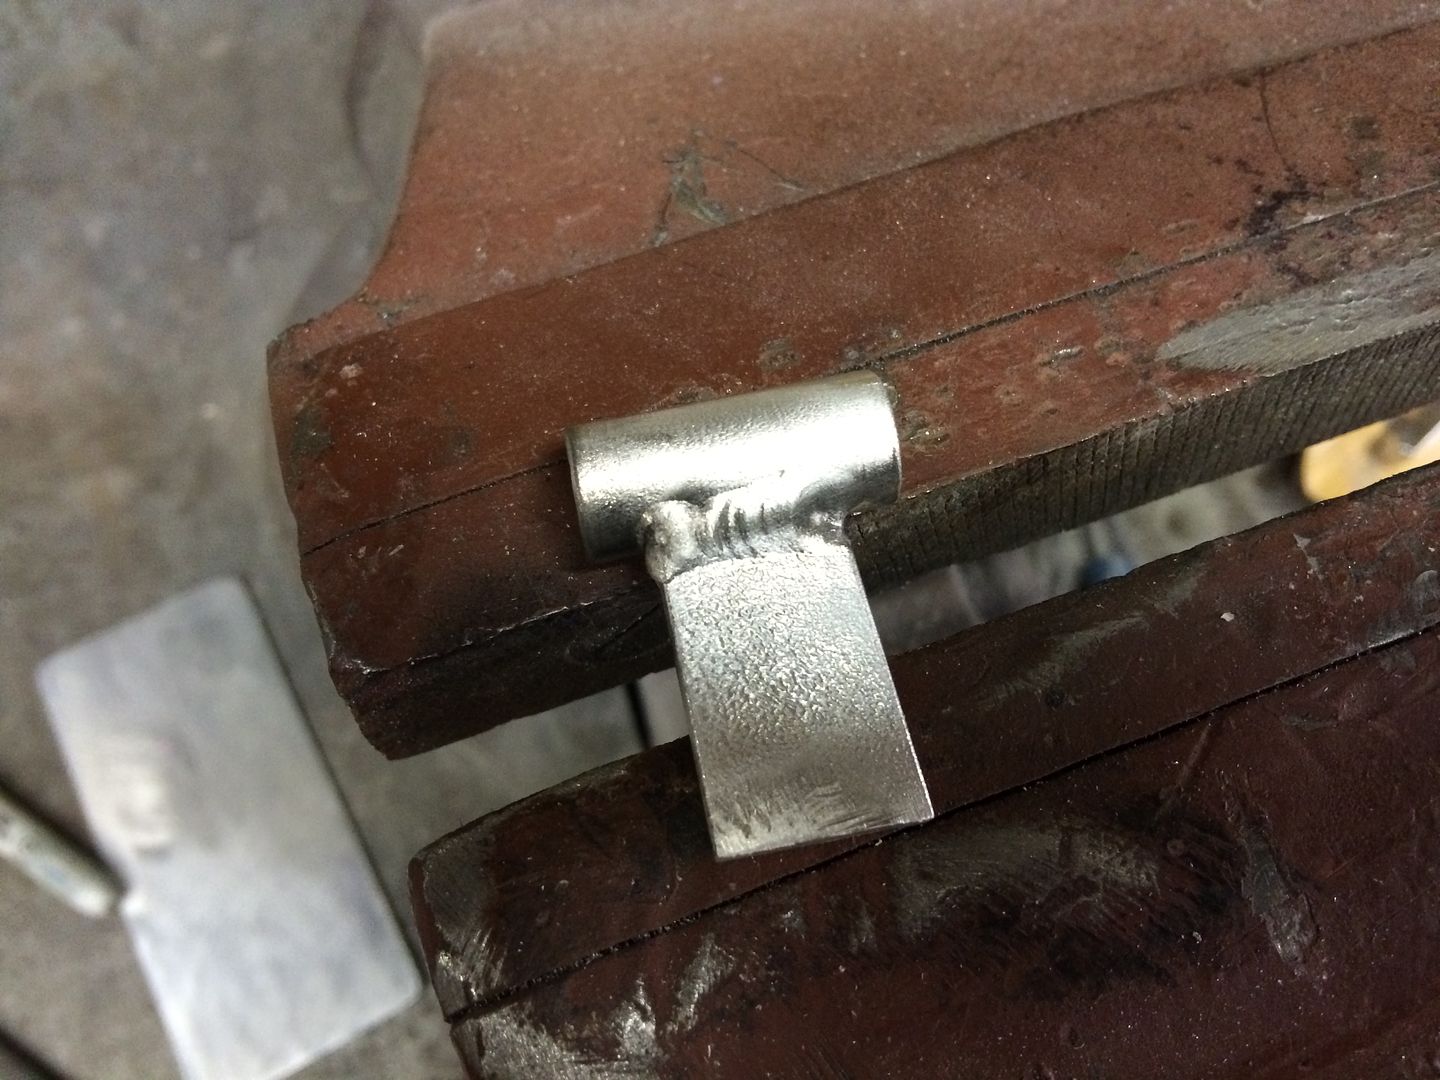
Next I needed a actuating lever to fit the 5/16" square bar on the handle, this was made in a bit of 3/8" plate and is secured to the square by a grubscrew.
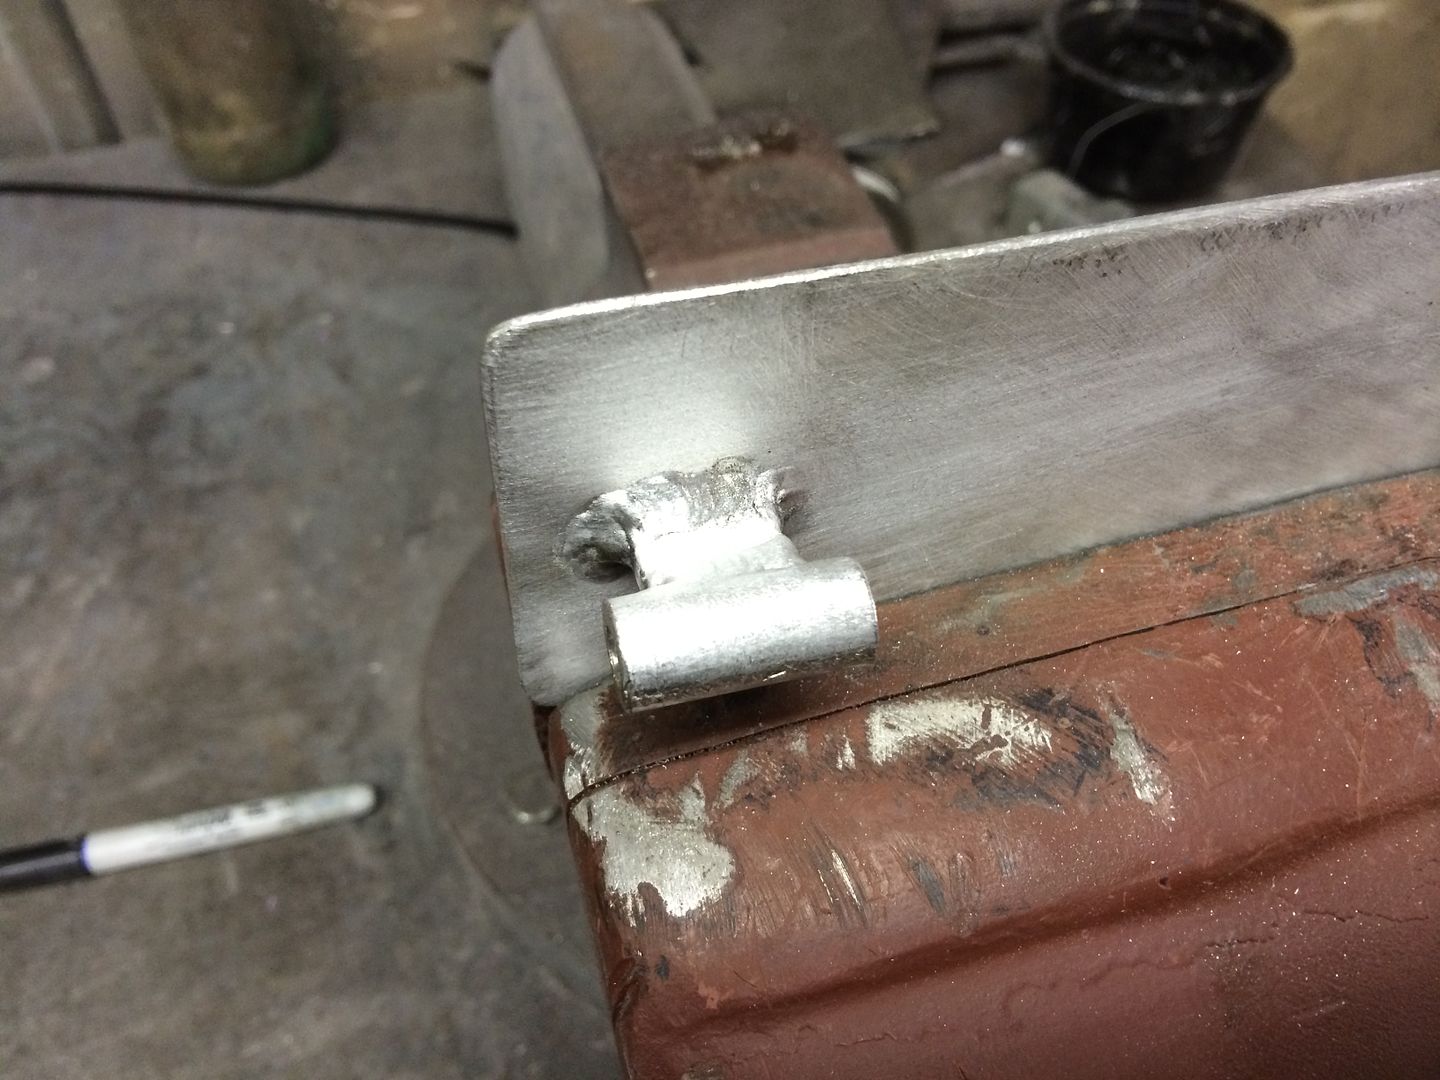
Here its all assembled and glassed into place. I bonded in a couple of bits of aluminium tube for the cable to run through so it don't rub against the window.

.Its aweful lonesome in the saddle since my horse died.


 Reply With Quote


Posting Permissions
- You may not post new threads
- You may not post replies
- You may not post attachments
- You may not edit your posts

i've enjoyed the years here . made a lot of friends. most who have left. i see no reason to continue with this so hope to see you somewhere else. i dont think this site will ever be back. it's lived...
Dead!