


 815Likes
Thread: 1940 Ford Pickup


Results 331 to 345 of 1085
 LinkBack URL
 About LinkBacks
-
02-06-2014 05:28 PM #331
 CHR Member

- Join Date
- Mar 2013
- Location
- Seguin
- Car Year, Make, Model: 1940 Ford p/u 1937 Caddy Coupe
- Posts
- 782
Randy: Some times I just worry to much about everything, I also don't want to screw up to badly if I can prevent it. I'm just wanting to do it the right way, within my means and get an education on it all at the same time. Oh yea and have fun doing it. Originally Posted by randyr

Your right I doubt I'll ever haul anything heavy in it or anything at all if I finish out the bed nicely.
Thanks for your inputs !
-
Advertising

- Google Adsense
- REGISTERED USERS DO NOT SEE THIS AD
-
02-06-2014 05:43 PM #332
CHR Member
- Join Date
- Apr 2011
- Location
- Prairie City
- Car Year, Make, Model: 40 Ford Deluxe, 68 Corvette, 72&76 K30
- Posts
- 7,301
- Blog Entries
- 1
I agree with Randy that I doubt your frame flexes or twists a lot being boxed and having that nice cross member. Shocks are looking good.Ryan
1940 Ford Deluxe Tudor 354 Hemi 46RH Electric Blue w/multi-color flames, Ford 9" Residing in multiple pieces
1968 Corvette Coupe 5.9 Cummins Drag Car 11.43@130mph No stall leaving the line with 1250 rpm's and poor 2.2 60'
1972 Chevy K30 Longhorn P-pumped 24v Compound Turbos 47RH Just another money pit
1971 Camaro RS 5.3 BTR Stage 3 cam, SuperT10
Tire Sizes
-
02-06-2014 05:59 PM #333
CHR Member
- Join Date
- Feb 2006
- Location
- Bartlett
- Posts
- 6,831
well I guess Driveline 101 explains PHASING of the u joints---
I agree with 34 40 about lowering the shock tops just a wee bit so the weight won't hang on the shoch when truck jacked up off ground
The shock mounting angle really just effects the dampening rates a bit because of the angle ---one of the main oem reasons to angle them is for clearance during full suspension travel and /or clearance for the exhaust over the axle. Once you have them mounted in regards to there travel length, I would suggest fabbibg a mock up tube at the shock ride height length so the truck chassis sets at that level while you do the drive line angle work---the spring perches don't look like they are welded to the axle housing tubes yet??? that is good as you can tip the housing for the u joint angle before you tack them-----
-
02-06-2014 07:52 PM #334
CHR Member
- Join Date
- Mar 2013
- Location
- Seguin
- Car Year, Make, Model: 1940 Ford p/u 1937 Caddy Coupe
- Posts
- 782
40FordDeluxe, Jerry, thanks for the feed back. I'm getting smarter every time you leave feed back. Its a good thing I have cutoff wheels, plasma cutter, band saws, saws-alls and a hack saw or two because ( the spring perches don't look like they are welded to the axle housing tubes yet??? ) I'll need them to do some cutting. I aligned the rear straight to the trans, no thought of load ! Maybe no thought at all. I really appreciate your help, I'll get this truck right if I have to build it twice !
-
02-06-2014 08:02 PM #335
CHR Member
- Join Date
- Feb 2006
- Location
- Bartlett
- Posts
- 6,831
you won't have to cut them off---you can get tapered spring wedges at any spring shop---works for drive shaft angle or front end caster on leaf spring axles
And I appreciate your comments on our suggestions---so many just blunder on with no feed back
-
02-07-2014 05:19 PM #336
CHR Member
- Join Date
- Apr 2011
- Location
- Prairie City
- Car Year, Make, Model: 40 Ford Deluxe, 68 Corvette, 72&76 K30
- Posts
- 7,301
- Blog Entries
- 1
Jerry's right on the shims. You can also get the shims with a hole in the center so you can bolt them under your bottom spring plate so it is a more permanent piece.Ryan
1940 Ford Deluxe Tudor 354 Hemi 46RH Electric Blue w/multi-color flames, Ford 9" Residing in multiple pieces
1968 Corvette Coupe 5.9 Cummins Drag Car 11.43@130mph No stall leaving the line with 1250 rpm's and poor 2.2 60'
1972 Chevy K30 Longhorn P-pumped 24v Compound Turbos 47RH Just another money pit
1971 Camaro RS 5.3 BTR Stage 3 cam, SuperT10
Tire Sizes
-
02-07-2014 05:55 PM #337
CHR Member
- Join Date
- Mar 2013
- Location
- Seguin
- Car Year, Make, Model: 1940 Ford p/u 1937 Caddy Coupe
- Posts
- 782
Thanks guys. I've looked at some shims on the web and think I might just put my Mill to work and machine a set, plenty of raw steel laying around the shop. It only got up to 39 degrees in the shop today so I didn't get a lot done, just welded the new cross member. Have a great weekend everybody !
-
02-09-2014 06:05 PM #338
CHR Member
- Join Date
- Mar 2013
- Location
- Seguin
- Car Year, Make, Model: 1940 Ford p/u 1937 Caddy Coupe
- Posts
- 782
Today's activity involves the radiator mounting and I'm looking for inputs. There should be some rubber spacers/bushings at ? I have a bolt/spring kit for the lower rad mounts. Here's some pic's. Do I bolt the rad support mount tight on the rad or ?

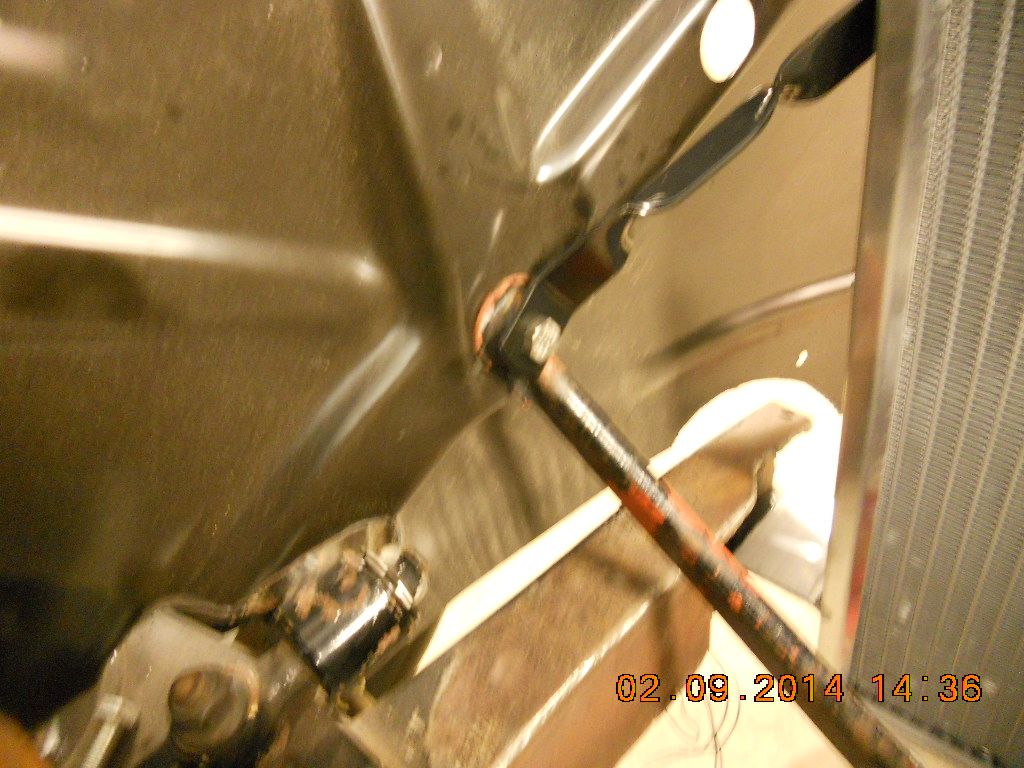

Another question, my fan shroud is plastic of some sort and came with 4 sheet metal screws for mounting. I'm thinking of drill and tap and use 10-32 screws maybe 6 instead of 4.
-
02-10-2014 10:21 AM #339
CHR Member/Contributor
- Join Date
- Jul 2003
- Location
- Madison
- Car Year, Make, Model: '67 Ranchero, '57 Chevy, '82 Camaro,
- Posts
- 21,160
I use a rubber pad on the bottom and top mounts just to keep some of the vibration from working on the welds in the radiator. As for the fan, 6-10/32 screws with nylock nuts should do fine IMOYesterday is history, tomorrow is a mystery, Live for Today!
Carroll Shelby
Learning must be difficult for those who already know it all!!!!
-
02-10-2014 11:05 AM #340
CHR Member/Contributor
- Join Date
- Sep 2007
- Location
- Gardner, KS
- Car Year, Make, Model: '33 HiBoy Coupe, '32 HiBoy Roadster
- Posts
- 11,245
Gordy,
I overlooked your questions on this one. On mine I used the standard spring loaded mounts at the bottom and put a rubber pad nominal 3x3x1/8" thick under each of the two mounting tabs at the bottom. The top of mine has a pair of adapter plates that hook to the Carolina Customs hood top mounting bars that brace back to the firewall. I didn't use any rubber at the top.
For the fan, mine came from PRC with a shroud made from a sheet of aluminum with a 16" hole matching the fan diameter. At the top and bottom they bent over a nominal 1/2" tab to close the space, and on the sides the made a similar 90 degree bend with a nominal 3/4" tab, then bent out a 1/4" mounting flange which aligns with the two mounting channels on the sides of the radiator. This gives a little "box" that sits 1/2" off of the radiator core, matches the core area, and has mounting flanges that are held to the radiator with four 10-32 screws near the corners. I've had zero problems with over heating using this shroud, and my unintentional "test" was forgetting to hit my "ACC" button one day, and noticing the pegged temp gauge after idling in traffic for a few minutes
 Punched the "ACC" power, and watched the temp gauge start falling within ten seconds, and sitting at 190F within less than a minute.
 Proved the goodness of a shrouded fan to me!!
Roger
Enjoy the little things in life, and you may look back one day and realize that they were really the BIG things.
-
02-10-2014 04:35 PM #341
CHR Member
- Join Date
- Mar 2013
- Location
- Seguin
- Car Year, Make, Model: 1940 Ford p/u 1937 Caddy Coupe
- Posts
- 782
I've a PRC radiator with a flange around the edges but no excess to the back side of the flange so it's screws or machine sdcrews into tapped holes to hold the fan assy on. Its a 17" and the shroud covers all the back side of the radiator, so I guess that'll be plenty. With aluminum I always worry about vibration and wear. The bottom mounting is all set just like yours but the side ? I have to keep the side mount bolts from vibrating in the radiator frame/shell. Originally Posted by rspears
Now that I think about it, maybe I should put a washer, than a nut, tighten and than use a rubber bushing over the bolt inside the bracket along with a nut to secure it.
Tell me about " Carolina Customs hood top mounting bars" , replaces original hood hinges ?
Thanks for the input !!!!
-
02-10-2014 04:37 PM #342
CHR Member
- Join Date
- Mar 2013
- Location
- Seguin
- Car Year, Make, Model: 1940 Ford p/u 1937 Caddy Coupe
- Posts
- 782
Thanks for the feedback ! I wish I could use the lock nuts but the flange won't allow it. I'll have to tap the flange/shell and use some locktite maybe. Originally Posted by Dave Severson
-
02-10-2014 04:47 PM #343
CHR Member
- Join Date
- Feb 2006
- Location
- Bartlett
- Posts
- 6,831
How about riv-nuts?
-
02-10-2014 07:51 PM #344
CHR Member
- Join Date
- Mar 2013
- Location
- Seguin
- Car Year, Make, Model: 1940 Ford p/u 1937 Caddy Coupe
- Posts
- 782
Jerry I was thinking of those or something like that I used on airplanes. I guess I'll Google it up and find a source. D#m it sometimes I just want to rush things instead of waiting to get the right stuff. It sure would look and last better if I used them. Thanks for the input. Originally Posted by jerry clayton
-
02-10-2014 08:00 PM #345
CHR Member
- Join Date
- Feb 2006
- Location
- Bartlett
- Posts
- 6,831
I only mentioned them because I would bet you knew what they were and how to use them


 Reply With Quote


Posting Permissions
- You may not post new threads
- You may not post replies
- You may not post attachments
- You may not edit your posts

i've enjoyed the years here . made a lot of friends. most who have left. i see no reason to continue with this so hope to see you somewhere else. i dont think this site will ever be back. it's lived...
Dead!