


 3390Likes
Thread: 55 Wagon Progress


Results 691 to 705 of 1865
 LinkBack URL
 About LinkBacks
-
12-25-2015 10:13 AM #691
 CHR Member

- Join Date
- Oct 2007
- Location
- Petaluma
- Car Year, Make, Model: 48 Ford F1
- Posts
- 9,795
Nice work. i LIKE THE HEATER TOO!
"  "No matter where you go, there you are!" Steve.
-
Advertising

- Google Adsense
- REGISTERED USERS DO NOT SEE THIS AD
-
12-27-2015 04:04 PM #692
CHR Member
- Join Date
- Jun 2008
- Location
- Leonardtown
- Car Year, Make, Model: Walking
- Posts
- 1,228
In the winter weather, the booth fan will evacuate the heat in short order, the torpedo heater does a good job of keeping the temps up to par.
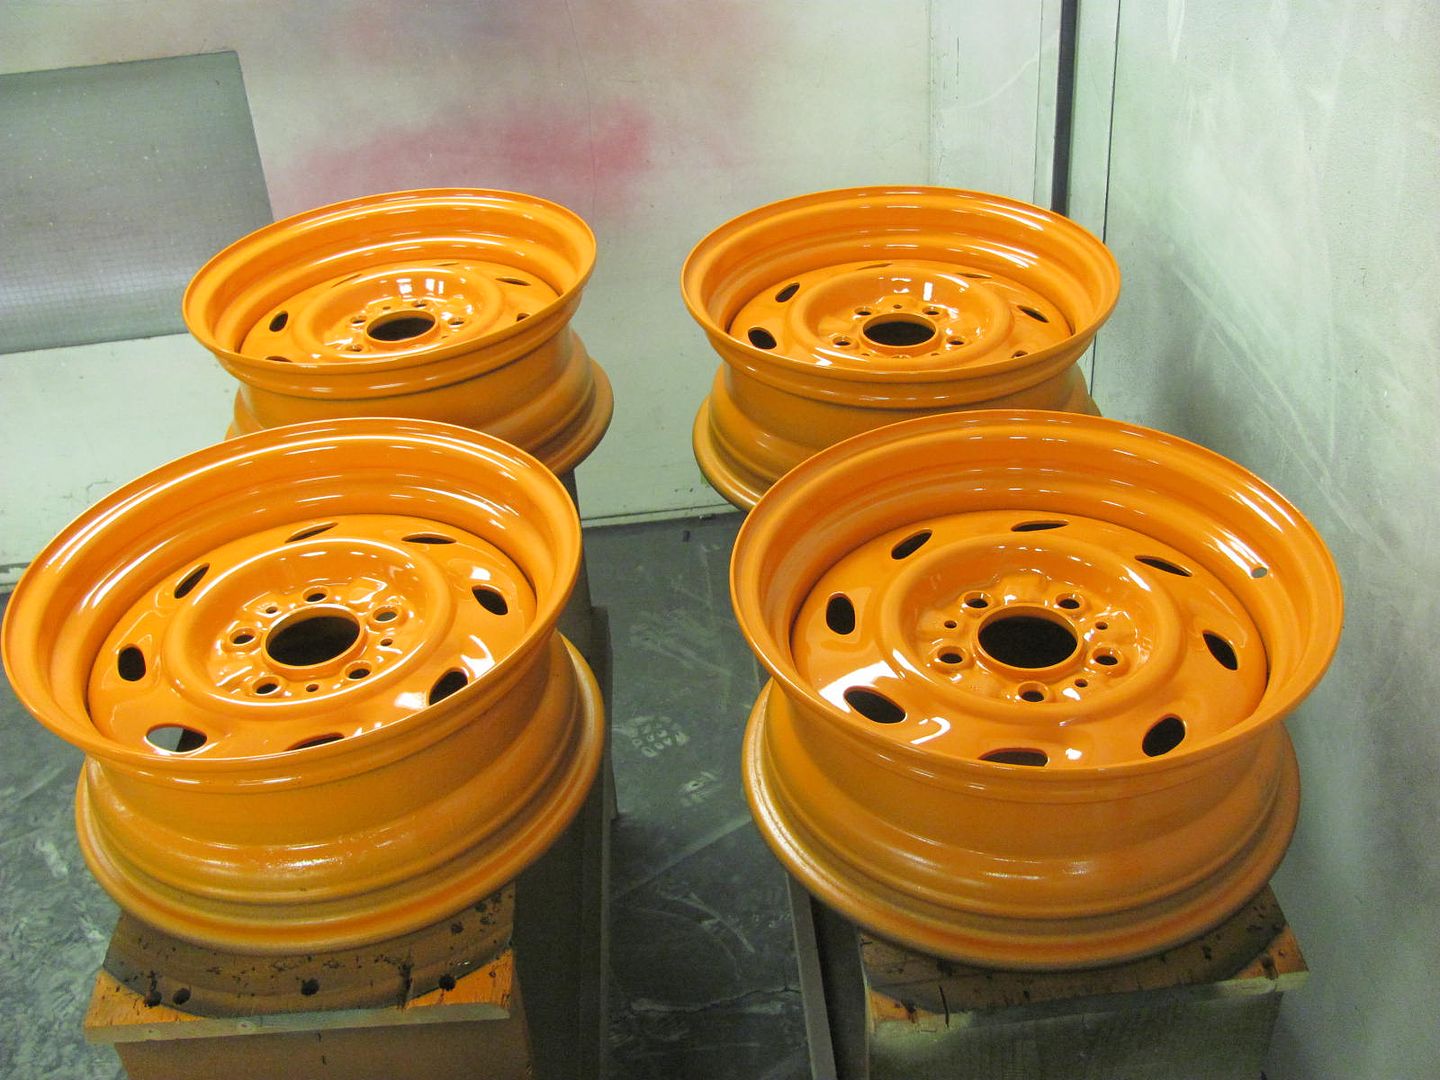
The other day when we primed the frame a second time we also did the front side of the trailer wheels..
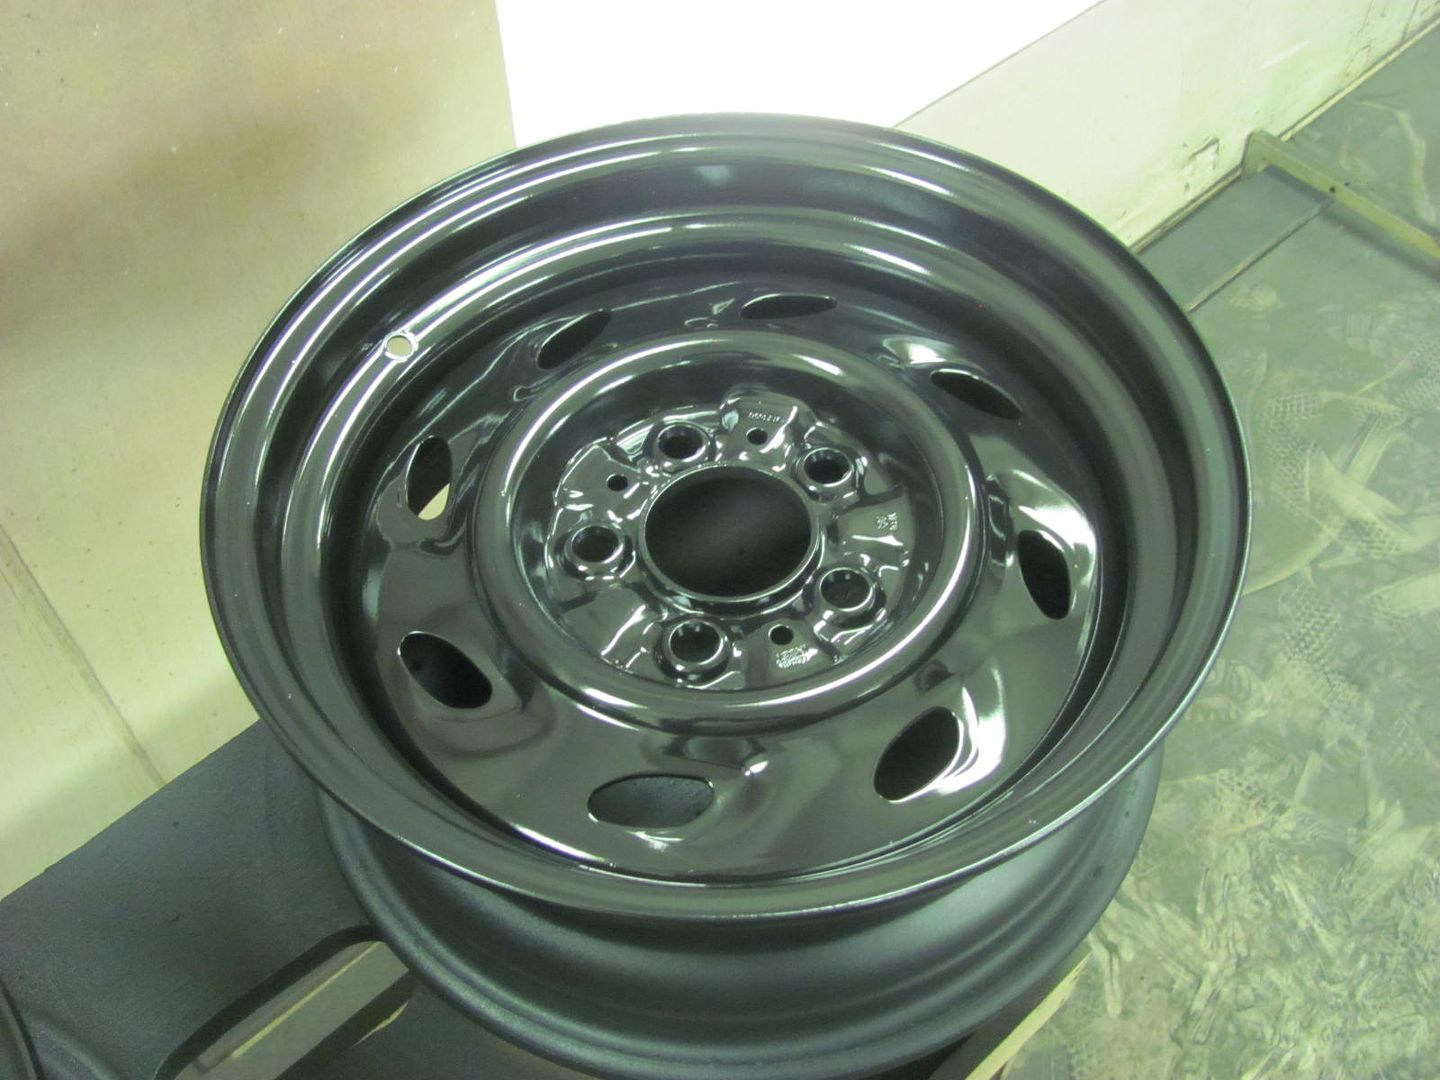
and today I mixed up some Centari that has been sitting on the shelf a few years.. It sprayed pretty decent...
And more blocking.....

Last edited by MP&C; 12-27-2015 at 04:14 PM.
Robert
-
12-27-2015 04:46 PM #693
CHR Member
- Join Date
- Sep 2007
- Location
- New Bedford
- Car Year, Make, Model: 34 Ford 3W Coupe Replica
- Posts
- 14,754
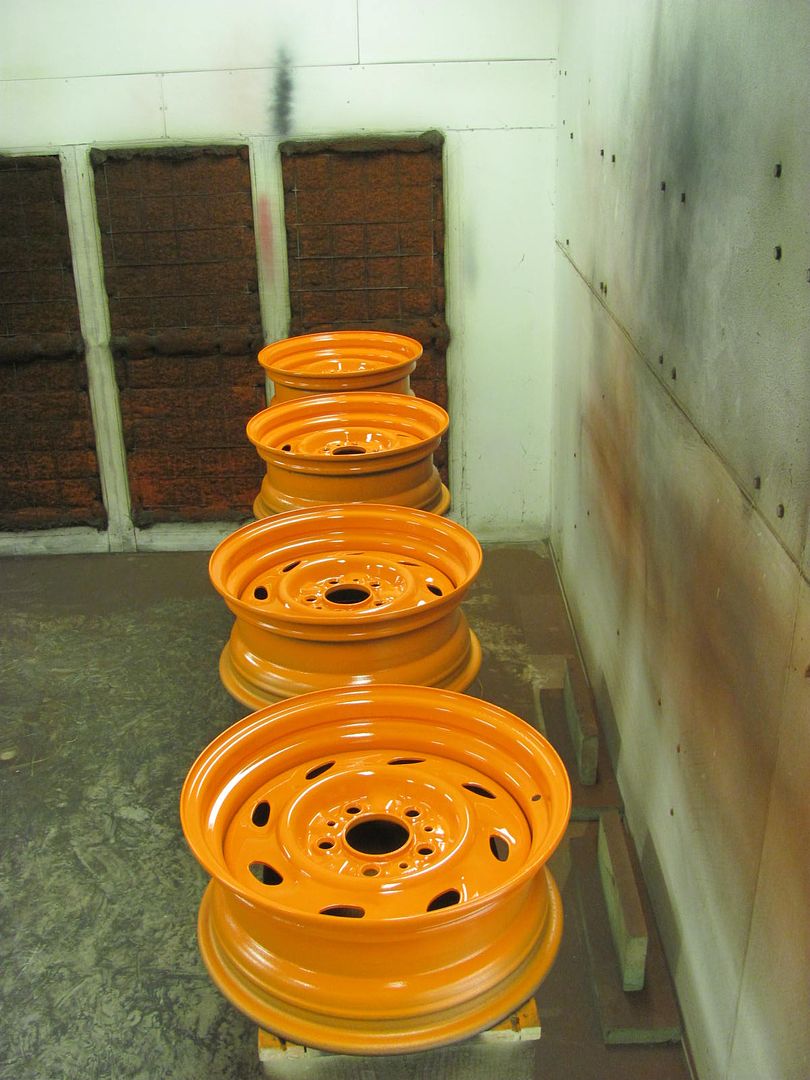
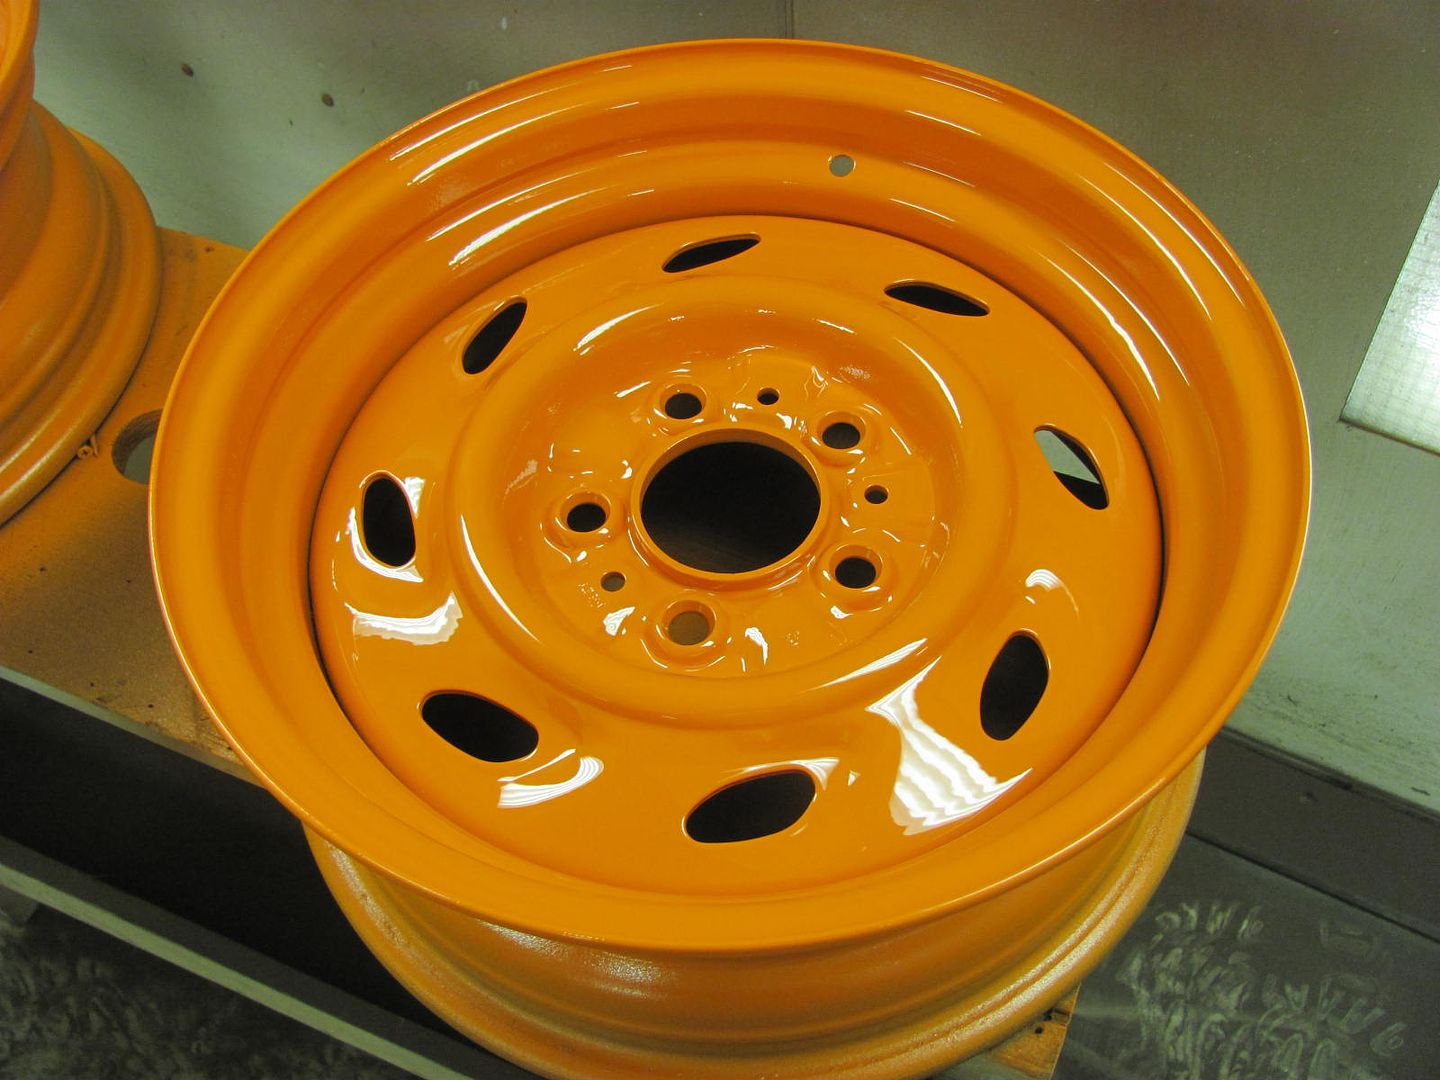
great color for the wheels! I'd like to see my car that color I think...
-
12-29-2015 08:45 PM #694
CHR Member
- Join Date
- Jun 2008
- Location
- Leonardtown
- Car Year, Make, Model: Walking
- Posts
- 1,228
They would see you coming for sure!!
Made another trip to the car wash tonight. Tire soak, high pressure soap, and a rinse...
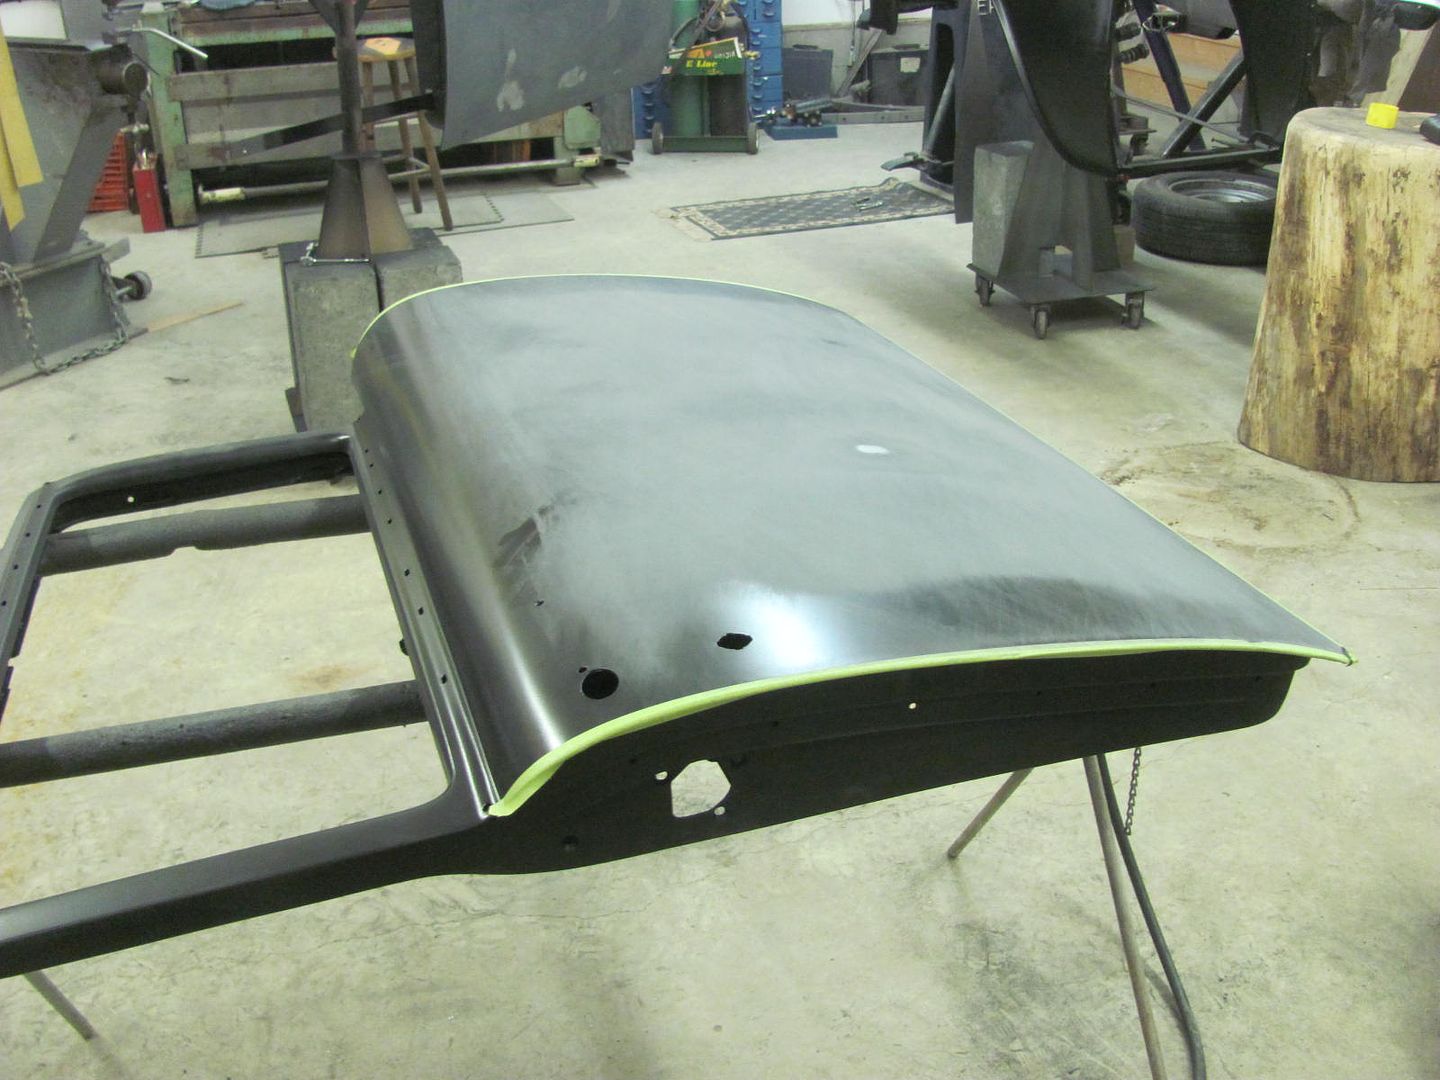
While Kyle was media blasting, I used the 36" AFS to block the tail gate.
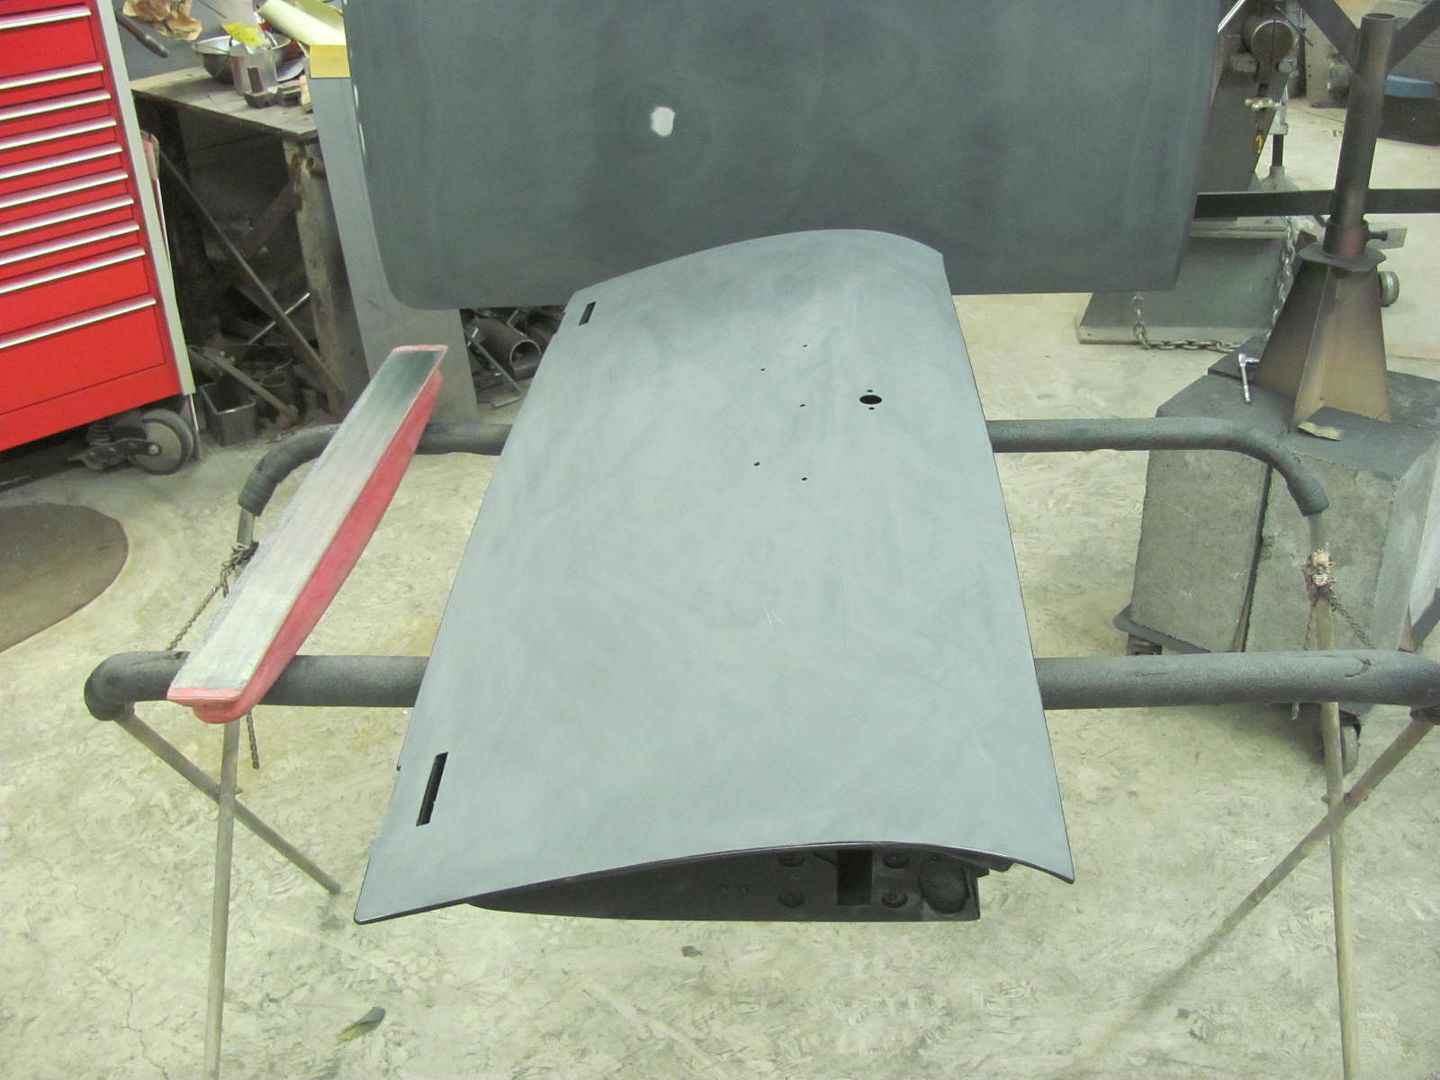
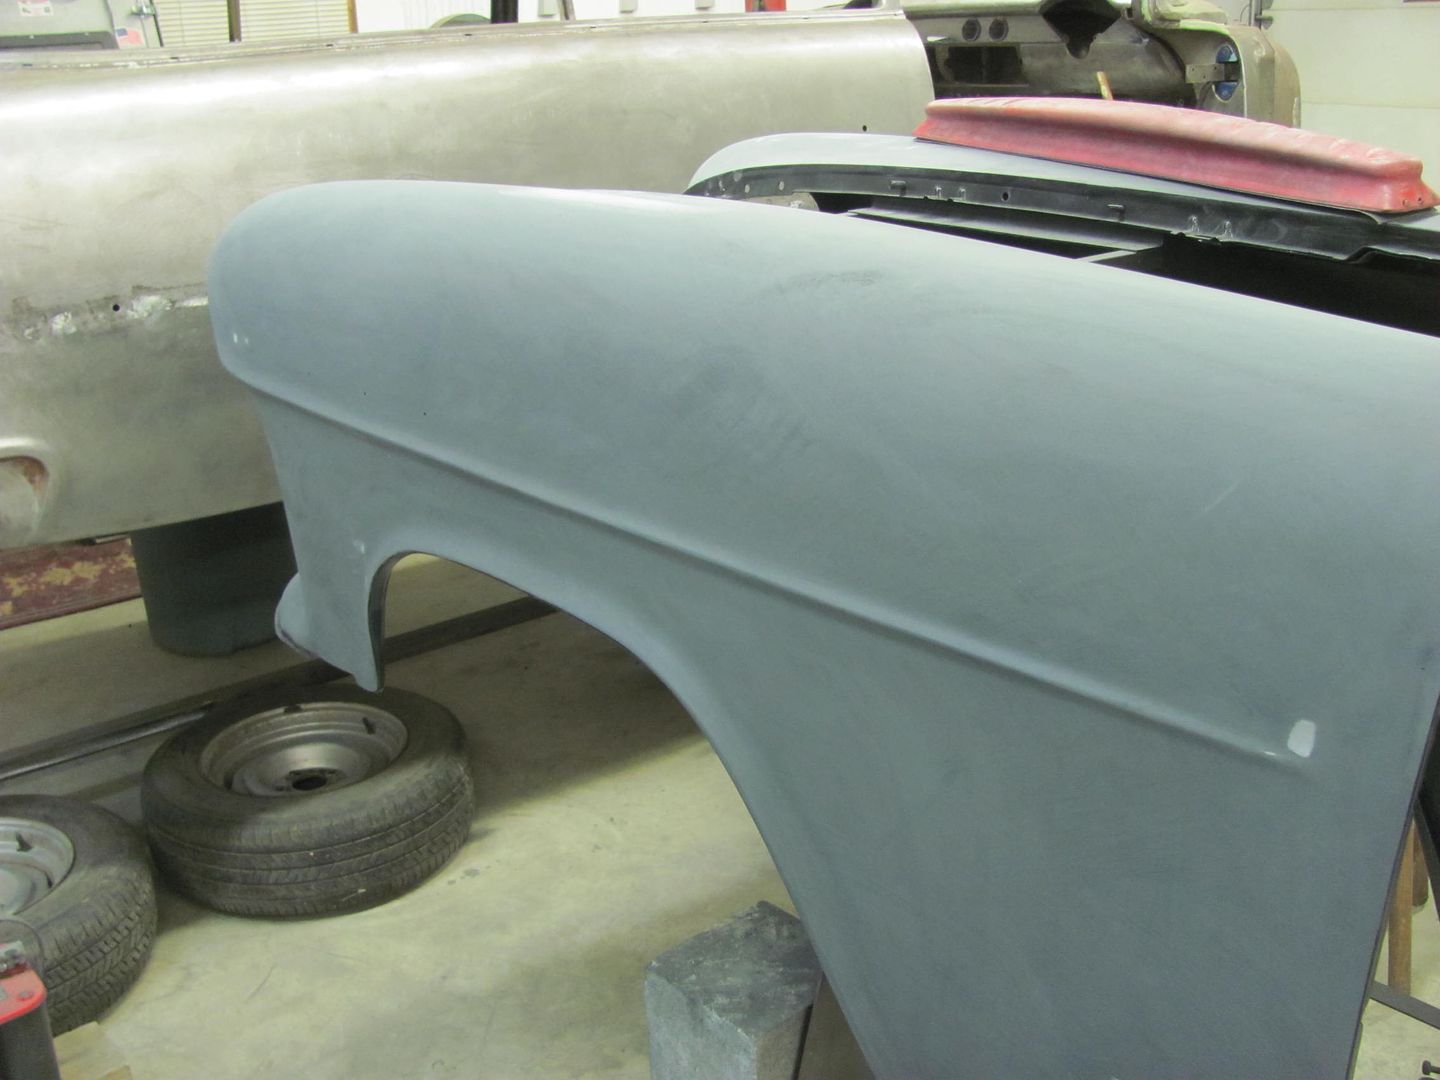
This had been blocked a couple times before and never seemed to come out right. Of course, I was using a shorter block as well. The 36 really did the trick in getting things nice and flat...
.....and getting things ready for another epoxy session...
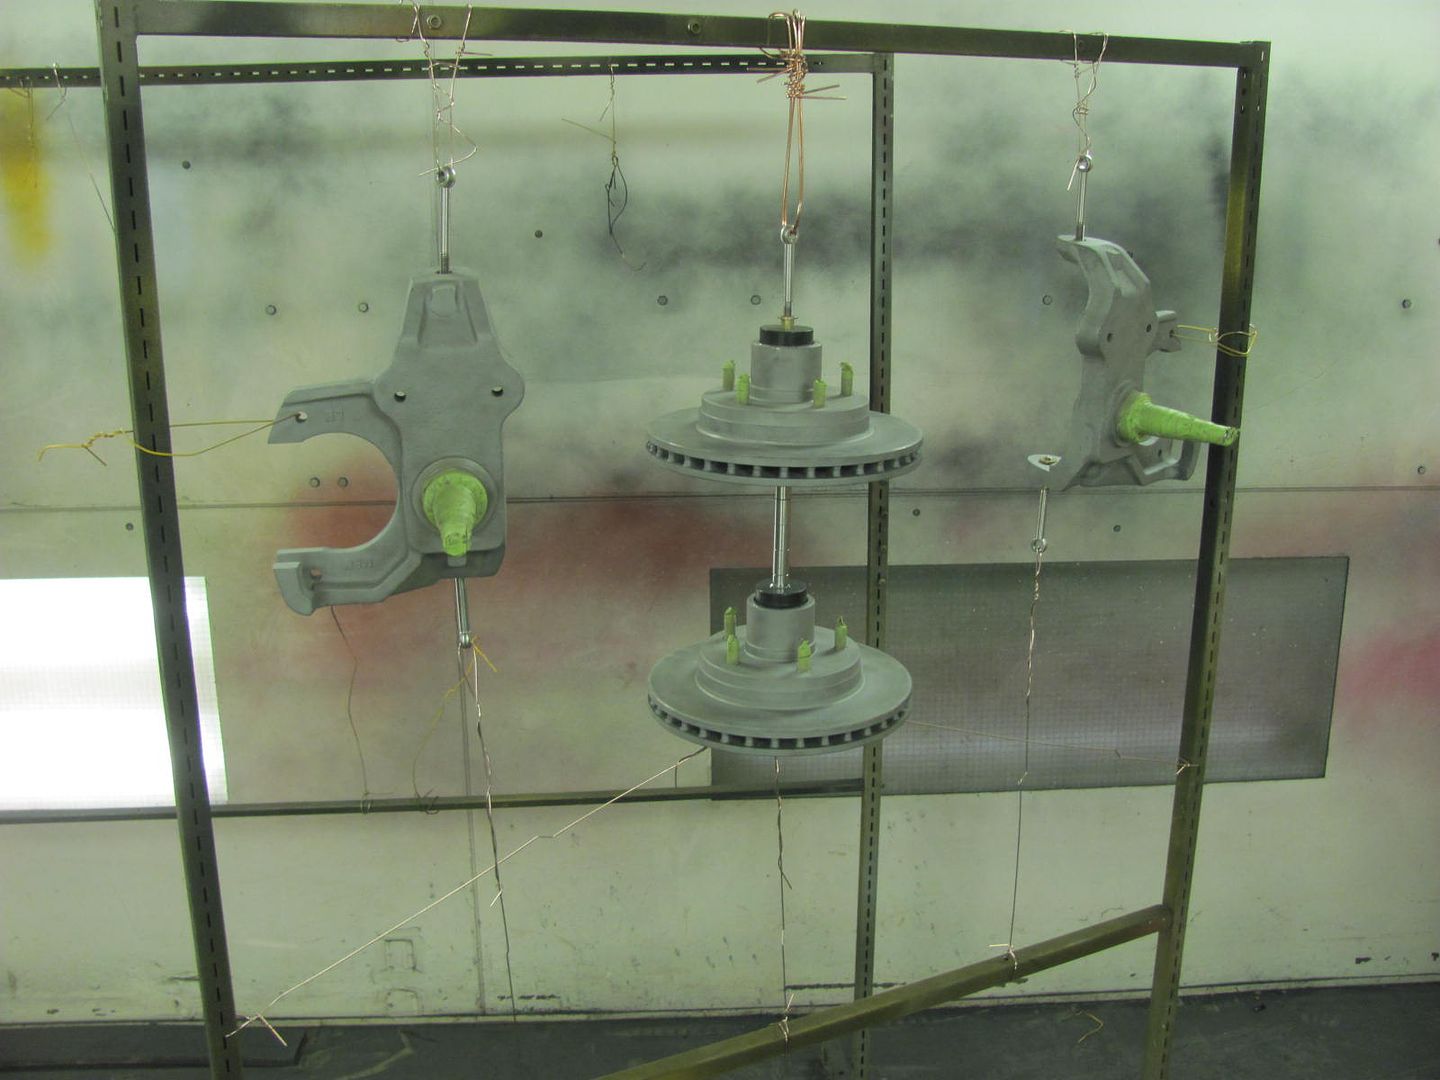
Moved these out of the way, closer to the door so we can get tires on this weekend. Order trim rings today, now for some baby moons that fit... I swear they get brighter every time I look at them..
Robert
-
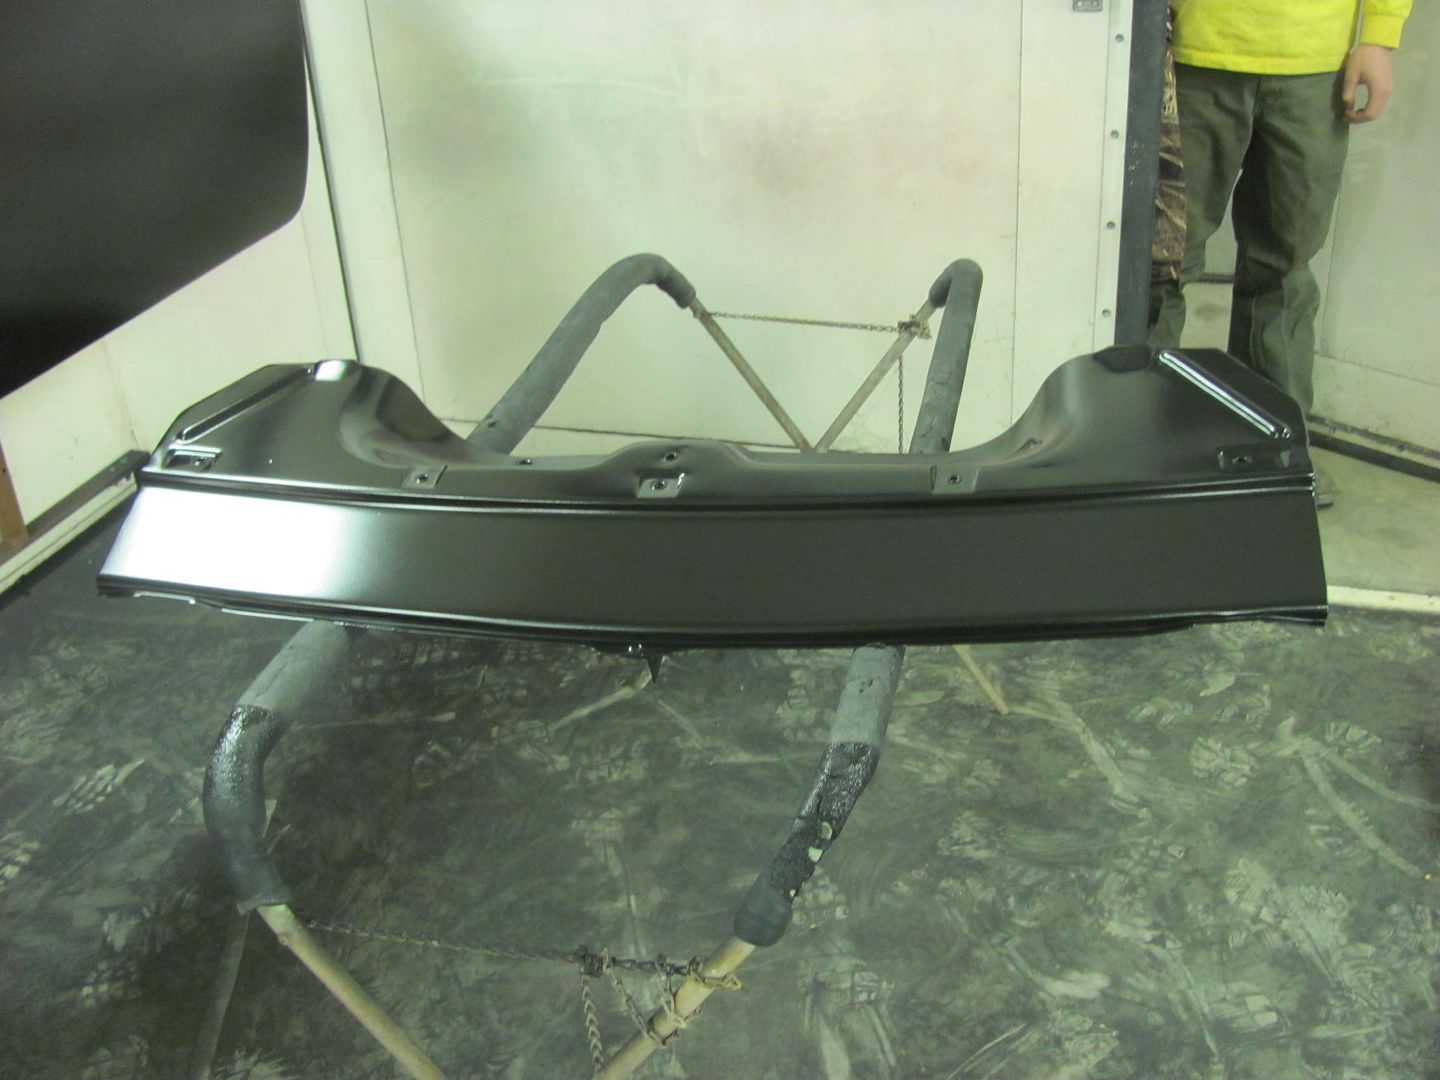
12-29-2015 08:49 PM #695
CHR Member
- Join Date
- Jun 2008
- Location
- Leonardtown
- Car Year, Make, Model: Walking
- Posts
- 1,228
 Originally Posted by Jack F

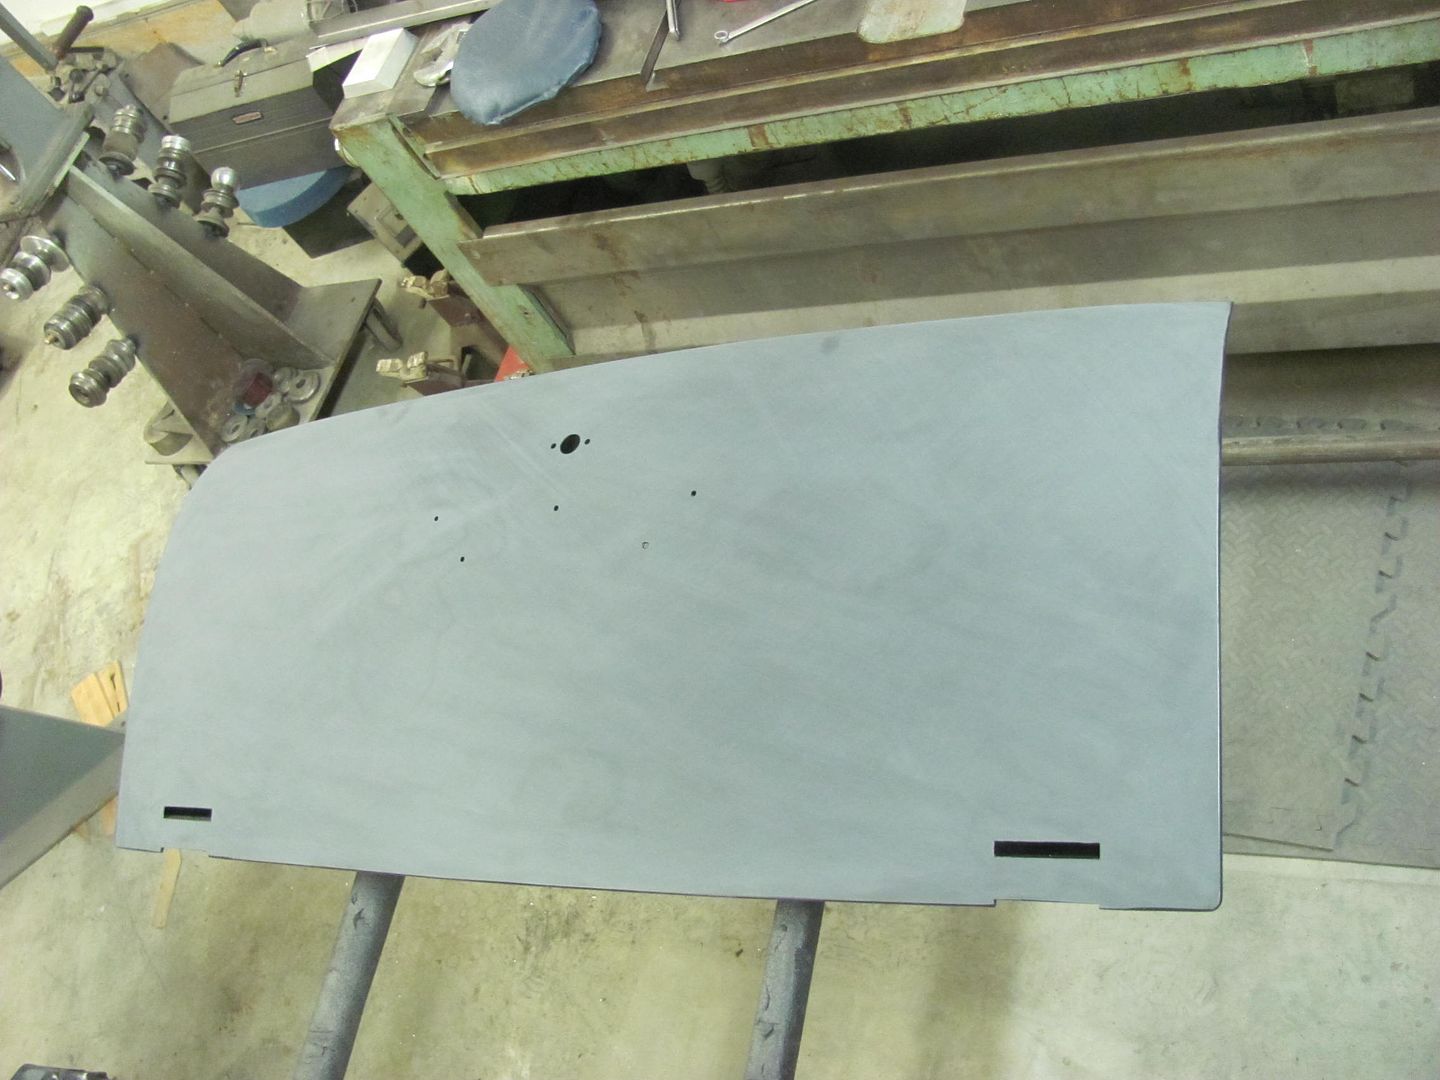
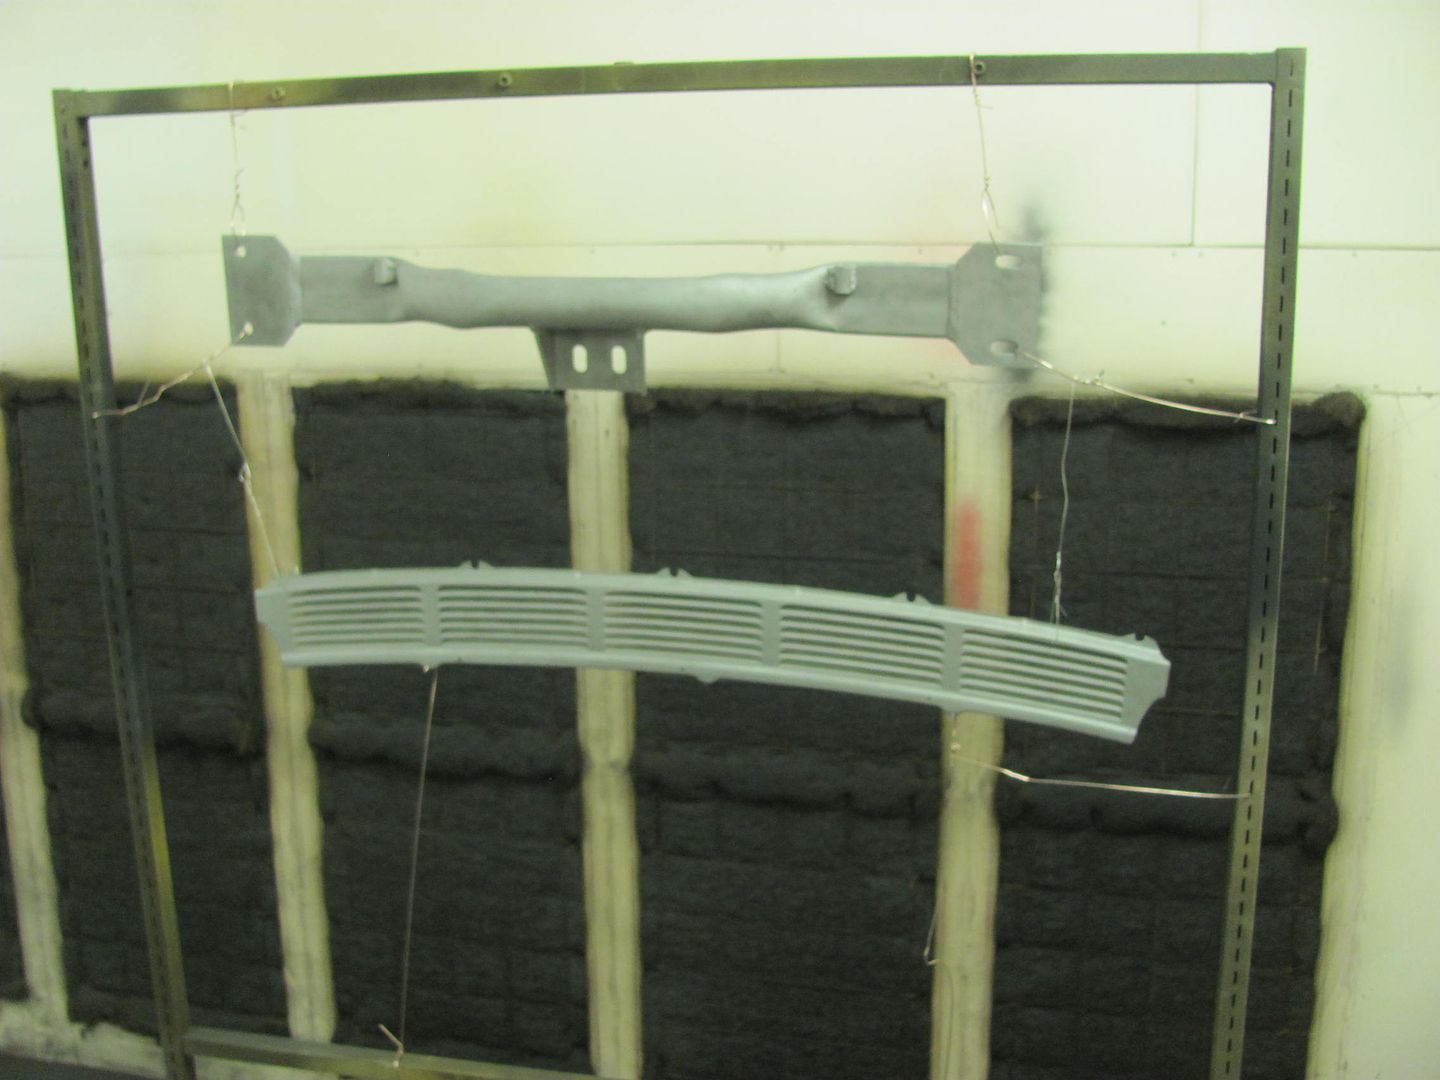
Jack, sorry, missed your question. That panel is the filler behind the front bumper, so yes, it gets blocked as well.Robert
-
12-30-2015 02:41 AM #696
CHR Member
- Join Date
- Sep 2007
- Location
- New Bedford
- Car Year, Make, Model: 34 Ford 3W Coupe Replica
- Posts
- 14,754
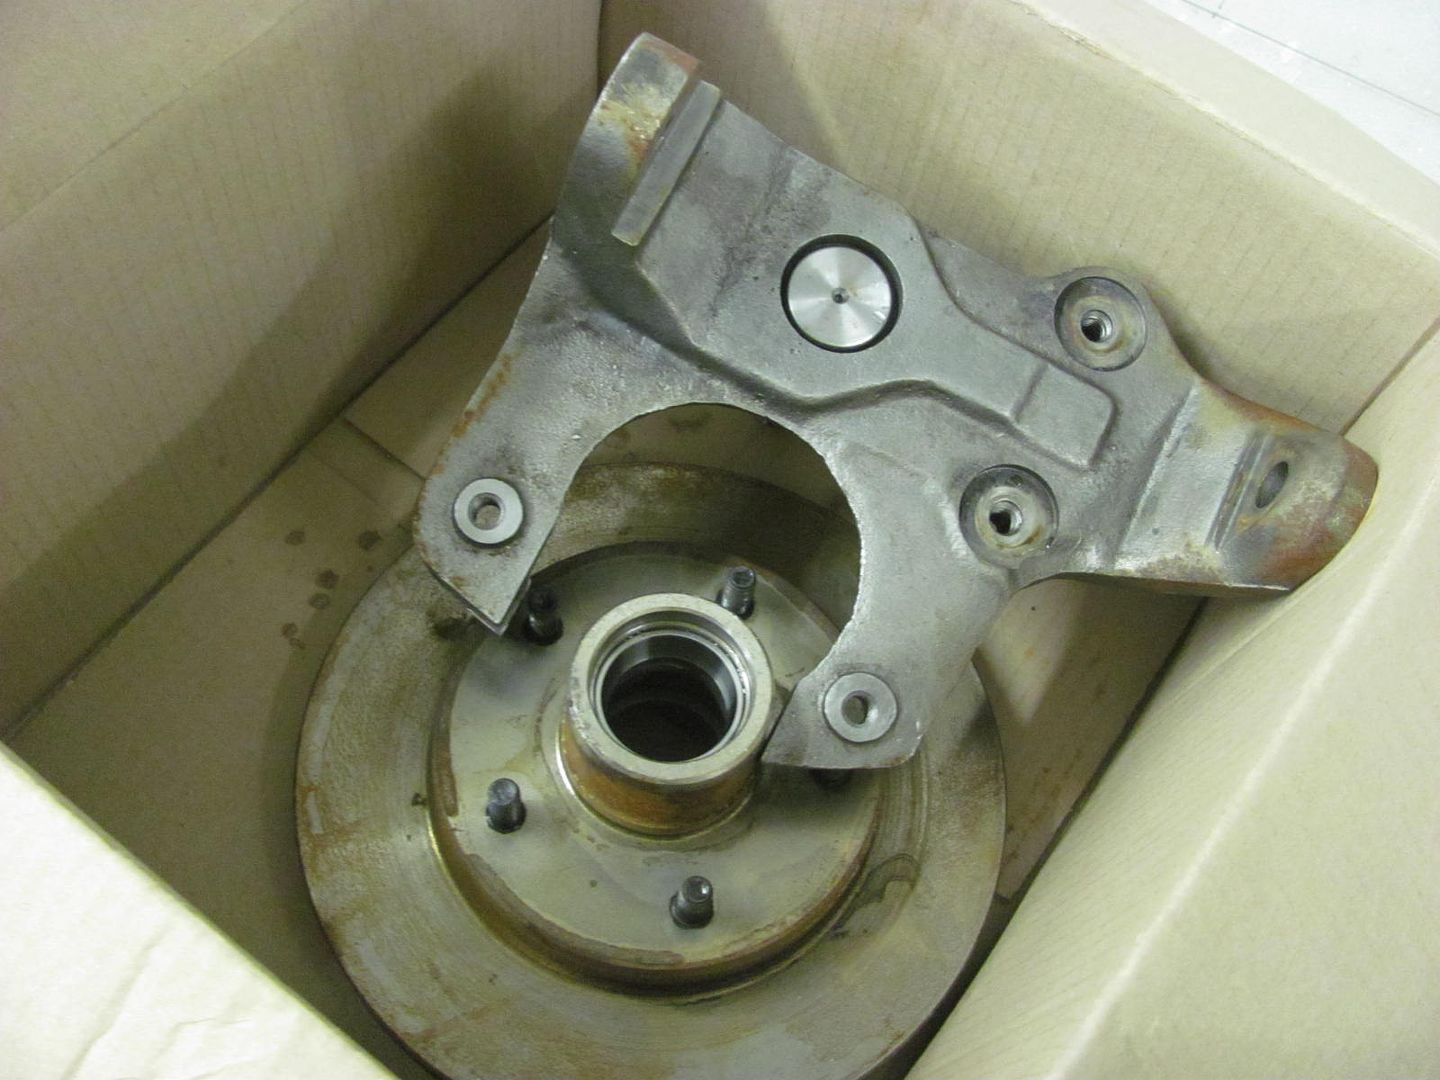
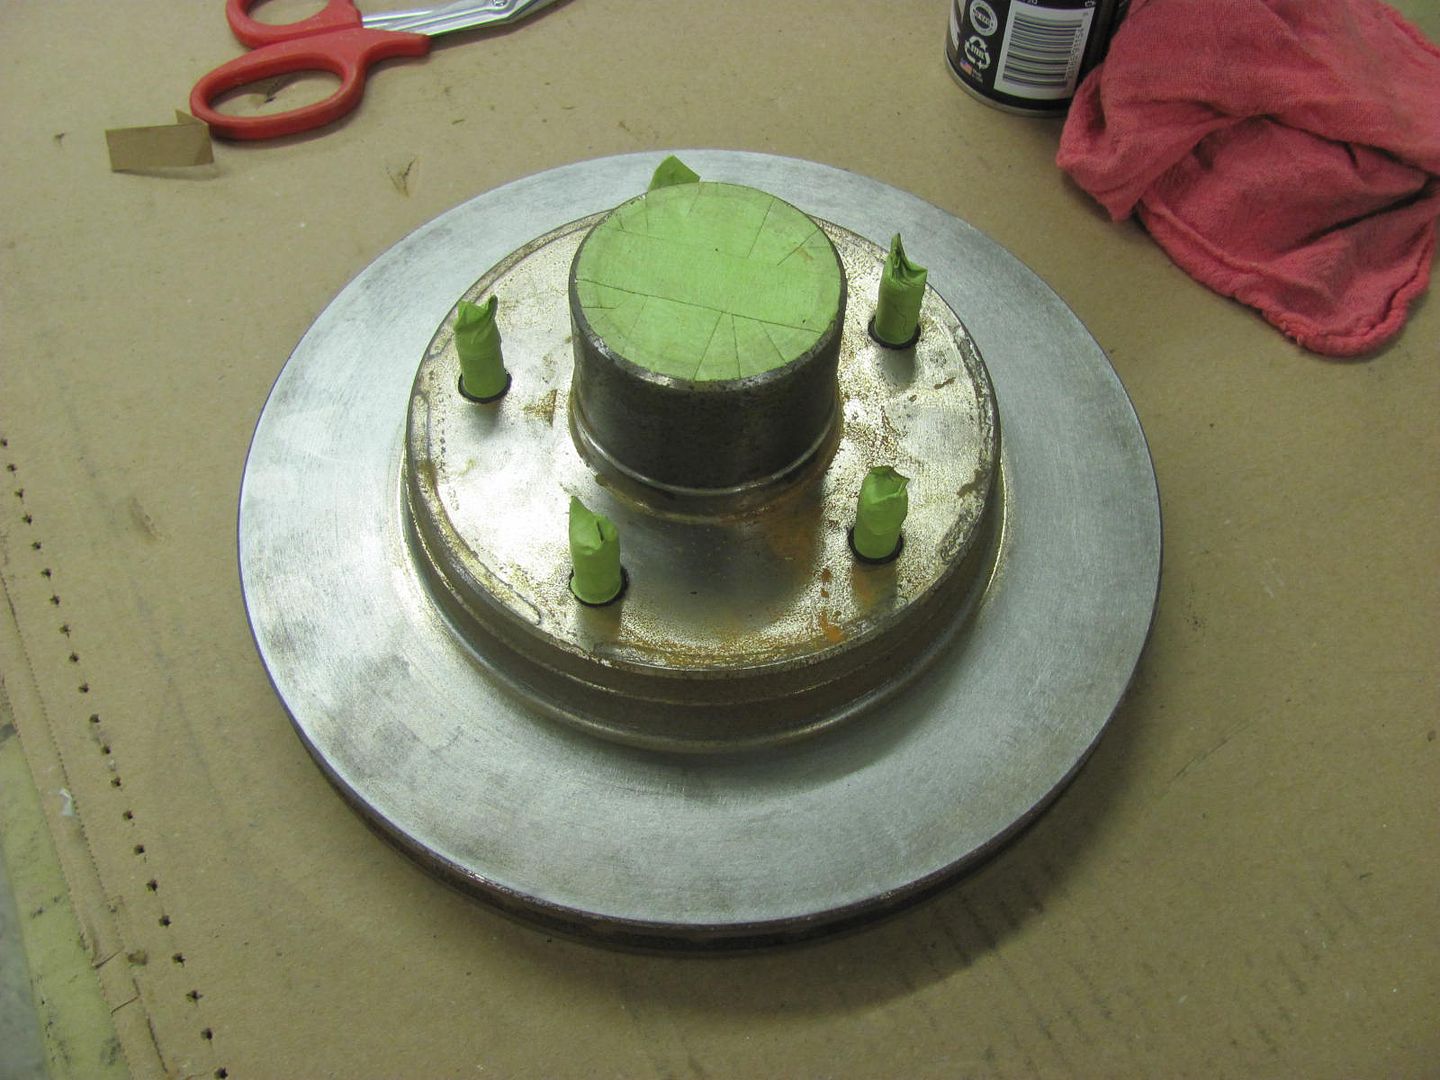
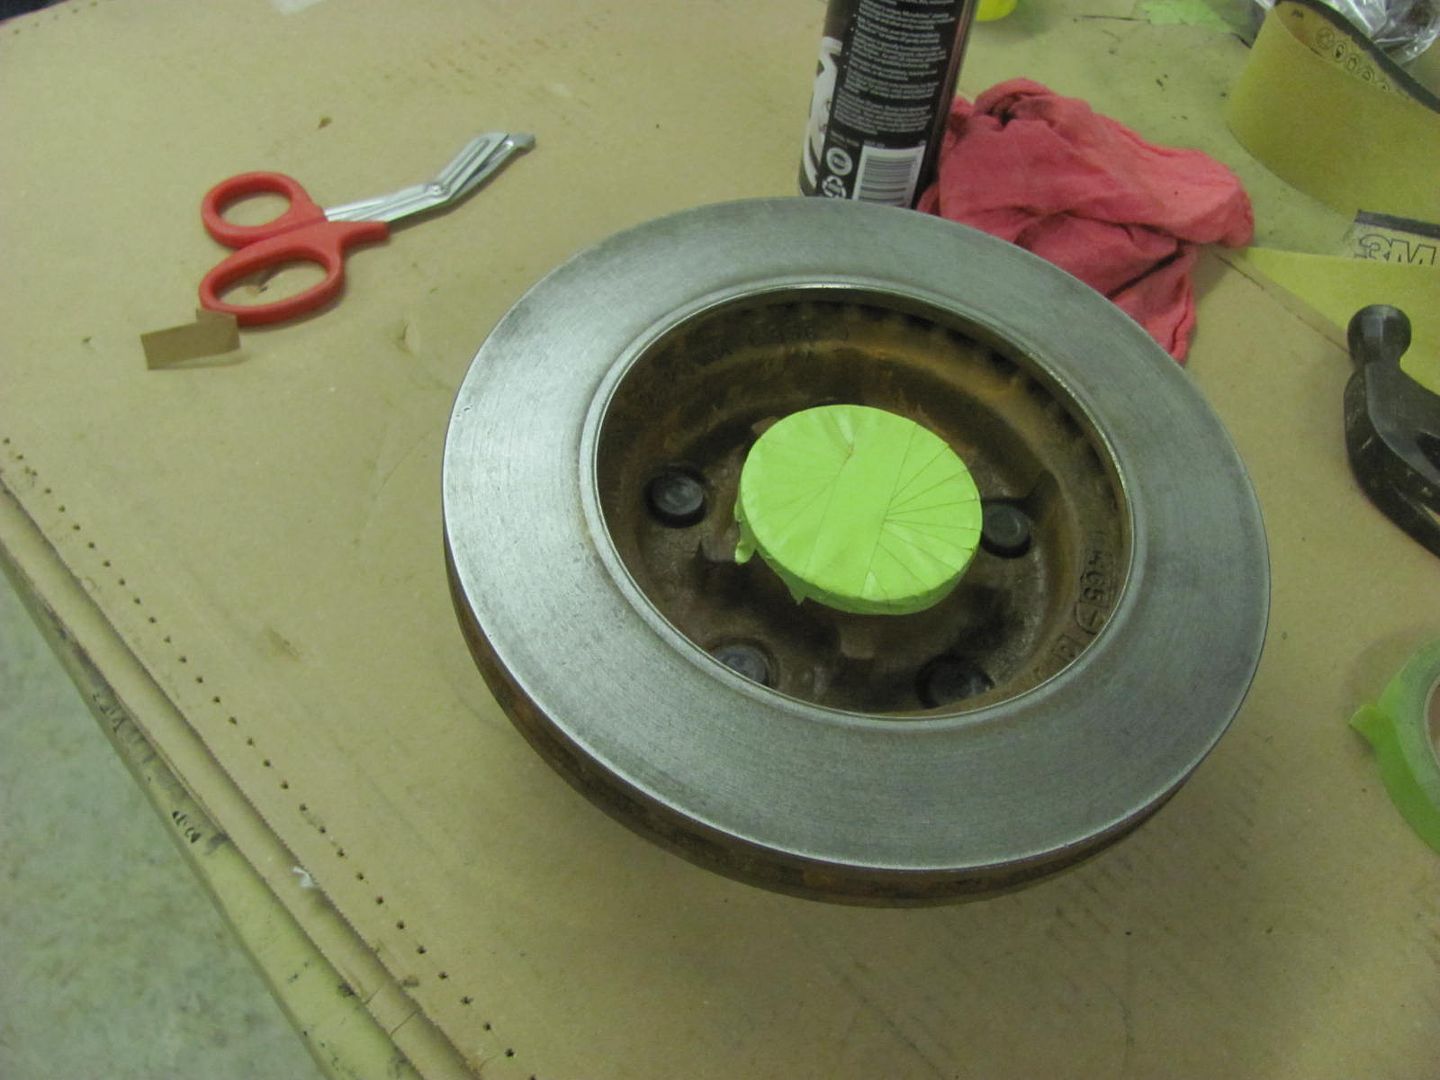
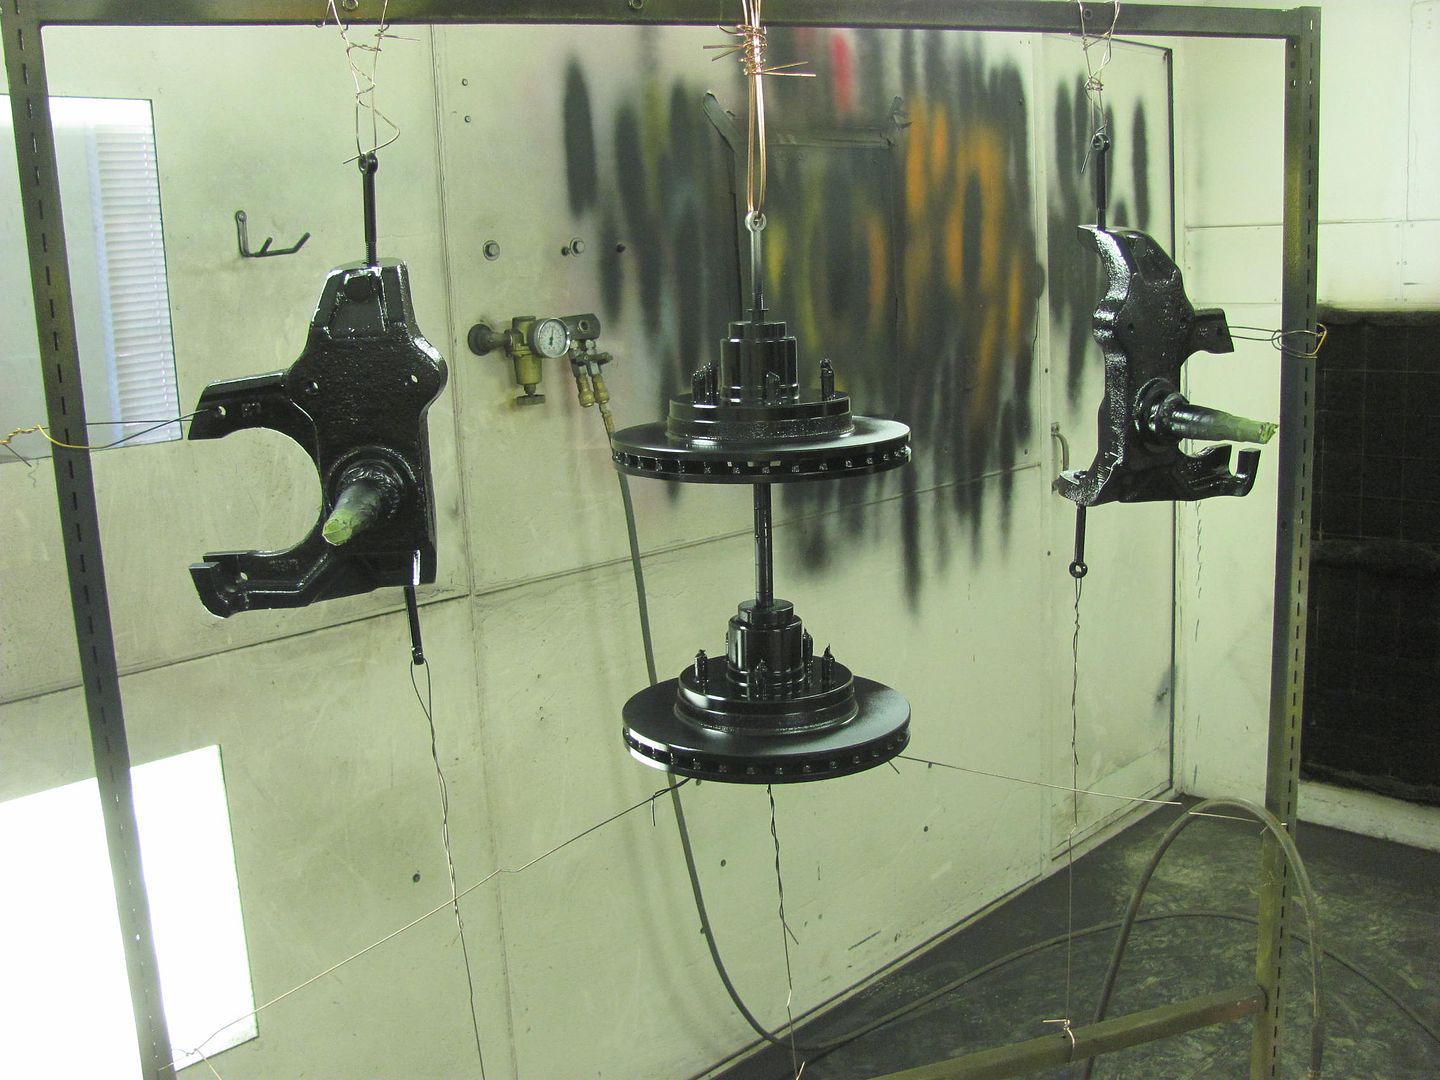
Best part is they are NOT red. Originally Posted by MP&C


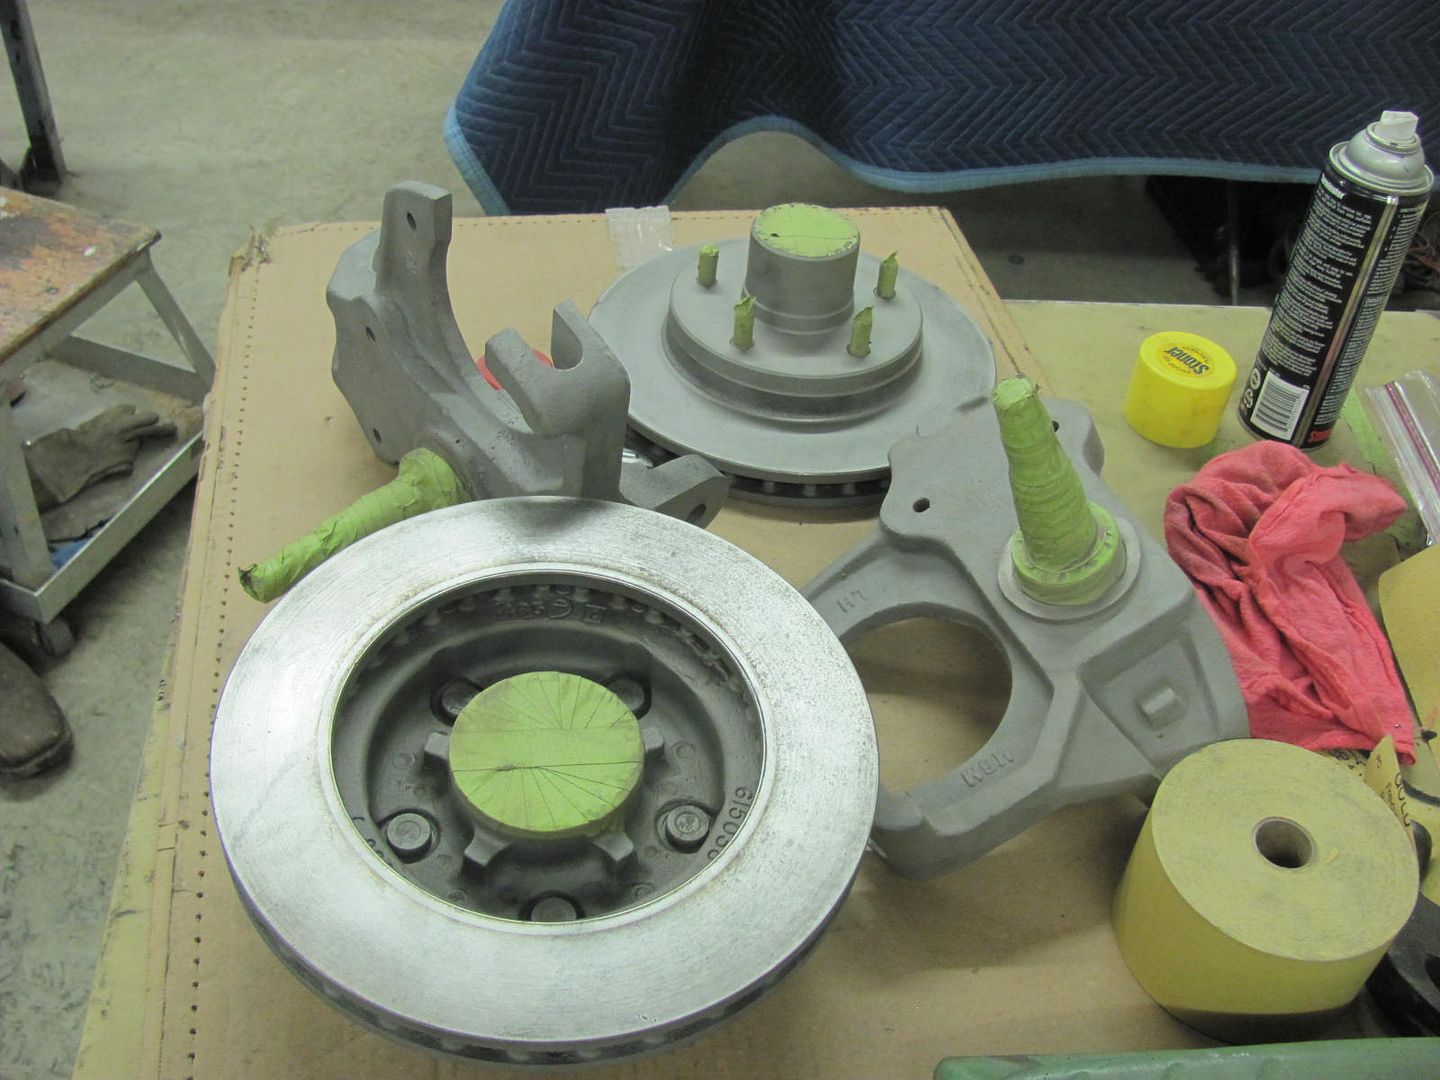
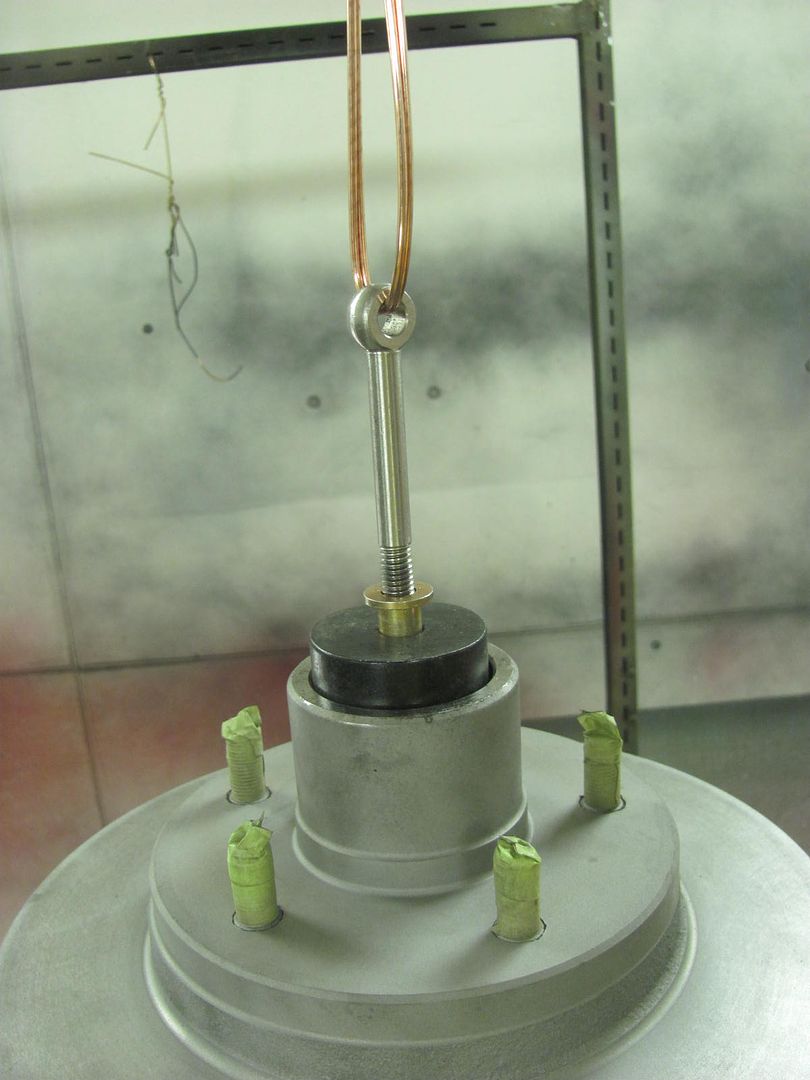
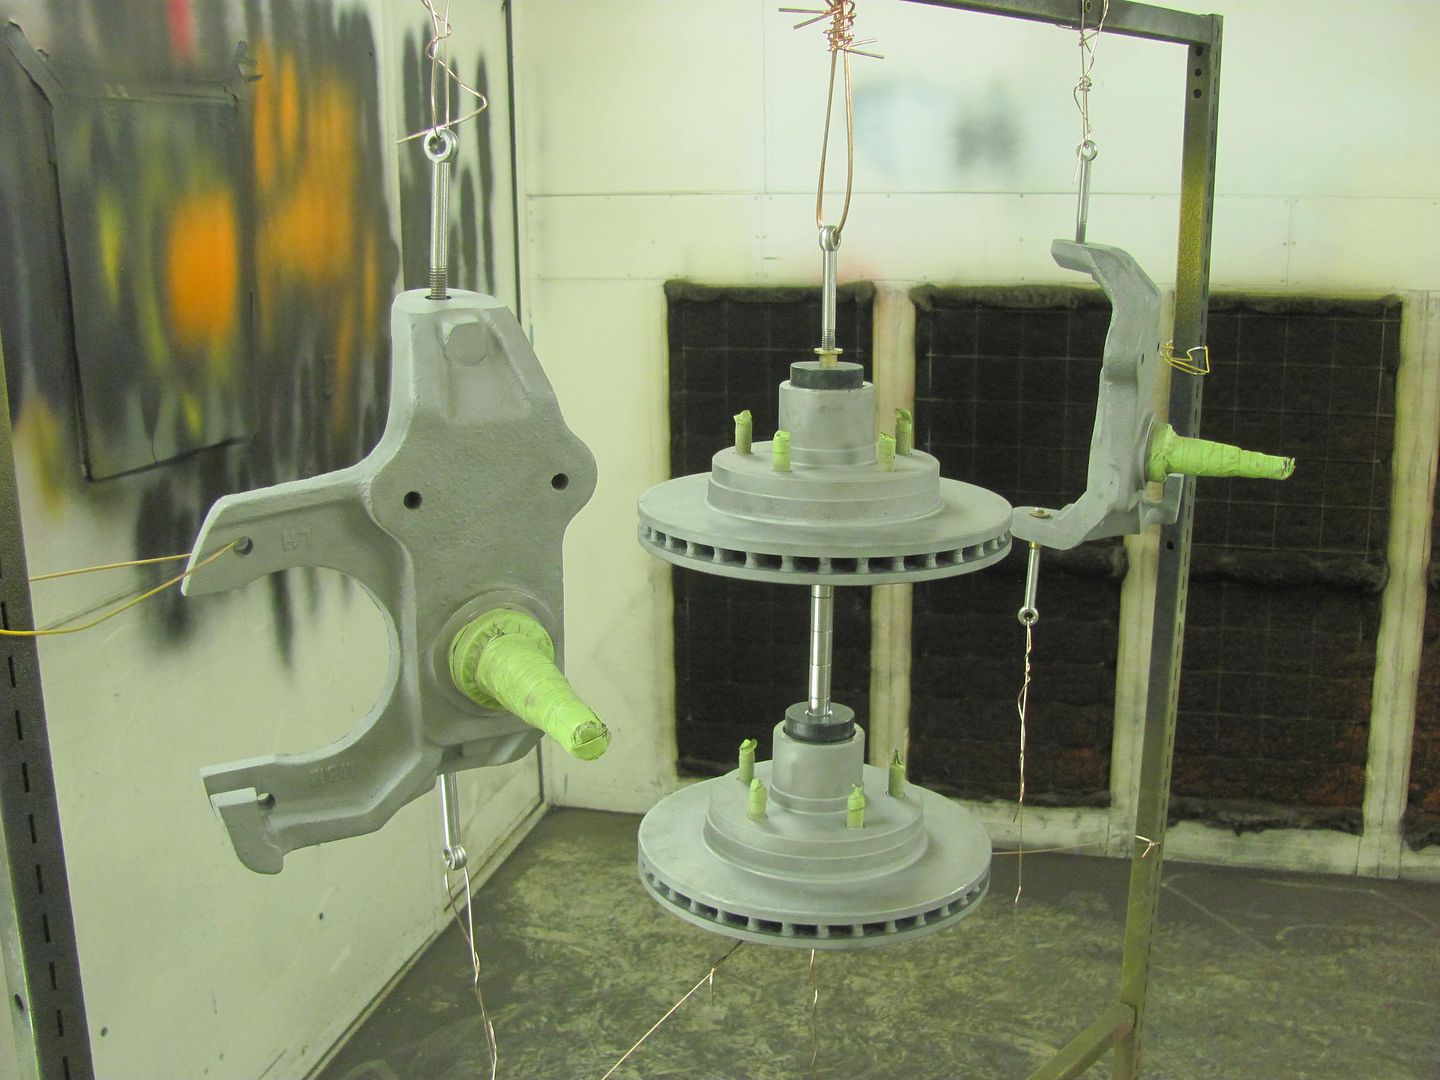
I find the bits you're using to hold the rotors interesting.. secure and keeps the paint from the interior. NICE!
-
12-30-2015 01:07 PM #697
CHR Member
- Join Date
- Apr 2011
- Location
- Prairie City
- Car Year, Make, Model: 40 Ford Deluxe, 68 Corvette, 72&76 K30
- Posts
- 7,301
- Blog Entries
- 1
Great work and nice fixtures to hold things!Ryan
1940 Ford Deluxe Tudor 354 Hemi 46RH Electric Blue w/multi-color flames, Ford 9" Residing in multiple pieces
1968 Corvette Coupe 5.9 Cummins Drag Car 11.43@130mph No stall leaving the line with 1250 rpm's and poor 2.2 60'
1972 Chevy K30 Longhorn P-pumped 24v Compound Turbos 47RH Just another money pit
1971 Camaro RS 5.3 BTR Stage 3 cam, SuperT10
Tire Sizes
-
01-01-2016 11:18 AM #698
CHR Member
- Join Date
- May 2005
- Location
- Tataraimaka NZ
- Car Year, Make, Model: `47 Ford sedan, A.C.Cobra replica.
- Posts
- 2,895
Wash your mouth with super-glue! Originally Posted by 34_40
The rims on our '47 are red...and I like them like that!

johnboy
Mountain man. (Retired.)
Some mistakes are too much fun to be made only once.
I don't know everything about anything, and I don't know anything about lots of things.
'47 Ford sedan. 350 -- 350, Jaguar irs + ifs.
'49 Morris Minor. Datsun 1500cc, 5sp manual, Marina front axle, Nissan rear axle.
'51 Ford school bus. Chev 400 ci Vortec 5 sp manual + Gearvendors 2sp, 2000 Chev lwb dually chassis and axles.
'64 A.C. Cobra replica. Ford 429, C6 auto, Torana ifs, Jaguar irs.
-
01-01-2016 05:50 PM #699
CHR Member
- Join Date
- Jun 2008
- Location
- Leonardtown
- Car Year, Make, Model: Walking
- Posts
- 1,228
Uh-oh... here we go....
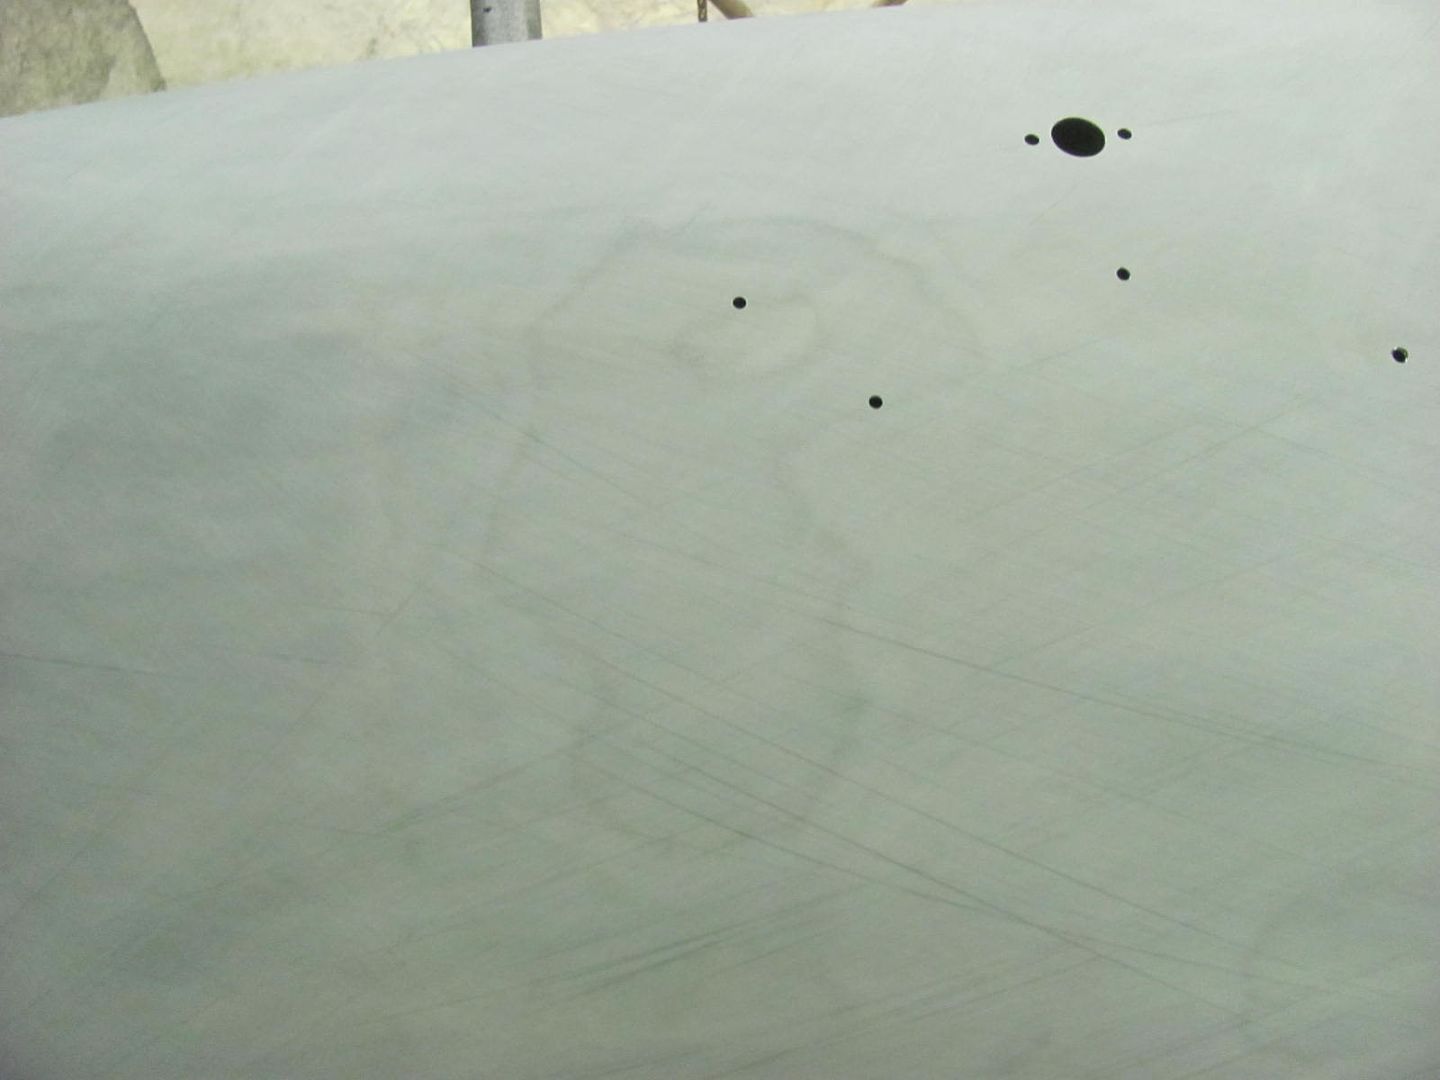
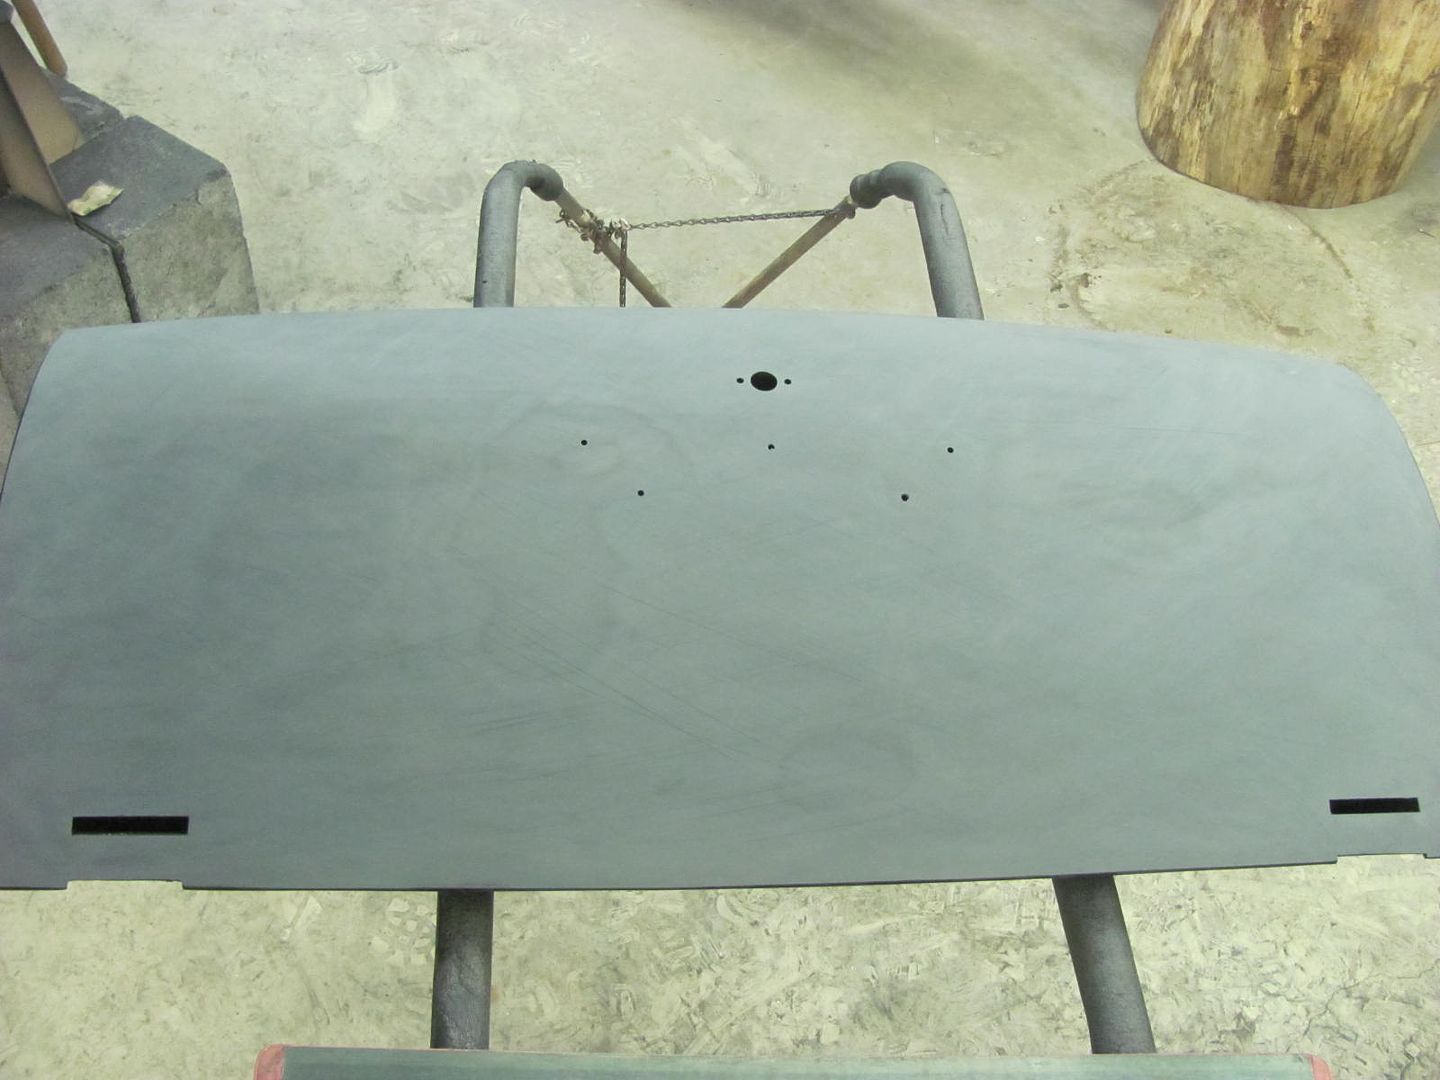
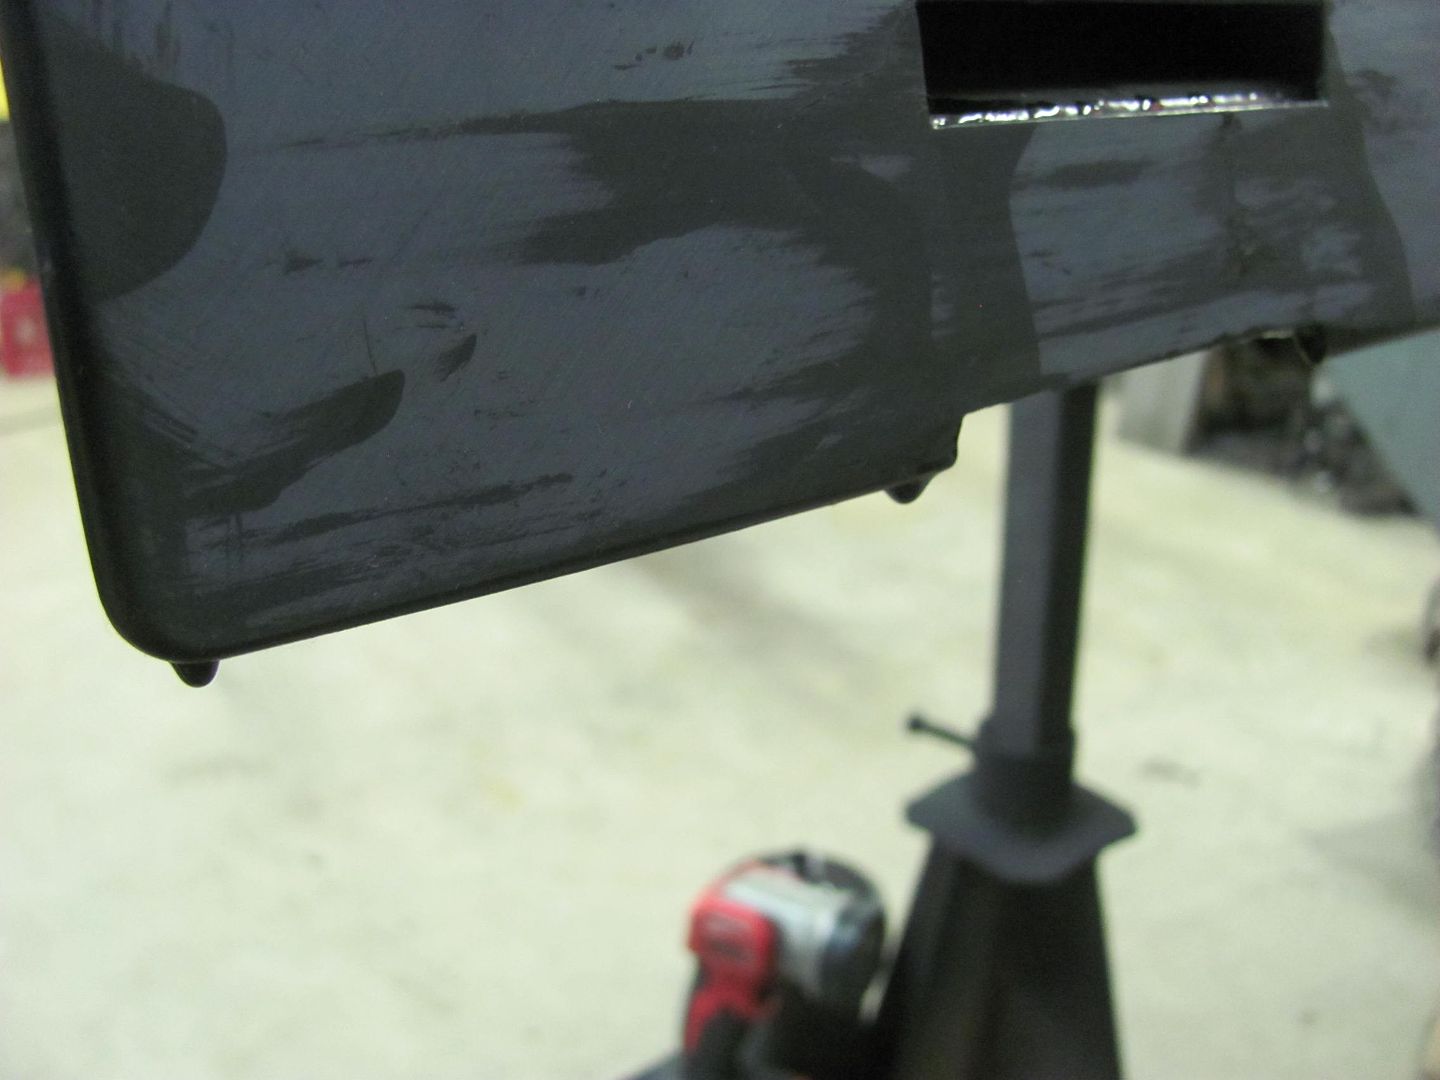
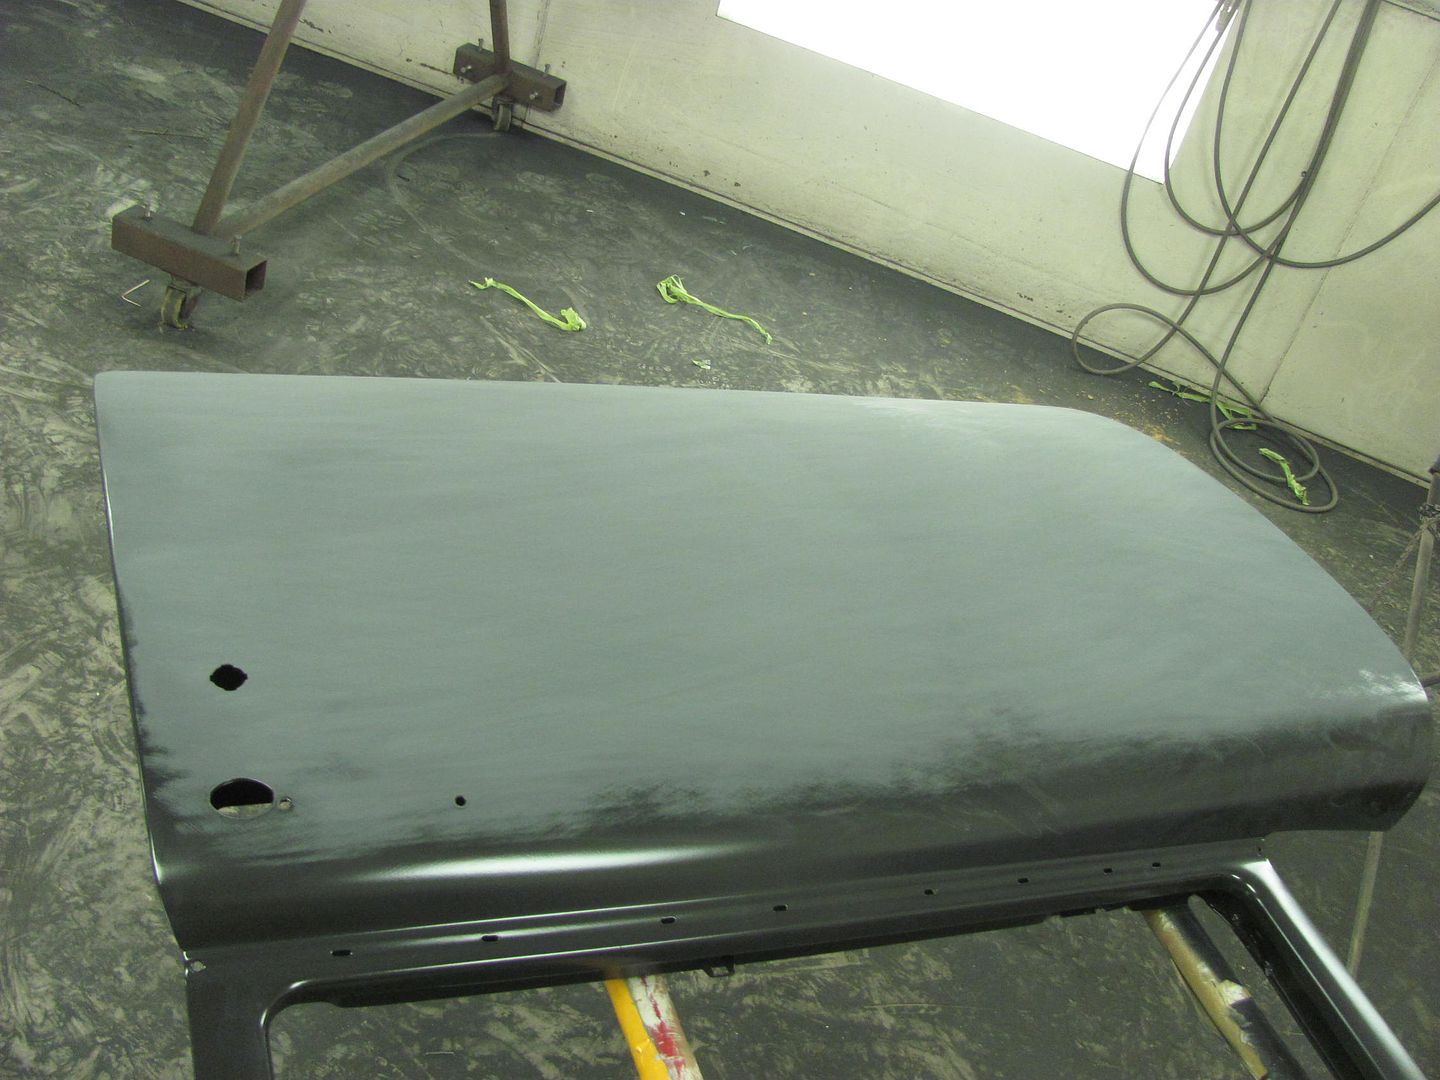
Picked up some 400 grit PSA paper yesterday, used it this evening to get the tail gate finished to 400 grit, next week we'll wet sand to 600 grit.
Nephew Chris came over and helped Kyle and I get the frame off the rotisserie and back on the floor..
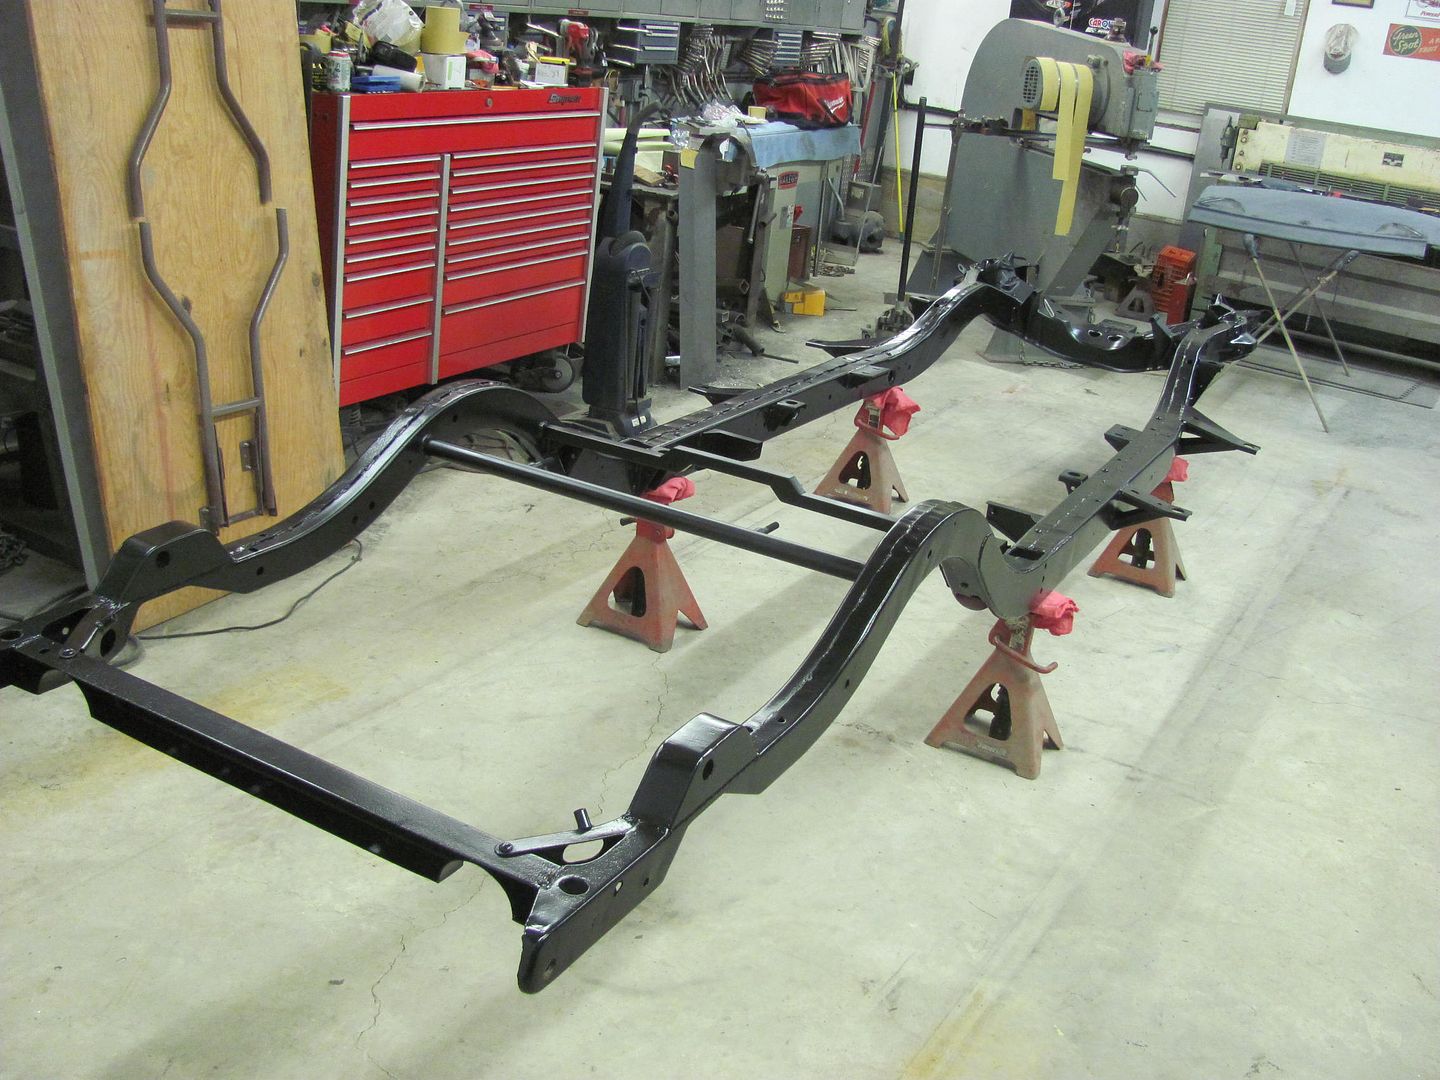
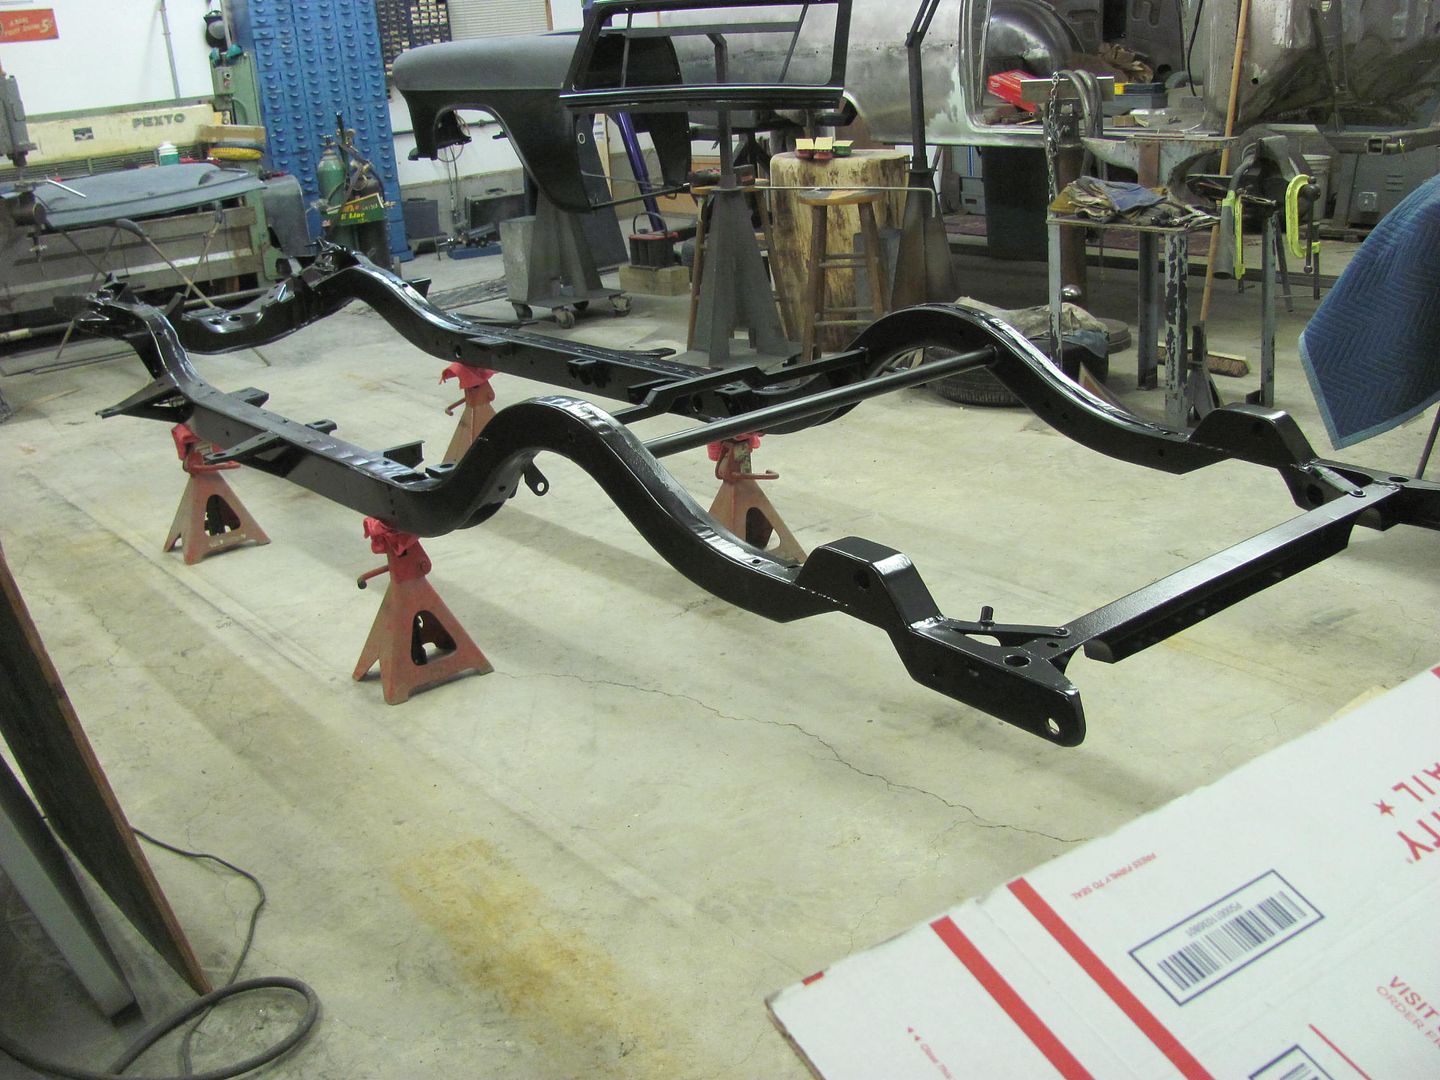
With the rotisserie freed up, we now have a new paint fixture...
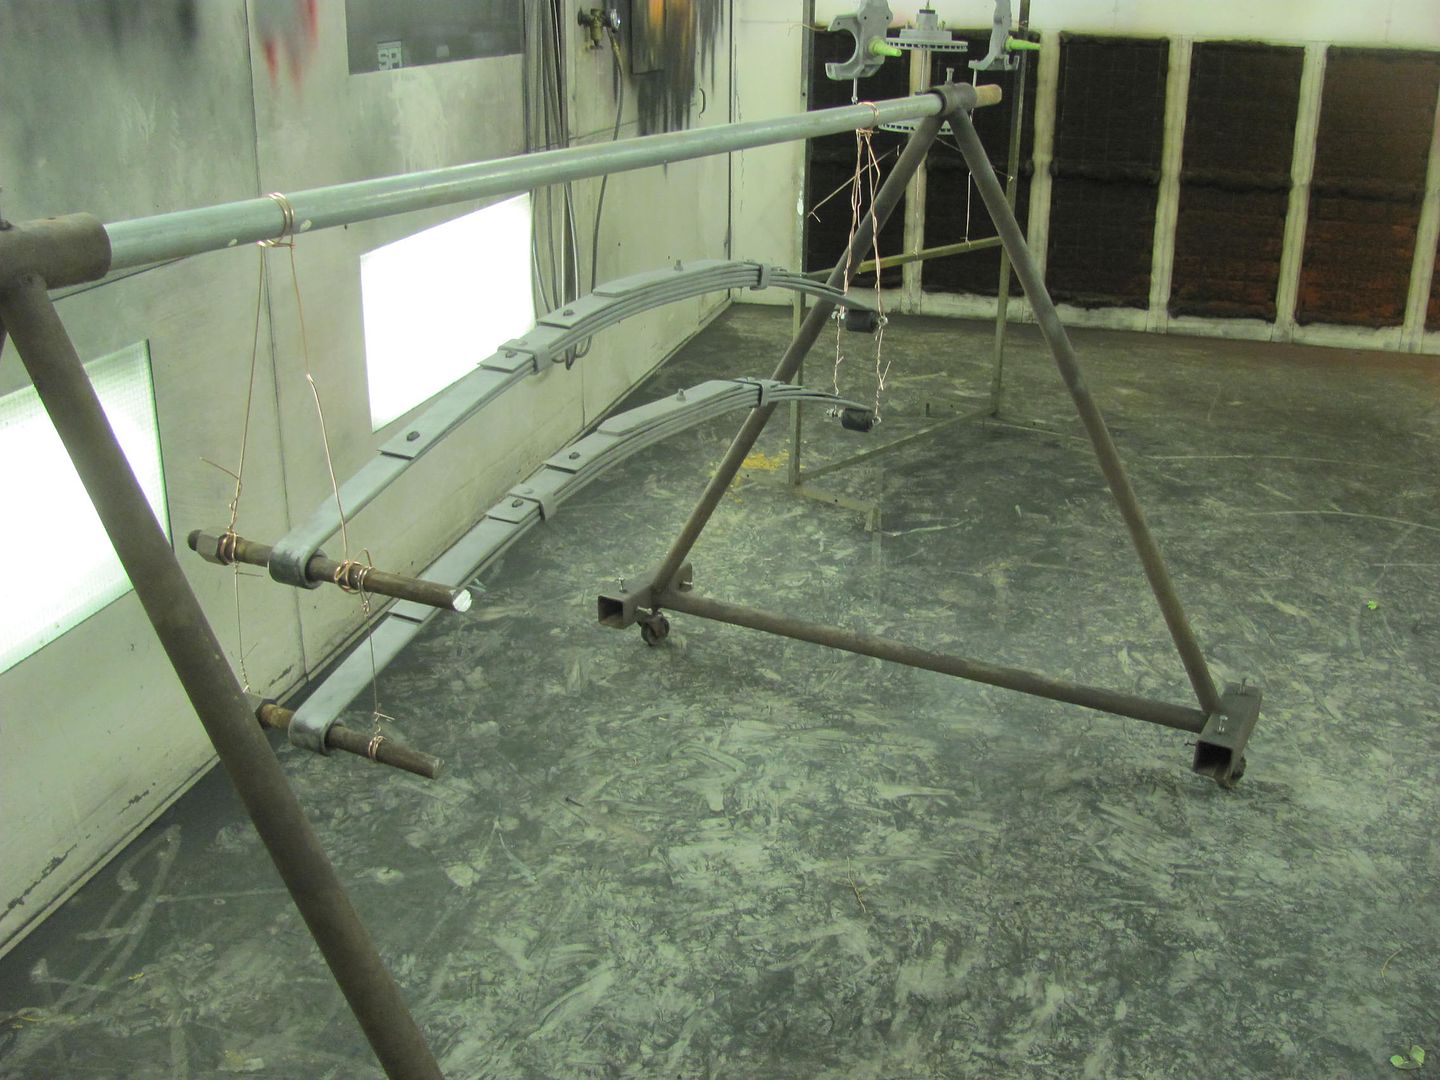
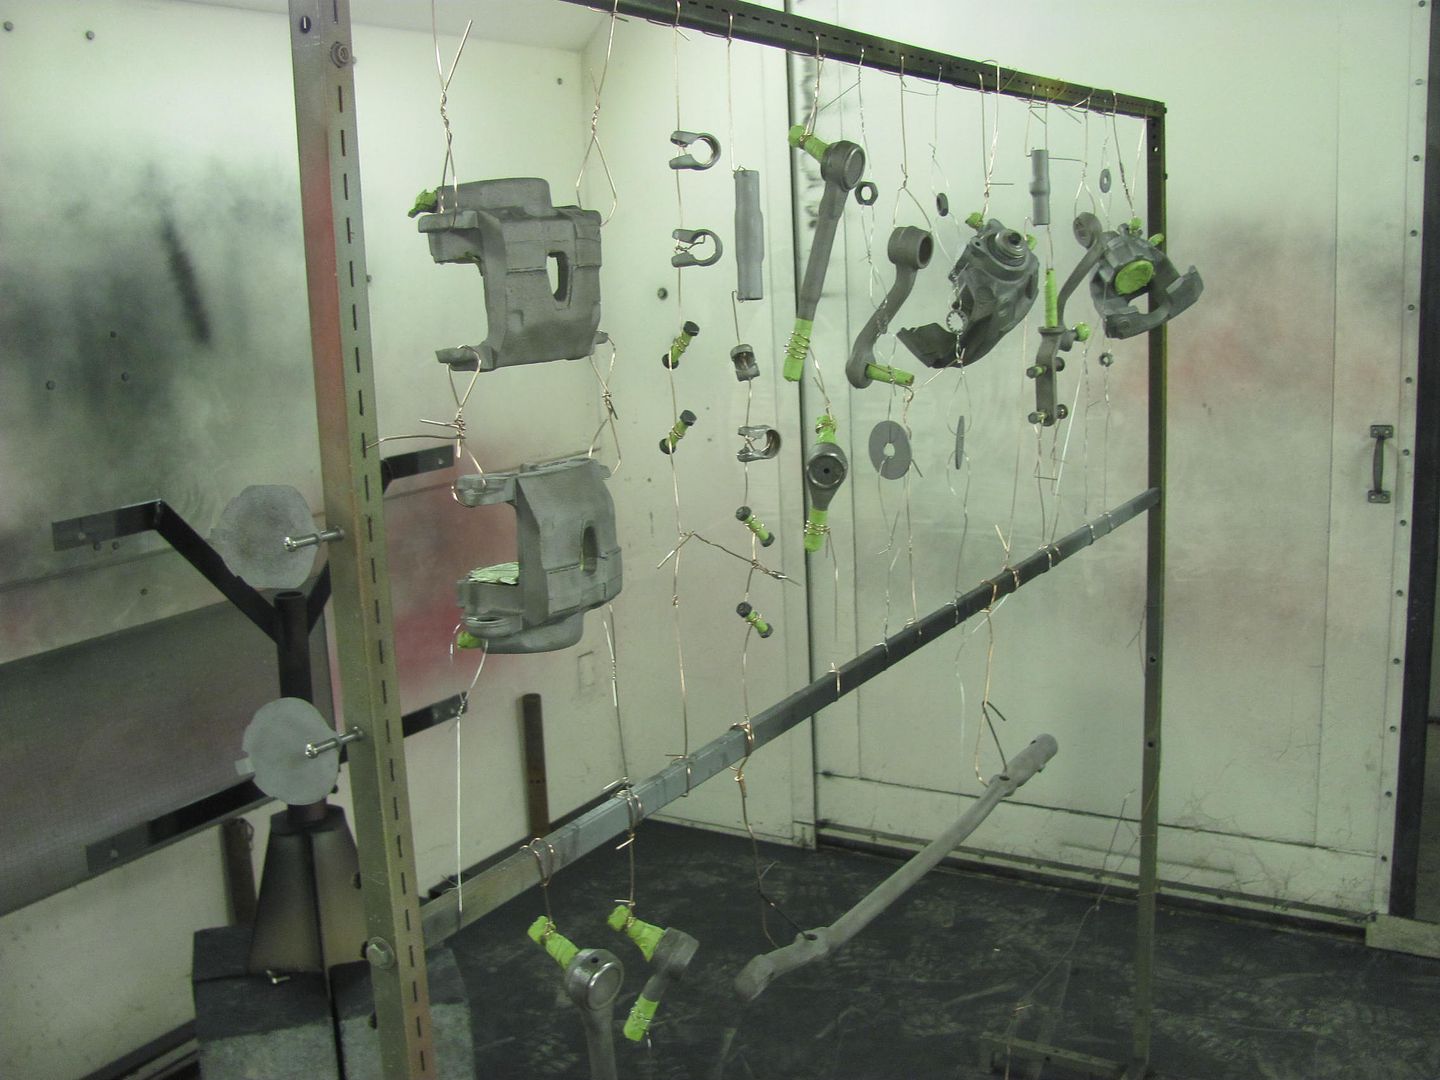
Parts prepped for epoxy primer tomorrow...
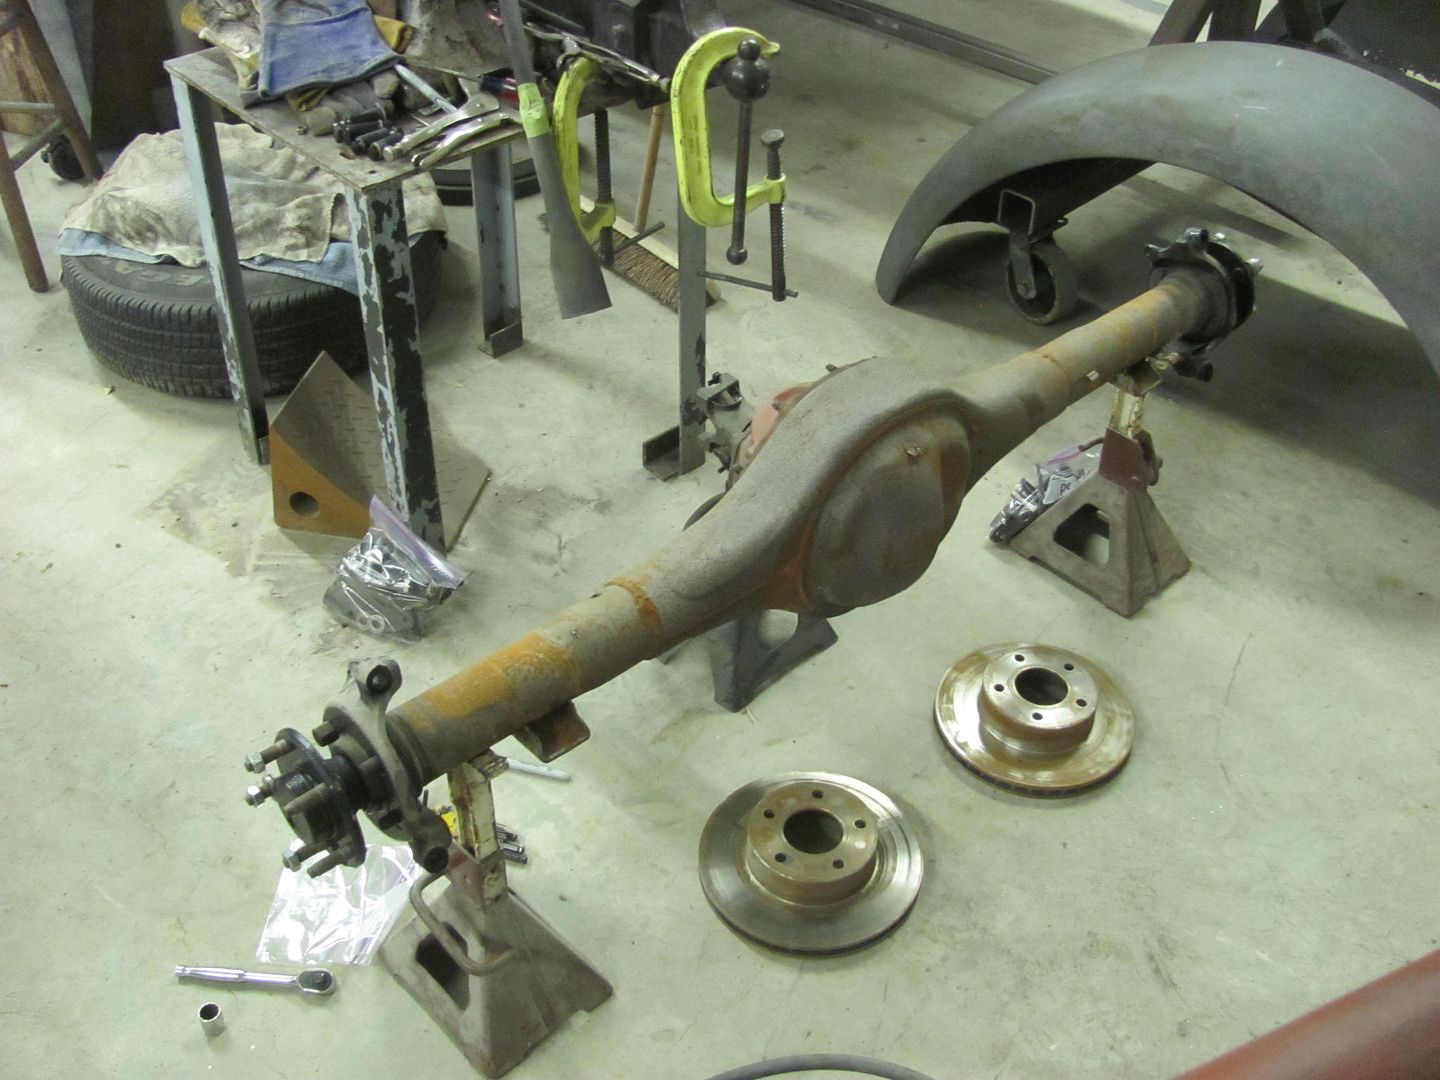
While I was getting these parts taped off, Kyle started blowing apart the rear end for media blasting..
Robert
-
01-02-2016 08:21 PM #700
CHR Member
- Join Date
- Jun 2008
- Location
- Leonardtown
- Car Year, Make, Model: Walking
- Posts
- 1,228
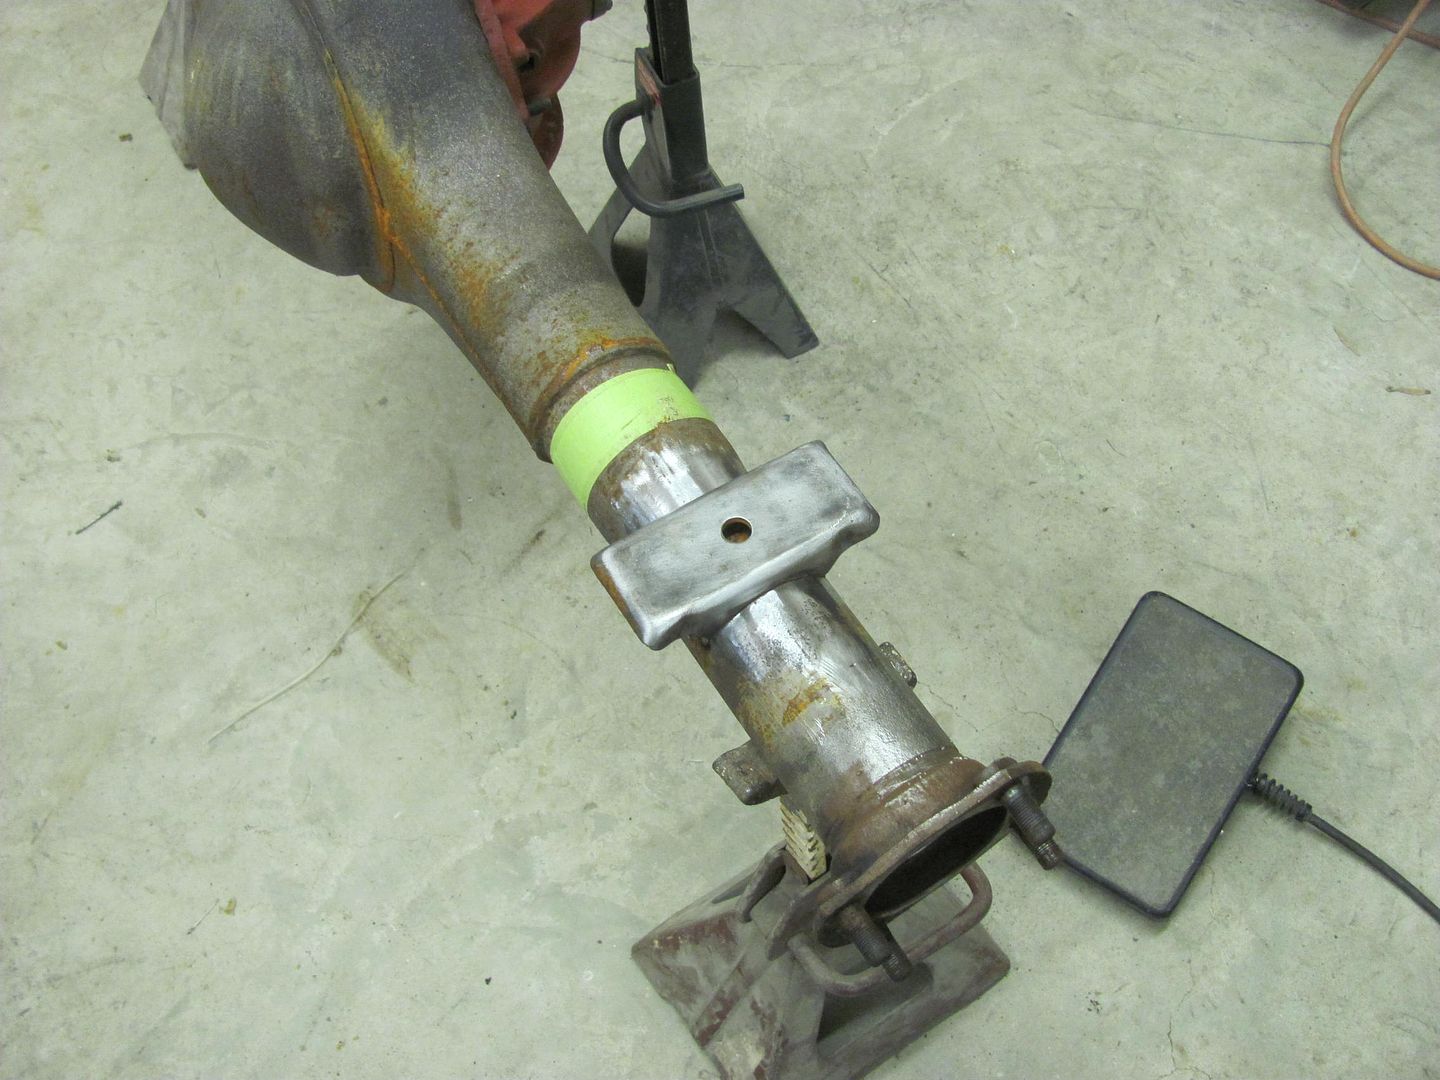
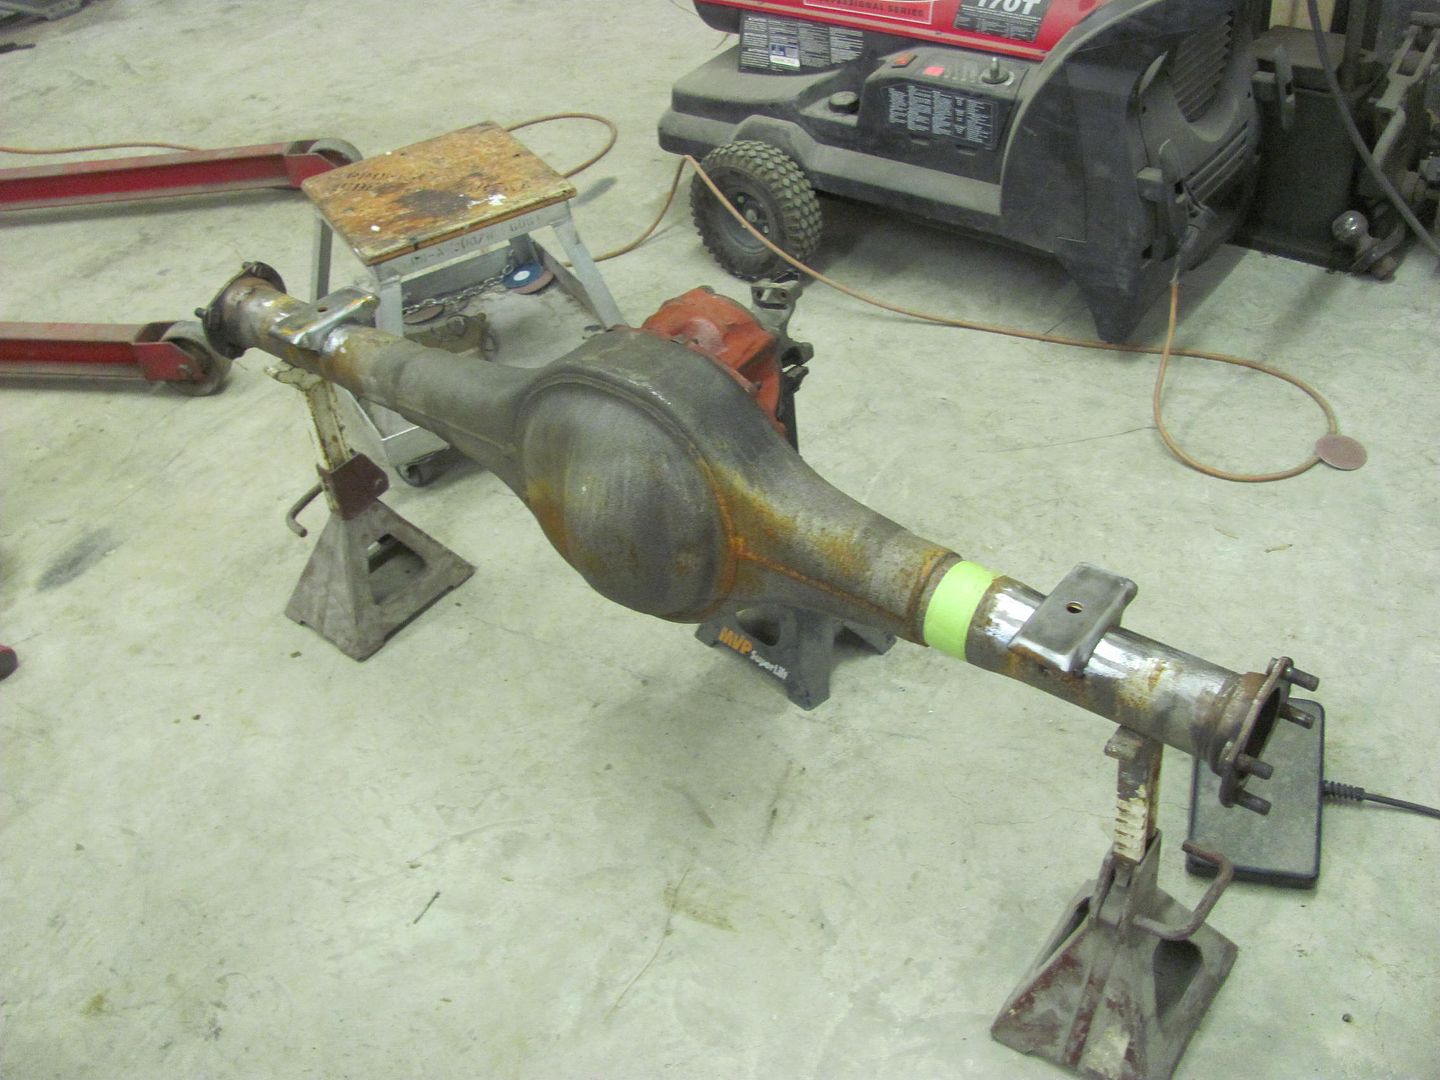
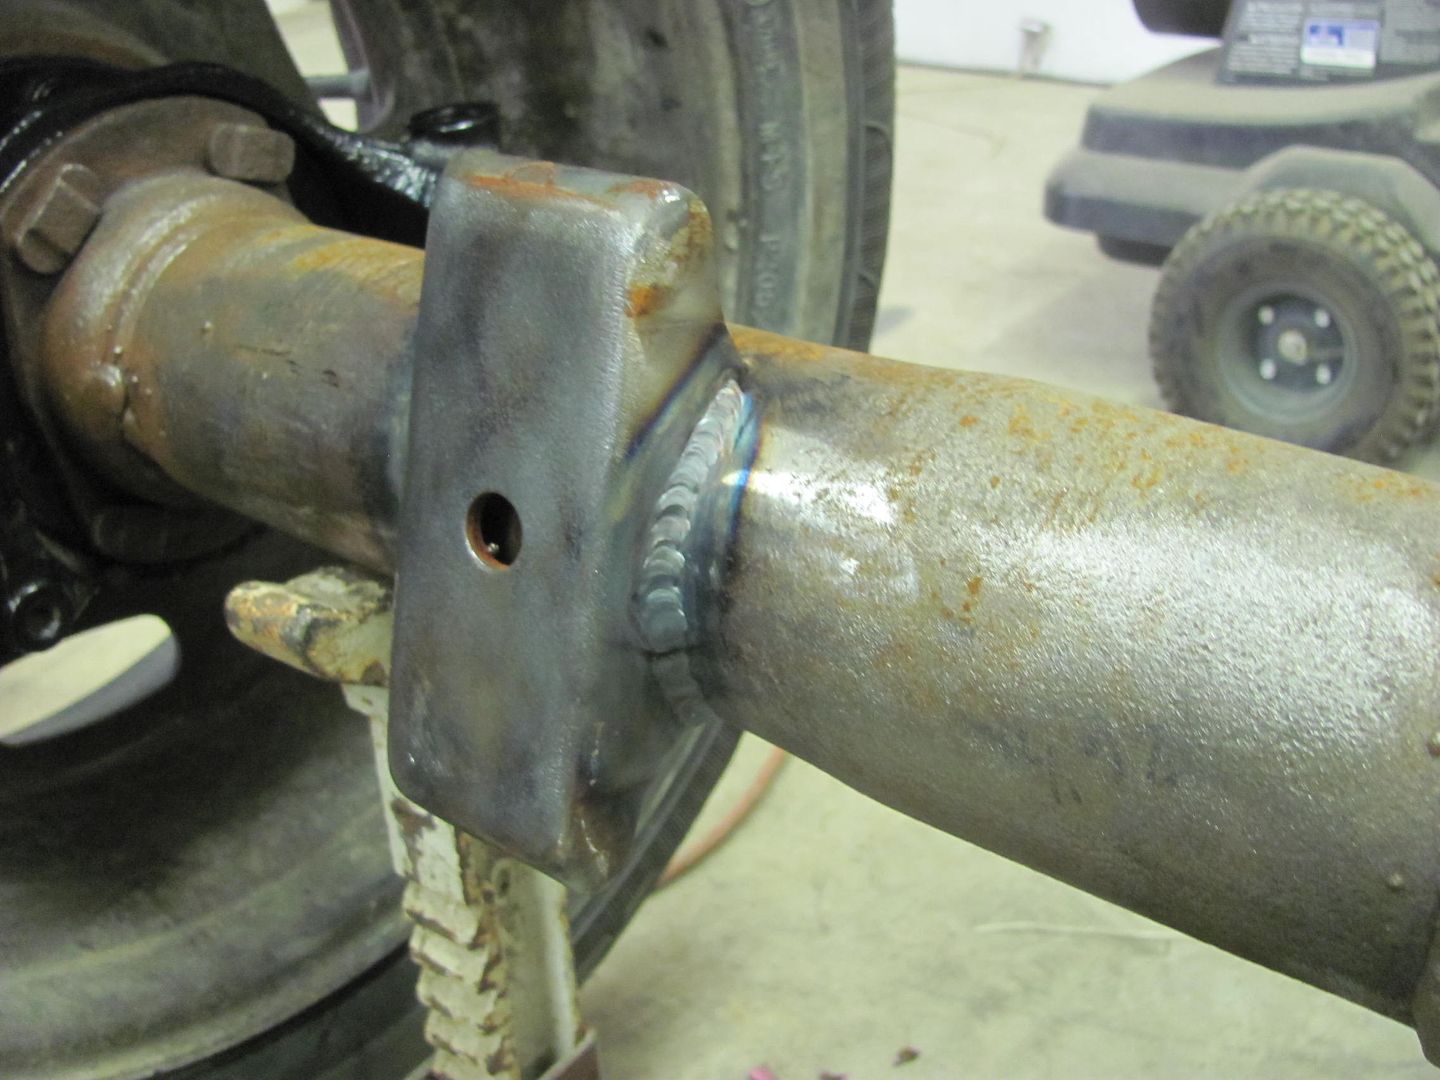
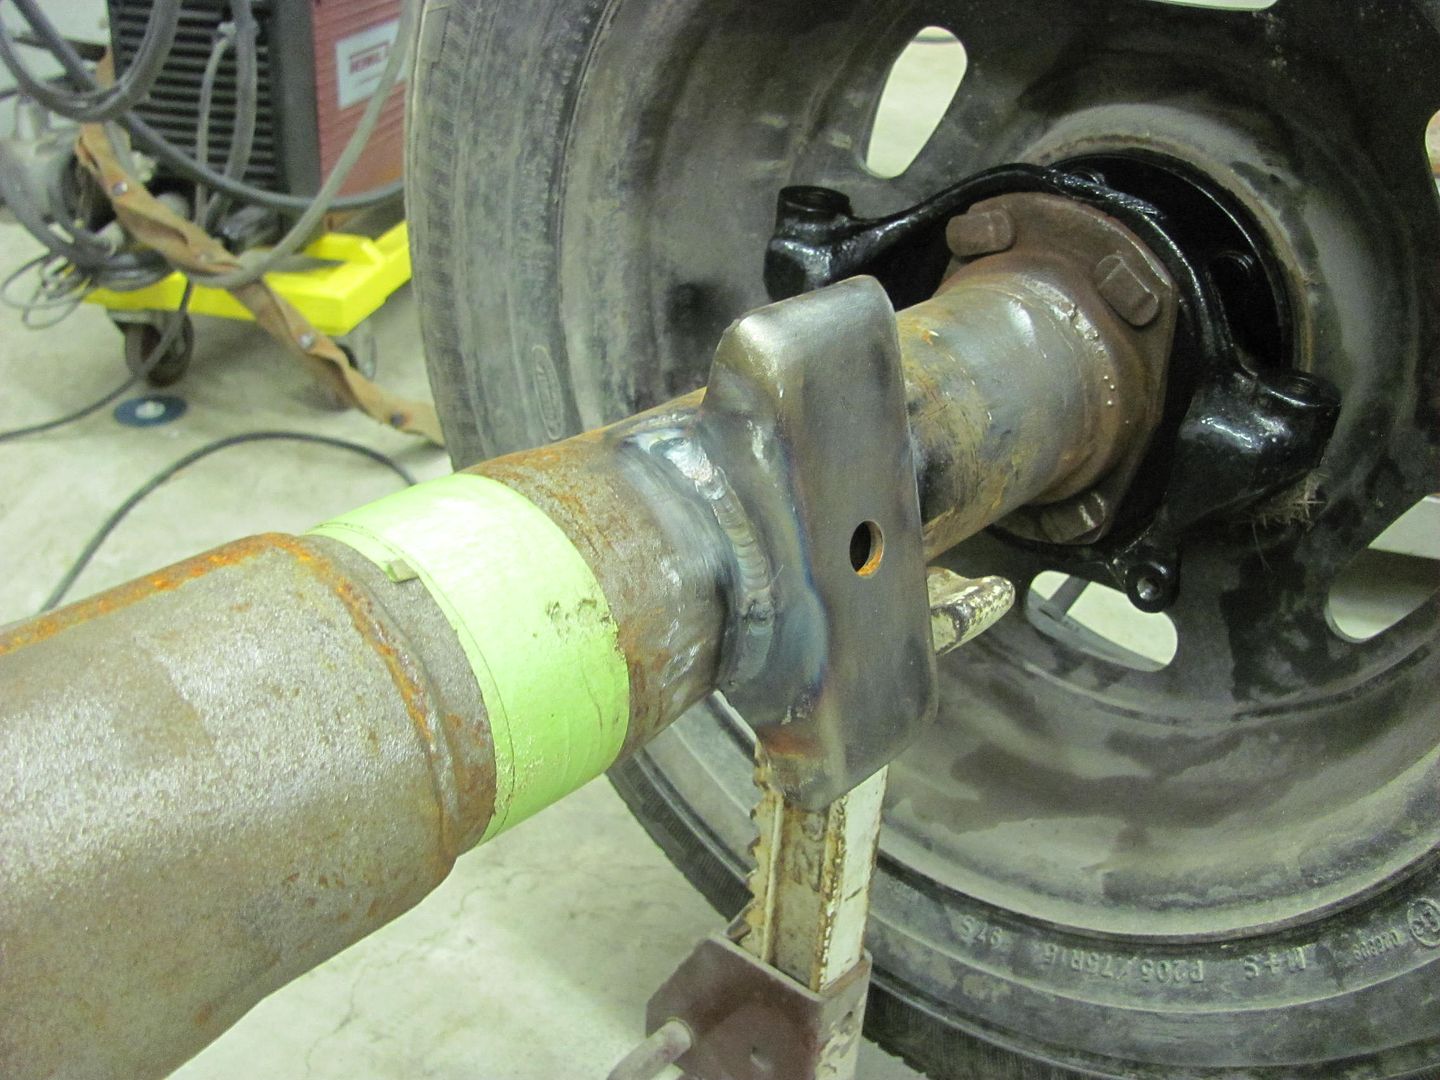
Today Kyle worked on getting the axle pads welded on....
.....while I was spraying some SPI epoxy....
.....and while I had some epoxy mixed, we poured some inside the tailgate to seal the inner and outer skins ..

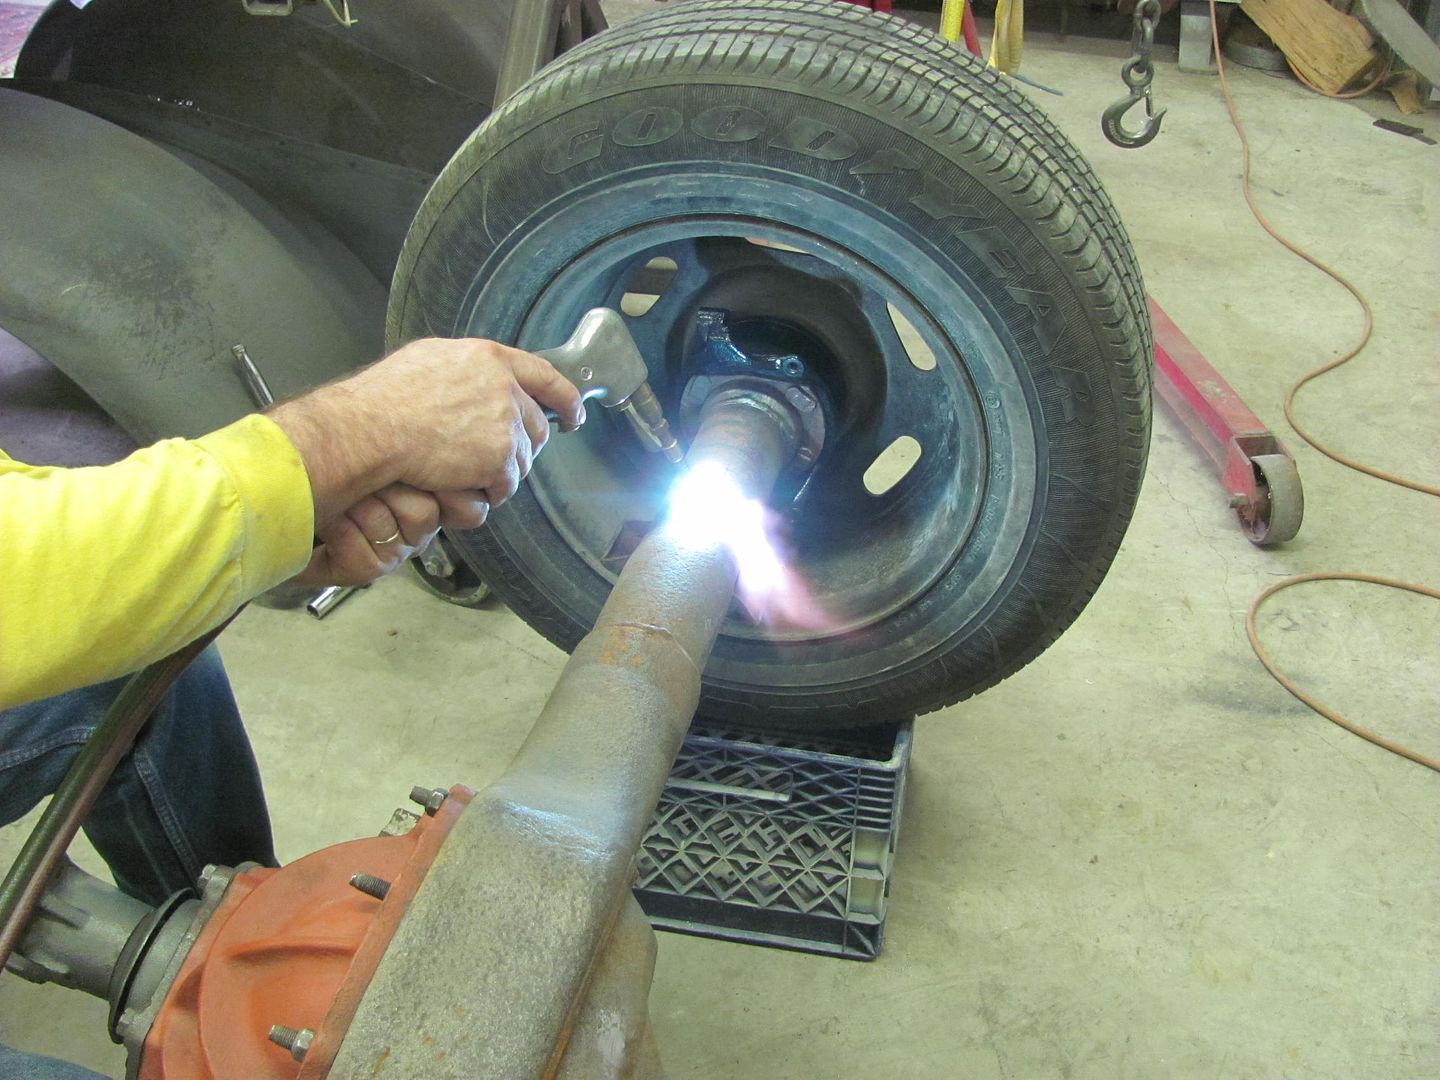
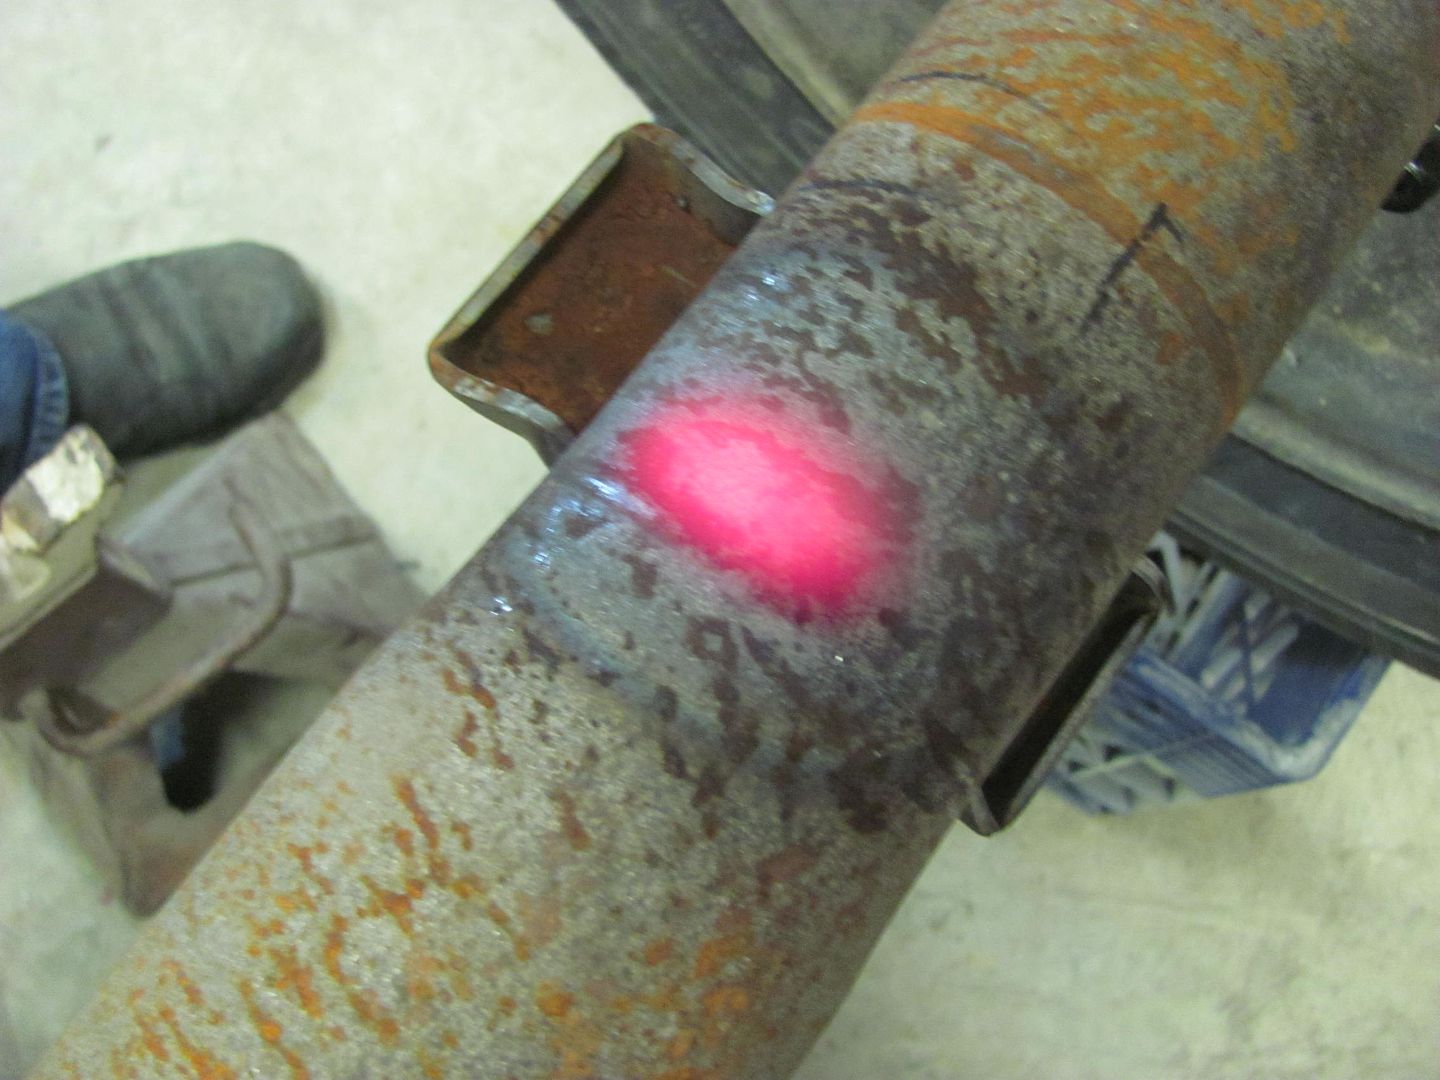
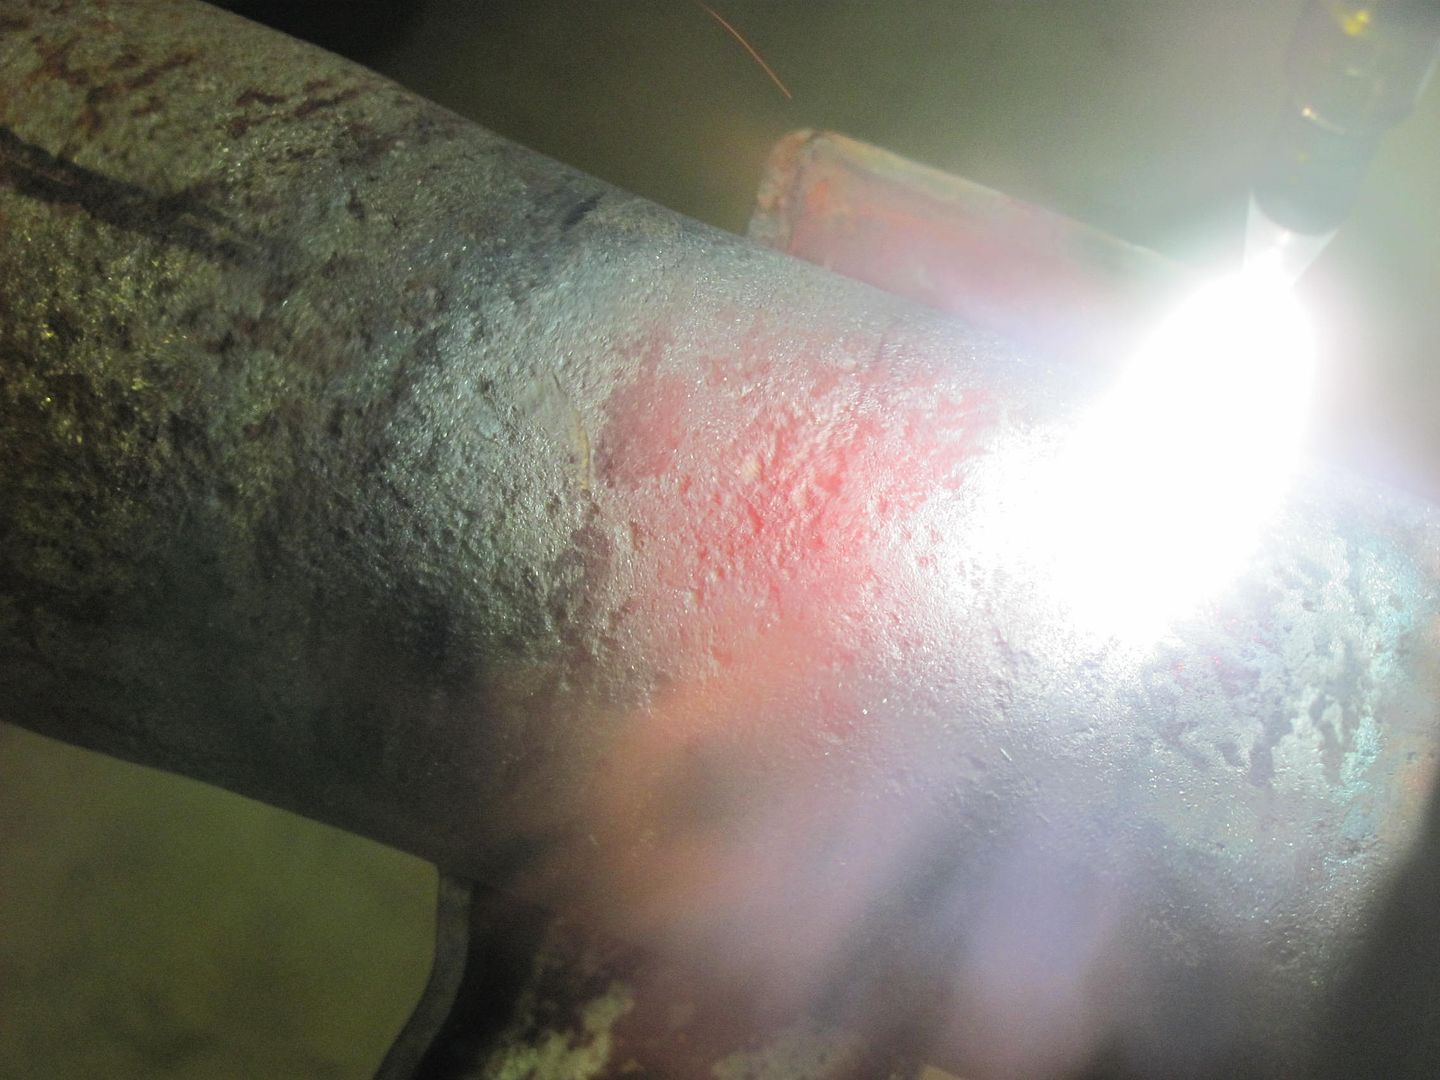
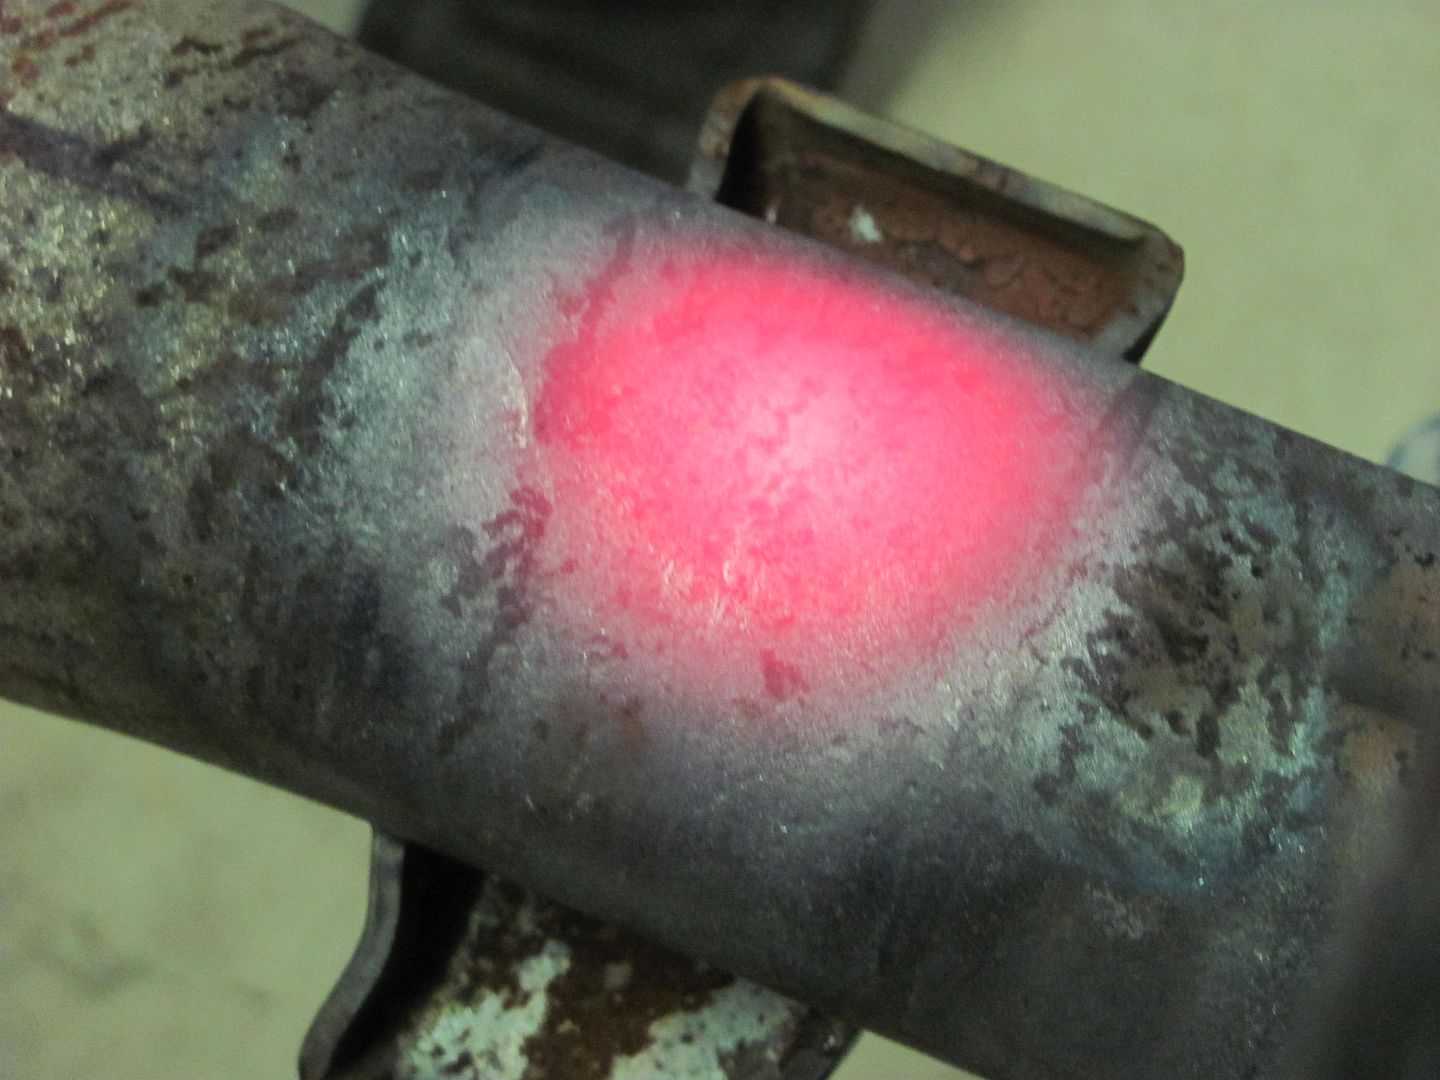
Axle pads done, then heated the opposite side to counter the weld shrinking...
It's real close, just a little more straightening to do...
other parts from the booth today....
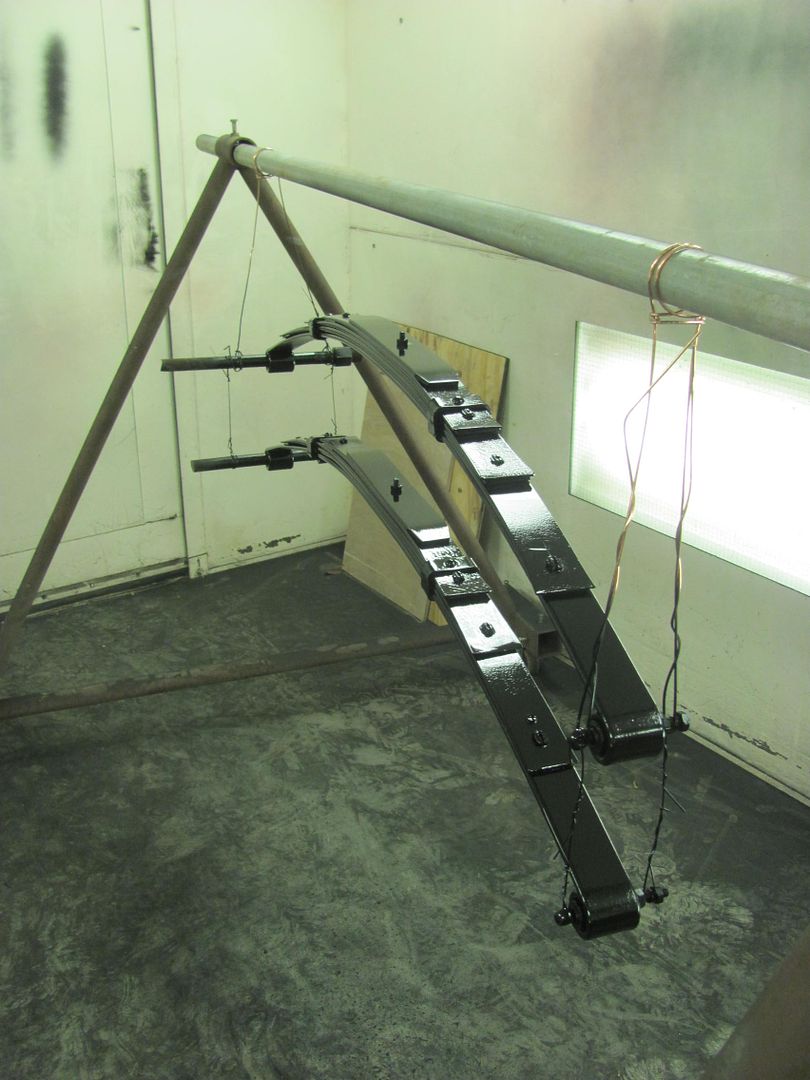
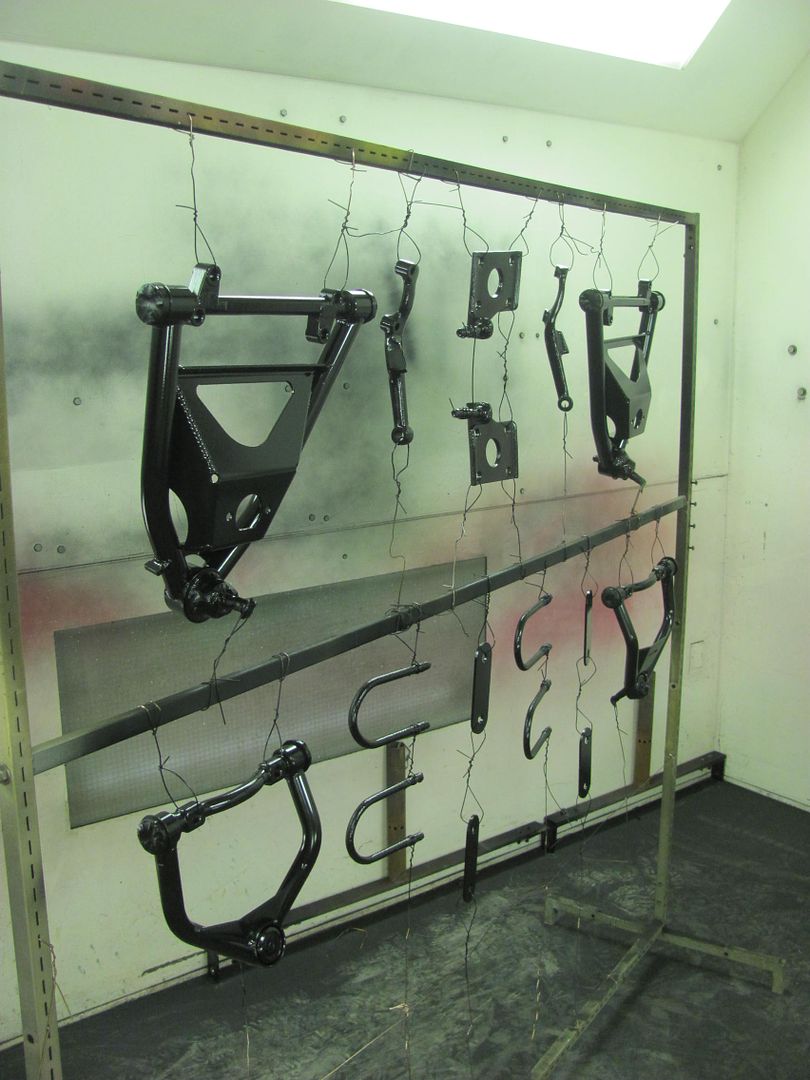
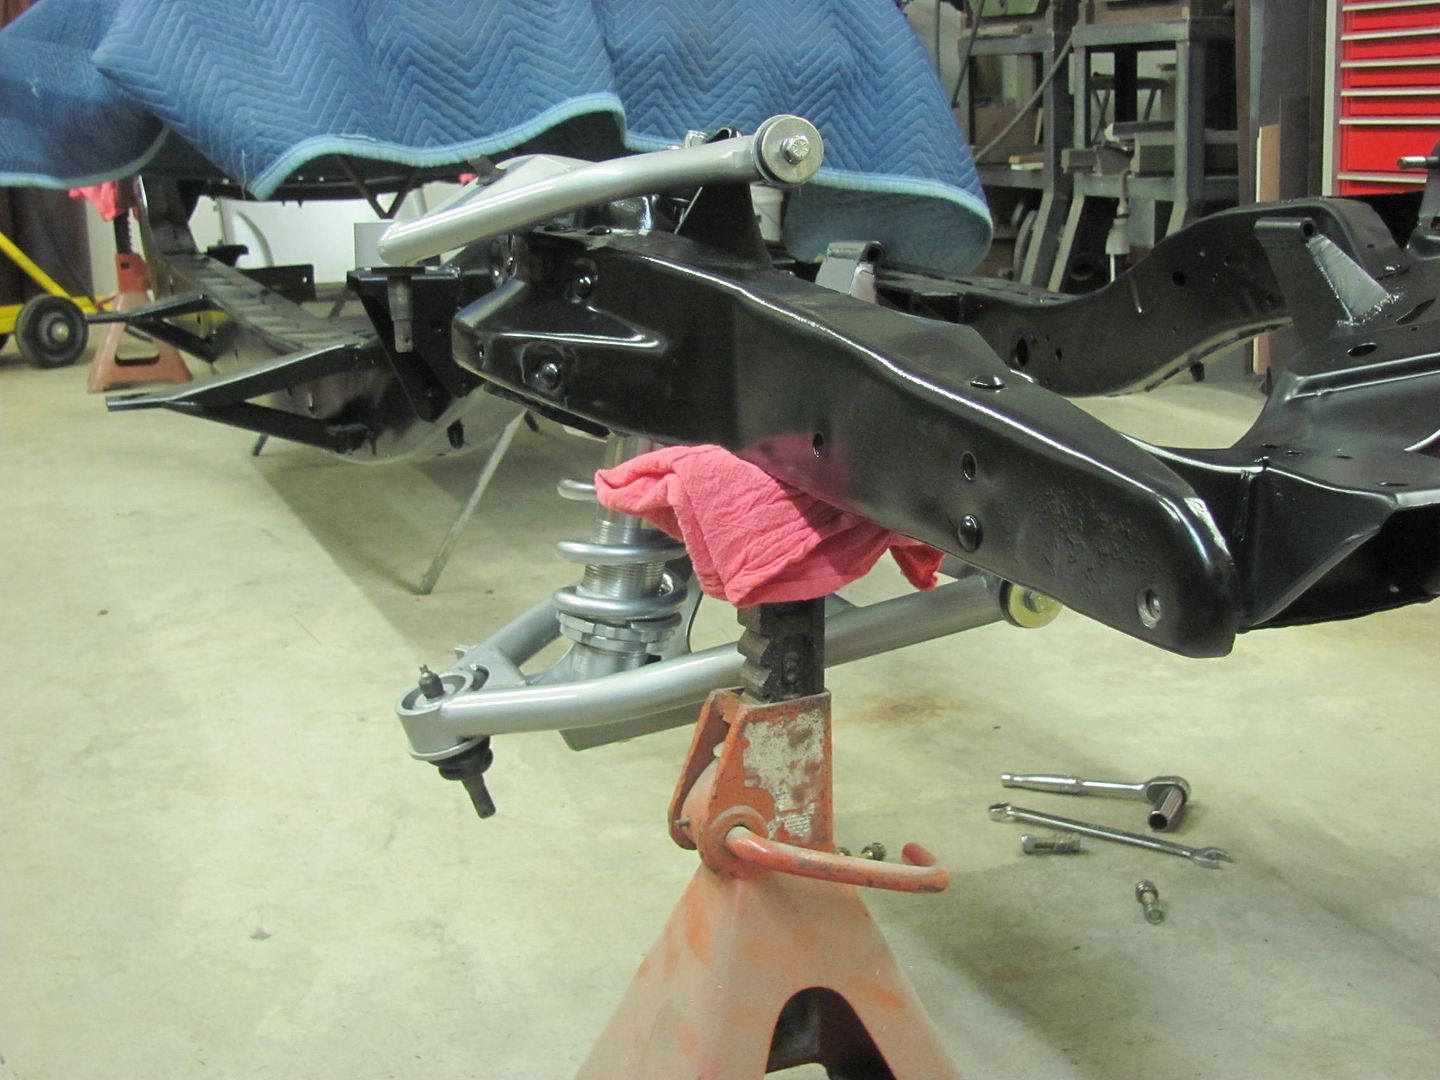
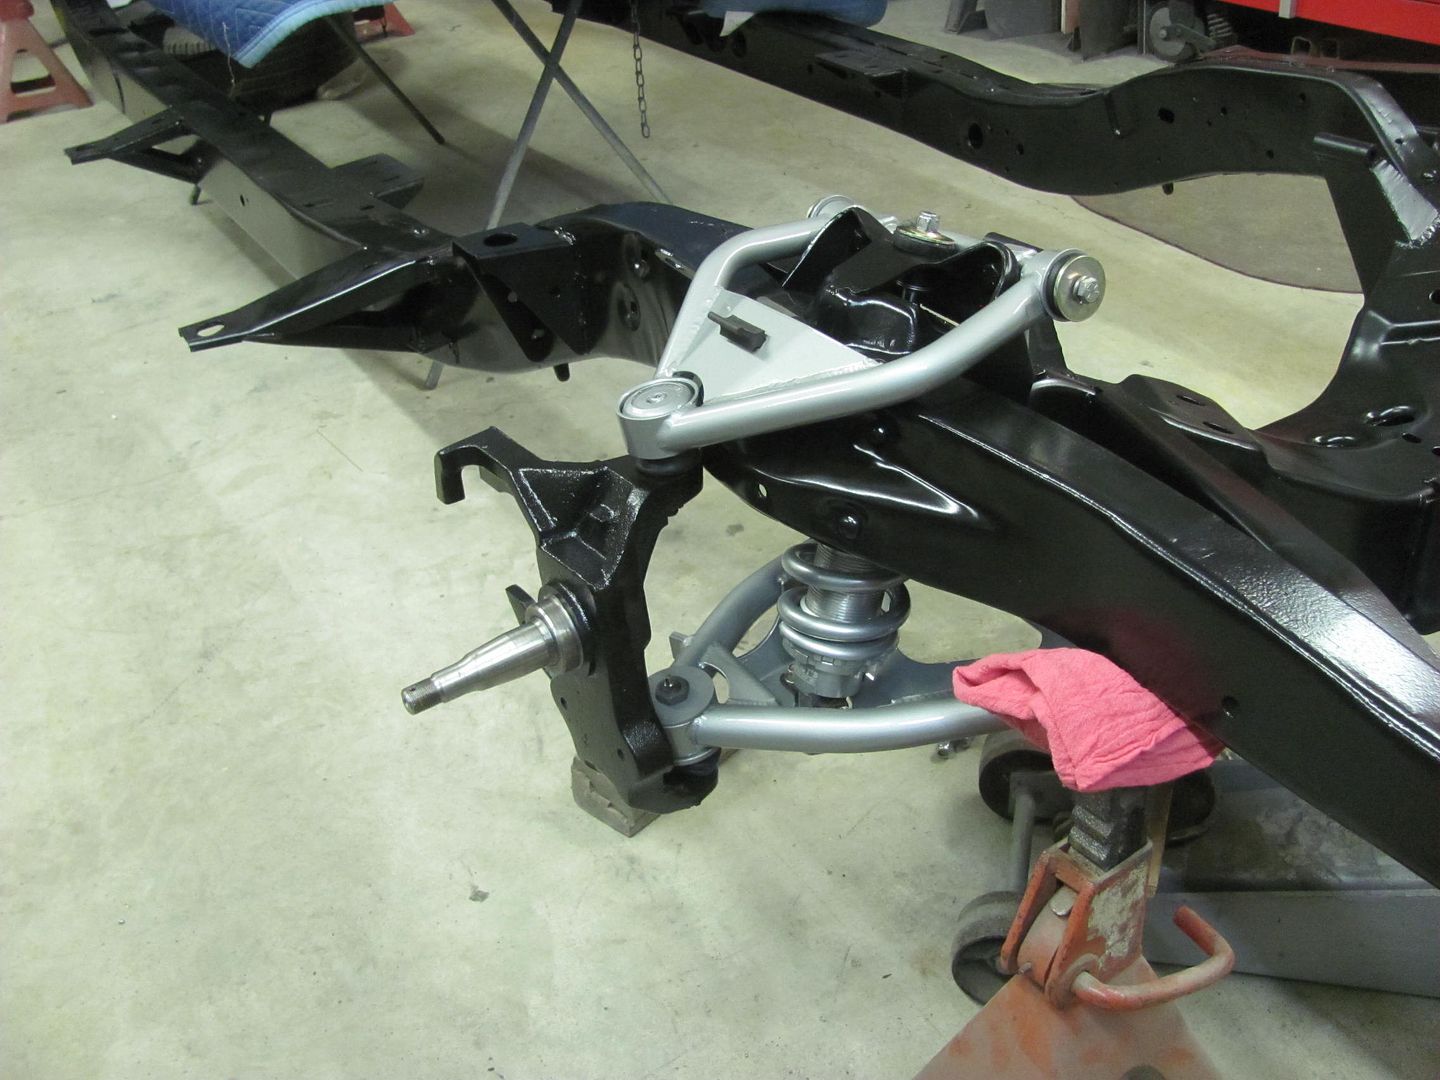
....and then sprayed some silver metallic Imron on the A-arms..
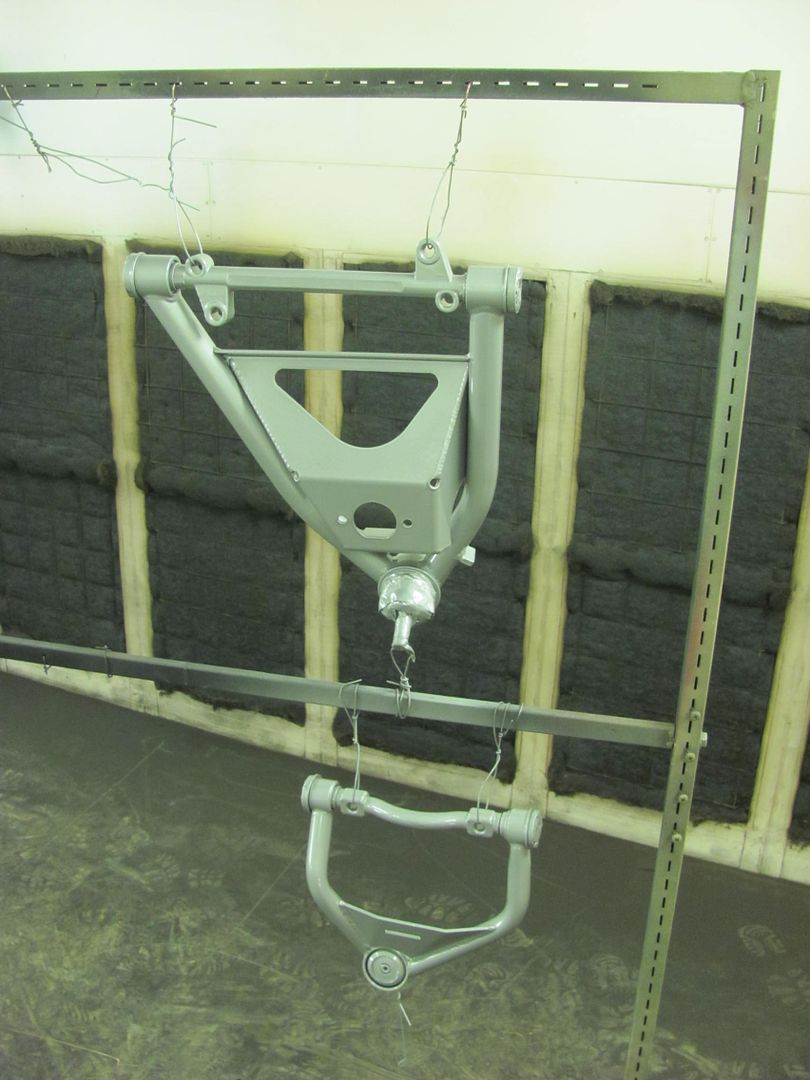
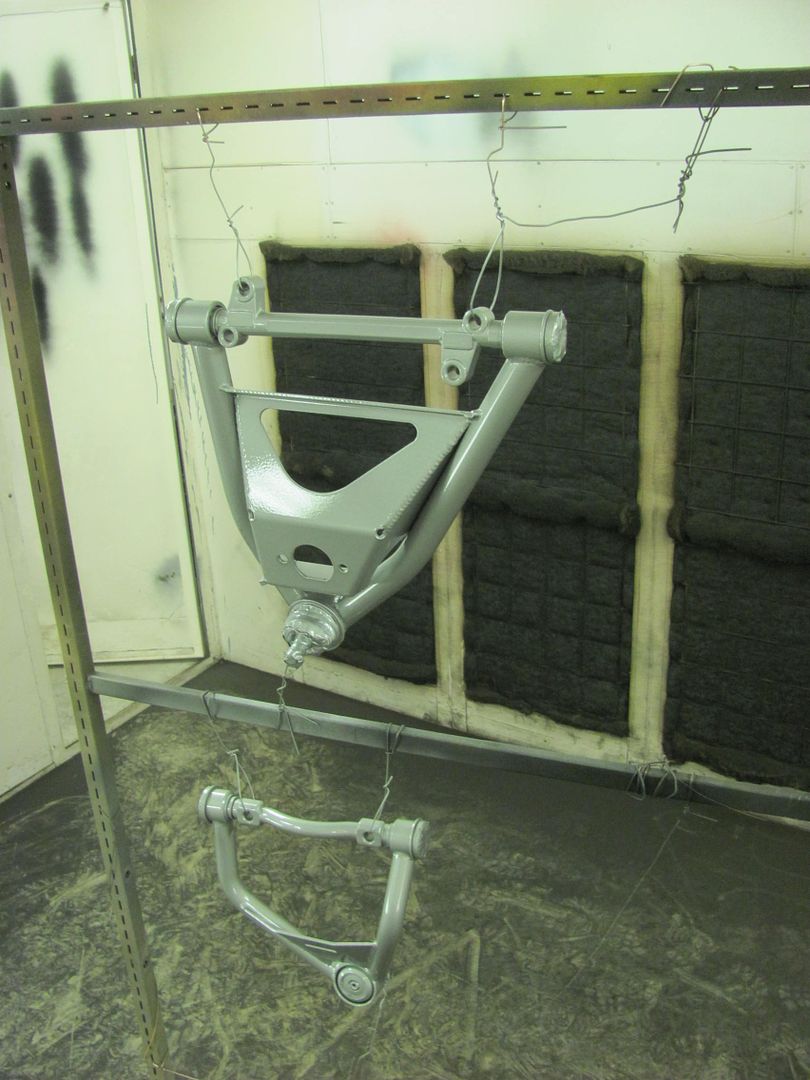
Robert
-
01-05-2016 08:32 PM #701
CHR Member
- Join Date
- Jun 2008
- Location
- Leonardtown
- Car Year, Make, Model: Walking
- Posts
- 1,228
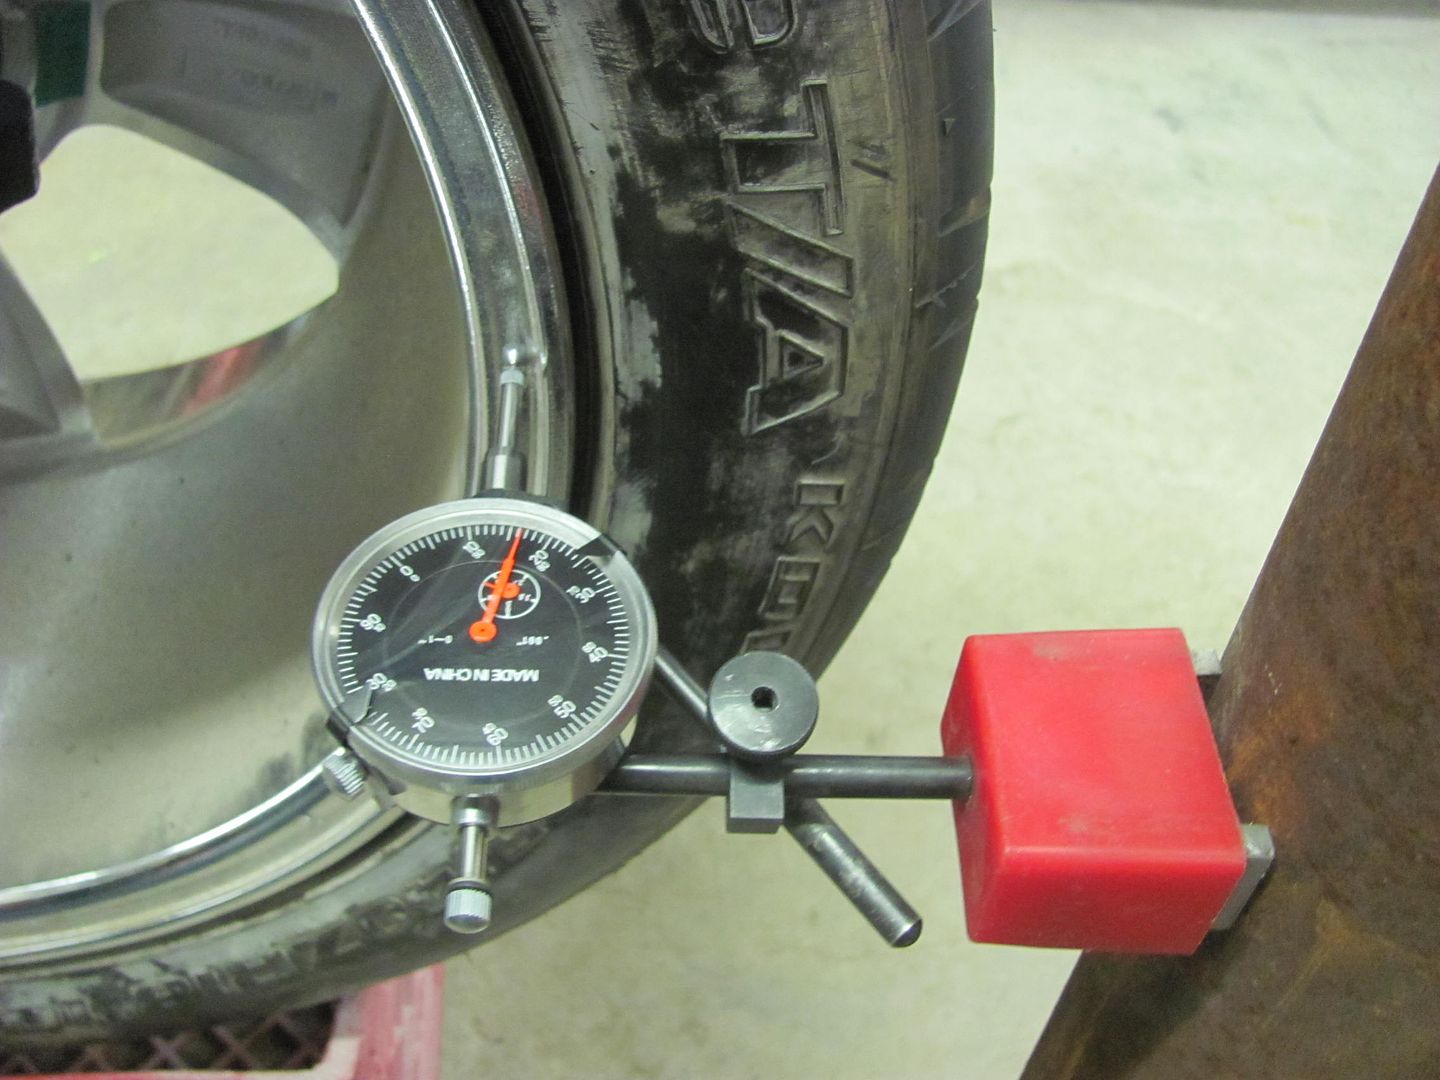
Well tonight we worked on getting the parts out of the booth so we can get the next load of parts ready for epoxy, and in between spent some more time on straightening the rear. In measuring at the bead of the 18" wheels, we had a +/- .020 on the passenger side and a +/- .035 on the drivers side.
....and more heat applied for some shrink..
We'll let that cool and get some of the front end parts bolted up..

Robert
-
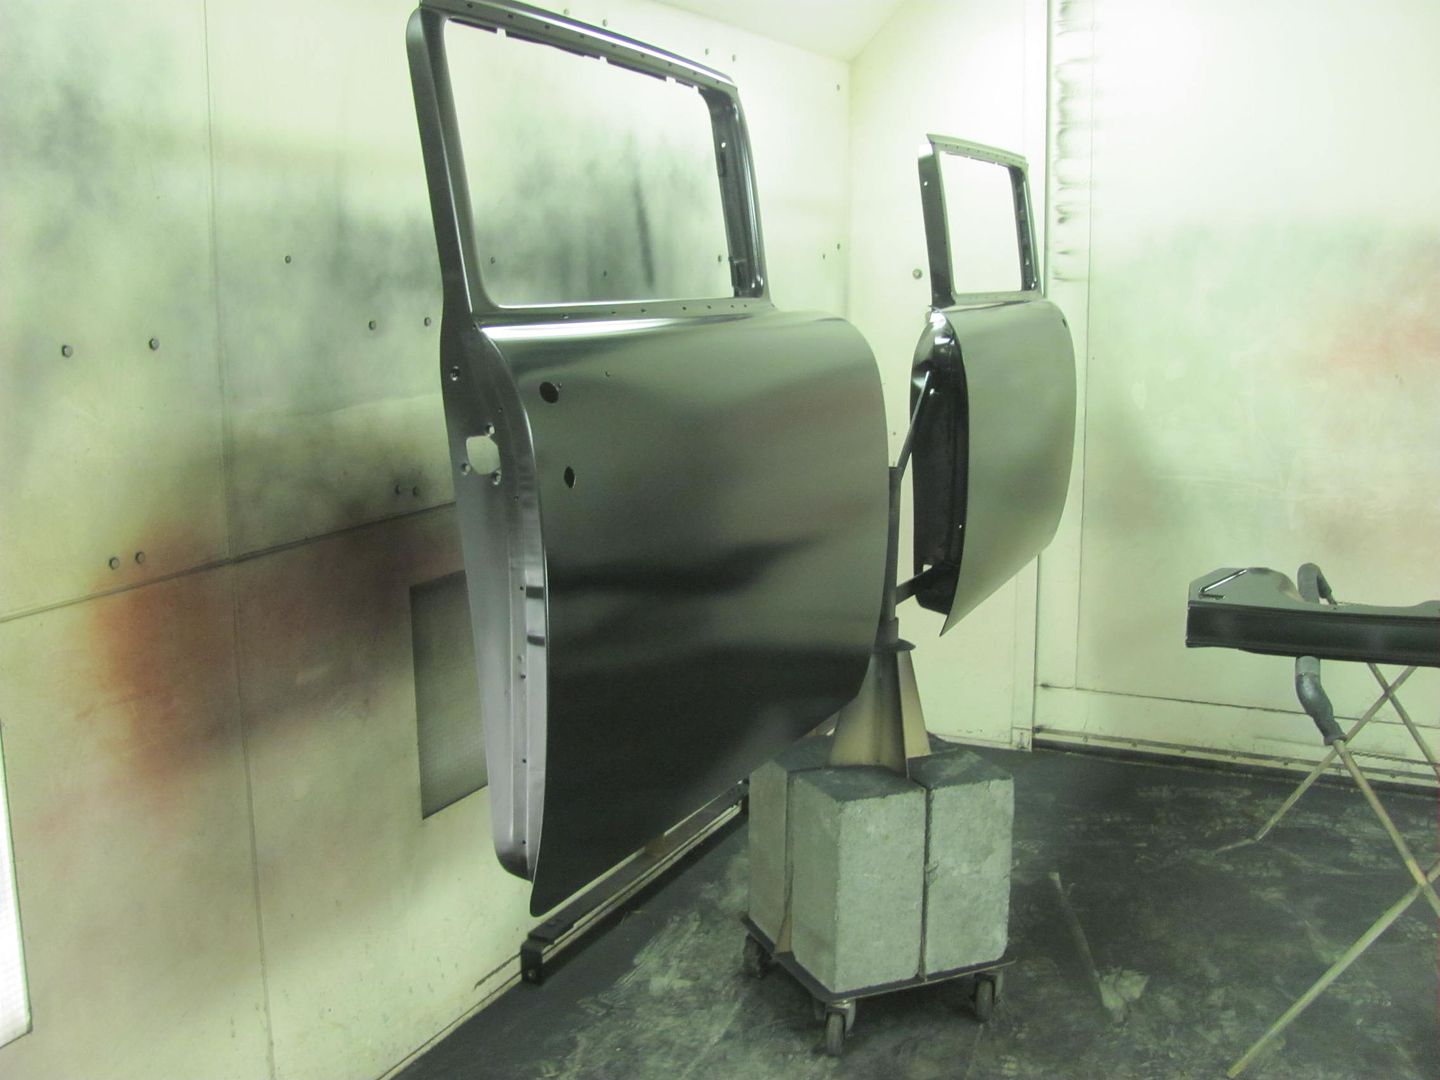
01-09-2016 09:58 PM #702
CHR Member
- Join Date
- Jun 2008
- Location
- Leonardtown
- Car Year, Make, Model: Walking
- Posts
- 1,228
Getting the front end put together...
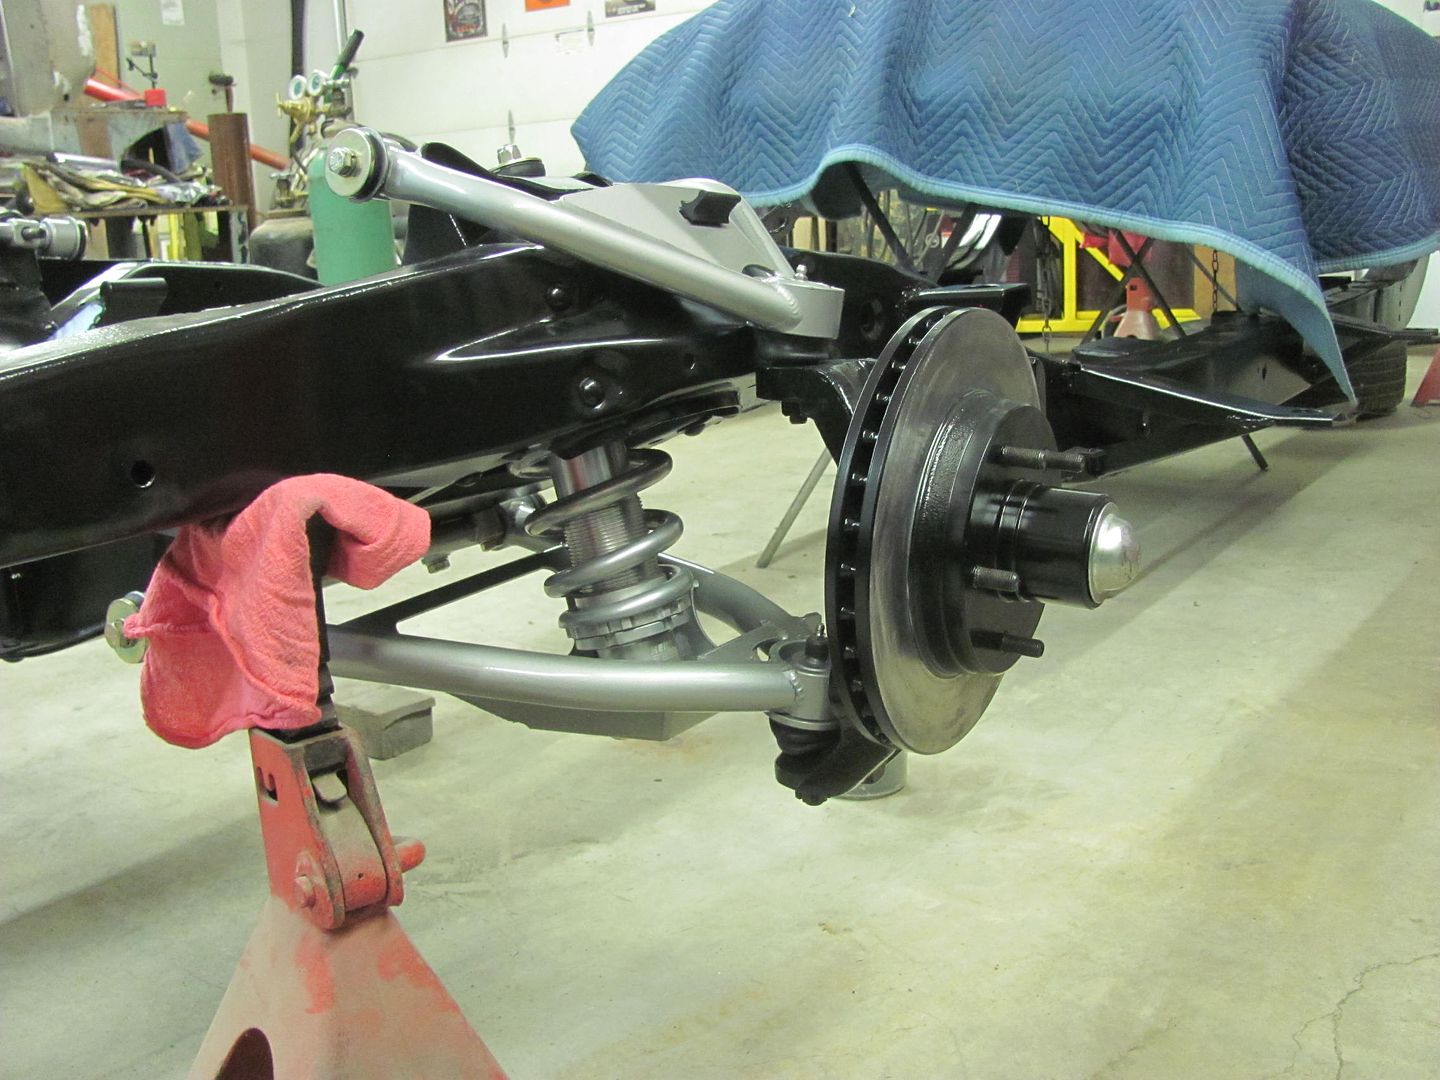
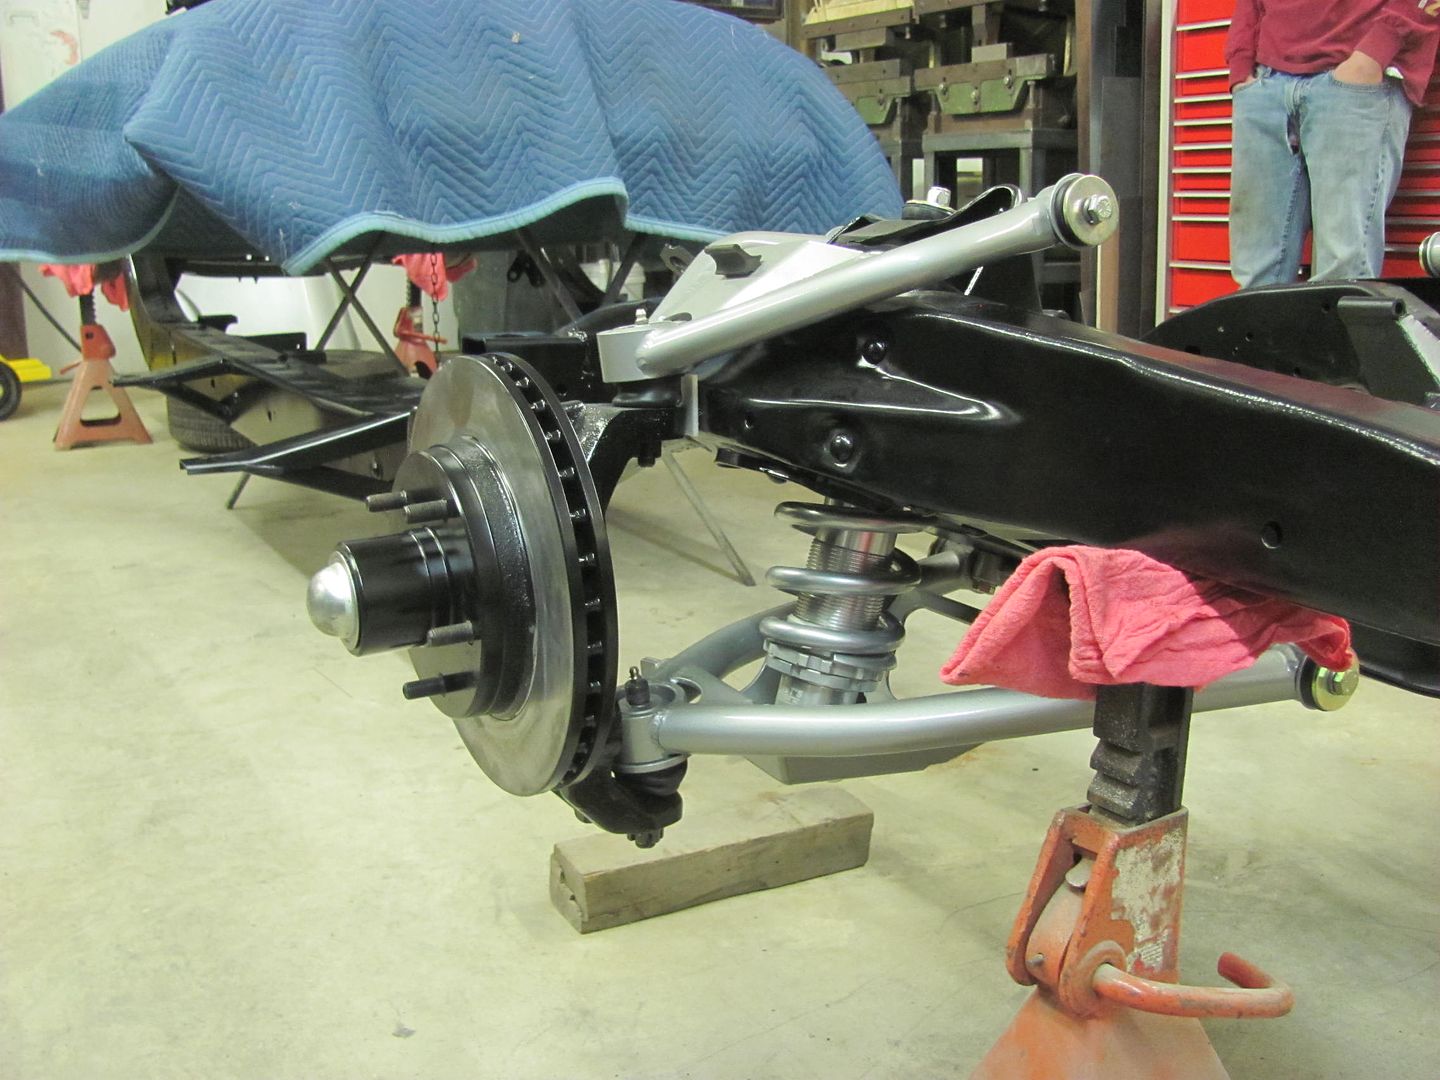
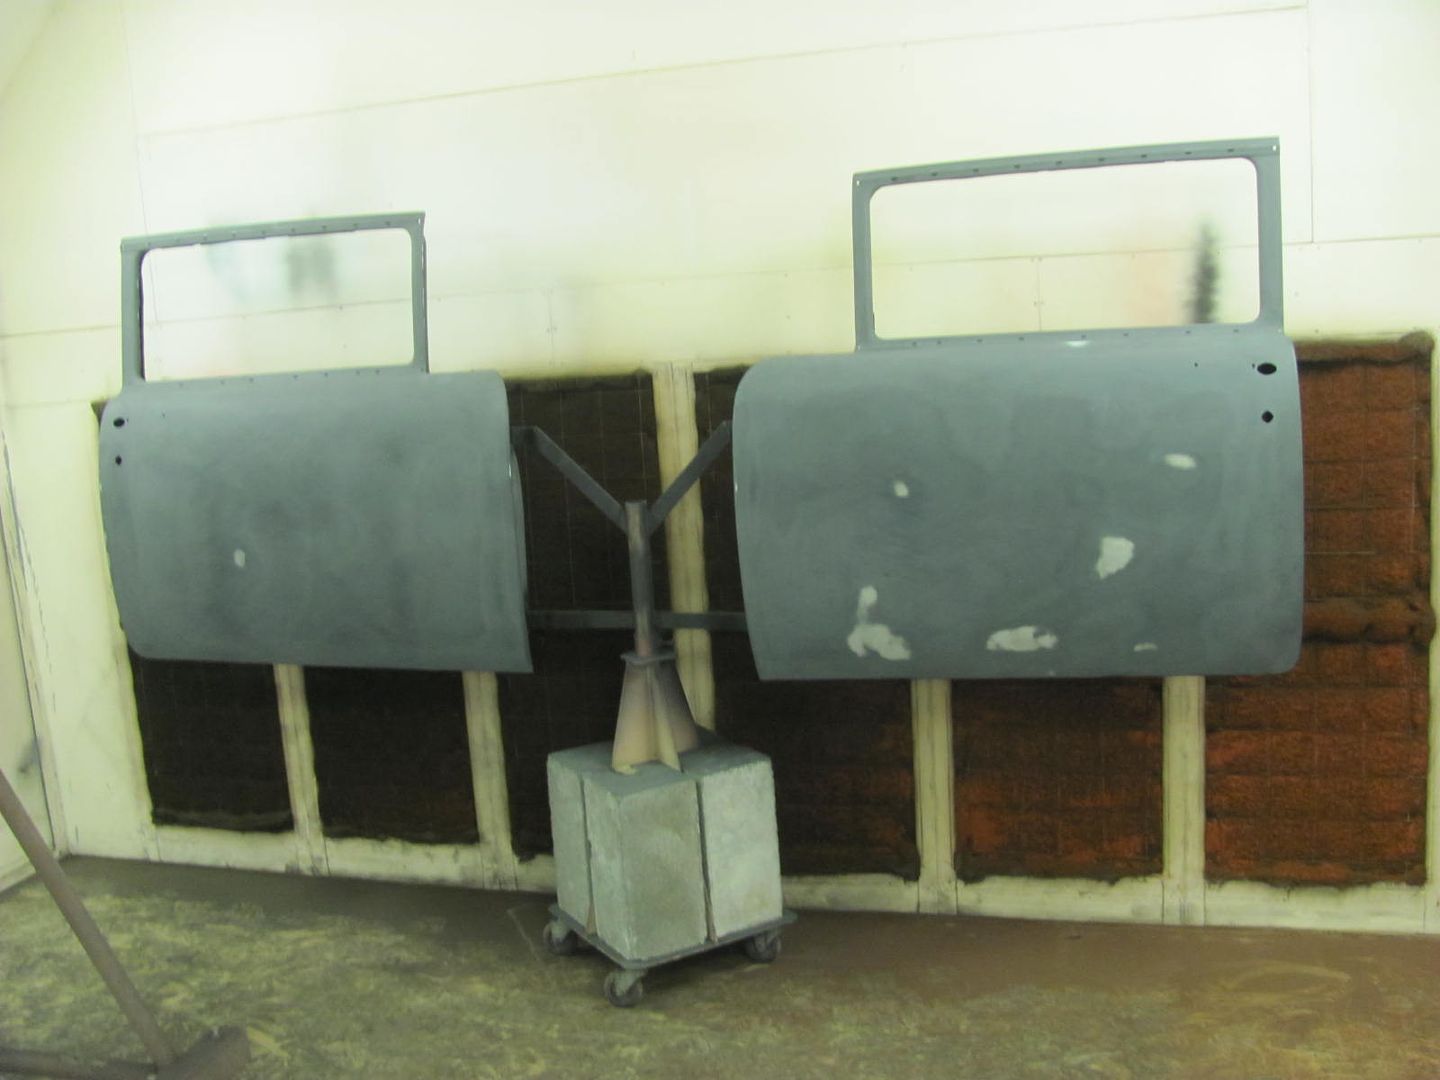
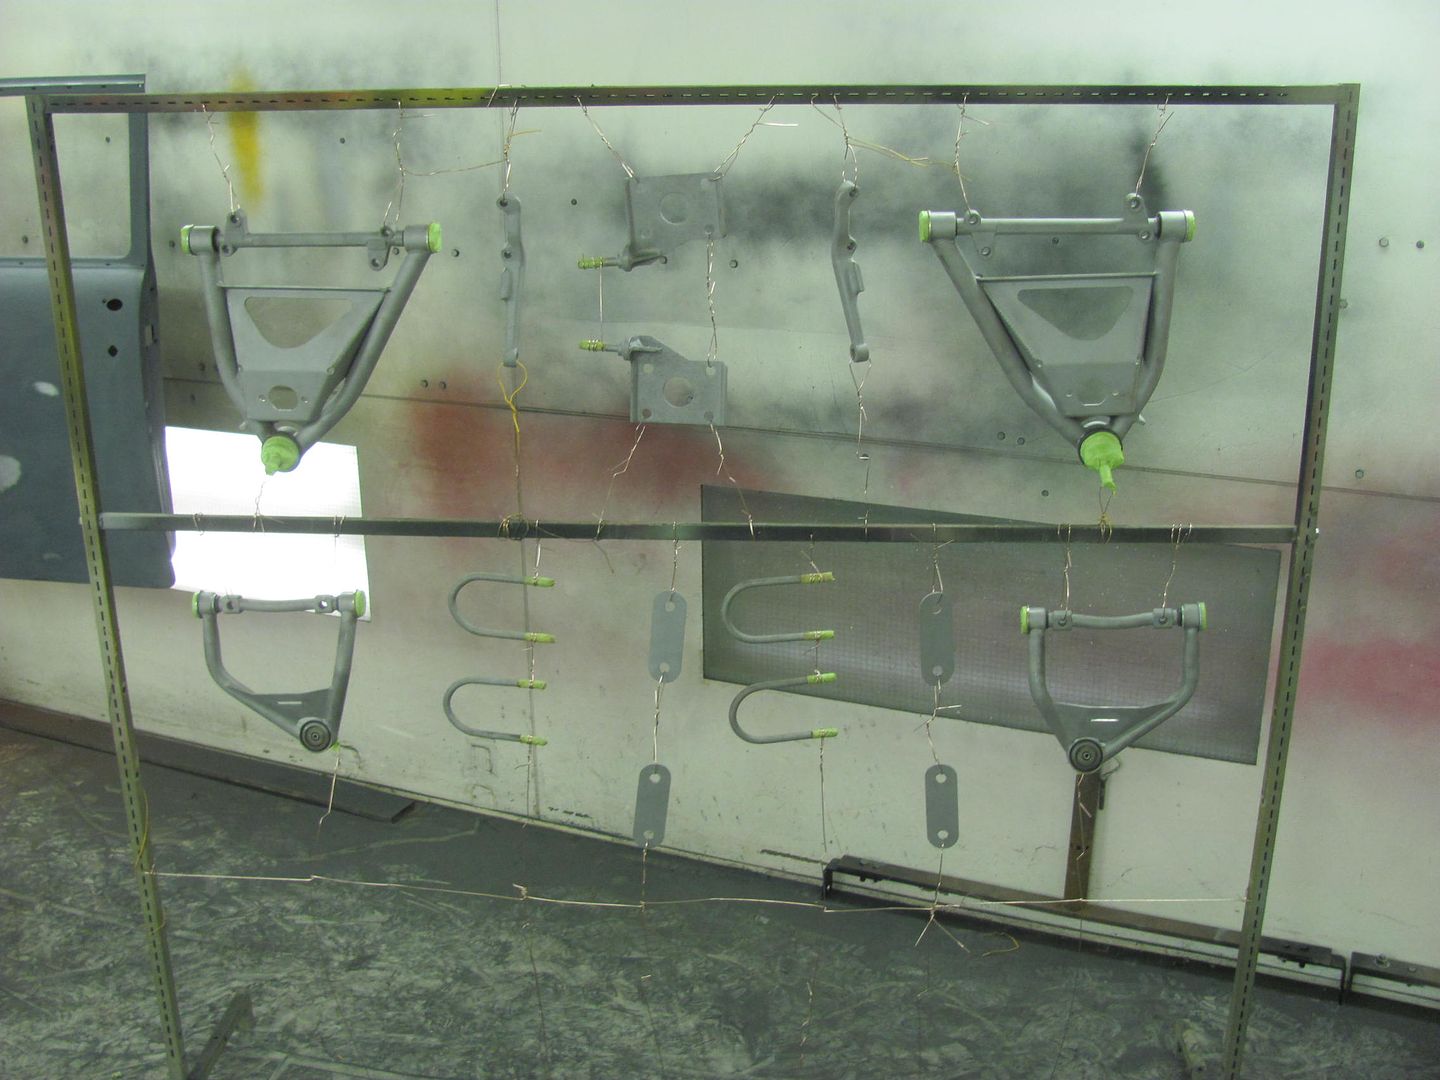
....and more blocking and hanging parts in prep for the next round of epoxy...
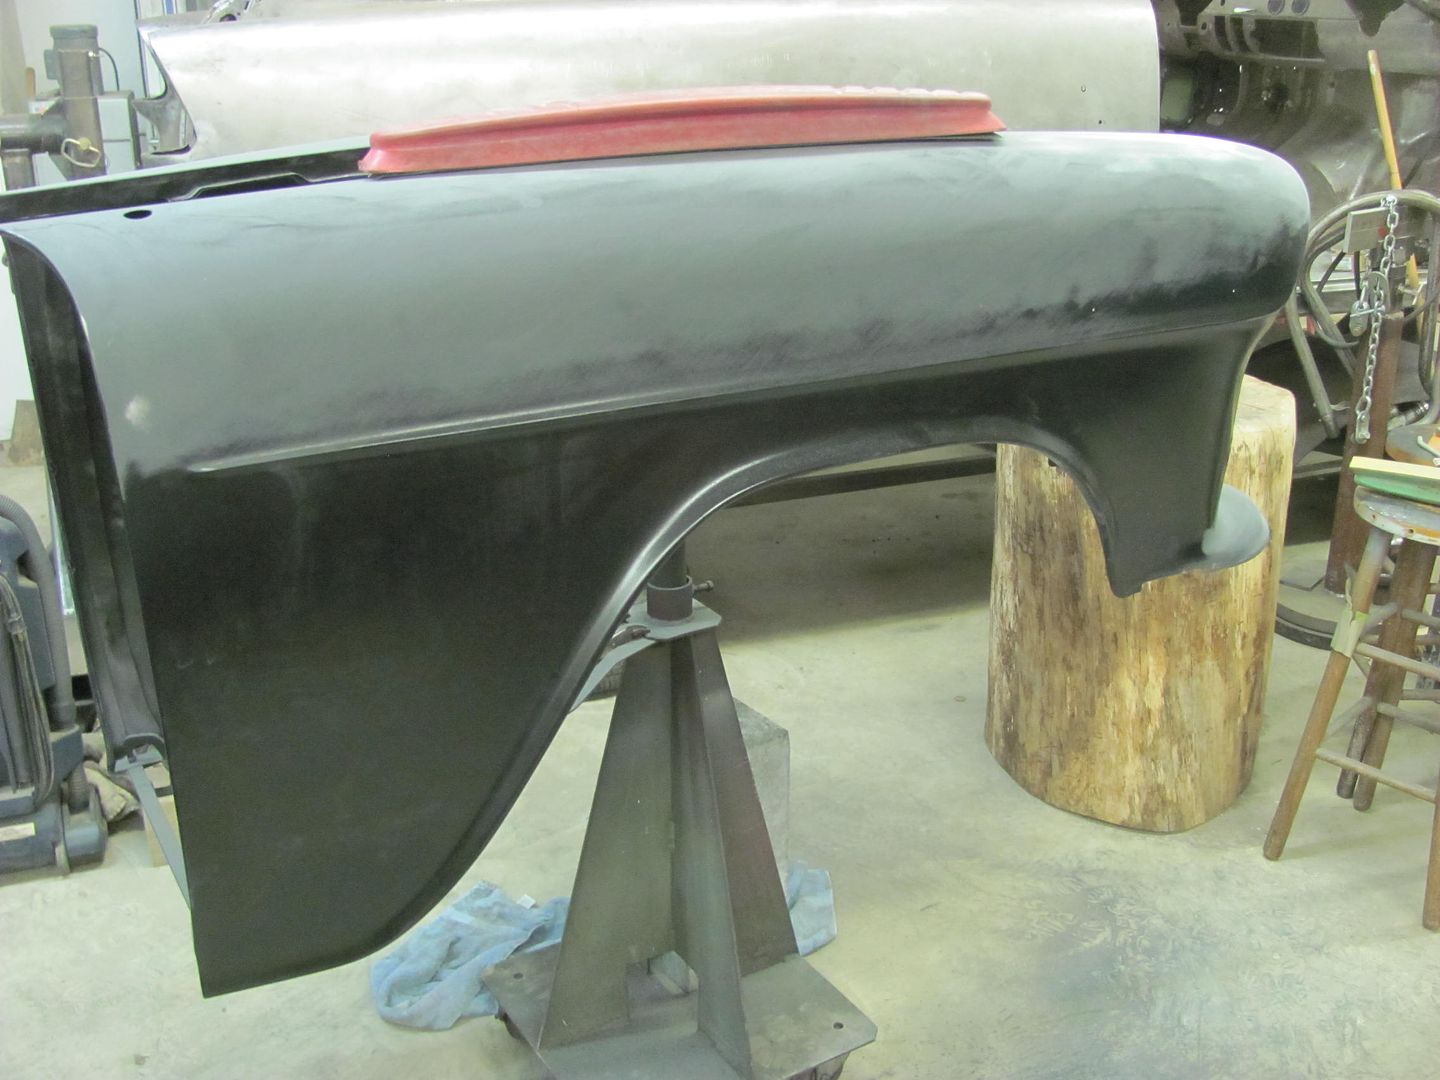
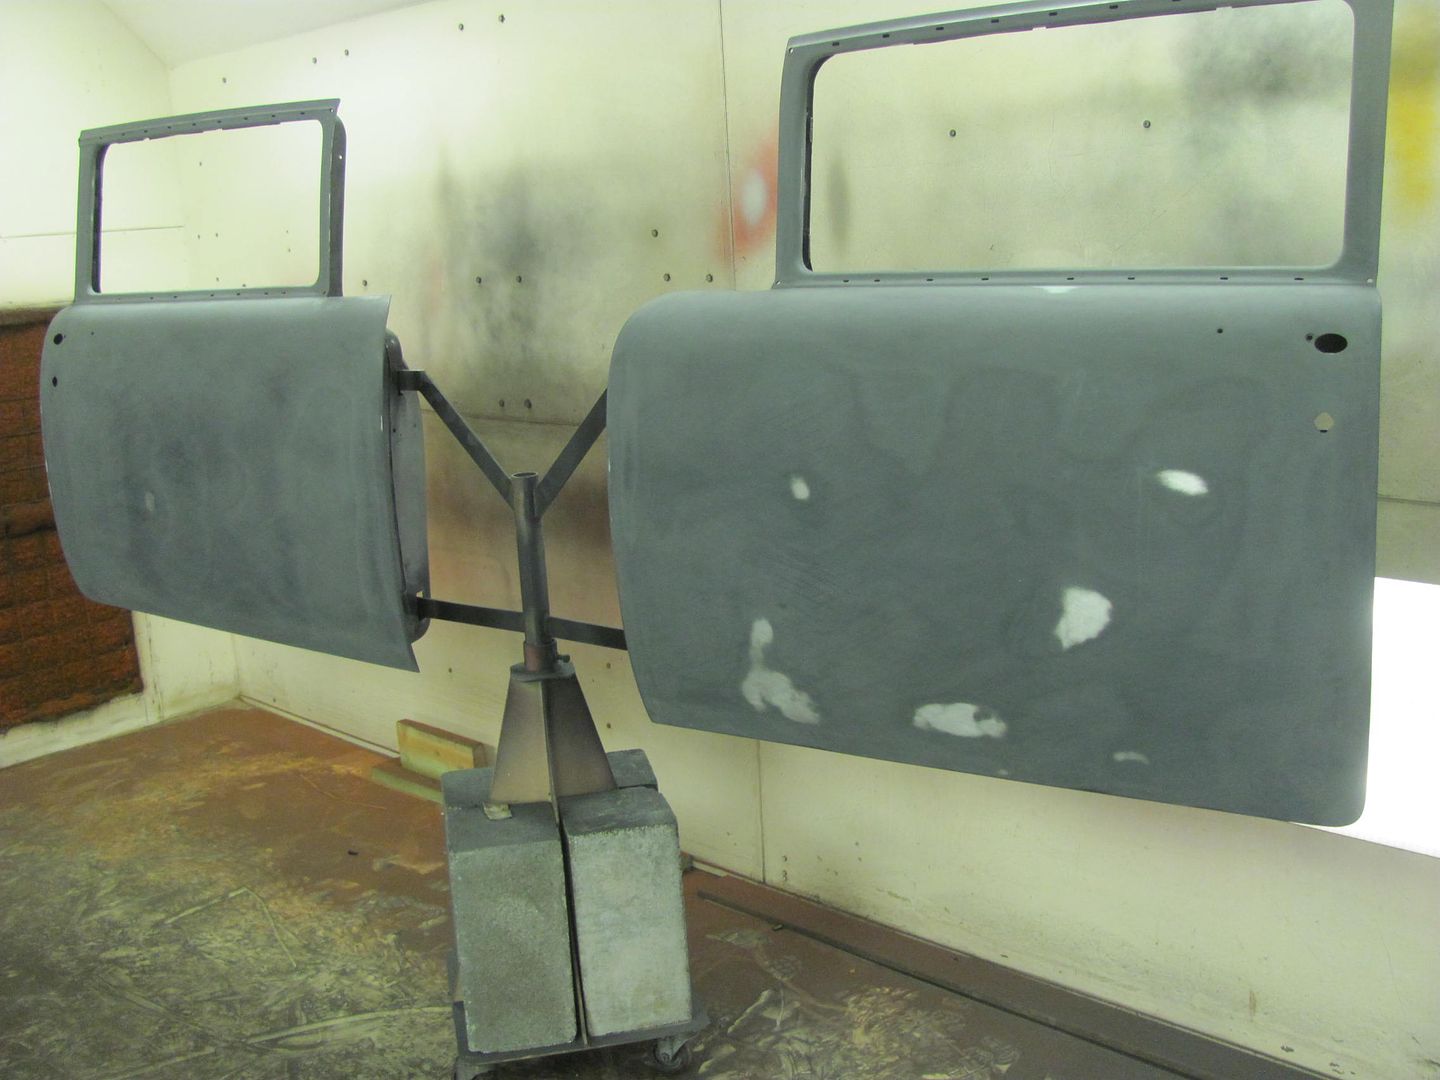
The doors are getting real close to needing wet sanding..
Robert
-
01-10-2016 08:30 AM #703
CHR Member
- Join Date
- Jun 2008
- Location
- Leonardtown
- Car Year, Make, Model: Walking
- Posts
- 1,228
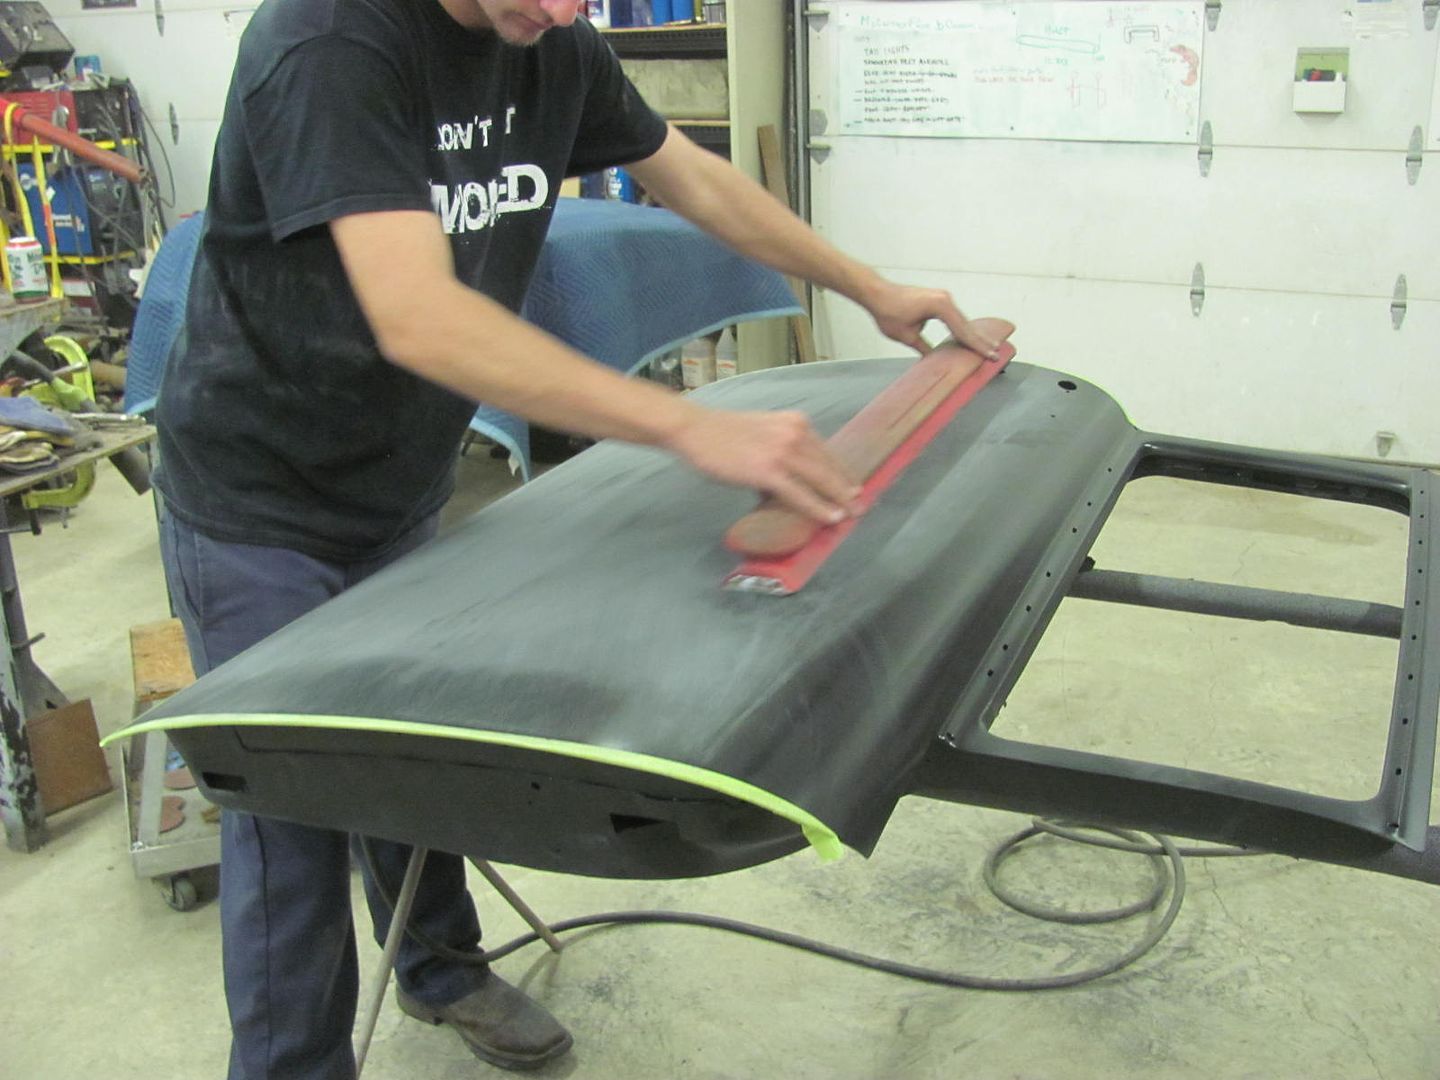
Here's a video taken yesterday using the 36" AFS sander. Note how the sander is grasped and the fact that this promotes letting the sandpaper do the work without "leaning" on it. Applying downward force through your palm to get the job done more quickly runs the risk of deflecting the sander downward at that point, causing low spots...
Robert
-
01-10-2016 08:58 AM #704
CHR Member/Contributor
- Join Date
- Sep 2007
- Location
- Gardner, KS
- Car Year, Make, Model: '33 HiBoy Coupe, '32 HiBoy Roadster
- Posts
- 11,245
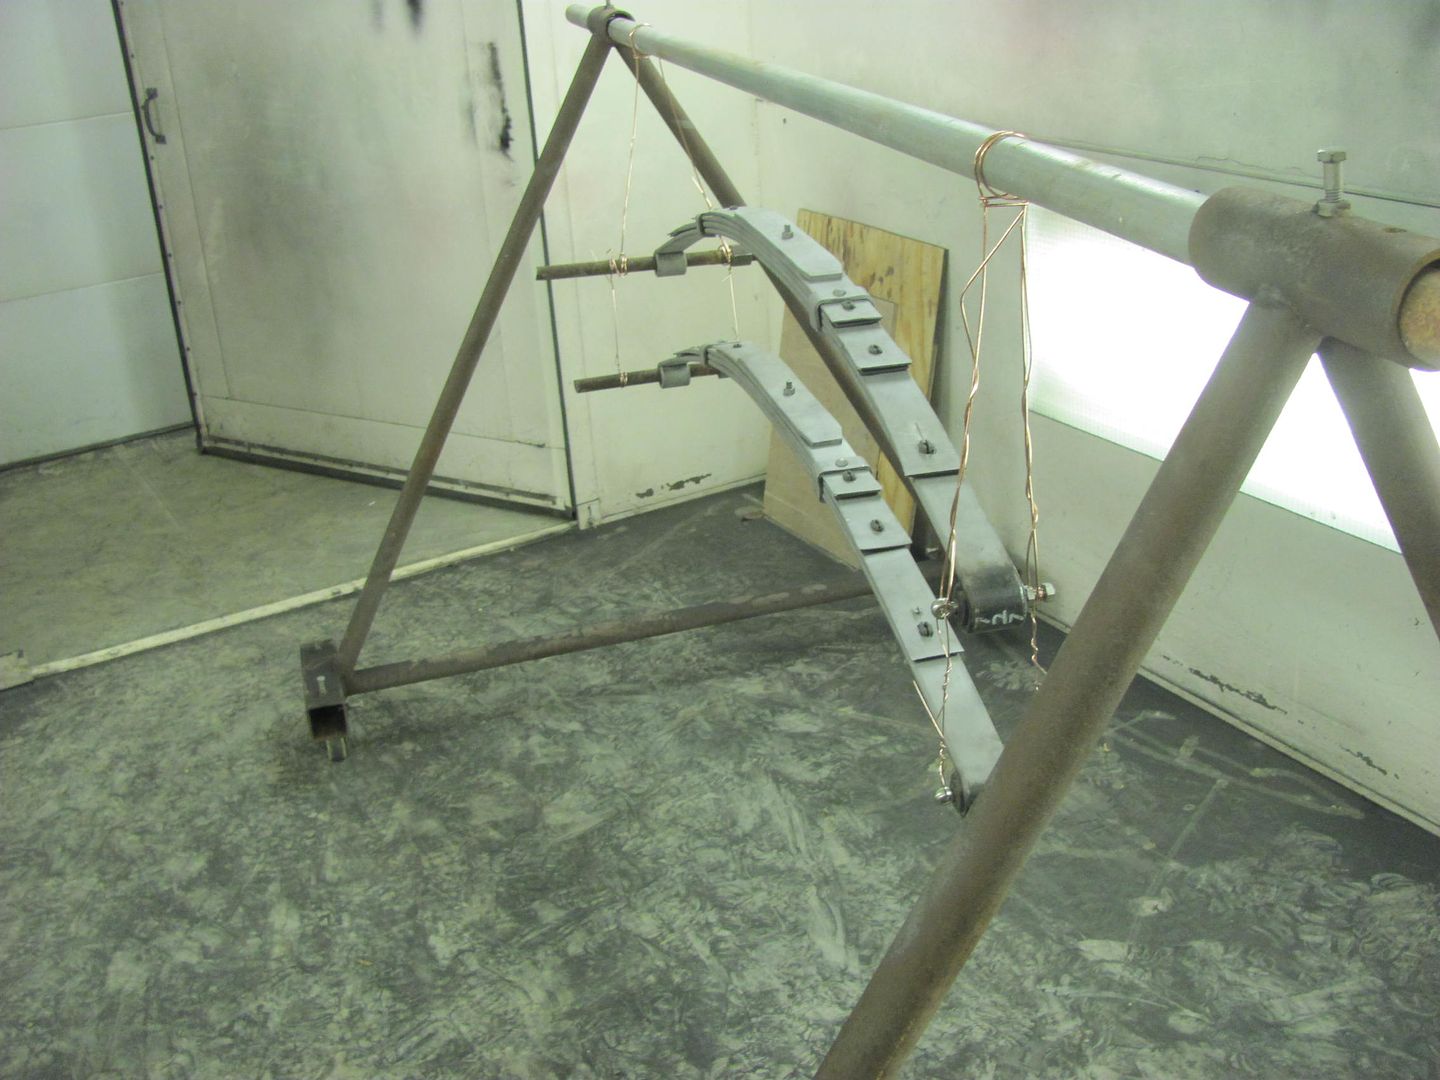
Robert, two things really jumped out at me in this group of posts, and I thank you for the details. First, you postedwith a couple of pictures, and what jumped out at me was the simplicity and versatility of your basic double "A" frame ends, and the wheeled base plates that have pieces of square tube with locking bolts for bottom cross members. I used a pair of engine stands before without taking out the nominal 5 degree up-tilt on the top pipe, and while they did OK they were really too low, and got pretty squirrely when spinning the frame. I had been thinking of buying a pair of Harbor Freight stands and cutting them apart to make them rotisserie specific, but now I think I'll just make one up from square tube & pipe. Originally Posted by MP&C
Second was your attention to alignment on the axle tubes, and the straight forward method of fixing the bend caused by welding on the spring pad. I'd venture that there are more vehicles out there that have the 0.020" to 0.040" of runout after having new spring perches welded than there are that are dead on smooth. It takes a bit of time for the heat & allow to cool, and may be an iterative process, but it's the right way! Good on ya', as our southern neighbors say!
Thanks for your continued posts that show your progress, but also provide information and education. The little sanding tutorial showing the right way to hold the long board is great. A friend of mine turned about 4 gallons of epoxy primer into sanding dust on the floor due to his heavy pressure on the blocks, and refusing to understand that he was simply over sanding, and creating more highs & lows than he was fixing.Last edited by rspears; 01-10-2016 at 11:36 AM.
Roger
Enjoy the little things in life, and you may look back one day and realize that they were really the BIG things.
-
01-10-2016 08:59 AM #705
CHR Member
- Join Date
- Feb 2008
- Location
- Caldwell
- Car Year, Make, Model: 34 ford 3 window/461 pontiac
- Posts
- 918
Robert, when taking a reading for runout at the bead of the rim, how do you determine if the runout is in the wheel or at the axle?
I agree with Roger, I'll bet there are a lot of cars running around with that kind of runout, or more. What attention to detail.
Jack.Last edited by Jack F; 01-10-2016 at 09:07 AM.
www.clubhotrod.com/forums/showthread.php?t=44081
 Reply With Quote

Posting Permissions
- You may not post new threads
- You may not post replies
- You may not post attachments
- You may not edit your posts

i've enjoyed the years here . made a lot of friends. most who have left. i see no reason to continue with this so hope to see you somewhere else. i dont think this site will ever be back. it's lived...
Dead!