


 3390Likes
Thread: 55 Wagon Progress


Results 1,291 to 1,305 of 1865
 LinkBack URL
 About LinkBacks
-
01-26-2019 09:31 PM #1291
 CHR Member

- Join Date
- Feb 2007
- Location
- Santa Monica
- Car Year, Make, Model: 37 Ford tudor humpback
- Posts
- 1,988
Robert, that rainbow was amazing!!! So, is your work!!! Spectacular, as always! Thanks for sharing! I'm sure the tacos were great too...
"It is not much good thinking of a thing unless you think it out." - H.G. Wells
-
Advertising

- Google Adsense
- REGISTERED USERS DO NOT SEE THIS AD
-
01-27-2019 11:09 AM #1292
CHR Member
- Join Date
- Oct 2007
- Location
- Petaluma
- Car Year, Make, Model: 48 Ford F1
- Posts
- 9,795
Must be good fish tacos they are where the pot of gold should be under the Rainbow!"  "No matter where you go, there you are!" Steve.
-
01-27-2019 01:55 PM #1293
CHR Member
- Join Date
- Sep 2013
- Location
- Portage
- Car Year, Make, Model: 31 A Coupe
- Posts
- 567
I would expect your HAZ to be slightly wider than with Tig, do you find that to be the case? I agree that
it would be handy in areas that a foot pedal was difficult to operate. Working alone I like to tack with
the Mig, grind the tacks, and finish with the Tig.
That console look's good enough to use as is ! Great stuff on the seat belts !
Richhttp://www.clubhotrod.com/hot-rod-bu...del-coupe.html
-
01-27-2019 04:04 PM #1294
CHR Member
- Join Date
- Jan 2005
- Location
- Doon, Ia
- Car Year, Make, Model: 53 Chevy 3100
- Posts
- 2,716
The detail being put into this car is incredible, thanks again for going through the work of sharing!Seth
God cannot give us a happiness and peace apart from Himself, because it is not there. There is no such thing. C.S.Lewis
-
01-28-2019 03:33 PM #1295
CHR Member
- Join Date
- Apr 2011
- Location
- Prairie City
- Car Year, Make, Model: 40 Ford Deluxe, 68 Corvette, 72&76 K30
- Posts
- 7,301
- Blog Entries
- 1
The only rainbows we'll be seeing around here is a sun doggy. More great work. Does the mess on the floor mean color is coming soon? I can give you an address to send those scrap escutcheons too so you don't have to throw them away.
Ryan
1940 Ford Deluxe Tudor 354 Hemi 46RH Electric Blue w/multi-color flames, Ford 9" Residing in multiple pieces
1968 Corvette Coupe 5.9 Cummins Drag Car 11.43@130mph No stall leaving the line with 1250 rpm's and poor 2.2 60'
1972 Chevy K30 Longhorn P-pumped 24v Compound Turbos 47RH Just another money pit
1971 Camaro RS 5.3 BTR Stage 3 cam, SuperT10
Tire Sizes
-
02-03-2019 02:34 PM #1296
CHR Member
- Join Date
- Jun 2008
- Location
- Leonardtown
- Car Year, Make, Model: Walking
- Posts
- 1,228
Thanks for the comments guys! We try to make it there for tacos every time we're in Cocoa Beach.
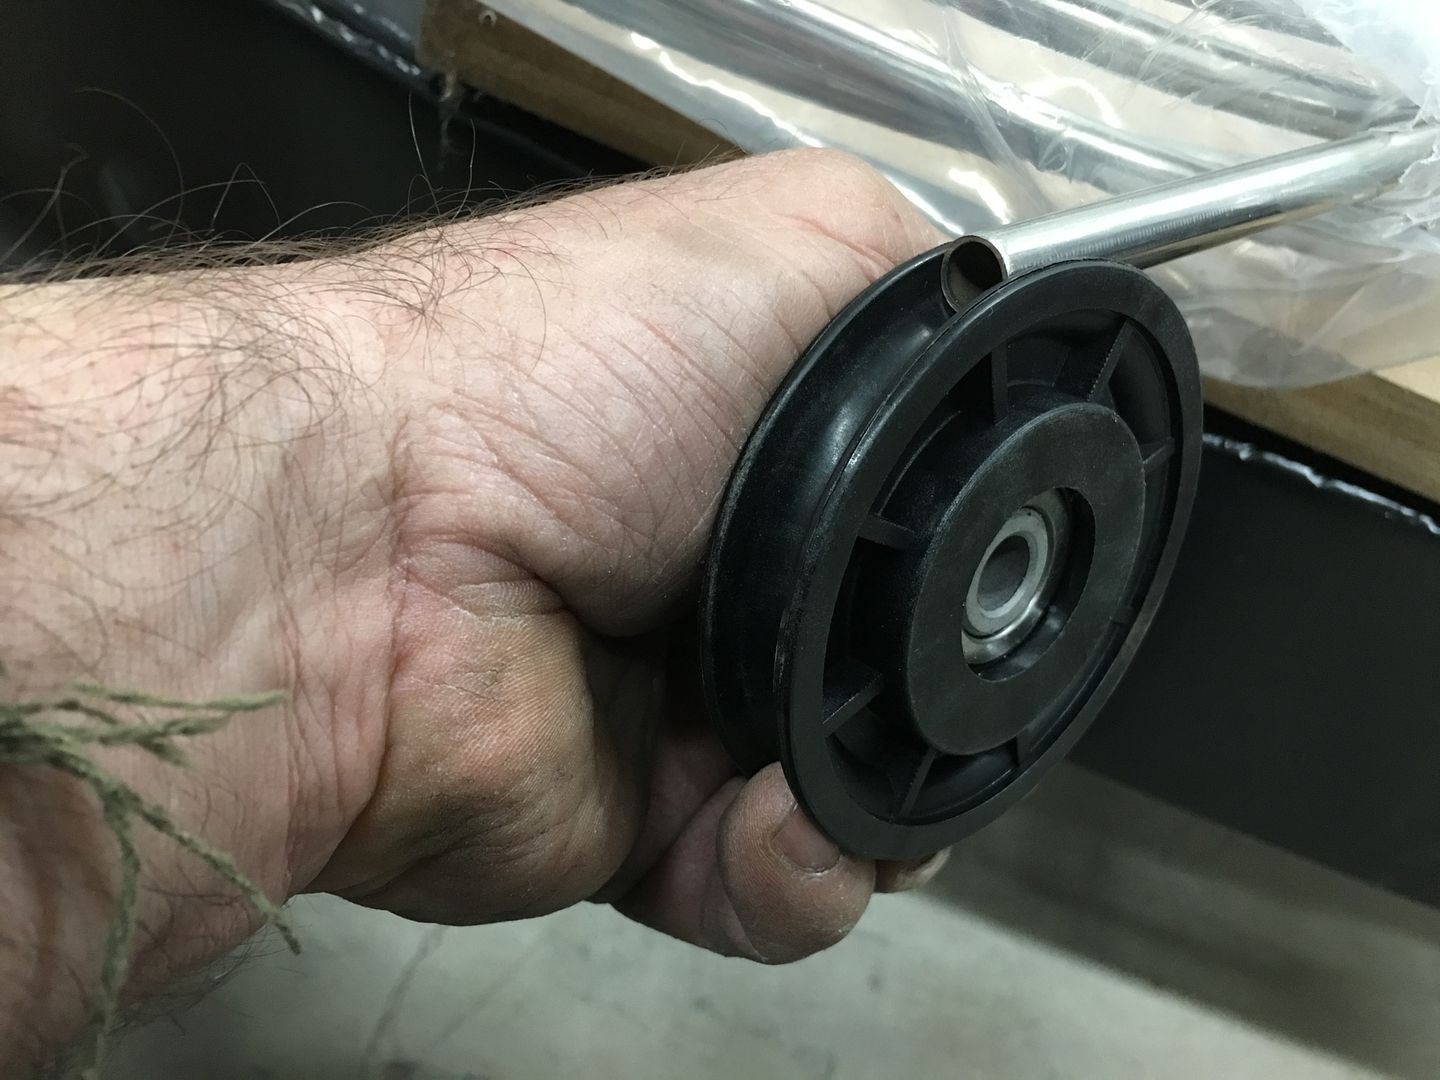
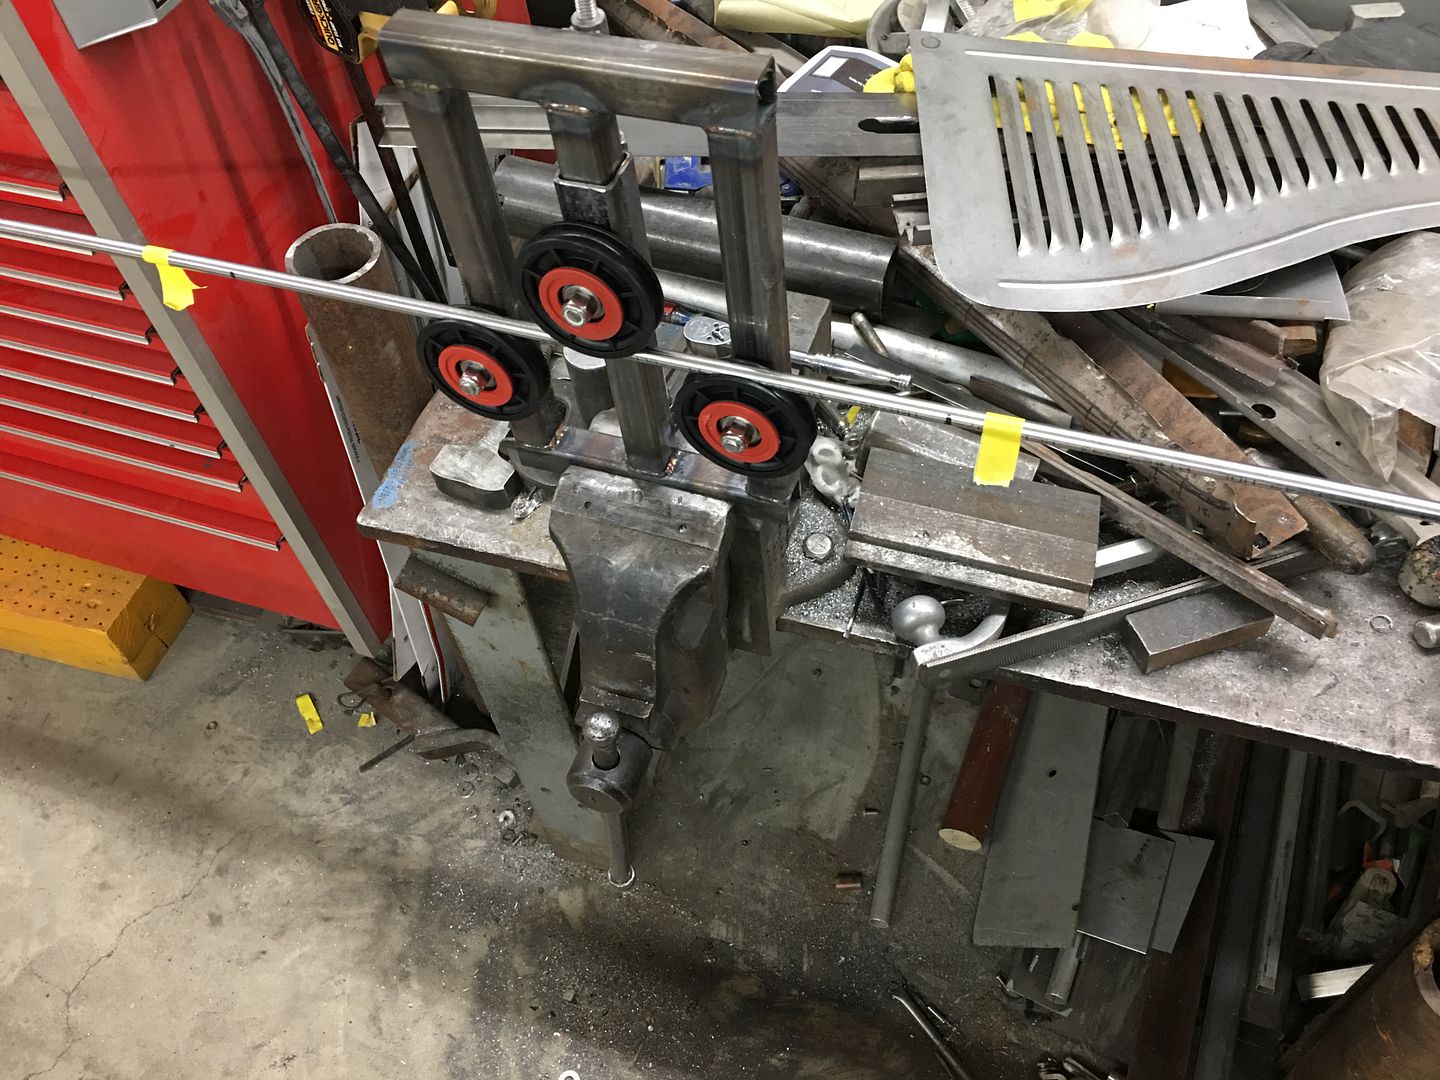
More progress on the wagon, we had ordered some 3/8 Stainless fuel line, which comes in a coil... so we needed to be able to straighten it out as I can see me "unbending" and getting it right.. So I placed an order with McMaster Carr for some pulleys designed for 3/8 rope and using 3/8 bolt hole in the bearing. Part number 59475K51.
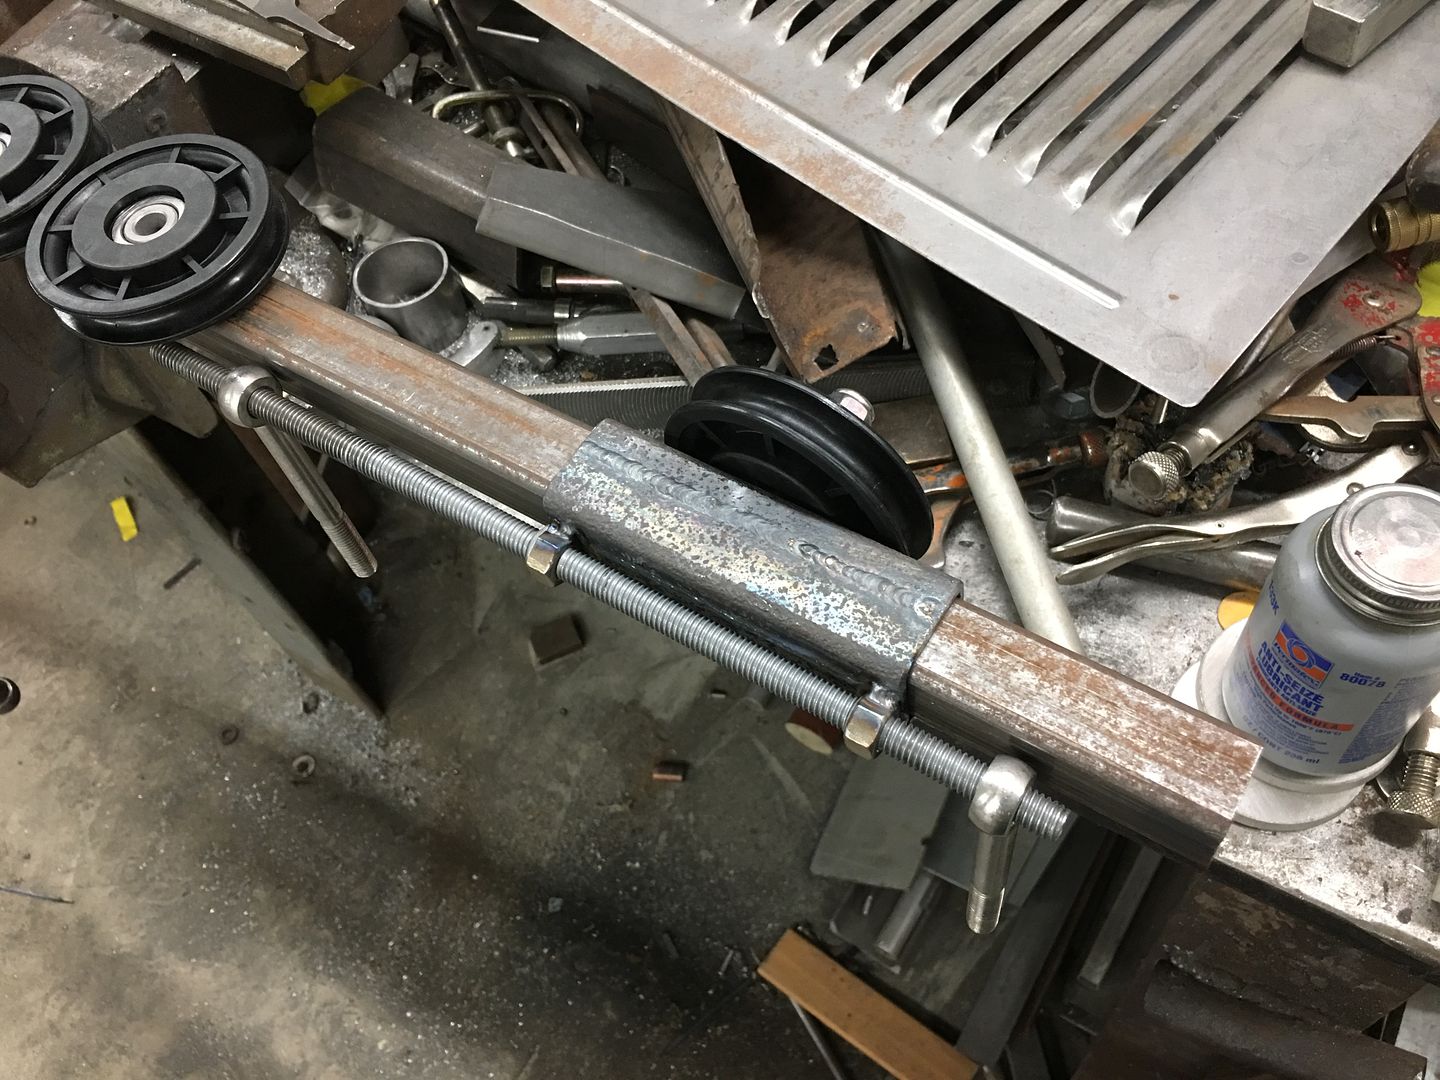
A drive mechanism was made using 3/8-16 stainless all-thread, and the slider was cut and re-welded to better fit the 1" square tubing.
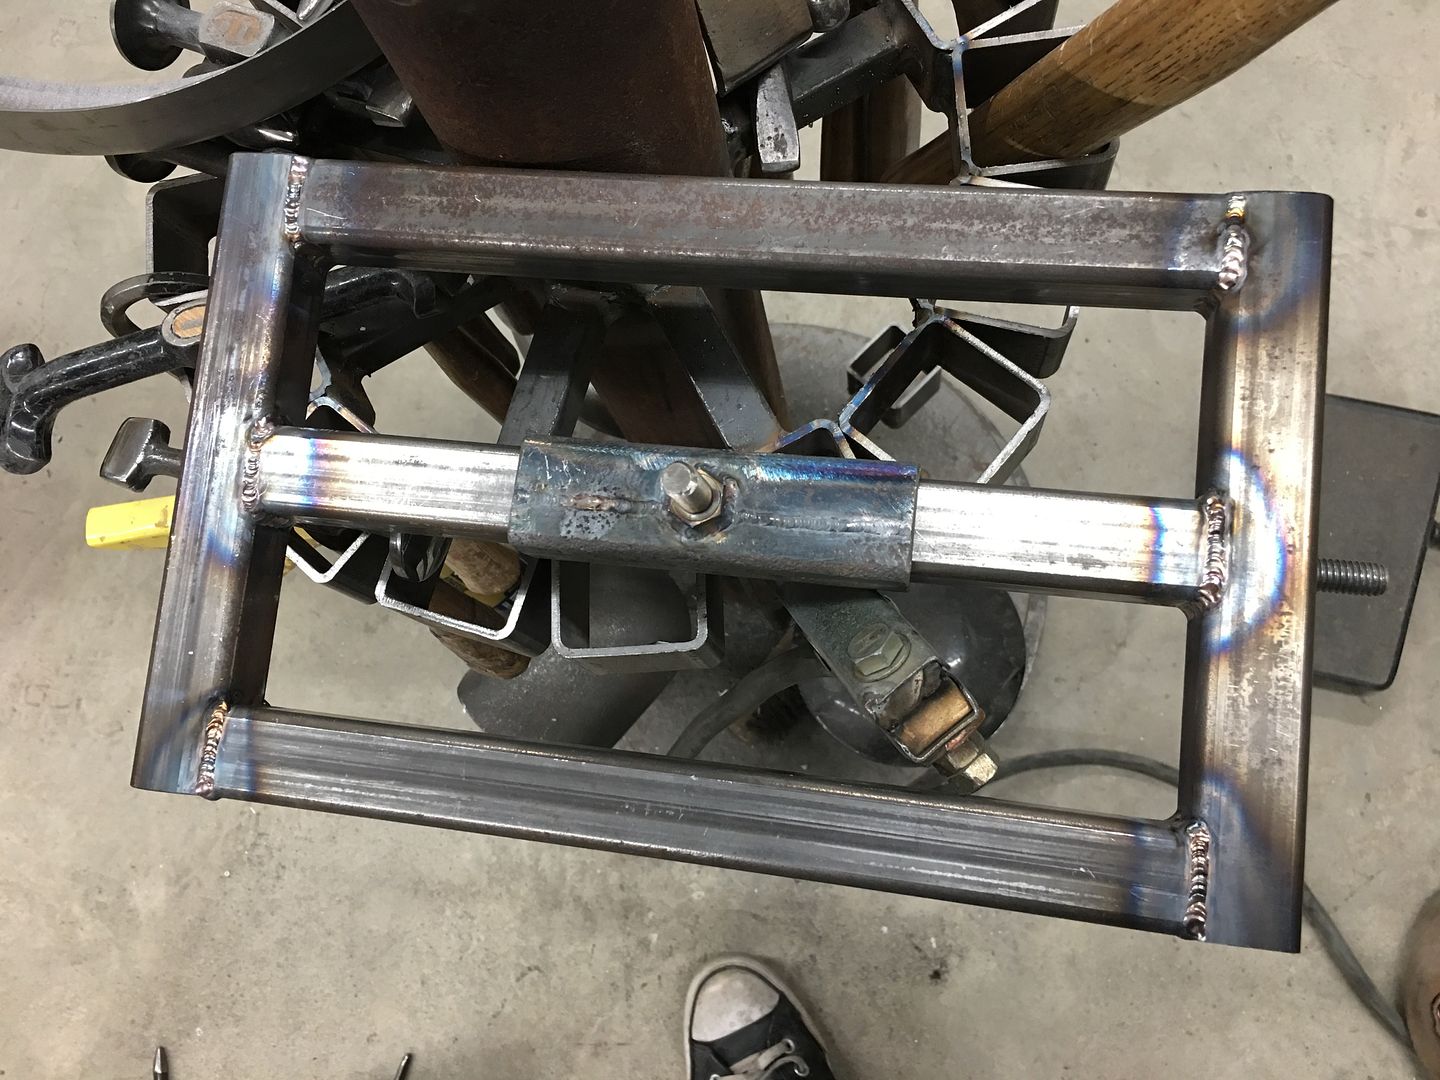
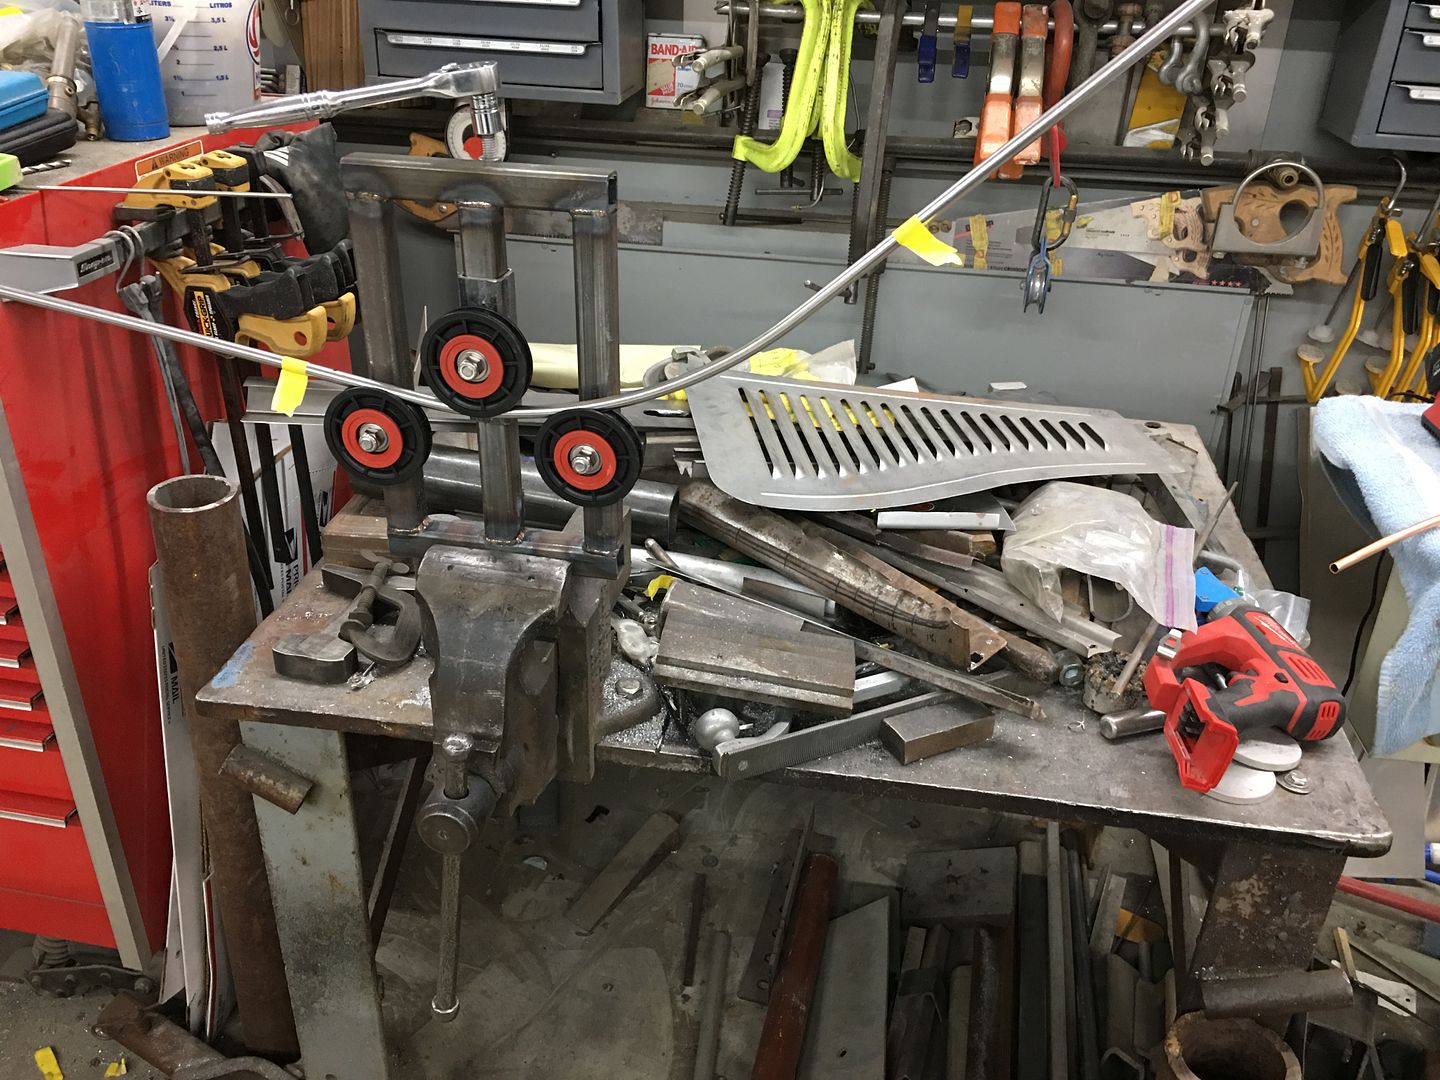
A better view all around of the design, we used three pulleys so this could also serve as a bender as well as straightener..
https://www.youtube.com/watch?v=TpgMekrEA3g
Then Mike and I did a test run using copper tubing...
https://www.youtube.com/watch?v=FumsneaLJlU
Now onto the stainless....

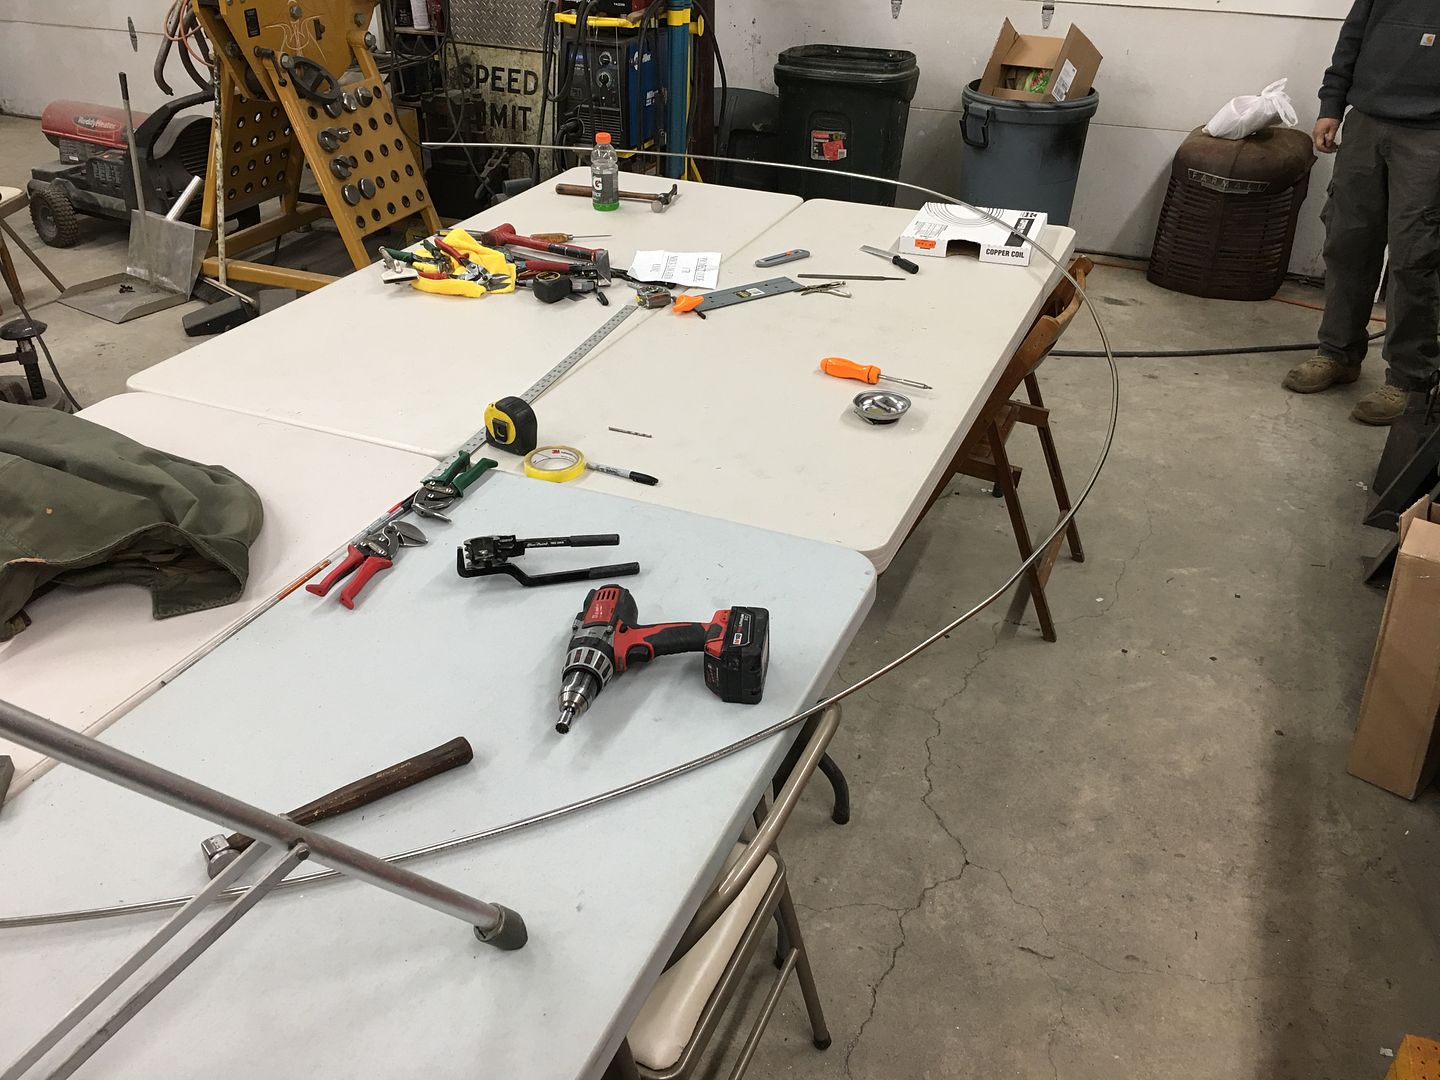
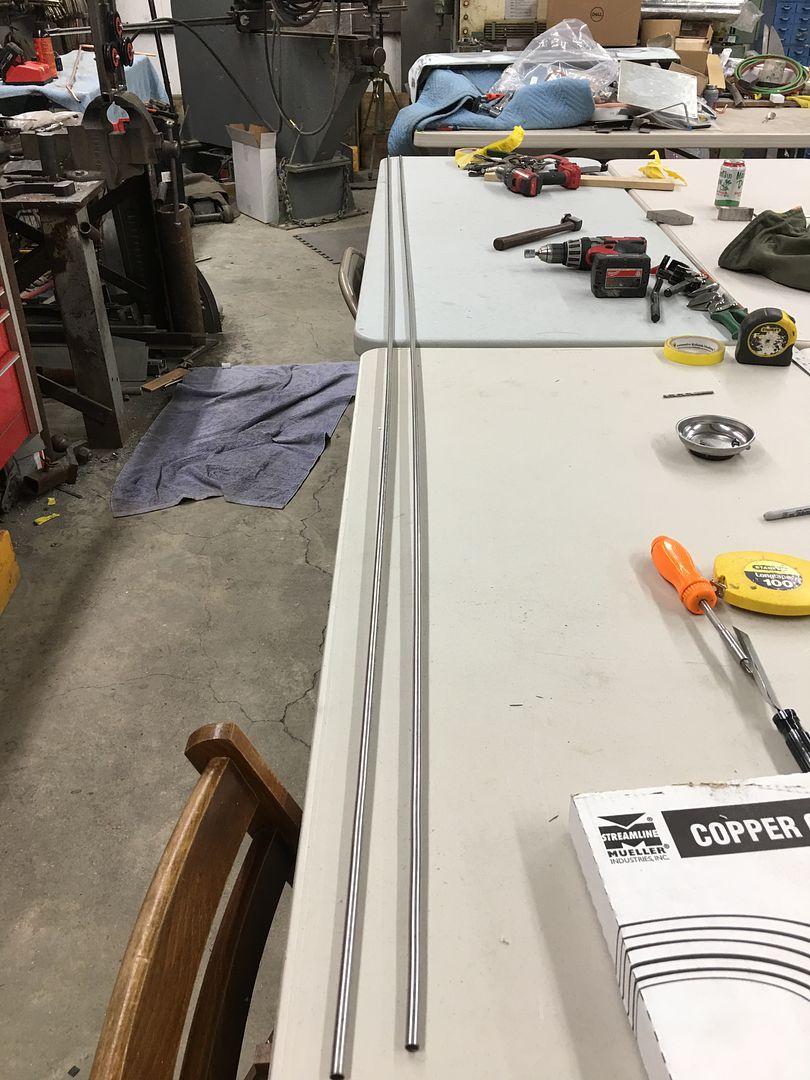
At this point we measured and cut the 20' piece in two so it would be more more manageable.
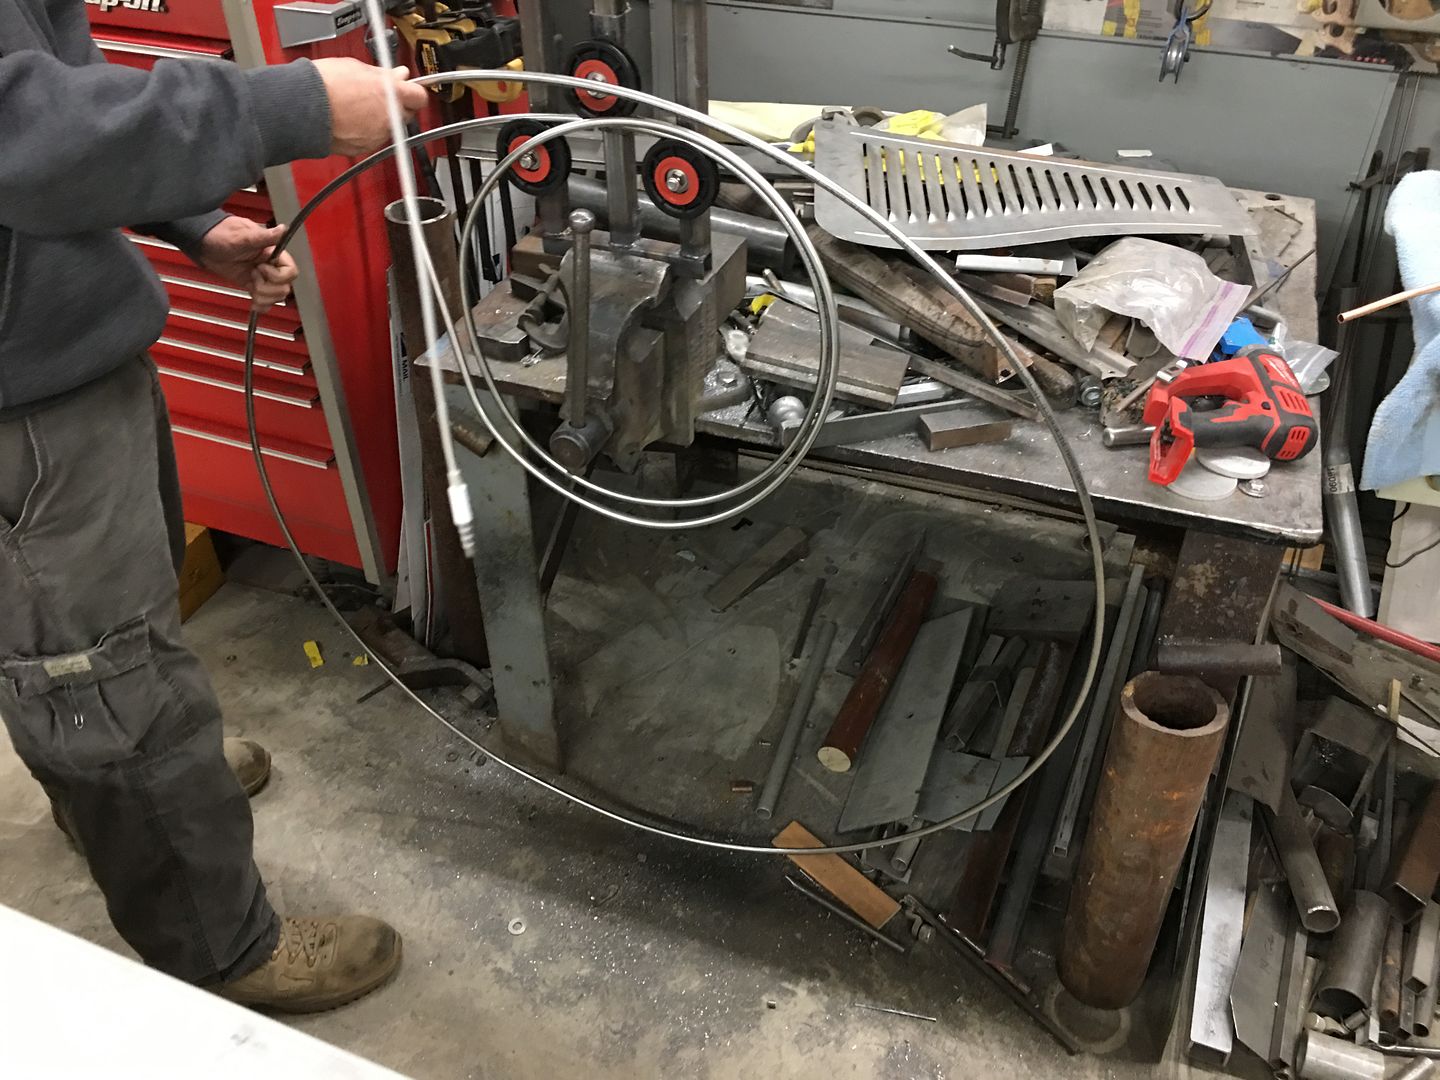
Straightened....
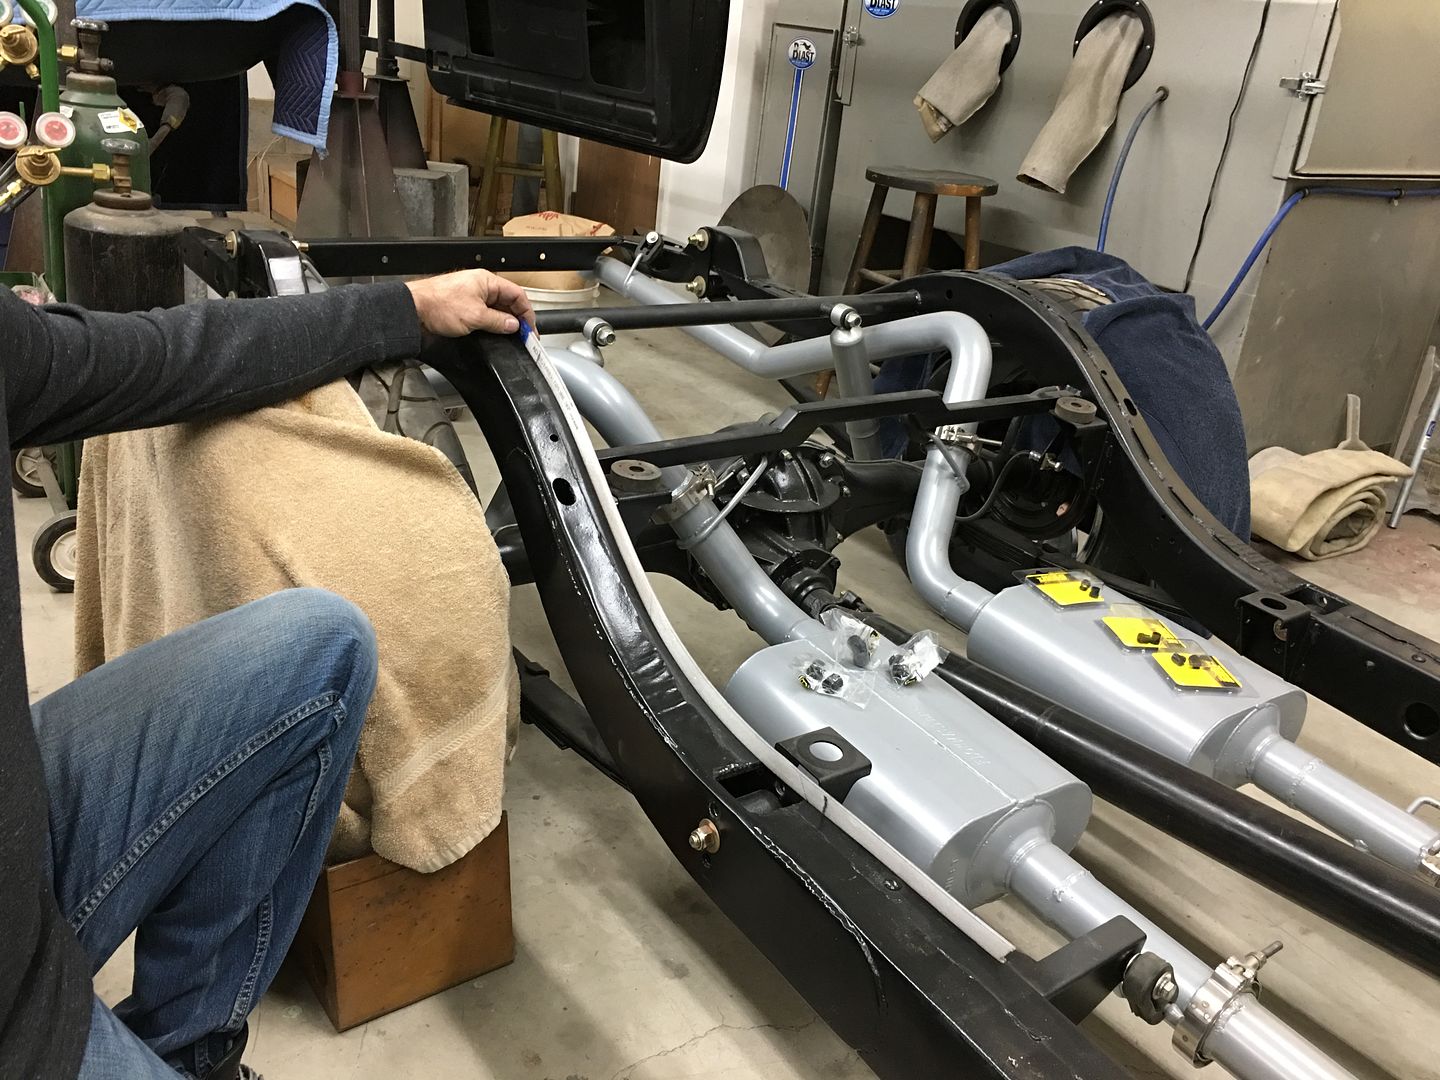
Now we used the adjustable spline to get the curve of the frame for the proper bend on the stainless...
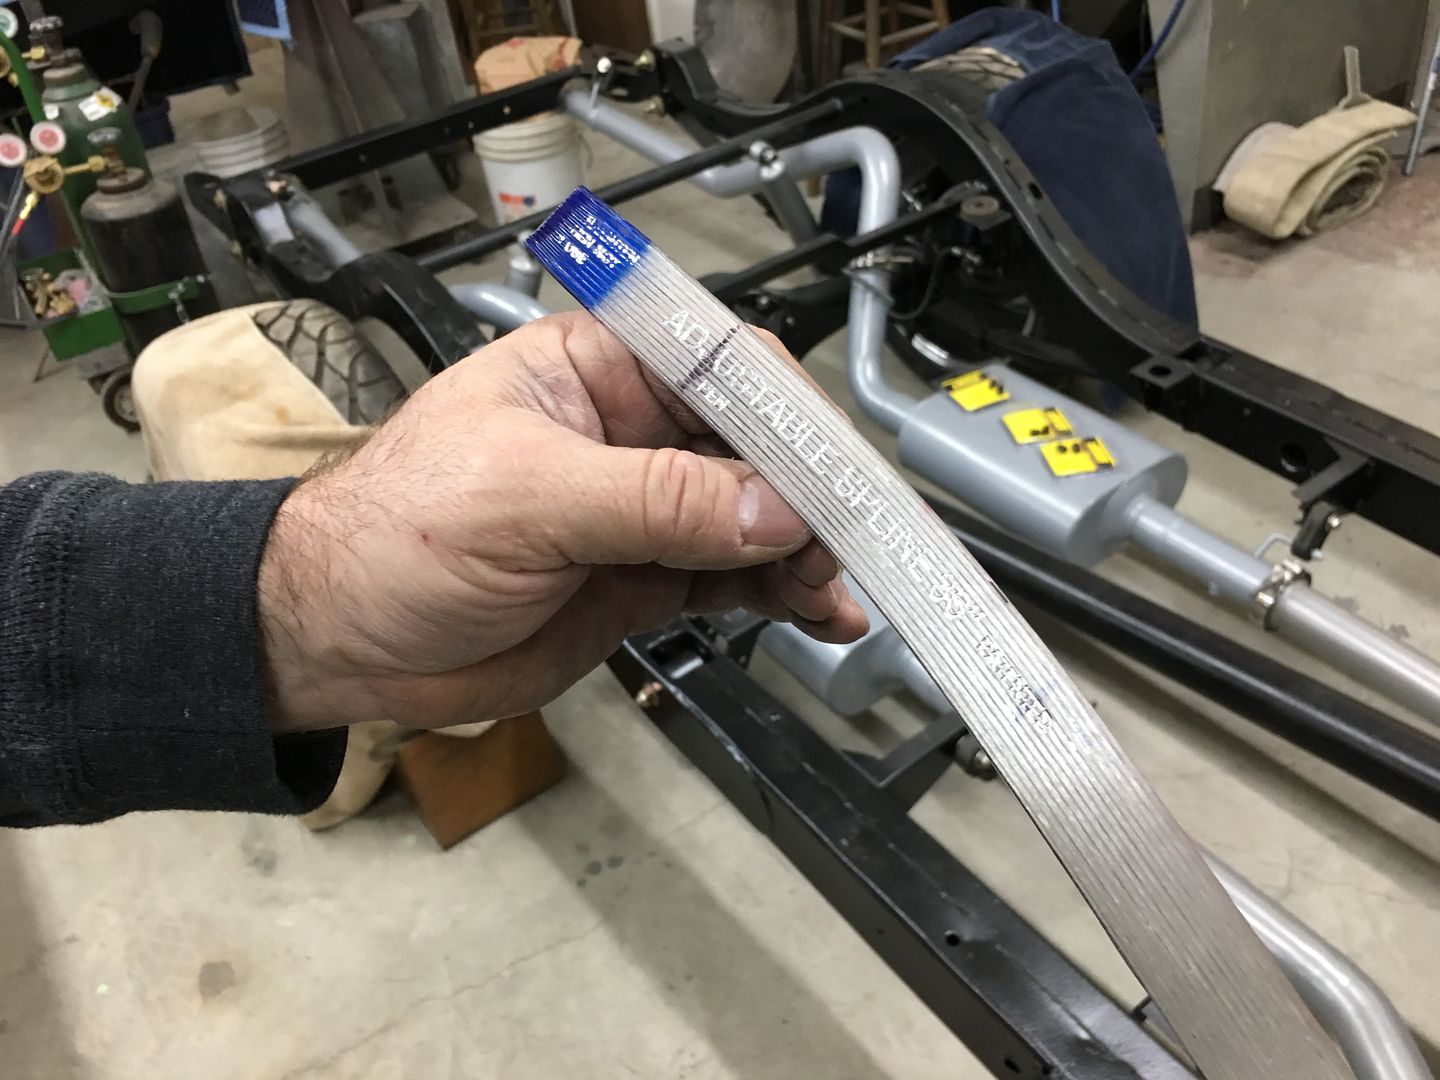
A strip of tape applied helps to lock the shape from moving, and the tubing is marked for the radius distance..
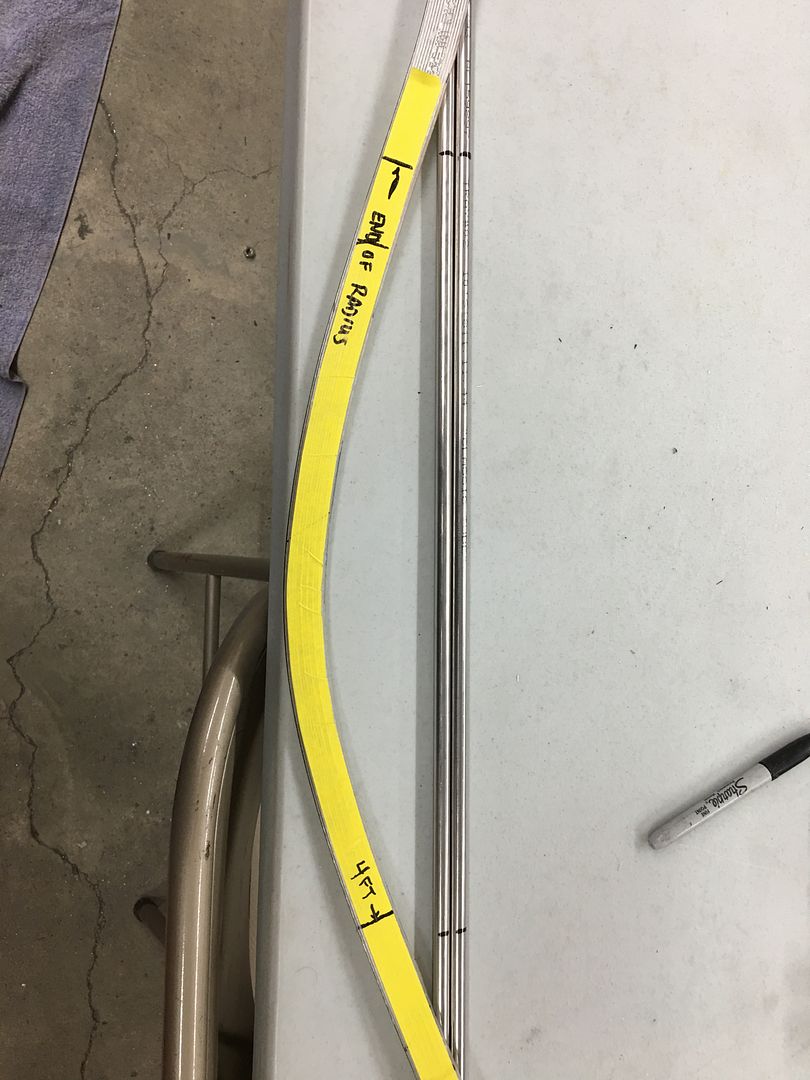
The tube is placed back in the new machine to add the radius to match our profile...
Adding some of the needed bends...
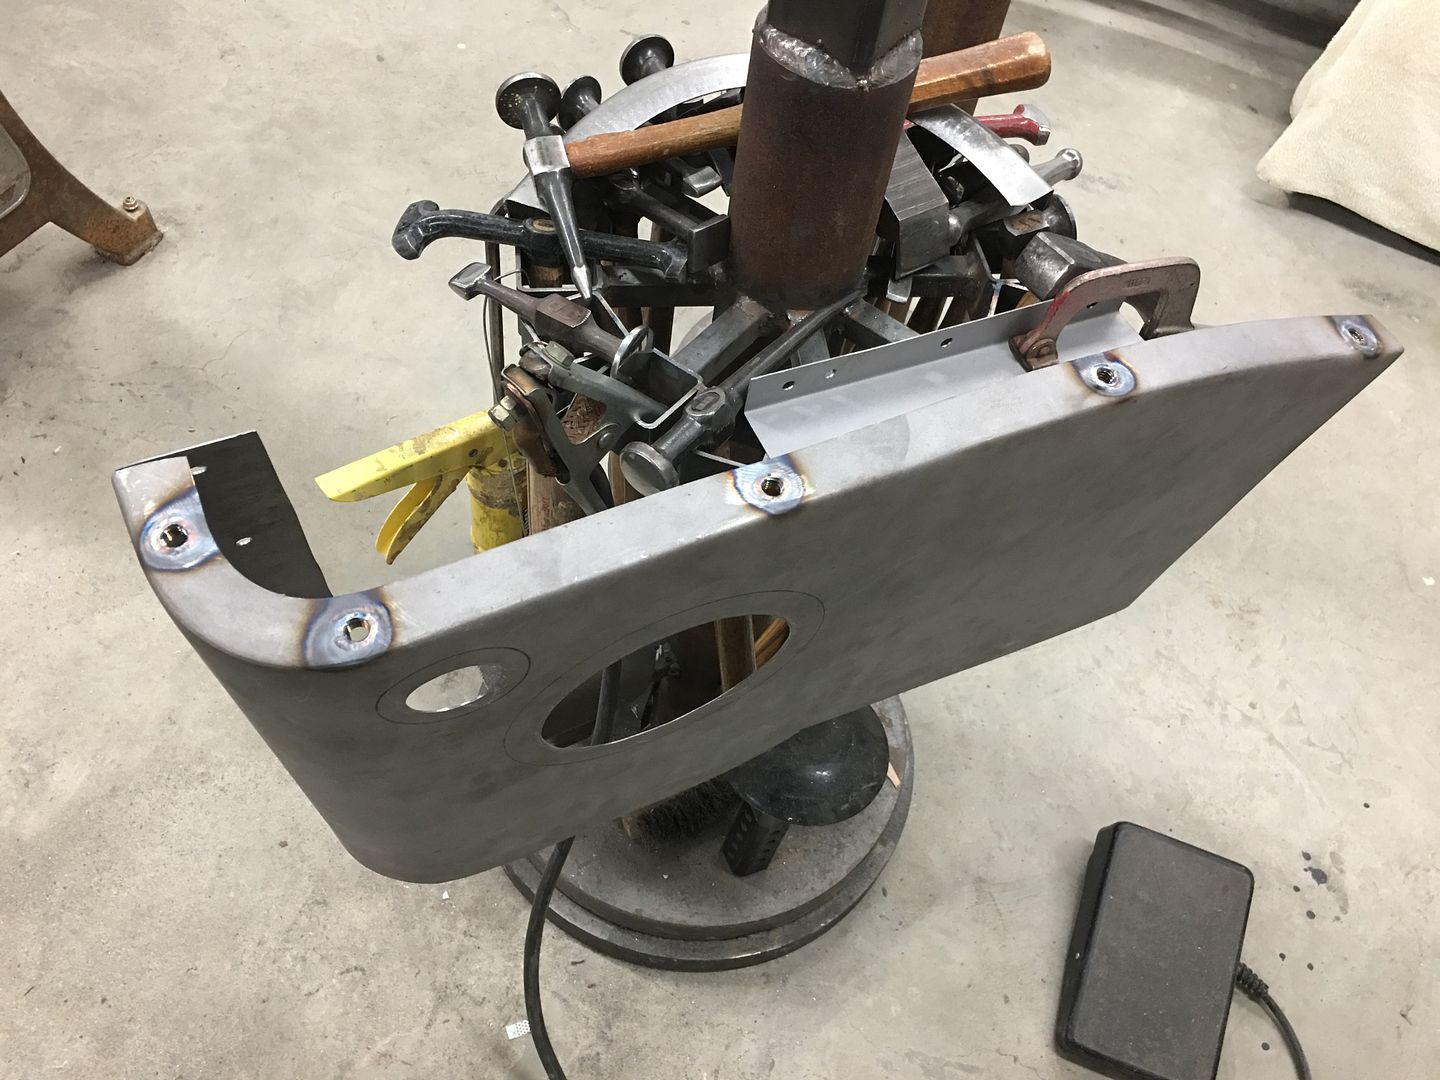
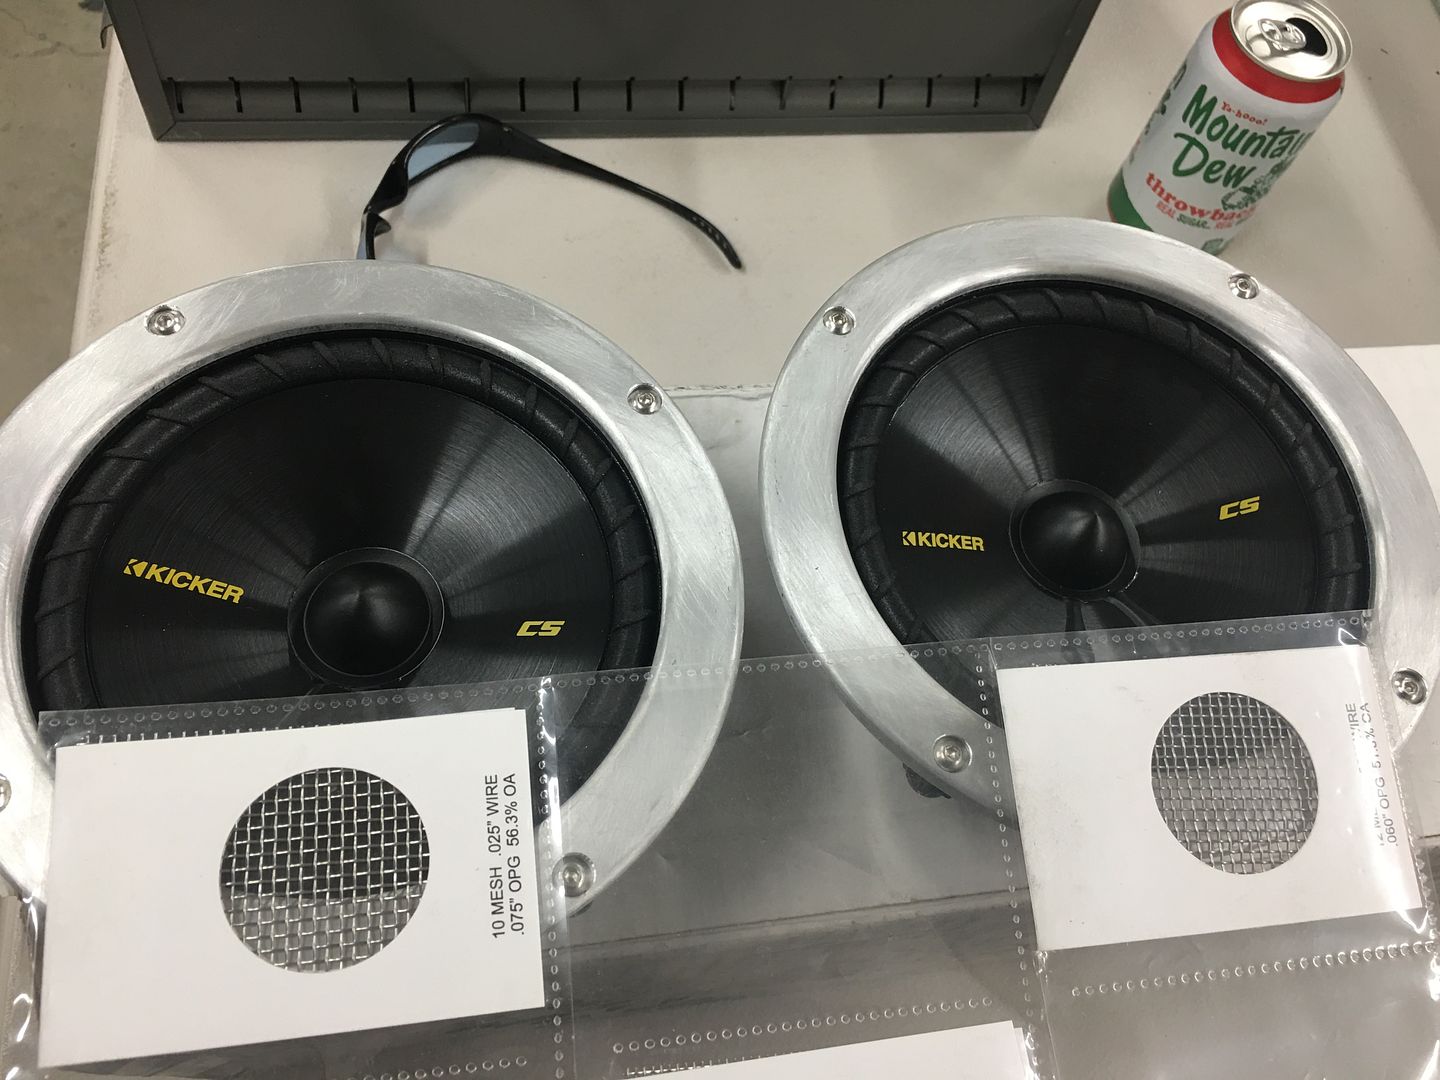
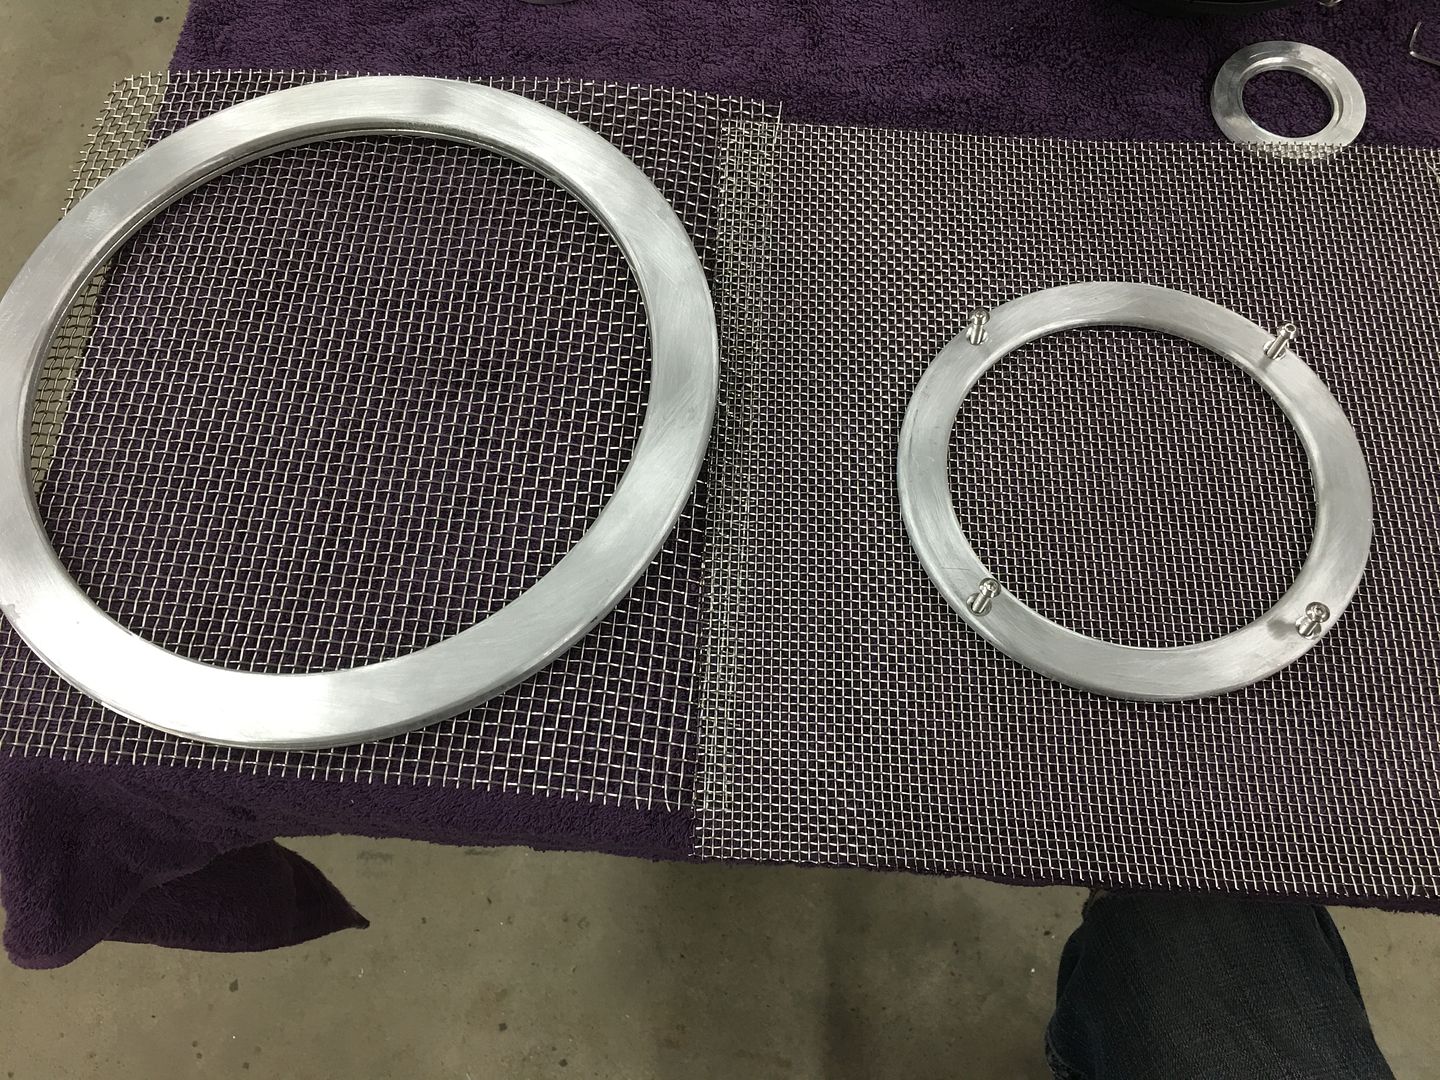
For some of the interior details, we took delivery of the speaker trim rings from my cousin JB, he did a nice job cutting these out for us... They still need holes drilled, stainless mesh cut to fit, and polishing...

....and our Mopar door clips we were going to use for the rear arm rests turned out to be a bit brittle, most snapped off rather than pull back through the hole. So we ordered the similar GM version, keeping our fingers crossed...
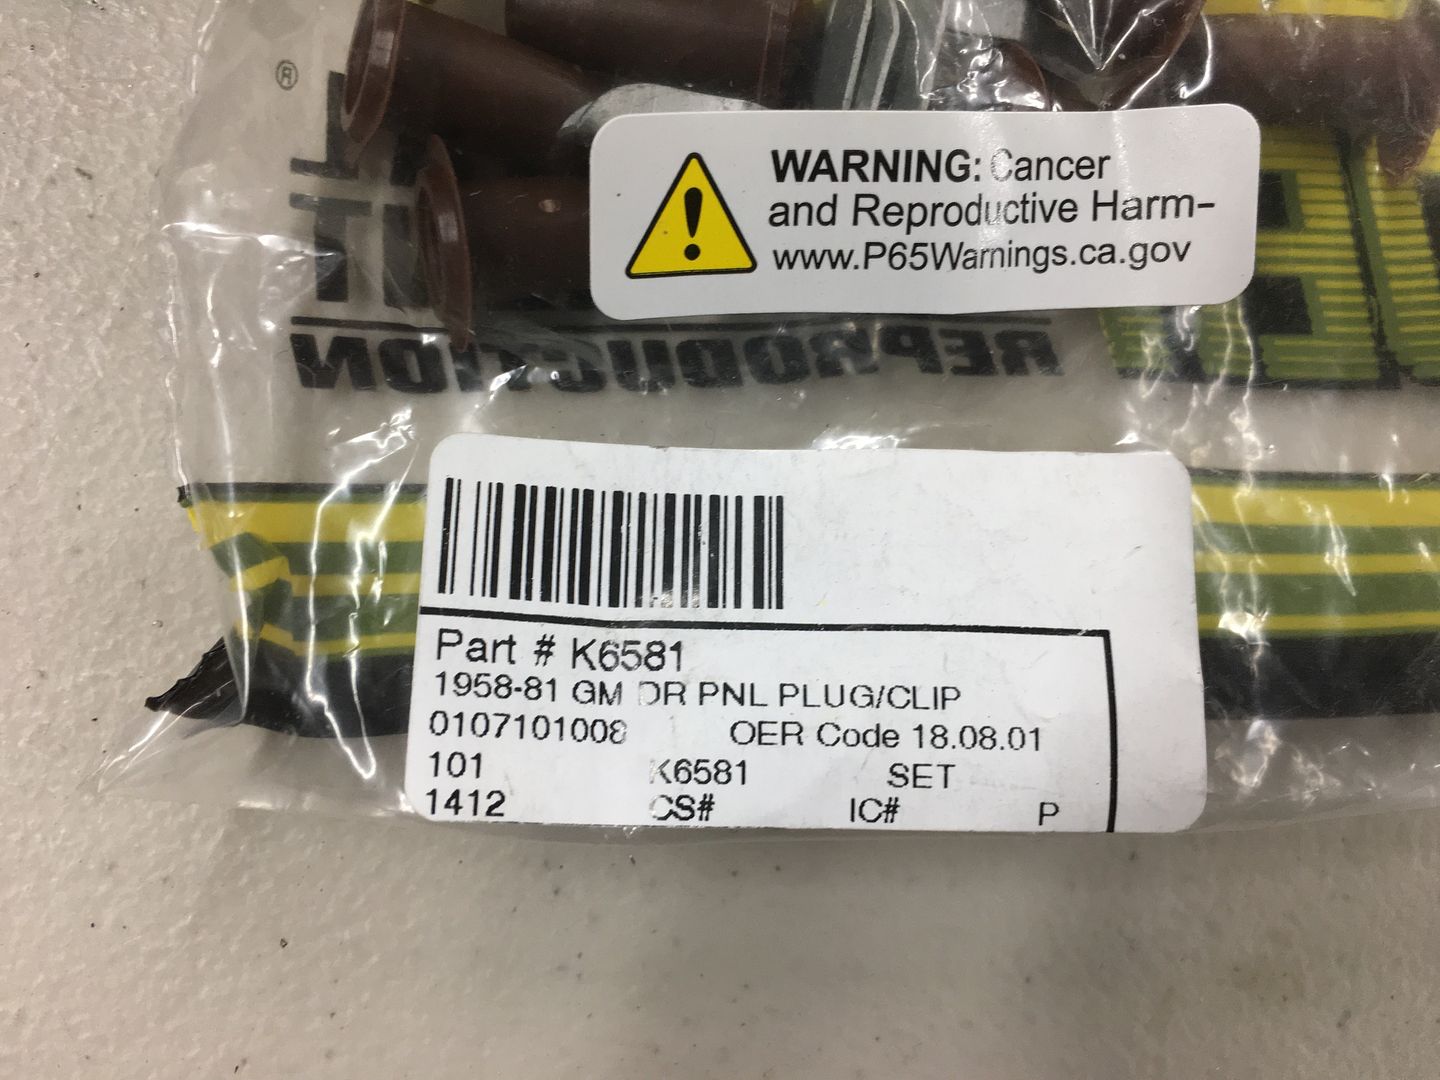
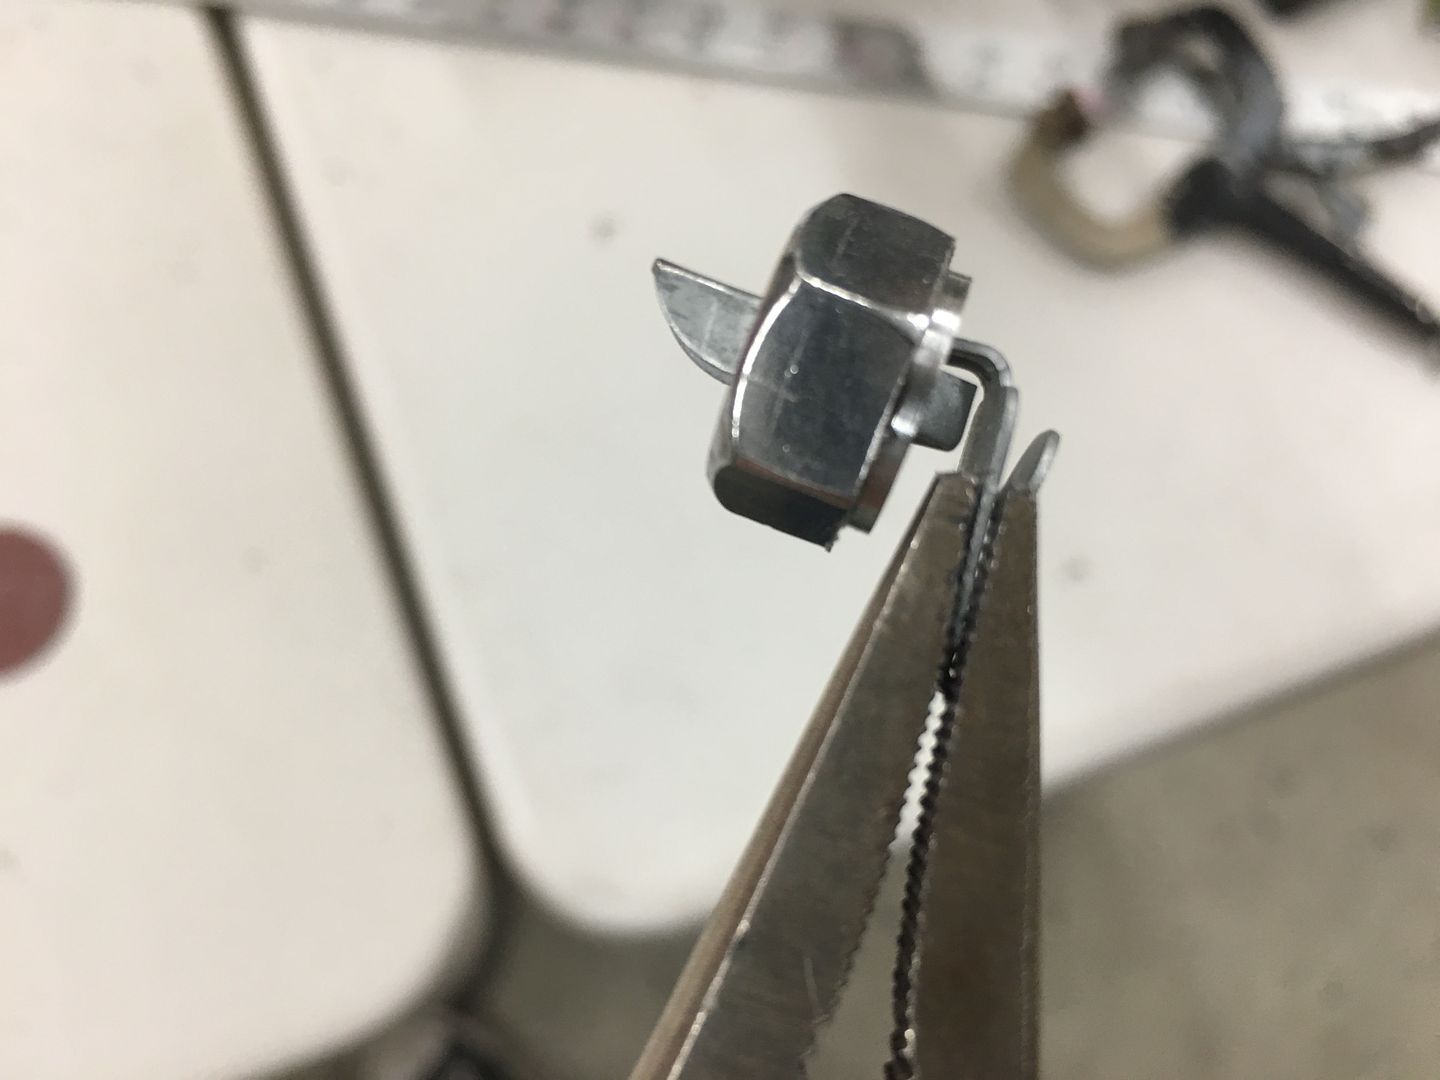
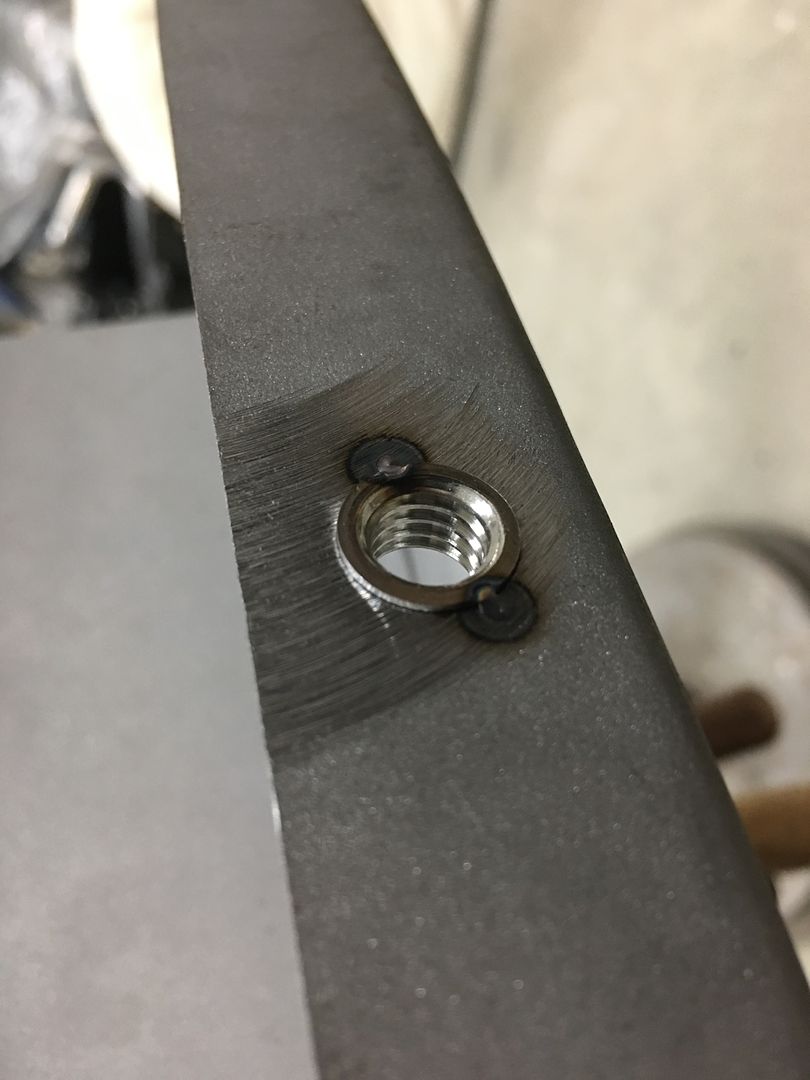
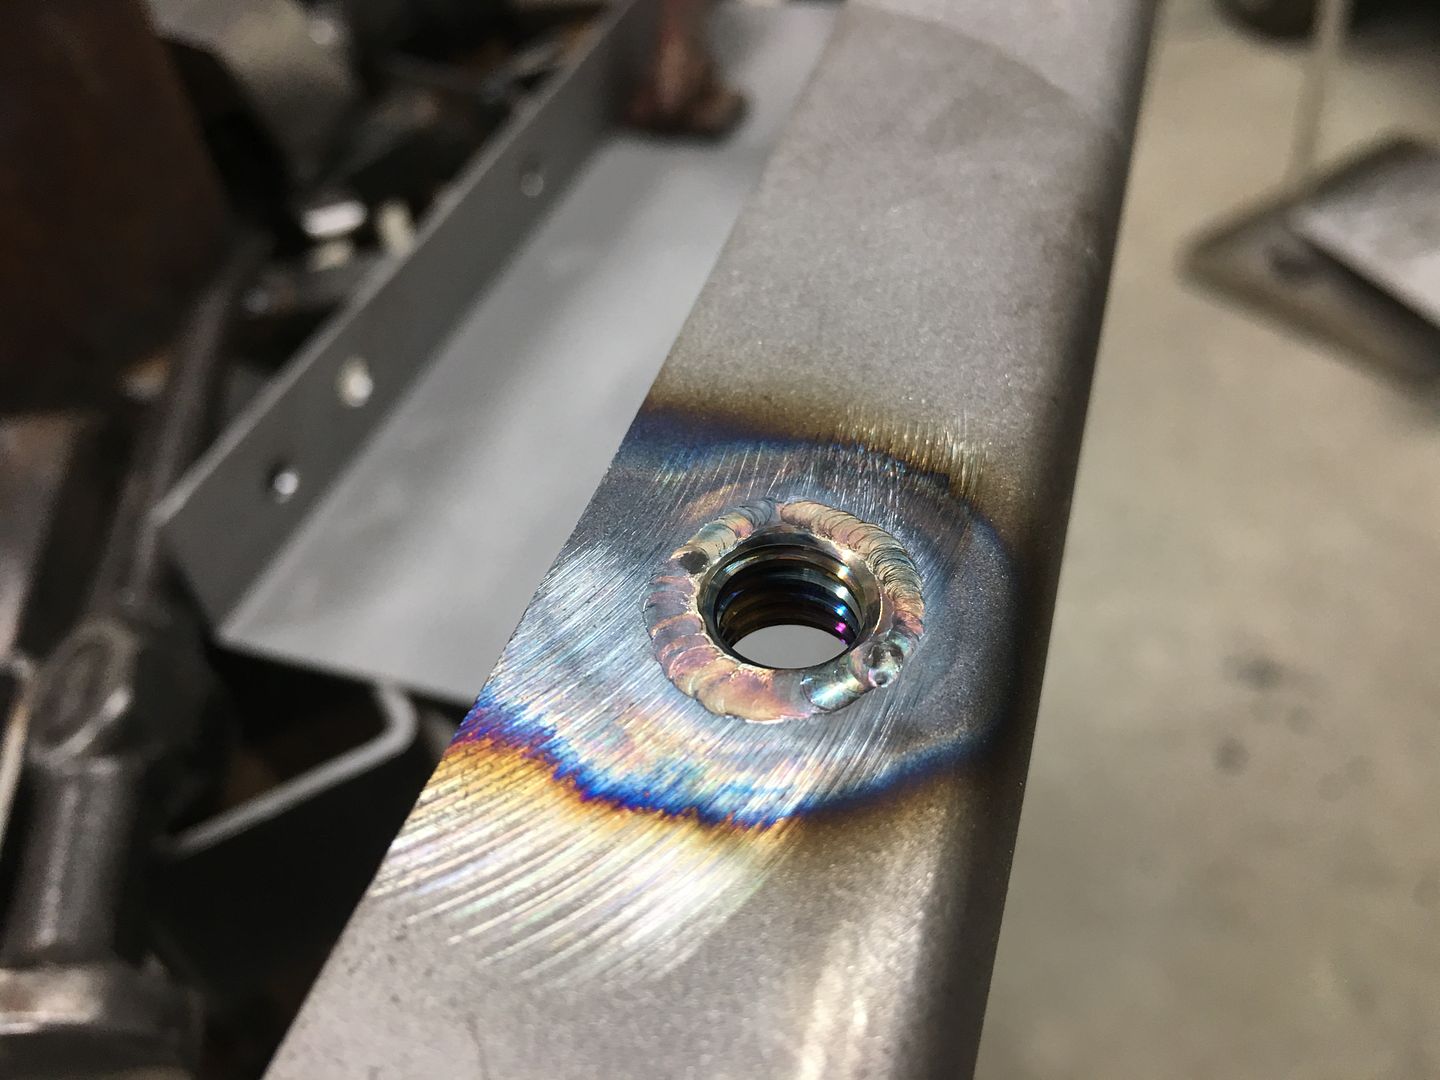
Alas, in my typical Murphy strikes again mode, these were slightly smaller and/or the holes already located in the kick panels were slightly gaping.. We searched the entire shop for a MacGyver solution and found that a 3/8-16 hex nut did a good job of "capturing" the clip, but without the "not letting go" part that a hole in sheet metal provides if the clip rotates slightly while in the hole. So some 3/8 stainless nuts were machined so that they could be welded into the kick panel and yet have the thread grip flush at the surface.
Robert
-
02-04-2019 01:14 PM #1297
CHR Member
- Join Date
- Apr 2011
- Location
- Prairie City
- Car Year, Make, Model: 40 Ford Deluxe, 68 Corvette, 72&76 K30
- Posts
- 7,301
- Blog Entries
- 1
Very nice! What is the piece at the bottom of the threaded rod? Your straightener looks really nice. Nice work on those lines too!Ryan
1940 Ford Deluxe Tudor 354 Hemi 46RH Electric Blue w/multi-color flames, Ford 9" Residing in multiple pieces
1968 Corvette Coupe 5.9 Cummins Drag Car 11.43@130mph No stall leaving the line with 1250 rpm's and poor 2.2 60'
1972 Chevy K30 Longhorn P-pumped 24v Compound Turbos 47RH Just another money pit
1971 Camaro RS 5.3 BTR Stage 3 cam, SuperT10
Tire Sizes
-
02-04-2019 01:36 PM #1298
CHR Member
- Join Date
- Jun 2008
- Location
- Leonardtown
- Car Year, Make, Model: Walking
- Posts
- 1,228
I used round male to female 3/8-16 standoffs and cut those part out of them. The one in the center of the sandwich is drilled out to act as a guide, the other two threaded and tigged to the threaded rod to lock it in place. Used these round parts rather than hex nuts for less chance of rotating parts catching on something..Robert
-
02-10-2019 09:14 PM #1299
CHR Member
- Join Date
- Jun 2008
- Location
- Leonardtown
- Car Year, Make, Model: Walking
- Posts
- 1,228
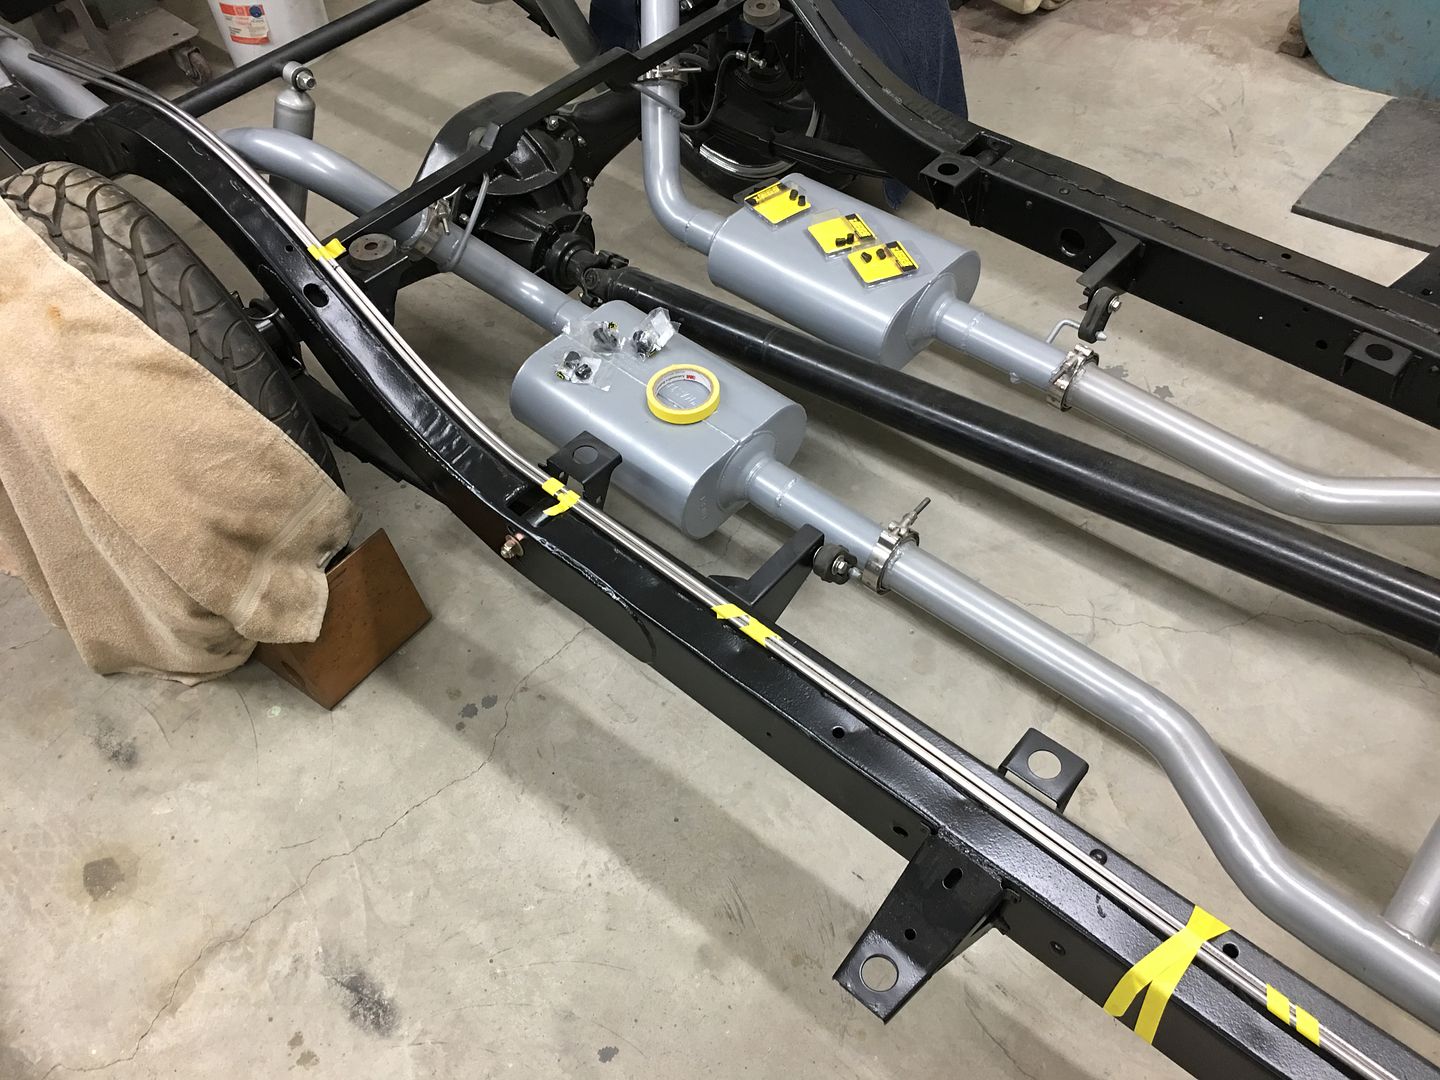
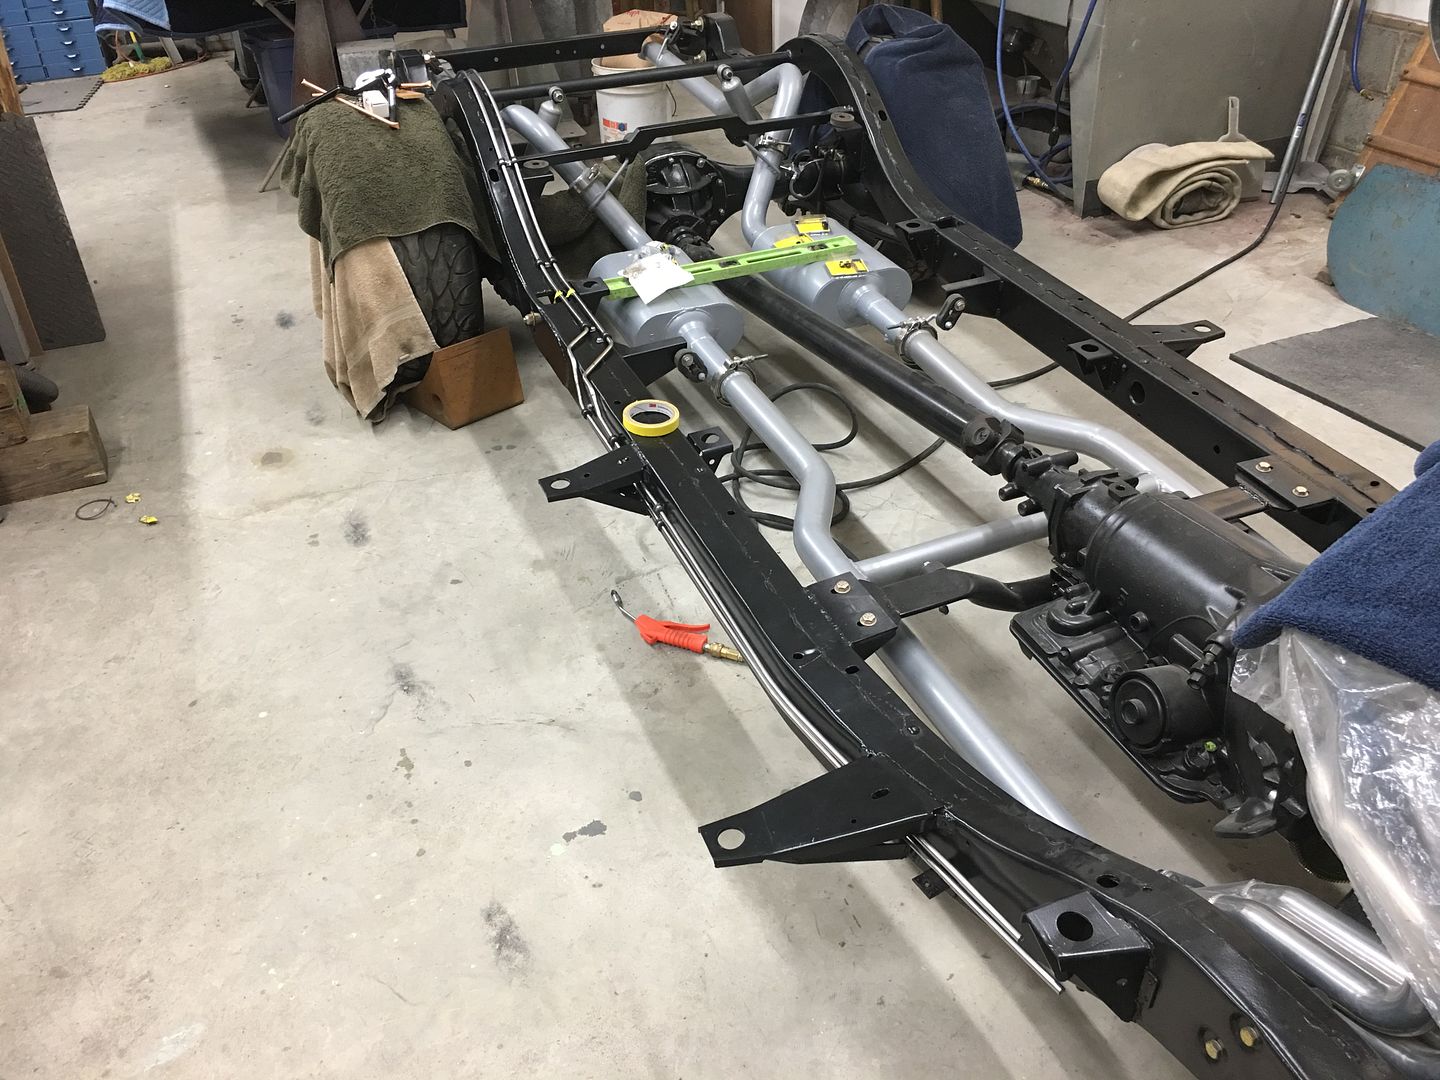
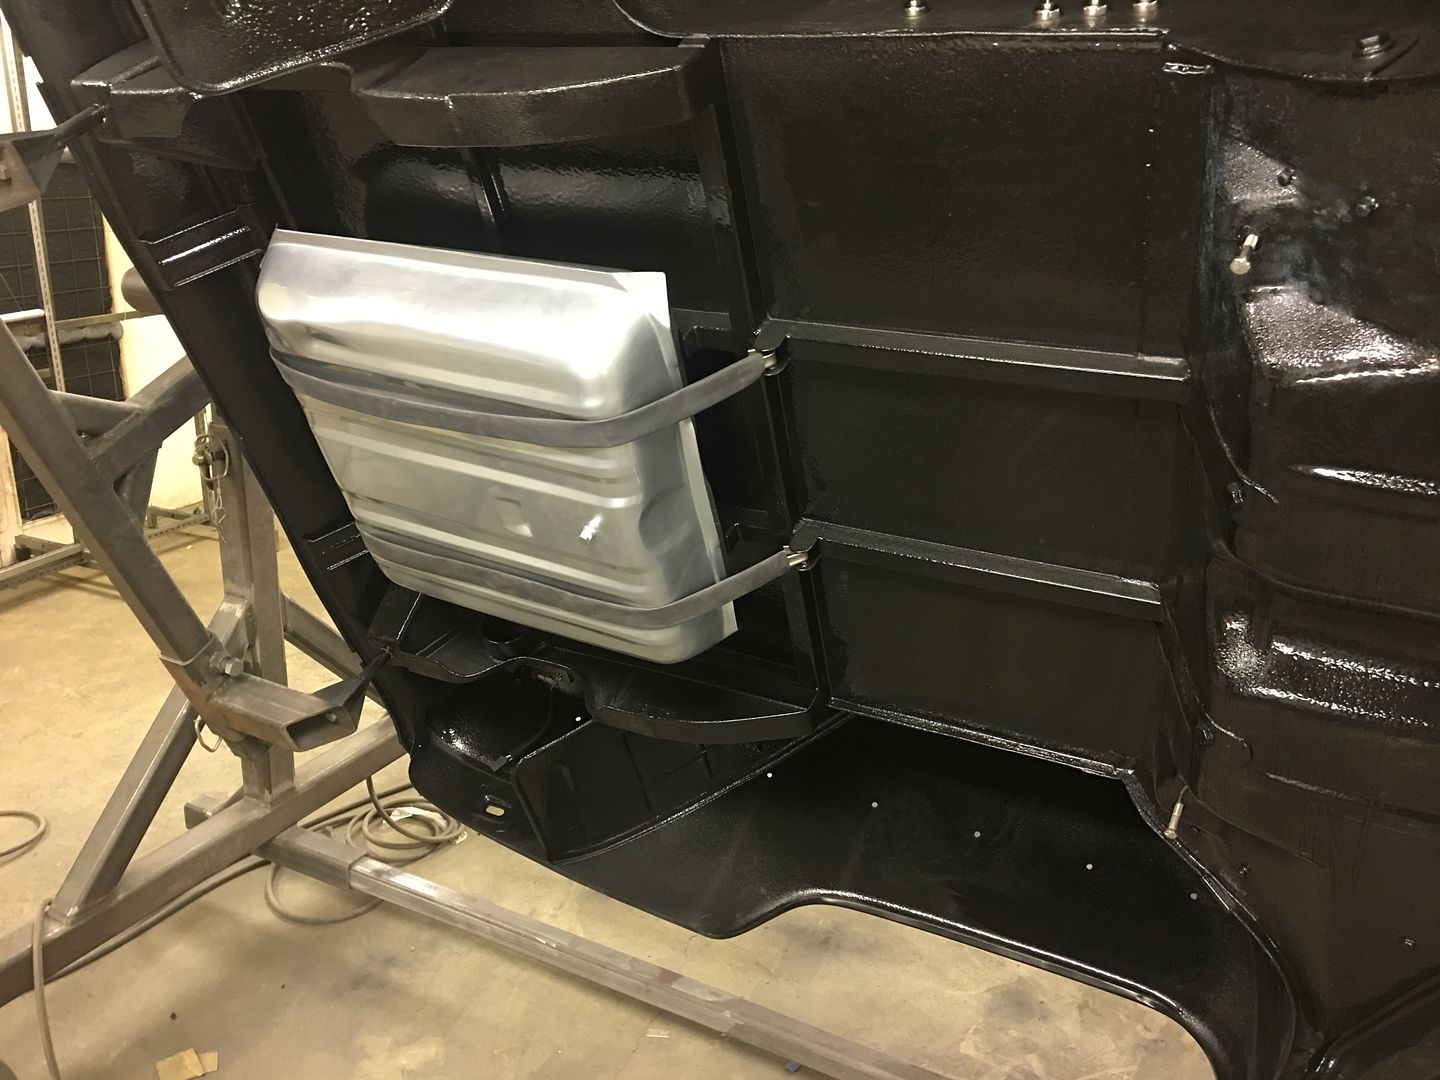
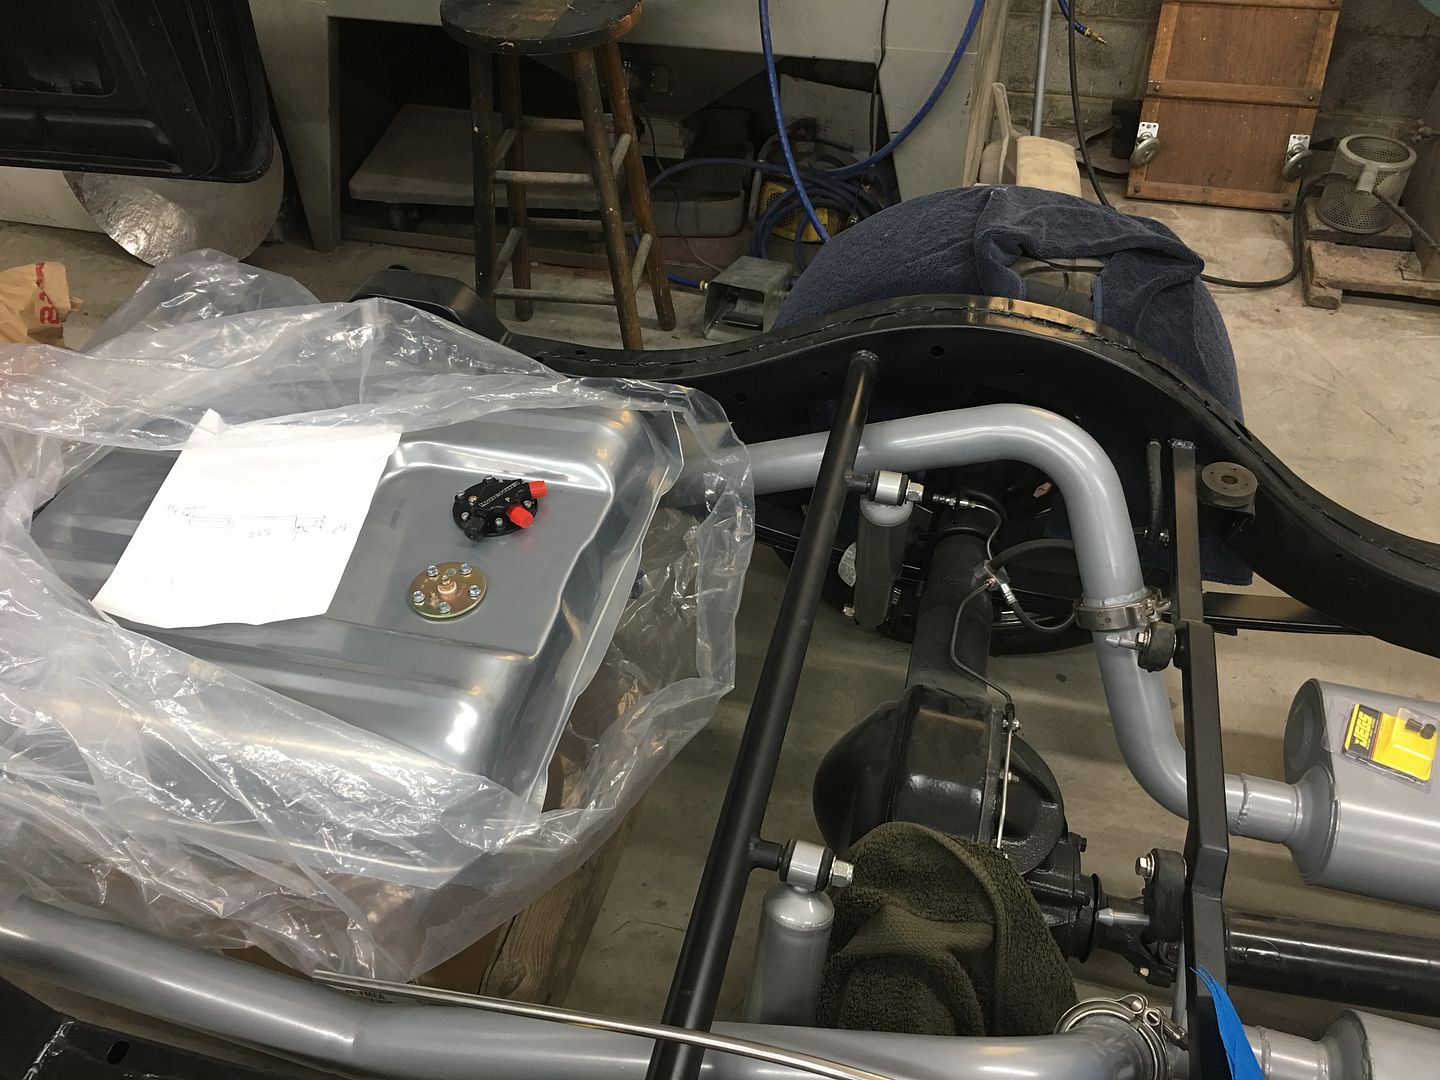
Saturday we got the tank installed so we could get a good reading on where it locates in relation to the body mounts in front of the axle.
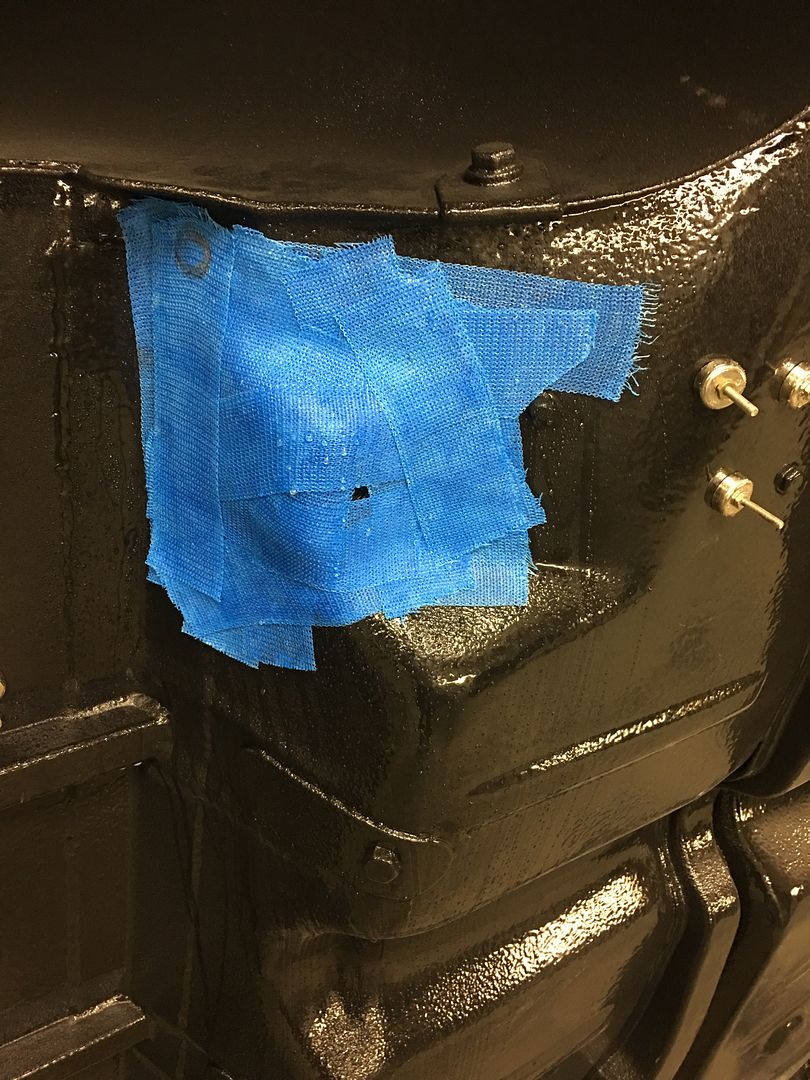
We also pulled a pattern from the body mount so we could bend the lines around it accurately.
Highly technical drawing showing our tank location...
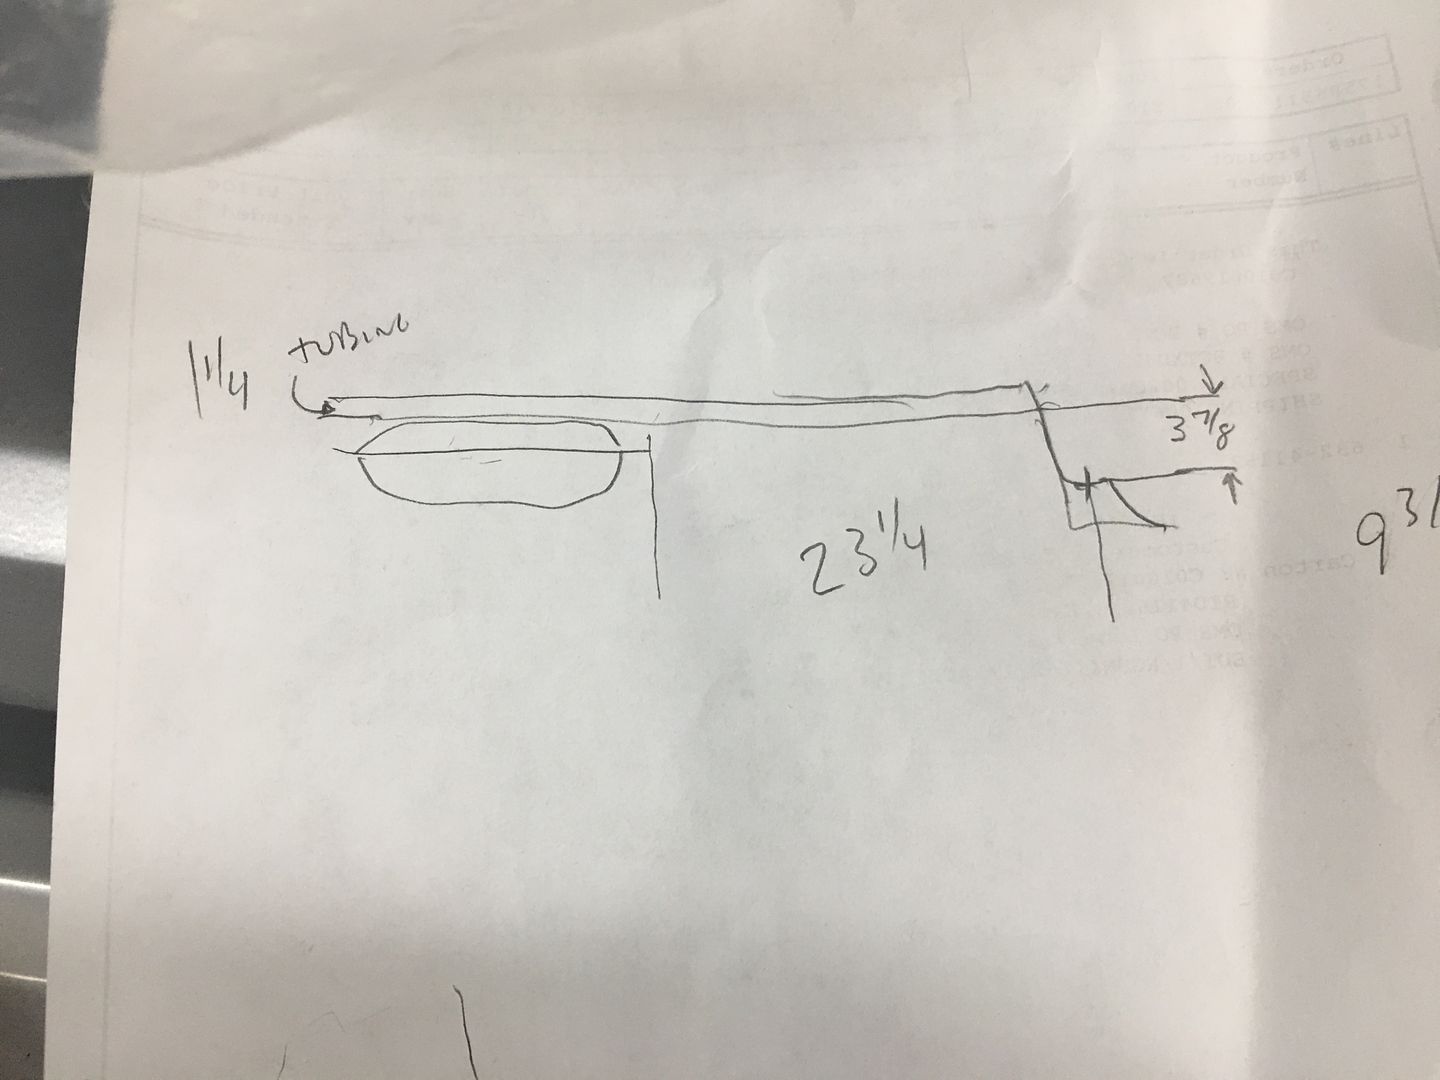
Tank located per our drawing in relation to body mount..
The more I look at this, the less I wanted to use the braided lines between the hard line and the tank. I'm just not comfortable with another fitting in the vicinity of the tail pipes. So back up and punt, looks like we're getting new tubing and bending again. The last lines weren't long enough to make it back to the tank, so we'll chalk them up as practice pieces, learning curve, if you will...
Here the Body mount pattern is bolted up, the lines will make a bend behind this body mount, travel across to the middle, and then toward the back where it will attach directly to the tank.
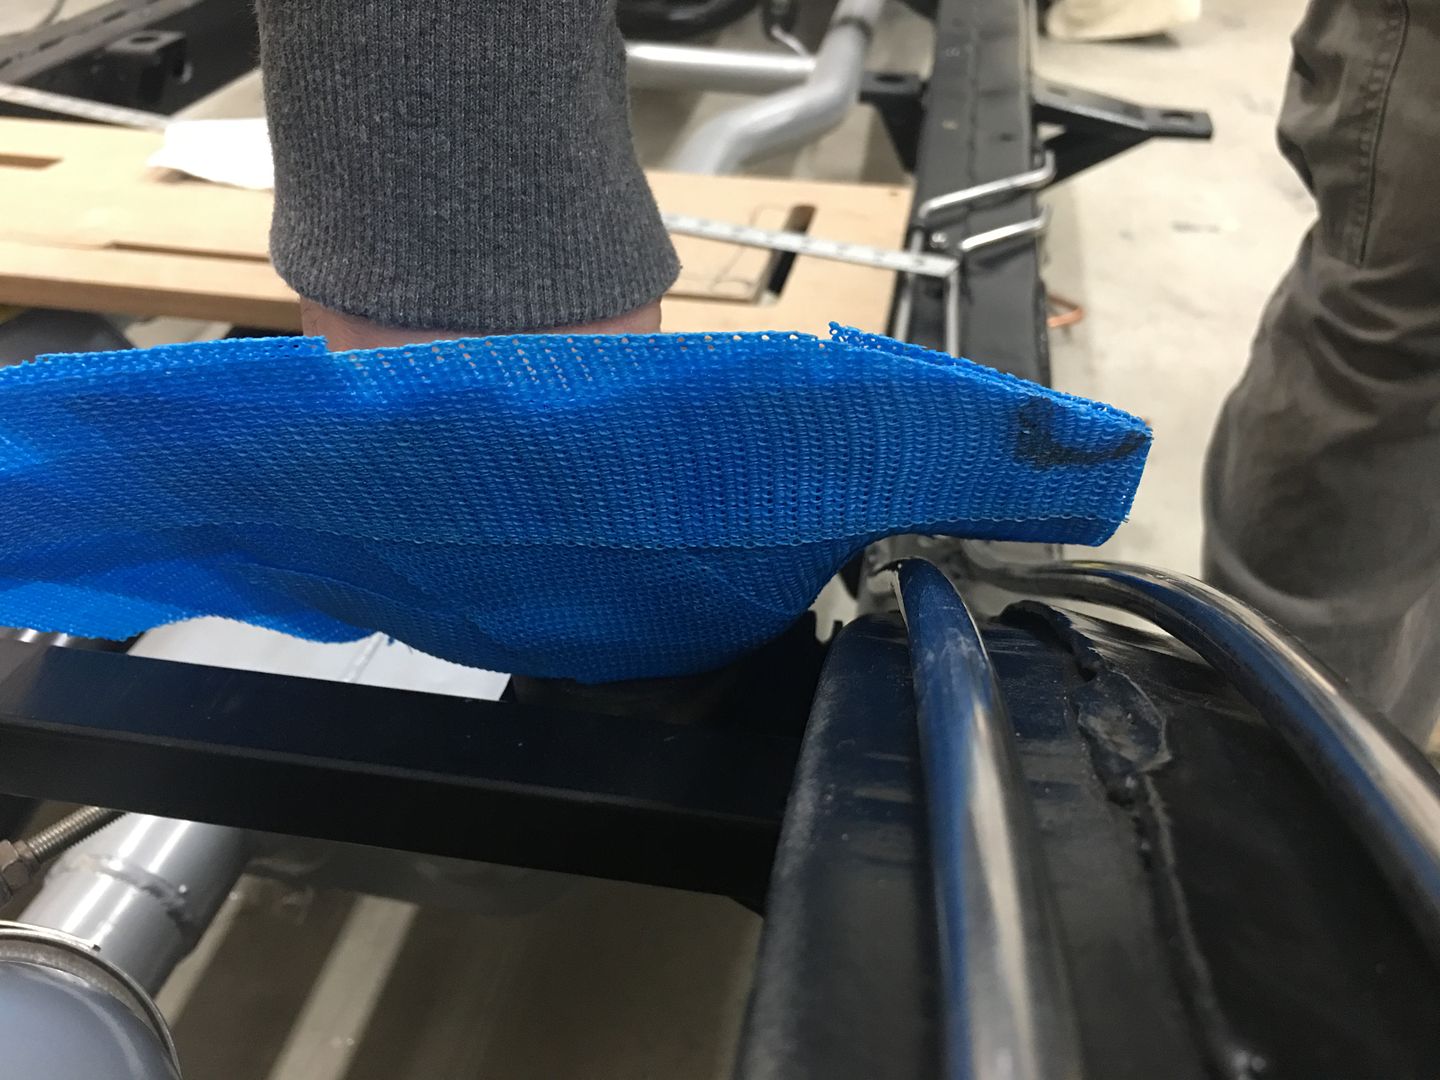
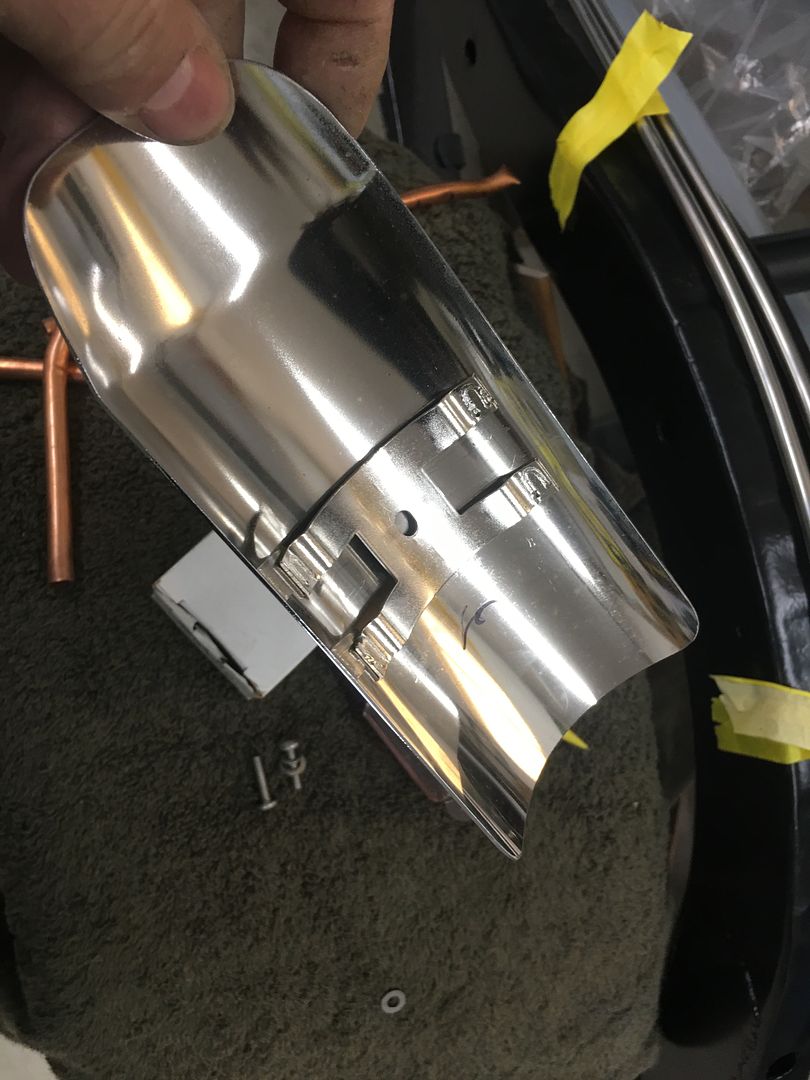
The lines will come close to the passenger tail pipe, so we'll add a heat shield. I visited a local motorcycle shop and picked up a donor...
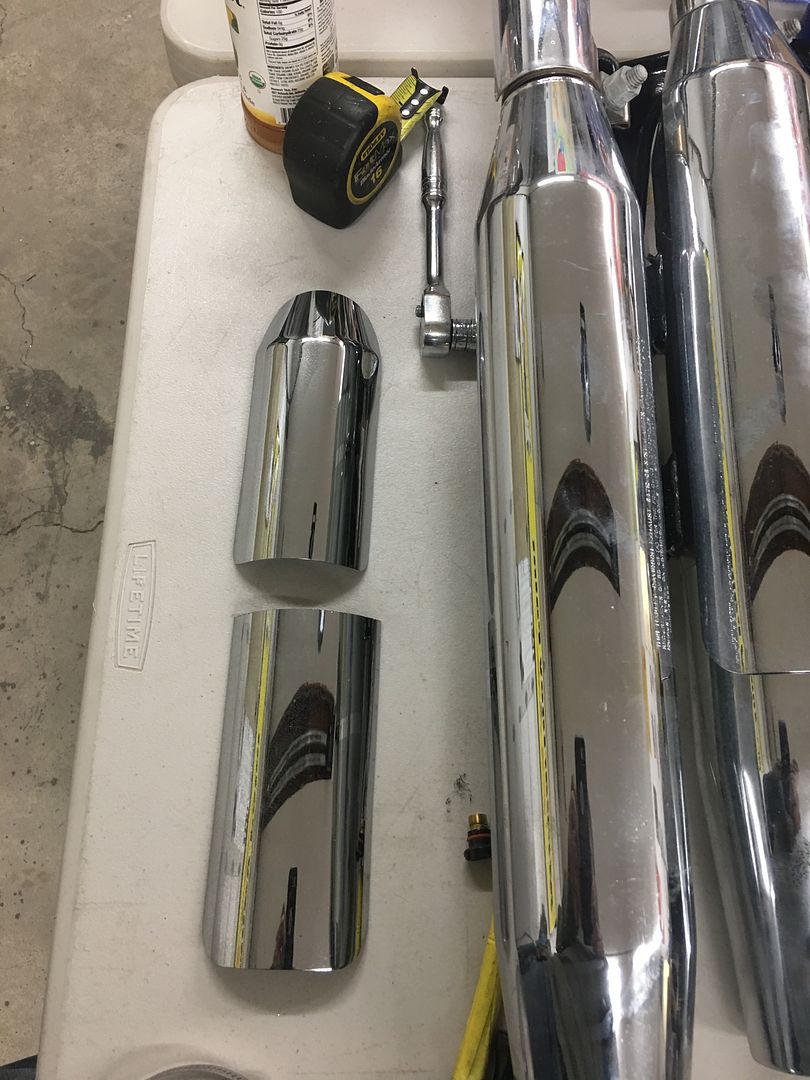
trimmed to fit...
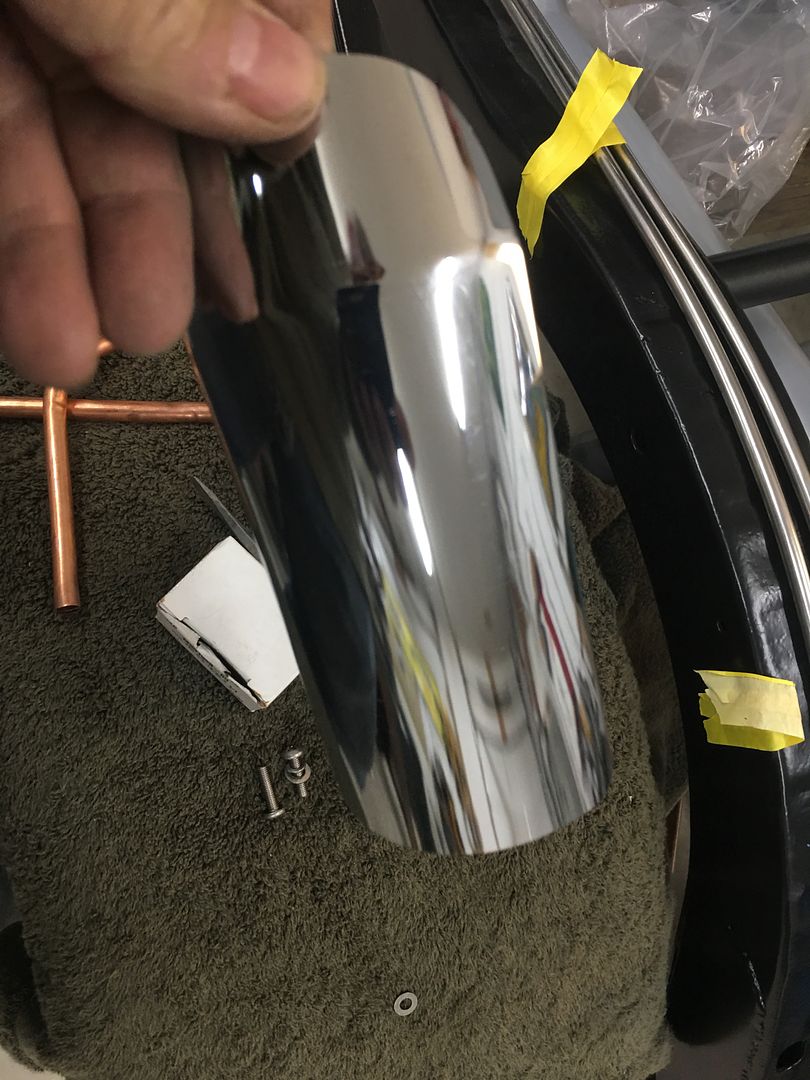
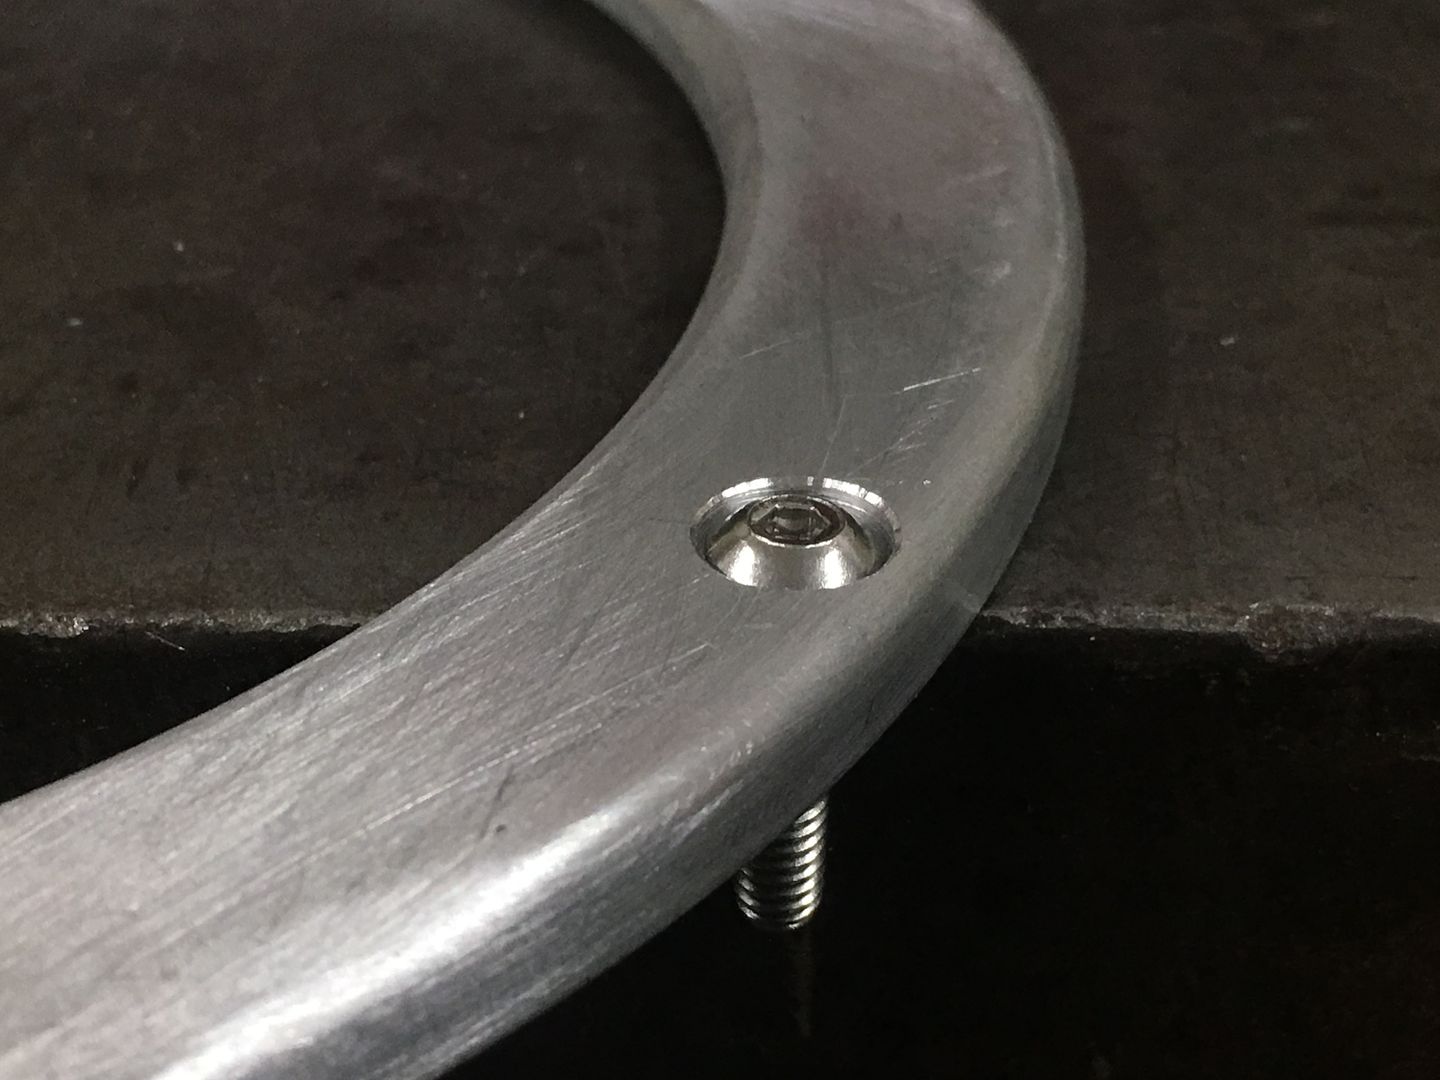
That should do. Next, we need to finish the kick panels for upholstery, which means mounting the speakers. The trim rings from cousin JB will need holes drilled to match the speakers. We have some button head allen screws we plan on using, but didn't really care for the surface mounted look...
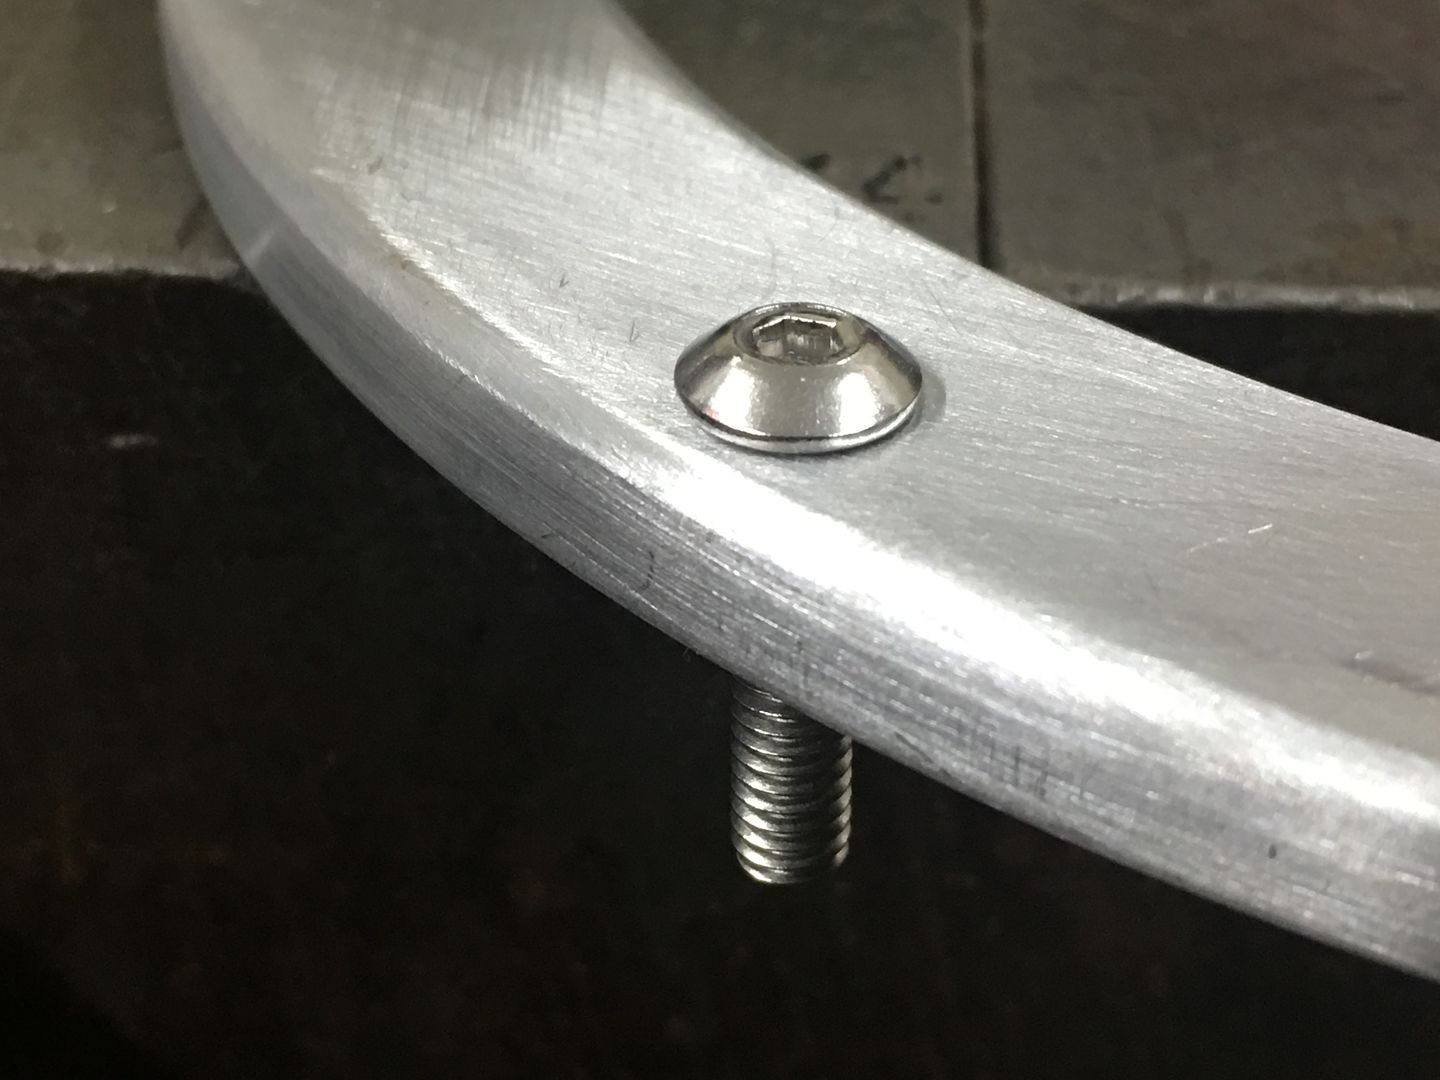
This would look so much better with the details of counterbored holes. Alas, the pitfalls of working on Saturdays without a local source. What's a person to do but make their own. The extended die grinder almost fits the Aloris tool holder too well, like it was made to be.
https://www.youtube.com/watch?v=q38H...ature=youtu.be
A 120 grit roloc sanding disc does well to backface the cutting edge and we are in business..
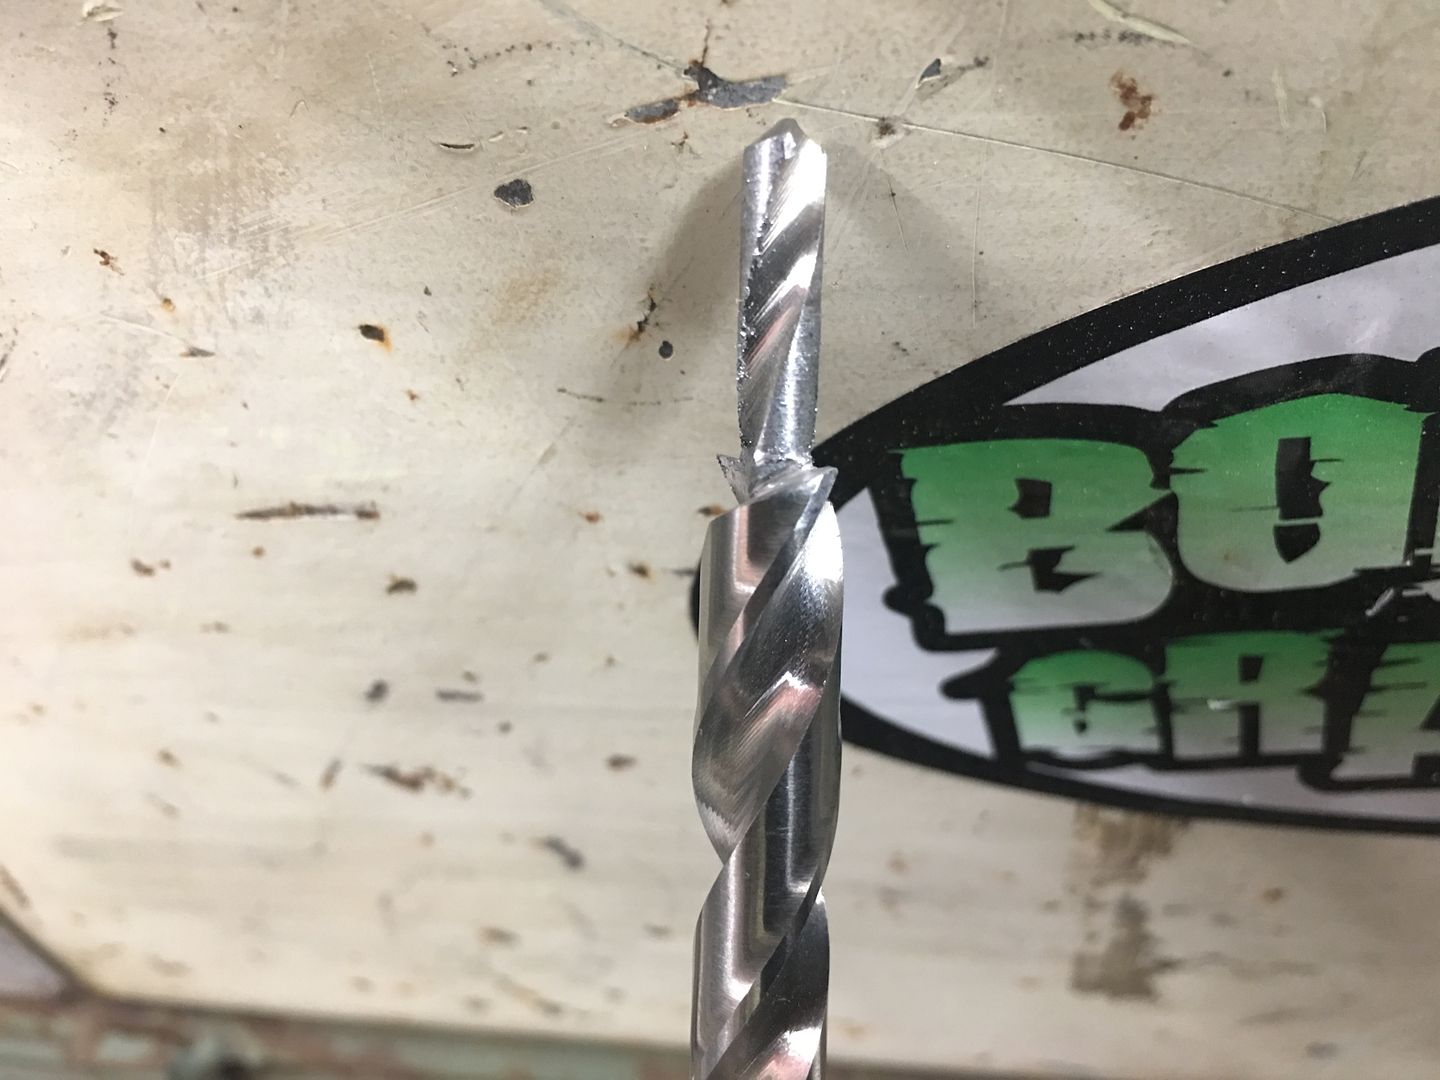
Much better, all in the details..
….and adding the tweeters to the kick panel...
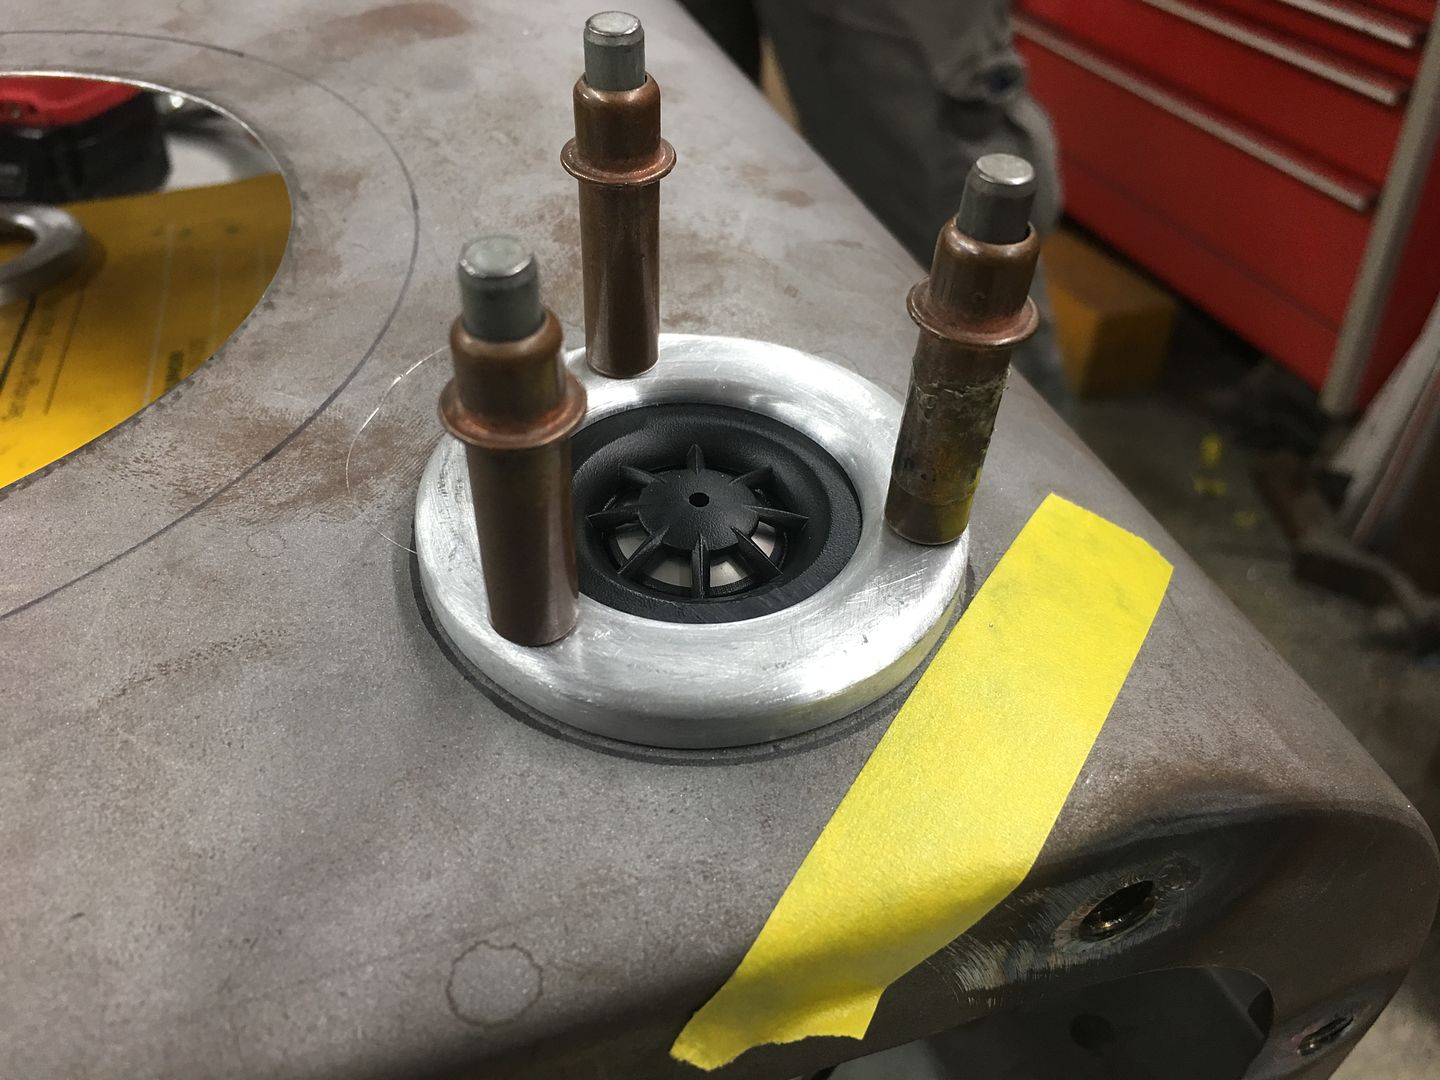
Robert
-
02-11-2019 09:52 AM #1300
CHR Member
- Join Date
- Oct 2007
- Location
- Petaluma
- Car Year, Make, Model: 48 Ford F1
- Posts
- 9,795
Awesome ! Love the adapt and make your own tools. You guys make it look effortless!" "No matter where you go, there you are!" Steve.
-
02-11-2019 12:03 PM #1301
CHR Member
- Join Date
- Apr 2011
- Location
- Prairie City
- Car Year, Make, Model: 40 Ford Deluxe, 68 Corvette, 72&76 K30
- Posts
- 7,301
- Blog Entries
- 1
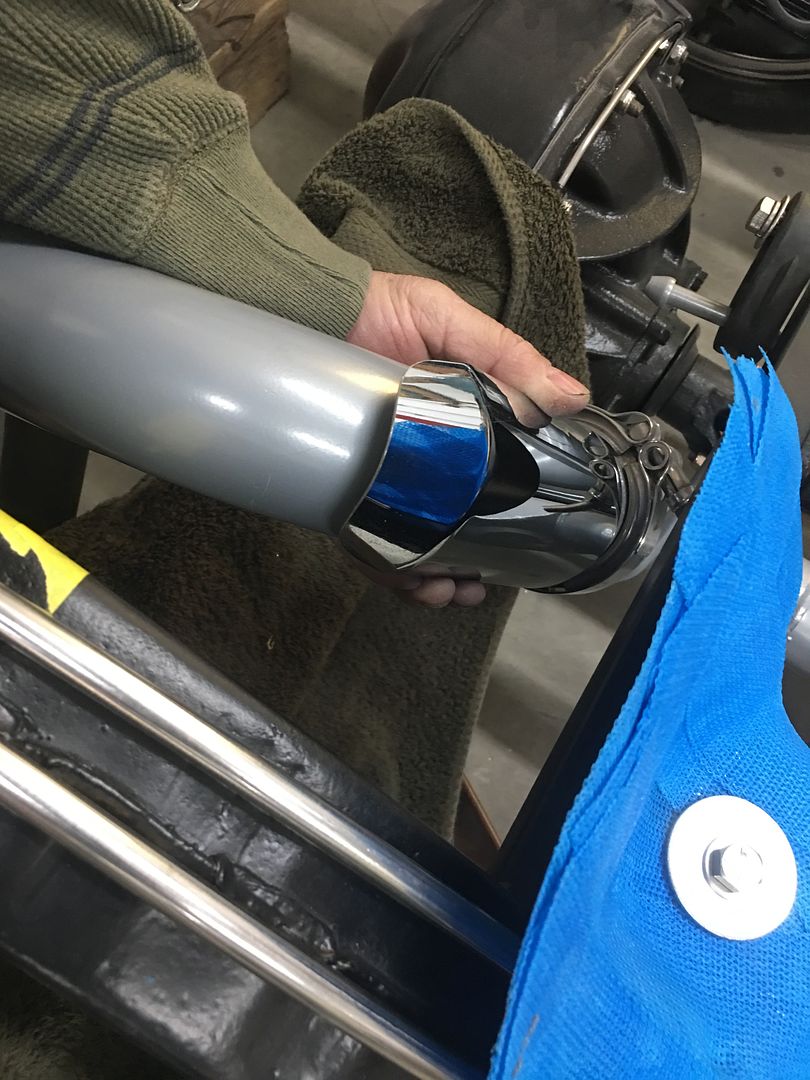
Aww man, that is just too cool. Way to go being creative and master minding it again! How do those heat shields attach? It looks like a v band clamp at the bottom of it in the pic? By the looks of the bracket of the bottom side of it, I'm assuming a regular worm rear hose clamp slips in the bracket?
.Ryan
1940 Ford Deluxe Tudor 354 Hemi 46RH Electric Blue w/multi-color flames, Ford 9" Residing in multiple pieces
1968 Corvette Coupe 5.9 Cummins Drag Car 11.43@130mph No stall leaving the line with 1250 rpm's and poor 2.2 60'
1972 Chevy K30 Longhorn P-pumped 24v Compound Turbos 47RH Just another money pit
1971 Camaro RS 5.3 BTR Stage 3 cam, SuperT10
Tire Sizes
-
02-11-2019 12:21 PM #1302
CHR Member
- Join Date
- Jun 2008
- Location
- Leonardtown
- Car Year, Make, Model: Walking
- Posts
- 1,228
Yes, stainless worm gear clamp.Robert
-
02-13-2019 05:43 AM #1303
CHR Member
- Join Date
- Jun 2008
- Location
- Leonardtown
- Car Year, Make, Model: Walking
- Posts
- 1,228
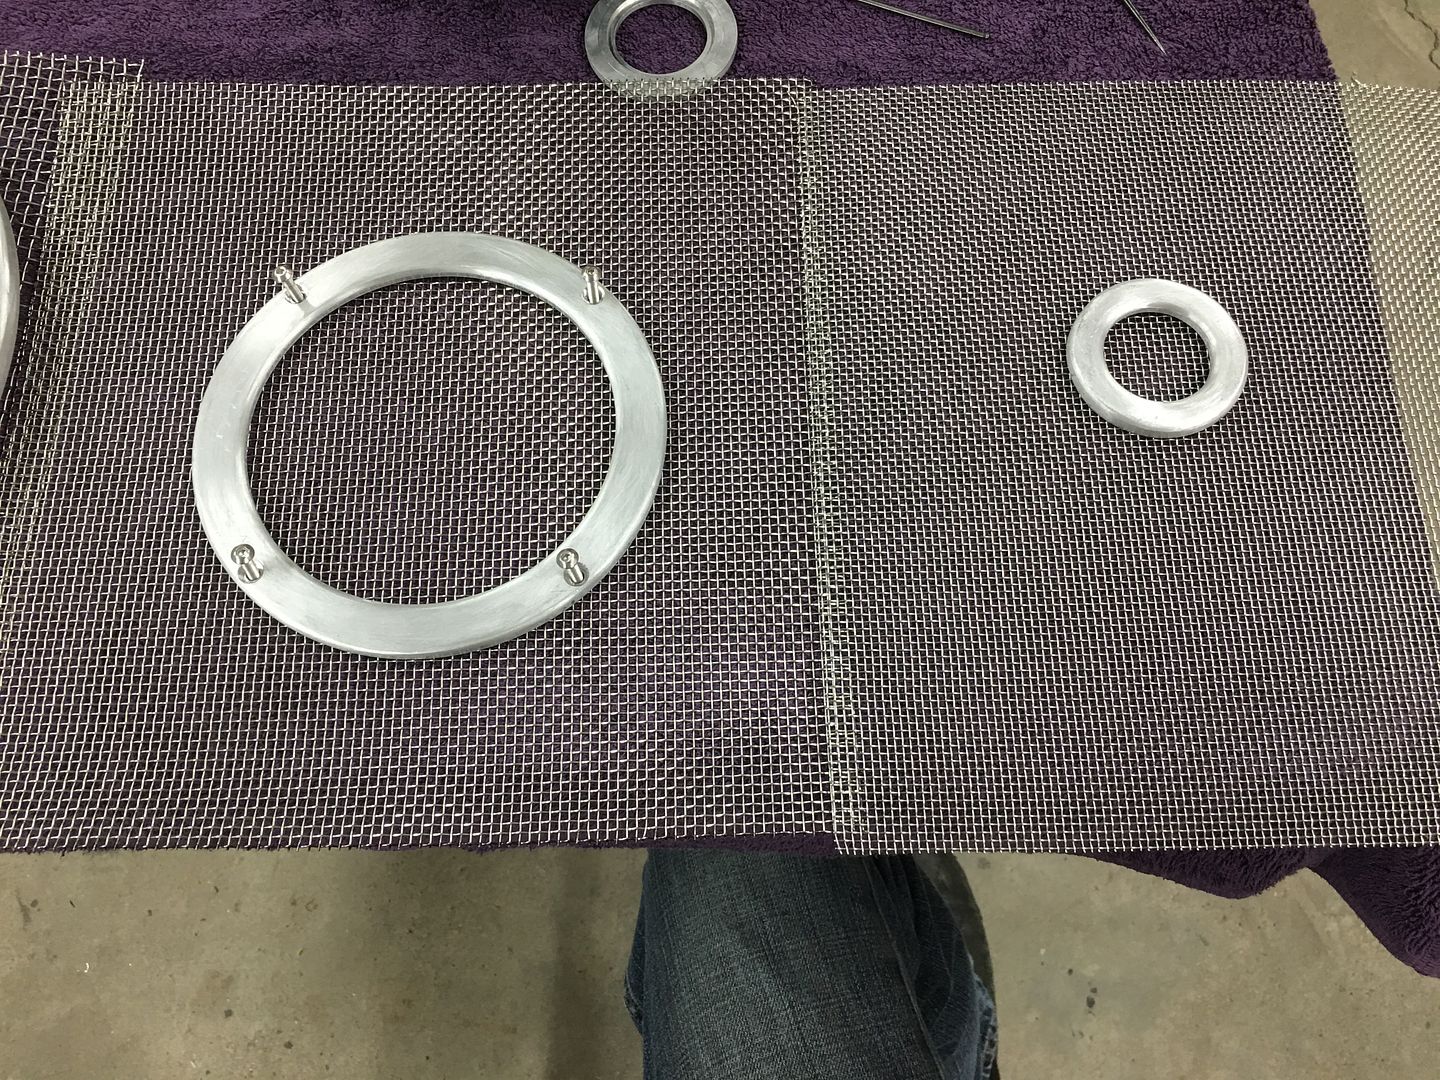
Took delivery yesterday of the 304 Stainless mesh for the speaker grills.
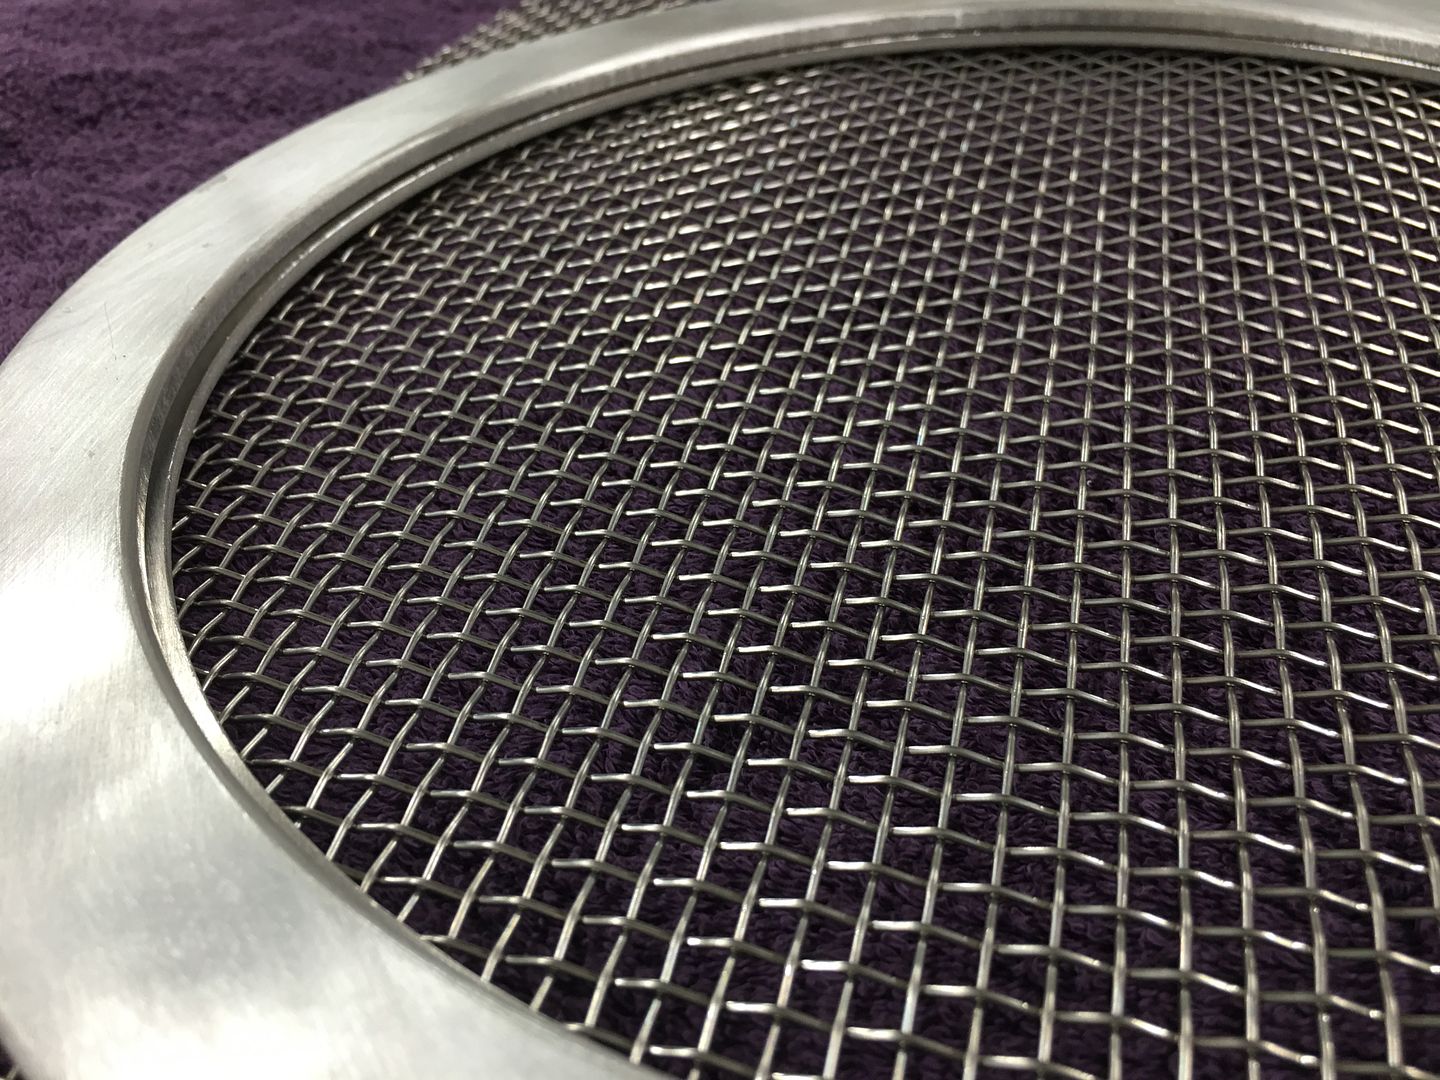
Just like we used different widths on the trim rings so they would be proportional to the diameter, with the mesh we used three different sizes as well..
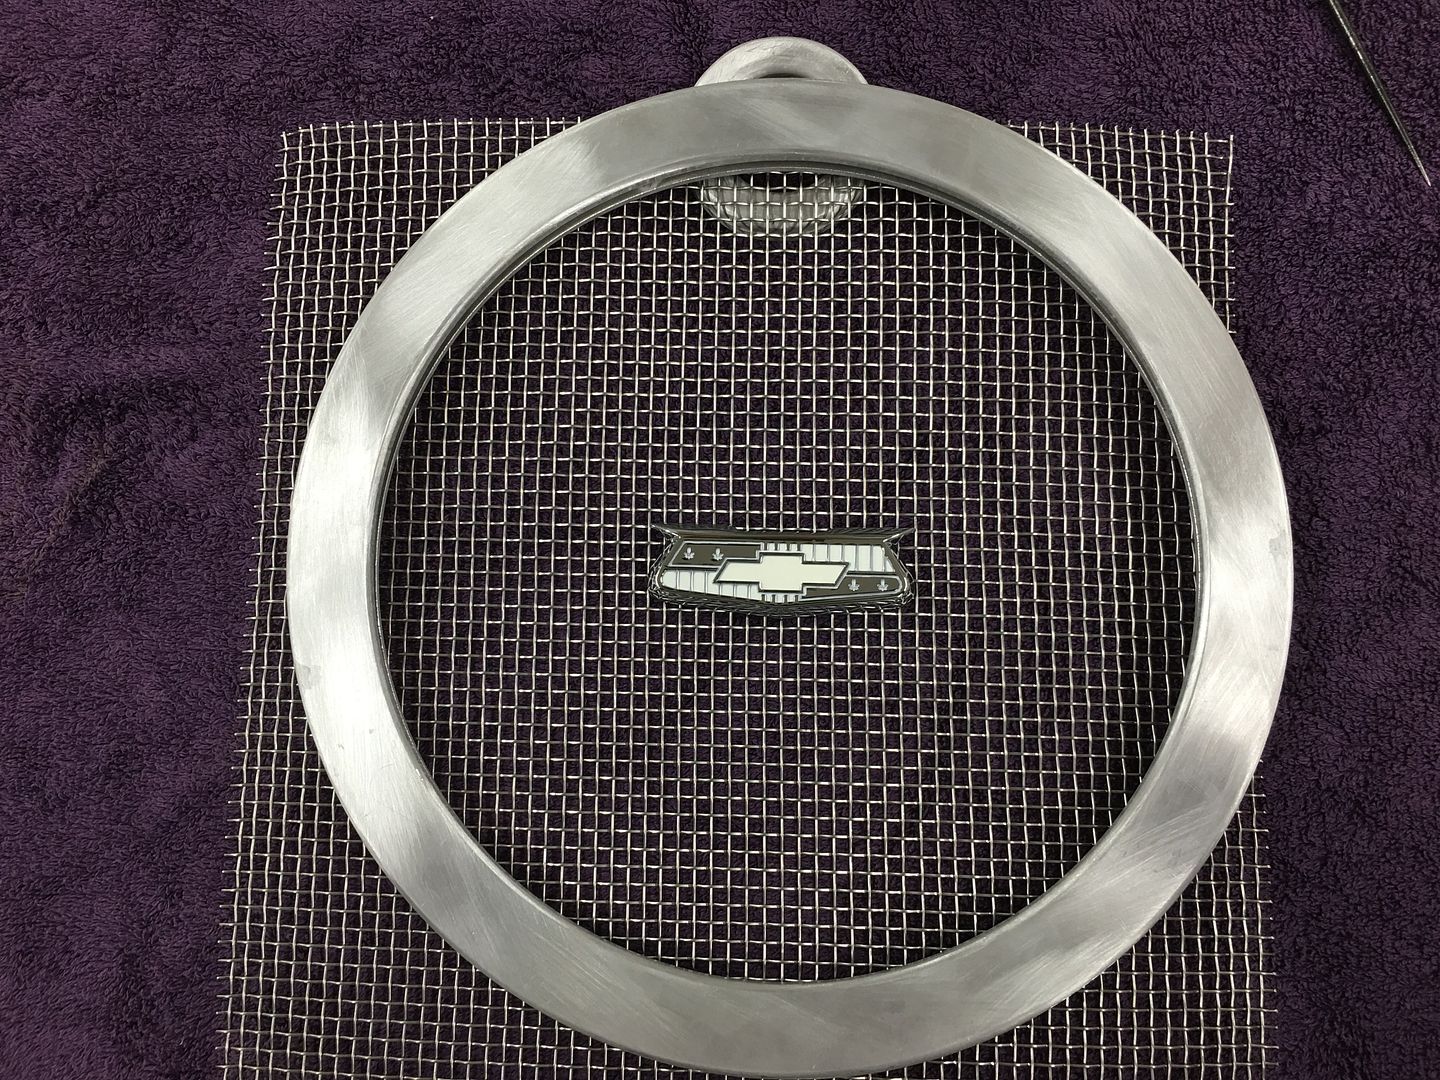
For the bass speaker grill we are also adding a BelAir emblem. The mesh will be recessed for that so the emblem is flush, then the remaining mesh will be pressed outward so it is flush with the surface of the trim ring. (or so) Now for the unofficial poll, would you orient the mesh straight across/up and down, or at a 45 degree rotation?

Robert
-
02-13-2019 06:47 AM #1304
CHR Member
- Join Date
- Jan 2006
- Location
- Constantine
- Car Year, Make, Model: 57 chevy 2 dr wagon
- Posts
- 9,476
craftsmanship all the wayCharlie
Lovin' what I do and doing what I love
Some guys can fix broken NO ONE can fix STUPID
W8AMR
http://fishertrains94.webs.com/
Christian in training
-
02-13-2019 01:46 PM #1305
CHR Member
- Join Date
- Apr 2011
- Location
- Prairie City
- Car Year, Make, Model: 40 Ford Deluxe, 68 Corvette, 72&76 K30
- Posts
- 7,301
- Blog Entries
- 1
I kind of like the 45* but straight would match the dash trim I think. Where did you source the SS mesh? I like the idea of the emblem being in the center too. Especially flush mounted. Are you going to make a buck to form the mesh down?Ryan
1940 Ford Deluxe Tudor 354 Hemi 46RH Electric Blue w/multi-color flames, Ford 9" Residing in multiple pieces
1968 Corvette Coupe 5.9 Cummins Drag Car 11.43@130mph No stall leaving the line with 1250 rpm's and poor 2.2 60'
1972 Chevy K30 Longhorn P-pumped 24v Compound Turbos 47RH Just another money pit
1971 Camaro RS 5.3 BTR Stage 3 cam, SuperT10
Tire Sizes
 Reply With Quote

Posting Permissions
- You may not post new threads
- You may not post replies
- You may not post attachments
- You may not edit your posts

i've enjoyed the years here . made a lot of friends. most who have left. i see no reason to continue with this so hope to see you somewhere else. i dont think this site will ever be back. it's lived...
Dead!