


 3390Likes
Thread: 55 Wagon Progress


Results 1,231 to 1,245 of 1865
 LinkBack URL
 About LinkBacks
-
10-19-2018 05:50 AM #1231
 CHR Member

- Join Date
- Jan 2006
- Location
- Constantine
- Car Year, Make, Model: 57 chevy 2 dr wagon
- Posts
- 9,476
"Quality" and you know itCharlie
Lovin' what I do and doing what I love
Some guys can fix broken NO ONE can fix STUPID
W8AMR
http://fishertrains94.webs.com/
Christian in training
-
Advertising

- Google Adsense
- REGISTERED USERS DO NOT SEE THIS AD
-
10-24-2018 06:10 AM #1232
CHR Member
- Join Date
- Jun 2008
- Location
- Leonardtown
- Car Year, Make, Model: Walking
- Posts
- 1,228
Saturday morning Mike and I went to look at a 39 Ford that needs a complete new wiring harness. What a rats nest the under-dash was, with far too many splices. When people run wires with no regard to movement and function of things like the cowl vent handle or parking brake, when three separate wires are spliced to go from one point to another, you just shake your head. For me I guess it validates what I do in sharing the various tips and methods in this thread. If it helps one person to get some ideas to better improve their own build, or it keeps hack work like we saw Saturday from happening, then mission accomplished.
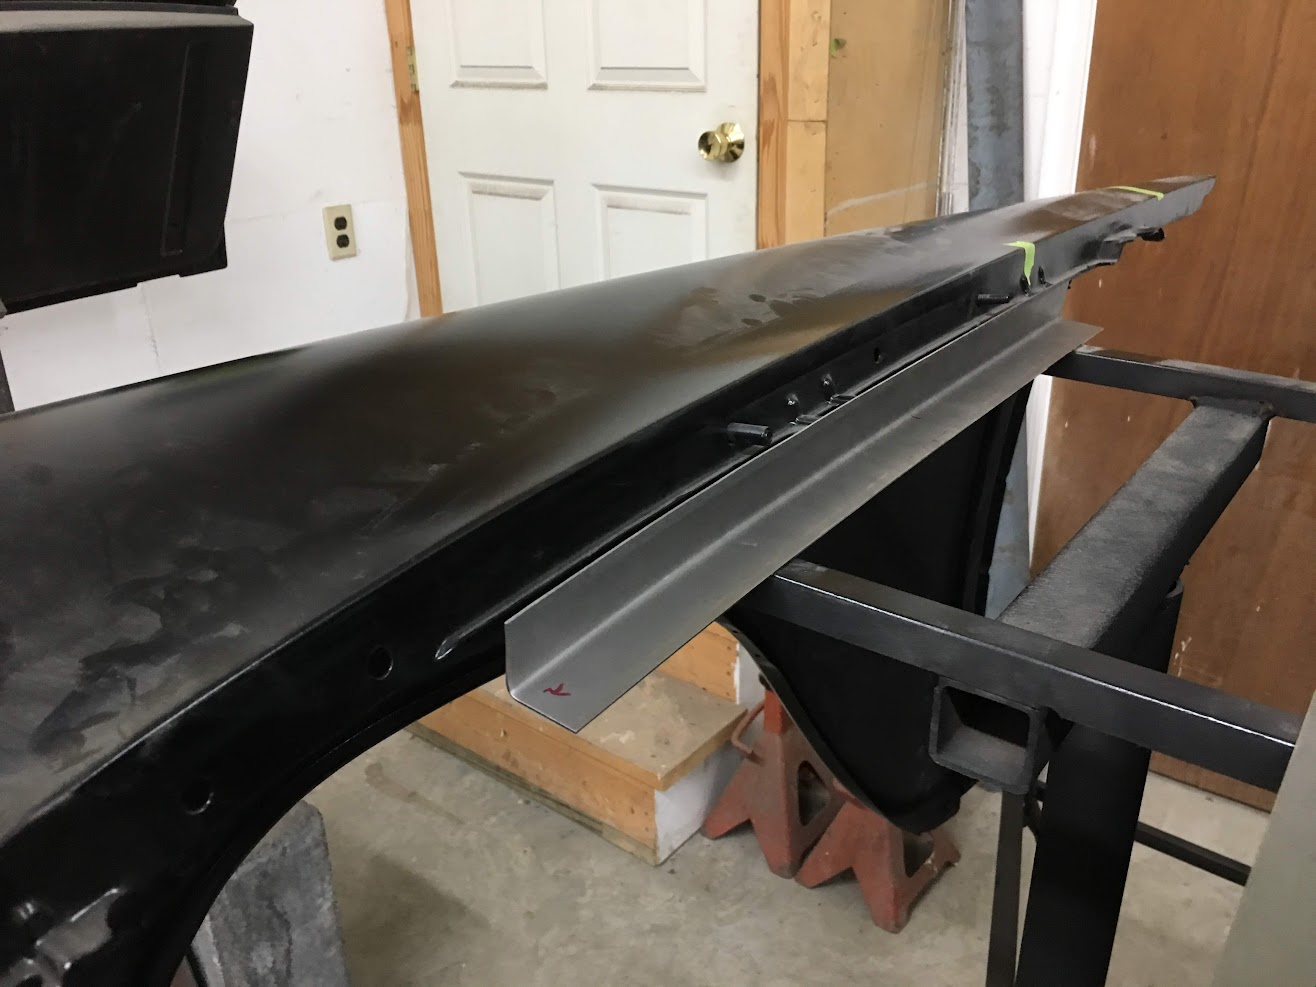
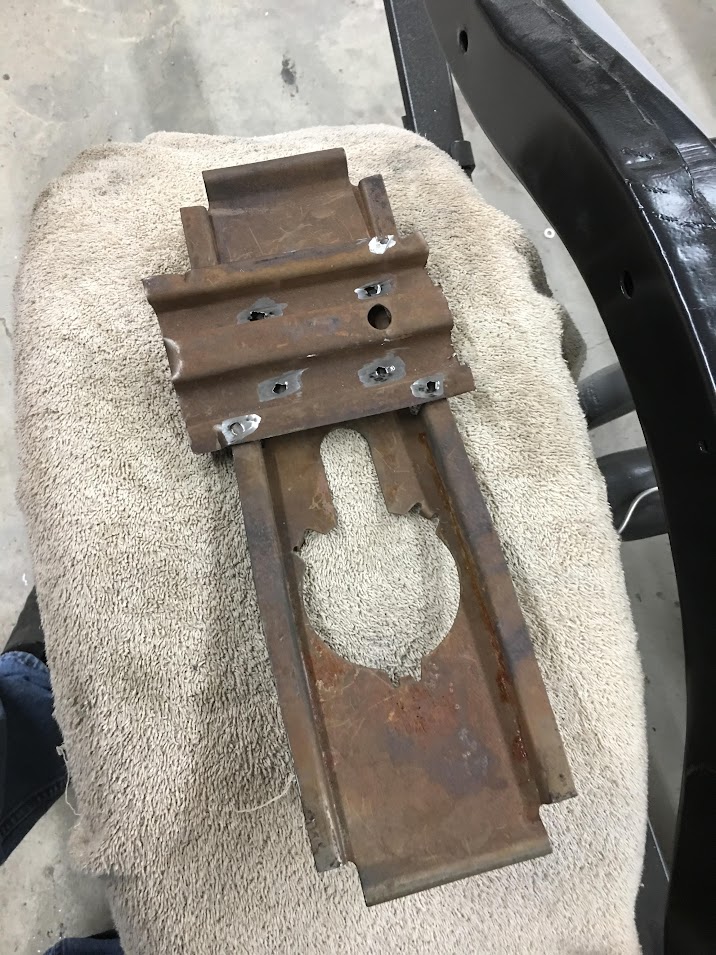
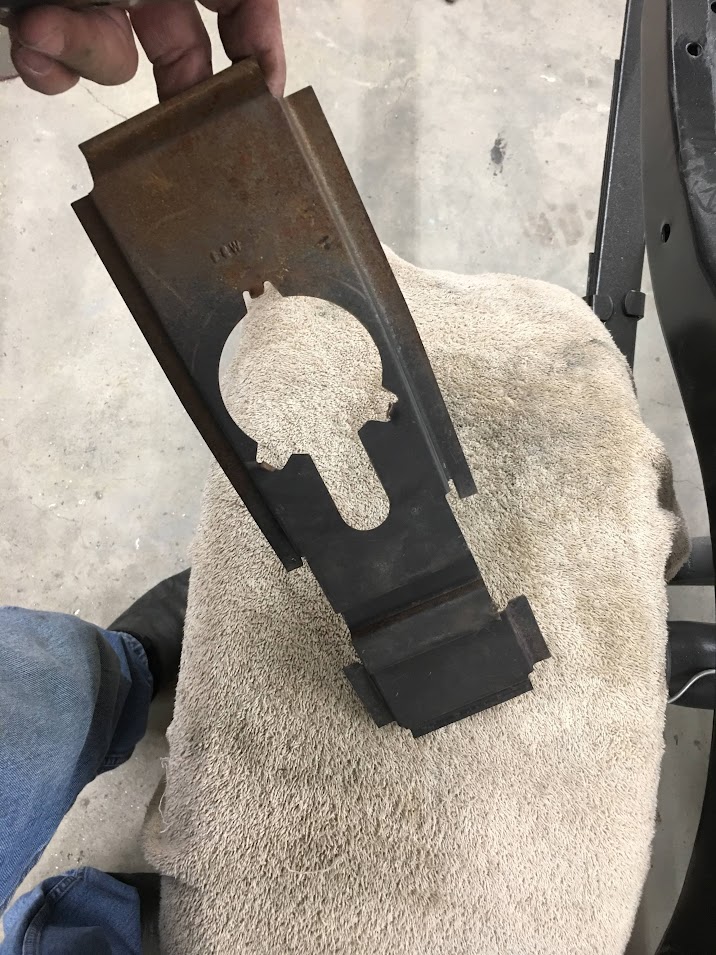
When we returned from that, I finished up the remaining hinge conversion, and Mike cut out some 18 GA cold rolled and made some bolting angles for some inner fenders we have planned in dressing up the blah engine compartment. Undoubtedly there will be some components bolted onto the original inner fenders and these "covers", and this bolting angle will allow us to remove them for access without having to remove fender bolts.
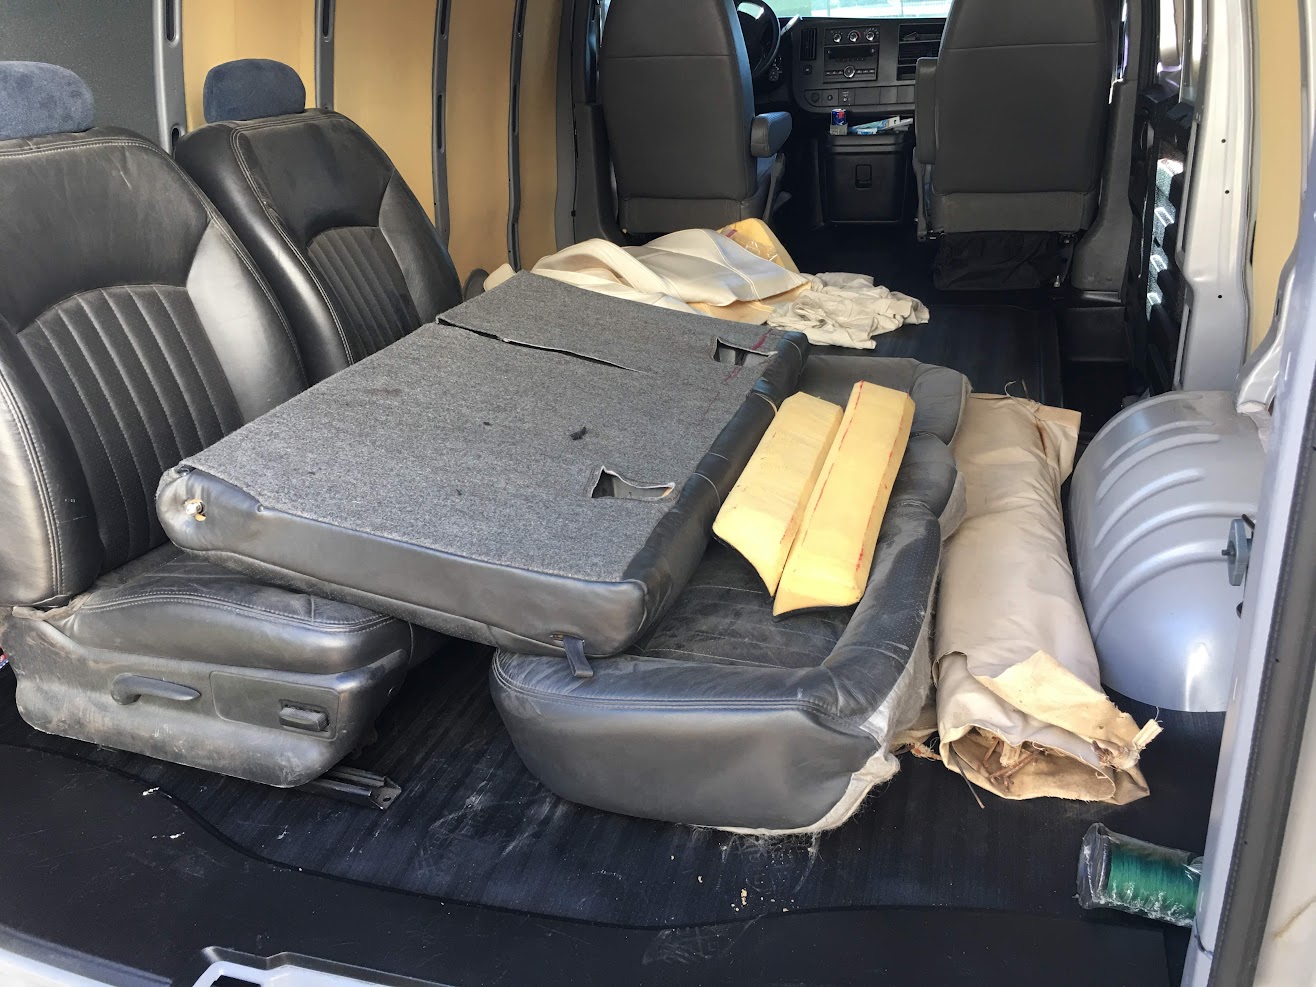
Monday evening we had a departure, the upholstery has left the building! Well, most of it, we still have door panels, arm rests, etc, etc.... to address.
Thanks Gary!
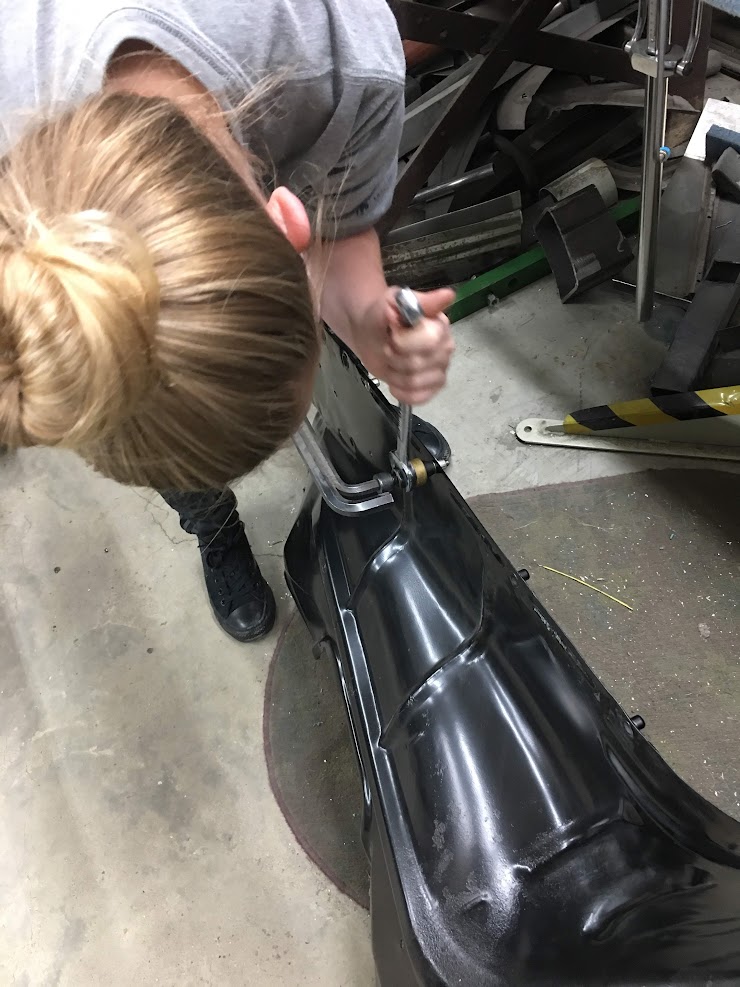
Last night we cut out some bend sample strips to nail down our console lid insert, should get the final version cut out and fabricated Thursday night. Meanwhile, E and I worked on locating attachment holes on the mounting angles Mike had made. The original inner fenders were attached to the fender, and noticed we needed a mounting hole up front of our angles for better stability, so we added those holes and installed some rivnuts in the inner fenders. This will allow assembly without the need to hold washers and nuts on the opposite side.
E gaining some rivnut installing skills....
This shows the side by side with the angles installed.
https://www.youtube.com/watch?v=qePepMuDThE
Thursday we'll get the attachment holes for the new inner inner fenders located, drilled, and rivnuts installed. Then these parts can get sent off for powder coating.Last edited by MP&C; 10-24-2018 at 06:13 AM.
Robert
-
10-24-2018 11:12 AM #1233
CHR Member
- Join Date
- Apr 2011
- Location
- Prairie City
- Car Year, Make, Model: 40 Ford Deluxe, 68 Corvette, 72&76 K30
- Posts
- 7,301
- Blog Entries
- 1
Great idea on those pieces. Rivnuts are so darn handy! (As long as the person putting them in does it right.) We have some toyota cargo tractors that the dudes across the big pond can't install rivnuts to save their lives!Ryan
1940 Ford Deluxe Tudor 354 Hemi 46RH Electric Blue w/multi-color flames, Ford 9" Residing in multiple pieces
1968 Corvette Coupe 5.9 Cummins Drag Car 11.43@130mph No stall leaving the line with 1250 rpm's and poor 2.2 60'
1972 Chevy K30 Longhorn P-pumped 24v Compound Turbos 47RH Just another money pit
1971 Camaro RS 5.3 BTR Stage 3 cam, SuperT10
Tire Sizes
-
10-24-2018 11:14 AM #1234
CHR Member
- Join Date
- Jun 2008
- Location
- Leonardtown
- Car Year, Make, Model: Walking
- Posts
- 1,228
Share my installation video with them....
I prefer the BF Goodrich style tooling (as shown in video) For smaller sizes that are more susceptible to stripping, I either use a stubby 3/4 wrench or choke up on the ratcheting wrench so you don't have so much leverage. To help prevent spinning, I've been using the AVK style with the splined sides, a sample pn from McMaster Carr is :
https://www.mcmaster.com/95105a143Robert
-
10-24-2018 11:46 AM #1235
CHR Member
- Join Date
- Apr 2011
- Location
- Prairie City
- Car Year, Make, Model: 40 Ford Deluxe, 68 Corvette, 72&76 K30
- Posts
- 7,301
- Blog Entries
- 1
I have used a bolt and nut in a pinch. I need to get a tool like yours.Ryan
1940 Ford Deluxe Tudor 354 Hemi 46RH Electric Blue w/multi-color flames, Ford 9" Residing in multiple pieces
1968 Corvette Coupe 5.9 Cummins Drag Car 11.43@130mph No stall leaving the line with 1250 rpm's and poor 2.2 60'
1972 Chevy K30 Longhorn P-pumped 24v Compound Turbos 47RH Just another money pit
1971 Camaro RS 5.3 BTR Stage 3 cam, SuperT10
Tire Sizes
-
10-24-2018 12:05 PM #1236
CHR Member
- Join Date
- Jun 2008
- Location
- Leonardtown
- Car Year, Make, Model: Walking
- Posts
- 1,228
Tool part numbers in the smaller sizes are C845-440 through C845-2520. 1/4 is also available in UNF for those aircraft applications. Larger sizes tool part numbers start at C722-3118 and go up to C722-5013. Google should find you some vendors, many may be aircraft related which normally = $$$$$$$$$$$$$$$, so shop around.Robert
-
10-27-2018 08:22 PM #1237
CHR Member
- Join Date
- Jun 2008
- Location
- Leonardtown
- Car Year, Make, Model: Walking
- Posts
- 1,228
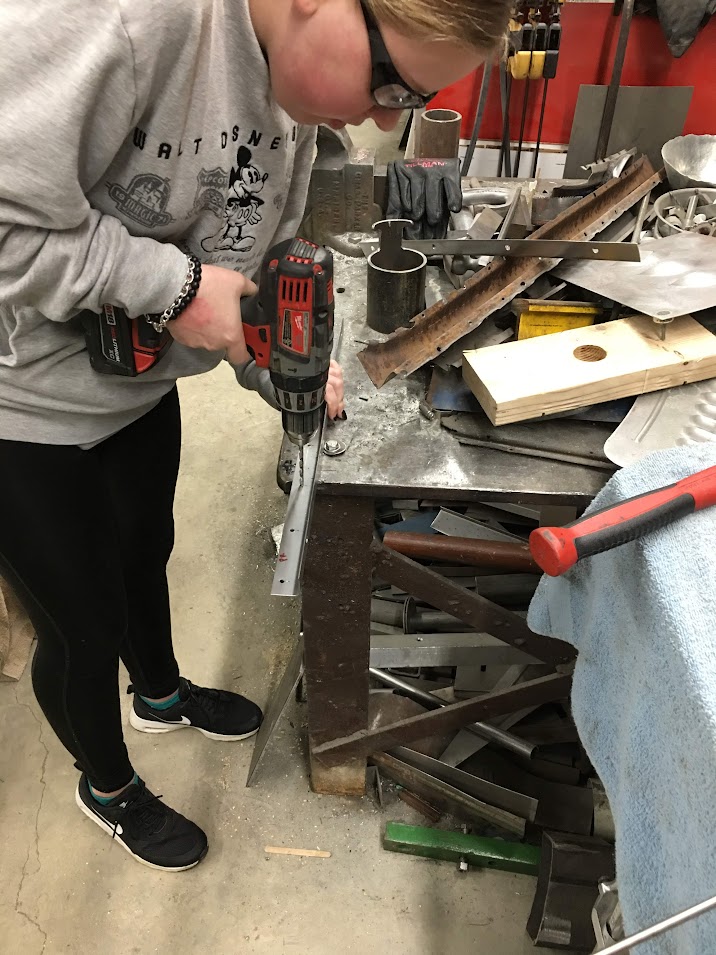
E worked Thurday evening on drilling holes and installing rivet nuts for the inner inner fender mounts.
Oops, I think she chipped a nail..
Meanwhile, I fabricated the console lid insert...
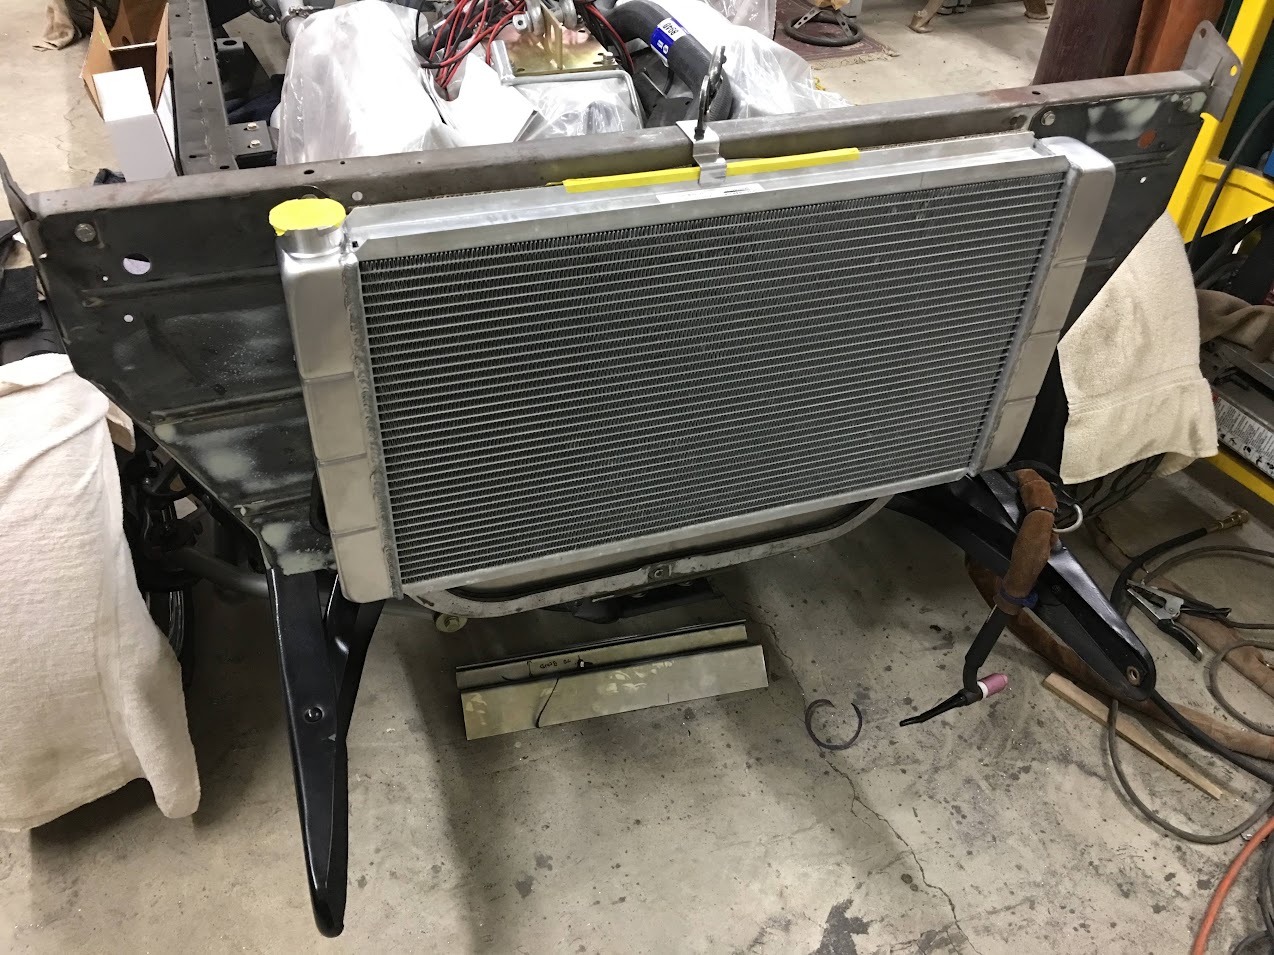
Today, Mike and I worked on the lower radiator mount. We tossed around various ideas, and settled on one that would keep the lower condensor mount a separate isolated part. We decided to use the same dies used to for the J-channel detail on the back of the 52 Chevy tailpan that we made up a couple years ago.
Here the J-channel detail is added on a piece of 16 gauge cold rolled steel..
https://www.youtube.com/watch?v=52tz0CWvRHM
Radiator test fit:
https://www.youtube.com/watch?v=XEQFMLnb4z4
.Robert
-
10-29-2018 12:14 PM #1238
CHR Member
- Join Date
- Apr 2011
- Location
- Prairie City
- Car Year, Make, Model: 40 Ford Deluxe, 68 Corvette, 72&76 K30
- Posts
- 7,301
- Blog Entries
- 1
Nice work. That looks like it'll be real fun to work on when it's all done. Do you plan to use the heat shrink type hose clamps on the radiator side?Ryan
1940 Ford Deluxe Tudor 354 Hemi 46RH Electric Blue w/multi-color flames, Ford 9" Residing in multiple pieces
1968 Corvette Coupe 5.9 Cummins Drag Car 11.43@130mph No stall leaving the line with 1250 rpm's and poor 2.2 60'
1972 Chevy K30 Longhorn P-pumped 24v Compound Turbos 47RH Just another money pit
1971 Camaro RS 5.3 BTR Stage 3 cam, SuperT10
Tire Sizes
-
10-29-2018 07:04 PM #1239
CHR Member
- Join Date
- Jun 2008
- Location
- Leonardtown
- Car Year, Make, Model: Walking
- Posts
- 1,228
We tossed around quite a few ideas, in the end, this version gives support for the radiator whether bolted or not, for ease (??) of maintenance. Also, tilting forward while top is unbolted allows more room for tightening hose clamps, and we should have room enough in the core support to hide said ugly hose clamps.. We may even use the Oetiker ear style crimp-on clamps to save some room..

Robert
-
10-29-2018 07:37 PM #1240
CHR Member
- Join Date
- Apr 2011
- Location
- Prairie City
- Car Year, Make, Model: 40 Ford Deluxe, 68 Corvette, 72&76 K30
- Posts
- 7,301
- Blog Entries
- 1
Those gates heat shrink ones are pretty cool, until you need to get them off. I figured you'd hook all hoses to the radiator then bolt it to the support. The trans cooler lines would be fun. Qwik connect would be nice there, but they always tend to leak.
.Ryan
1940 Ford Deluxe Tudor 354 Hemi 46RH Electric Blue w/multi-color flames, Ford 9" Residing in multiple pieces
1968 Corvette Coupe 5.9 Cummins Drag Car 11.43@130mph No stall leaving the line with 1250 rpm's and poor 2.2 60'
1972 Chevy K30 Longhorn P-pumped 24v Compound Turbos 47RH Just another money pit
1971 Camaro RS 5.3 BTR Stage 3 cam, SuperT10
Tire Sizes
-
10-30-2018 05:33 AM #1241
CHR Member
- Join Date
- Sep 2007
- Location
- New Bedford
- Car Year, Make, Model: 34 Ford 3W Coupe Replica
- Posts
- 14,754
I had the exact same thoughts, Use the Gates heat shrink and attach to the radiator side first, then slide into place. Originally Posted by 40FordDeluxe

Or just re-do the whole support with new ideas??

")
-
11-04-2018 08:32 AM #1242
CHR Member
- Join Date
- Jun 2008
- Location
- Leonardtown
- Car Year, Make, Model: Walking
- Posts
- 1,228
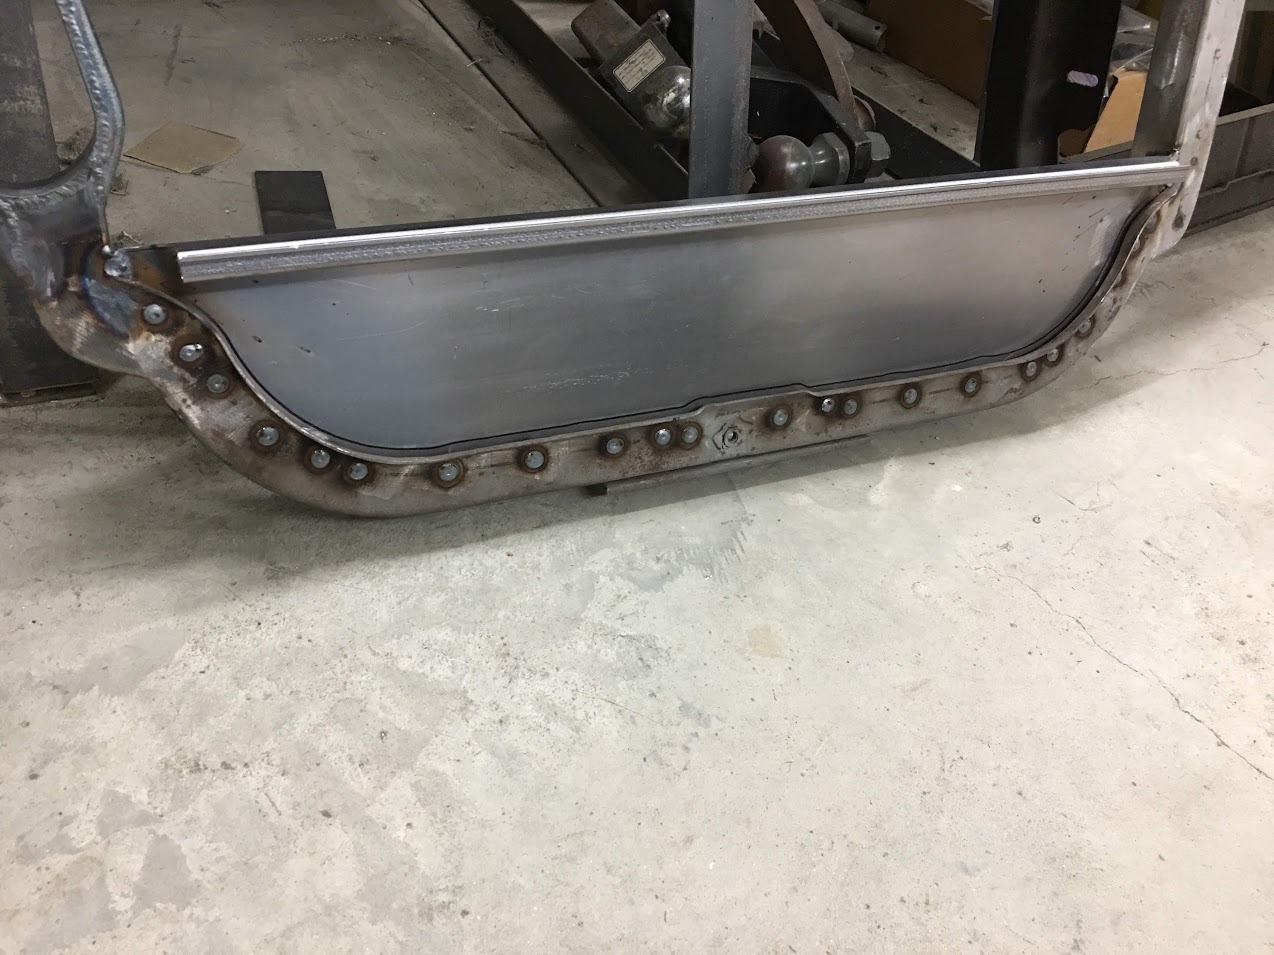
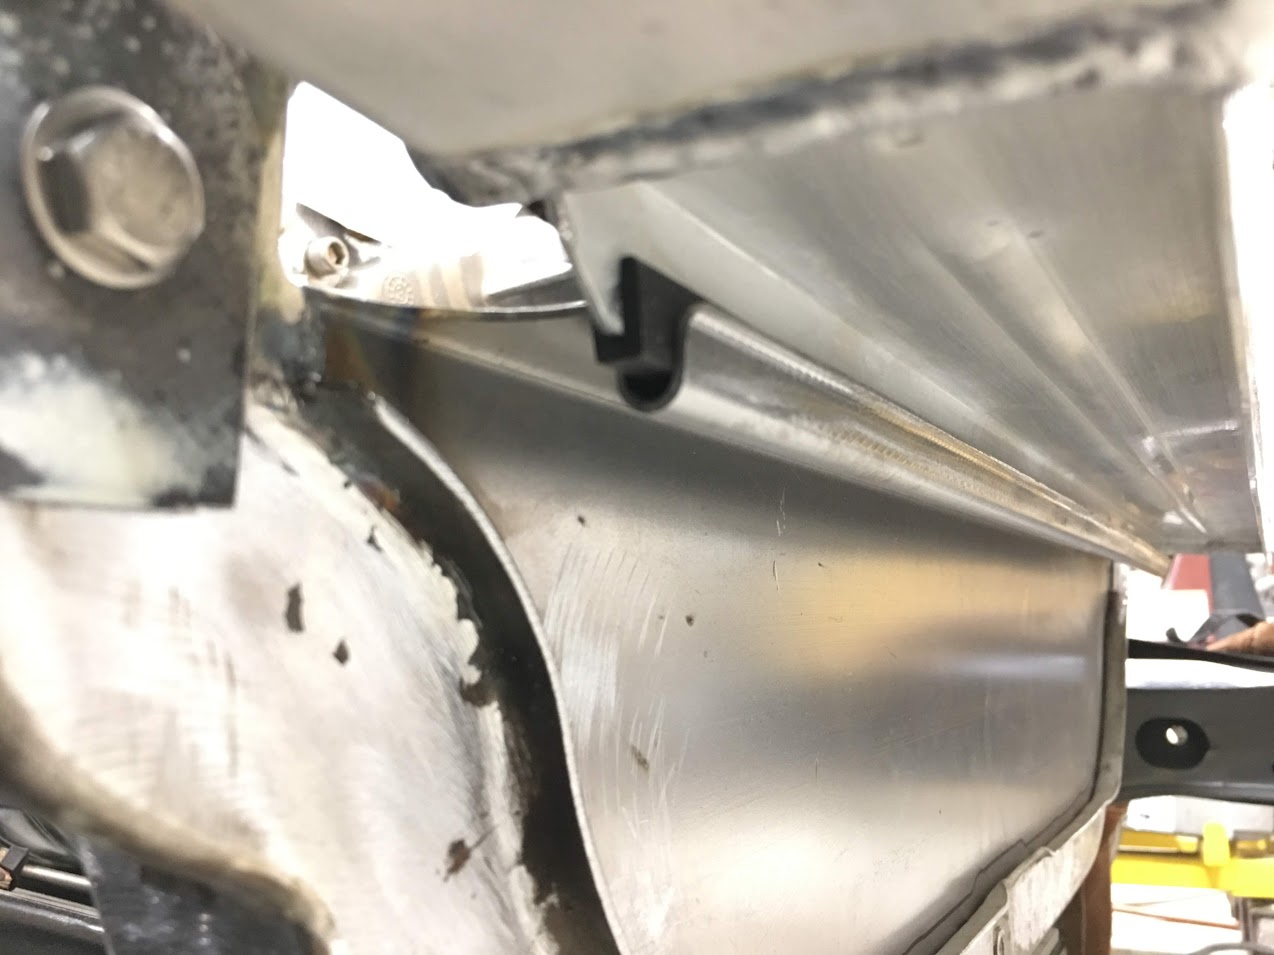
Another part we're adding due to the length of this car is a second interior light. We chose to go with the original version, so here's a factory mount, spot welds ground out from the back side of the included section of roof crossmember. Then it will get media blasted, epoxy primed, and plug welded in place.
We got the baffle/lower radiator mount plug welded in place...
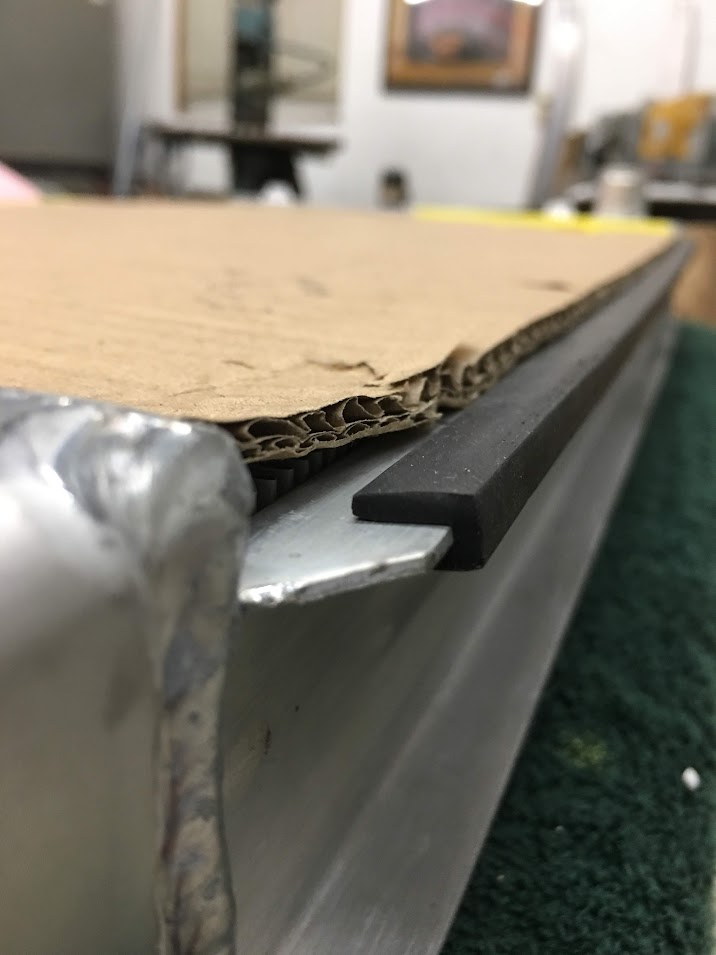
...and the rubber edge trim for our lower radiator mount added.. The "final" version will include weather strip adhesive to keep it locked in place on the radiator.
Needs to be pressed in a little more but this is the idea...
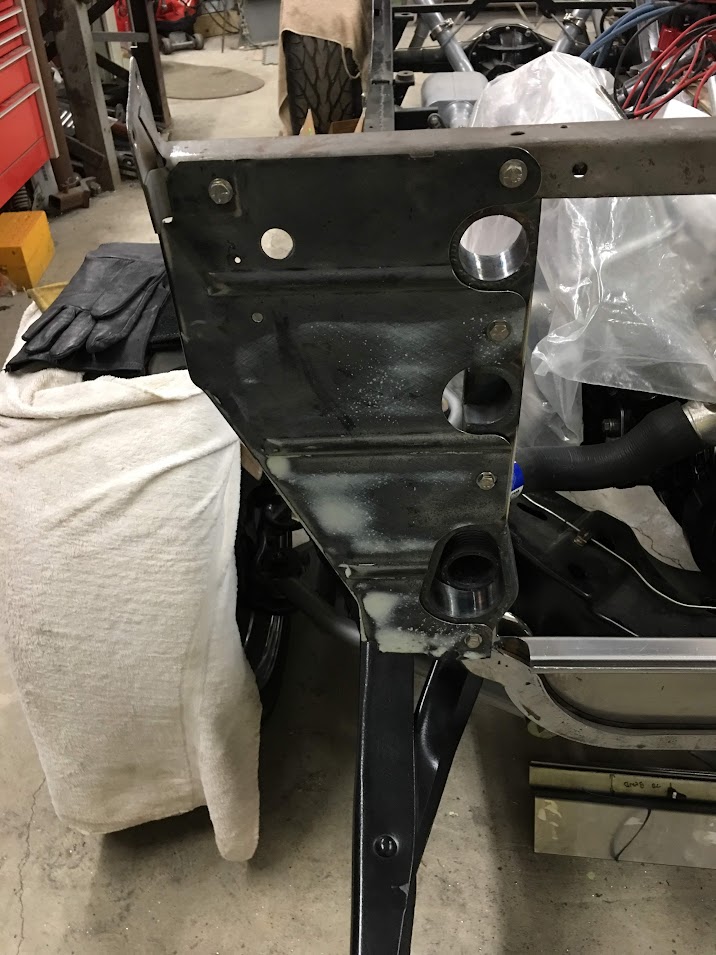
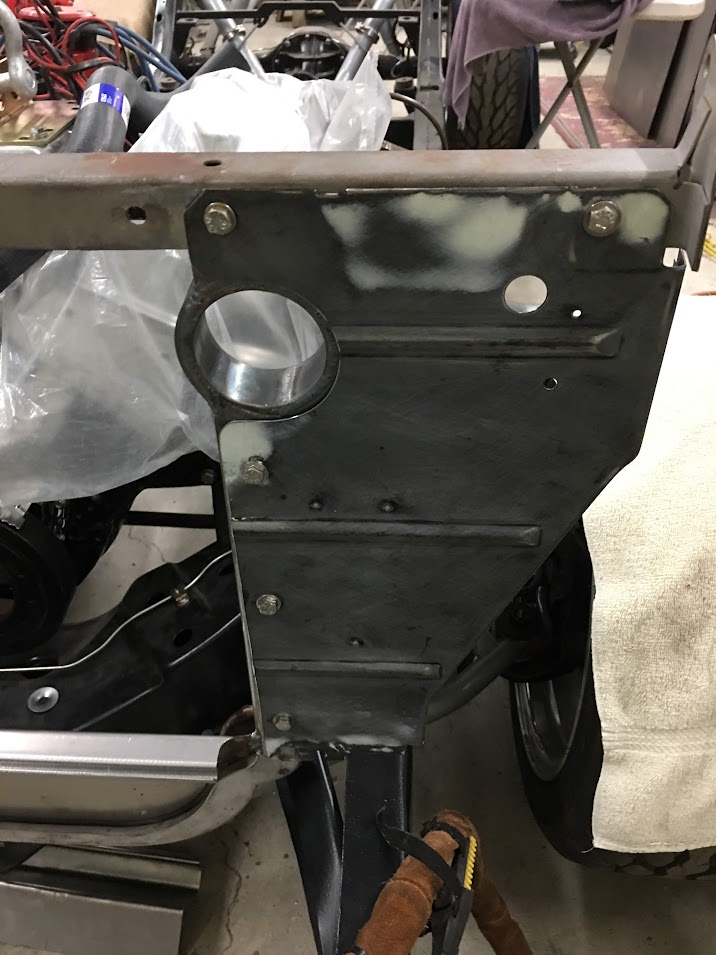
Side baffles for the core support were trimmed on the inside (for our larger opening) , new mounting slots added, and access holes opened up..
Lower radiator hose clearance to the battery support bracket...
Robert
-
11-15-2018 06:33 PM #1243
CHR Member
- Join Date
- Jun 2008
- Location
- Leonardtown
- Car Year, Make, Model: Walking
- Posts
- 1,228
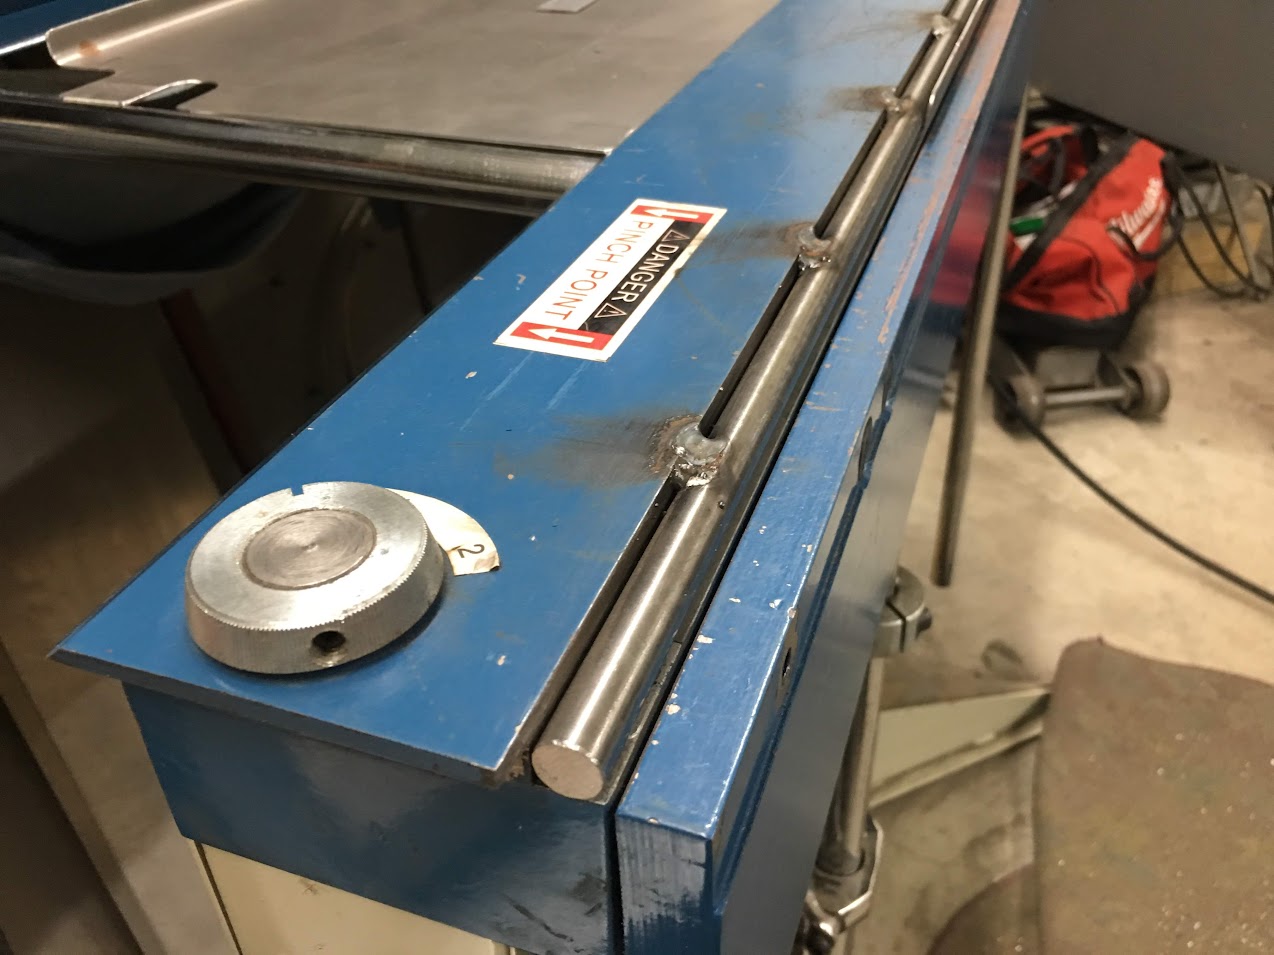
I have a couple radius bends to do on the AC condenser bracket, so a piece of 1/2" 4130 was added to the Magnetic Brake die.. This will help keep things from moving, and it is welded on what is usually the back side, so no interference otherwise...
This will be the mounting flange to the radiator..
1" rod is used to form the radius on the side "covers"
A test fit before we cut out the gaping hole for air flow....
https://www.youtube.com/watch?v=YbIW...ature=youtu.be
The center hole is cut out and a flange tipped for wrapping a 3/16" rod for wire edge. This should add plenty of strength, if the 16 GA wasn't enough..
Our anvil we made up for stretching the metal in the corners for tipping..
Where we left off....to be continued..
Robert
-
11-16-2018 08:09 AM #1244
CHR Member
- Join Date
- Jun 2008
- Location
- Leonardtown
- Car Year, Make, Model: Walking
- Posts
- 1,228
https://www.youtube.com/watch?v=w8Ay...ature=youtu.be
Wire edging complete:
.Last edited by MP&C; 11-20-2018 at 09:56 AM.
Robert
-
11-16-2018 05:27 PM #1245
CHR Member
- Join Date
- Apr 2011
- Location
- Prairie City
- Car Year, Make, Model: 40 Ford Deluxe, 68 Corvette, 72&76 K30
- Posts
- 7,301
- Blog Entries
- 1
Great work! That is one of the nicest condenser mounts I have seen! That rod in there should add some good strength for sure. A little Bierdmen inspiration there?
.Ryan
1940 Ford Deluxe Tudor 354 Hemi 46RH Electric Blue w/multi-color flames, Ford 9" Residing in multiple pieces
1968 Corvette Coupe 5.9 Cummins Drag Car 11.43@130mph No stall leaving the line with 1250 rpm's and poor 2.2 60'
1972 Chevy K30 Longhorn P-pumped 24v Compound Turbos 47RH Just another money pit
1971 Camaro RS 5.3 BTR Stage 3 cam, SuperT10
Tire Sizes
 Reply With Quote


Posting Permissions
- You may not post new threads
- You may not post replies
- You may not post attachments
- You may not edit your posts

i've enjoyed the years here . made a lot of friends. most who have left. i see no reason to continue with this so hope to see you somewhere else. i dont think this site will ever be back. it's lived...
Dead!