


 3390Likes
Thread: 55 Wagon Progress


Results 1,141 to 1,155 of 1865
 LinkBack URL
 About LinkBacks
-
01-06-2018 07:46 PM #1141
 CHR Member

- Join Date
- Jun 2008
- Location
- Leonardtown
- Car Year, Make, Model: Walking
- Posts
- 1,228
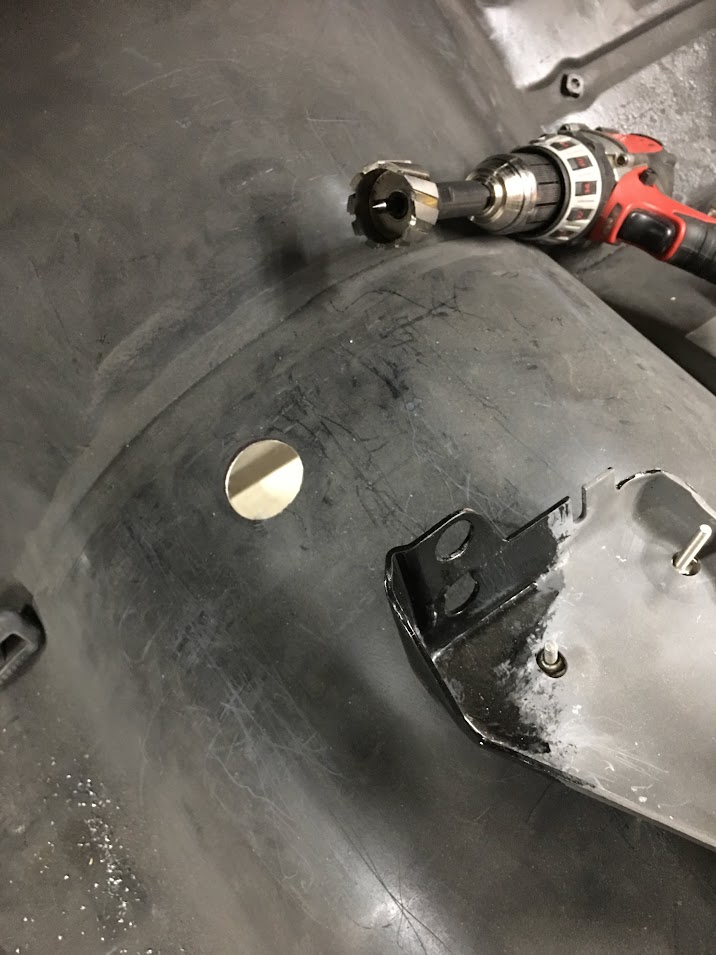
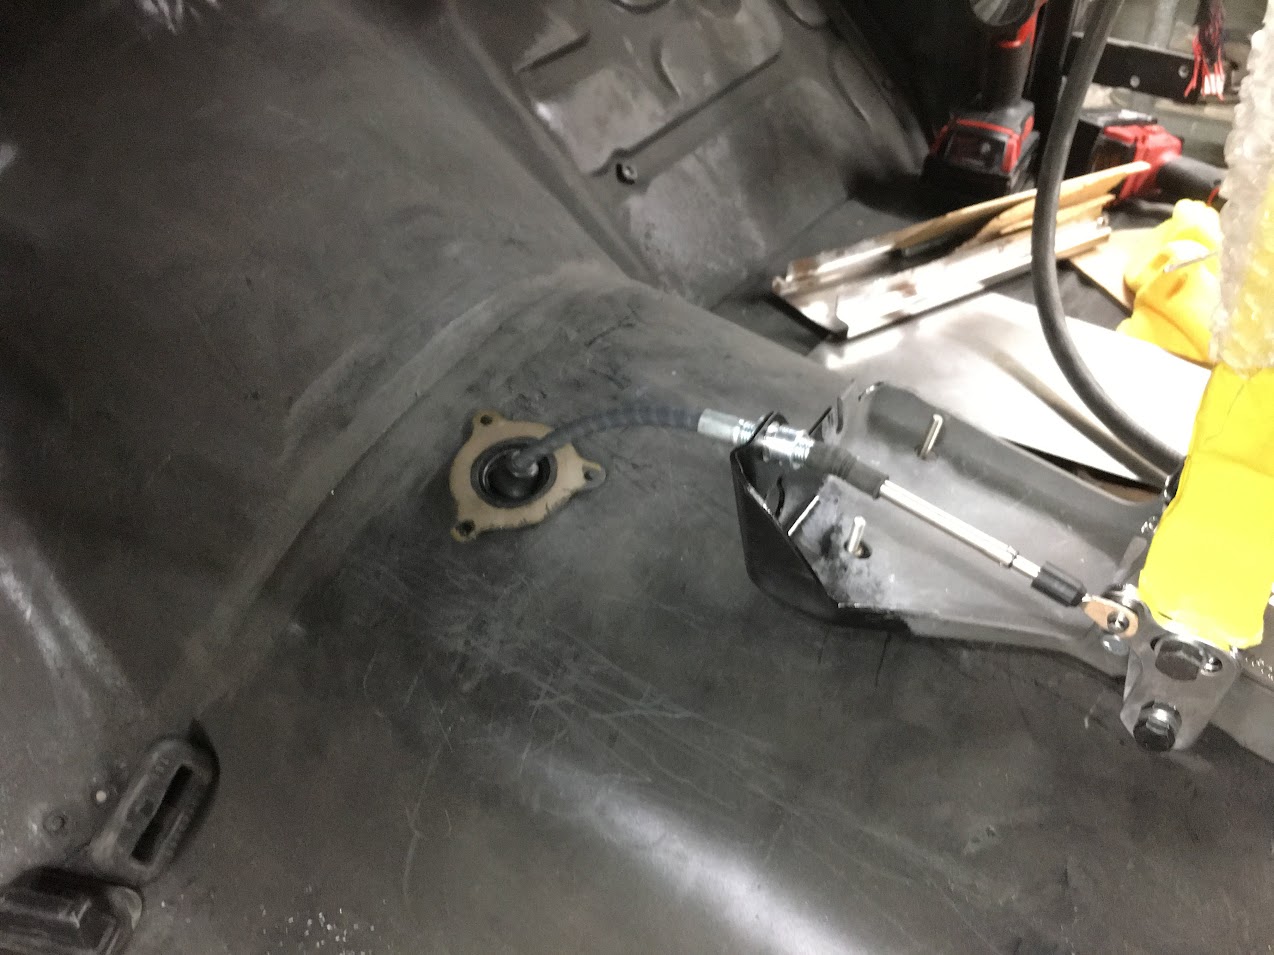
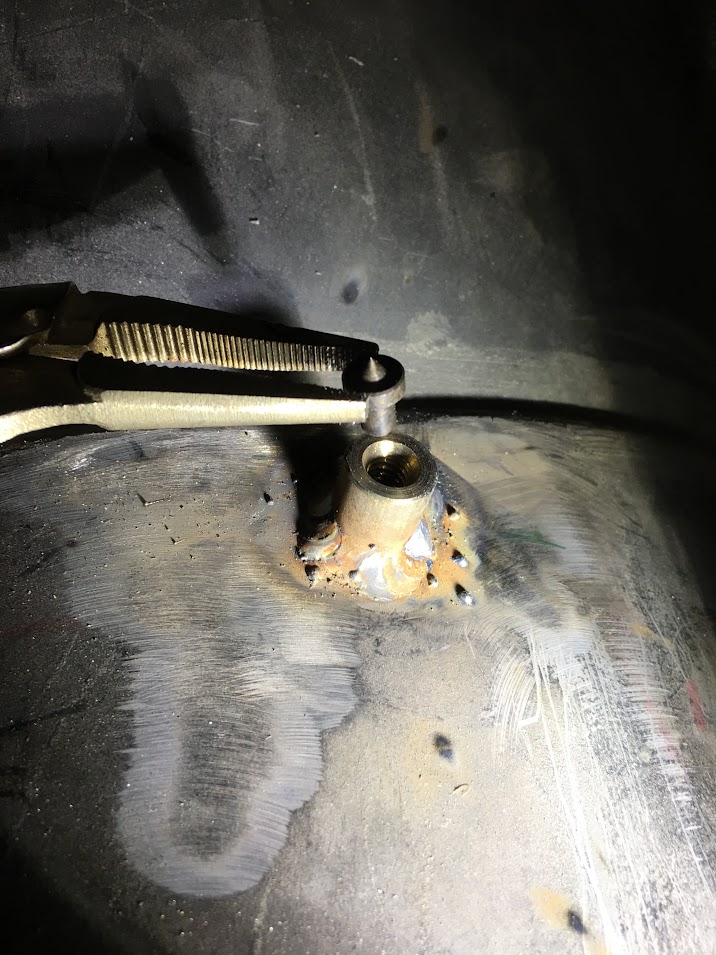
More console progress today, started off using Rotacutter to put a hole in the transmission tunnel for the shifter cable. The bulkhead seal that came with the cable has some mounting holes, we'll use some AVK style rivet nuts for ease of installation/replacement.
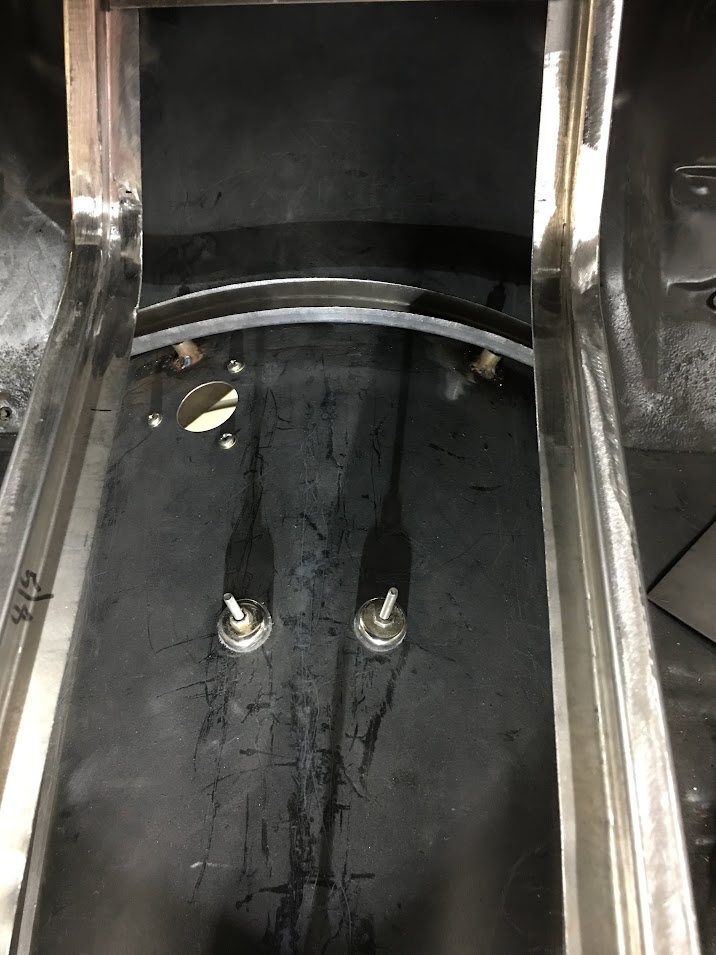
More anchors welded to the floor, some "crossmembers" fabricated, and welded into the console.
To locate the holes in the crossmembers, some spotters are set in the anchors, console placed, and crossmember tapped from above to mark.
Next we need to close off the front of the storage cavity to give us an anchor point for the latch. So we started the fabrication but found some limitations in our acute dies for the press brake.
Not quite enough bend, so we opted for a piece of sharpened 12 ga cold rolled to give us a bit more....
Trimmed and welded in place...
Video version:
https://www.youtube.com/watch?v=qiOet_0AwO0
.Robert
-
Advertising

- Google Adsense
- REGISTERED USERS DO NOT SEE THIS AD
-
01-13-2018 06:25 PM #1142
CHR Member
- Join Date
- Jun 2008
- Location
- Leonardtown
- Car Year, Make, Model: Walking
- Posts
- 1,228
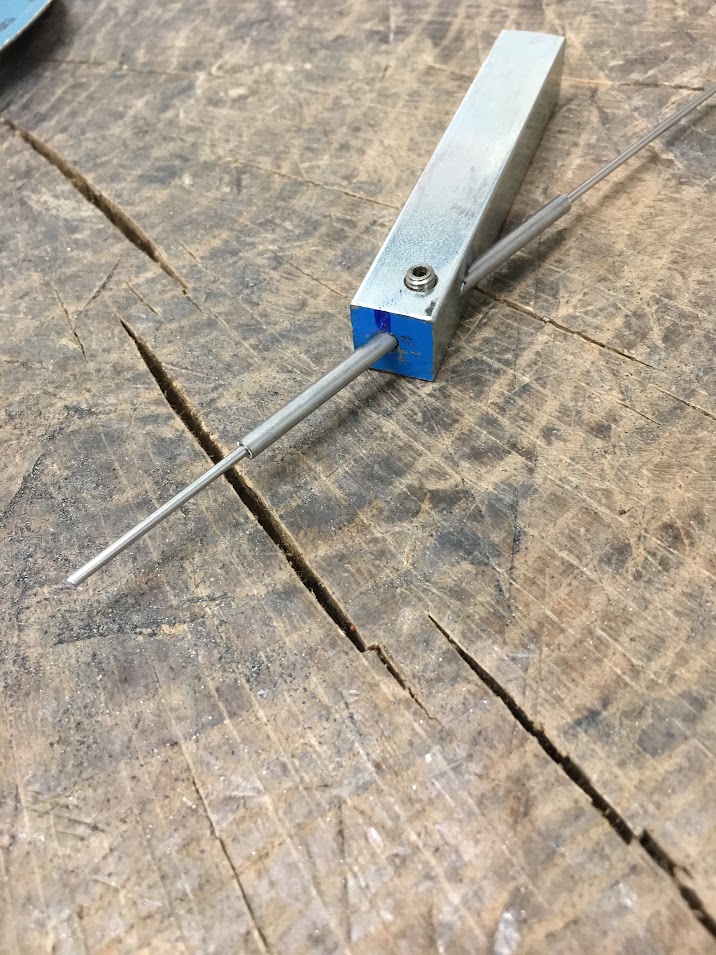
We were originally going to hinge the console lid along the passenger side, but thought it would be better accessible from either front seat if it was hinged at the rear. We're using the same hinge as we used for the widened glove box door. In our attempt to add a torsion spring to keep the lid upright in the open position, we couldn't find the size to fit our 1/8" diameter hinge pin with enough torsion to hold the lid open. (Yes, even McMaster failed us) So we decided to wrap our own. Here's a fixture we made for the Aloris tool holder on the South Bend to act as a guide for the 1/16" music wire.
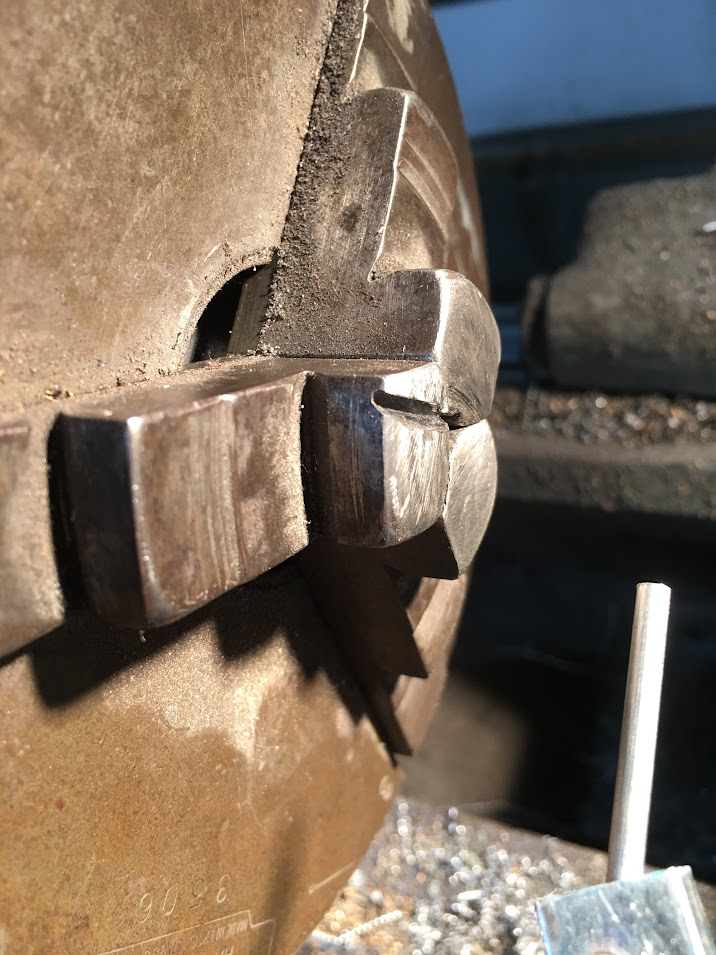
We also installed the older 3 jaw chuck, but not before adding a "wire catch"
Here's a video of us wrapping the spring... As my South Bend lacks slow enough speed for such a task, we opted for manual rotation..
https://www.youtube.com/watch?v=OvJAIk1-Cs4
Here's the positioning and function of the hinge with torsion spring installed...
https://www.youtube.com/watch?v=QPPY2dVOzmQ
With our hinge now positioned, we also found we needed to move the hinge closer to the rear edge for better lid clearance while open. Back up and punt you say?
Robert
-
01-14-2018 04:16 AM #1143
CHR Member
- Join Date
- Sep 2007
- Location
- New Bedford
- Car Year, Make, Model: 34 Ford 3W Coupe Replica
- Posts
- 14,754
As always, amazing and clever! Thank You for another lesson..
-
01-15-2018 11:17 AM #1144
CHR Member
- Join Date
- Apr 2011
- Location
- Prairie City
- Car Year, Make, Model: 40 Ford Deluxe, 68 Corvette, 72&76 K30
- Posts
- 7,301
- Blog Entries
- 1
Very nice work. I know you have told us before, but where do you source the hole locating pins you use? Those roto cutters are nice. I might have to start buying some of those. They look like they would work a lot better than a regular hole saw.Ryan
1940 Ford Deluxe Tudor 354 Hemi 46RH Electric Blue w/multi-color flames, Ford 9" Residing in multiple pieces
1968 Corvette Coupe 5.9 Cummins Drag Car 11.43@130mph No stall leaving the line with 1250 rpm's and poor 2.2 60'
1972 Chevy K30 Longhorn P-pumped 24v Compound Turbos 47RH Just another money pit
1971 Camaro RS 5.3 BTR Stage 3 cam, SuperT10
Tire Sizes
-
01-15-2018 06:05 PM #1145
CHR Member
- Join Date
- Sep 2007
- Location
- New Bedford
- Car Year, Make, Model: 34 Ford 3W Coupe Replica
- Posts
- 14,754
Ryan, the original.. Home - Rotabroach
you can find cheaper, I mean "more economical" knock-offs around.
-
01-15-2018 06:42 PM #1146
CHR Member
- Join Date
- Jun 2008
- Location
- Leonardtown
- Car Year, Make, Model: Walking
- Posts
- 1,228
Ryan, these were Rotacut hole cutters by Hougen, look at MSC Industrial or similar as a source. The arbor uses a spring loaded center, 1/8 diameter for the smaller sizes and 1/4 for the larger, IIRC. We typically extend the center and use set screw to lock it stationary, then use the cutter with a pre-drilled hole to accommodate the center pin. We've found this more precise than the spring loaded functionality slipping out of a punched divot.
*********edit********
Missed the locating pin part, do a search on blind hole spotters. Most Industrial suppliers carry them, you can get a complete set with about 6 ea size, but I believe Spellman makes the "originals"
http://www.rlspellmanmfg.com/spellma...leSpotters.htm
https://www.mcmaster.com/#3414a11/=1b59vyfLast edited by MP&C; 01-15-2018 at 08:29 PM.
Robert
-
01-15-2018 08:43 PM #1147
CHR Member
- Join Date
- Jan 2005
- Location
- Doon, Ia
- Car Year, Make, Model: 53 Chevy 3100
- Posts
- 2,716
Very nice as usual, thanks for keeping us updated !Seth
God cannot give us a happiness and peace apart from Himself, because it is not there. There is no such thing. C.S.Lewis
-
01-28-2018 09:13 PM #1148
CHR Member
- Join Date
- Jun 2008
- Location
- Leonardtown
- Car Year, Make, Model: Walking
- Posts
- 1,228
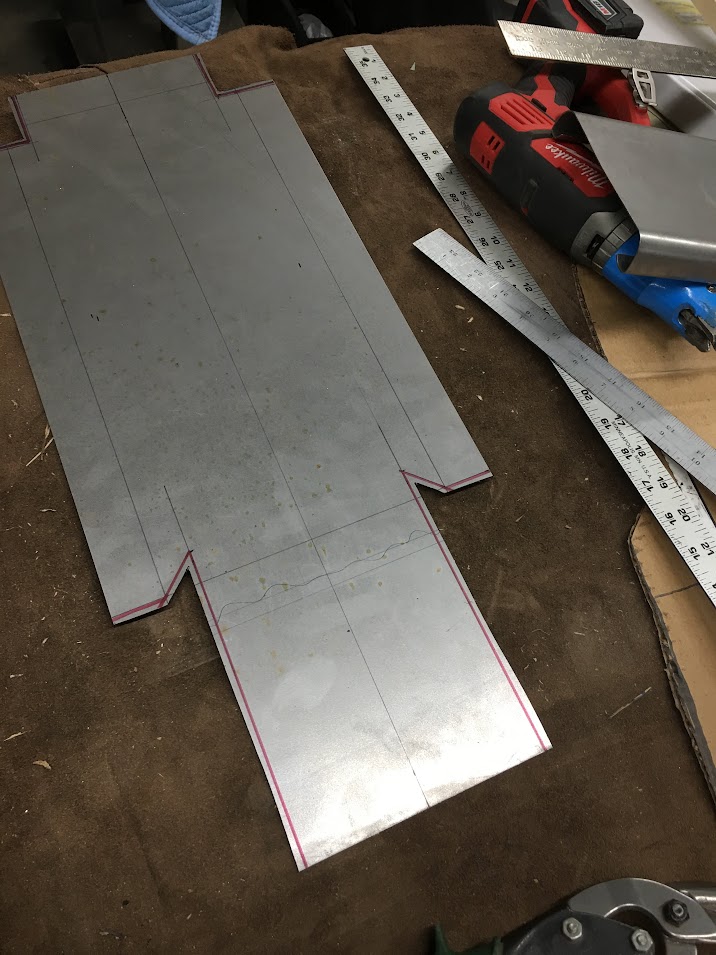
Didn't get as many pictures this weekend as I'd have liked. While I worked on some final details on the console, Jake made some cardboard templates of our rear armrests. These will also serve to hide the seat belt retractors for the front buckets, as well as the rear speakers.
Here Jake transferring the pattern to some 19 gauge cold rolled, cleaning up some of the lines as well...
I was welding in the front cross piece that Jake made to the console and had some underside welds to do. Sometimes we make it easier on ourselves, especially if we can't weld upside-down all too well..
Suspended from the door track...
The hinge at the rear now moved rearward, metal added for mounting the hinge and securing the "storage recess".
Robert
-
01-29-2018 02:17 PM #1149
CHR Member
- Join Date
- Apr 2011
- Location
- Prairie City
- Car Year, Make, Model: 40 Ford Deluxe, 68 Corvette, 72&76 K30
- Posts
- 7,301
- Blog Entries
- 1
That looks great, and thanks for the links!Ryan
1940 Ford Deluxe Tudor 354 Hemi 46RH Electric Blue w/multi-color flames, Ford 9" Residing in multiple pieces
1968 Corvette Coupe 5.9 Cummins Drag Car 11.43@130mph No stall leaving the line with 1250 rpm's and poor 2.2 60'
1972 Chevy K30 Longhorn P-pumped 24v Compound Turbos 47RH Just another money pit
1971 Camaro RS 5.3 BTR Stage 3 cam, SuperT10
Tire Sizes
-
01-29-2018 04:07 PM #1150
CHR Member
- Join Date
- Sep 2007
- Location
- New Bedford
- Car Year, Make, Model: 34 Ford 3W Coupe Replica
- Posts
- 14,754
Boy this one has been a pile of work. but it's coming down the home stretch it seems.
I noticed Cosmo is looking on. He seems to approve. LOL
-
02-21-2018 07:00 AM #1151
CHR Member
- Join Date
- Jun 2008
- Location
- Leonardtown
- Car Year, Make, Model: Walking
- Posts
- 1,228
Scary if it meets Kramer's approval...
OK, here's our update for the past couple weeks..
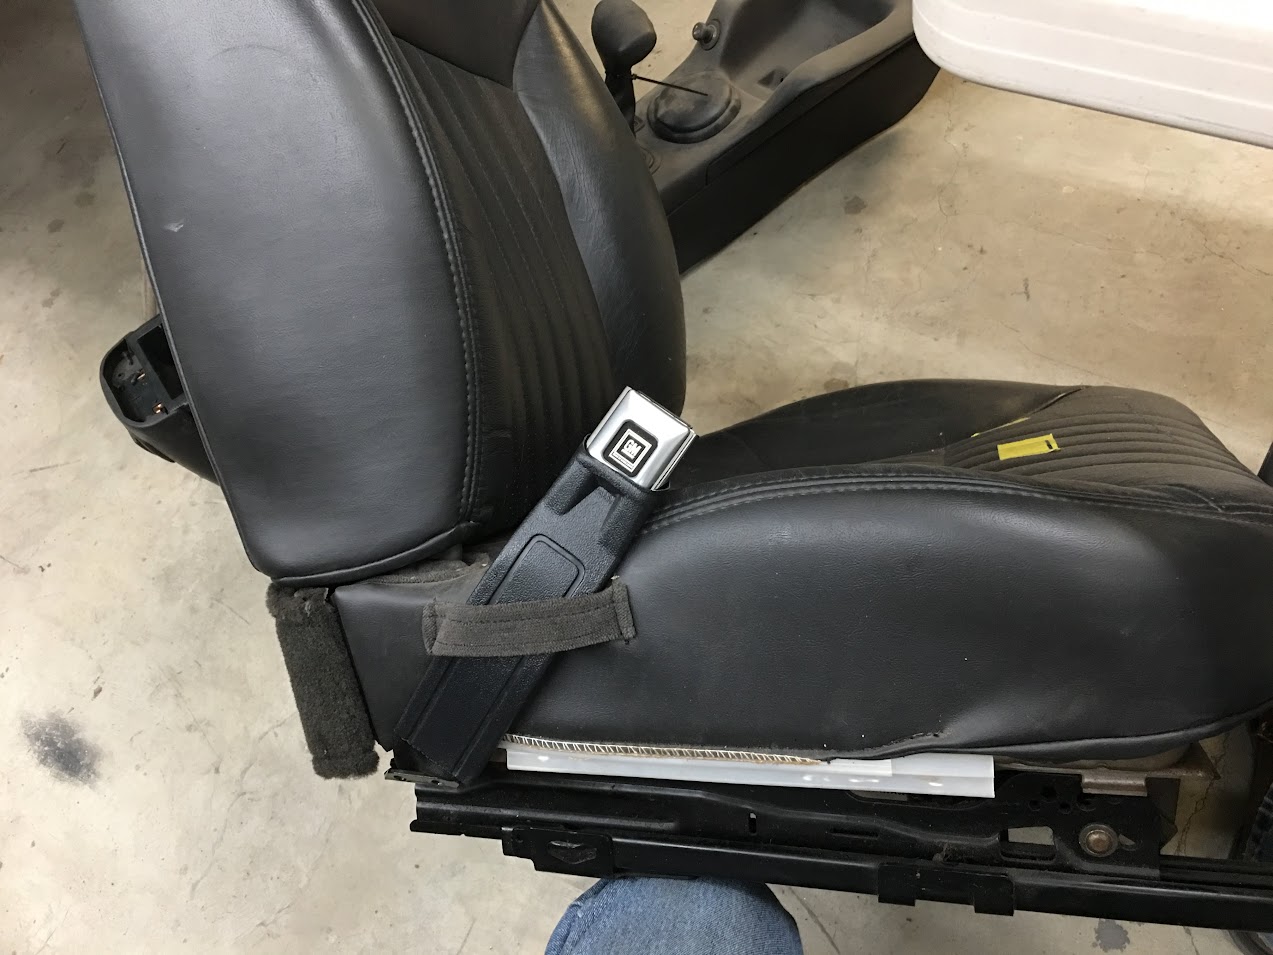
We're working on getting the seats ready to go to the upholsterer, and these 2002 Monte Carlo seat belts just aren't cutting it...
This these belts are riveted to a bracket that stands off from the seat, and we'll need to stand off our replacement as well. So the rivets are removed and the new seat belt gets bolted to the same bracket using 1/2" bolt, grade 8. The "new" seat belts look much more vintage correct.
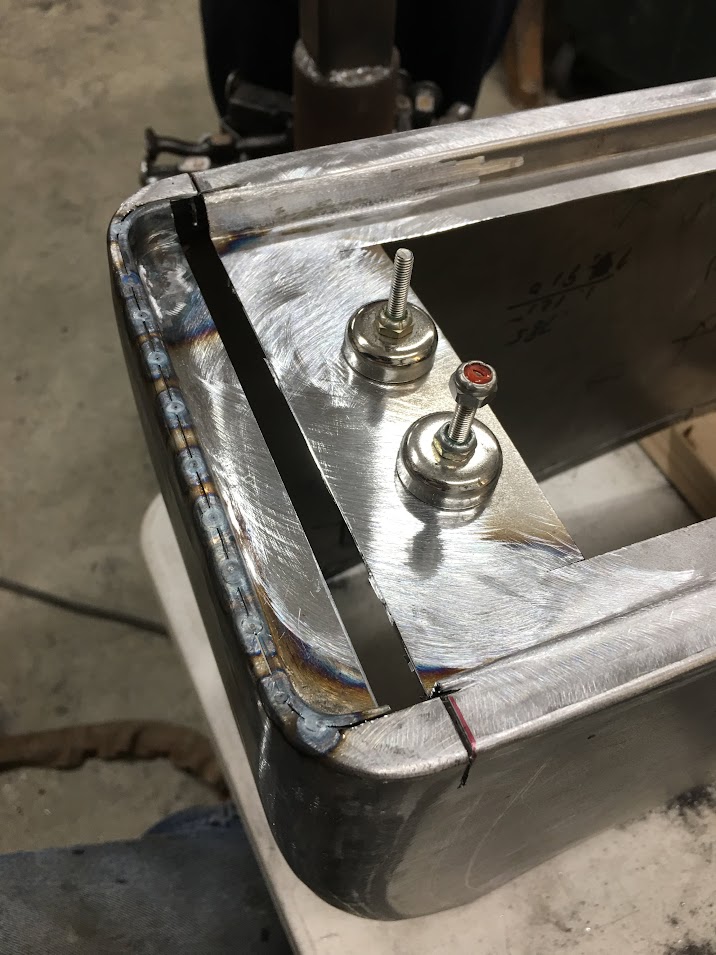
With console in place and bezel checked to proper height, anchors are set in place for welding to the floor pan. Bolted to shifter plate for proper alignment and standoffs used to provide space to get in there and weld...
Next, our replacement for the parking brake pull handle didn't fit just right so an extension was added that will use factory holes, we do need to drill the firewall for the studs out the front end..
Robert
-
02-21-2018 07:04 AM #1152
CHR Member
- Join Date
- Jun 2008
- Location
- Leonardtown
- Car Year, Make, Model: Walking
- Posts
- 1,228
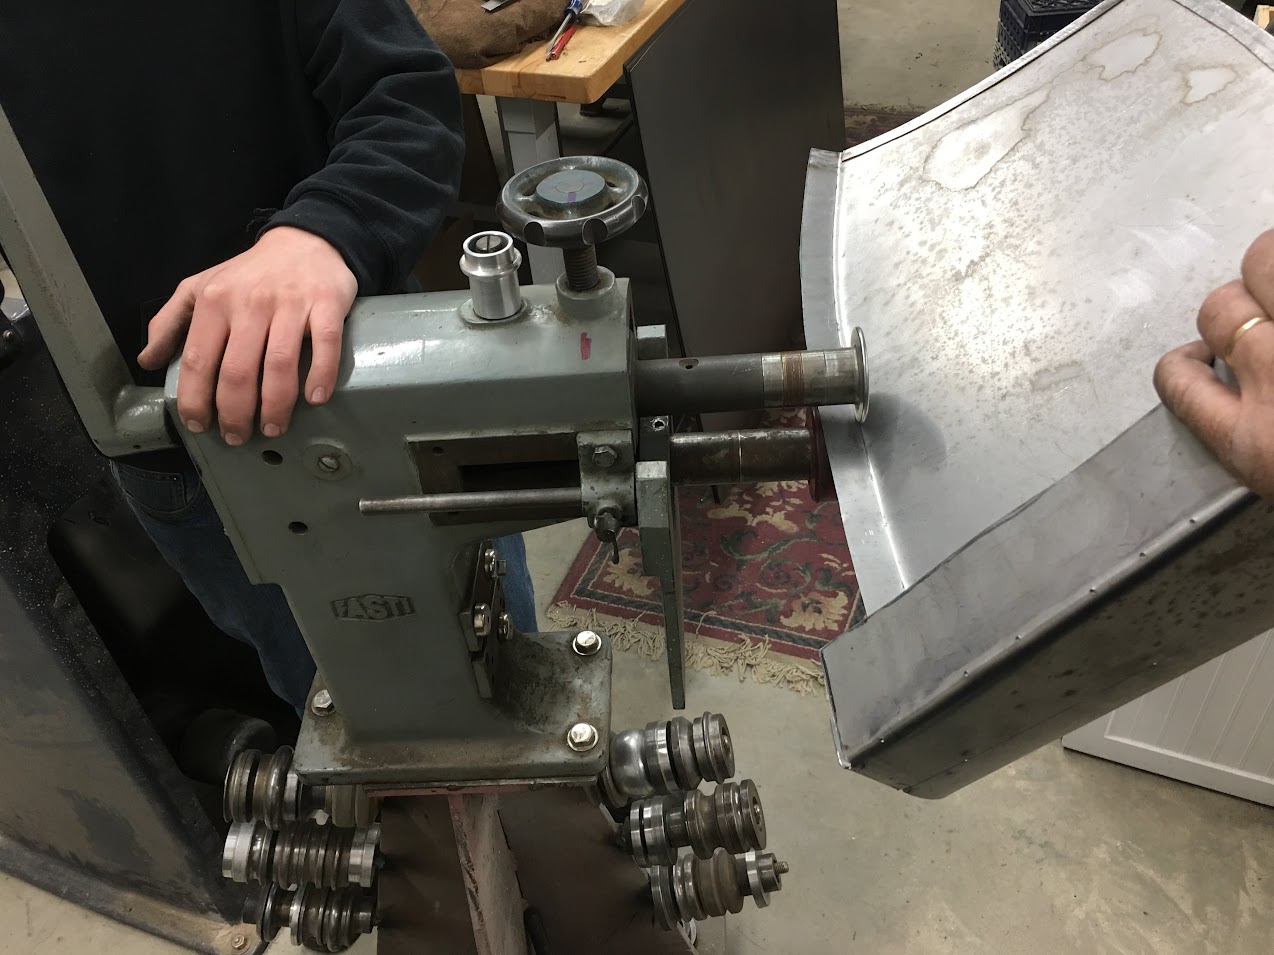
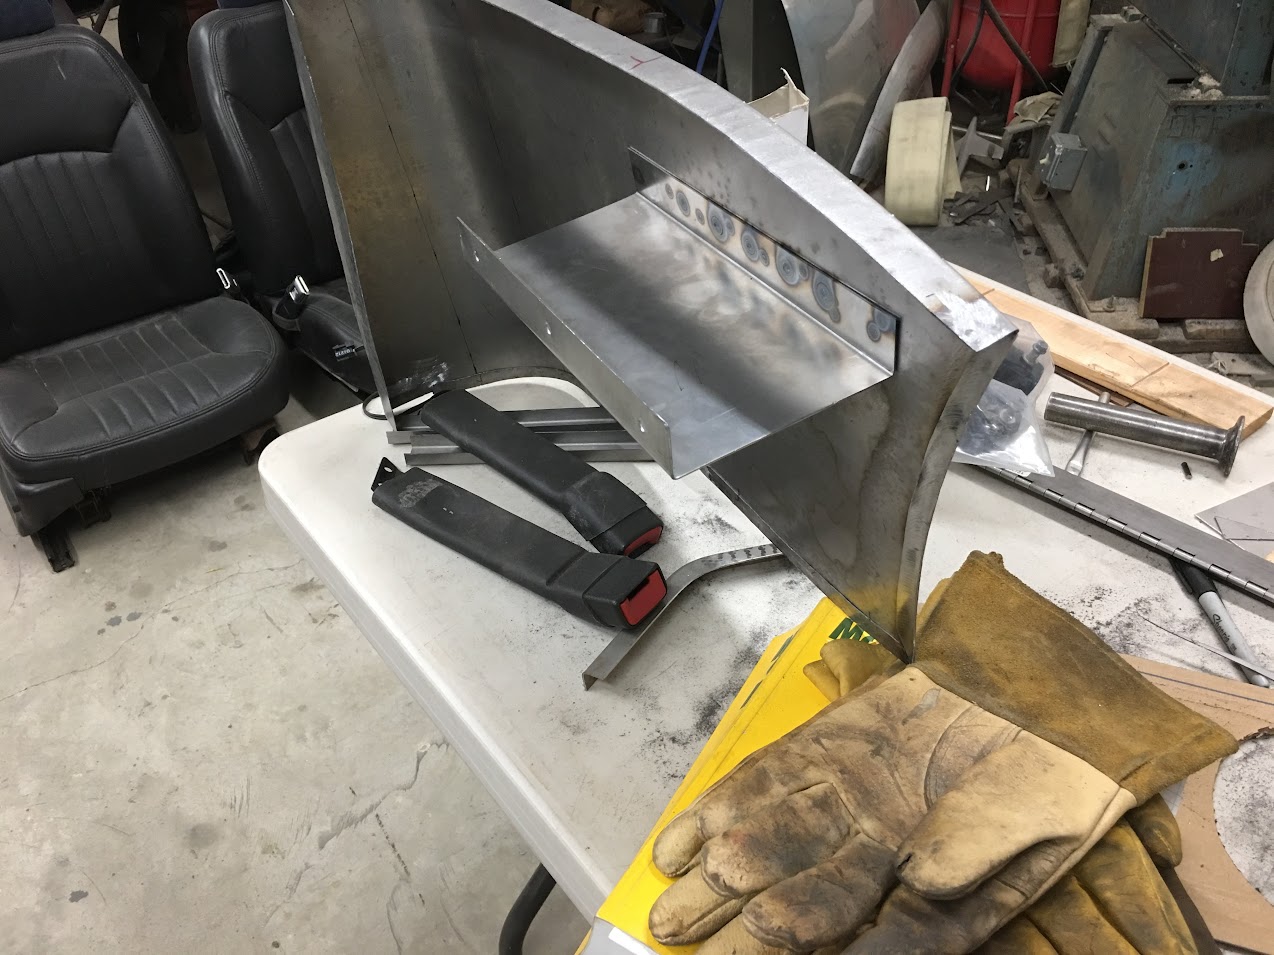
Jake's progress on the rear seat kick panel...
Tipping wheel on the Fasti folds over the top flange that will hold our arm rest..
Bolting bracket that will secure the kick panel to the inner quarter..
And here we're cutting out our console lid...
Thinning bend lines for a more crisp bend...
A piece of round rod in our magnetic brake gives us radius-ed corners...
A few passes in the Tommasini Wheeling Machine gives a bit of crown for better support
Corner details TIG welded in...
Corner detail test fit...
There we go, all caught up!Robert
-
02-21-2018 09:52 AM #1153
CHR Member
- Join Date
- Oct 2007
- Location
- Petaluma
- Car Year, Make, Model: 48 Ford F1
- Posts
- 9,795
Excellent!"  "No matter where you go, there you are!" Steve.
-
02-21-2018 03:07 PM #1154
CHR Member
- Join Date
- Apr 2011
- Location
- Prairie City
- Car Year, Make, Model: 40 Ford Deluxe, 68 Corvette, 72&76 K30
- Posts
- 7,301
- Blog Entries
- 1
So much awesomeness going on there!Ryan
1940 Ford Deluxe Tudor 354 Hemi 46RH Electric Blue w/multi-color flames, Ford 9" Residing in multiple pieces
1968 Corvette Coupe 5.9 Cummins Drag Car 11.43@130mph No stall leaving the line with 1250 rpm's and poor 2.2 60'
1972 Chevy K30 Longhorn P-pumped 24v Compound Turbos 47RH Just another money pit
1971 Camaro RS 5.3 BTR Stage 3 cam, SuperT10
Tire Sizes
-
02-21-2018 03:33 PM #1155
CHR Member
- Join Date
- Sep 2007
- Location
- New Bedford
- Car Year, Make, Model: 34 Ford 3W Coupe Replica
- Posts
- 14,754
Cosmo and I approve! rotflmao
As always, Thanks Robert.


 Reply With Quote


Posting Permissions
- You may not post new threads
- You may not post replies
- You may not post attachments
- You may not edit your posts

i've enjoyed the years here . made a lot of friends. most who have left. i see no reason to continue with this so hope to see you somewhere else. i dont think this site will ever be back. it's lived...
Dead!