


 3390Likes
Thread: 55 Wagon Progress


Results 1,276 to 1,290 of 1865
 LinkBack URL
 About LinkBacks
-
01-08-2019 09:34 AM #1276
 CHR Member

- Join Date
- Jun 2008
- Location
- Leonardtown
- Car Year, Make, Model: Walking
- Posts
- 1,228
Thanks for checking out the progress guys!
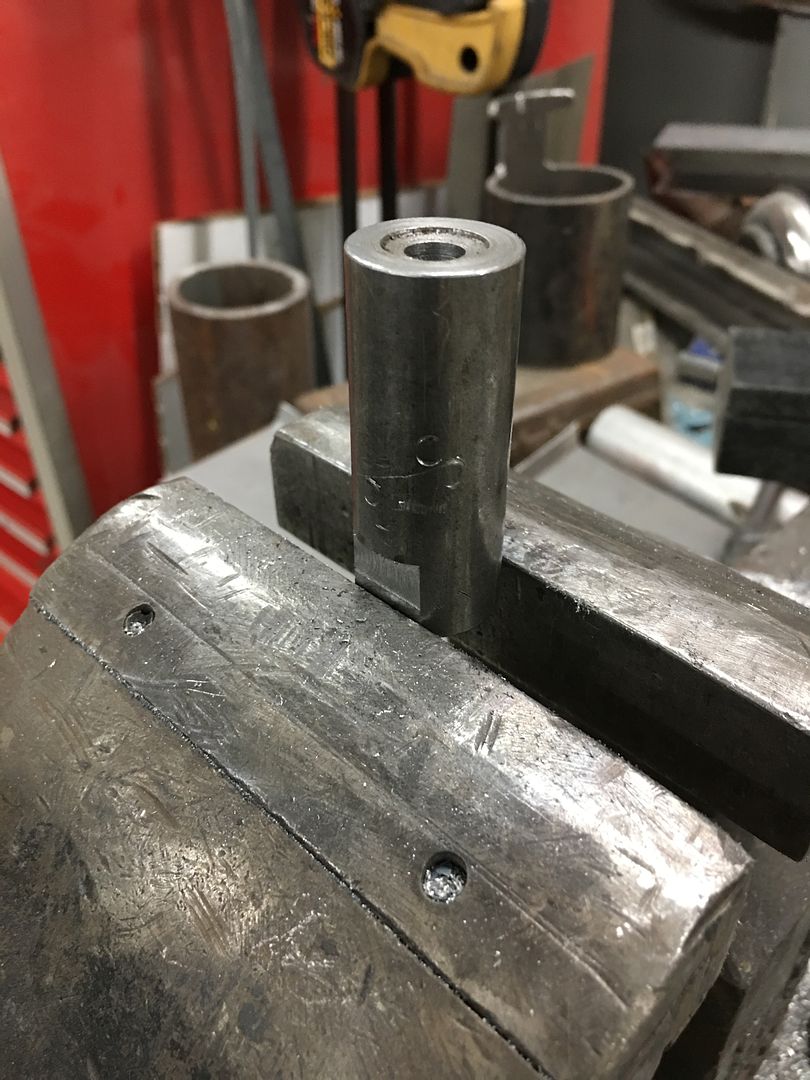
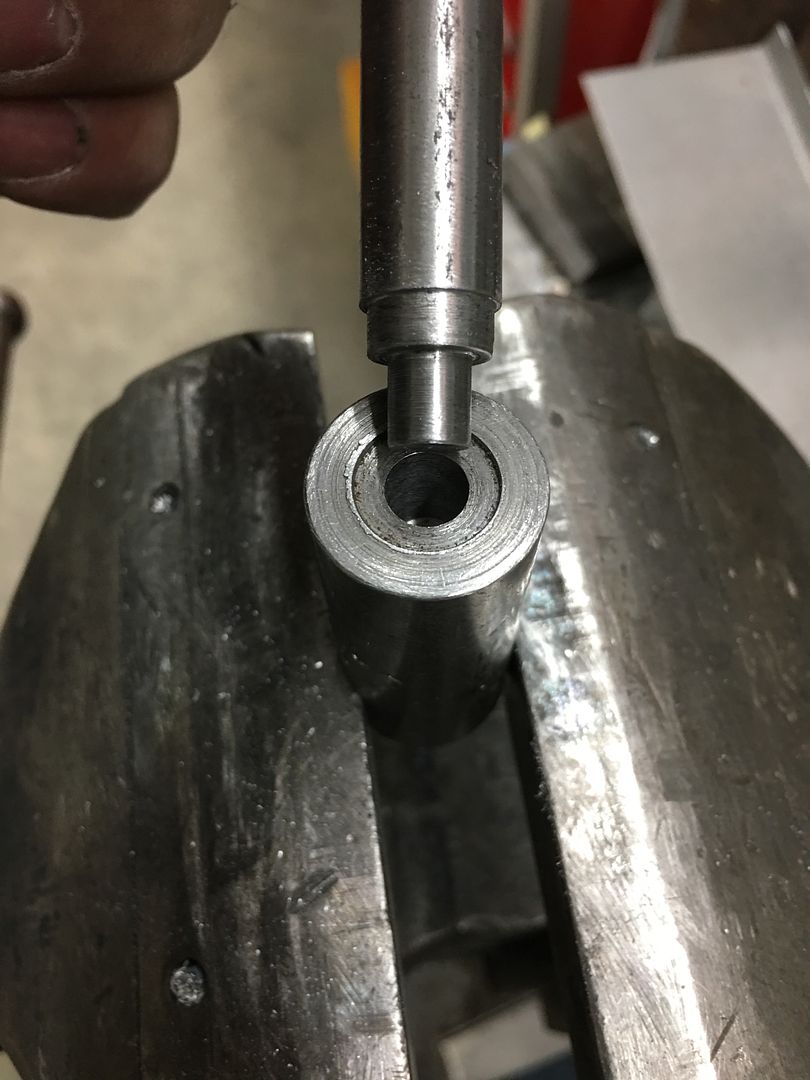
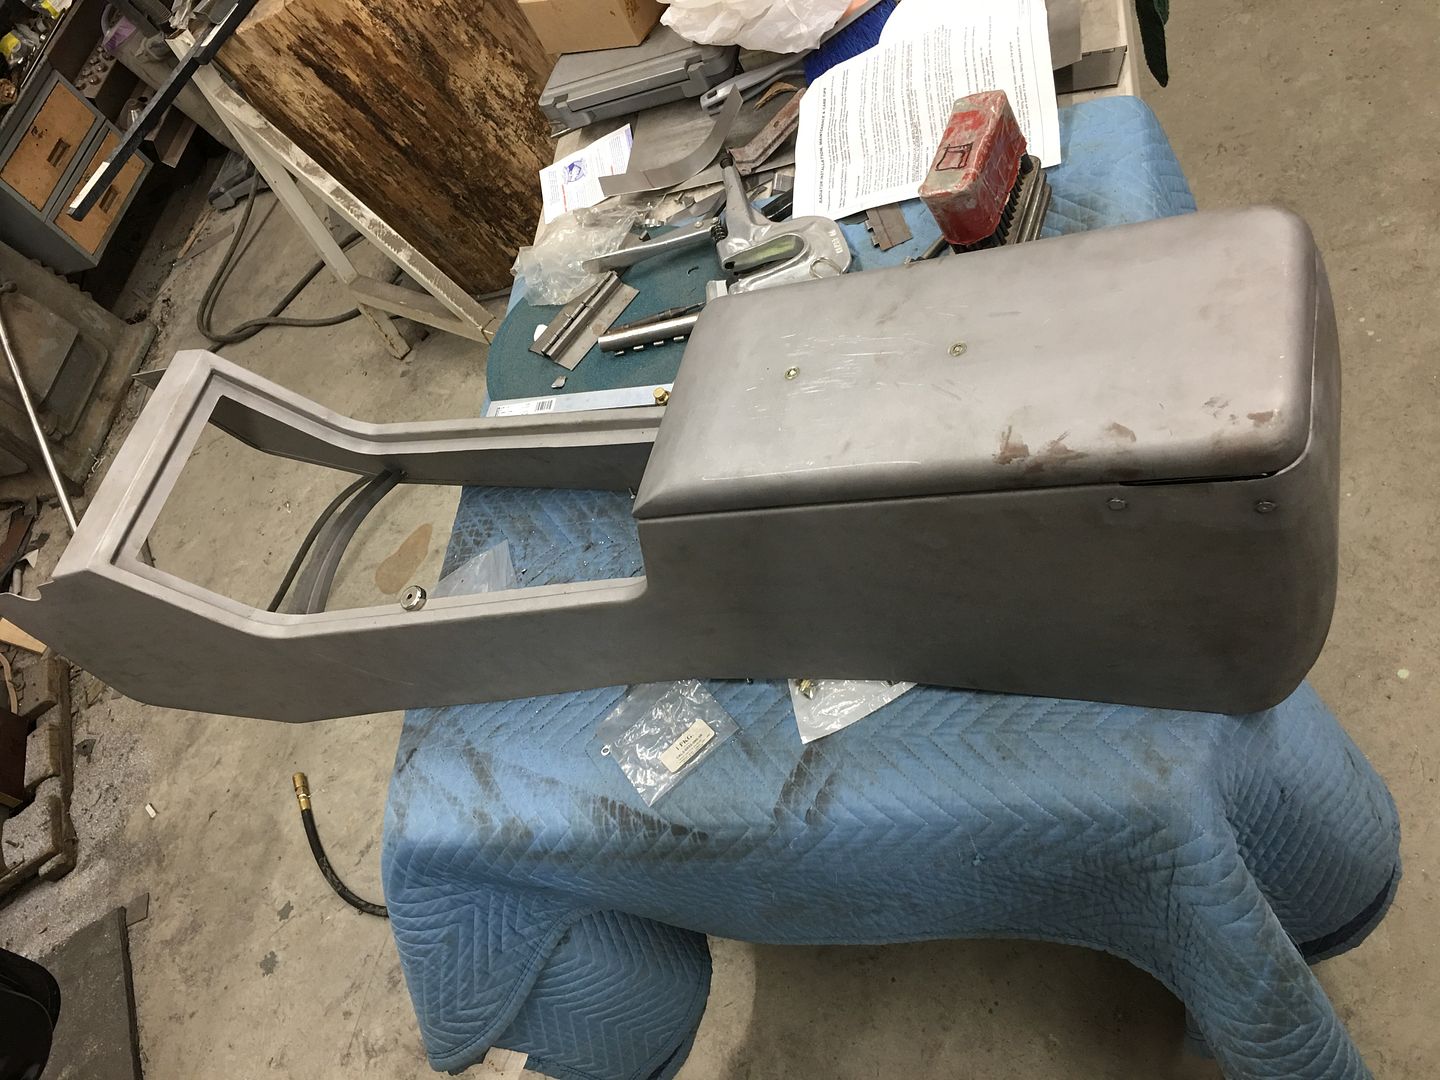
Dotting the i's, crossing the t's... The insert for the bottom side of the console lid will be held in with a couple of 10-32 screws into a rivet nut. To insure the rivet nut is flush on the outside for the installation of upholstery, we want to provide a slight recess for the rivet nut flange. Here's the punch and die we made for the occasion, the bottom die is machined on the side to keep things from moving when clamped in the vise.
South Bend milling machine:
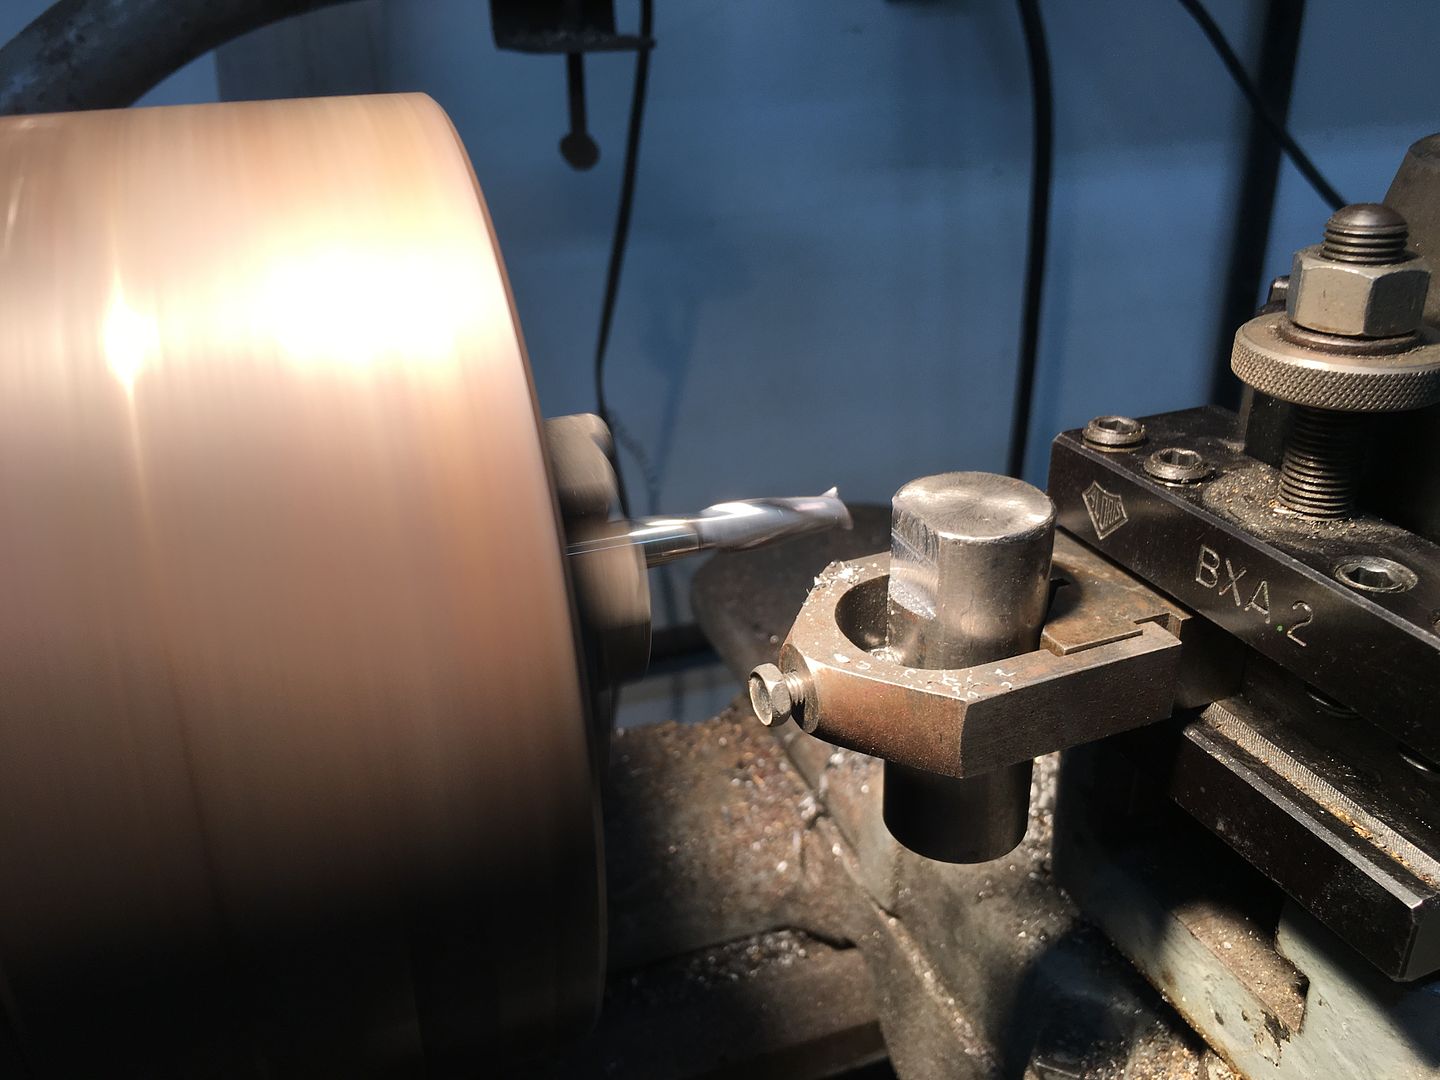
action shot:
https://www.youtube.com/watch?v=Z3hS...ature=youtu.be
inner parts installed...

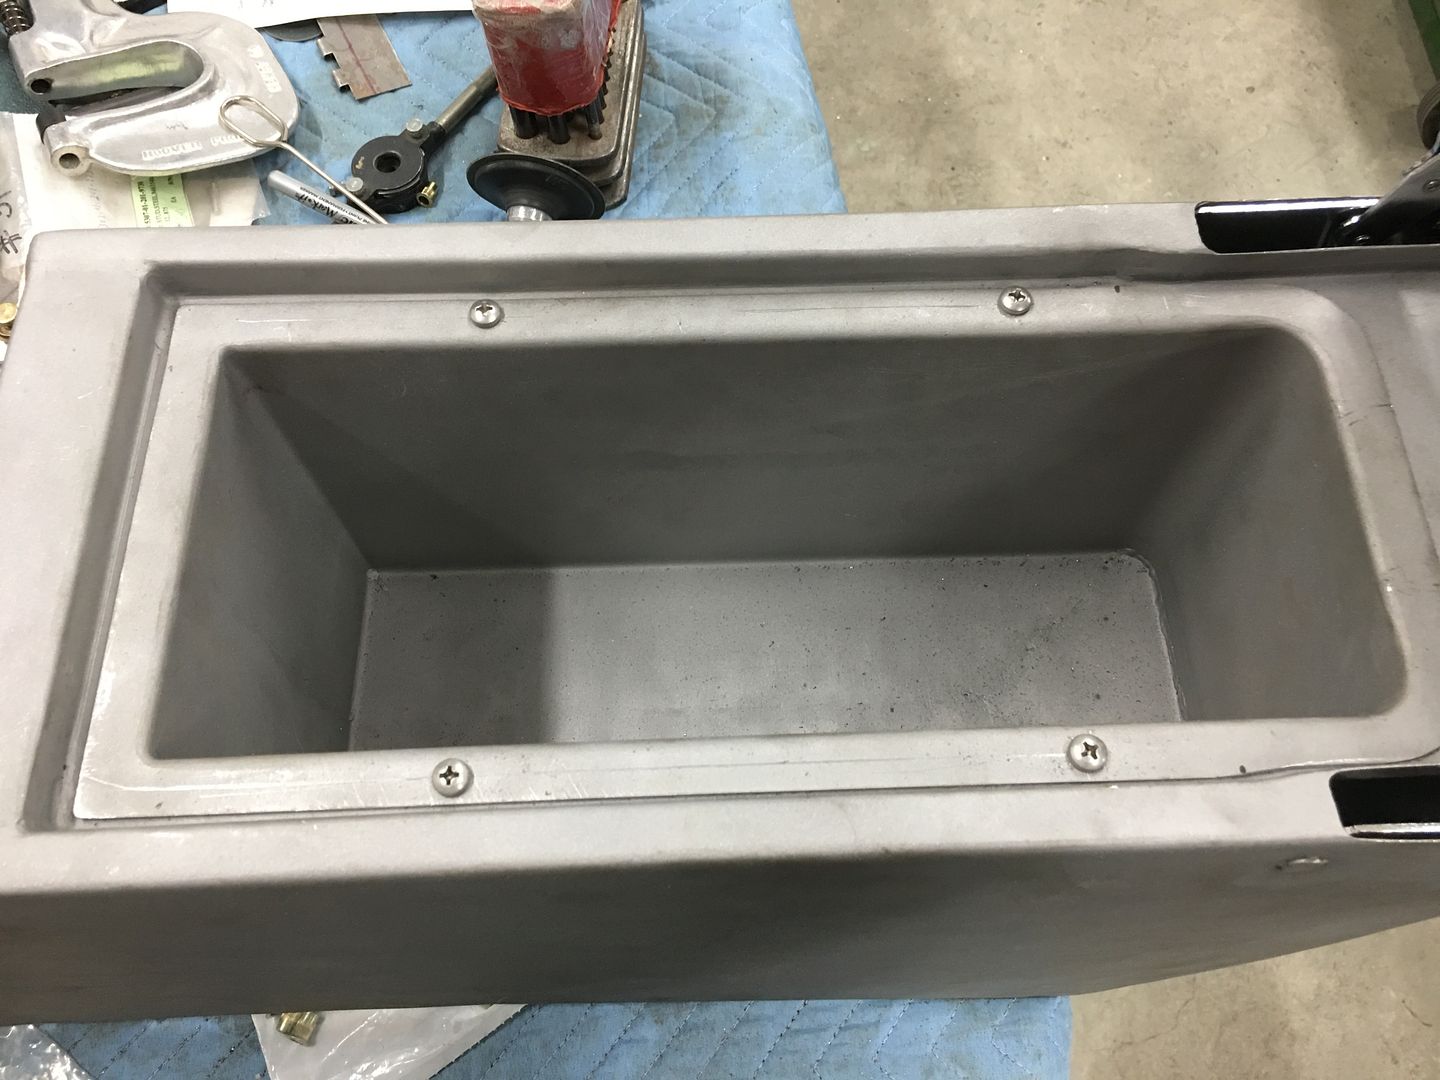
ready for powder coat / epoxy primer, whichever comes first...
Robert
-
Advertising

- Google Adsense
- REGISTERED USERS DO NOT SEE THIS AD
-
01-08-2019 12:56 PM #1277
CHR Member
- Join Date
- Apr 2011
- Location
- Prairie City
- Car Year, Make, Model: 40 Ford Deluxe, 68 Corvette, 72&76 K30
- Posts
- 7,301
- Blog Entries
- 1
So very nice!Ryan
1940 Ford Deluxe Tudor 354 Hemi 46RH Electric Blue w/multi-color flames, Ford 9" Residing in multiple pieces
1968 Corvette Coupe 5.9 Cummins Drag Car 11.43@130mph No stall leaving the line with 1250 rpm's and poor 2.2 60'
1972 Chevy K30 Longhorn P-pumped 24v Compound Turbos 47RH Just another money pit
1971 Camaro RS 5.3 BTR Stage 3 cam, SuperT10
Tire Sizes
-
01-08-2019 03:55 PM #1278
CHR Member
- Join Date
- Sep 2007
- Location
- New Bedford
- Car Year, Make, Model: 34 Ford 3W Coupe Replica
- Posts
- 14,754
more amazing work and results.
-
01-09-2019 07:57 AM #1279
CHR Member
- Join Date
- Nov 2016
- Location
- rocklin
- Posts
- 656
Really great metal work. No one will appreciate that once it's covered up with upholstery, kind of sad.
-
01-09-2019 08:58 AM #1280
CHR Member
- Join Date
- Sep 2013
- Location
- Portage
- Car Year, Make, Model: 31 A Coupe
- Posts
- 567
I like how you use the lathe as a mill to machine that round stock!http://www.clubhotrod.com/hot-rod-bu...del-coupe.html
-
01-09-2019 09:27 AM #1281
CHR Member
- Join Date
- Jun 2008
- Location
- Leonardtown
- Car Year, Make, Model: Walking
- Posts
- 1,228
 Originally Posted by RichB

To help out with "learning curve", you do have to watch overtightening the machine screw (set screw). The first time I used this method I was a bit eager in tightening, and it mushroomed the end of the fastener. Had to cut the screw to get it out...
Robert
-
01-10-2019 07:50 PM #1282
CHR Member
- Join Date
- Jun 2008
- Location
- Leonardtown
- Car Year, Make, Model: Walking
- Posts
- 1,228
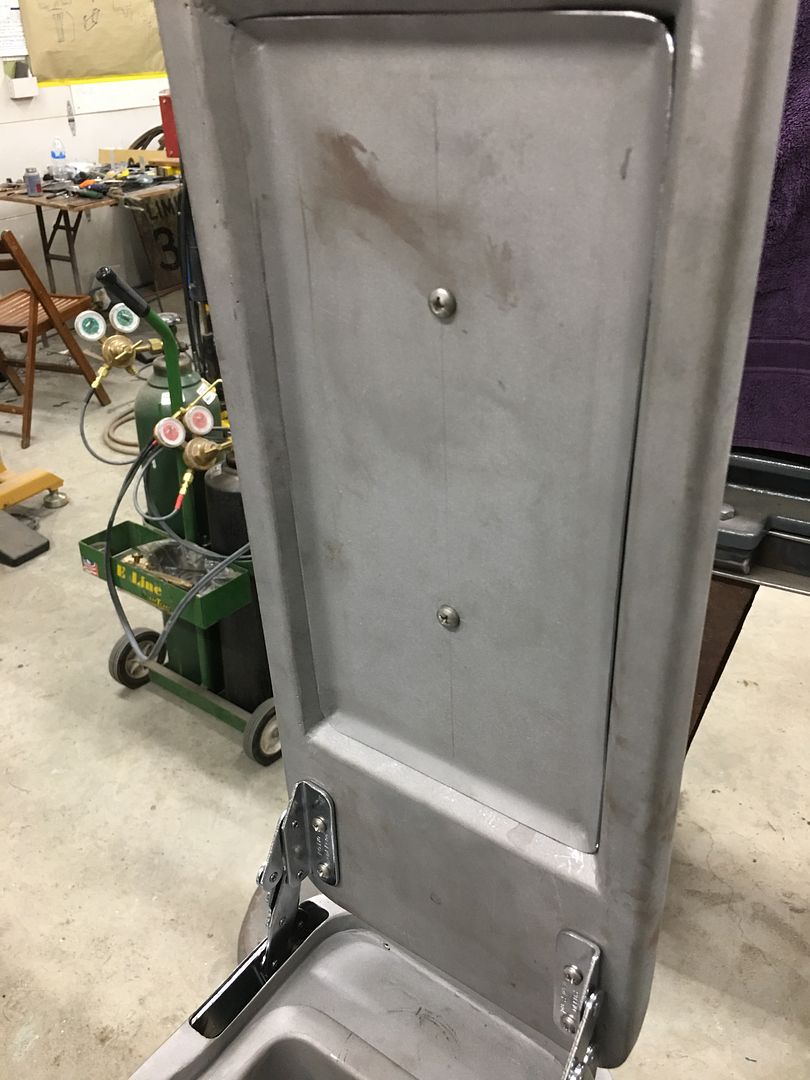
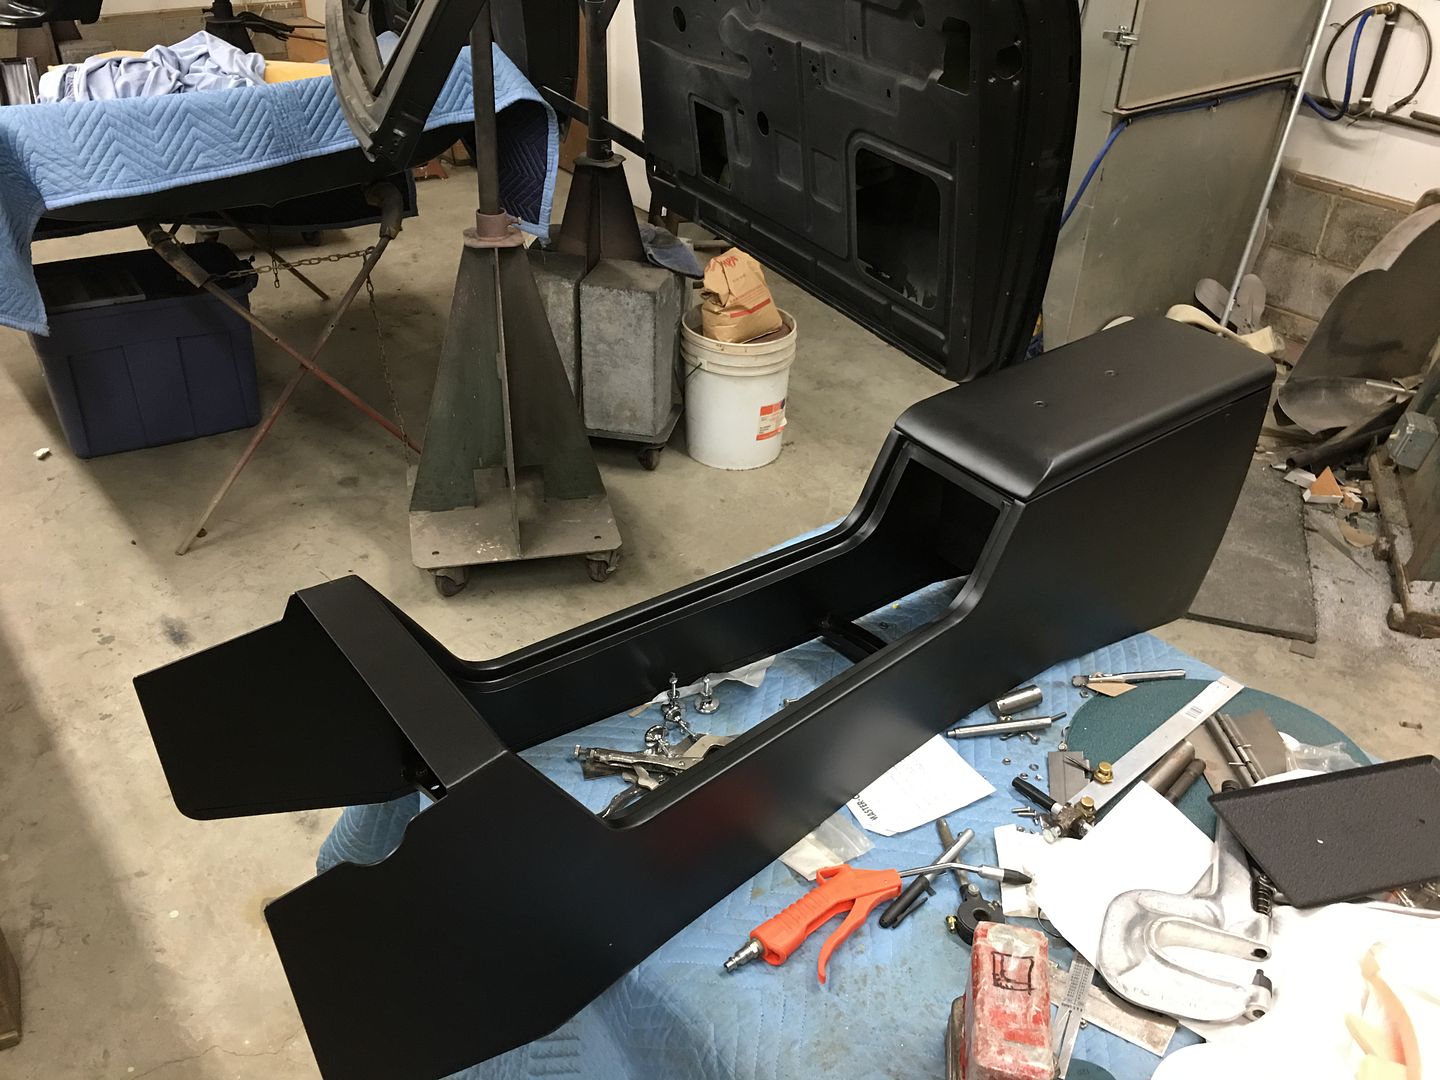
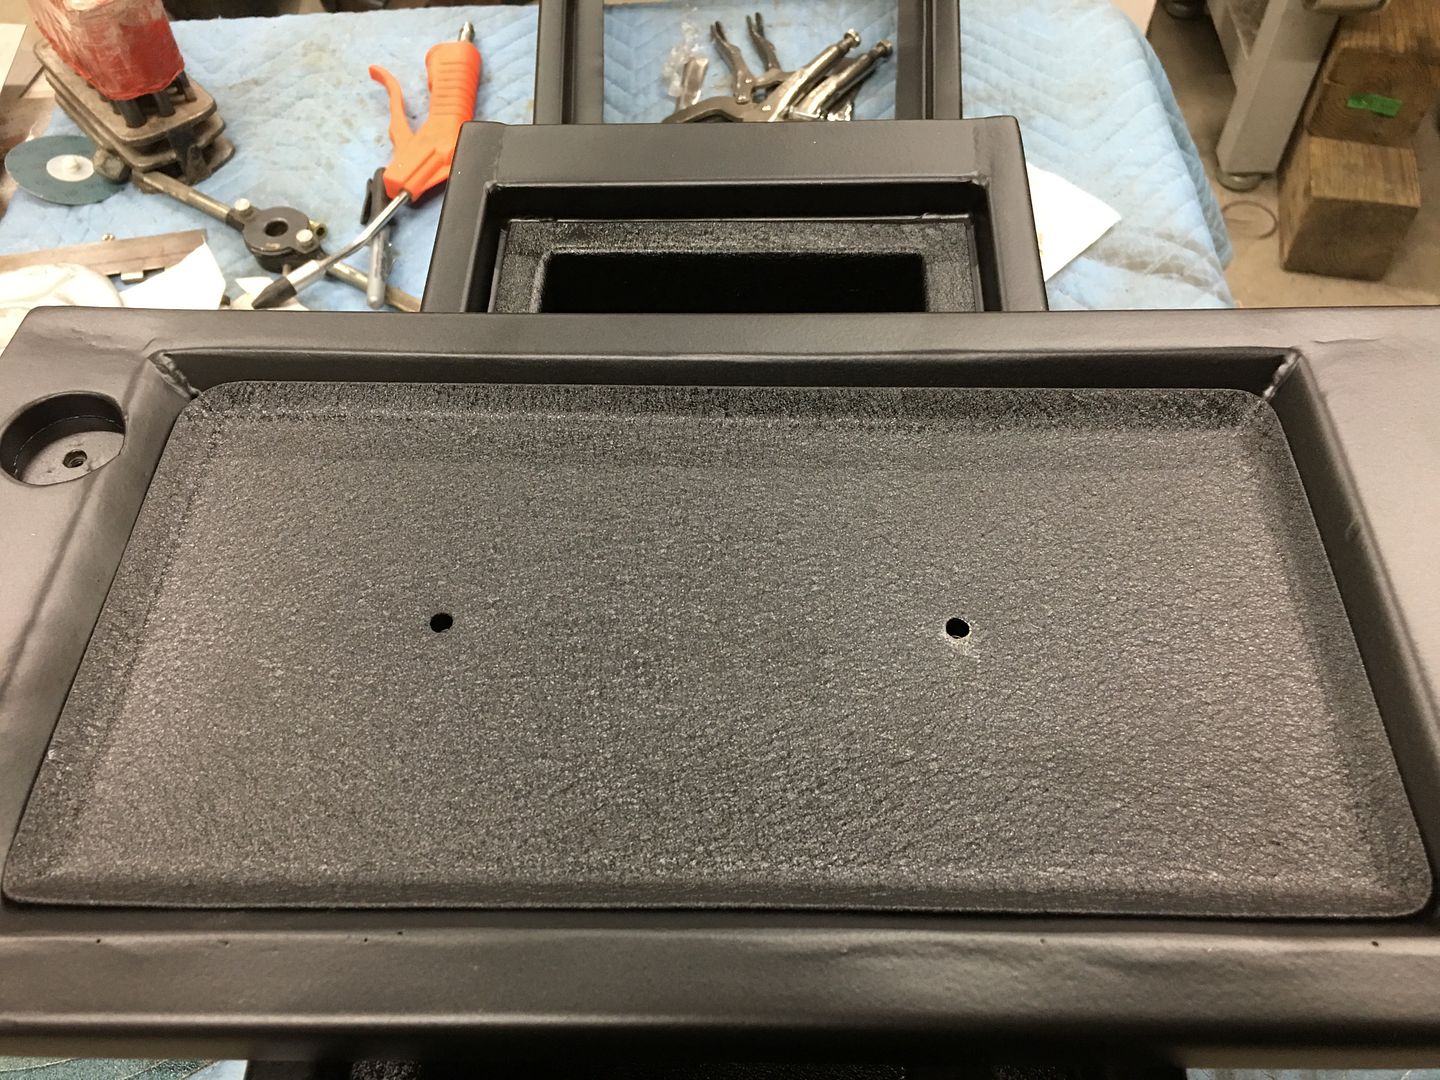
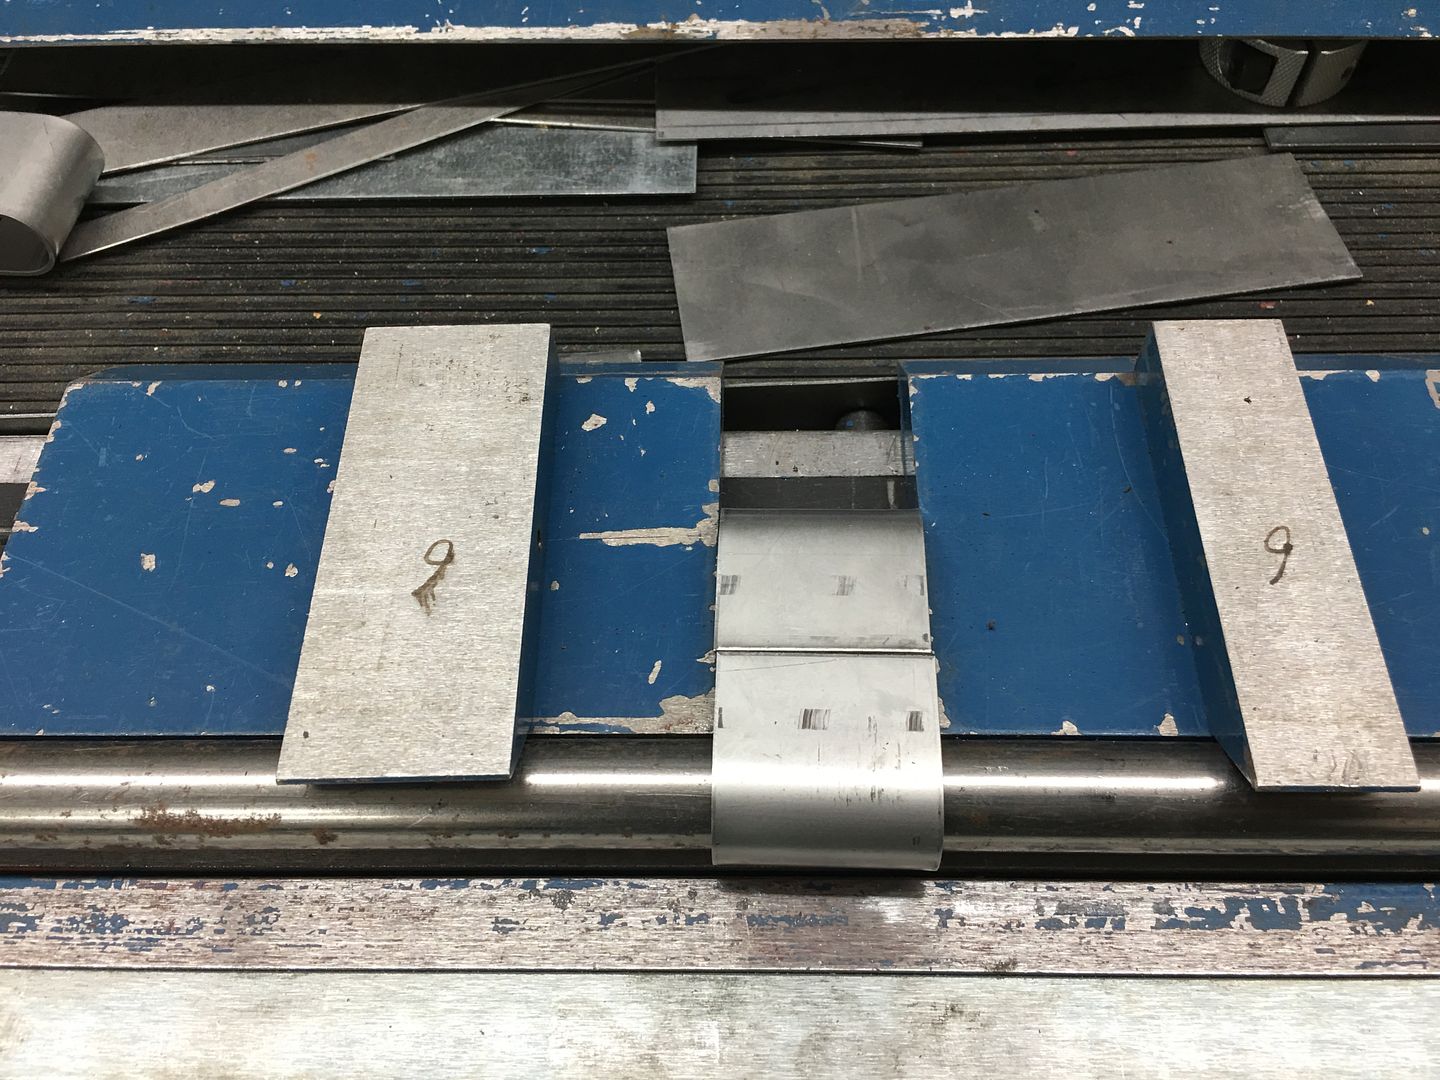
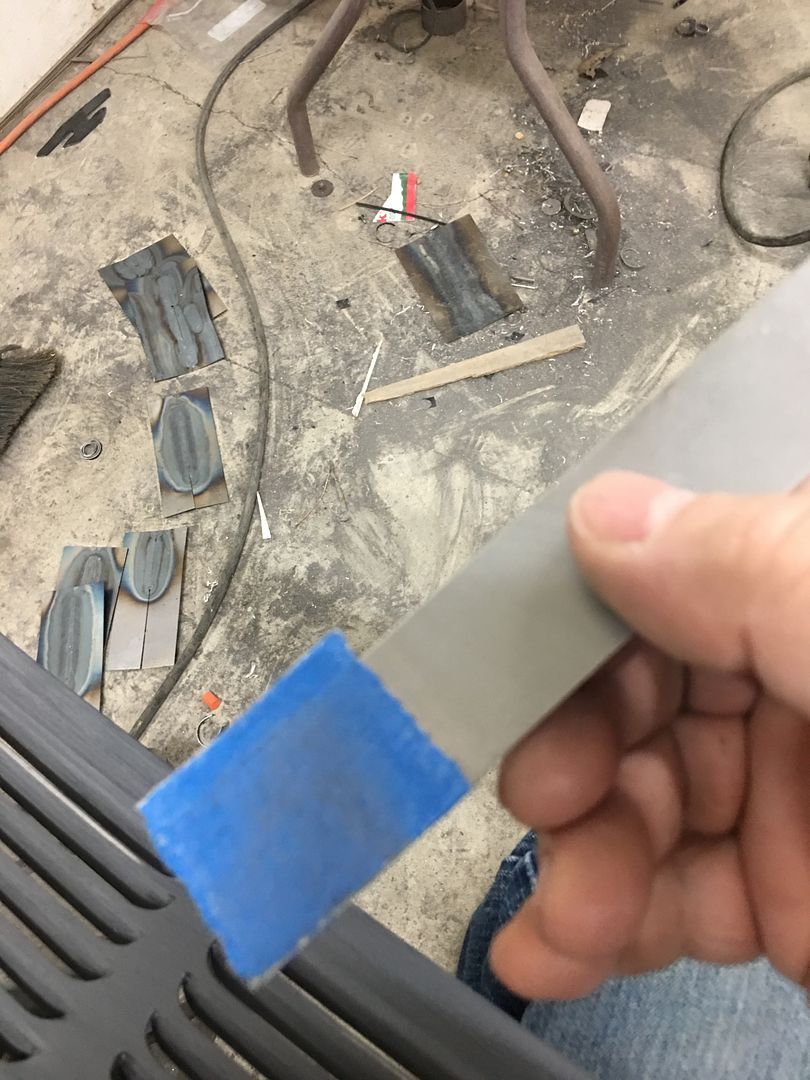
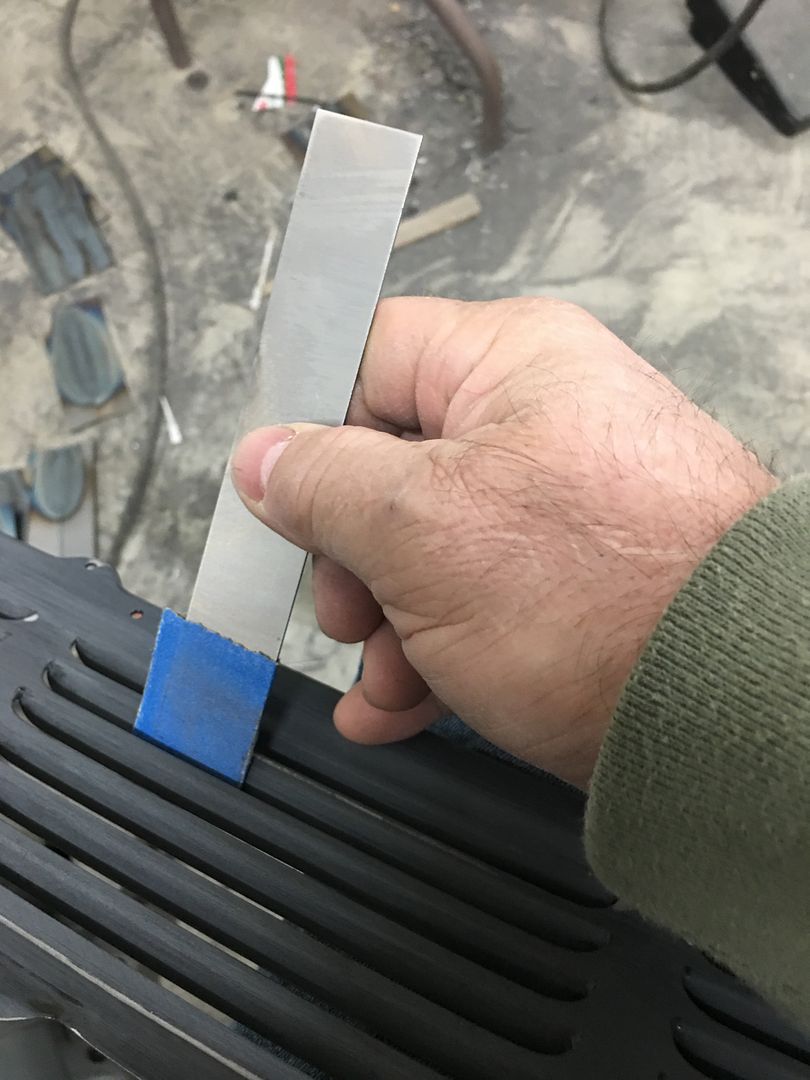
Picked up the console from the powder coater, the outside was done in satin black and will be covered in upholstery, the inside parts were done in wrinkle finish, this will be their "covering"


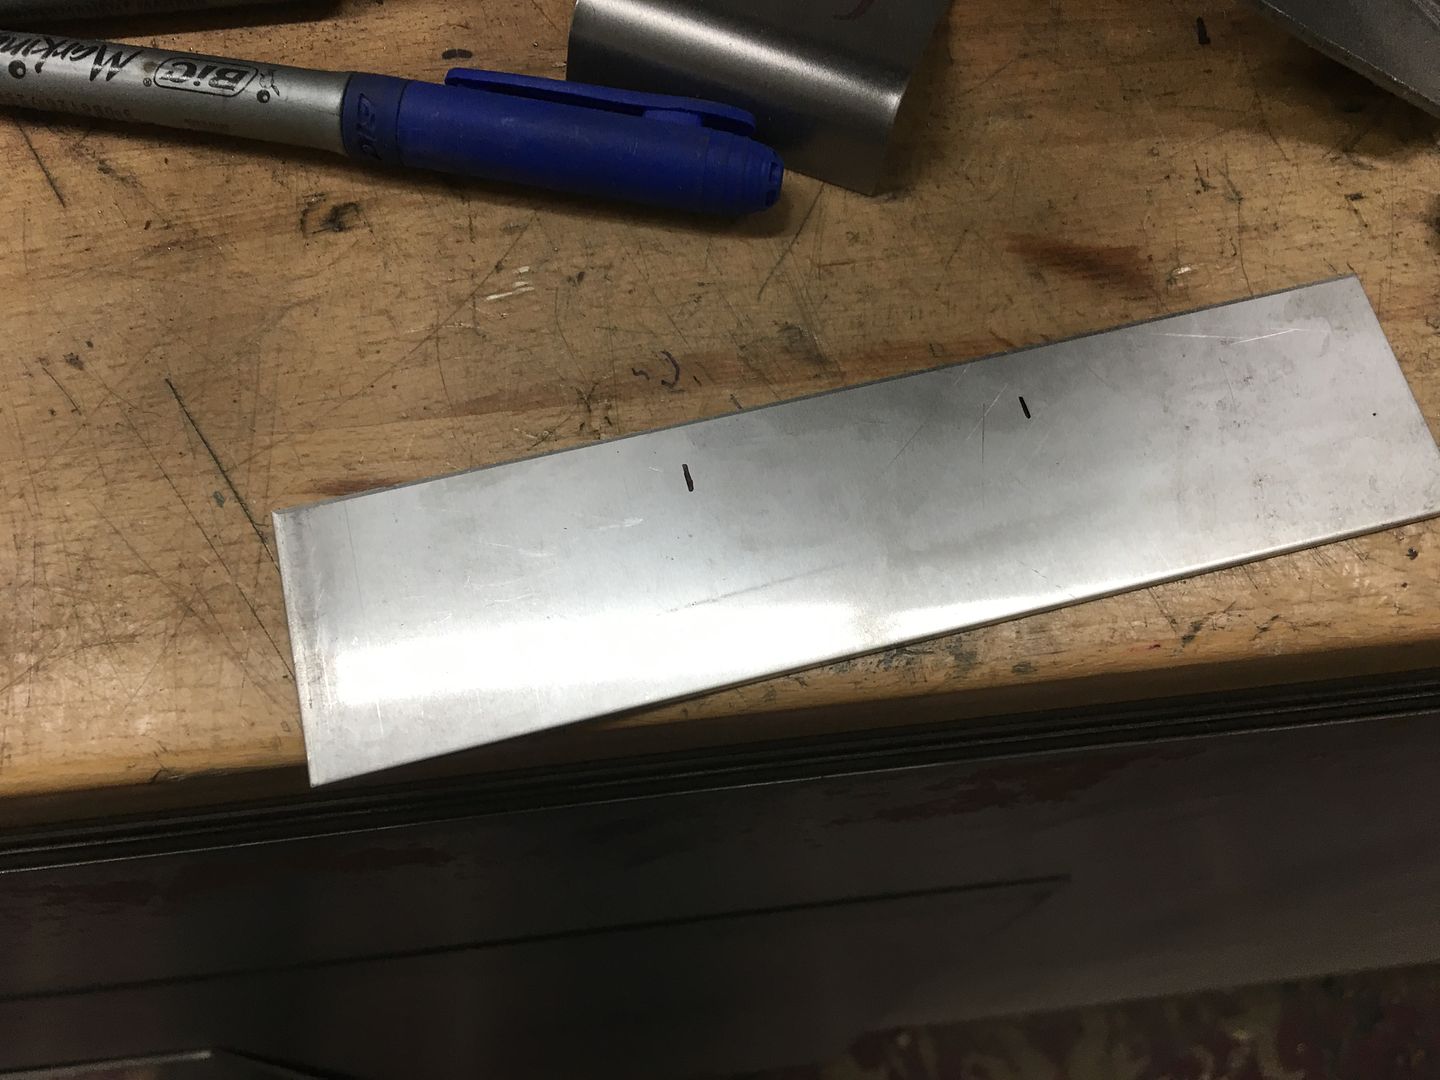
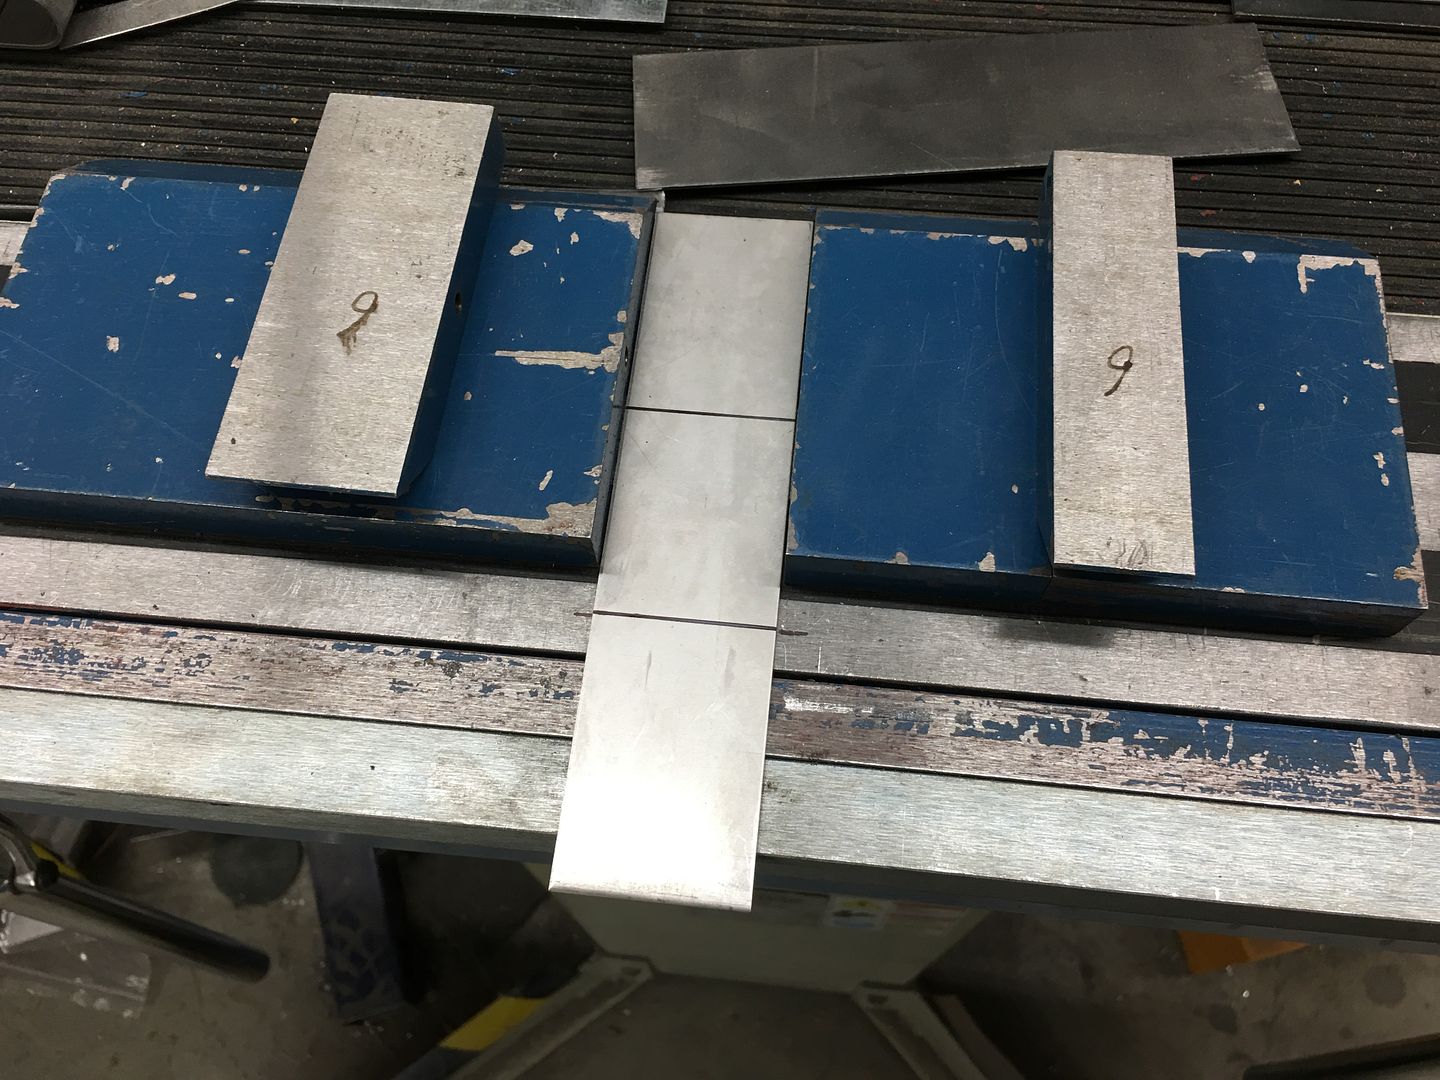
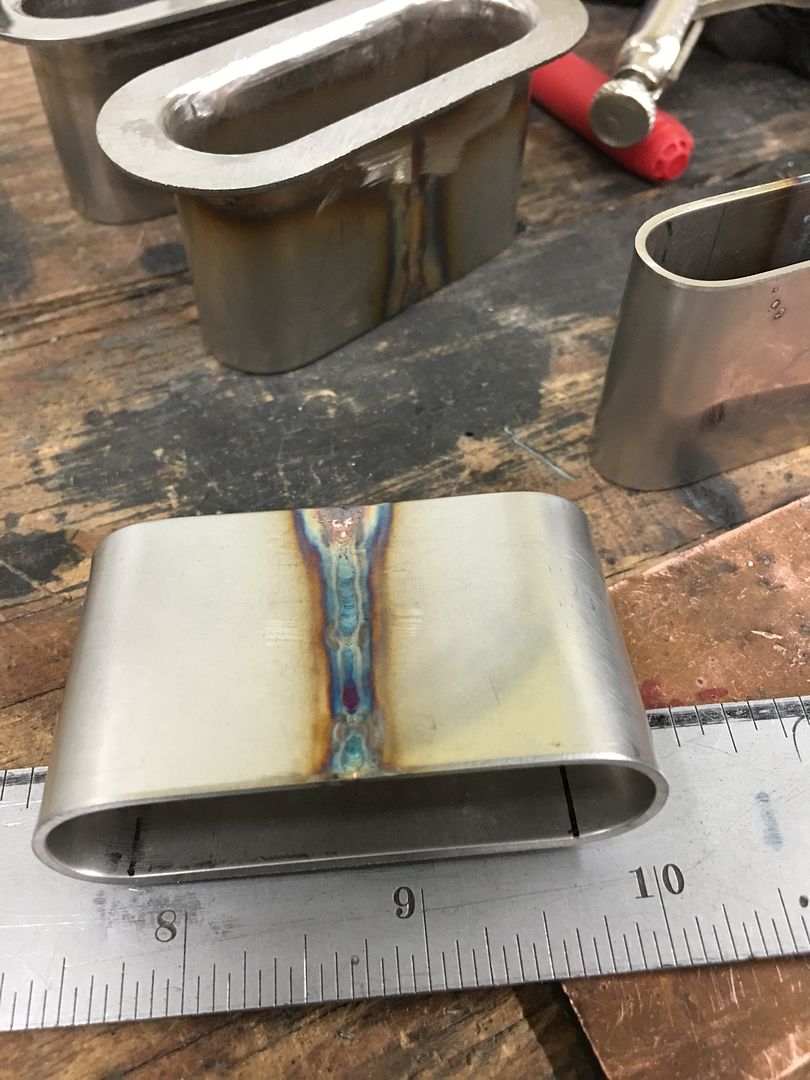
Tonight we worked on some stainless for our seat belt escutcheons..
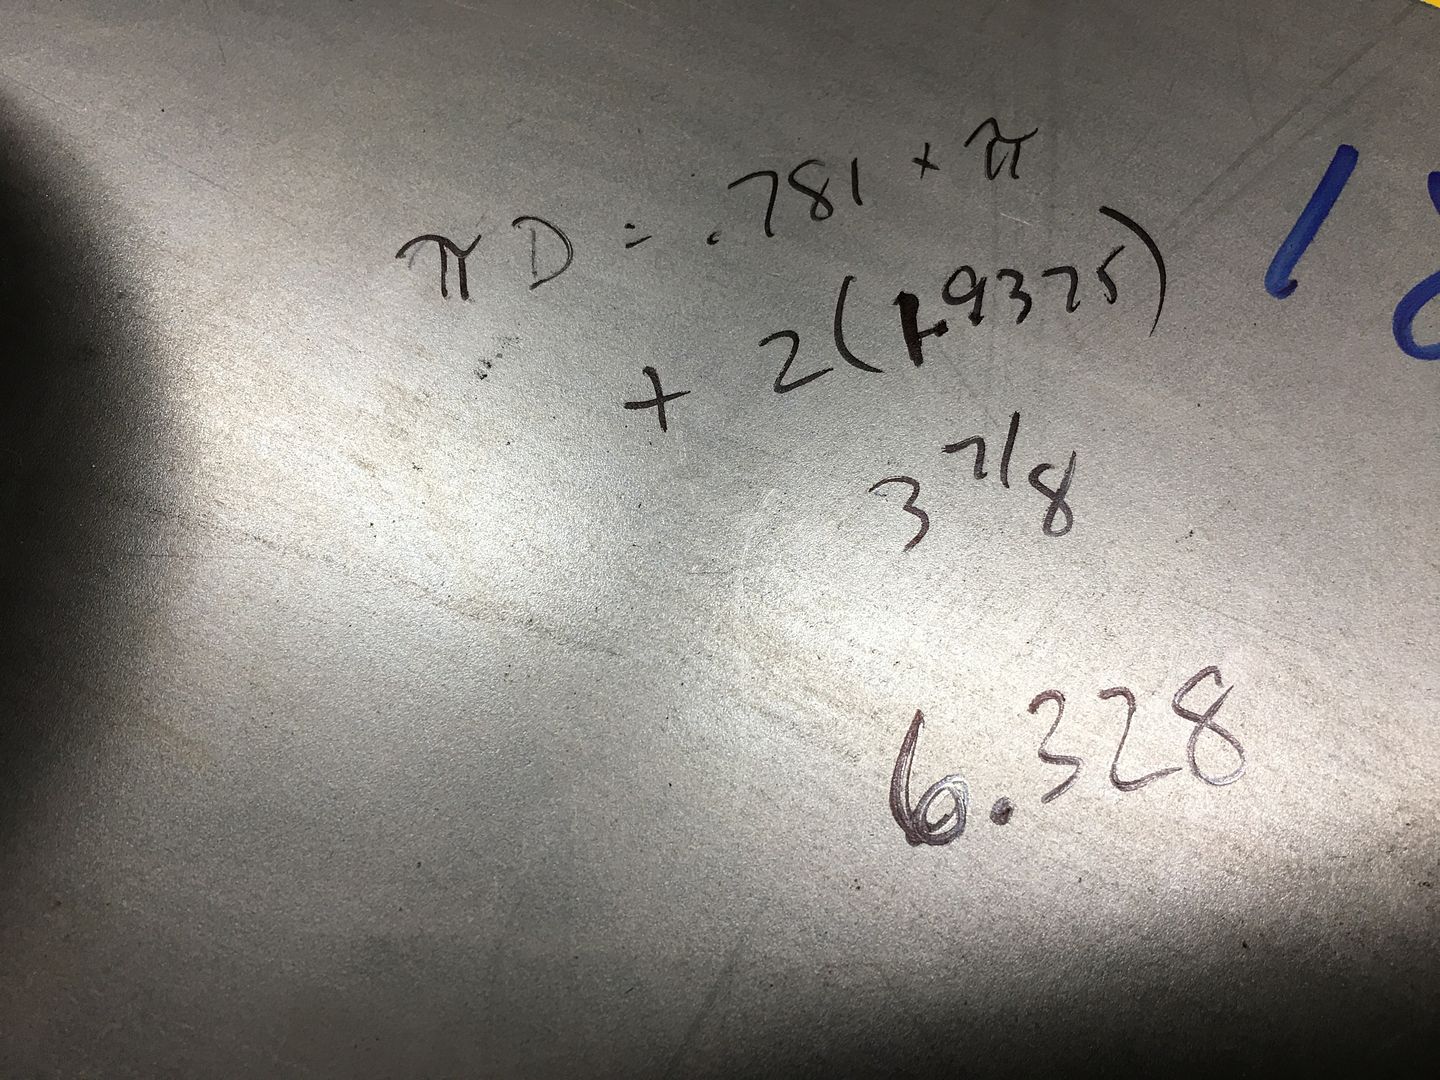
Some measurements and geometry from high school should get us the correct size from the onset...
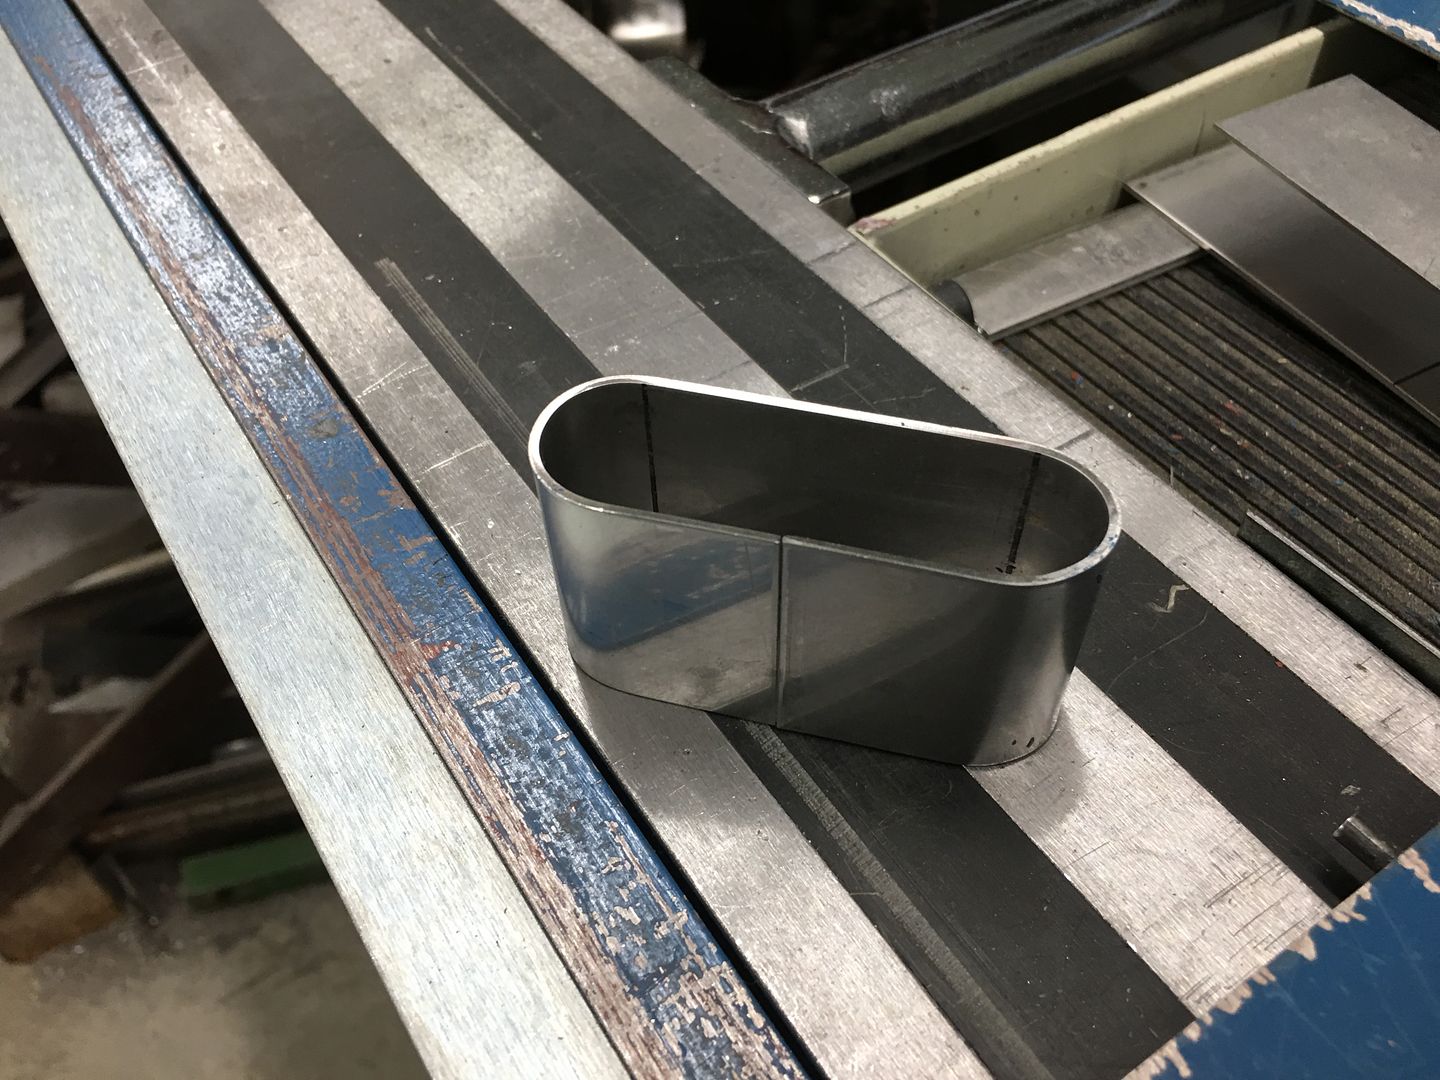
Using the mag brake and a 3/4 tube to bend our radius...
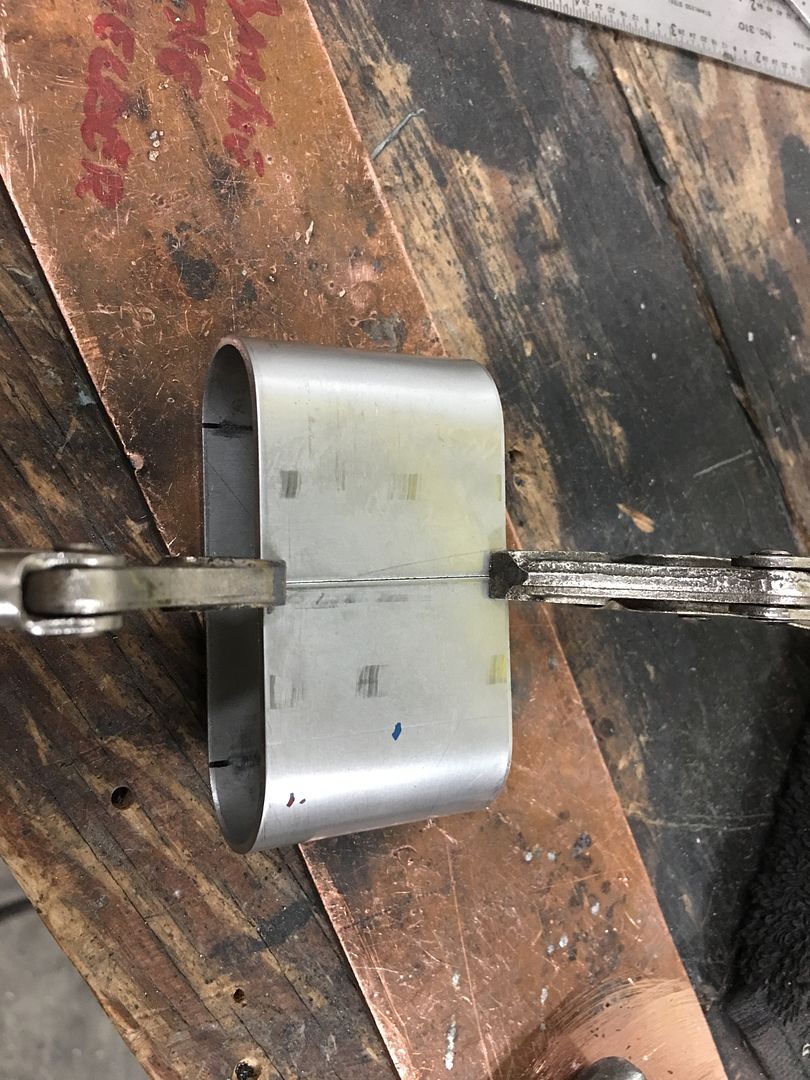
Tacked together using the TIG

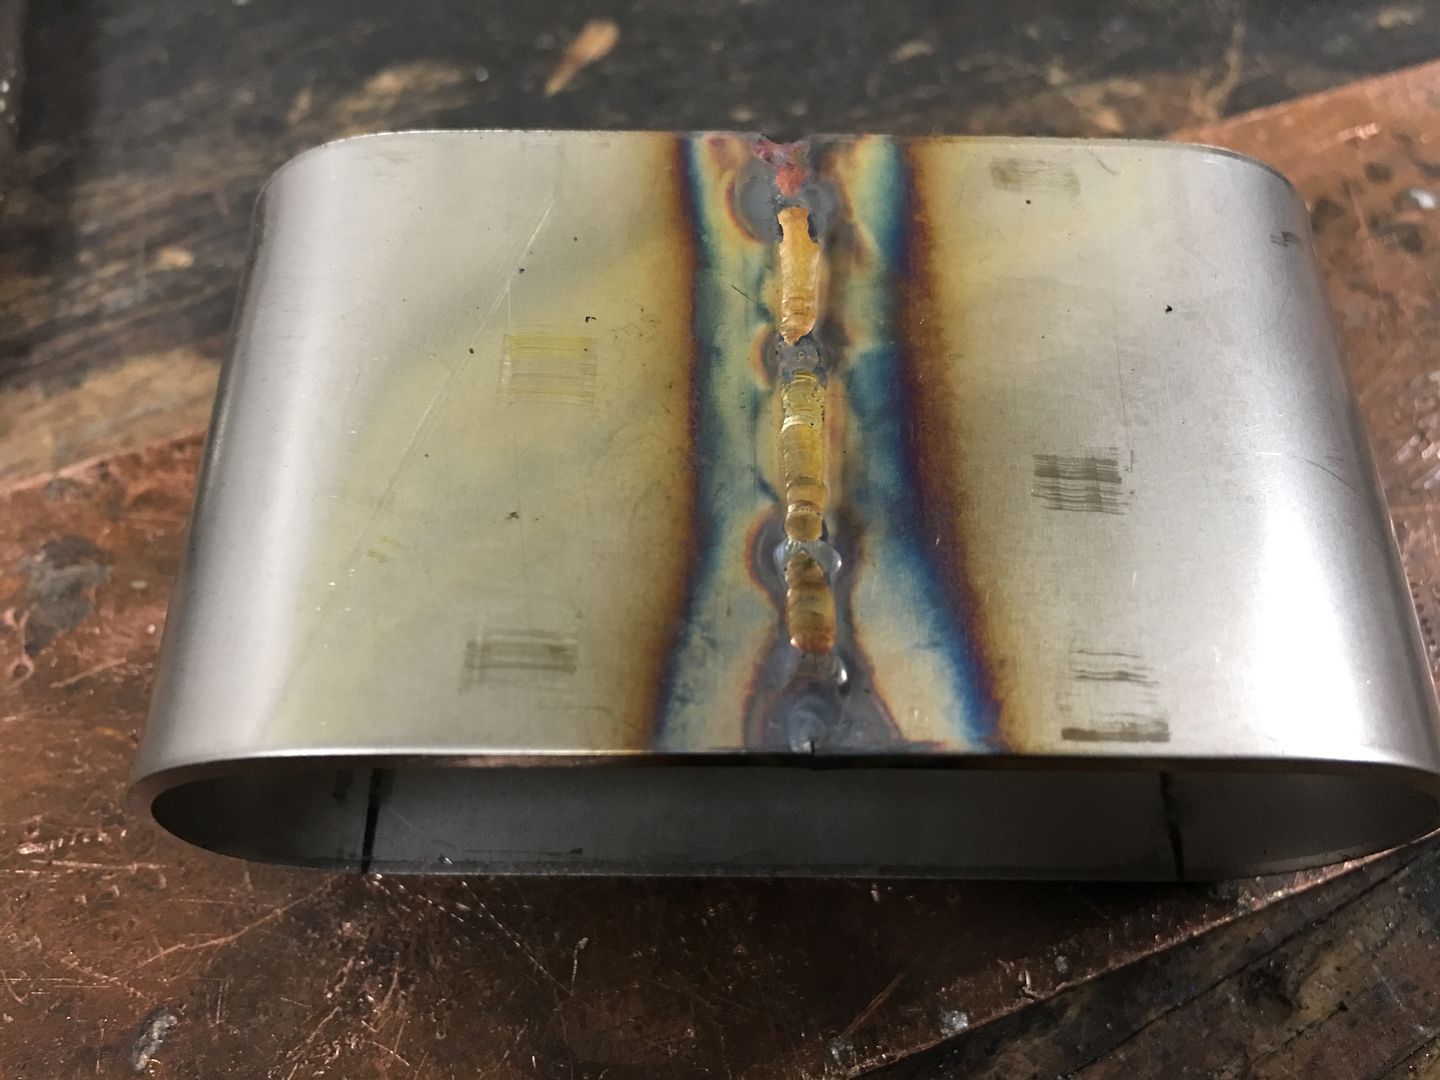
Got running late and missed some pictures, but here's the part welded up and polished..
https://www.youtube.com/watch?v=b48a...ature=youtu.be
.Robert
-
01-11-2019 11:34 AM #1283
CHR Member
- Join Date
- Oct 2007
- Location
- Petaluma
- Car Year, Make, Model: 48 Ford F1
- Posts
- 9,795
Very nice. Your finishing details like everything else is "fantastic""  "No matter where you go, there you are!" Steve.
-
01-14-2019 09:58 AM #1284
CHR Member
- Join Date
- Jun 2008
- Location
- Leonardtown
- Car Year, Make, Model: Walking
- Posts
- 1,228
Thanks!
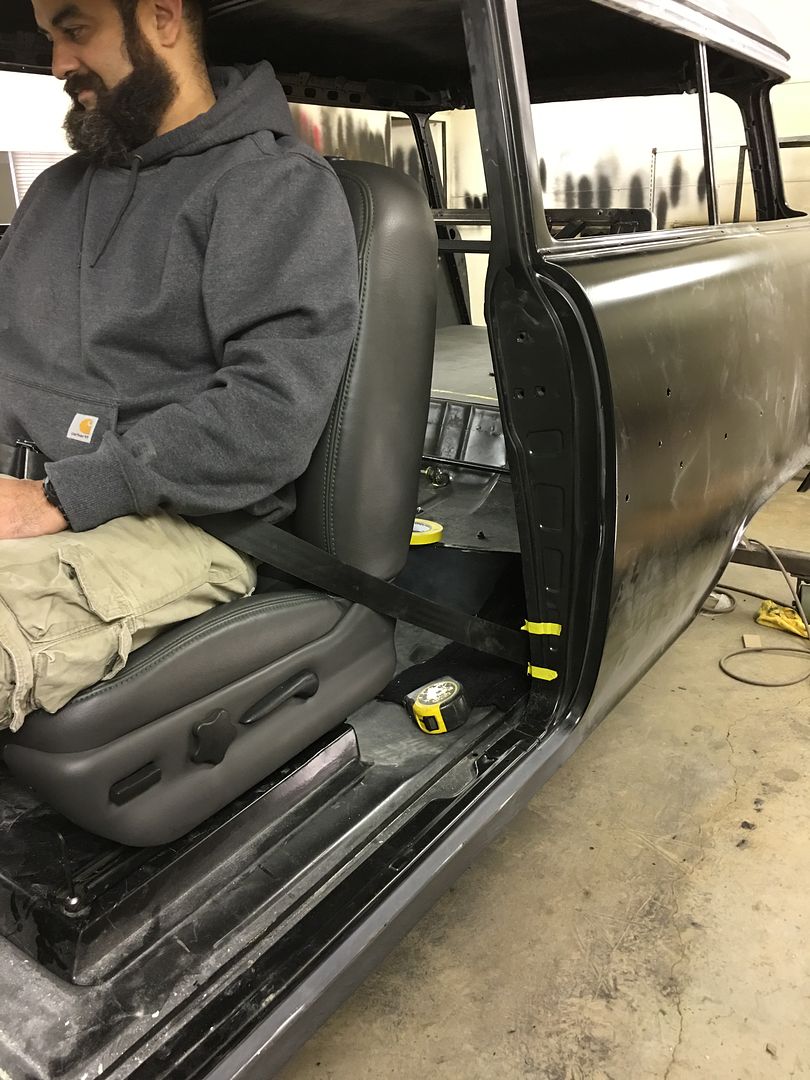
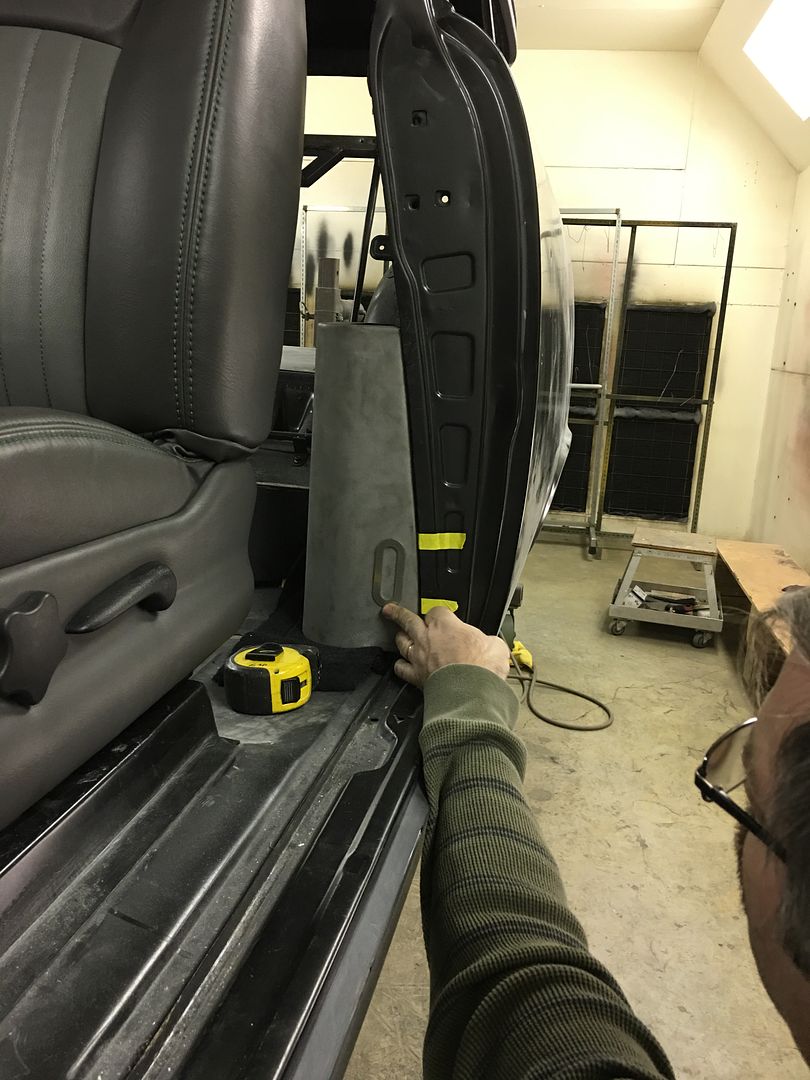
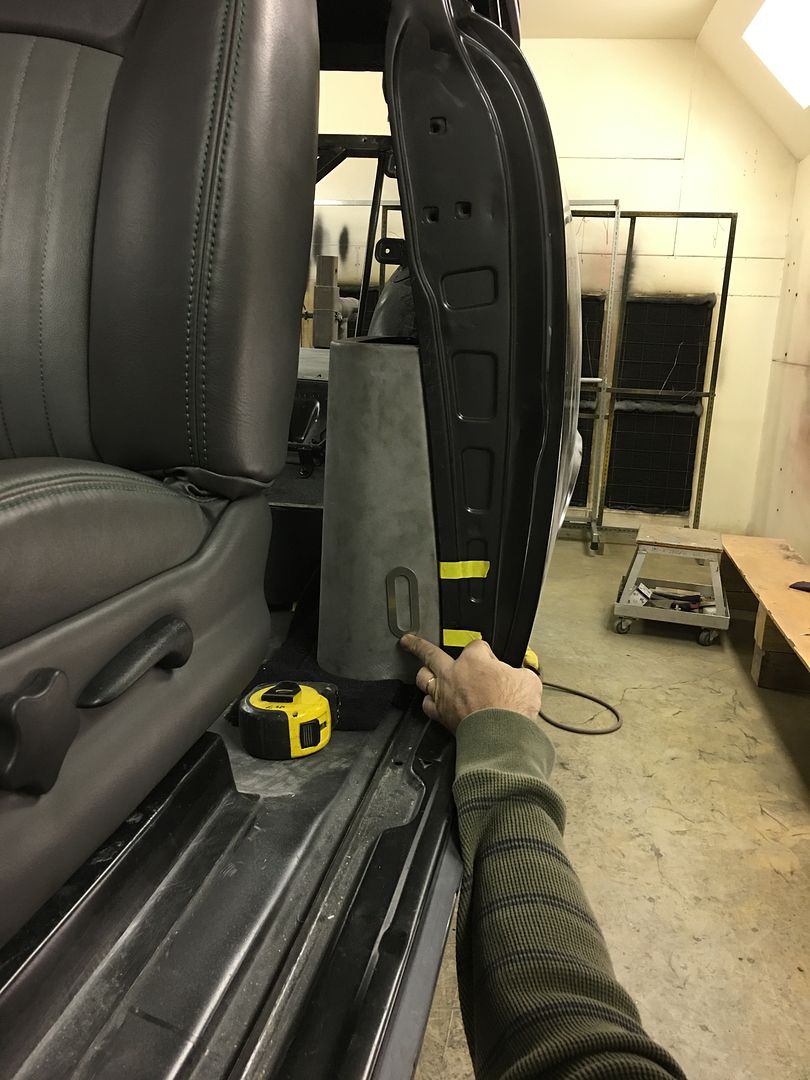
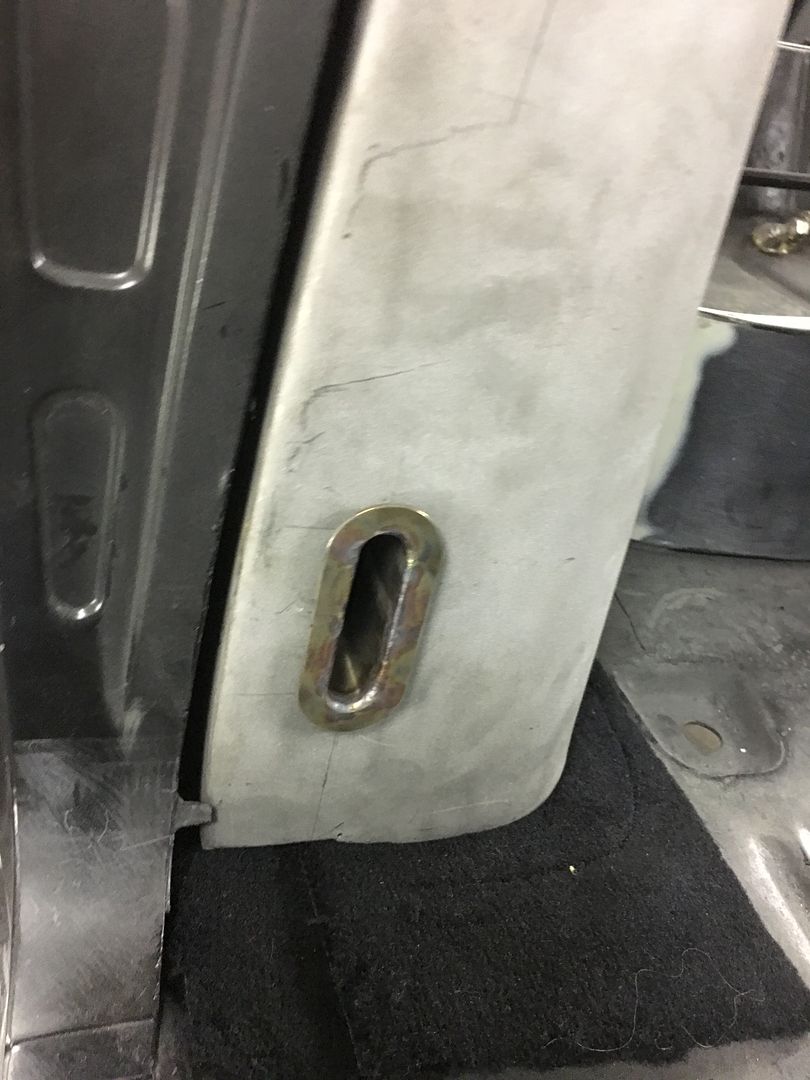
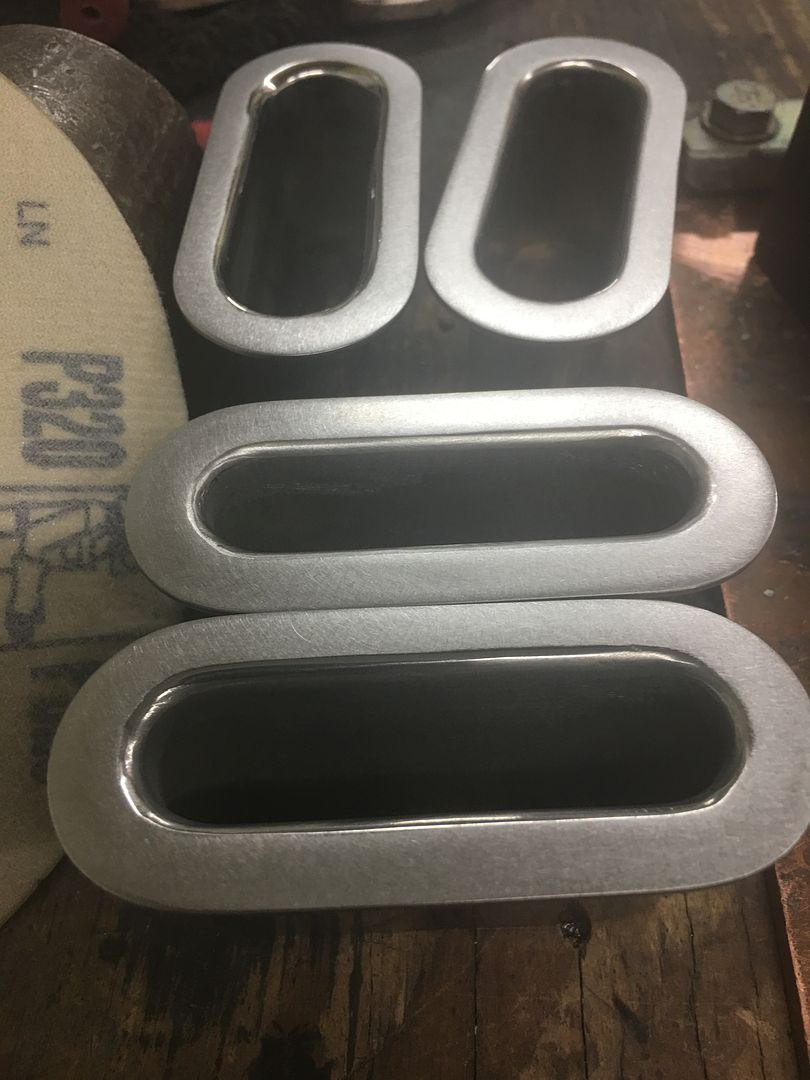
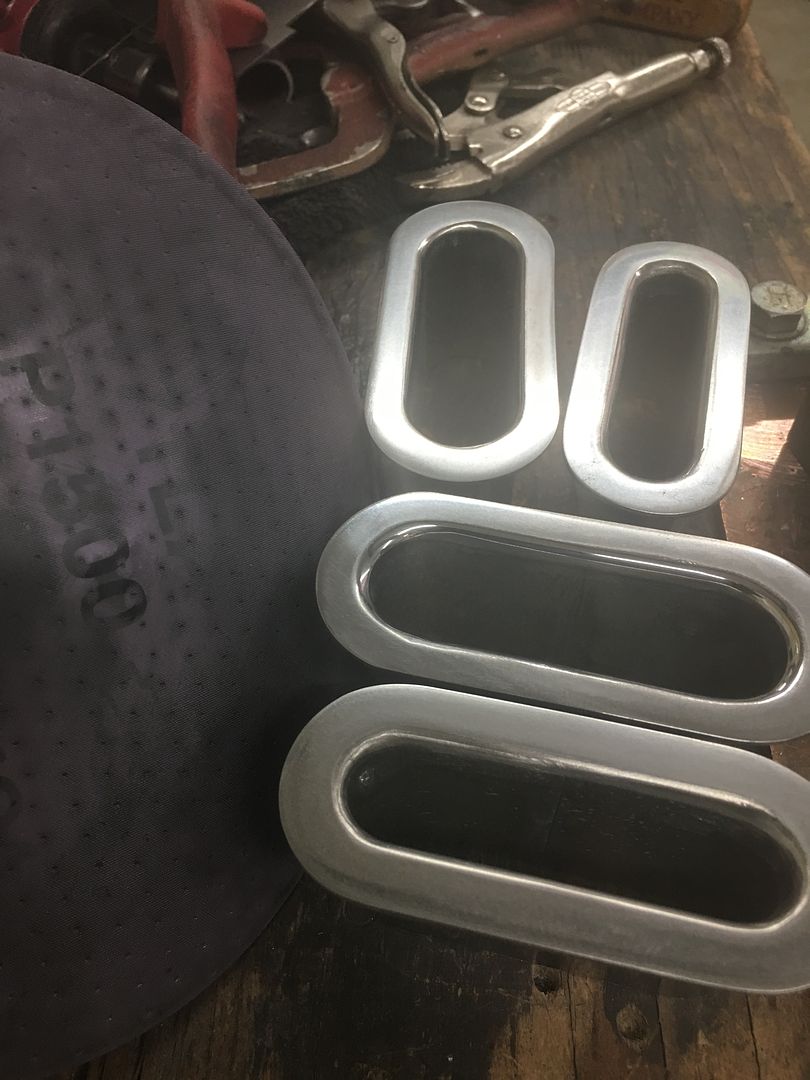
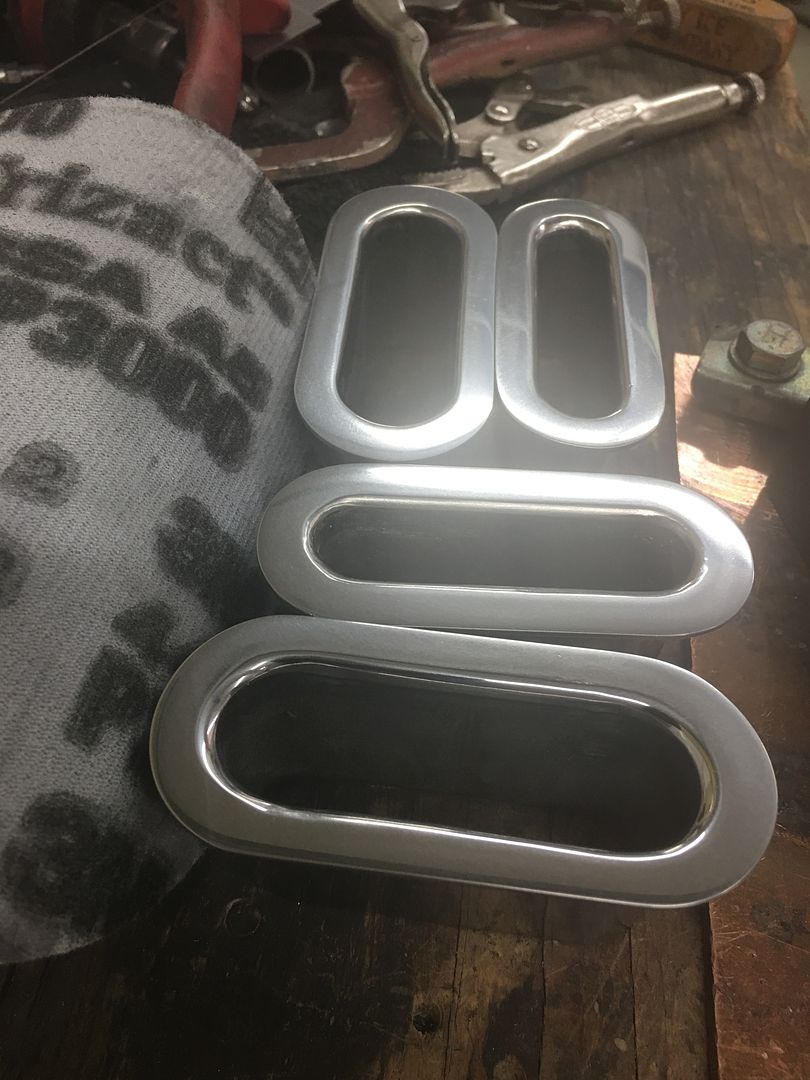
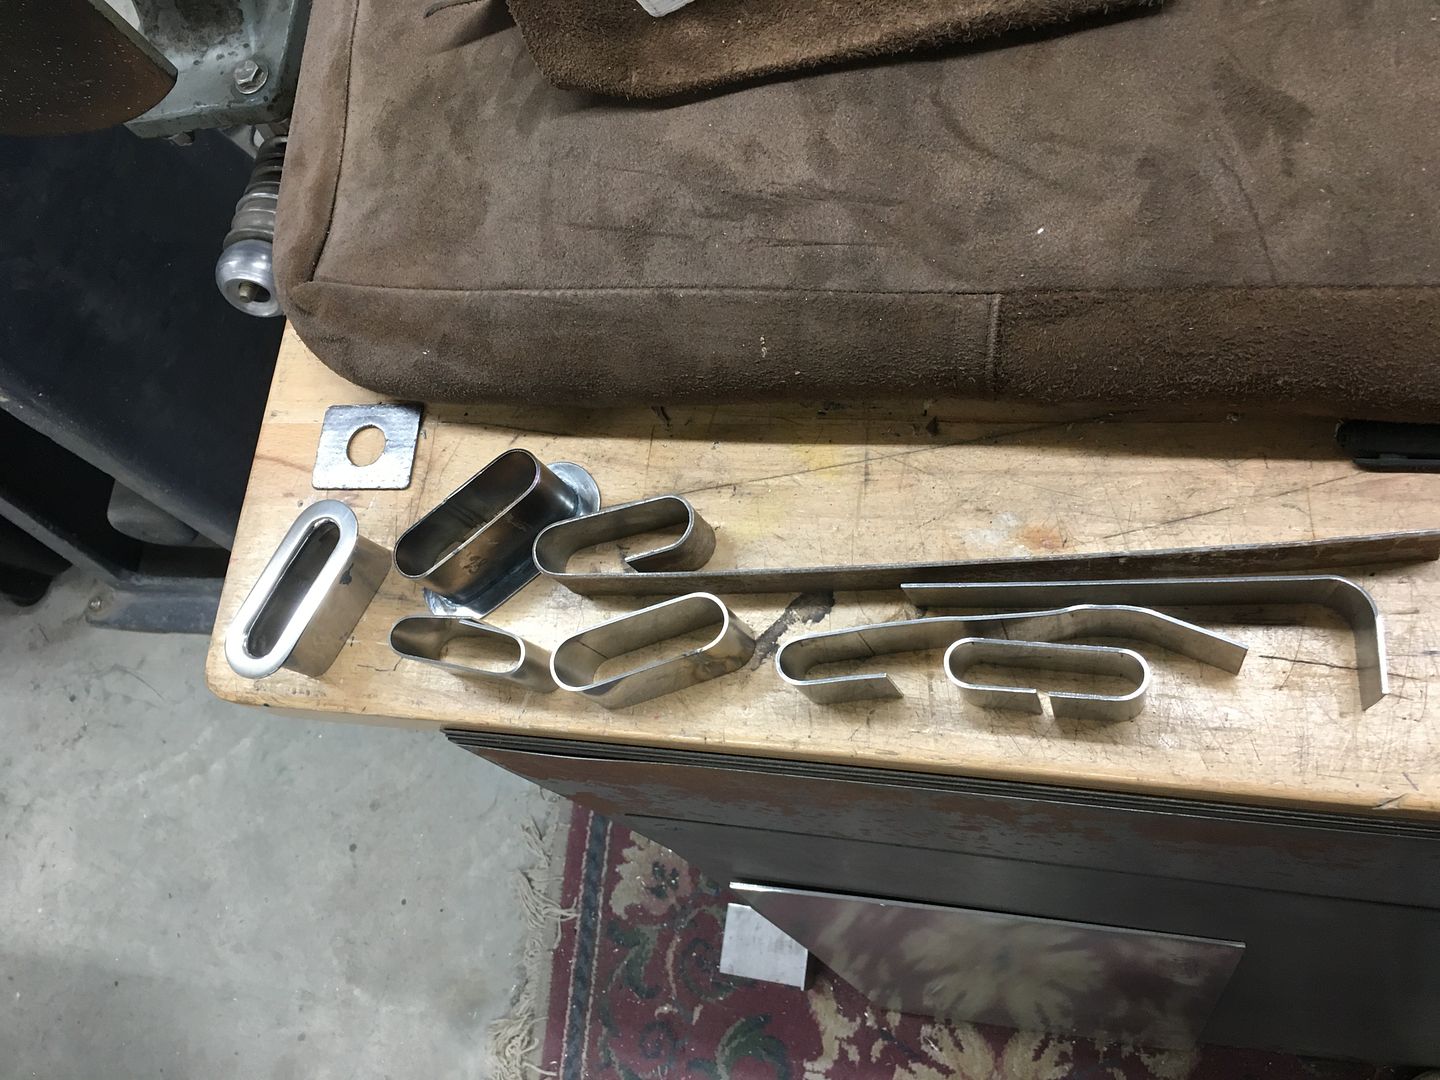
More progress, Mike installed the driver seat so we could mock up the lap belt for locating the lower escutcheon.
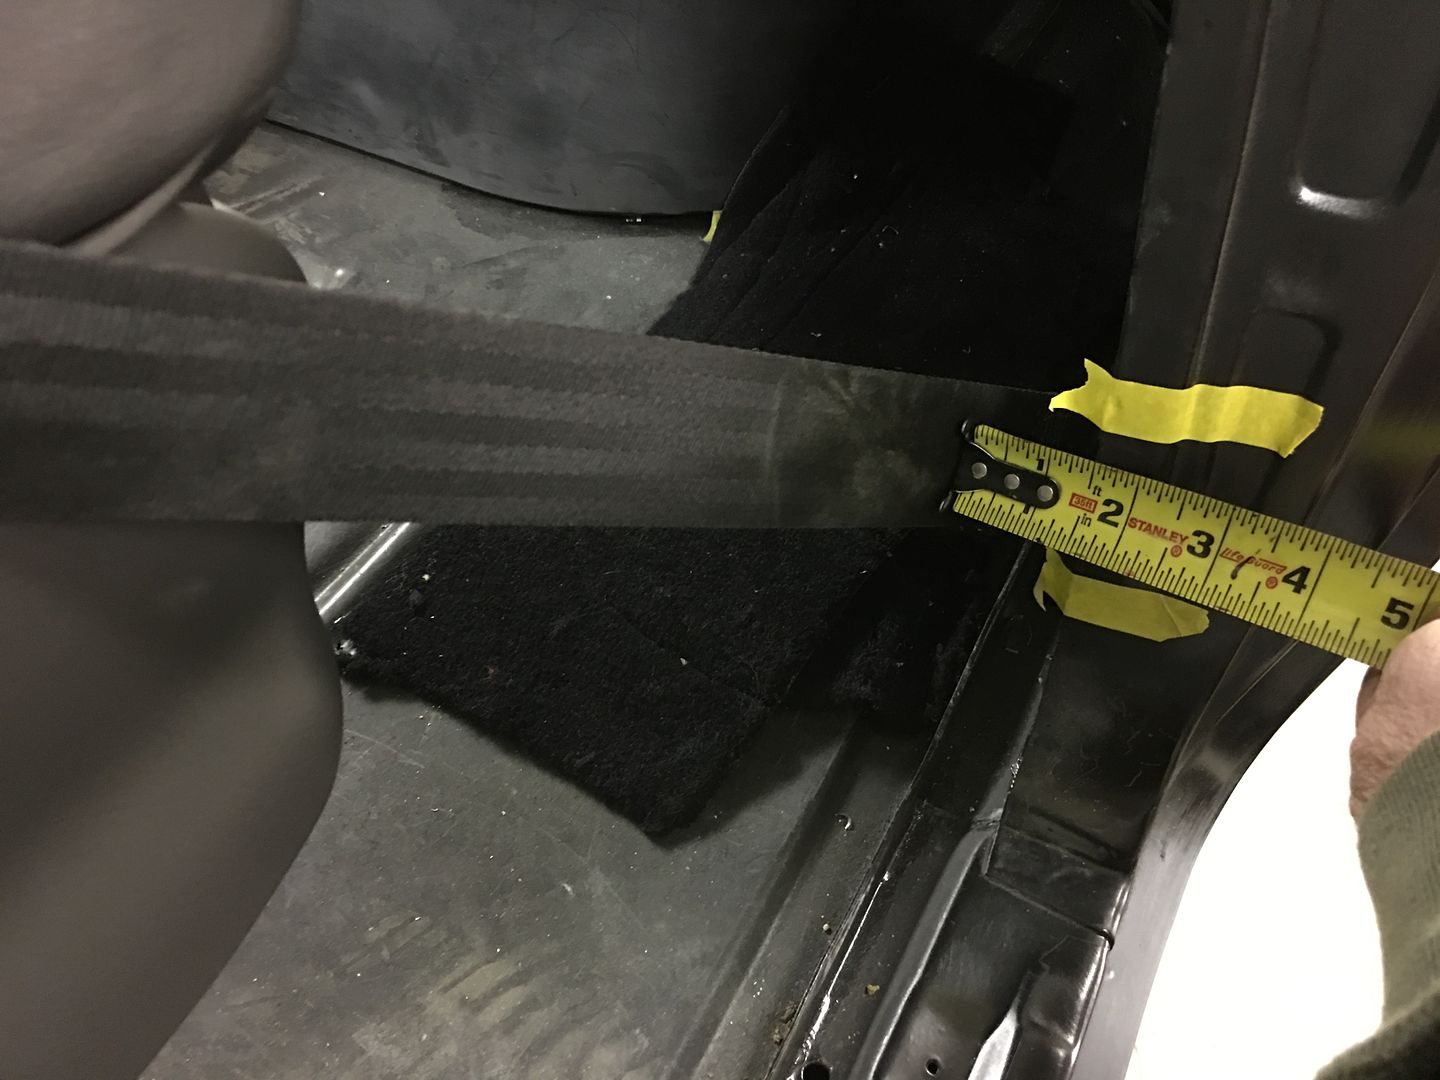
Then we contemplated vertical or parallel....
Remaining escutcheons were welded up...
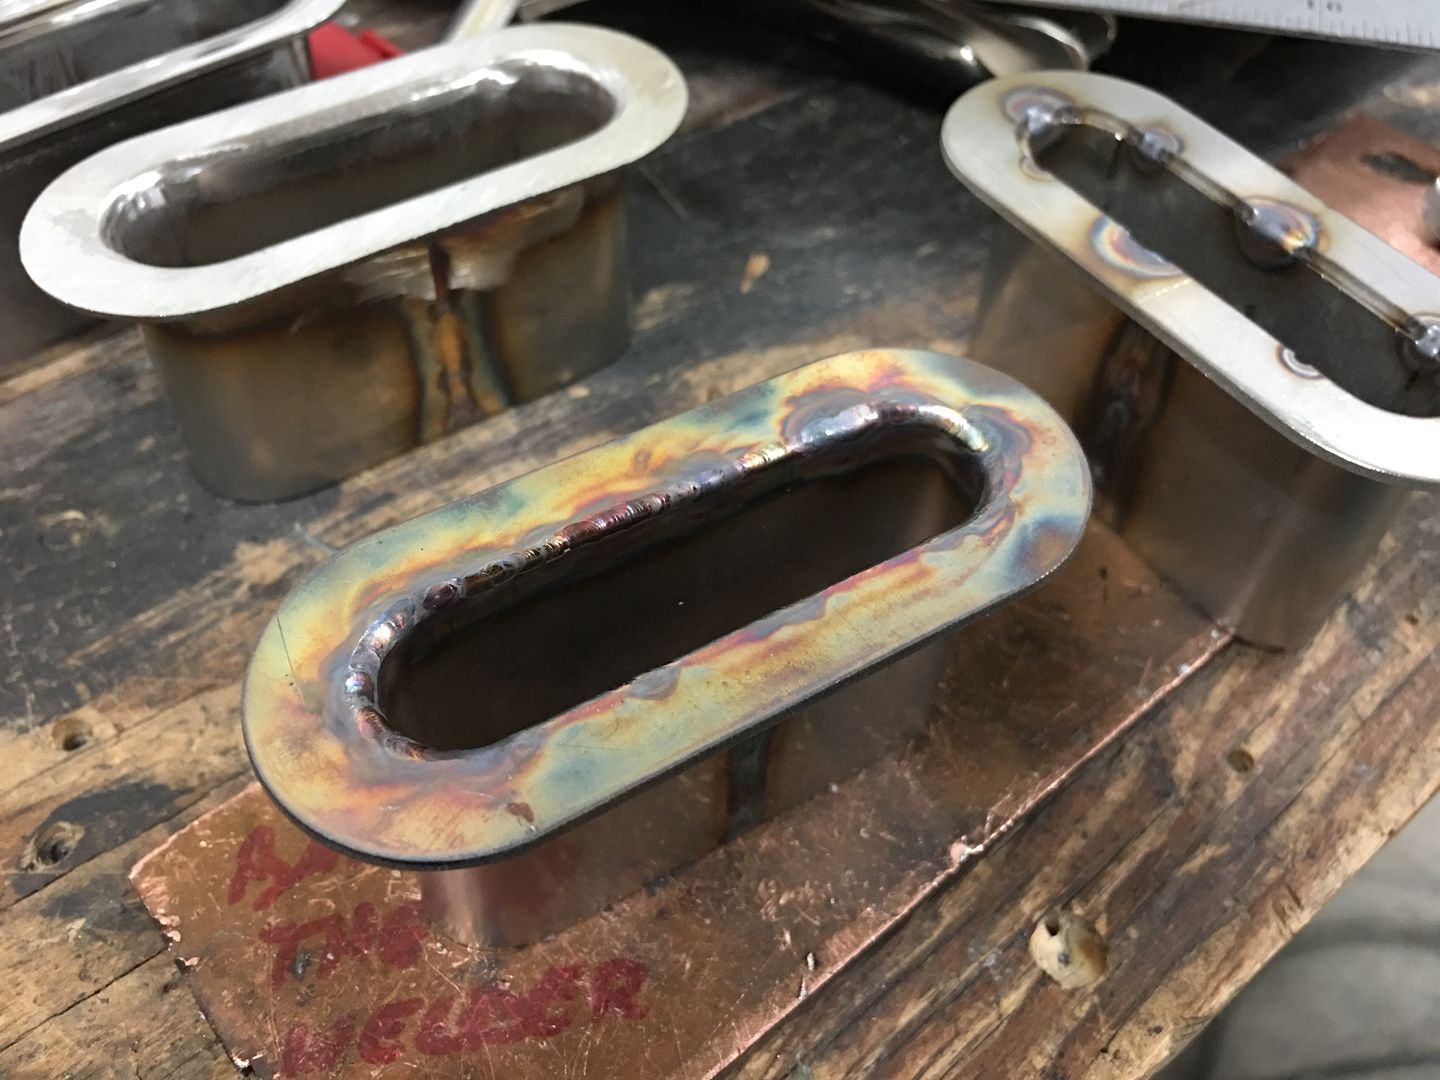
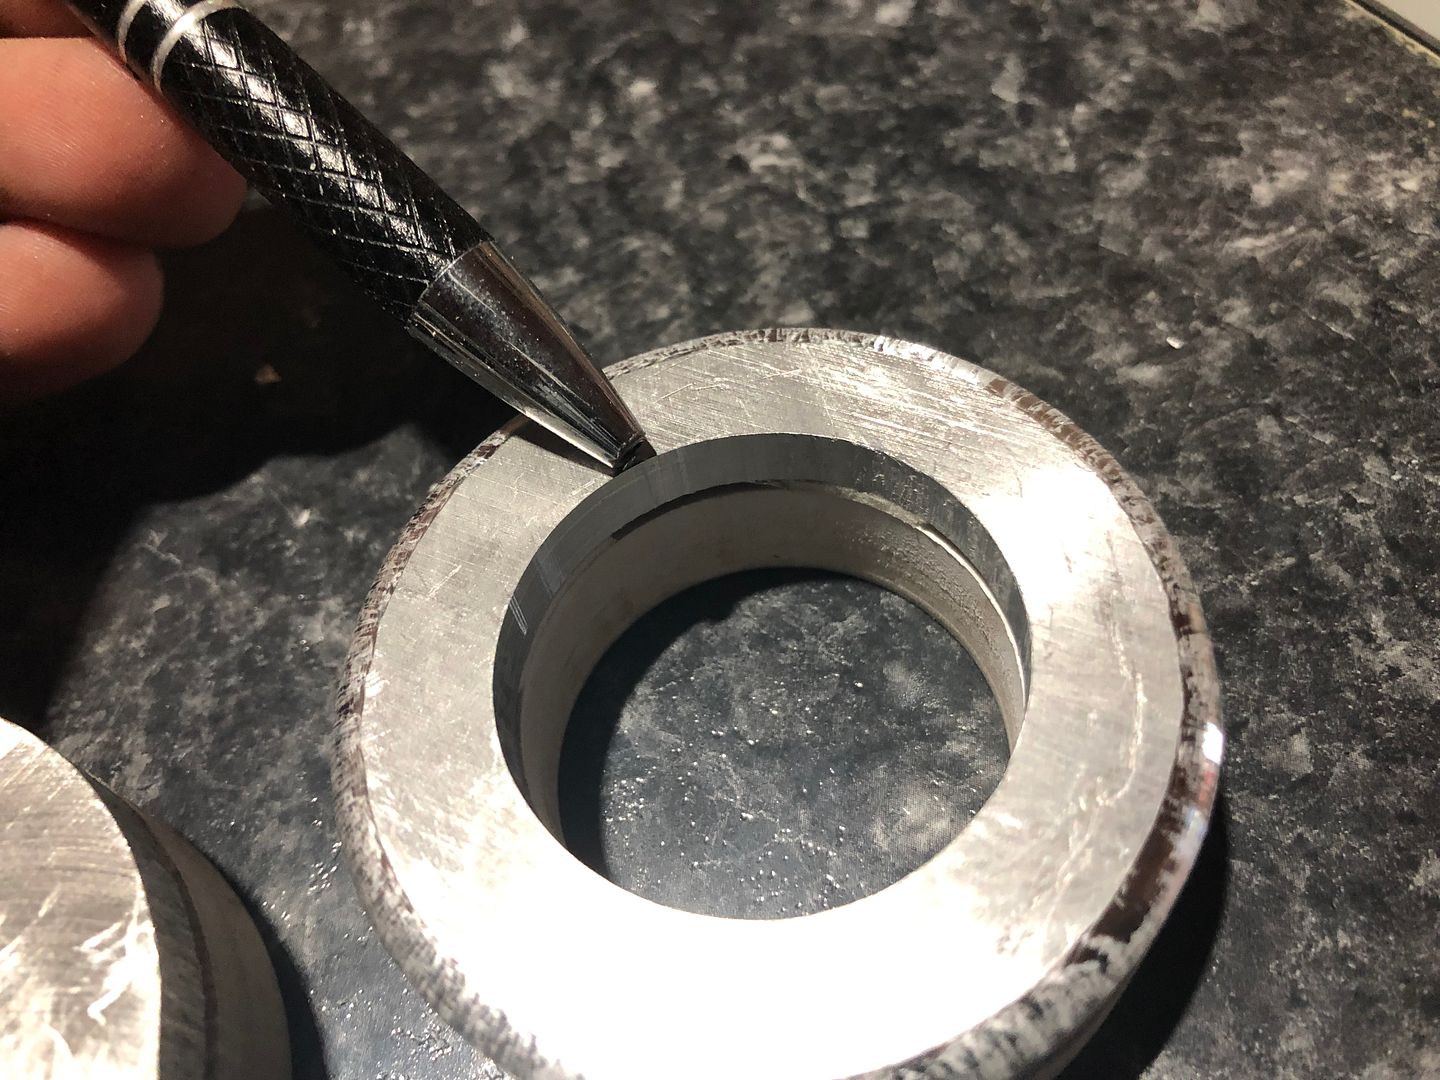
Ideally the inner opening of the ring should rest on the midline of the sleeve. This provides for a good fusion weld and starts the formation of the radius we're looking for around the inside opening. Here's the various stages of welding the escutcheons:
https://www.youtube.com/watch?v=jGklrvD4L6o
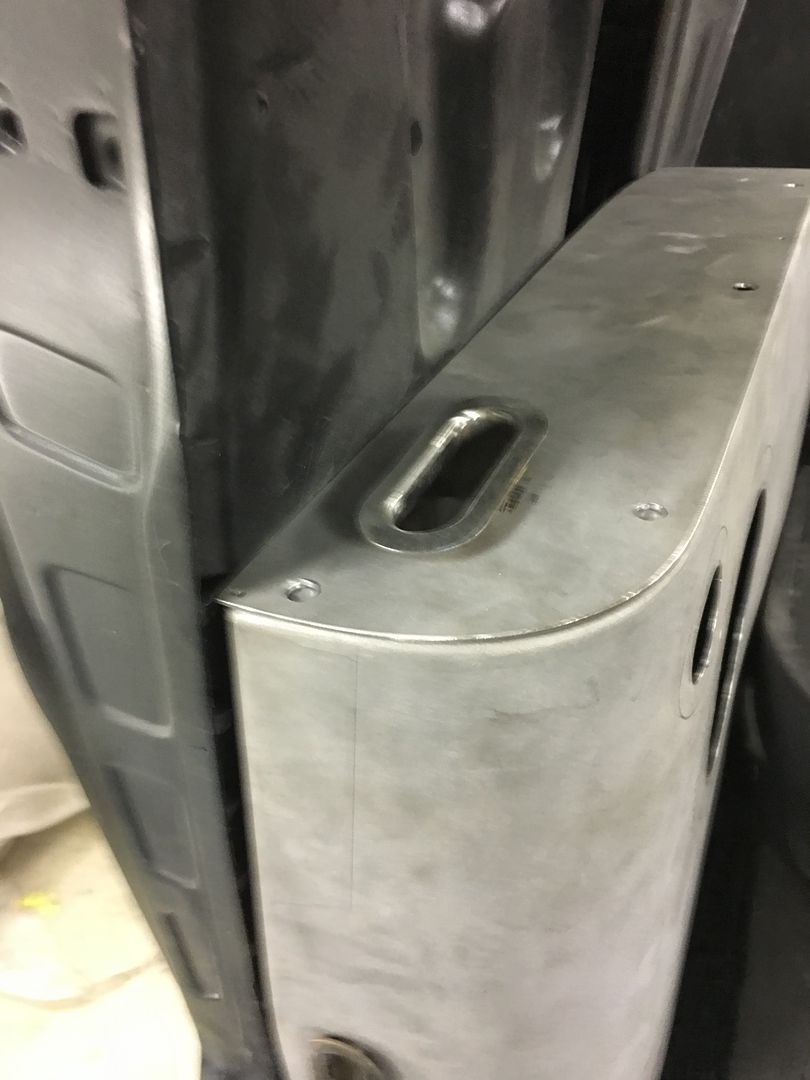
Mike got the remaining openings cut in the arm rest and kick panels for the escutcheons...
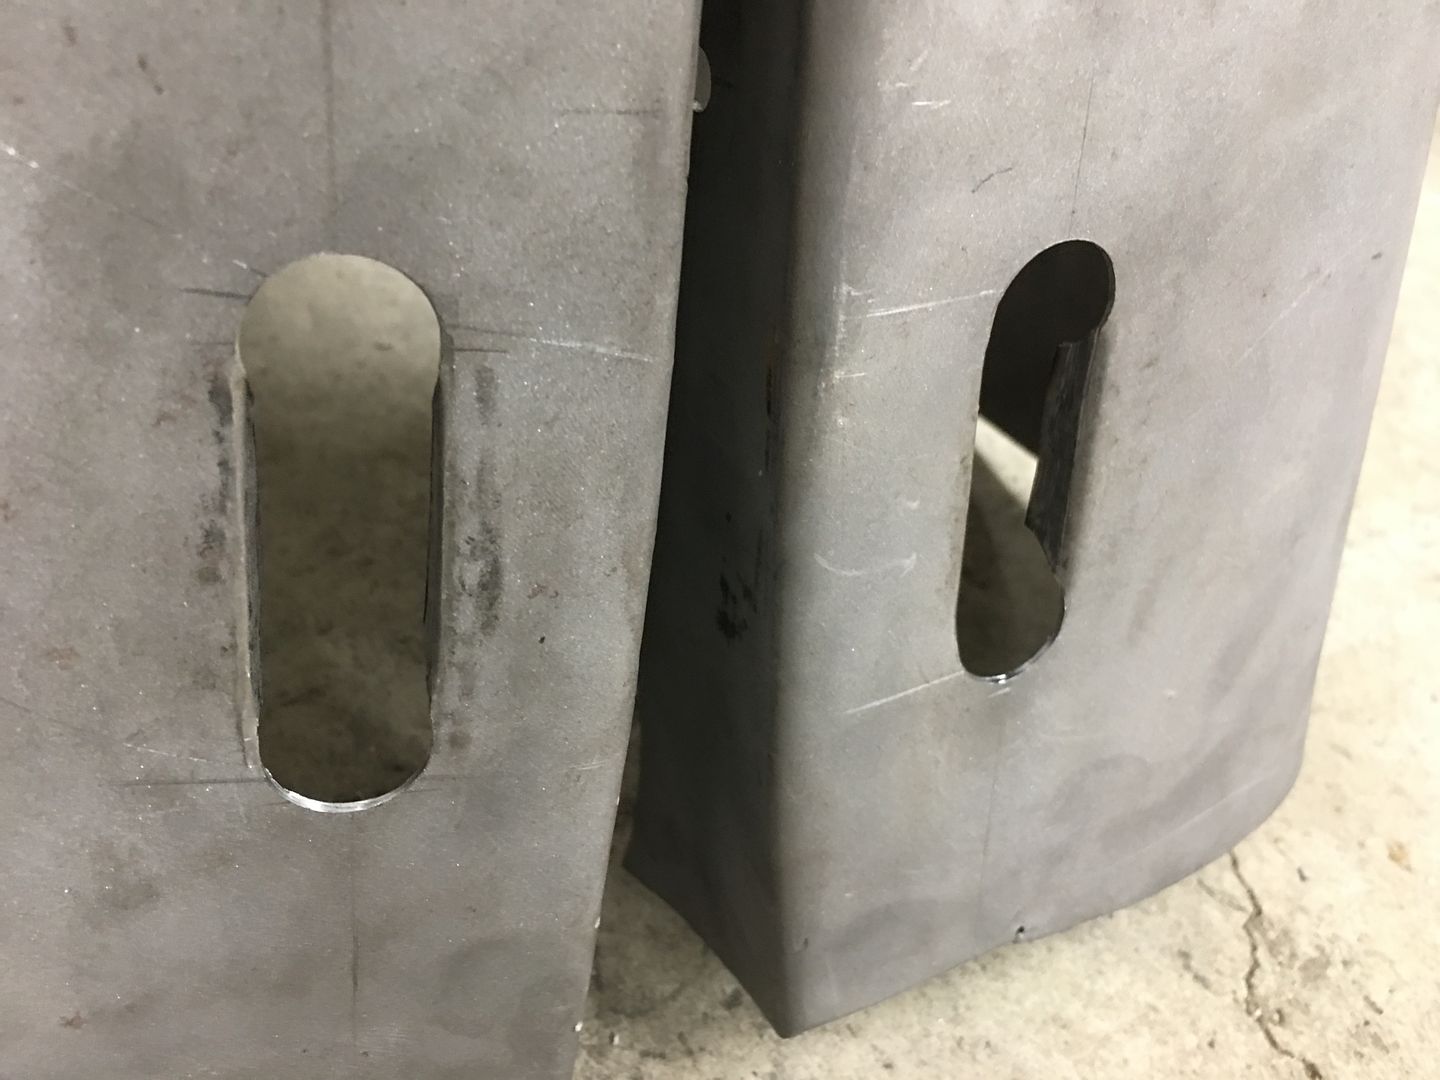
Test fit...
…..and JB got started on the speaker trim rings for us...
The recess on the rear is for the stainless mesh...

Last edited by MP&C; 01-14-2019 at 05:50 PM.
Robert
-
01-16-2019 07:21 AM #1285
CHR Member
- Join Date
- Jun 2008
- Location
- Leonardtown
- Car Year, Make, Model: Walking
- Posts
- 1,228
Last night I tried to tackle the wizardry of filming the gas welding with the goal of better visibility of the weld puddle. This is about as close as I can get with using a iPhone camera and a welding helmet lens. Also made use of a Milwaukee LED light to brighten things for less of a change in light.
These are filmed through the Miller Digital Elite, Weld setting 9, delay 2. sensitivity 6. I think I still need to come up with something better, especially for showing any TIG welding. Are there any Photography guru's that can steer me in the right direction for filming weld processes?
Tacking:
https://www.youtube.com/watch?v=lo3npncFfDM
Weld pass:
https://www.youtube.com/watch?v=LL4i0fqr4BERobert
-
01-16-2019 10:05 AM #1286
CHR Member
- Join Date
- Oct 2007
- Location
- Petaluma
- Car Year, Make, Model: 48 Ford F1
- Posts
- 9,795
Very cool. I'd say your camera /welding helmit setup worked pretty well!" "No matter where you go, there you are!" Steve.
-
01-16-2019 01:54 PM #1287
CHR Member
- Join Date
- Jan 2006
- Location
- Constantine
- Car Year, Make, Model: 57 chevy 2 dr wagon
- Posts
- 9,476
Just wondering would it be better to weld the opposite side of the tack to control the weld pullingCharlie
Lovin' what I do and doing what I love
Some guys can fix broken NO ONE can fix STUPID
W8AMR
http://fishertrains94.webs.com/
Christian in training
-
01-17-2019 04:31 AM #1288
CHR Member
- Join Date
- Jun 2008
- Location
- Leonardtown
- Car Year, Make, Model: Walking
- Posts
- 1,228
I didn't show the planishing process that typically occurs afterward... cutting room floor or something.. With gas welding you end up with a bit of undercut, perhaps due to gravity pull on the weld puddle. After welding is complete the entire weld is planished smooth, which tends to "push' any droop on the back side back into any undercut depression on the top. Additionally, the planishing straightens out deformation on the panel.
Robert
-
01-19-2019 09:10 PM #1289
CHR Member
- Join Date
- Jun 2008
- Location
- Leonardtown
- Car Year, Make, Model: Walking
- Posts
- 1,228
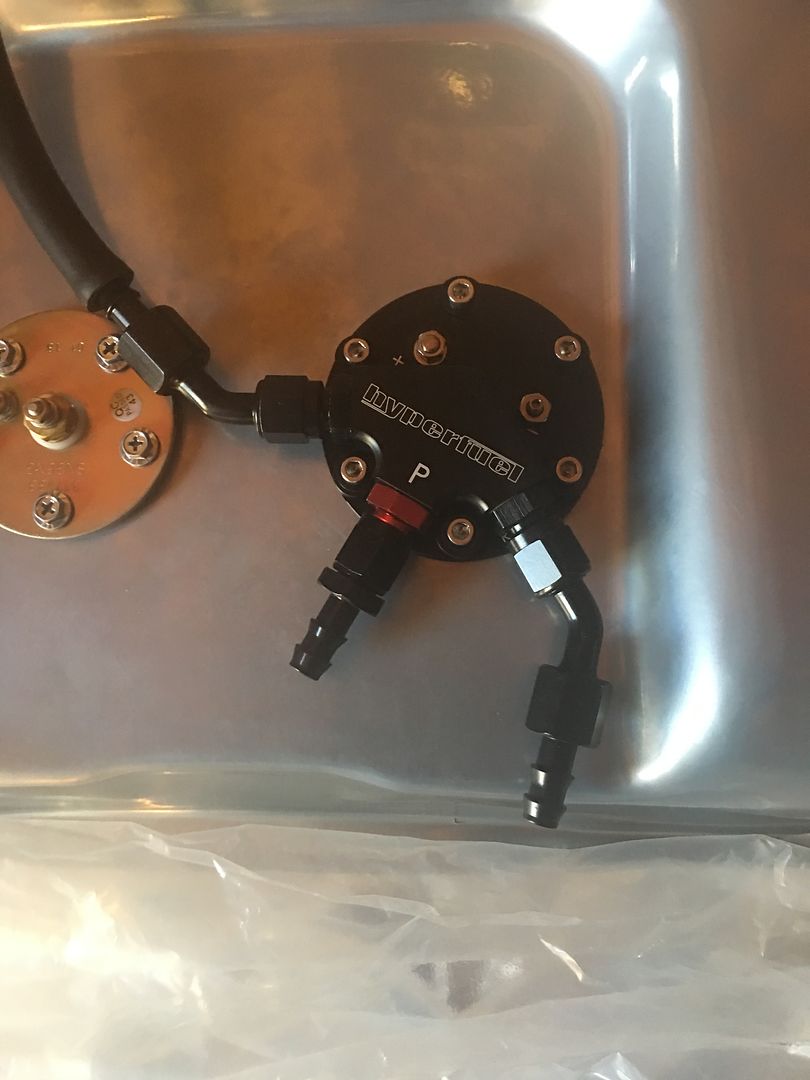
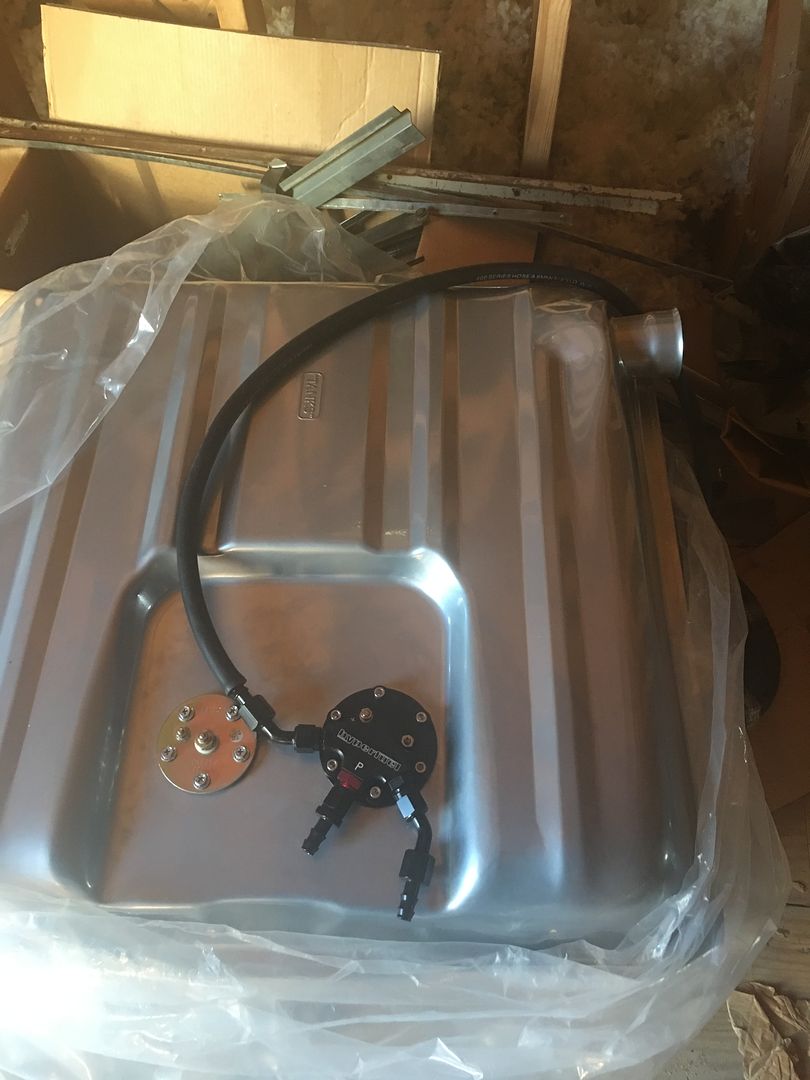
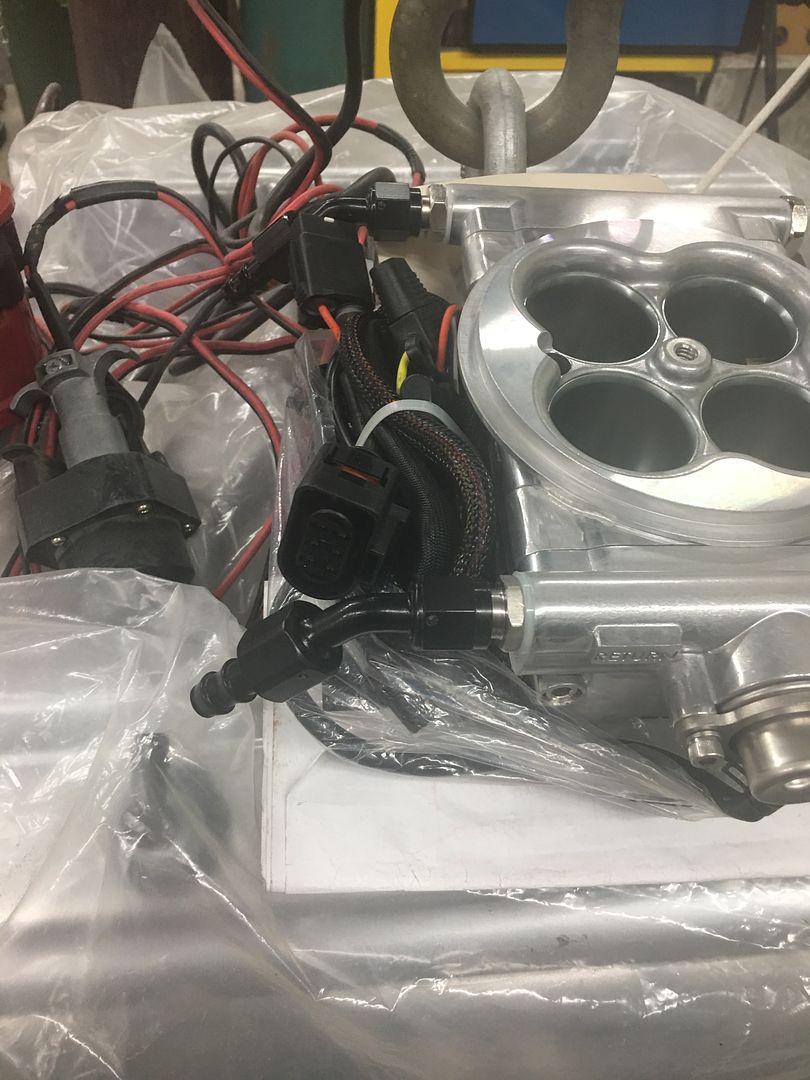
Did some mockup of the fuel lines so we could get the required fittings identified..
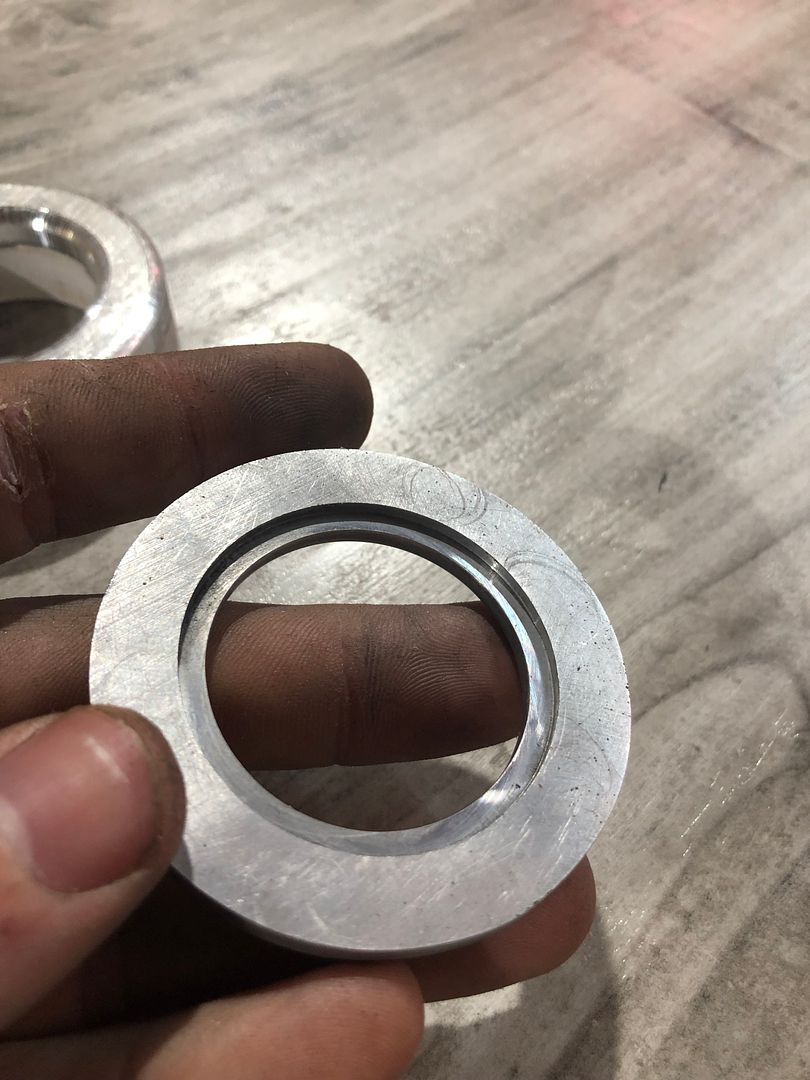
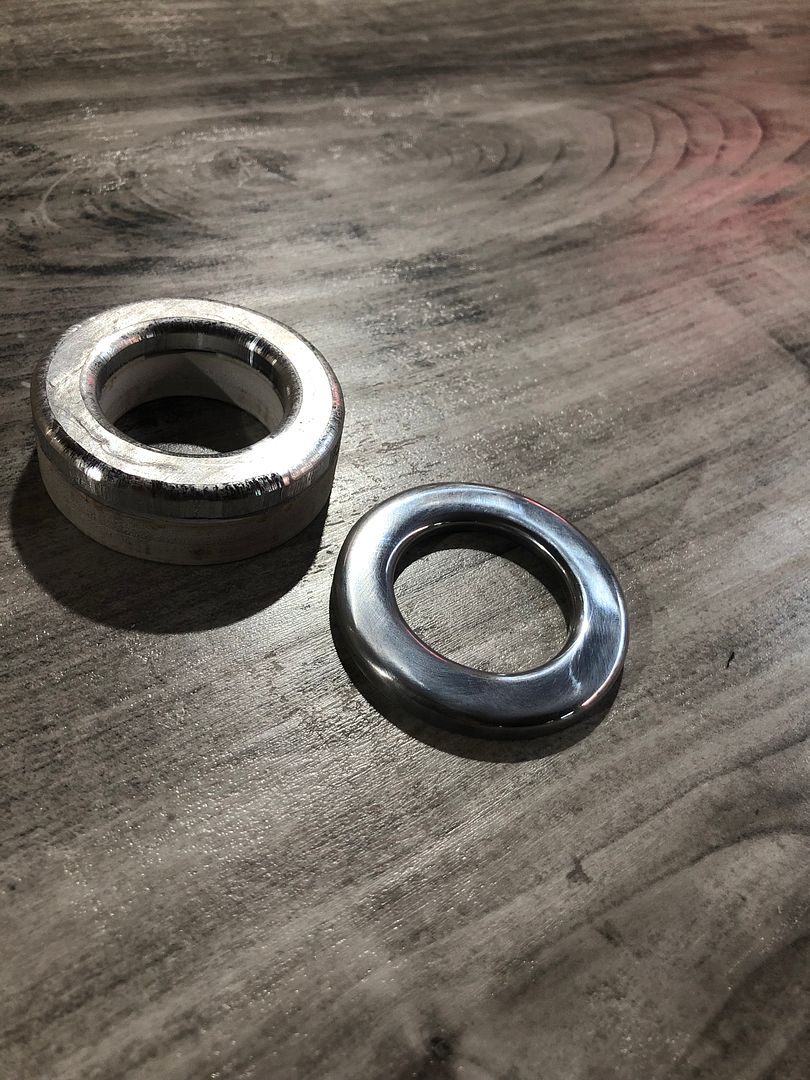
Finishing up the polishing of our seat belt escutcheons.. after using roloc scotchbrite pads to clean up the vixen file marks, we then used 320 dry, 1500 wet, and 3000 trizact damp. Then to the polishing..

https://www.youtube.com/watch?v=zBaVKe1aBhQ
Here's the comparison between the 3000 and after polishing..
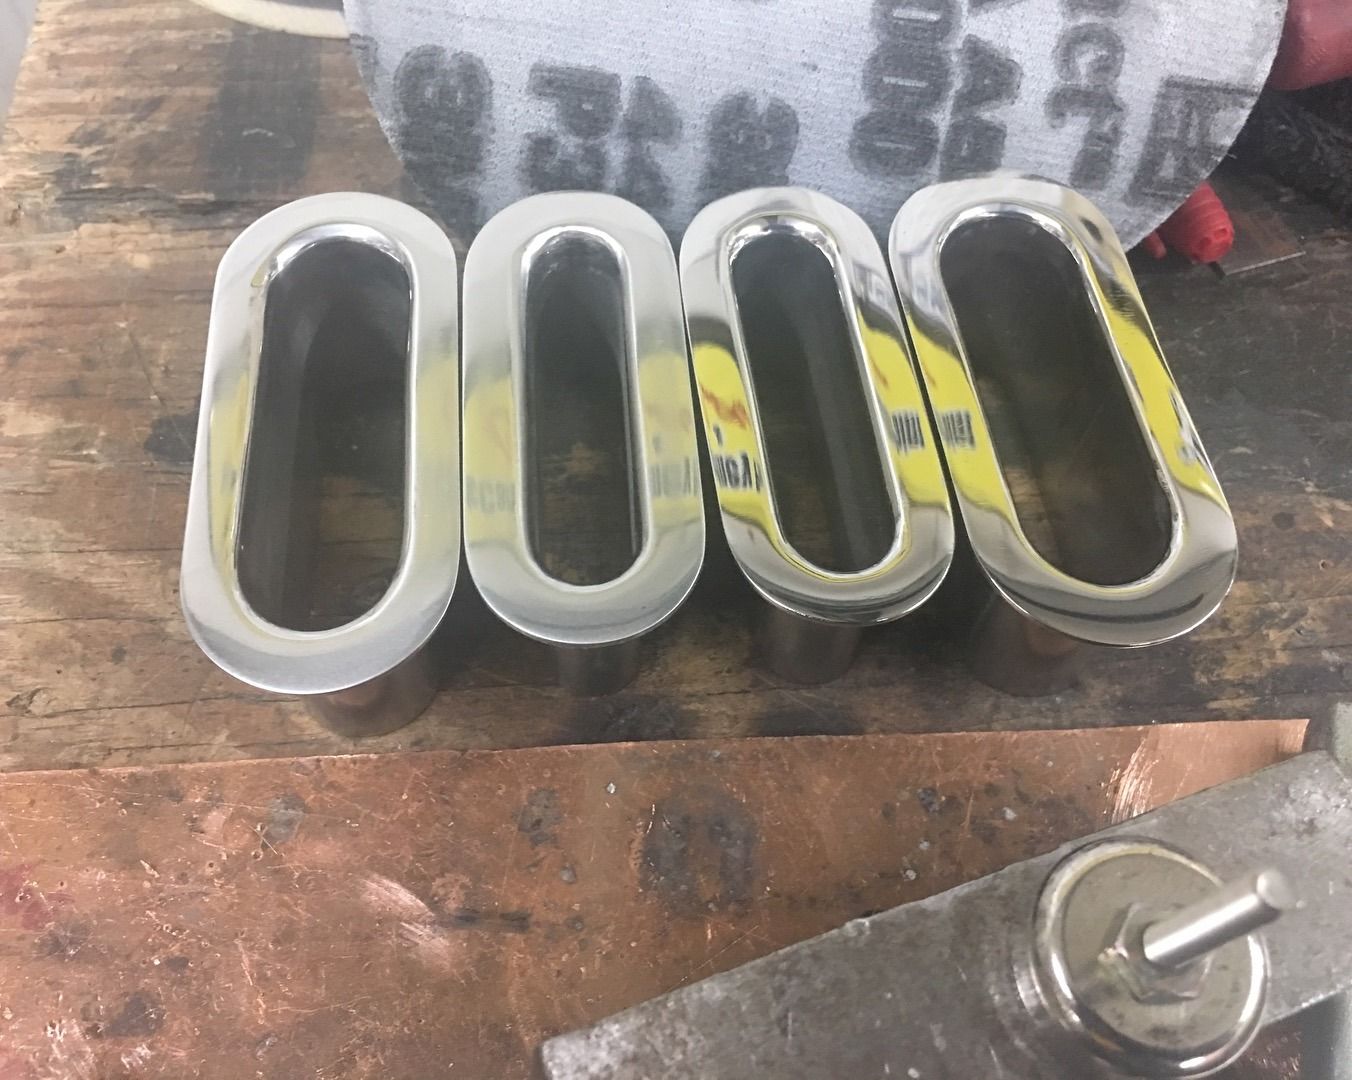
That should do for us..Robert
-
01-26-2019 08:02 PM #1290
CHR Member
- Join Date
- Jun 2008
- Location
- Leonardtown
- Car Year, Make, Model: Walking
- Posts
- 1,228
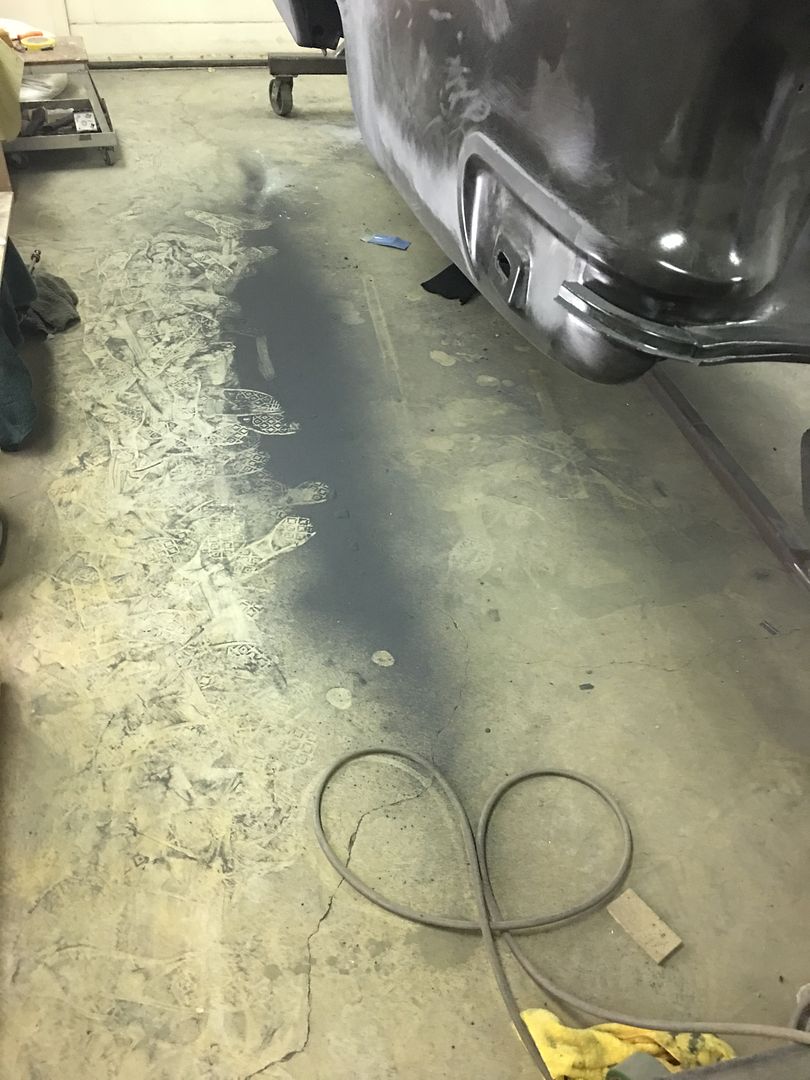
Some progress, doesn't look like much until you look at the floor...
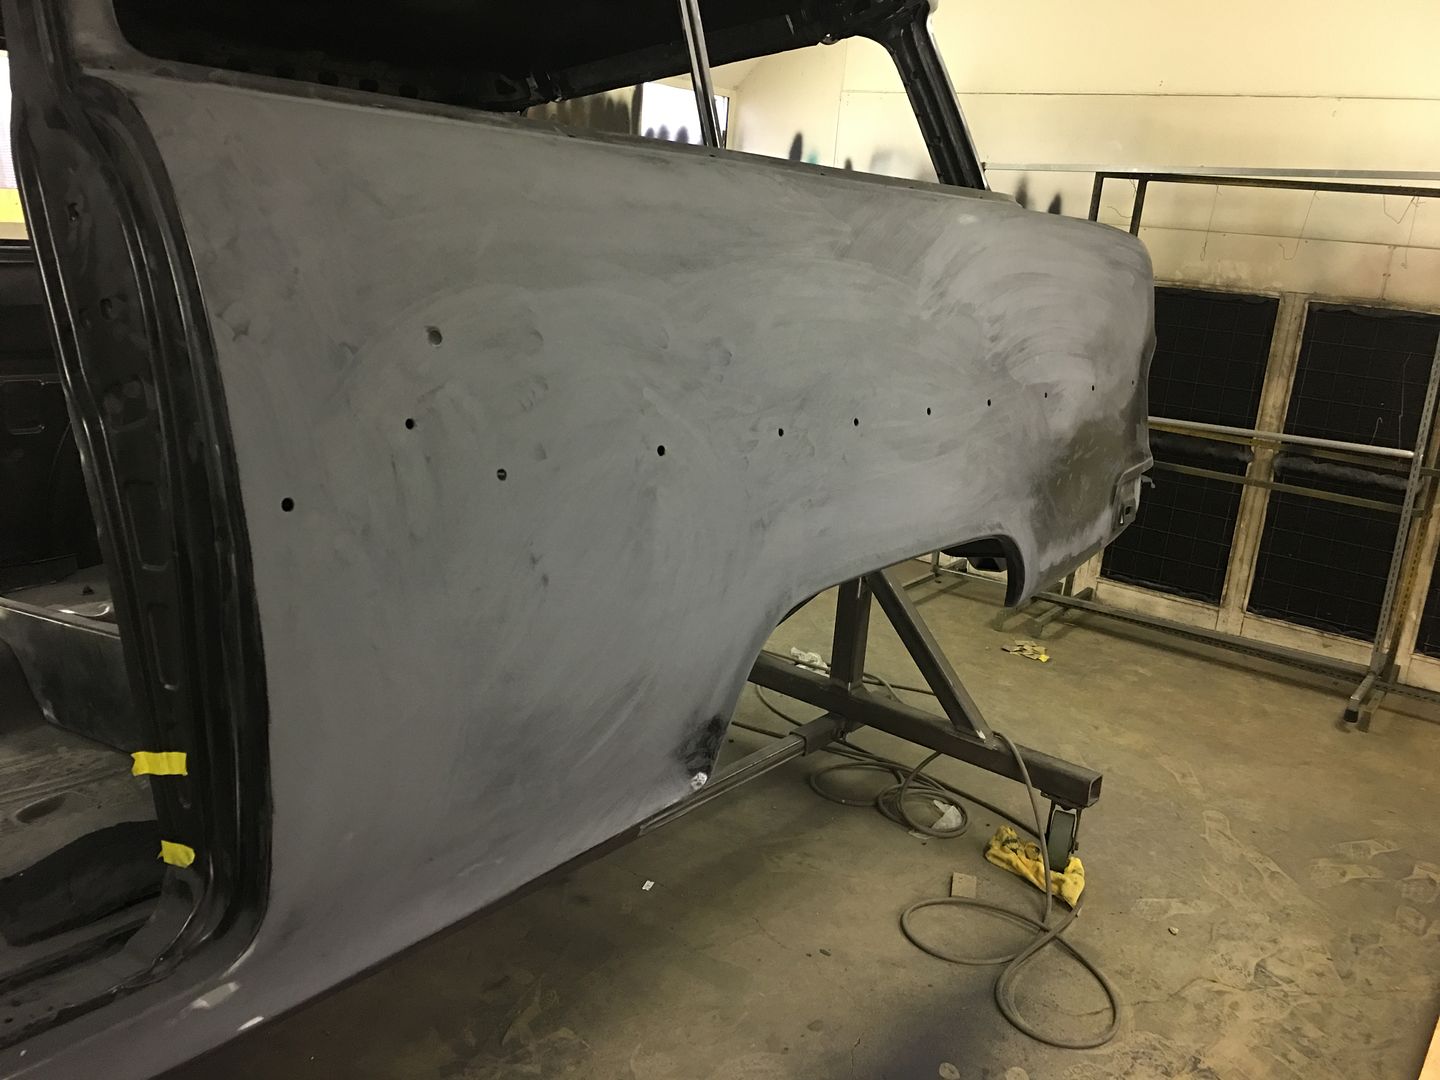
Sometimes these louvers can be a challenge to sand.
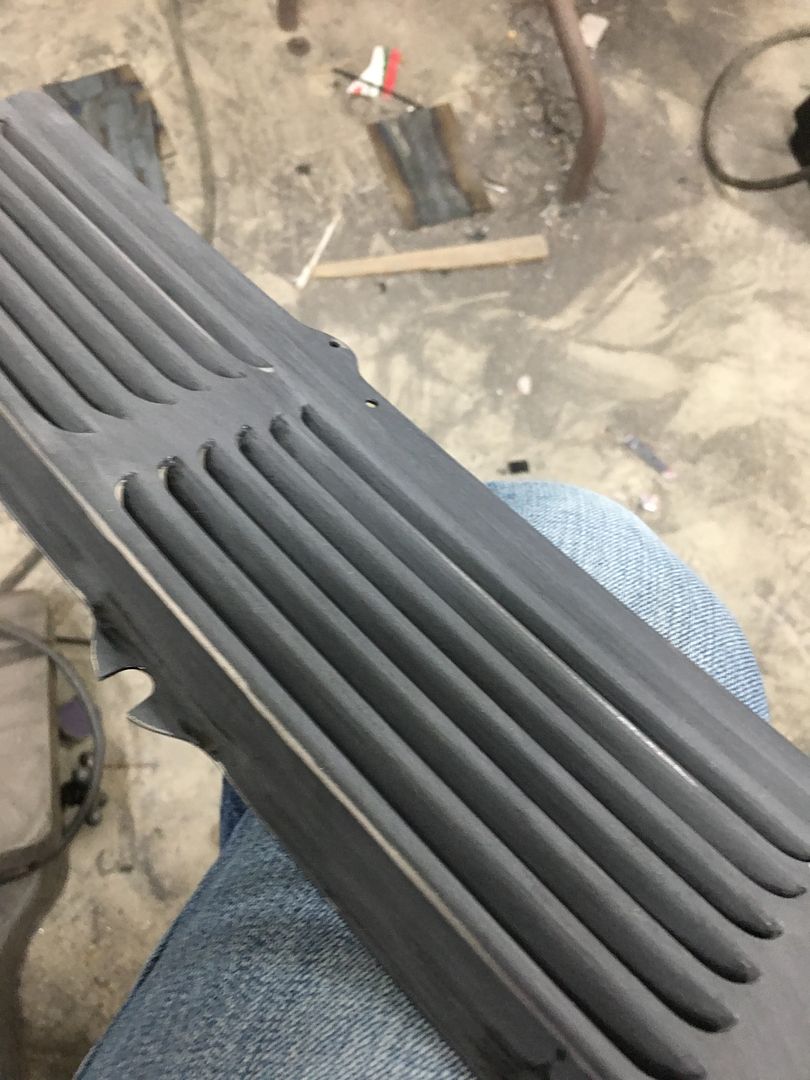
In the spirit of "everything's a tool", a strip of 18 ga steel and a wrap of PSA paper does a good job of getting in the tight spaces.
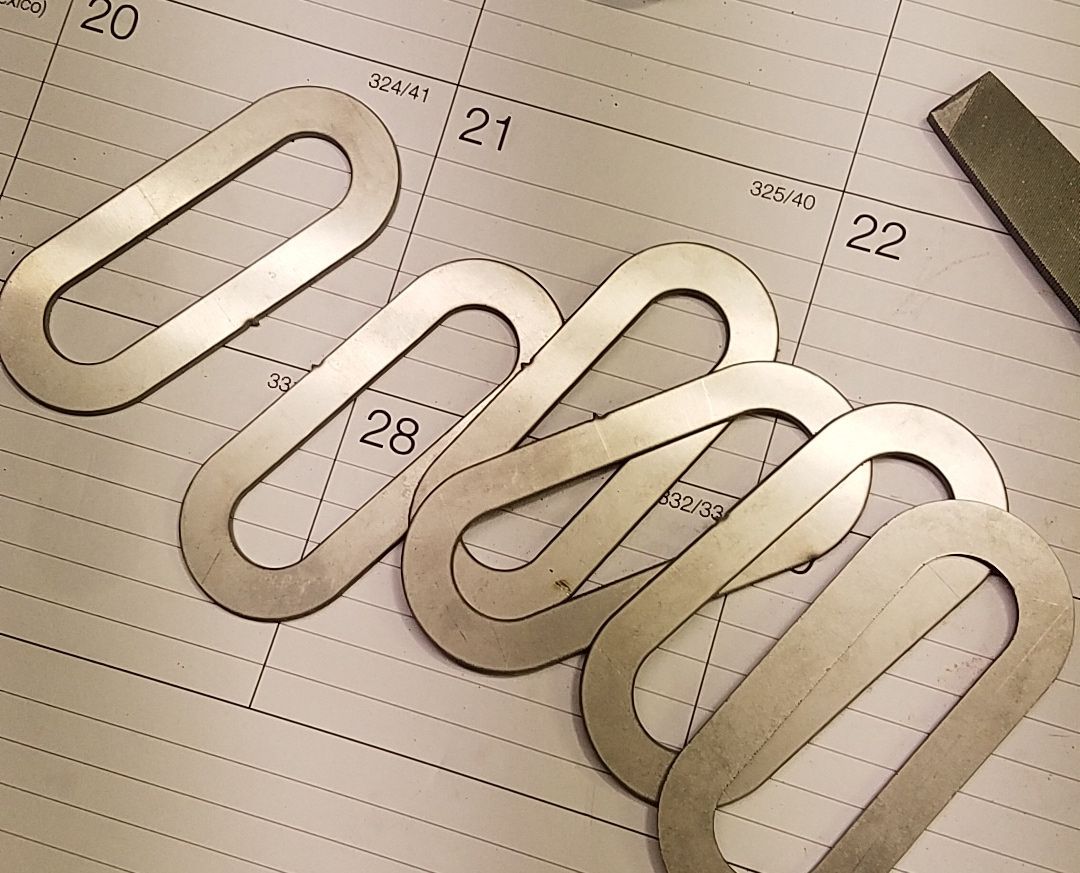
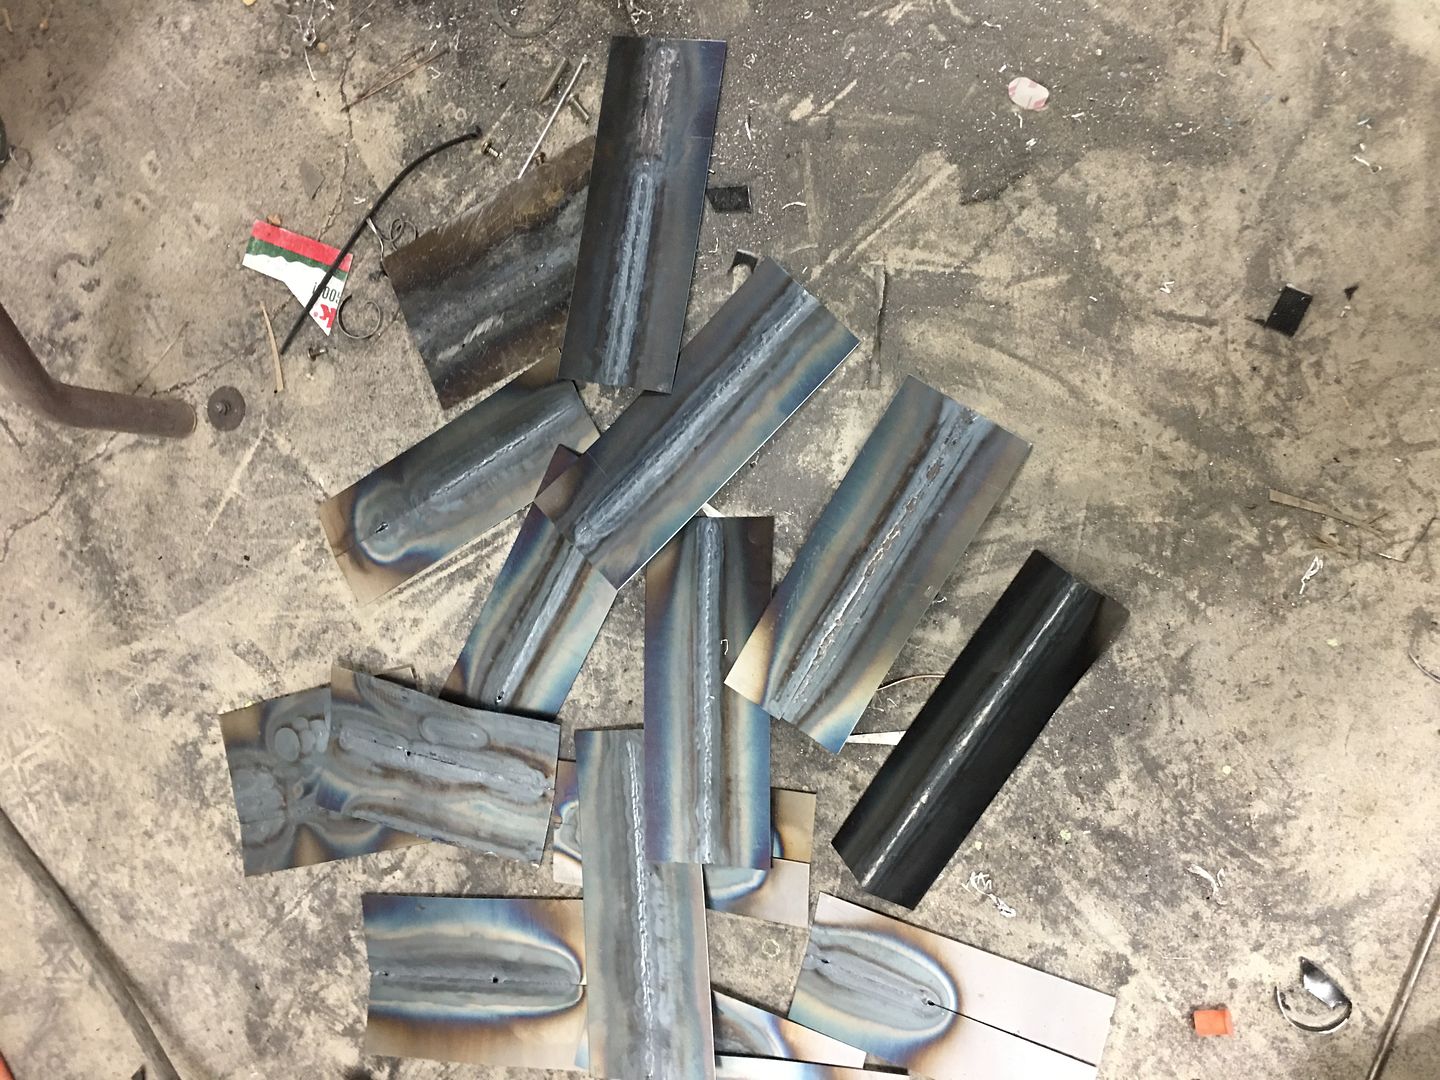
Another shot of the scrap pile before I clean it up, this is what went into fabricating the escutcheons..
And now for the reason we didn't post earlier this week, had to make a speed run for Taco Tuesday.. even saw a full rainbow in the process.
https://www.youtube.com/watch?v=jWrIkyuUBTs
Back in the shop this weekend, but we had a distraction in another Meco torch that showed up for sale not three miles away. So needless to say about the only thing accomplished was more welding practice!!
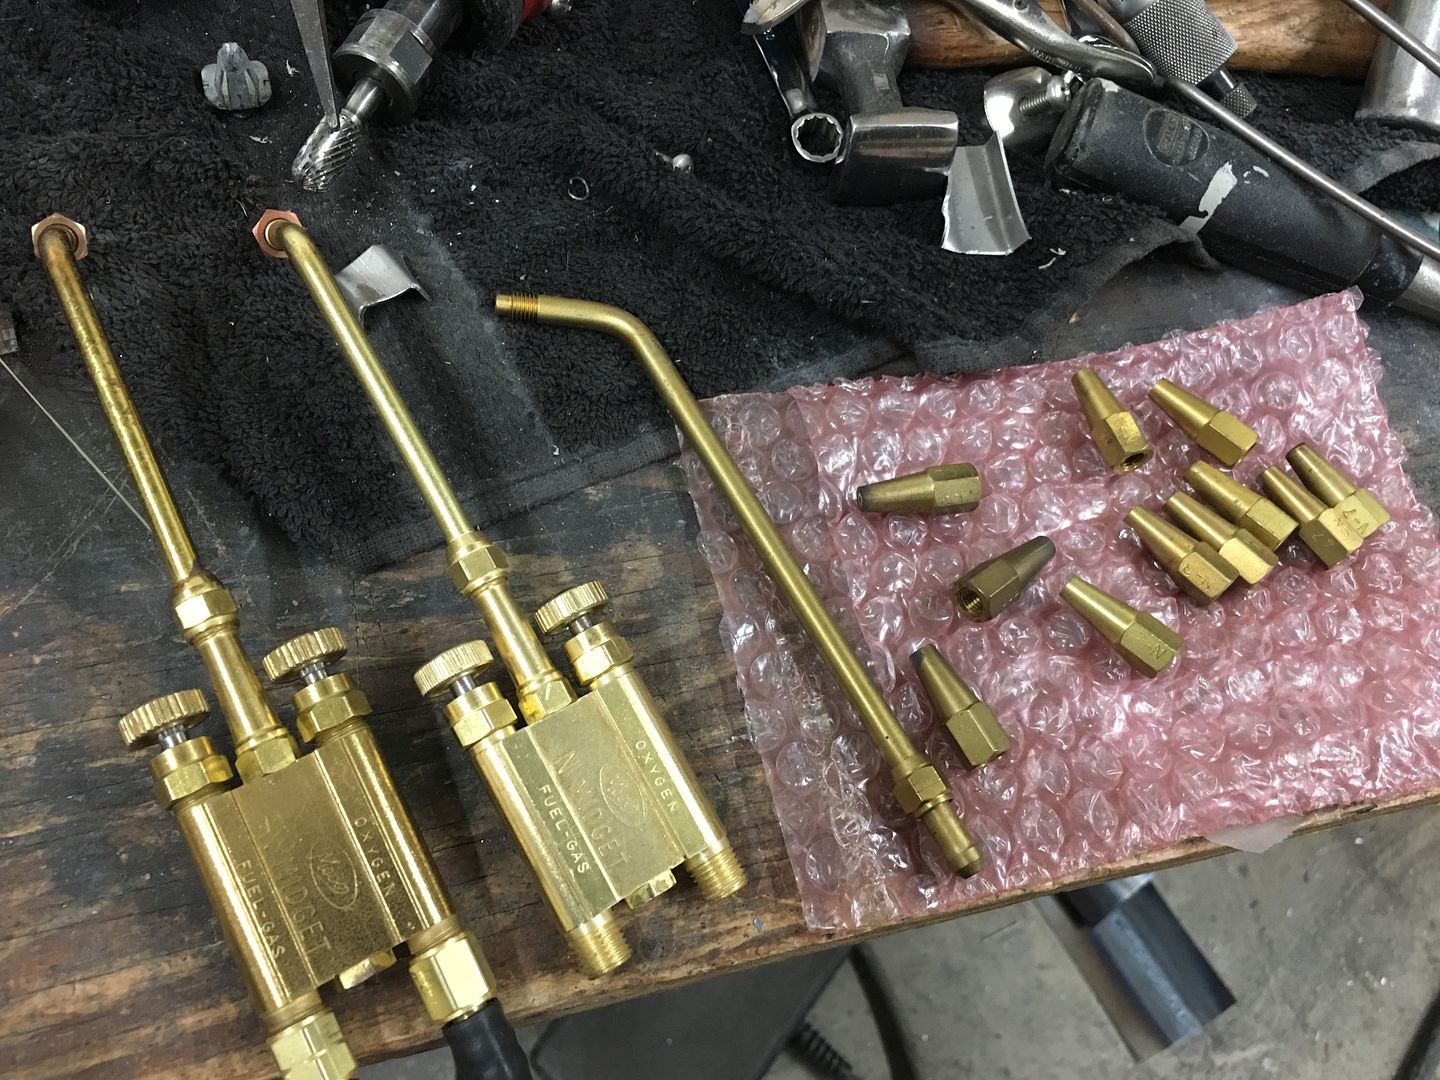
https://www.youtube.com/watch?v=O9Wf1AbzP3c
After planishing...
https://www.youtube.com/watch?v=BDy82sixbjQ
.Robert
 Reply With Quote


Posting Permissions
- You may not post new threads
- You may not post replies
- You may not post attachments
- You may not edit your posts

i've enjoyed the years here . made a lot of friends. most who have left. i see no reason to continue with this so hope to see you somewhere else. i dont think this site will ever be back. it's lived...
Dead!