


 3390Likes
Thread: 55 Wagon Progress


Results 1,486 to 1,500 of 1865
 LinkBack URL
 About LinkBacks
-
04-12-2020 02:51 PM #1486
 CHR Member

- Join Date
- Sep 2007
- Location
- New Bedford
- Car Year, Make, Model: 34 Ford 3W Coupe Replica
- Posts
- 14,754
For a split second there, I thought you were going to say But wait.. There's MORE! Originally Posted by MP&C


Looking GOOD too.
-
Advertising

- Google Adsense
- REGISTERED USERS DO NOT SEE THIS AD
-
04-14-2020 06:58 PM #1487
CHR Member
- Join Date
- Apr 2011
- Location
- Prairie City
- Car Year, Make, Model: 40 Ford Deluxe, 68 Corvette, 72&76 K30
- Posts
- 7,301
- Blog Entries
- 1
Very nice!!Ryan
1940 Ford Deluxe Tudor 354 Hemi 46RH Electric Blue w/multi-color flames, Ford 9" Residing in multiple pieces
1968 Corvette Coupe 5.9 Cummins Drag Car 11.43@130mph No stall leaving the line with 1250 rpm's and poor 2.2 60'
1972 Chevy K30 Longhorn P-pumped 24v Compound Turbos 47RH Just another money pit
1971 Camaro RS 5.3 BTR Stage 3 cam, SuperT10
Tire Sizes
-
04-17-2020 05:42 PM #1488
CHR Member
- Join Date
- Jun 2008
- Location
- Leonardtown
- Car Year, Make, Model: Walking
- Posts
- 1,228
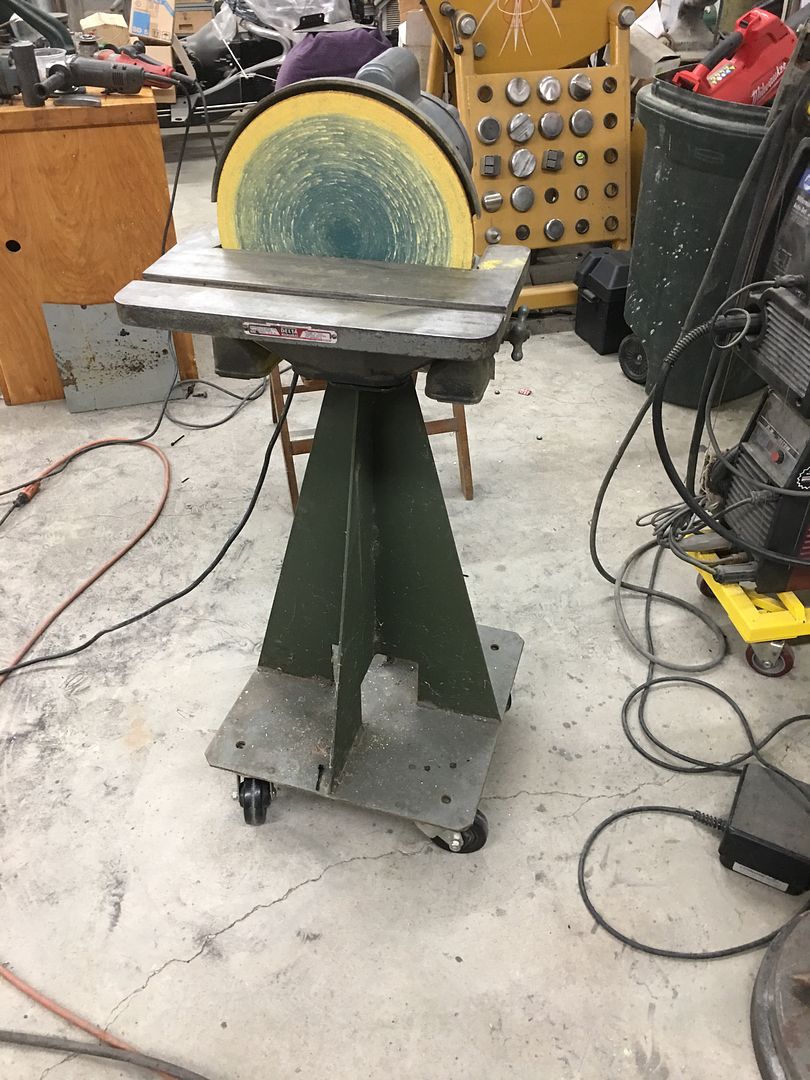
Some spring cleaning.... Picked up a 12" disc sander quite a few months back, and Mike has been using this on the floor.. So I decided to help the guy out and put it at a more useable height... Added a "bolting framework" to the top of one of the paint tripods, already set up with casters so you can push it in the corner....
Rivnuts installed since I didn't have bolts in stock long enough to go all the way through..
Ready for some sanding...
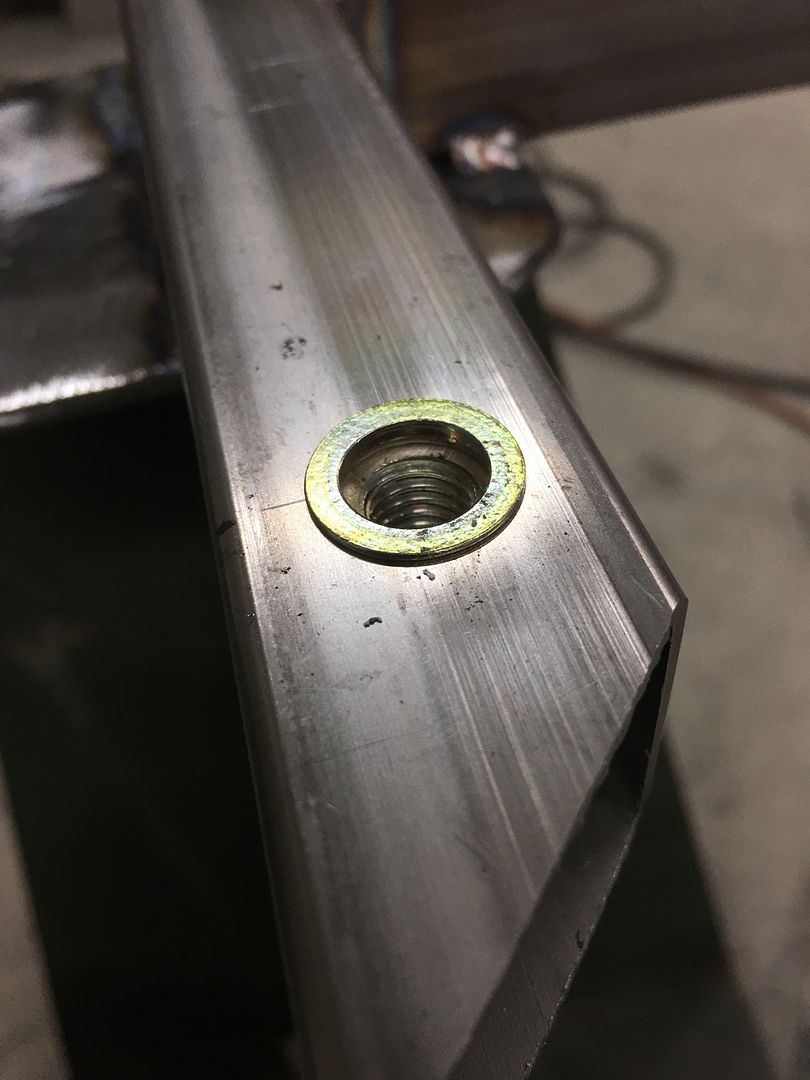
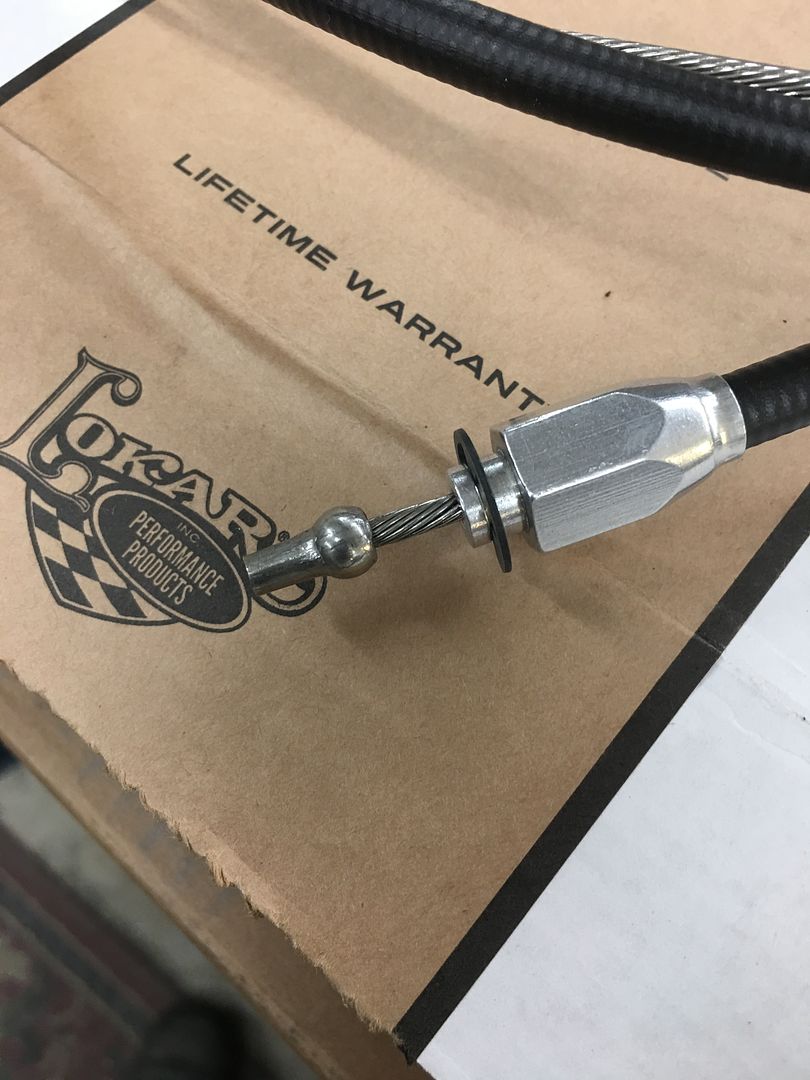
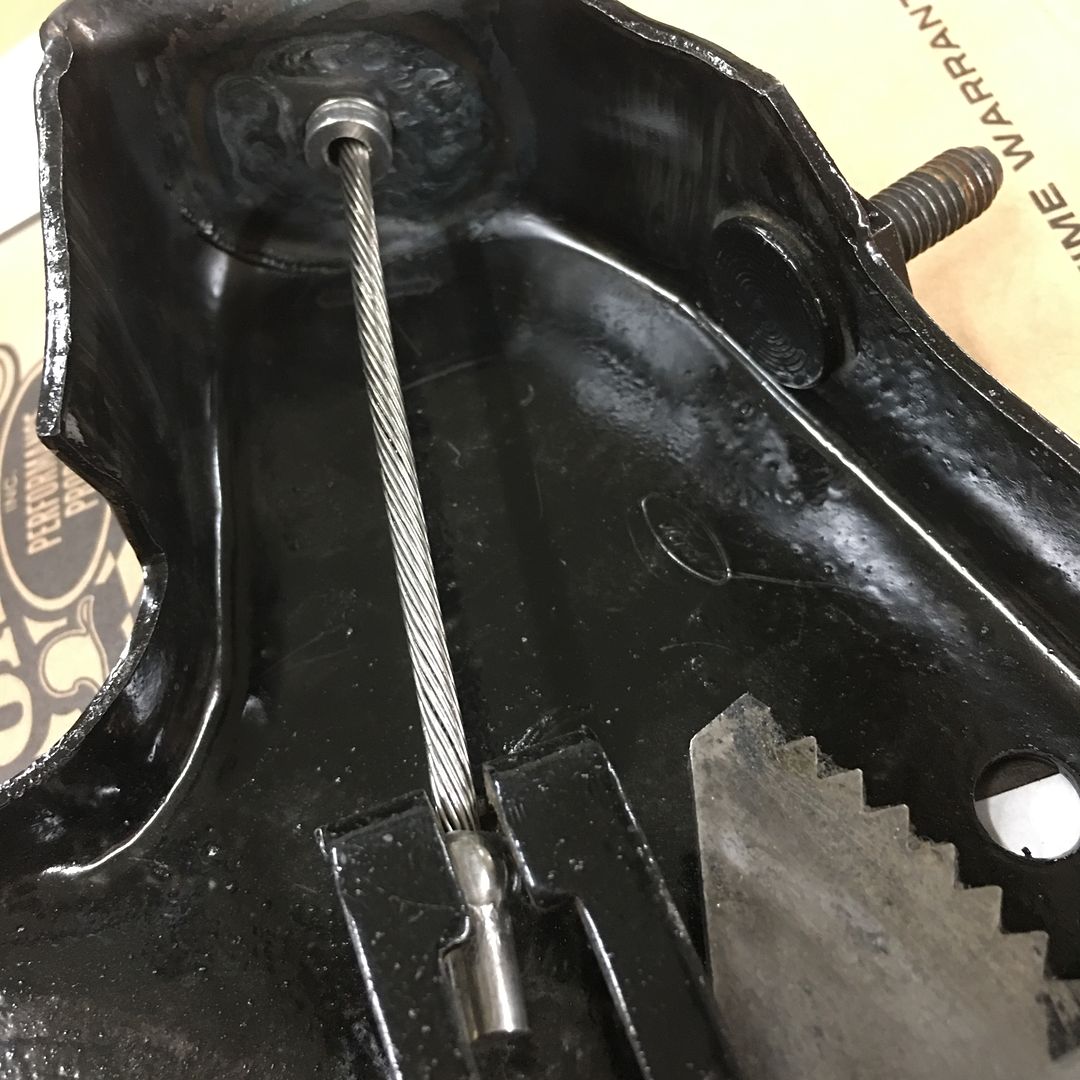
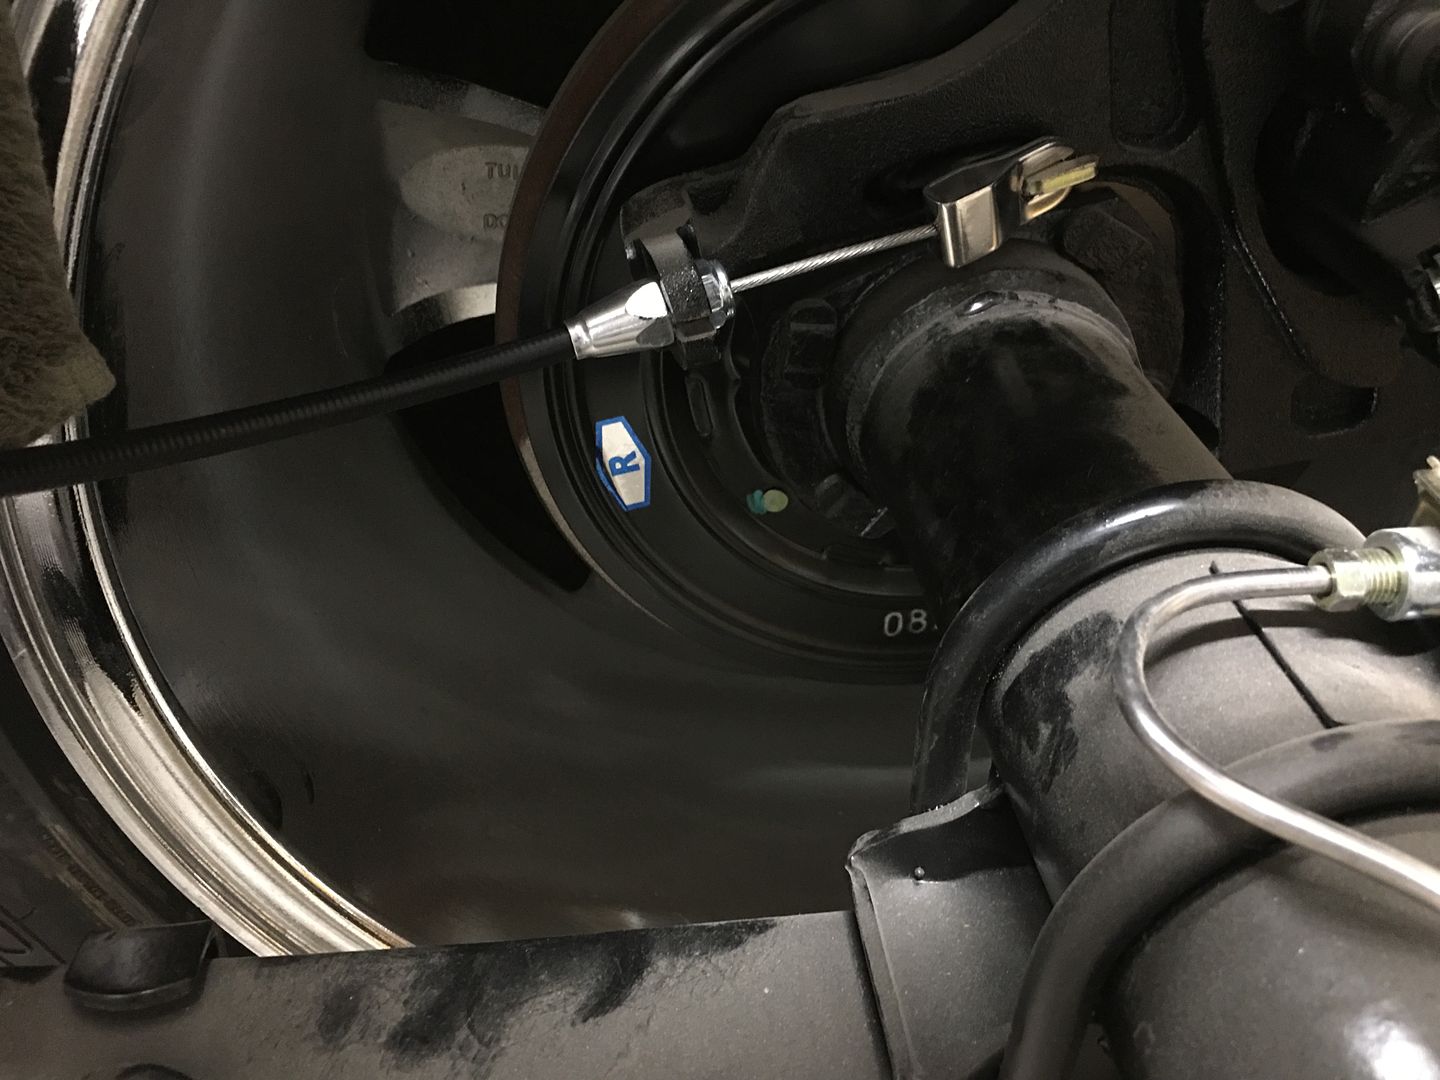
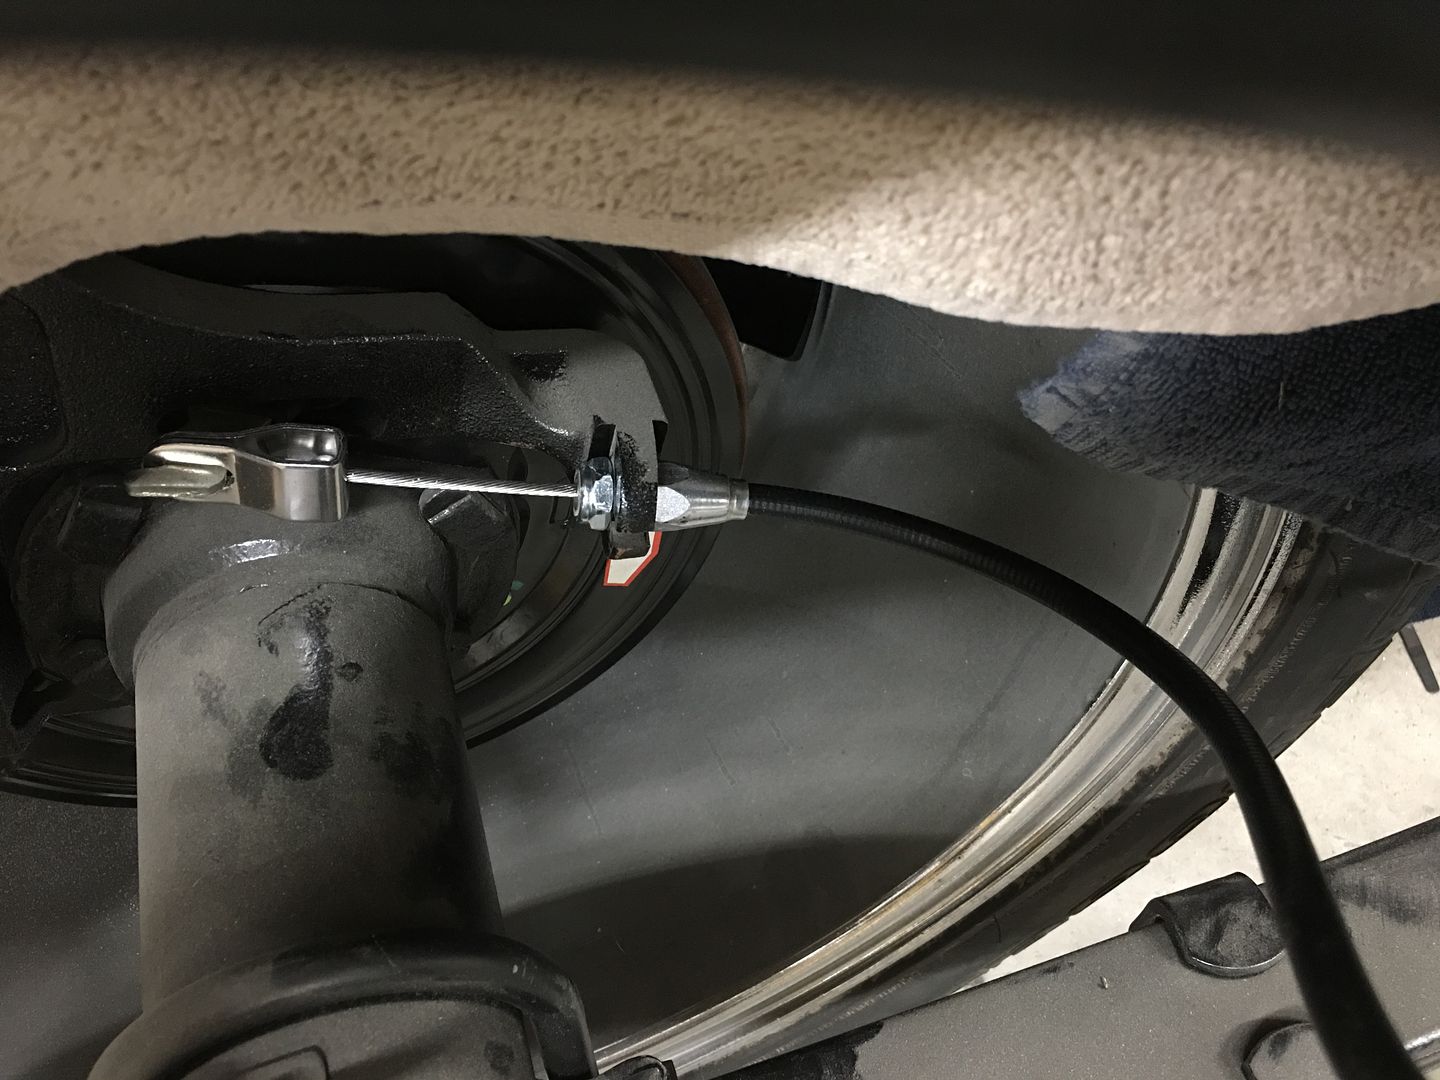
Dana dropped off the new brake cables for the wagon the other day. The single cable that attaches to the pedal has a shouldered ferrule that sits in the bottom of the parking brake bracket. Only this shoulder was much too small for the factory hole, the Hex portion almost pulled through the hole.
I considered making an adapter sleeve on the lathe, but the figured resizing the hole would be quicker. Found a nice thick 3/8 flat washer in stock that fit the ferrule shoulder perfectly and matched the thickness of the parking brake bracket. In order to get the weld heat farther from the 3/8 hole, the bracket opening was oversized up to 7/8" (largest step drill that I could find) and the washer slightly downsized to fit.. Some 3/8 standoffs made a quick arbor for the drill, and the die grinder does the rest. we had our correct size in about a minute..
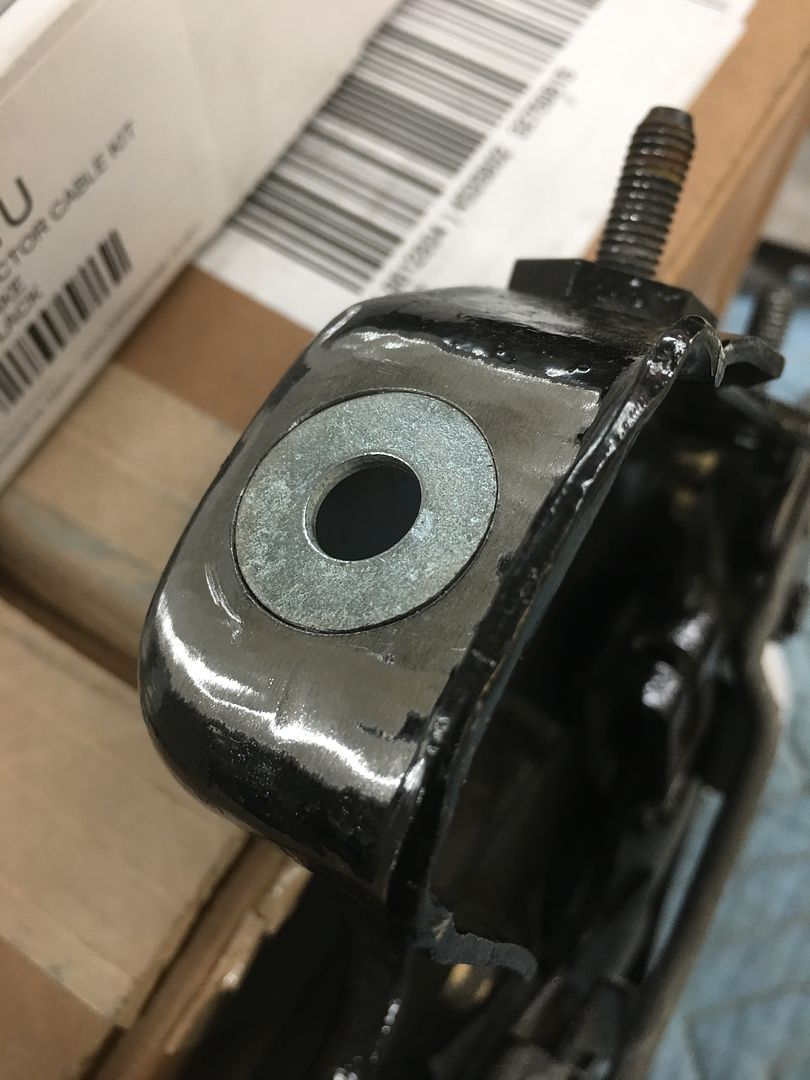
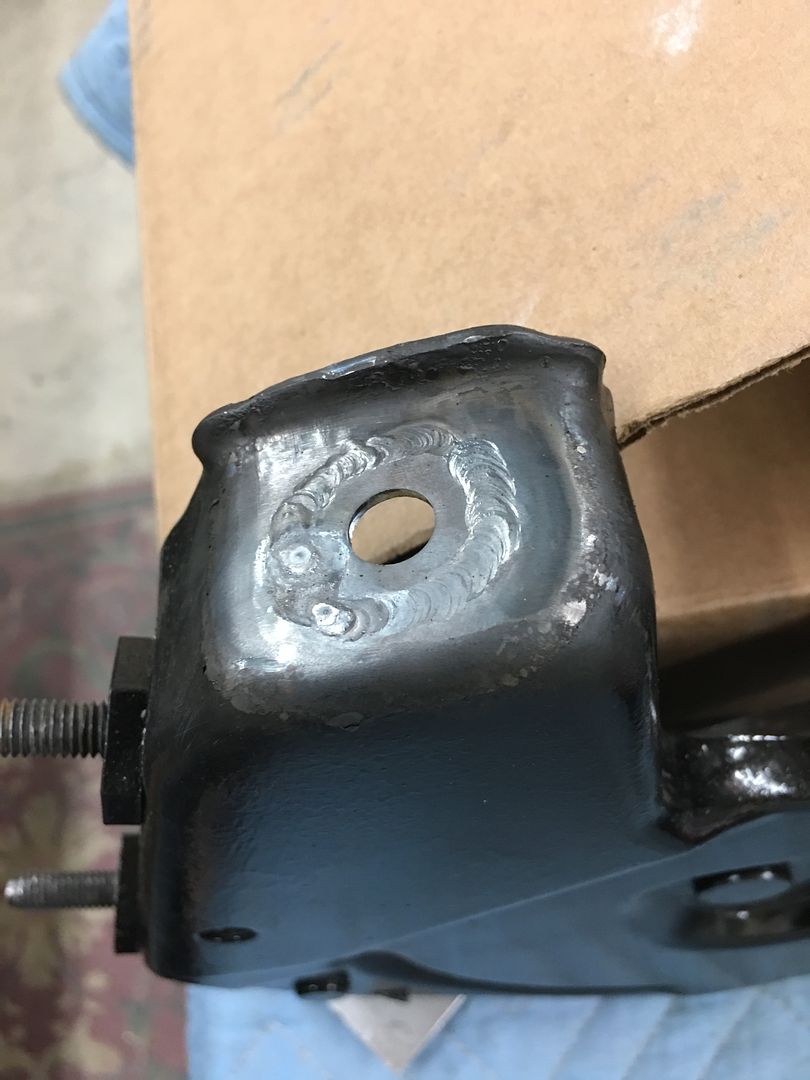
Installed, much better fit... Now Vince needs to do some touch up on the paint!
Robert
-
04-18-2020 06:28 PM #1489
CHR Member
- Join Date
- Jun 2008
- Location
- Leonardtown
- Car Year, Make, Model: Walking
- Posts
- 1,228
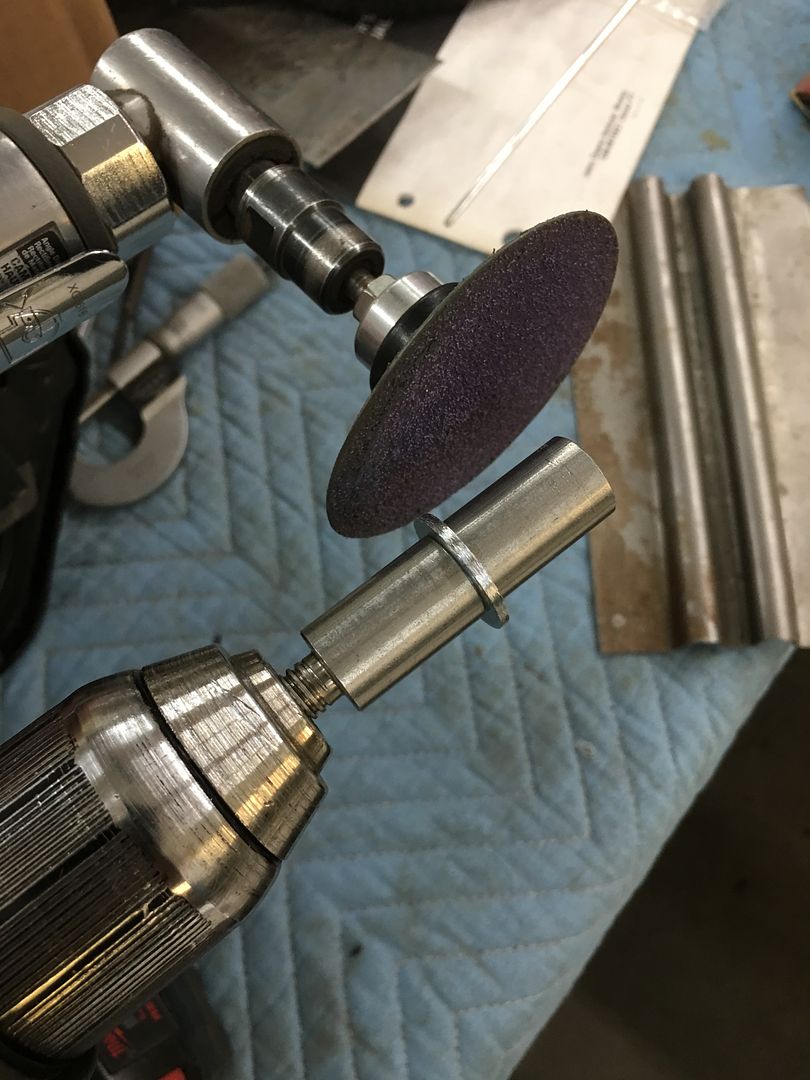
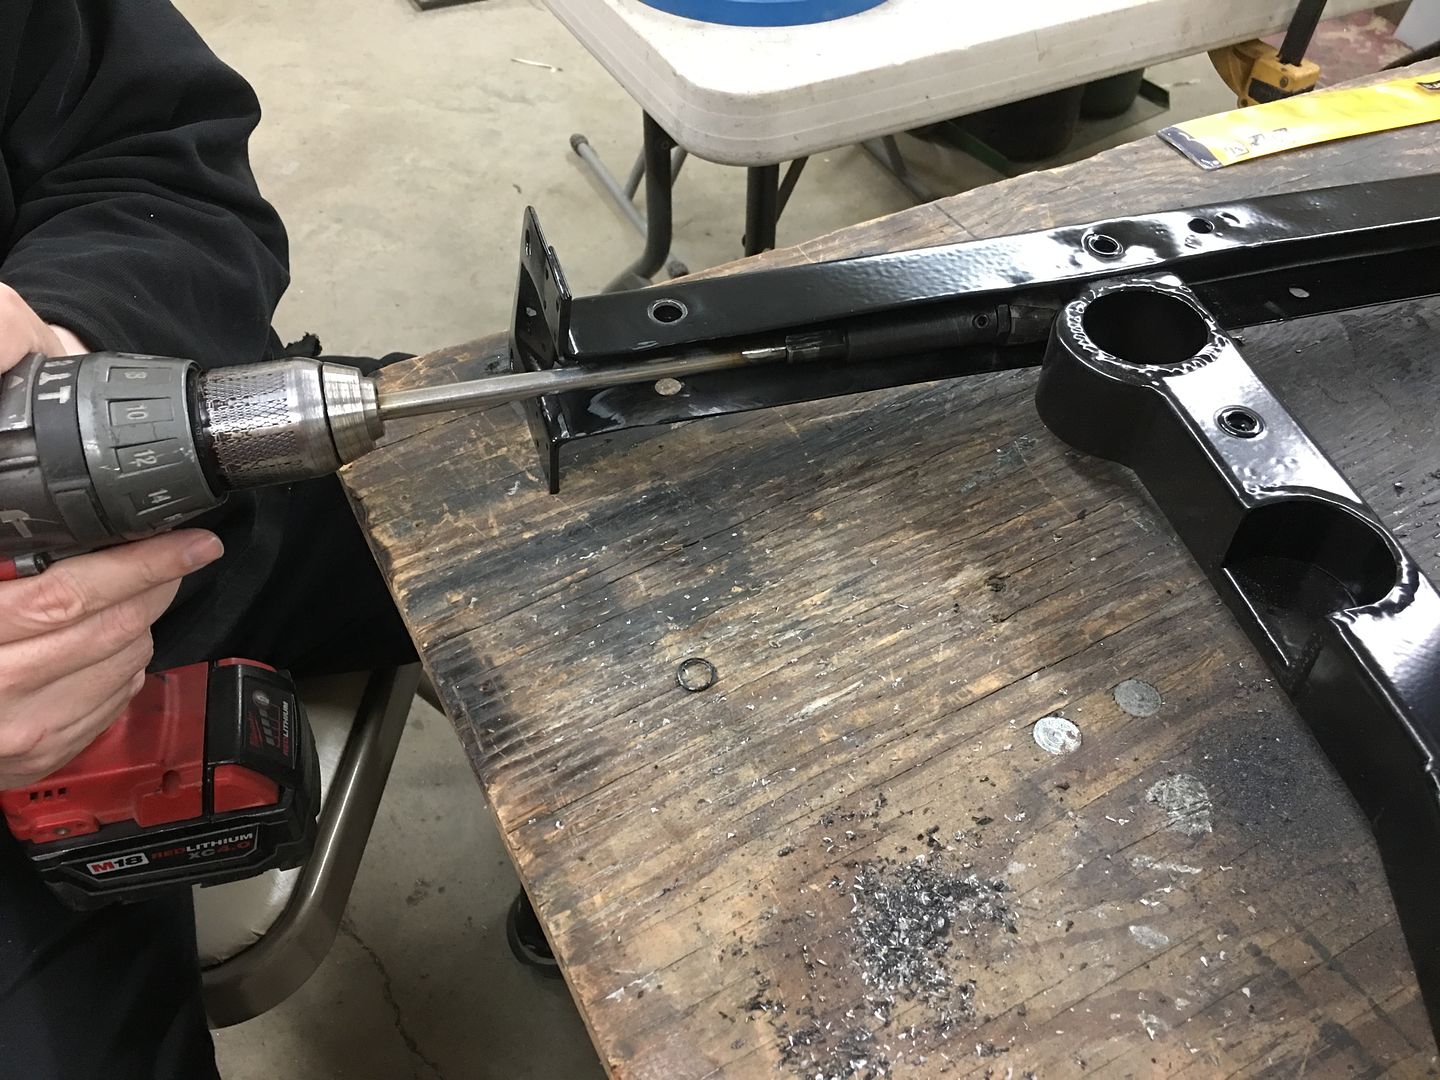
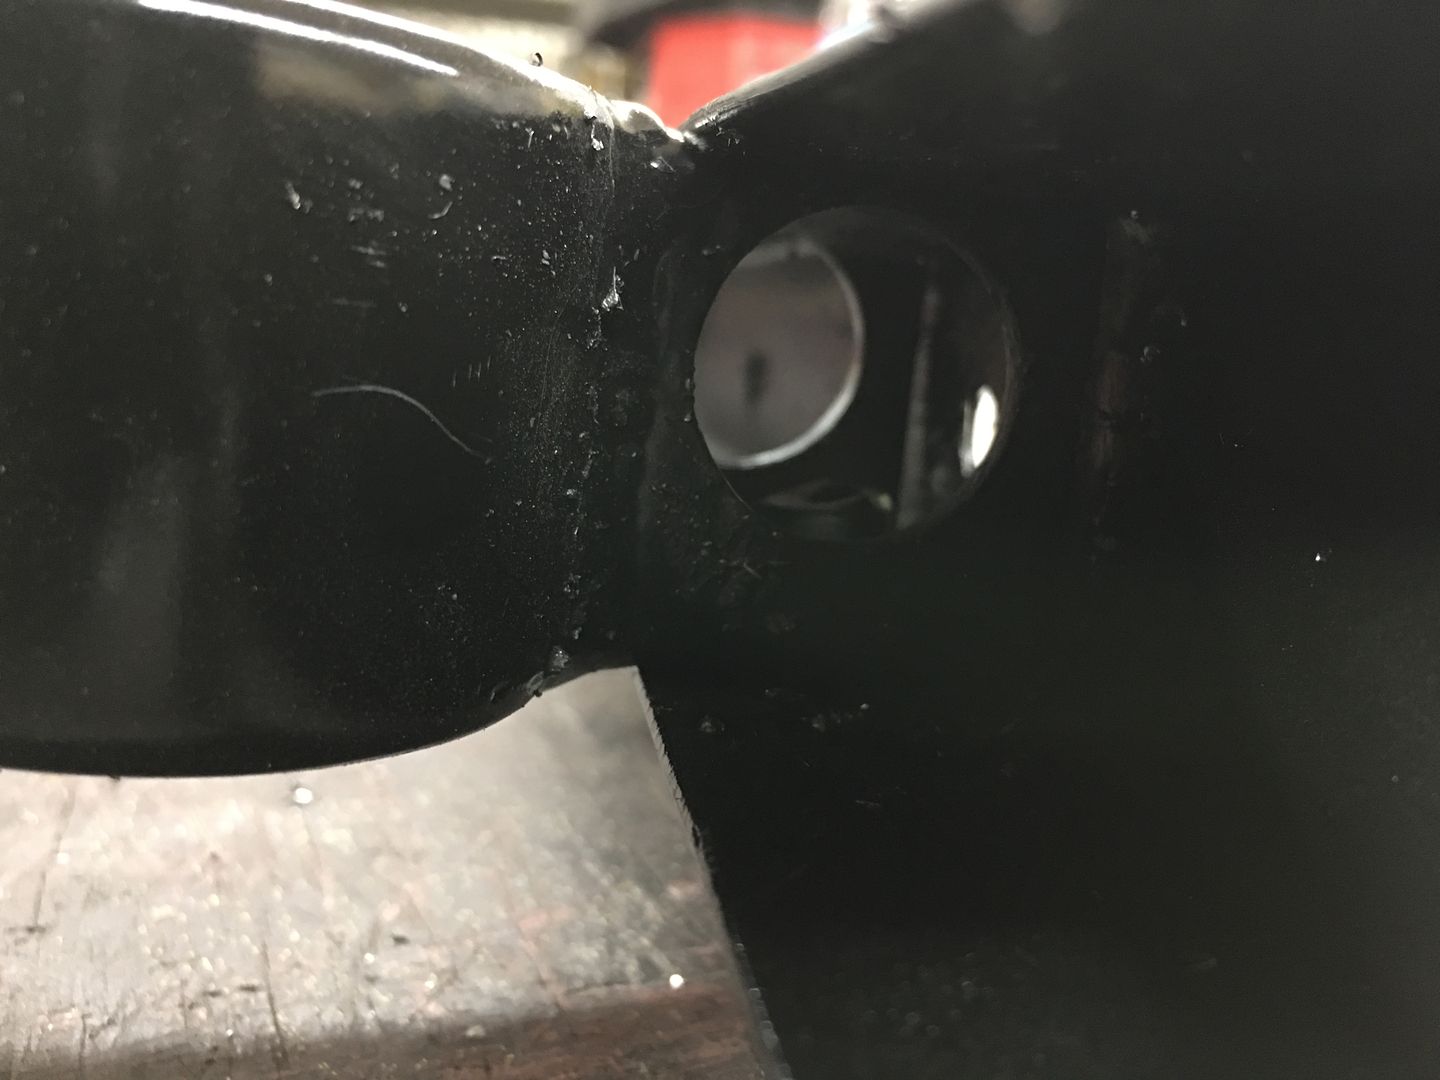
We're in the middle of blocking paint today on the core support and happened to notice someone forgot to add the holes in the new vertical uprights for the light wires to go across above the radiator.
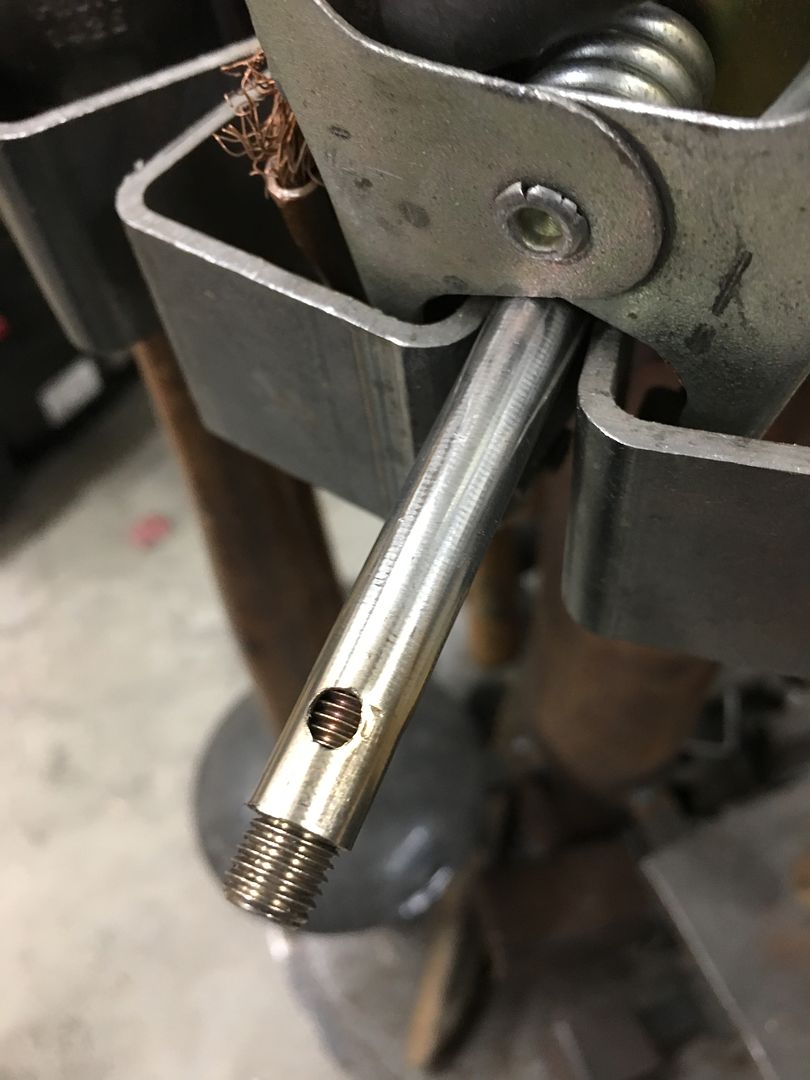
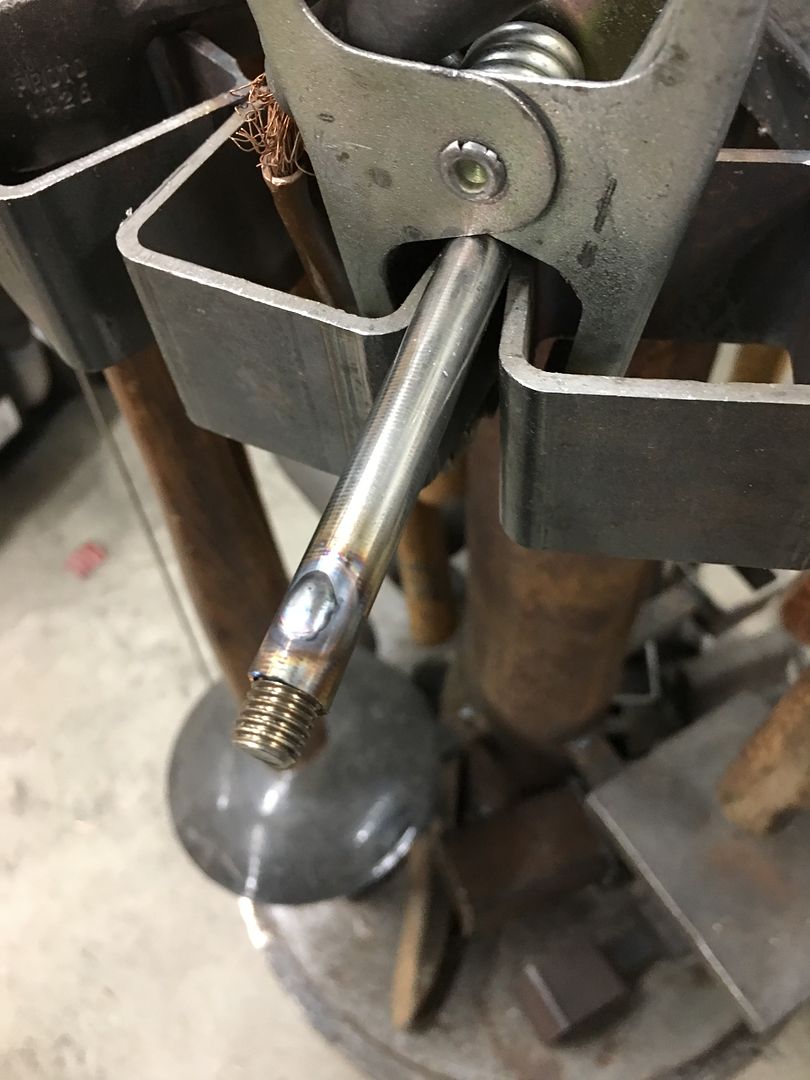
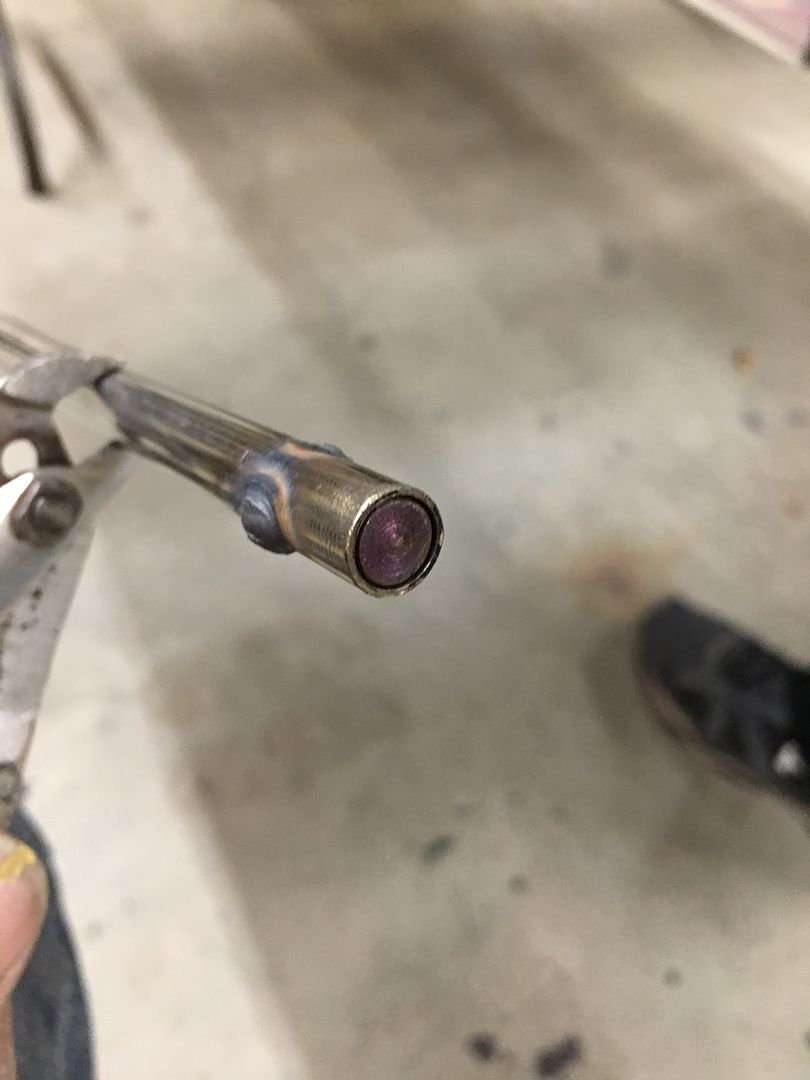
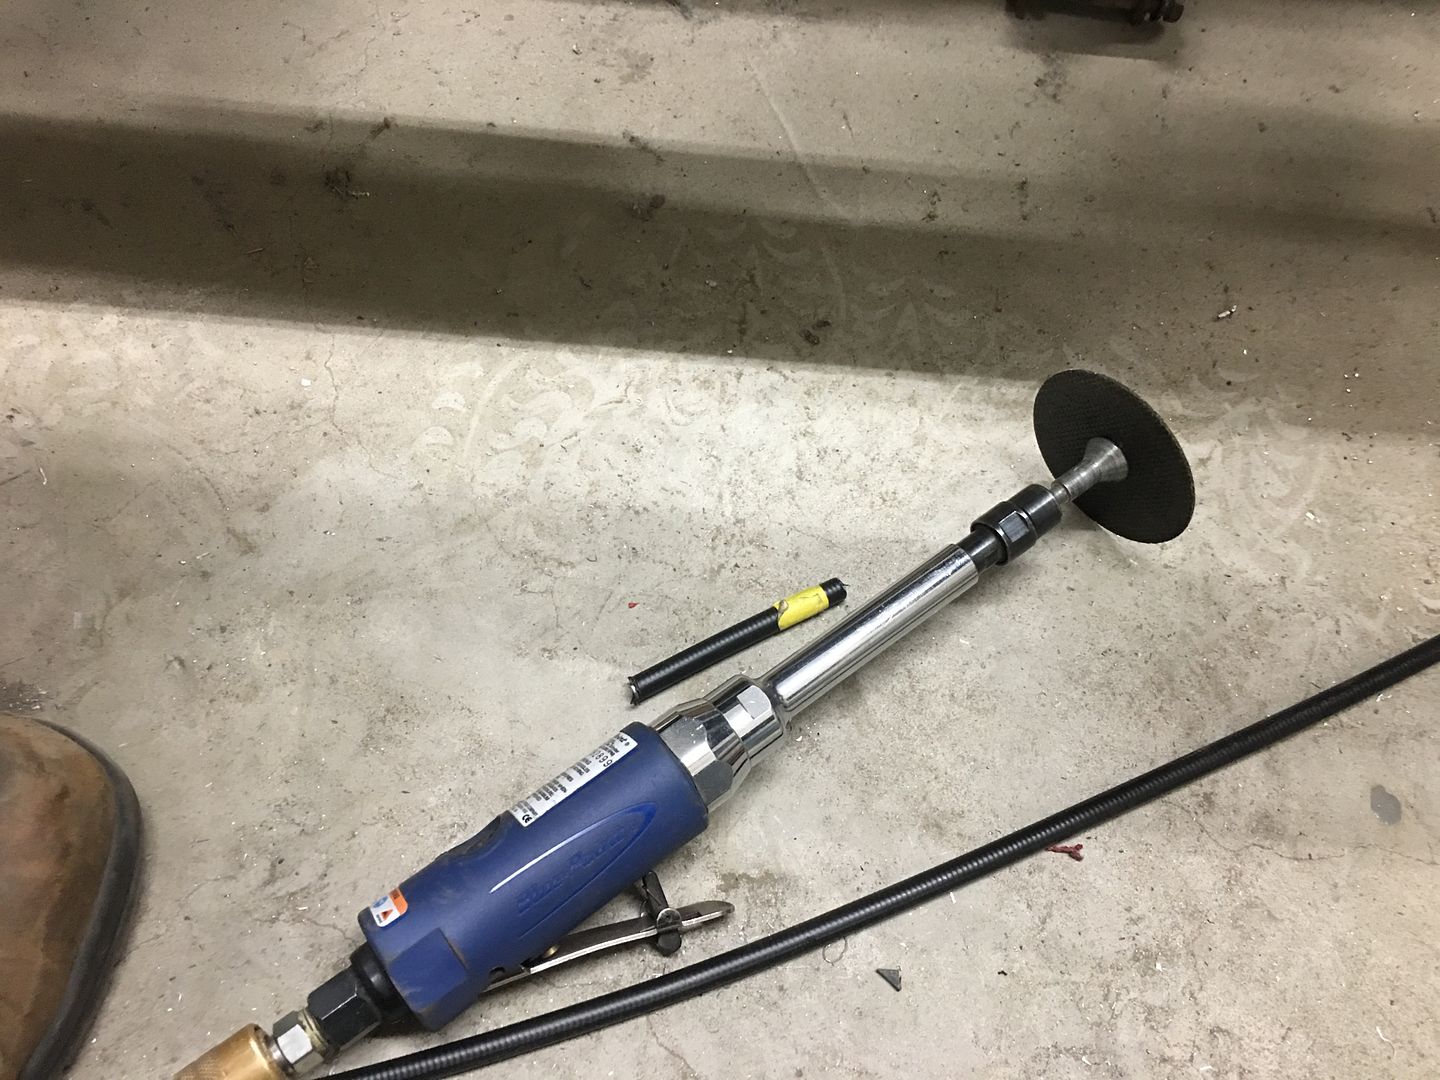
We have some rotary cutters that would do the trick but they are a bit short to reach from the outside (to keep things perpendicular) so lets make an extension. The set screw for the spring loaded center point is a 5/16-24 and we happened to have some in stock. So we used a piece of stainless fuel line and plug welded a stud in one end and a plug in the other for tightening in the drill chuck..
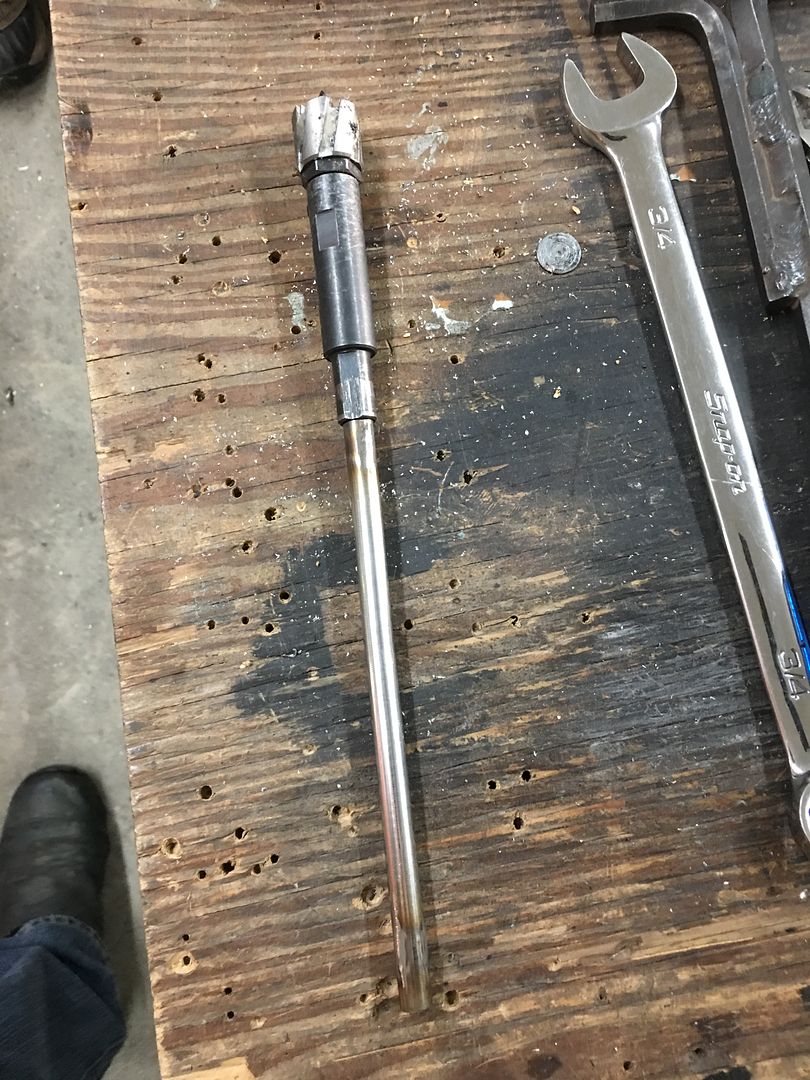
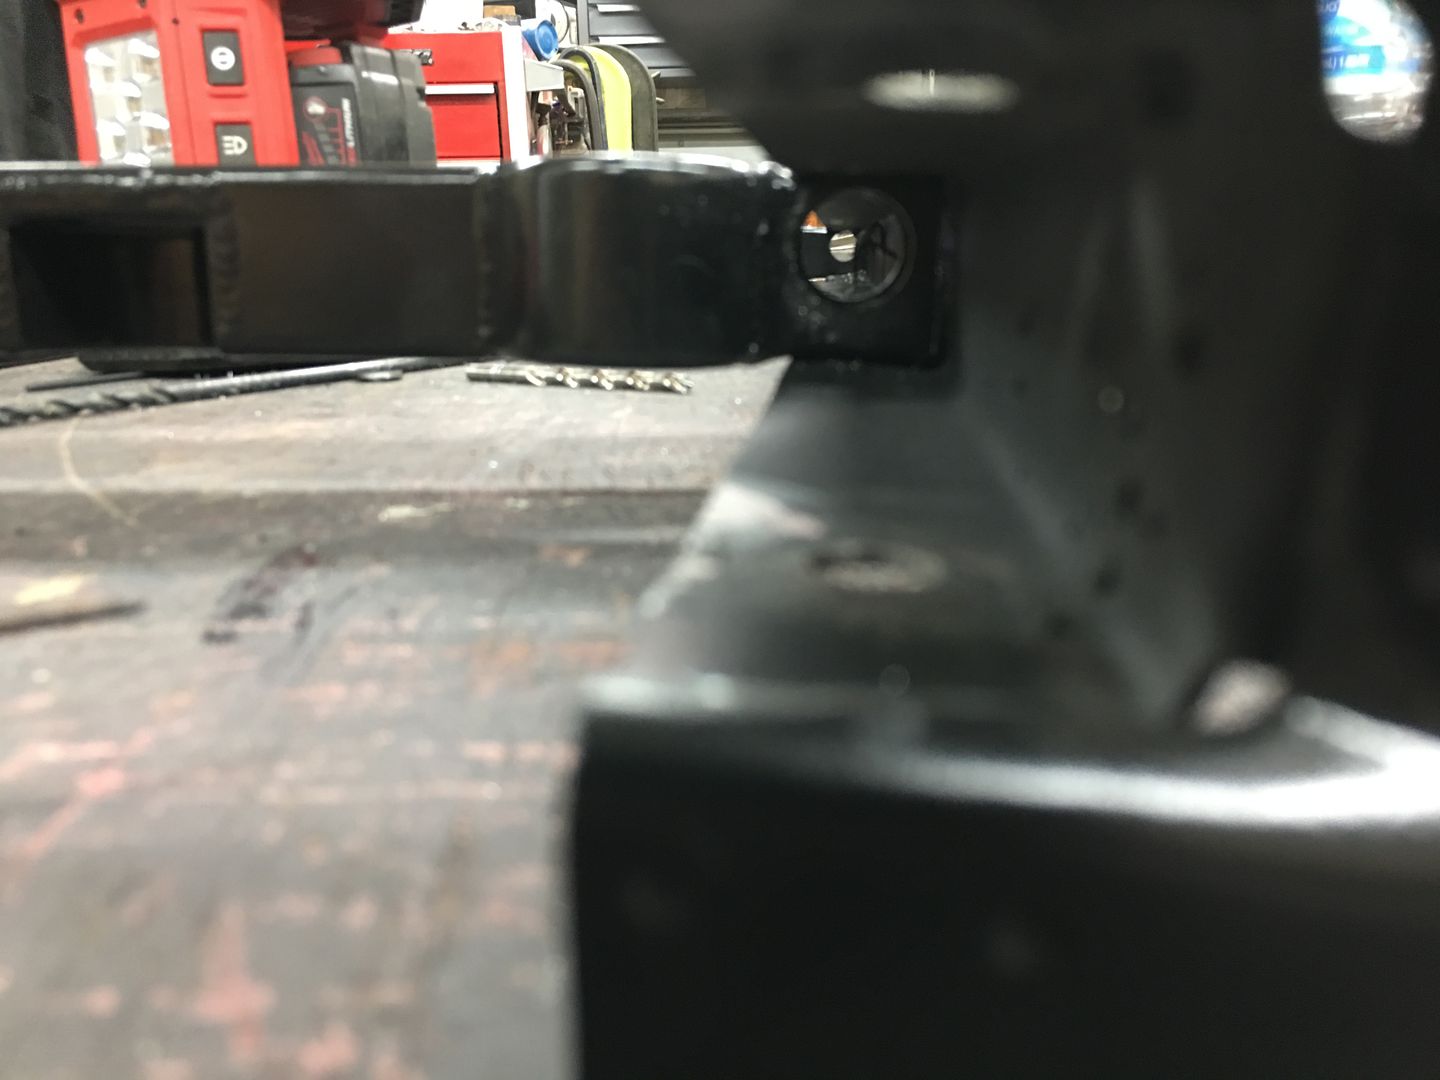
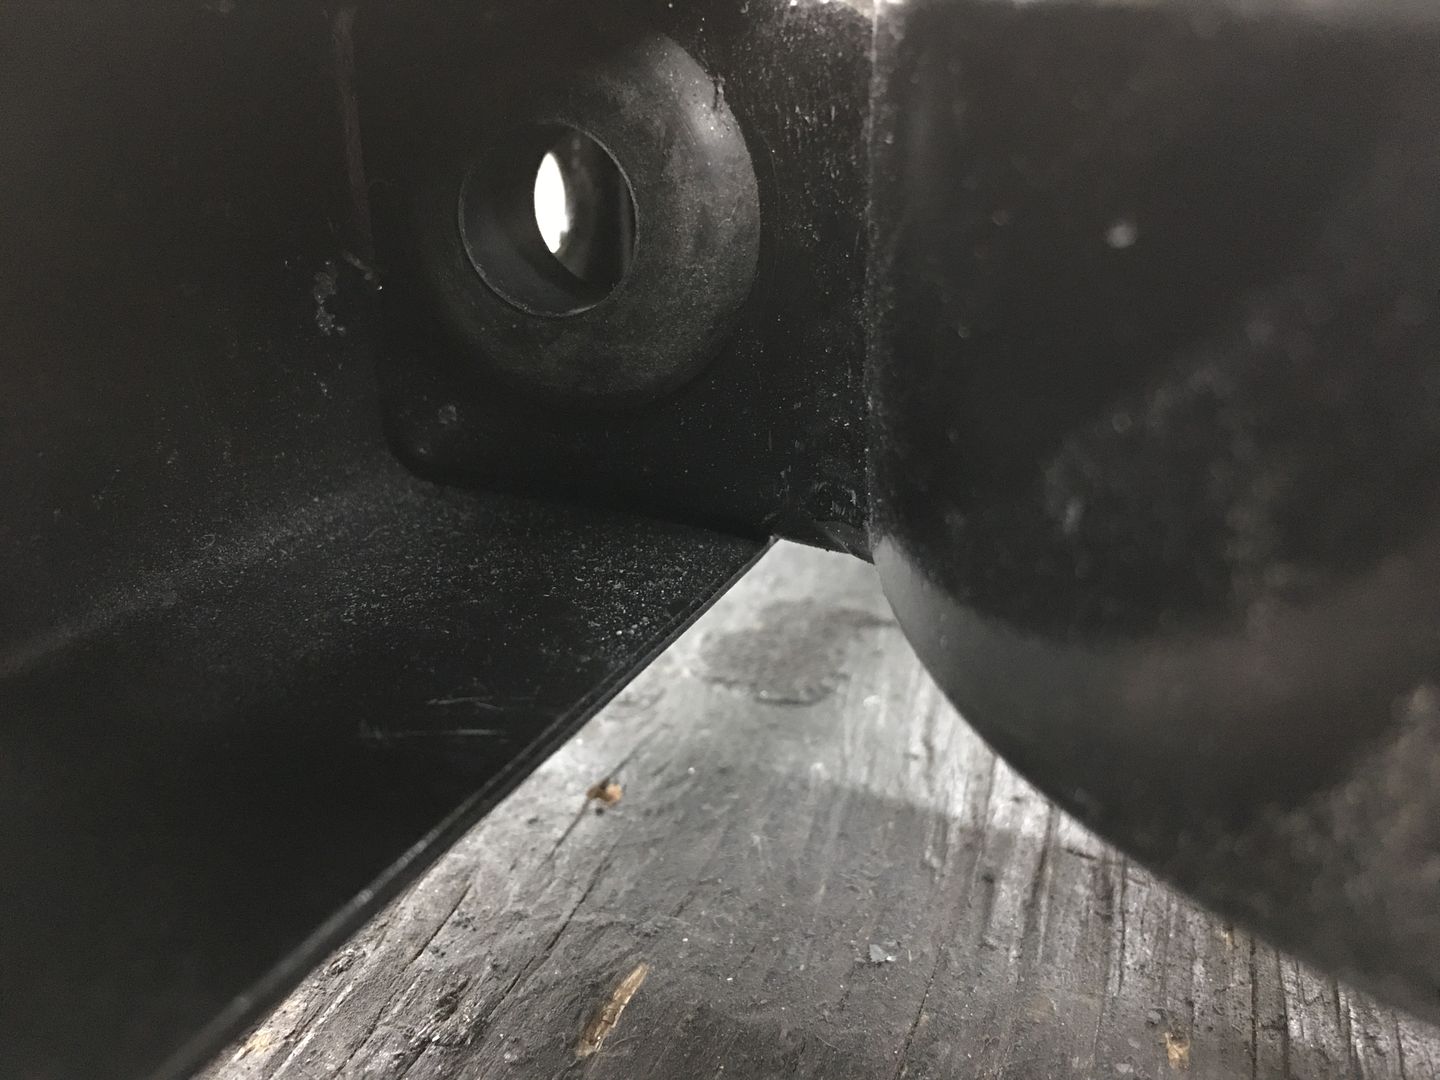
Holes drilled, deburred, and grommet test fitted..
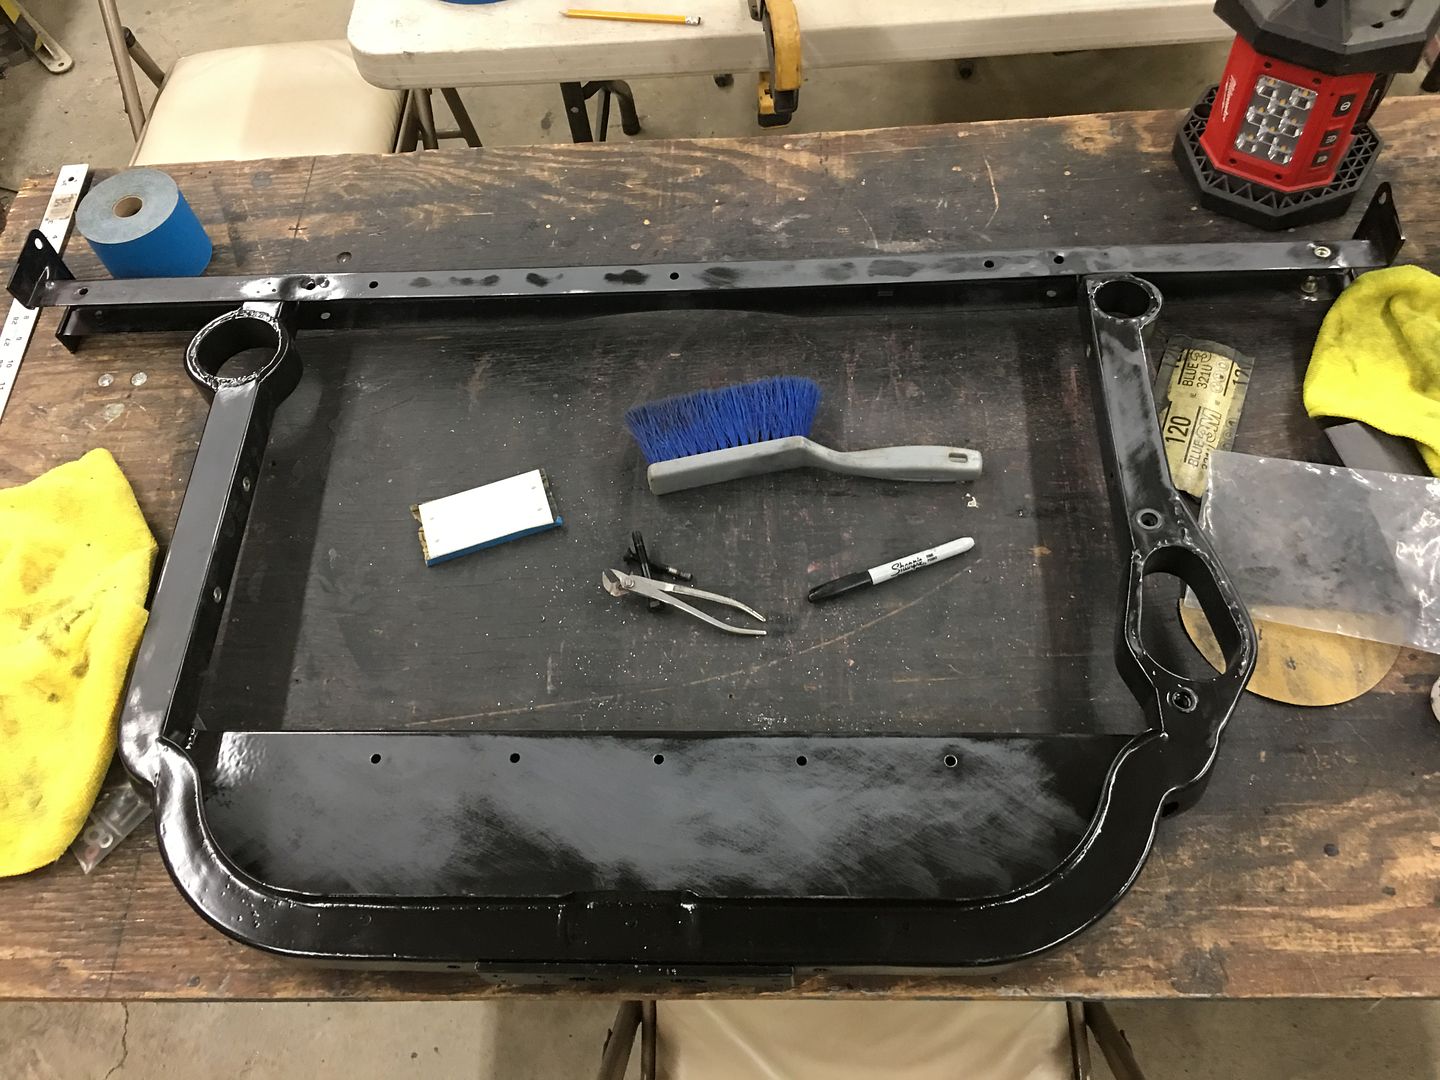
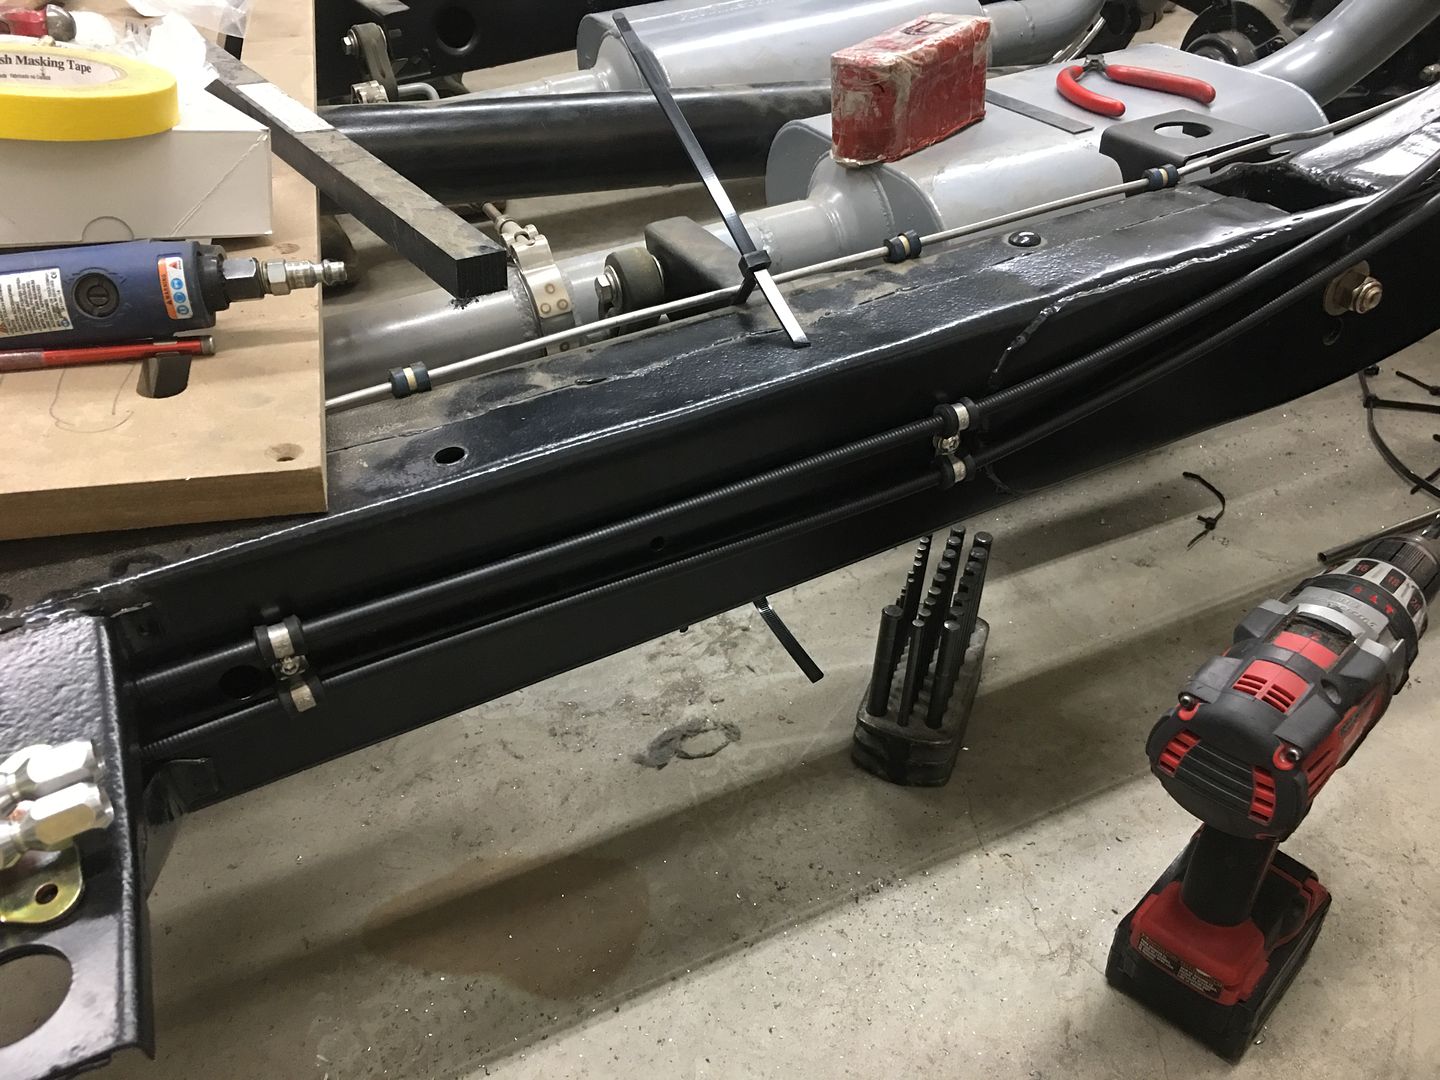
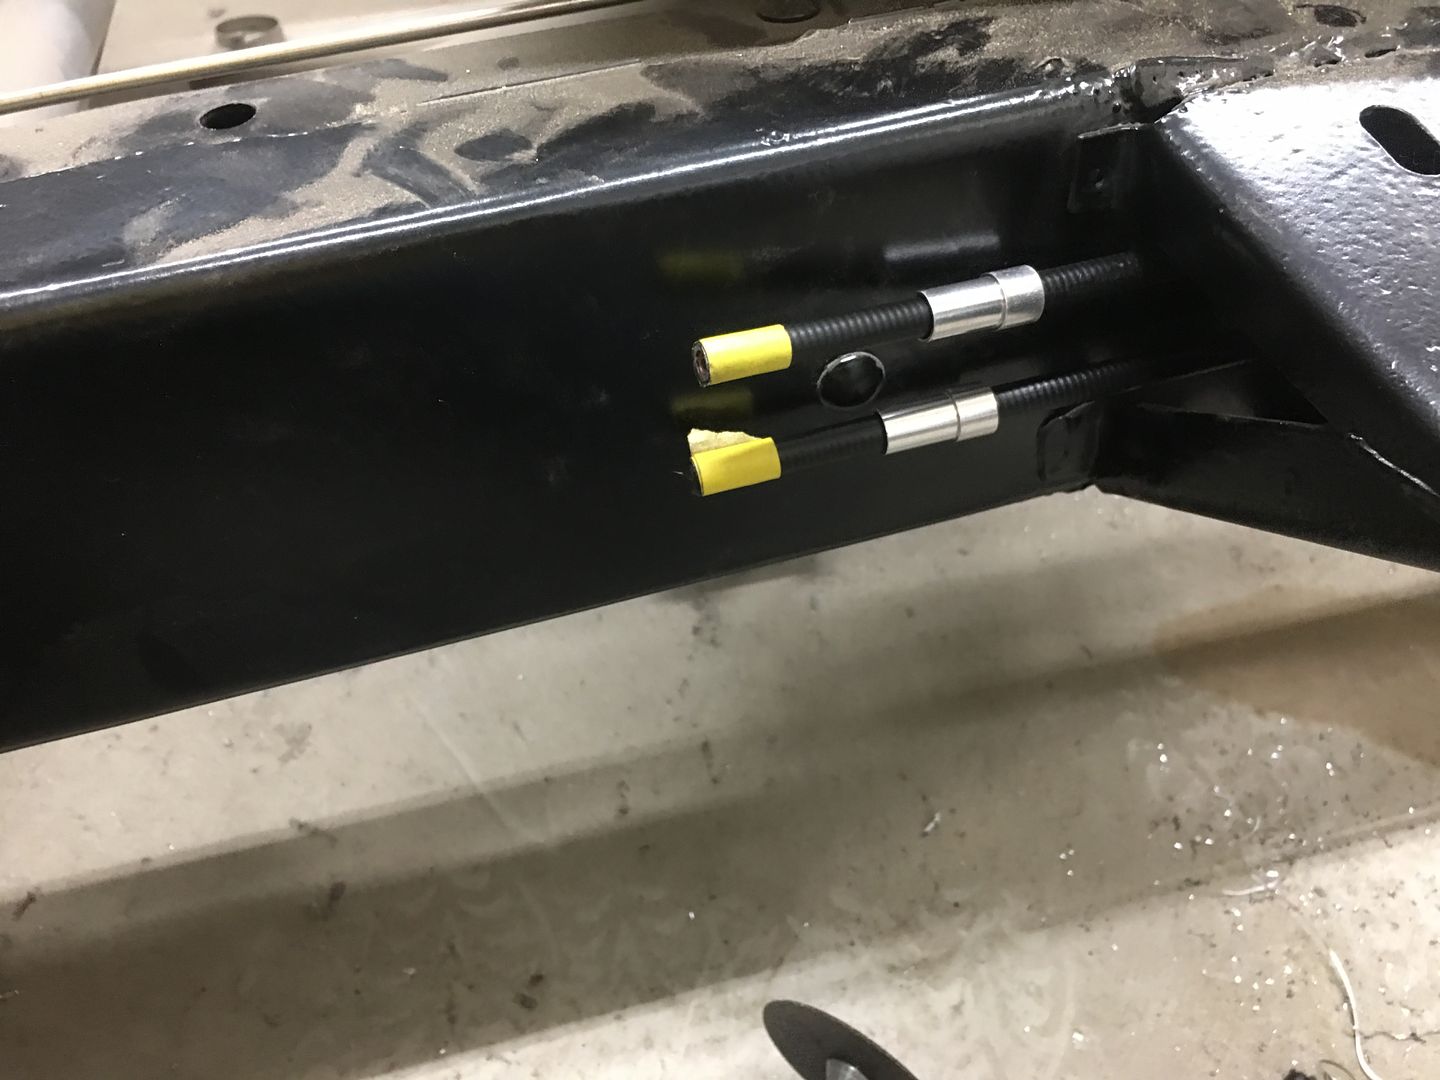
Now for a test fit of our Parking brake lines to mock up the routing prior to adding rivet nuts and adel clamps...
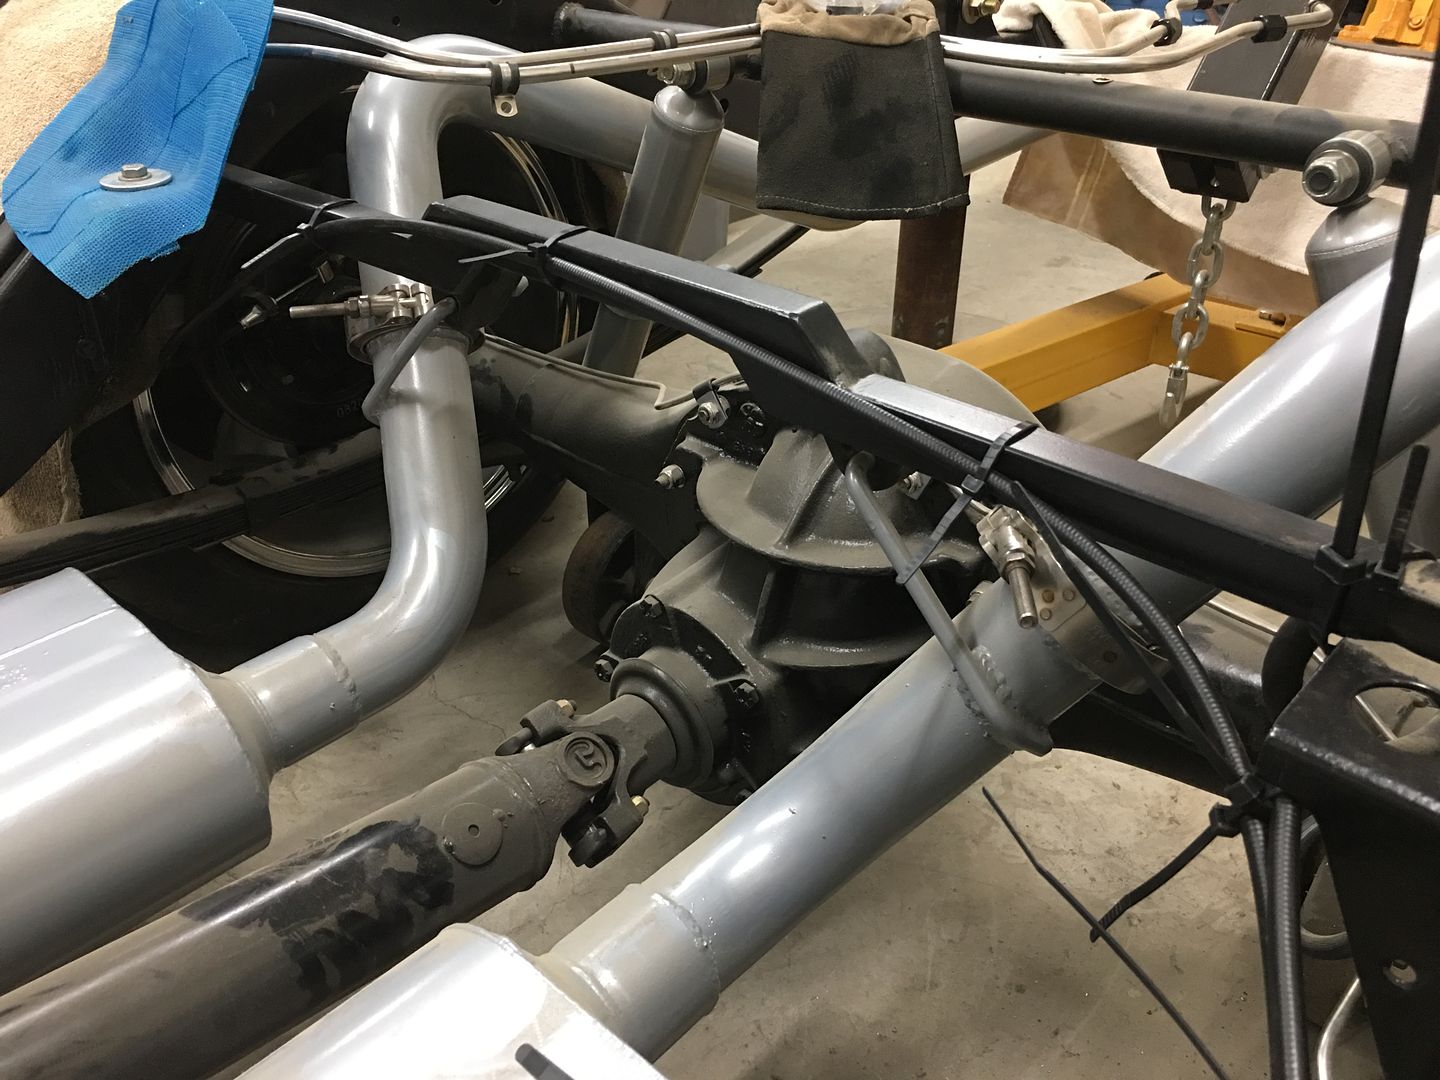

And here's our one cable to two part layout..
Robert
-
04-26-2020 11:40 AM #1490
CHR Member
- Join Date
- Jun 2008
- Location
- Leonardtown
- Car Year, Make, Model: Walking
- Posts
- 1,228
With our adel clamps arrived, Mike and I worked on the brake cables while Vince was prepping things for paint...
.JPG)
.JPG)
I think he's having too much fun...
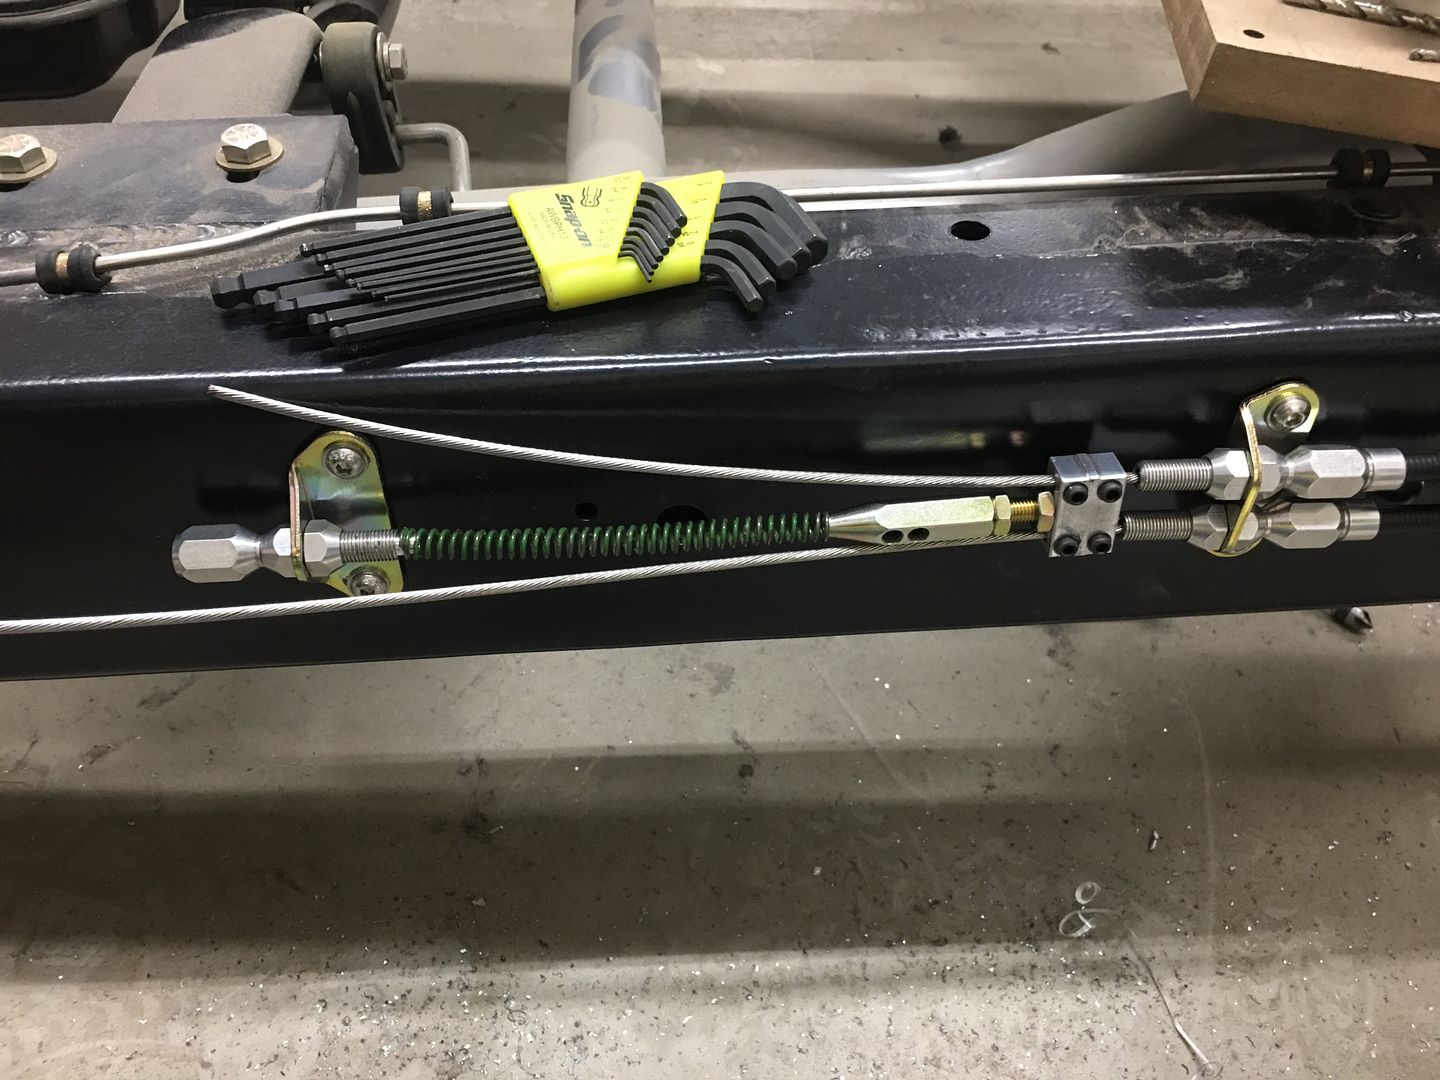
We had to wait for -5 clamps as these were snug enough to hold the cable from moving. This allows us to set the length to the backing plate such that it clears the frame during suspension travel..
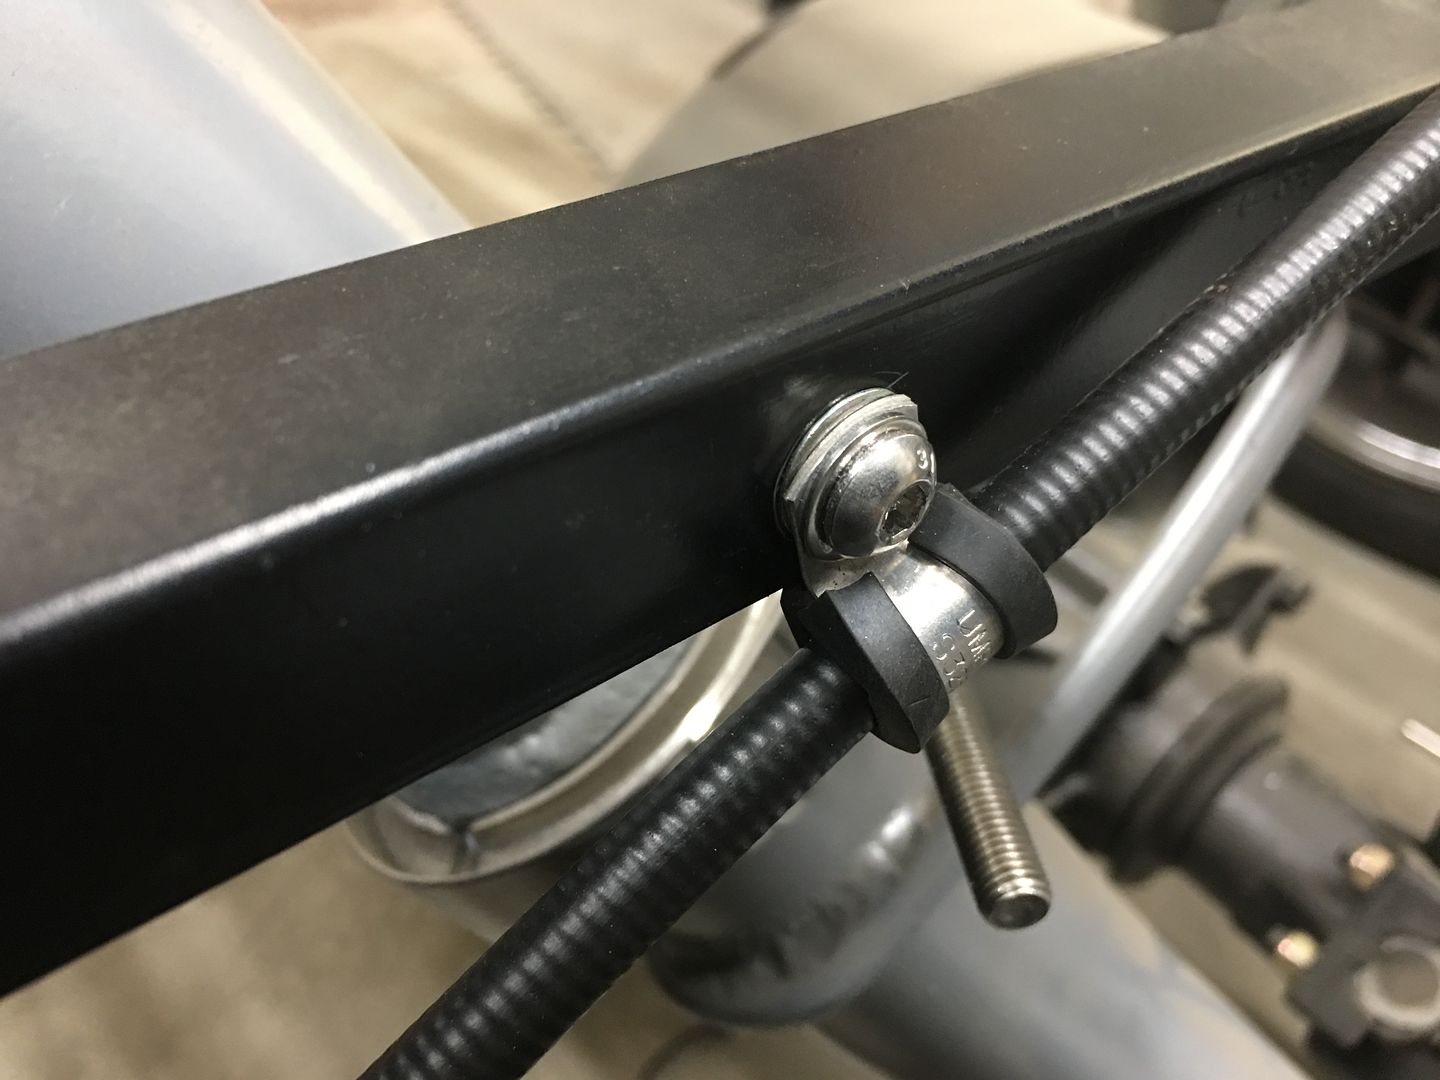
The clamps were held in place using rivet nuts installed into the frame. Here is a video showing rivet nuts and the proper installation:
https://www.youtube.com/watch?v=3jrrf_VbTsc
Outer sheaths are marked for trimming..
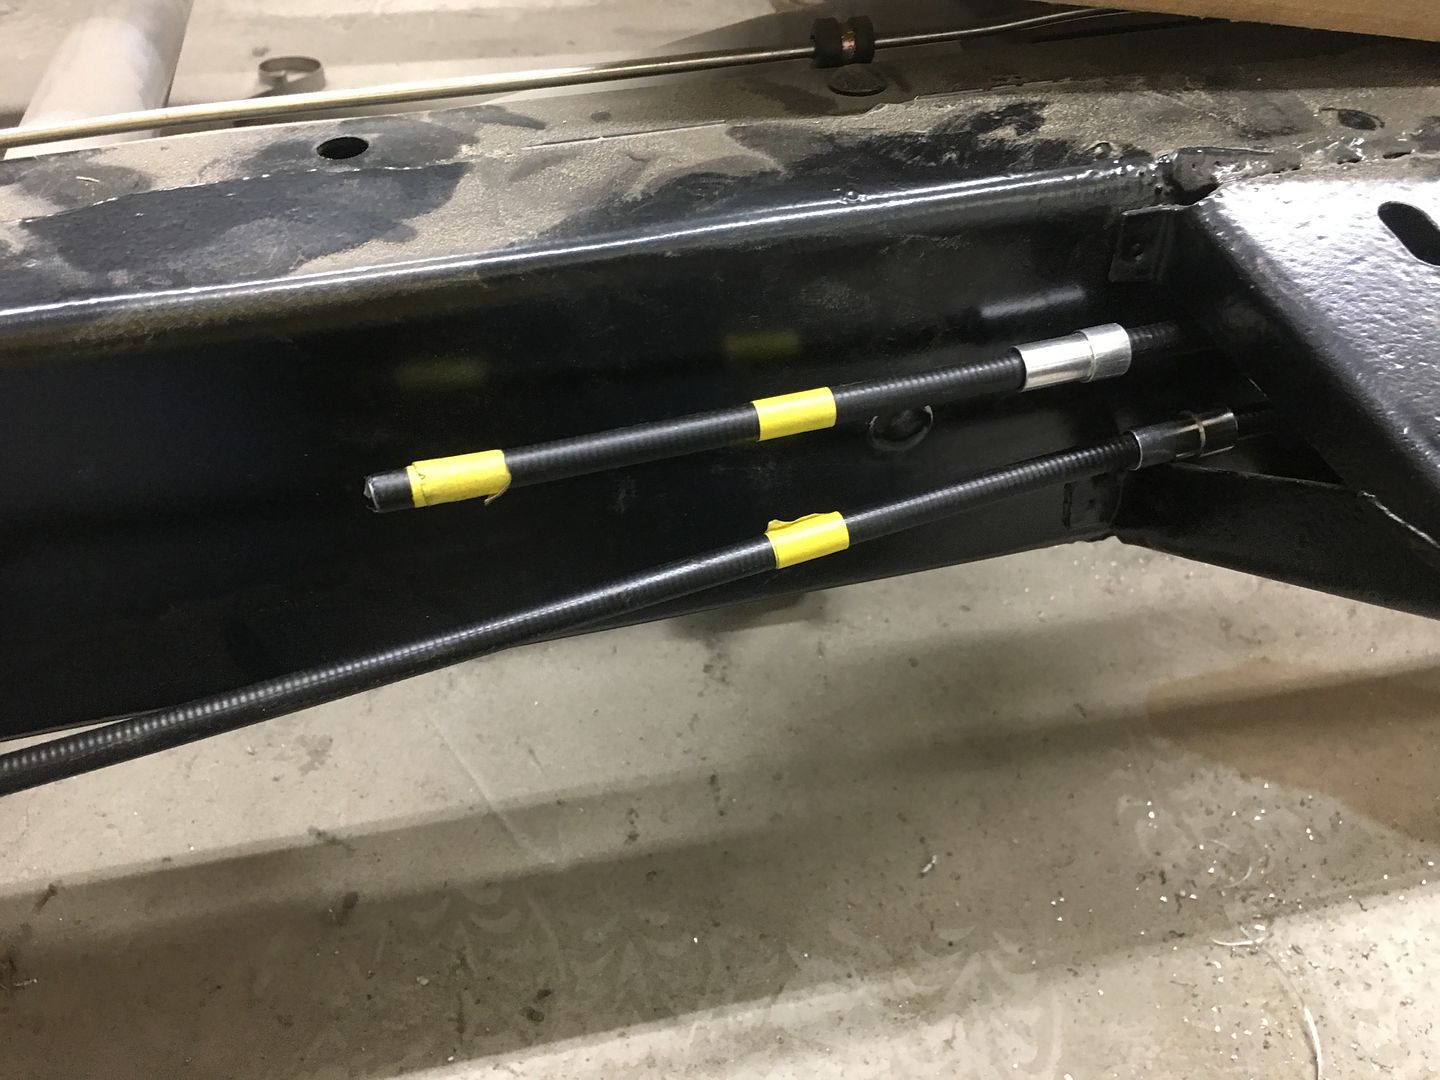
Be sure to pull cables out of the way prior to cutting...
Our implement of destruction...
Using Gripple cutters to cut the cable... Also made by Knip-ex, both are designed for cutting steel wire rope..
https://www.youtube.com/watch?v=kWrpry0XgAU
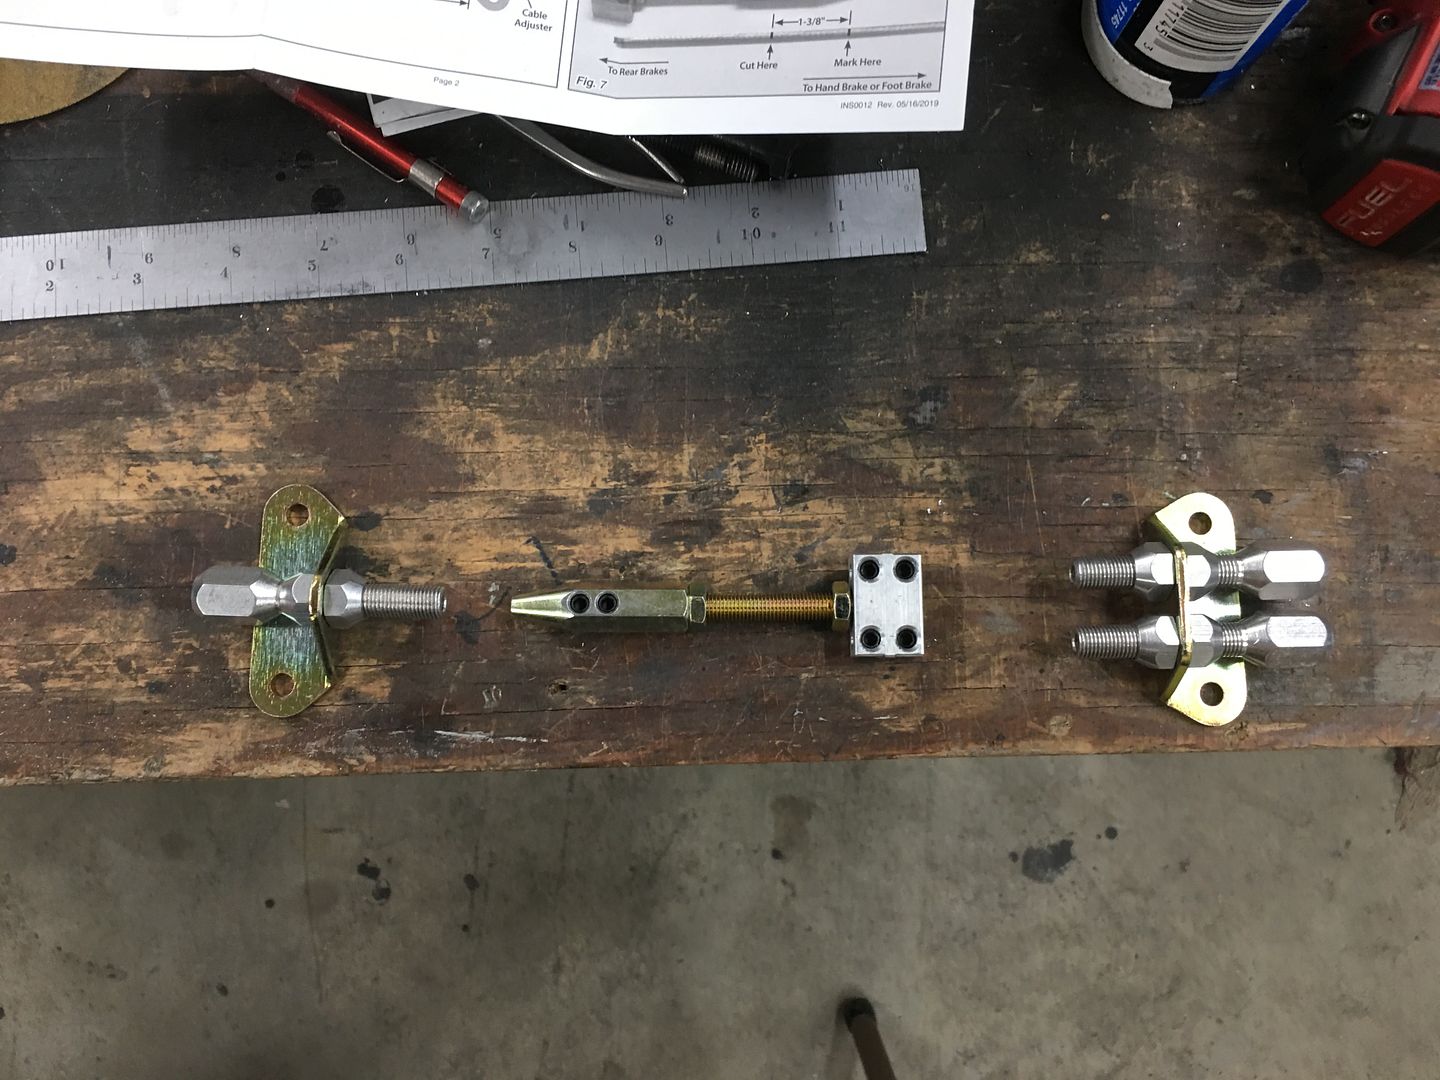
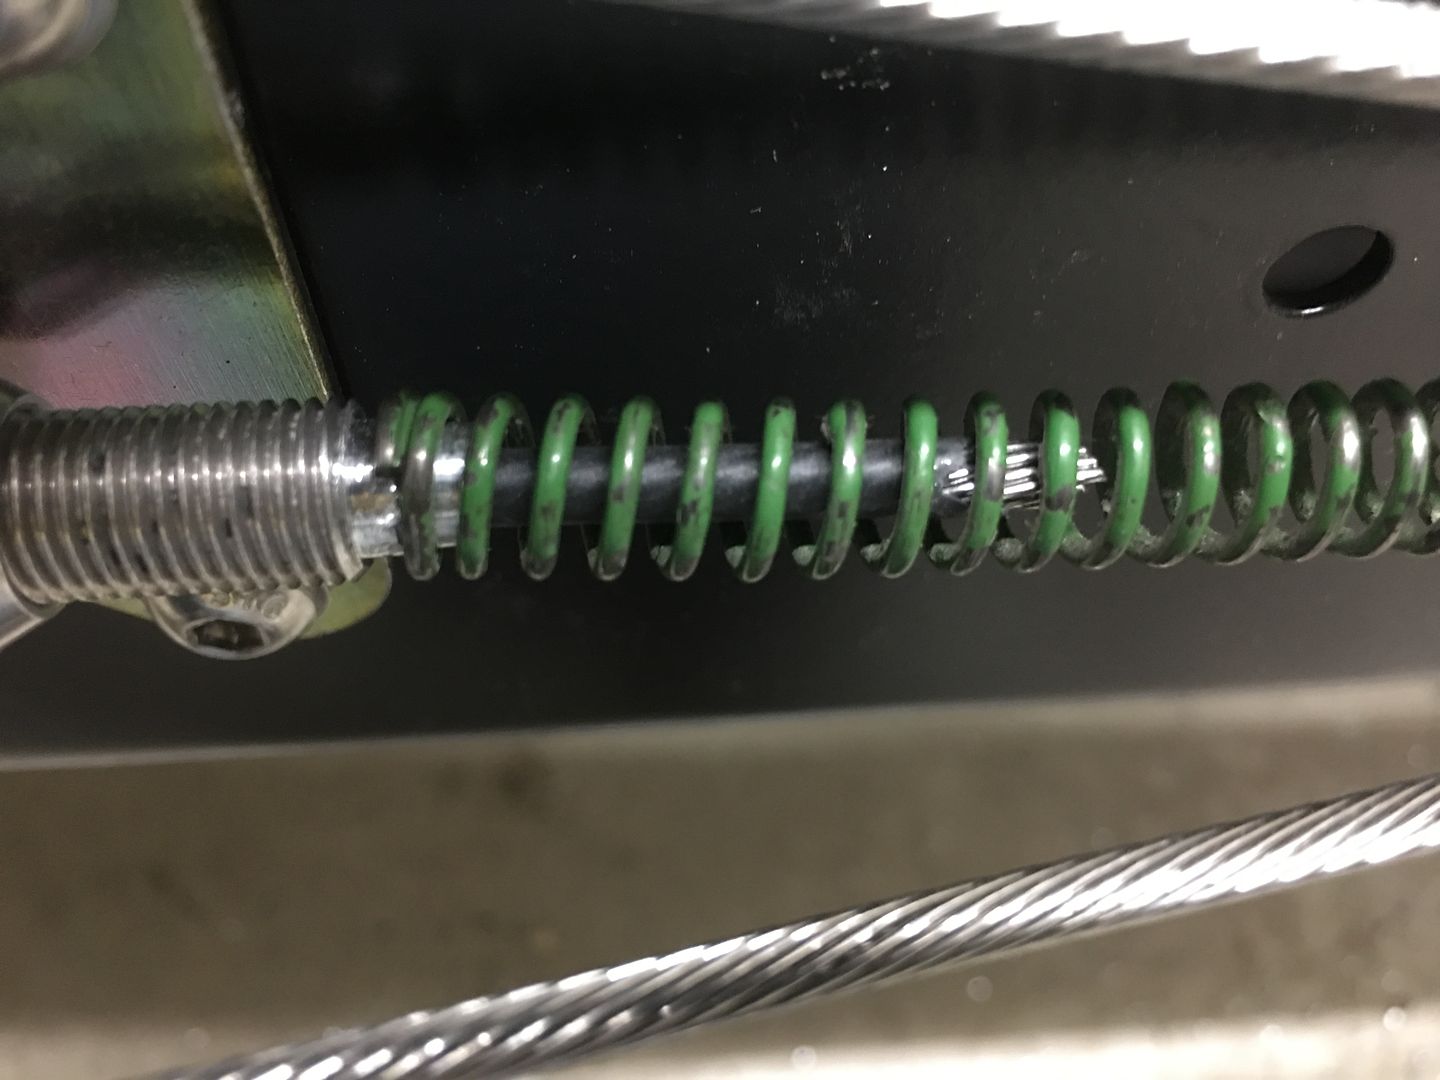
Our parking brake assembly used an integral "return spring" to pull the pedal back upwards when the brake is released, so that part is saved for this installation as well. To keep the end of the spring from rubbing against the cable in one spot, we machine a landing in the adjuster. We will also use some Teflon heat shrink over the cable to help prevent wear.
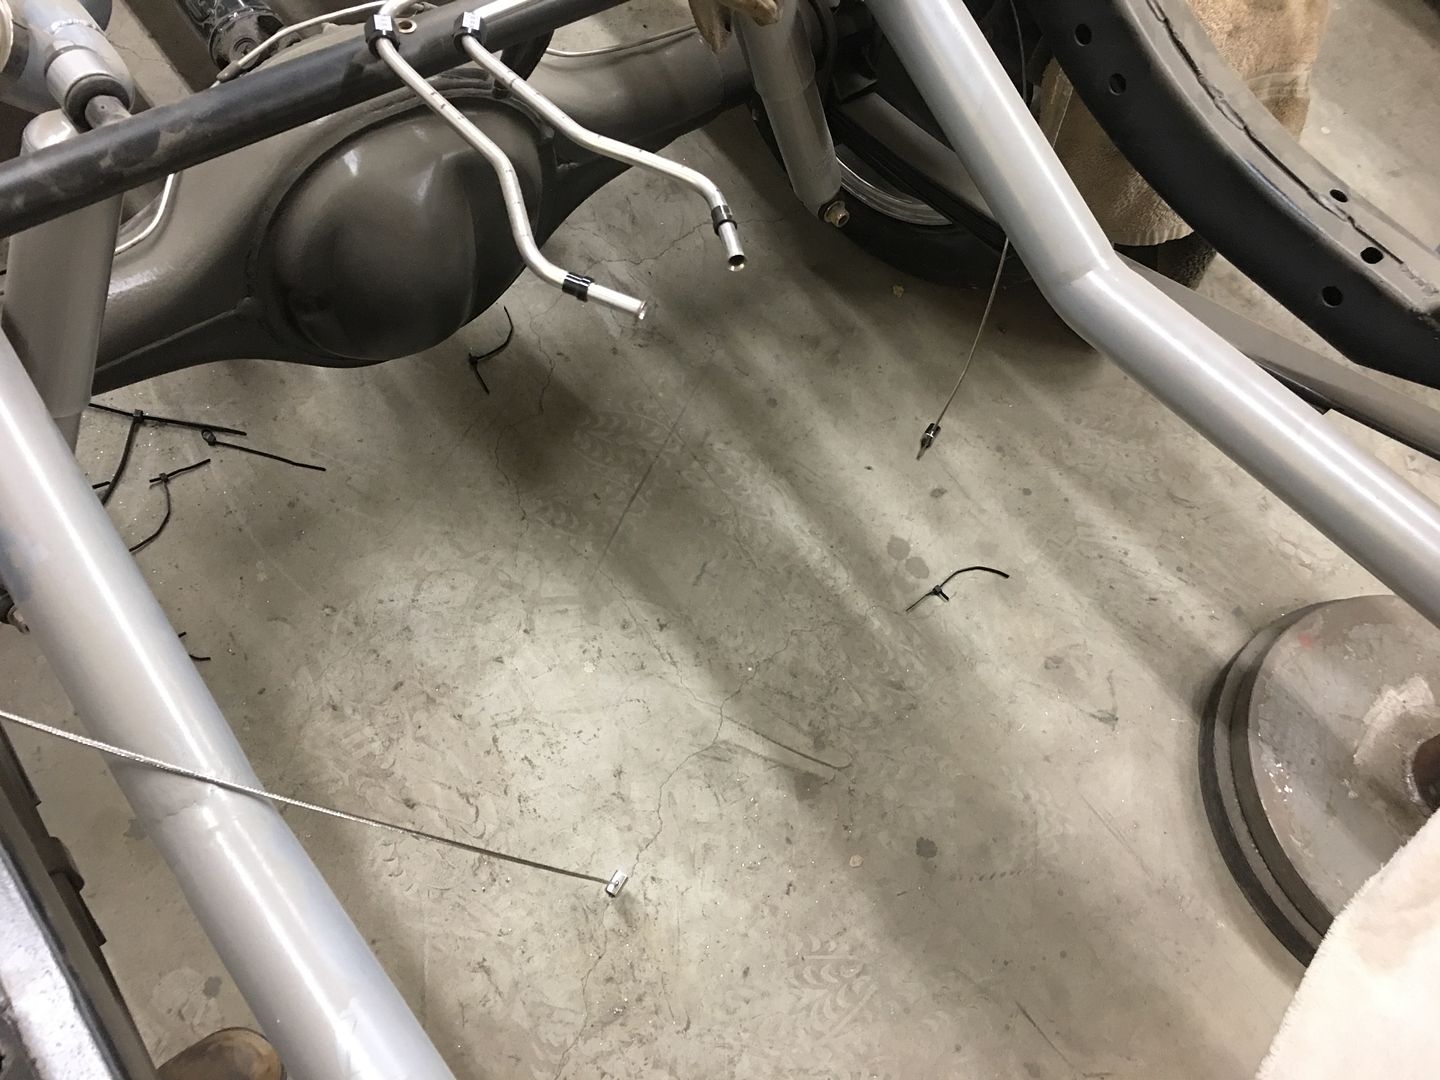
Final trim on the rear cables will come when we drop the body back on the frame for proper fitment to the brake pedal assembly.
.Robert
-
04-27-2020 06:12 PM #1491
CHR Member
- Join Date
- Apr 2011
- Location
- Prairie City
- Car Year, Make, Model: 40 Ford Deluxe, 68 Corvette, 72&76 K30
- Posts
- 7,301
- Blog Entries
- 1
That looks very nice!Ryan
1940 Ford Deluxe Tudor 354 Hemi 46RH Electric Blue w/multi-color flames, Ford 9" Residing in multiple pieces
1968 Corvette Coupe 5.9 Cummins Drag Car 11.43@130mph No stall leaving the line with 1250 rpm's and poor 2.2 60'
1972 Chevy K30 Longhorn P-pumped 24v Compound Turbos 47RH Just another money pit
1971 Camaro RS 5.3 BTR Stage 3 cam, SuperT10
Tire Sizes
-
04-29-2020 08:41 AM #1492
CHR Member
- Join Date
- Jun 2008
- Location
- Leonardtown
- Car Year, Make, Model: Walking
- Posts
- 1,228
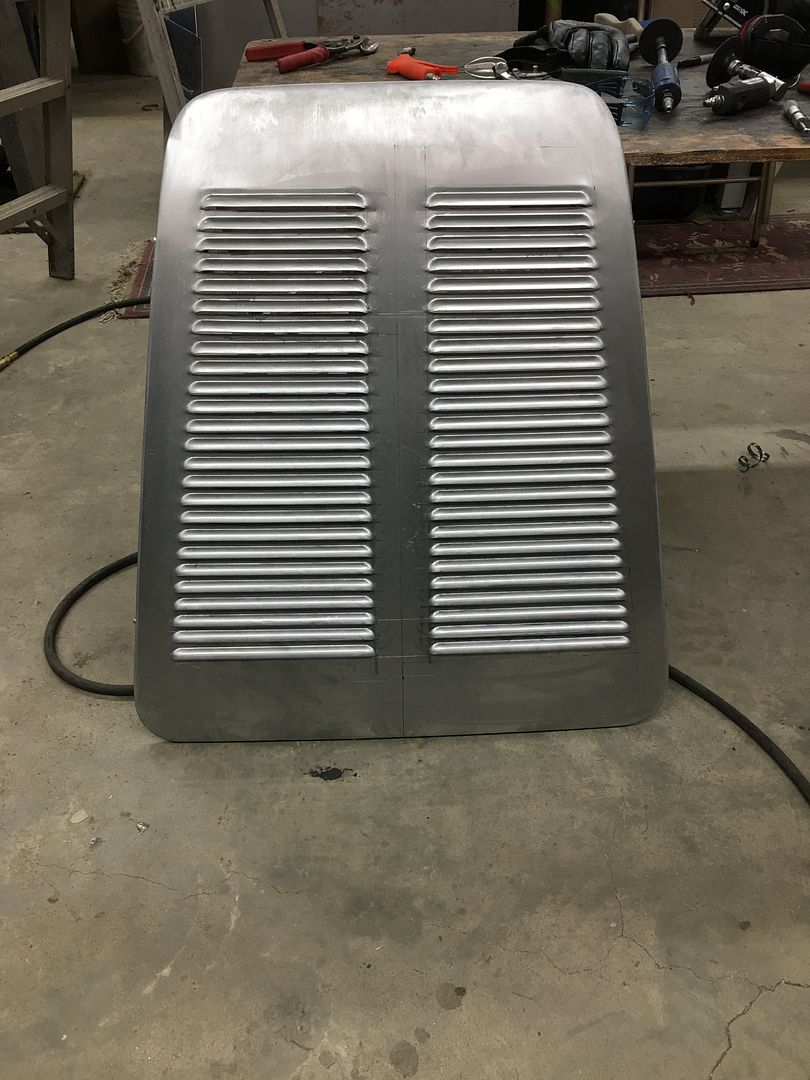
Had a visitor in the shop yesterday, collaborating with Cody Walls of Traditional Metalcraft (Milton, DE) on adding some louvers to an Austin Healey project he has in his shop. We got the bonnet done yesterday, and I had to modify my radius fixture for the boot as it had too much crown to simply louver while flat. So that is yet to come.
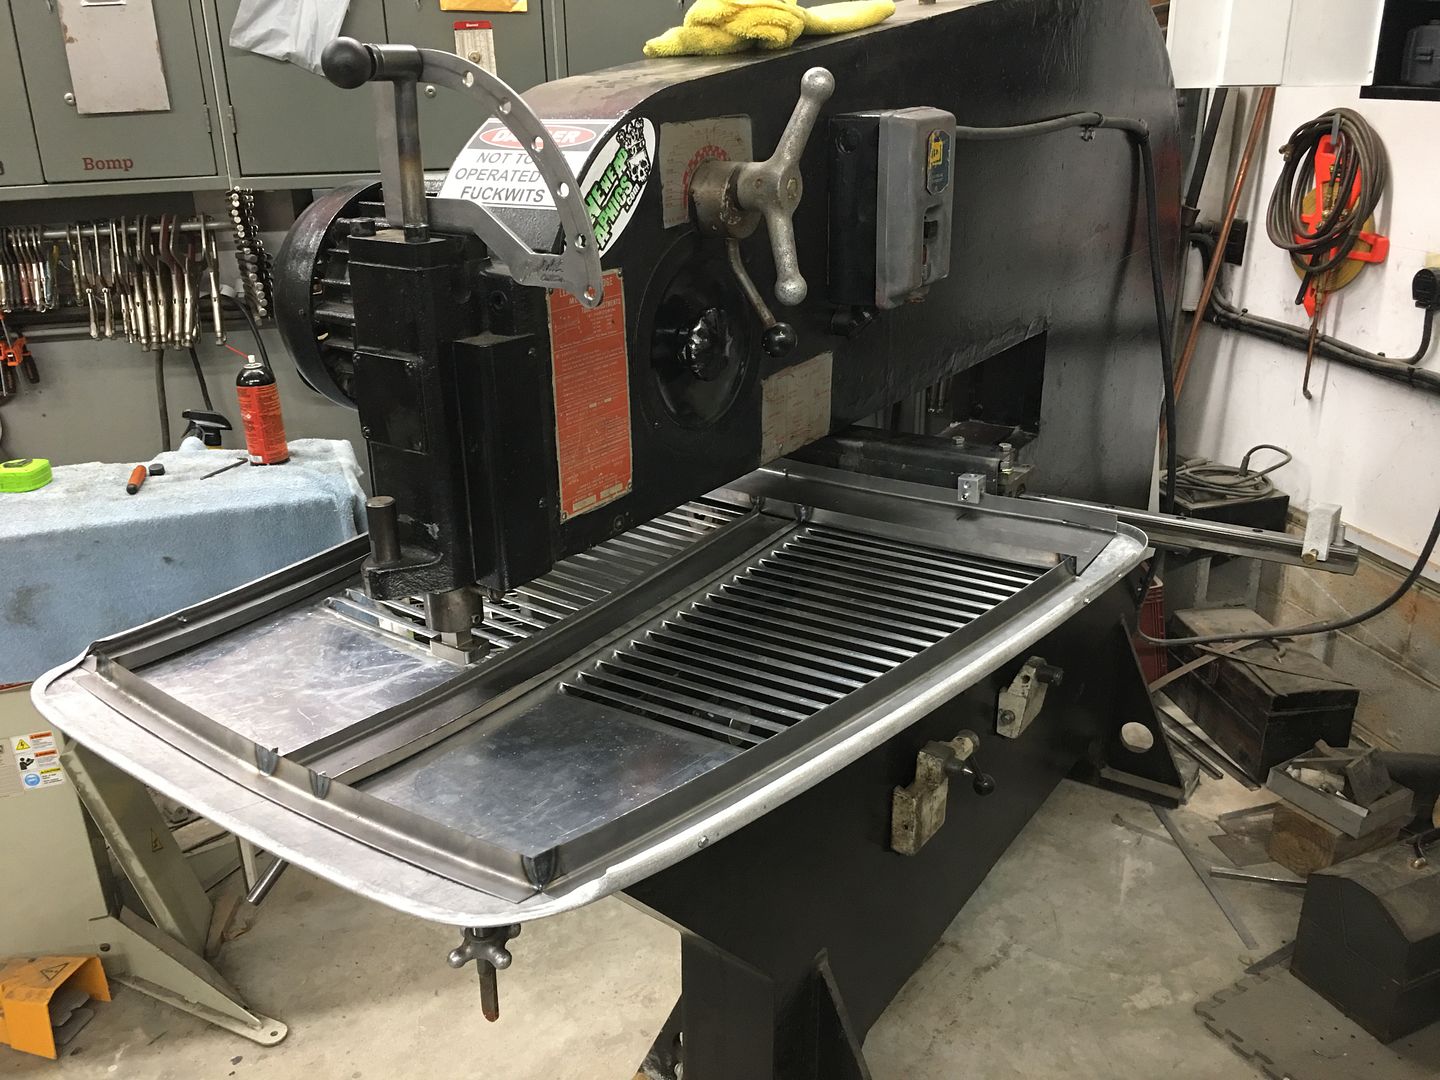
Time lapse:
https://www.youtube.com/watch?v=Y0zjX58BDgM
Modifying our radius fixture for louvering the boot:
https://www.youtube.com/watch?v=2_0rl50XxzM
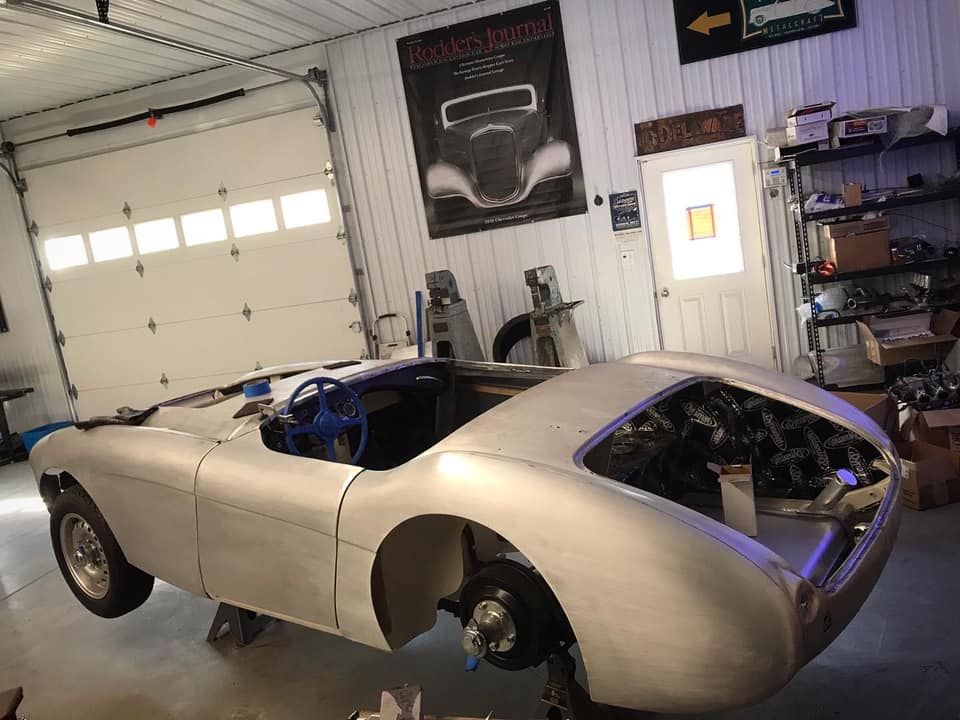
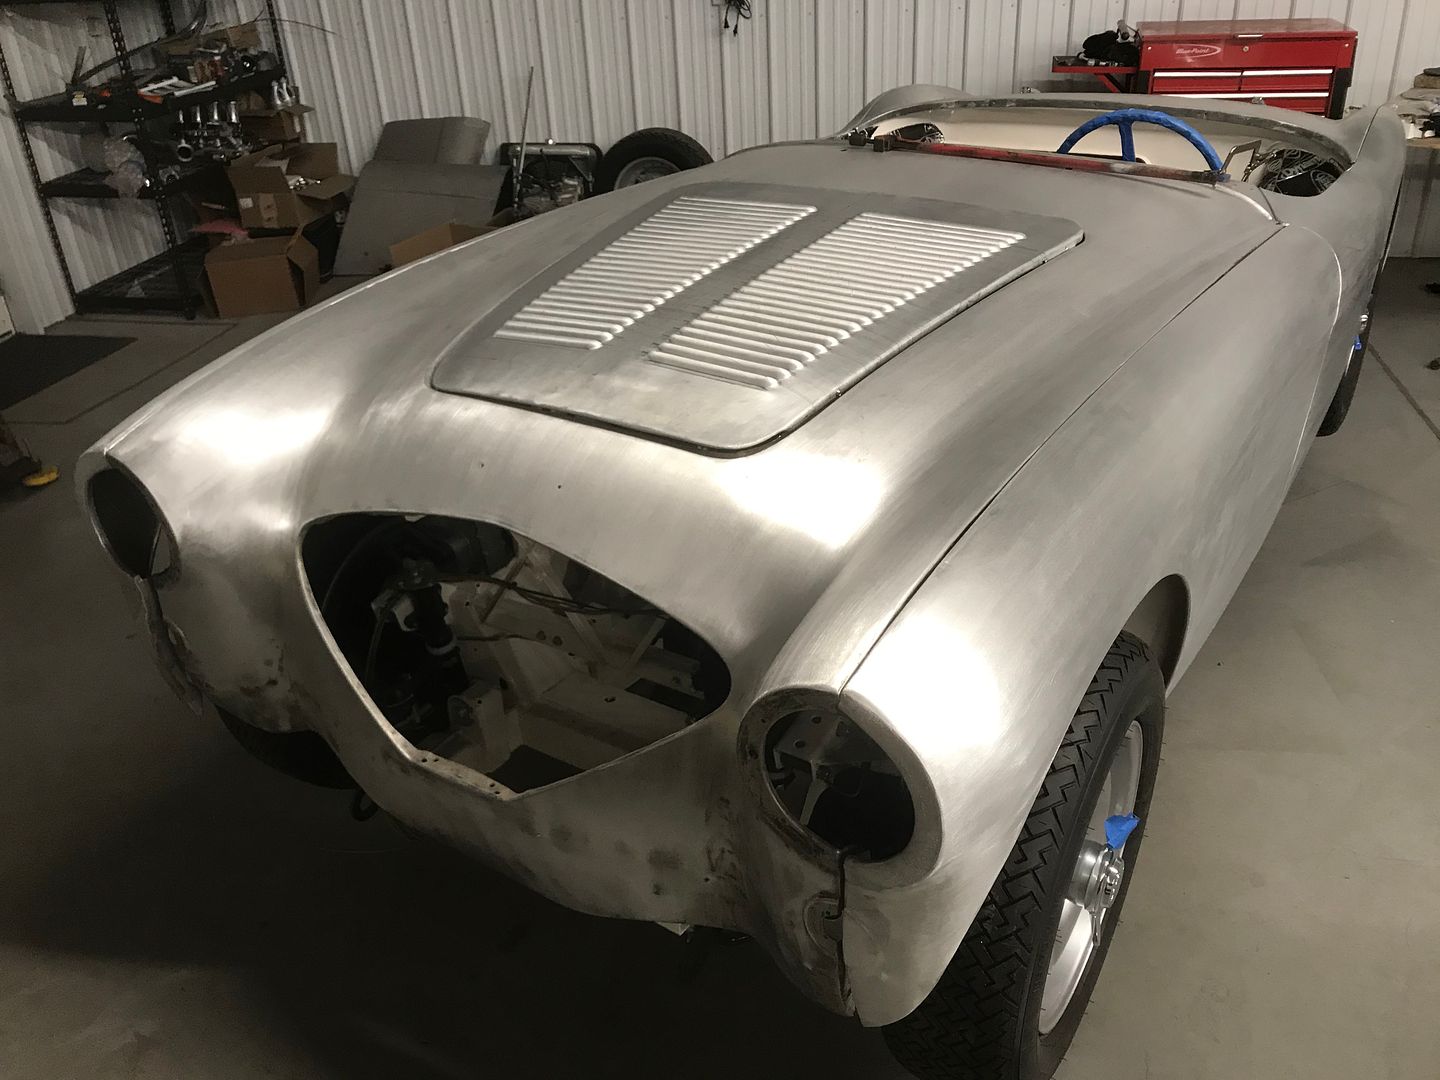
Here's pictures of the project car in Cody's shop for reference. Photo credit Traditional Metalcraft. Follow the progress on his build @eastcoastchanneljob on IG or Traditional Metalcraft on FB. This car is sporting a Honda S2000 drivetrain, should be a handful..

Robert
-
04-30-2020 04:55 AM #1493
CHR Member
- Join Date
- Apr 2001
- Location
- Salado
- Car Year, Make, Model: 32, 40 Fords,
- Posts
- 10,898
Those louvers are fantastic. Prepping, painting, and polishing them...………...that's another matter. Fortunately not yours.....
Your Uncle Bob, Senior Geezer Curmudgeon
It's much easier to promise someone a "free" ride on the wagon than to urge them to pull it.
Luck occurs when preparation and opportunity converge.
-
04-30-2020 06:01 AM #1494
CHR Member
- Join Date
- Jun 2008
- Location
- Leonardtown
- Car Year, Make, Model: Walking
- Posts
- 1,228
Bob, Cody says this one is keeping its bare finish, all aluminum.. But I'm with you.. We did go through a bit of practice samples and adjustment on the dies to minimize any burrs, but you still get them.. Previously we had riveted the "stop angles" to the skin and relied on filling holes. Since this will be bare aluminum, we figured any welds would be more visible, so the internal frame stop device was made, its screwed to the outer flange where things will be less noticeable..Last edited by MP&C; 04-30-2020 at 06:04 AM.
Robert
-
05-04-2020 09:19 AM #1495
CHR Member
- Join Date
- Jun 2008
- Location
- Leonardtown
- Car Year, Make, Model: Walking
- Posts
- 1,228
So yeah, we work on just about anything. File this one away under "everything's a tool". You need to be able to look at the problem, and figure out what you have readily available as a solution (especially when working weekends)
Vince is still milking the media blast job..
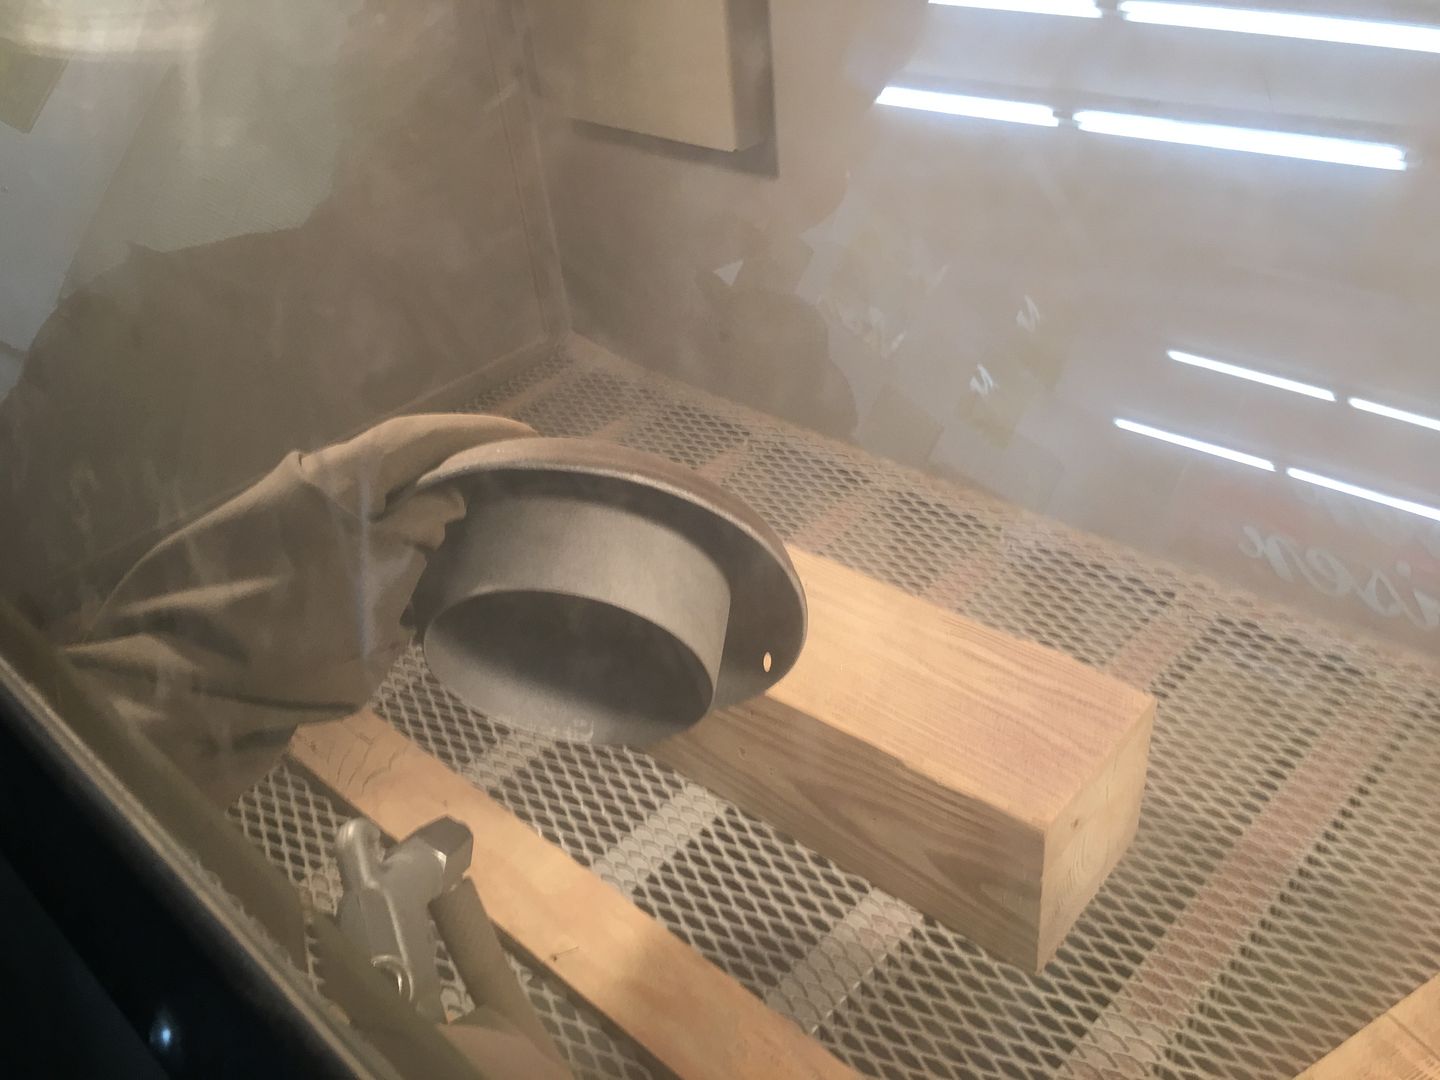
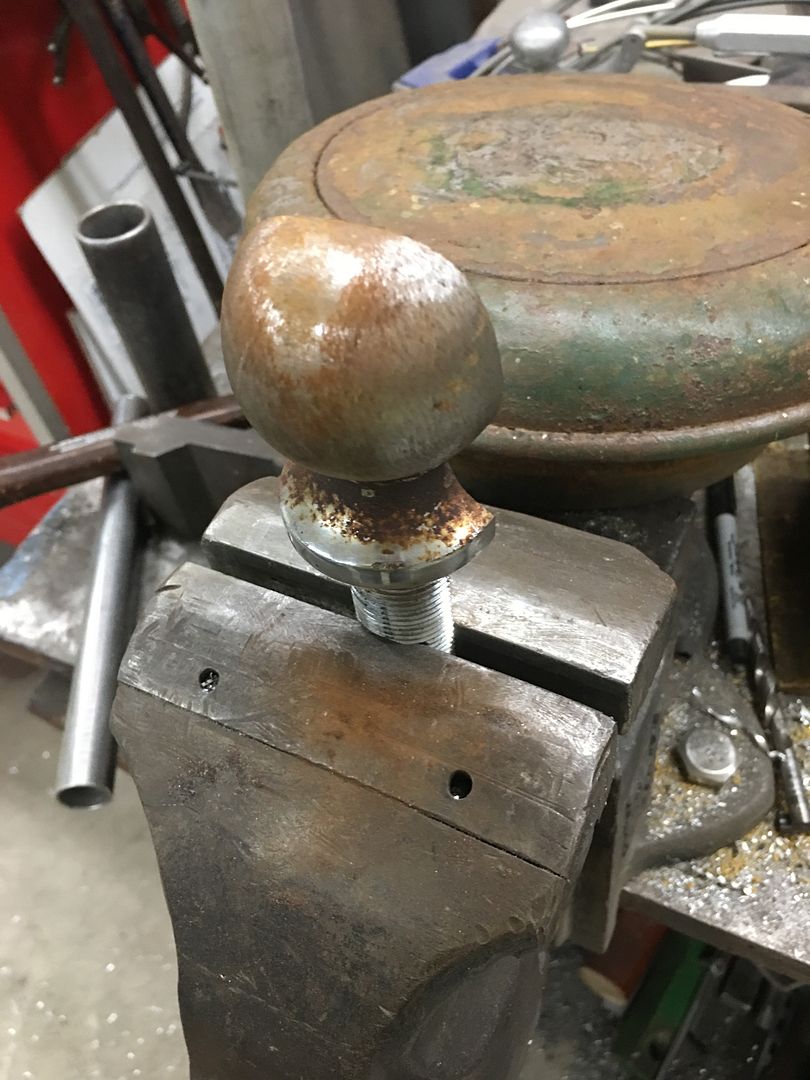
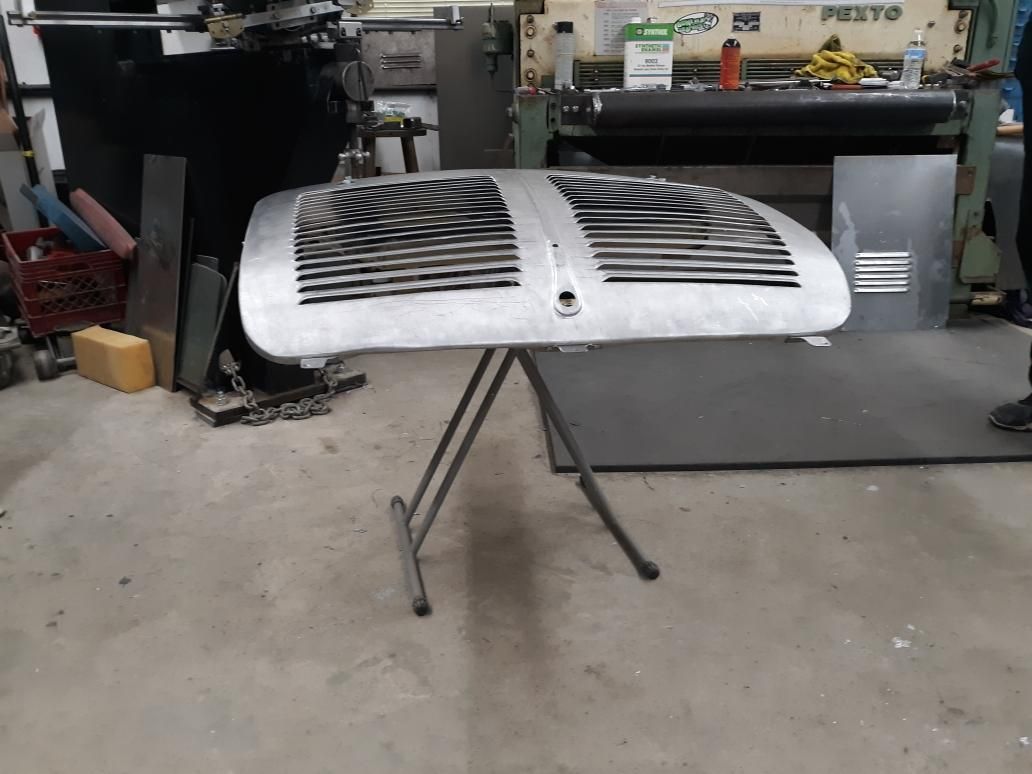
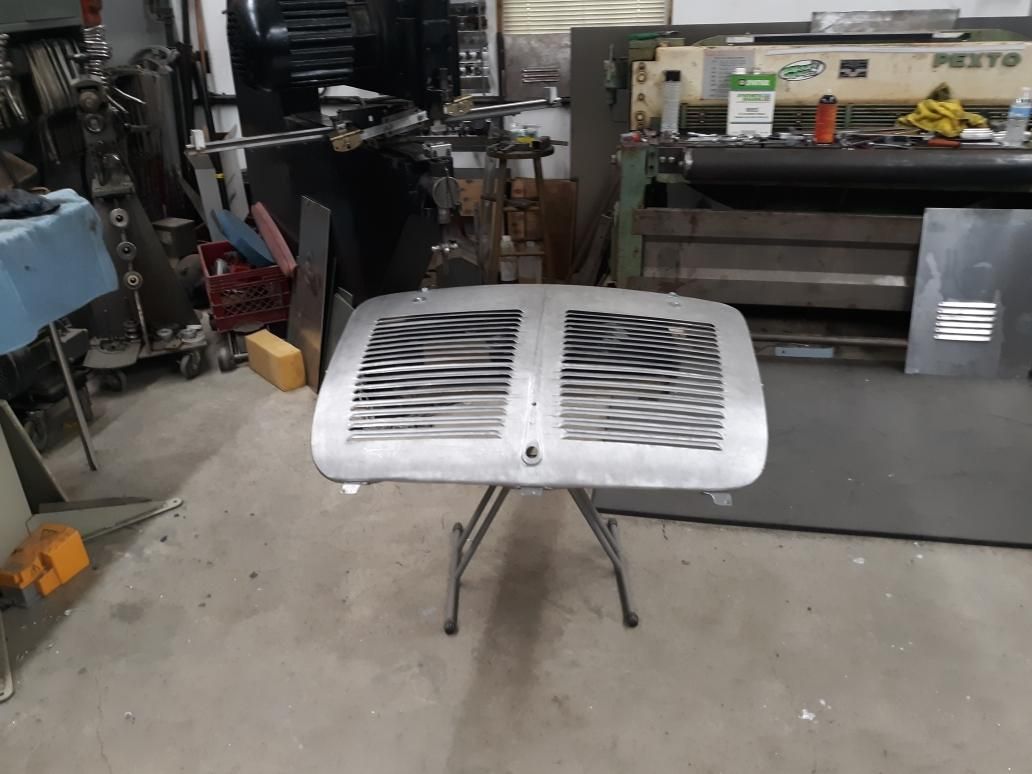
Another of the lids had been used and abused with a hammer over it's life, the center was concaved inward, the outer rim had several flat spots. So while Vince was busy, I came up with a dent removal tool to help straighten out the next lid.
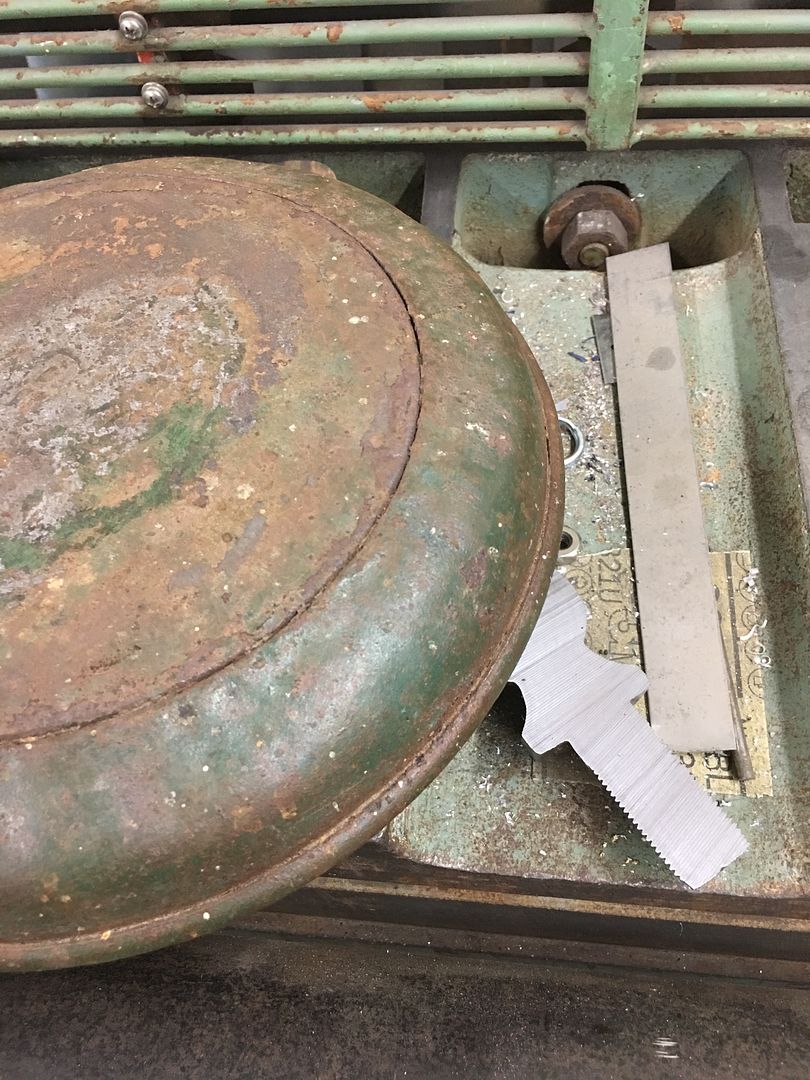
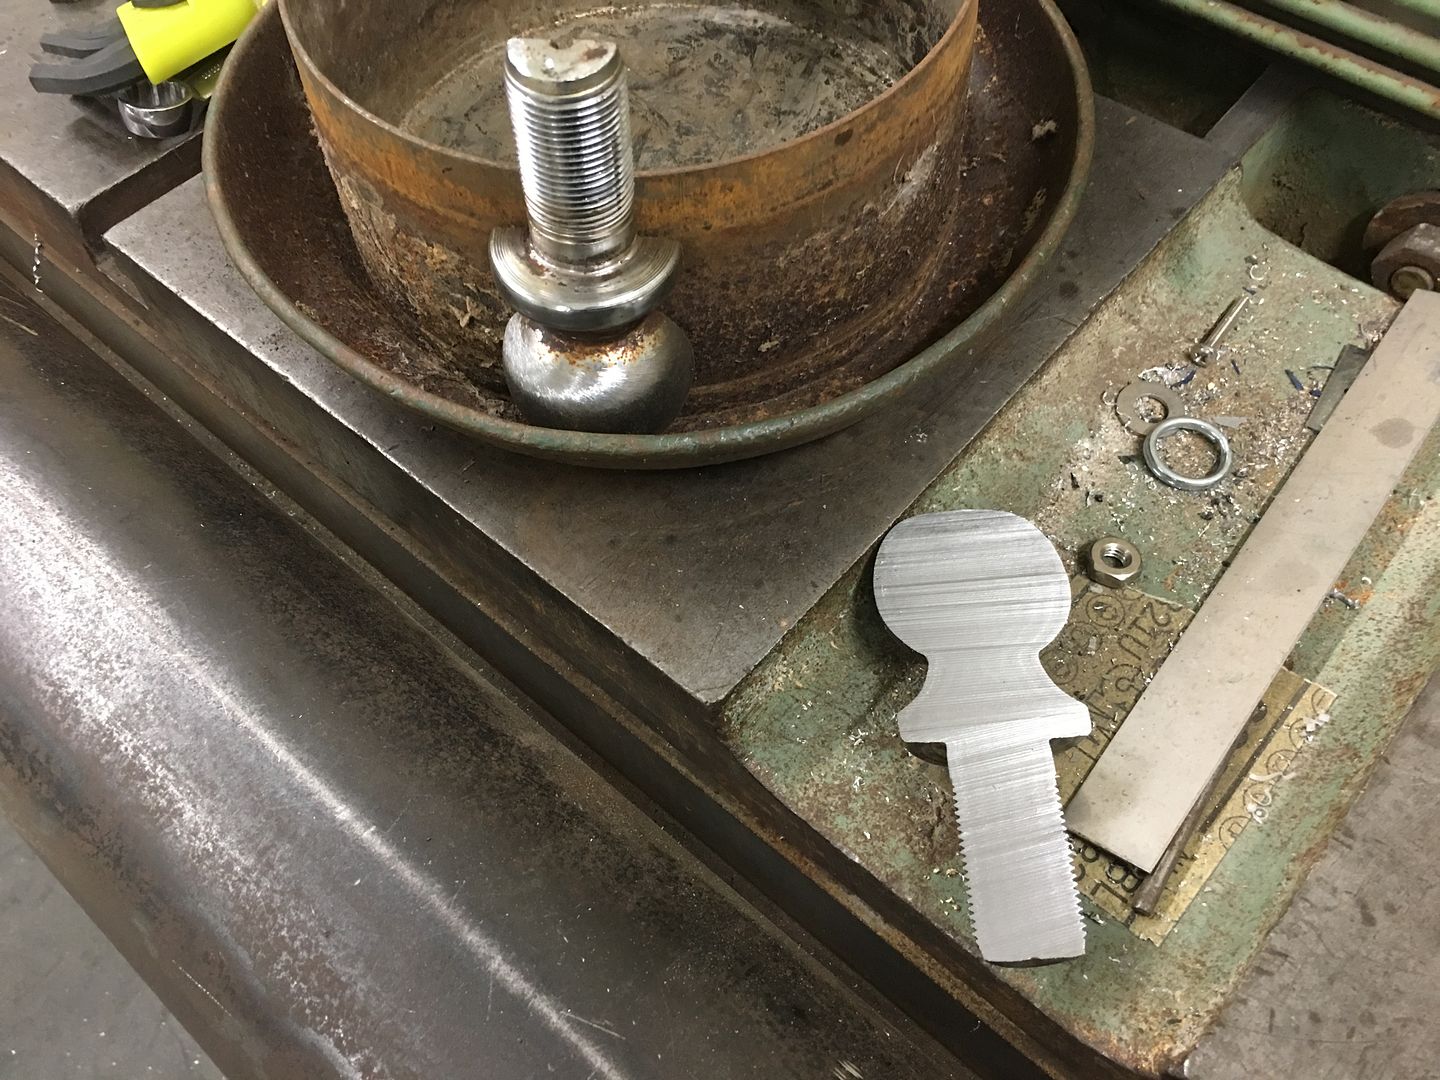

The half hitch ball was used as a punch straight down into the lid to add a consistent shape back to the outer ring. Some hammer and dolly work straightened the center concave, giving it a slight crown. A deep dent was heated to make it more pliable, the punch pushed to the bottom and used as fulcrum to push the dent outward (heated spot)
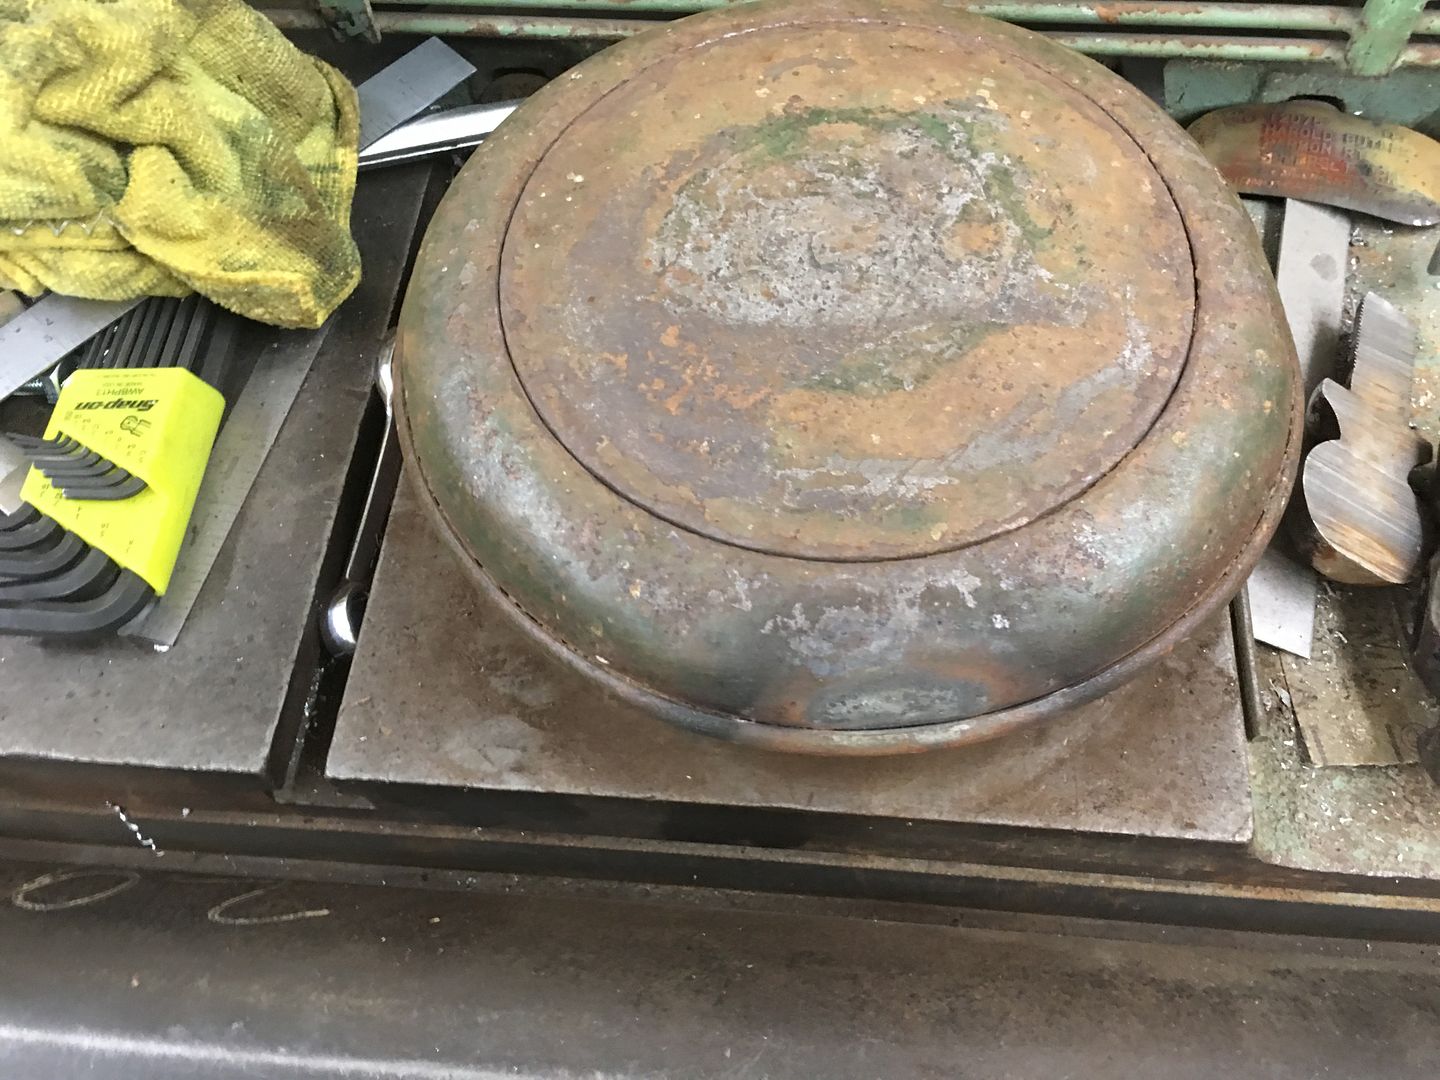
Then our "punch" was clamped in the vise to use as a post dolly. The lid was positioned where any low spots were placed against the "dolly" and hammering around the perimeter of the dent raised it outwards..
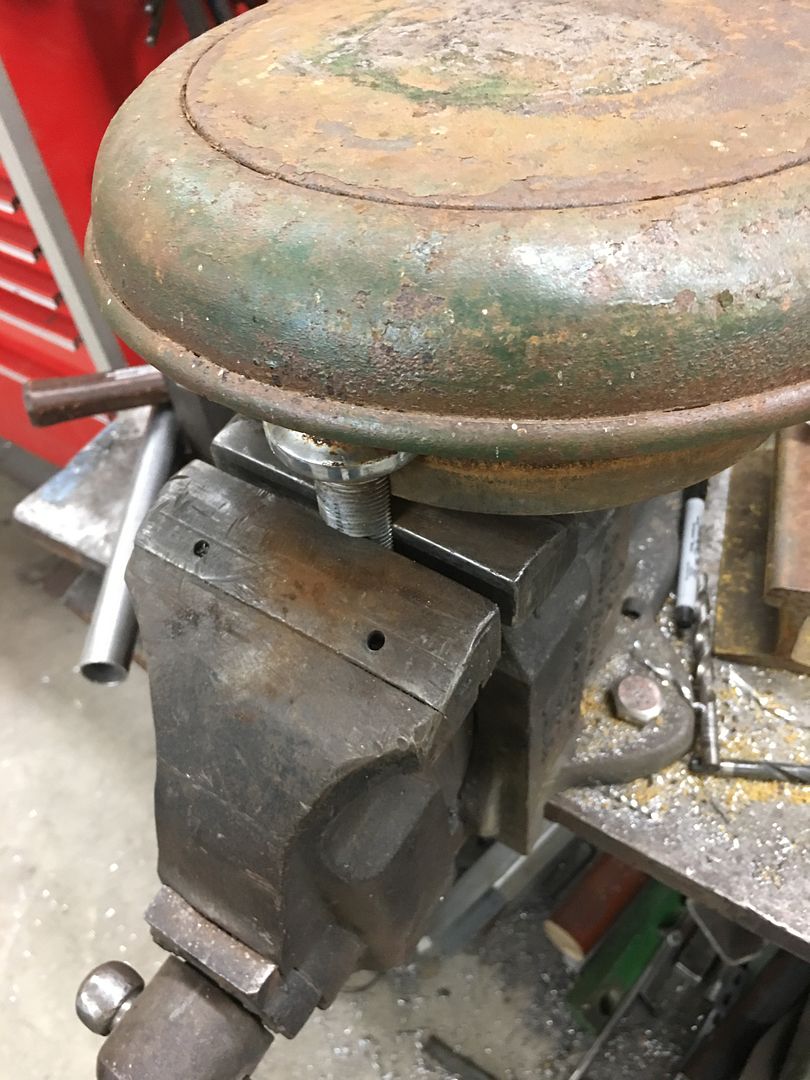
Some fine tuning left, but this is much better than where we started:
https://www.youtube.com/watch?v=80YGom51gc0
.Robert
-
05-04-2020 09:03 PM #1496
CHR Member
- Join Date
- May 2005
- Location
- Tataraimaka NZ
- Car Year, Make, Model: `47 Ford sedan, A.C.Cobra replica.
- Posts
- 2,895
Words fail me.
That is bloody clever.johnboy
Mountain man. (Retired.)
Some mistakes are too much fun to be made only once.
I don't know everything about anything, and I don't know anything about lots of things.
'47 Ford sedan. 350 -- 350, Jaguar irs + ifs.
'49 Morris Minor. Datsun 1500cc, 5sp manual, Marina front axle, Nissan rear axle.
'51 Ford school bus. Chev 400 ci Vortec 5 sp manual + Gearvendors 2sp, 2000 Chev lwb dually chassis and axles.
'64 A.C. Cobra replica. Ford 429, C6 auto, Torana ifs, Jaguar irs.
-
05-14-2020 04:46 AM #1497
CHR Member
- Join Date
- Jun 2008
- Location
- Leonardtown
- Car Year, Make, Model: Walking
- Posts
- 1,228
Thanks John!
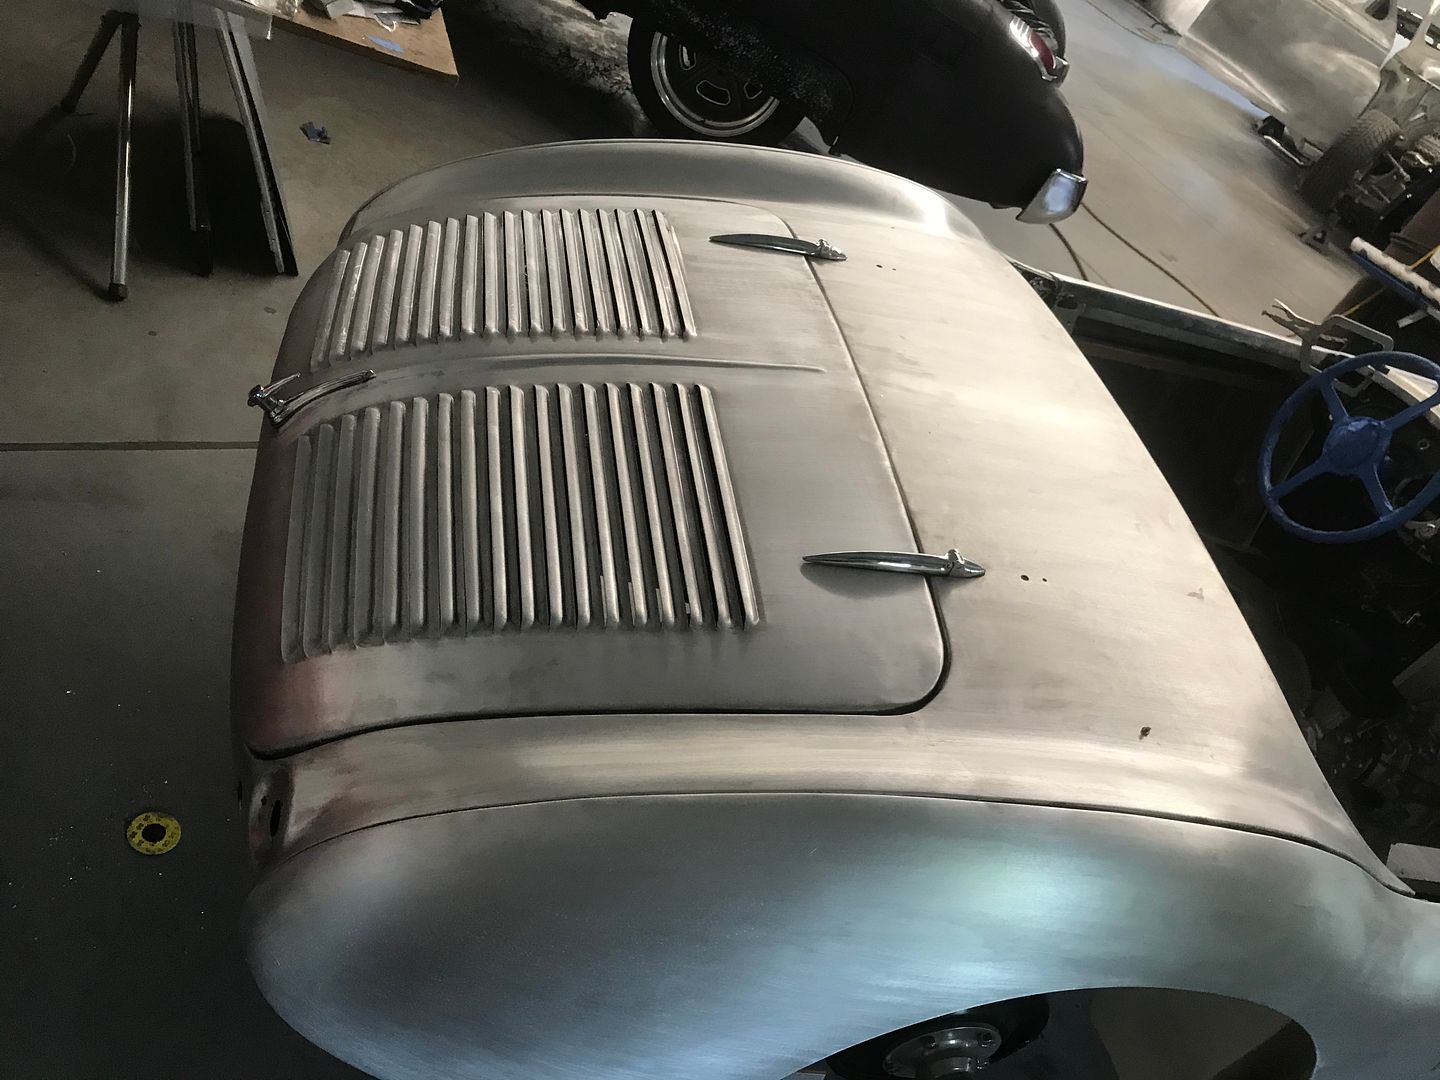
Cody set the hood (bonnet) on the Austin Healey to get a look see on the louvers....
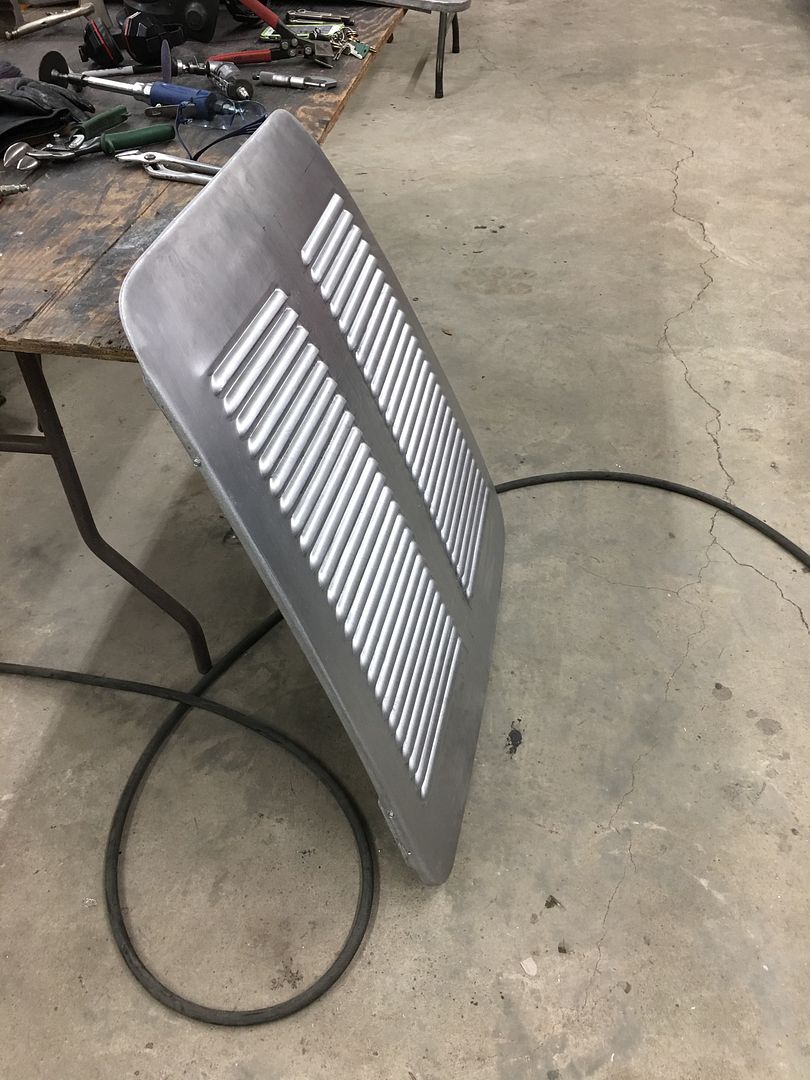
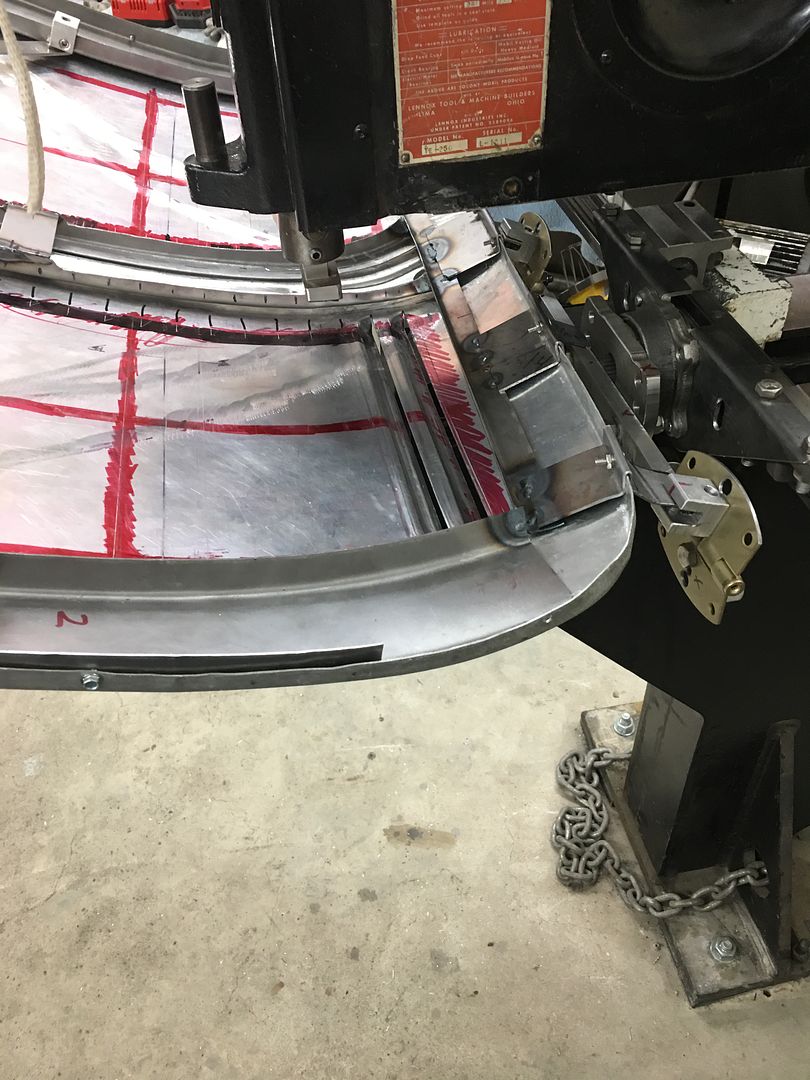
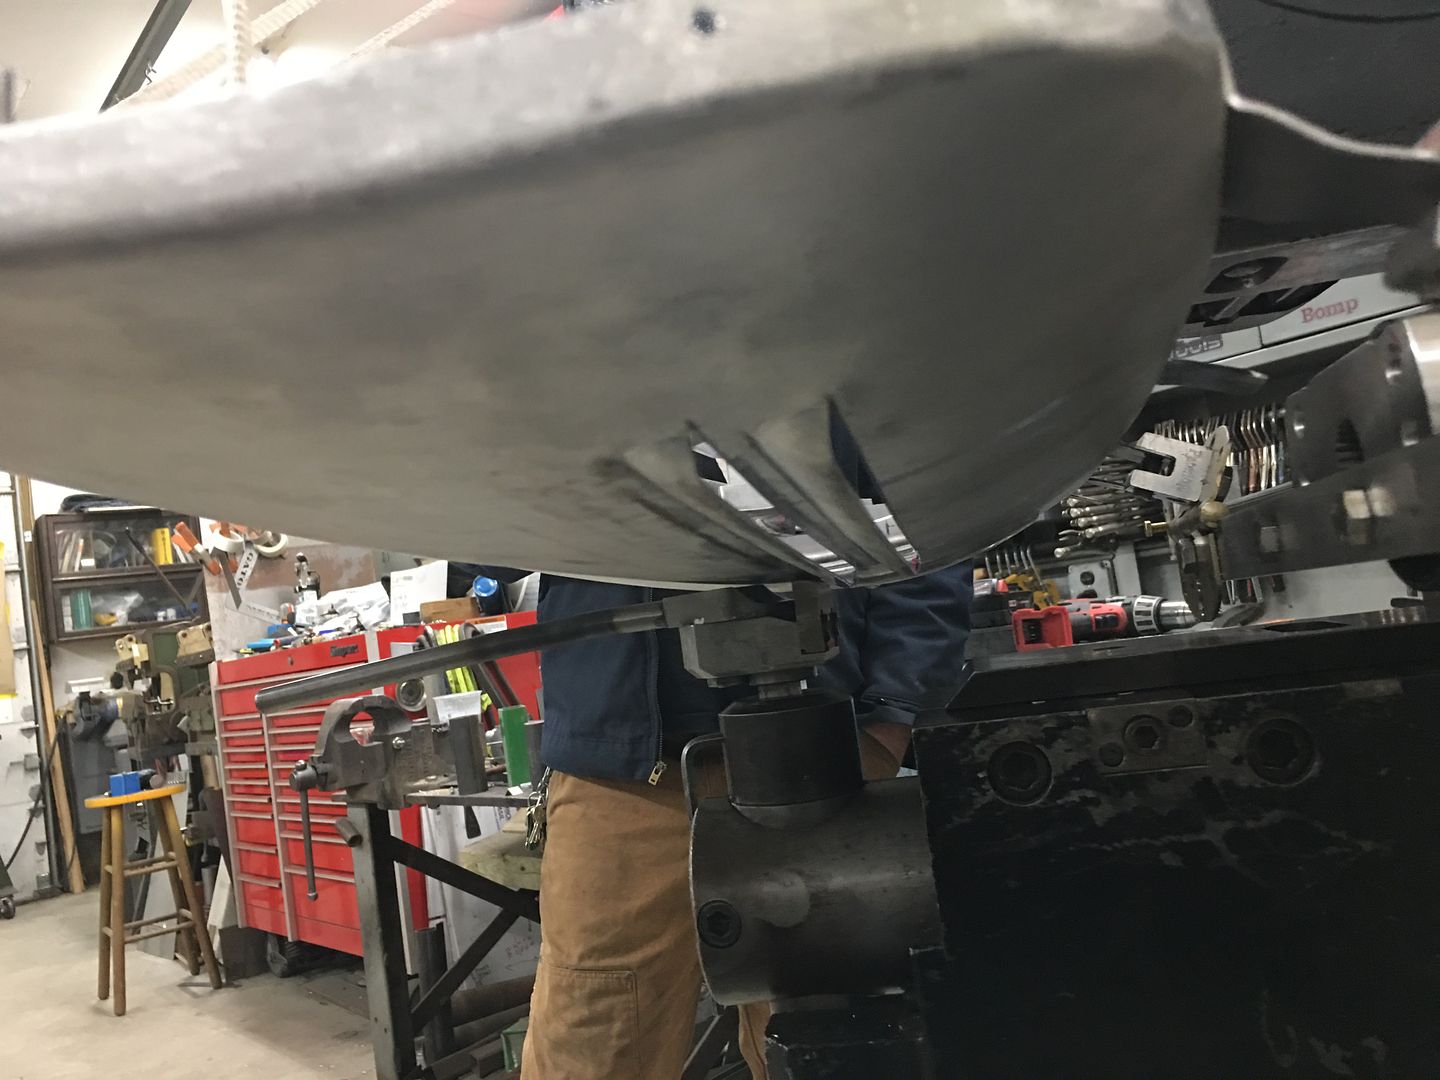
…..and this past Tuesday he came back to the shop so we could finish up the louvers in the trunk lid (boot). I must say this was the most involved and challenging louver job we have done so far. The trunk lid has a lot of crown, and with a 6” rise in the center, we needed to use the rotation fixture ala Mini Cooper wheel hub. We added to this a hinge mechanism to allow rotation up and down. The limits of the machine's throat height and high crown also meant we'd have to punch half the louvers from back end first, then rotate the lid and tooling and approach the rest from the front end. Now given the extreme flex/twist that the .050 aluminum is prone to, we needed to make sure the cut pattern would be parallel to the last set at the point we rotated from front to back. This required some "gusset" straps clamped in place to limit the twist.
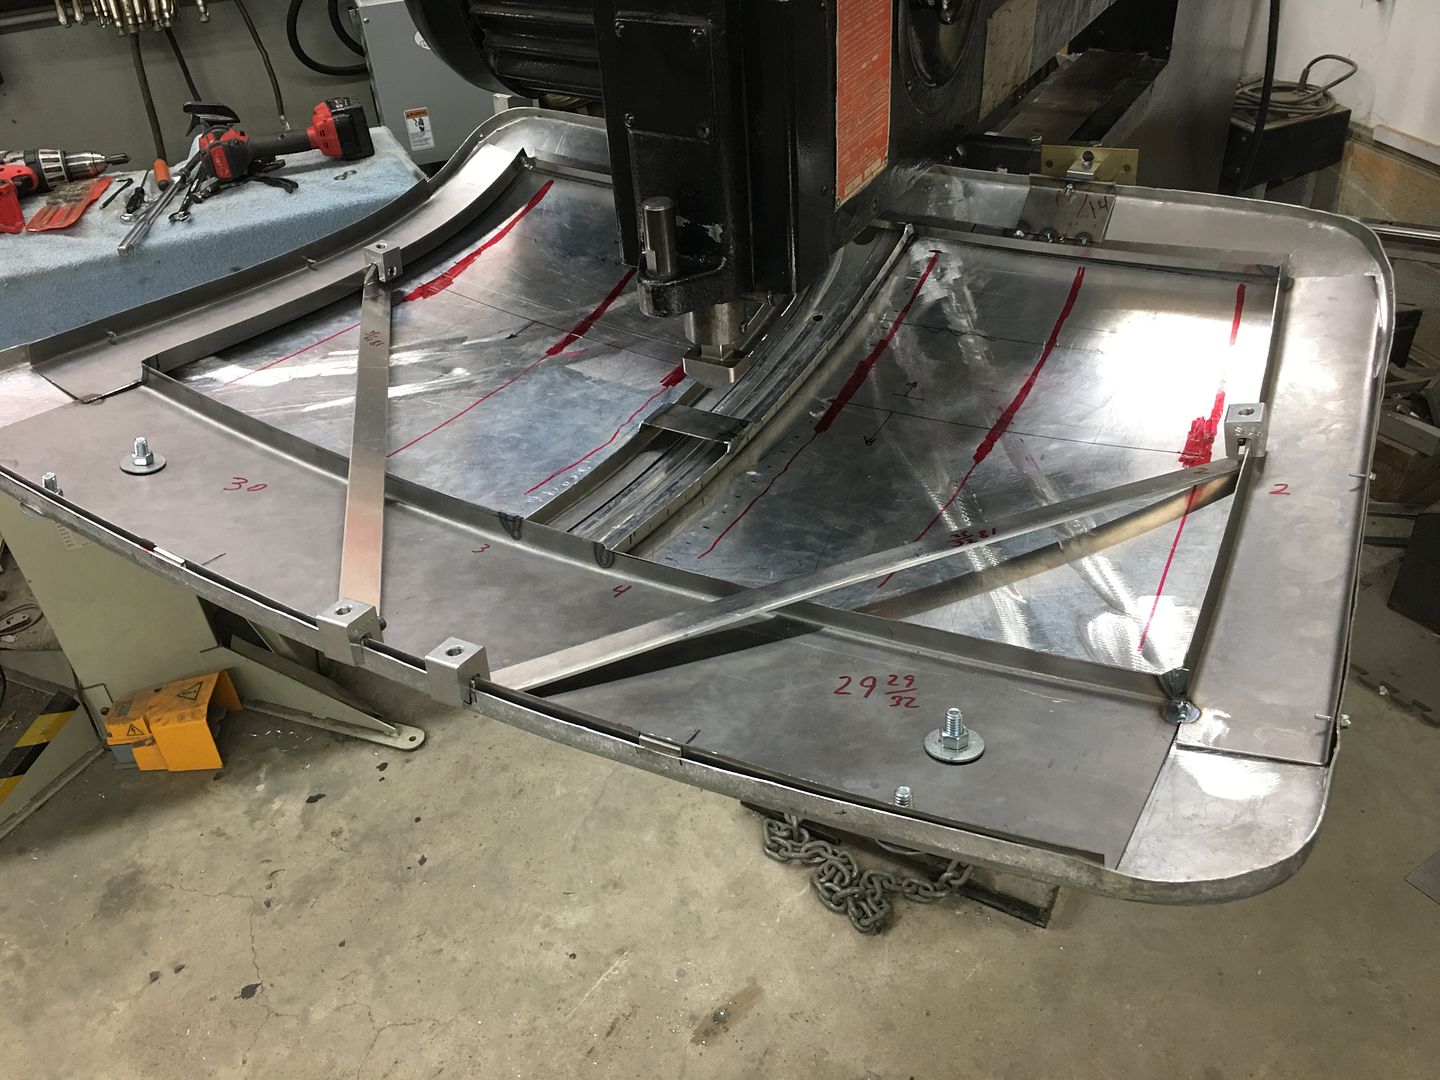
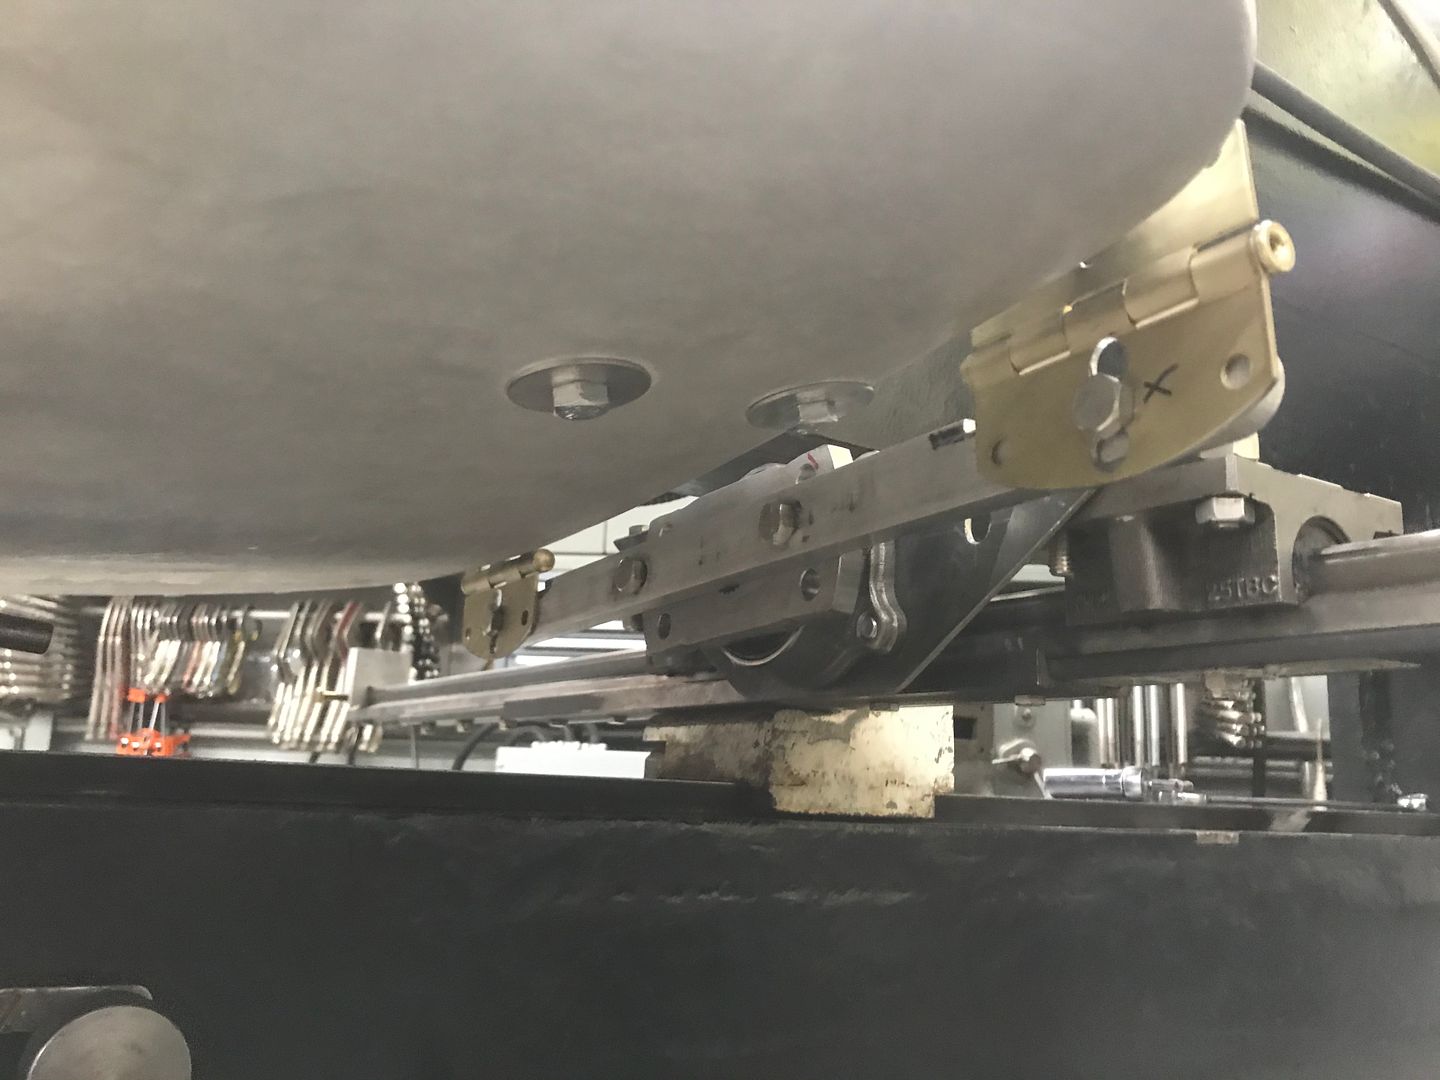
Before this was added, any twist of the panel would change the outer limits of the cut +/- 1/4". Here's the wheel hub arrangement along with the hinges for up and down adjustment. We needed adjustments along 3 different axis to be able keep all the louvers running true and parallel.

….and we're off....
At this point we were 4 hours in to measuring, clamping, test run (drag the cutter against the panel to scribe the location), rotate 180 front to back, and test the pattern again, just to get to where we could start cutting. …..and another 4 hours to go before we finished. All told, with the time Vince and I spent Saturday working out clamping methods and other details, the layout was approx 4 times that of what it took to do the actual cutting.

….and the time lapse video of the process..
https://www.youtube.com/watch?v=NMmm...ature=youtu.be
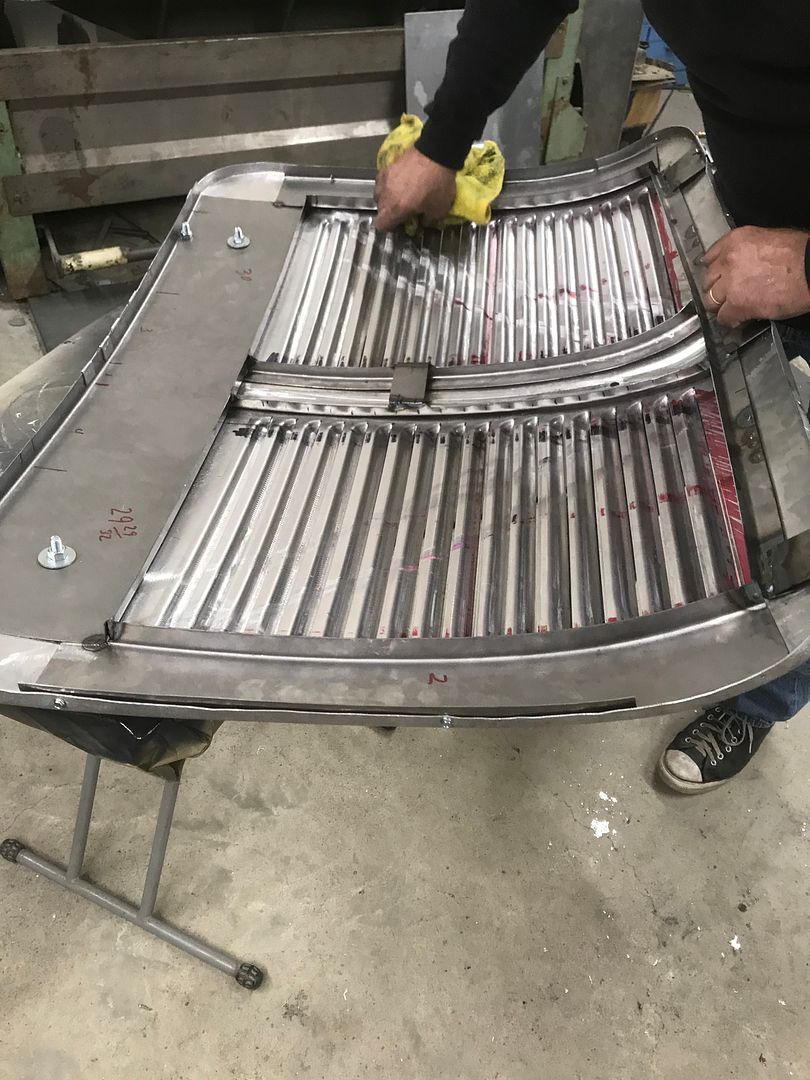
Yesterday Cody sent me pictures of the trunk lid installed.. These louvers really change the attitude of the car... Badass....
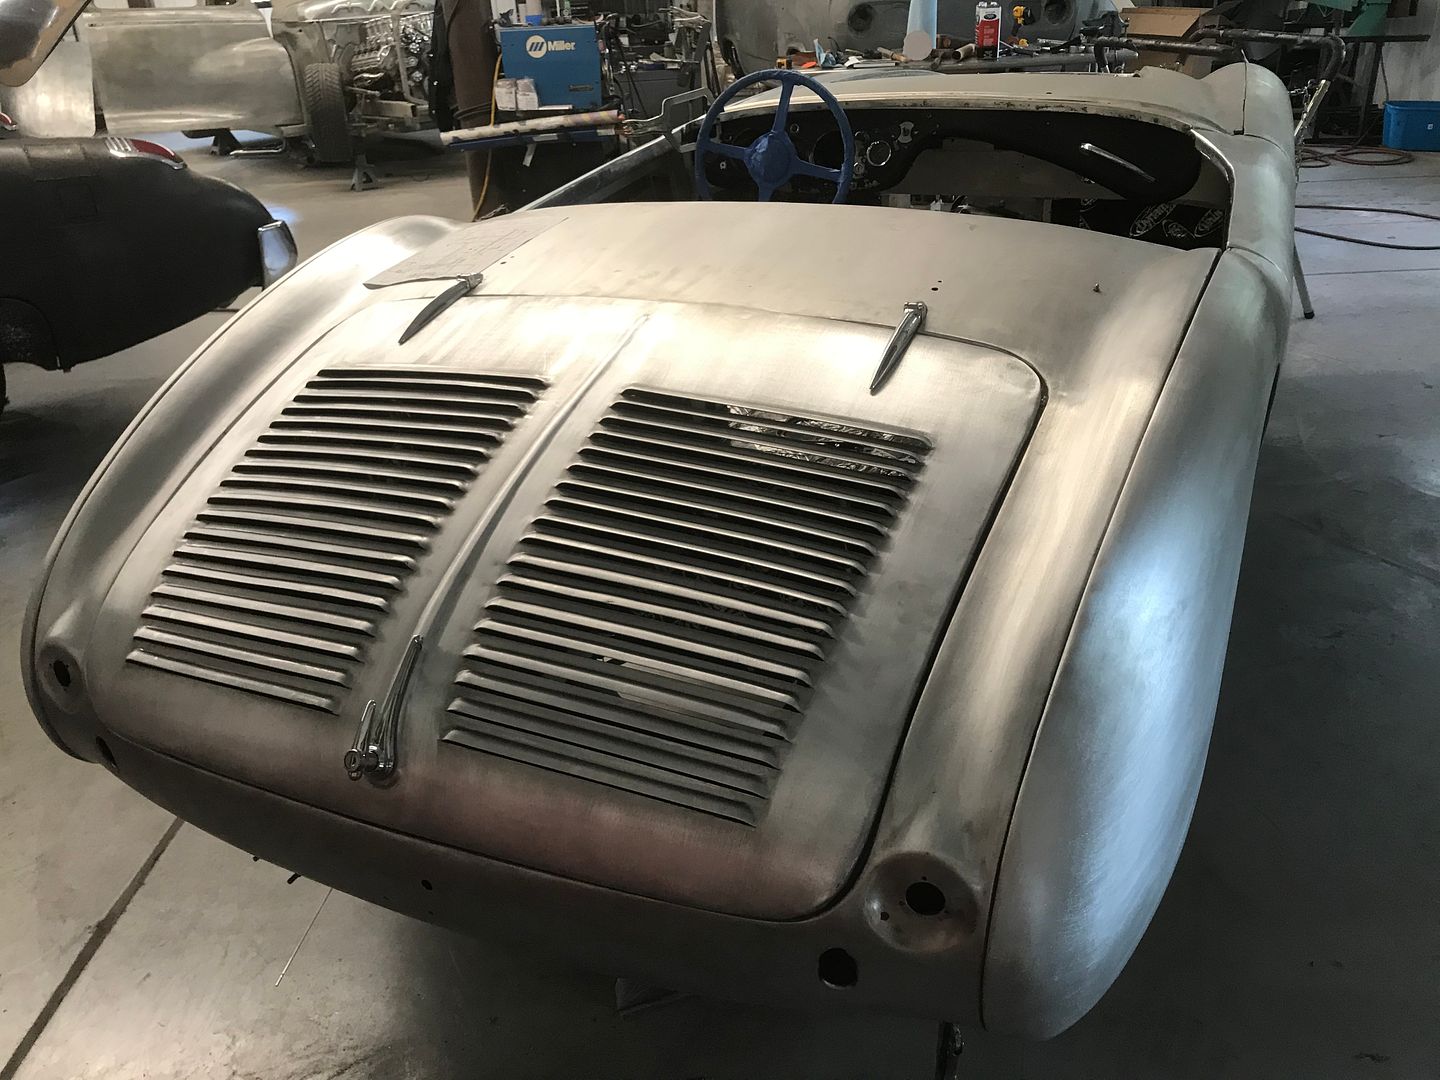
Robert
-
05-14-2020 05:08 AM #1498
CHR Member
- Join Date
- Jan 2006
- Location
- Constantine
- Car Year, Make, Model: 57 chevy 2 dr wagon
- Posts
- 9,476
hard to say anything more than WOWCharlie
Lovin' what I do and doing what I love
Some guys can fix broken NO ONE can fix STUPID
W8AMR
http://fishertrains94.webs.com/
Christian in training
-
05-14-2020 05:25 AM #1499
CHR Member
- Join Date
- Apr 2001
- Location
- Salado
- Car Year, Make, Model: 32, 40 Fords,
- Posts
- 10,898
What Charlie said!
Although, the suitcases might get wet if it rains...…….Your Uncle Bob, Senior Geezer Curmudgeon
It's much easier to promise someone a "free" ride on the wagon than to urge them to pull it.
Luck occurs when preparation and opportunity converge.
-
05-14-2020 05:40 AM #1500
CHR Member
- Join Date
- Jun 2008
- Location
- Leonardtown
- Car Year, Make, Model: Walking
- Posts
- 1,228
Thanks guys! Cody has an inner lid fabricated so they can have the look of louvers and any rain should drain to the bottomRobert
 Reply With Quote

Posting Permissions
- You may not post new threads
- You may not post replies
- You may not post attachments
- You may not edit your posts

i've enjoyed the years here . made a lot of friends. most who have left. i see no reason to continue with this so hope to see you somewhere else. i dont think this site will ever be back. it's lived...
Dead!