


 747Likes

Results 496 to 510 of 1004
 LinkBack URL
 About LinkBacks
-
02-12-2015 03:24 PM #496
 CHR Member/Contributor

- Join Date
- Sep 2007
- Location
- Gardner, KS
- Car Year, Make, Model: '33 HiBoy Coupe, '32 HiBoy Roadster
- Posts
- 11,245
Steve, Originally Posted by roadster32

Like I said, I totally misinterpreted how your filler panel was going to be done, and was visualizing an extension of the hood side to fill the gap vs a body panel to mate up with the hood edge, but that wouldn't allow the hood to swing, so it was a "DUH" moment for me, an I apologize for the interruption. I totally enjoy your innovative approach, and appreciate that you take time to show us your steps.Roger
Enjoy the little things in life, and you may look back one day and realize that they were really the BIG things.
-
Advertising

- Google Adsense
- REGISTERED USERS DO NOT SEE THIS AD
-
02-12-2015 05:16 PM #497
CHR Member
- Join Date
- Oct 2007
- Location
- Petaluma
- Car Year, Make, Model: 48 Ford F1
- Posts
- 9,795
Cheers Steve you've accomplished what Willy's should have done in the first place. Your version is stellar compared to theirs!
Maybe this mind the gap is better?

"  "No matter where you go, there you are!" Steve.
-
02-12-2015 06:45 PM #498
CHR Member
- Join Date
- Feb 2008
- Location
- Caldwell
- Car Year, Make, Model: 34 ford 3 window/461 pontiac
- Posts
- 918
Steve,never get tired of works of art.
Jack.www.clubhotrod.com/forums/showthread.php?t=44081
-
02-13-2015 12:41 AM #499
CHR Member
- Join Date
- Apr 2009
- Location
- watford
- Car Year, Make, Model: 26T Coupe, 32 Roadster, 41 Willys Coupe
- Posts
- 2,363
No problem Roger, asking questions is good, its how we all learn stuff Originally Posted by rspears
.Its aweful lonesome in the saddle since my horse died.
-
02-13-2015 12:43 AM #500
CHR Member
- Join Date
- Apr 2009
- Location
- watford
- Car Year, Make, Model: 26T Coupe, 32 Roadster, 41 Willys Coupe
- Posts
- 2,363
Steve funnily enough I find that more appealing Originally Posted by stovens

.Its aweful lonesome in the saddle since my horse died.
-
02-13-2015 12:42 PM #501
CHR Member
- Join Date
- Apr 2011
- Location
- Prairie City
- Car Year, Make, Model: 40 Ford Deluxe, 68 Corvette, 72&76 K30
- Posts
- 7,301
- Blog Entries
- 1
Watch out for that sand.
Ryan
1940 Ford Deluxe Tudor 354 Hemi 46RH Electric Blue w/multi-color flames, Ford 9" Residing in multiple pieces
1968 Corvette Coupe 5.9 Cummins Drag Car 11.43@130mph No stall leaving the line with 1250 rpm's and poor 2.2 60'
1972 Chevy K30 Longhorn P-pumped 24v Compound Turbos 47RH Just another money pit
1971 Camaro RS 5.3 BTR Stage 3 cam, SuperT10
Tire Sizes
-
02-13-2015 12:45 PM #502
CHR Member
- Join Date
- Apr 2011
- Location
- Prairie City
- Car Year, Make, Model: 40 Ford Deluxe, 68 Corvette, 72&76 K30
- Posts
- 7,301
- Blog Entries
- 1
Great work on that filler piece. I'm glad to see I'm not the only one who has half the parts for his project he's working on, in that project at the same time. Have to love trucks!!!Ryan
1940 Ford Deluxe Tudor 354 Hemi 46RH Electric Blue w/multi-color flames, Ford 9" Residing in multiple pieces
1968 Corvette Coupe 5.9 Cummins Drag Car 11.43@130mph No stall leaving the line with 1250 rpm's and poor 2.2 60'
1972 Chevy K30 Longhorn P-pumped 24v Compound Turbos 47RH Just another money pit
1971 Camaro RS 5.3 BTR Stage 3 cam, SuperT10
Tire Sizes
-
02-14-2015 10:07 AM #503
CHR Member
- Join Date
- Apr 2009
- Location
- watford
- Car Year, Make, Model: 26T Coupe, 32 Roadster, 41 Willys Coupe
- Posts
- 2,363
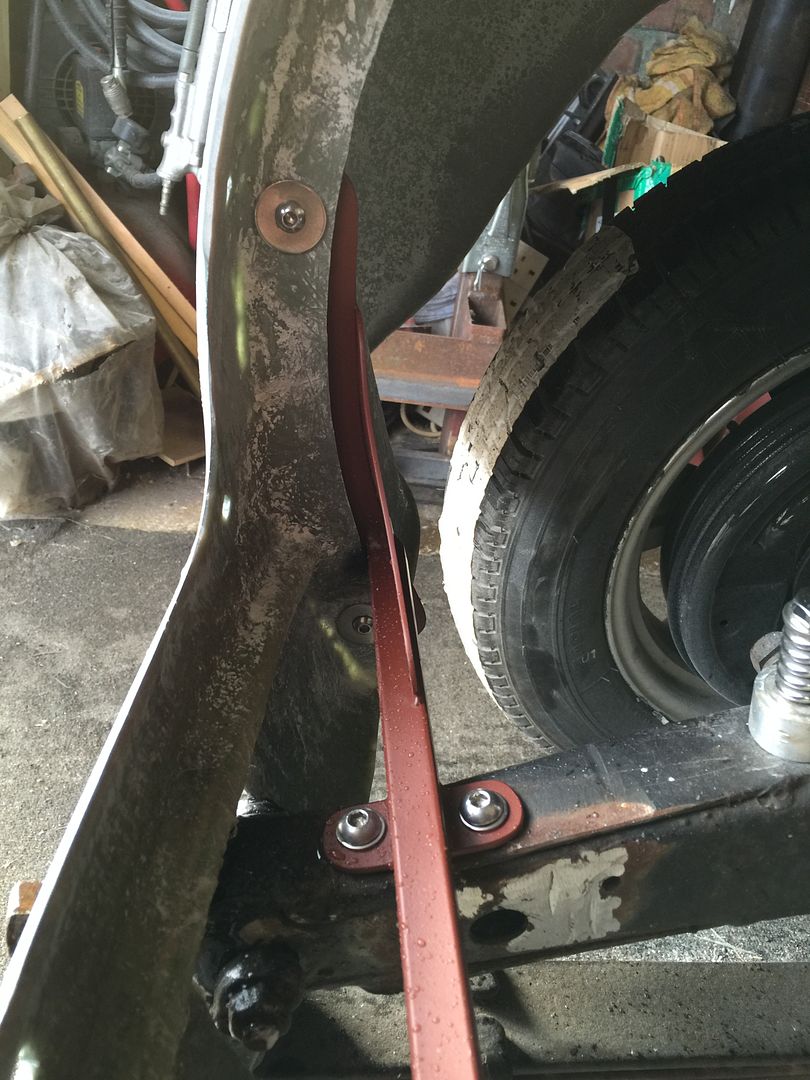
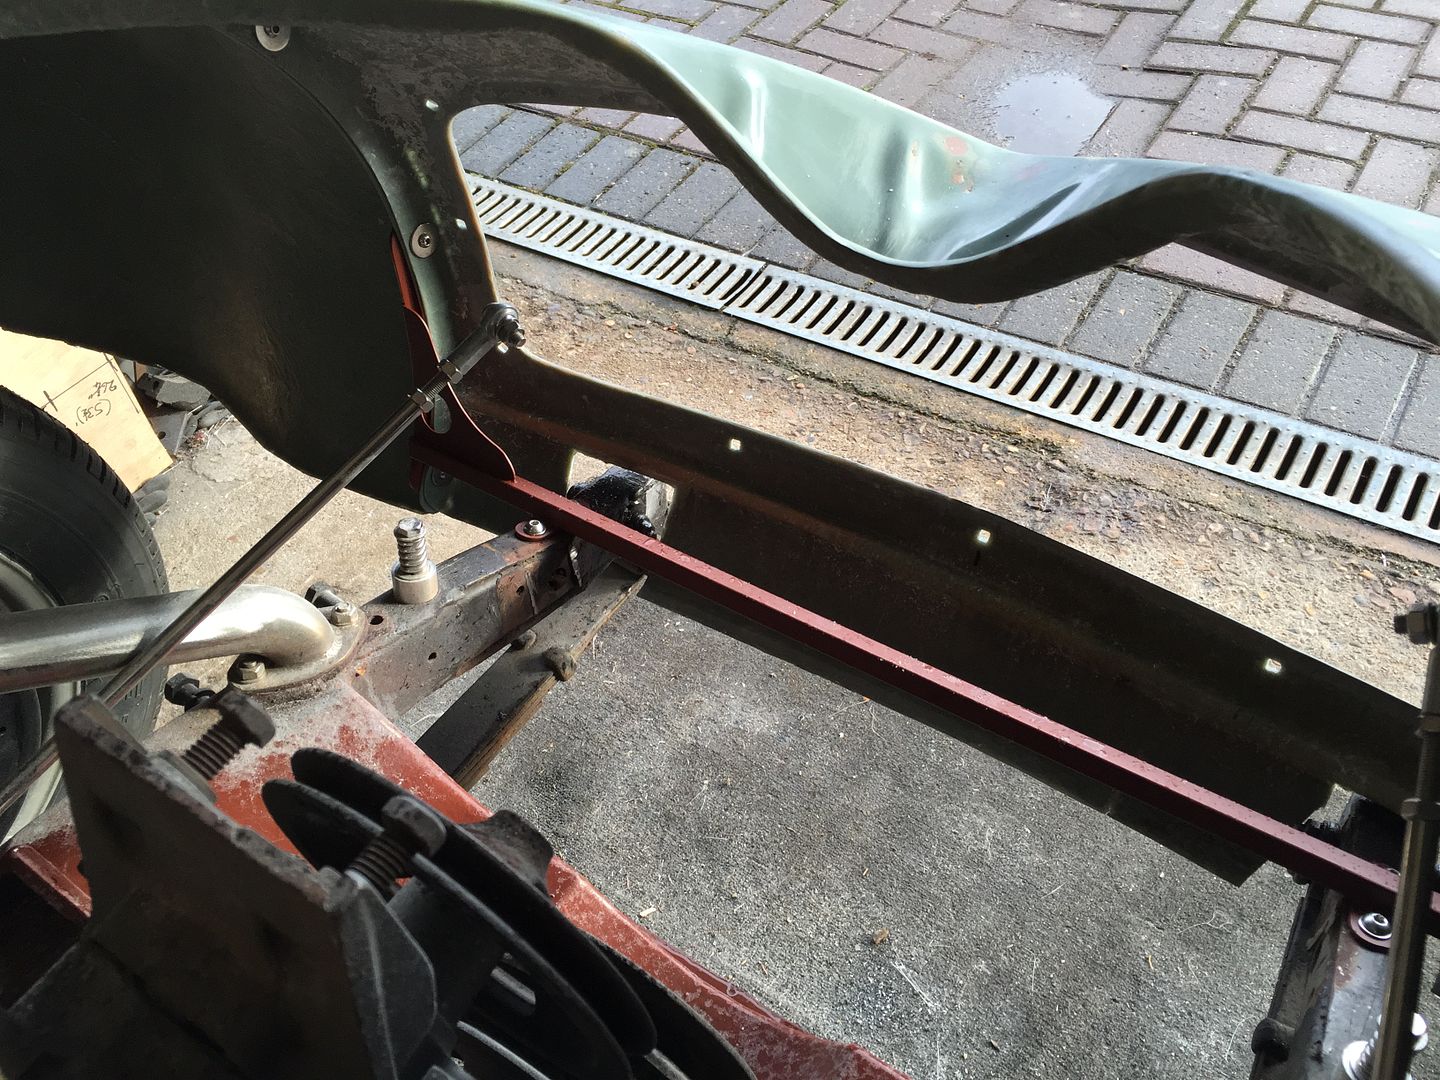
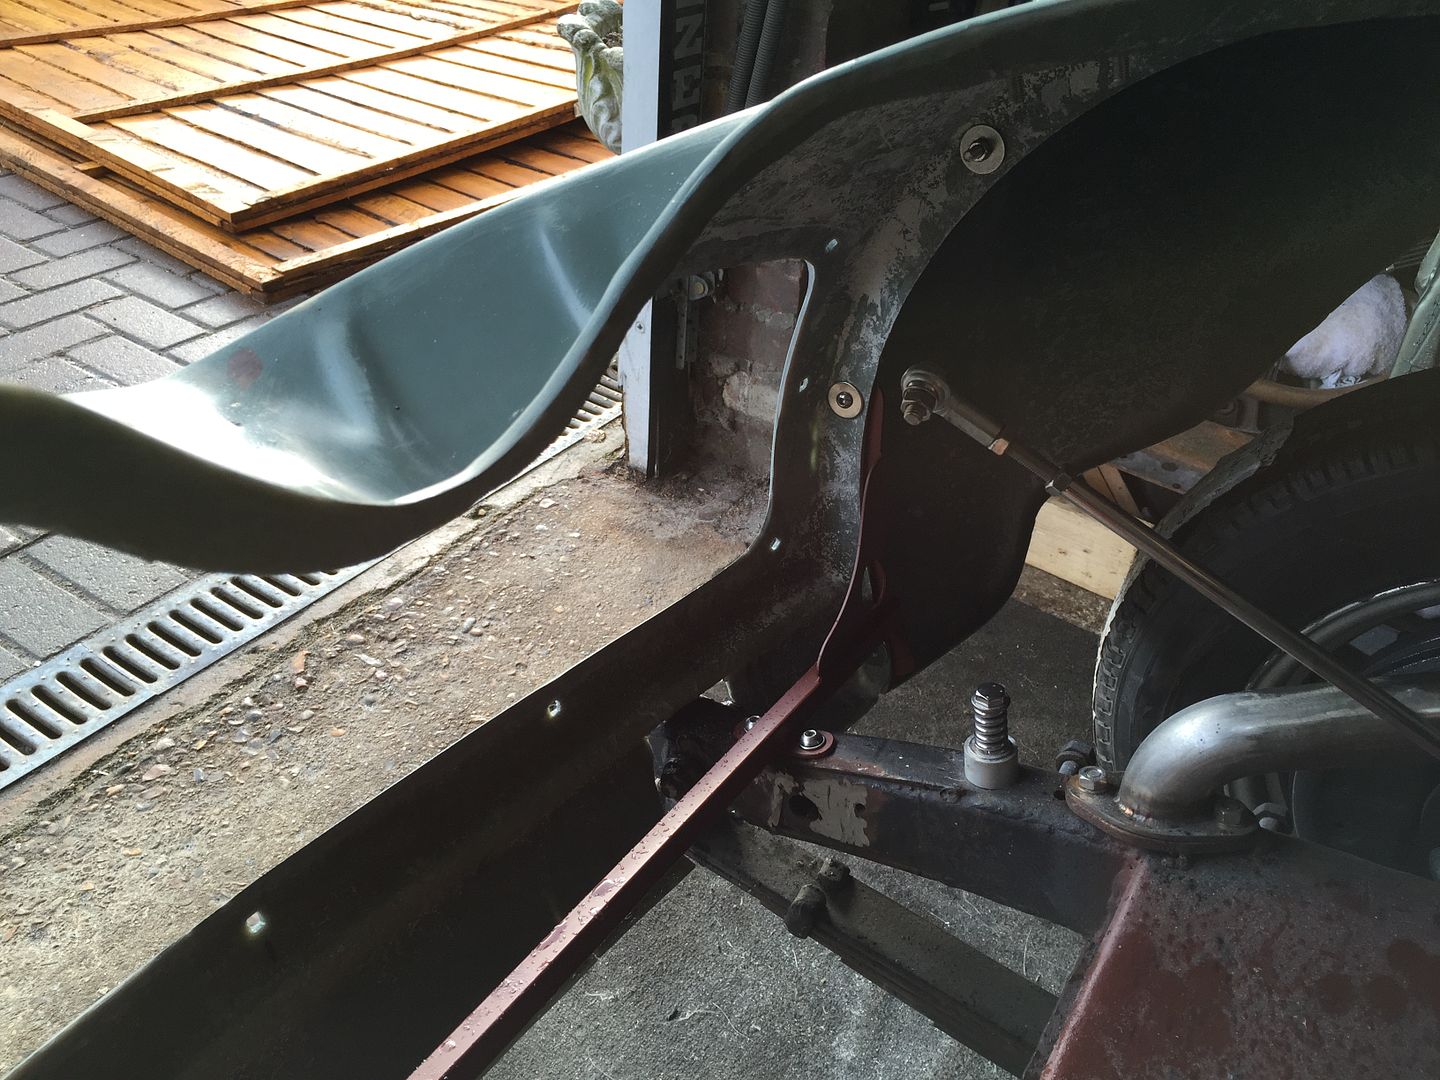
Well now I had the rear fender mounts sorted it was time for the front mounts, wanted to keep it simple so first a piece of 3/4" x 1/16" wall box was cut to fit between the front fender/front panel joint,next a pair of curved 1/8" plates were cut out to follow the curve of the joint, these are held in place by the lower 2 fender bolts each side. 2 mounting plates were welded on to align with the frame horns, this was tacked on the car with a mig and then tigged in the workshop, a couple of gussets were added to make it all light but strong, I sat on the fender and jumped around a bit and they never moved so happy with that.
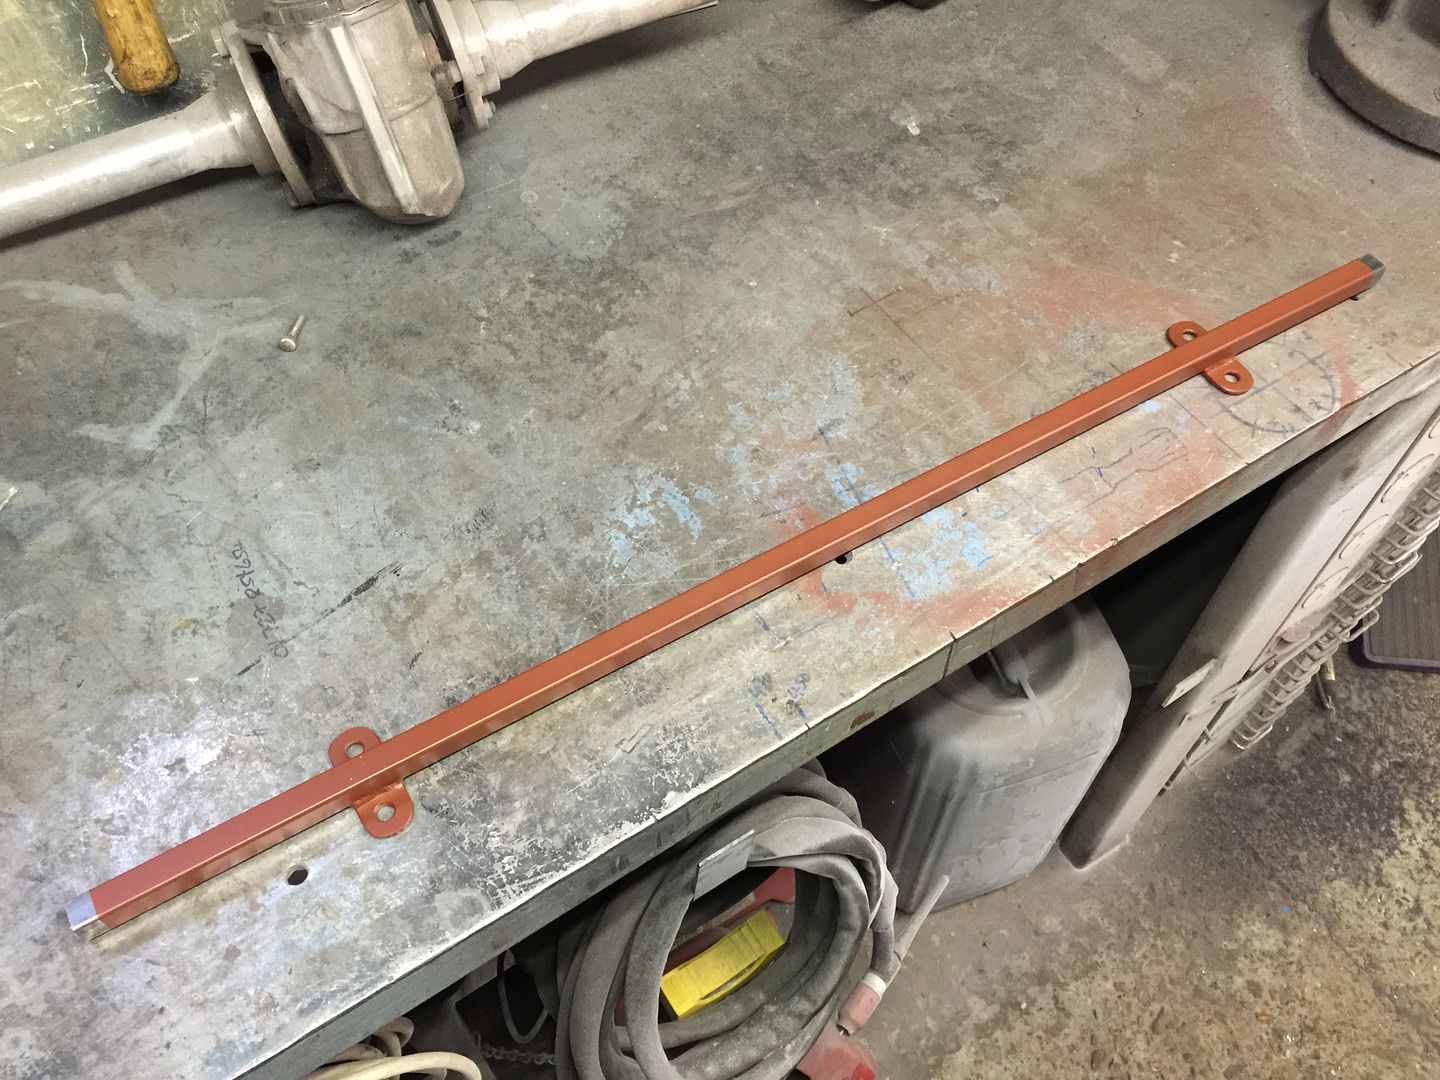
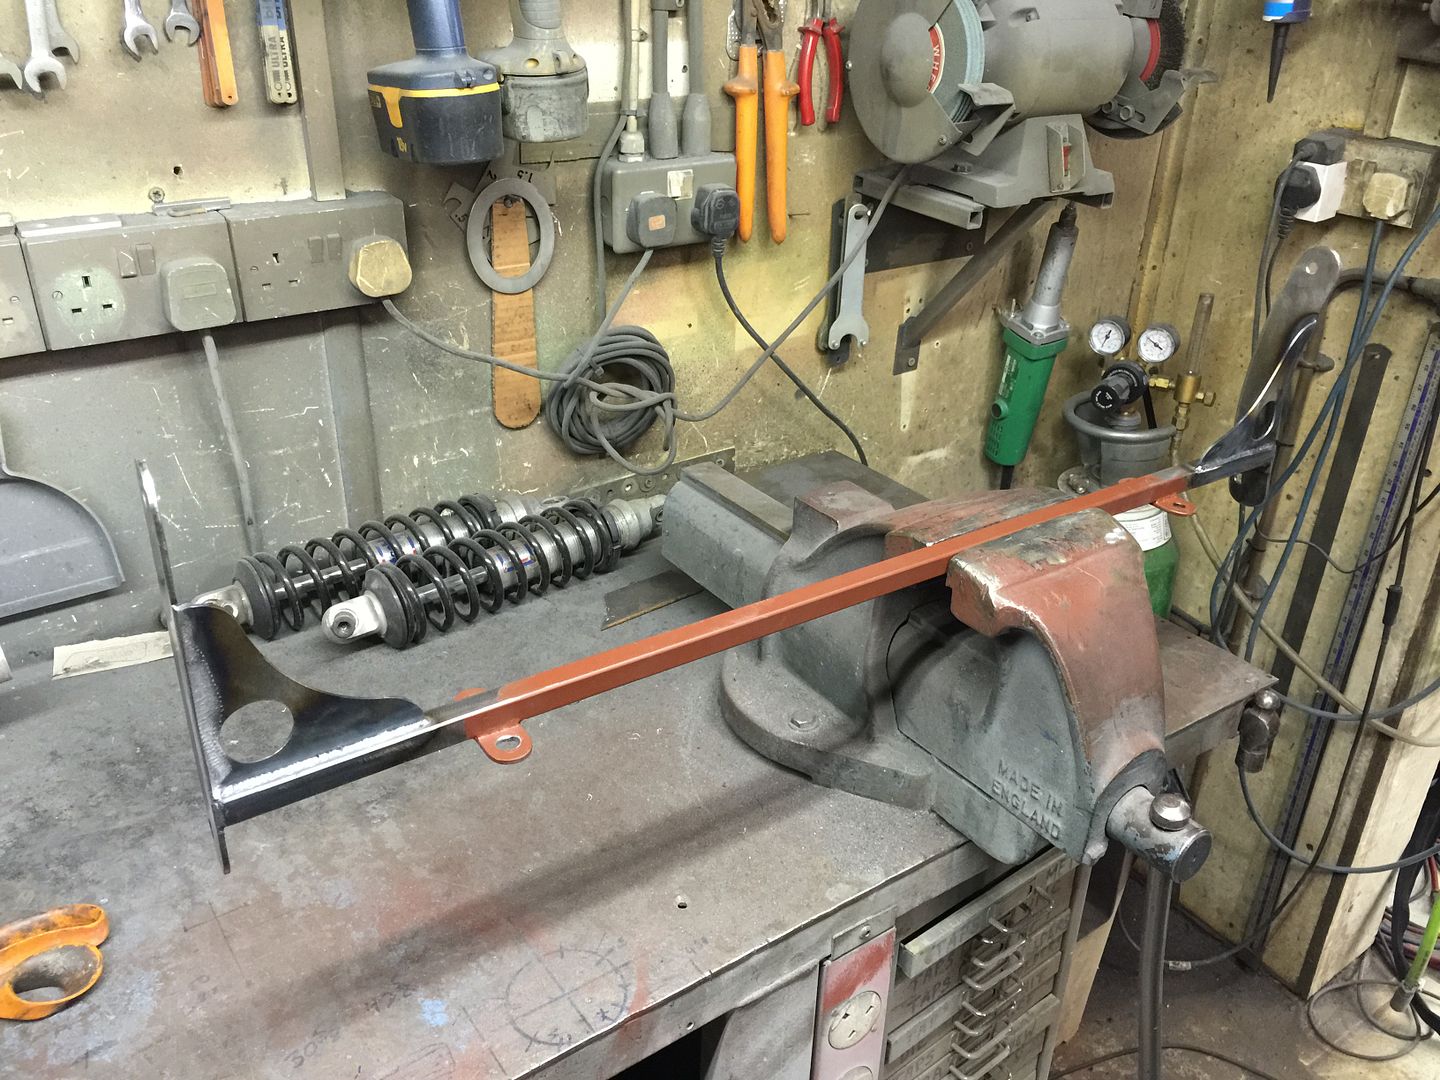
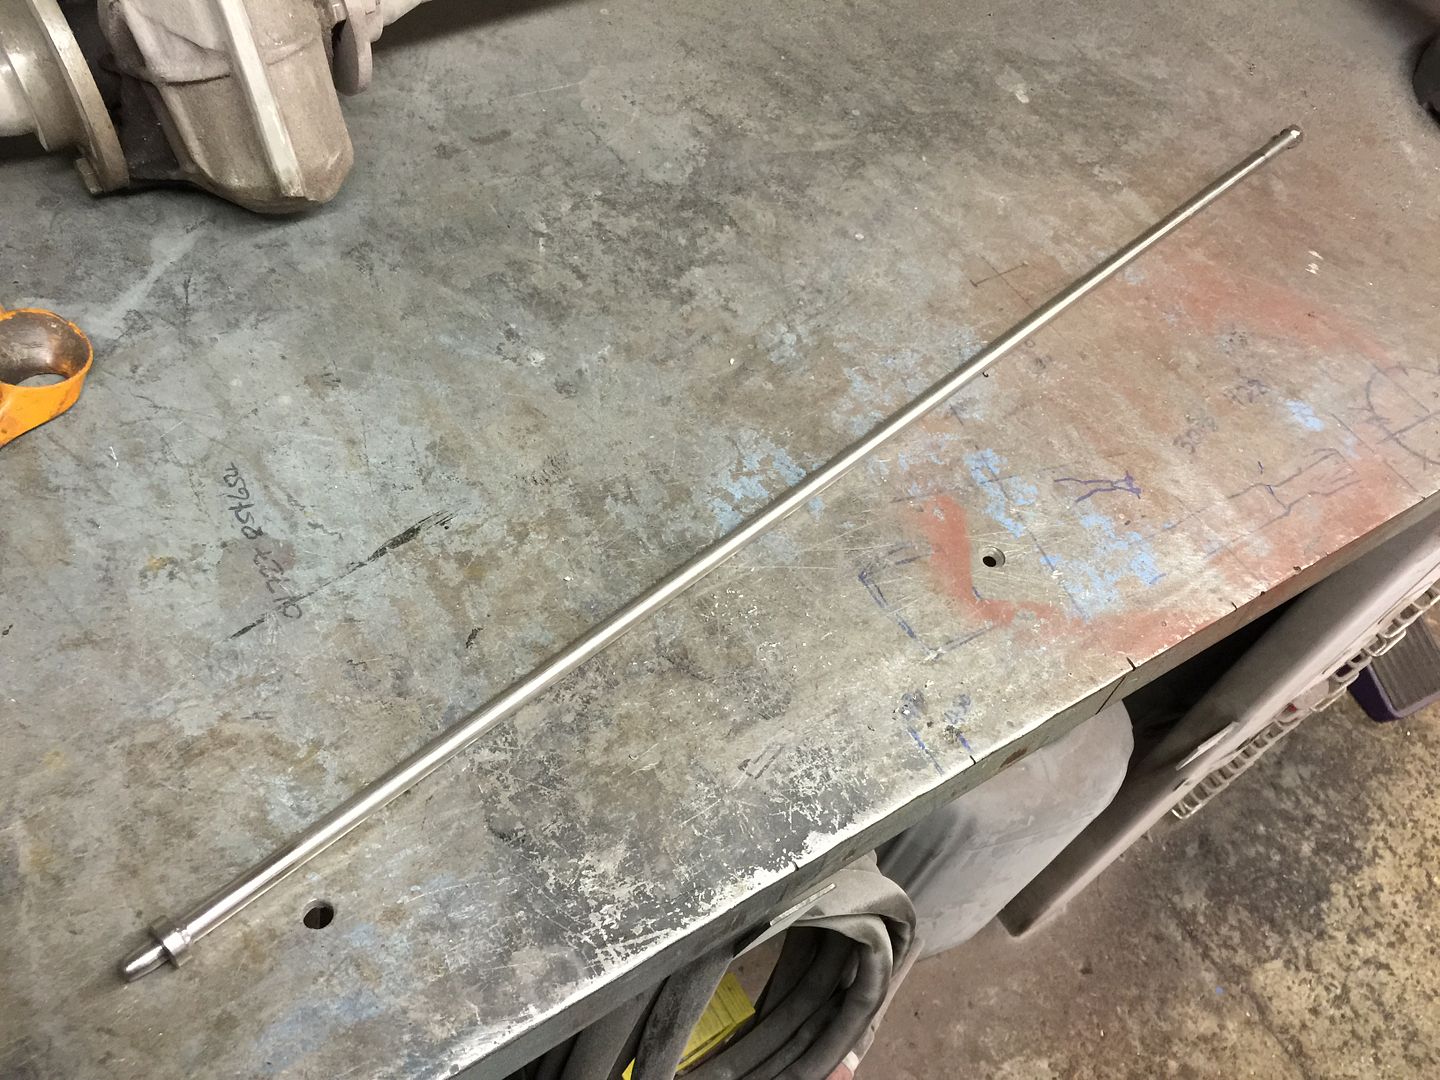
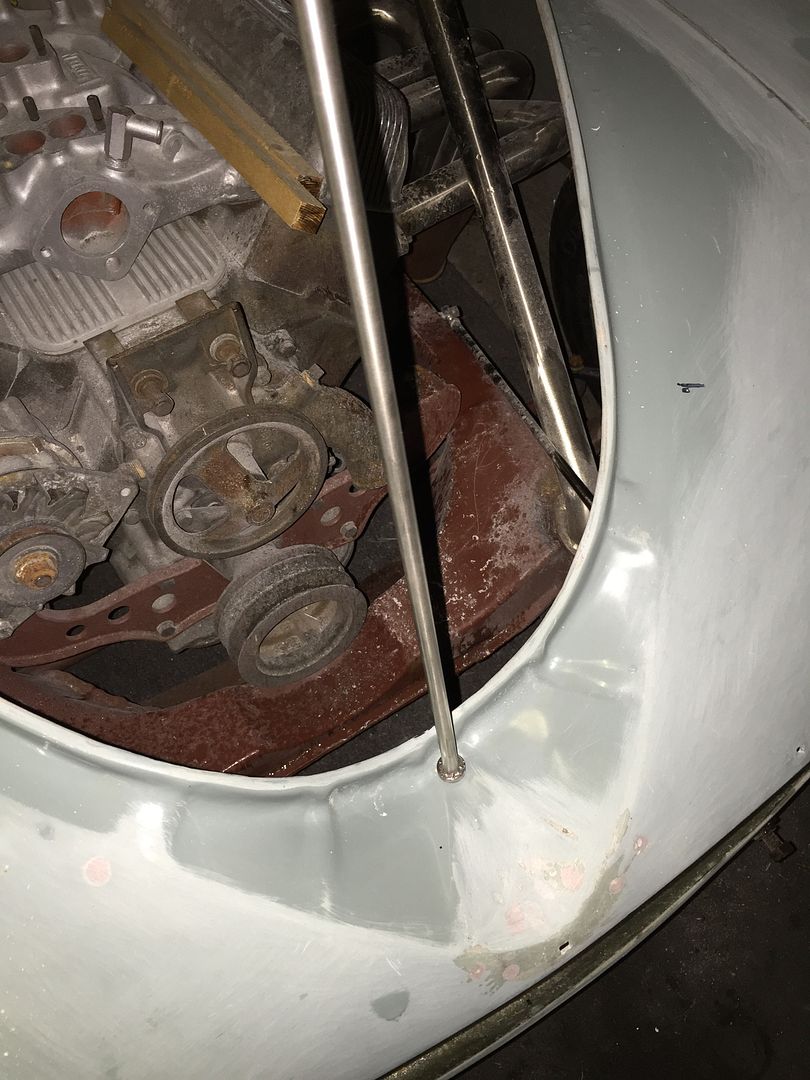
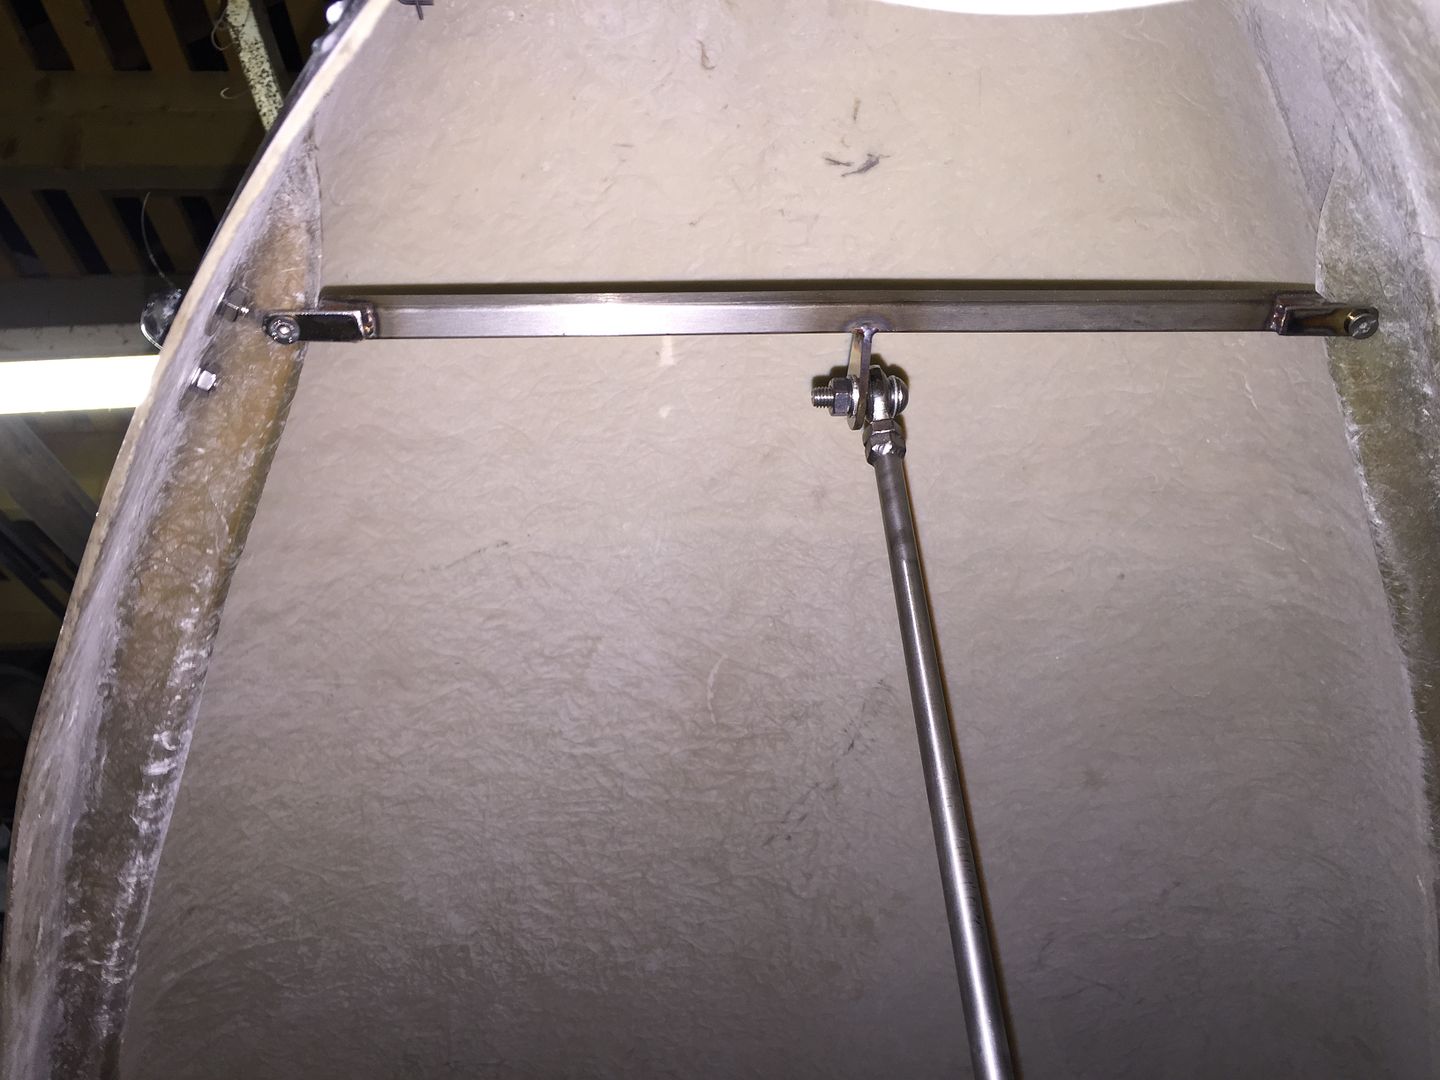
The above took up most of the day to complete but I also got time to make a stainless hood prop, The bit of wood I had been using was starting to be annoying so had to go. again nice and simple, a piece of 3/8" stainless box was fitted with tabs and bolted through the hood stiffeners, then a hole was drilled in the front panel, the hole also acts as a drain as the water collects there.
.Its aweful lonesome in the saddle since my horse died.
-
02-15-2015 07:08 AM #504
CHR Member
- Join Date
- Feb 2008
- Location
- Caldwell
- Car Year, Make, Model: 34 ford 3 window/461 pontiac
- Posts
- 918
Steve, until this and your coupe thread I had no Idea how much work went into building a glass body. Do all glass bodys need this much re-work or is this unique to Willys?
Jack.www.clubhotrod.com/forums/showthread.php?t=44081
-
02-15-2015 07:34 AM #505
CHR Member
- Join Date
- Apr 2009
- Location
- watford
- Car Year, Make, Model: 26T Coupe, 32 Roadster, 41 Willys Coupe
- Posts
- 2,363
Originally Posted by Jack F
Not always Jack, the Willys because of the shape suffers more than most, glass when left and not stored level & straight can move about with temp, If they are made with a floor (like a 32 say) it makes them more stable.
.Its aweful lonesome in the saddle since my horse died.
-
02-15-2015 10:10 AM #506
CHR Member
- Join Date
- Oct 2007
- Location
- Petaluma
- Car Year, Make, Model: 48 Ford F1
- Posts
- 9,795
One of the best parts of your build threads is showing everyone how to approach these fixes. Prior to reading your's a and a couple other build threads, I would of never know where to start or what to do. This will pay off in droves should I ever tackle a glass build, and with my own glass replacement parts on my truck. Thanks again for taking the time Steve for posting these steps. I know you do it for your customers as well, but we sure appreciate it.
" "No matter where you go, there you are!" Steve.
-
02-15-2015 10:42 AM #507
CHR Member
- Join Date
- Apr 2009
- Location
- watford
- Car Year, Make, Model: 26T Coupe, 32 Roadster, 41 Willys Coupe
- Posts
- 2,363
Not a problem Steve, i'm a hotrodder so more than happy to help others, makes for a better hobby all round I reckon. Originally Posted by stovens
.Its aweful lonesome in the saddle since my horse died.
-
02-15-2015 11:20 AM #508
CHR Member
- Join Date
- Oct 2007
- Location
- Petaluma
- Car Year, Make, Model: 48 Ford F1
- Posts
- 9,795
Steve I notice you use large diameter flat washers when bolting directly to glass. I am guessing this is to put the pressure over a larger area of the fiberglass to prevent cracking the glass? I have running boards for my pickup that are made from fiberglass and I have been wondering one how tight to bolt them on, and 2 if the use of a washer will be necessary on the top side of the running board where the carraige style bolts go through? These are thick glass boards made by Bebops Glassworks for my truck. Thanks. Steve.Last edited by stovens; 02-16-2015 at 12:49 AM.
" "No matter where you go, there you are!" Steve.
-
02-16-2015 12:06 AM #509
CHR Member
- Join Date
- Apr 2009
- Location
- watford
- Car Year, Make, Model: 26T Coupe, 32 Roadster, 41 Willys Coupe
- Posts
- 2,363
Steve it's always wise to spread the load but the carriage bolts will be fine, I do them up pretty tight but always use a spring washer. Originally Posted by stovens
.Its aweful lonesome in the saddle since my horse died.
-
02-16-2015 12:49 AM #510
CHR Member
- Join Date
- Oct 2007
- Location
- Petaluma
- Car Year, Make, Model: 48 Ford F1
- Posts
- 9,795
Thanks Steve, good to know!" "No matter where you go, there you are!" Steve.
 Reply With Quote


Posting Permissions
- You may not post new threads
- You may not post replies
- You may not post attachments
- You may not edit your posts

i've enjoyed the years here . made a lot of friends. most who have left. i see no reason to continue with this so hope to see you somewhere else. i dont think this site will ever be back. it's lived...
Dead!