


 747Likes

Results 526 to 540 of 1004
 LinkBack URL
 About LinkBacks
-
03-04-2015 11:50 AM #526
 CHR Member

- Join Date
- Apr 2004
- Location
- Little Elm
- Car Year, Make, Model: 34 Ford Low Boy w/ZZ430 Clone
- Posts
- 3,890
What are these mm things you speak of? Originally Posted by roadster32


Very nice work, by the way!Jack
Gone to Texas
-
Advertising

- Google Adsense
- REGISTERED USERS DO NOT SEE THIS AD
-
03-04-2015 01:43 PM #527
CHR Member
- Join Date
- Apr 2009
- Location
- watford
- Car Year, Make, Model: 26T Coupe, 32 Roadster, 41 Willys Coupe
- Posts
- 2,363
Gentleman might be taking it a bit far Steve Originally Posted by stovens
Its aweful lonesome in the saddle since my horse died.
-
03-04-2015 03:52 PM #528
CHR Member
- Join Date
- Feb 2006
- Location
- Bartlett
- Posts
- 6,831
Did you need dual belts??????????? finding matched length belts for proper tension is difficult and these days since production cars use serpinteen belts is going to be almost impossible------- but nice machine work
-
03-05-2015 12:56 AM #529
CHR Member
- Join Date
- Apr 2009
- Location
- watford
- Car Year, Make, Model: 26T Coupe, 32 Roadster, 41 Willys Coupe
- Posts
- 2,363
You may of missed the reason why Jerry but I wanted an old Crager look so yes dual vee belts is what I wanted, personally I don't see a problem picking up vee belts as there are scores of places that sell them. Originally Posted by jerry clayton
Lots of the guys are running dual belt drives without any problems.
.Its aweful lonesome in the saddle since my horse died.
-
03-05-2015 05:36 AM #530
CHR Member/Contributor
- Join Date
- Sep 2007
- Location
- Gardner, KS
- Car Year, Make, Model: '33 HiBoy Coupe, '32 HiBoy Roadster
- Posts
- 11,245
I don't think you'll have any problem, Steve. Many, many industrial machines run multiple v-belts, and manufacturing tolerances have actually improved a lot over the years with the major suppliers. For example, Gates changed their manufacturing process almost 35 years ago to make their V80 series belts meet or exceed the specified tolerances for "matched set" belts, but if one is worried about it they can still be special ordered as "Matched Set Belts". If you want to go with a better quality, like a belt with aramid tensile cords that stretch very little, they require a match tolerance that is tighter than the RMA standard. Even then, V-belts with aramid cords (such as the Gates Predator) are matched by selecting belts with a single punch code. I'd say you're good to go, and beautiful work, as usual! Originally Posted by roadster32
Can I bother you with a lathe question? You told me once before, but I think it was in a PM that was long ago deleted
 and with CRS I don't trust memory. What's the minimum spindle bore that you recommend for a general purpose machine, and can you explain your reasoning? Sorry to be a bother, and I swear that I'll commit it to memory this time....
 ")
Last edited by rspears; 03-05-2015 at 05:43 AM. Reason: Disabled the VigLink application, AGAIN!
Roger
Enjoy the little things in life, and you may look back one day and realize that they were really the BIG things.
-
03-05-2015 07:56 AM #531
CHR Member
- Join Date
- Feb 2006
- Location
- Bartlett
- Posts
- 6,831
Roger-lathe info---------get one with spindle bore big enough that you can use a 5c collect set thru it--------
Mine is a Pratt & Whitney off a early 40s battleship------
And thanks for update on v belts
-
03-05-2015 10:56 AM #532
CHR Member
- Join Date
- Apr 2009
- Location
- watford
- Car Year, Make, Model: 26T Coupe, 32 Roadster, 41 Willys Coupe
- Posts
- 2,363
Originally Posted by rspears
I would look for the biggest spindle bore you can find Roger, mine is 1.75" which is a good size but still can't get 2" bar in
I wasn't worried about the belts to be honest as already sorted them out with my local bearing specialist.
.Its aweful lonesome in the saddle since my horse died.
-
03-05-2015 01:33 PM #533
CHR Member
- Join Date
- Apr 2009
- Location
- watford
- Car Year, Make, Model: 26T Coupe, 32 Roadster, 41 Willys Coupe
- Posts
- 2,363
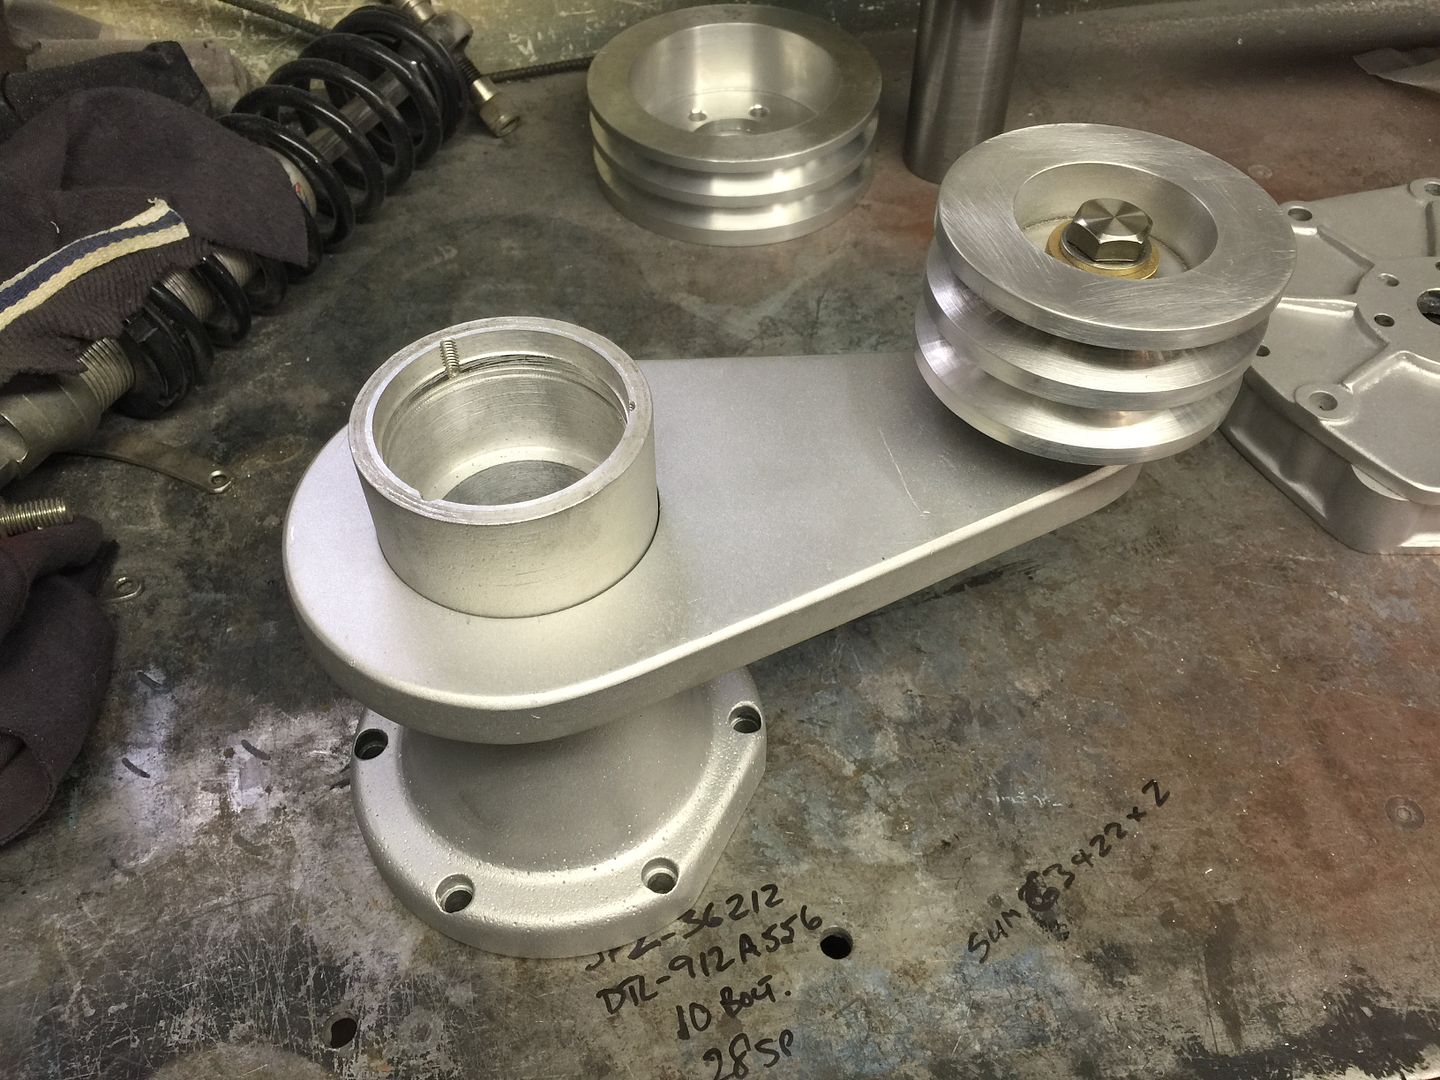
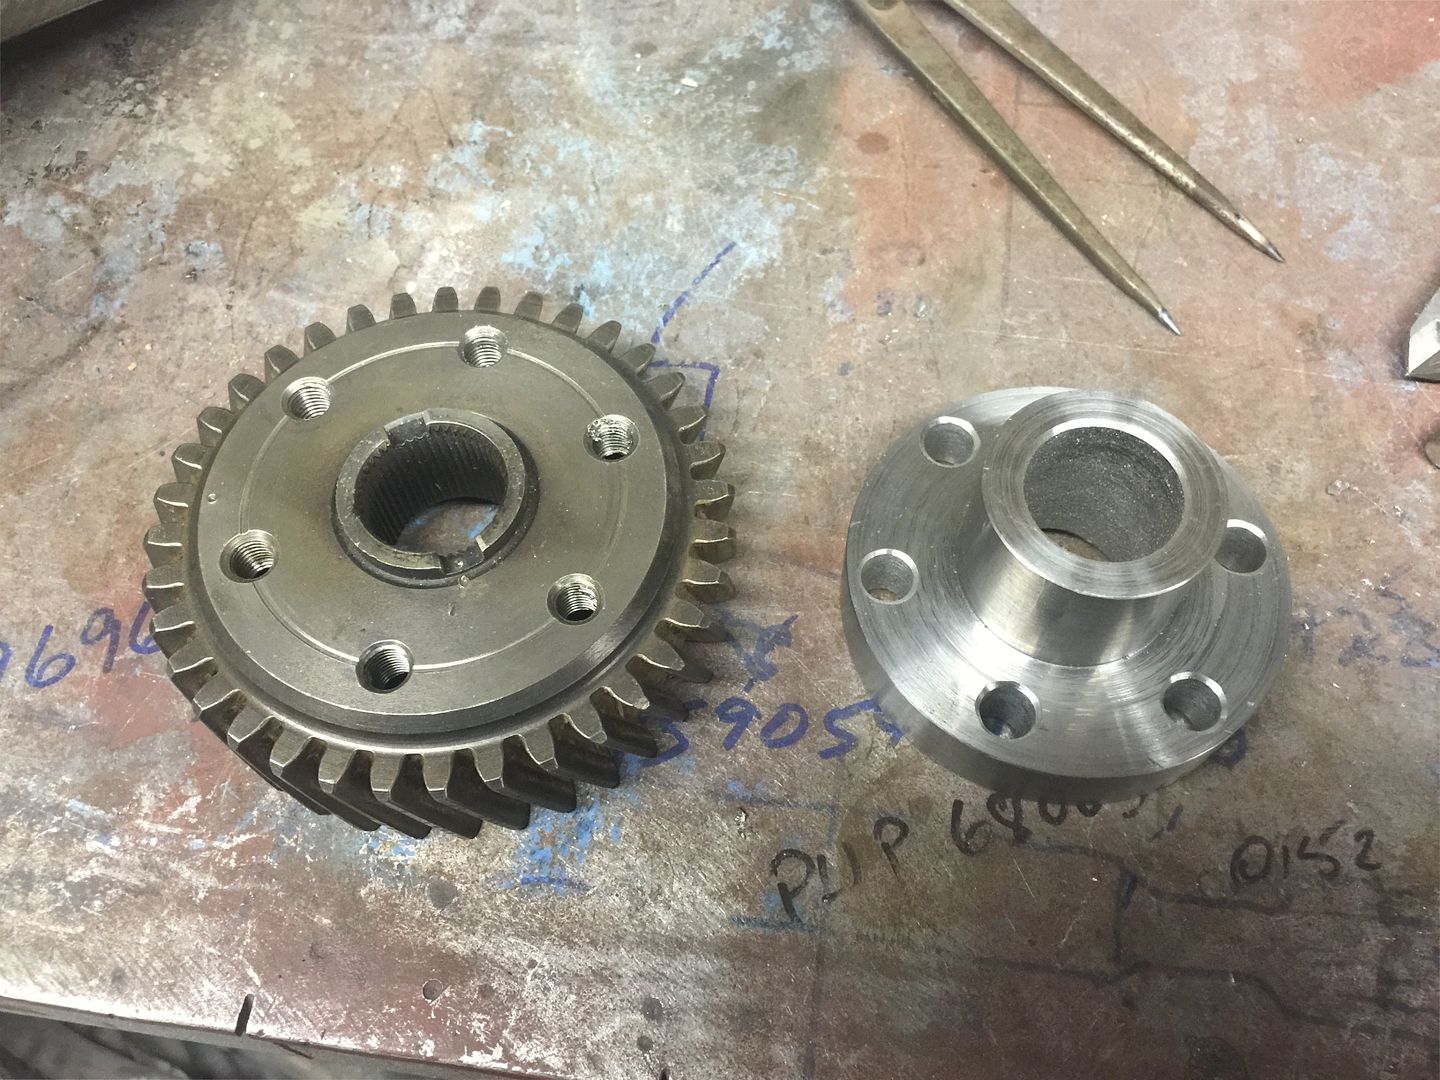
Started making the blower crank hub last night, another evening on the lathe, I chose to use a bit of 4" OD EN40 steel bar, tough to turn but ideal for the job.
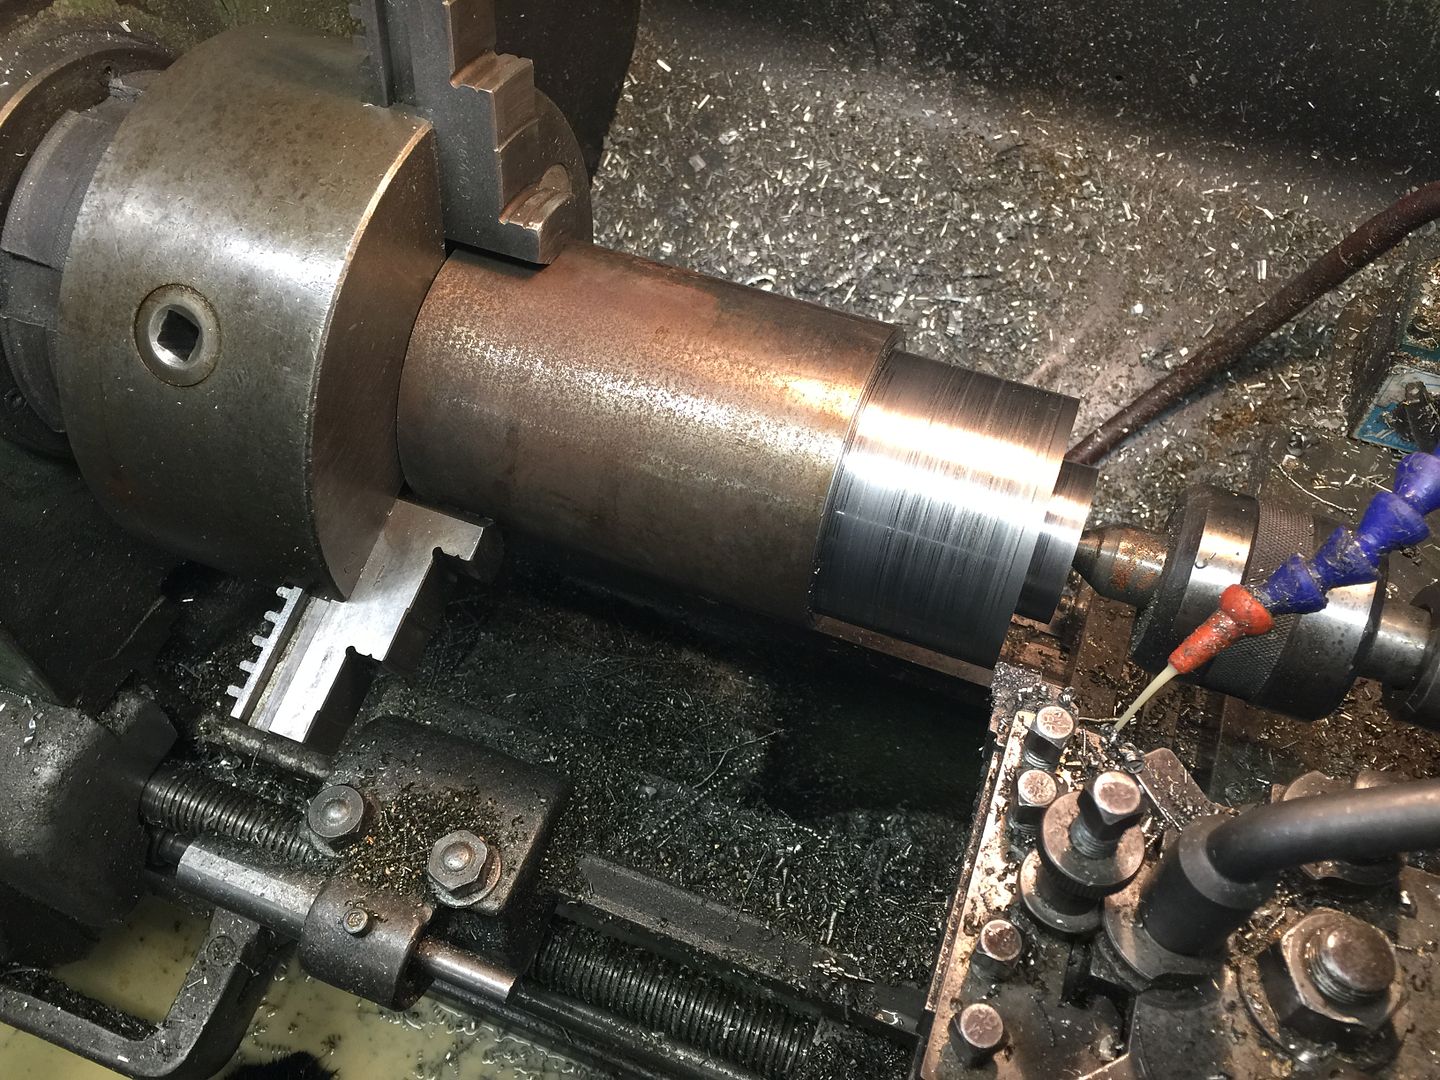
After a few hours I had this, Its a little long at the moment as I need to hold it to broach the double keyway, will trim to length once thats done.
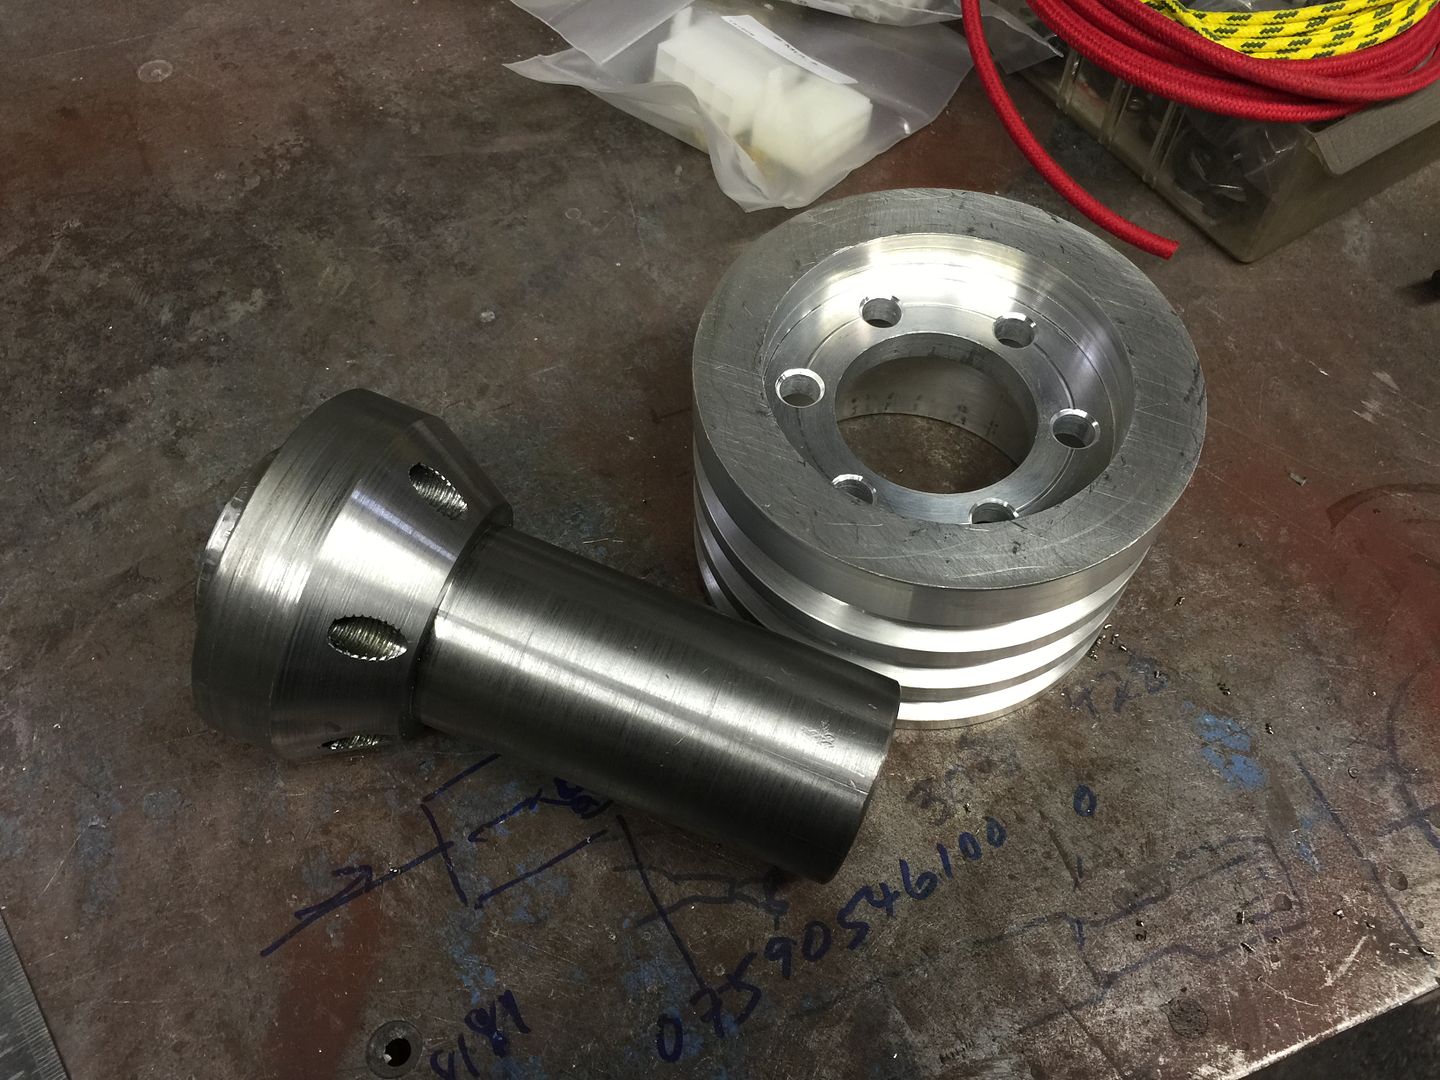
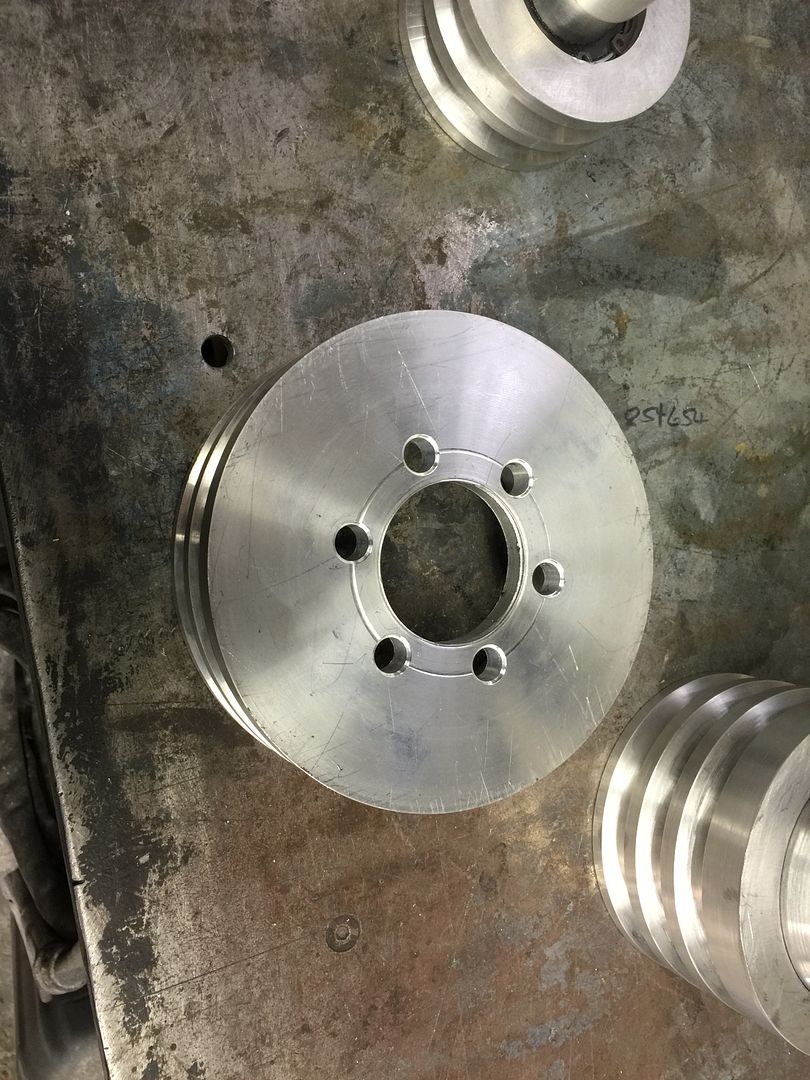
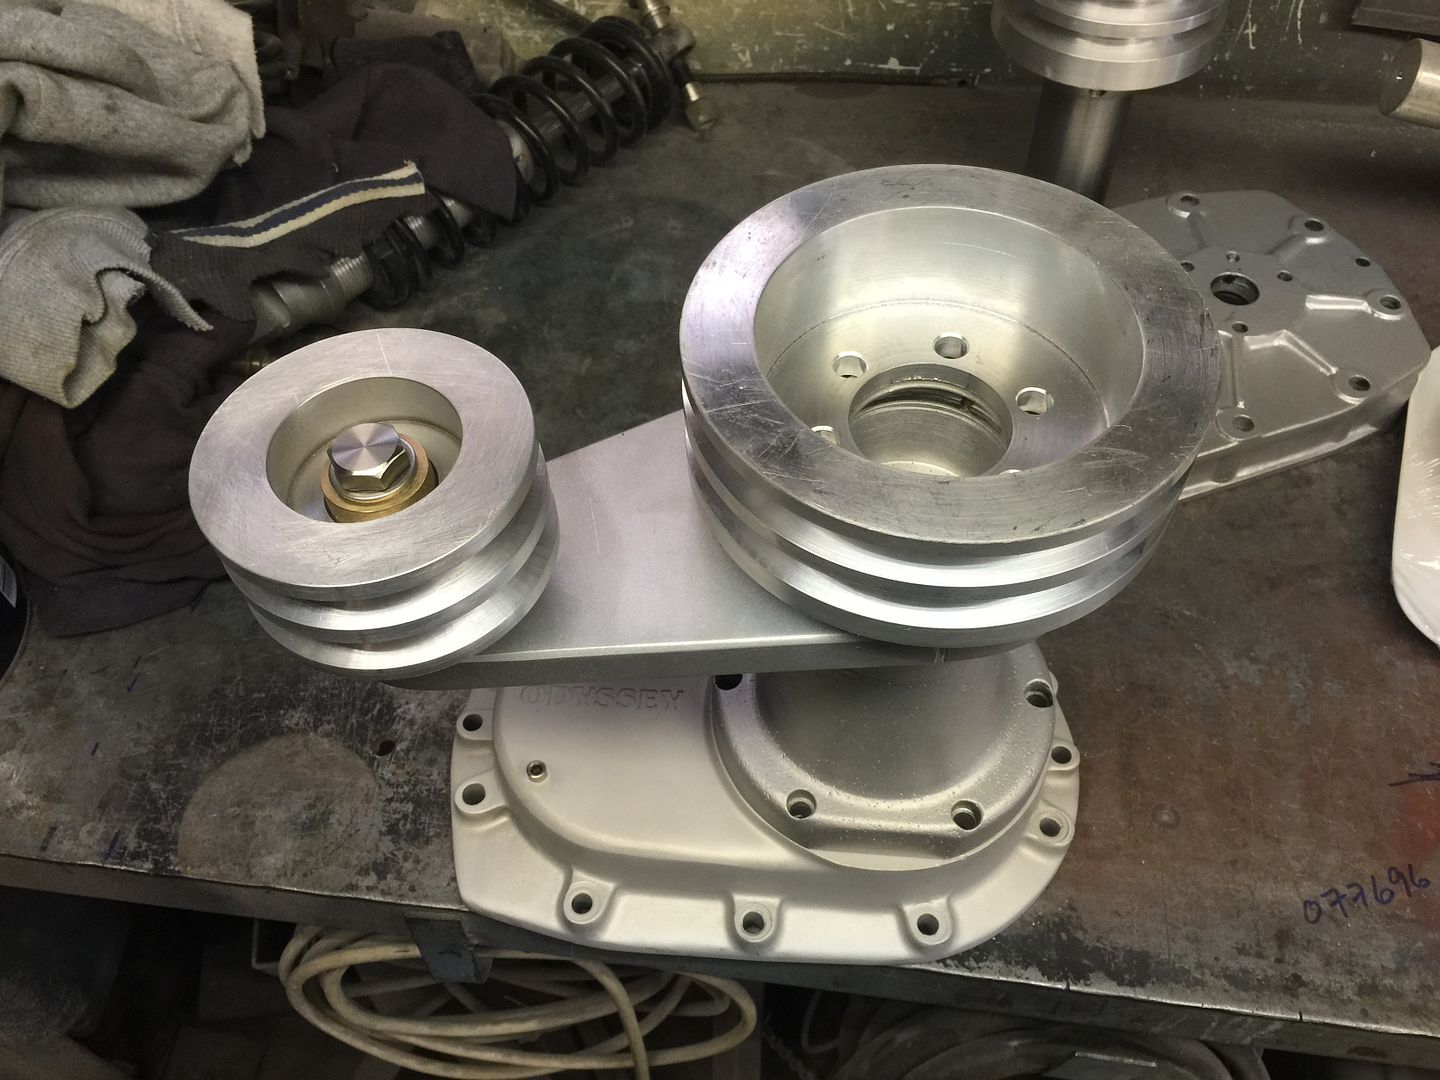
Drilled the 6 bolt pcd into the pulleys
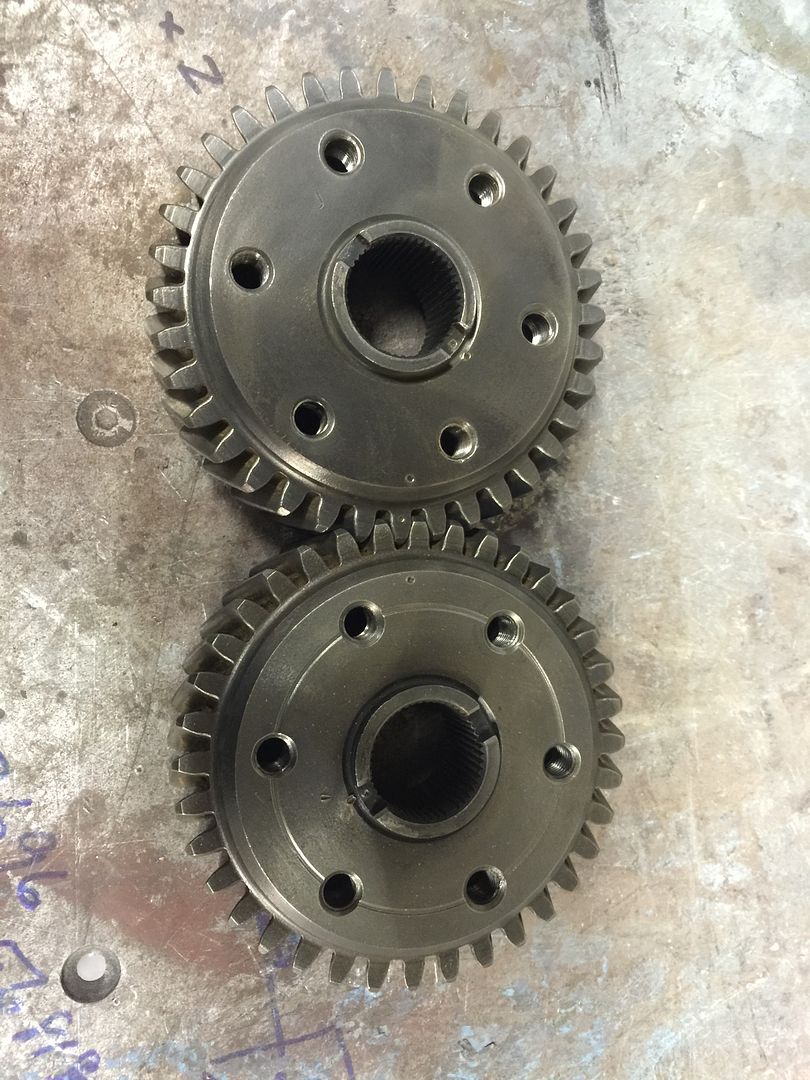
I got the various parts back from vapor blasting so nice and clean now.
Stripped the blower down to get it all clean and fit new bearings and do the required modifications, during stripping everything was centre dotted to aid in reassembly to keep everything in sync.
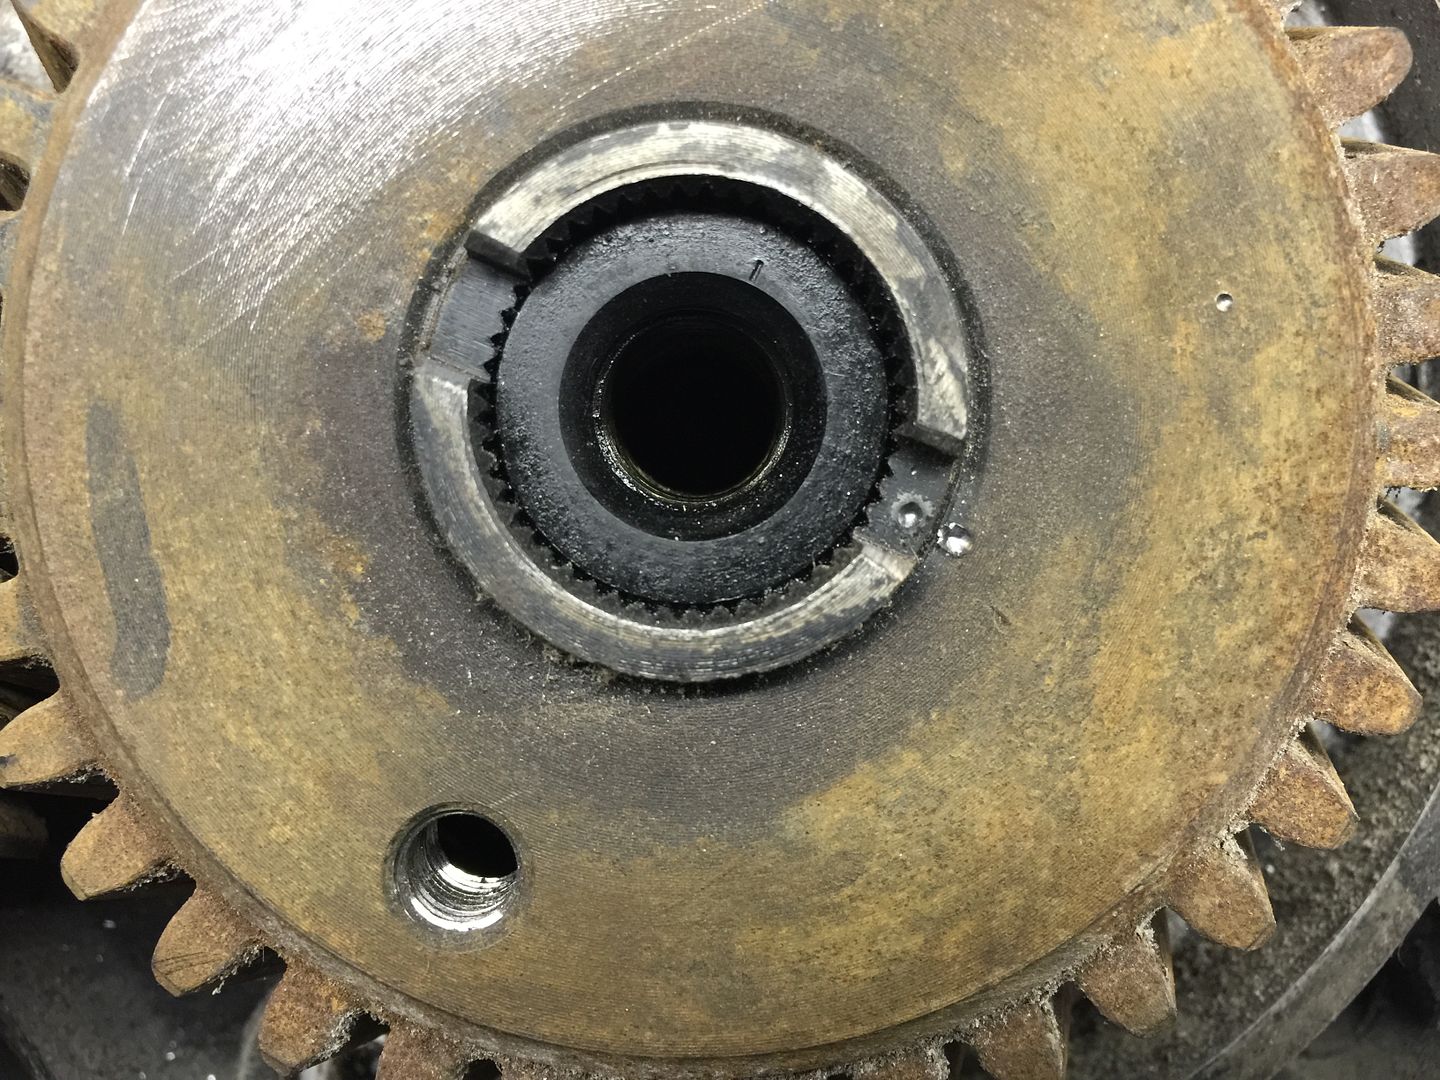
Undoing the gear bolts was a task as this blower has never been apart before, a bit of softwood jammed in the rotors stops any damage.
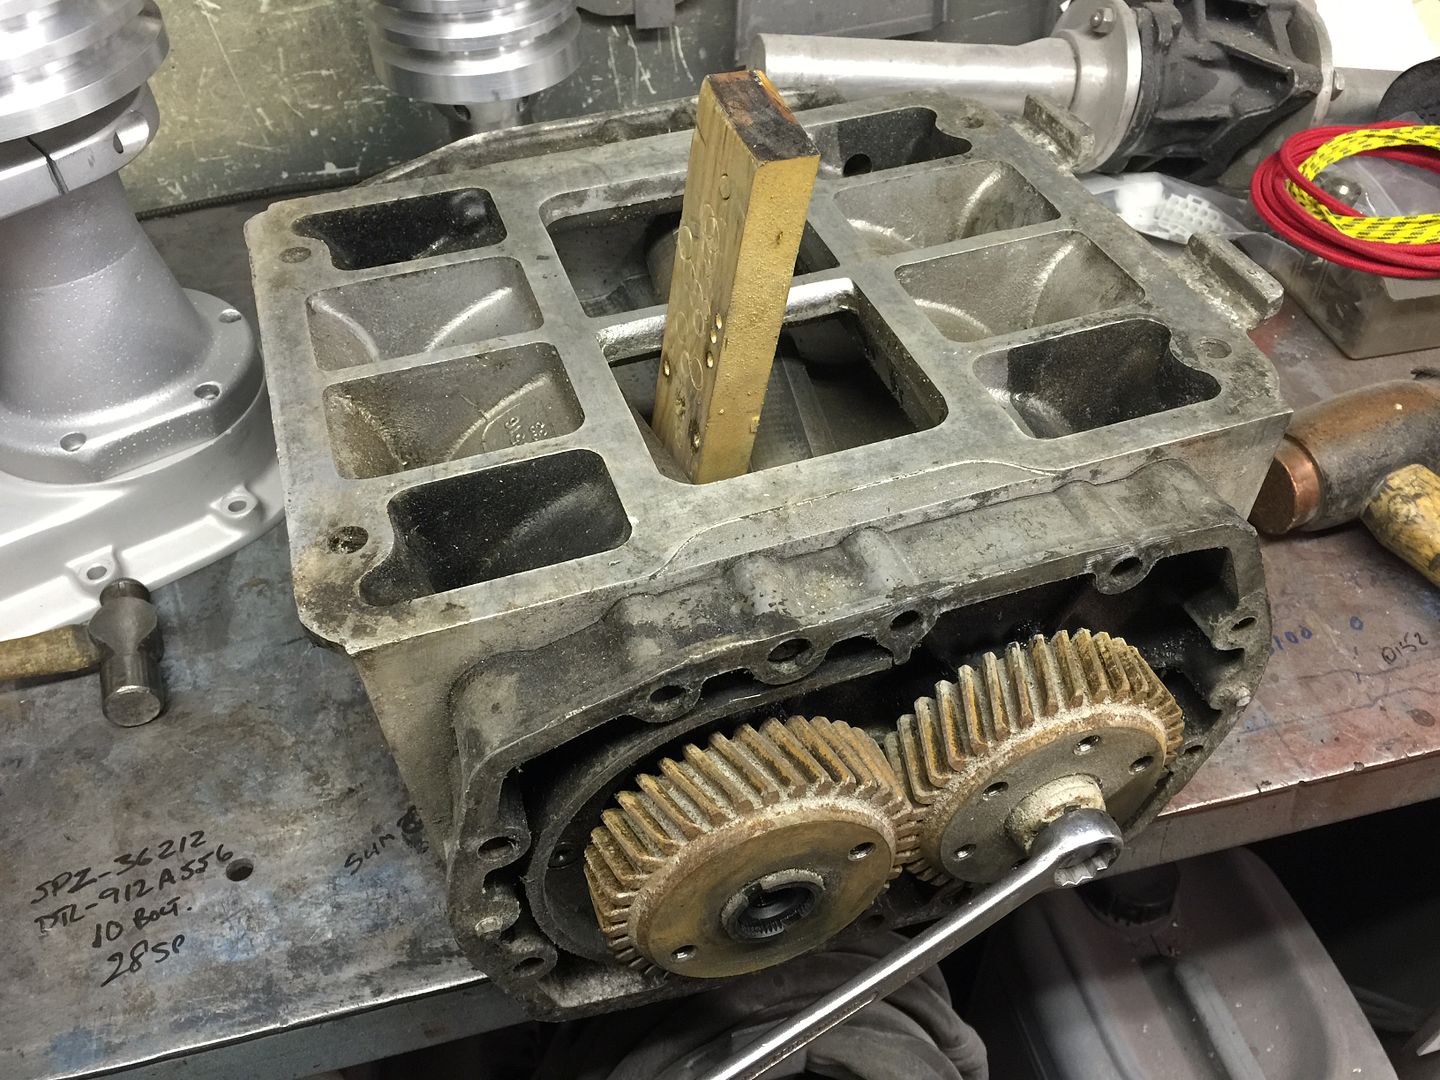
As the gears are helical they have to be pulled off together, a bit of scrap aluminium and some bolts were used as a simple puller.
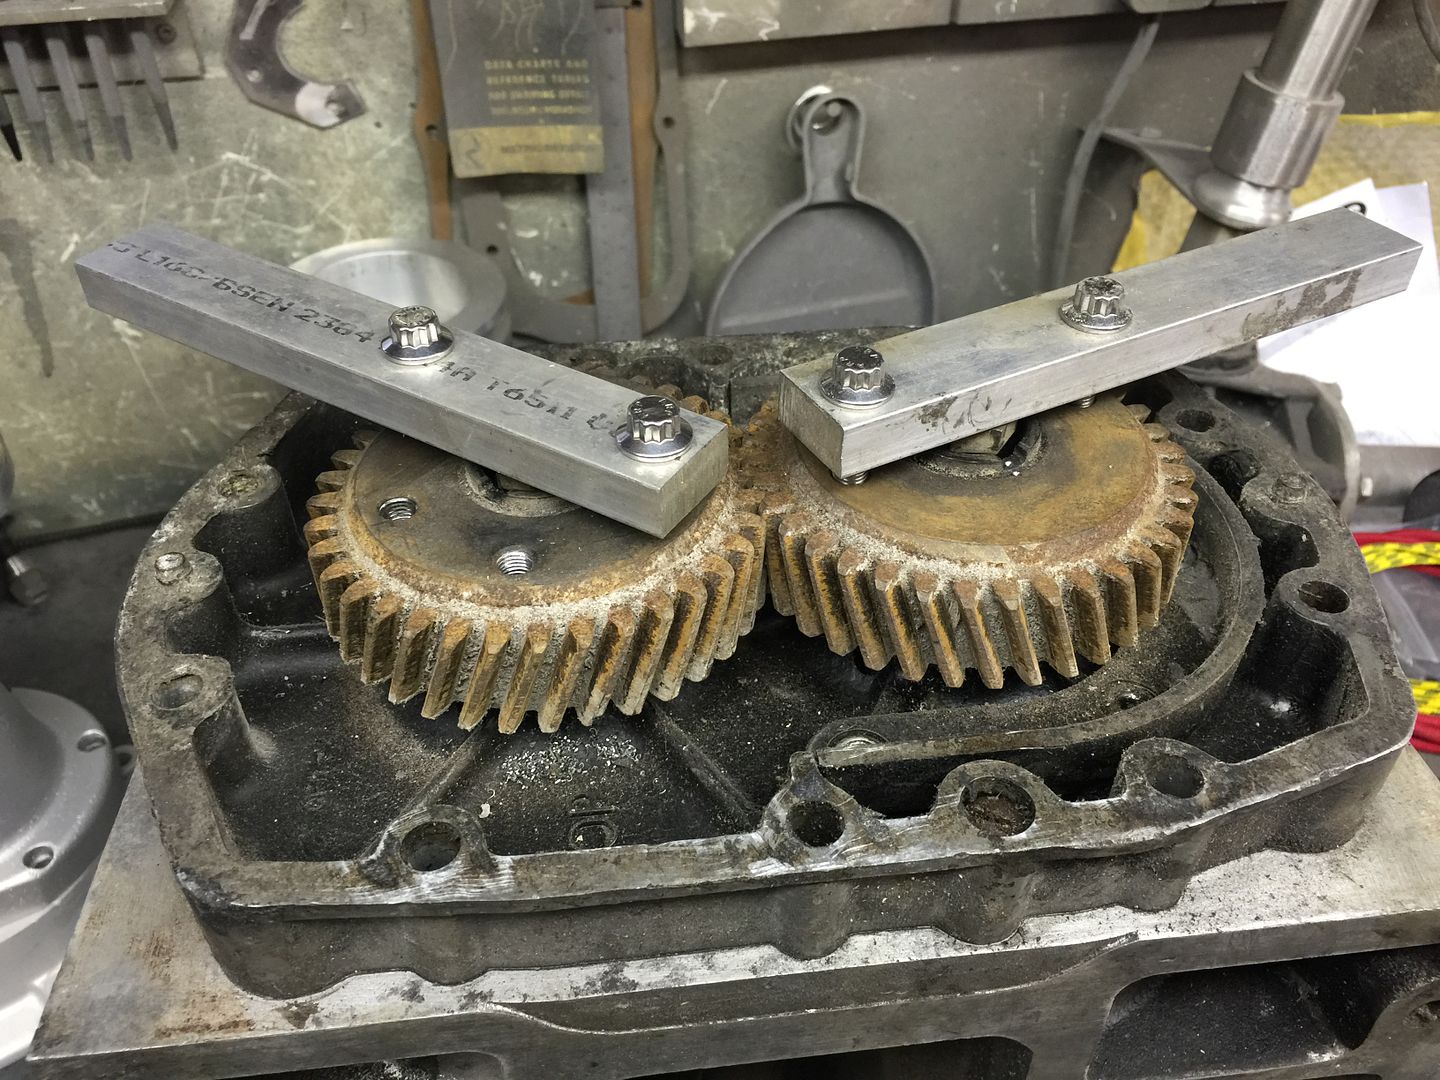
Again the gears were centre dotted to aid reassembly.

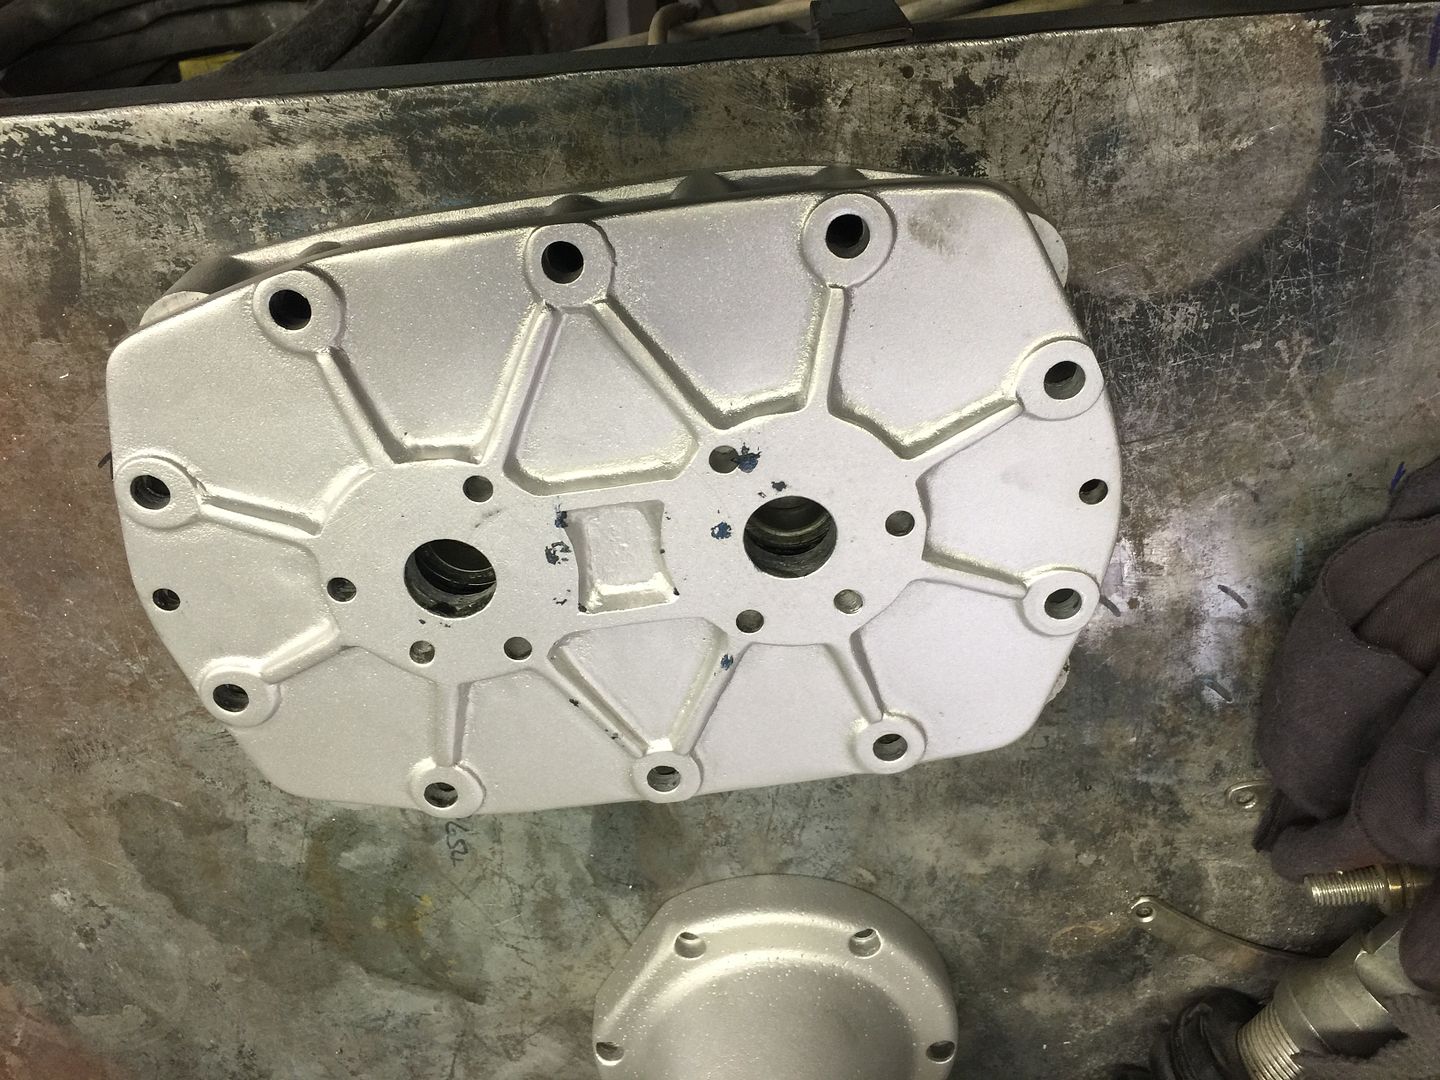
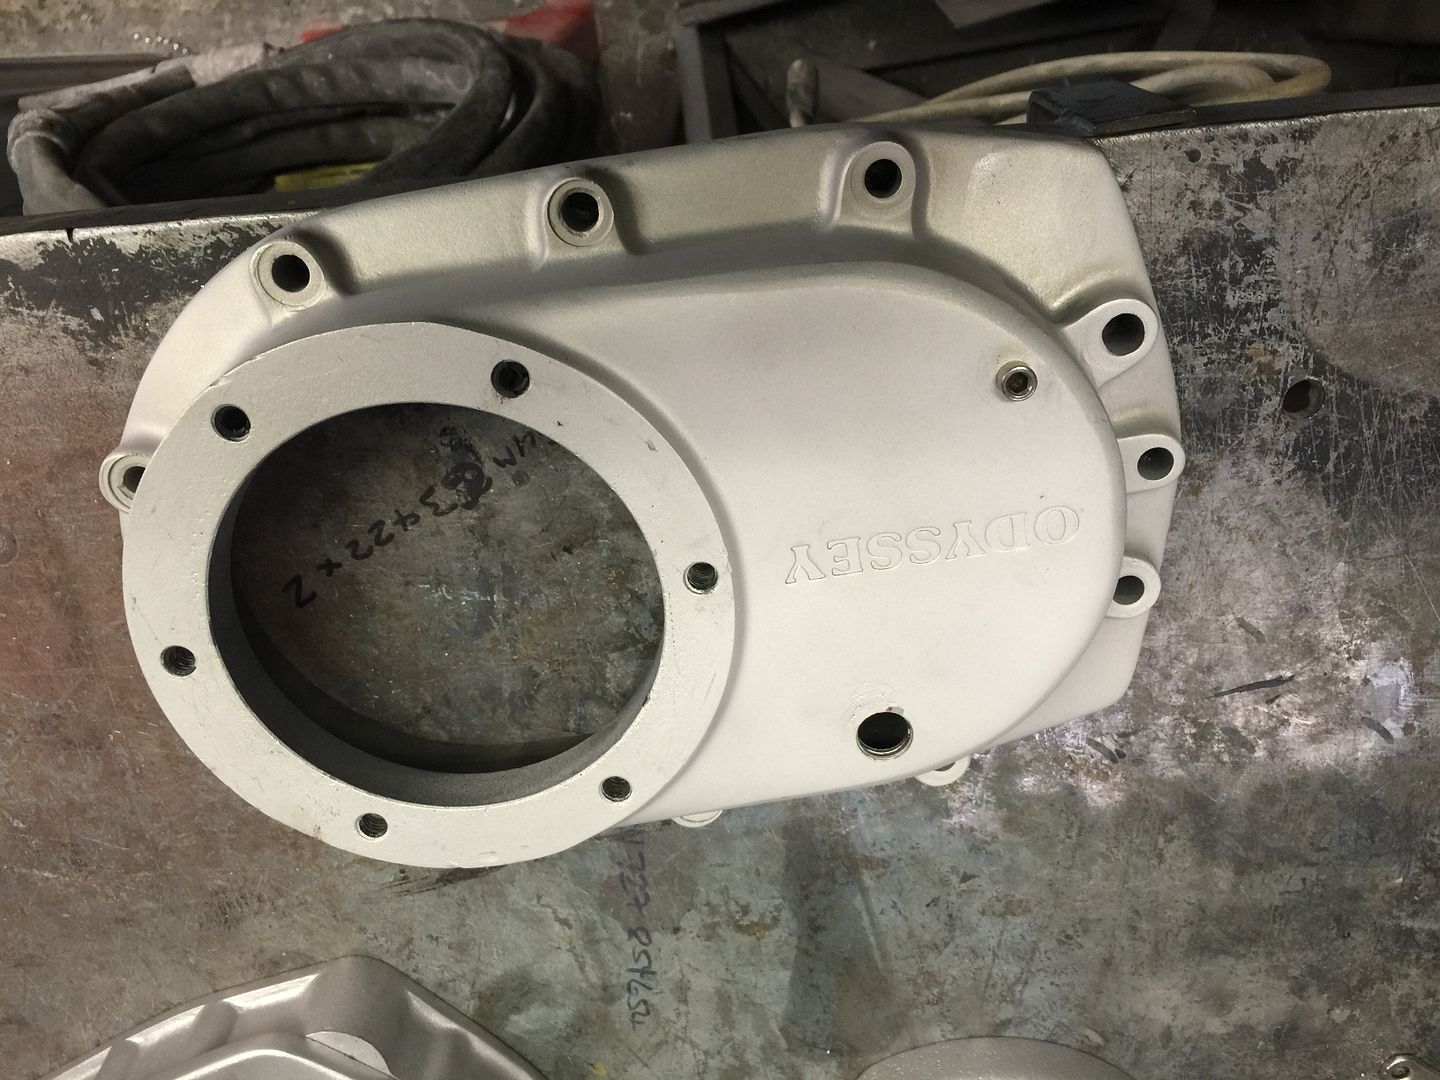
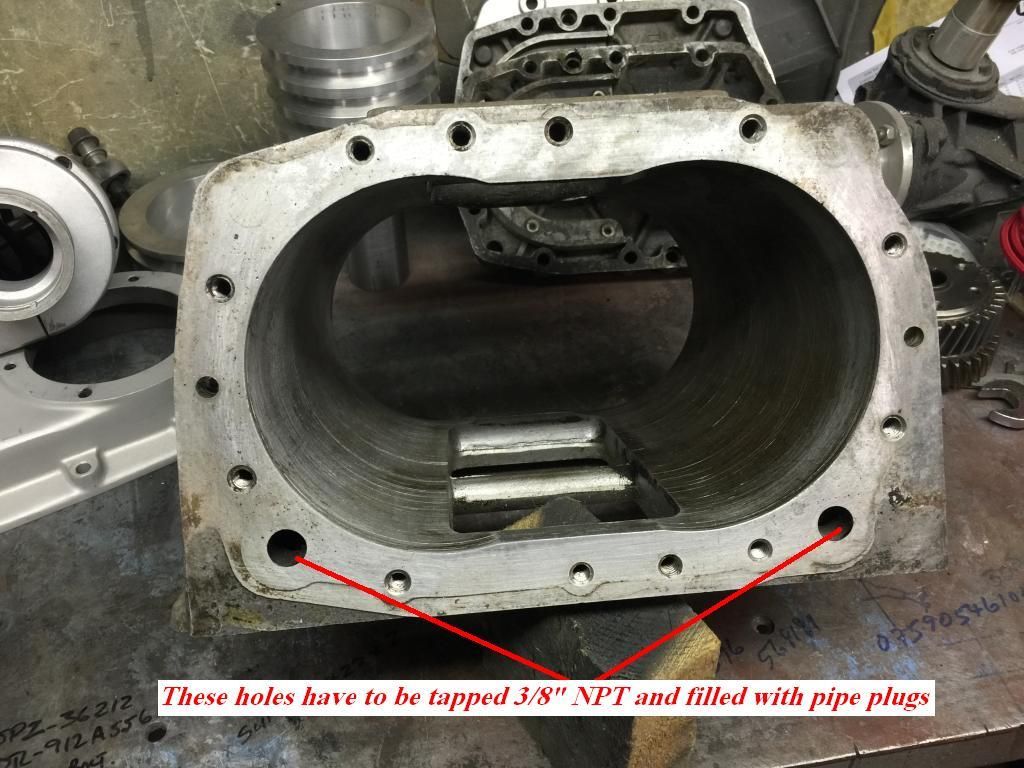
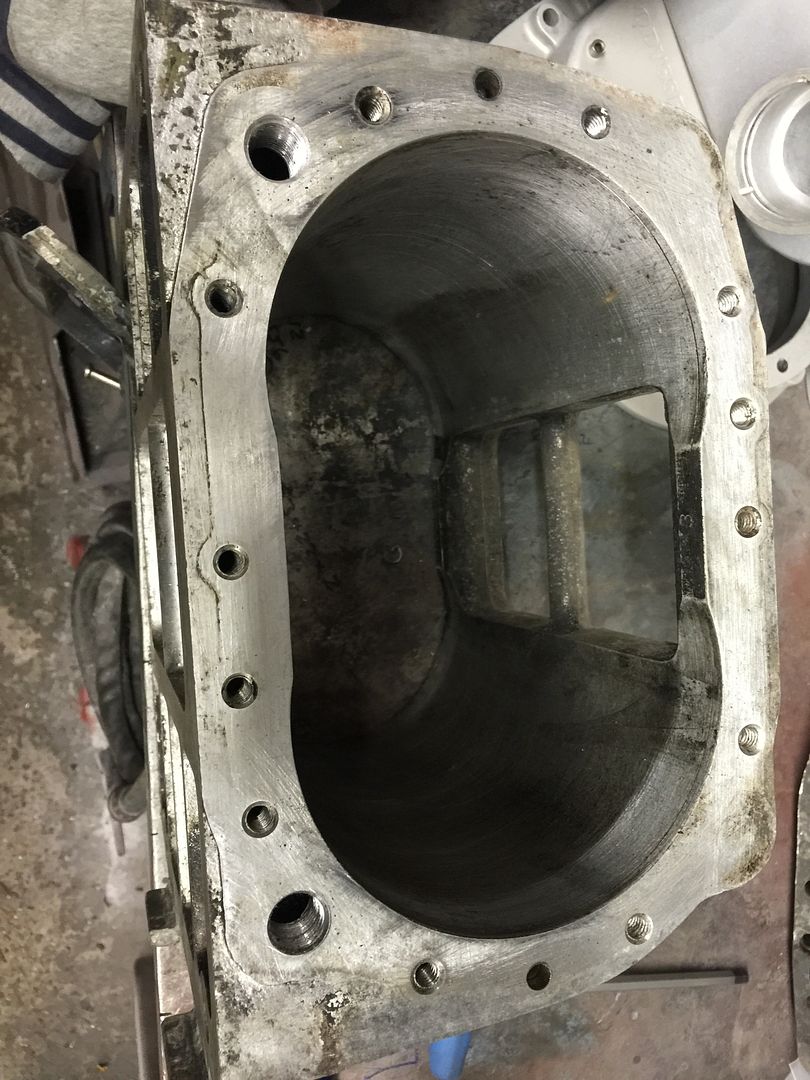
Heres the empty case ready for vapour blasting.
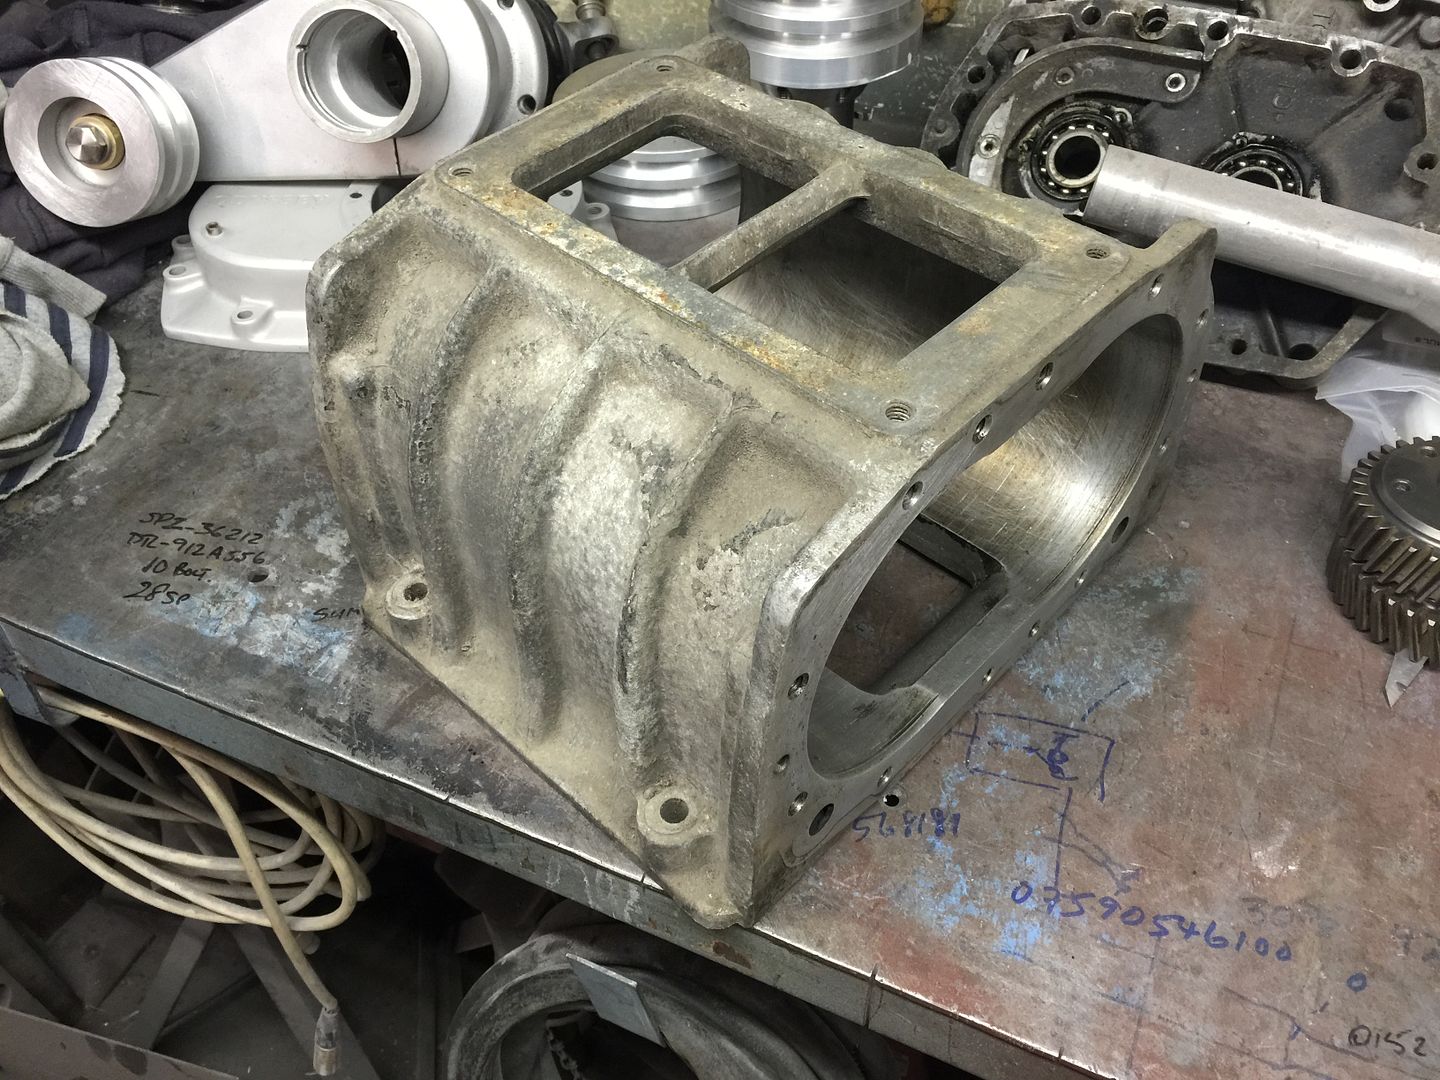
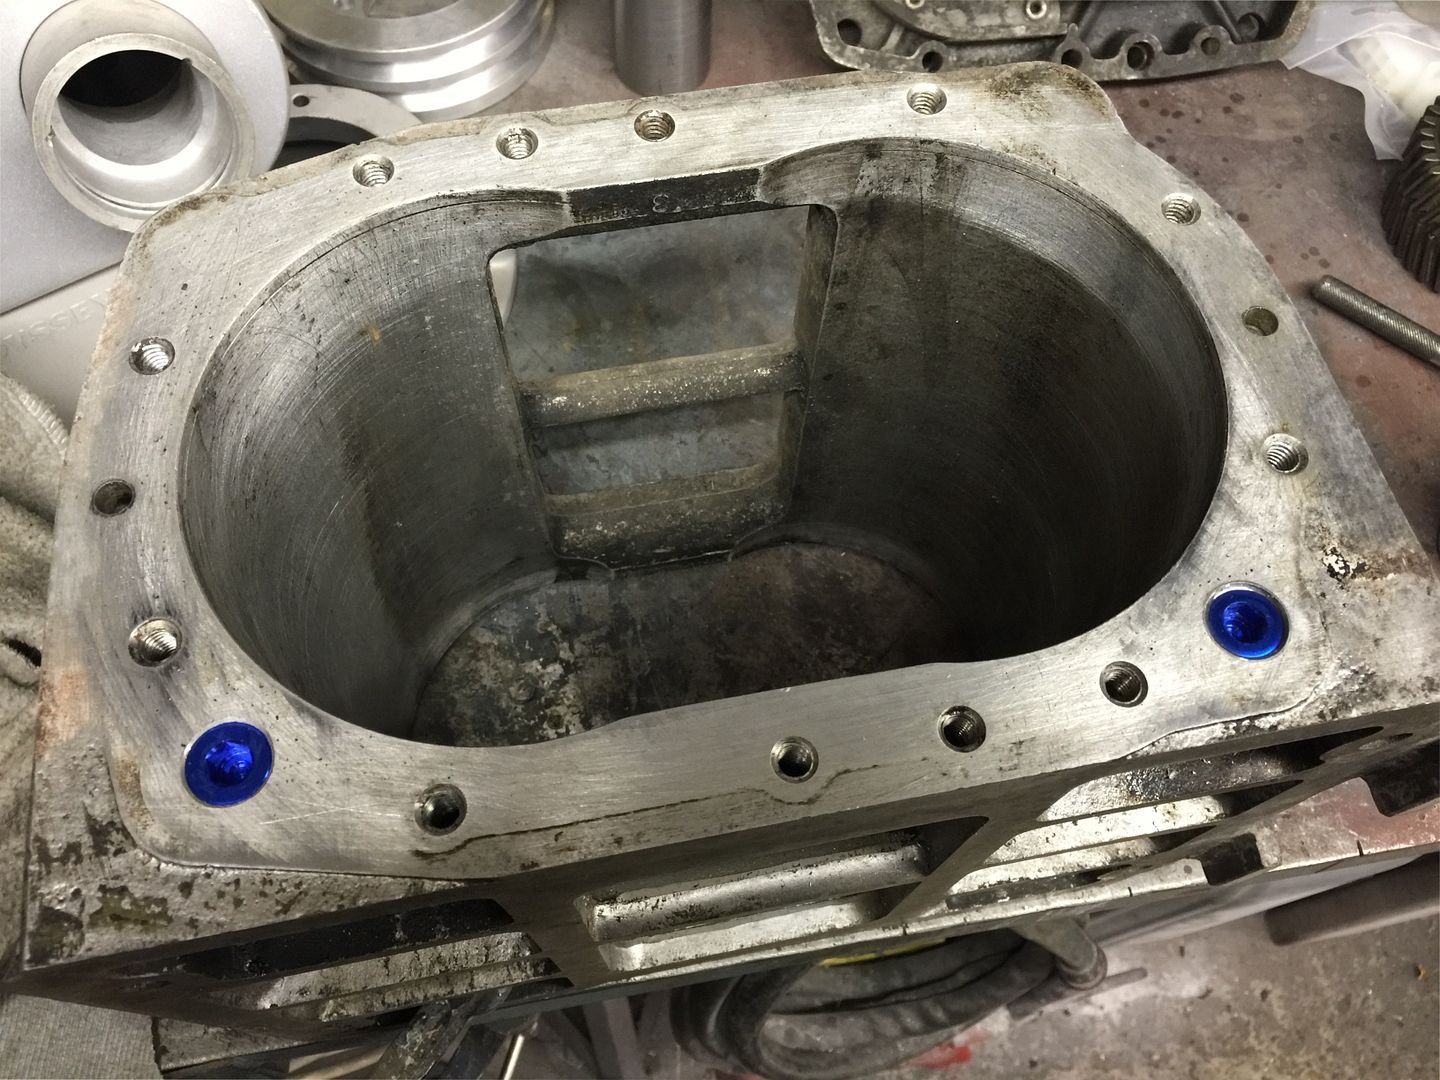
These holes in the case both ends have to be tapped 3/8"NPT and filled with pipe plugs to stop oil.
.Its aweful lonesome in the saddle since my horse died.
-
03-05-2015 02:19 PM #534
CHR Member/Contributor
- Join Date
- Sep 2007
- Location
- Gardner, KS
- Car Year, Make, Model: '33 HiBoy Coupe, '32 HiBoy Roadster
- Posts
- 11,245
Thanks, Steve, on the lathe info. Yeah, the belt thing used to be a real problem back in the '60's & '70's, but since around 1980 became all but a non issue with mandatory tolerances and improved processes. Originally Posted by roadster32
Roger
Enjoy the little things in life, and you may look back one day and realize that they were really the BIG things.
-
03-05-2015 05:04 PM #535
CHR Member
- Join Date
- Apr 2011
- Location
- Prairie City
- Car Year, Make, Model: 40 Ford Deluxe, 68 Corvette, 72&76 K30
- Posts
- 7,301
- Blog Entries
- 1
First of all, I really like your bracket/tab/fab design and work. my hat is off to you sir. Secondly, that blower was a great score, and will be an awesome added bonus on here! It's even better your mate had the front cover and a drive snout. The snout and drive parts bring more than a blower core up here. Way nice work on your pullies and idler. Nice markings before tear down to save you some head aches. The blower case looks pretty nice compared to some I've seen of that size. Great work, keep at it.Last edited by 40FordDeluxe; 03-05-2015 at 05:10 PM.
Ryan
1940 Ford Deluxe Tudor 354 Hemi 46RH Electric Blue w/multi-color flames, Ford 9" Residing in multiple pieces
1968 Corvette Coupe 5.9 Cummins Drag Car 11.43@130mph No stall leaving the line with 1250 rpm's and poor 2.2 60'
1972 Chevy K30 Longhorn P-pumped 24v Compound Turbos 47RH Just another money pit
1971 Camaro RS 5.3 BTR Stage 3 cam, SuperT10
Tire Sizes
-
03-06-2015 12:18 AM #536
CHR Member
- Join Date
- Apr 2009
- Location
- watford
- Car Year, Make, Model: 26T Coupe, 32 Roadster, 41 Willys Coupe
- Posts
- 2,363
Cheers Ryan, I'm pretty sure the blower has never been apart as there are no centre dots anywhere, yes it's in pretty tidy condition. Originally Posted by 40FordDeluxe
.Its aweful lonesome in the saddle since my horse died.
-
03-06-2015 01:53 PM #537
CHR Member
- Join Date
- Apr 2009
- Location
- watford
- Car Year, Make, Model: 26T Coupe, 32 Roadster, 41 Willys Coupe
- Posts
- 2,363
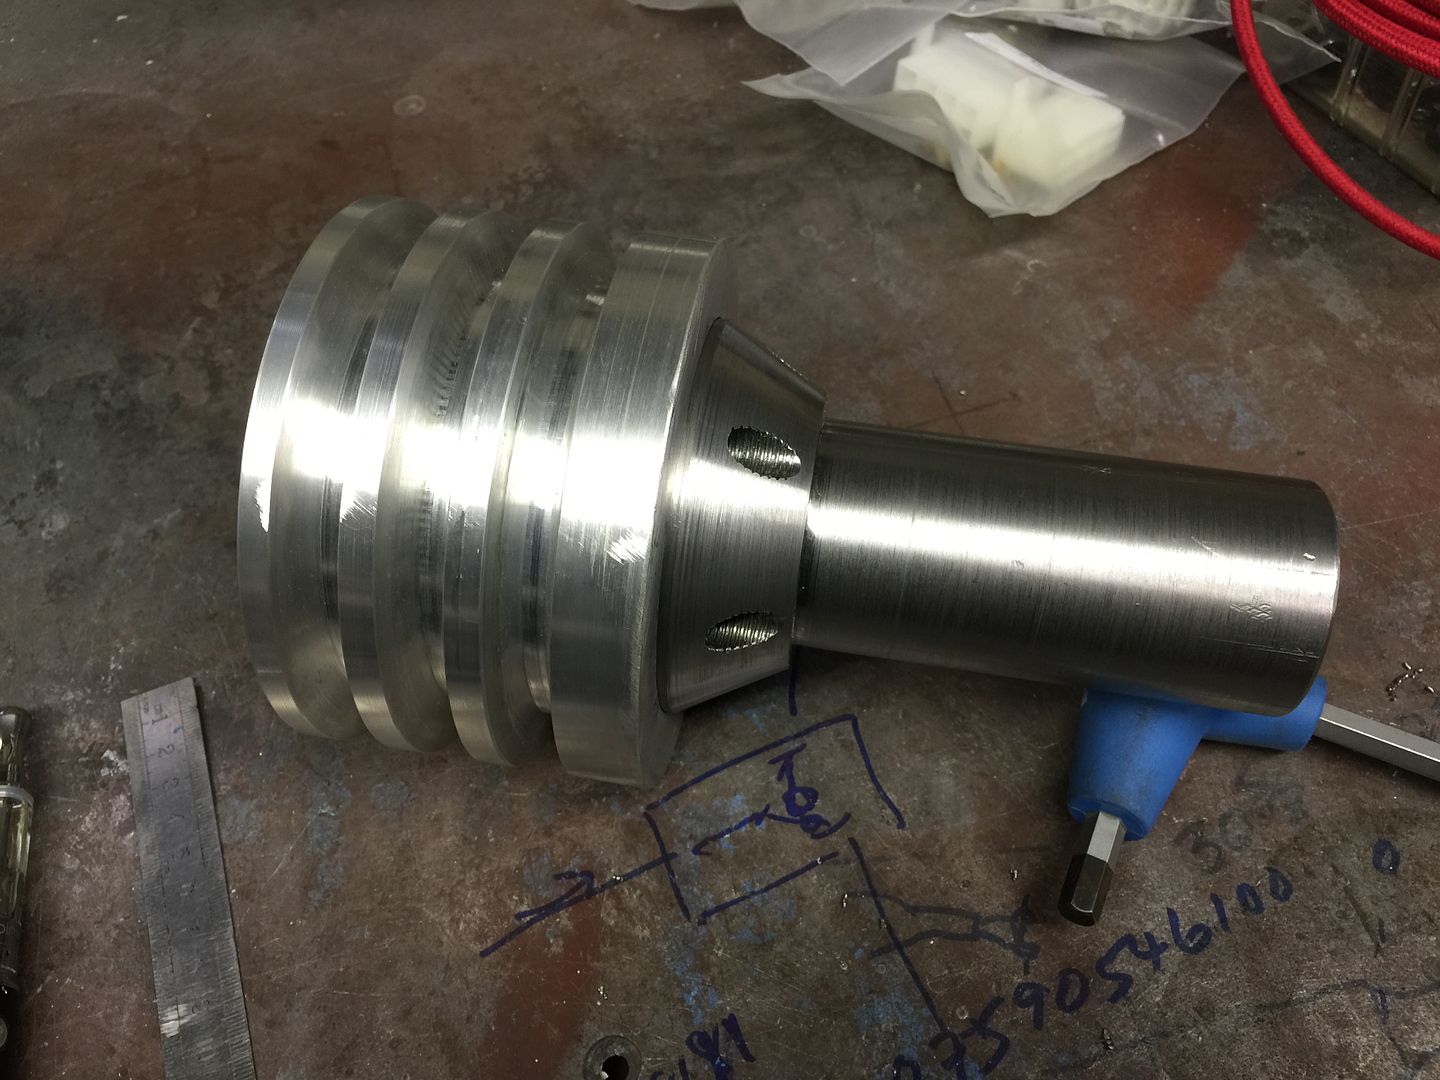
Started making the blower snout shaft last night, used the EN40 offcut from the crank hub, drilled the mounting holes, next I need to make the drive shaft which will be welded and pinned to the hub you see here.

.Its aweful lonesome in the saddle since my horse died.
-
03-06-2015 04:01 PM #538
CHR Member
- Join Date
- Apr 2011
- Location
- Prairie City
- Car Year, Make, Model: 40 Ford Deluxe, 68 Corvette, 72&76 K30
- Posts
- 7,301
- Blog Entries
- 1
Very nice, and those ARP fasteners finish it off. Do you buy those by the bag? I notice you use them a lot.Ryan
1940 Ford Deluxe Tudor 354 Hemi 46RH Electric Blue w/multi-color flames, Ford 9" Residing in multiple pieces
1968 Corvette Coupe 5.9 Cummins Drag Car 11.43@130mph No stall leaving the line with 1250 rpm's and poor 2.2 60'
1972 Chevy K30 Longhorn P-pumped 24v Compound Turbos 47RH Just another money pit
1971 Camaro RS 5.3 BTR Stage 3 cam, SuperT10
Tire Sizes
-
03-07-2015 02:31 AM #539
CHR Member
- Join Date
- Apr 2009
- Location
- watford
- Car Year, Make, Model: 26T Coupe, 32 Roadster, 41 Willys Coupe
- Posts
- 2,363
I'm a dealer for ARP Ryan so have them on the shelf, the best bolts around in my opinion, I only used the stainless as I didn't have any regular type, they will get changed. Originally Posted by 40FordDeluxe
.Its aweful lonesome in the saddle since my horse died.
-
03-07-2015 10:31 AM #540
CHR Member
- Join Date
- Apr 2009
- Location
- watford
- Car Year, Make, Model: 26T Coupe, 32 Roadster, 41 Willys Coupe
- Posts
- 2,363
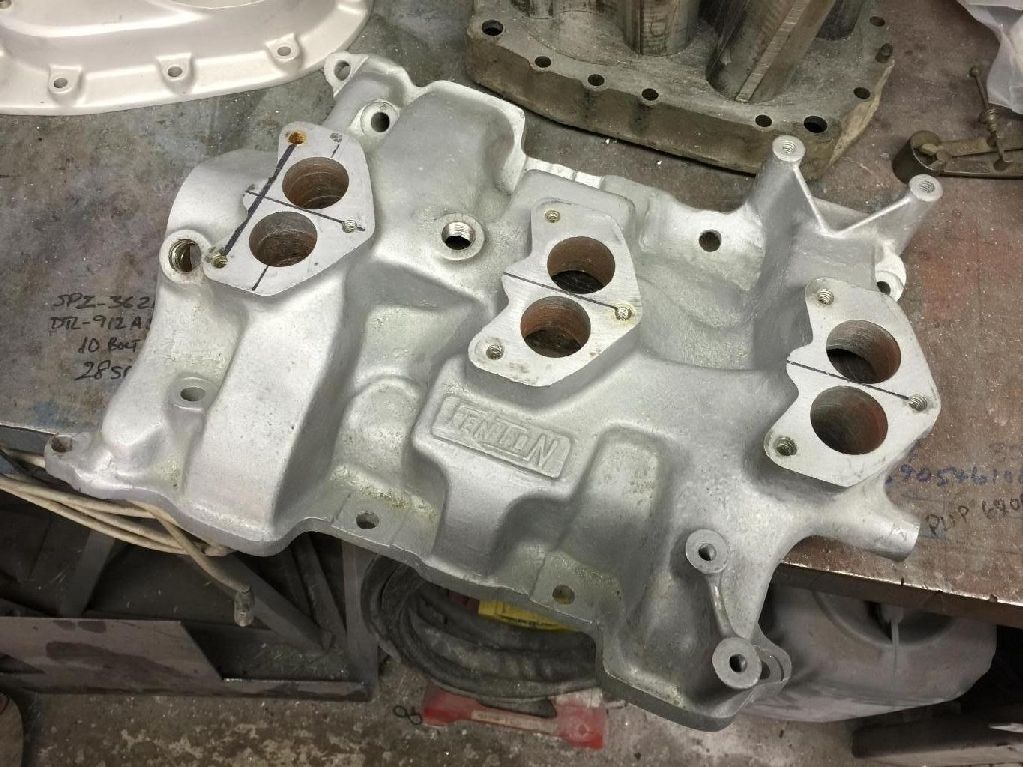
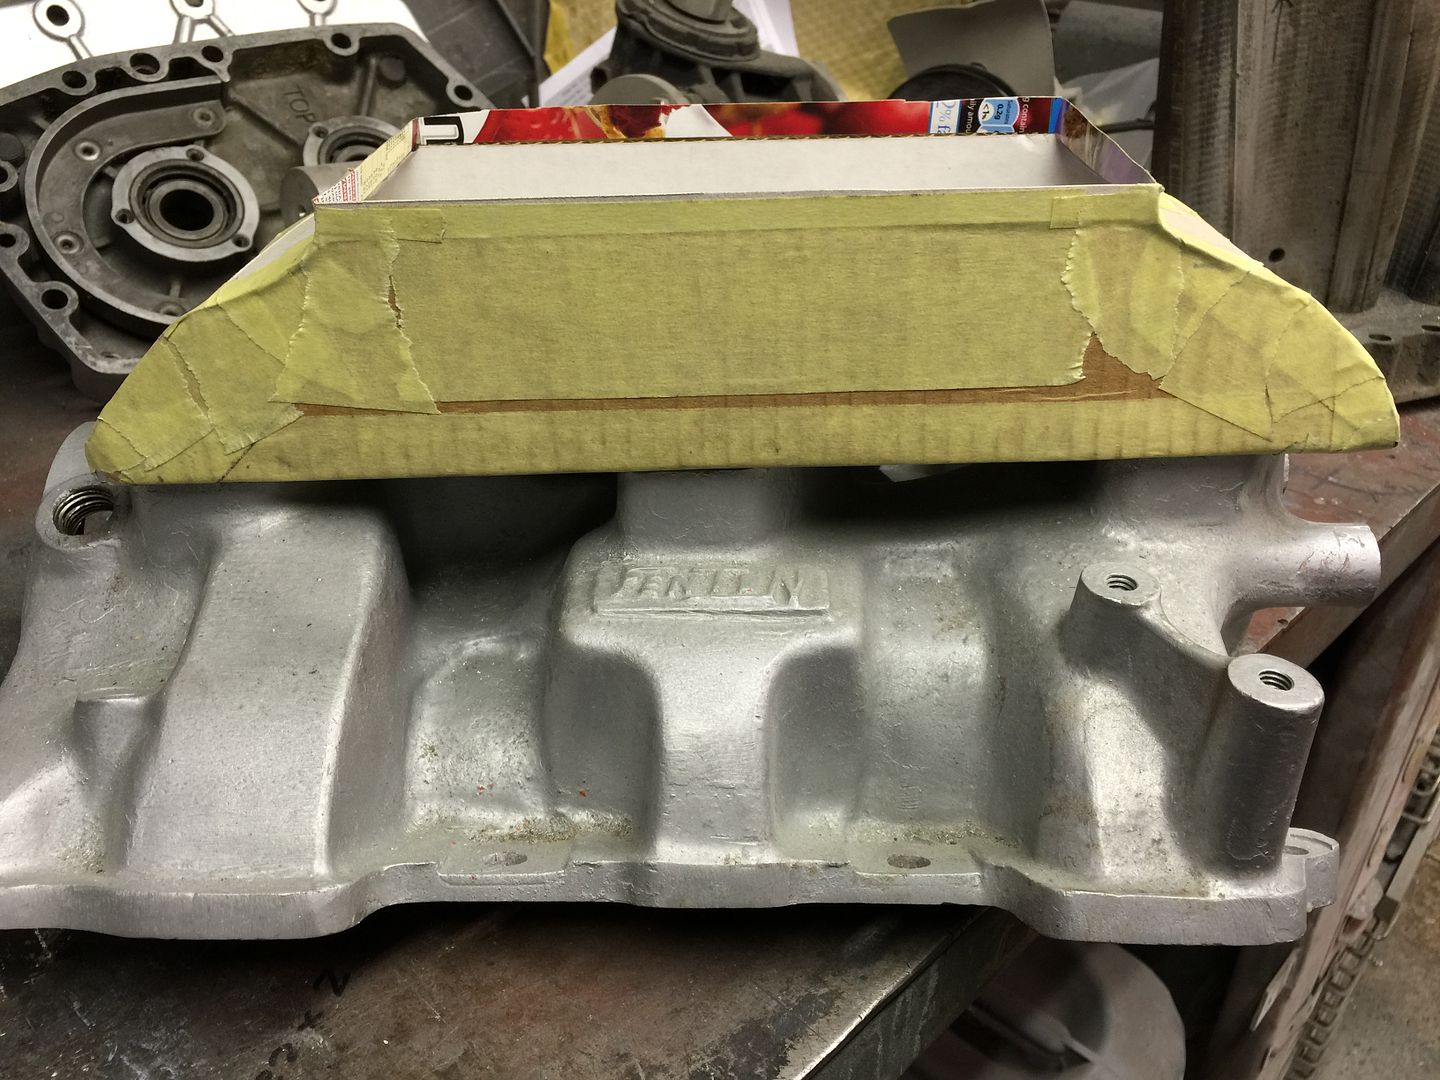
Came to a full stop on the snout shaft as run out of 1" bar so turned my attention to sorting the intake out, I'm gonna have to use the Fenton 3 x 2 as can't find an aluminium intake to mill out, Only one person making one and its big money, there is one guy making blower intakes for the Y block but at $1000 he can keep them !!!
The problem I have is the carb throats on the Fenton are too far apart for the bottom outlet of a 4/71, a 6/71 would of been spot on but way to big for the look I want. Anyways decided to stick with what I have, shame really as the Fenton seems to be fairly rare.
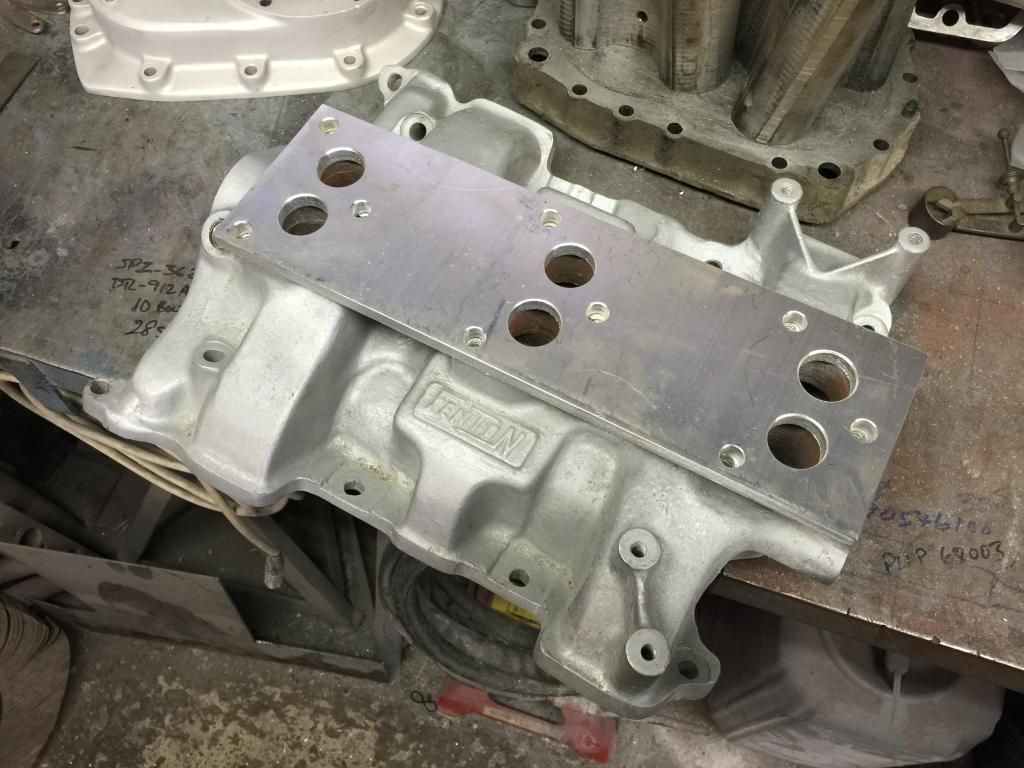
My cunning plan is to fabricate a curved ended box to act as a plenum which simply bolts to the existing intake and the blower bolts straight to this.
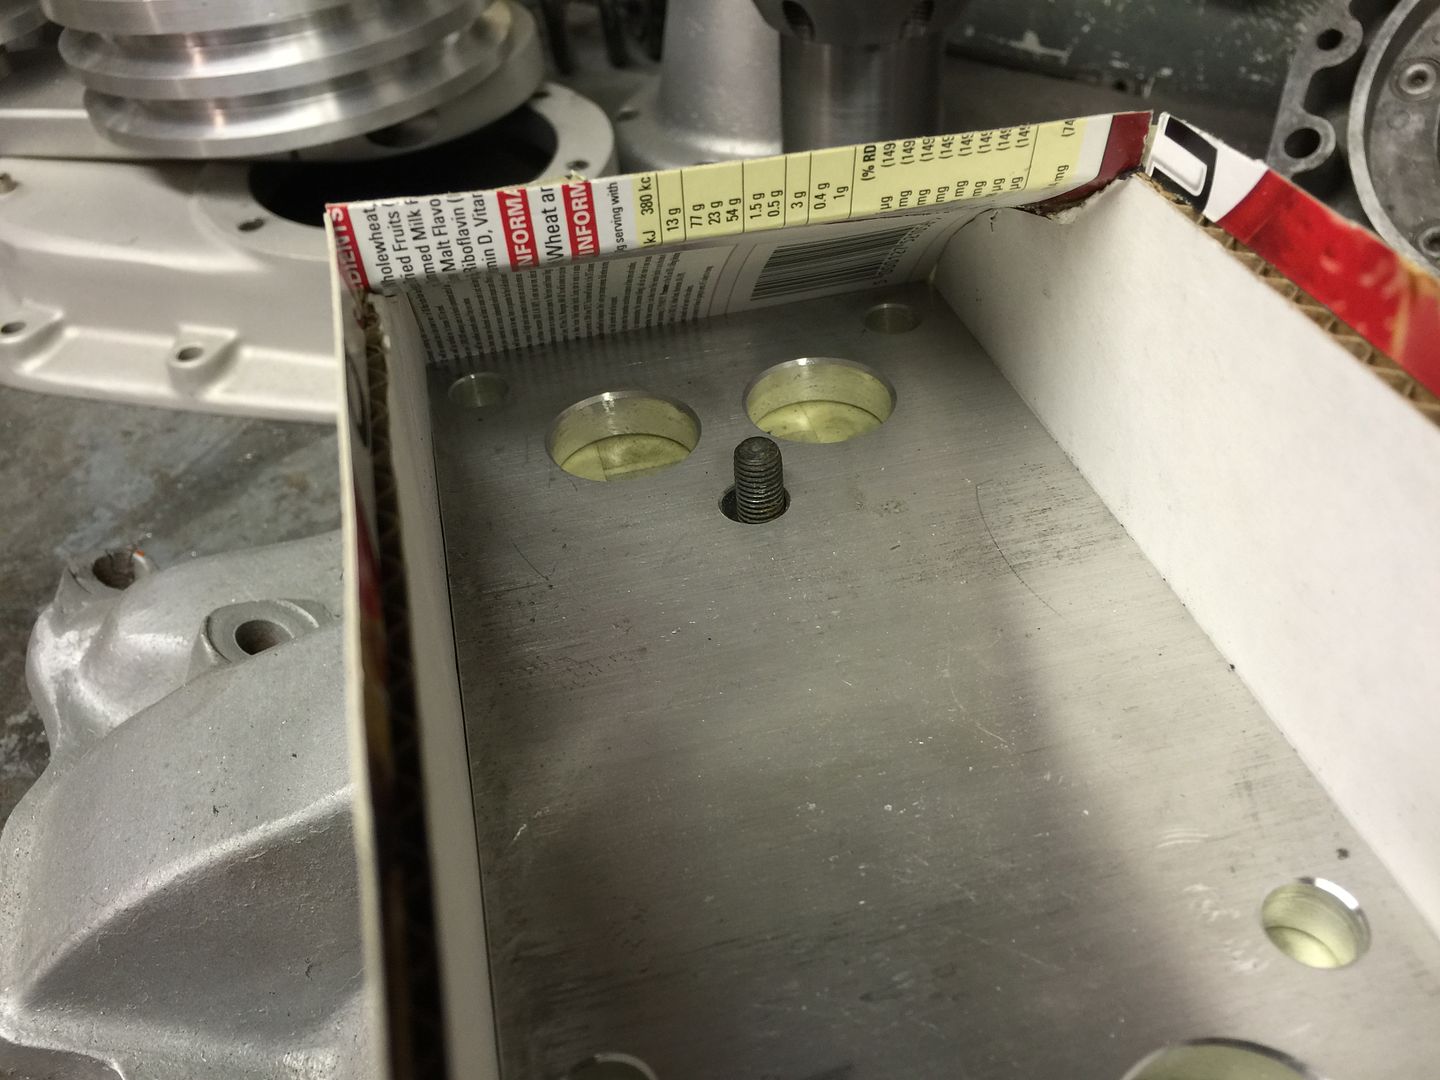
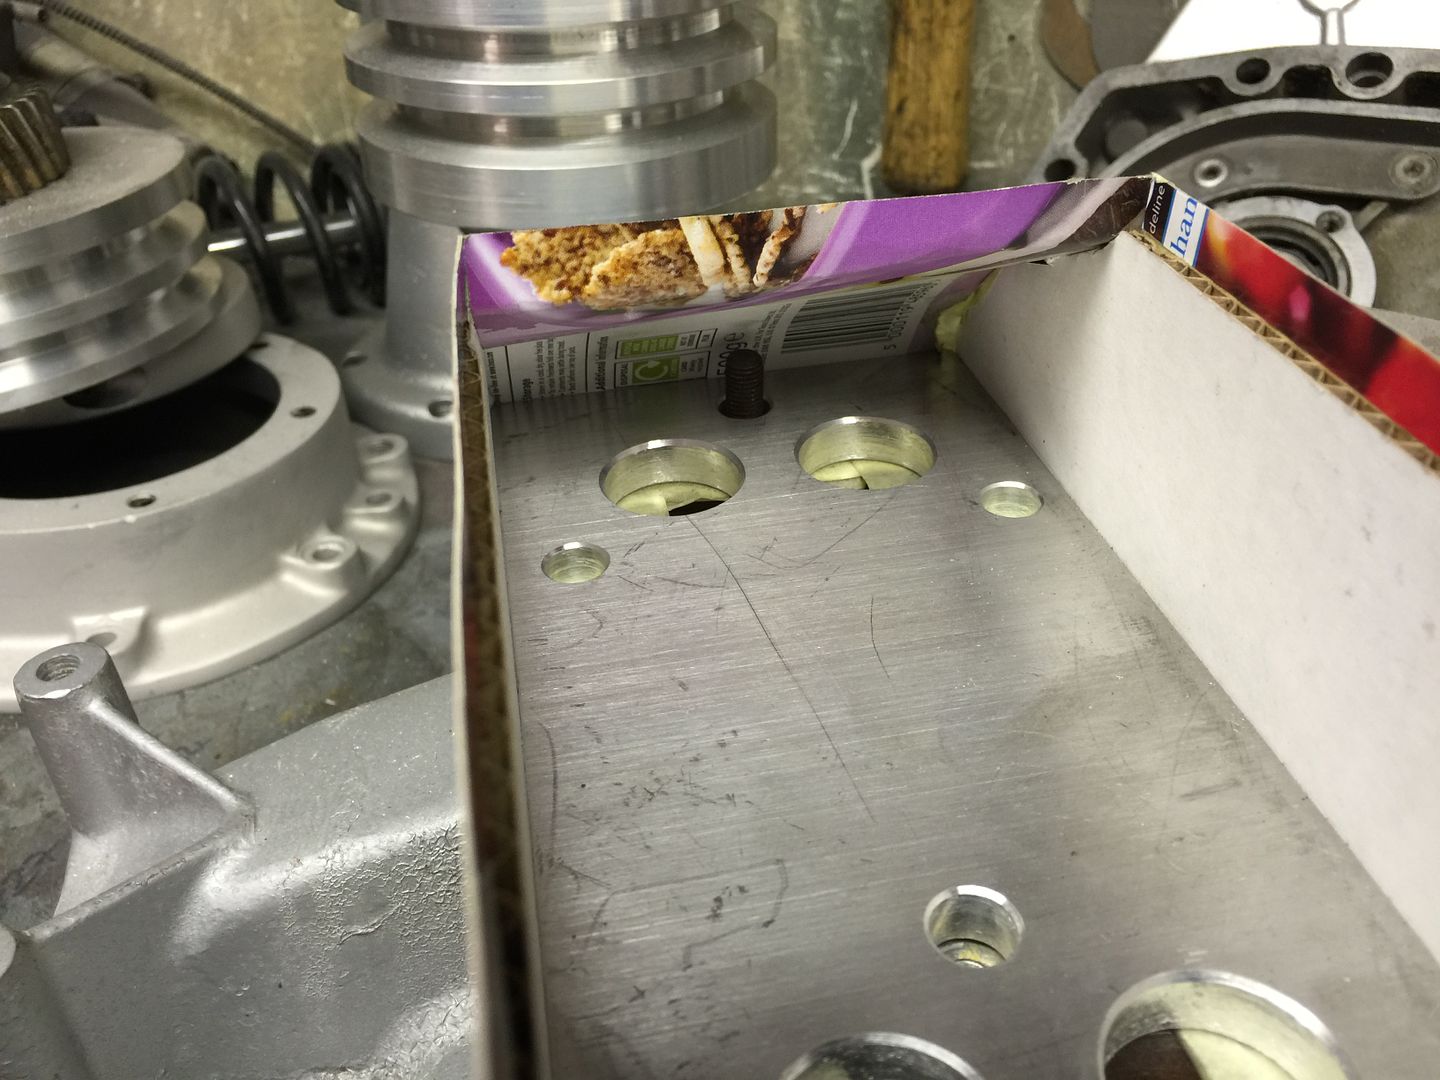
First job was to make a 3/8" plate for the base and transfer all the various holes, the original carb mounting holes will be drilled out to 3/8" as because of the top having the normal 5 degree inclination the holes will be slightly tilted once I flycut the top surface true to the crank centreline, the pics hopefully will explain.
Here I have made a mockup in cardboard.
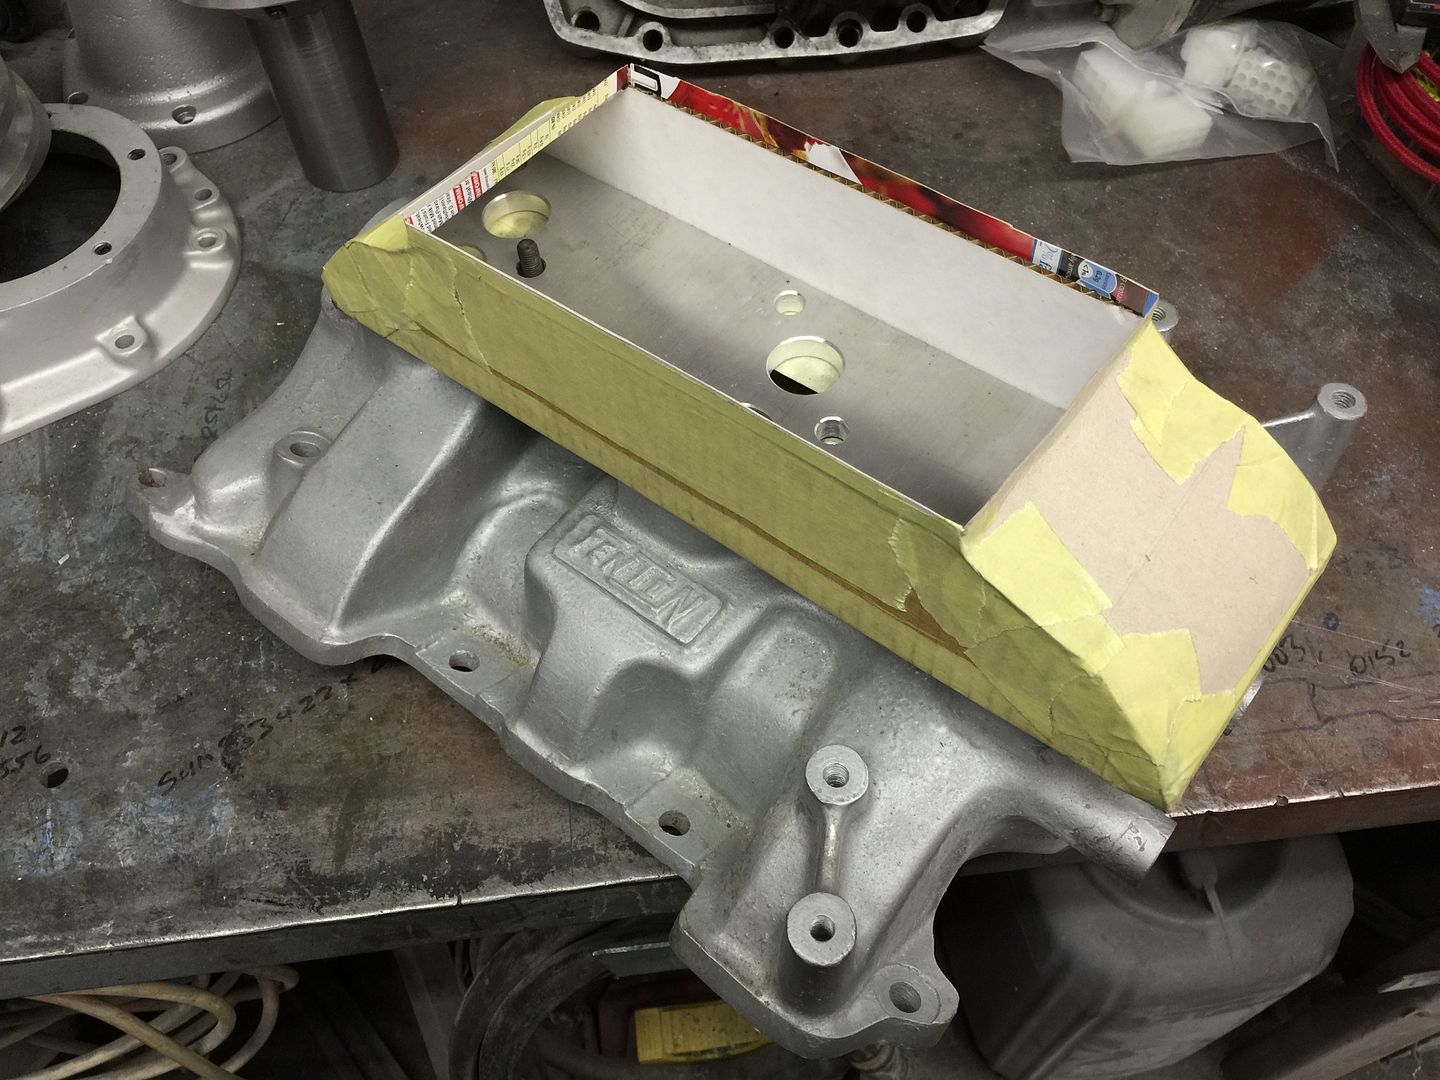
Getting to the rear 2 and the front 1 mounting bolt will be tricky but doable
.Its aweful lonesome in the saddle since my horse died.
 Reply With Quote


Posting Permissions
- You may not post new threads
- You may not post replies
- You may not post attachments
- You may not edit your posts

i've enjoyed the years here . made a lot of friends. most who have left. i see no reason to continue with this so hope to see you somewhere else. i dont think this site will ever be back. it's lived...
Dead!