


 3390Likes
Thread: 55 Wagon Progress


Results 1,651 to 1,665 of 1865
 LinkBack URL
 About LinkBacks
-
11-03-2021 07:35 PM #1651
 CHR Member

- Join Date
- Apr 2012
- Location
- american canyon
- Car Year, Make, Model: 36 Ford Sedan, 23 T Bucket
- Posts
- 1,899
I peeked behind the curtain, you are a wizard!
-
Advertising

- Google Adsense
- REGISTERED USERS DO NOT SEE THIS AD
-
11-08-2021 06:47 PM #1652
CHR Member
- Join Date
- Sep 2005
- Location
- Hamilton
- Car Year, Make, Model: 69 nomad, 73 charger, 74 vega
- Posts
- 3,900
It's beautiful, but clearly not stock.
Kudos..
Education is expensive. Keep that in mind, and you'll never be terribly upset when a project goes awry.
EG
-
11-21-2021 07:19 AM #1653
CHR Member
- Join Date
- Jun 2008
- Location
- Leonardtown
- Car Year, Make, Model: Walking
- Posts
- 1,228
Thanks guys!
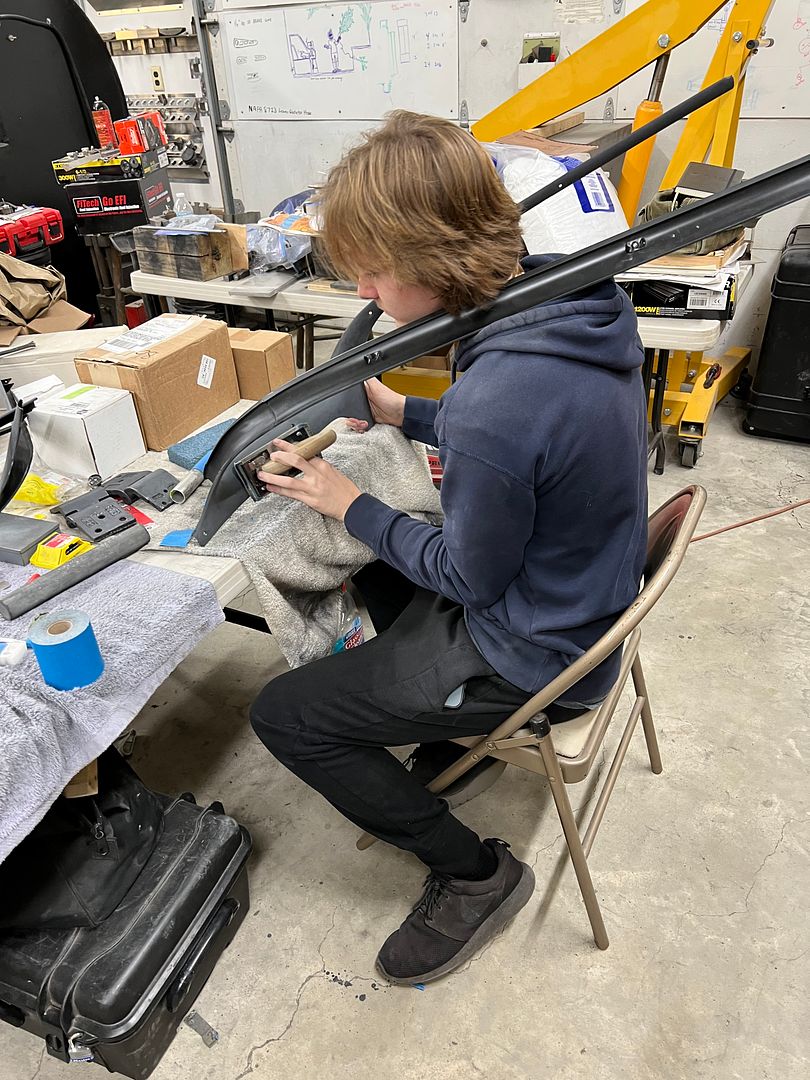
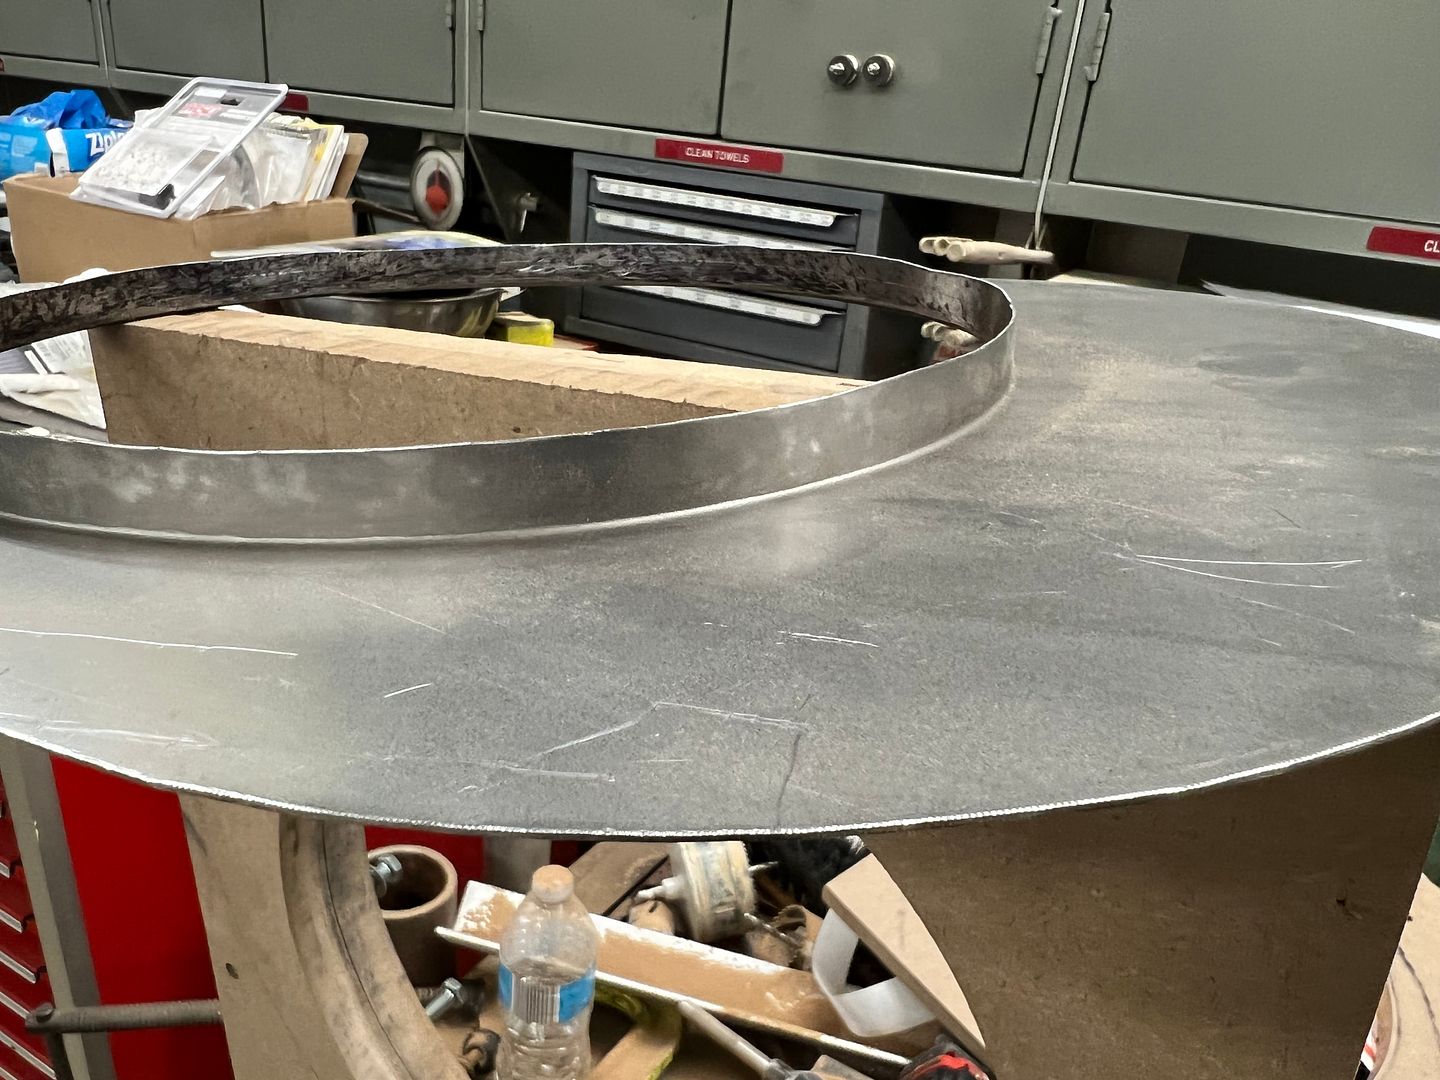
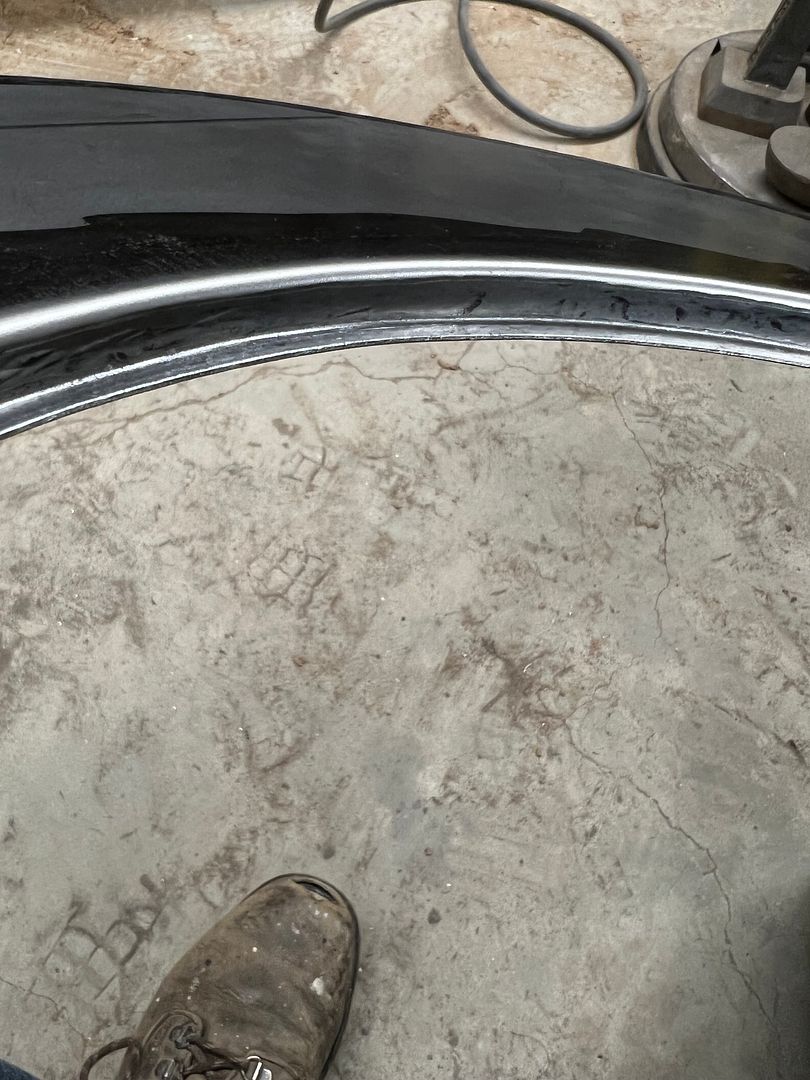
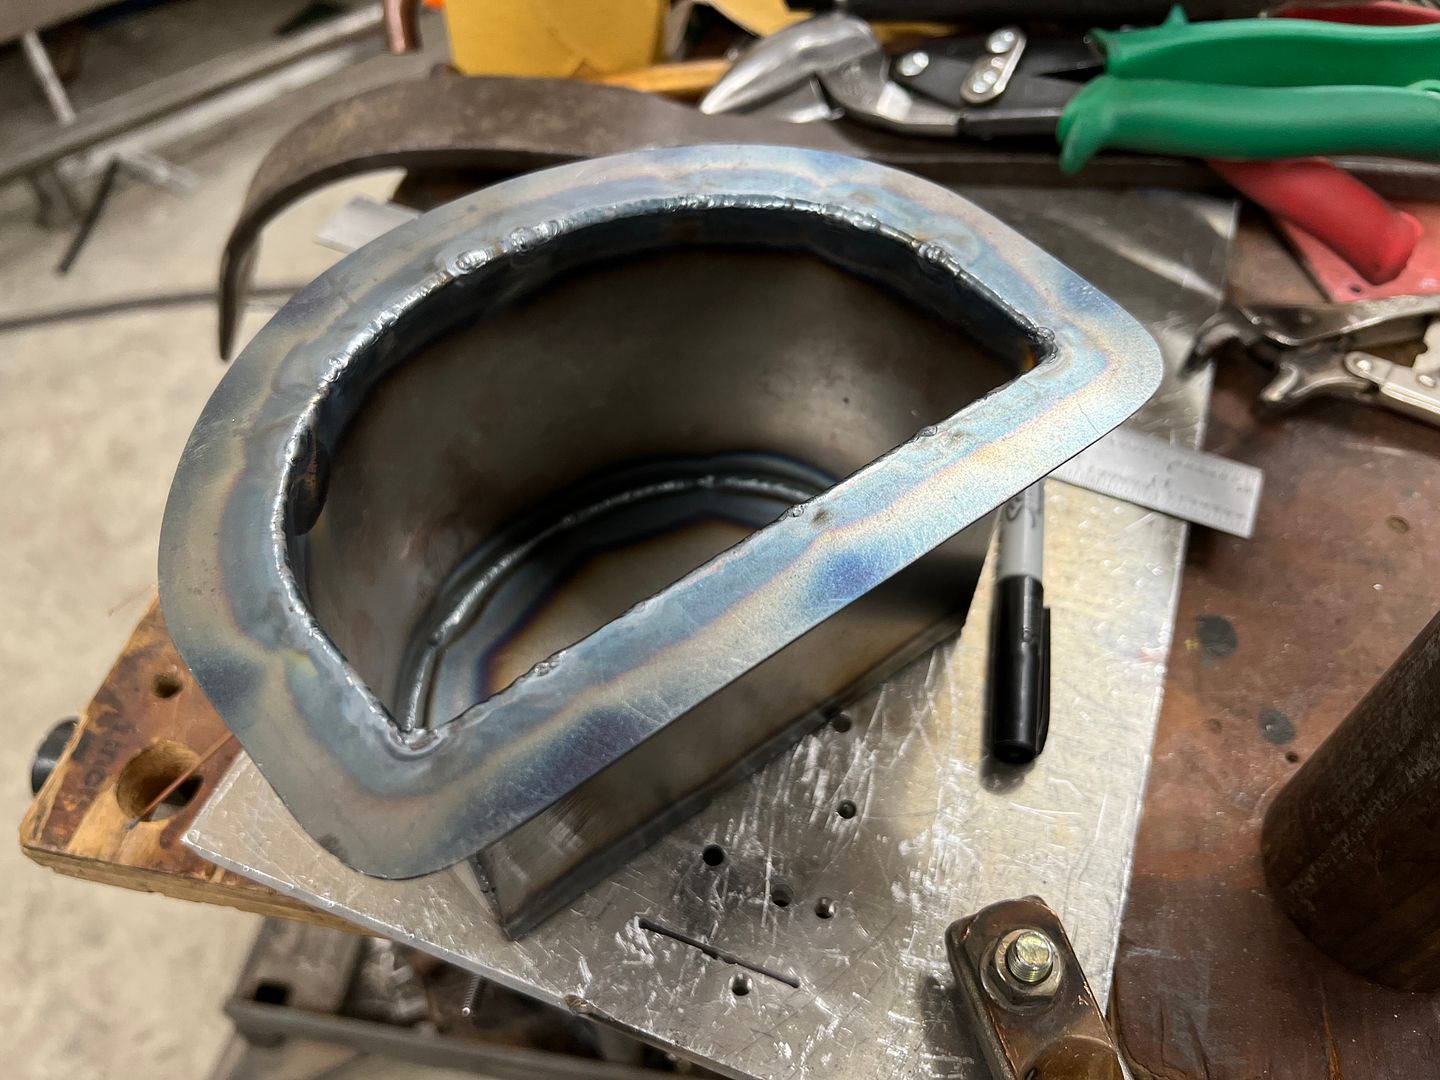
Wagon progress! So Jared has been tackling the fun task of prepping interior trim pieces, getting them ready for another round of epoxy..
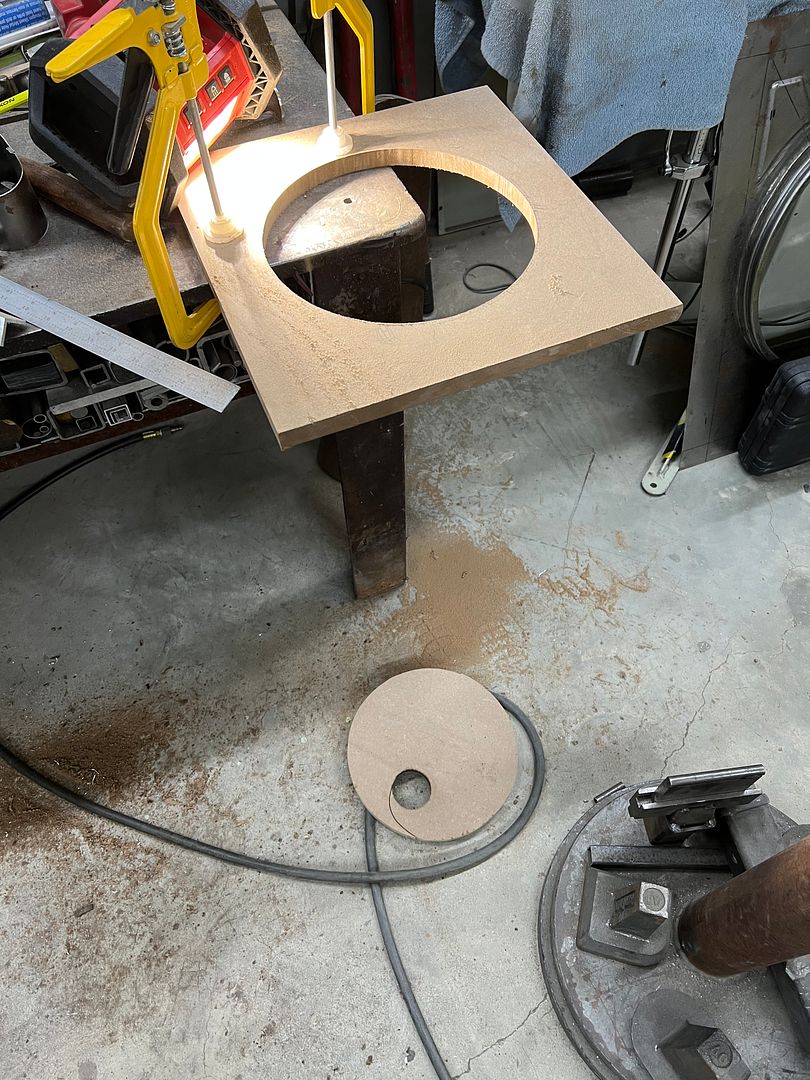
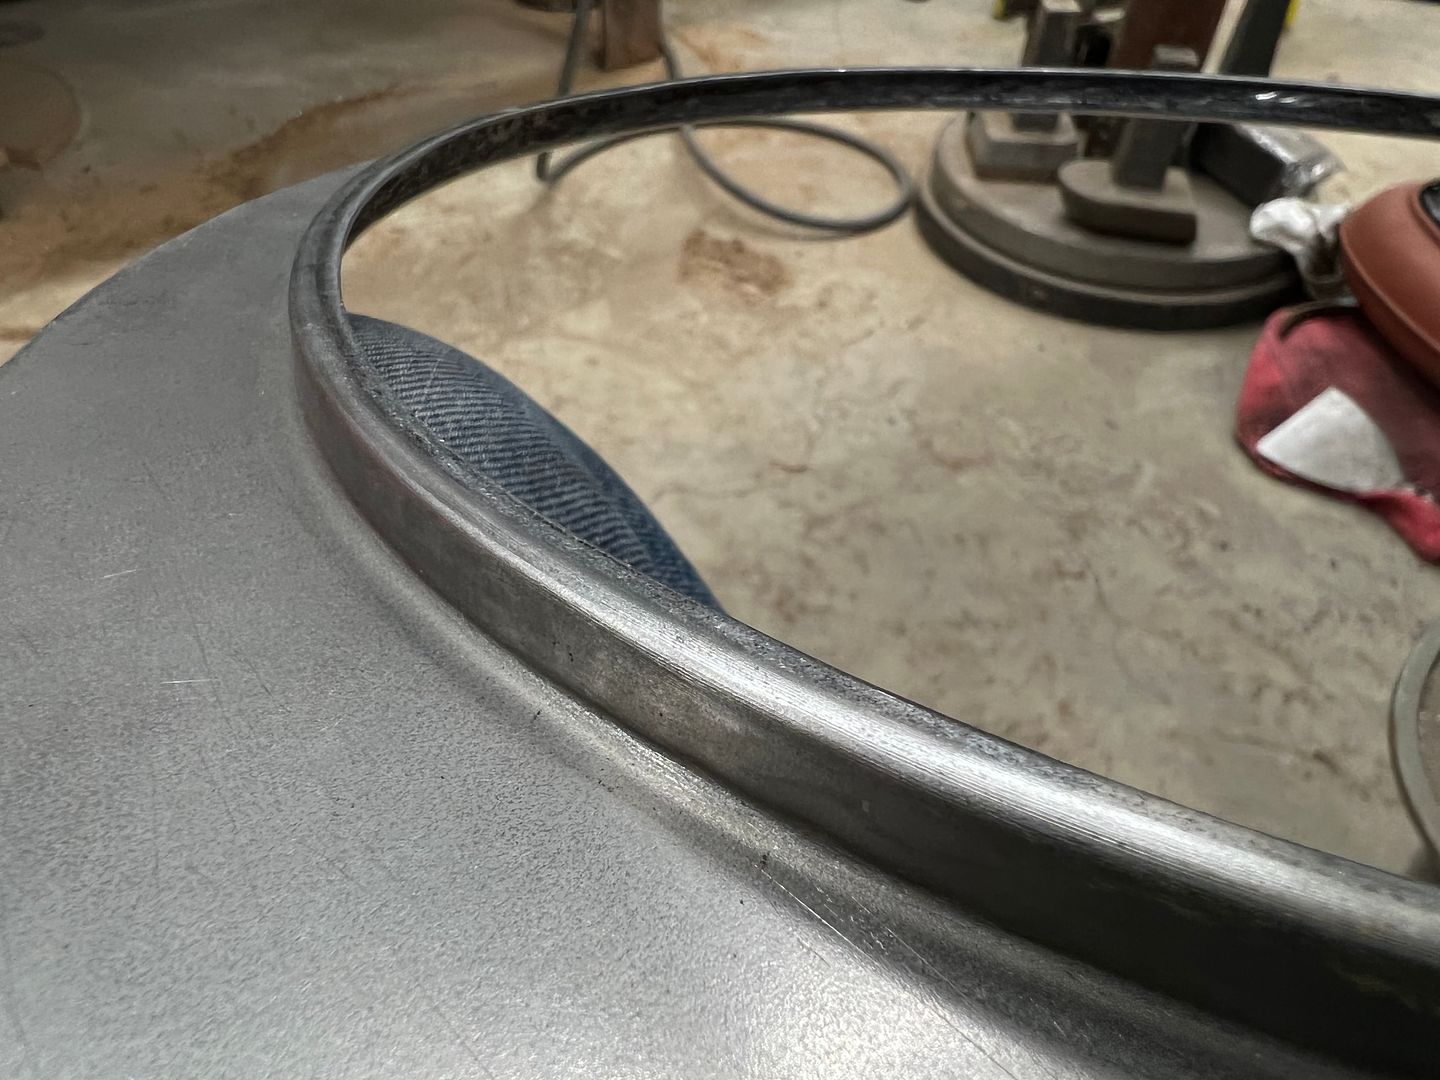
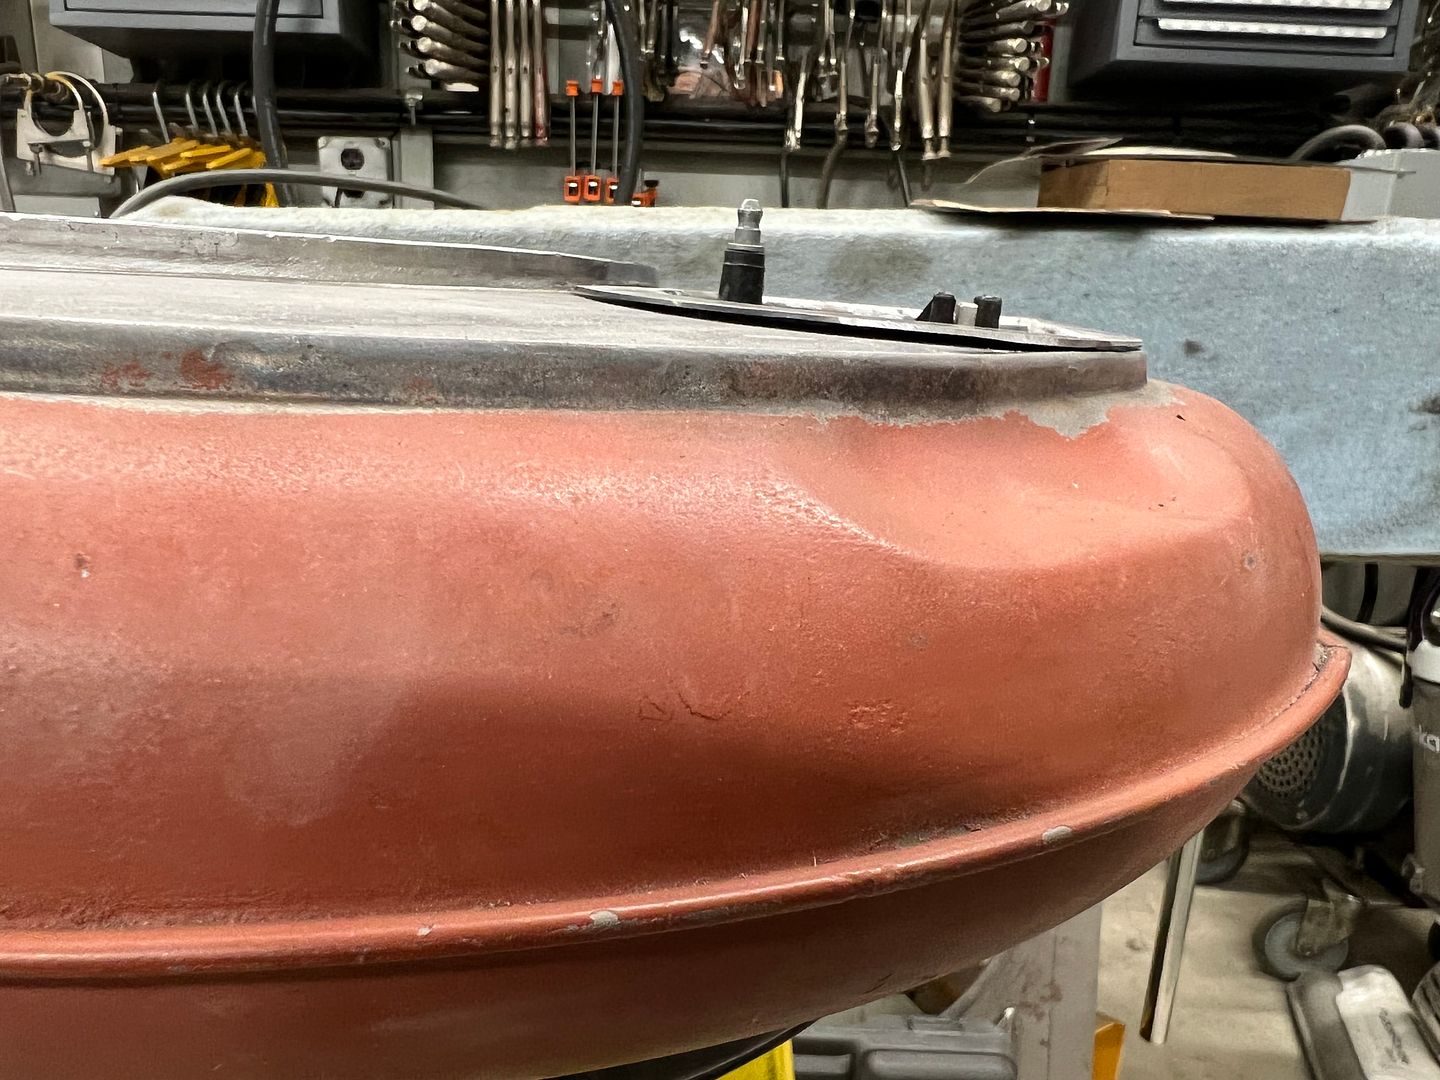
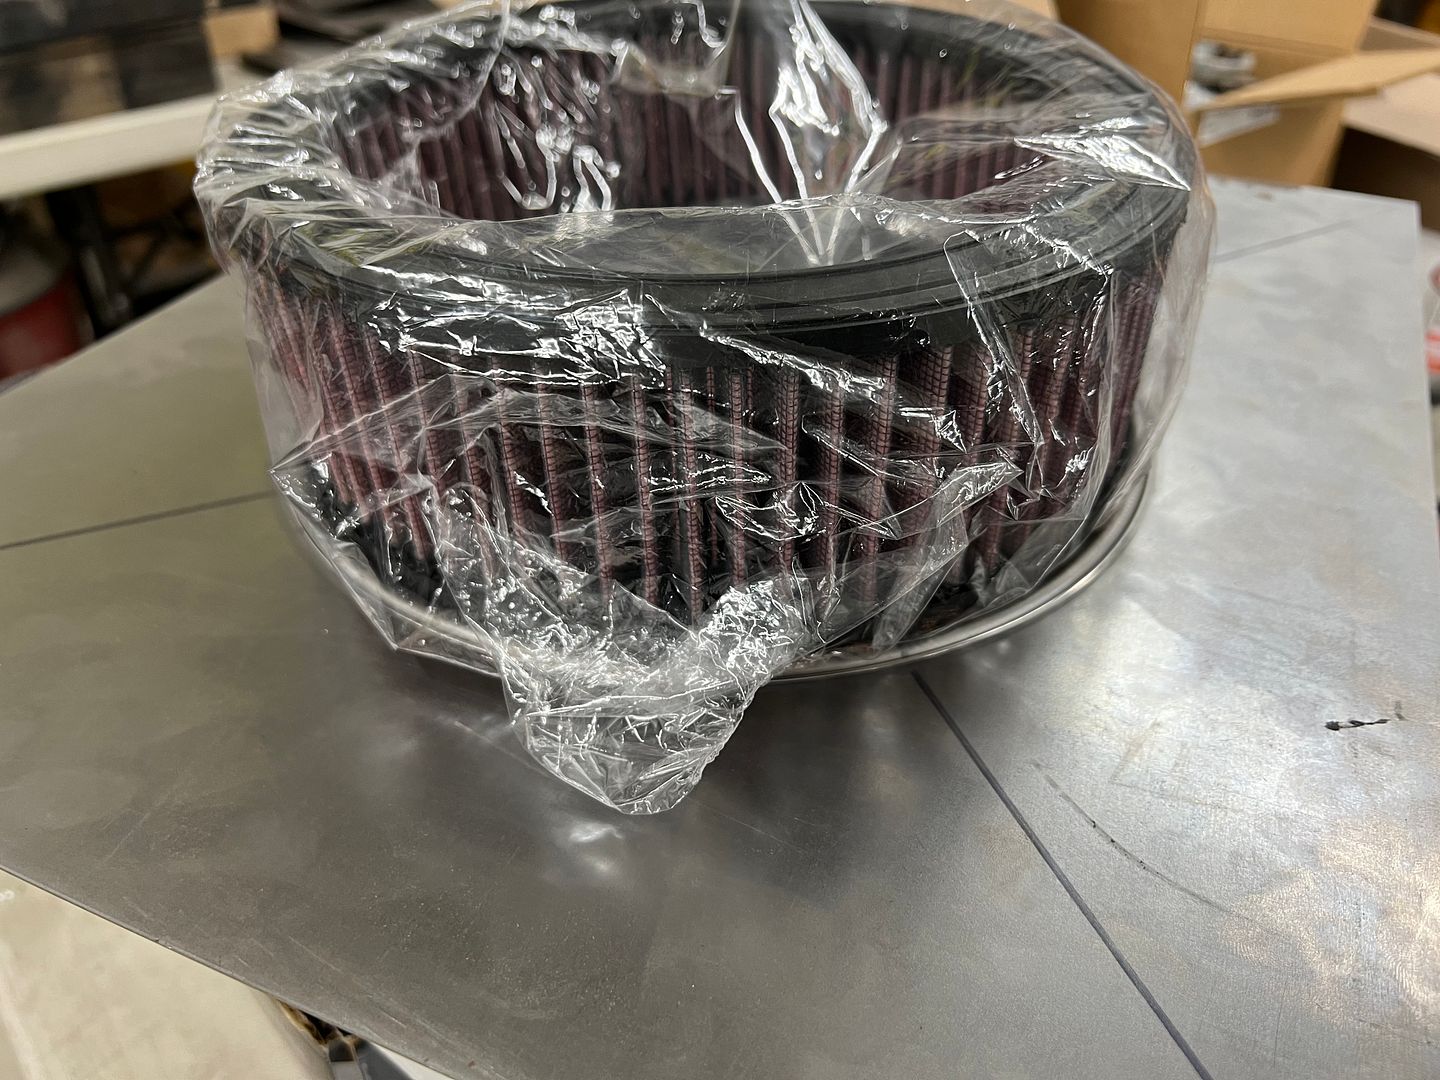
Another modification we're undertaking, the air cleaner, when mocked up on the engine, showed a tight proximity to the back of the AC compressor. Looking at the clearance we had to the firewall, moving backward 1" will give us much needed breathing room for the AC lines. So out with the old ....
And to move rearward, the mounting hole is moved forward one inch..
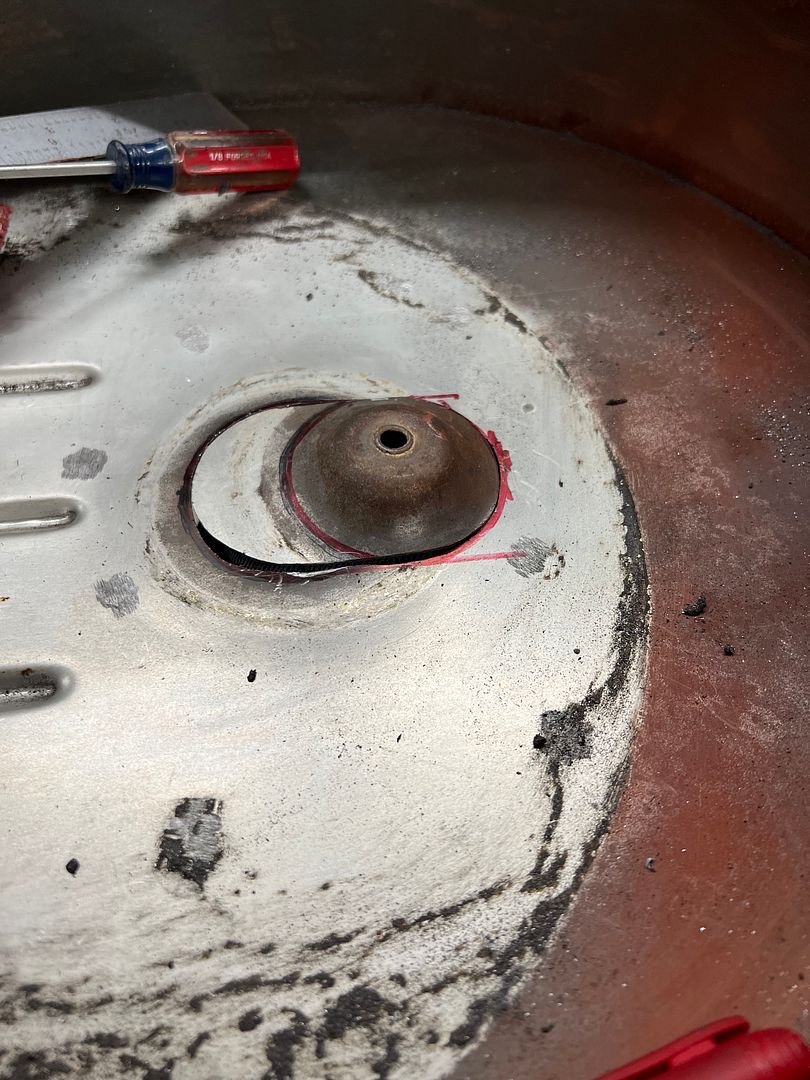
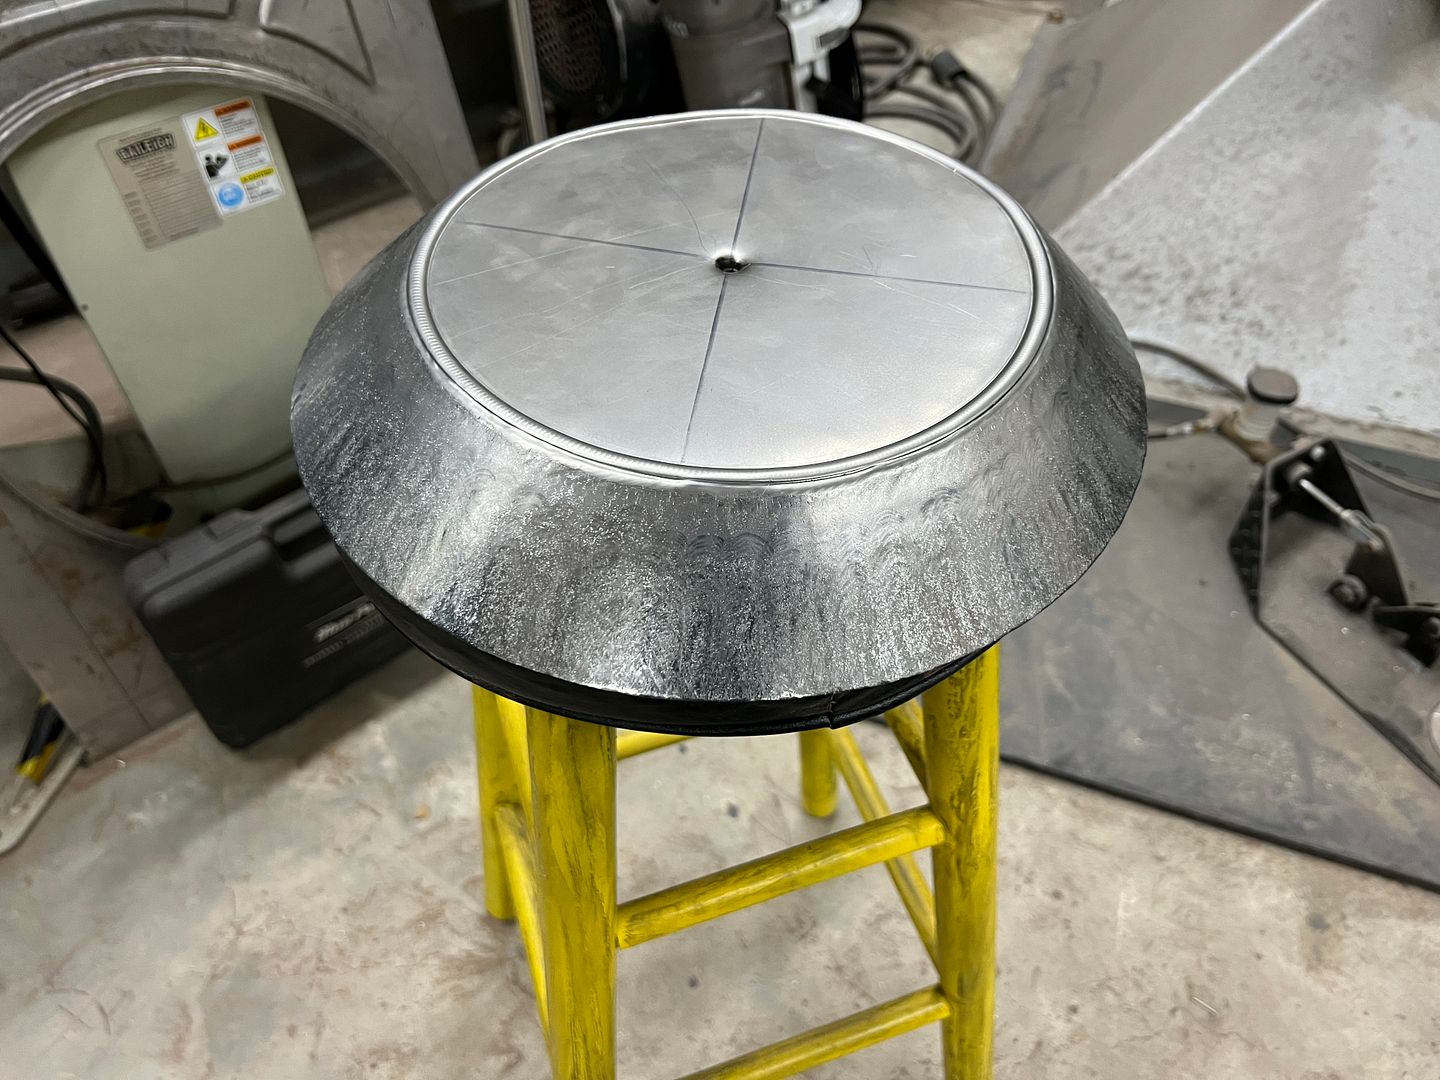
Next in store is a new bottom for the air cleaner..
A hammerform is used to give us a folded lip out the bottom
https://youtu.be/QPLDGIxJAYk
https://youtu.be/Zm6TIkxDDUA
Robert
-
11-21-2021 07:40 AM #1654
CHR Member
- Join Date
- Jun 2008
- Location
- Leonardtown
- Car Year, Make, Model: Walking
- Posts
- 1,228
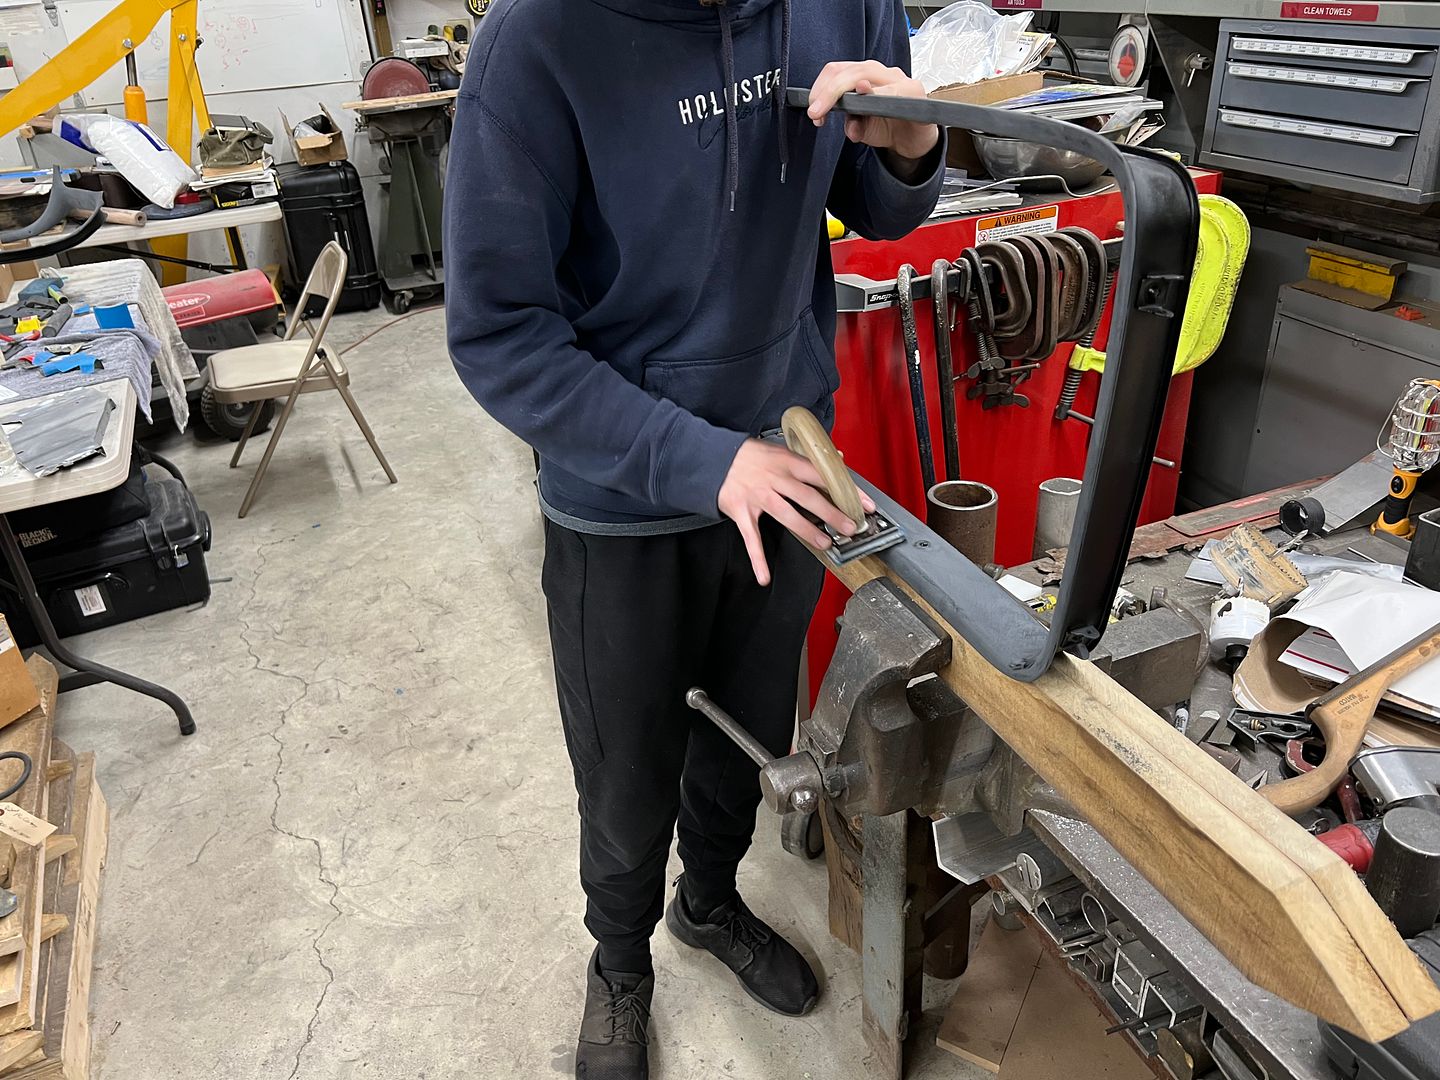
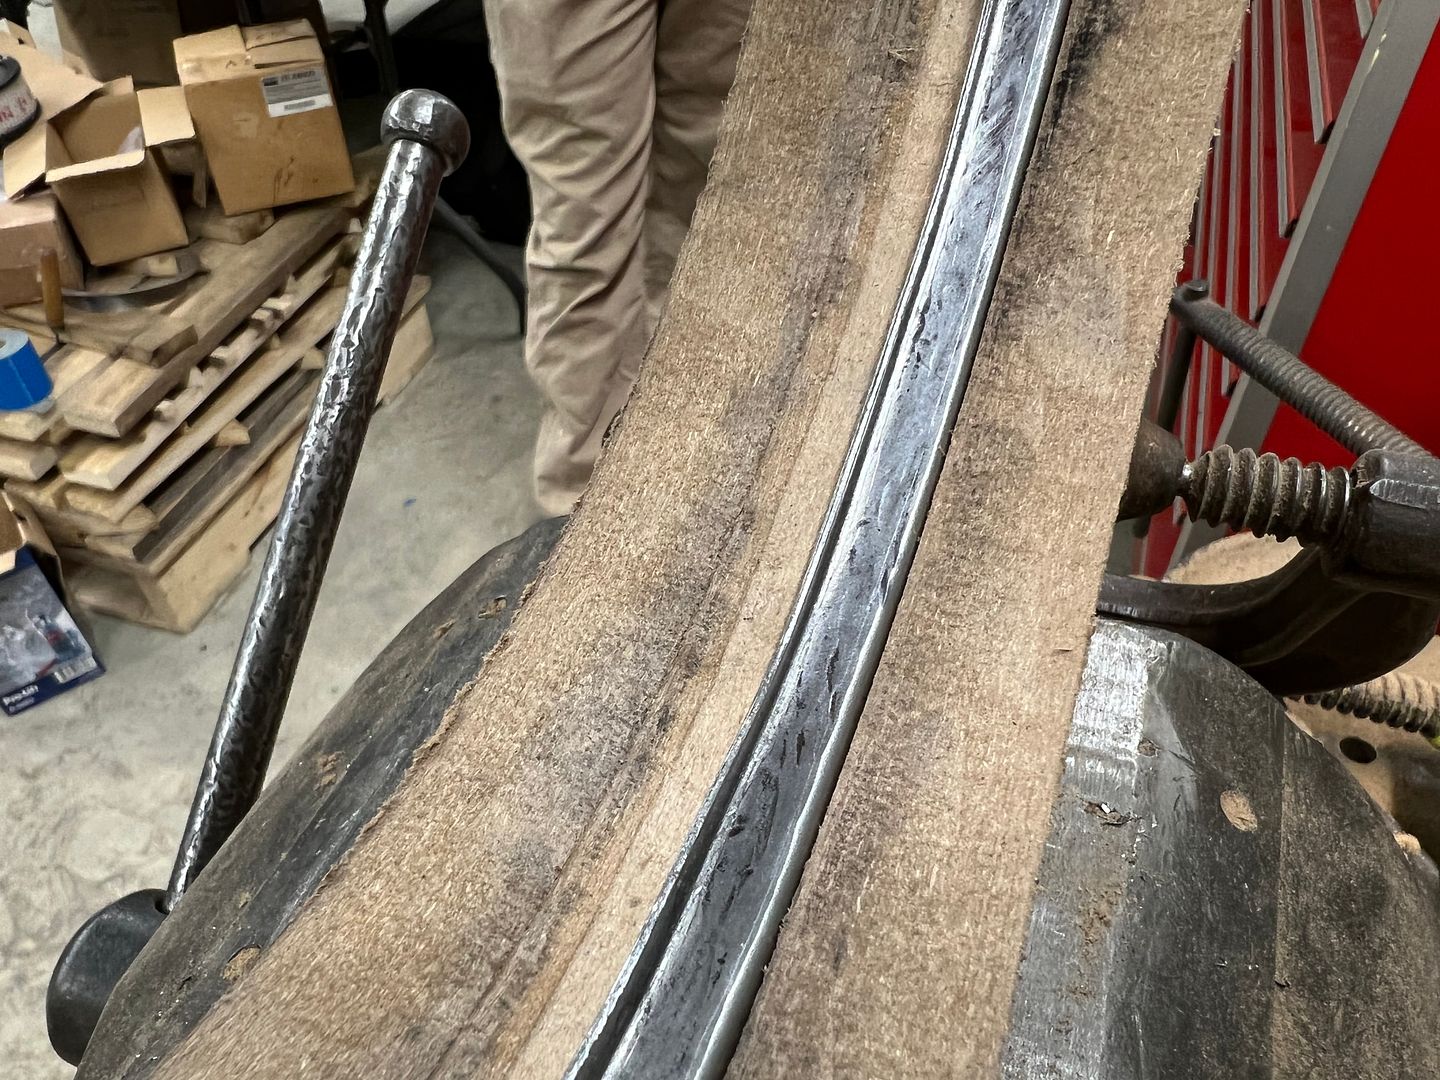
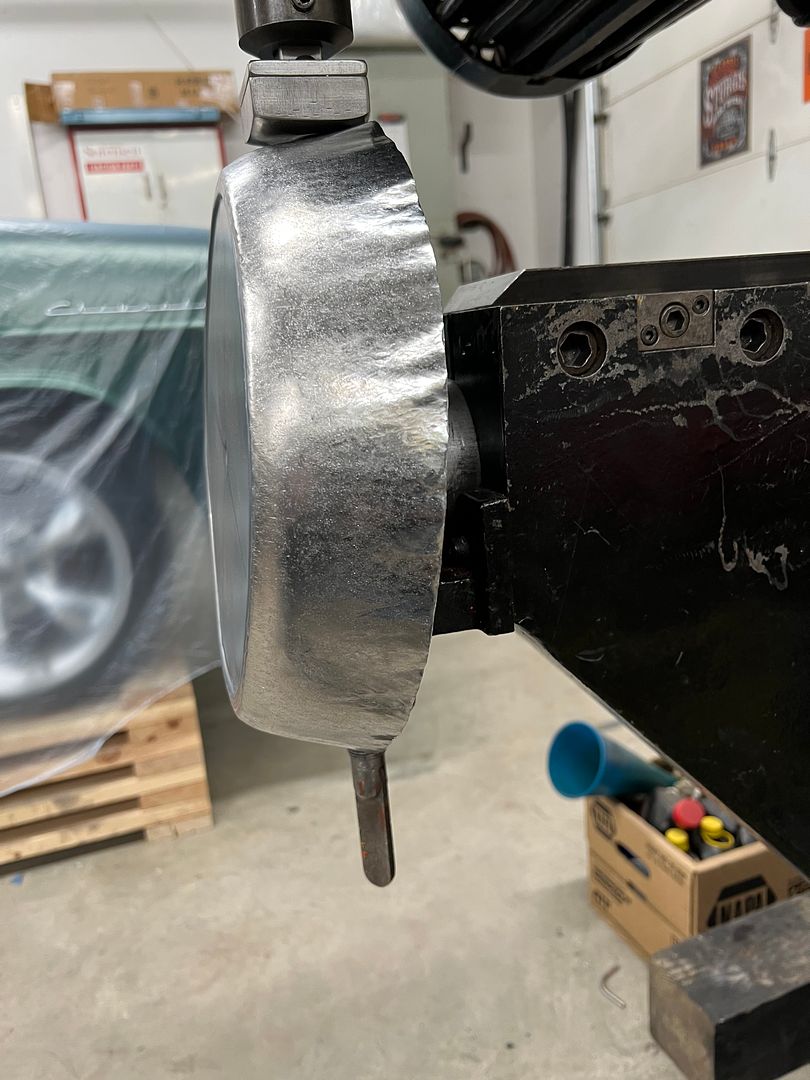
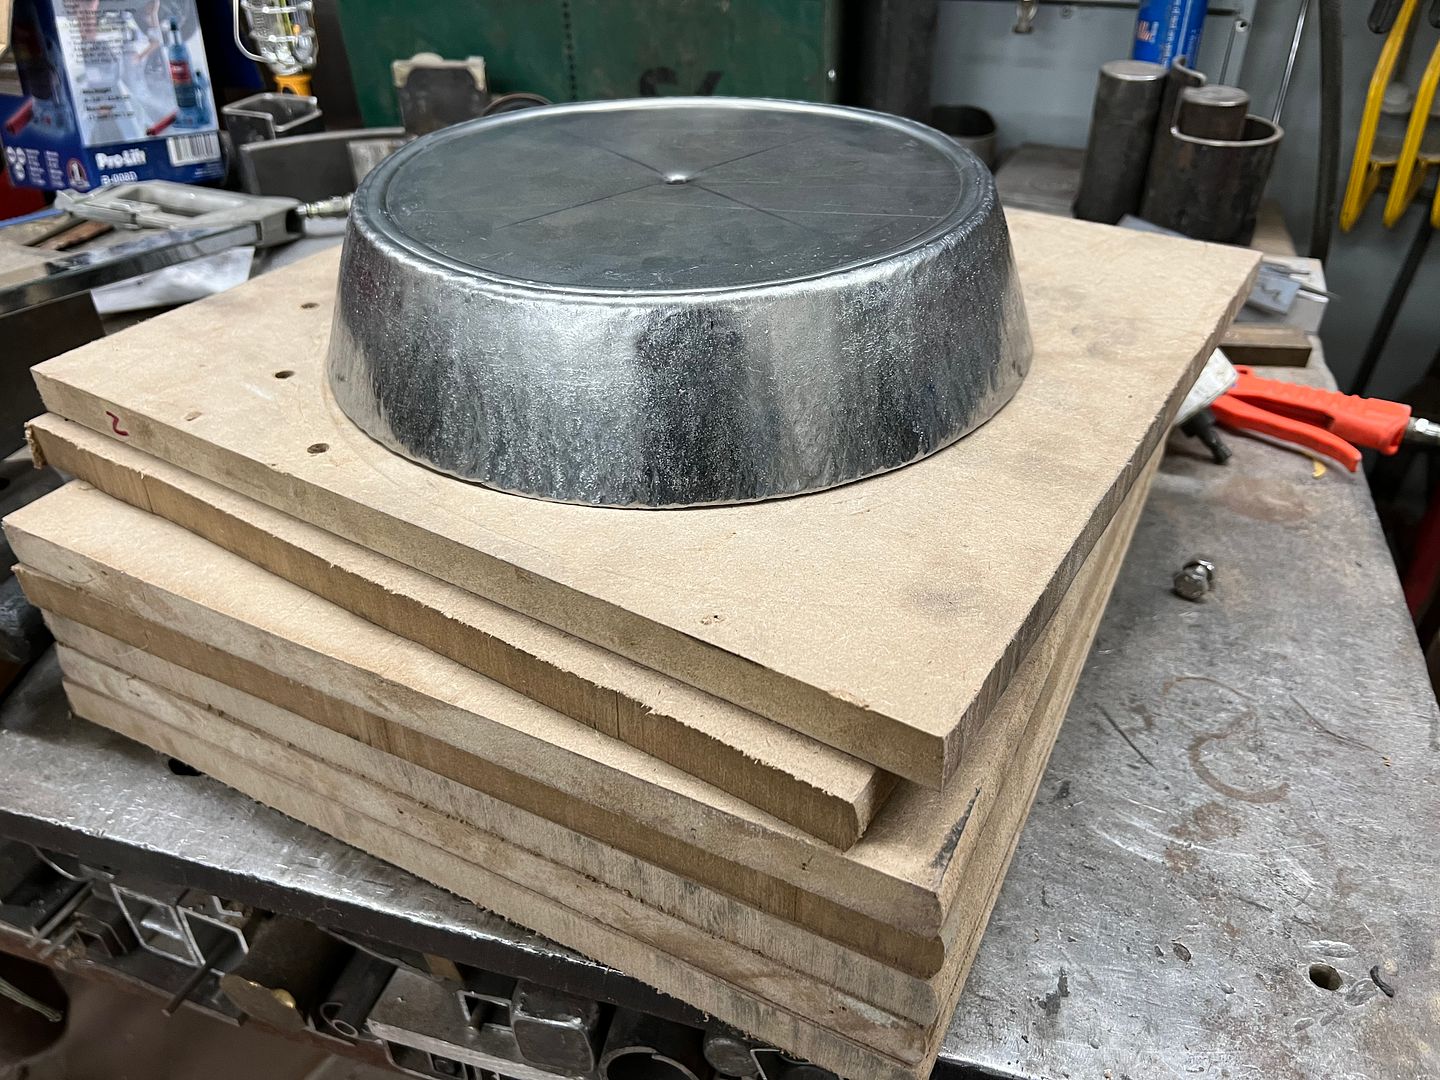
At this point we need to hem the flange so the bottom isn't quite so sharp..
A 1/2 x 1/2 aluminum angle is used as a height gauge so we can use the roloc sander to get our flange to a consistent height. This will allow us to use a tipping die in the bead roller to fold the hem..
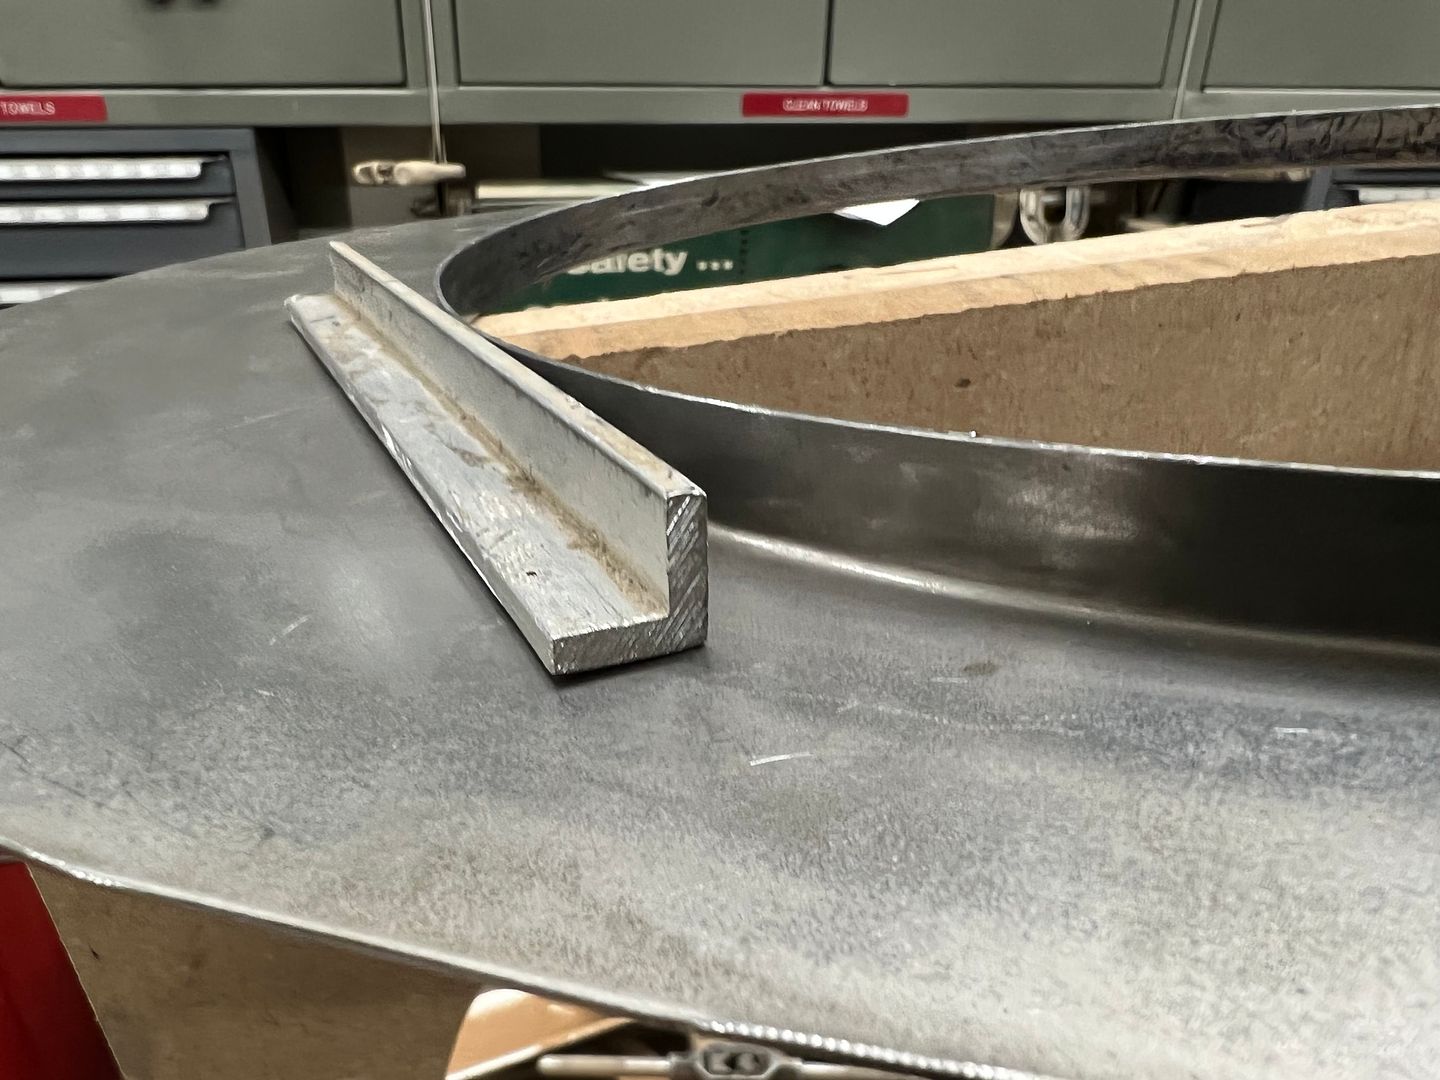
Then the part is re-installed in the hammer form to hammer the hem flat..
https://youtu.be/eScyS2lkfOU
Robert
-
11-22-2021 05:13 AM #1655
CHR Member
- Join Date
- Jun 2008
- Location
- Leonardtown
- Car Year, Make, Model: Walking
- Posts
- 1,228
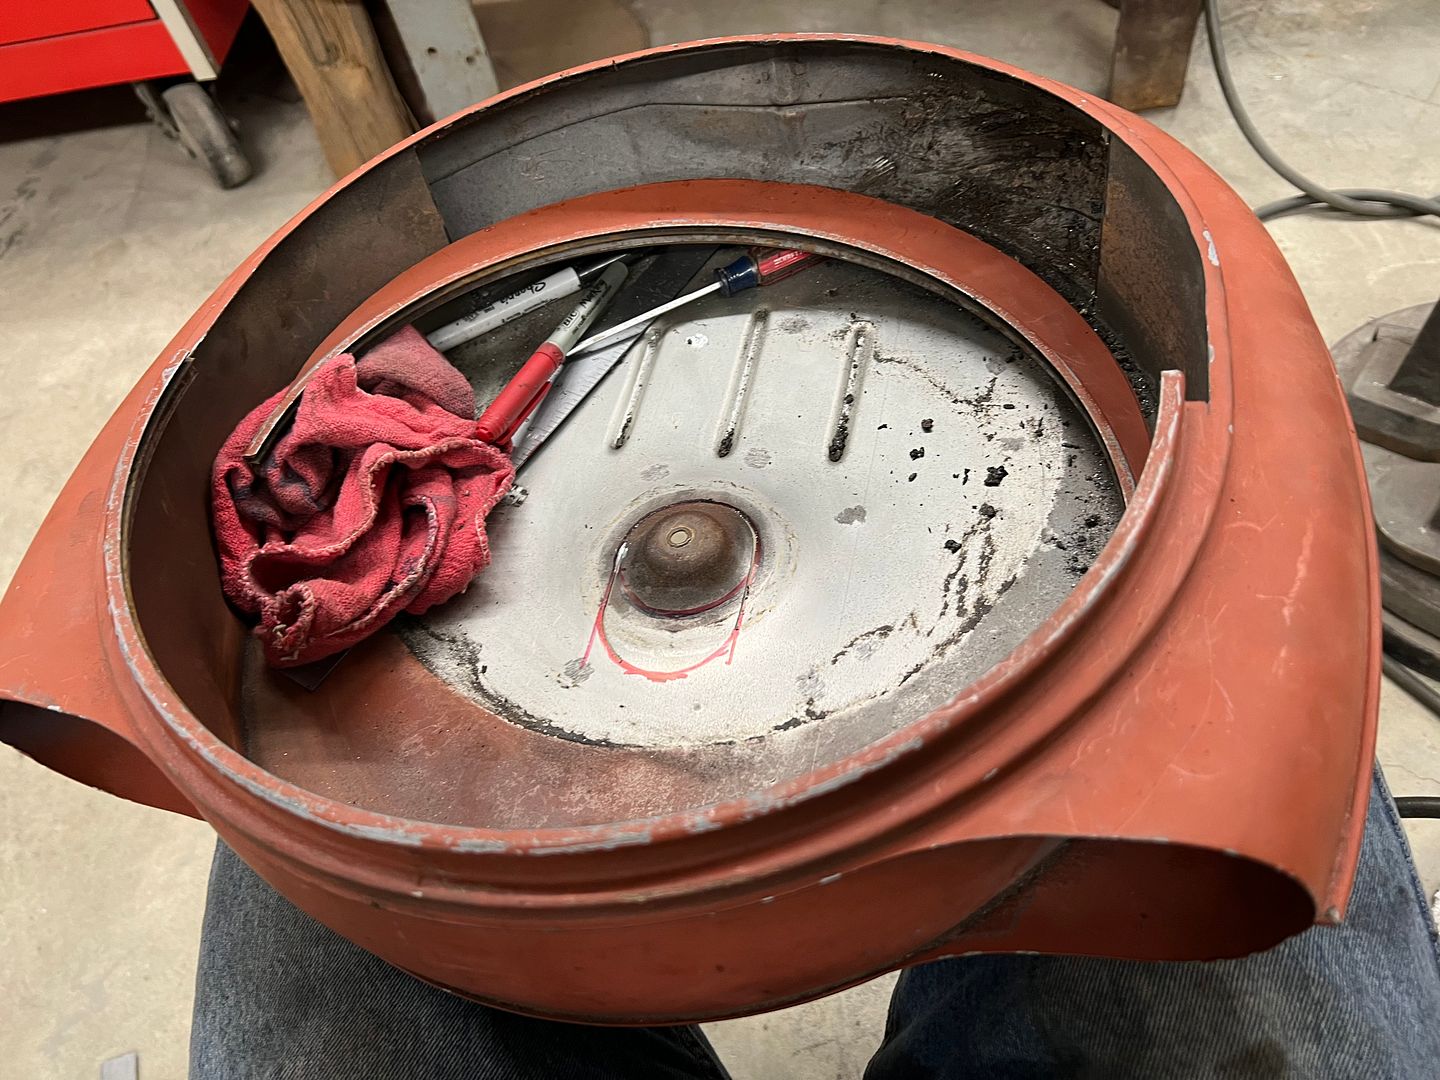
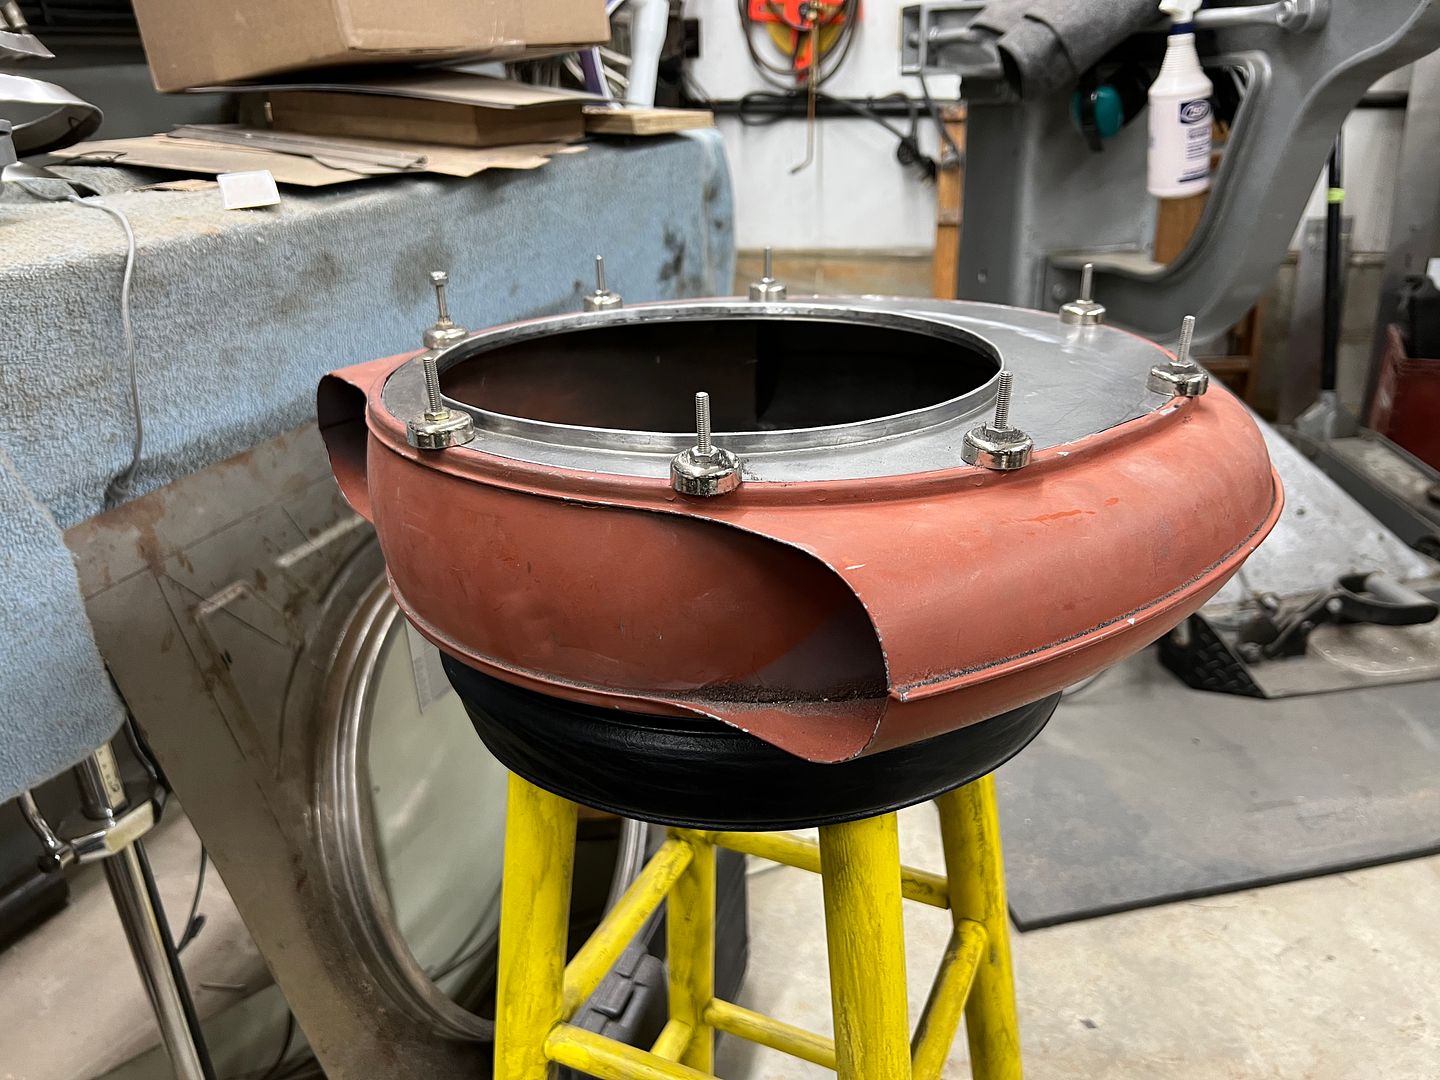
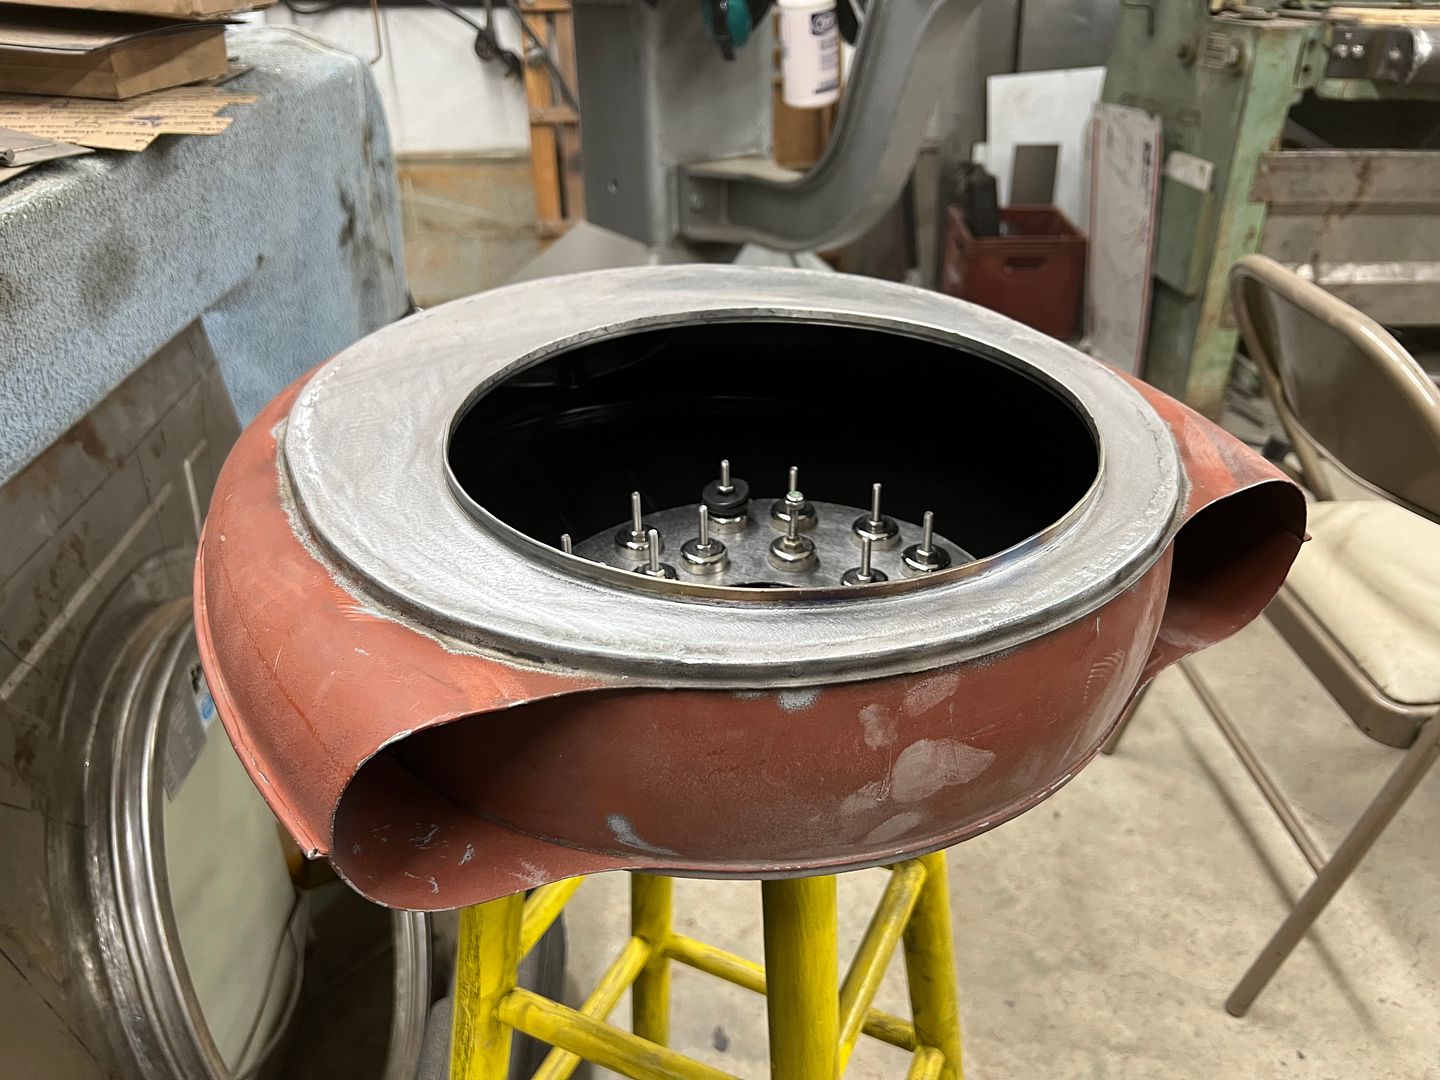
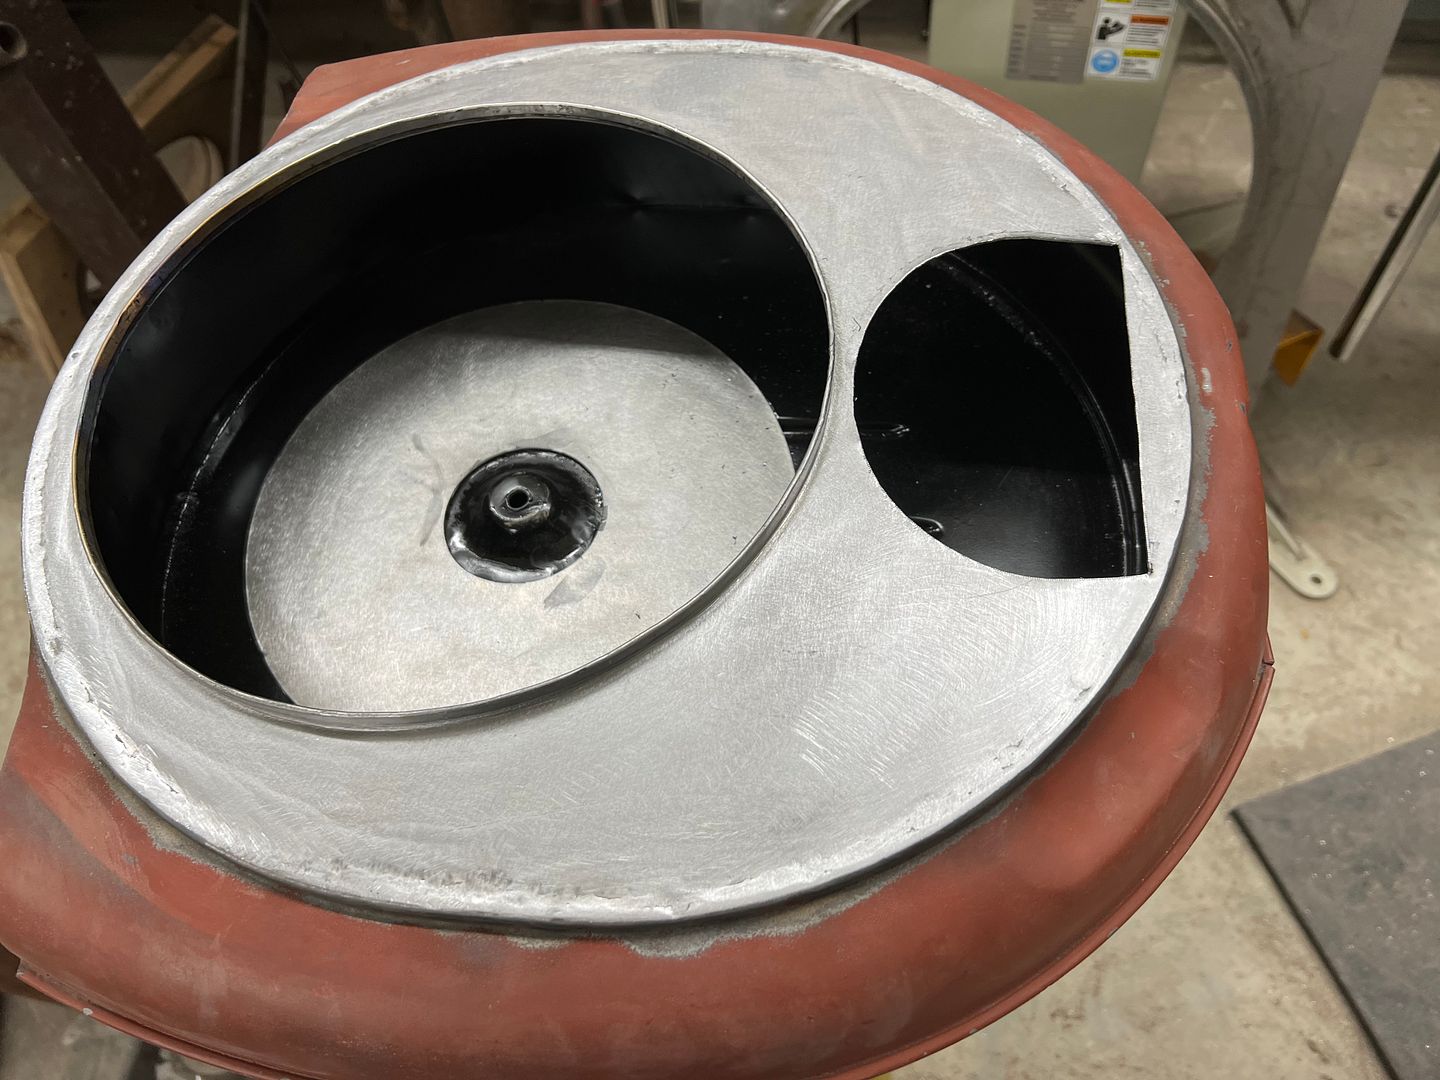
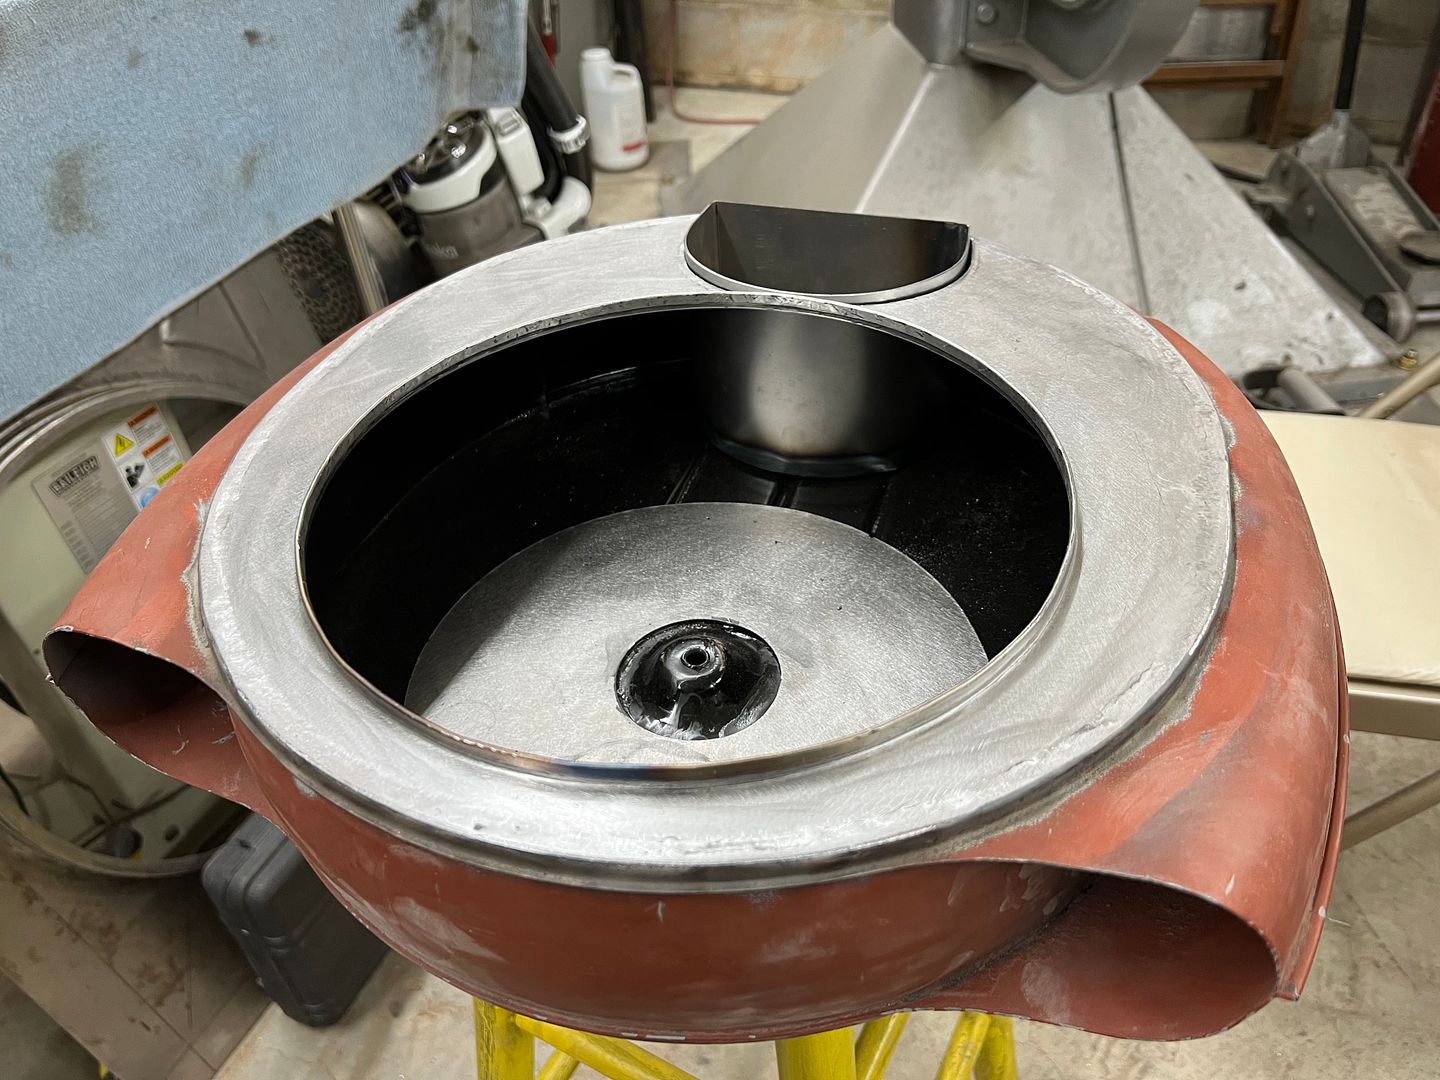
So I've had some questions as to why this or that with modifying the air cleaner. I was going to hold out with the REAL reason, but here goes.... This firewall is just too clean that I can't bring myself to clutter it up (or the wheelwell) by mounting an ignition coil and then being forced into using an overly long coil wire..
.JPG)
So as shown here.... this will be the approximate location as we fabricate a sealed cavity from the bottom side of the air cleaner to mount the coil. This should put the coil wire about two inches in front of the distributor...
.JPG)
So this should give us a nice clean look and keep the firewall as open as we can...Robert
-
11-23-2021 09:49 PM #1656
CHR Member
- Join Date
- Jun 2008
- Location
- Leonardtown
- Car Year, Make, Model: Walking
- Posts
- 1,228
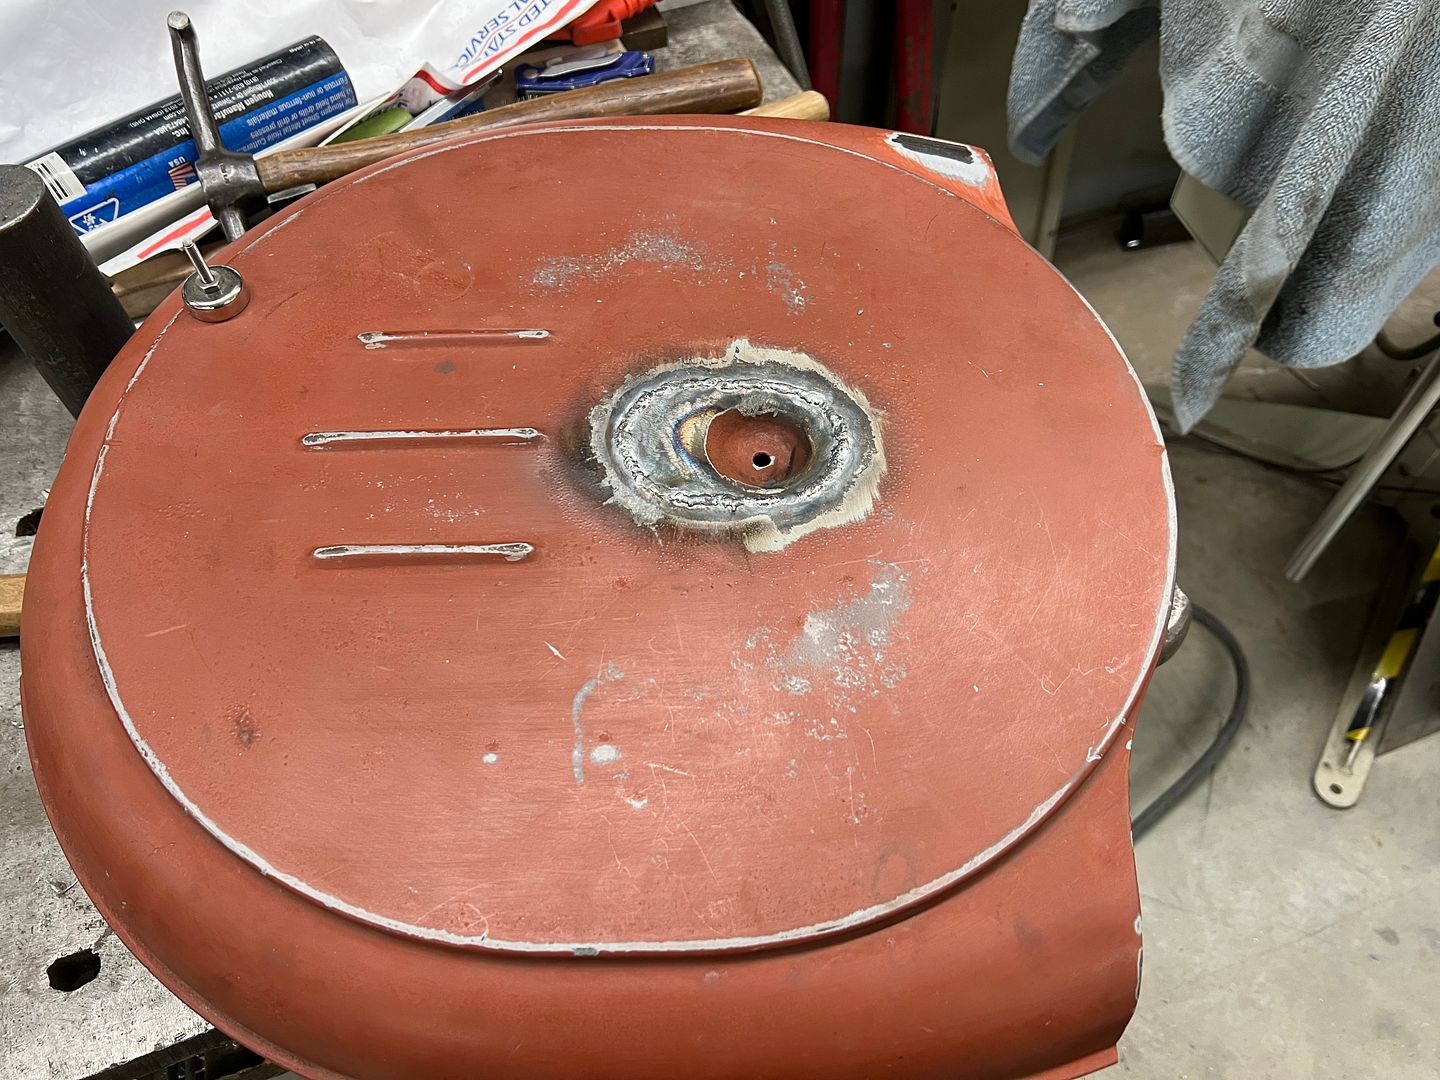
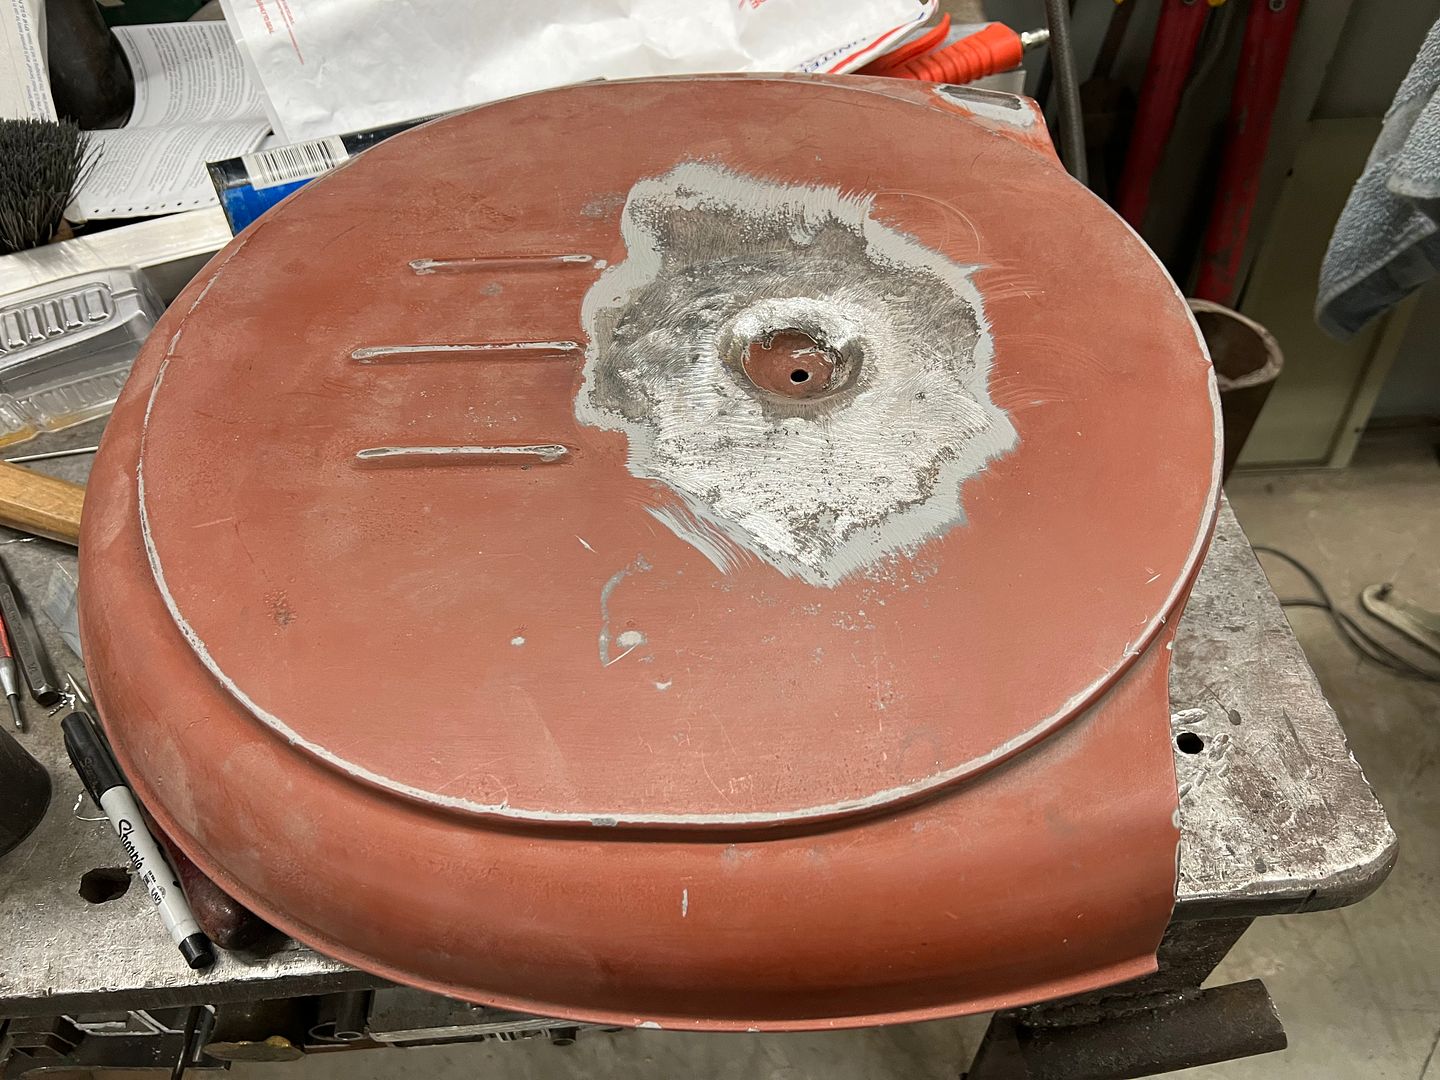
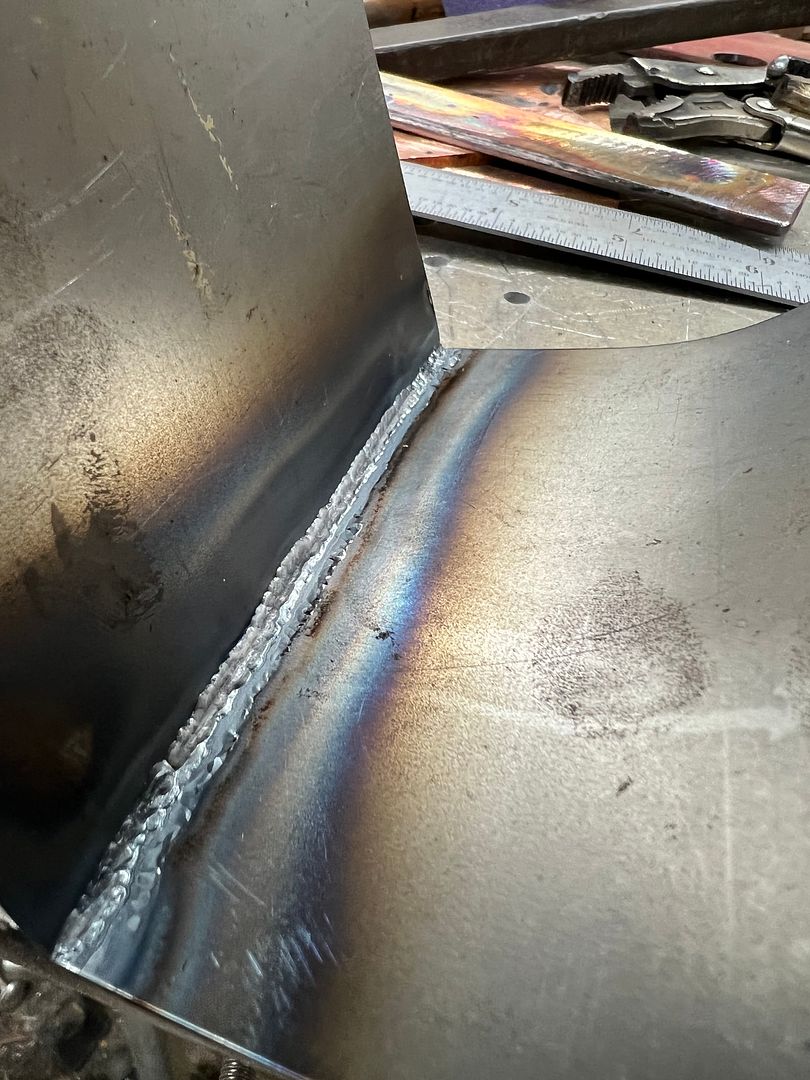
Time for some welding.. TIG used to tack the new bottom in place.....

I thought my eyesight was going.... time to replace these..
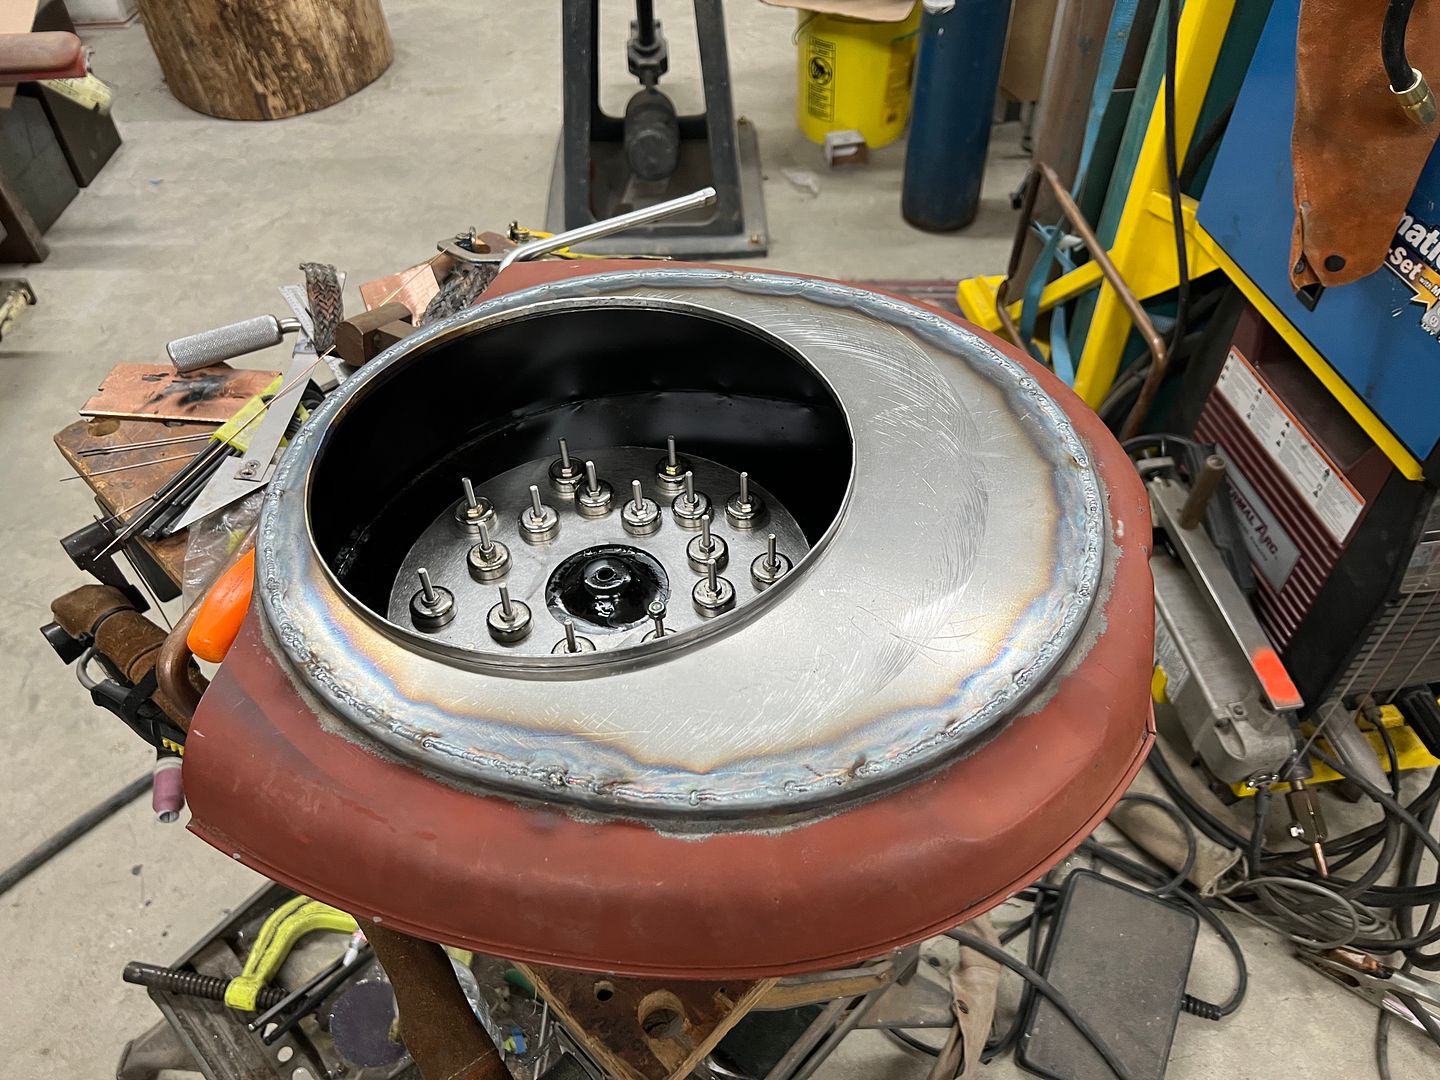
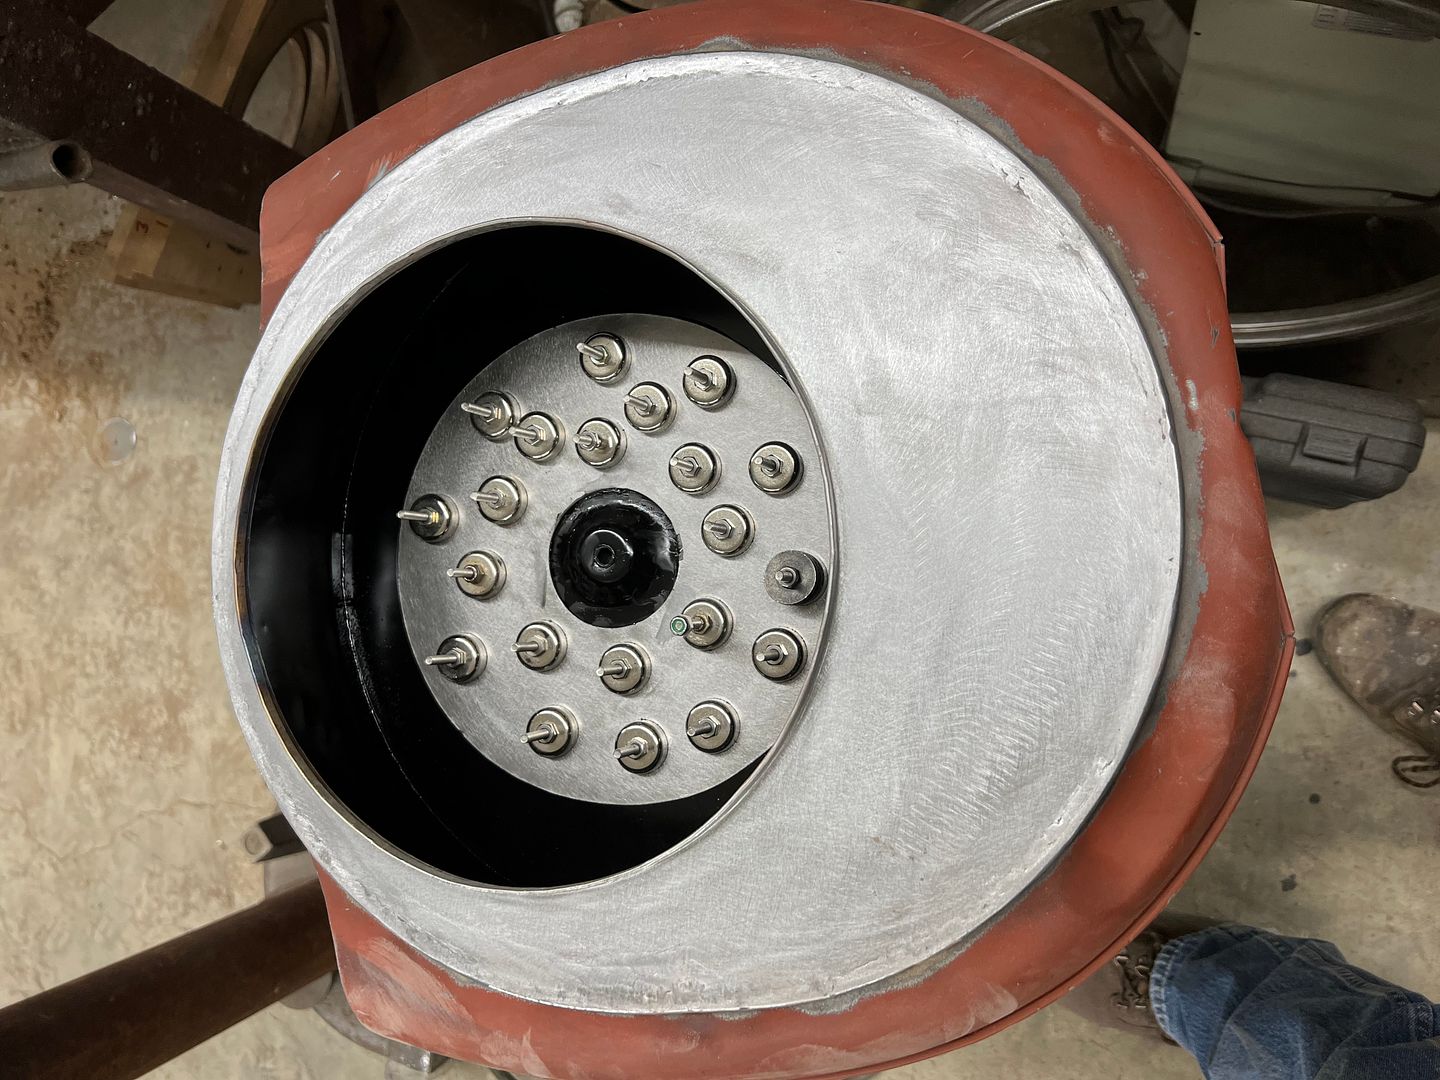
Next, we'll work on the base plate....Robert
-
11-26-2021 09:27 PM #1657
CHR Member
- Join Date
- Jun 2008
- Location
- Leonardtown
- Car Year, Make, Model: Walking
- Posts
- 1,228
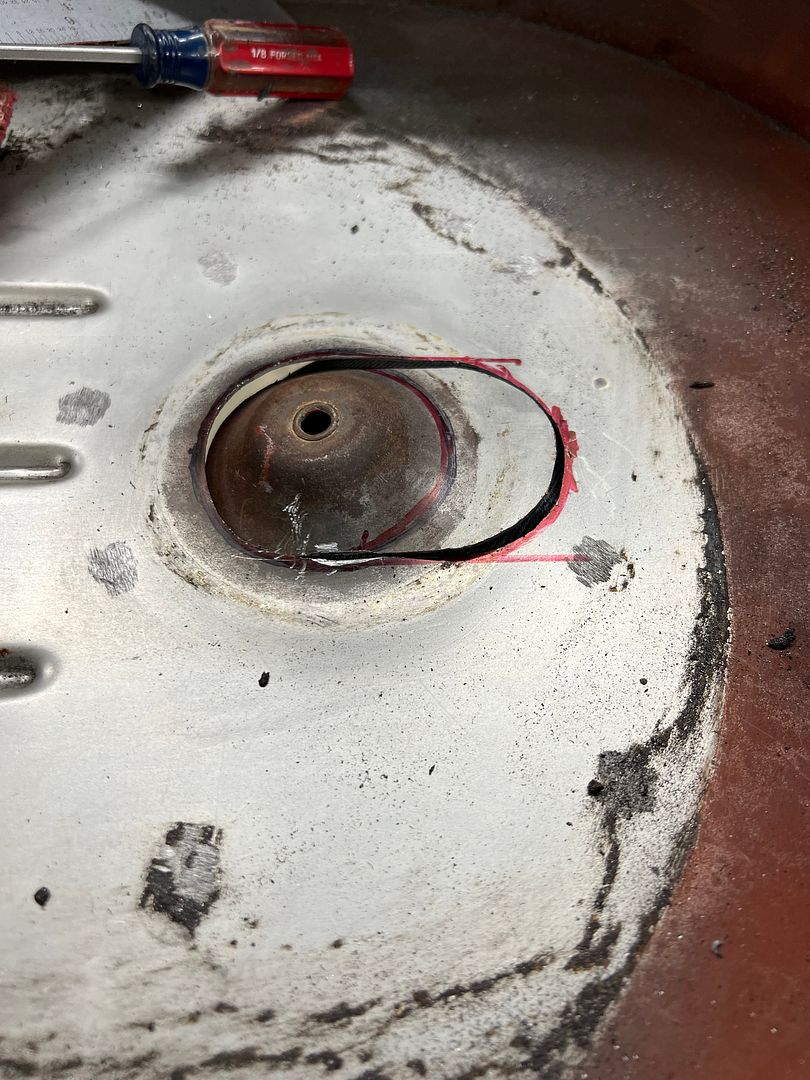
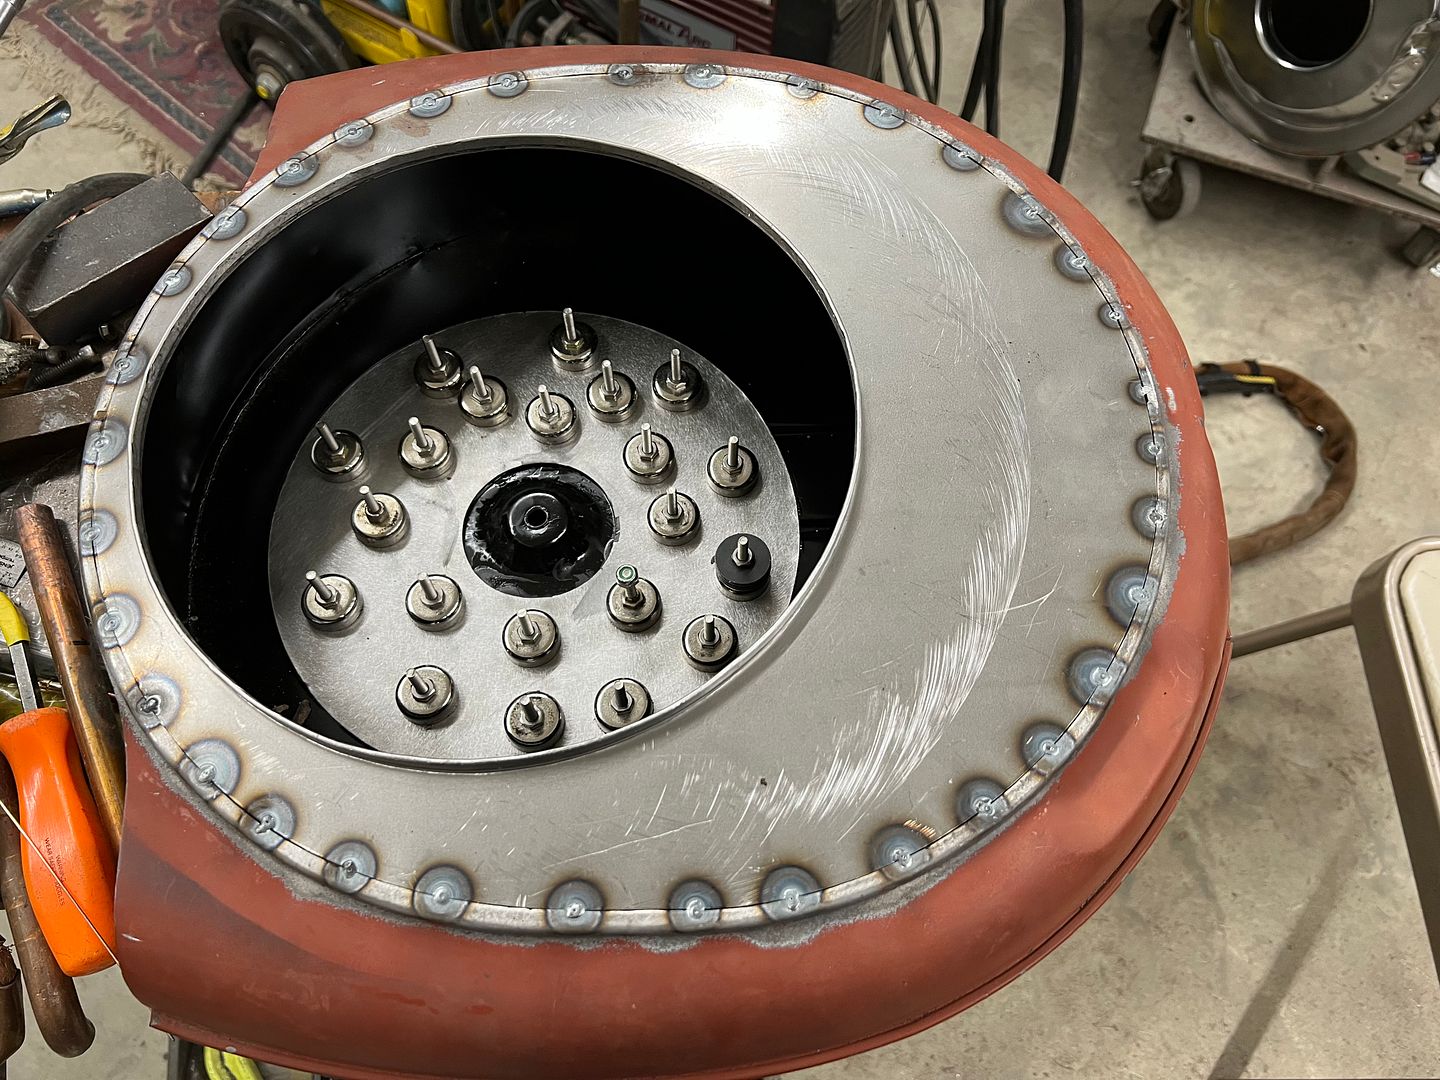
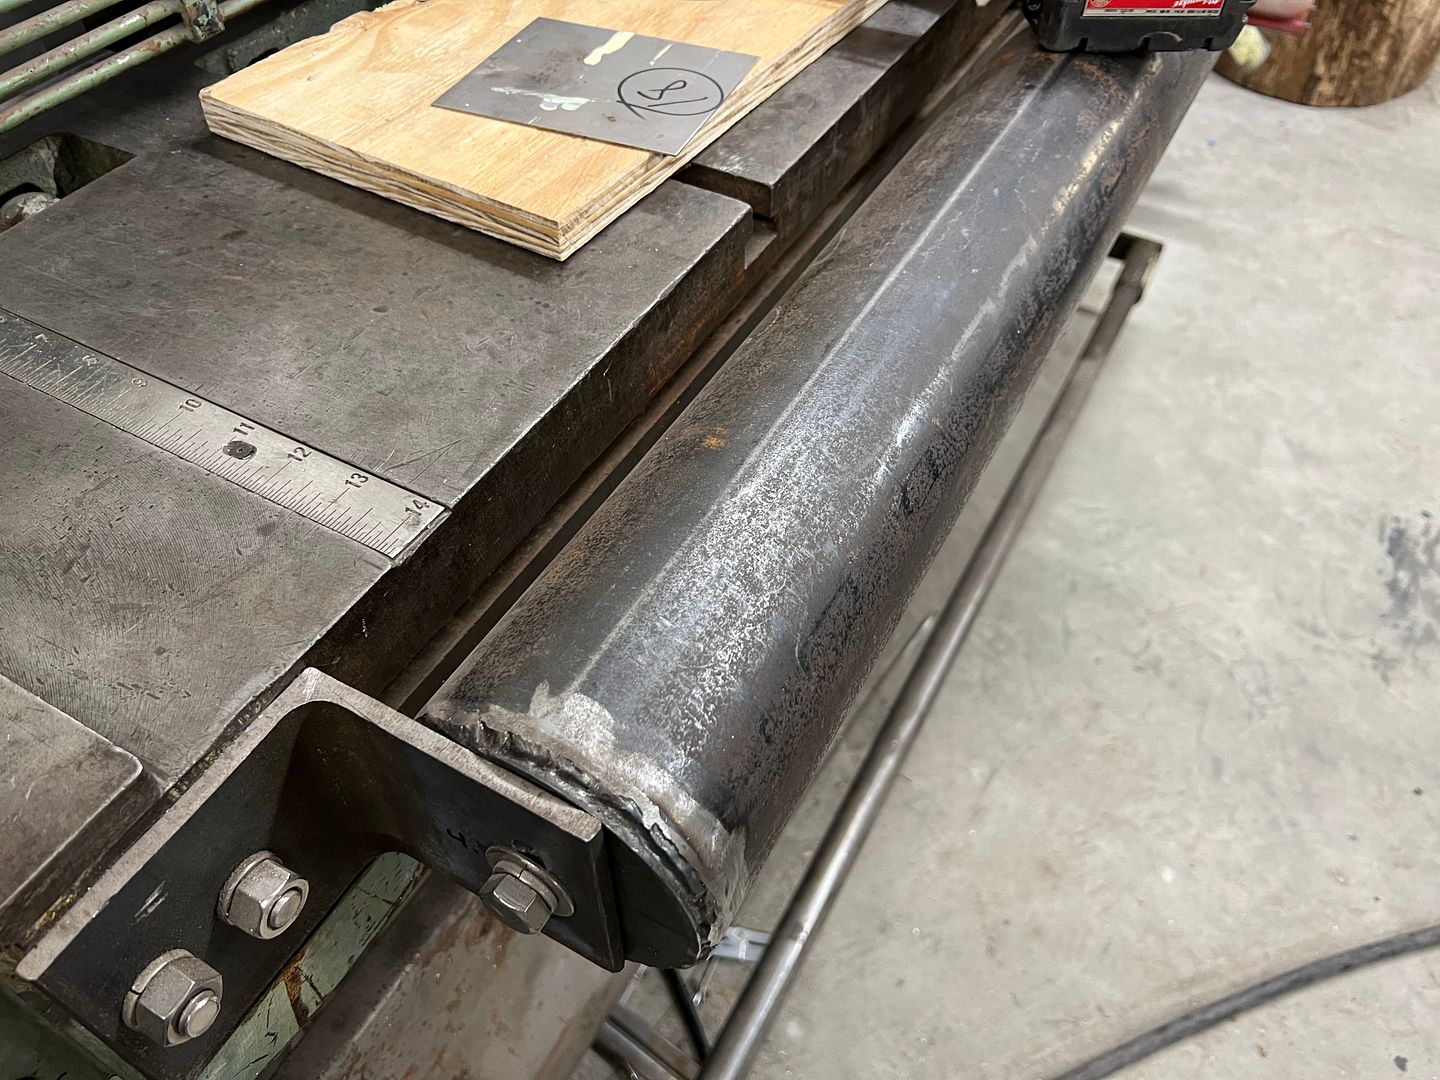
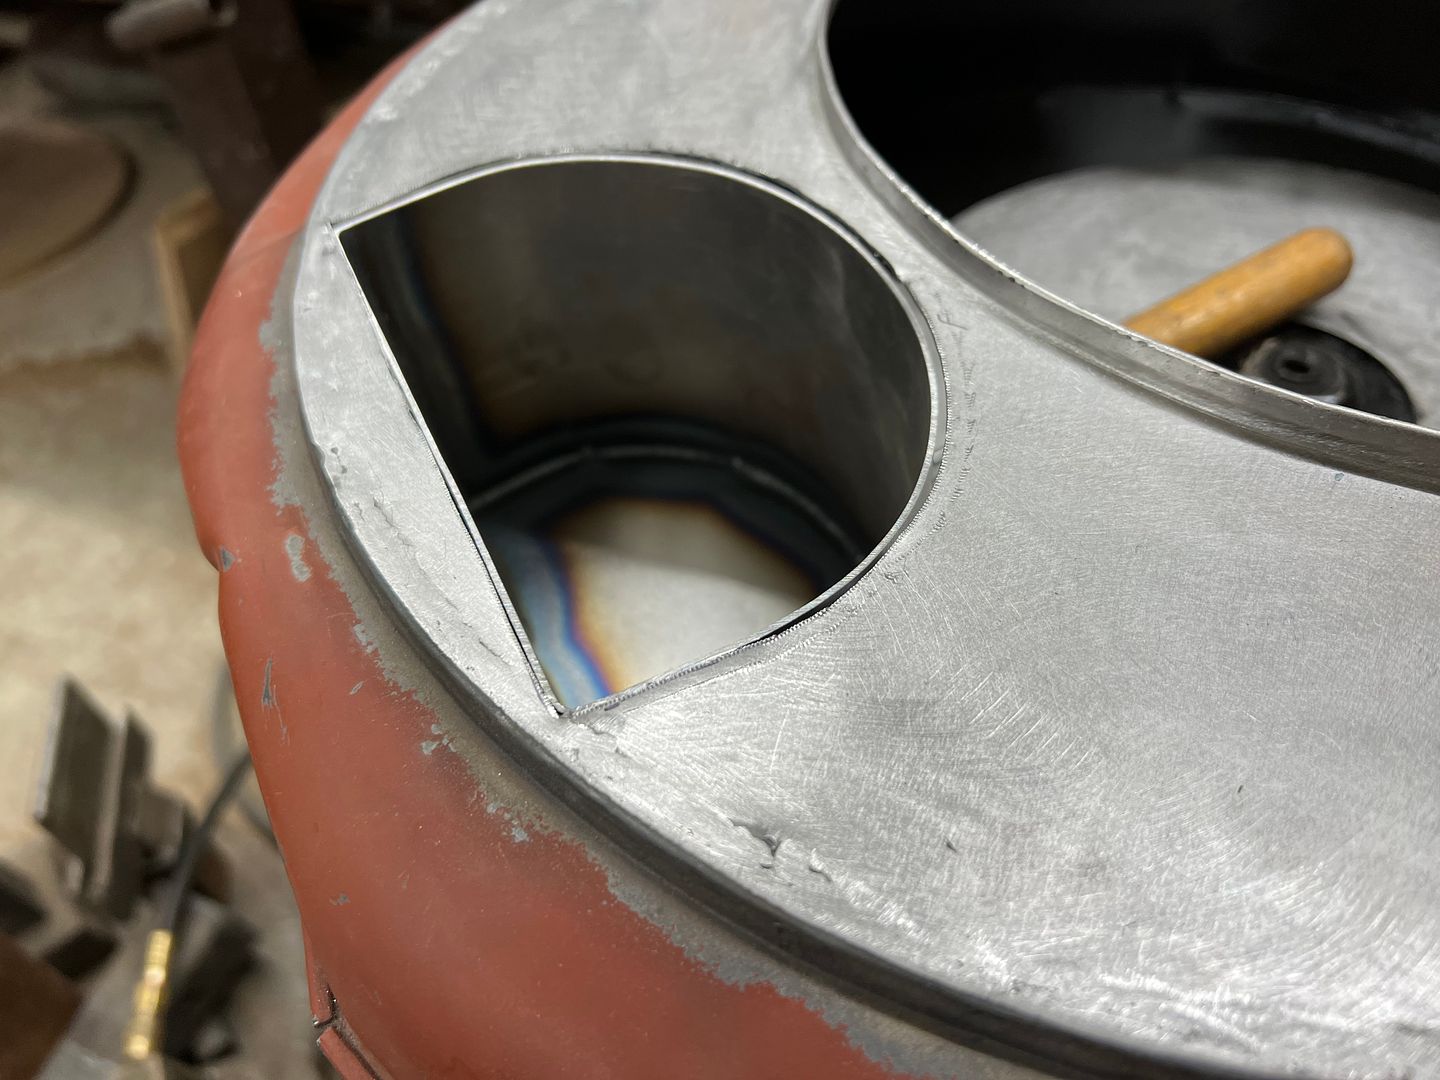
More work on the Caddy air cleaner, time to fabricate the pocket for the coil. Our radius brake that is bolted to the front of the shear is used to bend some 18ga into a horseshoe. One side is trimmed short and the other is left long to bend and form the bottom in the magnetic brake.
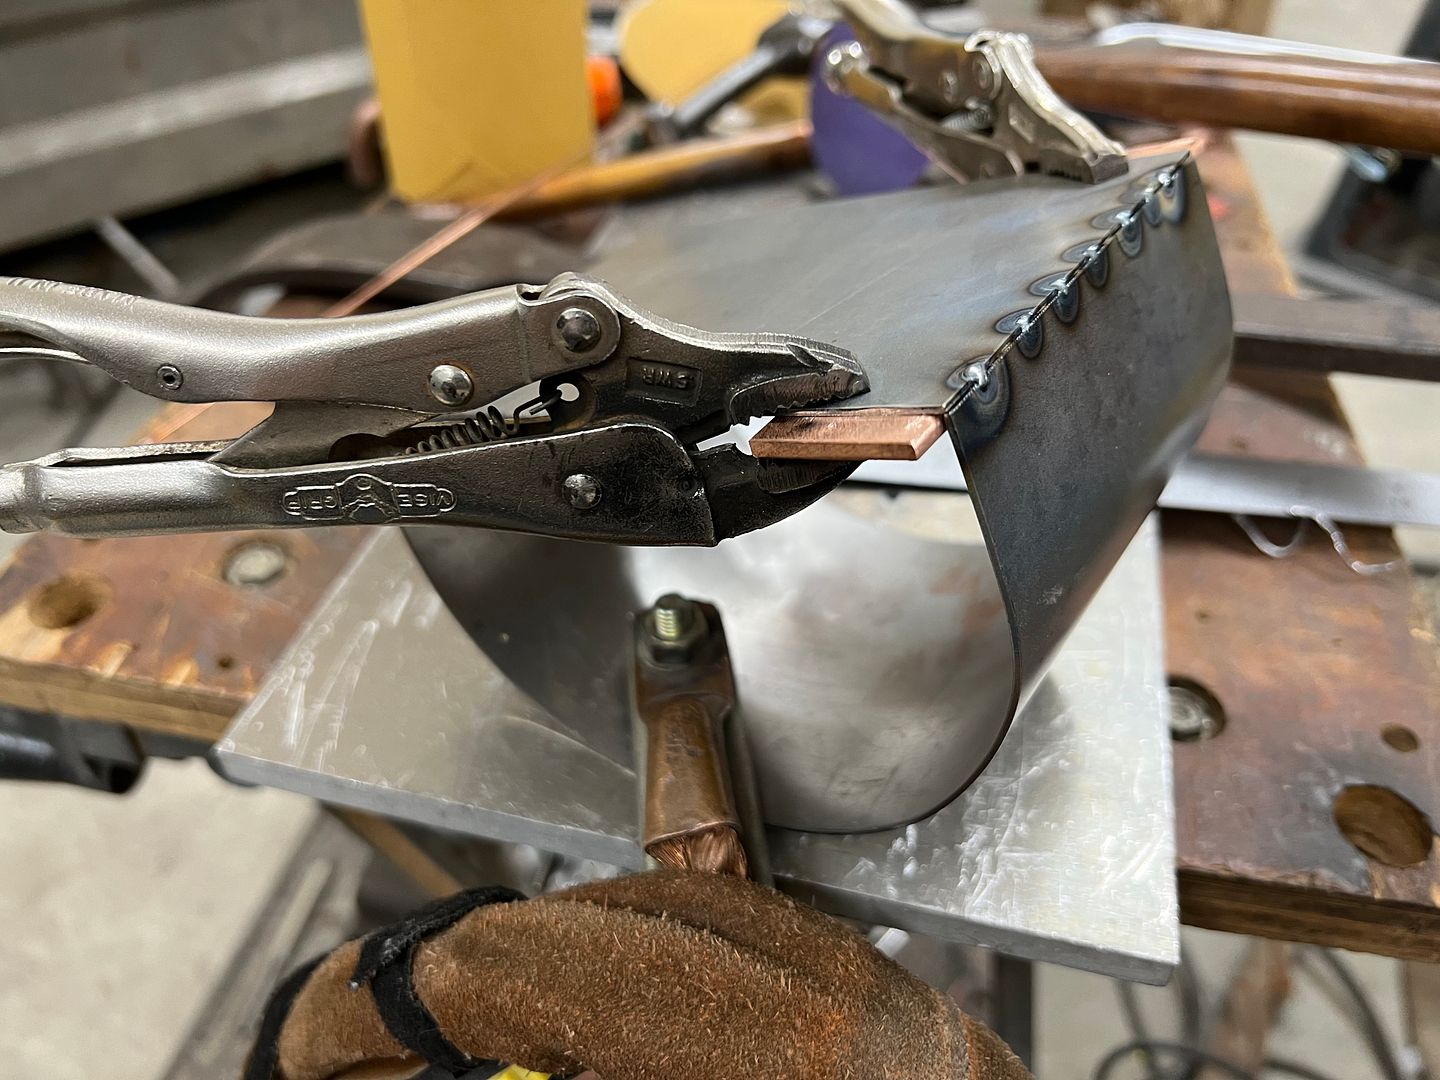
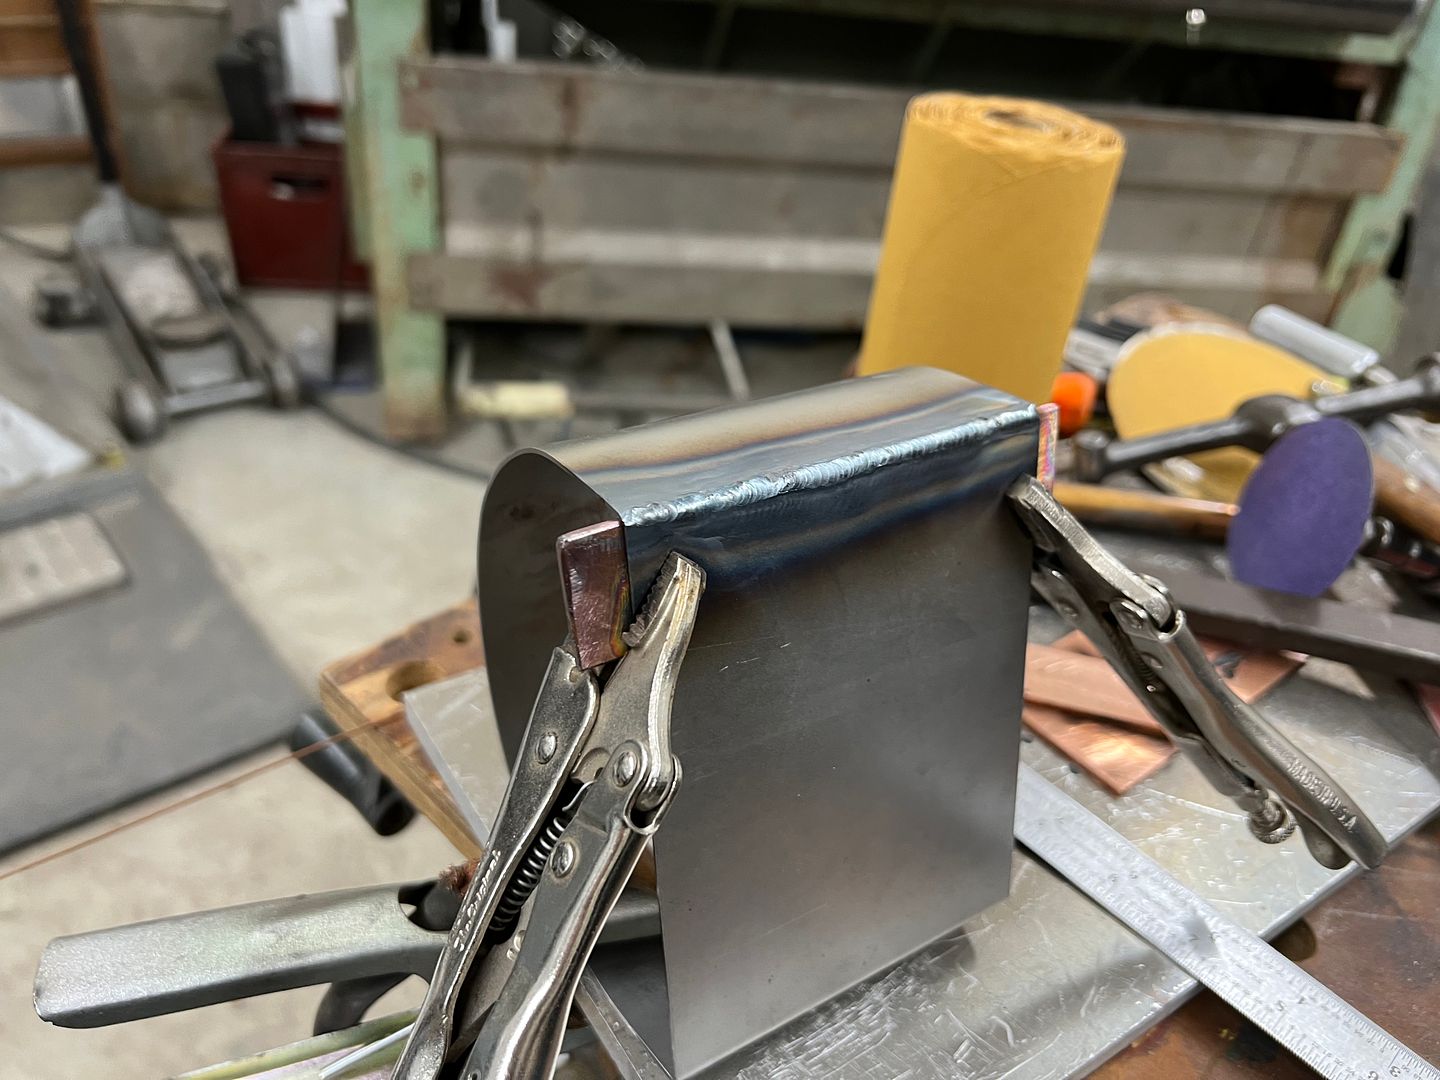
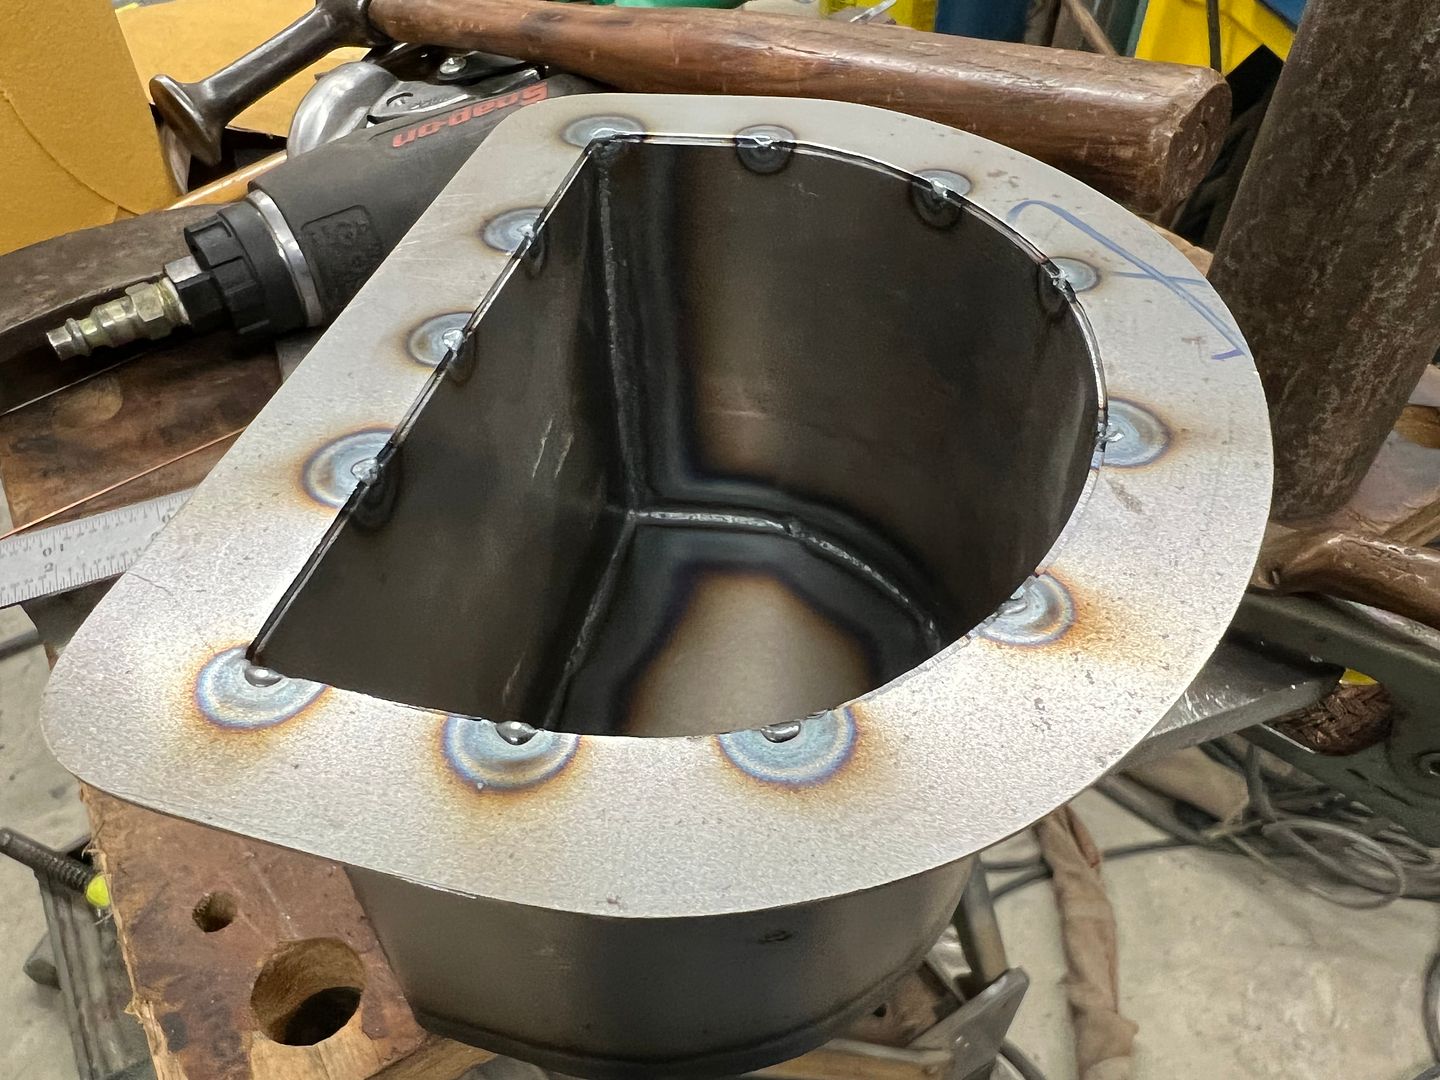
And end plate is cut out to seal off the void from the rest of the air cleaner innards. This gets tacked in place and then fusion welded using the TIG.

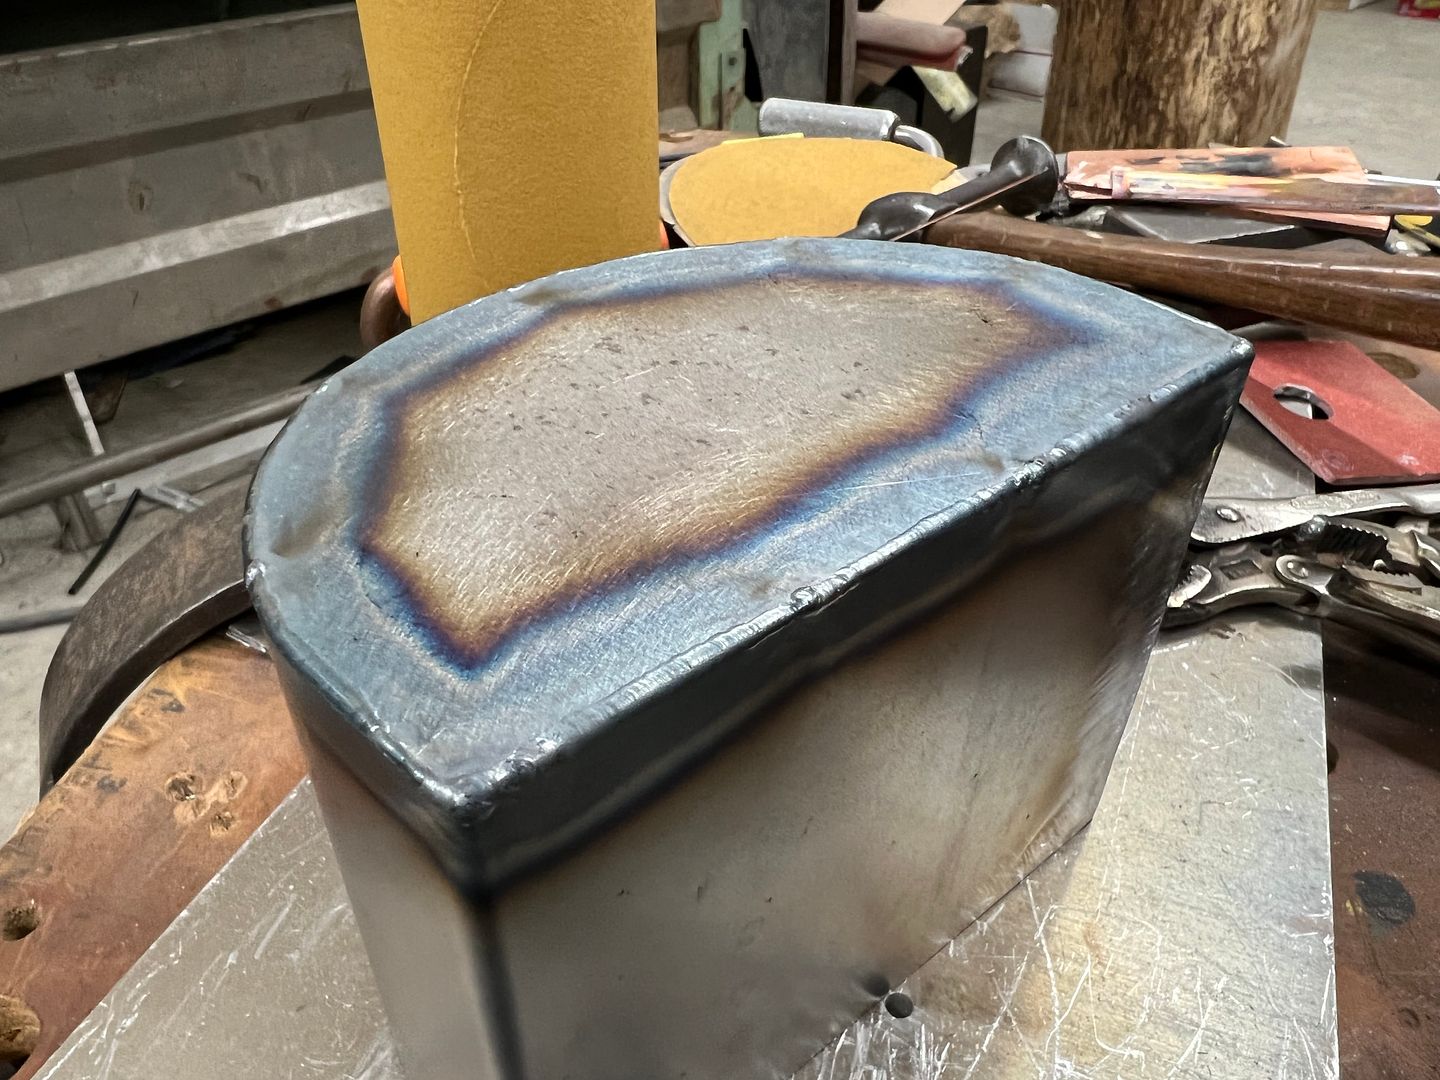
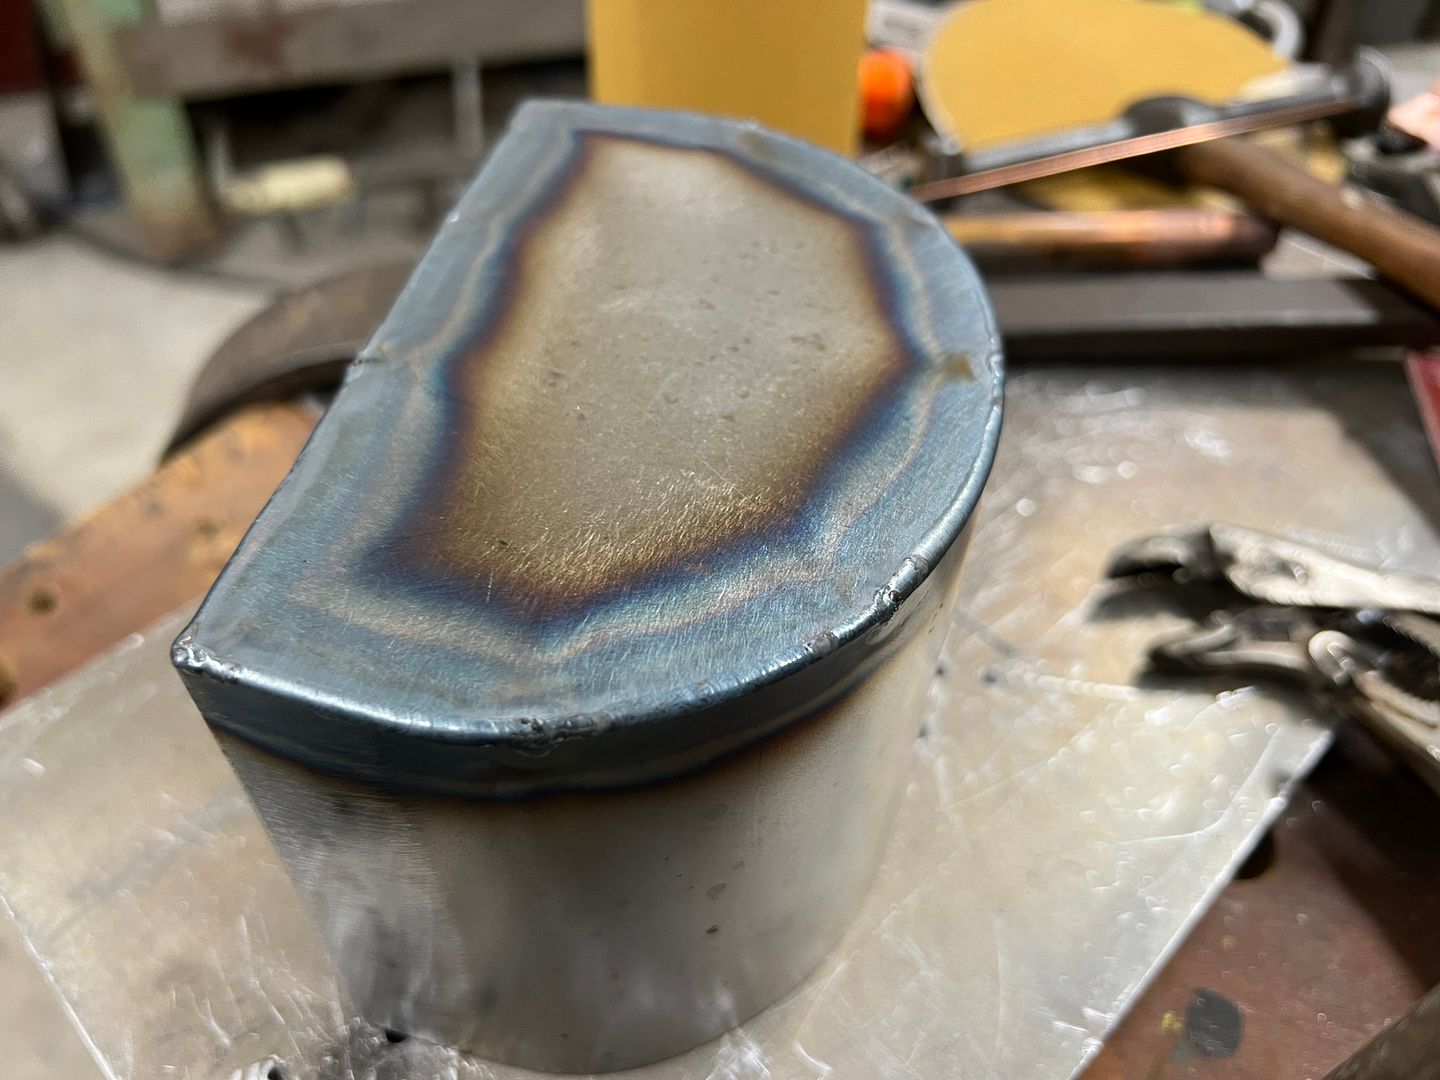
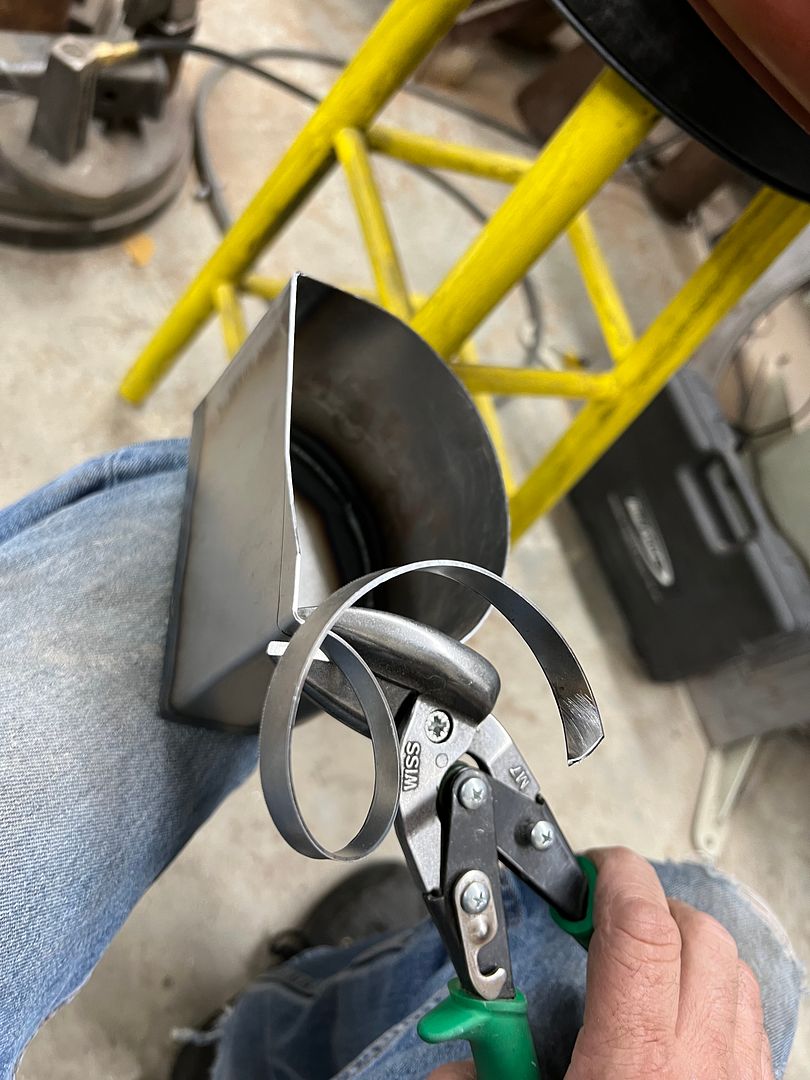
A holesaw is used to get the hole started and offset Wiss snips to trim out the hole in both the housing and the mounting flange. TIG tacked and fusion welding on the flange, and it then gets trimmed to fit inside the air cleaner housing.
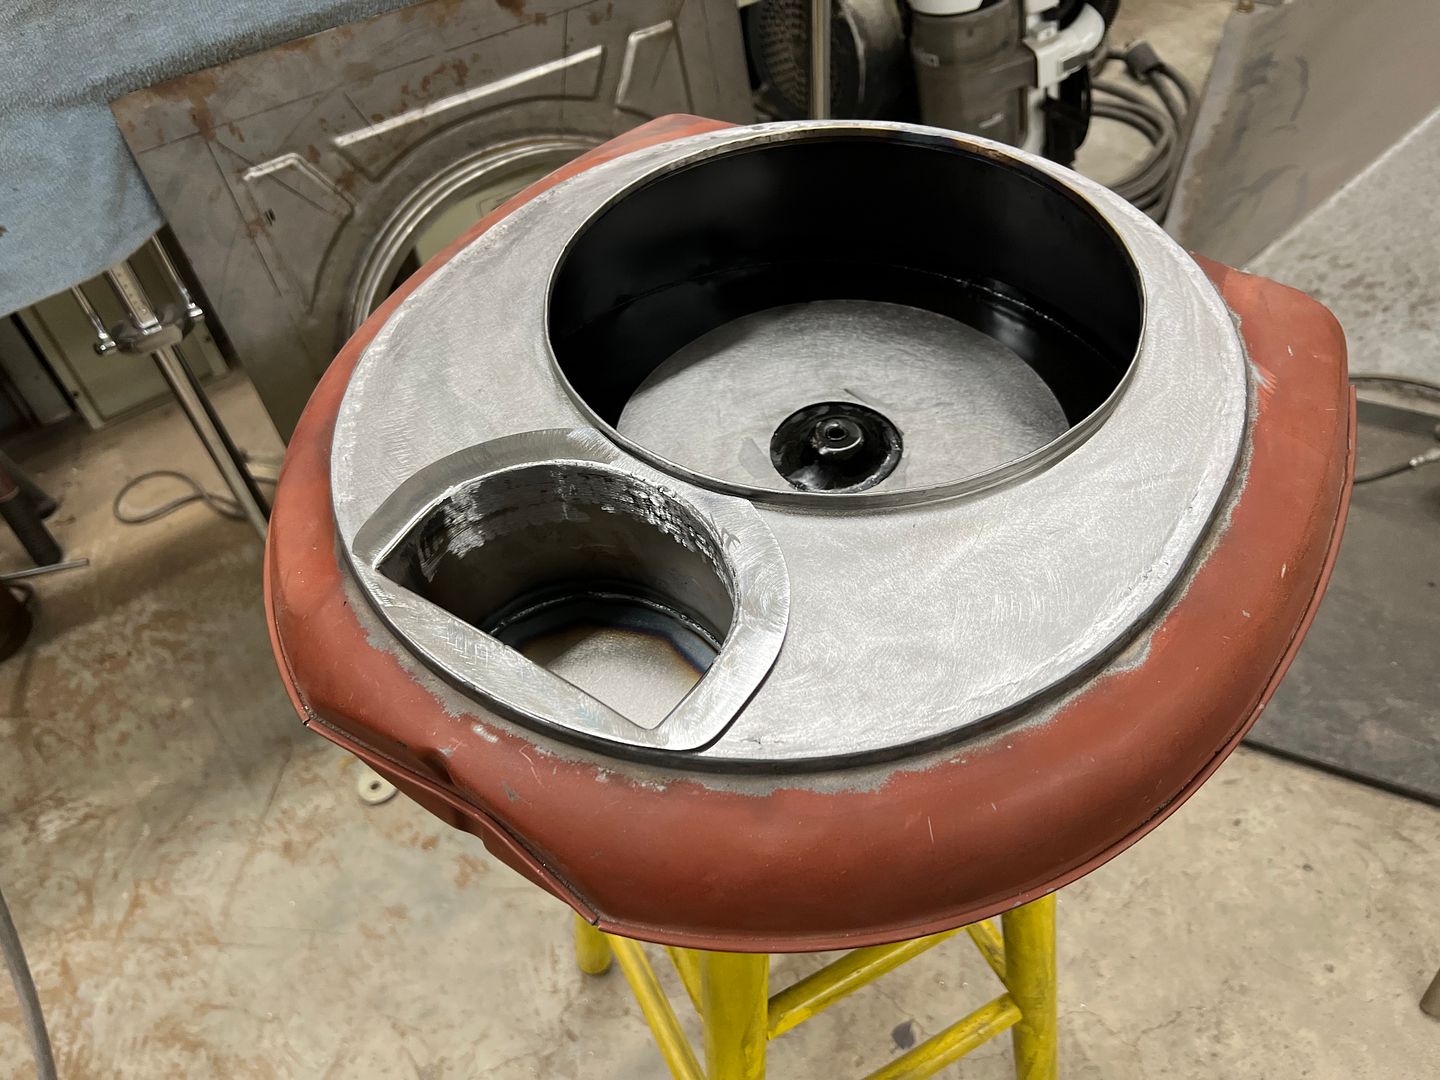
Yup, that's what I was looking for...Robert
-
11-27-2021 04:33 AM #1658
CHR Member
- Join Date
- Sep 2007
- Location
- New Bedford
- Car Year, Make, Model: 34 Ford 3W Coupe Replica
- Posts
- 14,754
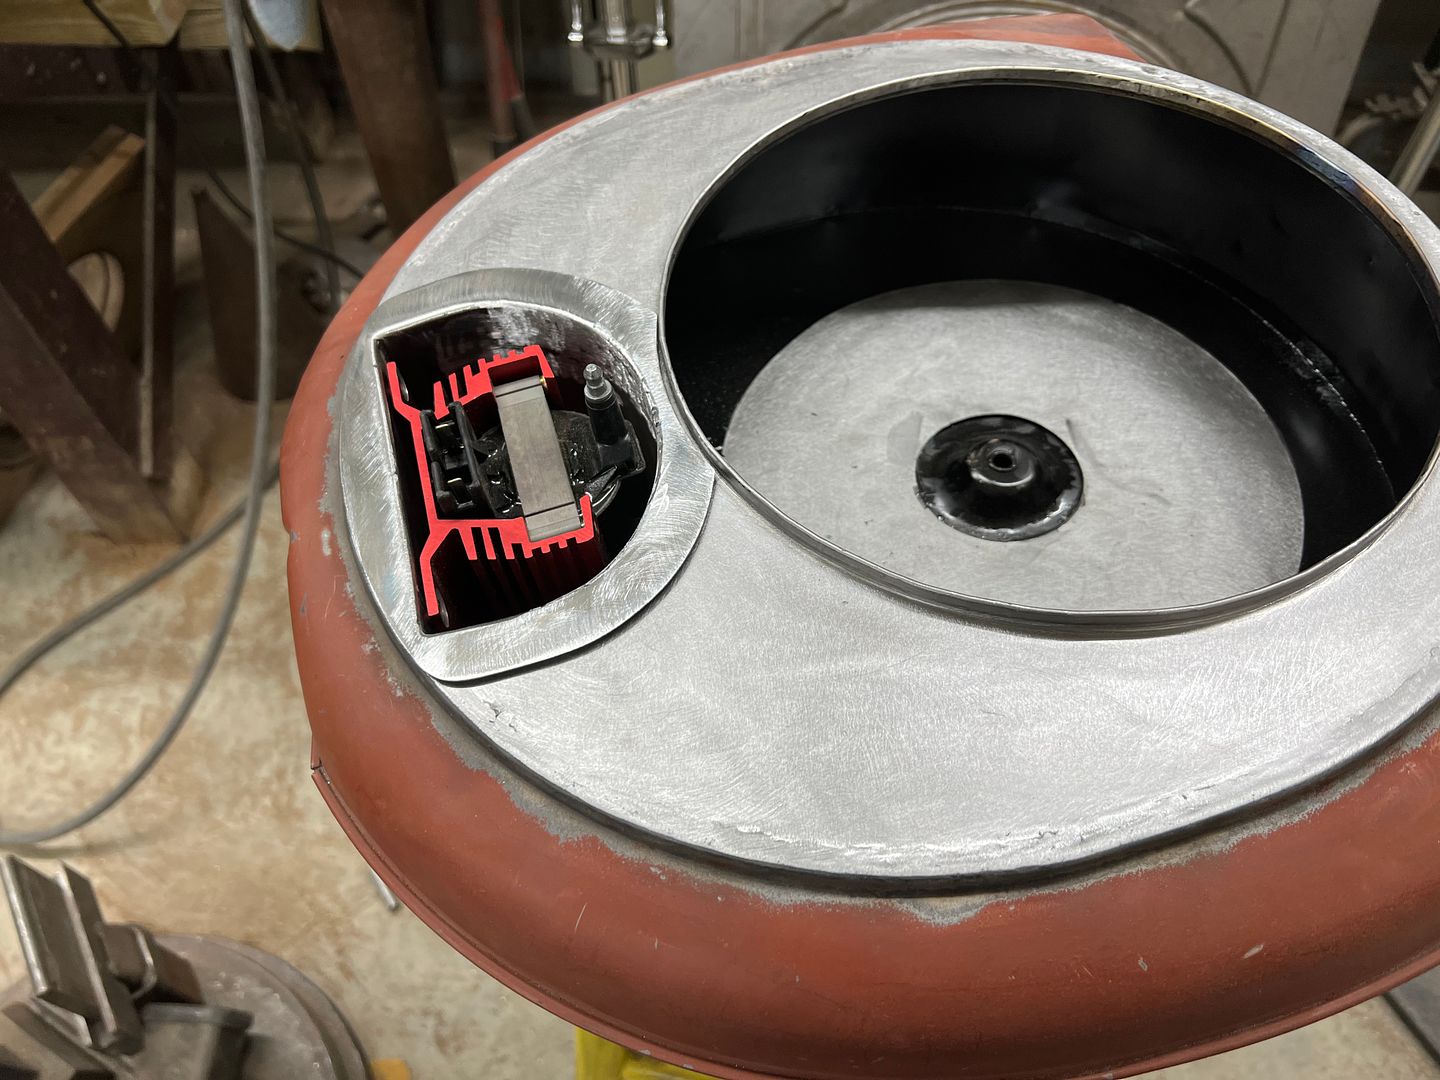
As always. your (and the crews) work is out of this world.. do you anticipate the weight of the coil causing any flex in the housing?
Just curious how rigid it's become.
-
11-27-2021 05:39 AM #1659
CHR Member
- Join Date
- Jun 2008
- Location
- Leonardtown
- Car Year, Make, Model: Walking
- Posts
- 1,228
When it was made we put some crown in the bottom panel to provide such support. So it should stay put. :fingerscrossed:Robert
-
11-27-2021 06:24 AM #1660
CHR Member/Contributor
- Join Date
- Sep 2007
- Location
- Gardner, KS
- Car Year, Make, Model: '33 HiBoy Coupe, '32 HiBoy Roadster
- Posts
- 11,245
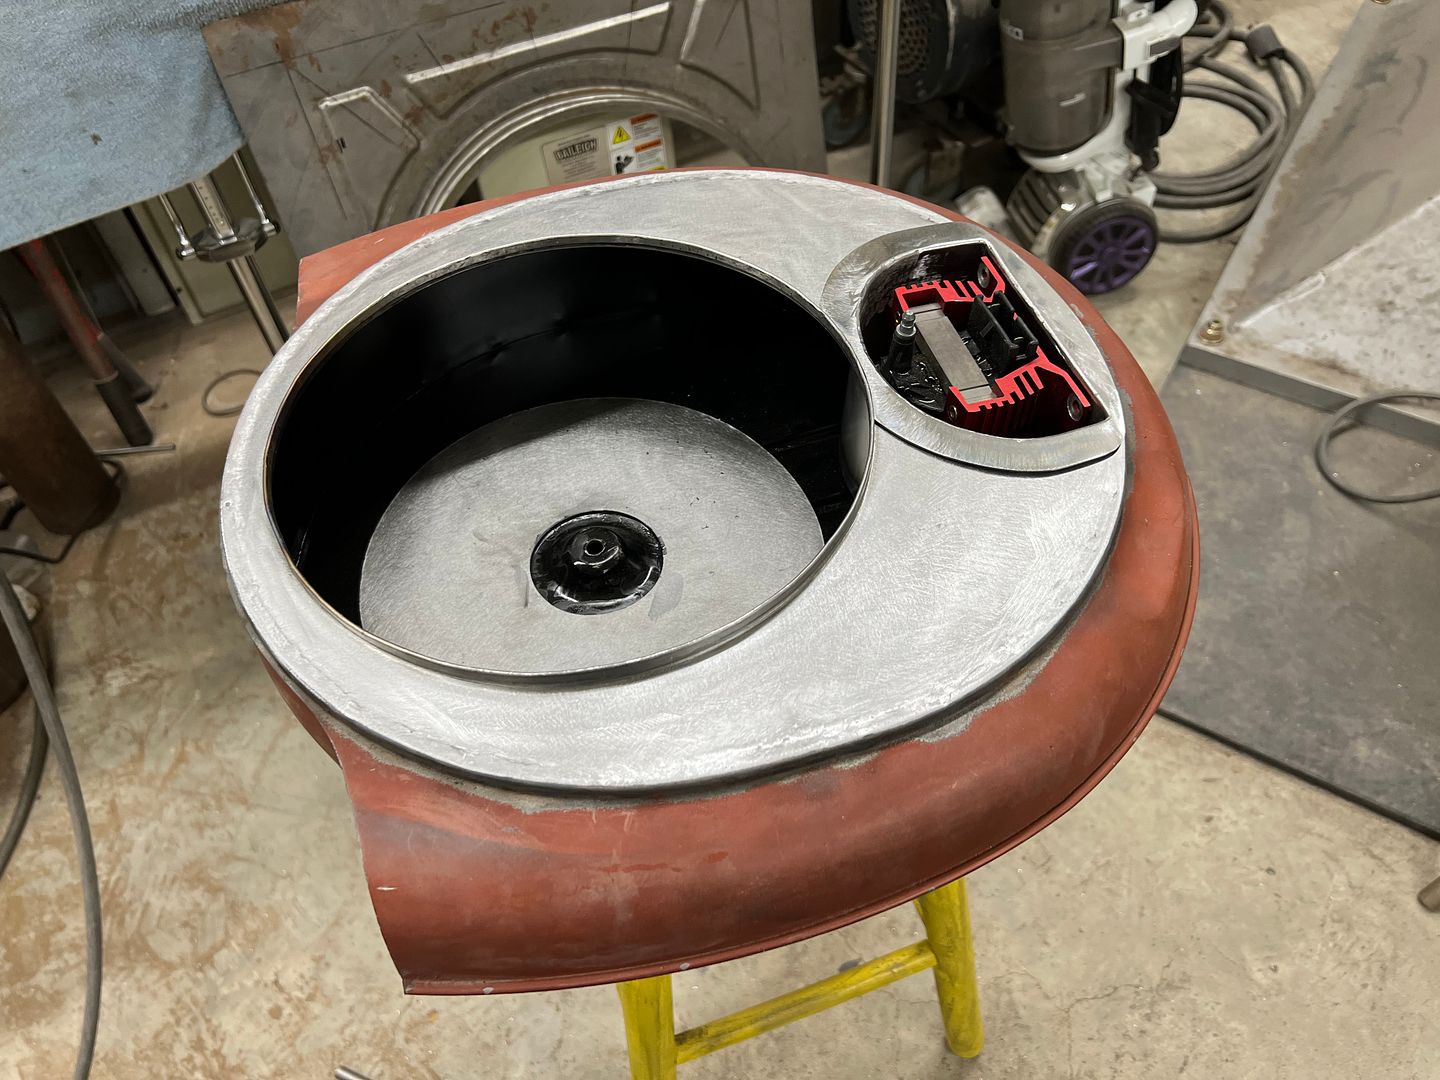
I continue to be amazed! Those fusion welds are a thing of beauty! Excellent, and great use of space too!Roger
Enjoy the little things in life, and you may look back one day and realize that they were really the BIG things.
-
11-27-2021 07:44 PM #1661
CHR Member
- Join Date
- May 2005
- Location
- Tataraimaka NZ
- Car Year, Make, Model: `47 Ford sedan, A.C.Cobra replica.
- Posts
- 2,895
I have to reiterate what Roger said. Originally Posted by rspears

But also add: there has been a lot of practical thought and out-of-the-box thinking here too.johnboy
Mountain man. (Retired.)
Some mistakes are too much fun to be made only once.
I don't know everything about anything, and I don't know anything about lots of things.
'47 Ford sedan. 350 -- 350, Jaguar irs + ifs.
'49 Morris Minor. Datsun 1500cc, 5sp manual, Marina front axle, Nissan rear axle.
'51 Ford school bus. Chev 400 ci Vortec 5 sp manual + Gearvendors 2sp, 2000 Chev lwb dually chassis and axles.
'64 A.C. Cobra replica. Ford 429, C6 auto, Torana ifs, Jaguar irs.
-
11-27-2021 08:33 PM #1662
CHR Member
- Join Date
- Jun 2008
- Location
- Leonardtown
- Car Year, Make, Model: Walking
- Posts
- 1,228
Thanks fellas.. Keeping fingers crossed that this thing works as planned..
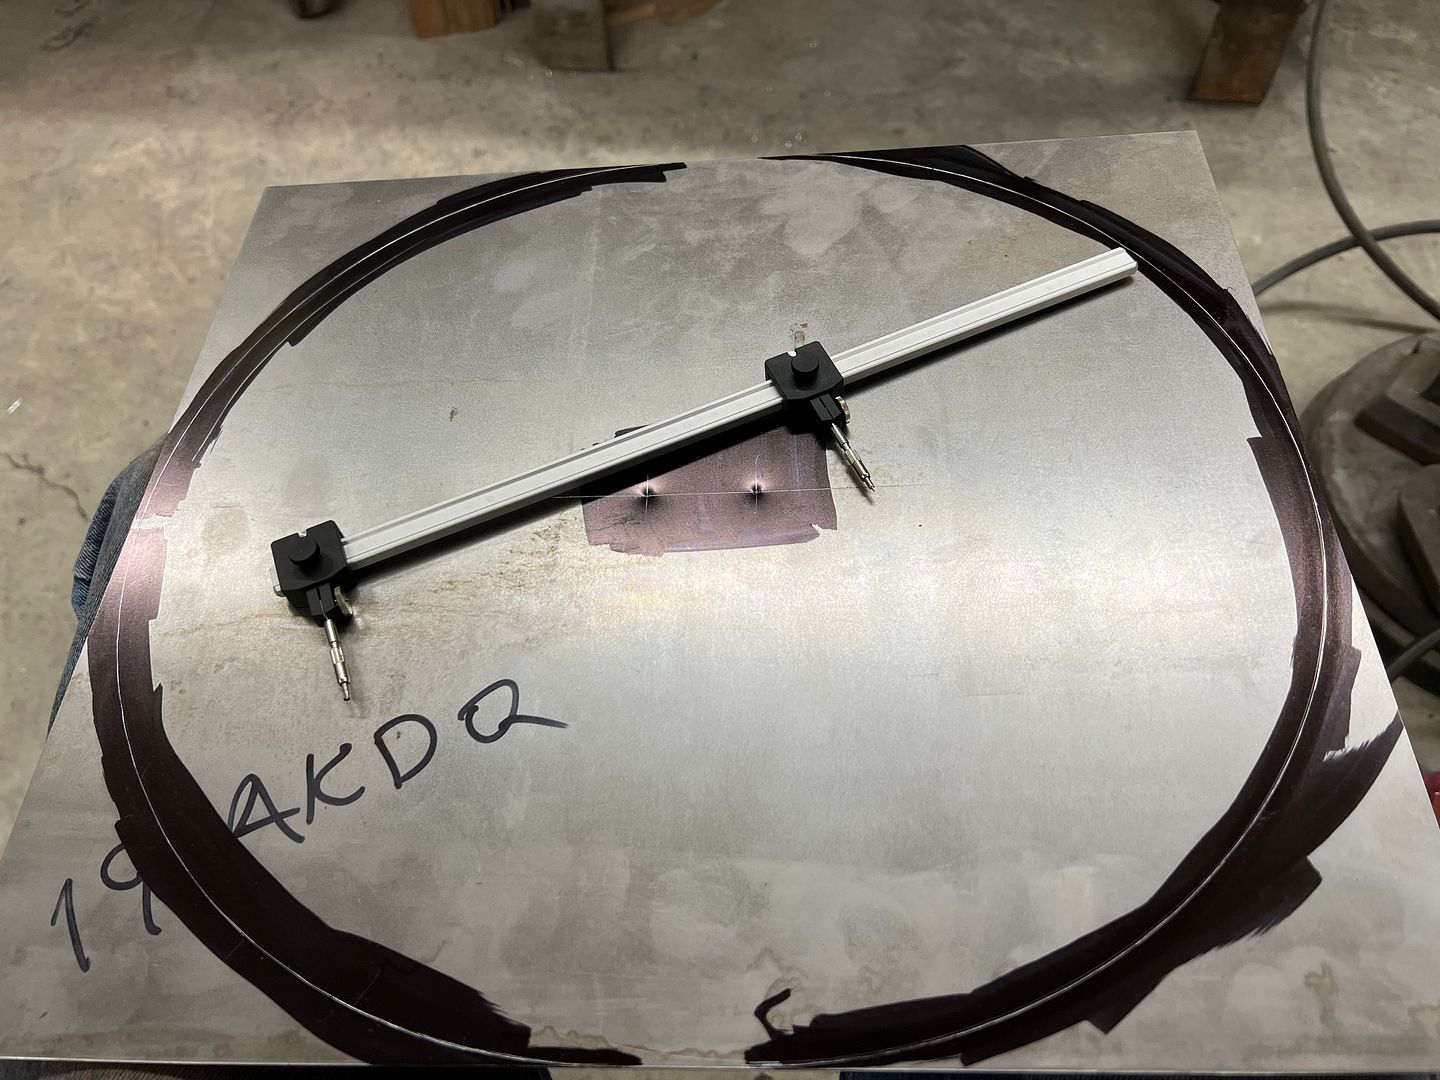
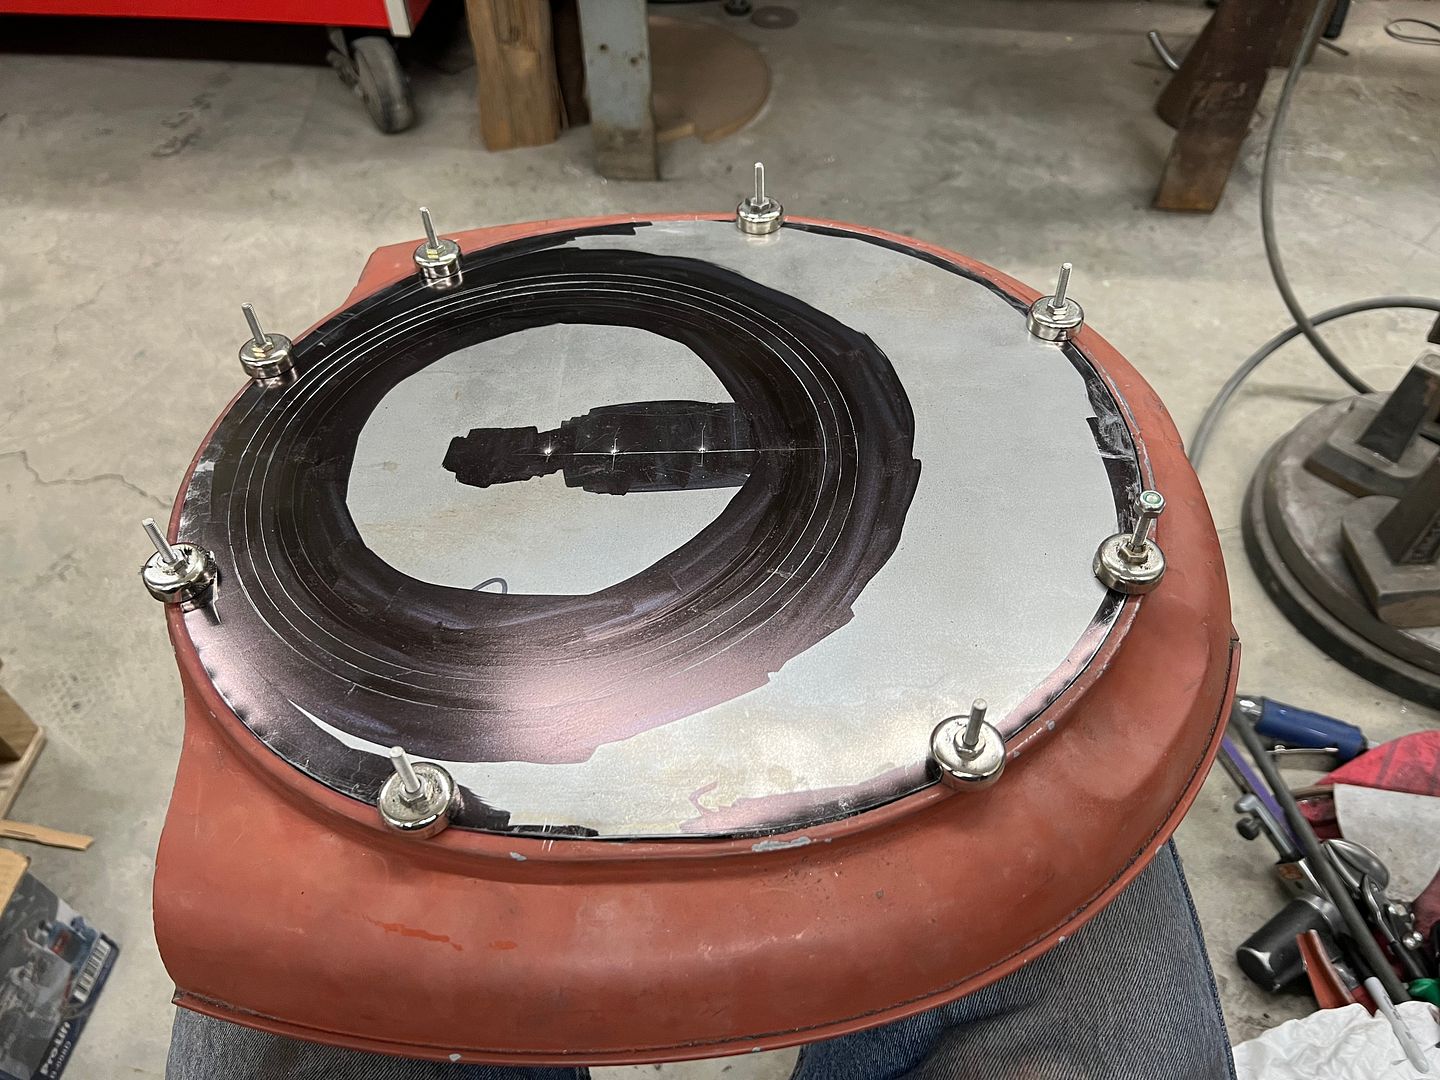
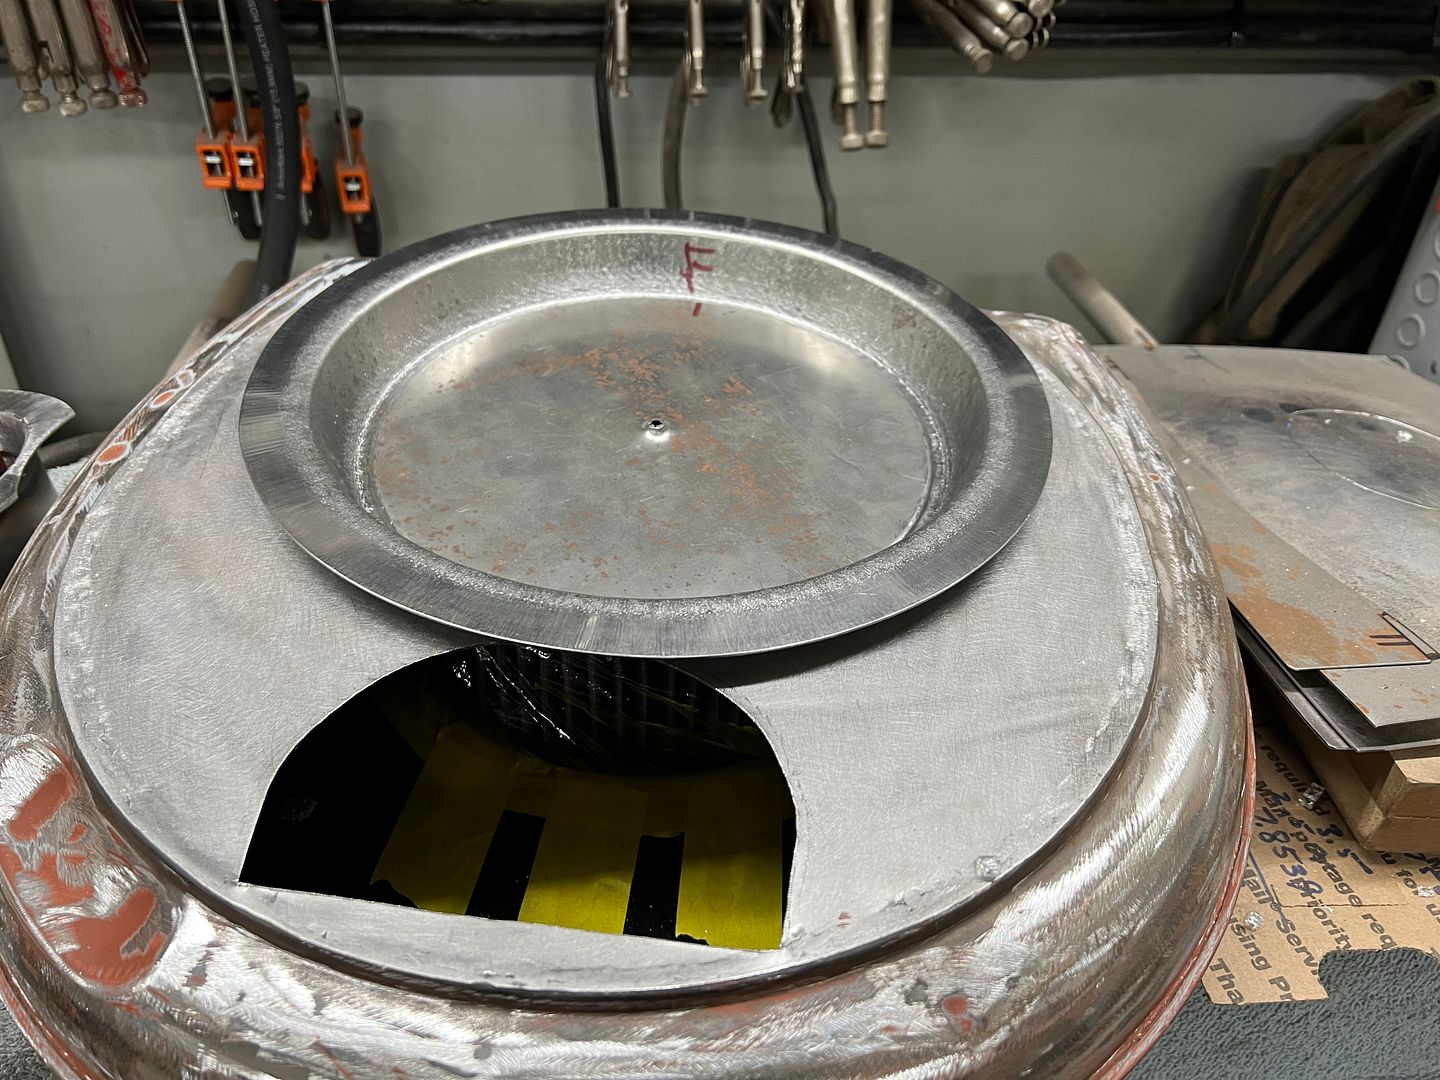
Now for our bottom plate for the air cleaner.. In order to keep the filter located properly (keep it from moving around) we decided to add a bead to the bottom of the plate.
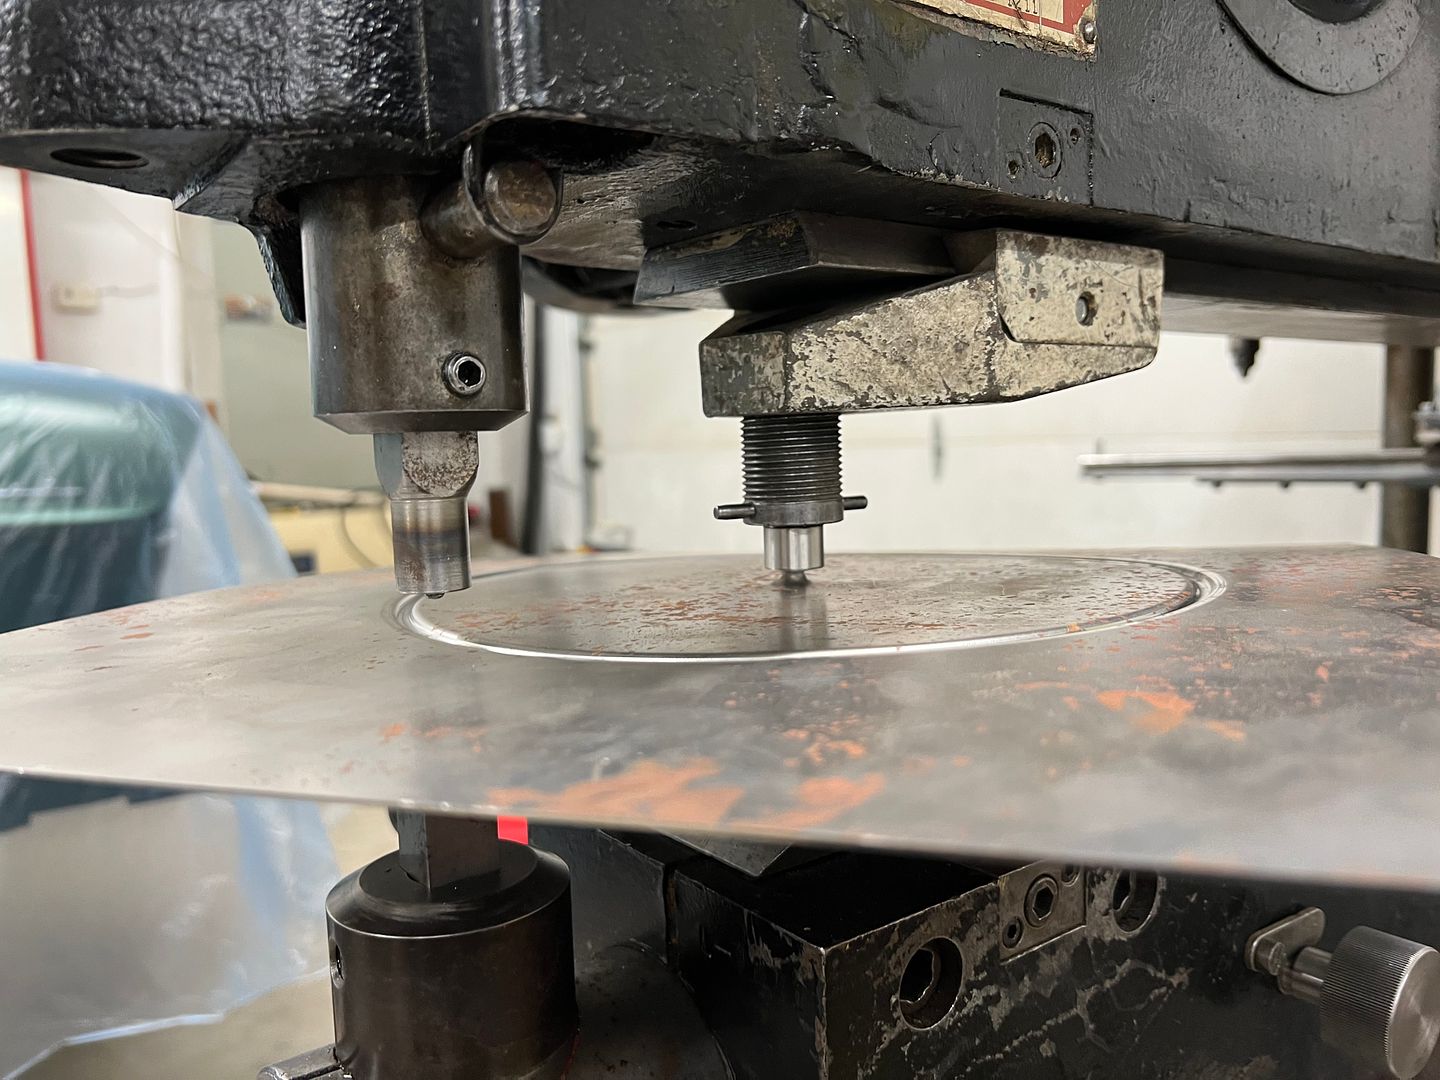
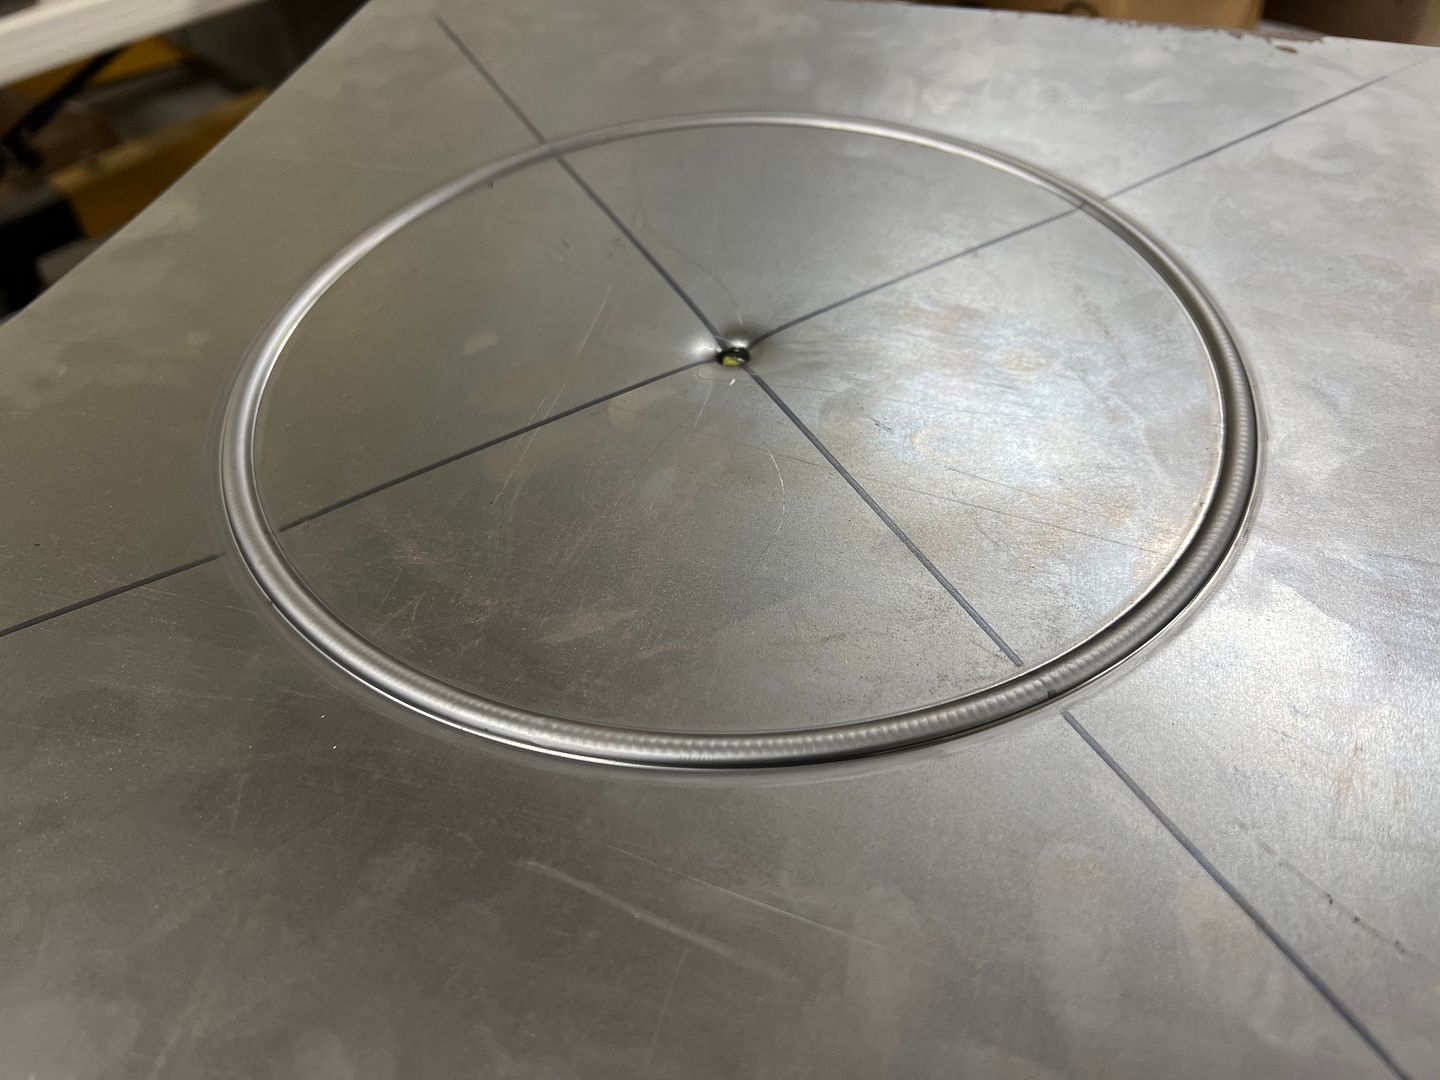
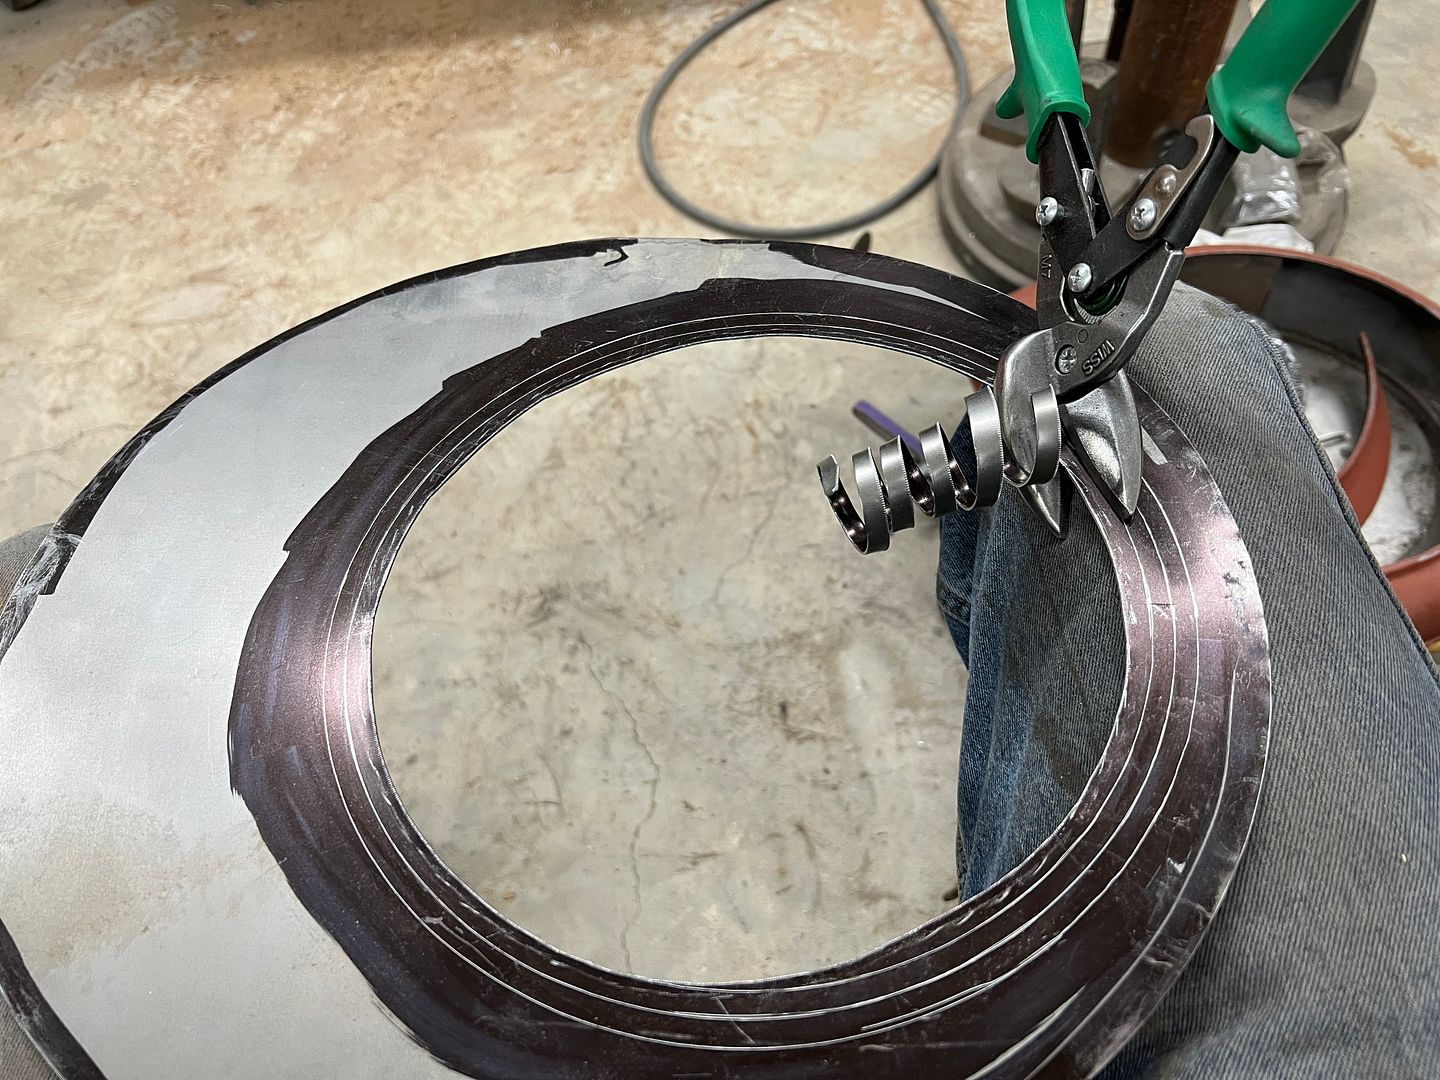
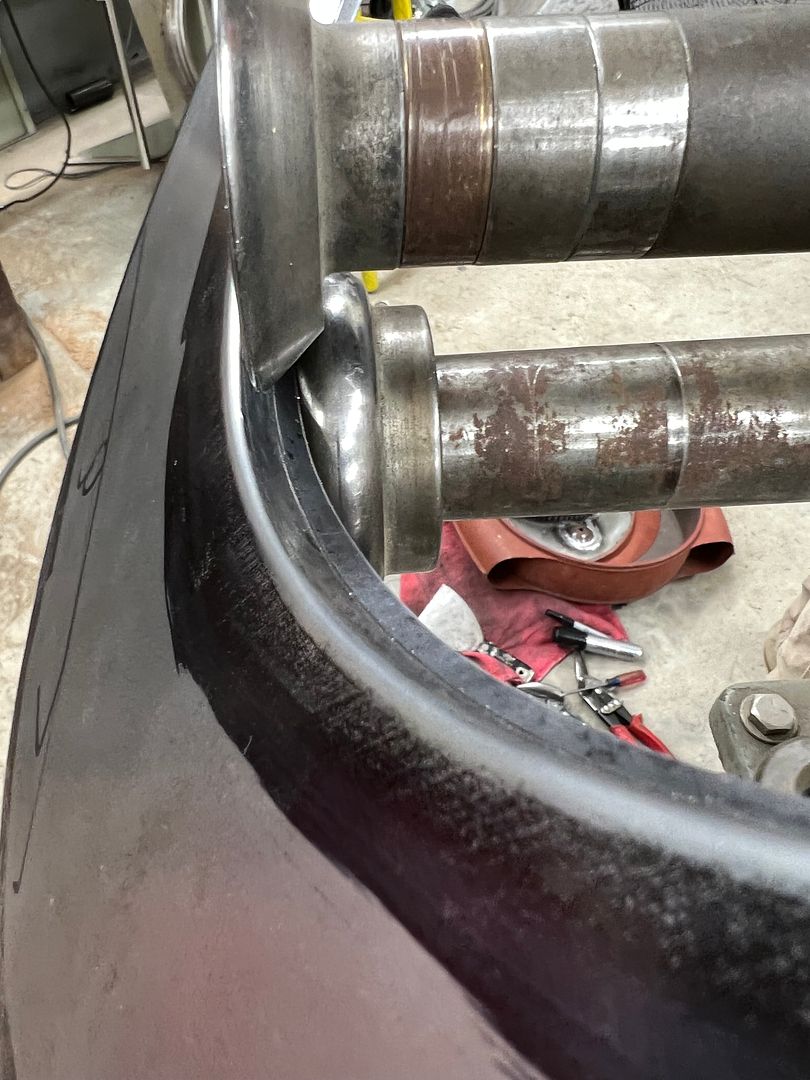
Then the plate is trimmed to a circle, and the thumbnail dies in the Lennox used to start the shrinking process around the edge.
https://youtu.be/Vy30NeziryY
We then jumped on the Erco kick shrinker to flatten the uneven surface..
https://youtu.be/B1Jg_9BfDNc
https://youtu.be/Xlu2LsUNcj0
And repeat. Repeatedly. We have two or three more rounds to go and we can start tipping and stretching.
Robert
-
12-01-2021 06:22 AM #1663
CHR Member
- Join Date
- Jun 2008
- Location
- Leonardtown
- Car Year, Make, Model: Walking
- Posts
- 1,228
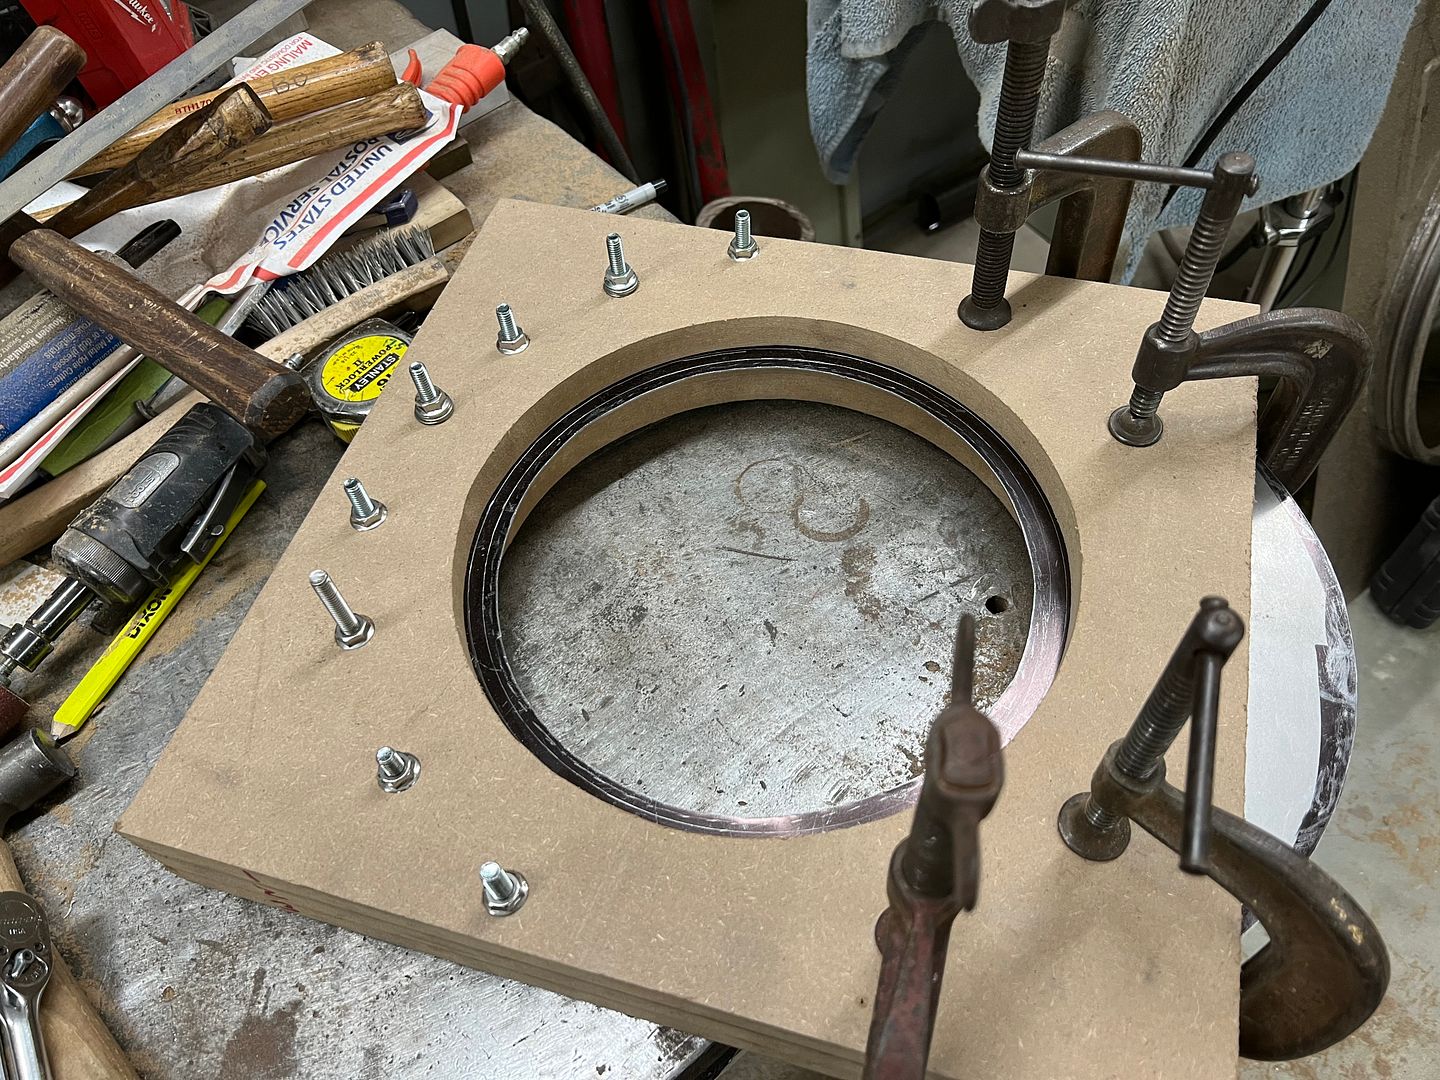
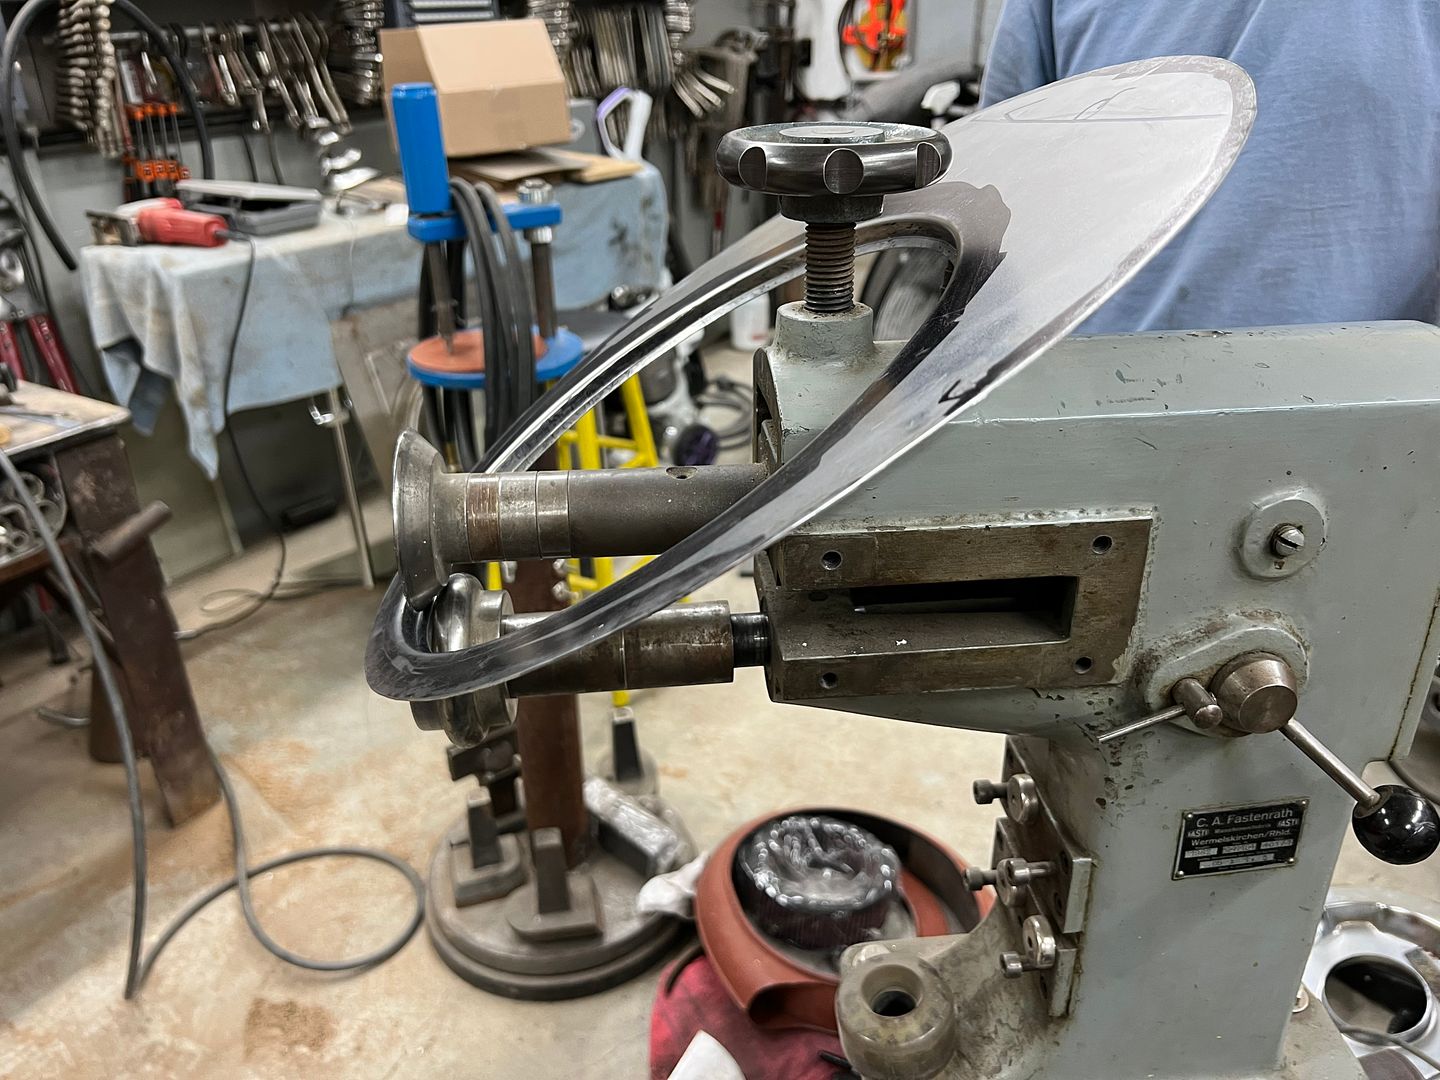
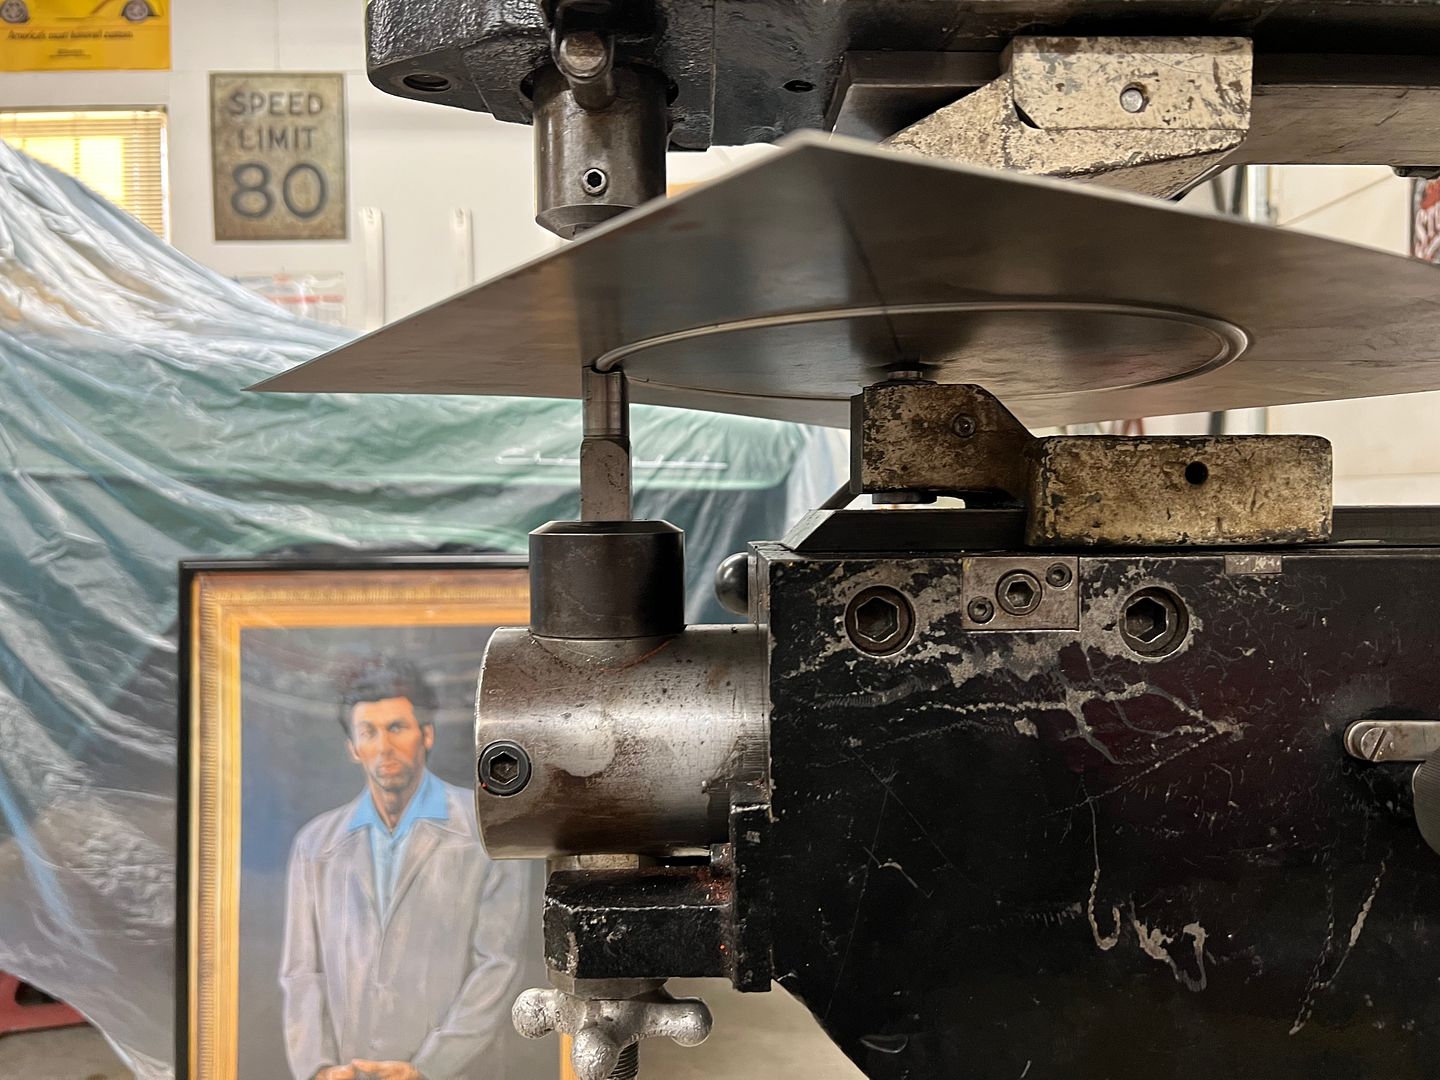
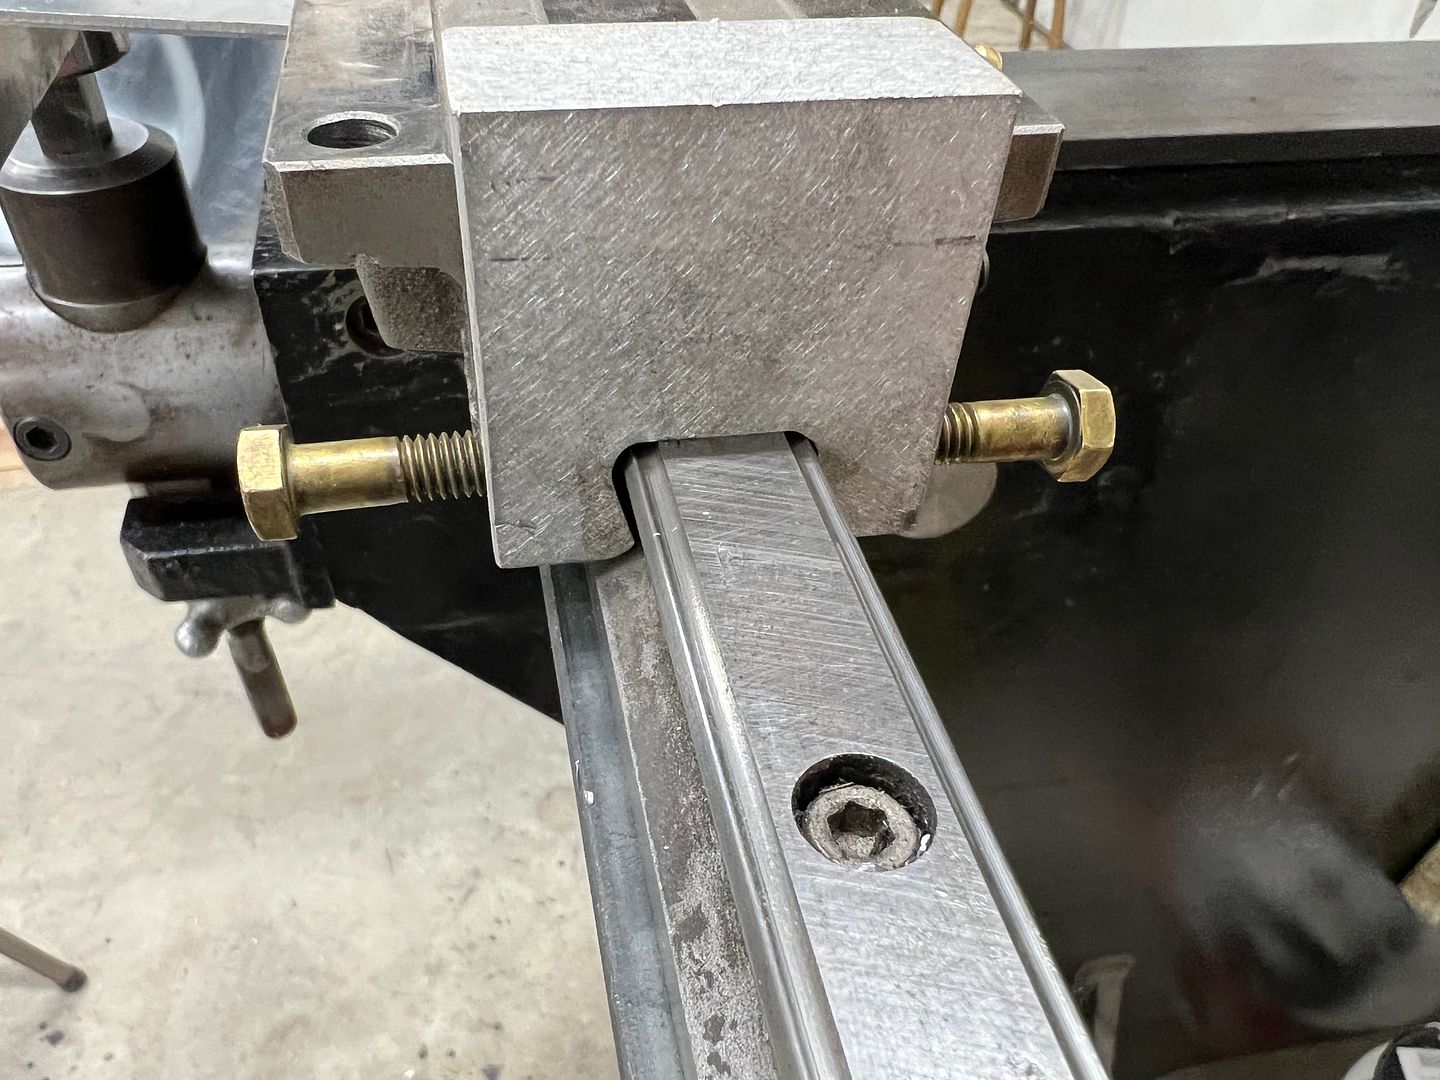
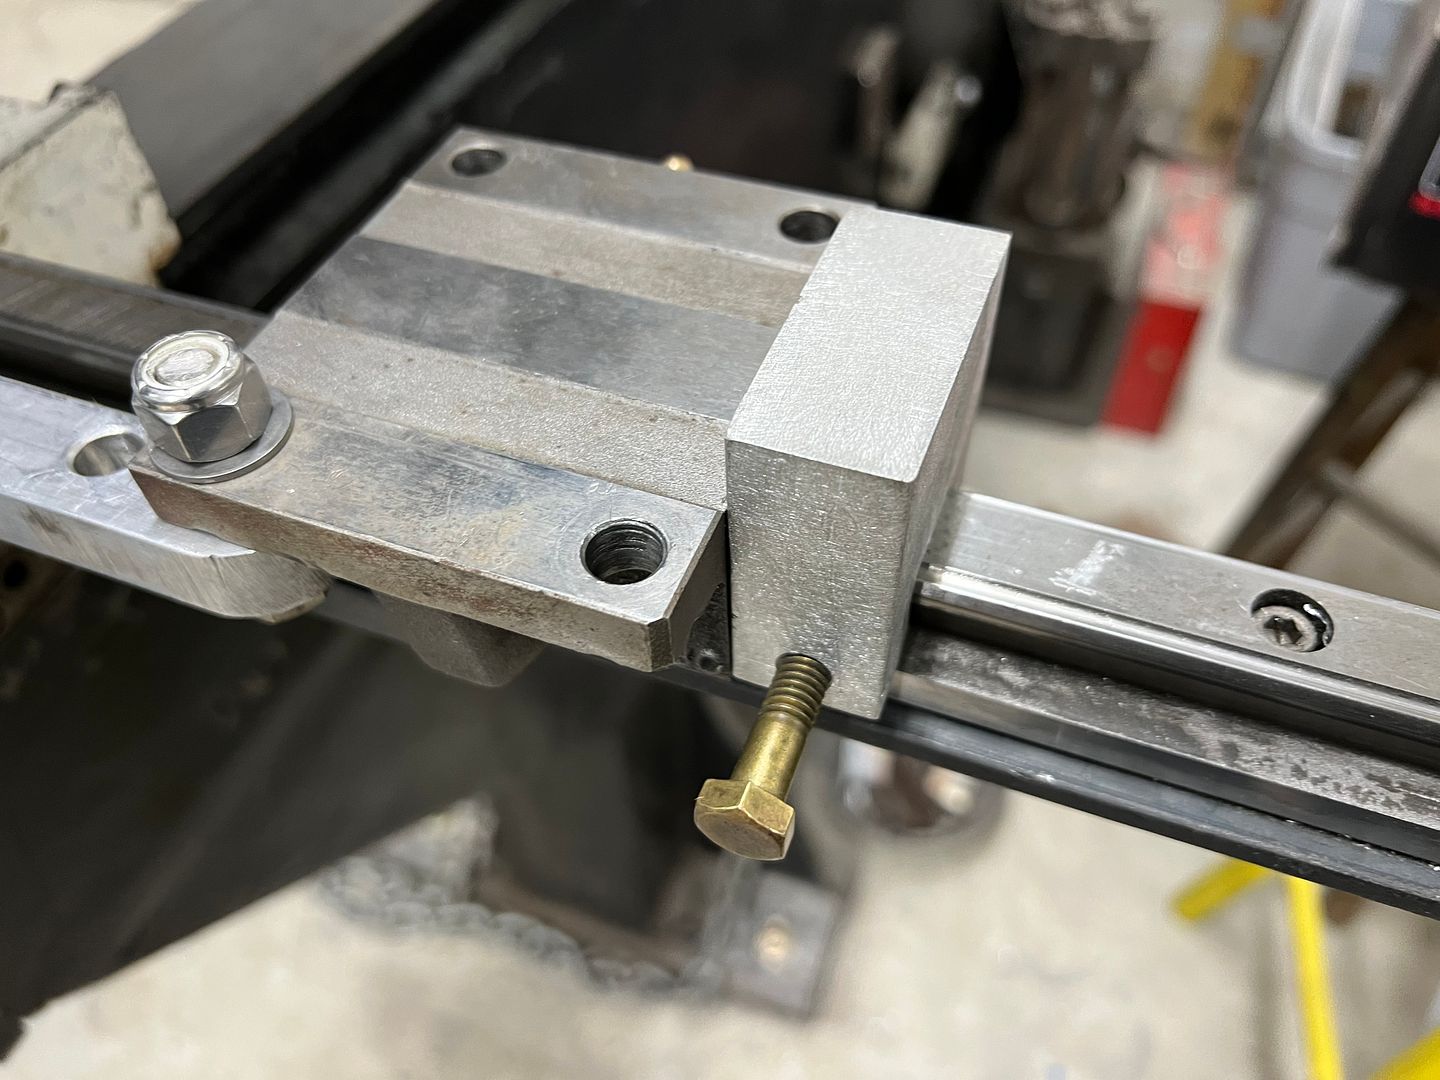
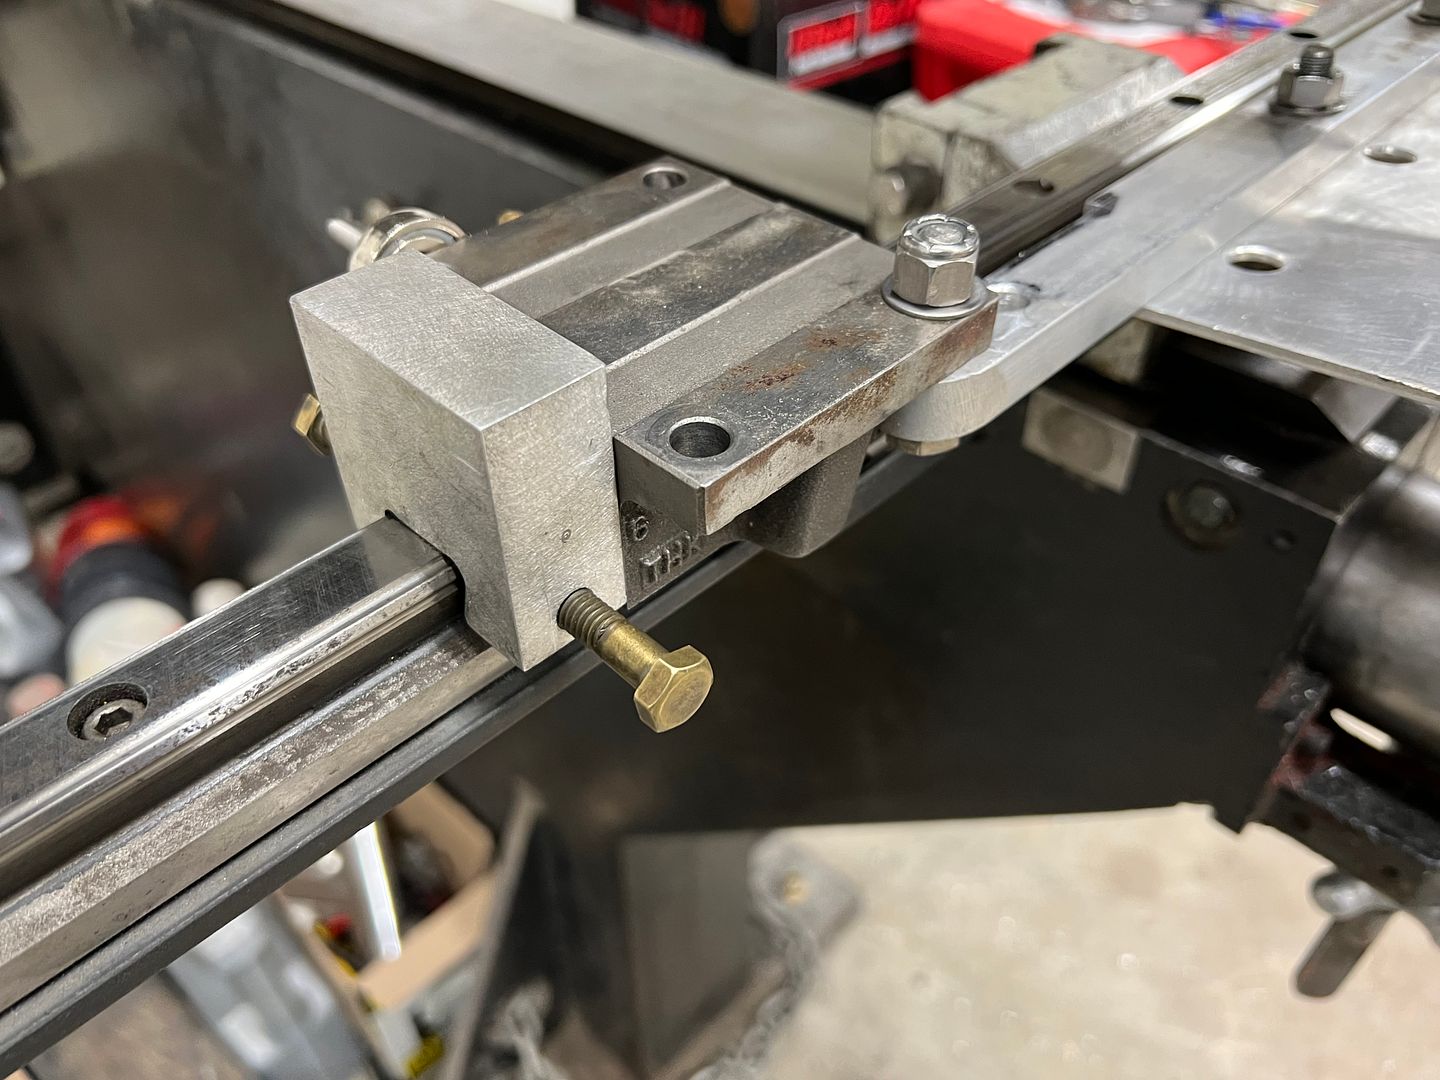
Last night we changed out the thumbnail shrinking dies for linear stretch dies in the Lennox TE250 in order to tip the flange back horizontal again. We have a backstop / fence that had been notched for tooling and this did a nice job of getting the flange depth consistent.
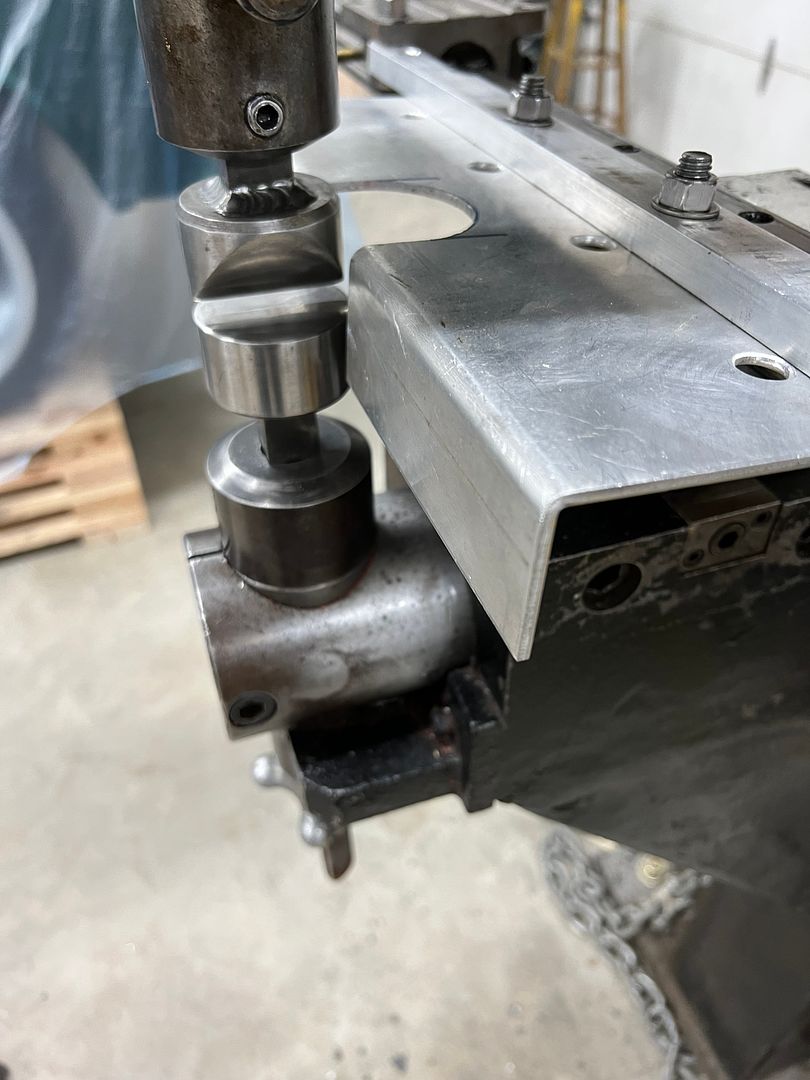
As this gets bolted to our linear slide and we'll need that to remain stationary, some Cerutti built clamp blocks are added.
Linear stretch dies in action:
https://www.youtube.com/watch?v=-euPrCTj9zI
Next, we had been having issue with the Skat Blast cabinet, and given the sale going on this week at TP Tools, ordered a new high volume cabinet gun and nozzle, some high flow fittings, and while we're at it, how about some fresh glass..
_IMG_1775.JPG)
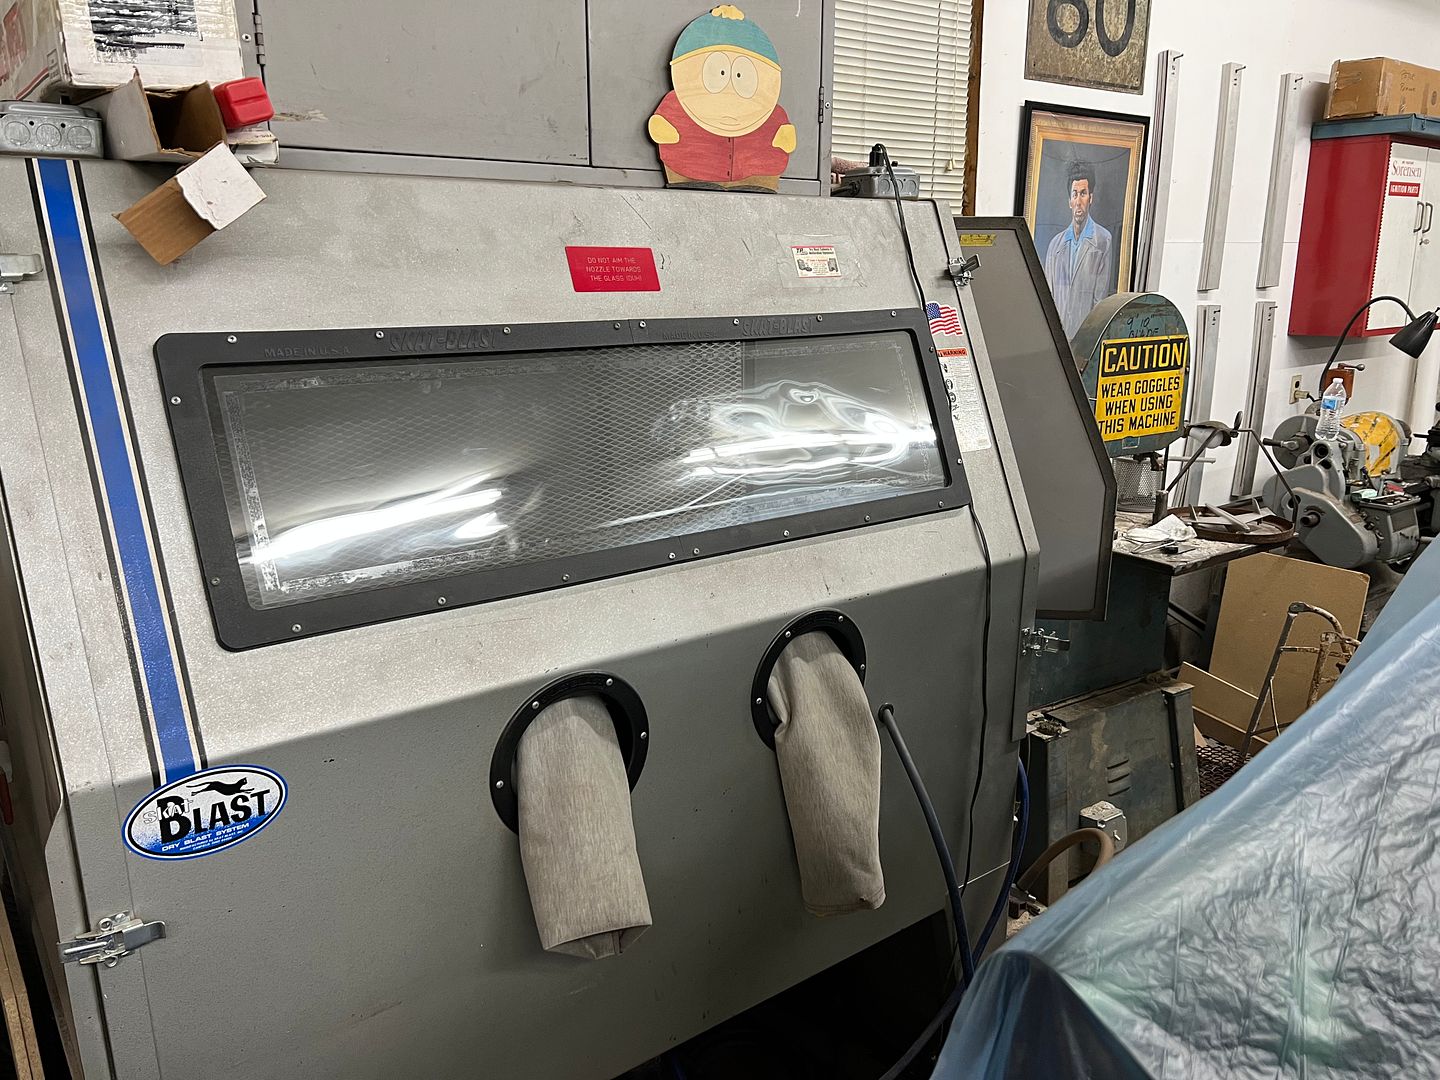
Amazing....we can see!
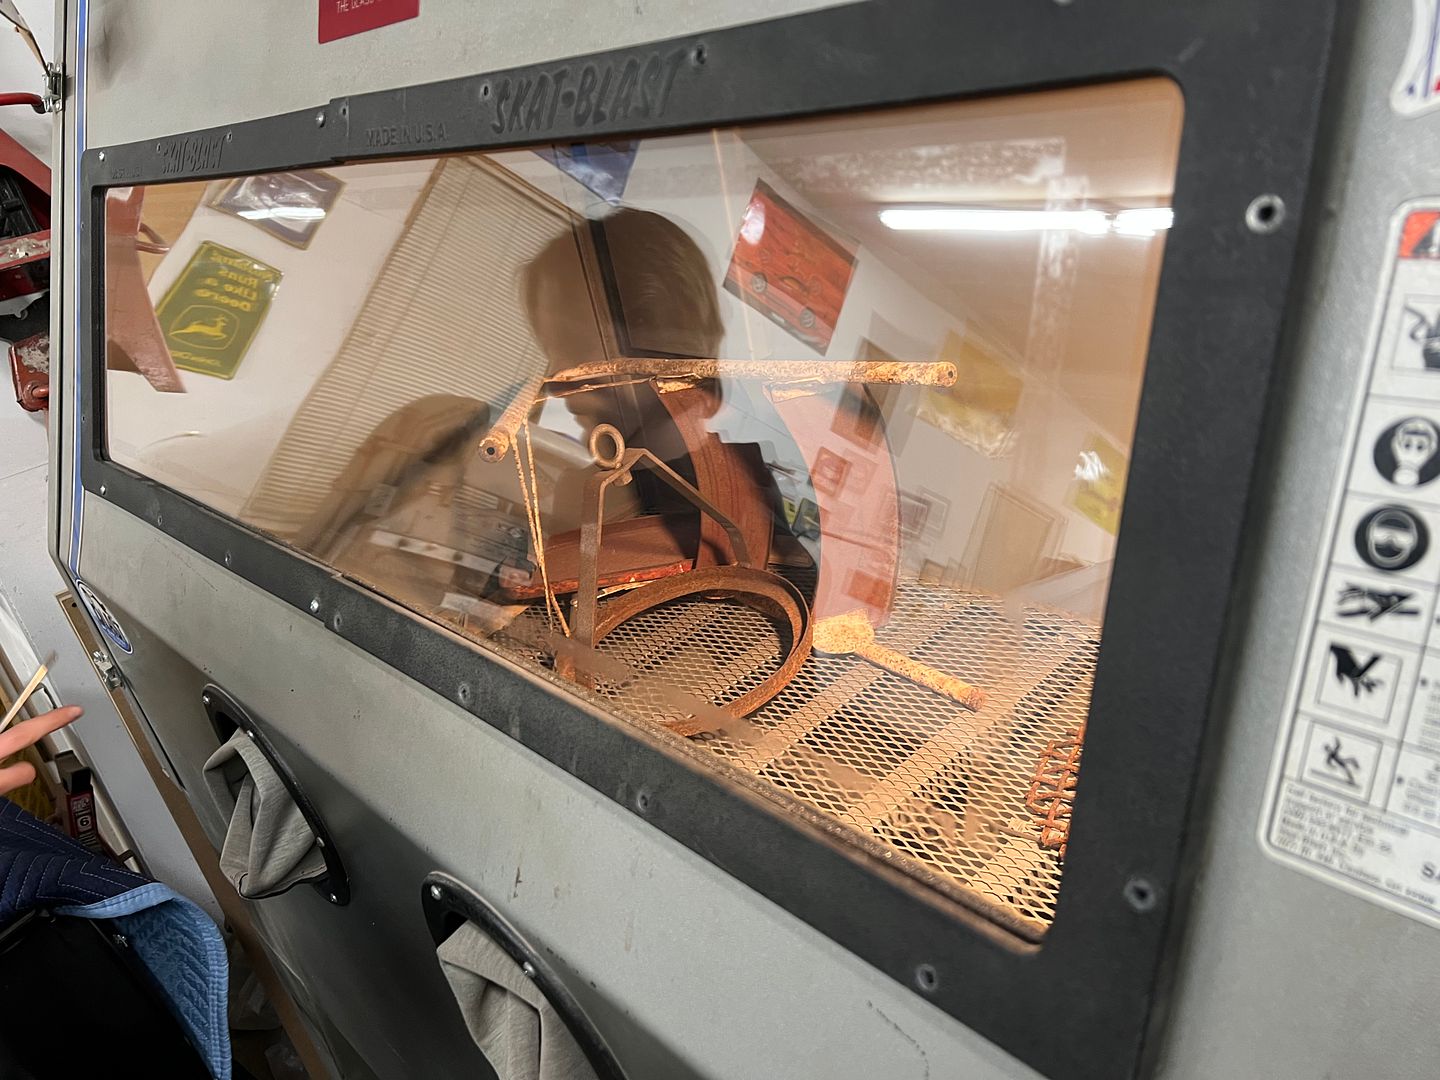
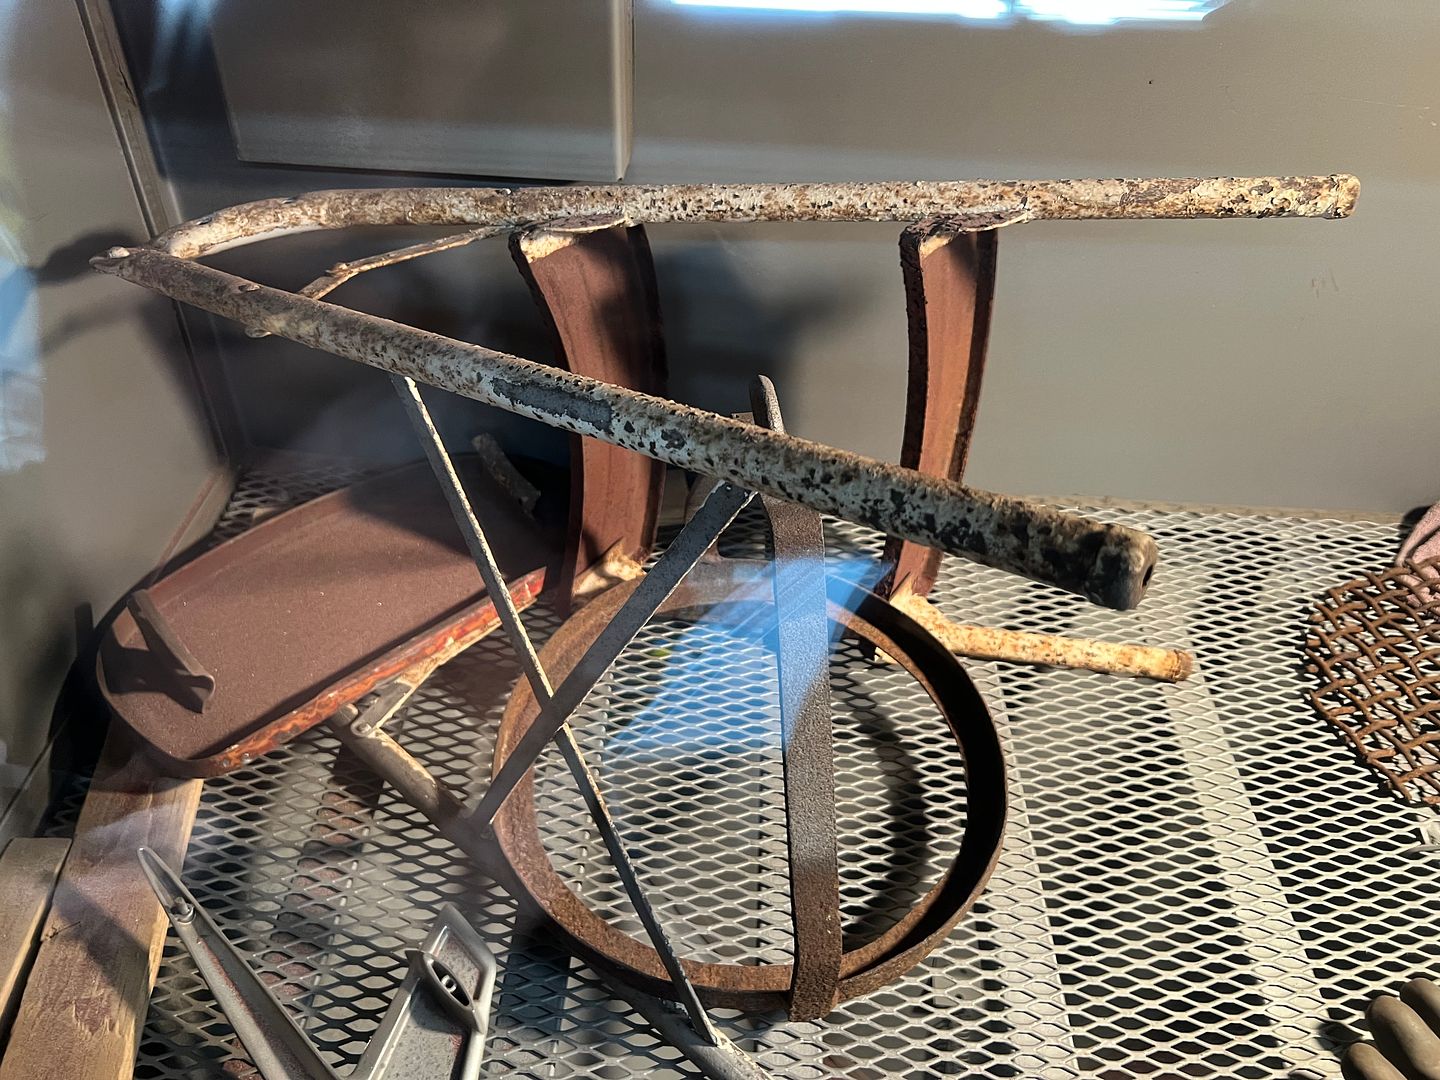
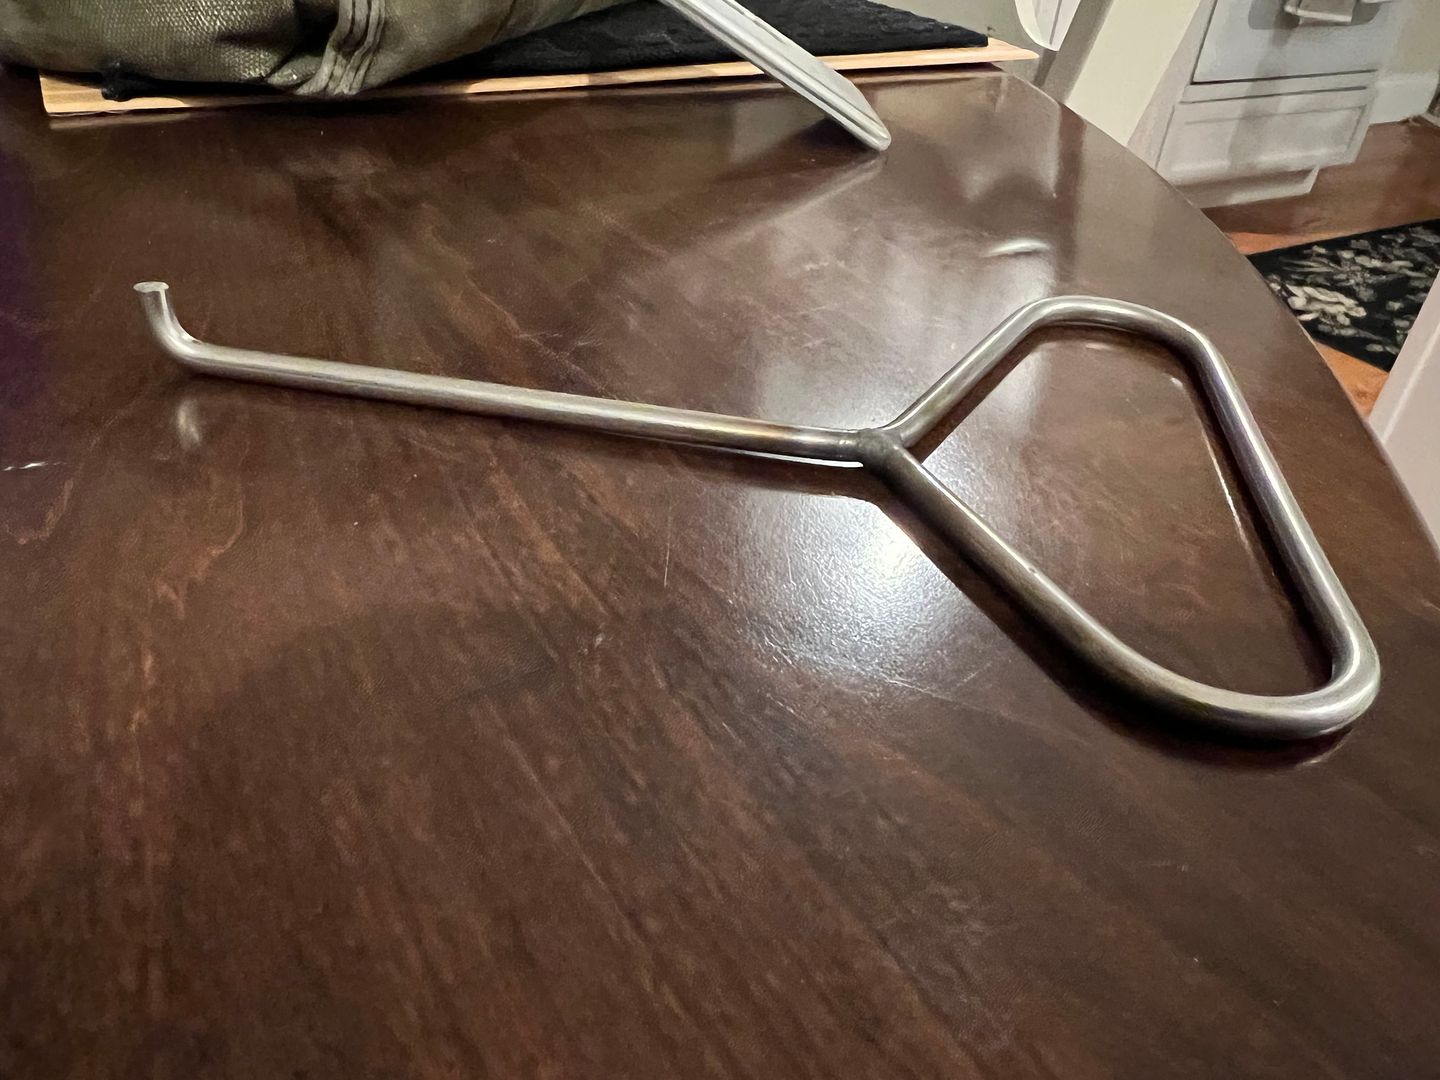
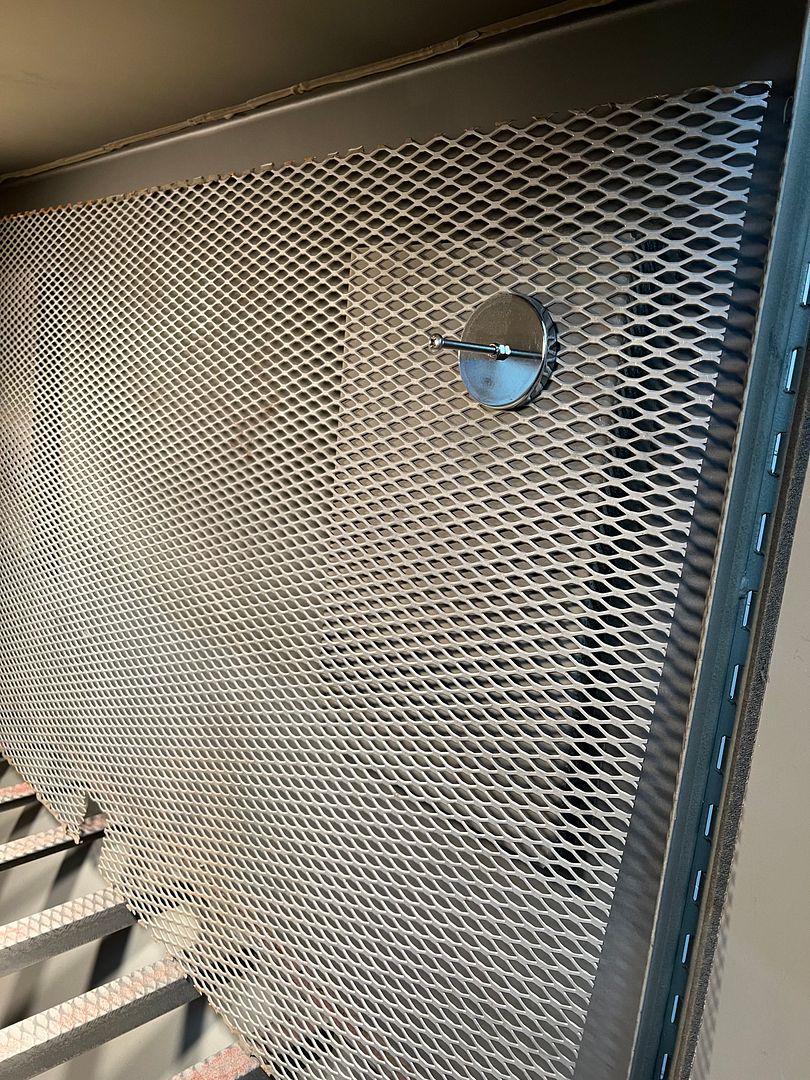
But alas, all the new parts did not fix the losing media about 5-10 seconds in. So we figured this was a blockage with the suction tube, which requires removing the expanded metal deck inside. Which has sealant along front and rear edge. So a handy utility knife was employed, along with this fancy tool we had made up for removing tiles in raised flooring, as it did well in pulling up the expanded metal.
The screen was tipped up out of the way and a large magnet holds it in place...
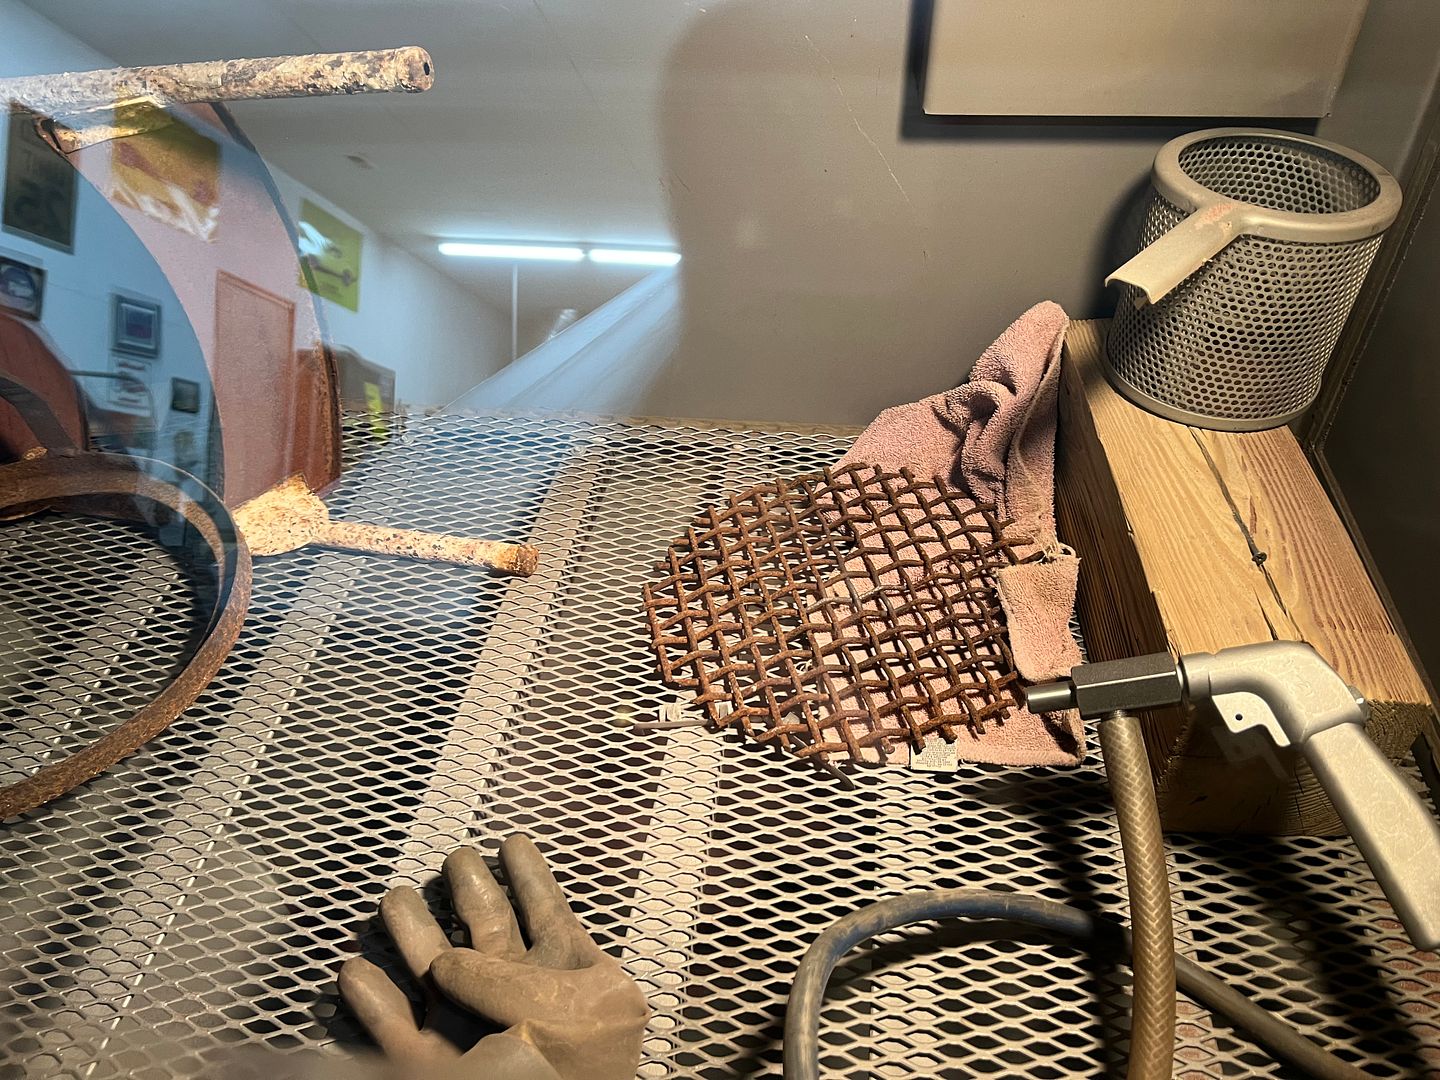
Once we had access to the pickup tube, we noticed a hole in the inside corner that didn't belong.
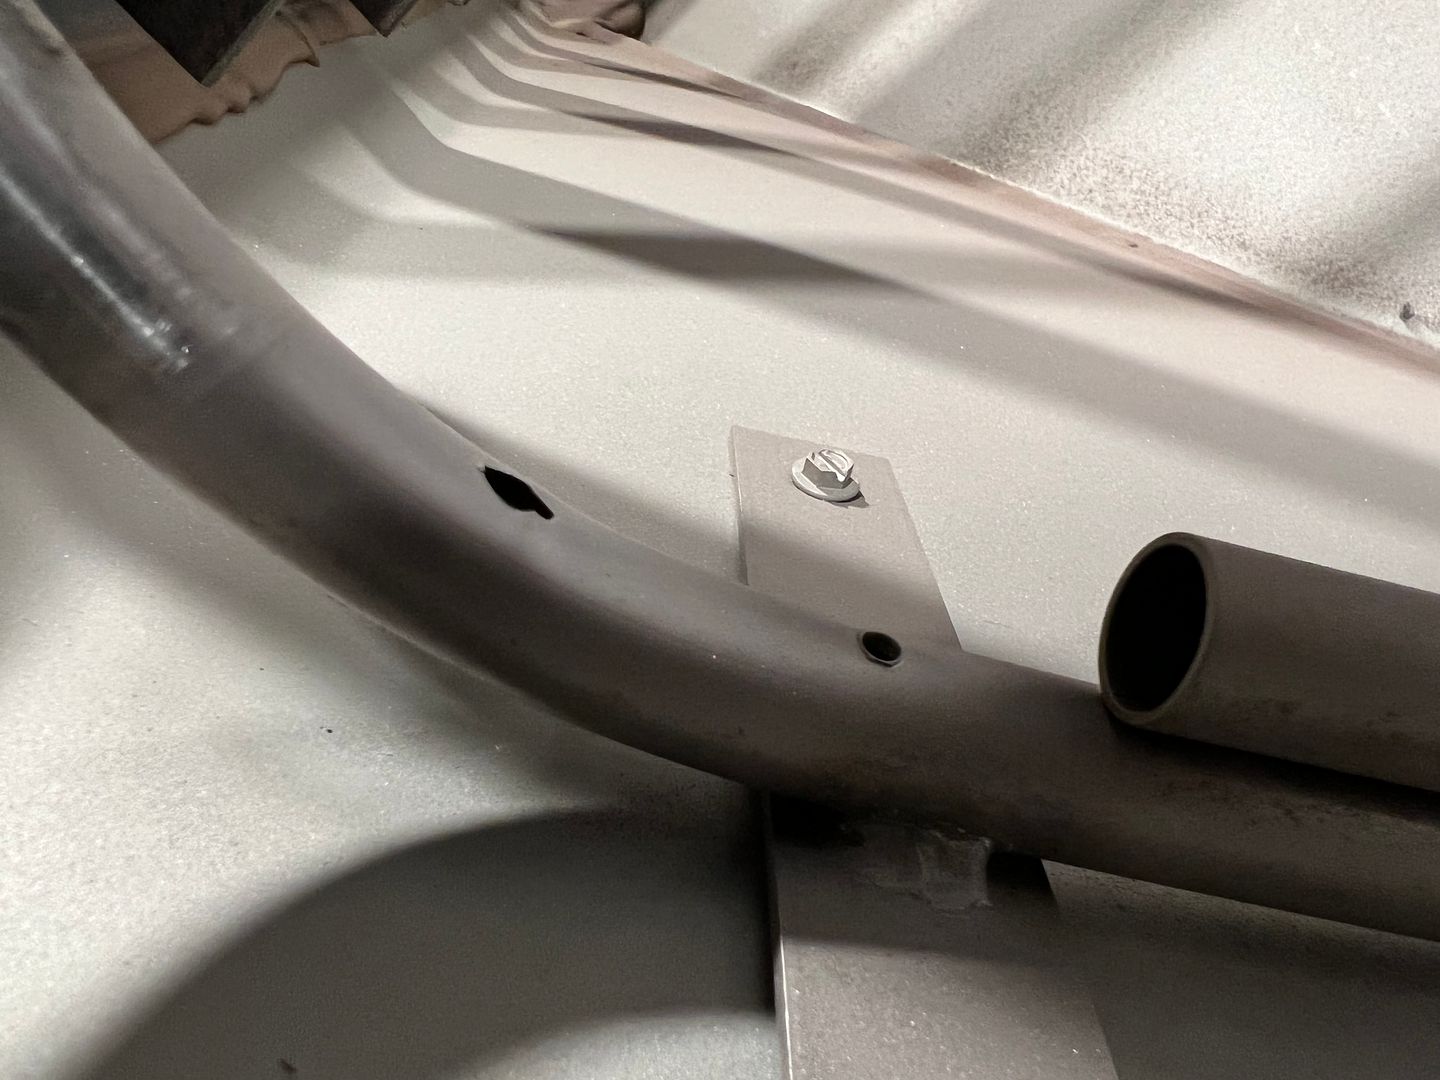
Once we removed the tube, we noticed it was more widespread...

Well, I guess we have found the suction/media issue, and now have a used High flow gun/nozzle for sale. Luckily the sale is still going on, ordered the replacement tube last night..Last edited by MP&C; 12-01-2021 at 09:33 AM.
Robert
-
12-01-2021 07:32 AM #1664
CHR Member/Contributor
- Join Date
- Sep 2007
- Location
- Gardner, KS
- Car Year, Make, Model: '33 HiBoy Coupe, '32 HiBoy Roadster
- Posts
- 11,245
Gotta say I was a bit surprised, not to read"....so we went over and found a piece of flat stock and made up a die set for the PullMax....." Originally Posted by MP&C


Roger
Enjoy the little things in life, and you may look back one day and realize that they were really the BIG things.
-
12-01-2021 08:50 AM #1665
CHR Member
- Join Date
- Jun 2008
- Location
- Leonardtown
- Car Year, Make, Model: Walking
- Posts
- 1,228
I did price materials... The replacement was too cheap and it has lasted the past 20 years...Robert
 Reply With Quote

Posting Permissions
- You may not post new threads
- You may not post replies
- You may not post attachments
- You may not edit your posts

This site is up more often lately, but very little traffic.
Dead!