


 3390Likes
Thread: 55 Wagon Progress


Results 1,696 to 1,710 of 1865
 LinkBack URL
 About LinkBacks
-
05-16-2022 07:01 PM #1696
 CHR Member

- Join Date
- Oct 2007
- Location
- Petaluma
- Car Year, Make, Model: 48 Ford F1
- Posts
- 9,795
Dash is Stunning, Project so incredible"  "No matter where you go, there you are!" Steve.
-
Advertising

- Google Adsense
- REGISTERED USERS DO NOT SEE THIS AD
-
05-17-2022 04:25 AM #1697
CHR Member
- Join Date
- Sep 2007
- Location
- New Bedford
- Car Year, Make, Model: 34 Ford 3W Coupe Replica
- Posts
- 14,754
Reality check... is that what we're calling this? LOL.. As always, simply stunning.
-
06-03-2022 07:22 PM #1698
CHR Member
- Join Date
- Jun 2008
- Location
- Leonardtown
- Car Year, Make, Model: Walking
- Posts
- 1,228
OK, long overdue for an update..
Playing some more with our dash insert, this should look good..
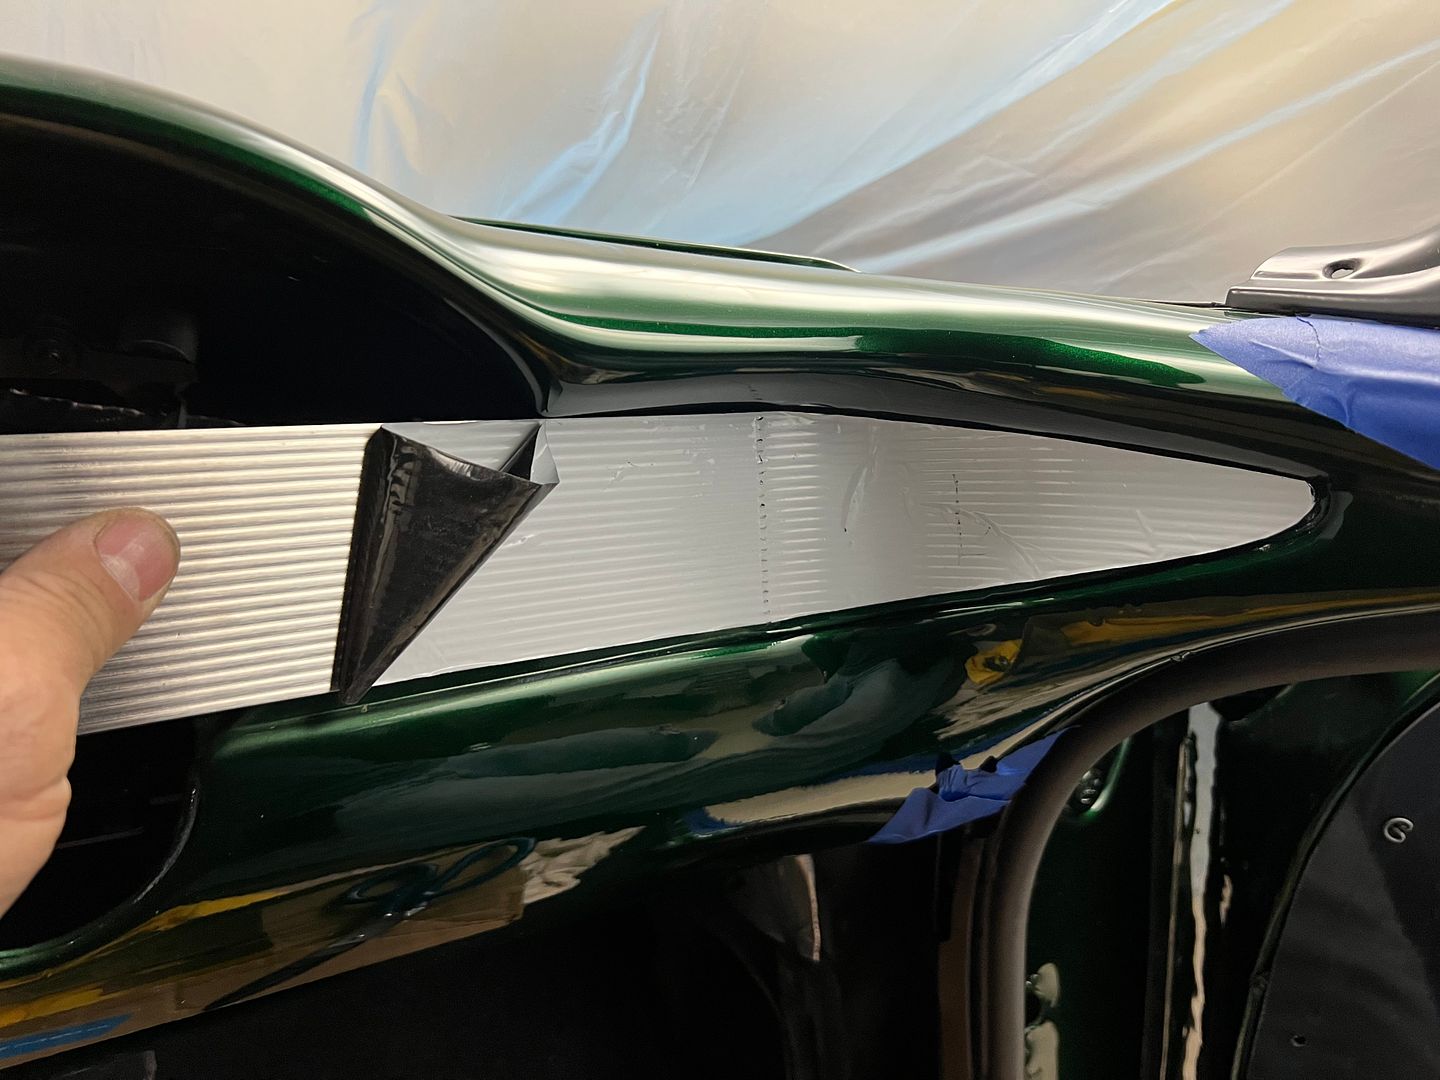
We attempted different processes for folding the hemmed edge trim, but alas none gave a good consistent finish.
So some stainless strips were dropped off at Triton metals, a local machine shop we have used before... They will get much better results, still waiting on completion.
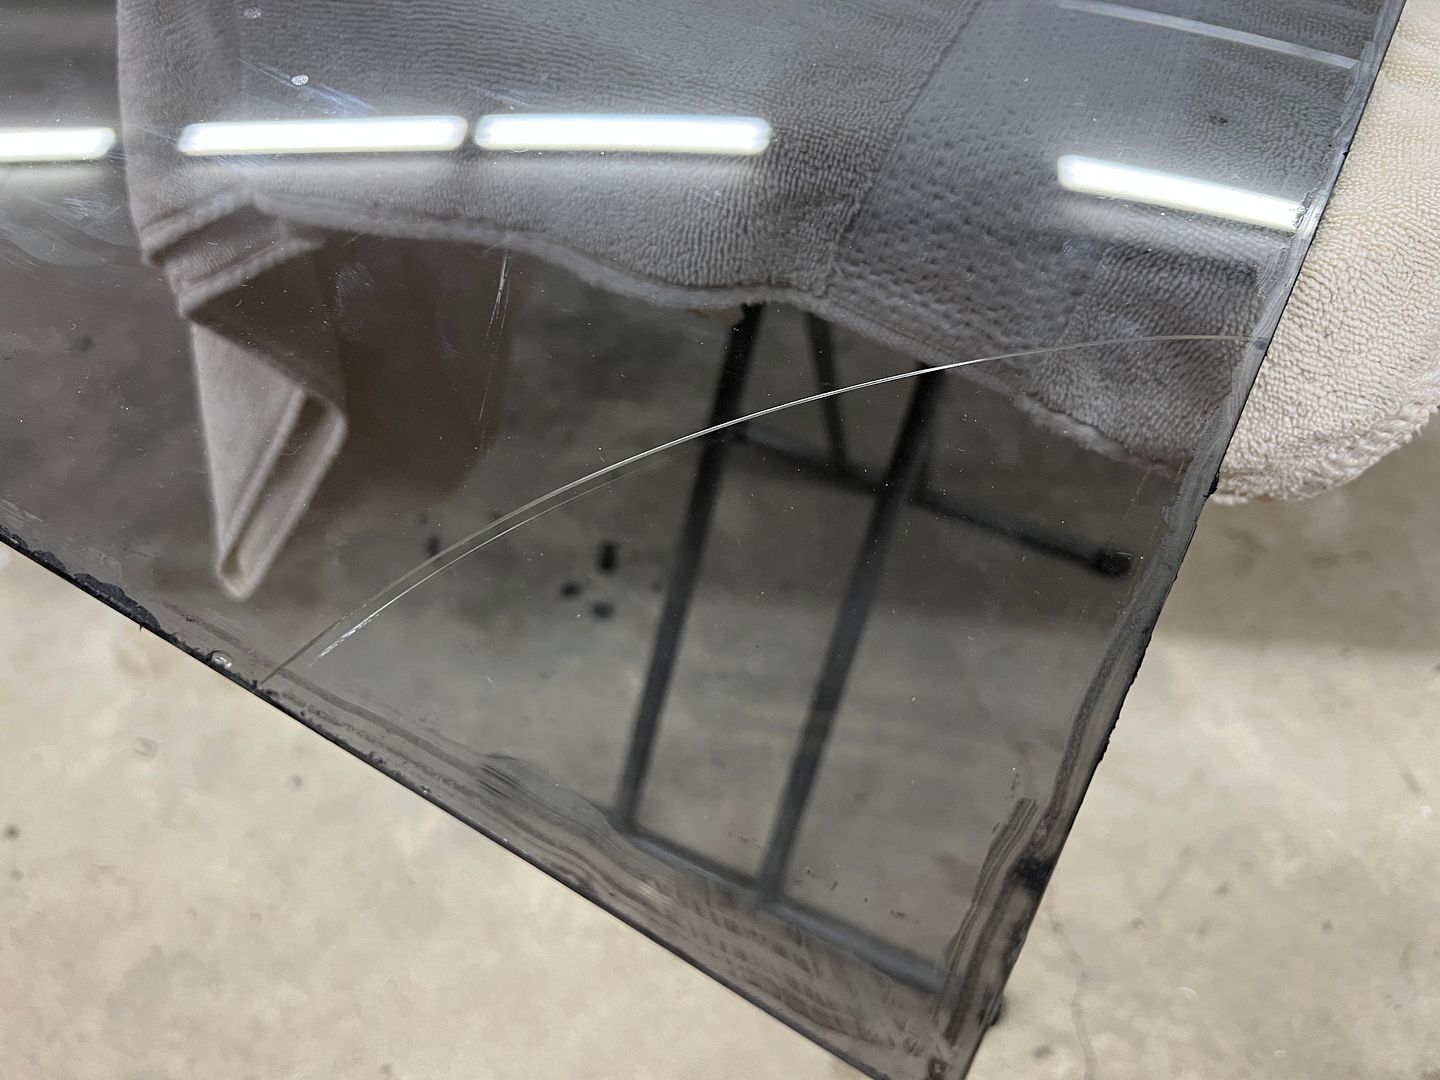
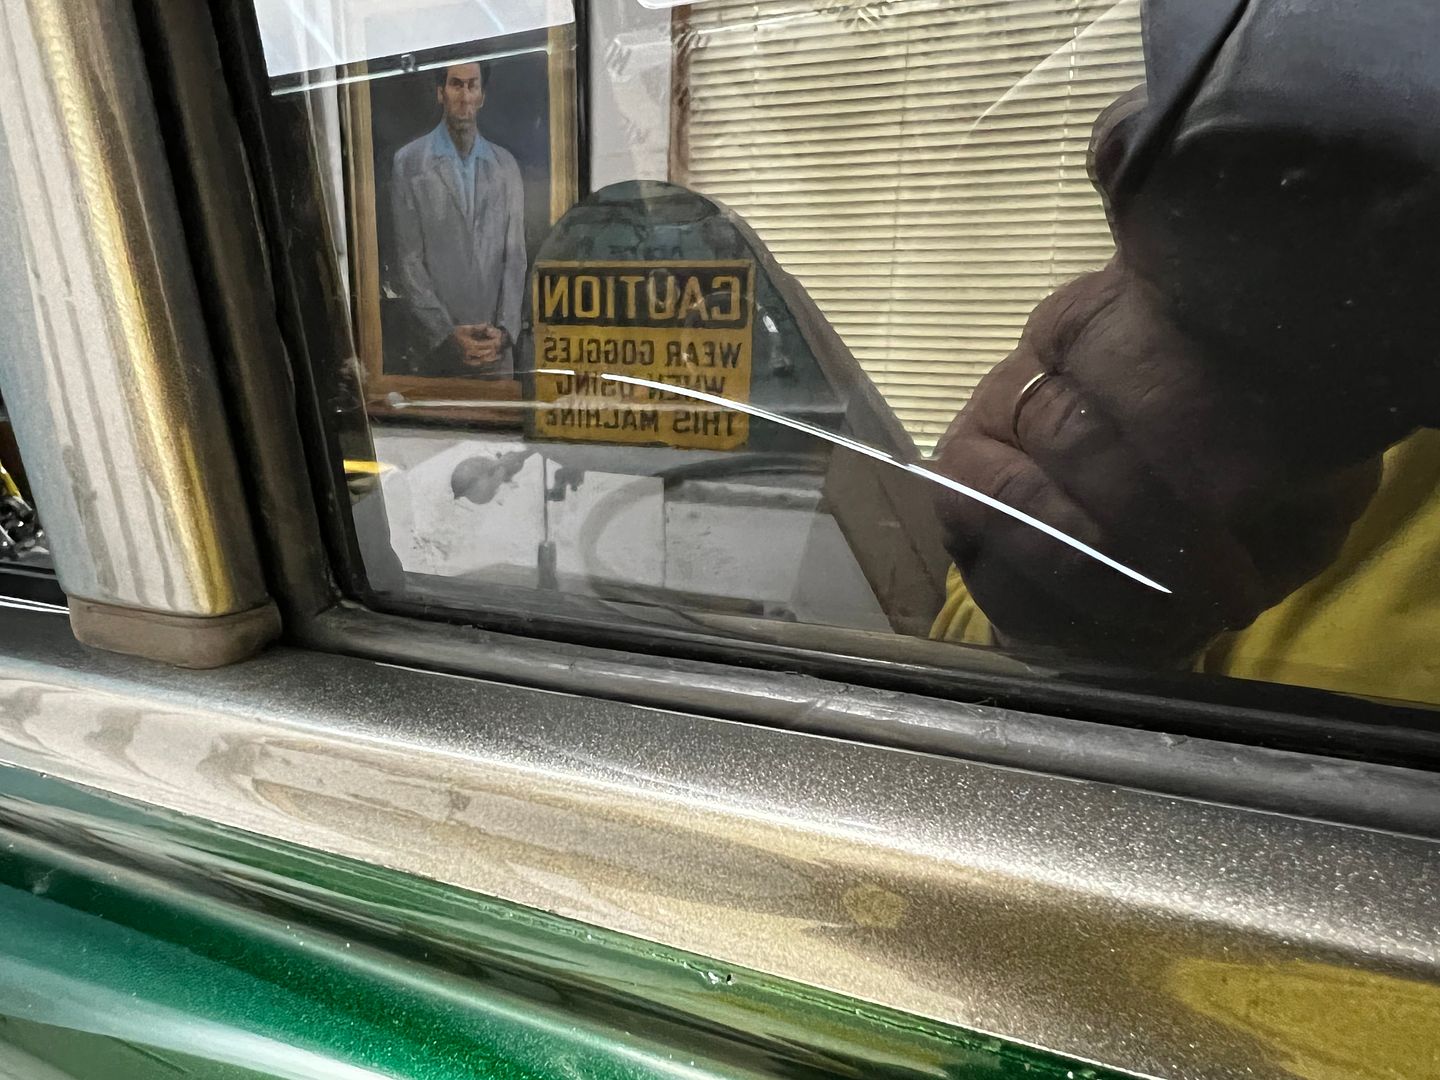
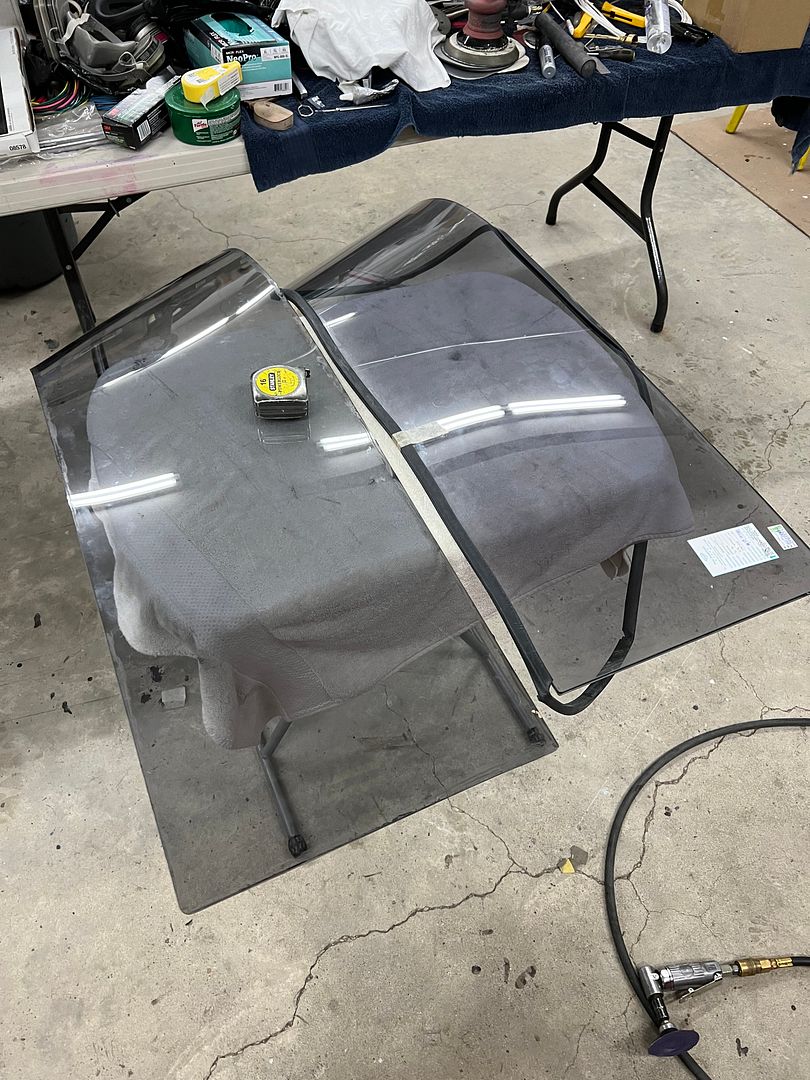
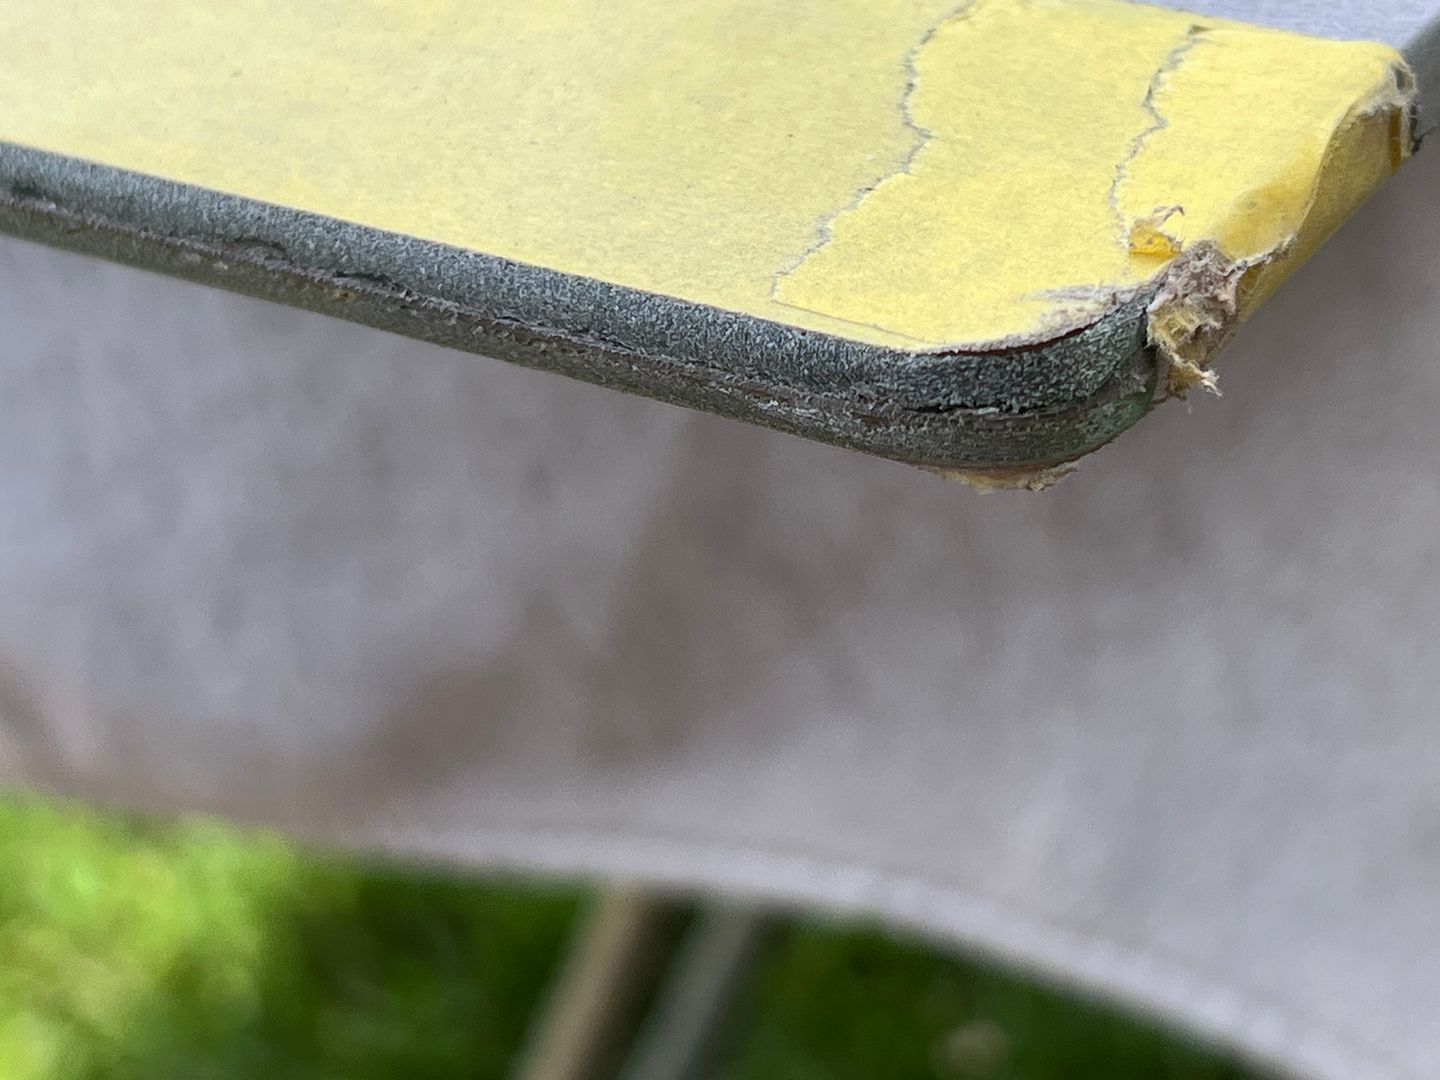
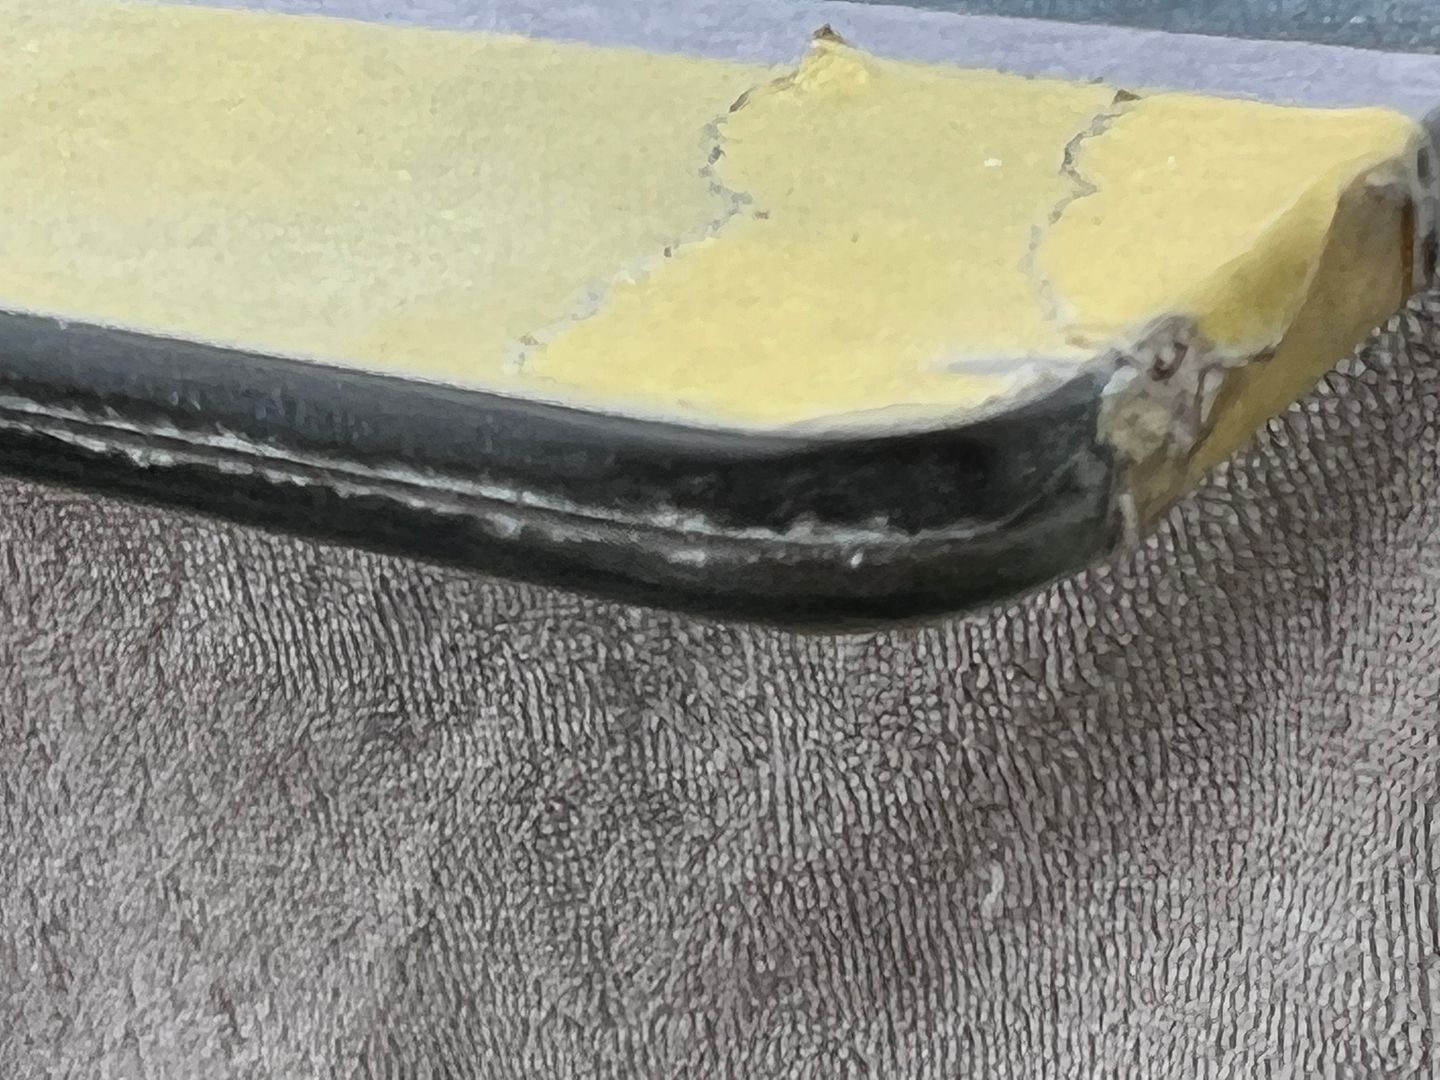
Back to our problem child of a window, this crack occurred as I slightly pried rearward with a metal rule. Exactly where I pried.
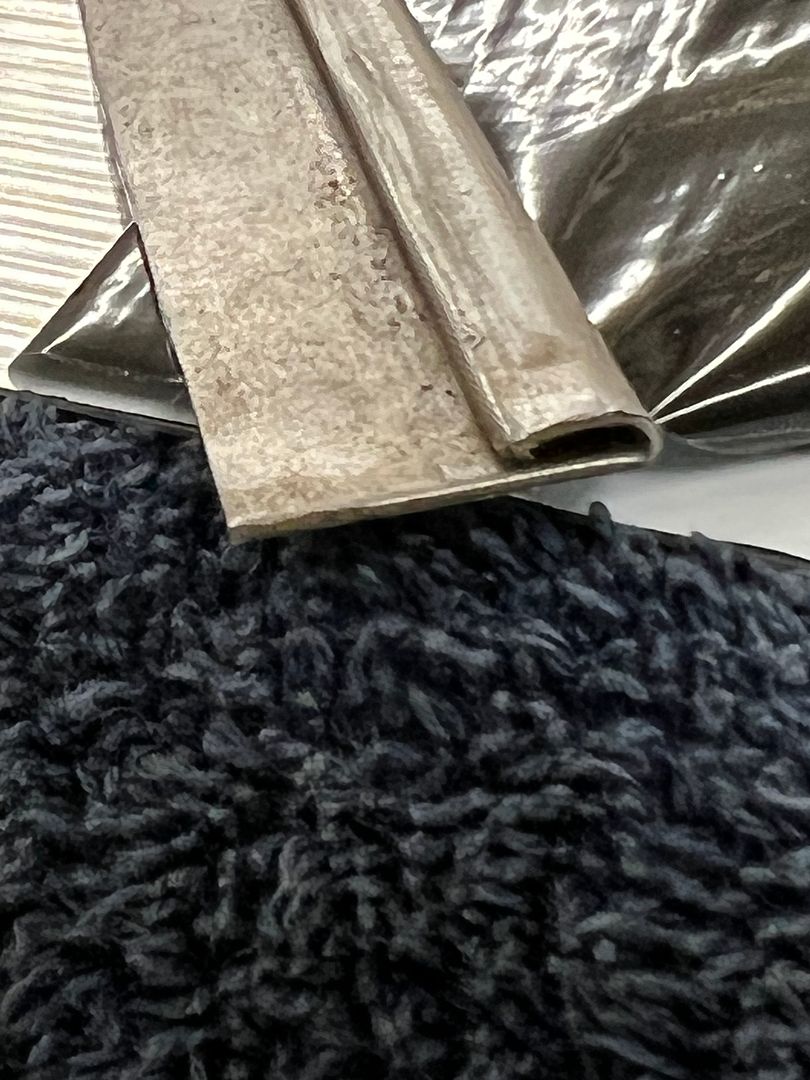
To limit the excess squeezed out of the seals on our next glass, we took the 3M strip-calk in its original form and sliced right down the middle..
Here's a video showing installation of the strip-calk, and another with installation of the seal over the strip-calk.
Installing window #2, we had a slight tight area and I asked Jared to push outward and that's when we had a repeat of Groundhog Day..
So, maybe the pry the first time was not the only issue. Fast forward so we can look back, last night we did a dry fit of the garnish moldings around these windows and found that the tack strips holding the headliner were far too thick and pushed the moldings down so far that the back side would be visible through the glass. In addition, this was also pushing downward on the window and seal while we were attempting the installation. When we had installed the quarter panel previously, we used plug welds inside this window opening and some had a slight proud. Nothing that I was concerned with at the time and considering had the tack strip been the correct thickness it likely wouldn't have been an issue now. But with the headliner pushing downward, the seal was hanging up on one of the plug welds as Jared was pushing outward on the corner, which made a perfect fulcrum effect for crack #2. Since we aren't pulling a headliner out, we went ahead and cleaned up the plug welds. This meant taping off all the nice pretty paint on the outside and the interior as well..
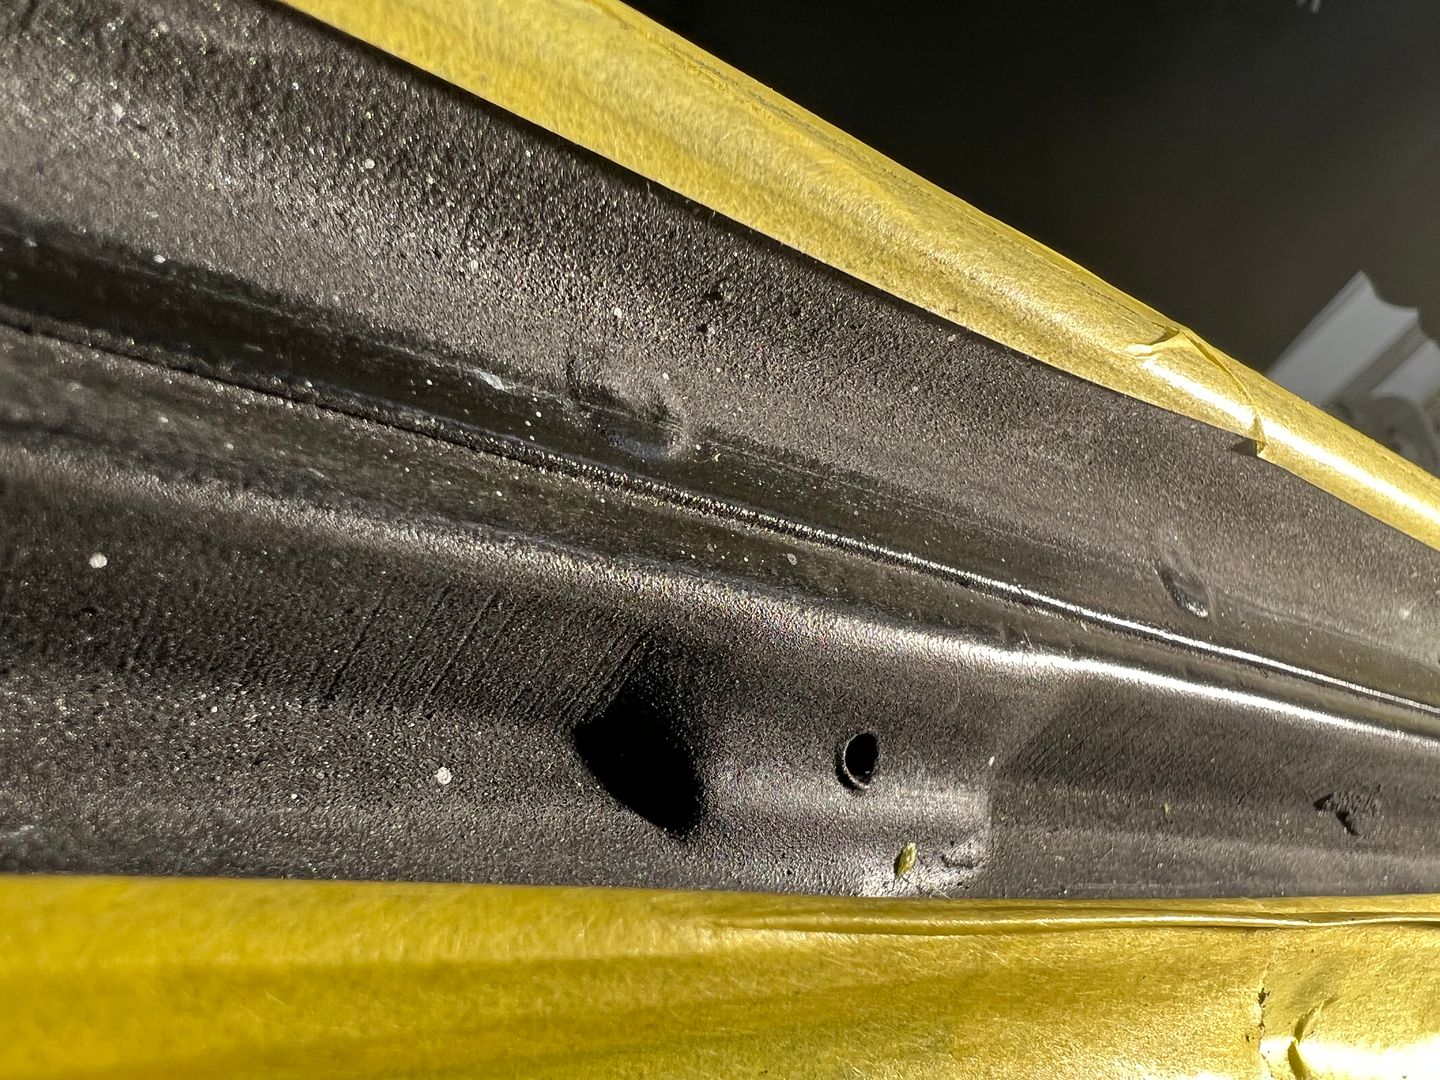
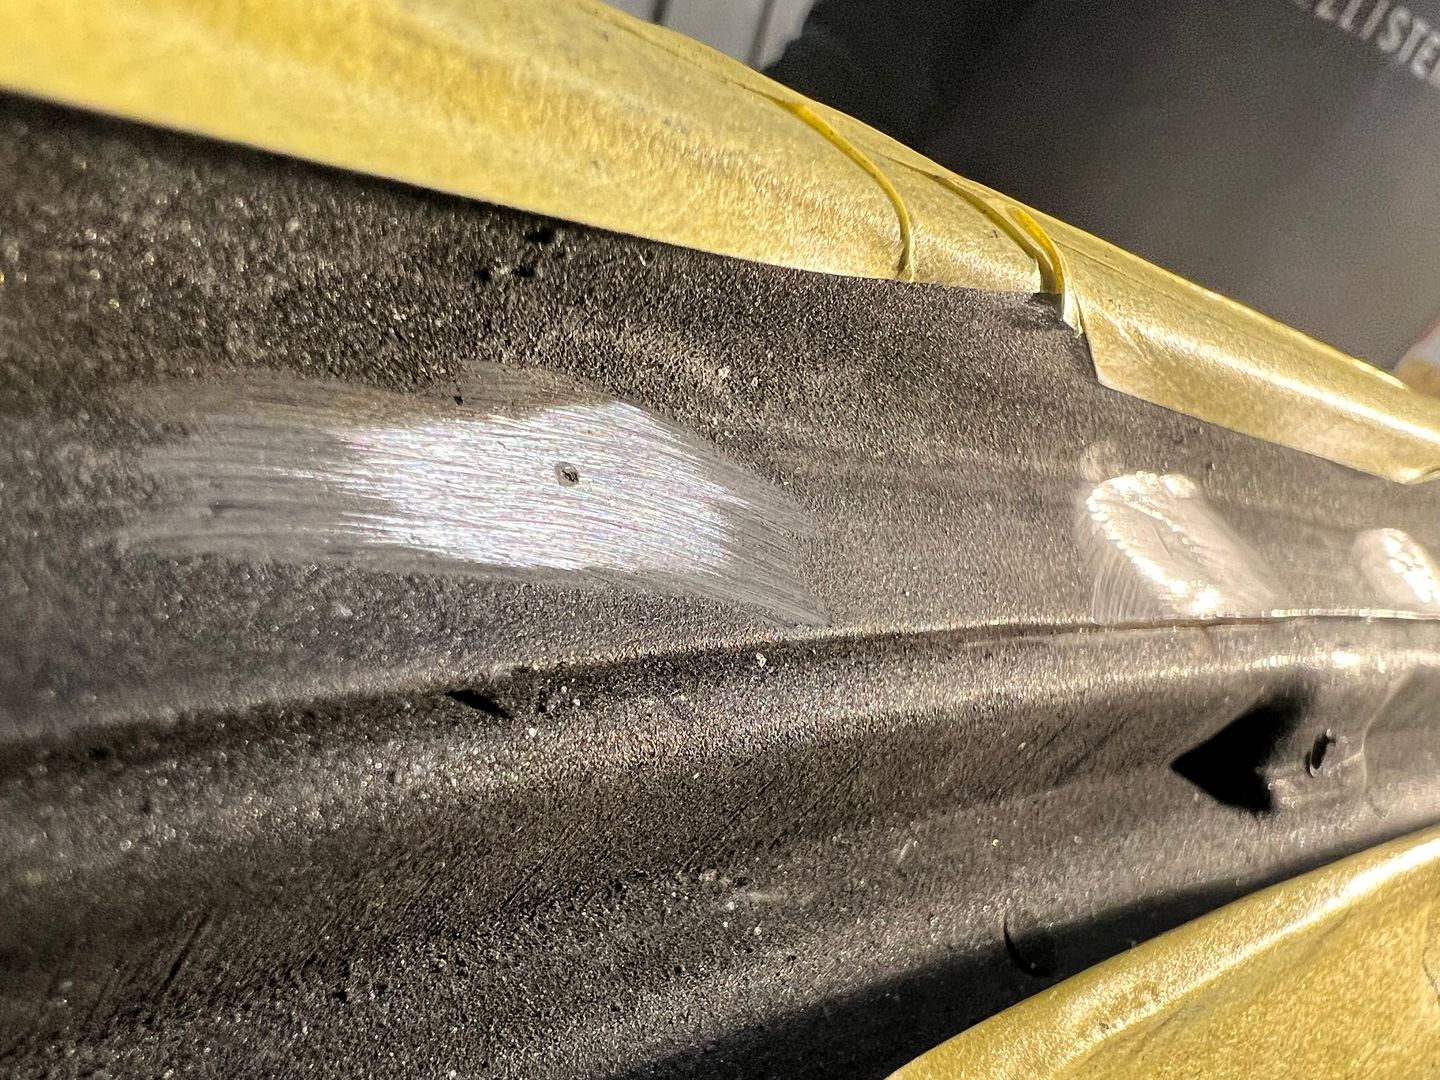
All of the welds cleaned up, we mixed up some SPI epoxy and used a small brush to add three coats on the bare areas. And to counter the effect of the garnish molding hanging too low, we will now need to make some one-off upper clips that are half height of the ones we just ordered (and have been waiting 4 months to arrive), in order to get the molding up and out of sight when looking through the glass. Story of my life..
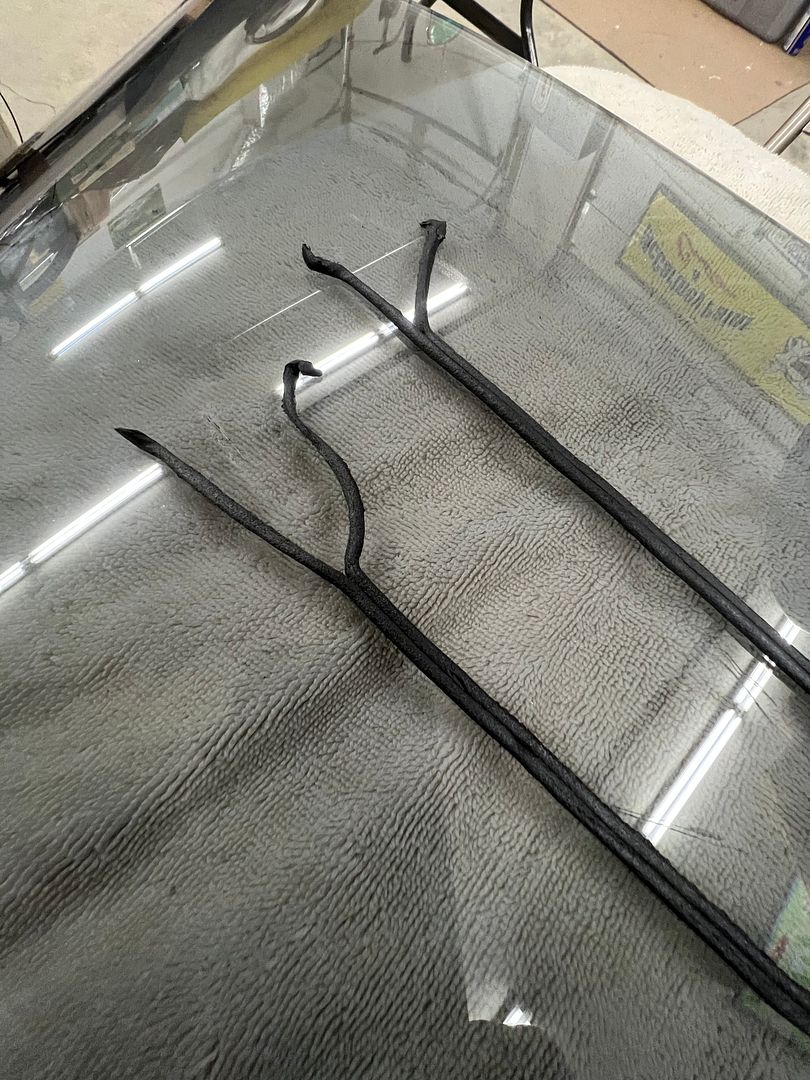
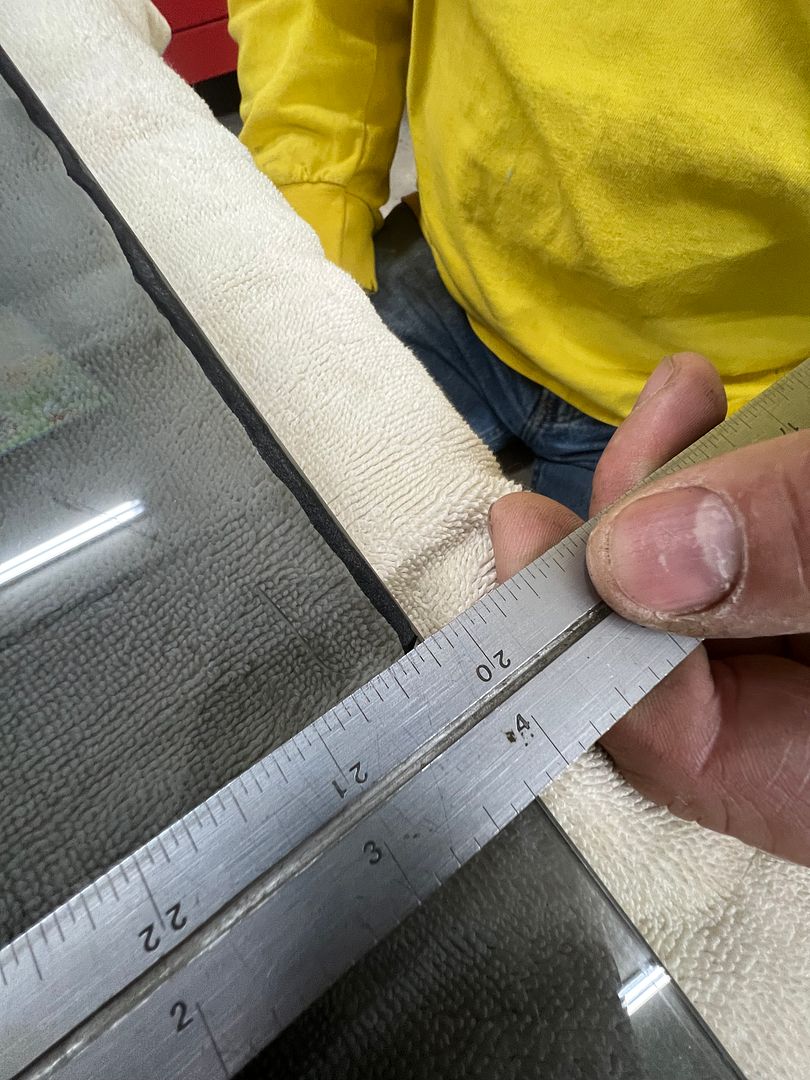
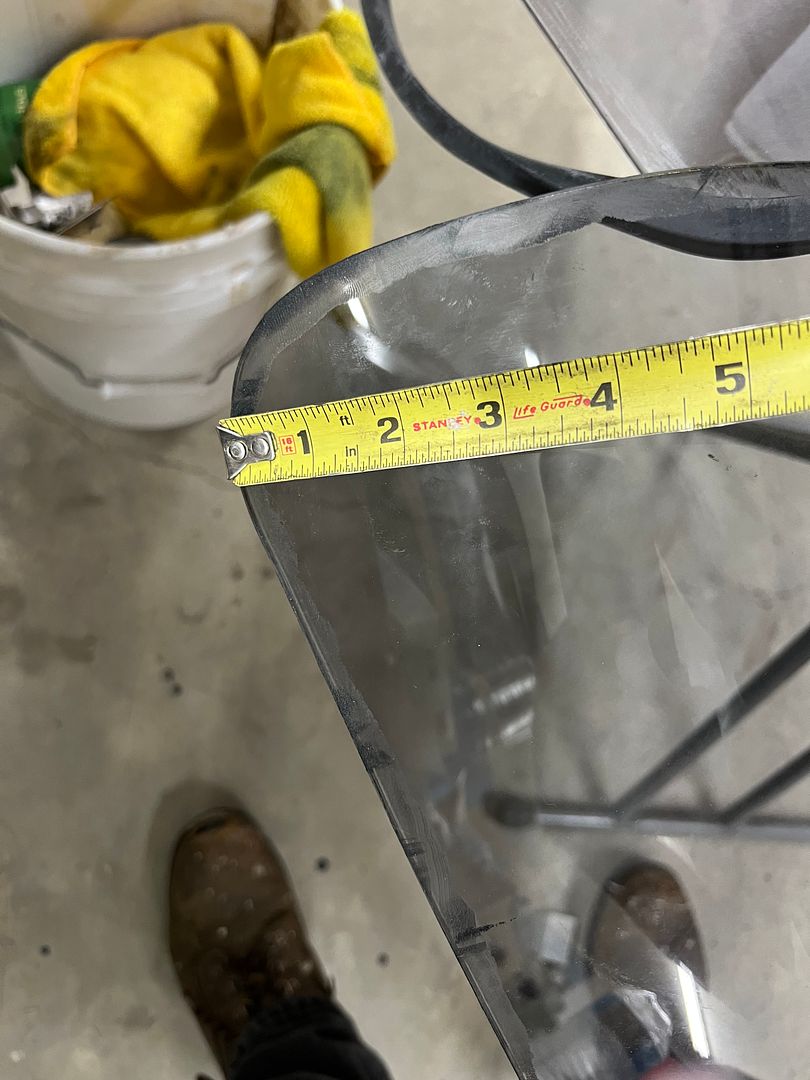
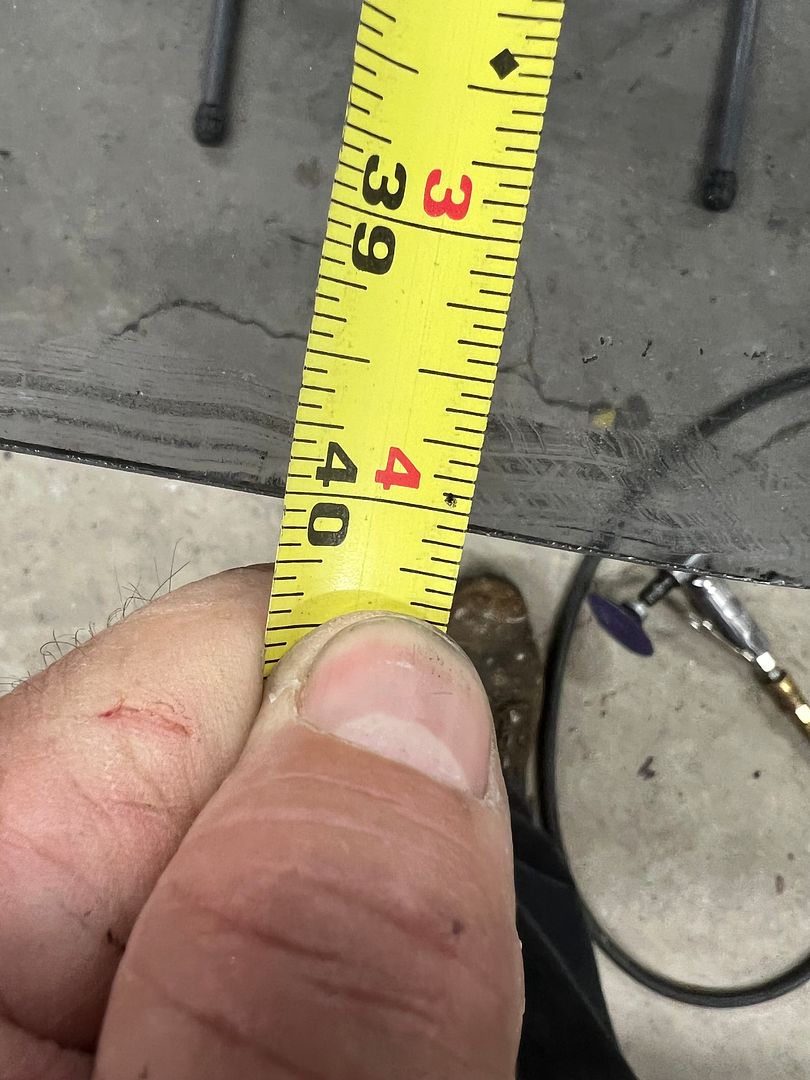
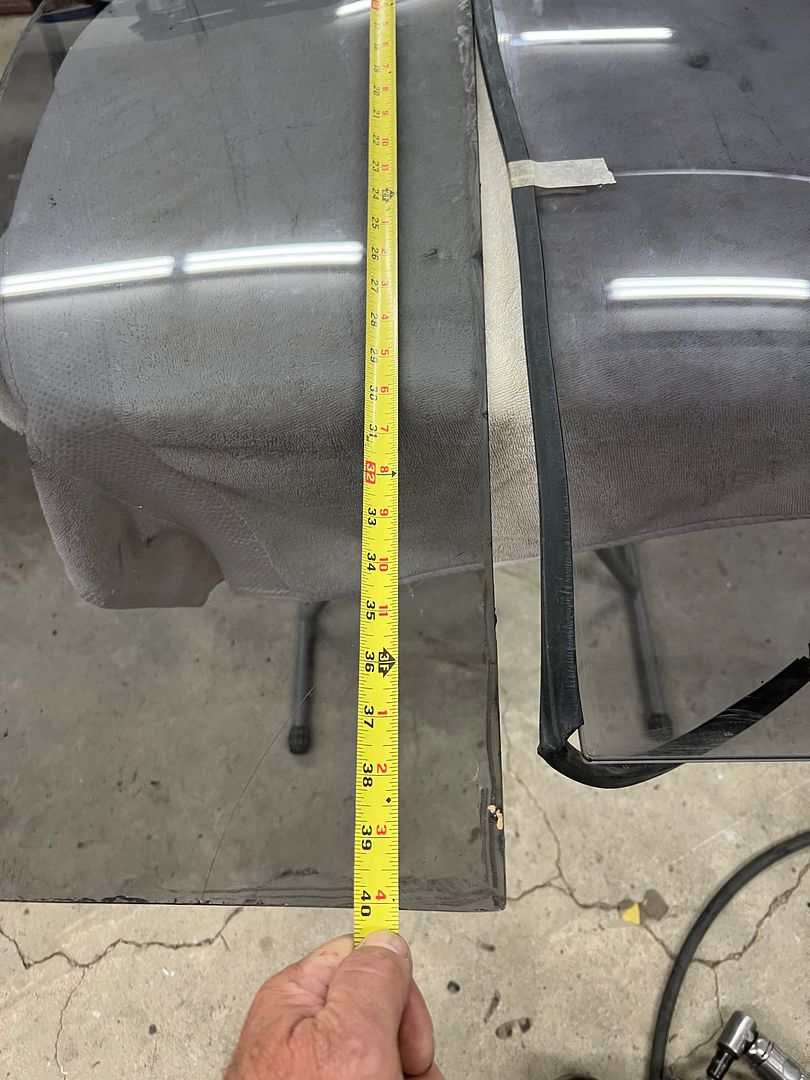
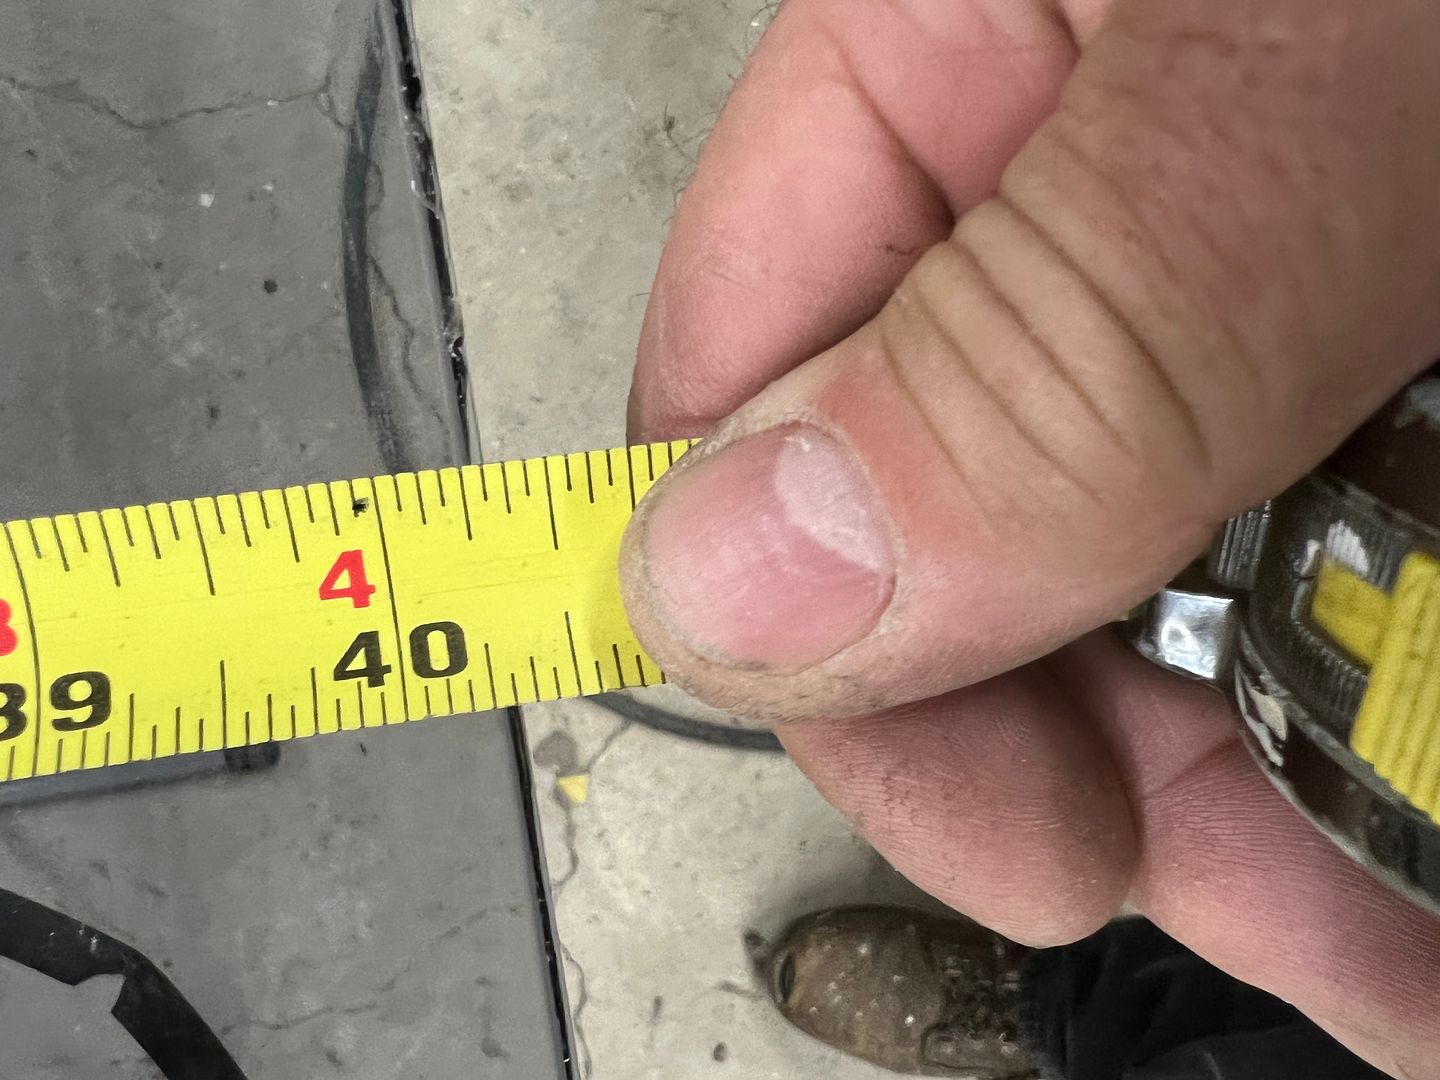
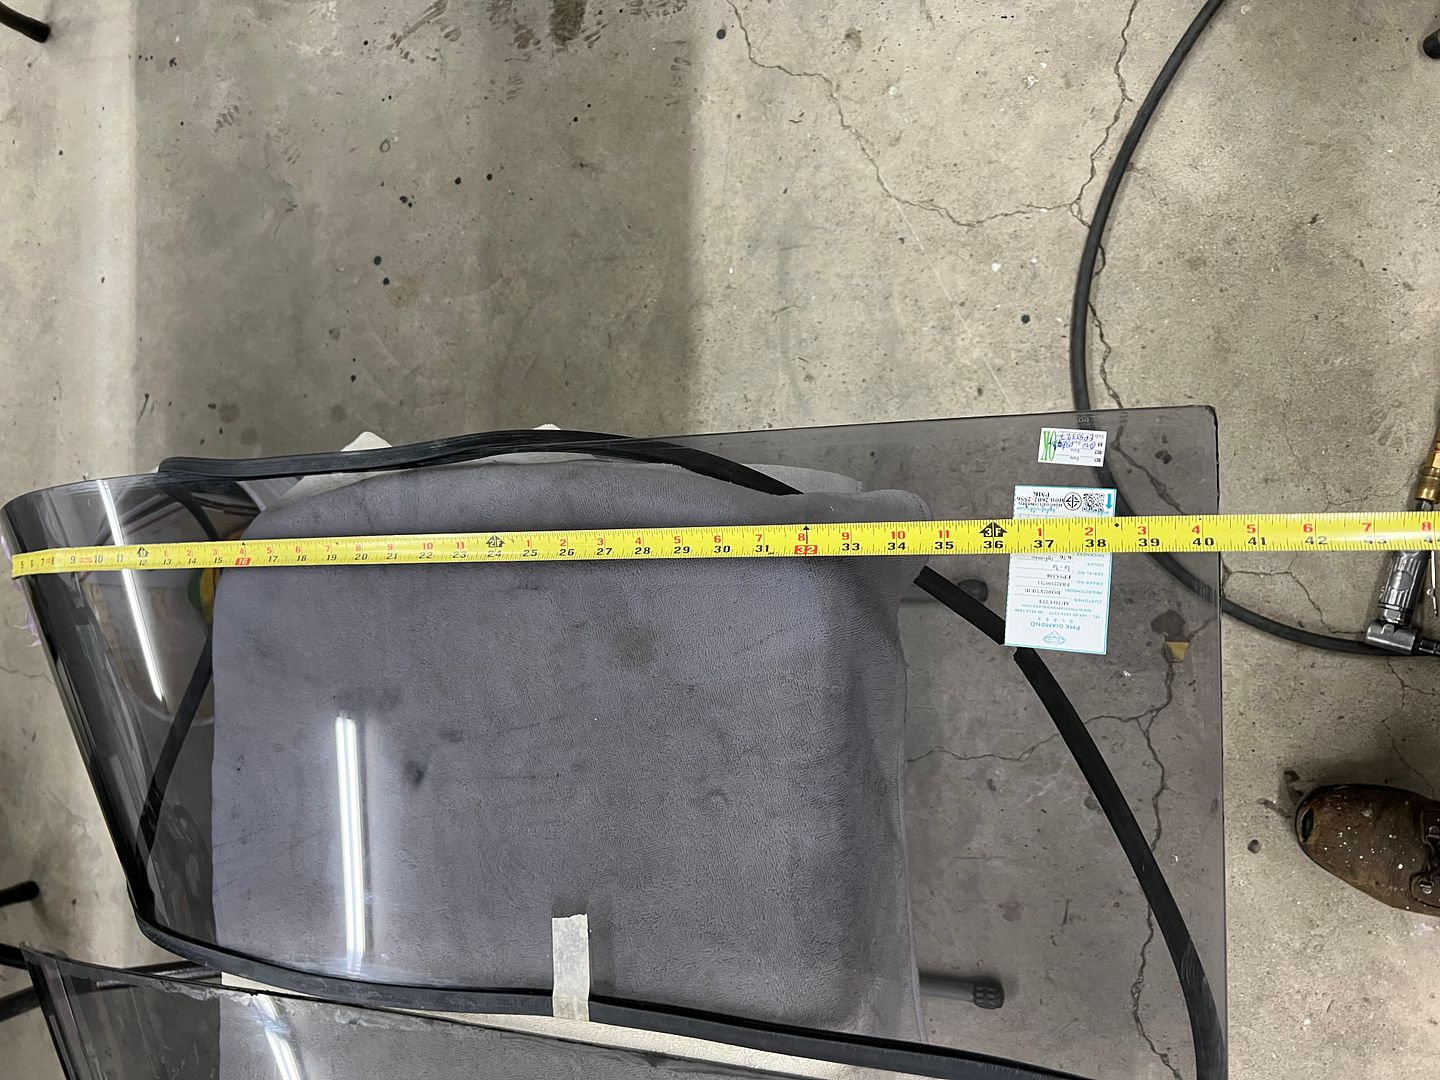
Window #3!! We had length issues from the last replacement, let's check this one as well. Hooking our tape measure on the apex of the pointy end, the original ordered with the rest of the glass set shows to be 40-1/16 in length. The new replacement, like the last one (#2), was 40-5/16. So we have a 1/4" to remove.
So we consulted my glass expert John Glenn the last time we did this, and got the rundown of the various methods we could possibly use. Since I'm more of a go slow and sneak up on the end goal, I opted for using abrasives. We used Cubitron belts on our Dynabride sander. It did a better job of taking down corners so we followed the process discussed in the next video. Then when we had reached the size needed (three hours later), a 320 grit disc on the DA gave a more polished appearance.
Our installation last night went in relatively painless and crack free. Now to make some upper clips..
Last edited by MP&C; 06-04-2022 at 07:39 AM.
Robert
-
06-07-2022 05:44 AM #1699
CHR Member
- Join Date
- Apr 2011
- Location
- Prairie City
- Car Year, Make, Model: 40 Ford Deluxe, 68 Corvette, 72&76 K30
- Posts
- 7,301
- Blog Entries
- 1
Very nice work! I bet you are glad to have that glass in without any cracks!Ryan
1940 Ford Deluxe Tudor 354 Hemi 46RH Electric Blue w/multi-color flames, Ford 9" Residing in multiple pieces
1968 Corvette Coupe 5.9 Cummins Drag Car 11.43@130mph No stall leaving the line with 1250 rpm's and poor 2.2 60'
1972 Chevy K30 Longhorn P-pumped 24v Compound Turbos 47RH Just another money pit
1971 Camaro RS 5.3 BTR Stage 3 cam, SuperT10
Tire Sizes
-
06-07-2022 05:59 AM #1700
CHR Member
- Join Date
- Jun 2008
- Location
- Leonardtown
- Car Year, Make, Model: Walking
- Posts
- 1,228
Thanks Ryan, yeah, getting into my pocket on those two.Robert
-
06-11-2022 10:19 AM #1701
CHR Member
- Join Date
- Jun 2008
- Location
- Leonardtown
- Car Year, Make, Model: Walking
- Posts
- 1,228
Never know what you see in the shop.. A good friend of mine has a powder coat business and has been restoring a Kent model KMX850 bmx bike. The bike was found in the woods and was brought to him for repairs, with many of the obsolete parts being sourced from other style bikes and scooters. Here is where he has it thus far..
.JPG)
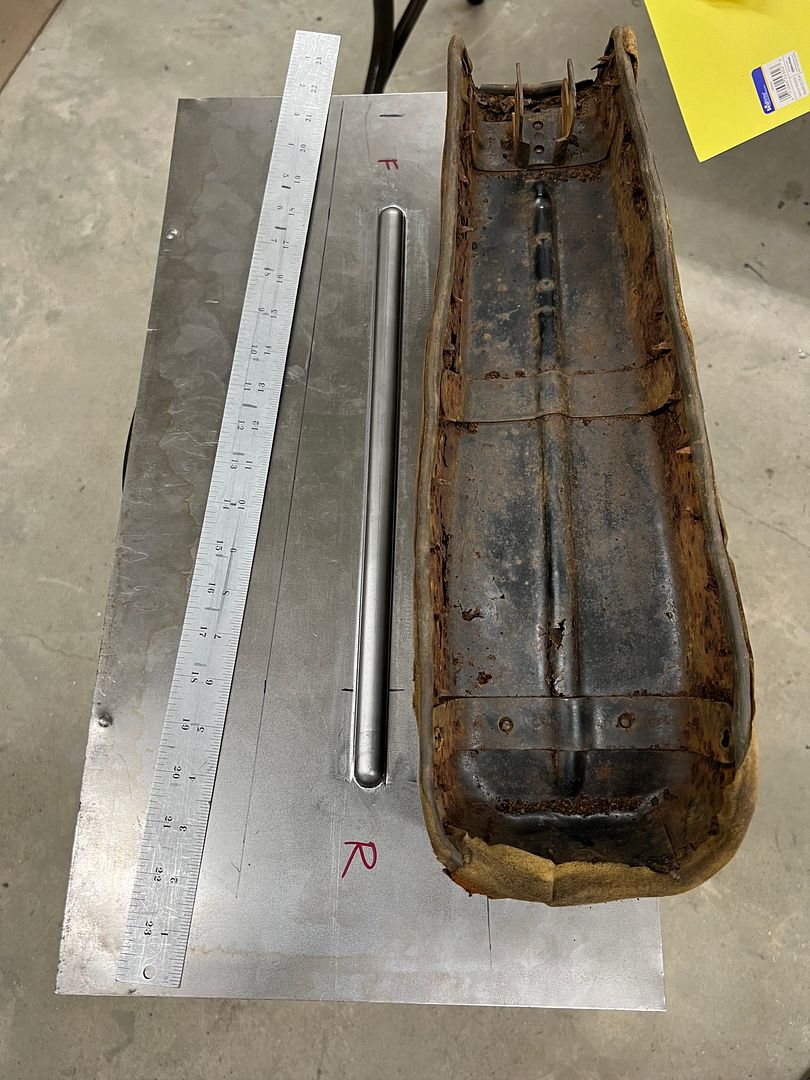
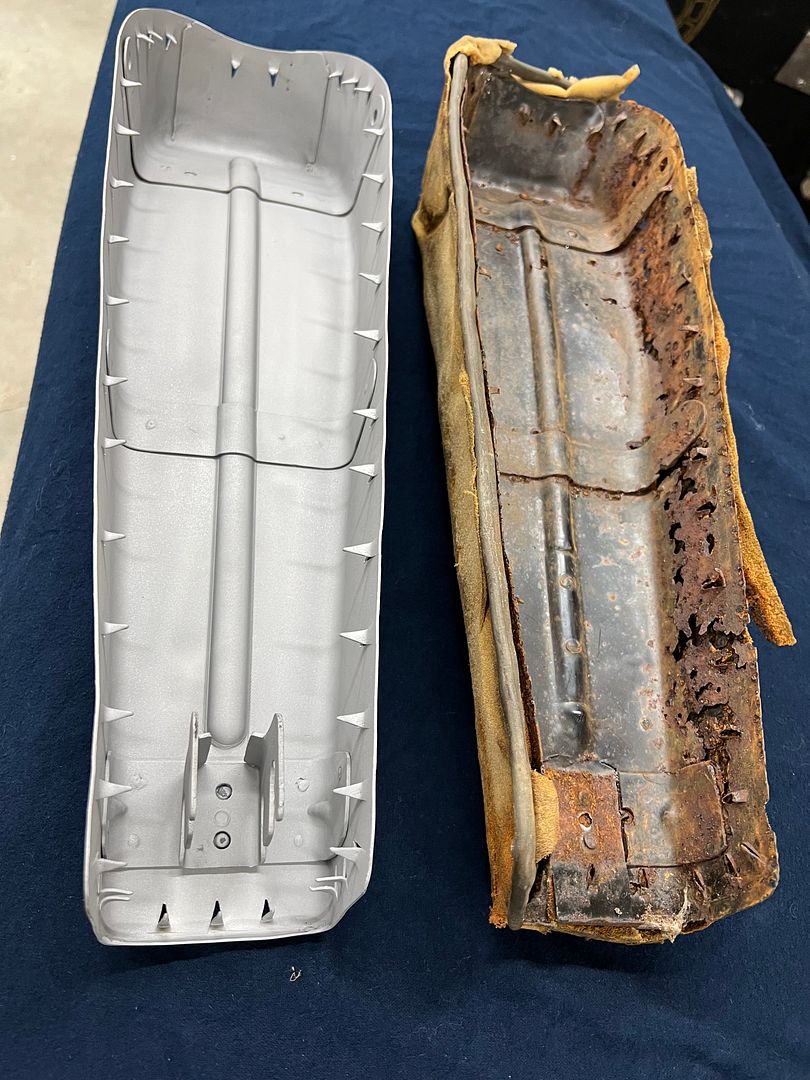
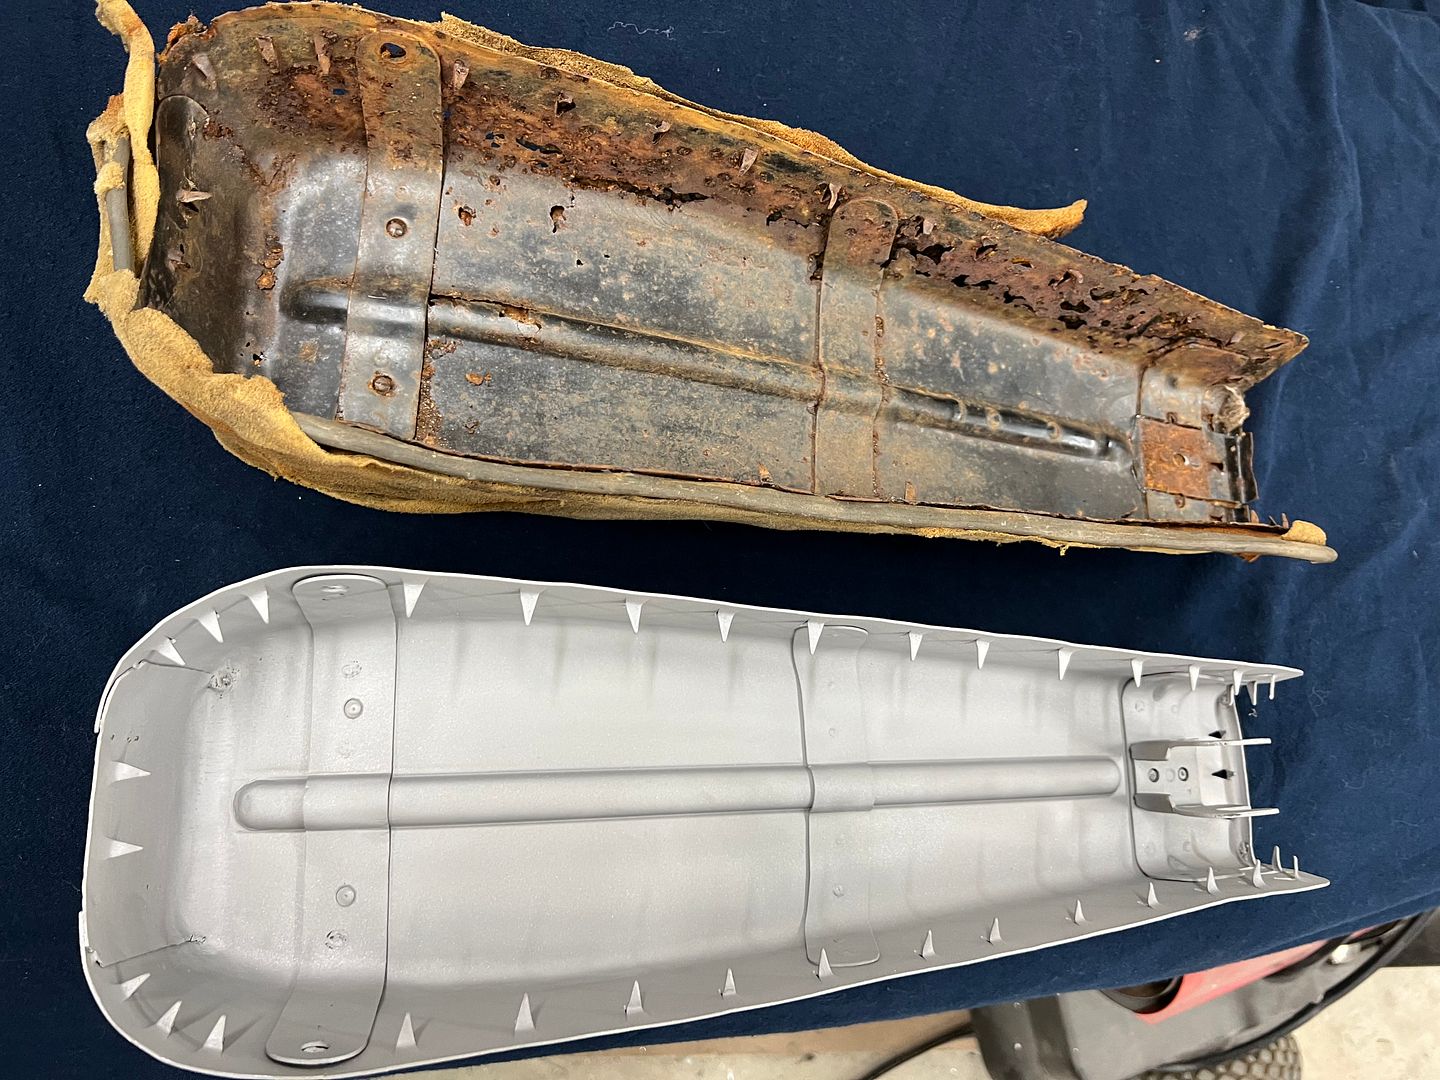
Once the sun had taken its toll on the seat upholstery, the foam inside became a nice sponge for all the precipitation that Mother Nature could throw at it, leaving much of the seat pan gone. So he needed a seat pan fabricated, and this is where I entered the picture..
.JPG)
His major concern was that we duplicate the impaling spikes to secure the upholstery.
.JPG)
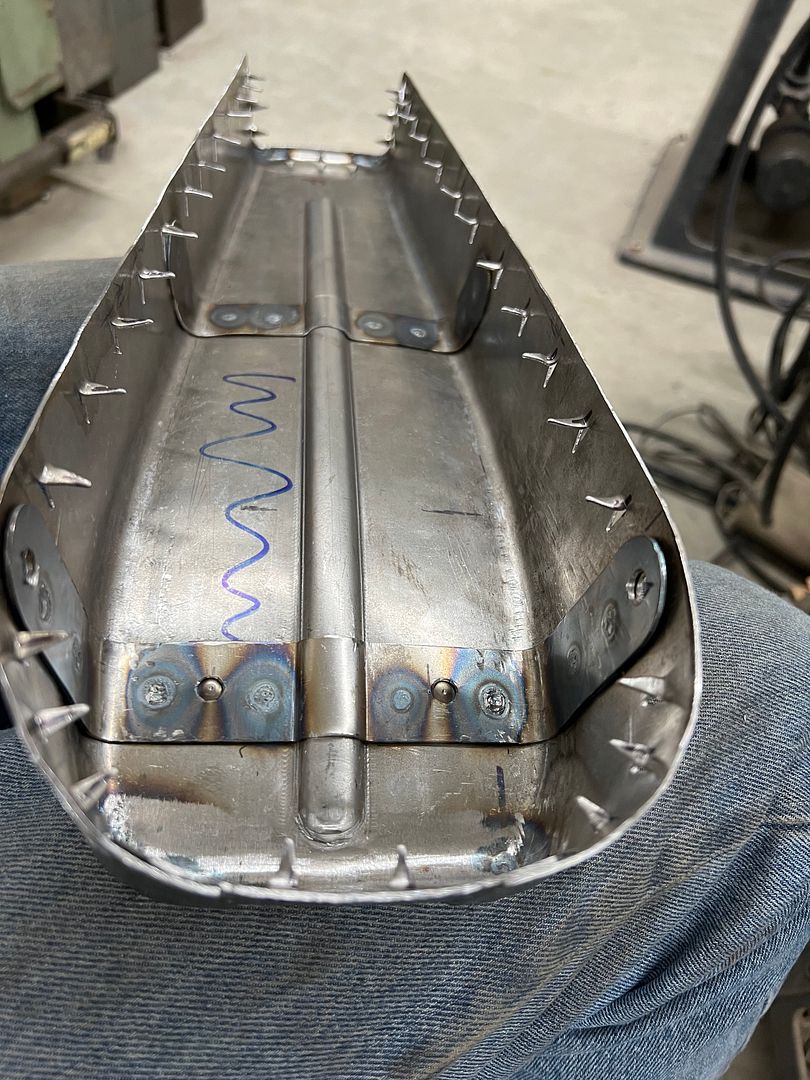
I had attended an estate sale about a year ago and picked up a set of Malco notchers, not knowing what I'd ever need them for, but also knowing I couldn't do without them.
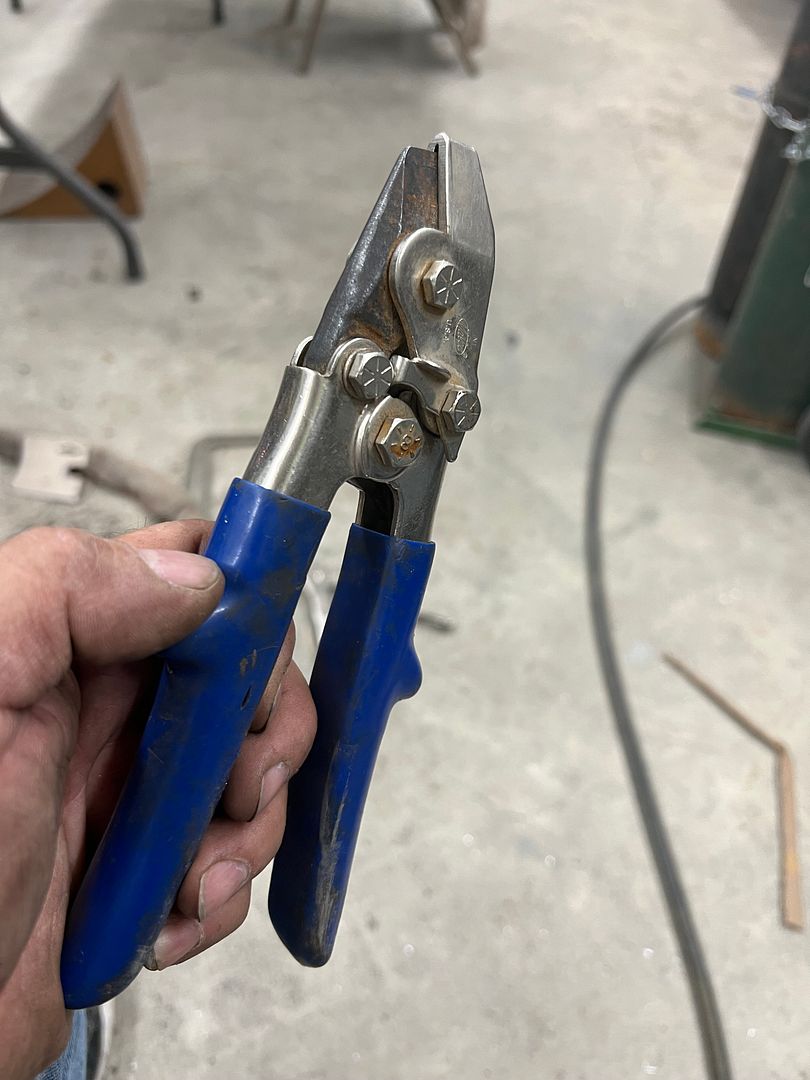
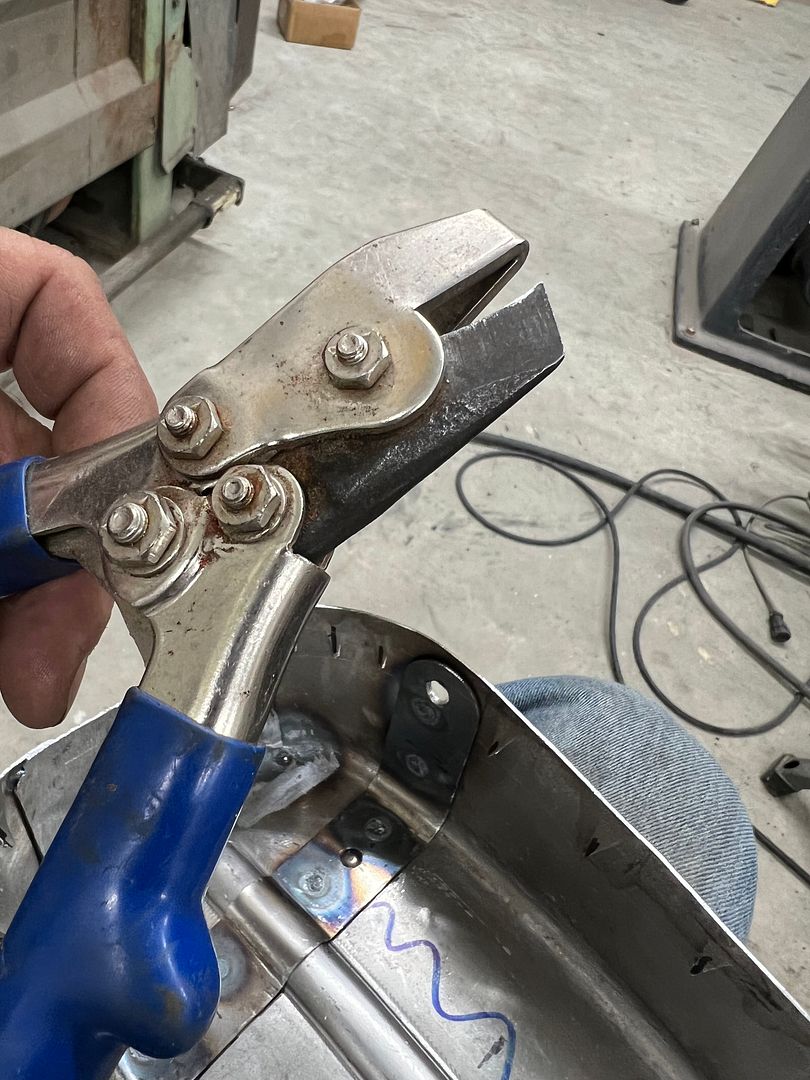
So when I pulled these out of the tool box all fears had been abated..
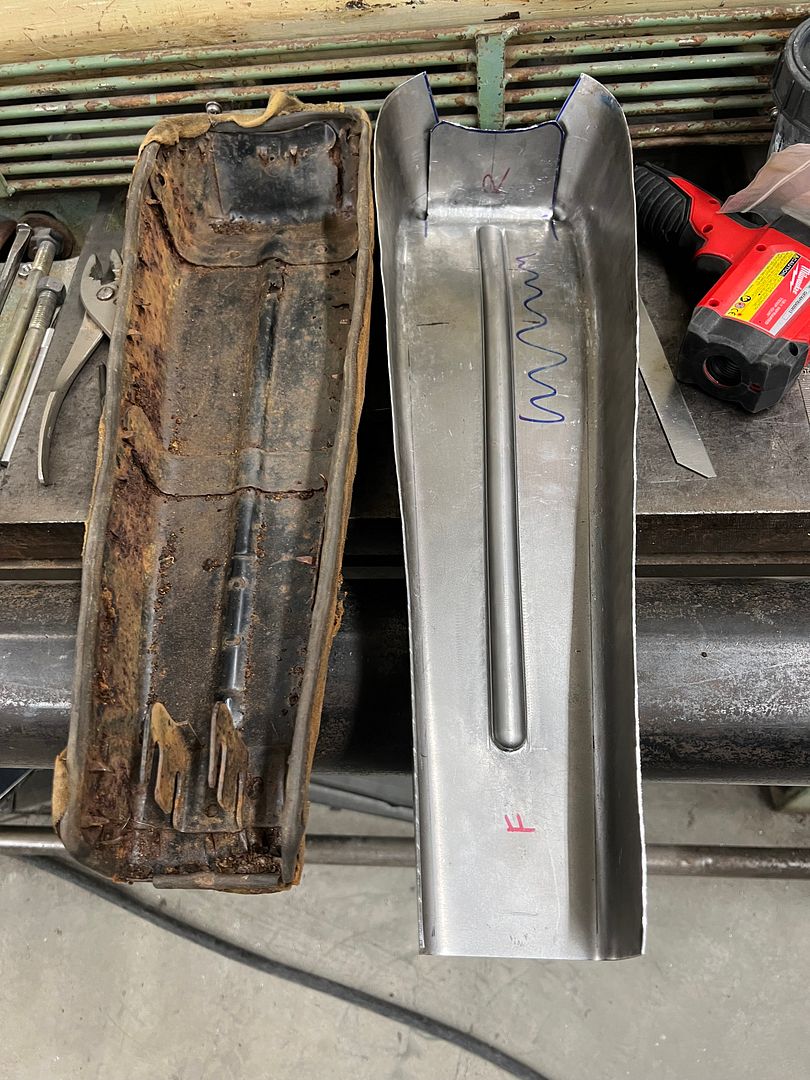
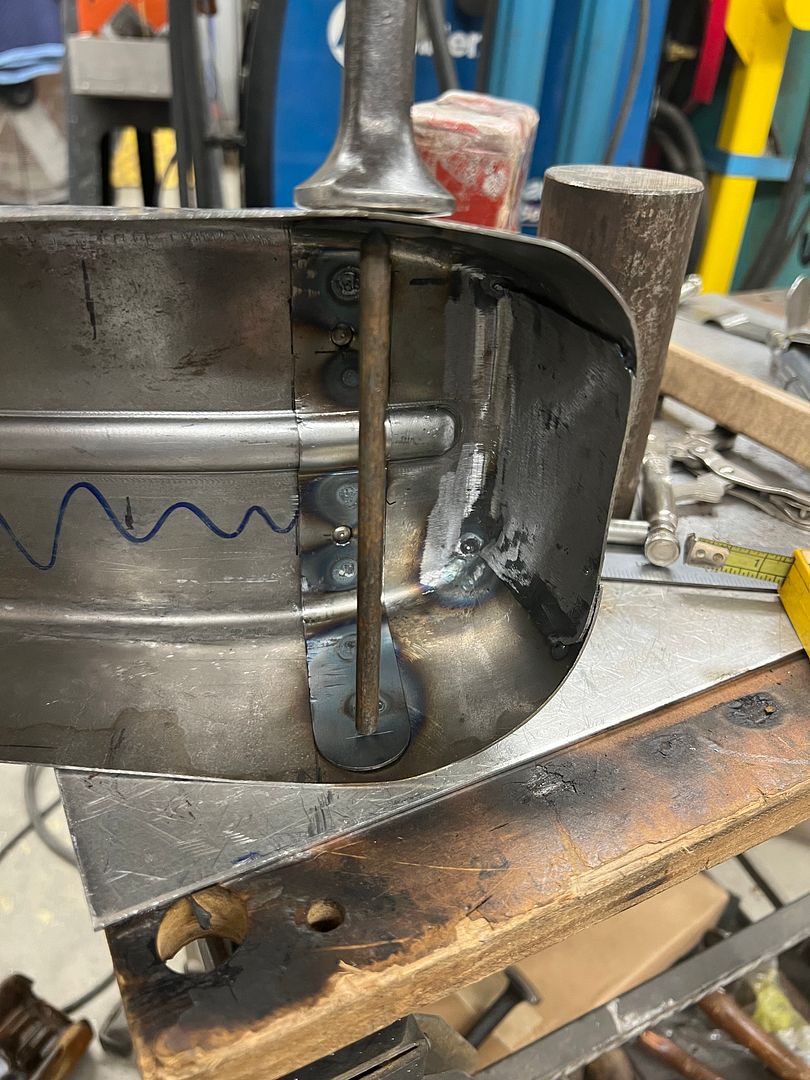
We started with a piece of 19 gauge AKDQ and used Stan Fulton beading dies to add the center bead.
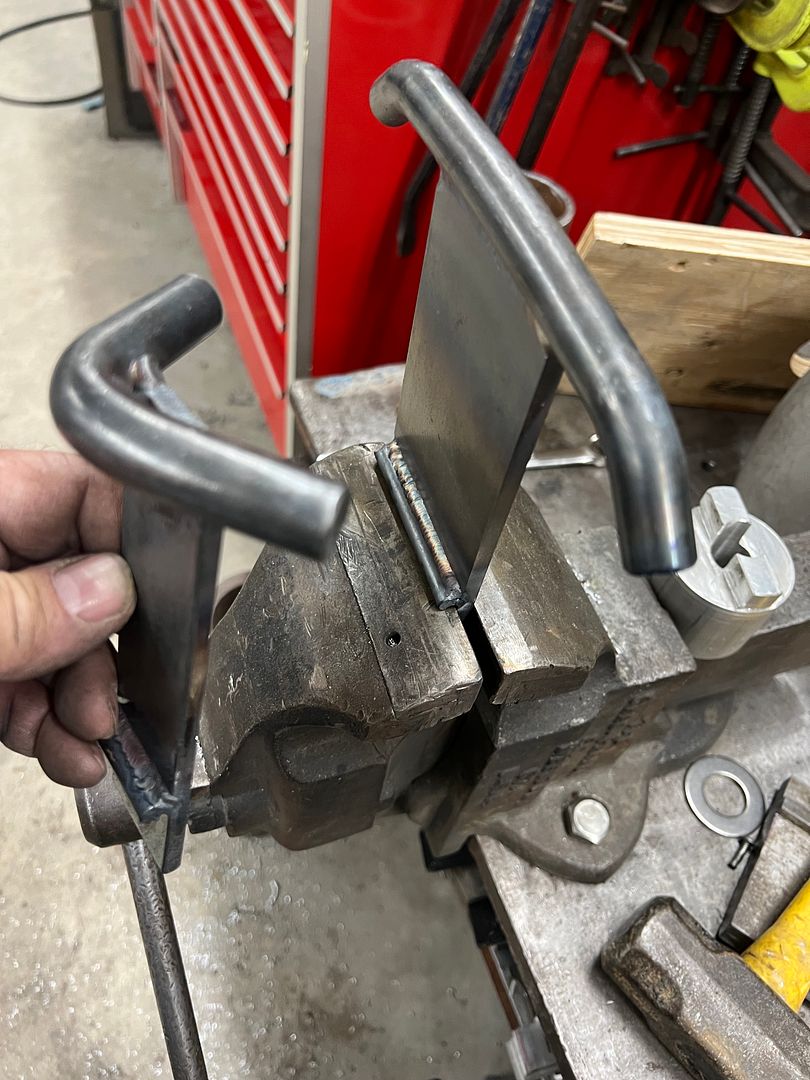
A piece of 5/8 round stock on the magnetic brake then added the radius for the side bends. Some of the 5/8 round stock was also used to make some post dollies with a welded stop for use in the bench vise..
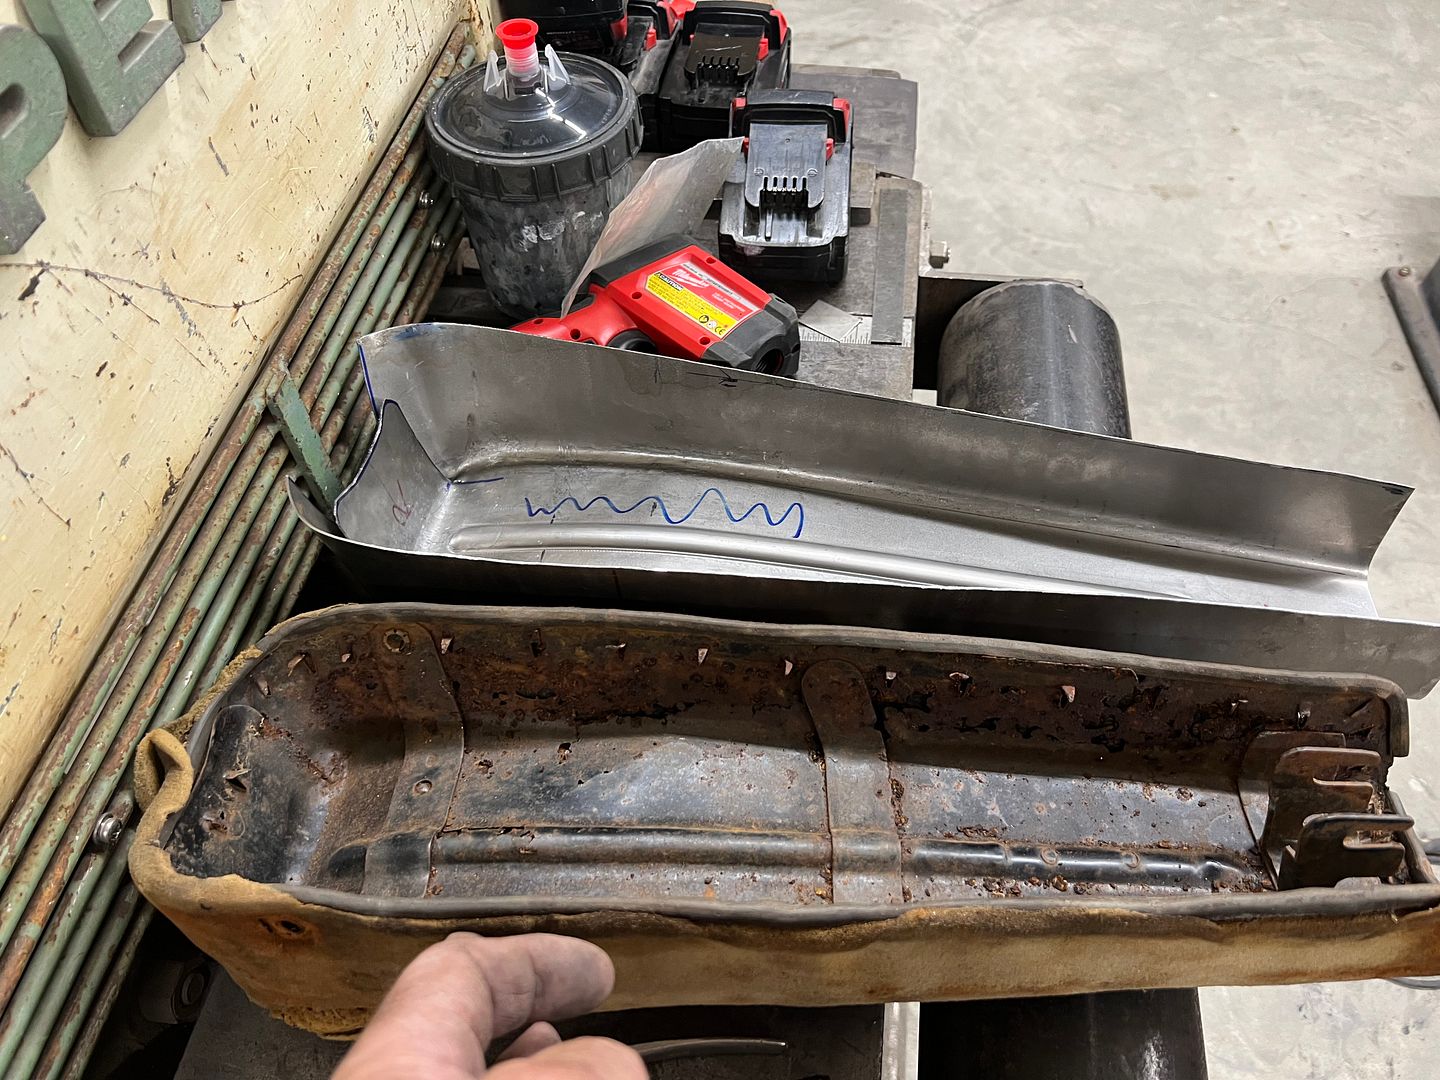
Basic shape
The Erco kick stretcher used on the sides and the post dollies on manipulating the radius bend helped to provide the kickup needed at the rear.
A solid rod across the rear mounting holes gives us some critical dimensions for layout....
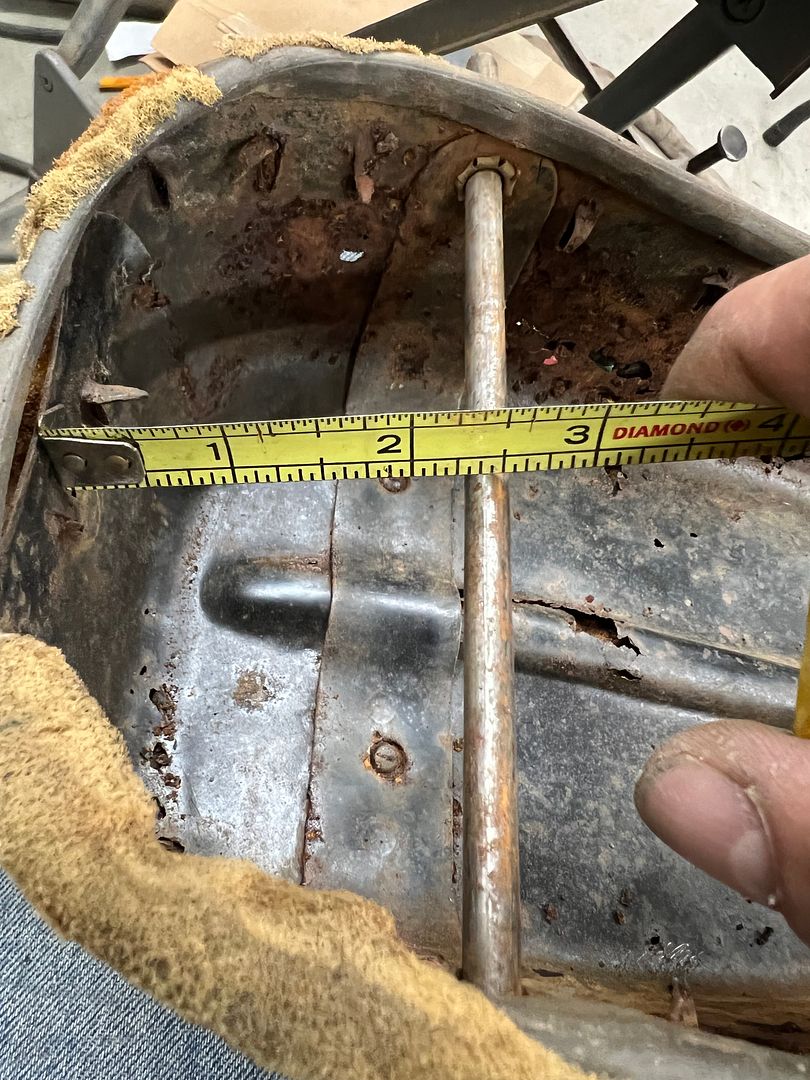
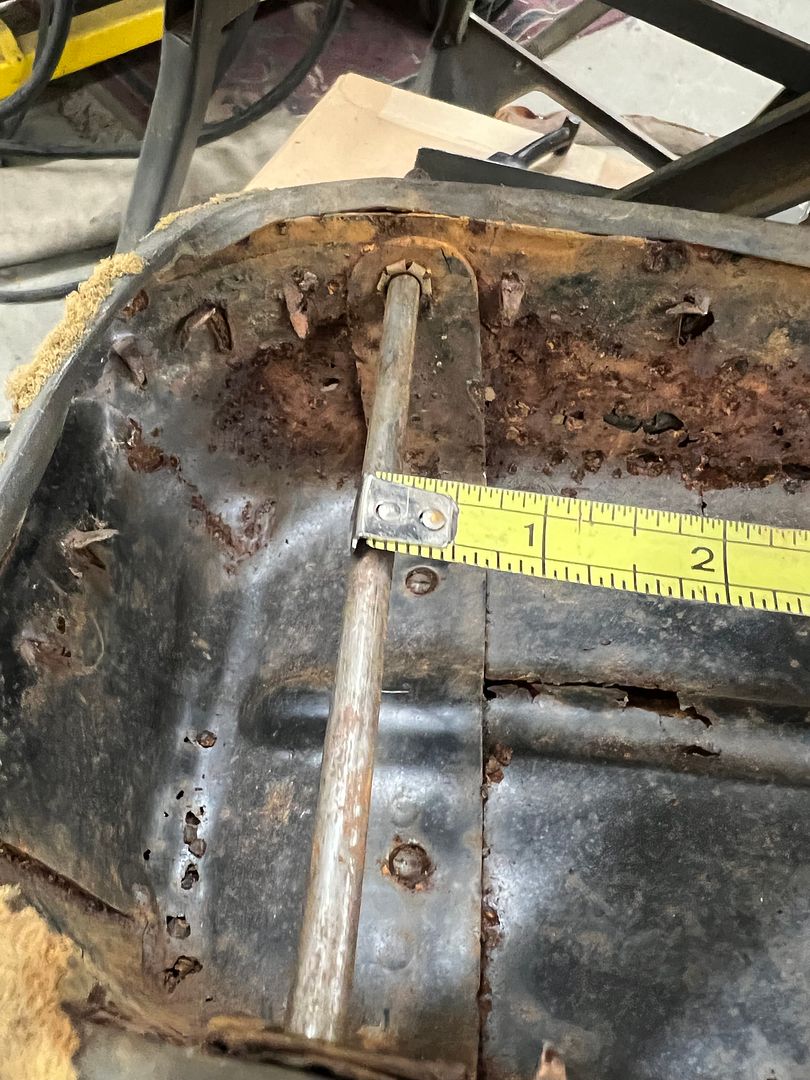
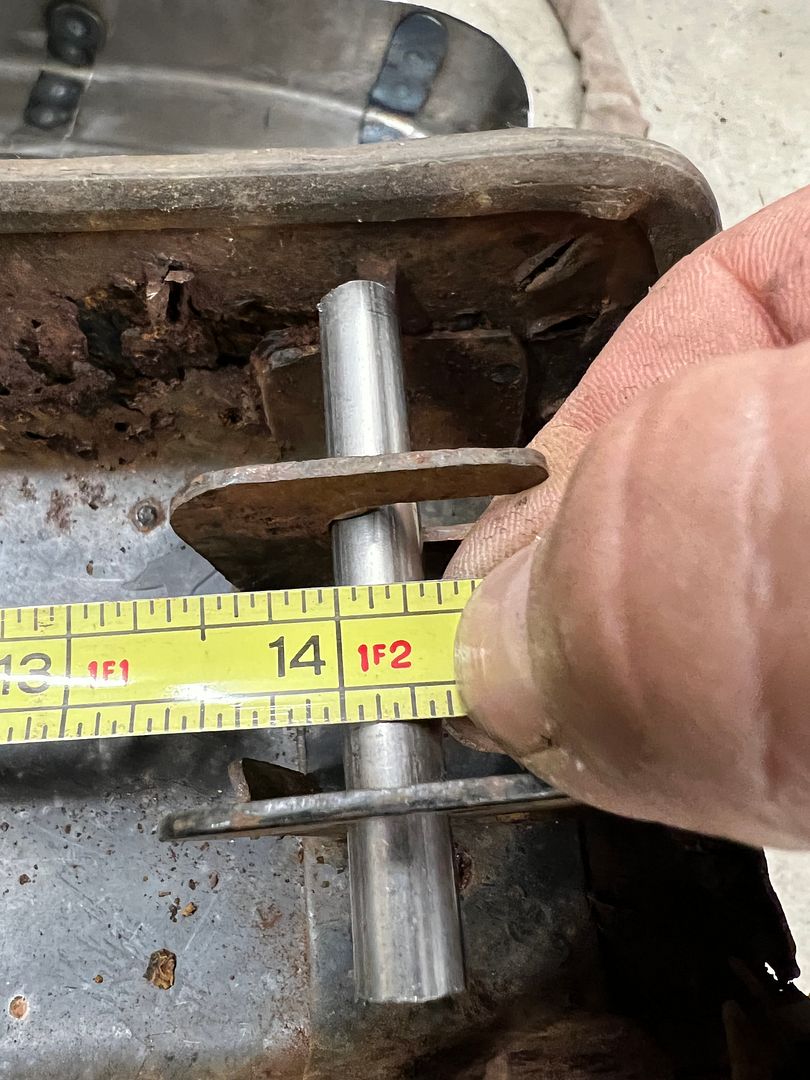
For the mounting holes in the rear, we measured 9/16 from the edge to hole center as per original, and then made a two ended transfer punch that fit snugly between the sides. Once we had our rear measurement and the point aligned to the 9/16 scribe line, we tapped either side to mark the holes.
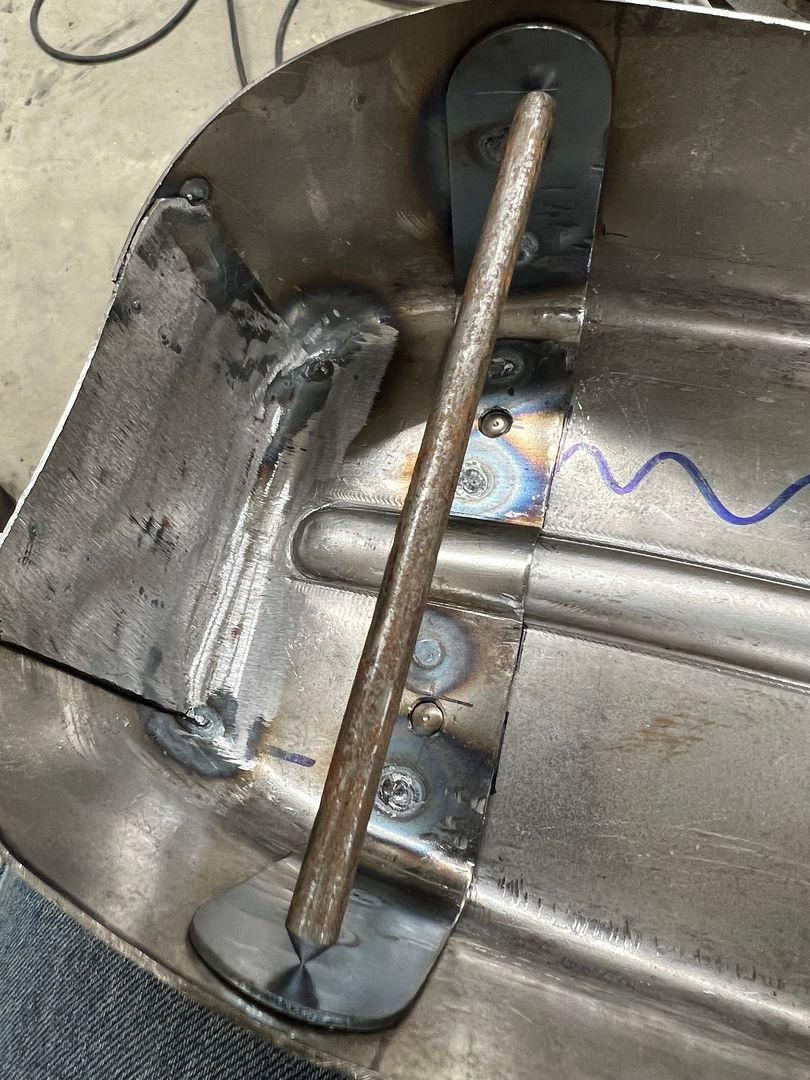
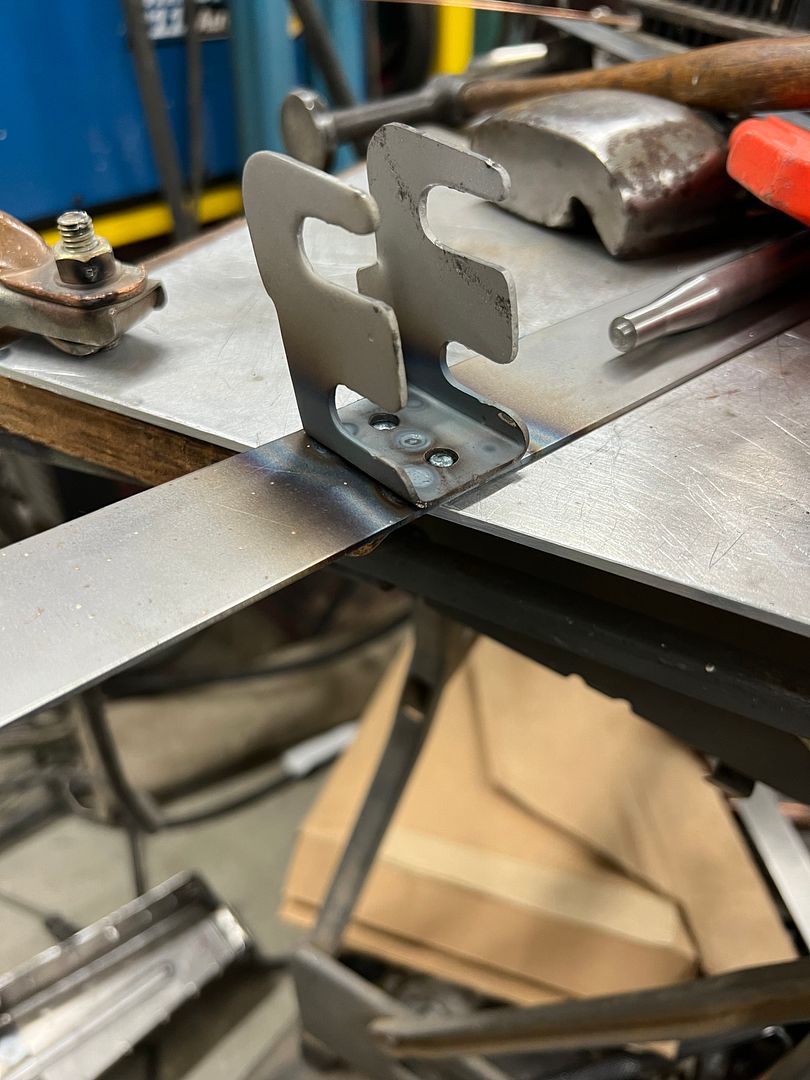
Once drilled, a rod through these holes lets us locate the front bracket. We reused the bracket to save some time (and money) as it was still good and solid..
Impaling spikes added

All bracket installed and assembly gets media blasted to prep for powder coat.
Last edited by MP&C; 06-12-2022 at 09:21 AM.
Robert
-
06-12-2022 05:34 AM #1702
CHR Member
- Join Date
- Sep 2007
- Location
- New Bedford
- Car Year, Make, Model: 34 Ford 3W Coupe Replica
- Posts
- 14,754
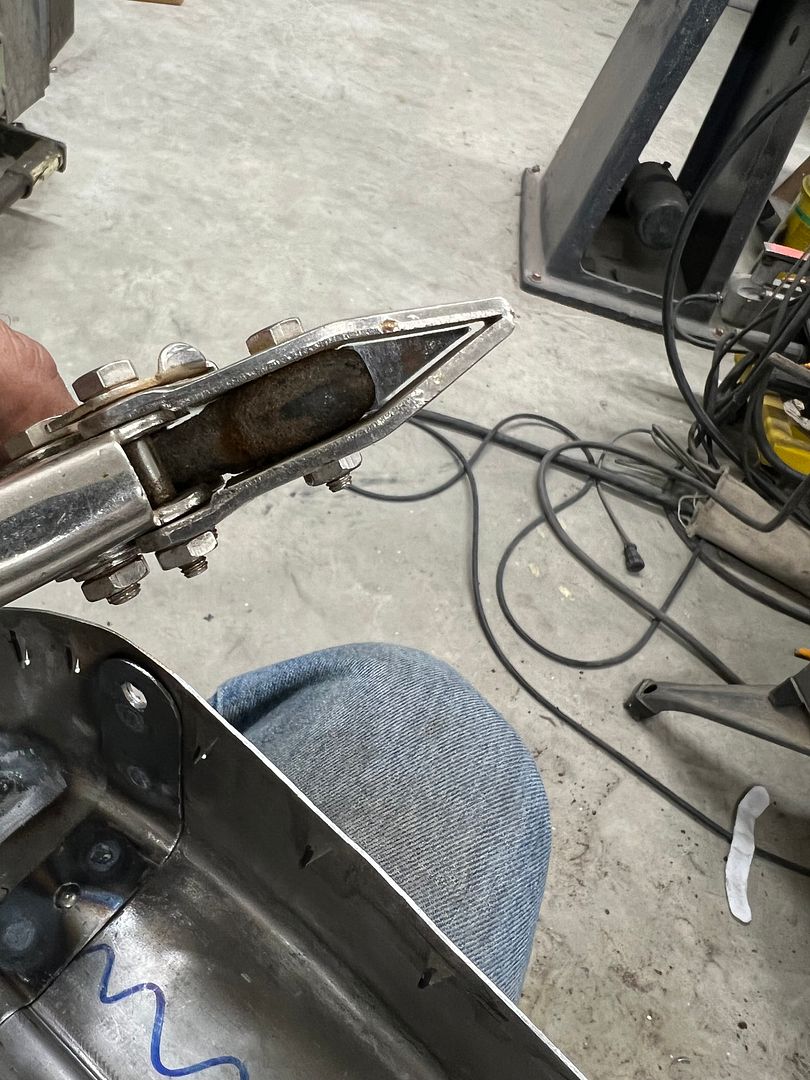
How hard was it to "break through" and created the spike/pike?
-
06-12-2022 08:20 AM #1703
CHR Member
- Join Date
- Jun 2008
- Location
- Leonardtown
- Car Year, Make, Model: Walking
- Posts
- 1,228
I had actually cut a couple pieces of aluminum tubing that were a snug fit over the handles. This was more a controlling factor so I didn’t have to squeeze so hard and wind up cutting all the way through. The additional leverage allowed moderation, so to speak.Robert
-
06-12-2022 01:39 PM #1704
CHR Member
- Join Date
- Sep 2007
- Location
- New Bedford
- Car Year, Make, Model: 34 Ford 3W Coupe Replica
- Posts
- 14,754
I can "see" that. Hence the question, I figured you'd press/squeeze so hard and then suddenly it would "pop" right on through. Good workaround with the longer handles! Originally Posted by MP&C

-
06-21-2022 10:23 AM #1705
CHR Member
- Join Date
- Jun 2008
- Location
- Leonardtown
- Car Year, Make, Model: Walking
- Posts
- 1,228
One expensive lesson we learned from installing a window three times, the tack strip that the owner bought was too thick for the headliner, and as a side effect cramped the glass going in. This also meant the upper window clips, which also serve to "position" the garnish molding, pushed the molding down far enough that the back side was visible through the glass.
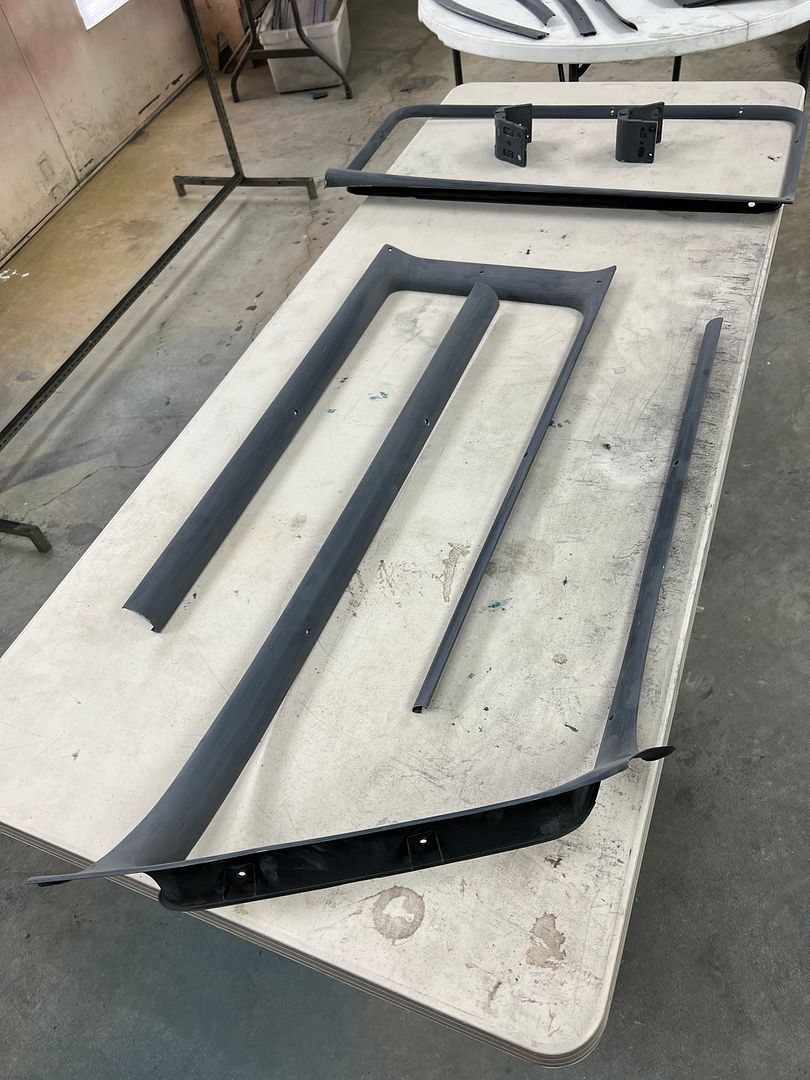
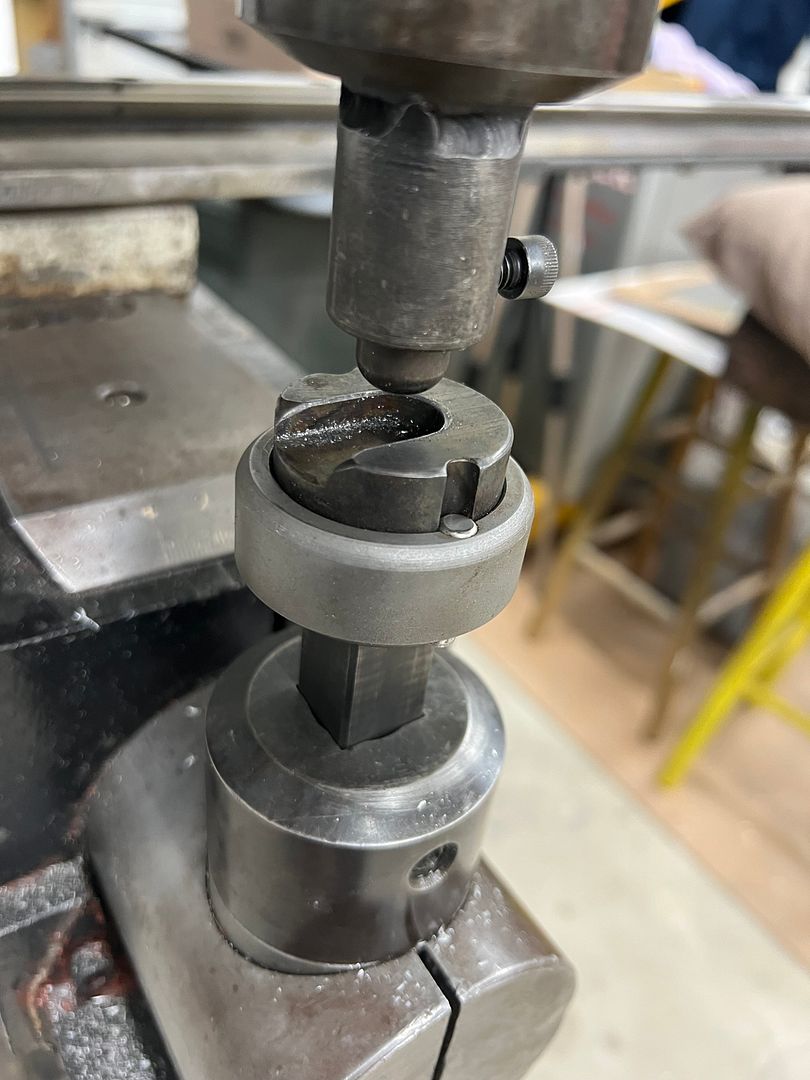
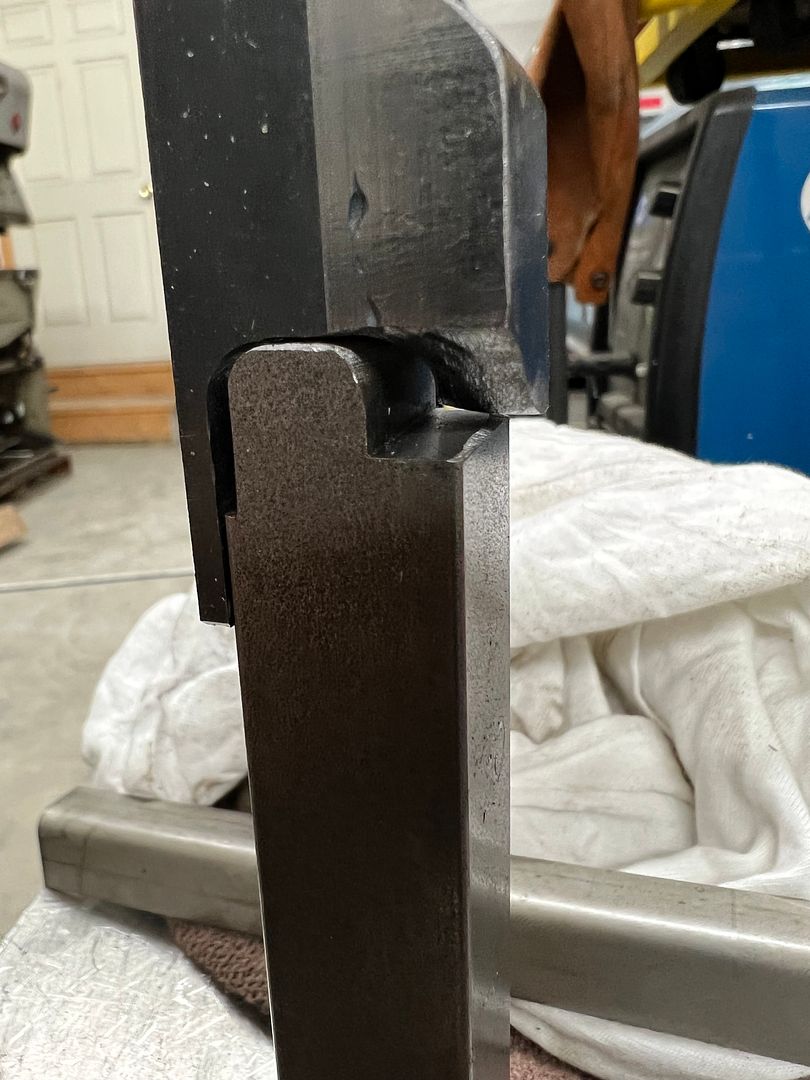
In order to remedy that view through the glass, we need to fabricate new clips that allow the trim to position higher on the glass. We start with a set of dies for the Lennox so we can make a run of the needed shape, and then cut them individually to size. This should give us the best consistency on size. Our first set of dies will take a folded 90* shape and form it into a "U" shape. We used the Southbend "milling machine" to provide a relief for the long side flange of the clip.
Additional reliefs and some roloc sander action and we have the lower die ready for the shortened clip.
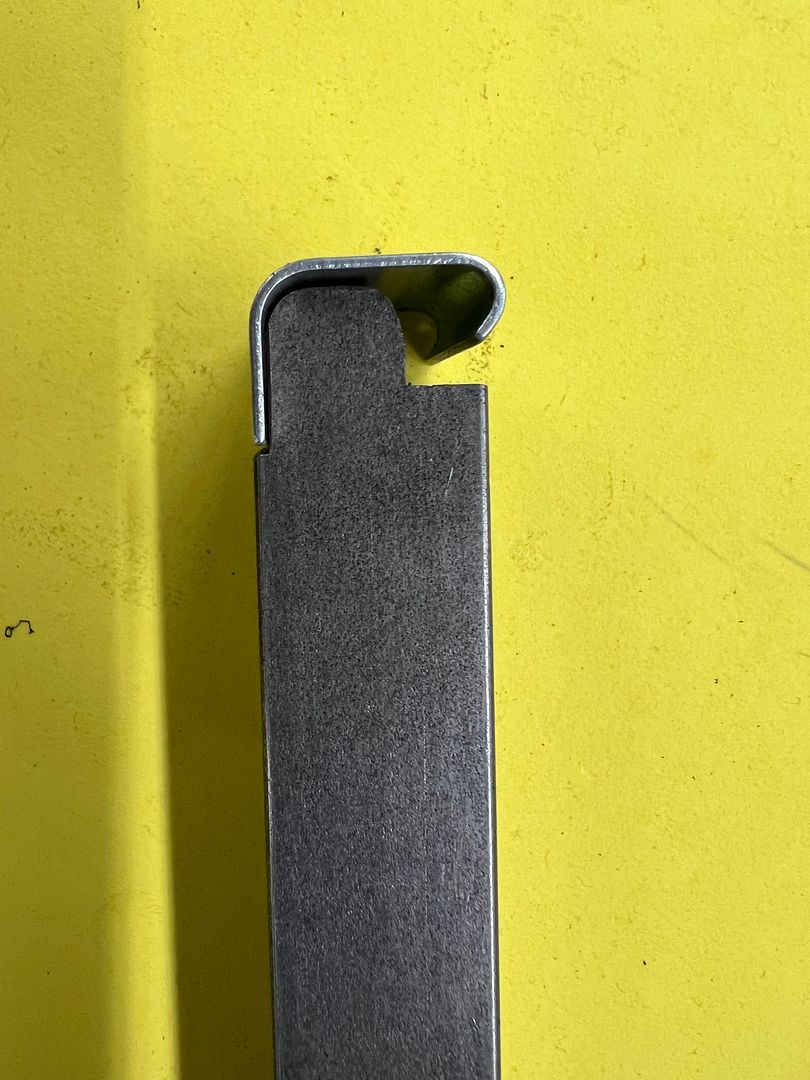
Then our 3/8 end mill is brought in from the end to form a matching profile.

A piece of 1018 is welded onto the side to give us more "meat" to make the folding ramp, and then machined to clean up the weld.
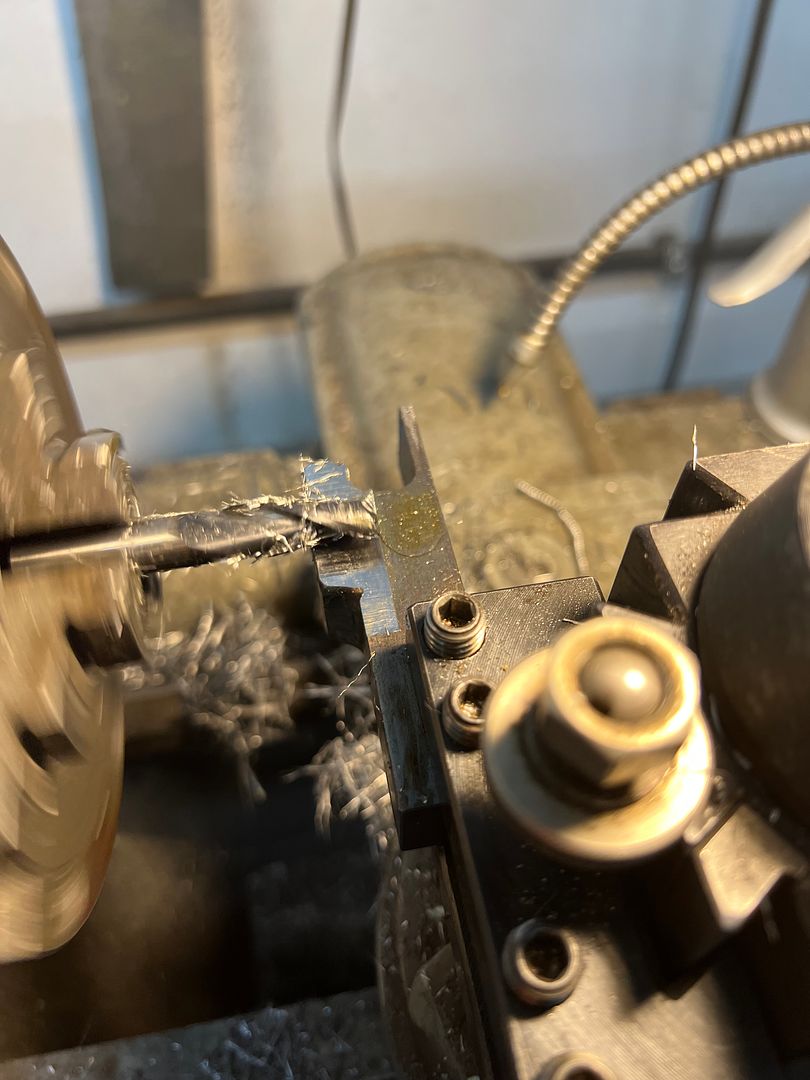
Using the pneumatic belt sander and a cone shaped die grinder we add the ramp to the upper die and then run a profile through..
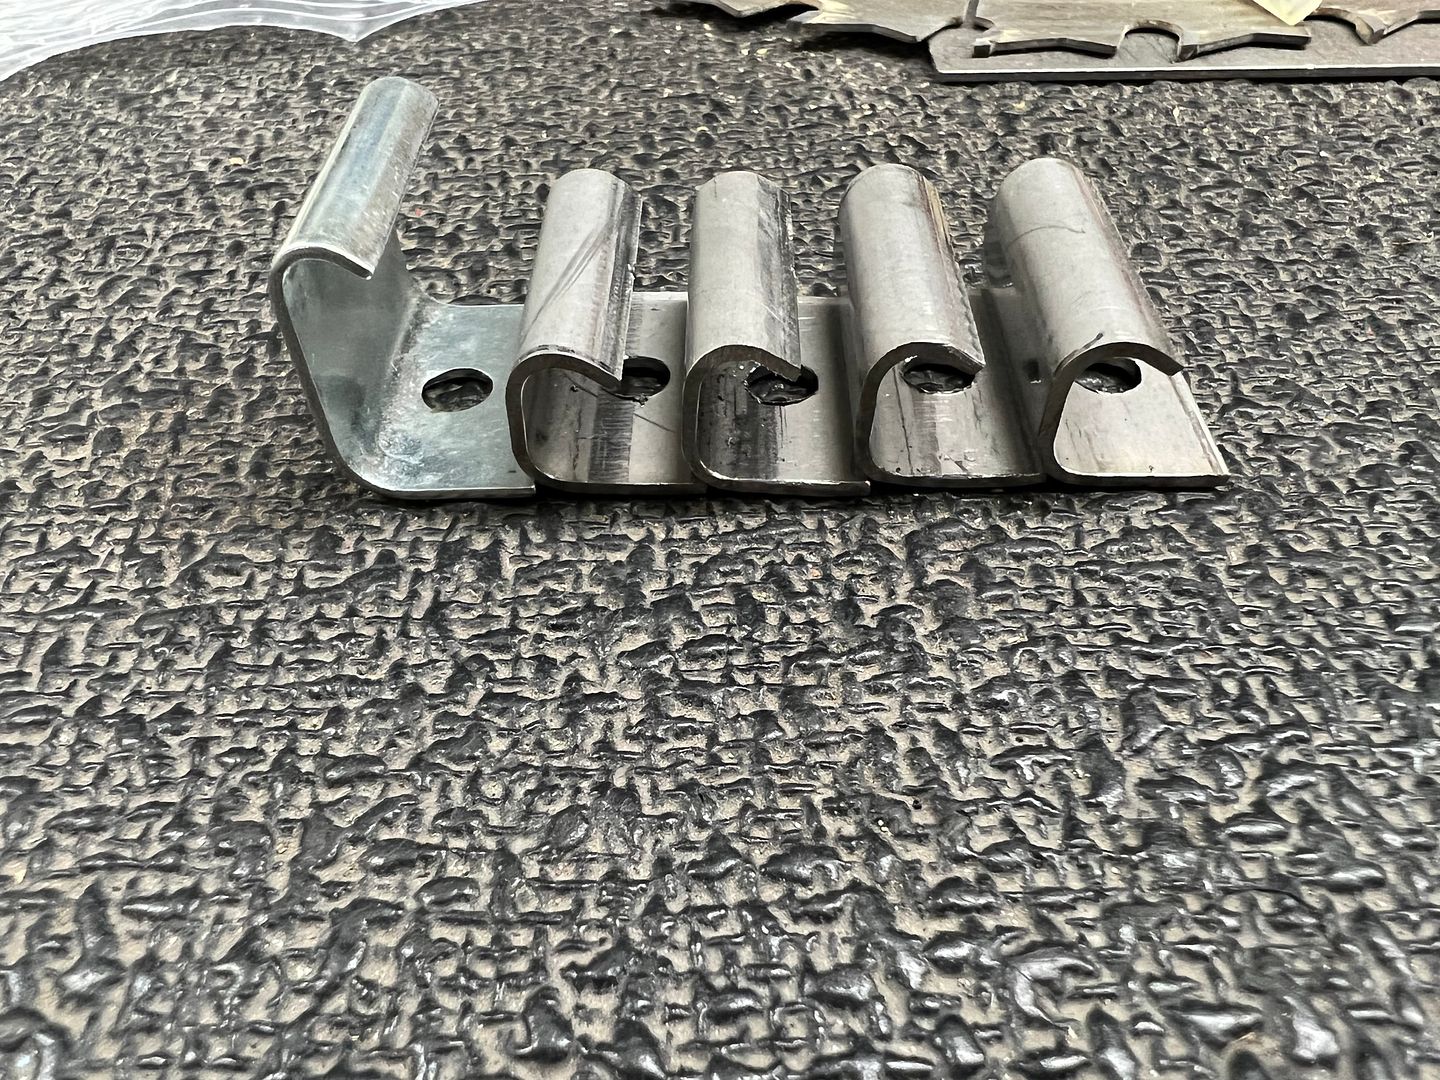
Our next set of dies for the wrap around fold....
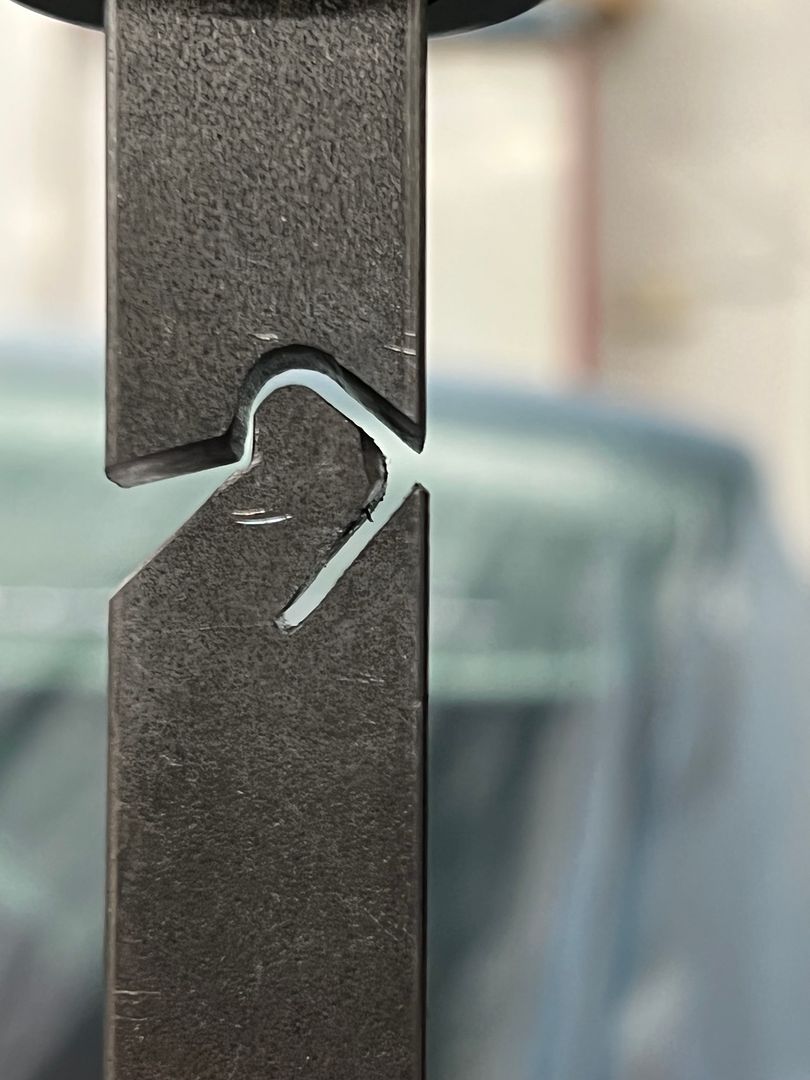
Clips cut to length and mounting holes drilled
Next on the list was to install the new wiper washer nozzles on my daily, since the old ones couldn't stand the heat under the hood with a turbo. The barb fitting had broken free of the nozzle and we no longer had windshield cleaning service. Upon removal, I found that one of the barb couplings had disintegrated as well. And here we were one hour after the auto parts stores had closed. Here's a still intact sample:
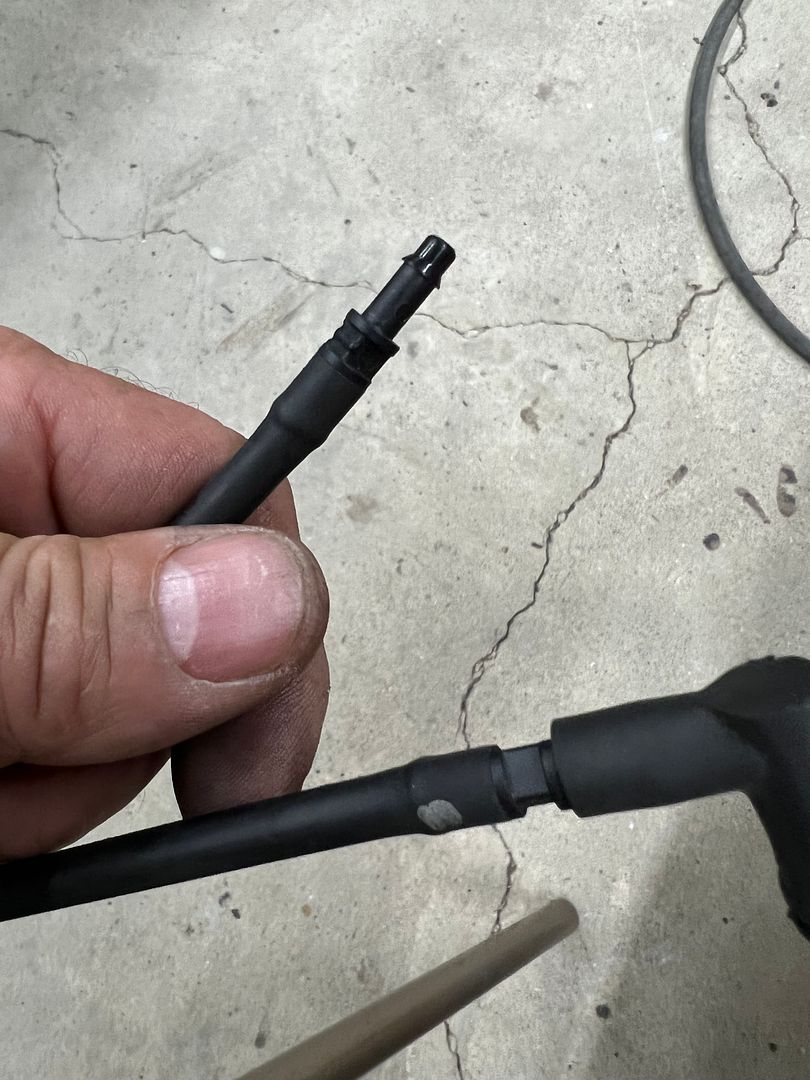
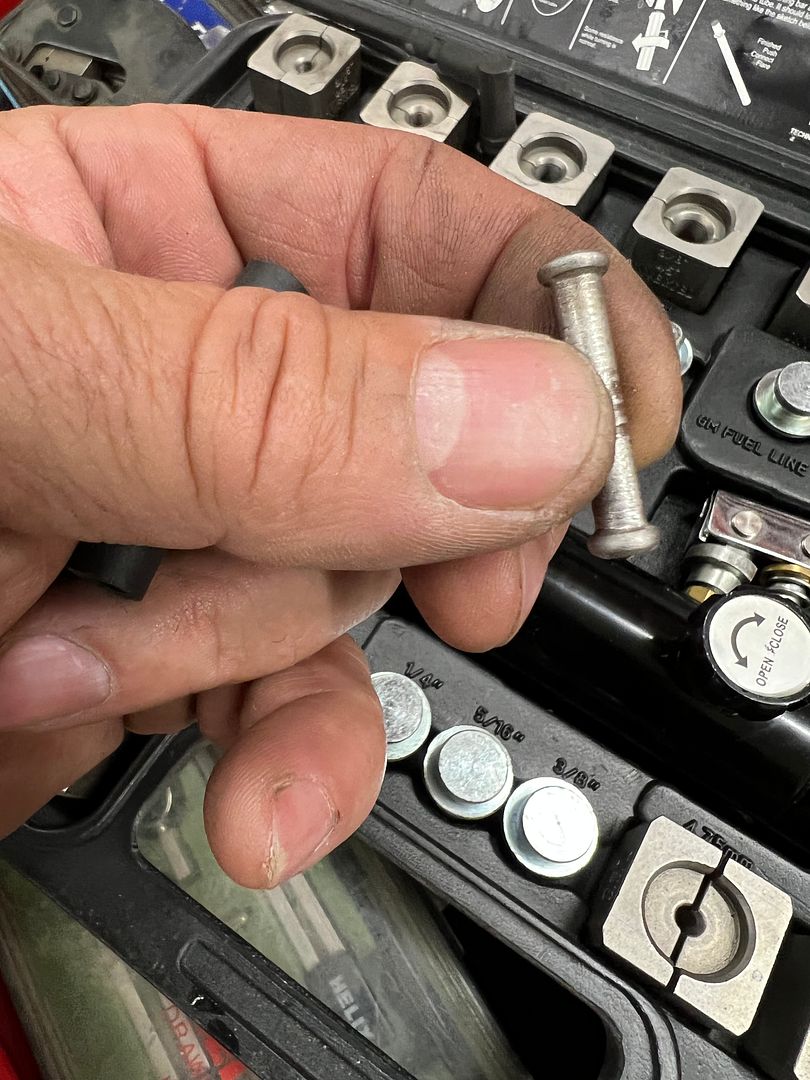
Since we had some stainless brake line left over from the wagon, lets make some lemonade...
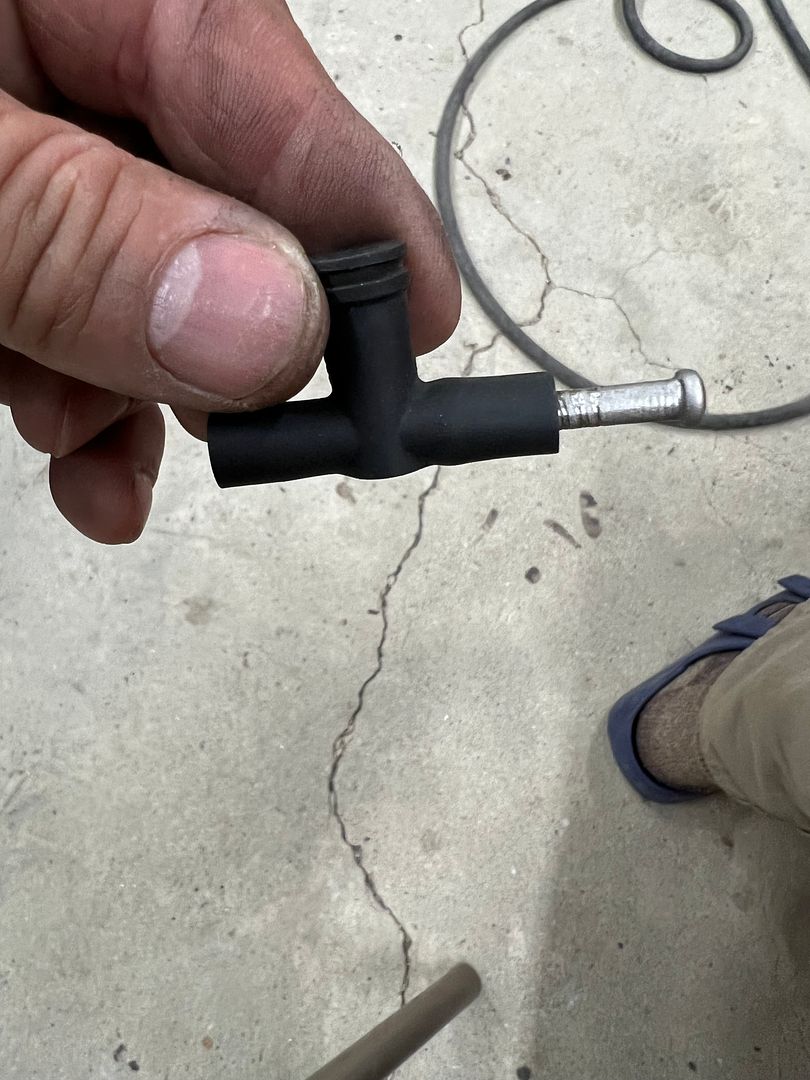
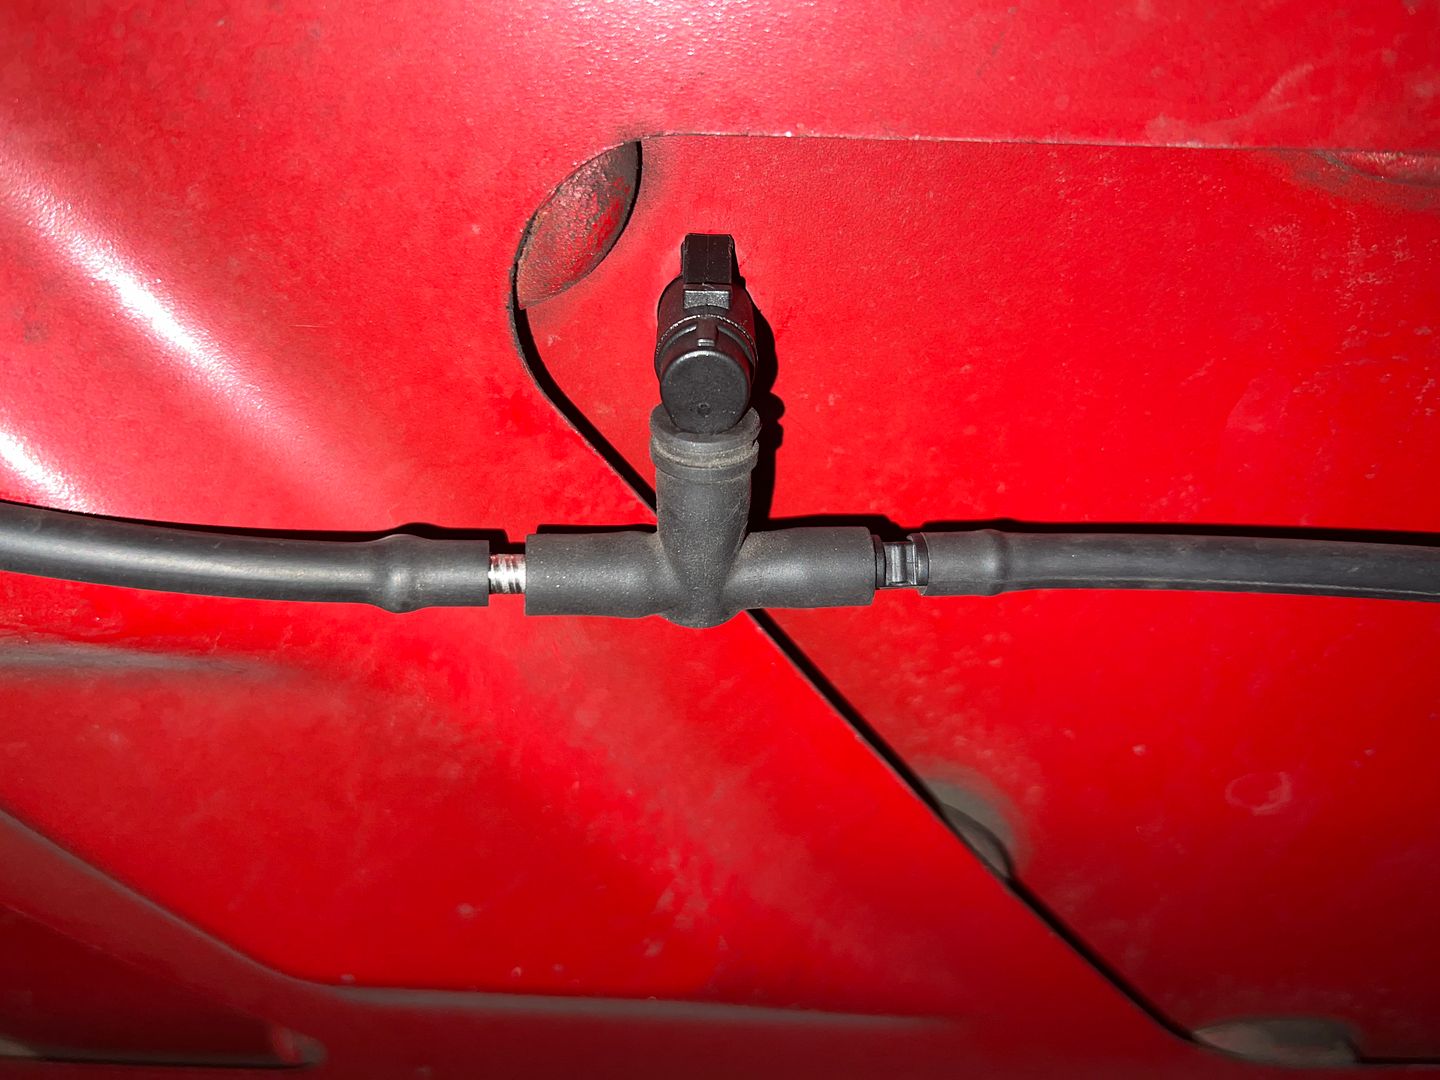
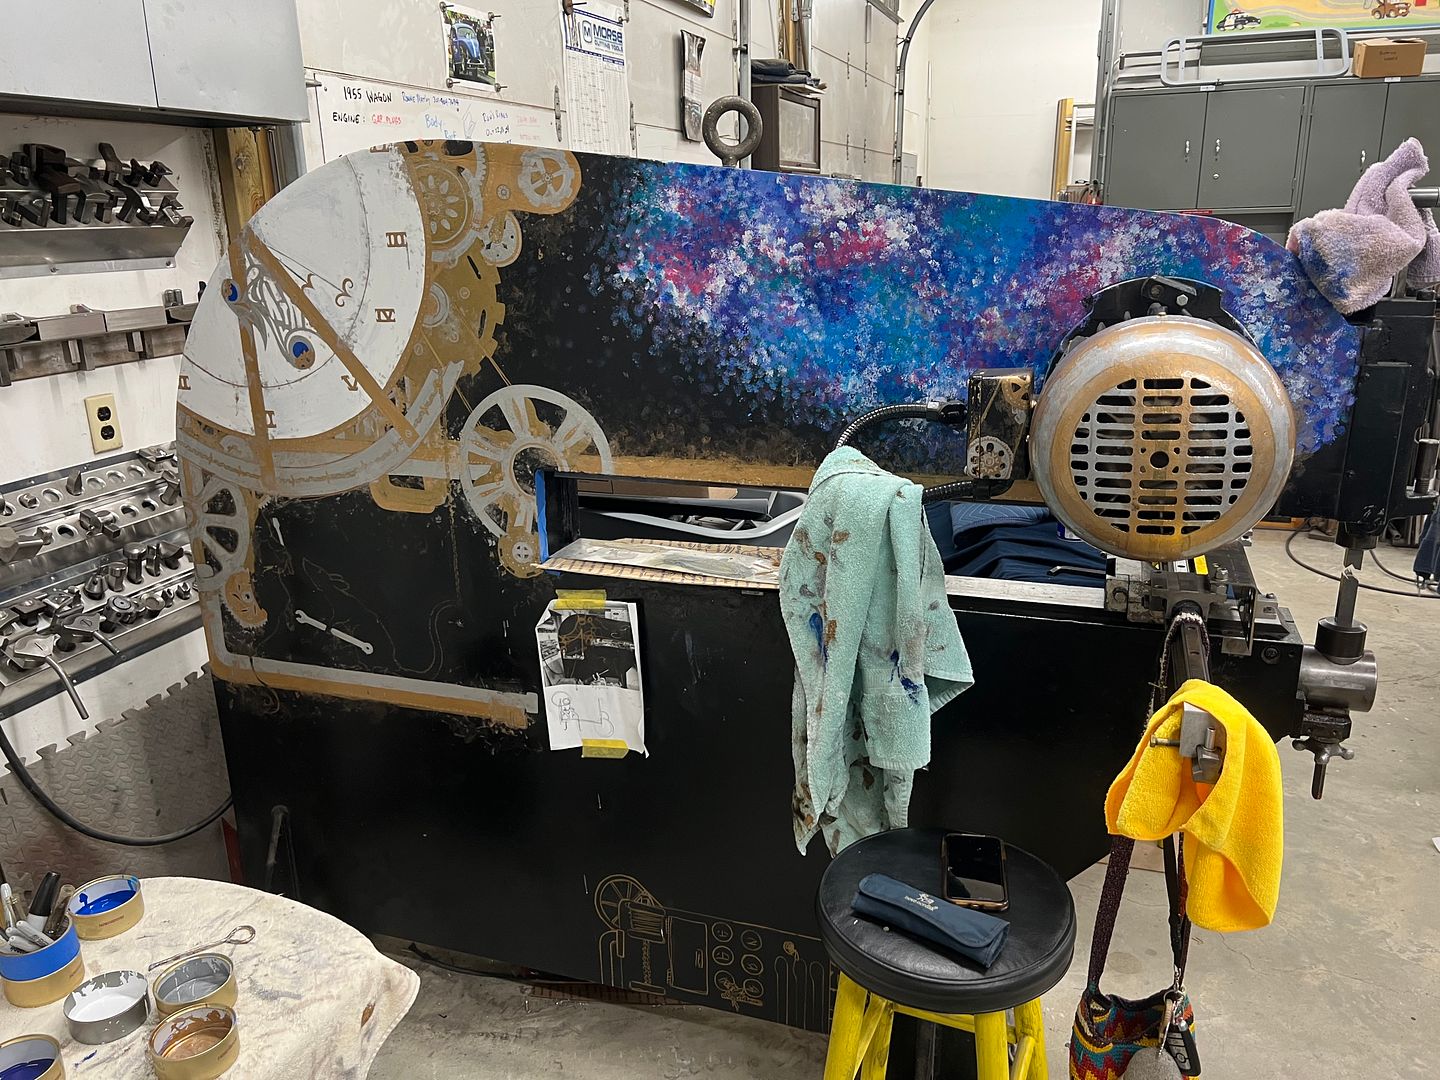
Back in business.. And the artist has made some progress on the Lennox....
Last edited by MP&C; 06-21-2022 at 10:37 AM.
Robert
-
06-21-2022 01:18 PM #1706
CHR Member
- Join Date
- Sep 2007
- Location
- New Bedford
- Car Year, Make, Model: 34 Ford 3W Coupe Replica
- Posts
- 14,754
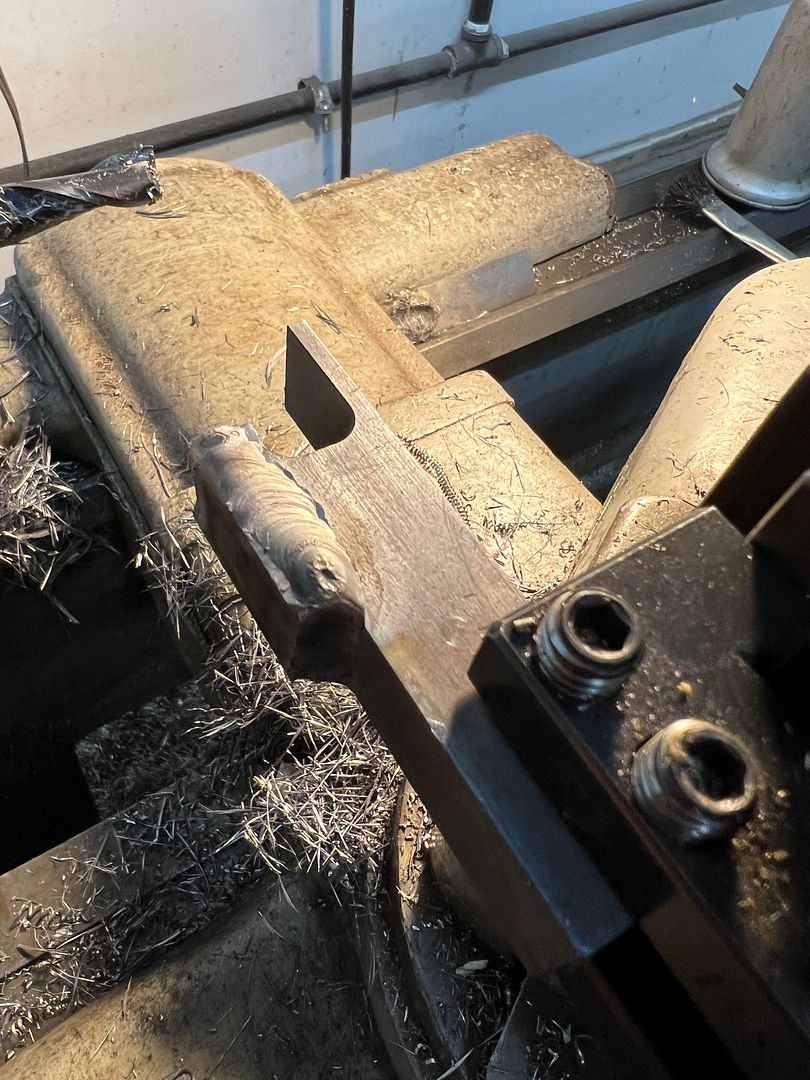
In your "milling machine", is that a AXA or BXA tool holder? Looks like a very large bit mounted.
-
06-21-2022 02:55 PM #1707
CHR Member
- Join Date
- Jun 2008
- Location
- Leonardtown
- Car Year, Make, Model: Walking
- Posts
- 1,228
F62203A3-63BC-468B-B61A-A2C6A055BB9F.jpg
With some modification at the inside top for clamping 3/4 square stock.Robert
-
06-22-2022 03:08 AM #1708
CHR Member
- Join Date
- Apr 2011
- Location
- Prairie City
- Car Year, Make, Model: 40 Ford Deluxe, 68 Corvette, 72&76 K30
- Posts
- 7,301
- Blog Entries
- 1
More absolutely amazing work Robert! That seat pan is remarkable! How do you like that hydraulic flaring tool? I have the same one. I noticed if you apply too much pressure you can crack the tubing. Have you ever had that issue?
Your washer line repair made me laugh. On our excursion a vacuum line runs along the bottom of the cowl in the plastic wiper gutter thing Ford designed. It is about 3" from the turbo. One day the hvac would only blow on defrost. I opened the hood and found the little plastic line sagged down and melted to the exhaust housing. LOL I made a metal line for it and covered it in some heat wrap. HahaRyan
1940 Ford Deluxe Tudor 354 Hemi 46RH Electric Blue w/multi-color flames, Ford 9" Residing in multiple pieces
1968 Corvette Coupe 5.9 Cummins Drag Car 11.43@130mph No stall leaving the line with 1250 rpm's and poor 2.2 60'
1972 Chevy K30 Longhorn P-pumped 24v Compound Turbos 47RH Just another money pit
1971 Camaro RS 5.3 BTR Stage 3 cam, SuperT10
Tire Sizes
-
06-22-2022 04:19 AM #1709
CHR Member
- Join Date
- Jun 2008
- Location
- Leonardtown
- Car Year, Make, Model: Walking
- Posts
- 1,228
I've used it almost extensively for stainless tubing and have noticed the cone die has depressed slightly from repeated flares in same location. I think I need to make one out of 4140 OH.. Originally Posted by 40FordDeluxe
Robert
-
06-22-2022 09:08 AM #1710
CHR Member
- Join Date
- Sep 2007
- Location
- New Bedford
- Car Year, Make, Model: 34 Ford 3W Coupe Replica
- Posts
- 14,754
Of course you do! LOL.. Originally Posted by MP&C
 Reply With Quote

Posting Permissions
- You may not post new threads
- You may not post replies
- You may not post attachments
- You may not edit your posts

Even though I know he won't see this, I still want to wish a Happy Birthday to my best friend, Richard Moore aka techinspector1
Happy Birthday techinspector1