


 3390Likes
Thread: 55 Wagon Progress


Results 1,381 to 1,395 of 1865
 LinkBack URL
 About LinkBacks
-
05-20-2019 02:43 PM #1381
 CHR Member

- Join Date
- Apr 2011
- Location
- Prairie City
- Car Year, Make, Model: 40 Ford Deluxe, 68 Corvette, 72&76 K30
- Posts
- 7,301
- Blog Entries
- 1
Great work! That is really going to look slick in there!Ryan
1940 Ford Deluxe Tudor 354 Hemi 46RH Electric Blue w/multi-color flames, Ford 9" Residing in multiple pieces
1968 Corvette Coupe 5.9 Cummins Drag Car 11.43@130mph No stall leaving the line with 1250 rpm's and poor 2.2 60'
1972 Chevy K30 Longhorn P-pumped 24v Compound Turbos 47RH Just another money pit
1971 Camaro RS 5.3 BTR Stage 3 cam, SuperT10
Tire Sizes
-
Advertising

- Google Adsense
- REGISTERED USERS DO NOT SEE THIS AD
-
05-20-2019 05:03 PM #1382
CHR Member/Contributor
- Join Date
- Sep 2007
- Location
- Gardner, KS
- Car Year, Make, Model: '33 HiBoy Coupe, '32 HiBoy Roadster
- Posts
- 11,244
Did the photo's in #1367 and #1379 disappear for everyone? I've got the pictures of the kitten, saying Photo Not Found..... CLICK for Photo, but no joy with the click.Roger
Enjoy the little things in life, and you may look back one day and realize that they were really the BIG things.
-
05-20-2019 05:19 PM #1383
CHR Member
- Join Date
- Sep 2007
- Location
- New Bedford
- Car Year, Make, Model: 34 Ford 3W Coupe Replica
- Posts
- 14,754
Pics are all still there for me.
-
05-28-2019 10:42 AM #1384
CHR Member
- Join Date
- Jun 2008
- Location
- Leonardtown
- Car Year, Make, Model: Walking
- Posts
- 1,228
Roger, did pictures ever show up for you? I can only guess PB was doing some maintenance??
Well it's been rather hectic around the home front as E is nearing graduation. Seems like yesterday she was showing me how to properly wet sand bare foot..
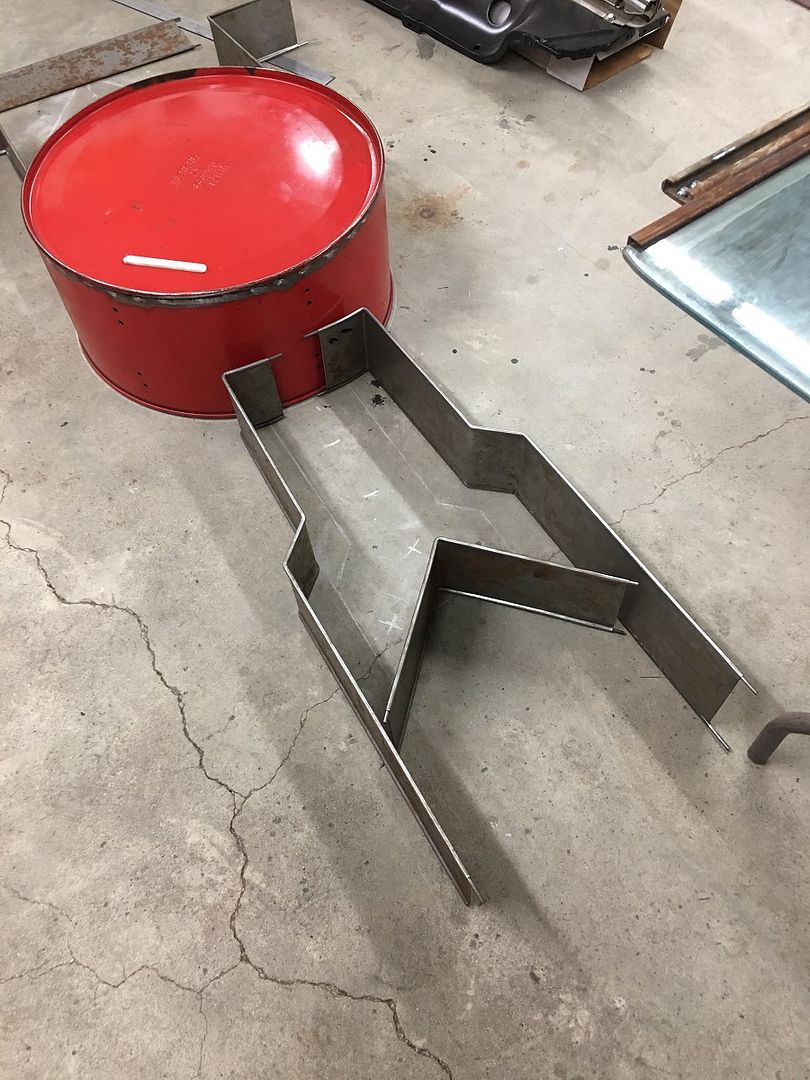
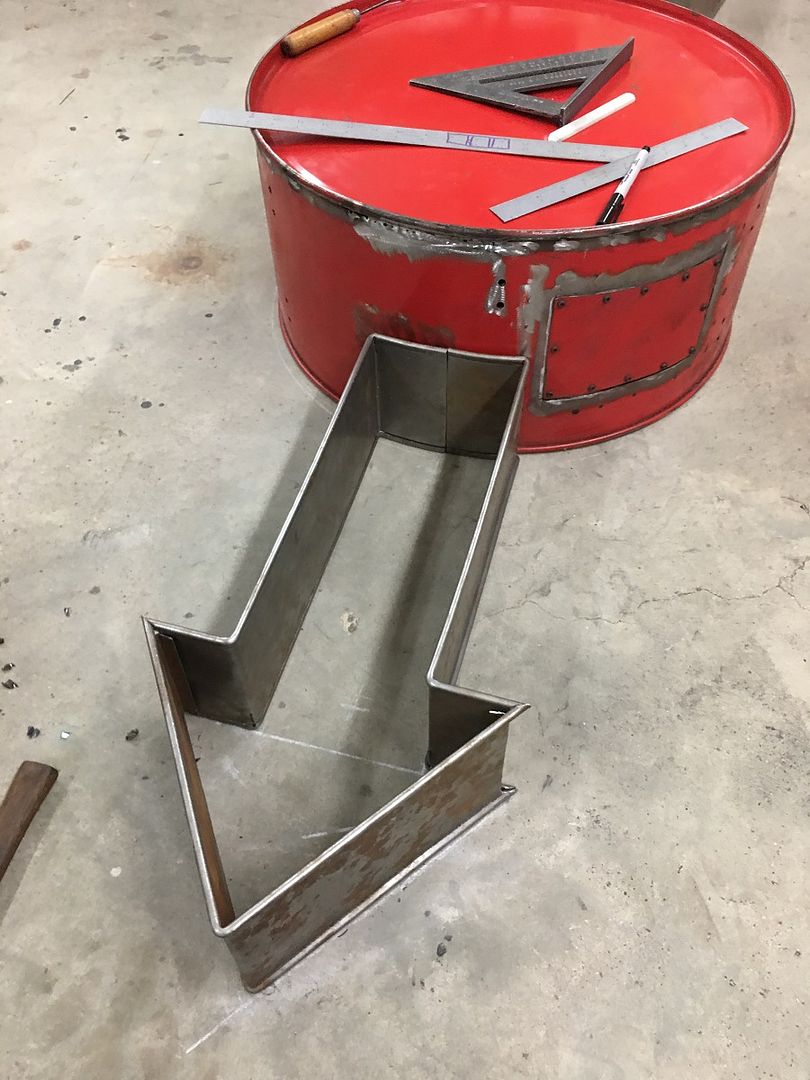
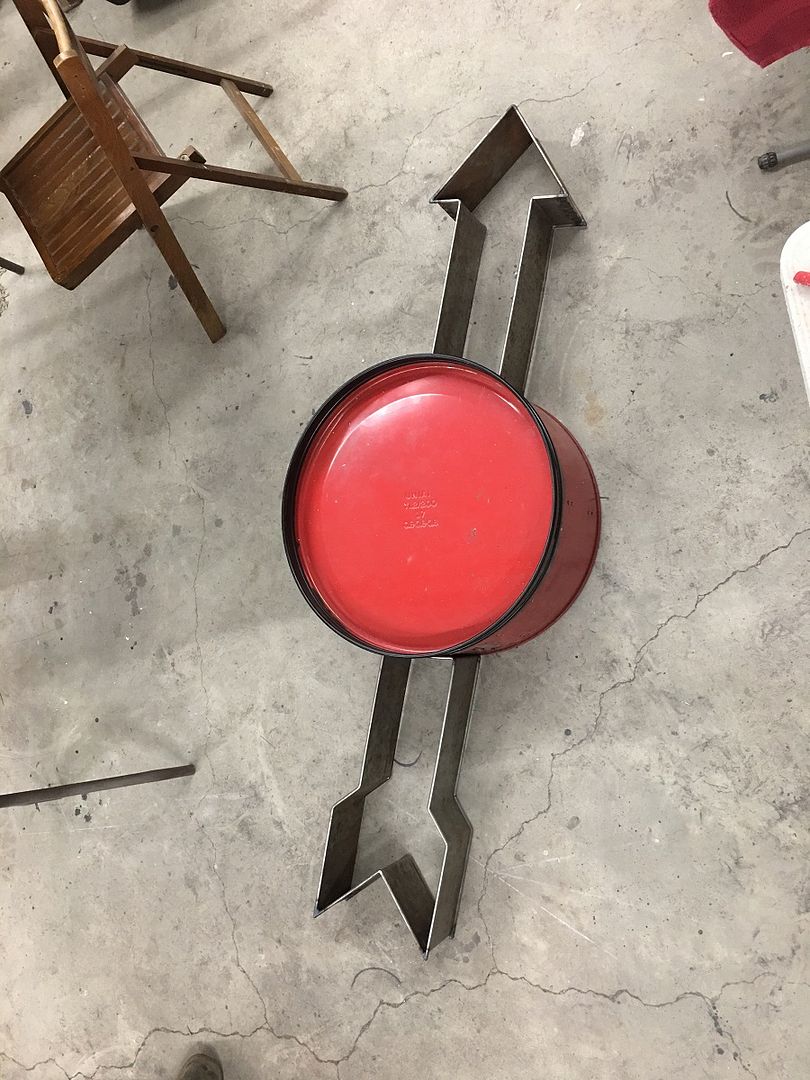
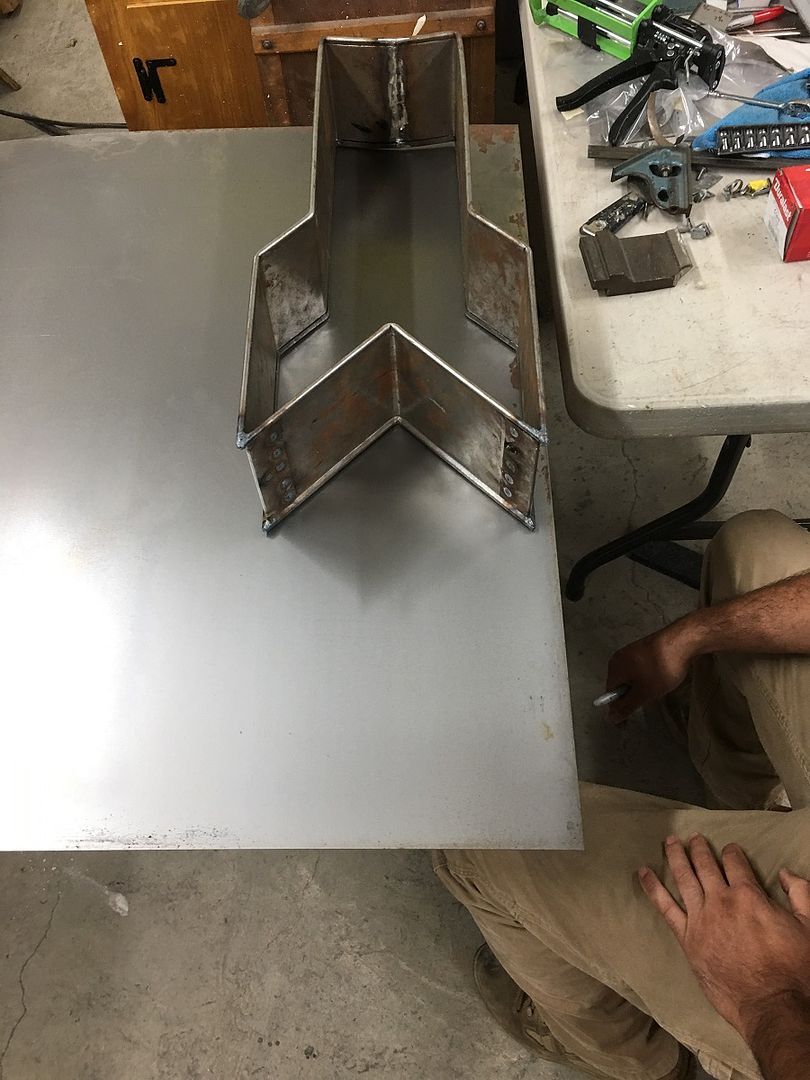
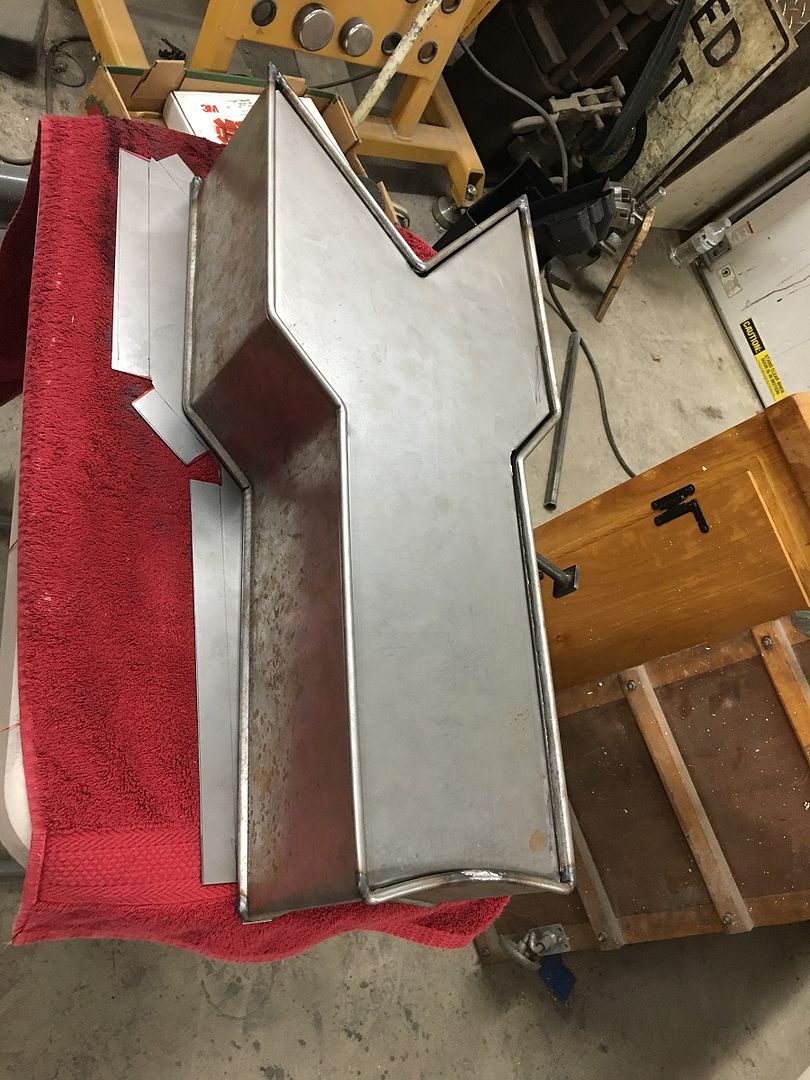
For shop activity, Mike has been working on a sign for a "Drummer's Lounge", since we had the wire edging tool already made up for the Biederman, he used that to give the outside bands of the arrow the beaded look...
CAD drawing:
Parts is parts:

Video:
https://www.youtube.com/watch?v=Y47I...ature=youtu.be
Meanwhile, I've been block sanding, and priming.... here the rear kick panels are now ready for upholstery...

I did break out the Meco torch again the other day to get the dust off....
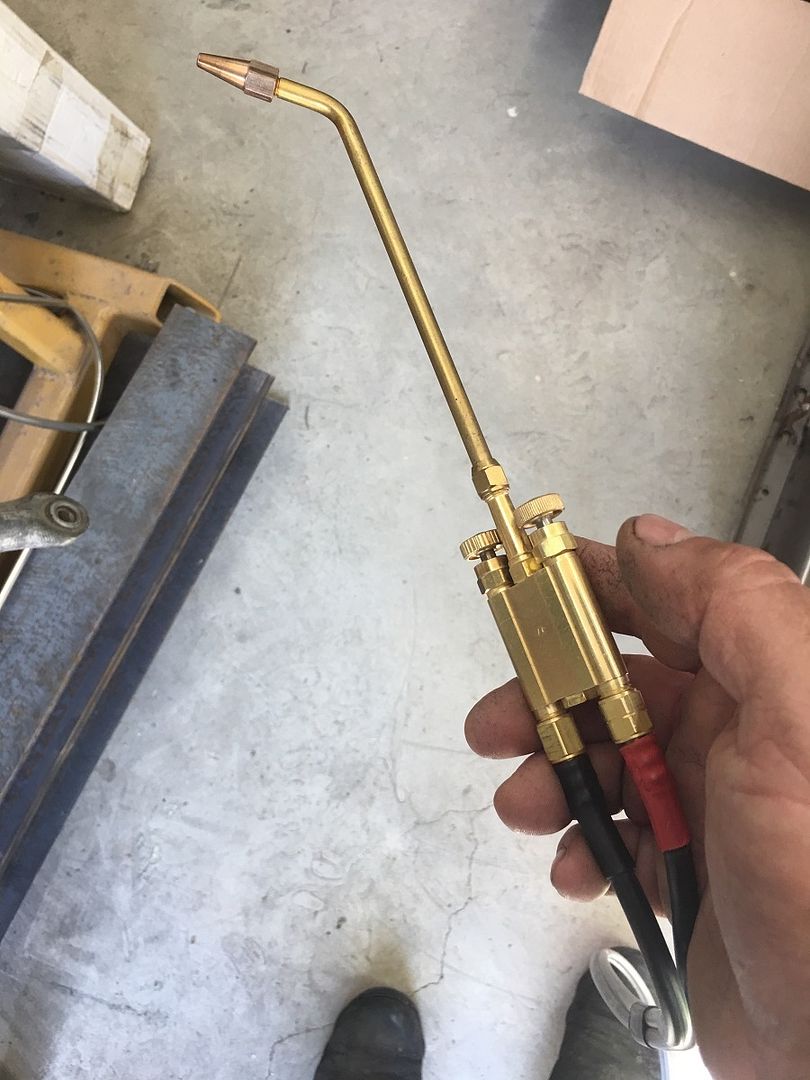
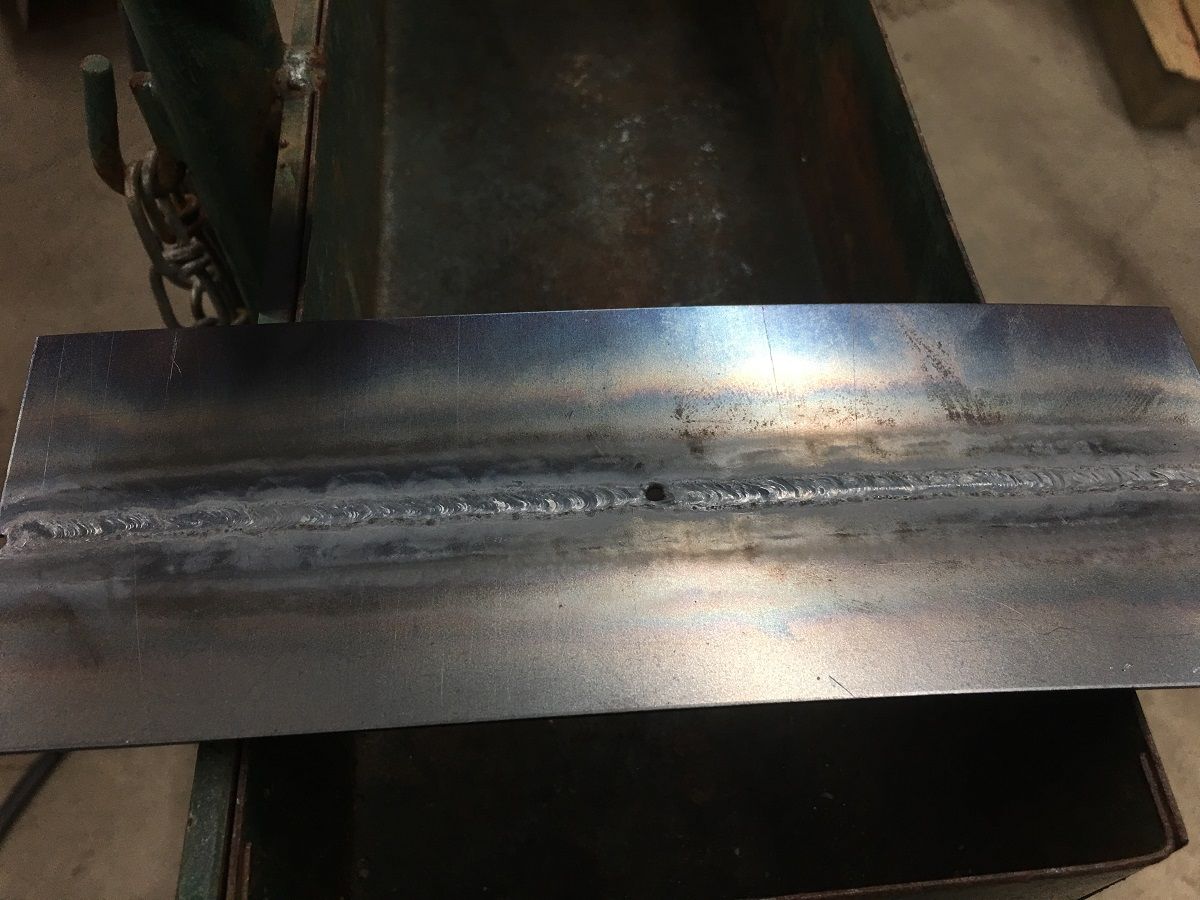
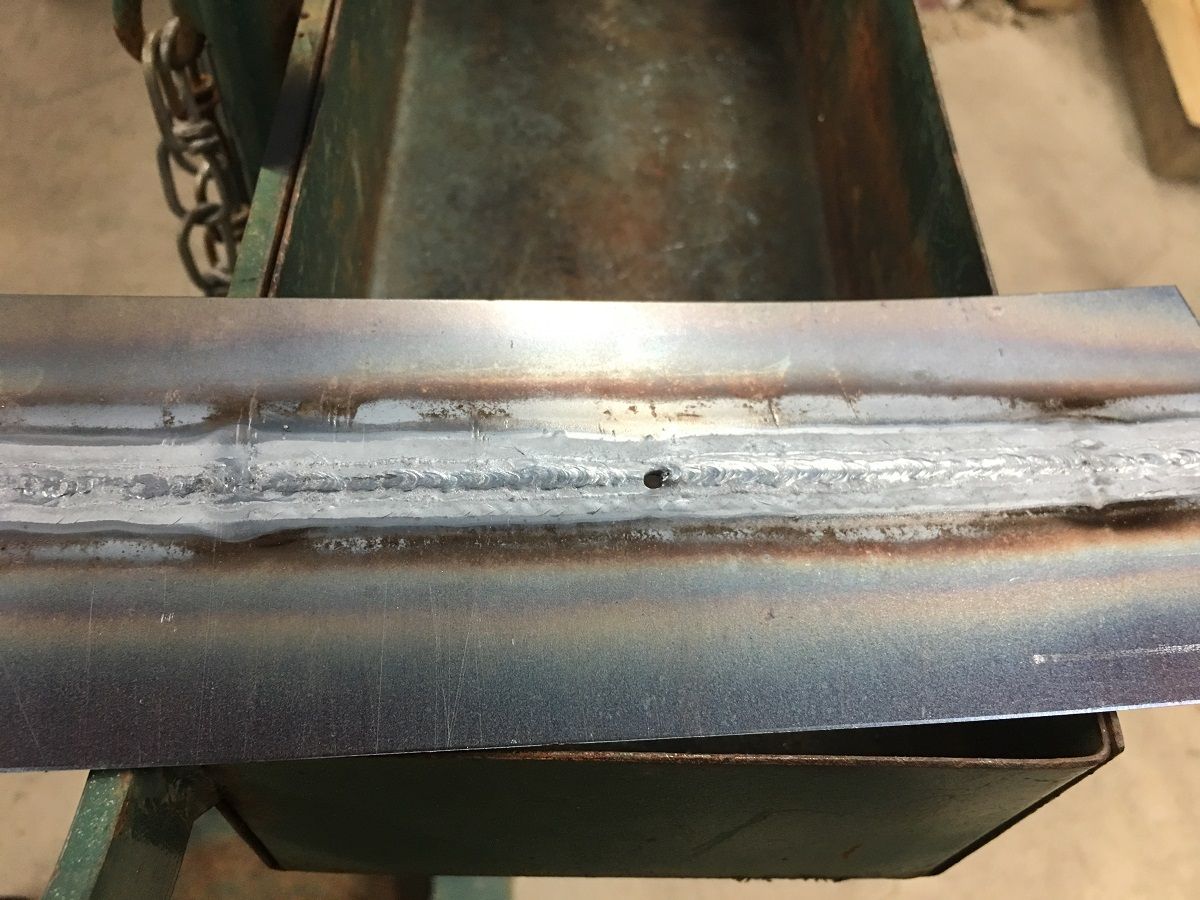
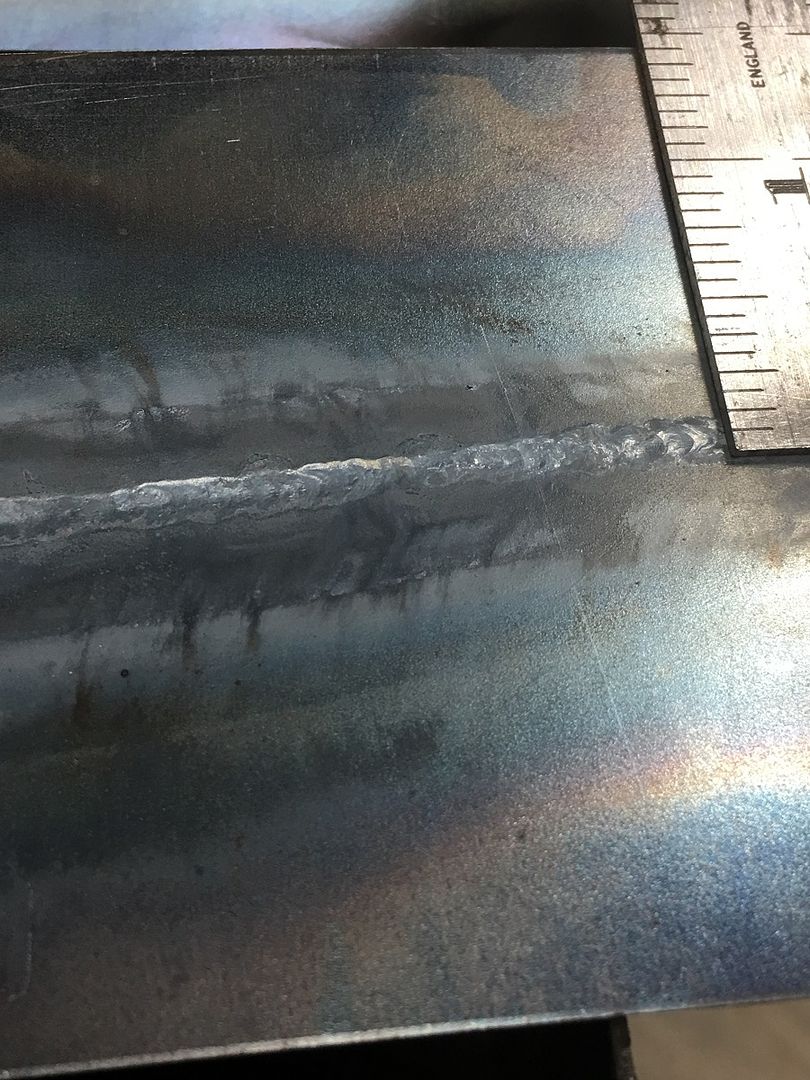
This first coupon shows how Peter Tommasini teaches tacking in gas welding. Tack a spot, then the next is placed where the HAZ (blue ring) touches the seam between the halves. And repeat. Note how this method leaves an almost perfect HAZ for minimal distortion..
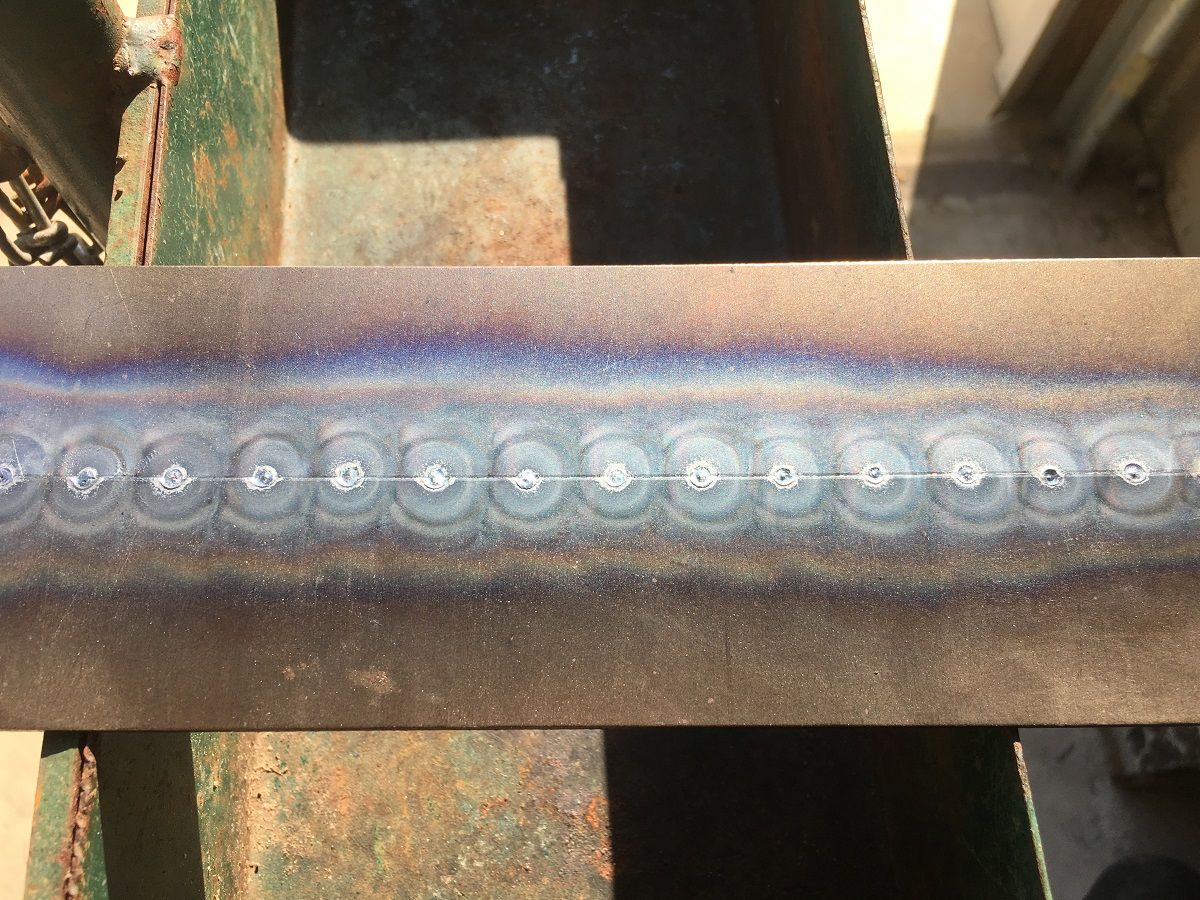
And we had a blowout. Don't stop, keep going and come back to it.. This is fusion welded, no filler, front side shown first, then back side
Stephen has been mocking up the power windows in the front doors so we can side step all the components and find a good location for our speakers. No pictures yet, I'll get some this week...Last edited by MP&C; 05-28-2019 at 10:49 AM.
Robert
-
05-28-2019 03:18 PM #1385
CHR Member
- Join Date
- Sep 2007
- Location
- New Bedford
- Car Year, Make, Model: 34 Ford 3W Coupe Replica
- Posts
- 14,754
I didn't realize your CAD Drawing meant Concrete Aided Design. Cool!!
-
05-28-2019 04:13 PM #1386
CHR Member/Contributor
- Join Date
- Sep 2007
- Location
- Gardner, KS
- Car Year, Make, Model: '33 HiBoy Coupe, '32 HiBoy Roadster
- Posts
- 11,244
Robert, Originally Posted by MP&C

I checked and they're all showing up again now. Thanks for checking!Roger
Enjoy the little things in life, and you may look back one day and realize that they were really the BIG things.
-
05-29-2019 08:29 PM #1387
CHR Member
- Join Date
- Apr 2011
- Location
- Prairie City
- Car Year, Make, Model: 40 Ford Deluxe, 68 Corvette, 72&76 K30
- Posts
- 7,301
- Blog Entries
- 1
That's a good one. I've used that method a few times too. Originally Posted by 34_40

Ryan
1940 Ford Deluxe Tudor 354 Hemi 46RH Electric Blue w/multi-color flames, Ford 9" Residing in multiple pieces
1968 Corvette Coupe 5.9 Cummins Drag Car 11.43@130mph No stall leaving the line with 1250 rpm's and poor 2.2 60'
1972 Chevy K30 Longhorn P-pumped 24v Compound Turbos 47RH Just another money pit
1971 Camaro RS 5.3 BTR Stage 3 cam, SuperT10
Tire Sizes
-
05-29-2019 09:43 PM #1388
CHR Member
- Join Date
- May 2005
- Location
- Tataraimaka NZ
- Car Year, Make, Model: `47 Ford sedan, A.C.Cobra replica.
- Posts
- 2,895
Haven't we all? Originally Posted by 40FordDeluxe
johnboy
Mountain man. (Retired.)
Some mistakes are too much fun to be made only once.
I don't know everything about anything, and I don't know anything about lots of things.
'47 Ford sedan. 350 -- 350, Jaguar irs + ifs.
'49 Morris Minor. Datsun 1500cc, 5sp manual, Marina front axle, Nissan rear axle.
'51 Ford school bus. Chev 400 ci Vortec 5 sp manual + Gearvendors 2sp, 2000 Chev lwb dually chassis and axles.
'64 A.C. Cobra replica. Ford 429, C6 auto, Torana ifs, Jaguar irs.
-
05-30-2019 04:52 PM #1389
CHR Member
- Join Date
- Sep 2007
- Location
- New Bedford
- Car Year, Make, Model: 34 Ford 3W Coupe Replica
- Posts
- 14,754
And it isn't a new technique, there was a time when every ship in the world had her beam laid in just that fashion.
Most impressive to see the pictures of the Titanic or one of her sister ships being laid out on the floor, I think there is a video of it on u-tube.
-
06-07-2019 07:46 PM #1390
CHR Member
- Join Date
- Jun 2008
- Location
- Leonardtown
- Car Year, Make, Model: Walking
- Posts
- 1,228
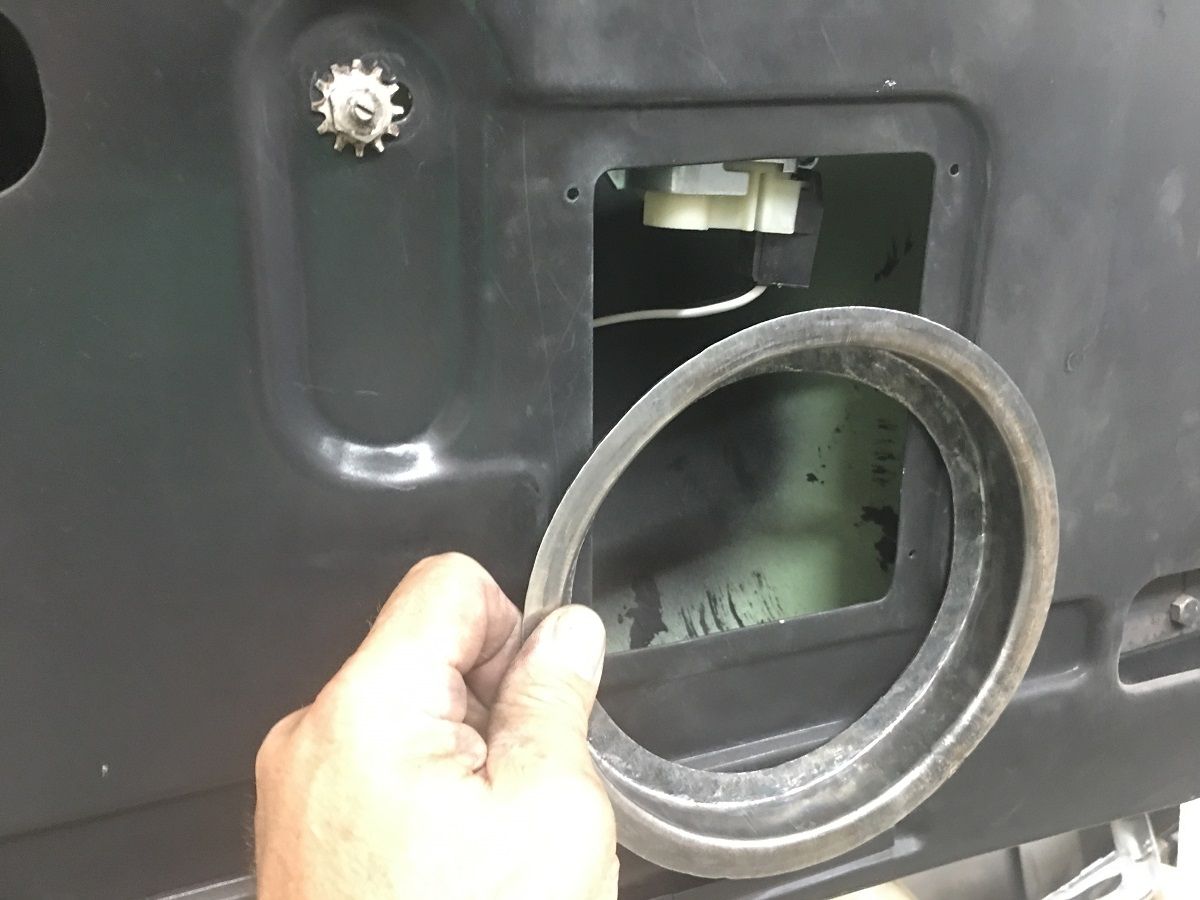
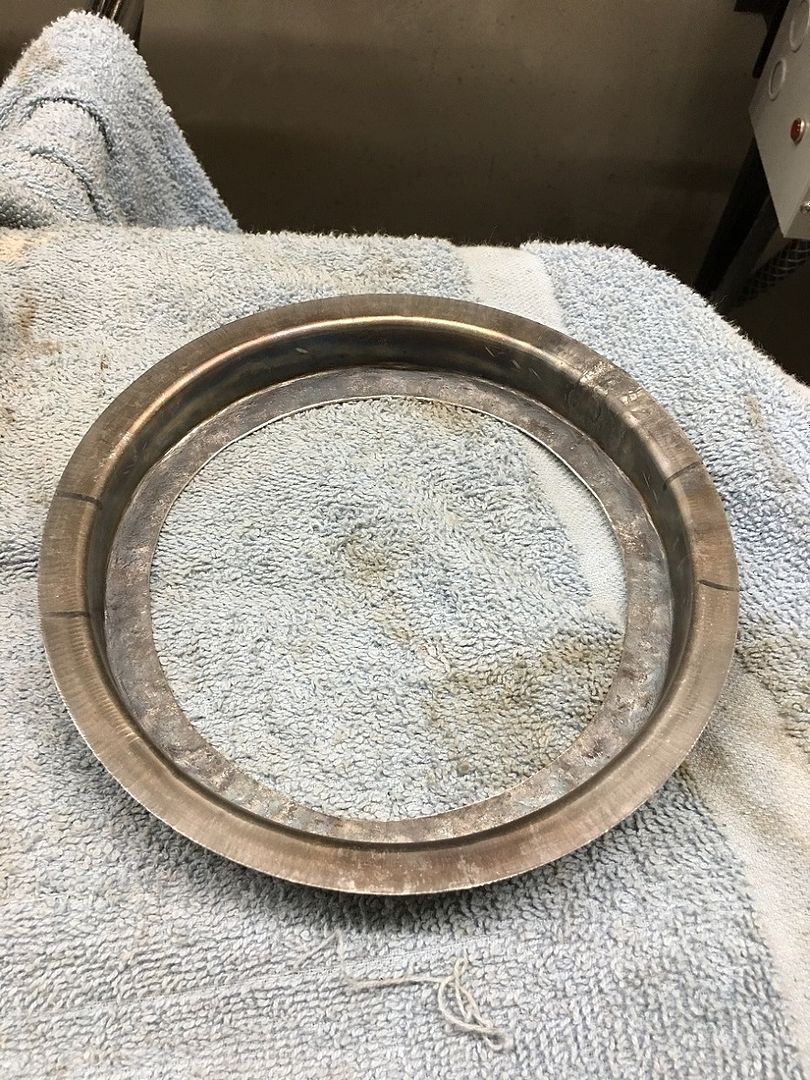
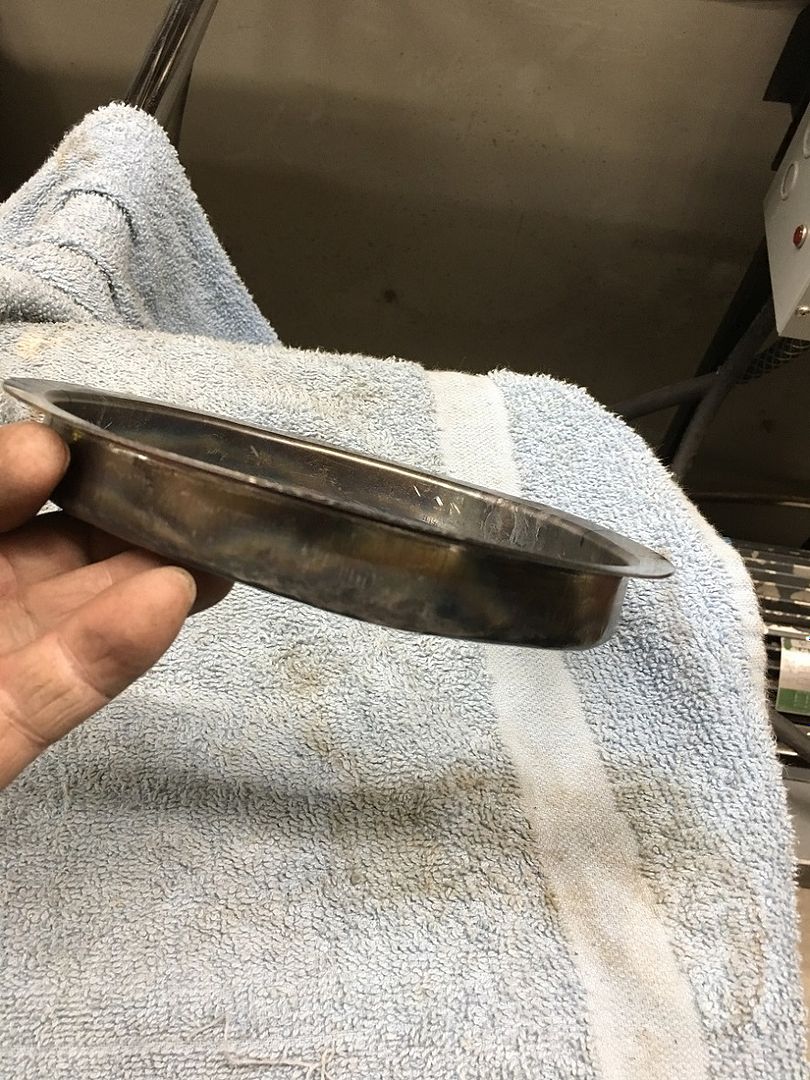
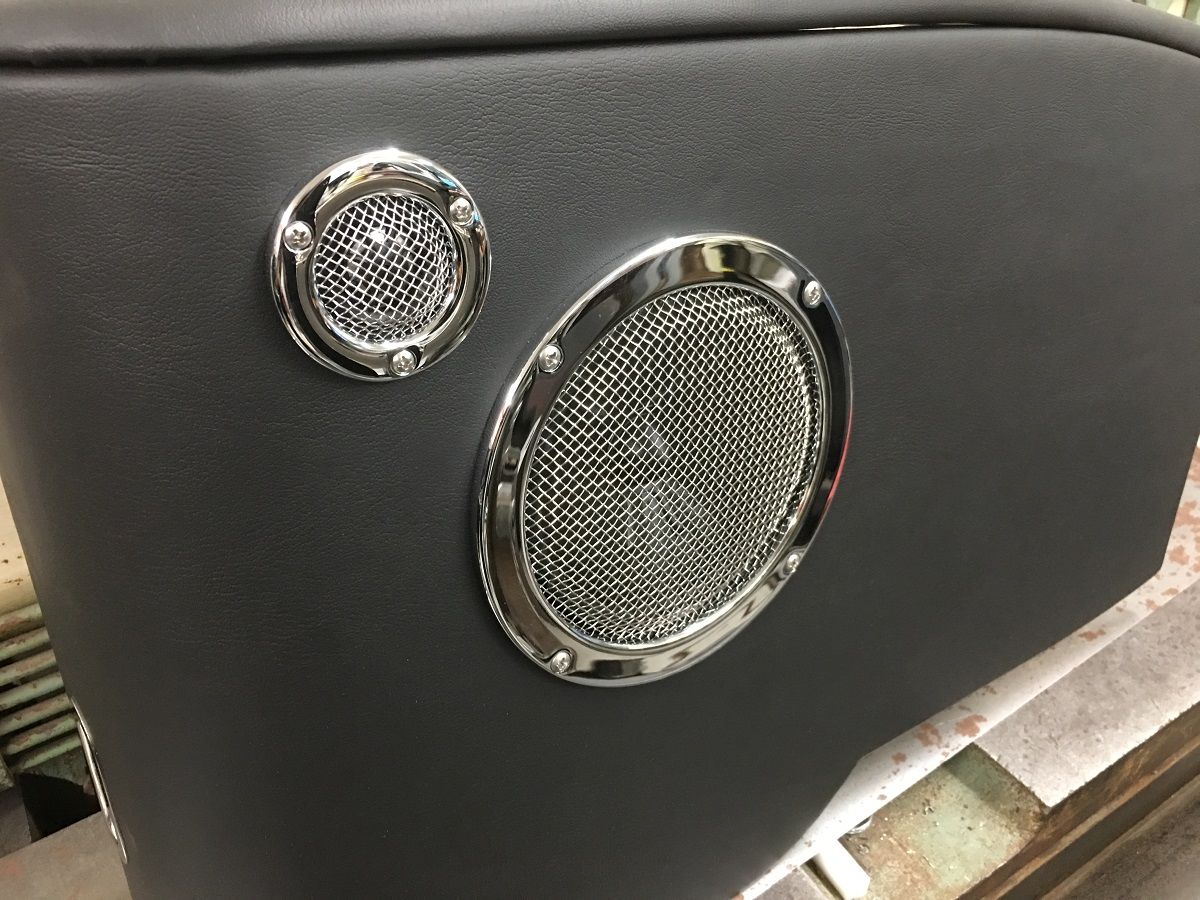
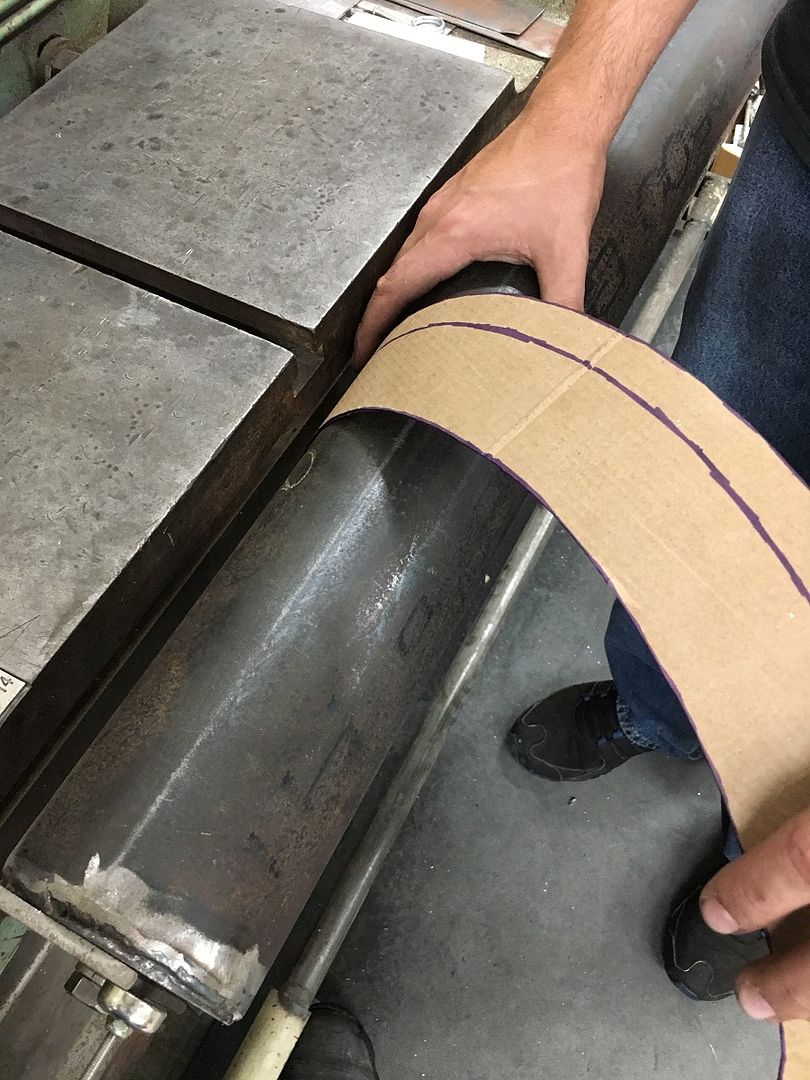
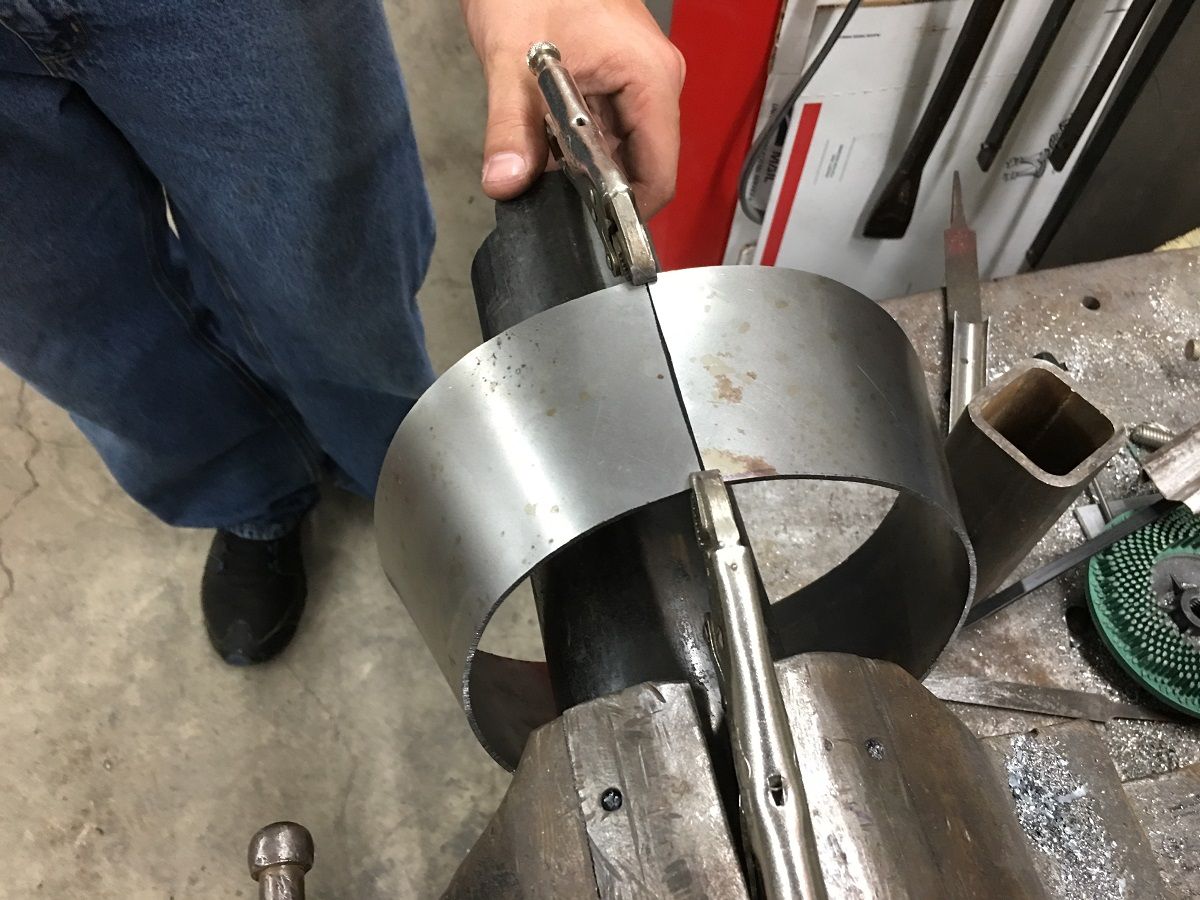
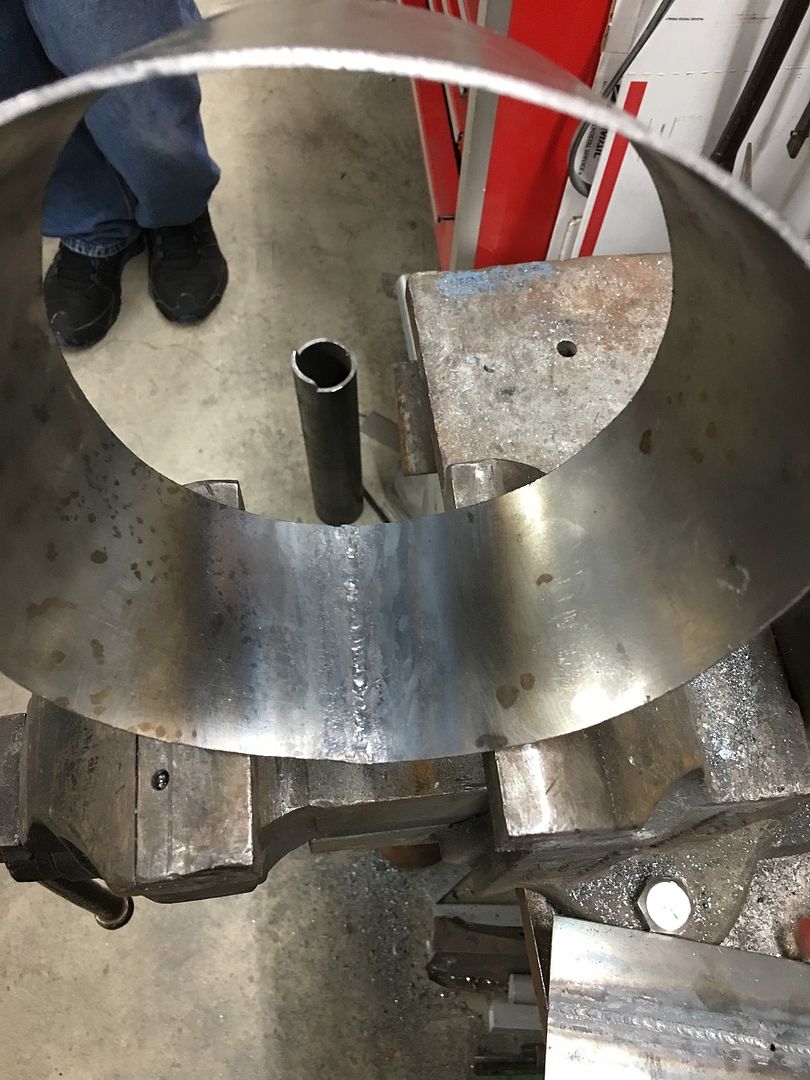
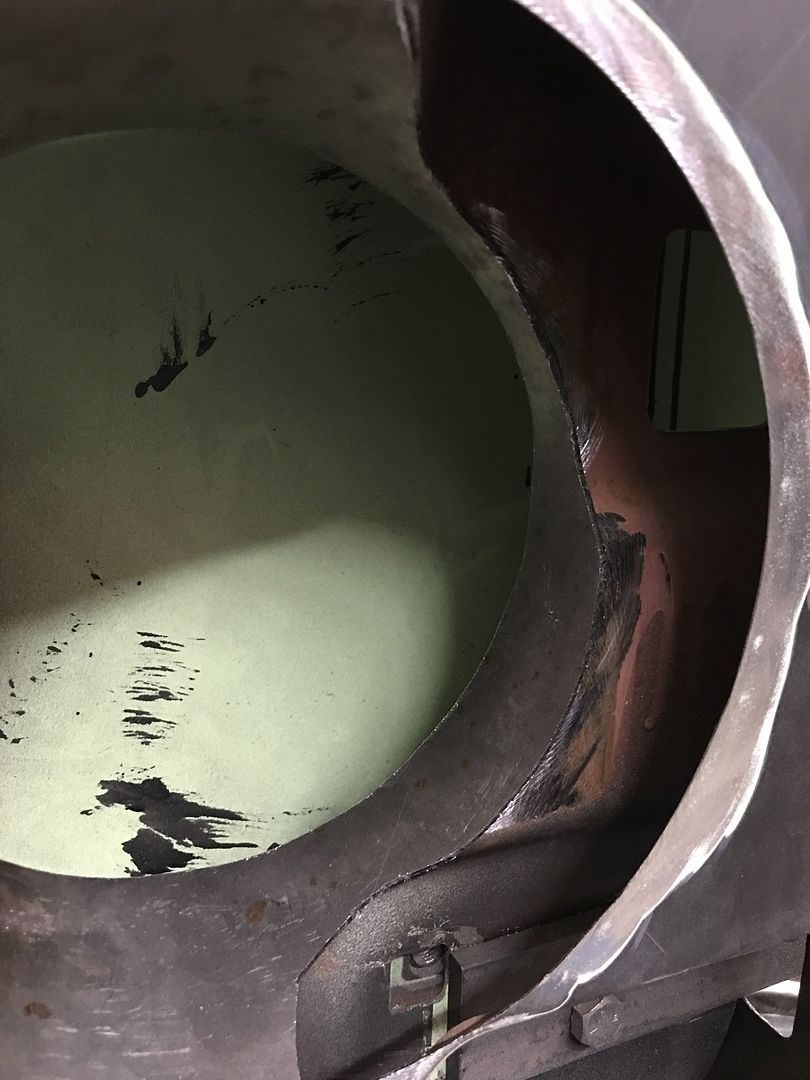
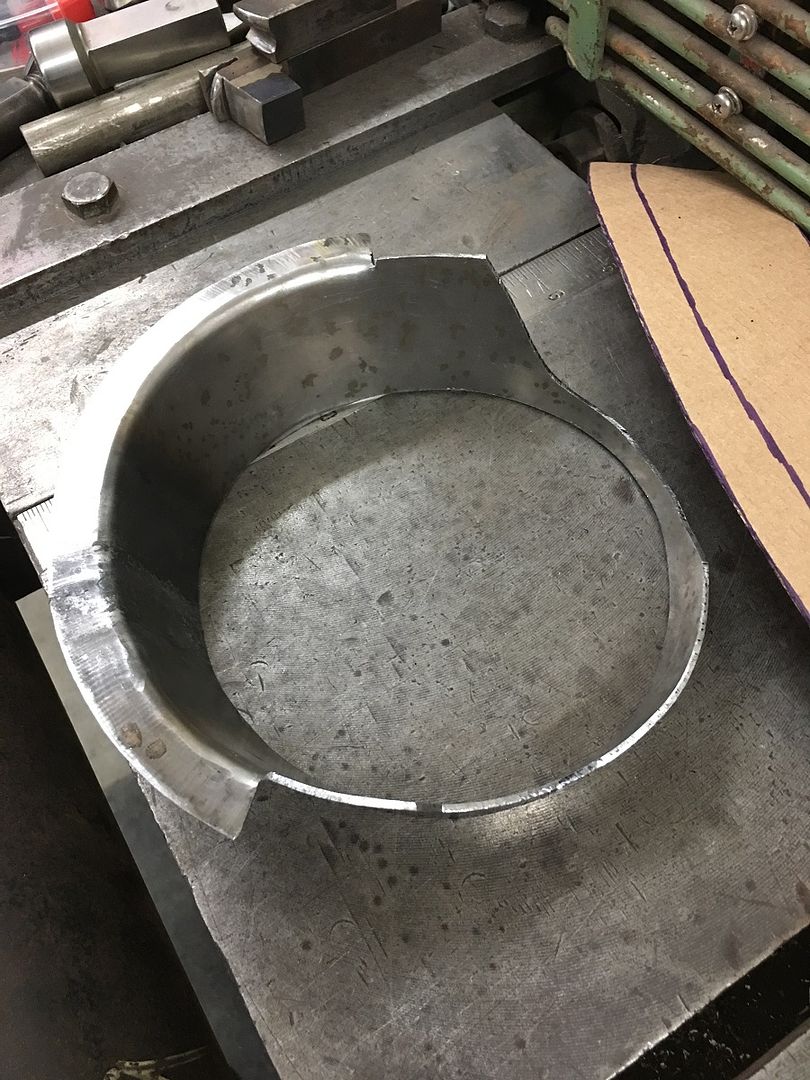
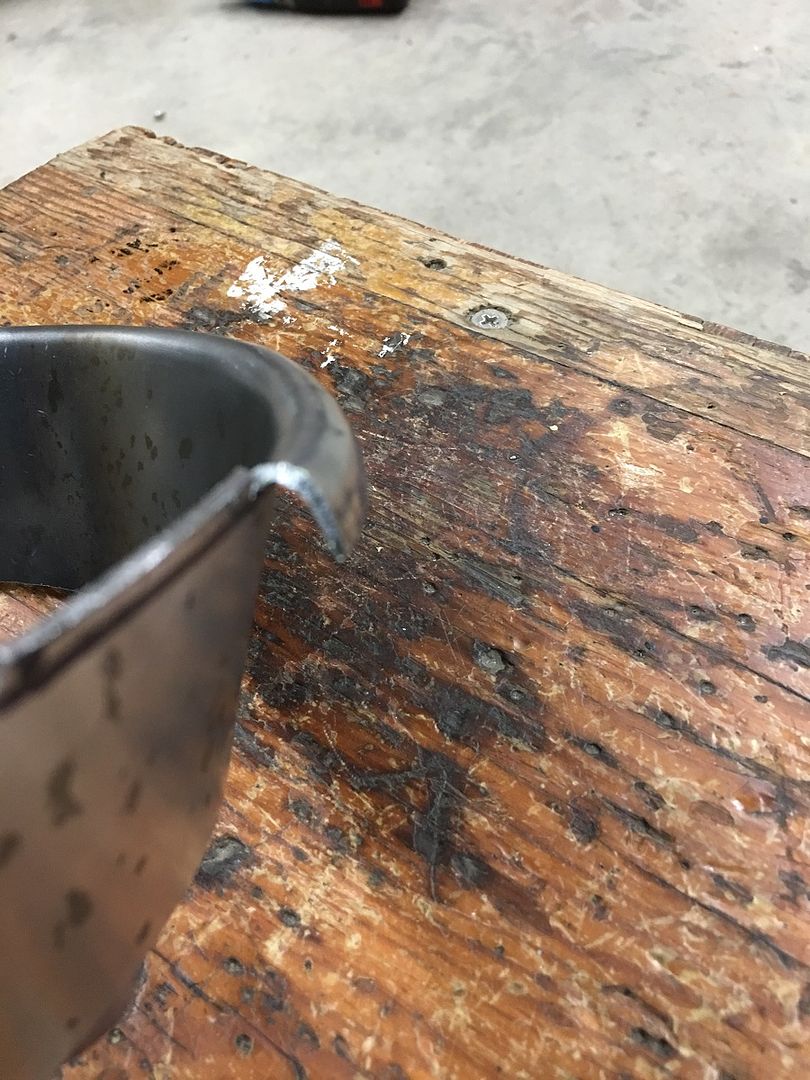
We had issue fitting the round speakers into the square holes in the door, so we used some 18 ga CRS to form some rings, the seam was gas welded.
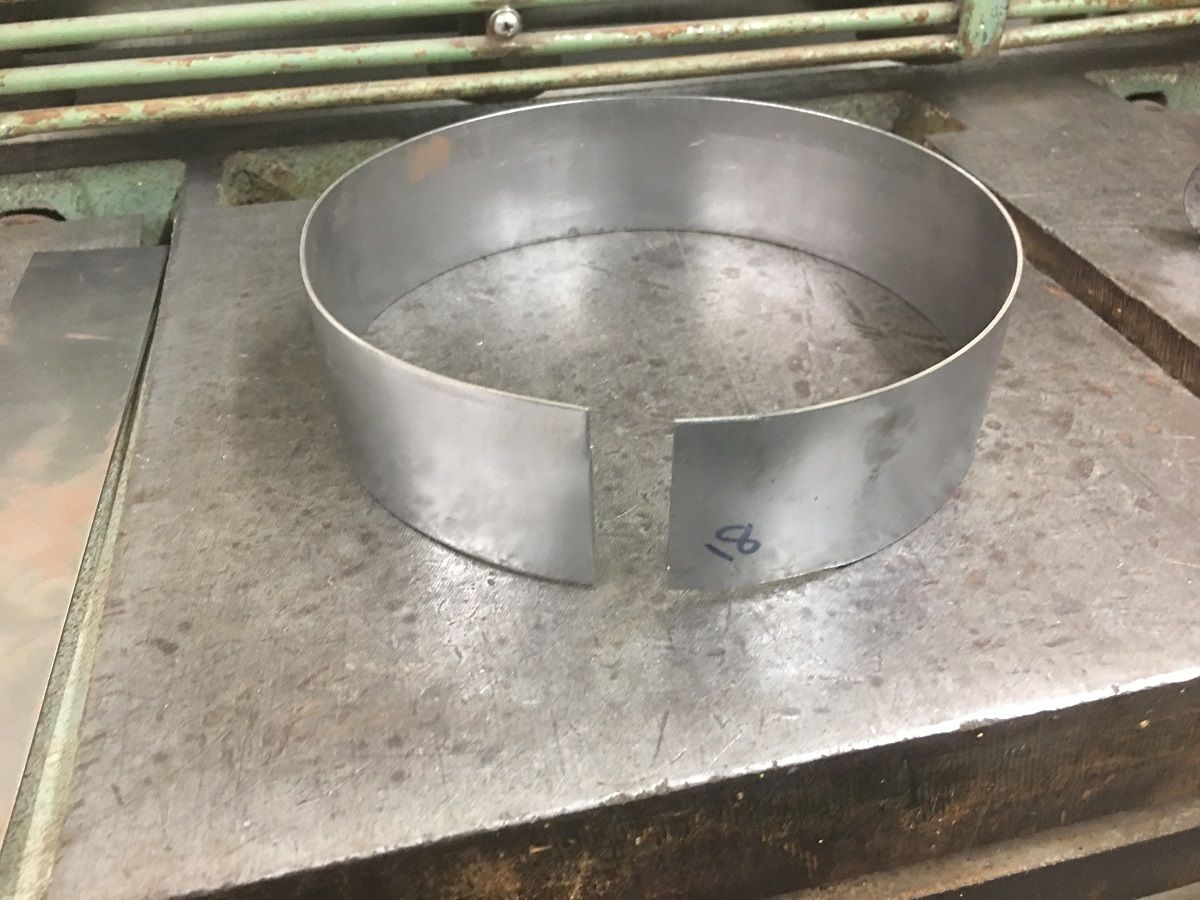
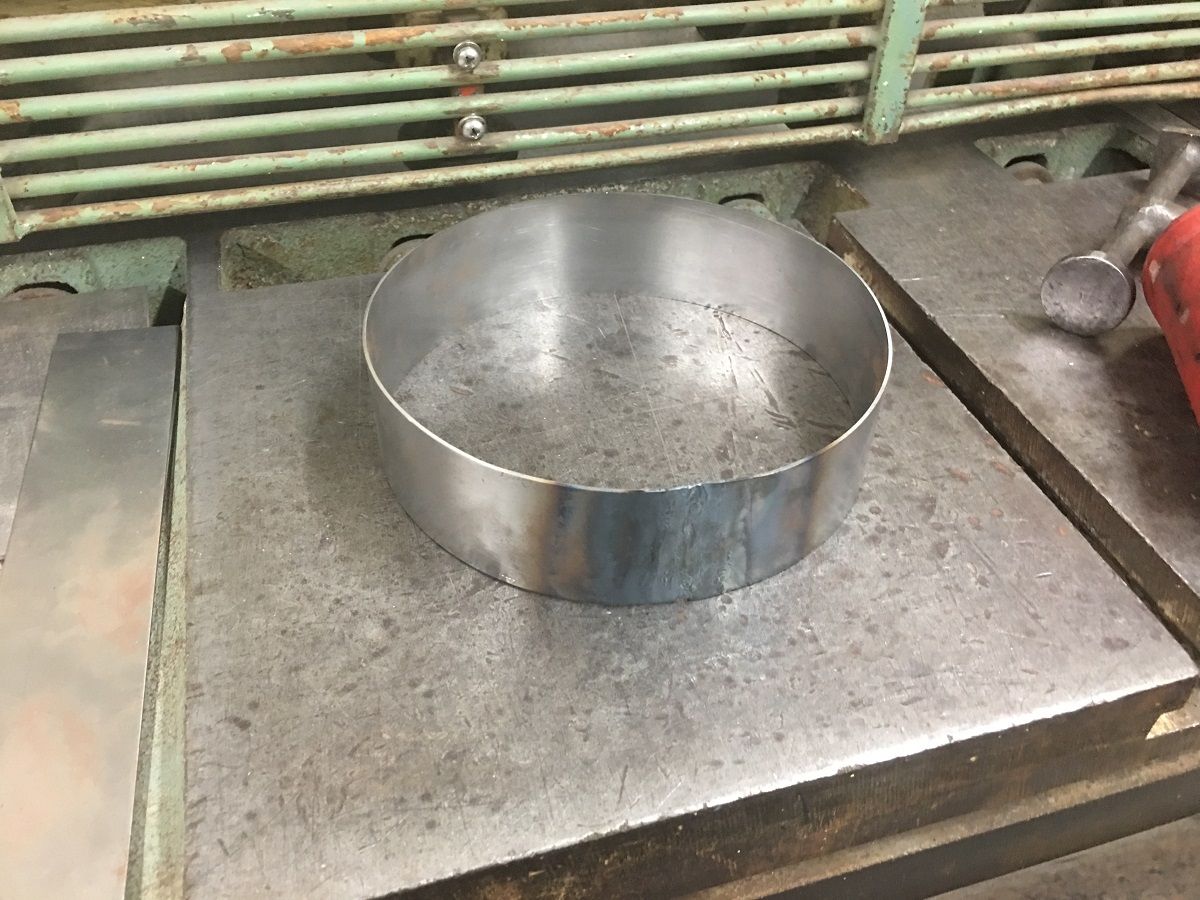
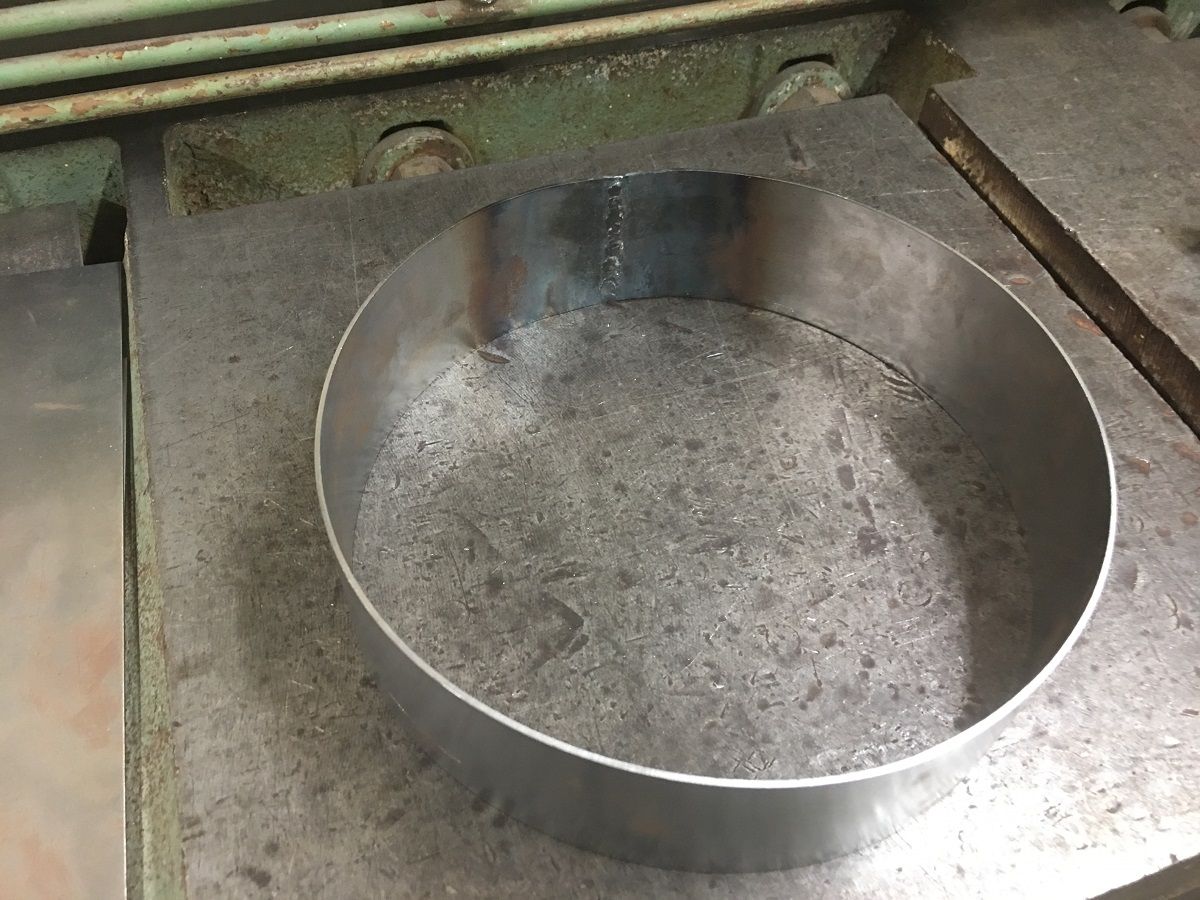
Then some flanges were tipped to form an adapter ring.. Stephen's first time using the Lennox..
https://www.youtube.com/watch?v=WolTnnoKfnM
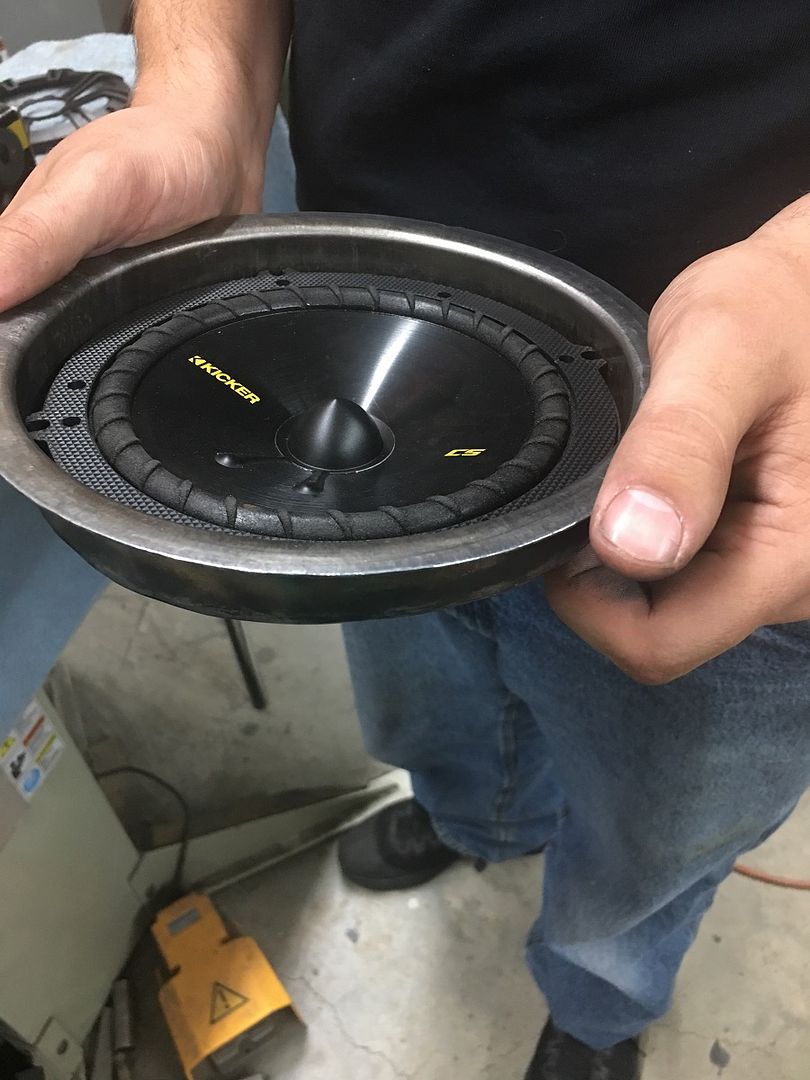
These will get welded into place...
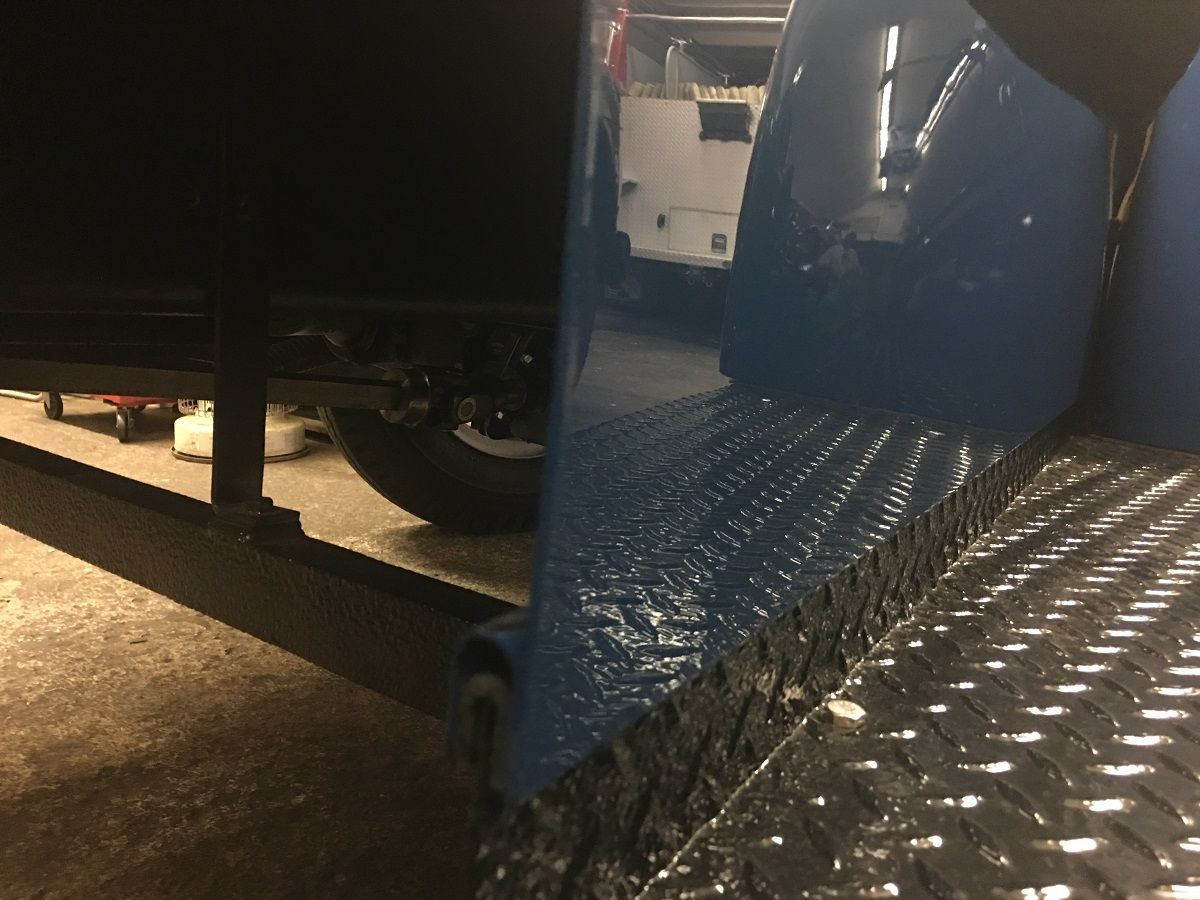
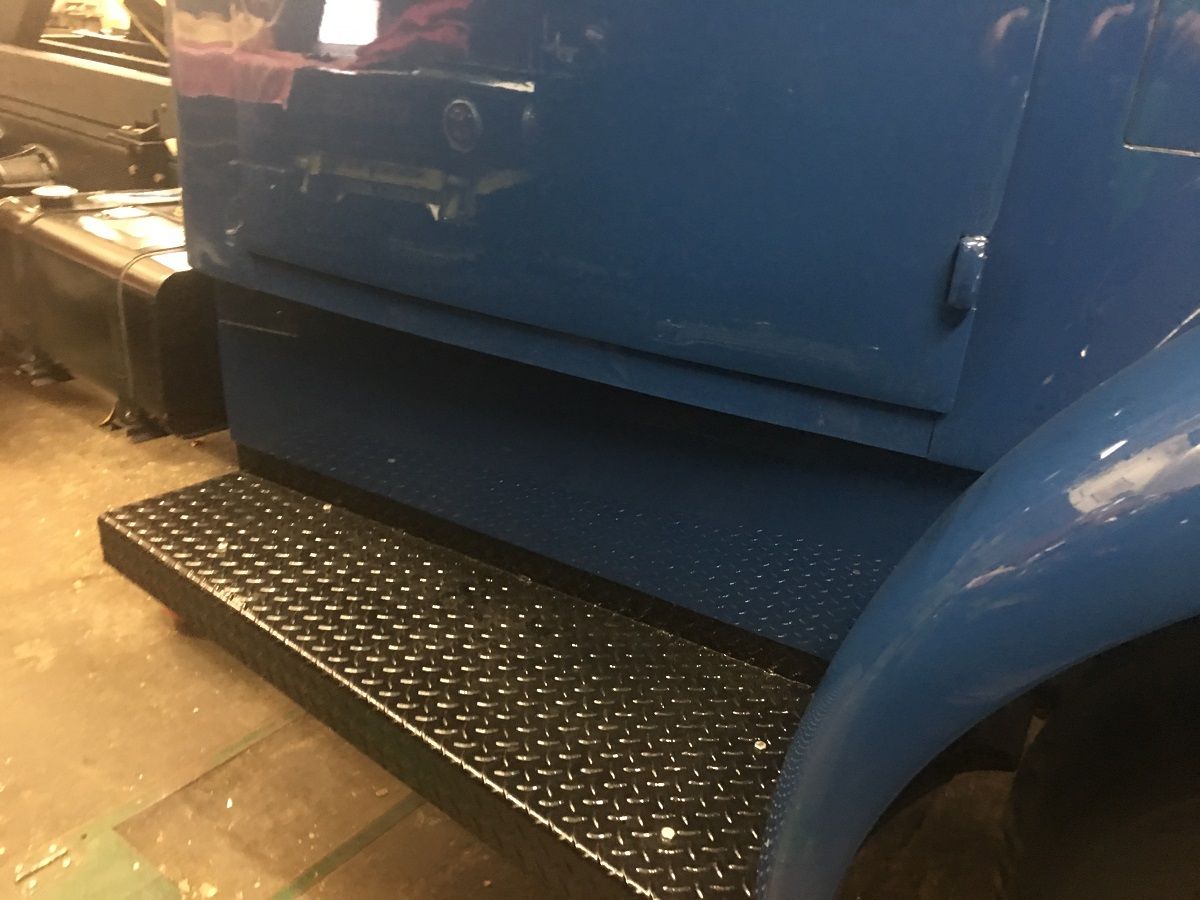
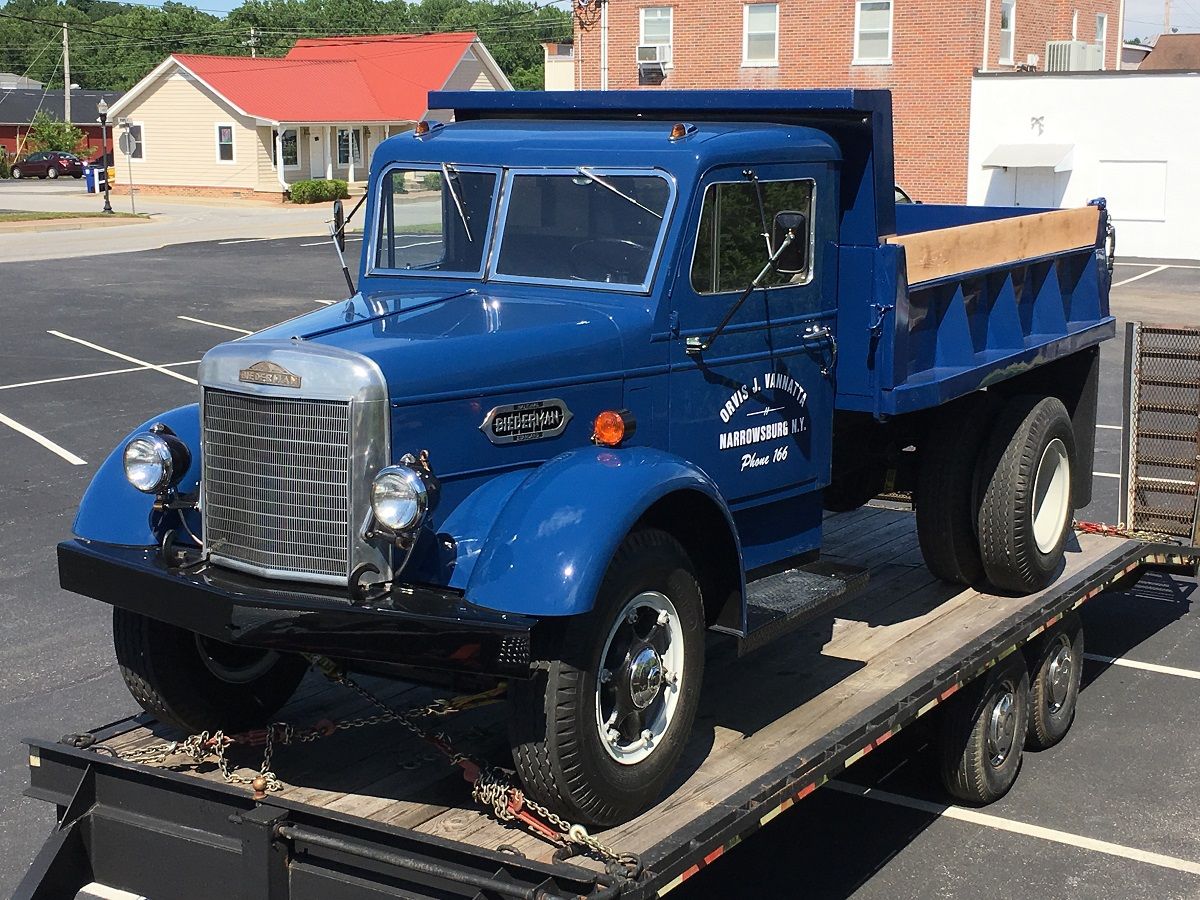
John is tying up the loose ends on the Biederman, the running board skirts were installed the other night.....
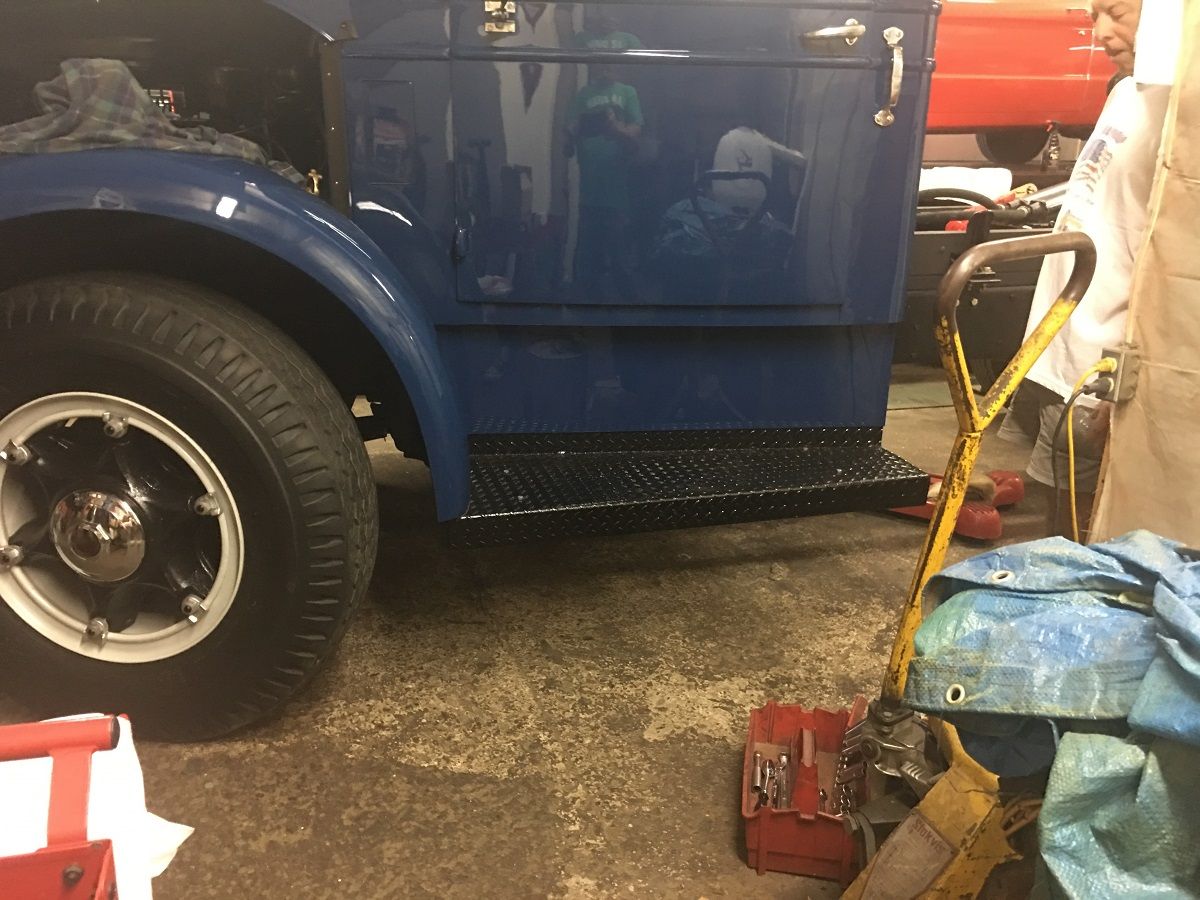
The dump body has been painted and he expects to get that installed tomorrow evening.
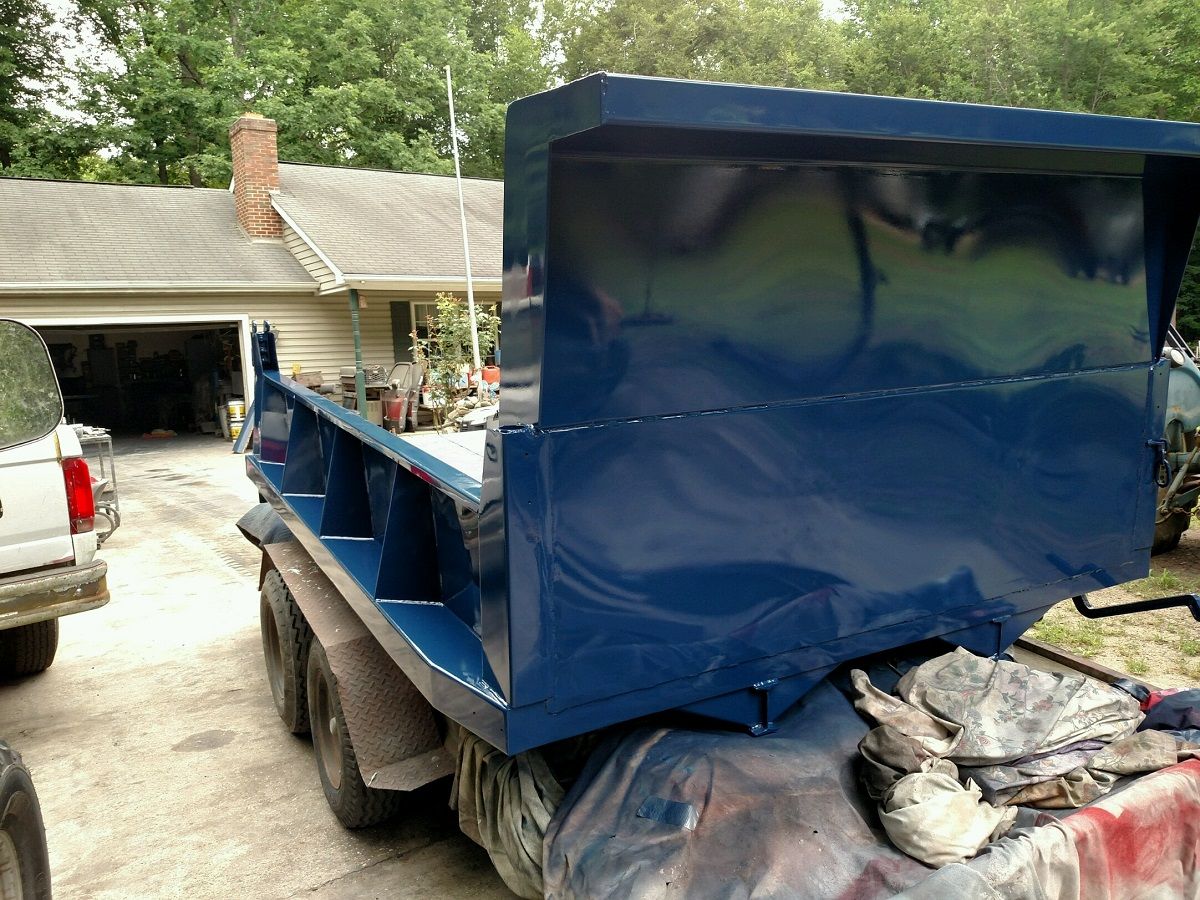
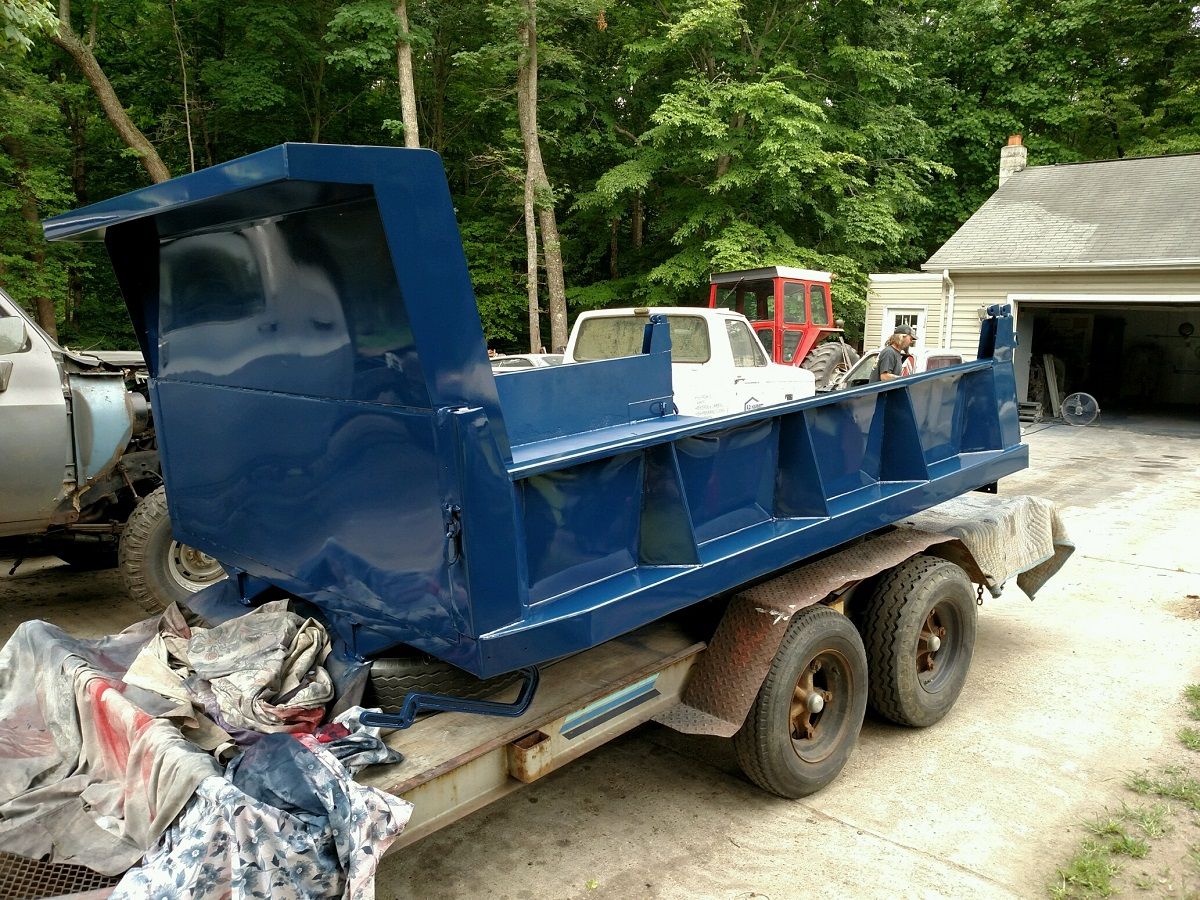
He will get it loaded up next week for the trip to Macungie PA for the truck show next weekend.Robert
-
06-13-2019 09:08 AM #1391
CHR Member
- Join Date
- Jun 2008
- Location
- Leonardtown
- Car Year, Make, Model: Walking
- Posts
- 1,228
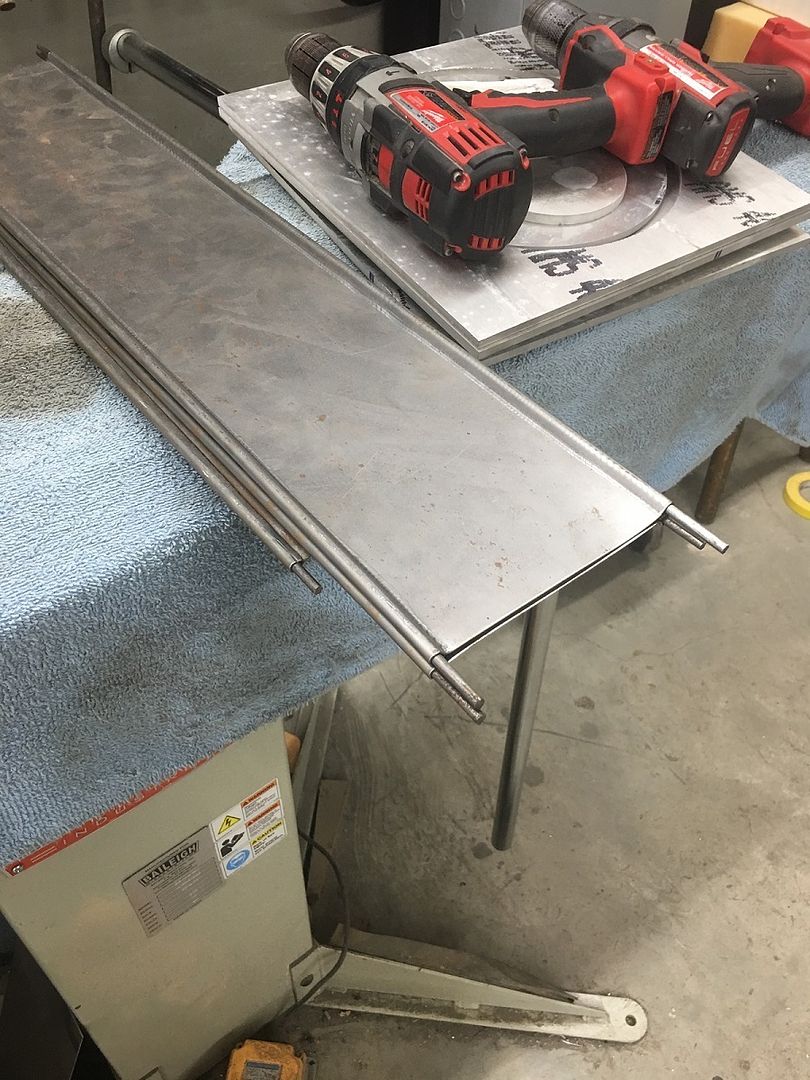
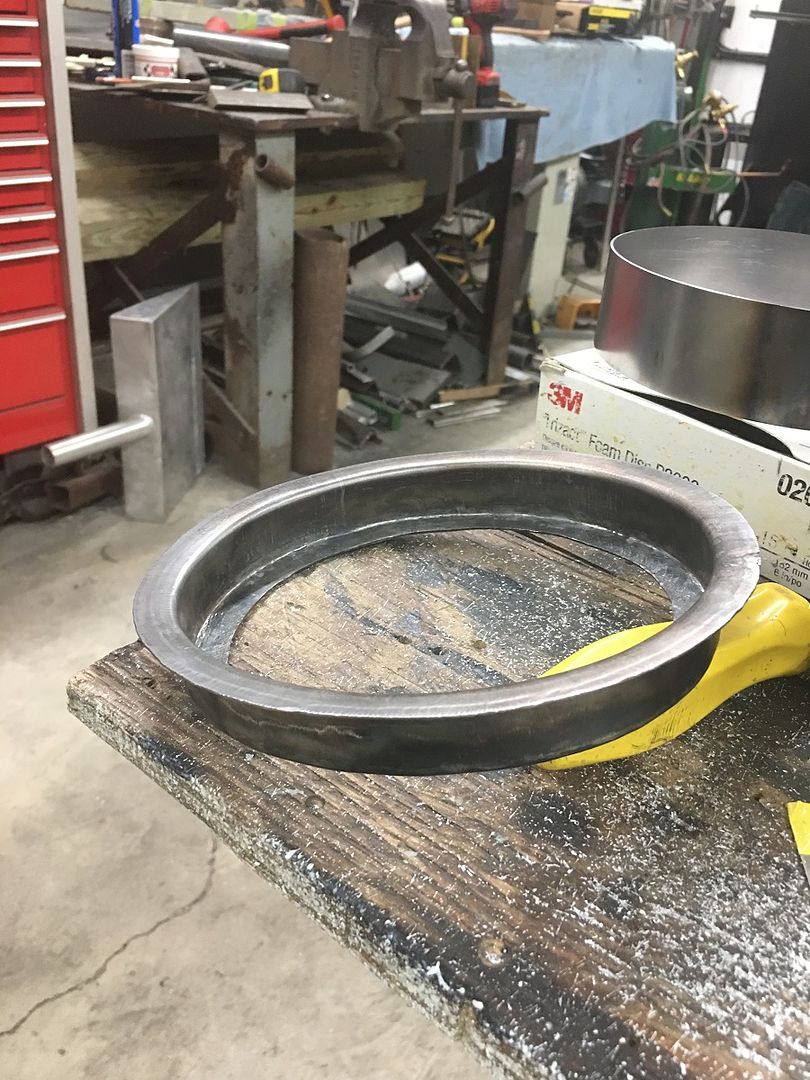
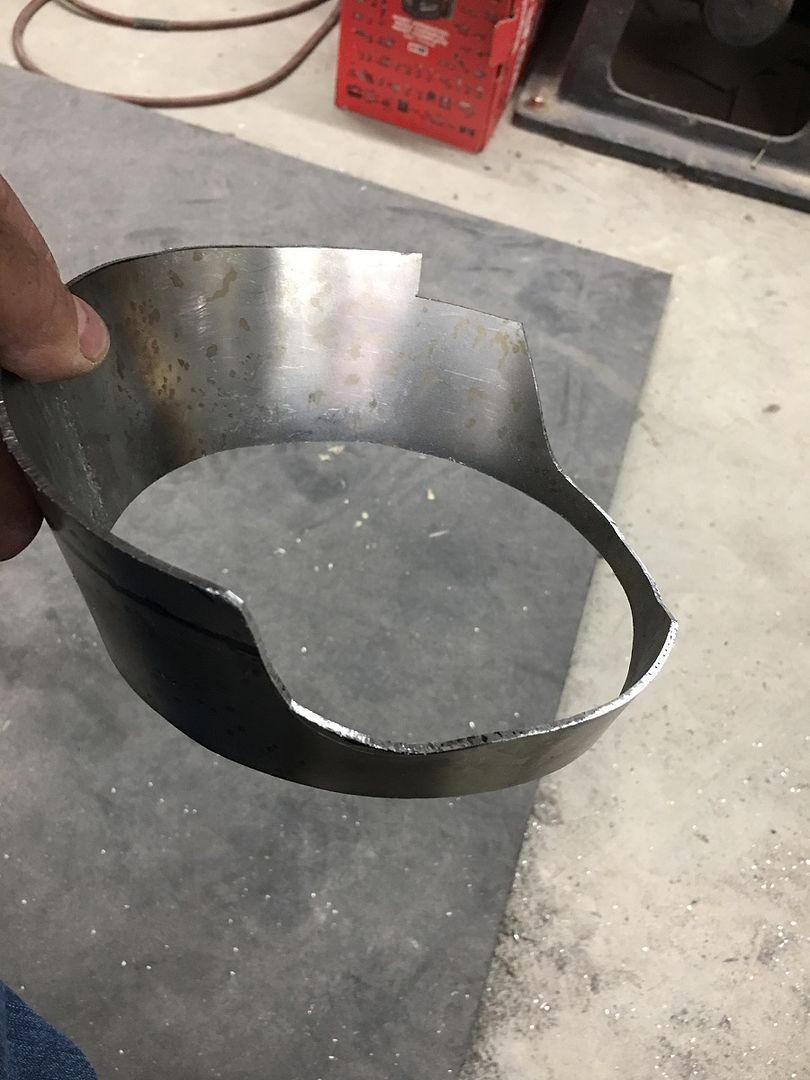
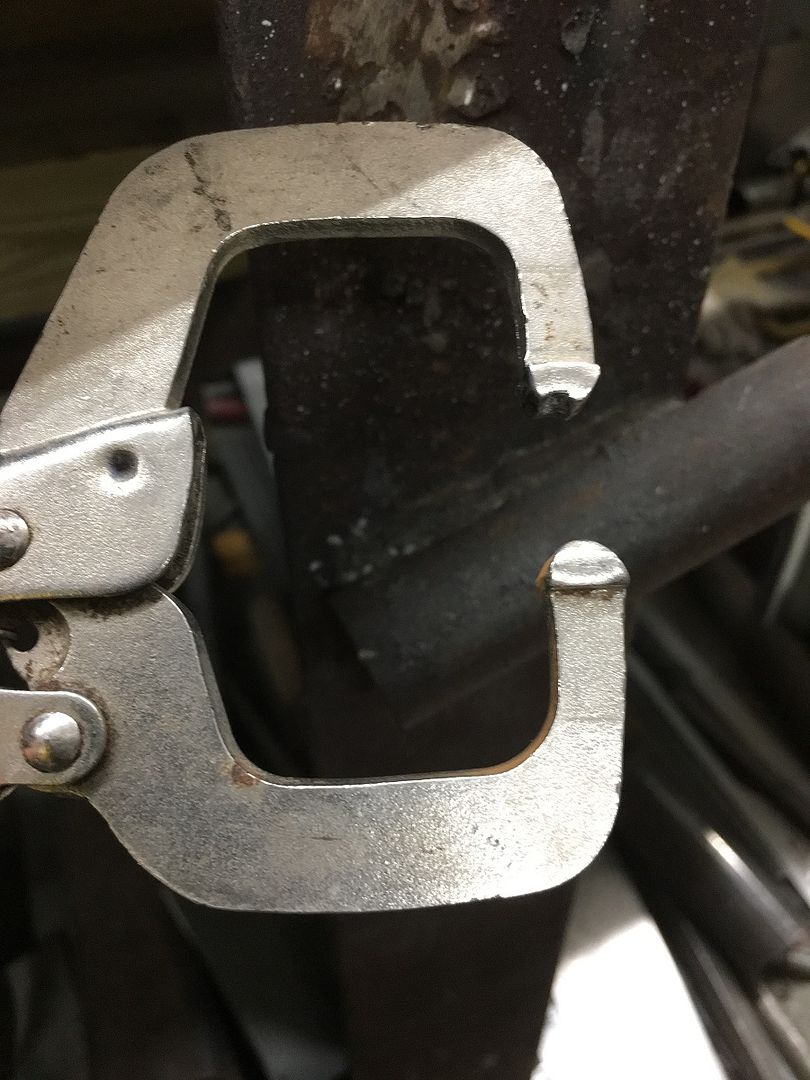
Had some questions about how the rings were formed, here's additional info. The outer ring is started on the Fasti-werks bead roller using the tipping die and the lower die we made last week.
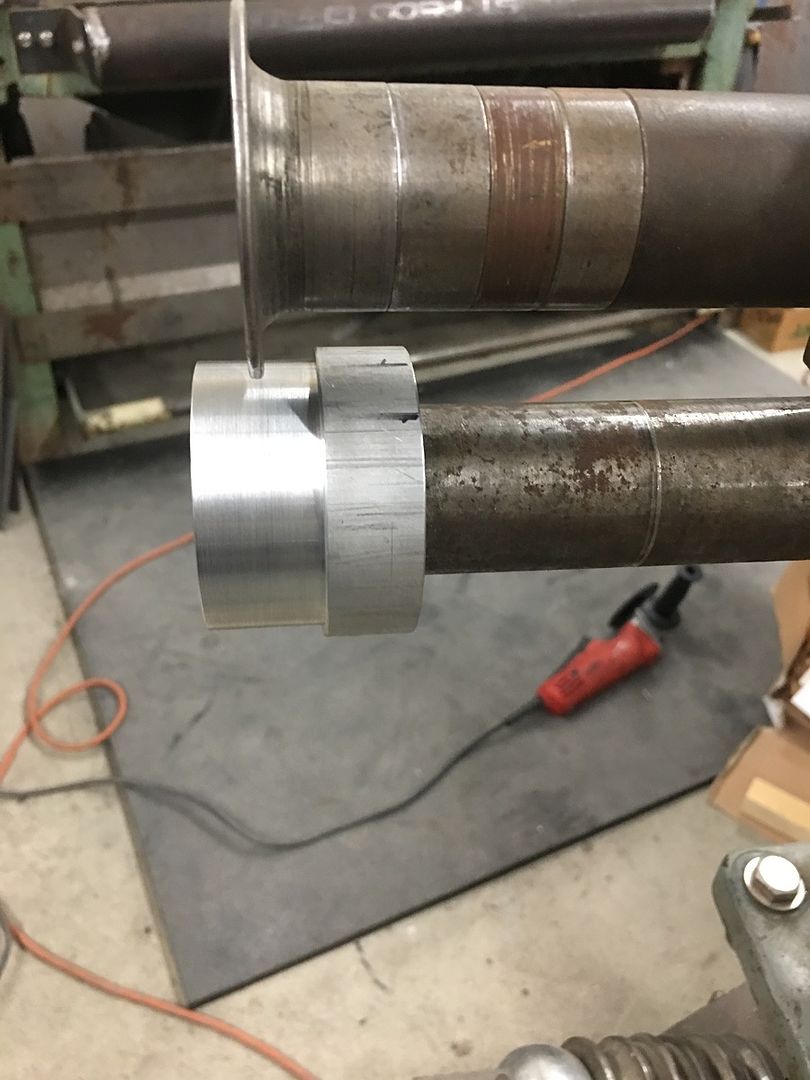
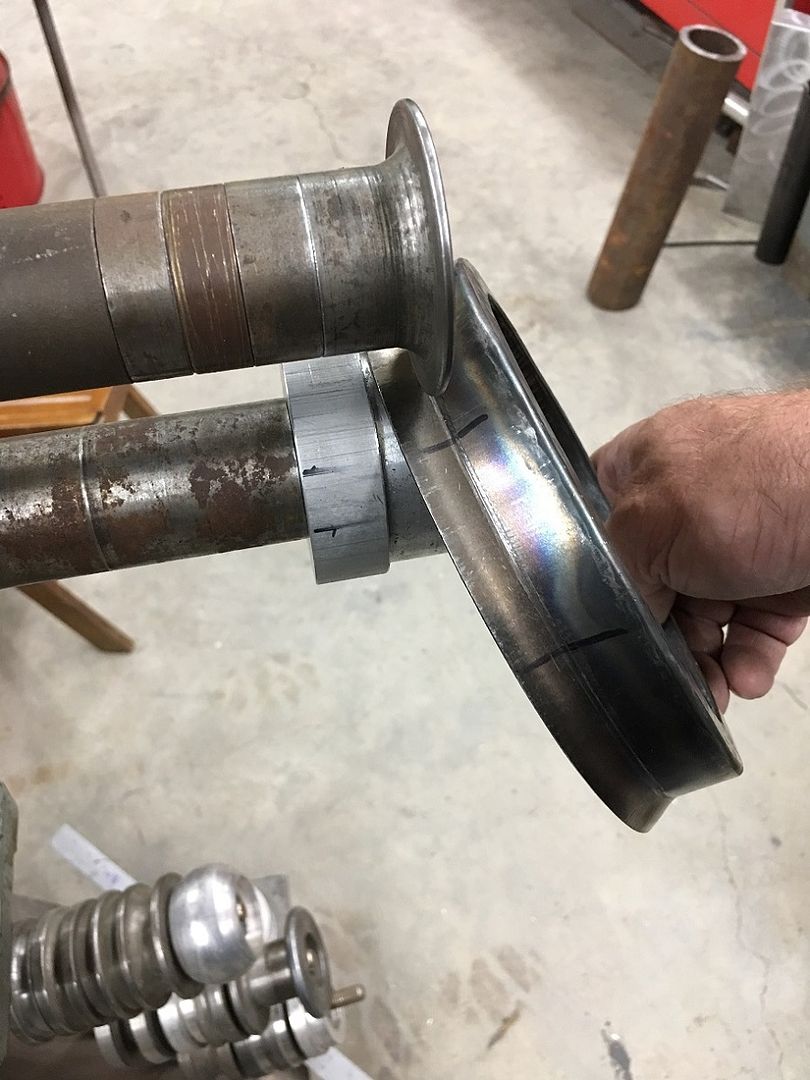
Once it started to resist the tipping (needs stretching of the flange) we changed to using the linear stretch dies in the Lennox TE250
https://www.youtube.com/watch?v=bX0gzPlqXEw
https://www.youtube.com/watch?v=ATRYXZ-I3CU
https://www.youtube.com/watch?v=9KRturFOdHA
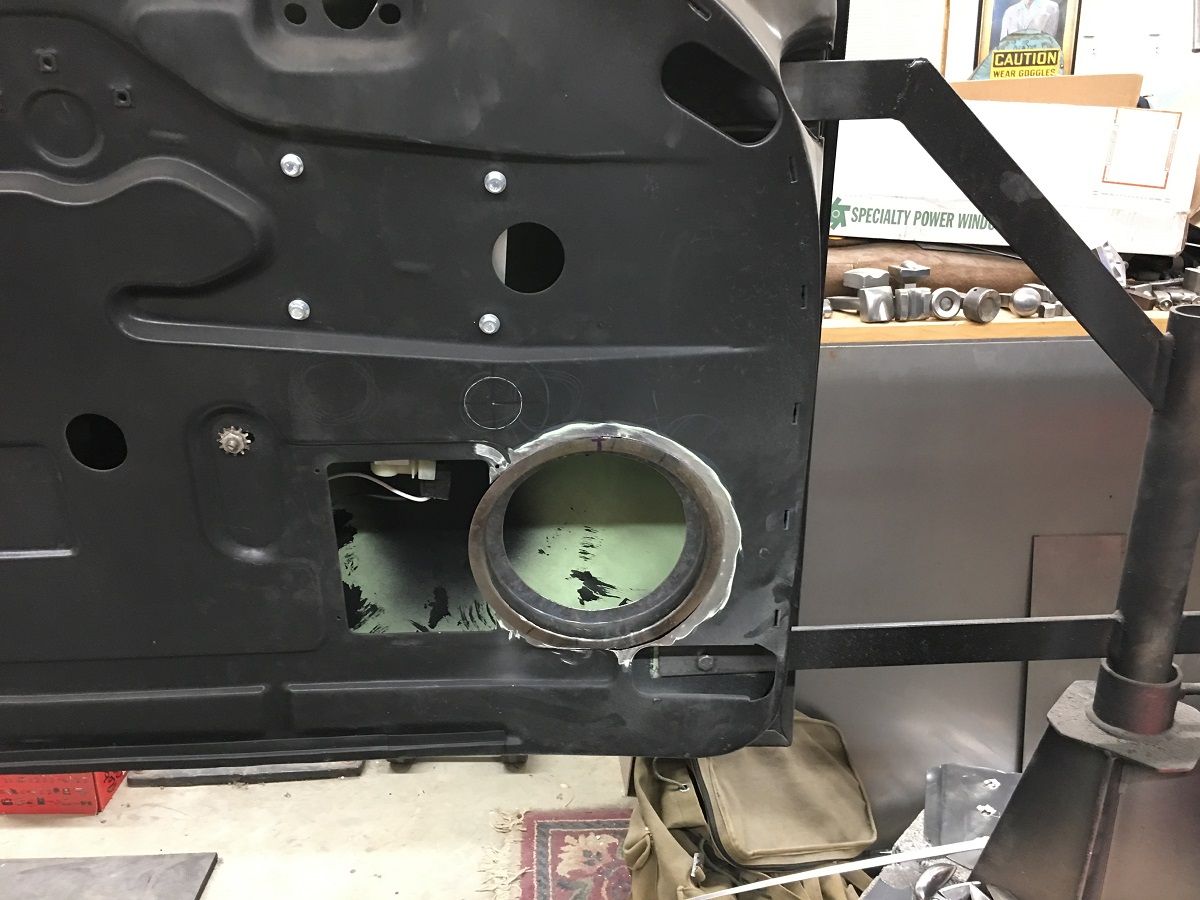
Originally we were looking at using the area below the power window motor, but in order to clear the power connector it would be too close to the bottom of the door...
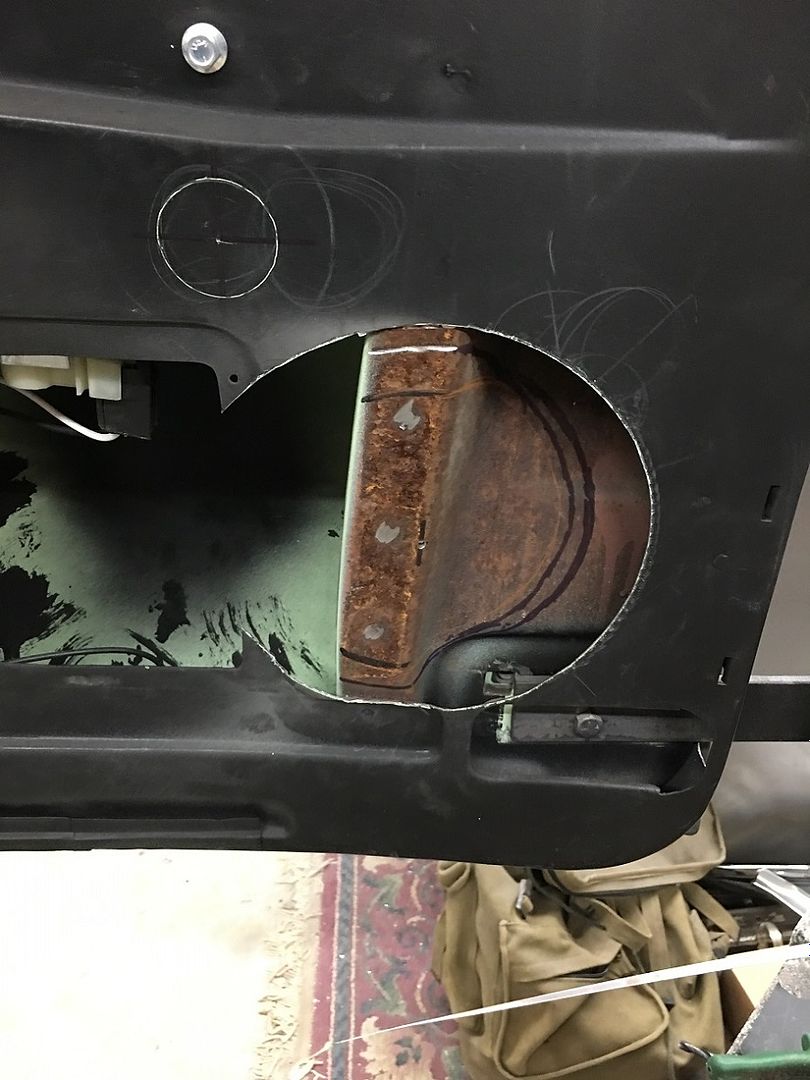
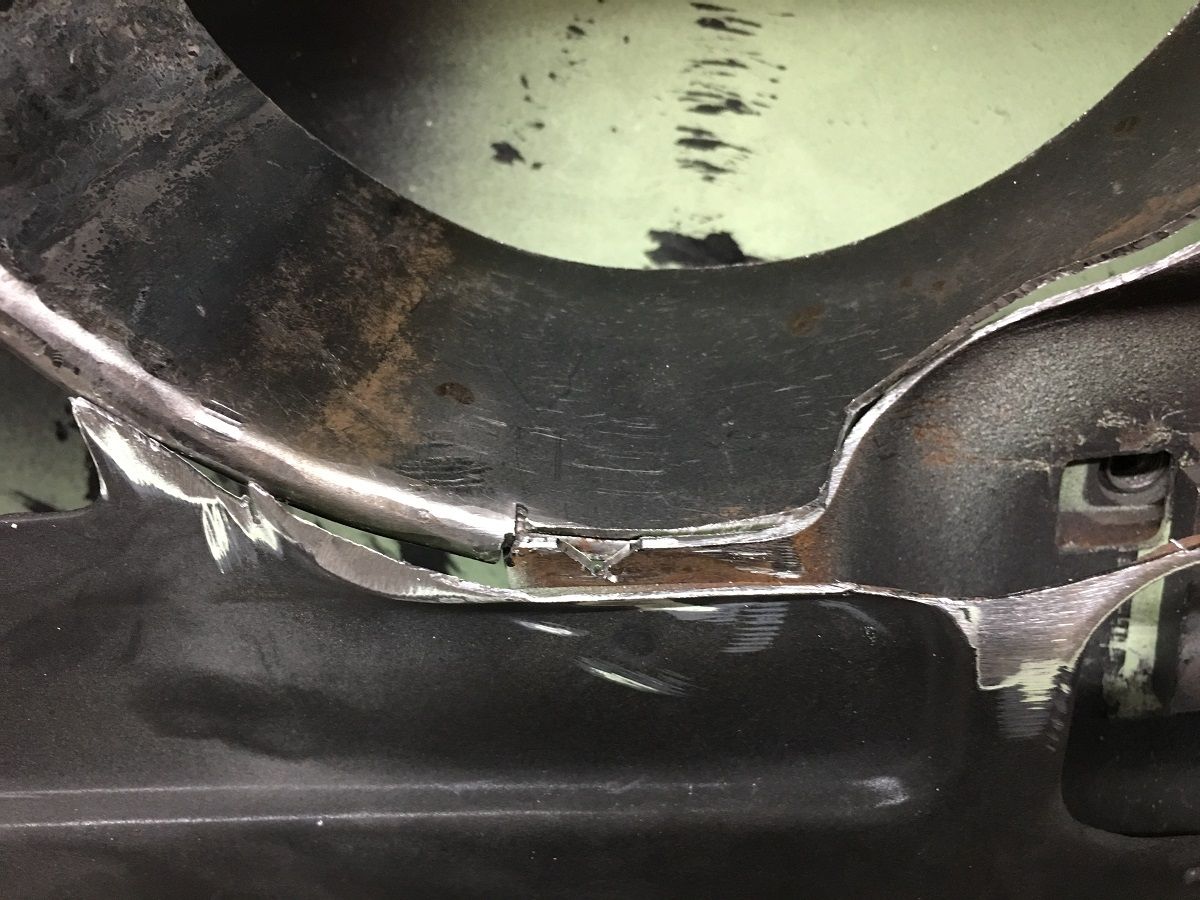
With not much else for room in the door, we opted to open a hole at the rear area of the inner hinge brace.
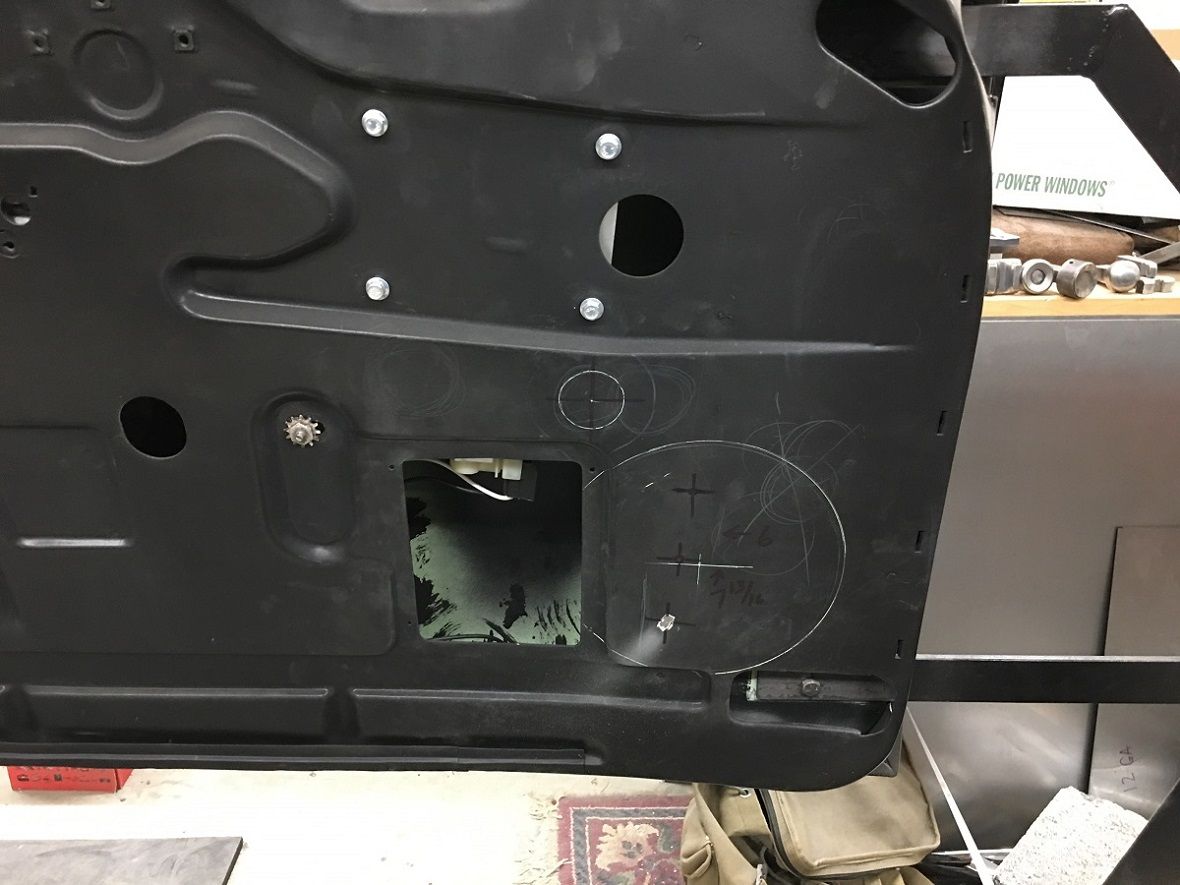
With space above for the tweeter, this will closely mimic what we have in the rear kick panels..
The rings will get TIG welded in place, but before that we'll add a bit of structure back in the hinge brace.
John has the Biederman loaded up and is headed up to Macungie PA today for the truck show this weekend.
This is the "tow" vehicle with Ian Watson, who is visiting from Melbourne Australia.
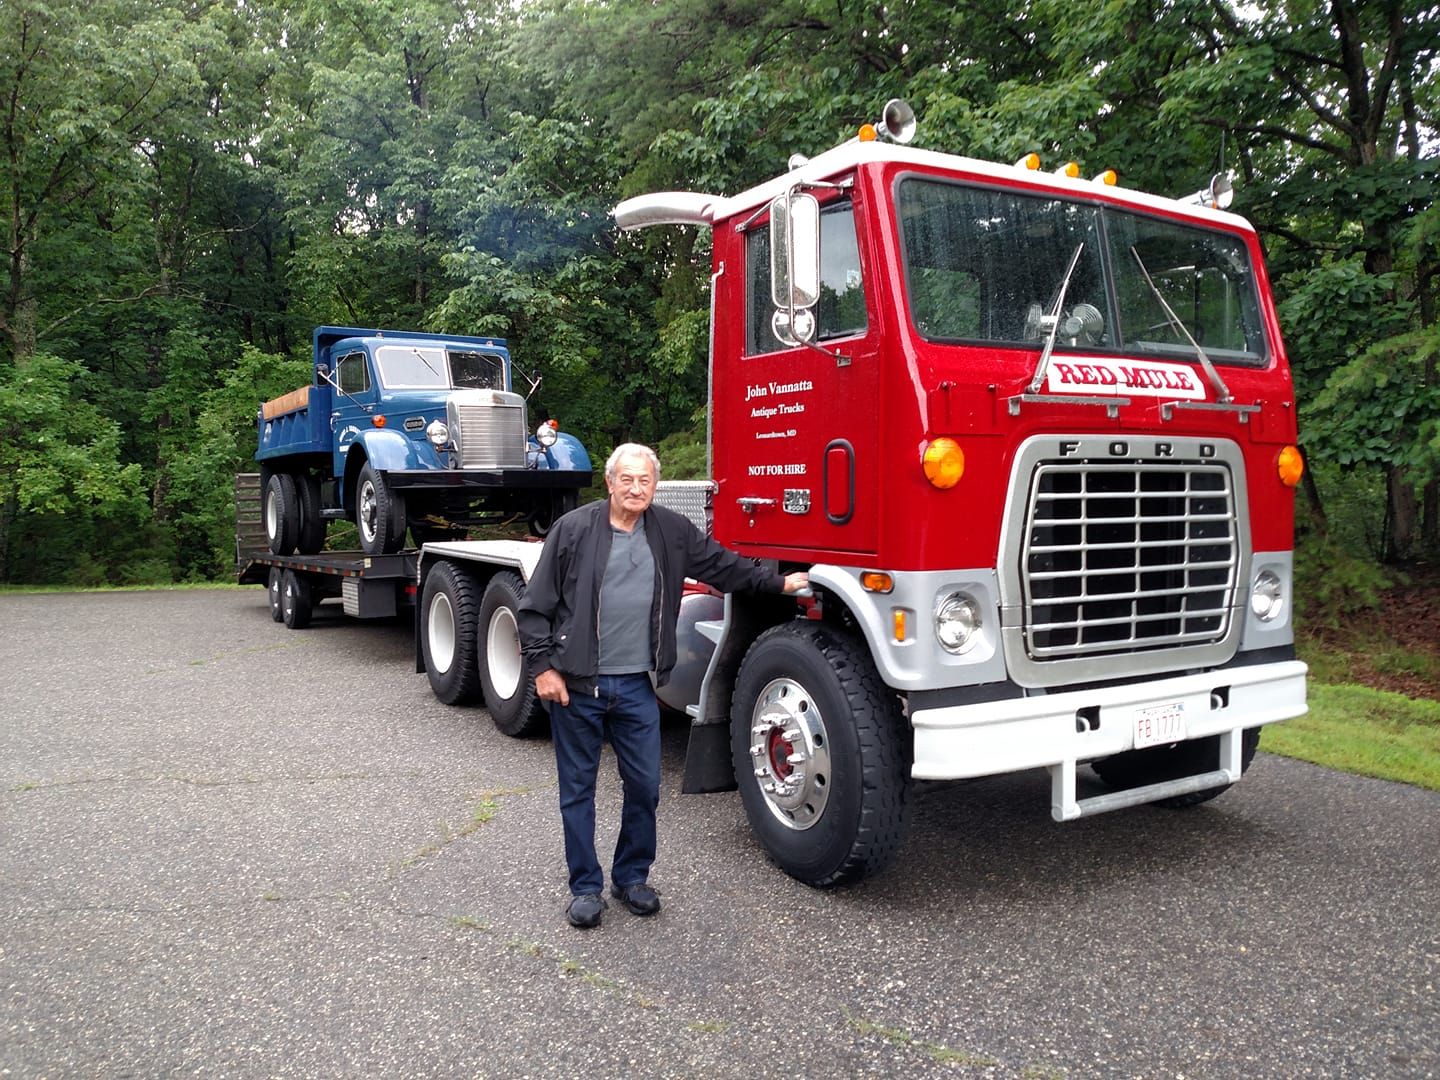
Anyone going to the Macungie show this weekend, stop by and check out the Biederman, a pretty rare truck..Robert
-
06-17-2019 06:34 AM #1392
CHR Member
- Join Date
- Jun 2008
- Location
- Leonardtown
- Car Year, Make, Model: Walking
- Posts
- 1,228
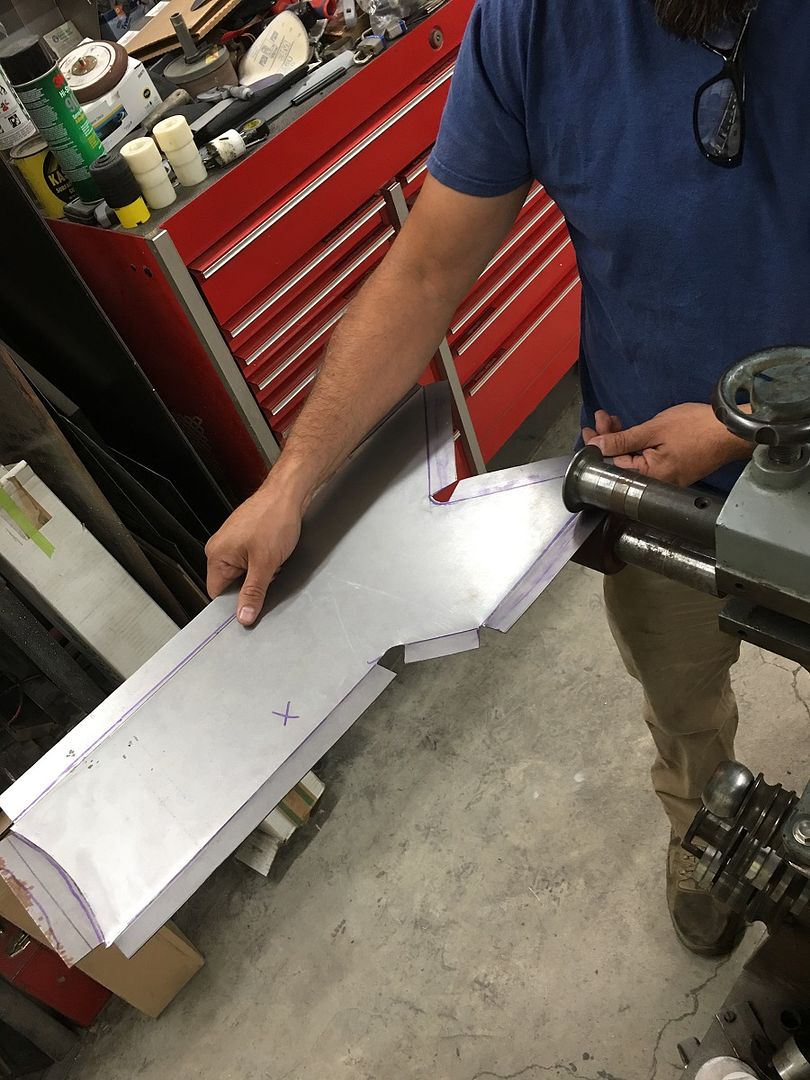
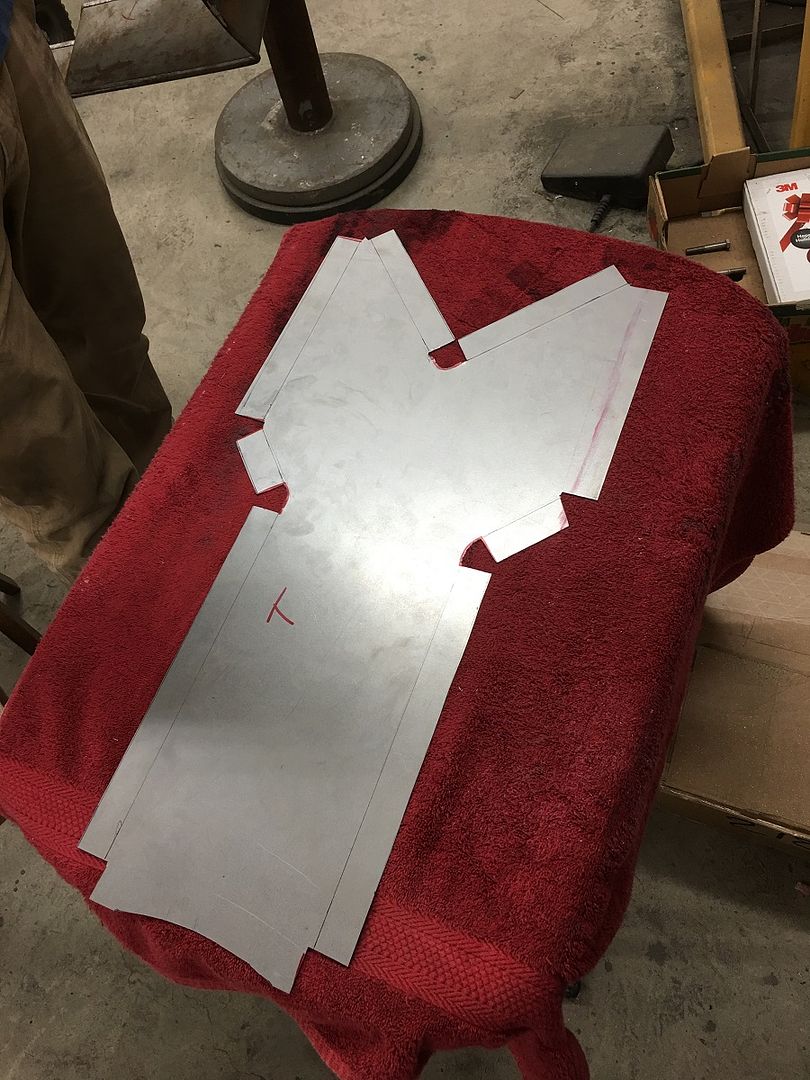
Mike is still plugging away on the Drummer's Lounge sign.
Saturday he started fabrication of the insert panels. One side will be plug welded in place, the other will be removeable to access the wiring for the flashing lights.
Tracing the first pattern onto some 19 ga crs, and adding mounting flanges.
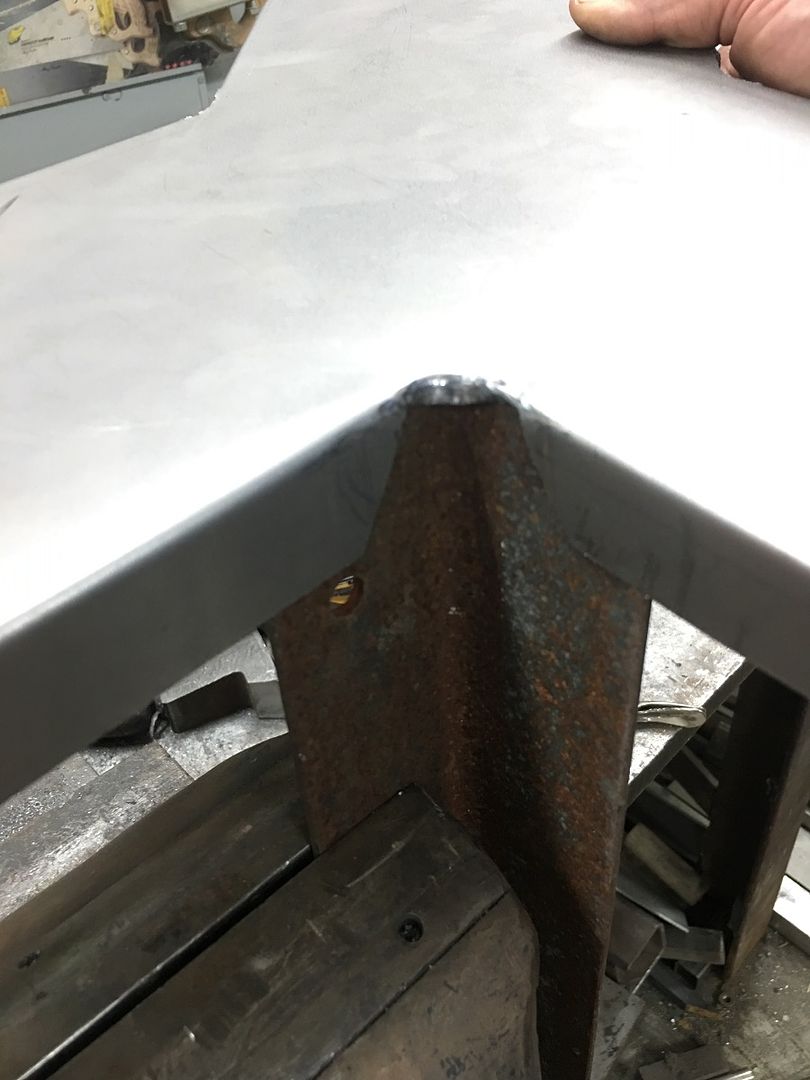
The bend lines are run through the bead roller with a tipping die into the skate board wheel to better mark the bend location. Makes it easier to locate the upper press brake die as it will fall into the indent.
Since everything is a tool, and we needed to fold down a bit of metal in the inside corner, a piece of angle is chosen for it's inside radius match and a body hammer with a nice barrel roll on it does the trick...

Side #2....
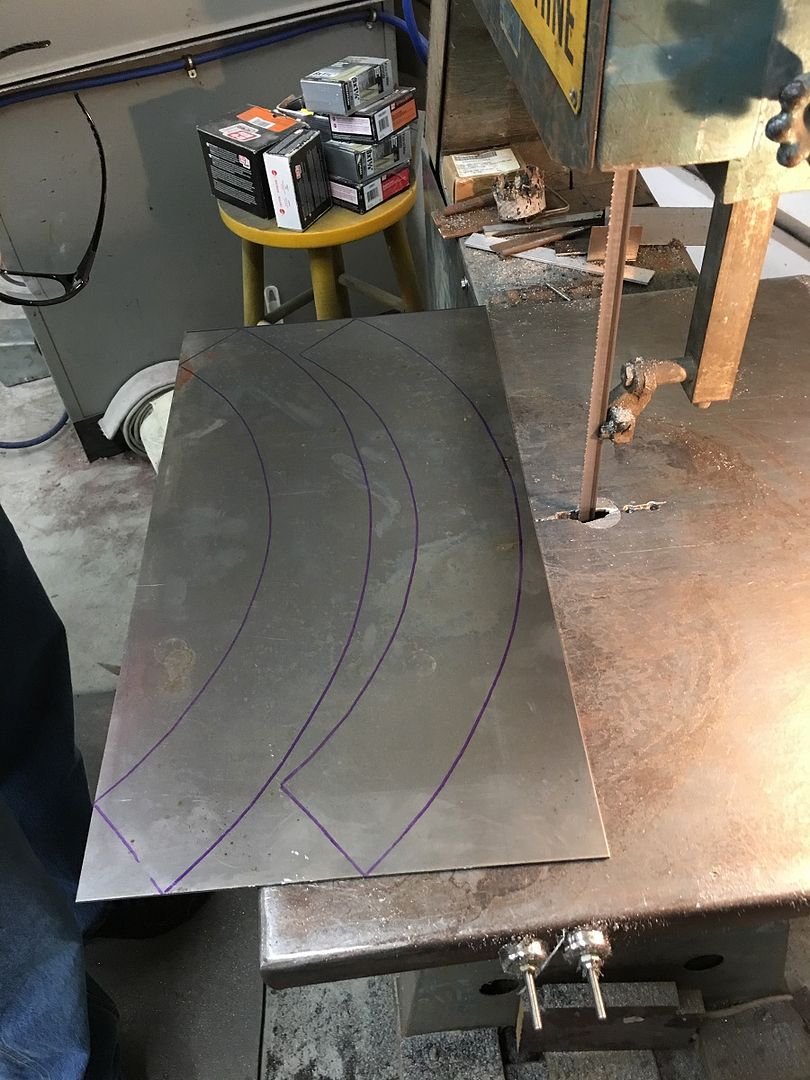
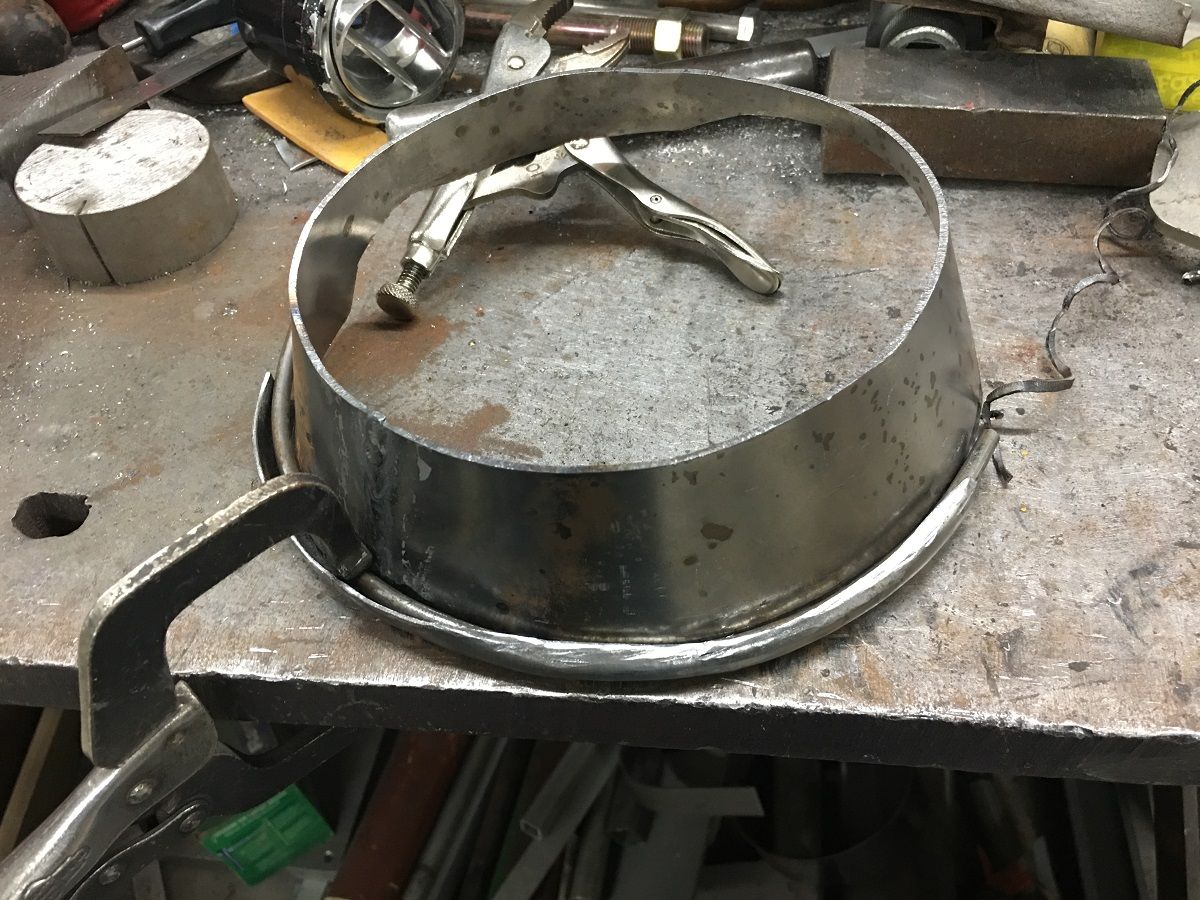
While he was busy with that, I continued on our speaker mount modification to the doors. Since we had cut away at the hinge mounting structure, we needed to add strength back in that surrounded the speaker. We chose a cone shape over cylindrical as we thought that would have less chance of collapse under stress. Our pattern is cut out and transferred to some 14 gauge cold rolled, the same thickness as the hinge structure.

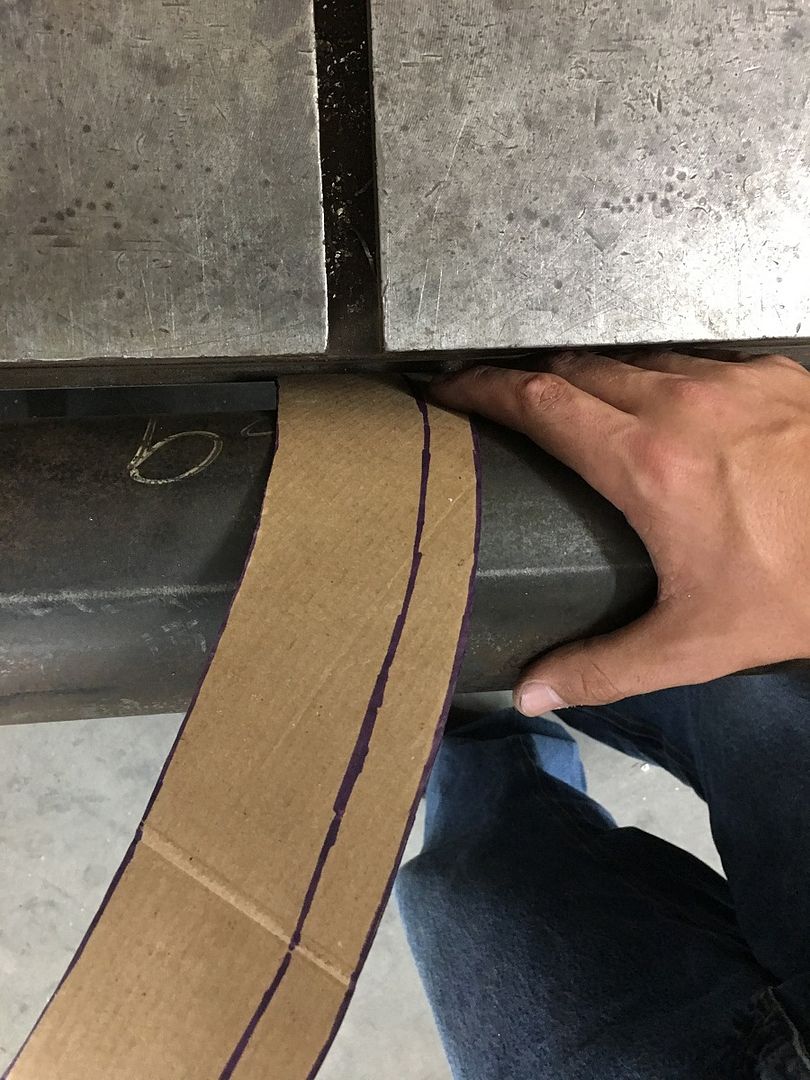
I forgot to get pictures of us rolling the cones, but basically as shown here with the pattern, the bend line was kept aligned with the vertex of the outer angle cuts, and slightly pressed, move and repeat, and continued until we have a good roll where the ends met up.
We plan on wire edge on the edge inside the square opening, so let's use gas welding for a more pliable weld area.
https://www.youtube.com/watch?v=hEWXNOFgSas
The cone is then trimmed to fit the structure profile...
Flange is left for our wire edging of the open area...

The flange is tipped on the bead roller and then used the linear stretch dies in the Lennox to both stretch and tip the flange over to flat.
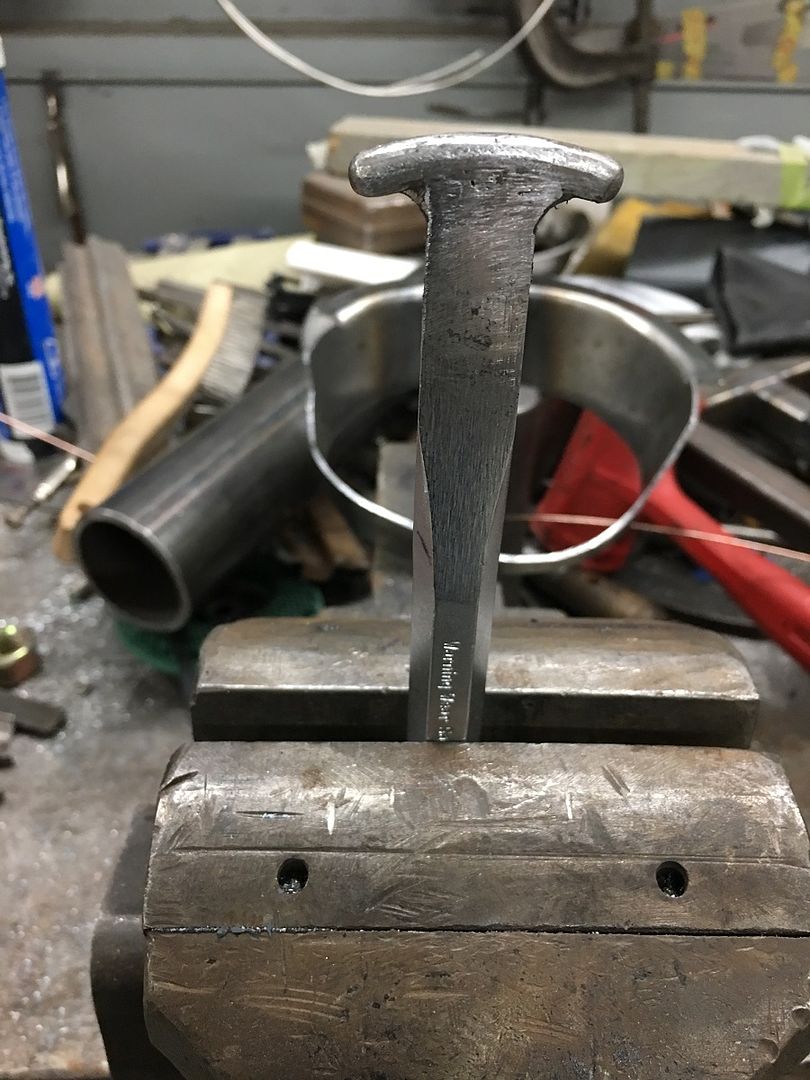
Then we use this modified Craftsman punch to hammer over a rounded void for the 3/16 wire to lay in..
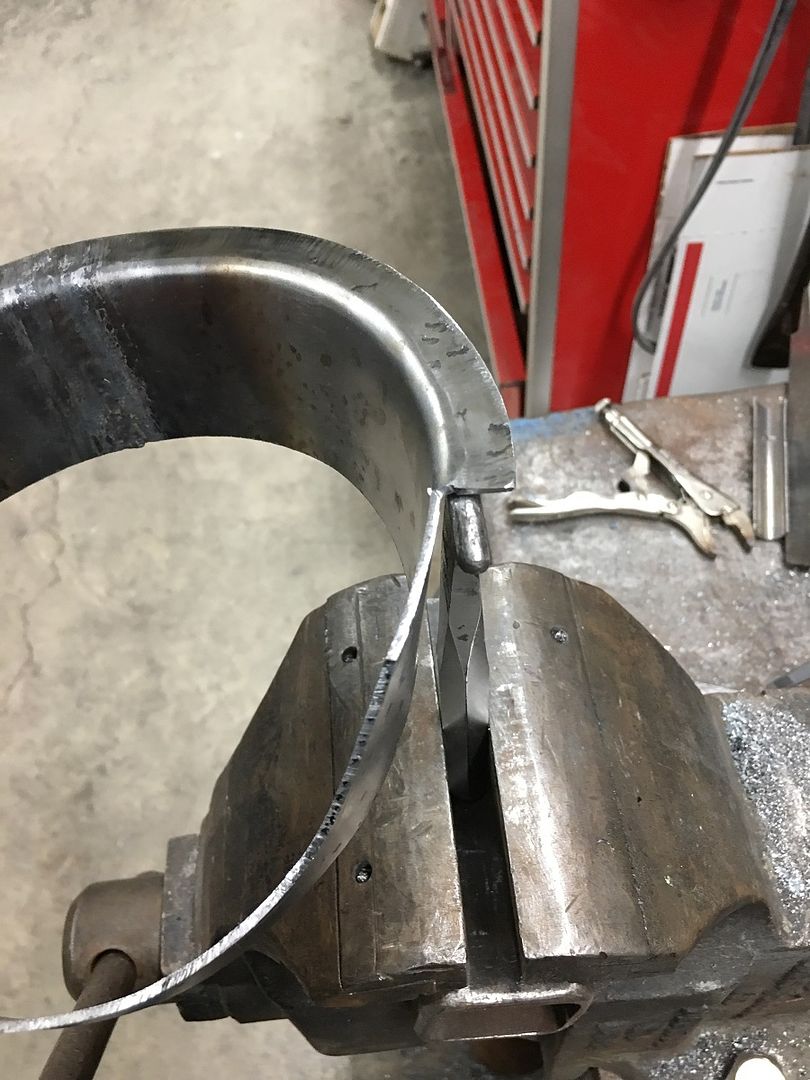
Then we have some modified vise grips that have a relief cut into the top so it won't slip off the wire when clamped.
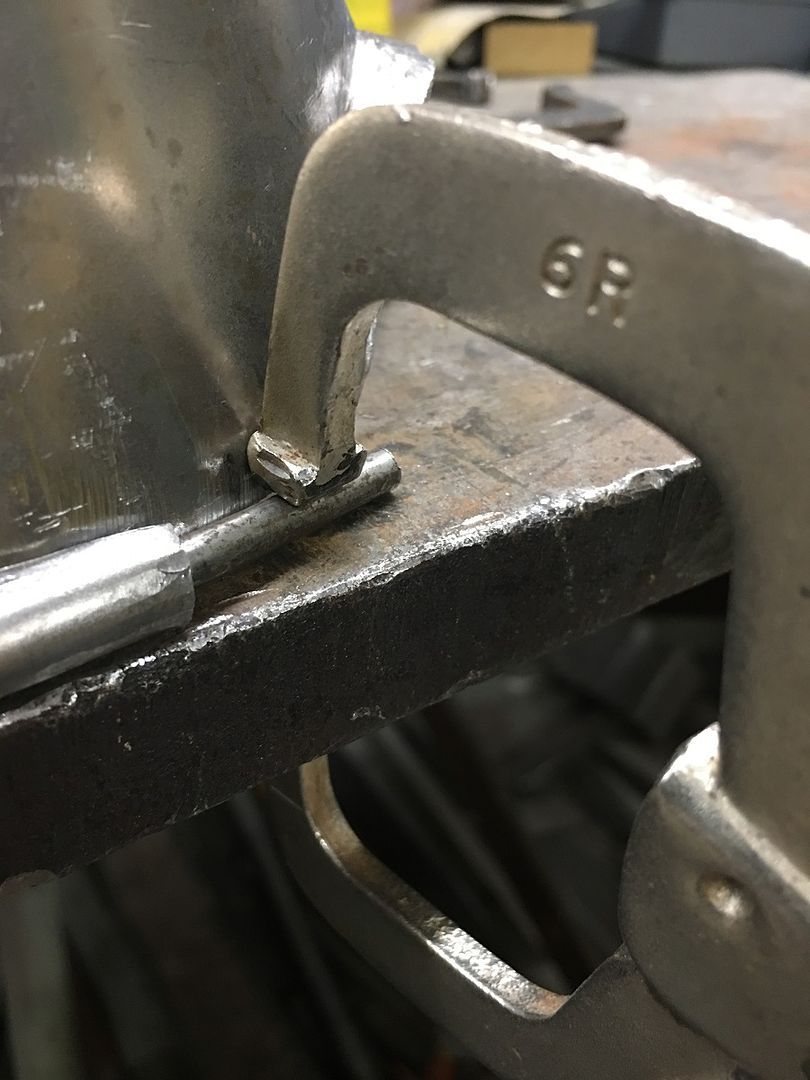
The wires were left long so they could better tie into the hinge structure, here the VEE relief is where the wire will weld to that structure.
https://www.youtube.com/watch?v=mEVDpRCER54
Tacked in place with the MIG, then TIG welded....
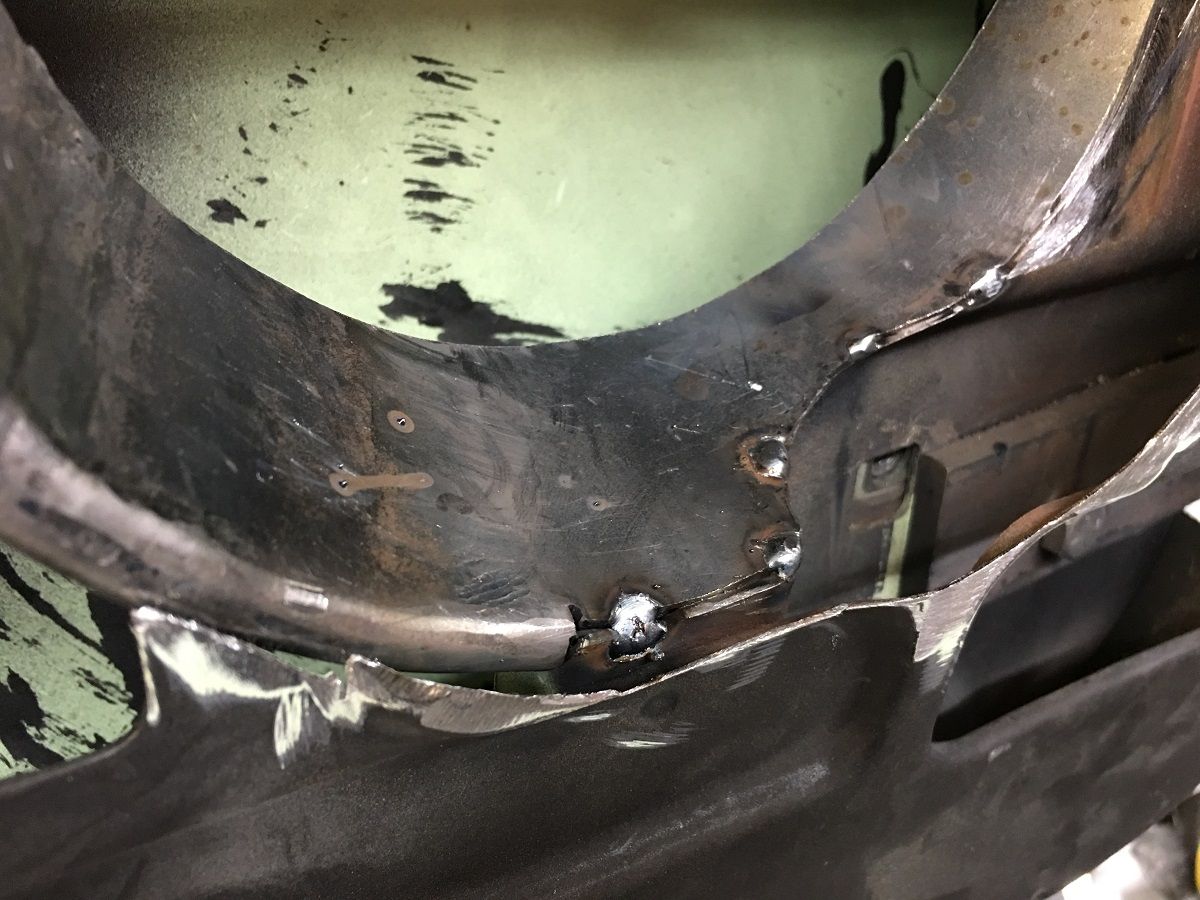
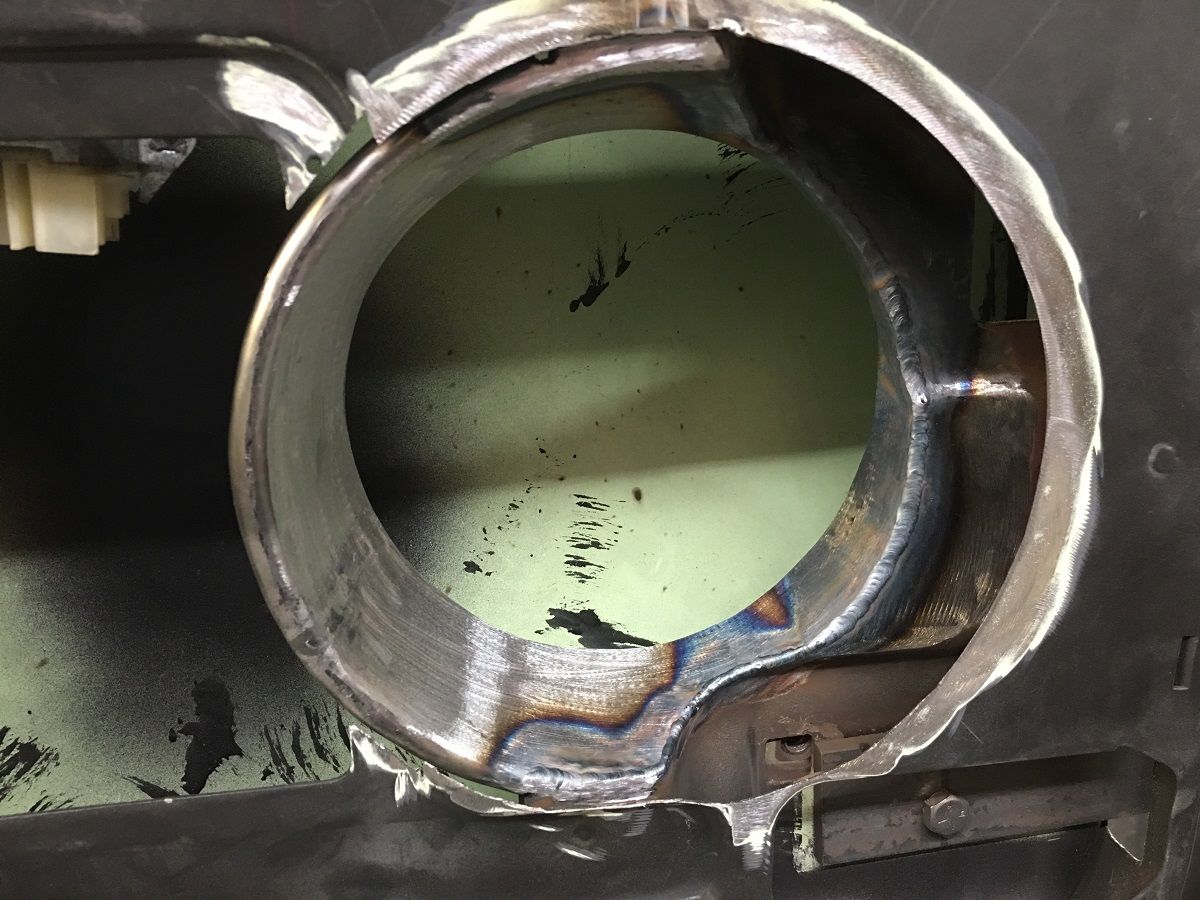
All cleaned up and then primed with some epoxy primer before we weld the speaker mounting ring in place.
Robert
-
06-18-2019 07:38 PM #1393
CHR Member
- Join Date
- Jun 2008
- Location
- Leonardtown
- Car Year, Make, Model: Walking
- Posts
- 1,228
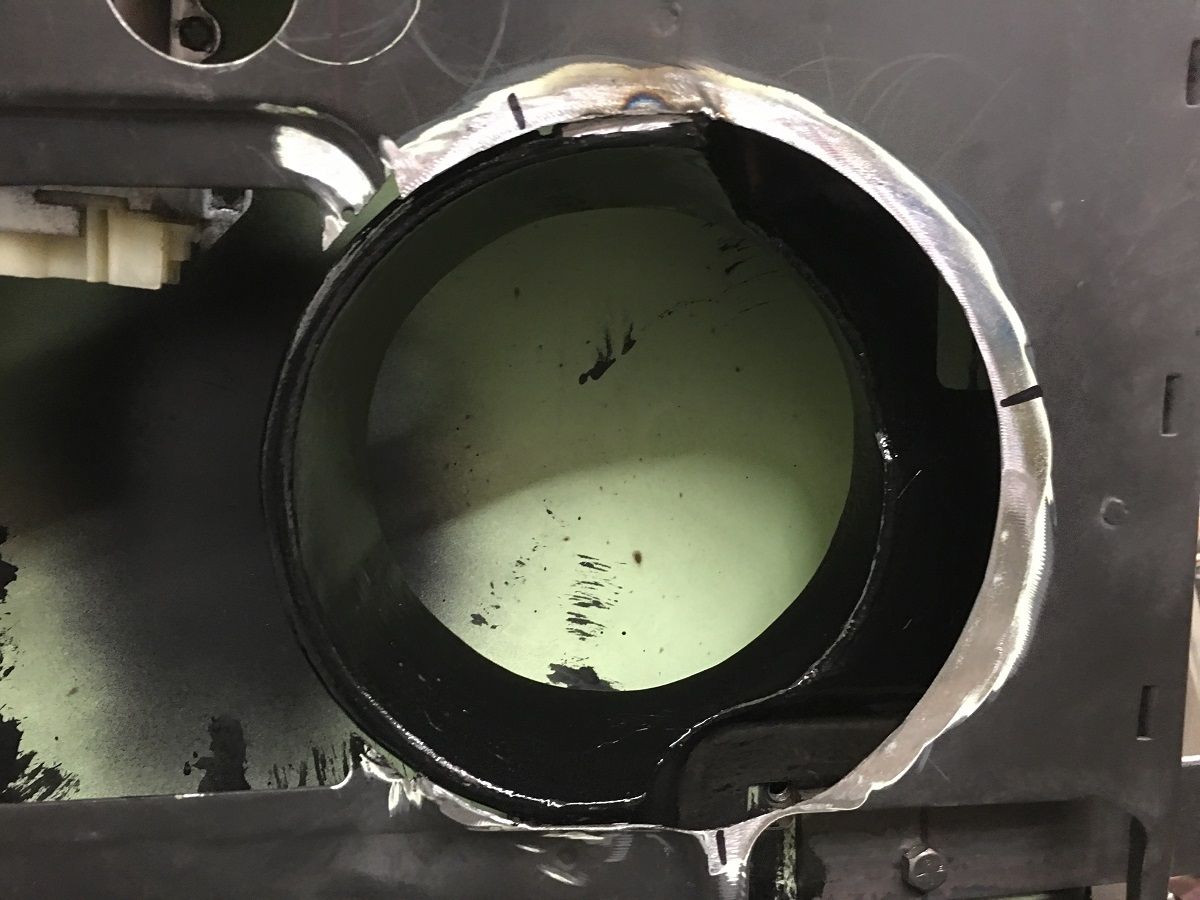
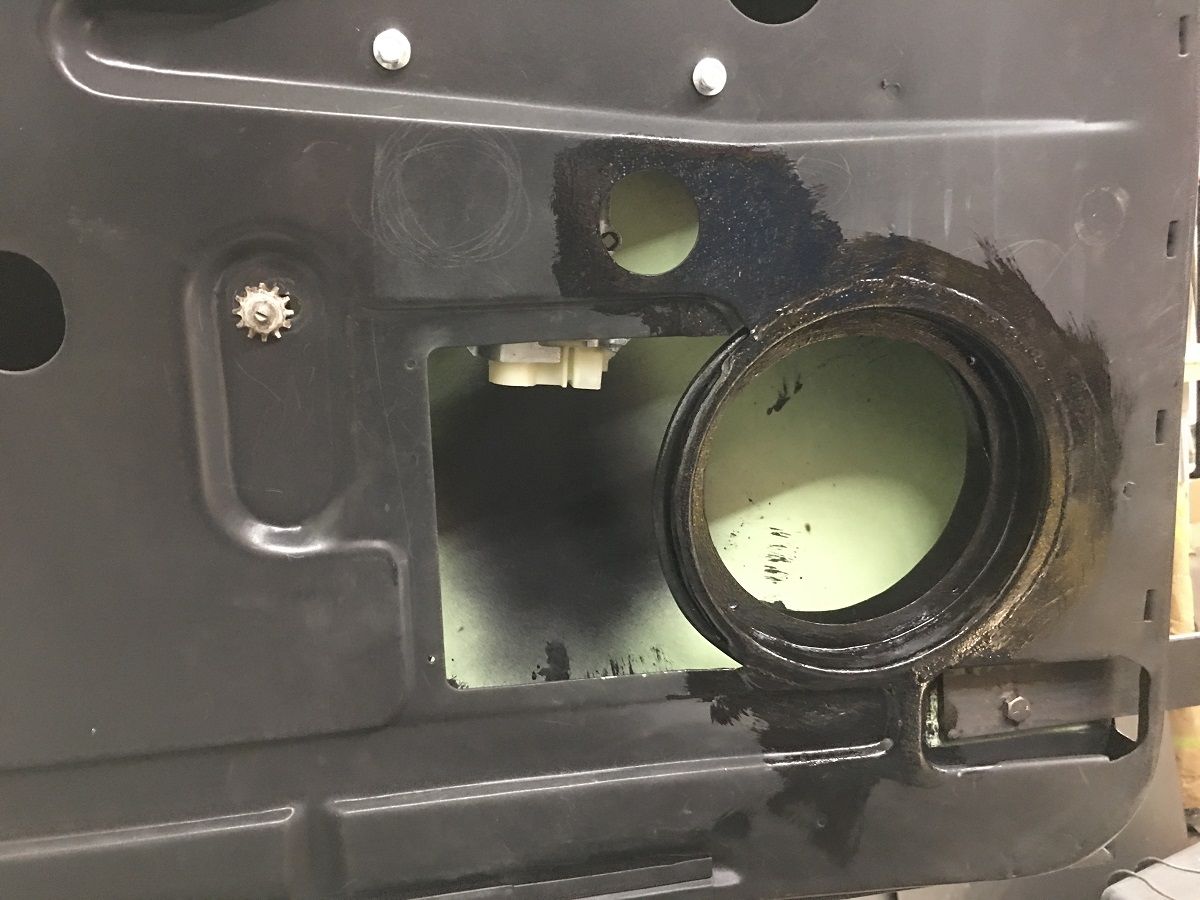
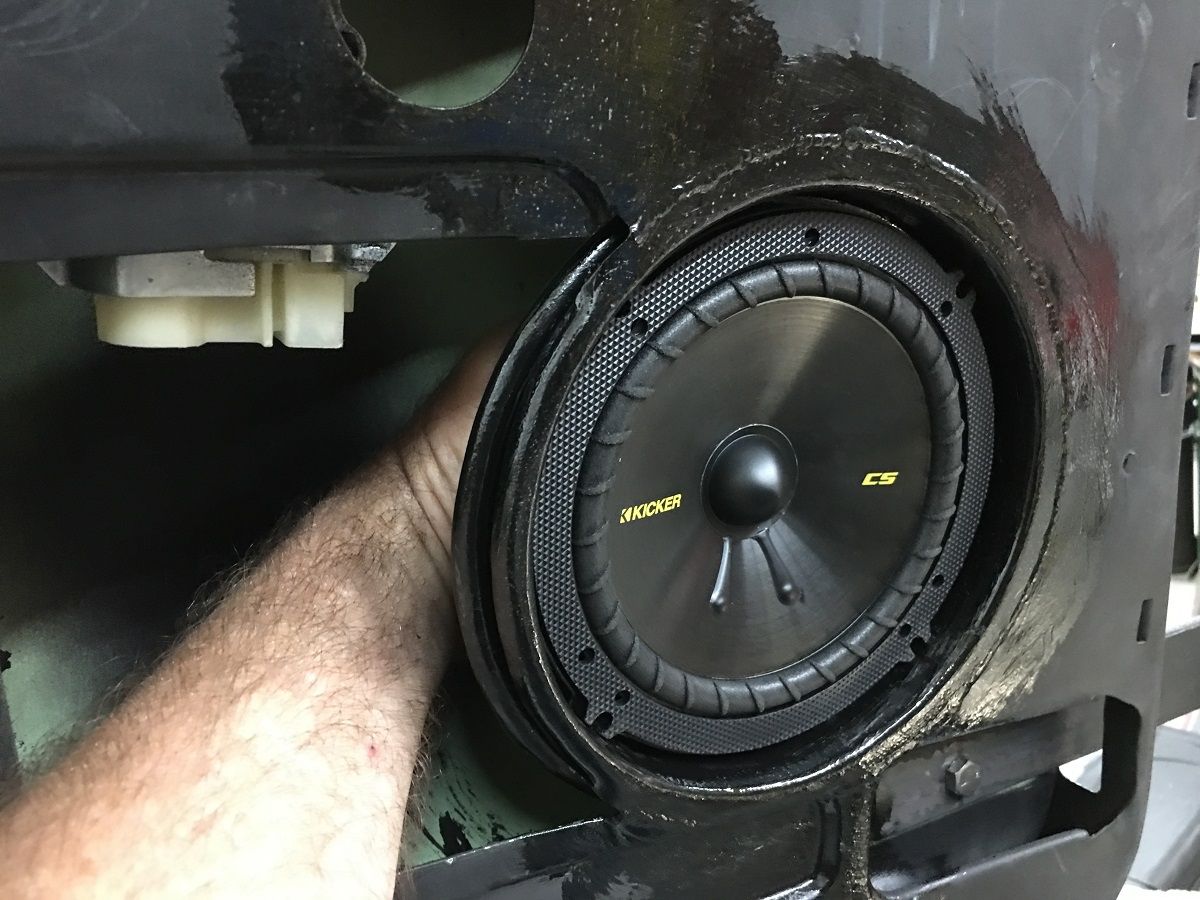
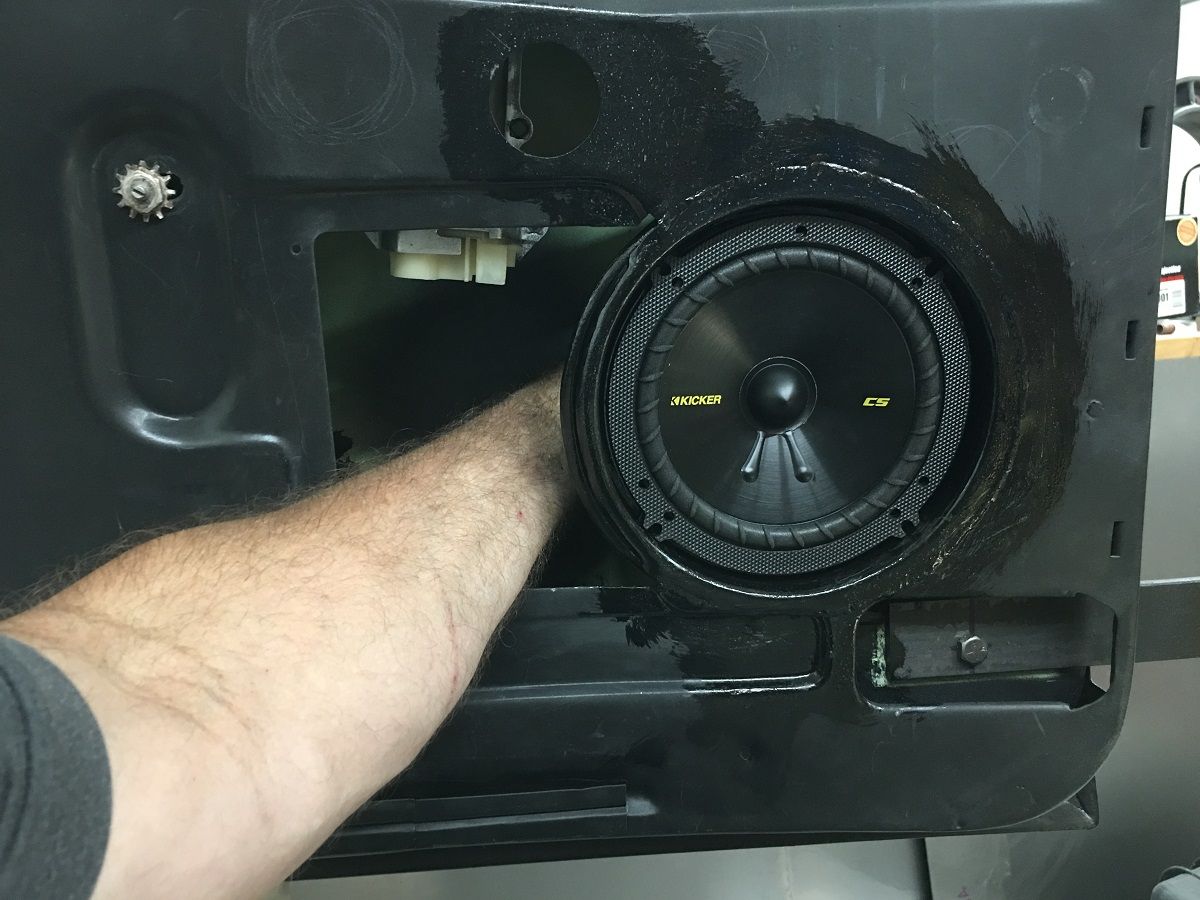
Back on our speaker mounting ring, we welded on some 8-32 hex nuts on the back side....
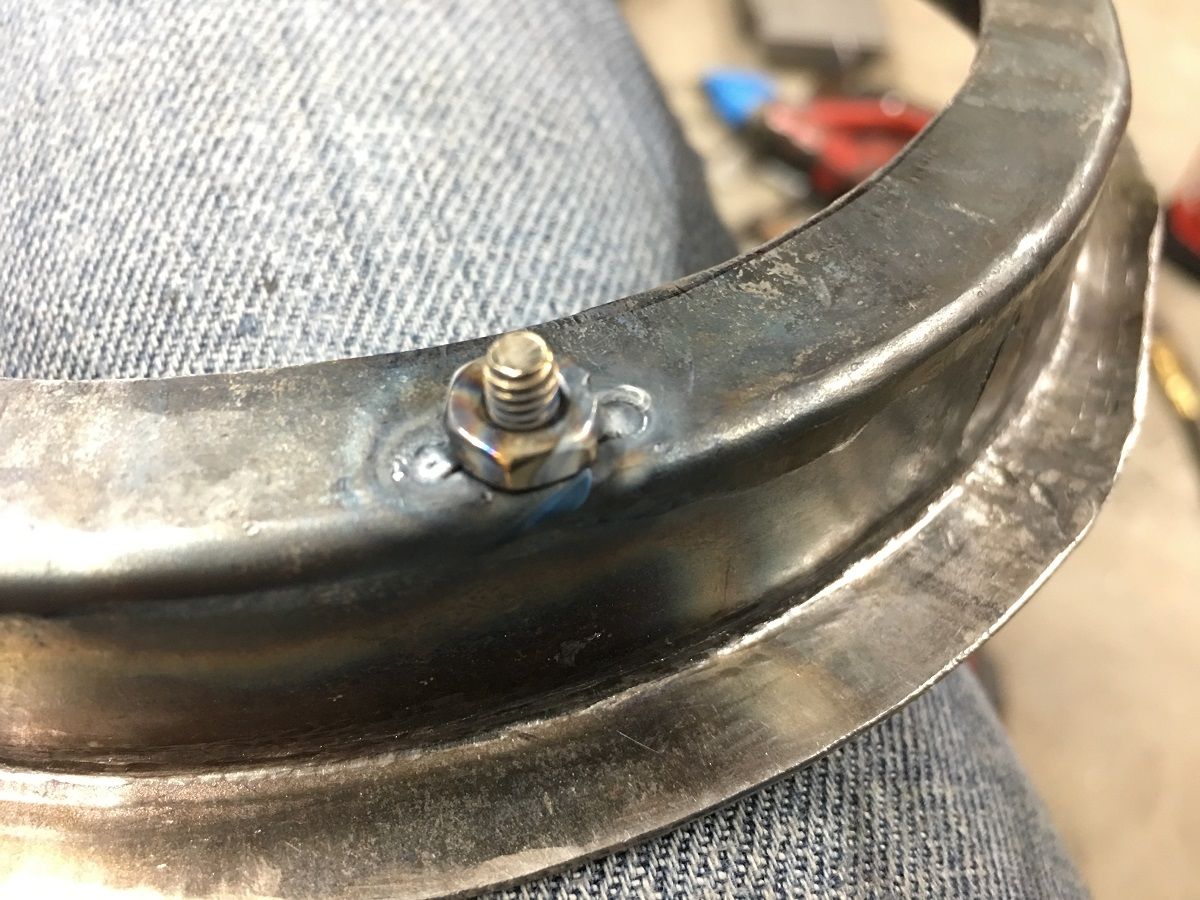
Then the ring is TIG welded in the door...
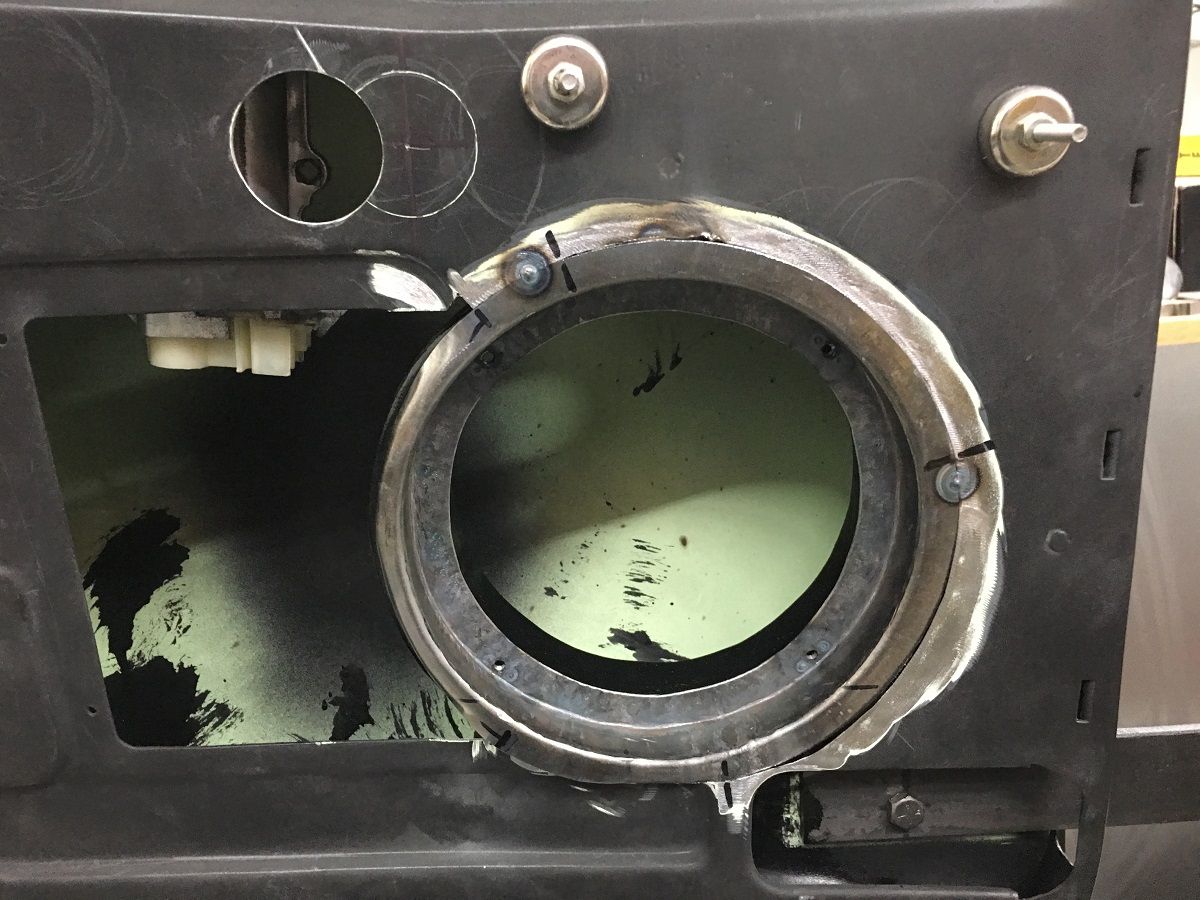
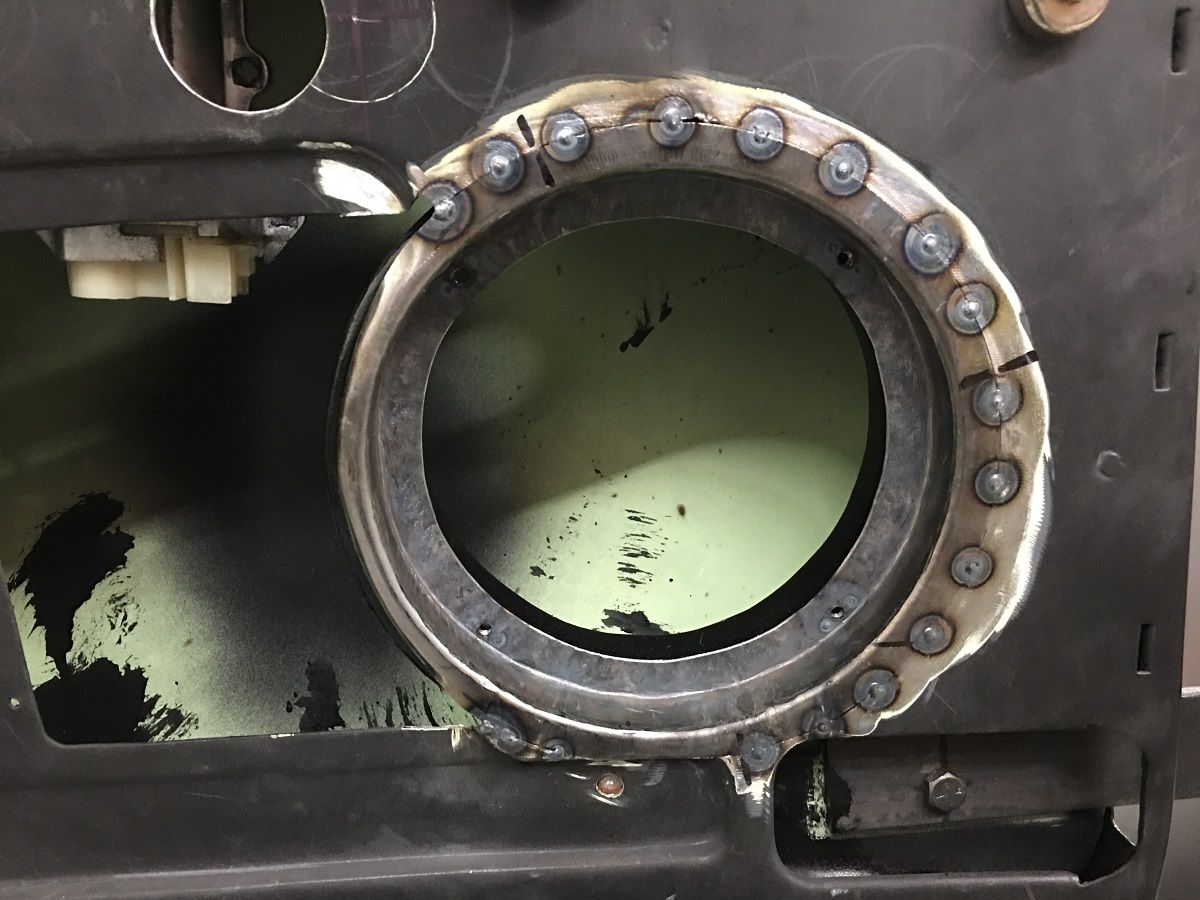
After welding, the area is scuffed and brush painted using SPI epoxy primer.
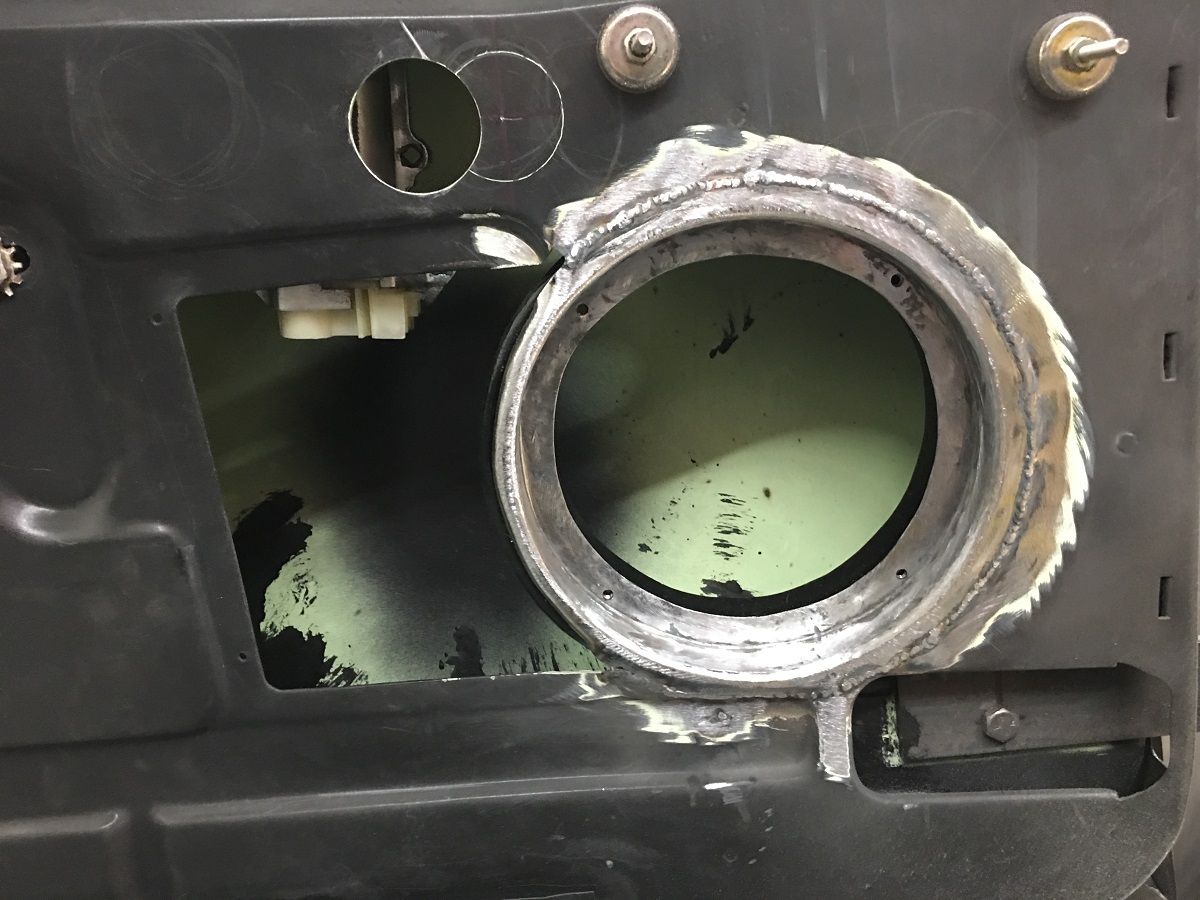
https://youtu.be/ywadRNLIywA
Robert
-
06-19-2019 08:49 AM #1394
CHR Member
- Join Date
- Sep 2005
- Location
- Hamilton
- Car Year, Make, Model: 69 nomad, 73 charger, 74 vega
- Posts
- 3,900
Mighty brave, welding an 8-32 nut.
I'd have opted to weld in a piece of rod, then drilled and tapped.
Then, I tend to have a heavy hand when applying the heat..
Education is expensive. Keep that in mind, and you'll never be terribly upset when a project goes awry.
EG
-
06-19-2019 09:15 AM #1395
CHR Member
- Join Date
- Jun 2008
- Location
- Leonardtown
- Car Year, Make, Model: Walking
- Posts
- 1,228
.040 tungsten, rare earth purple band. I also put a very small amount of anti-seize on the screw threads to keep it from galling and locking onto the nut.Last edited by MP&C; 06-19-2019 at 09:19 AM.
Robert
 Reply With Quote

Posting Permissions
- You may not post new threads
- You may not post replies
- You may not post attachments
- You may not edit your posts

I'm happy to see it back up, sure hope it lasts.
Back online