


 3390Likes
Thread: 55 Wagon Progress


Results 1,051 to 1,065 of 1865
 LinkBack URL
 About LinkBacks
-
07-18-2017 05:09 AM #1051
 CHR Member

- Join Date
- Jun 2008
- Location
- Leonardtown
- Car Year, Make, Model: Walking
- Posts
- 1,228
After three weeks of travelling the countryside, back to the grind, took delivery of the bus with the cracked hood this past Wednesday.
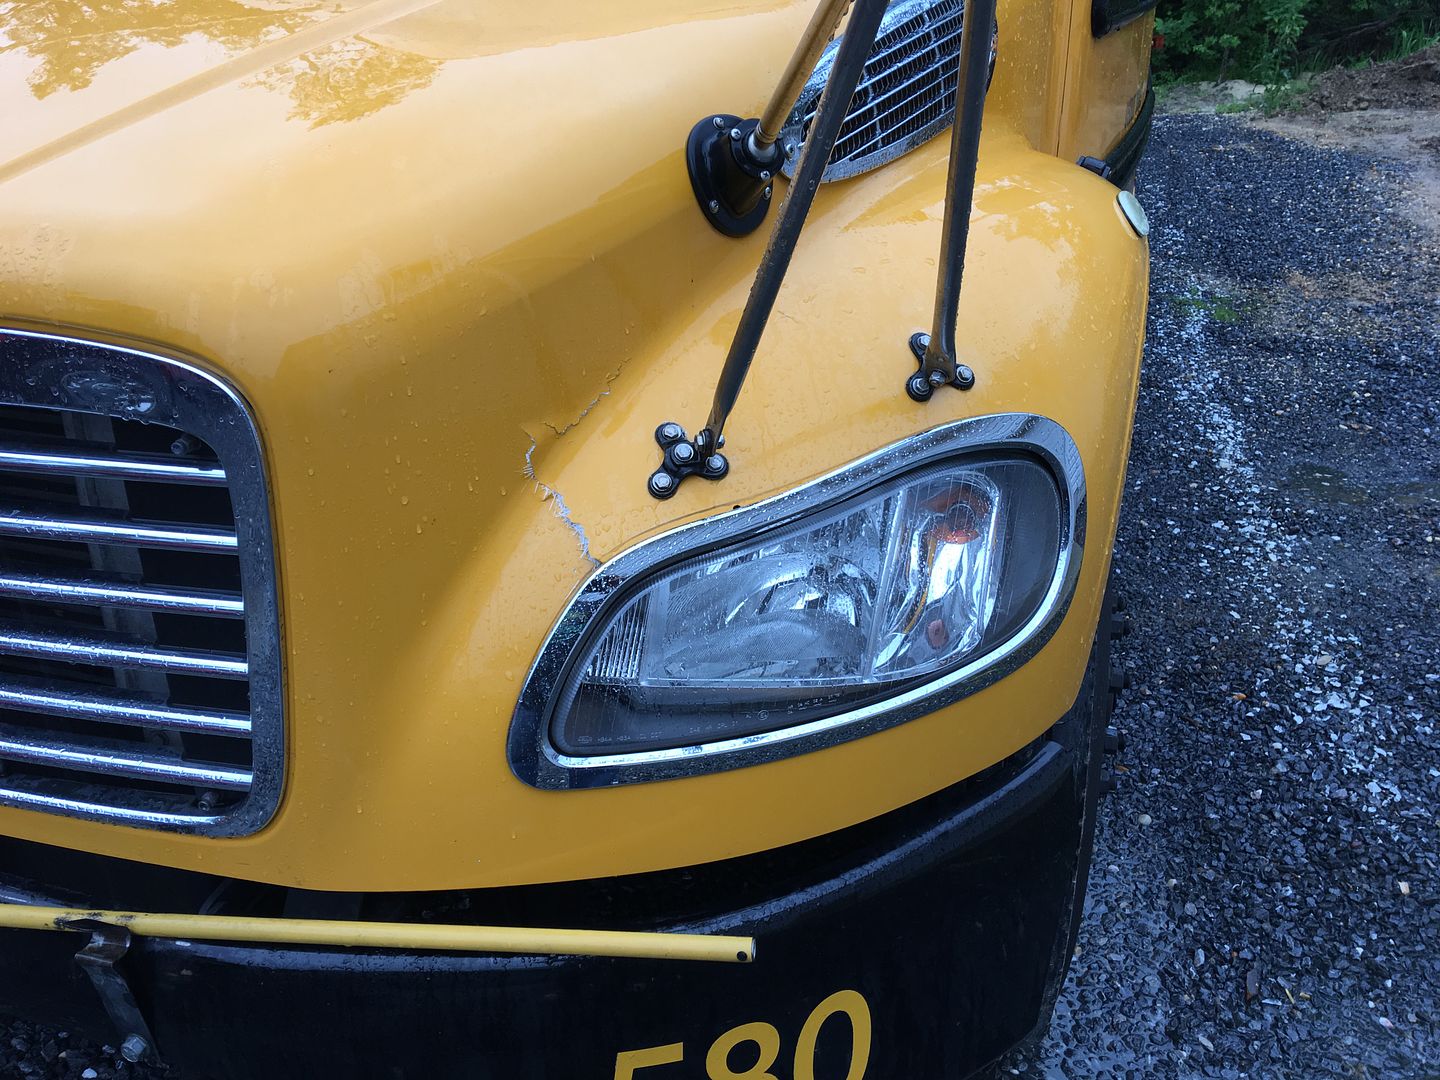
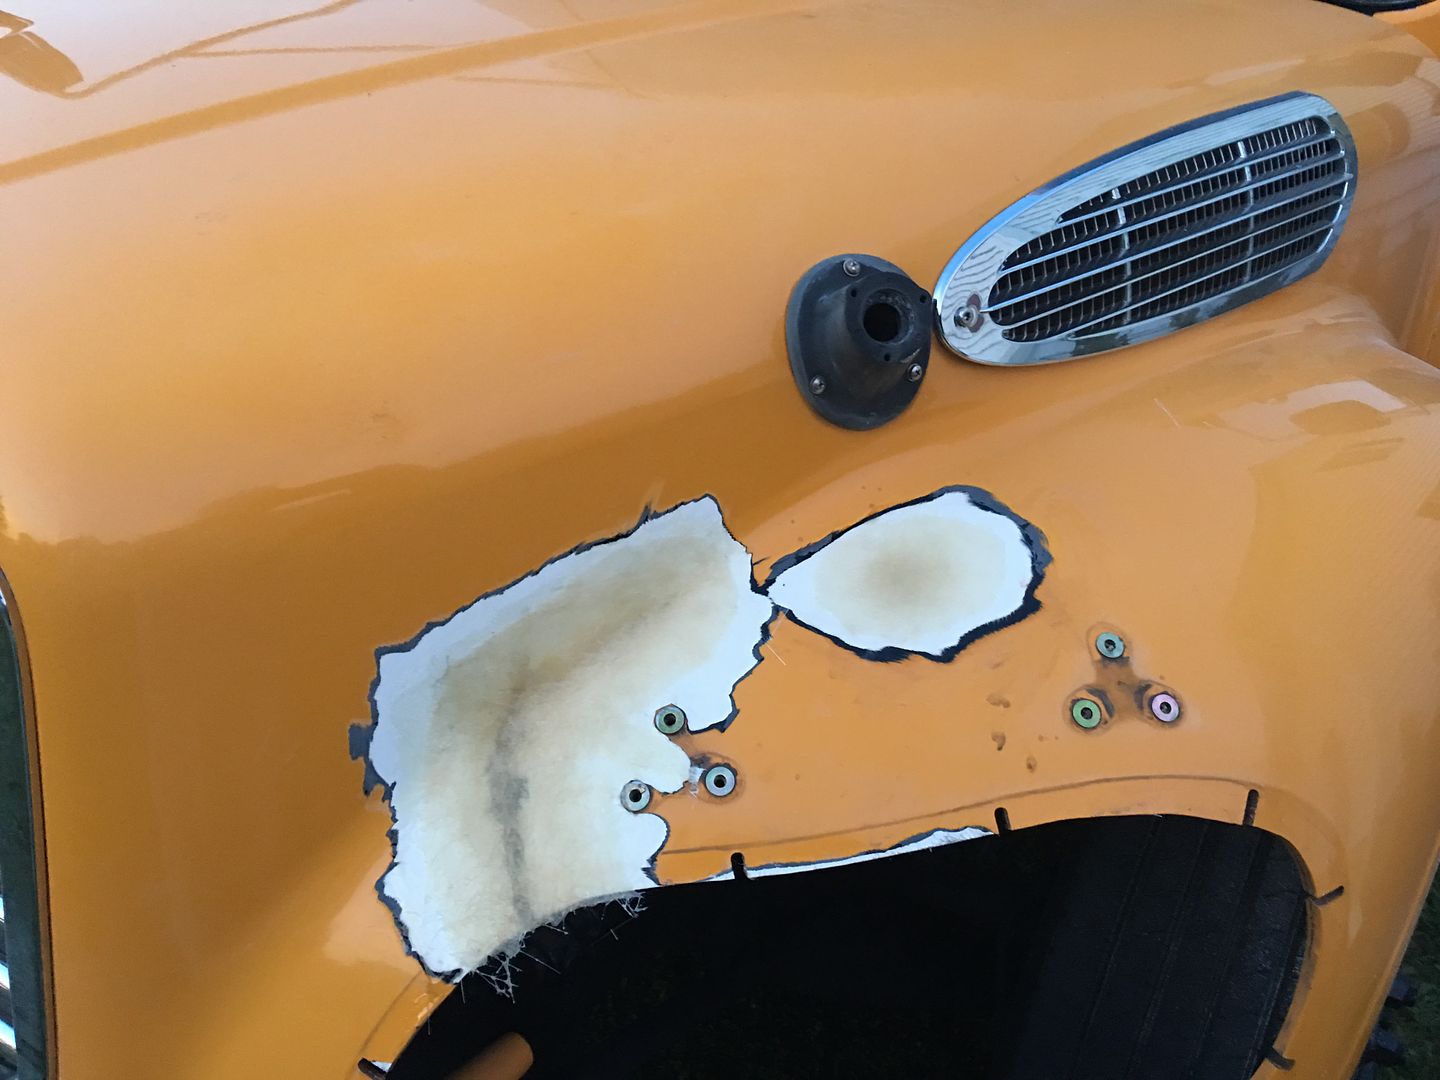
After removing headlights, I ground out the cracked areas, which relieved the tension and allowed the panels to lay flat again. Epoxy was used between the outer and inner layers, clamped, and let things set up.

After a couple layers added....
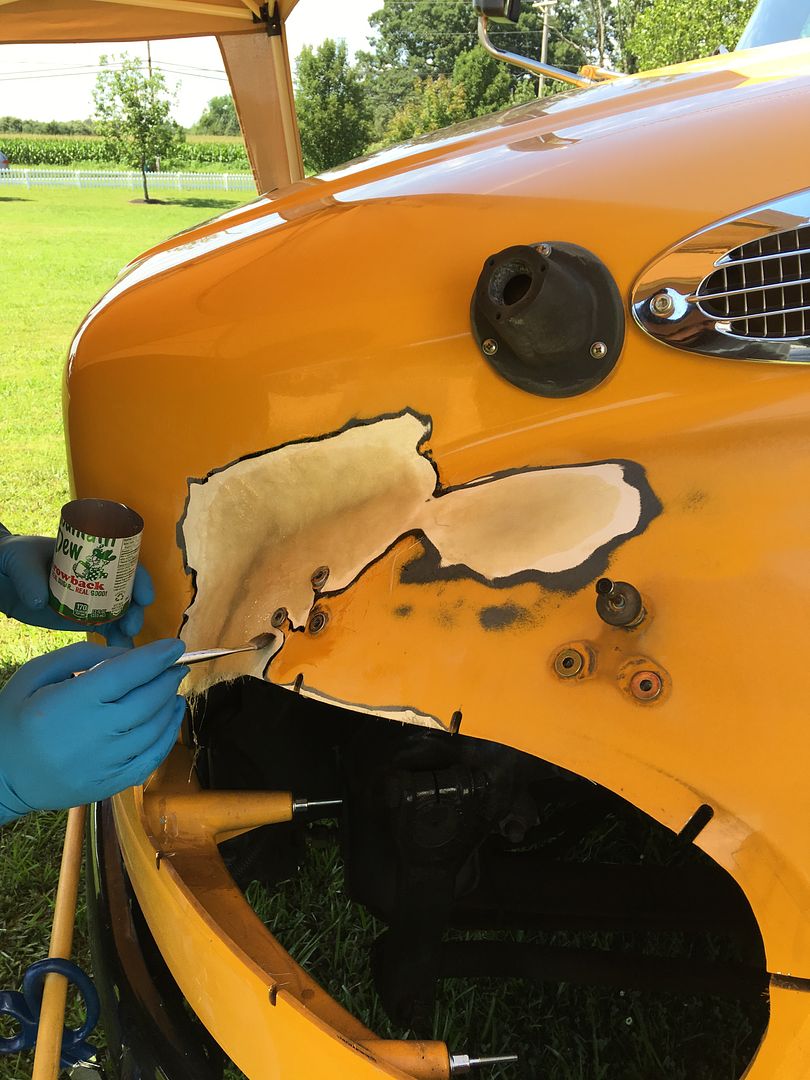
Left this to cure in the sun for a couple days, then back at it on Saturday.
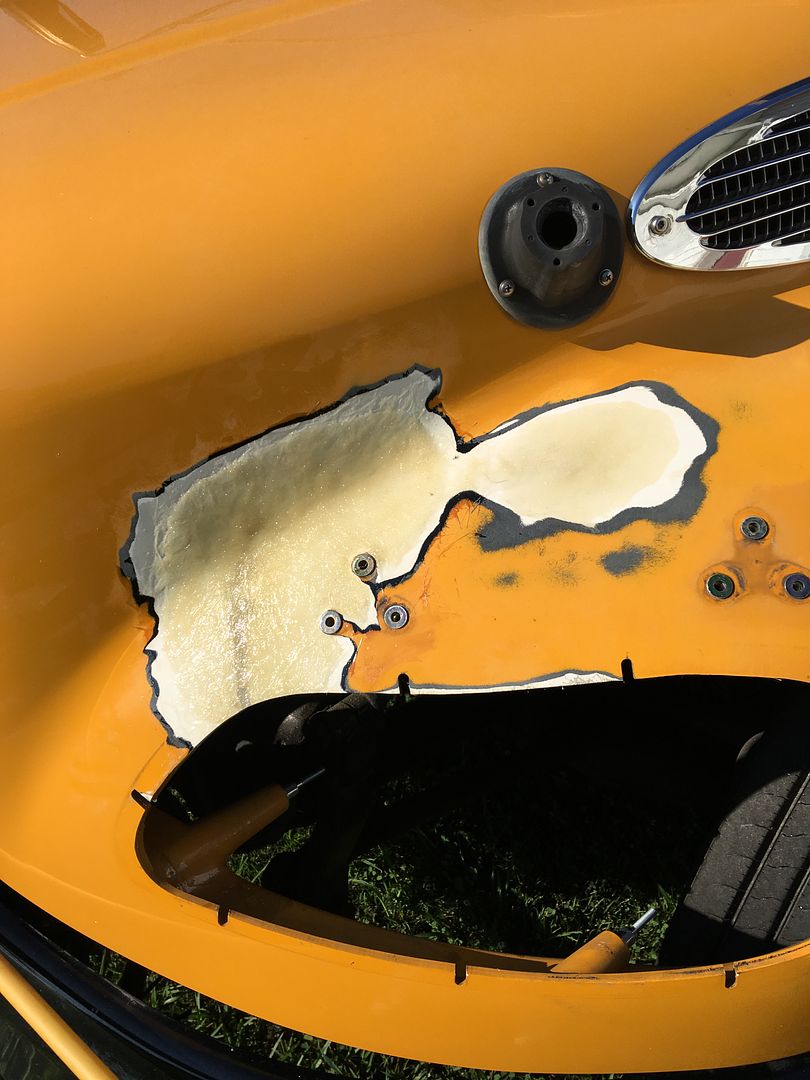
Ground smooth and hopefully the last layer added...
Back on the wagon, we needed to close off the back side of the rear seat.. We have some square tubing to use but needed a radius bender. The upper part of the buffer stand looks like it may work. As I've told Mike, everything is a tool..
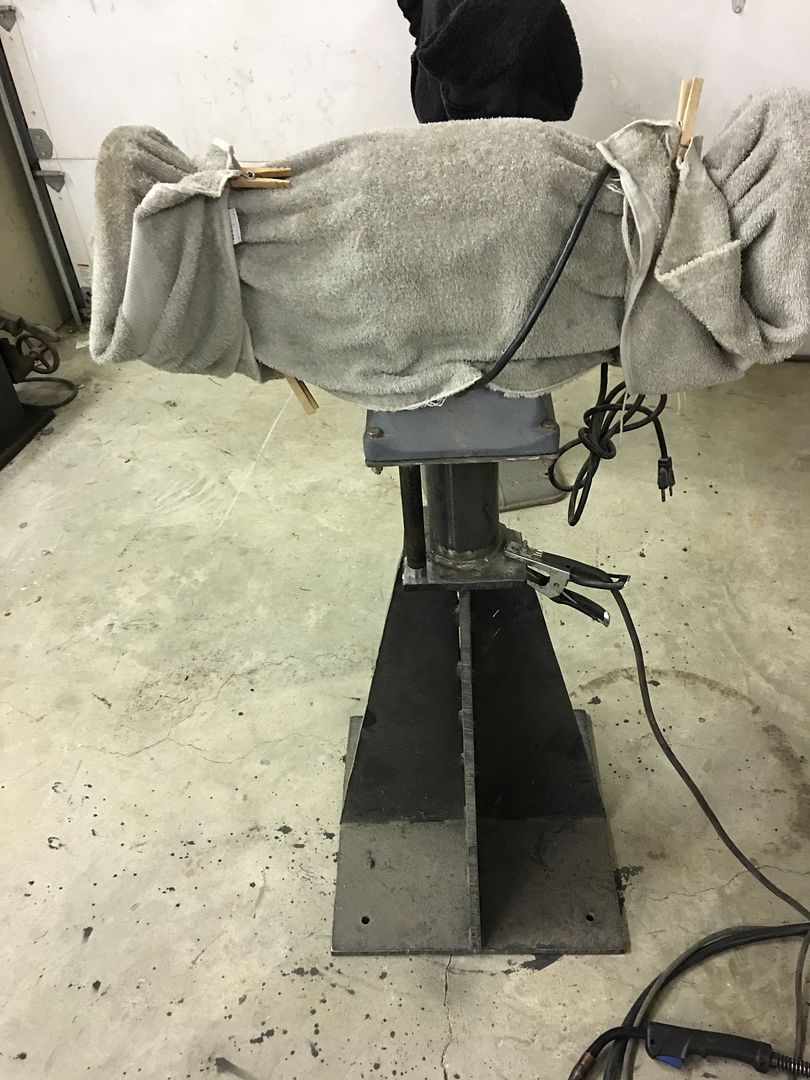
Add a welder and a piece of round stock for an anchor...
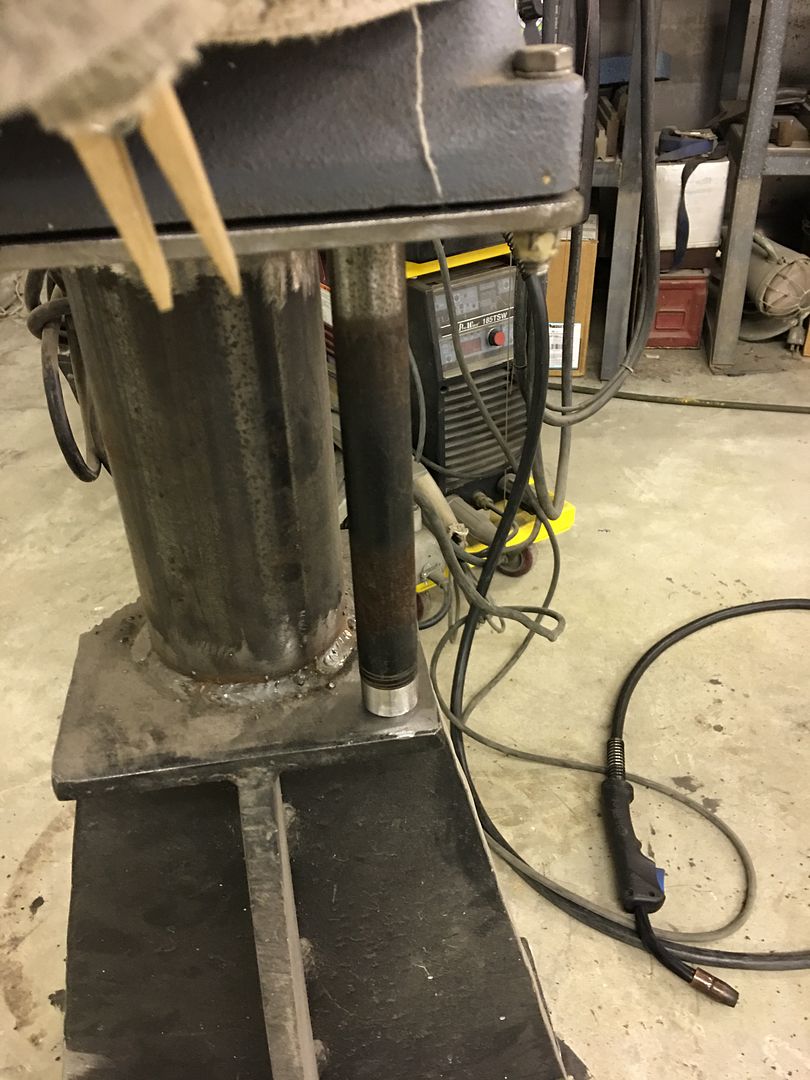
First test...
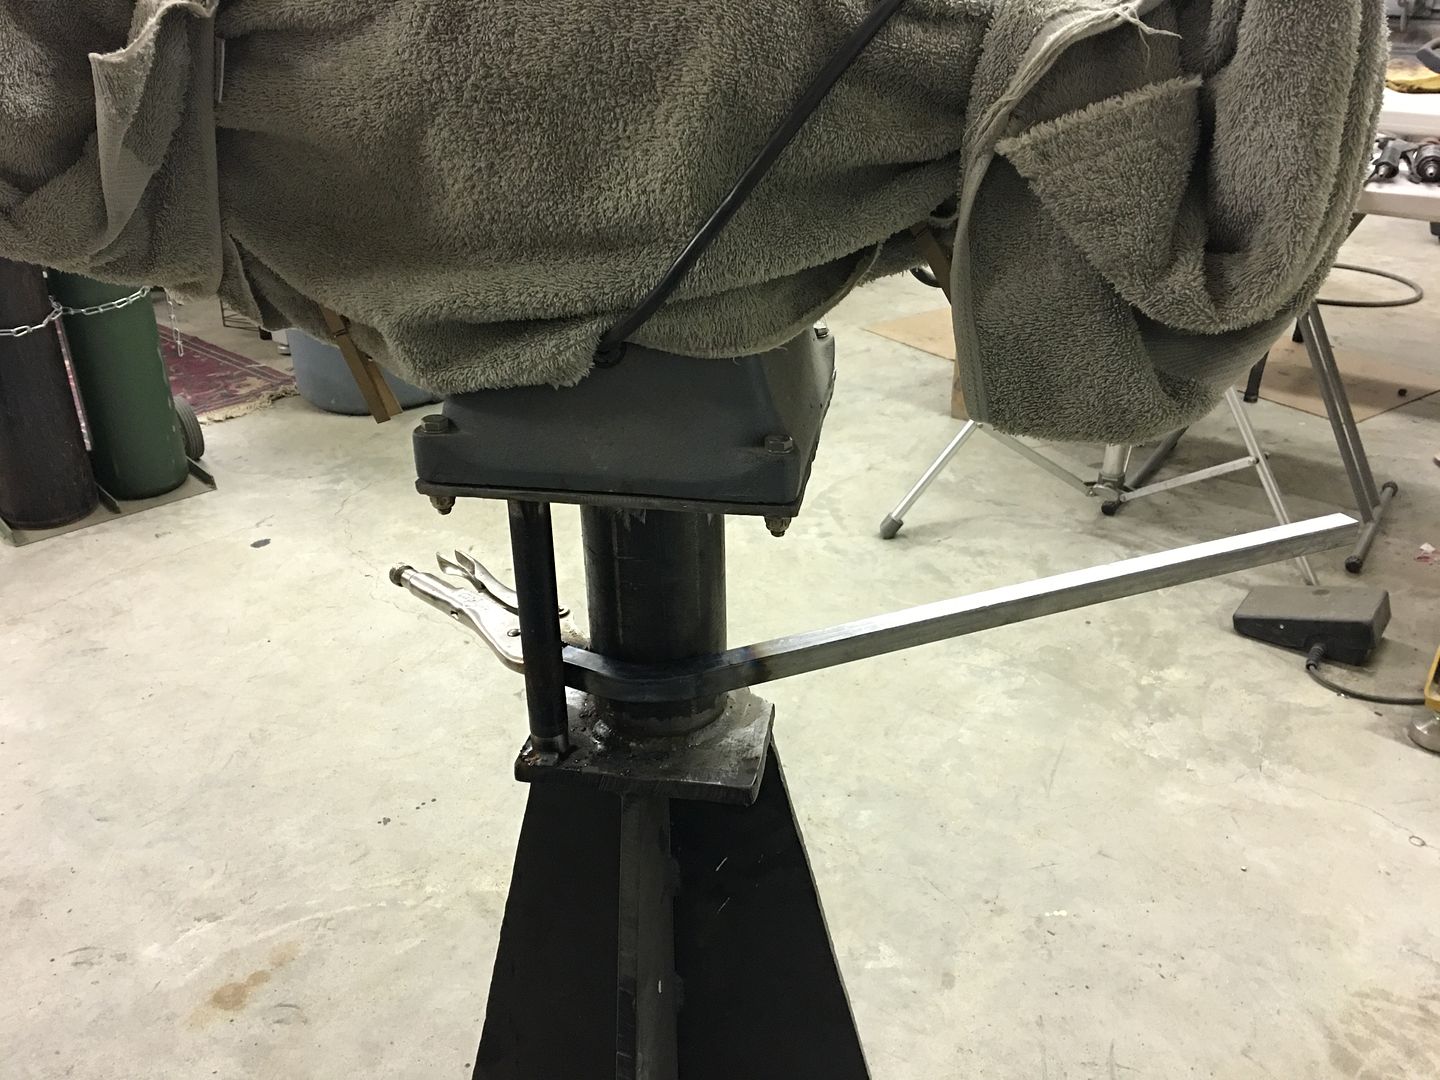
Four pieces needed...
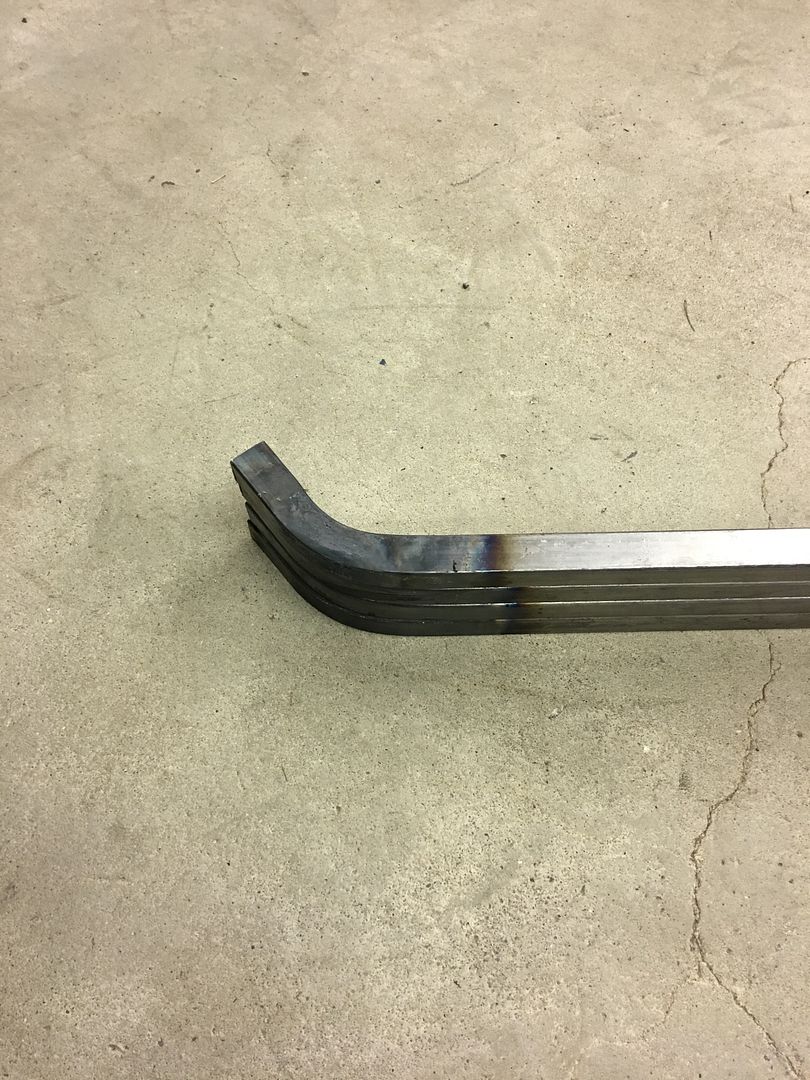
All TIG welded together...
Robert
-
Advertising

- Google Adsense
- REGISTERED USERS DO NOT SEE THIS AD
-
07-18-2017 08:55 PM #1052
CHR Member
- Join Date
- Feb 2010
- Location
- Pukekohe, New Zealand
- Car Year, Make, Model: '23 Ford T Roadster
- Posts
- 2,199
I know I'm not the brightest gold fish in the pond Robert, so can you explain why you went to all the trouble of hinging the rear seat if it isn't going to be able to be put to use. Have I missed something here as I think I remember you making a panel or something to hide the bass speaker I believe ? I can't imagine this wagon been used to haul a ladder or length of lumber from the hardware store.I maybe a little crazy but it stops me going insane.
Isaiah 48: 17,18.
Mark.
-
07-19-2017 03:58 AM #1053
CHR Member
- Join Date
- Jun 2008
- Location
- Leonardtown
- Car Year, Make, Model: Walking
- Posts
- 1,228
A single subwoofer speaker is destined for the center between the two uprights, and an amp will bolt to the ledge there inside. Once upholstered, the rear panel is less than accessible so the folding seat gives us access. The circle cutting feature on the Lennox will be used to add cutout slots for the speakers so that they will still support upholstery cloth.. instead of a big gaping hole, like so:Robert
-
07-19-2017 06:00 AM #1054
CHR Member/Contributor
- Join Date
- Sep 2007
- Location
- Gardner, KS
- Car Year, Make, Model: '33 HiBoy Coupe, '32 HiBoy Roadster
- Posts
- 11,245
Just thinking, which can be risky, but if a guy partitioned the space bit, still leaving the walls open at the top for the air volume that big speaker will like for free movement, the side spaces would make a nifty place too stash the cleaning supplies, and maybe a few tools or other "stuff" that you'd want to keep out of sight, tucked away for shows, cruises, etc. Easy access by flipping the seat back forward. Maybe not....Roger
Enjoy the little things in life, and you may look back one day and realize that they were really the BIG things.
-
07-19-2017 06:28 AM #1055
CHR Member
- Join Date
- Jun 2008
- Location
- Leonardtown
- Car Year, Make, Model: Walking
- Posts
- 1,228
Good call. had planned on centering amp, but perhaps to one side would better accommodate "stuff". Thanks for the suggestion!Robert
-
07-19-2017 06:38 PM #1056
CHR Member
- Join Date
- Jan 2005
- Location
- Doon, Ia
- Car Year, Make, Model: 53 Chevy 3100
- Posts
- 2,716
Following this thread, I don't think the end user will need any tools, just cleaning supplies.
Seth
God cannot give us a happiness and peace apart from Himself, because it is not there. There is no such thing. C.S.Lewis
-
07-21-2017 07:37 AM #1057
CHR Member
- Join Date
- Jun 2008
- Location
- Leonardtown
- Car Year, Make, Model: Walking
- Posts
- 1,228
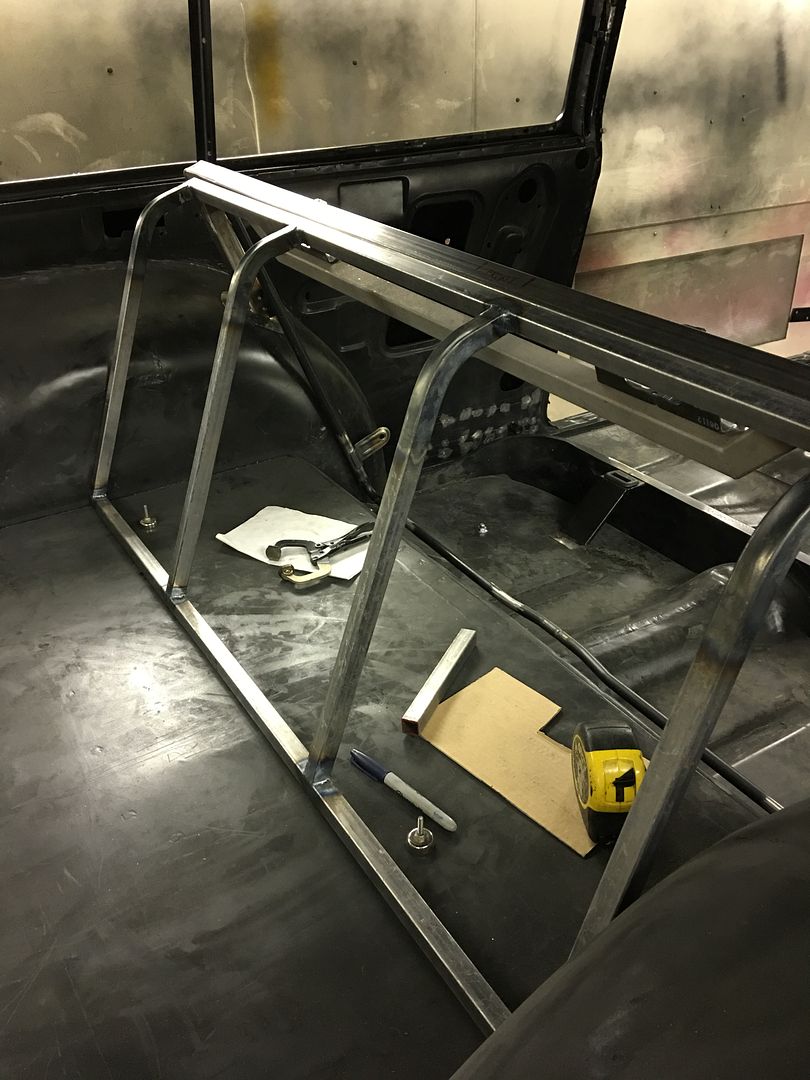
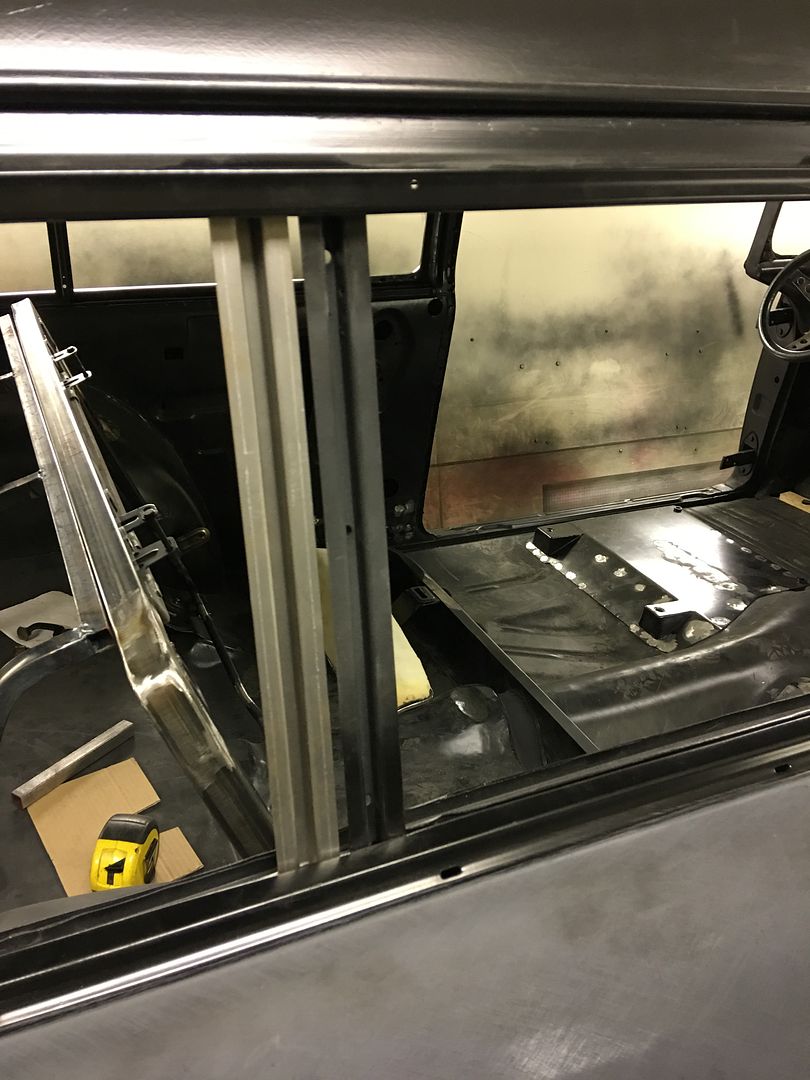
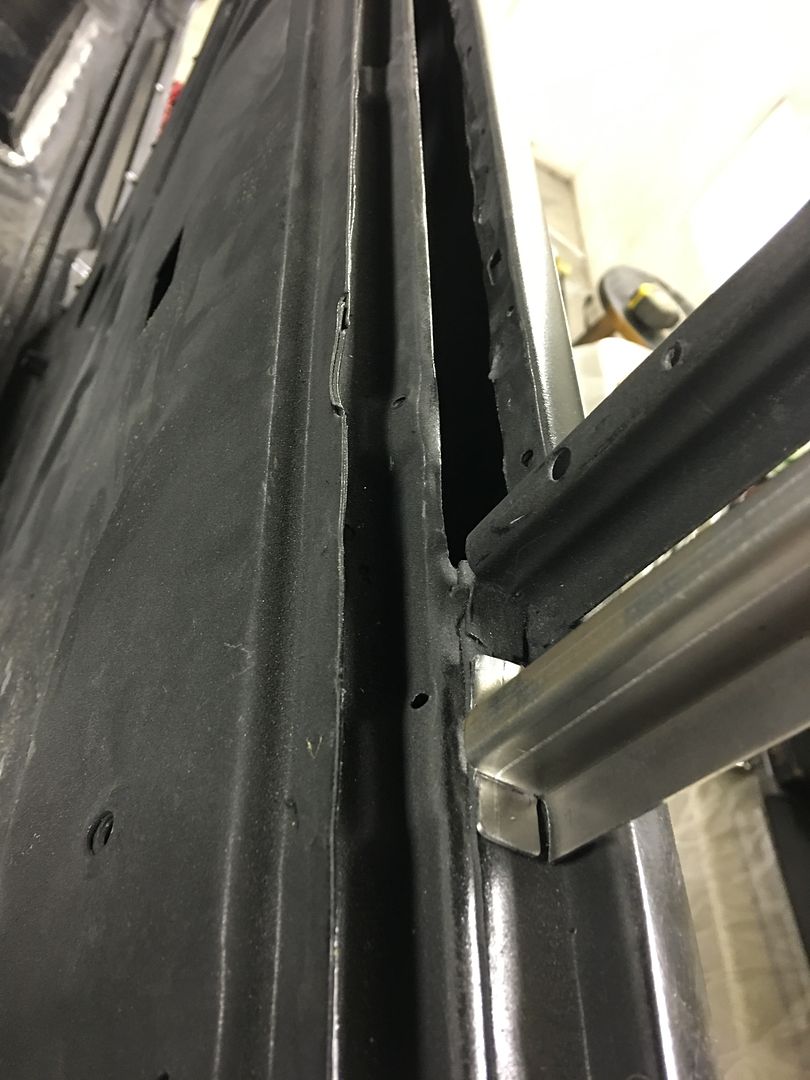
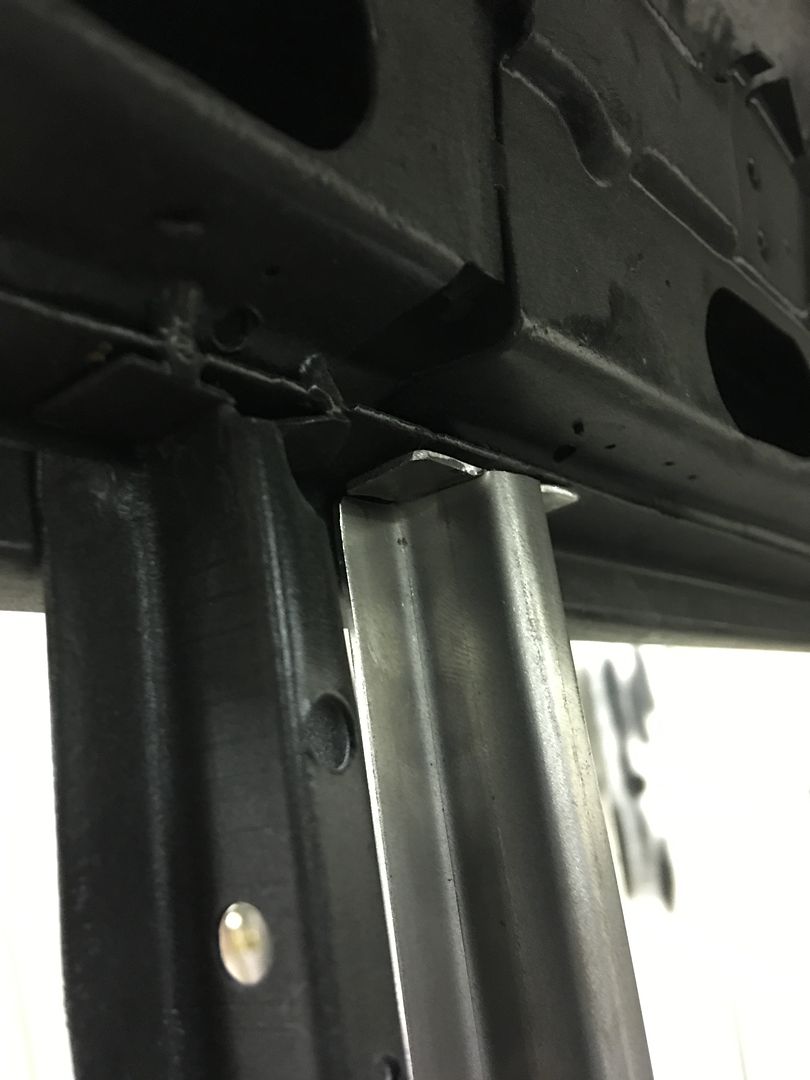
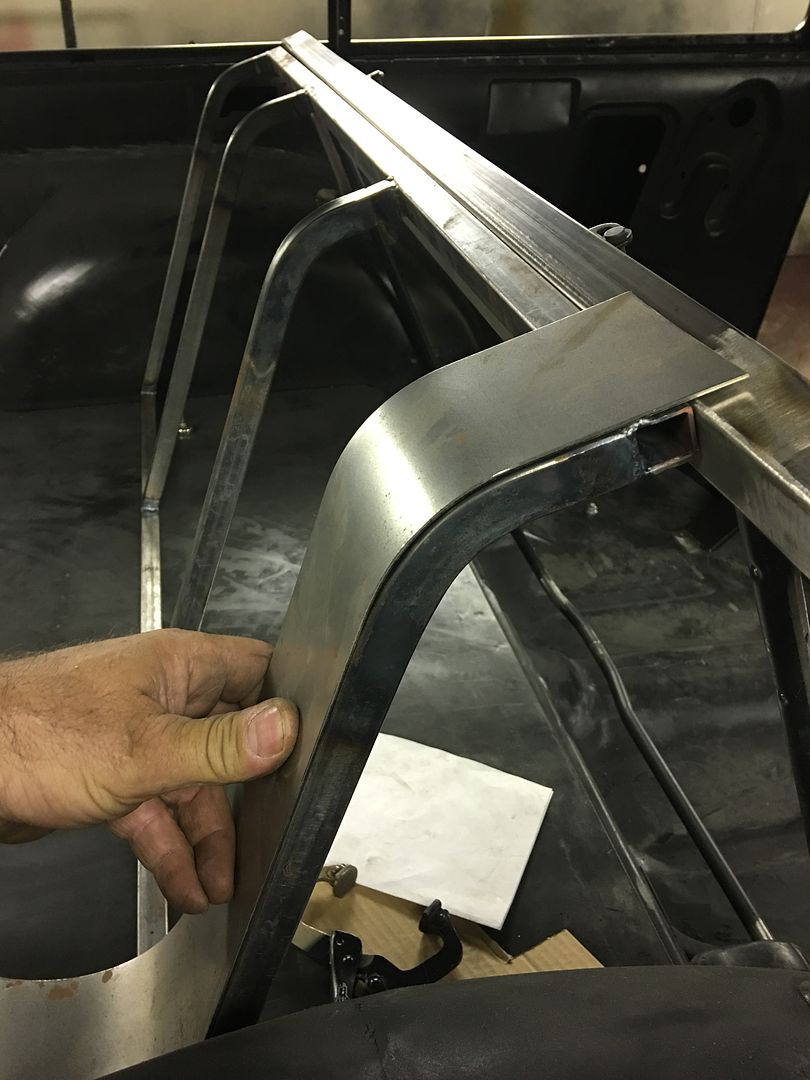
Made a set of C-pillars for a 56 wagon, they weld into the window opening and separate the fixed rear wrap around window from the roll down window for the back seat..
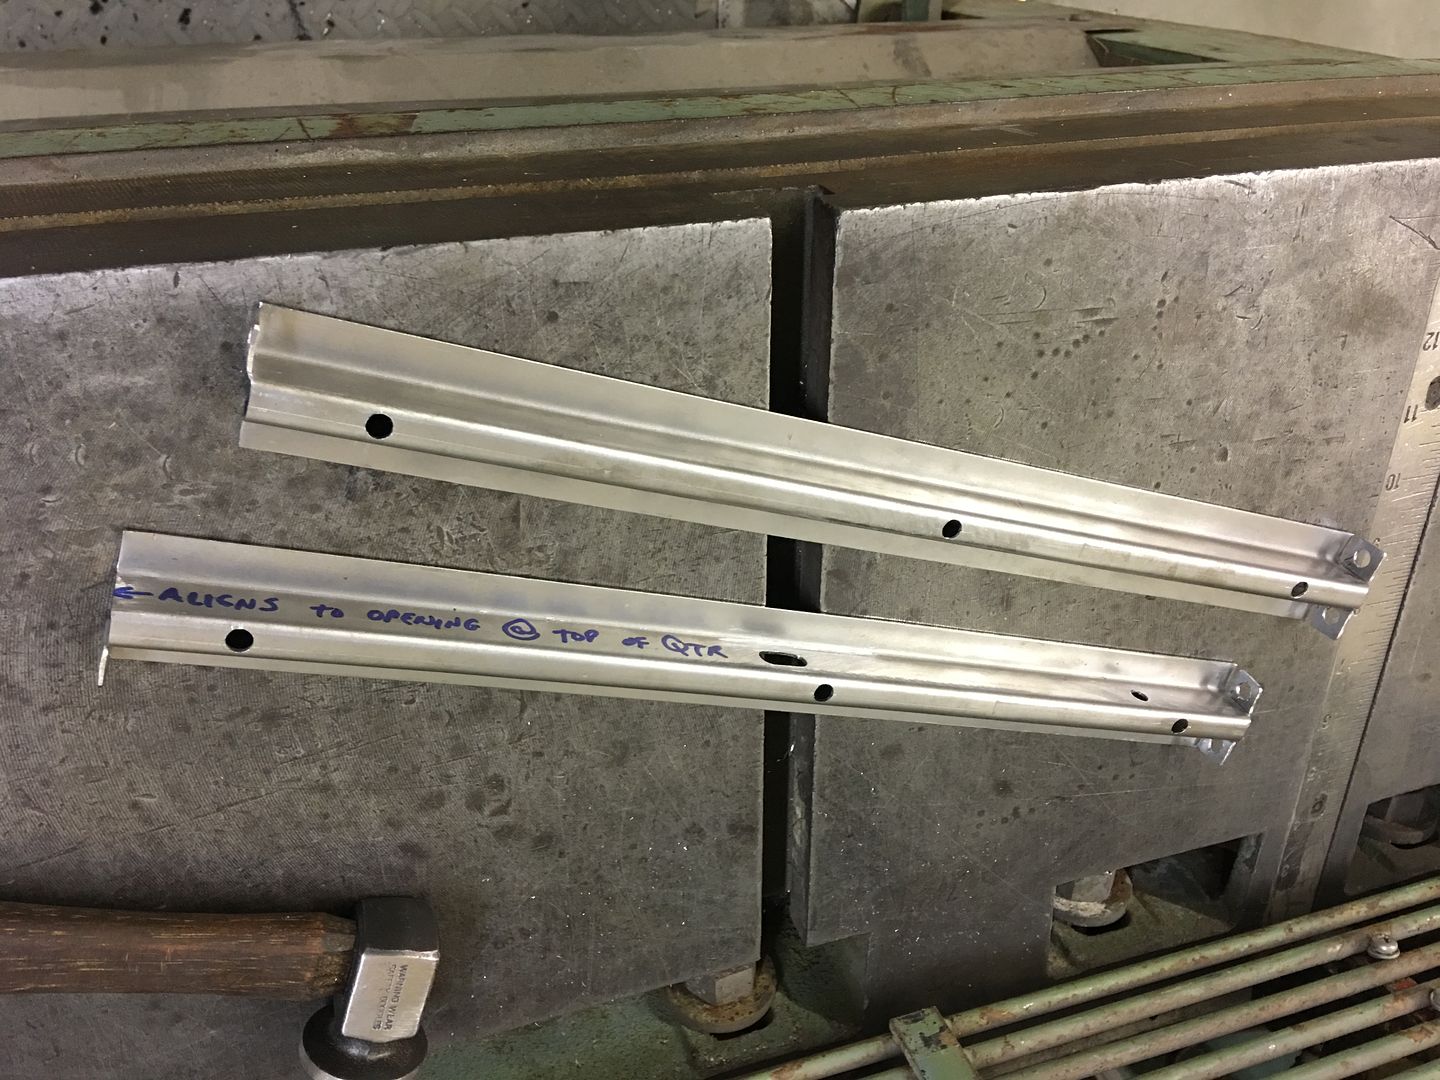
This is where they locate...
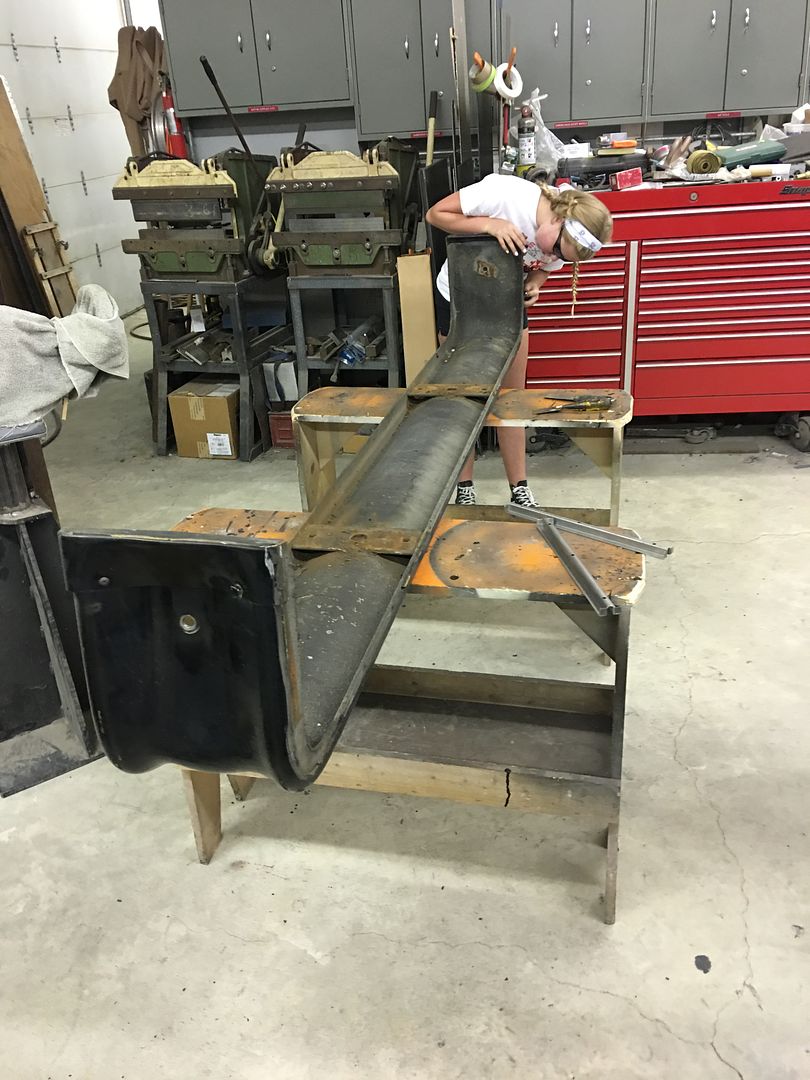
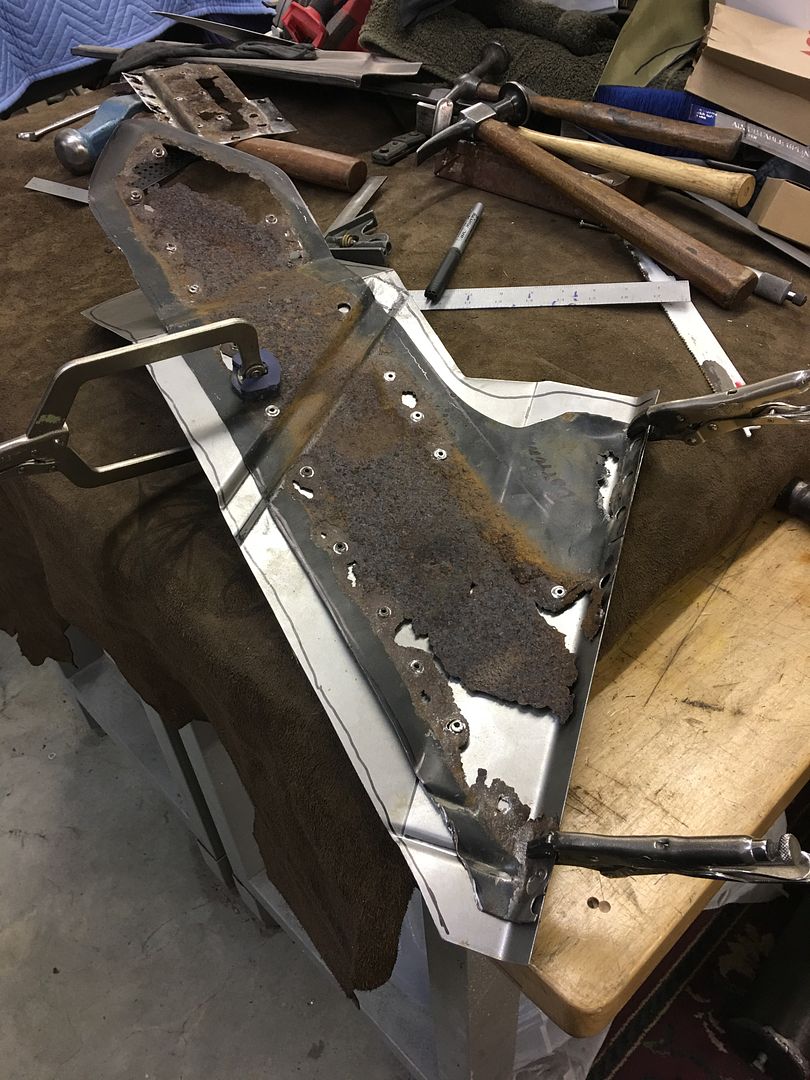
Meanwhile apprentice E is prepping some bus parts for paint, here working on a back bumper...
Robert
-
07-21-2017 11:37 AM #1058
CHR Member
- Join Date
- Sep 2007
- Location
- New Bedford
- Car Year, Make, Model: 34 Ford 3W Coupe Replica
- Posts
- 14,754
Are those little (small) shears behind apprentice "E"?
-
07-21-2017 11:54 AM #1059
CHR Member
- Join Date
- Jun 2008
- Location
- Leonardtown
- Car Year, Make, Model: Walking
- Posts
- 1,228
Diacro manual press brakes. I had one and bought another as I found myself changing dies too often. In cases like these C-pillars, it takes different dies to do the entire thing, so having multiple machines helps out.
OK, so I'm a hoarder...
Robert
-
07-21-2017 02:24 PM #1060
CHR Member
- Join Date
- Sep 2007
- Location
- New Bedford
- Car Year, Make, Model: 34 Ford 3W Coupe Replica
- Posts
- 14,754
"Diacro manual press brakes.
OK, so I'm a hoarder..."
Thanks for the info.
And I'm guilty as well, I just came home with about 150 gear cutters! I cleaned out the guys machine shop since he got rid of his gear machines. I couldn't help myself!
-
07-23-2017 09:02 AM #1061
CHR Member
- Join Date
- Jun 2008
- Location
- Leonardtown
- Car Year, Make, Model: Walking
- Posts
- 1,228
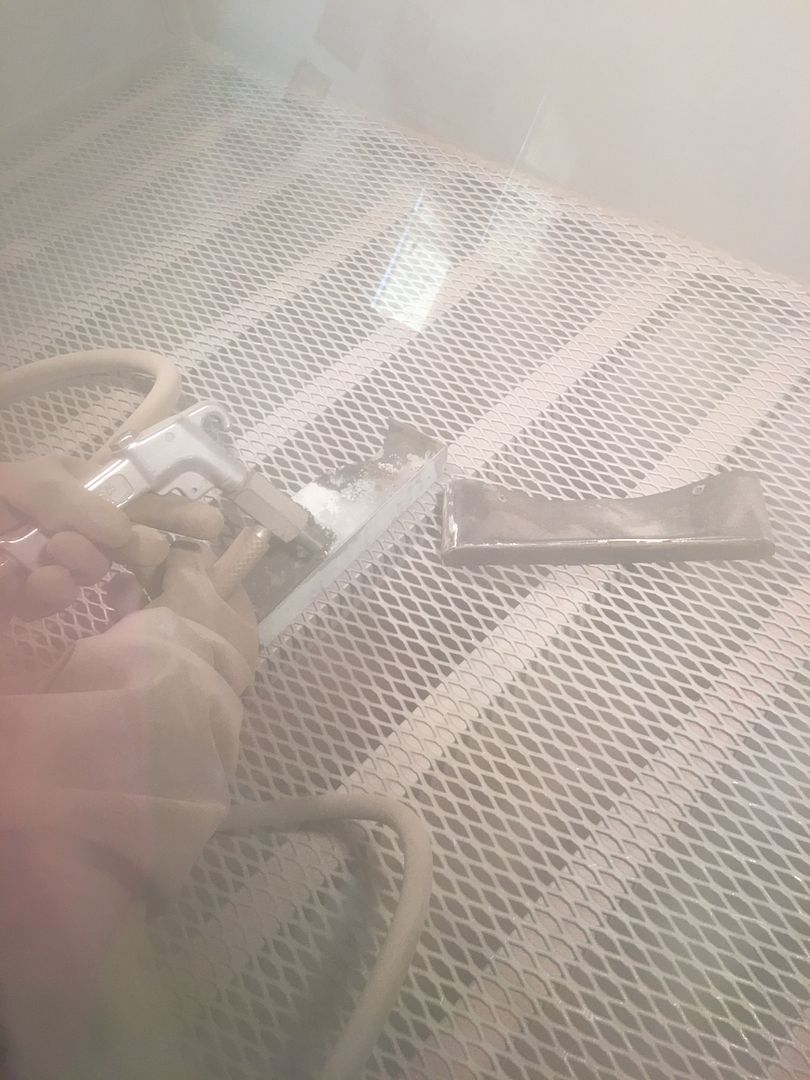
Yesterdays progress.... Apprentice E got the bus bumper end caps removed by drilling out the rivets, and then media blasted the caps so they will be ready for paint...
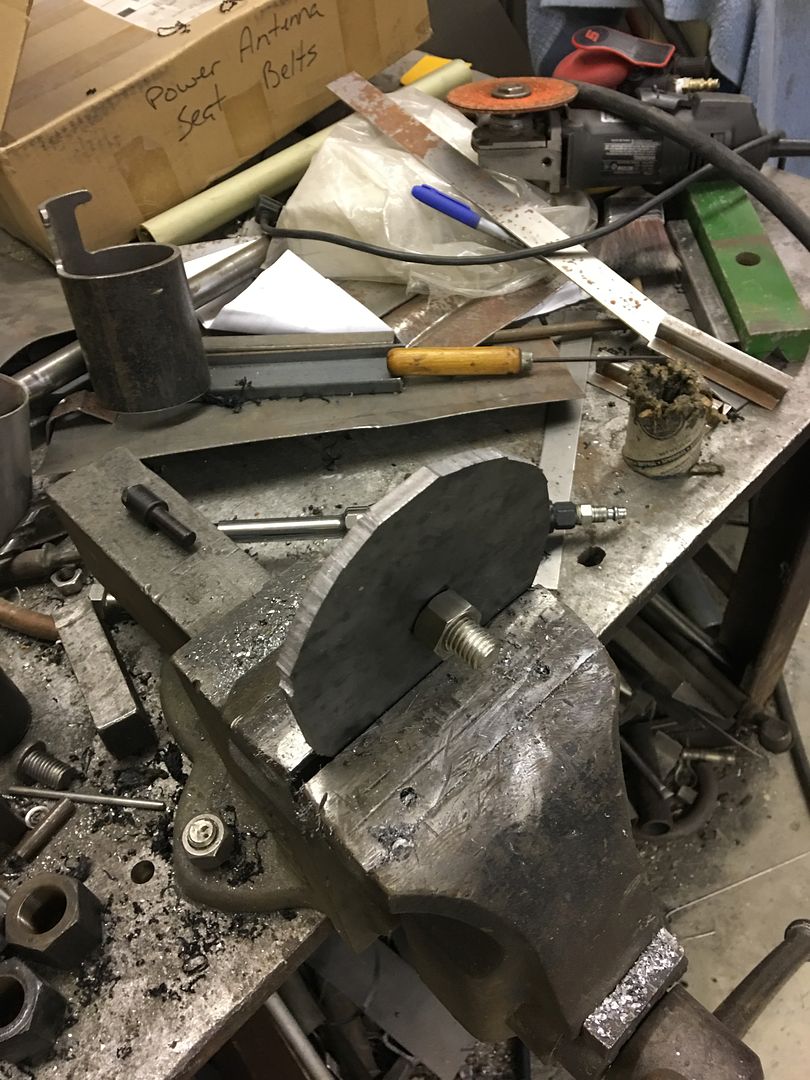
We needed some tooling for the next phase of the 55 wagon's interior fabrications, the radius we installed on the rear seat back framework will need to be duplicated onto the sheet metal covering. A trip to Hill Top welding had produced a suitable piece of 4" pipe. The Pexto shear has a t-slot along the front for it's support arms and we'll use this to bolt on a couple angle brackets to support this pipe along the front. A slight gap behind the pipe will allow us to use it as a fulcrum in adding a radius to our panel... Mike worked on adding some end caps to our radius die....
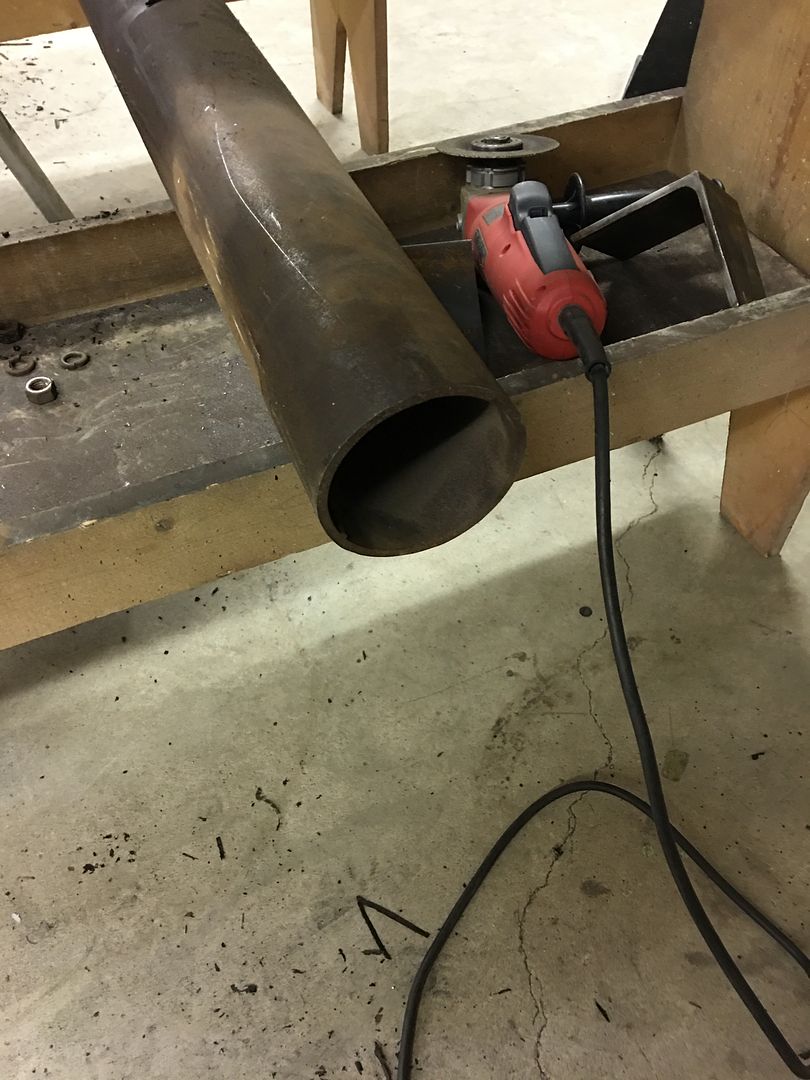


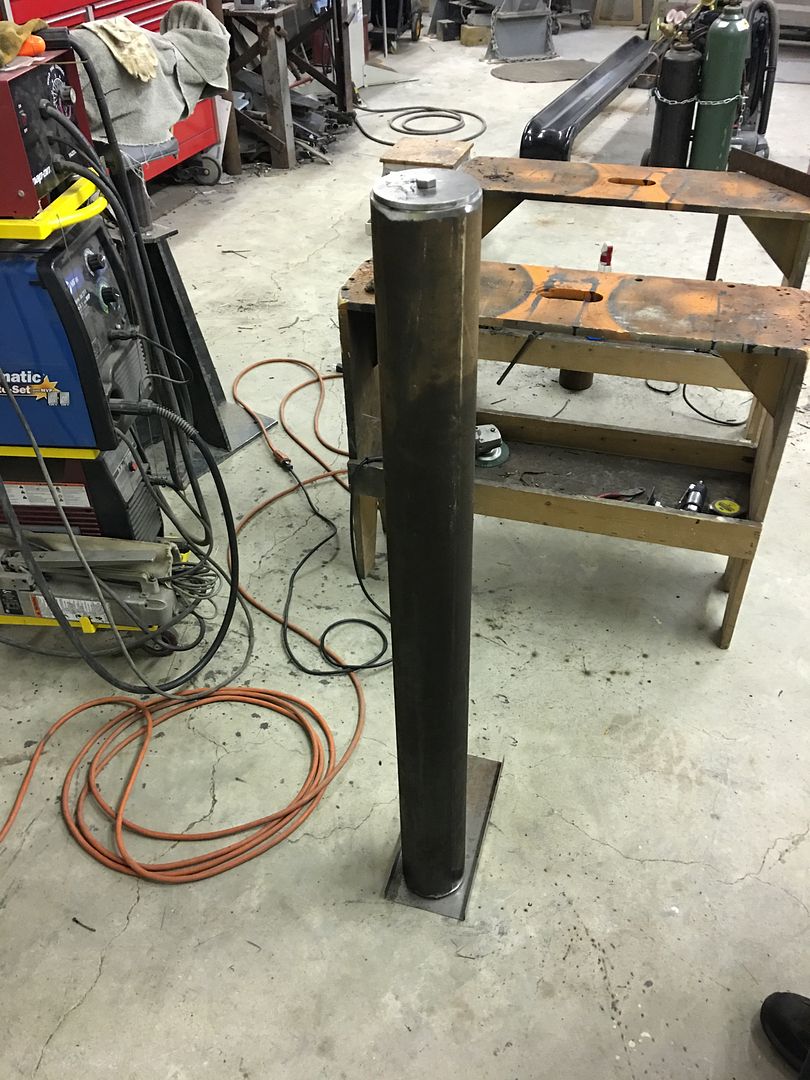
Need a ground clamp for a standing piece of pipe? set it on a flanged piece of sheet metal, instant clamp location....
More to come on that....
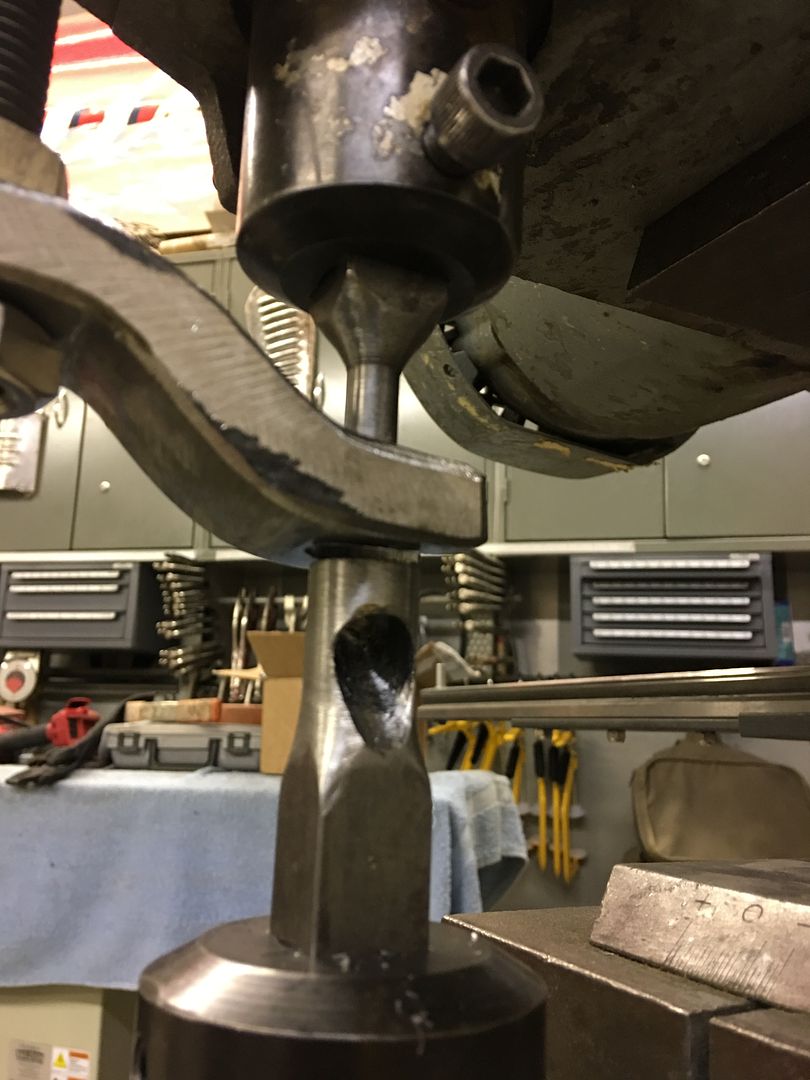
Meanwhile, our sheet metal panel will also serve to cover the rear bass speaker. Not wanting a grille showing, we plan on using upholstery cloth to conceal the speaker. Rather than a big gaping hole that would more readily show the location regardless, some slots will better support the upholstery cloth. So lets make some nibbling tooling..
This punch will be approx. 3/8 diameter and is made of 4140 oil hardening stock so we can heat treat when complete for better tool life..
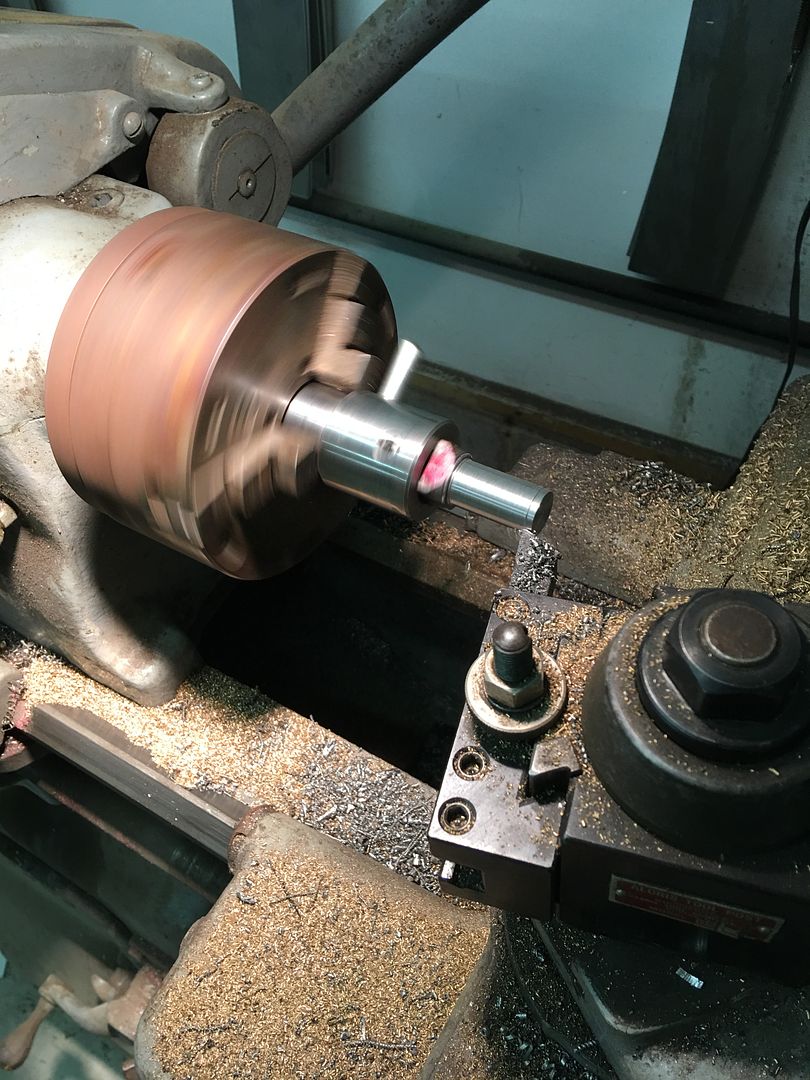
End is formed slightly concave to give a better cutting edge..
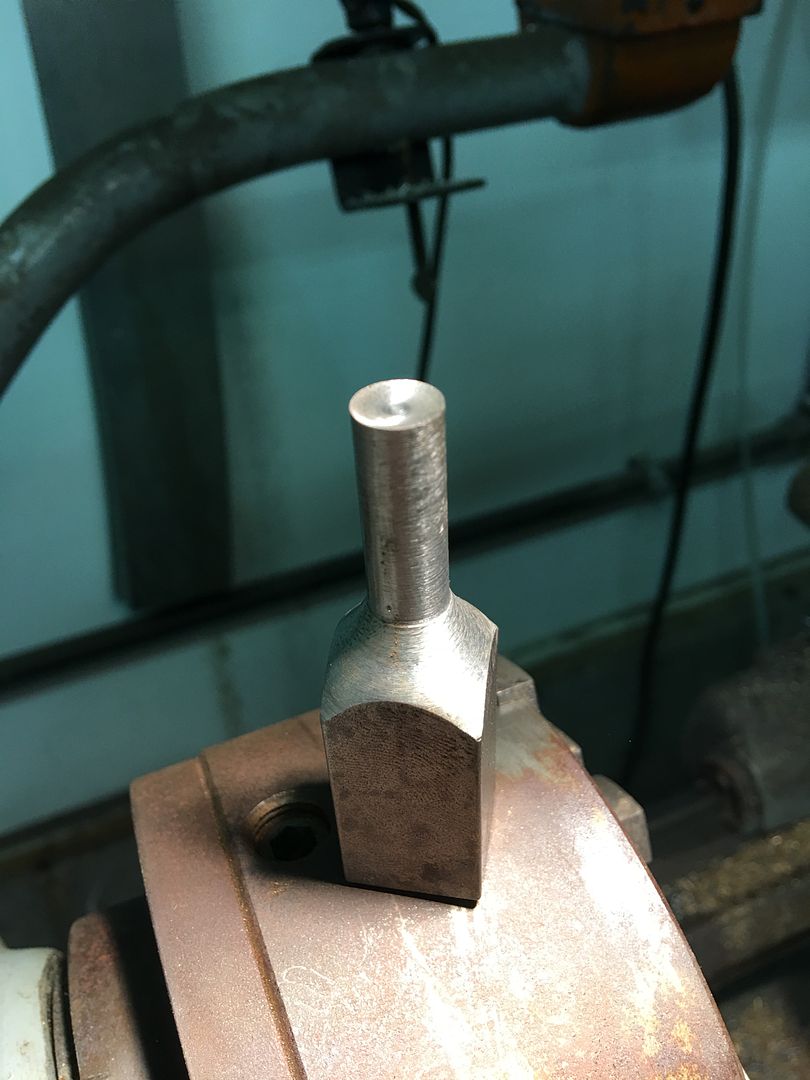
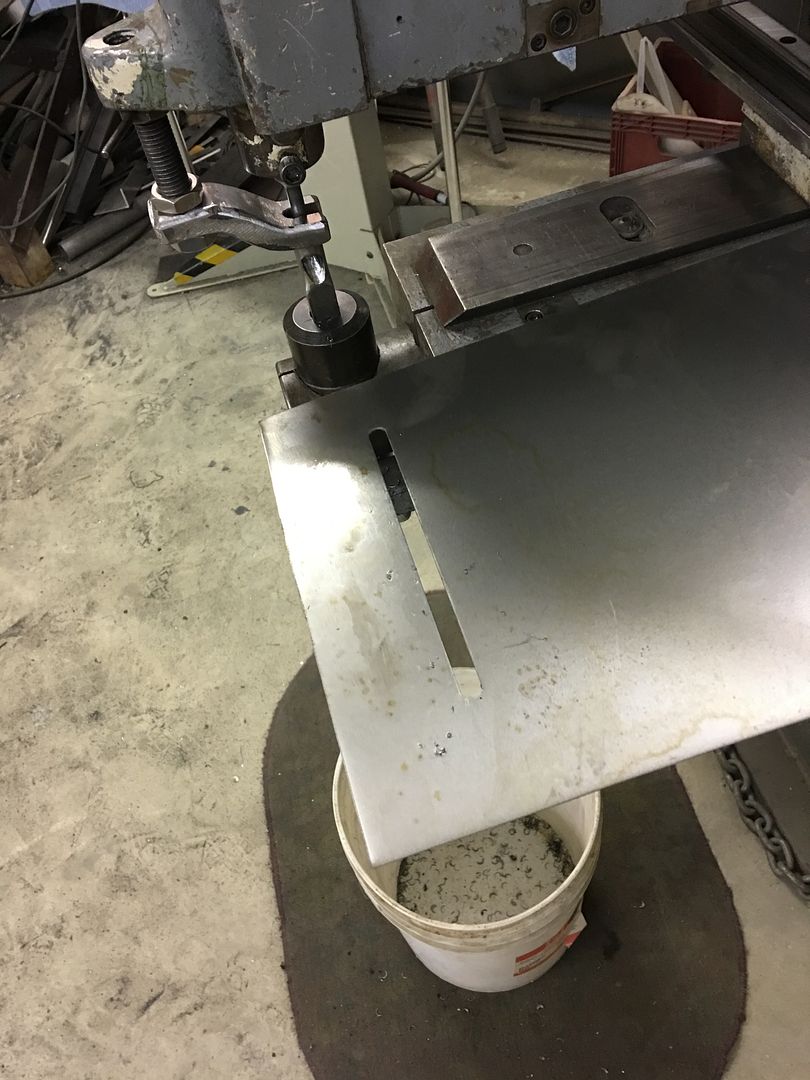
Bottom die gets a clearance hole for the 3/8 punch, then it gets bored from the bottom end using 1/2" bit to within about 1/8" of the top surface. This will allow better gravity flow of any chips passing through our bottom die..

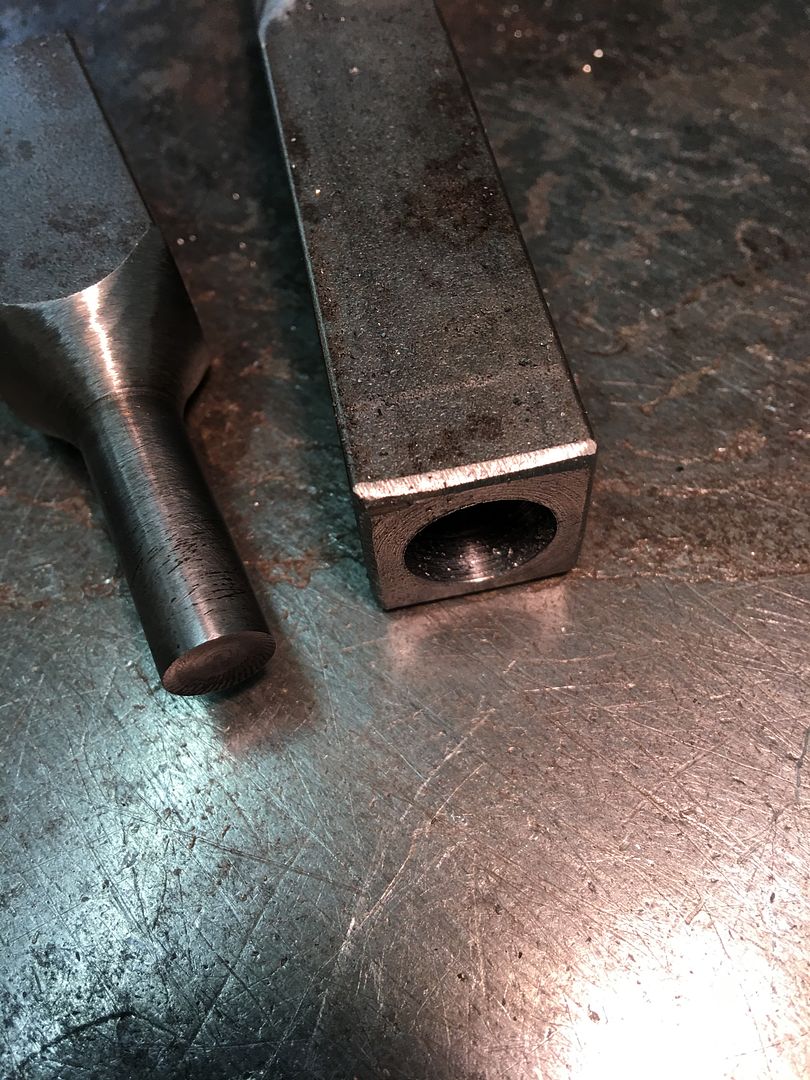
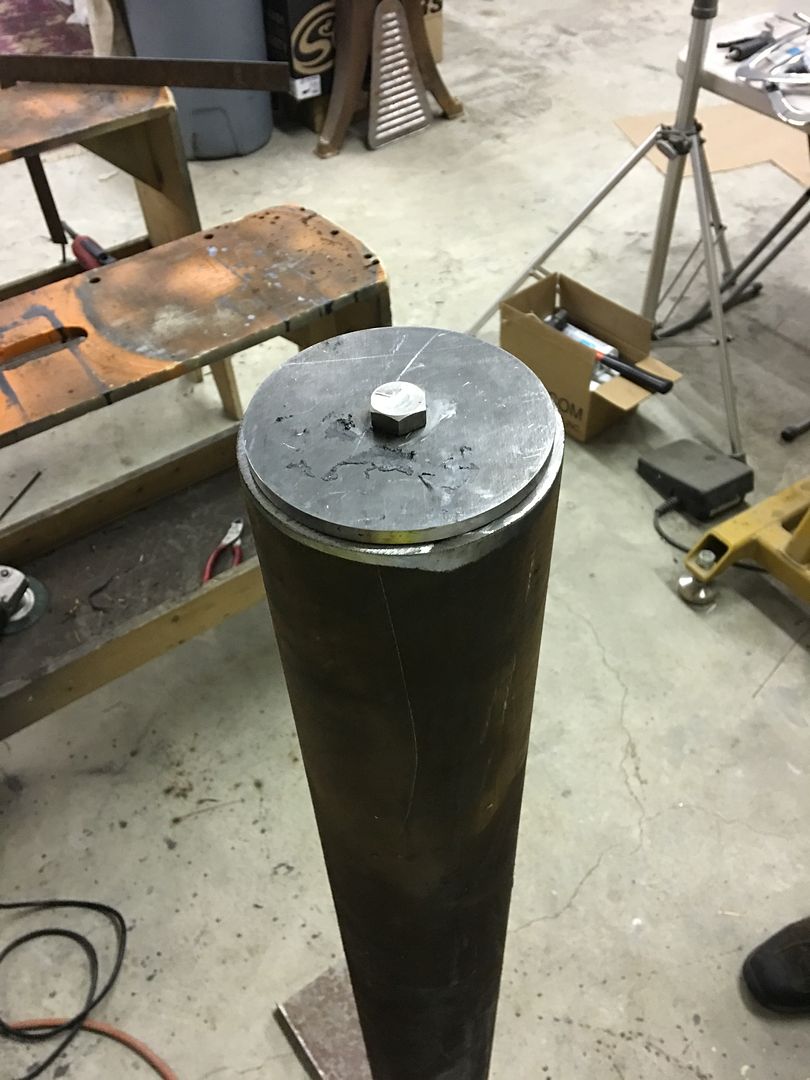
Then we'll need an exit chute, so a 1/2" angled hole is drilled through the side and a 1/2" plug made to fill the remainder...
The plug bottom gets chamfered and welded into the bottom die, then a ball end die grinder is used to fine tune the exit chute...
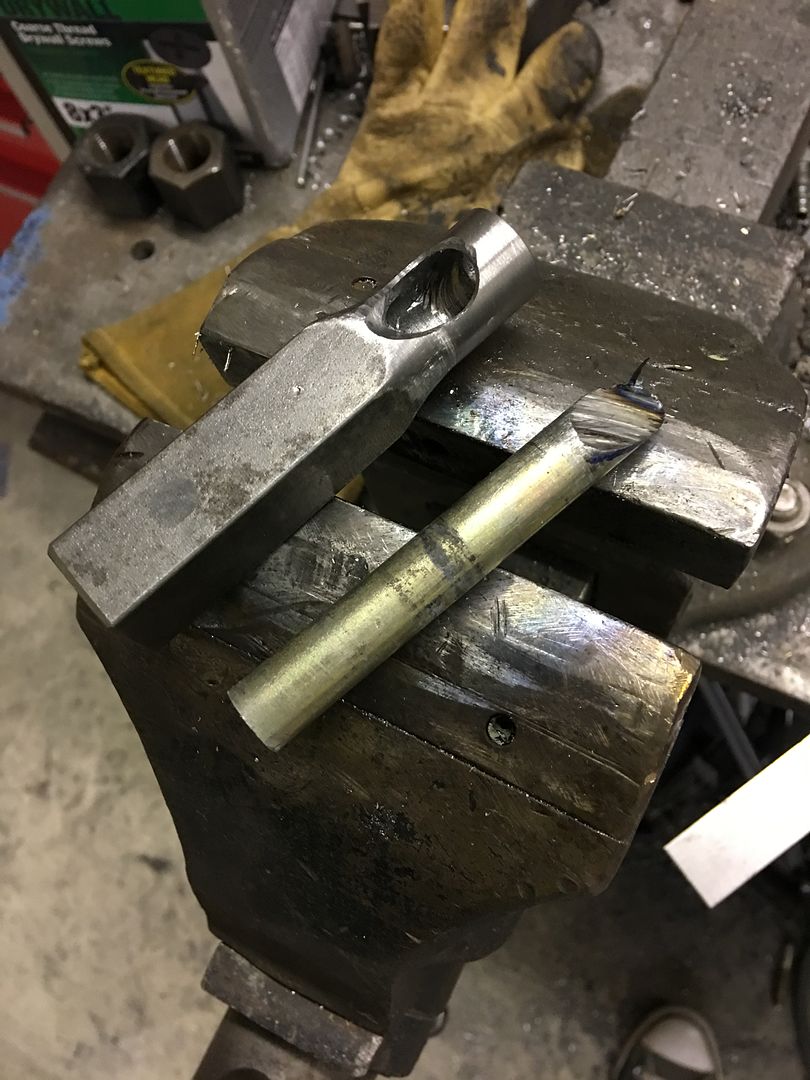
A "shoe" is formed to hold down the workpiece, as otherwise the punch tends to lock onto the panel after the first punch and raise it in the air, thus preventing any material feed...
An action video....
https://www.youtube.com/watch?v=Zzh1...ature=youtu.be
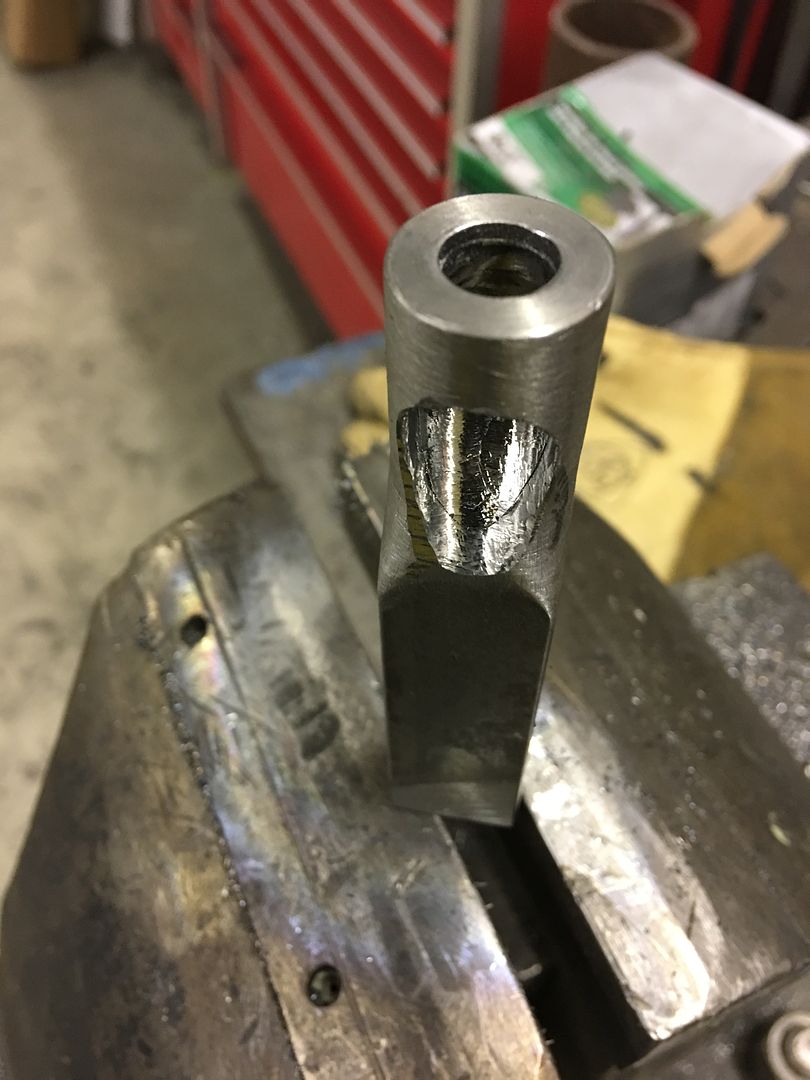
Our test slot.... this may work yet!
Robert
-
07-23-2017 09:36 AM #1062
CHR Member
- Join Date
- Feb 2007
- Location
- Santa Monica
- Car Year, Make, Model: 37 Ford tudor humpback
- Posts
- 1,988
That's one way to get your butt in gear.... Originally Posted by 34_40


"It is not much good thinking of a thing unless you think it out." - H.G. Wells
-
07-23-2017 12:56 PM #1063
CHR Member
- Join Date
- Sep 2007
- Location
- New Bedford
- Car Year, Make, Model: 34 Ford 3W Coupe Replica
- Posts
- 14,754
OH Randy.... groan..... Originally Posted by randyr
")


-
07-23-2017 03:43 PM #1064
CHR Member
- Join Date
- Feb 2010
- Location
- Pukekohe, New Zealand
- Car Year, Make, Model: '23 Ford T Roadster
- Posts
- 2,199
Robert, thank you in one way but, hell man, I am so envious of your ability to (A) think I need a tool to do this sort of one off job, (B) just have the material to put the idea from your brain into an actual tool, (C) and have a well equipped workshop with all the toys one like me can only dream about having let alone knowing how to make the most out of that machine. I really appreciate the fact that you are so generous with us for the trouble you go to the show us mere mortals detailed photo's, descriptions and videos of what you do and accomplish. Sir, if I had the ability, I would get the Queenie of England to Knight you for outstanding work and educating us all so marvellously.I maybe a little crazy but it stops me going insane.
Isaiah 48: 17,18.
Mark.
-
07-23-2017 07:48 PM #1065
CHR Member
- Join Date
- Jun 2008
- Location
- Leonardtown
- Car Year, Make, Model: Walking
- Posts
- 1,228
Thanks for the comments guys.
Today I got the pipe and brackets that Mike made up added to the front of the Pexto Shear. The top of the pipe is set up the same height as the surface of the shear, so no interference in using the shear. The pipe is 49" long so it can be used for a full sheet if we have enough oomph to bend it. Here's a video of the finished product:
https://www.youtube.com/watch?v=Fm1blt_jX7k
Sometimes you get lucky, here's the radius from our 4" pipe as matched to our seat back...
Also made up some patch panels for my brother in law's El Camino. He brought some parts over that he had cut out, so we fabbed up some new parts, here's a sample...
Robert
 Reply With Quote

Posting Permissions
- You may not post new threads
- You may not post replies
- You may not post attachments
- You may not edit your posts

i've enjoyed the years here . made a lot of friends. most who have left. i see no reason to continue with this so hope to see you somewhere else. i dont think this site will ever be back. it's lived...
Dead!