


 3390Likes
Thread: 55 Wagon Progress


Results 871 to 885 of 1865
 LinkBack URL
 About LinkBacks
-
09-18-2016 02:47 AM #871
 CHR Member

- Join Date
- Sep 2007
- Location
- New Bedford
- Car Year, Make, Model: 34 Ford 3W Coupe Replica
- Posts
- 14,754
I know we always say thank you for stopping to get pictures for us, and it really must slow down your productivity!
But, from one of the "students"... Thank You! I really do appreciate the education and it's enjoyable watching a master work.
Tell Kyle the "class" says Hi... lol..
-
Advertising

- Google Adsense
- REGISTERED USERS DO NOT SEE THIS AD
-
09-20-2016 08:32 PM #872
CHR Member
- Join Date
- Jun 2008
- Location
- Leonardtown
- Car Year, Make, Model: Walking
- Posts
- 1,228
Thanks!
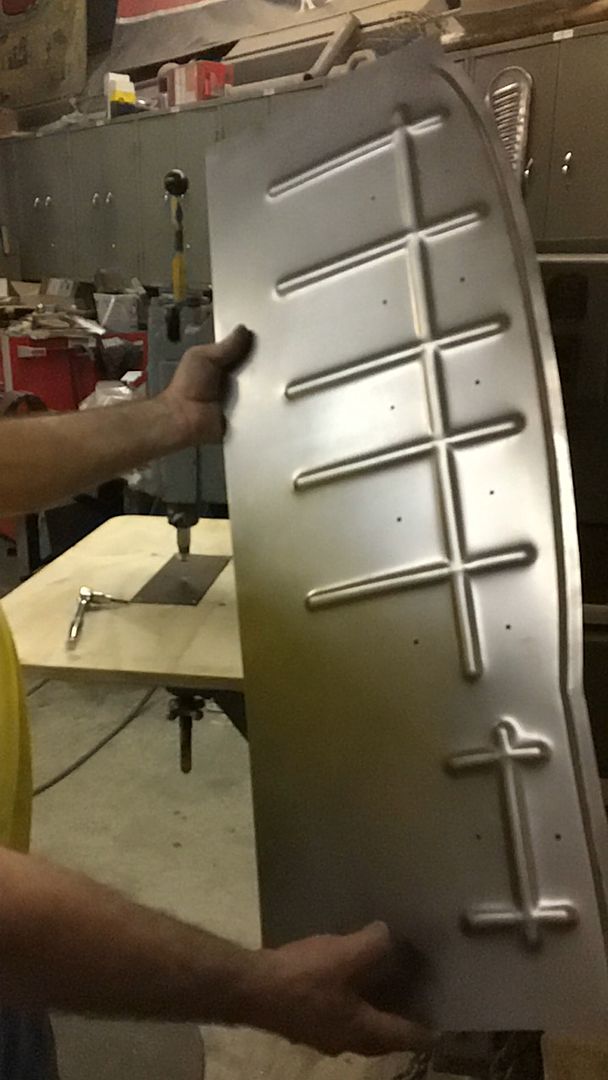
Made our table slightly larger to better hold the panel level for punch depth consistency..
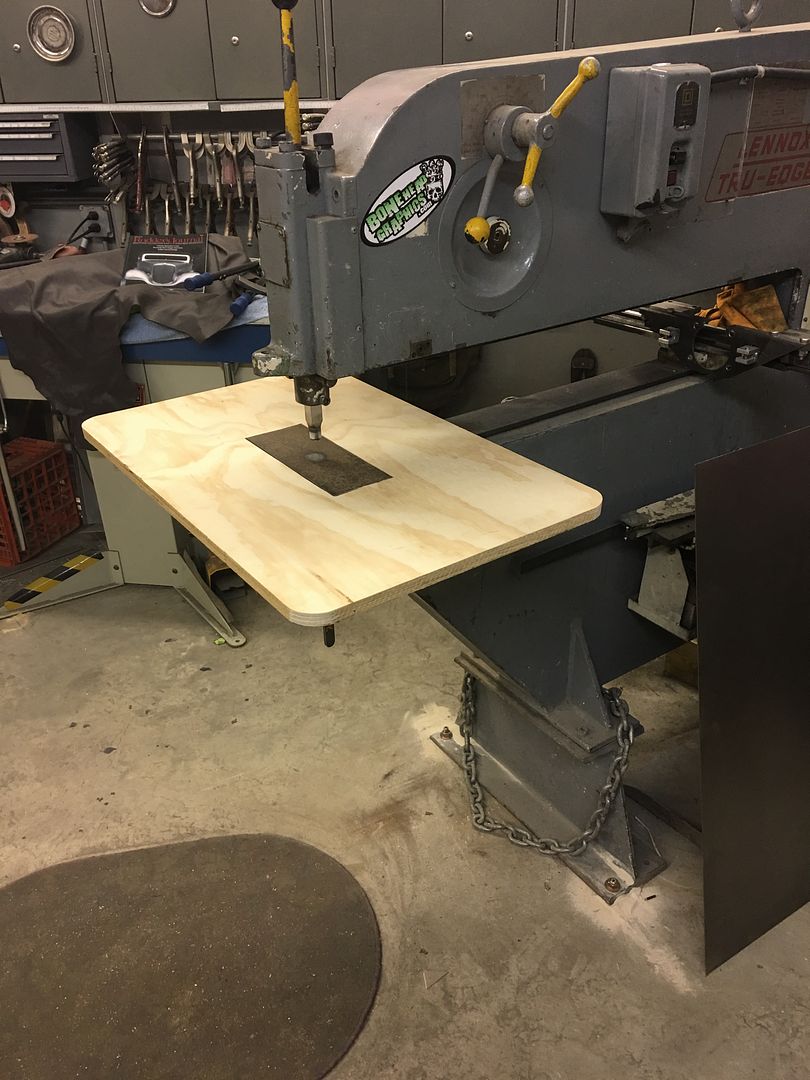
More holes for screws added to keep things snug
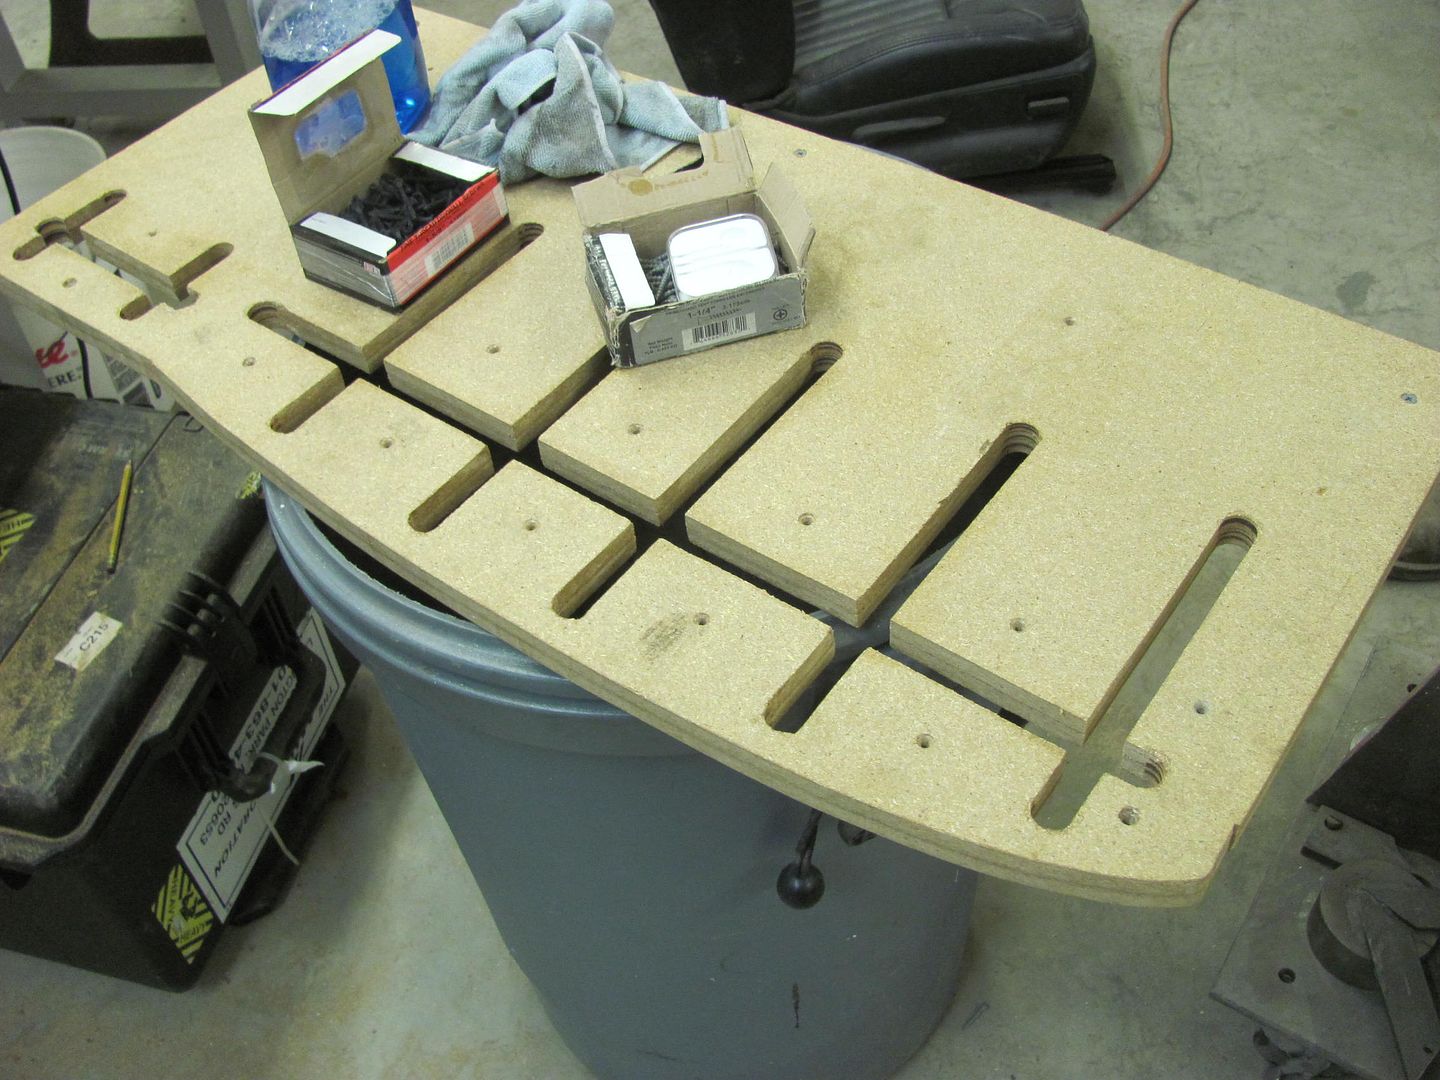
A few holes to fill, we'll get the other side done and weld them all in one sitting.
Motion picture version:
https://www.youtube.com/watch?v=KCIv27b4dPs
.Robert
-
09-23-2016 10:49 AM #873
CHR Member
- Join Date
- Jun 2008
- Location
- Leonardtown
- Car Year, Make, Model: Walking
- Posts
- 1,228
Last night we used the poster board template to check the fit of our pattern to the passenger side. Only a slight shave in the middle for a good snug fit. Then we test fit the repop front section of wheel well, which was horrendous. if we were to trim it to fit there wouldn't be enough step flange left over for the seal. So, Kyle added a 1/2" strip of 18 gauge cold rolled to the outside so we will have enough to trim for a proper fit. Still needs to add that corner on this side as well.
https://www.youtube.com/watch?v=DNiSM9Oyp2s
While he was welding away, I trimmed the second panel for the passenger rear wheel well, used the Lennox with the tipping die to add the step flange for the seal, and got it prepped for the bead detail work, which we'll get to on Saturday.Robert
-
09-23-2016 01:14 PM #874
CHR Member
- Join Date
- Sep 2007
- Location
- New Bedford
- Car Year, Make, Model: 34 Ford 3W Coupe Replica
- Posts
- 14,754
I wish I could tig as fast as Kyle! LOL...
-
09-23-2016 02:51 PM #875
CHR Member
- Join Date
- Jun 2008
- Location
- Leonardtown
- Car Year, Make, Model: Walking
- Posts
- 1,228
Me too. He just runs circles around me..
Robert
-
09-23-2016 03:31 PM #876
CHR Member
- Join Date
- Apr 2011
- Location
- Prairie City
- Car Year, Make, Model: 40 Ford Deluxe, 68 Corvette, 72&76 K30
- Posts
- 7,301
- Blog Entries
- 1
More great work you 2!Ryan
1940 Ford Deluxe Tudor 354 Hemi 46RH Electric Blue w/multi-color flames, Ford 9" Residing in multiple pieces
1968 Corvette Coupe 5.9 Cummins Drag Car 11.43@130mph No stall leaving the line with 1250 rpm's and poor 2.2 60'
1972 Chevy K30 Longhorn P-pumped 24v Compound Turbos 47RH Just another money pit
1971 Camaro RS 5.3 BTR Stage 3 cam, SuperT10
Tire Sizes
-
09-24-2016 07:00 PM #877
CHR Member
- Join Date
- Jun 2008
- Location
- Leonardtown
- Car Year, Make, Model: Walking
- Posts
- 1,228
Thanks Ryan!
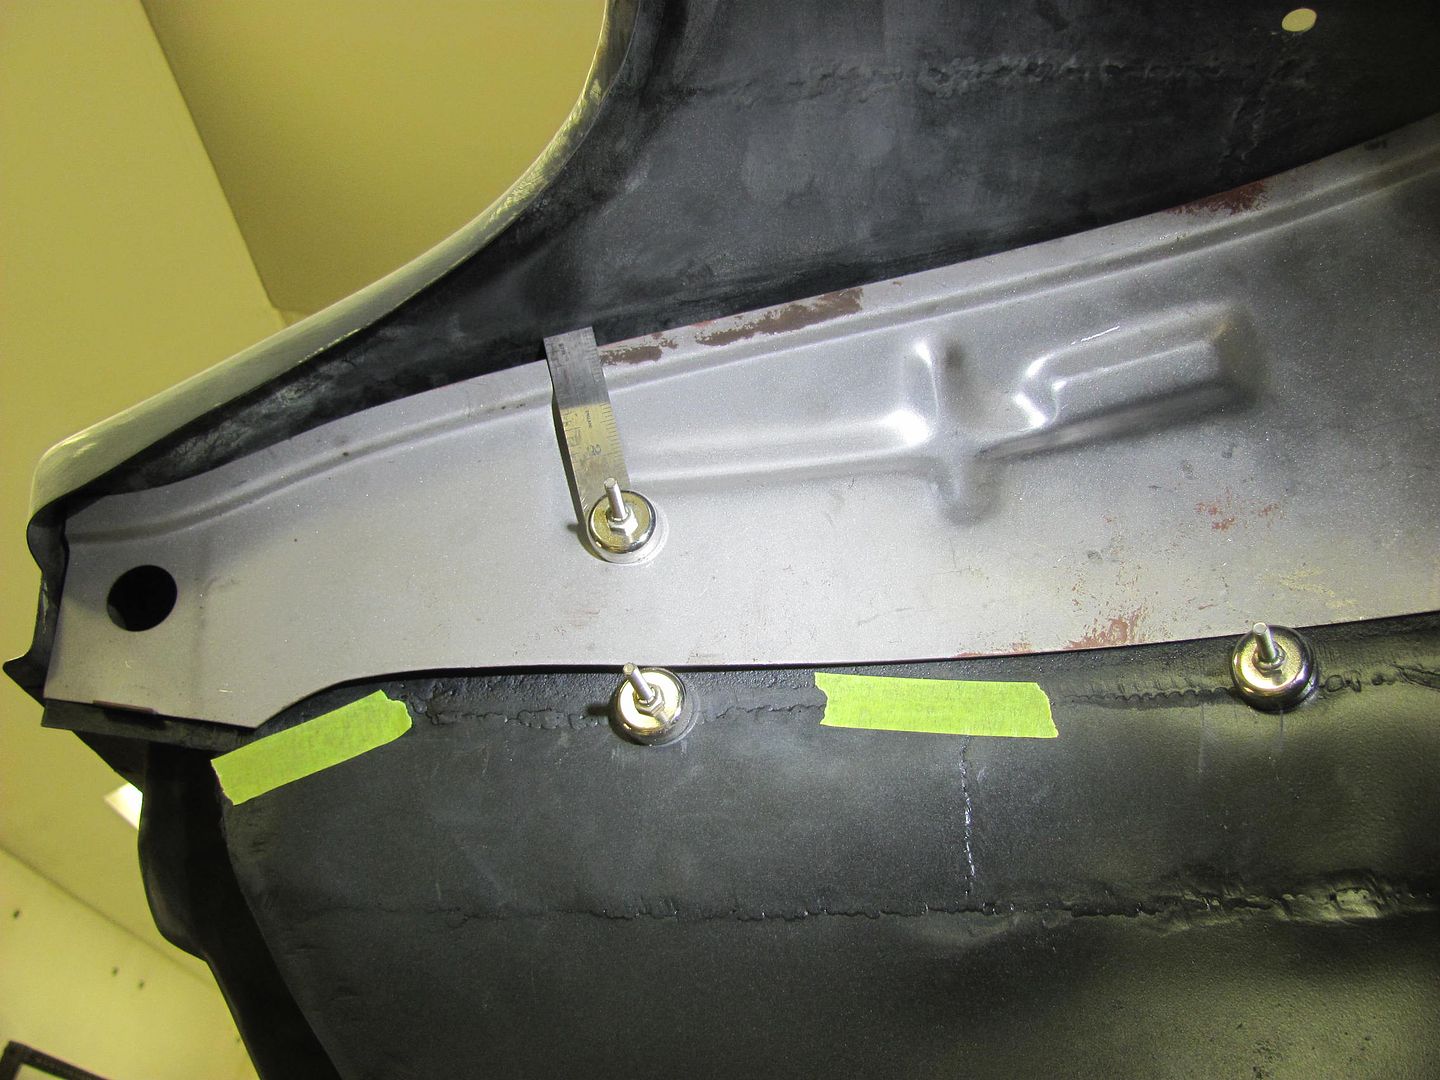
Here's a test fit of the reproduction wheel well for the 55, this is the front section. Note the poor fit to the rear side of the quarter panel. I don't know if these are an EXACT reproduction of OEM, but have heard others having similar "gaping hole" issues with their original cars.
This is the driver's side:

video version....
https://www.youtube.com/watch?v=WiSaQXkkowc
This is the passenger side we modified Thursday, adding a 1/2" filler strip and then trimming to fit to the quarter panel....
.......and shown here with seal in place...
Here Kyle is adding the 1/2" filler strip to the driver's side reproduction wheel well.
https://www.youtube.com/watch?v=penIygidVUc
With the rear section not available in reproduction (blessing in disguise), here is the final layout and trim of our version..
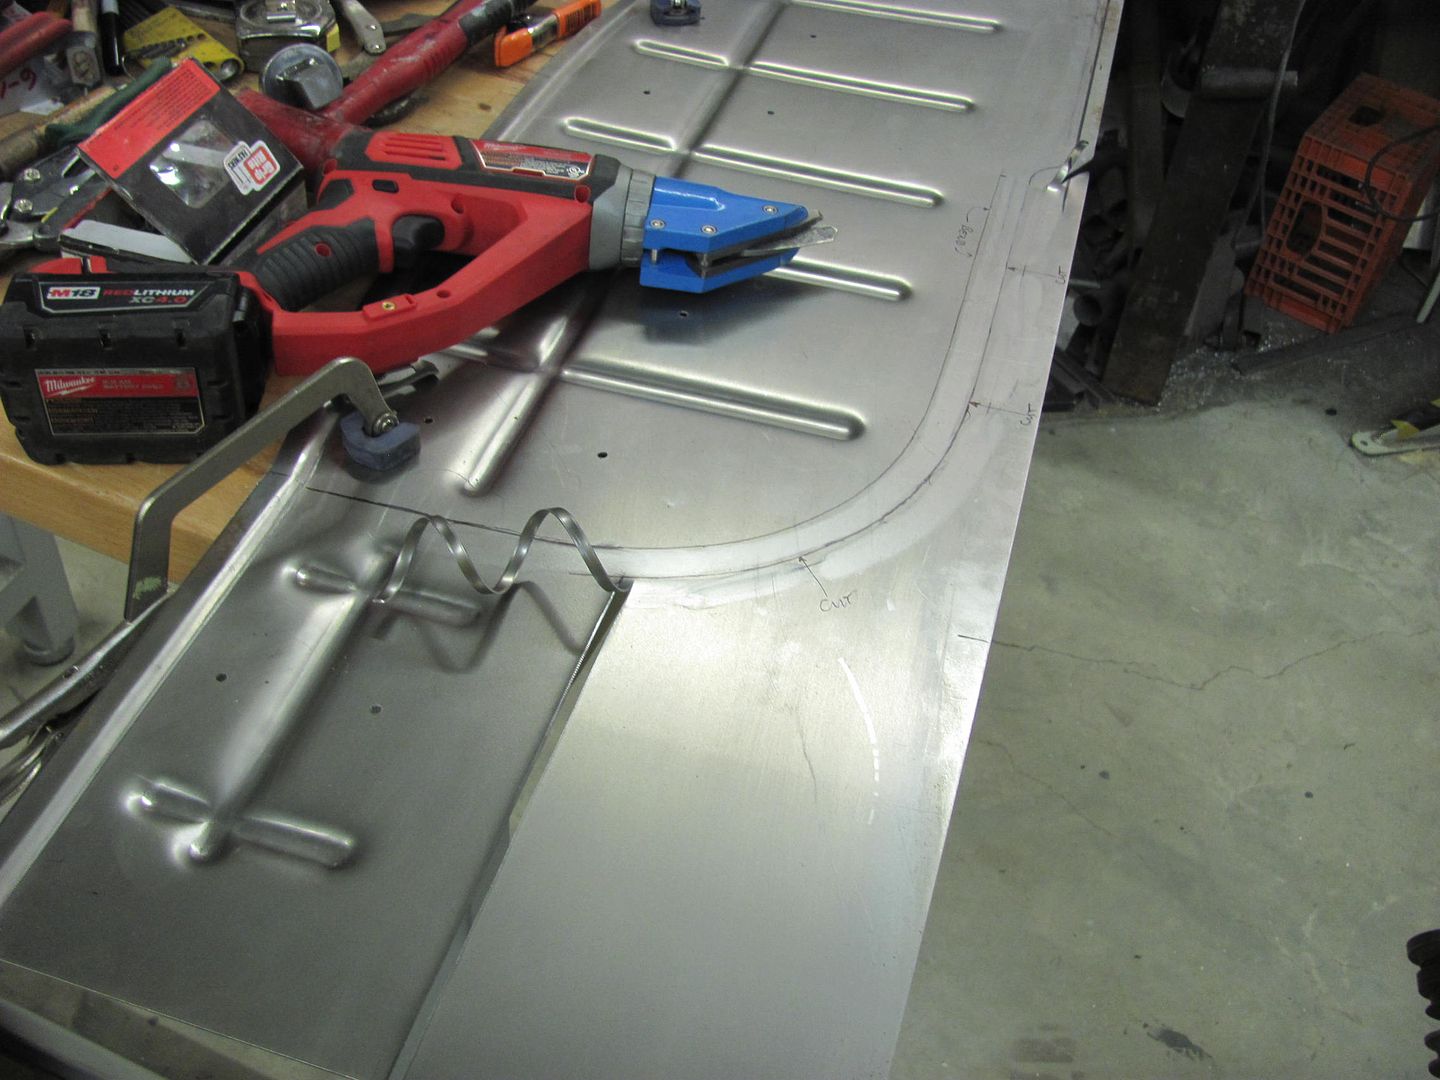
Flanges are tipped using the Fasti swaging machine..
Test fit of the driver's side wheel wells. The front reproduction piece has the filler strip added but still needs trimming, the rear section is a much better fit than what came out from the factory..
Video version:
https://www.youtube.com/watch?v=9BvNqdKQf3U
Once the front section has been trimmed for proper fit, we will butt weld the front and rear section together to eliminate another overlap rust trap.Robert
-
09-26-2016 02:05 PM #878
CHR Member
- Join Date
- Apr 2011
- Location
- Prairie City
- Car Year, Make, Model: 40 Ford Deluxe, 68 Corvette, 72&76 K30
- Posts
- 7,301
- Blog Entries
- 1
More great work and attention to detail no one will see. But, that will help keep that car around for another 100 years or more!Ryan
1940 Ford Deluxe Tudor 354 Hemi 46RH Electric Blue w/multi-color flames, Ford 9" Residing in multiple pieces
1968 Corvette Coupe 5.9 Cummins Drag Car 11.43@130mph No stall leaving the line with 1250 rpm's and poor 2.2 60'
1972 Chevy K30 Longhorn P-pumped 24v Compound Turbos 47RH Just another money pit
1971 Camaro RS 5.3 BTR Stage 3 cam, SuperT10
Tire Sizes
-
10-01-2016 08:07 PM #879
CHR Member
- Join Date
- Jun 2008
- Location
- Leonardtown
- Car Year, Make, Model: Walking
- Posts
- 1,228
Haha, so true. Thanks Ryan.
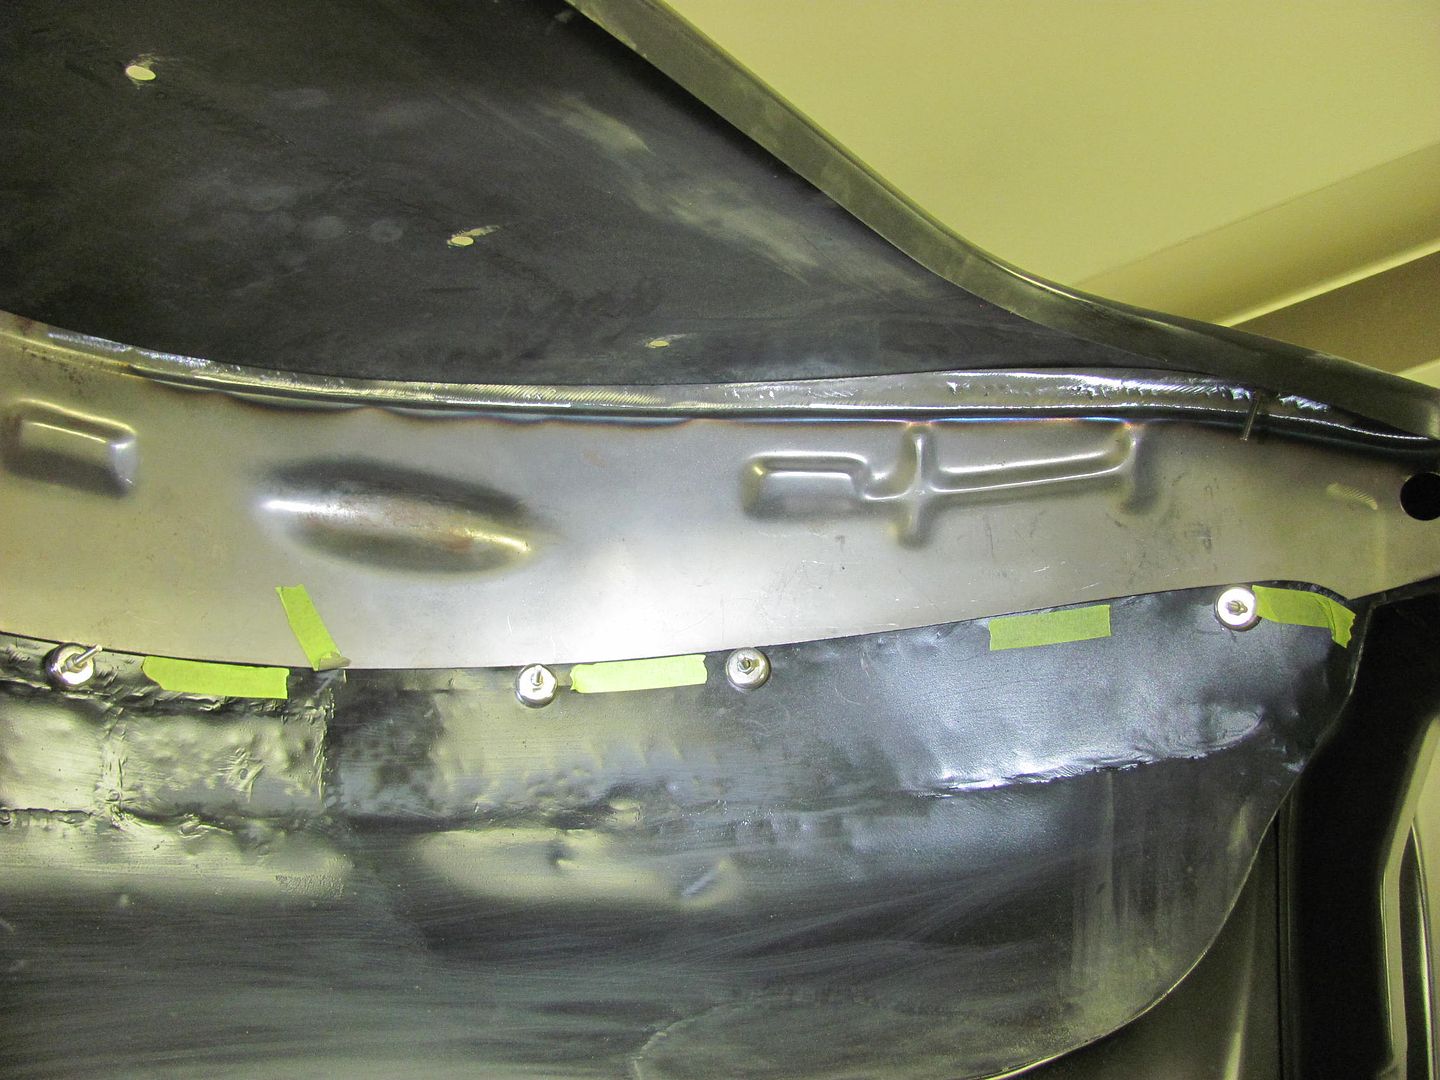
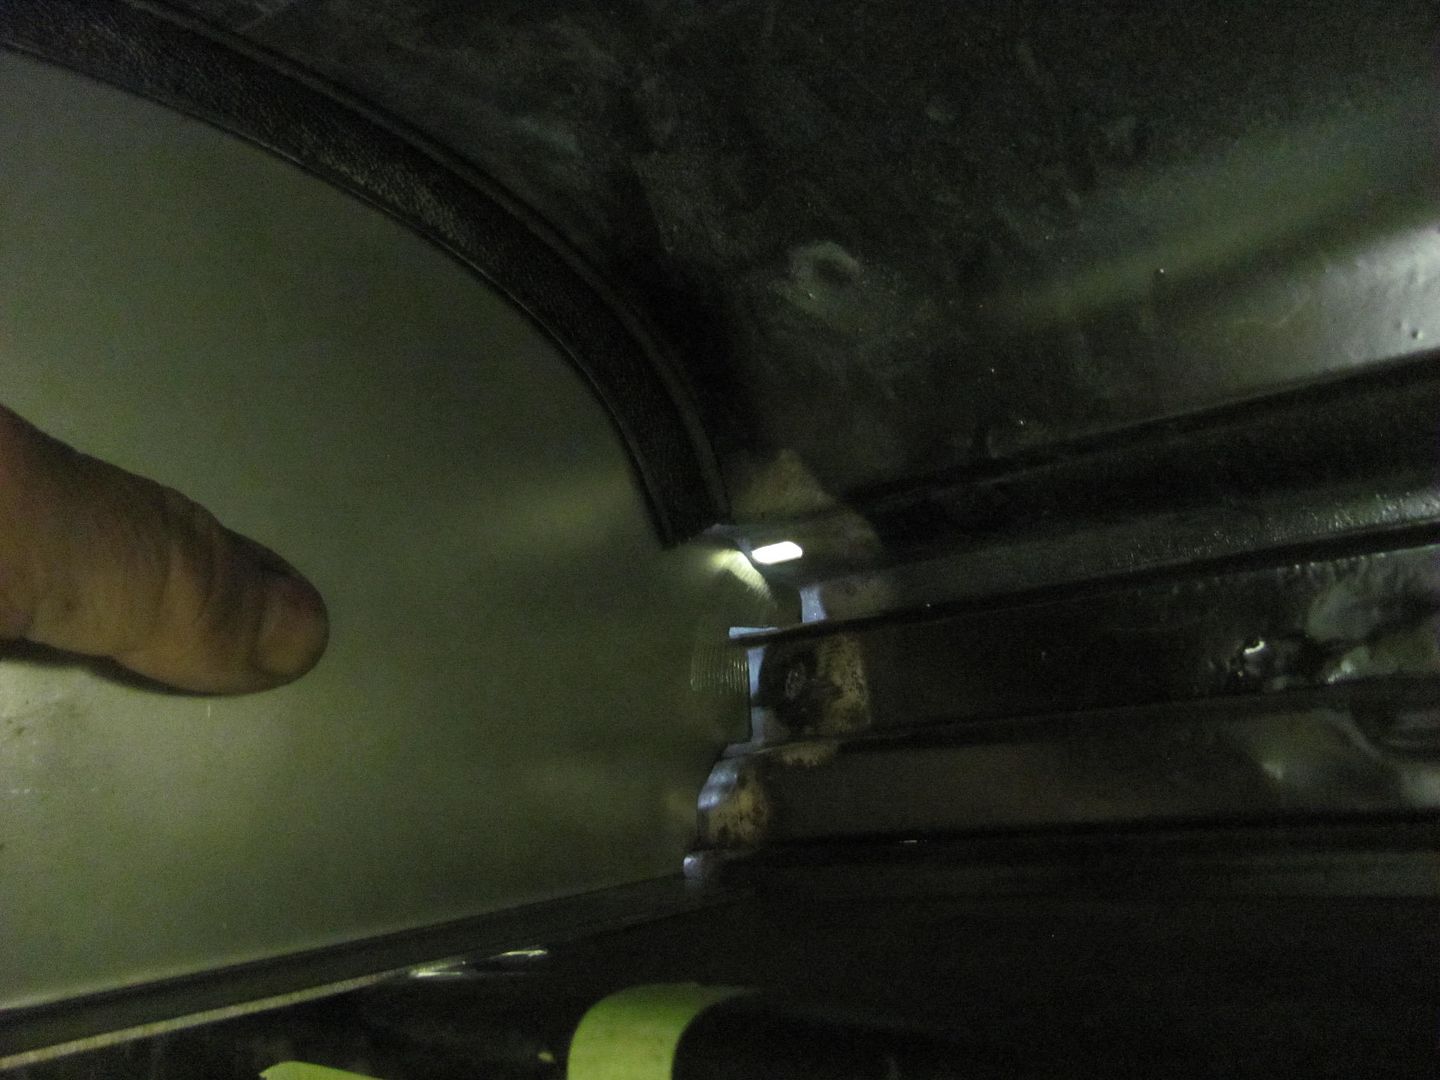
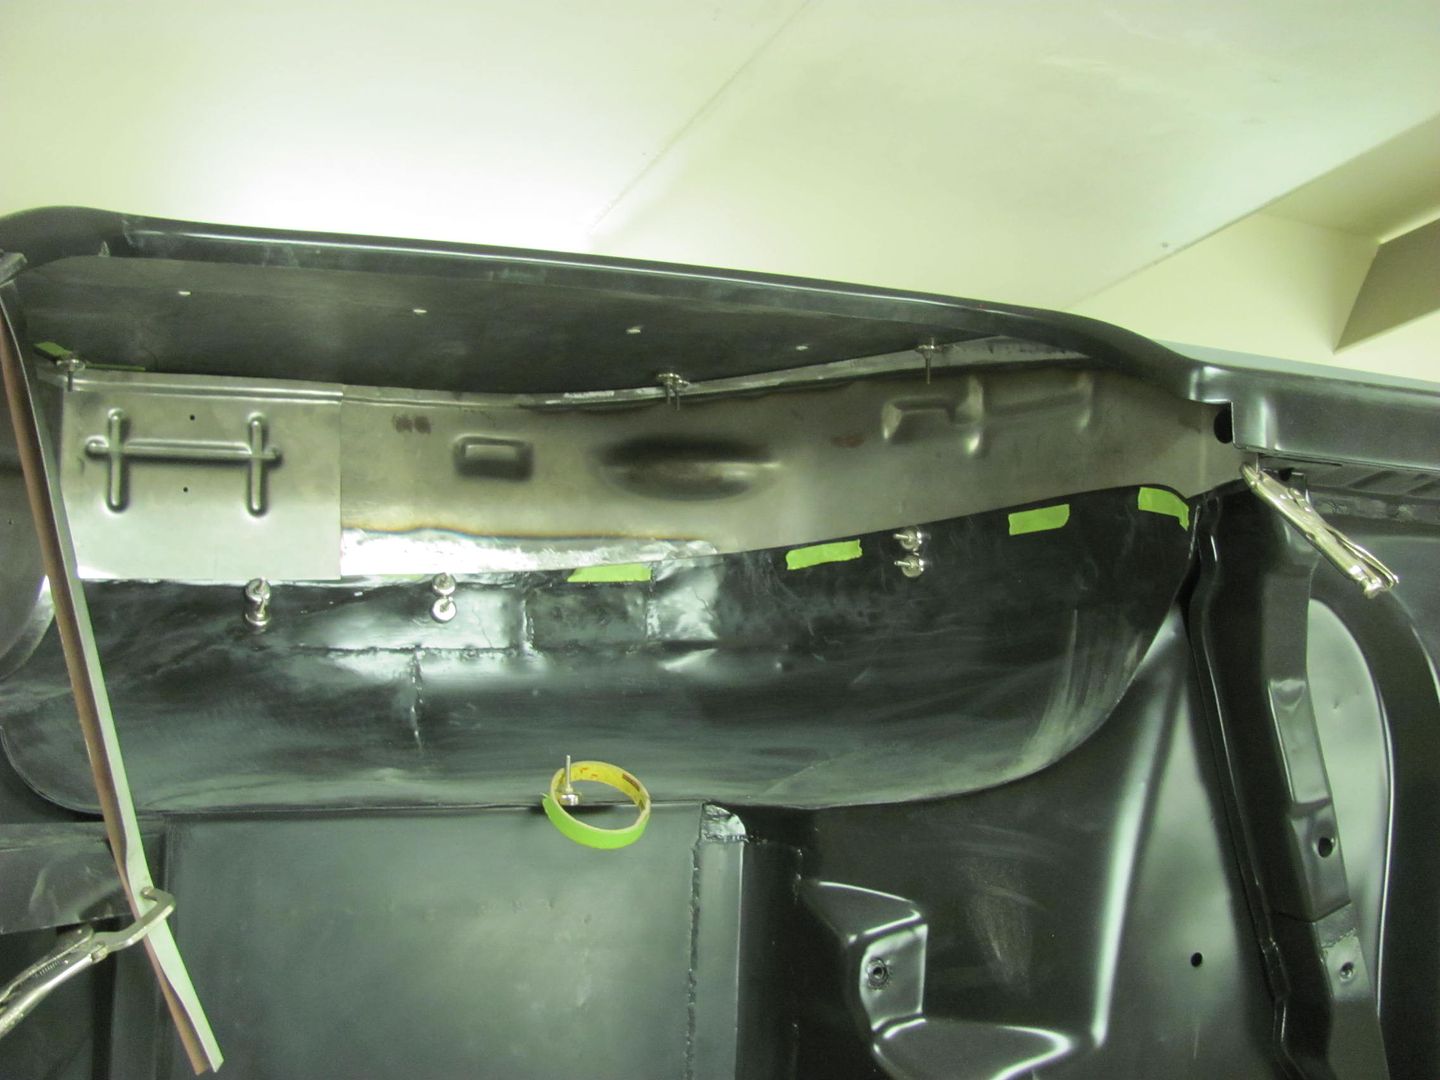
Finishing up on our drivers side wheel well today. The front "modified" reproduction is trimmed and fitted. A light is put behind it to check for gaps...
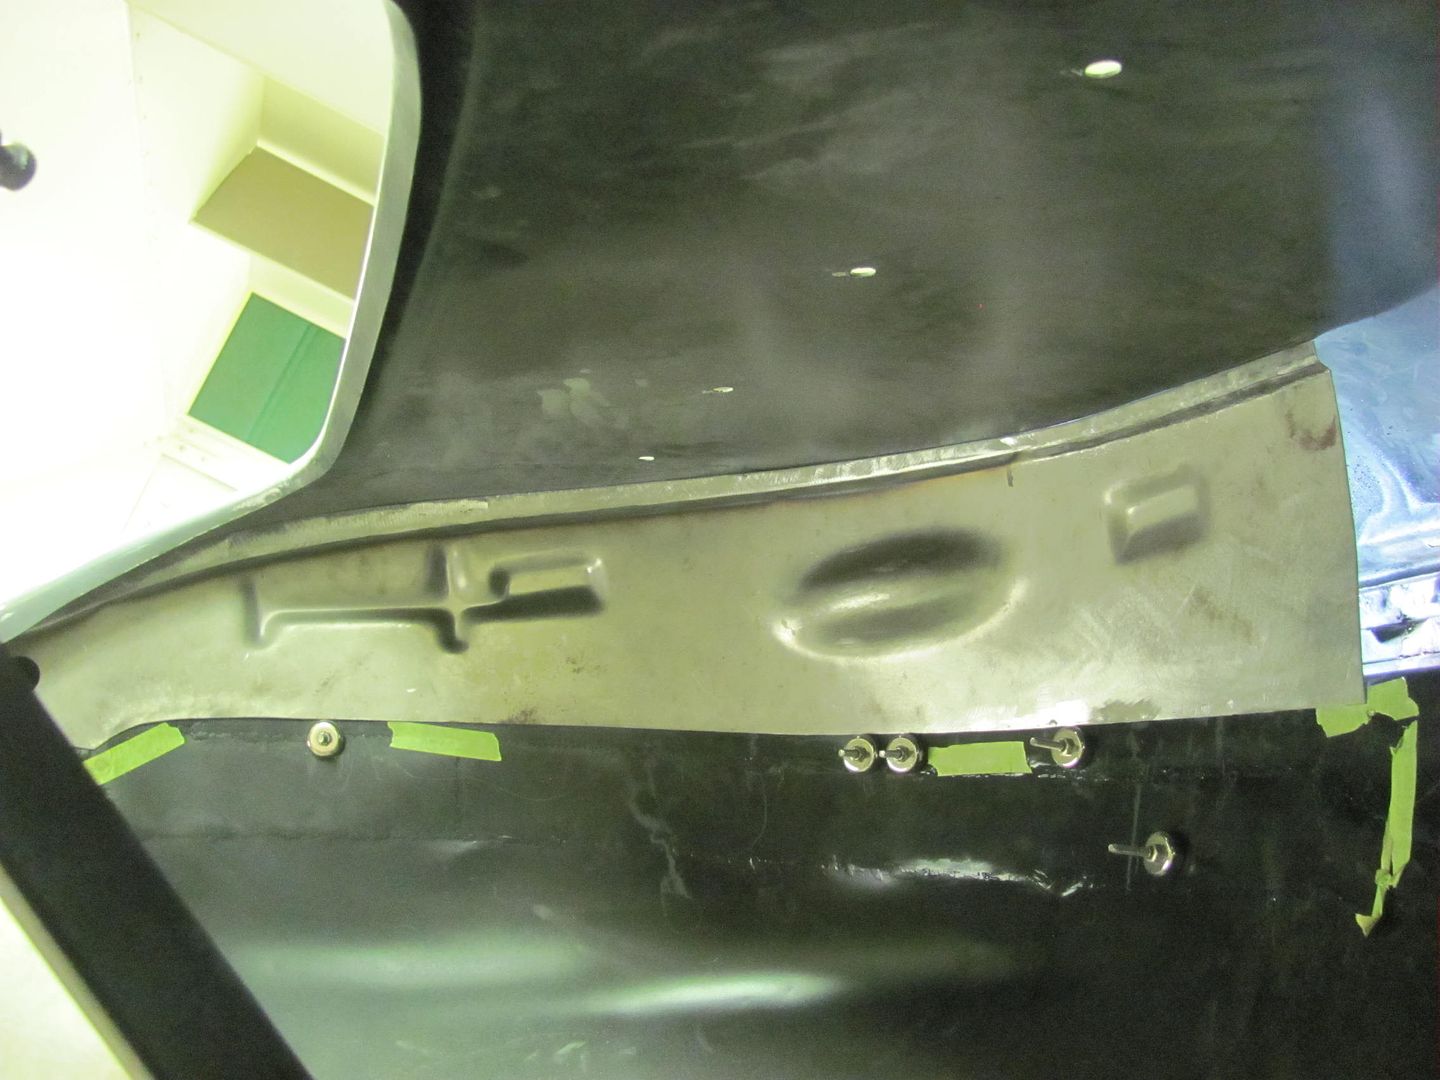
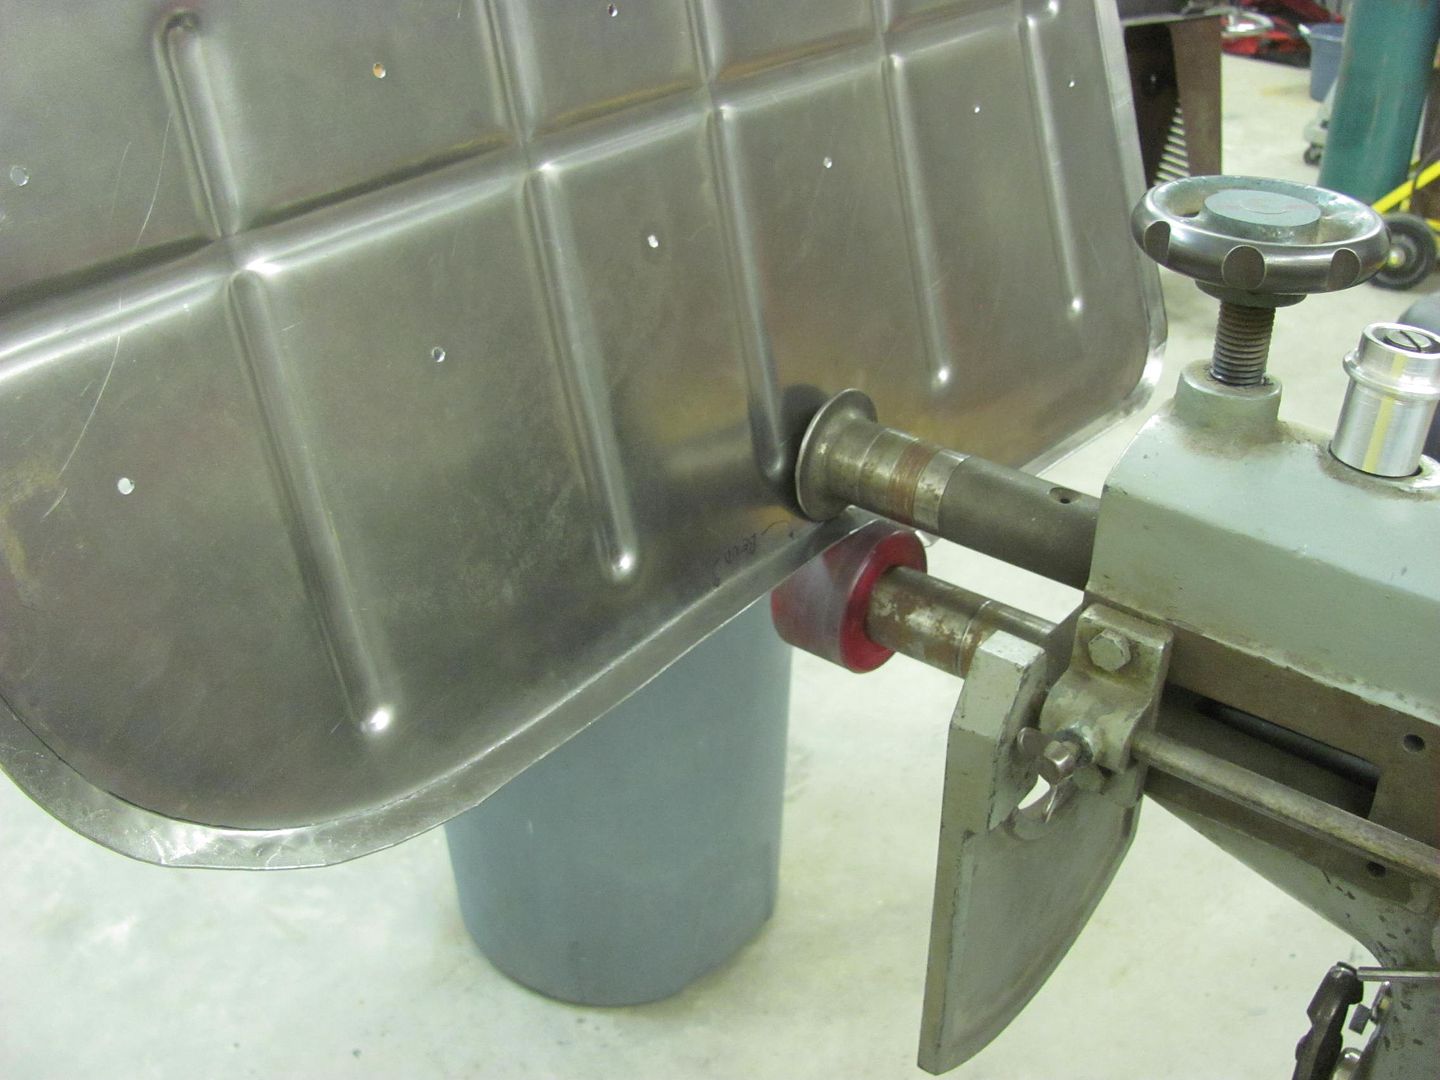
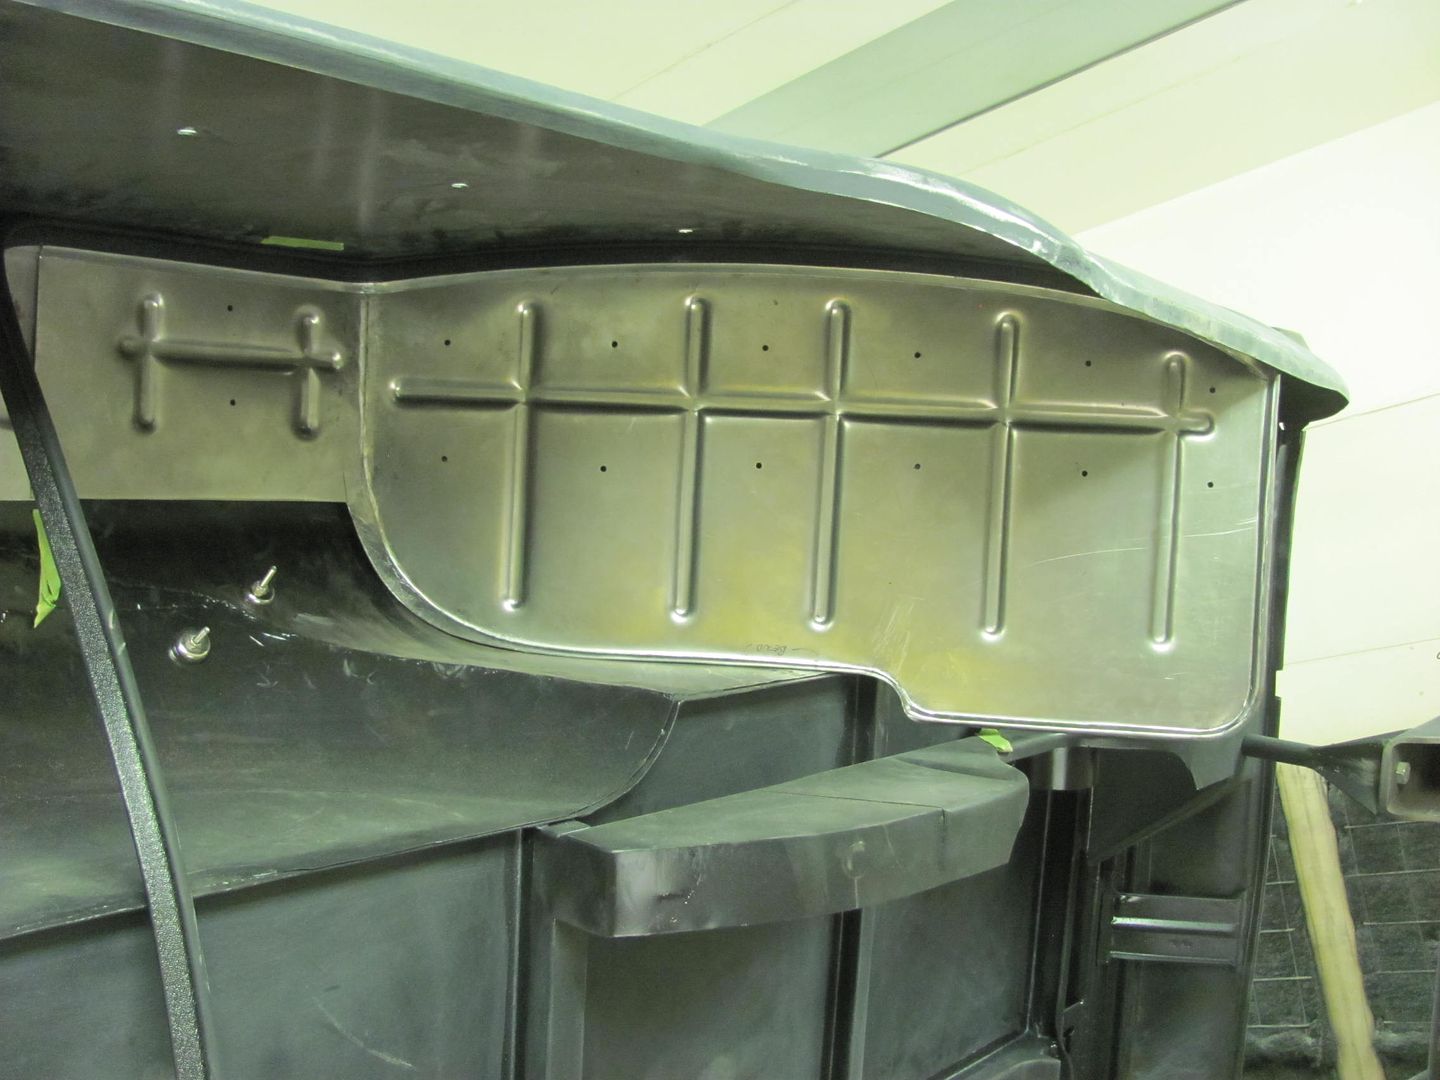
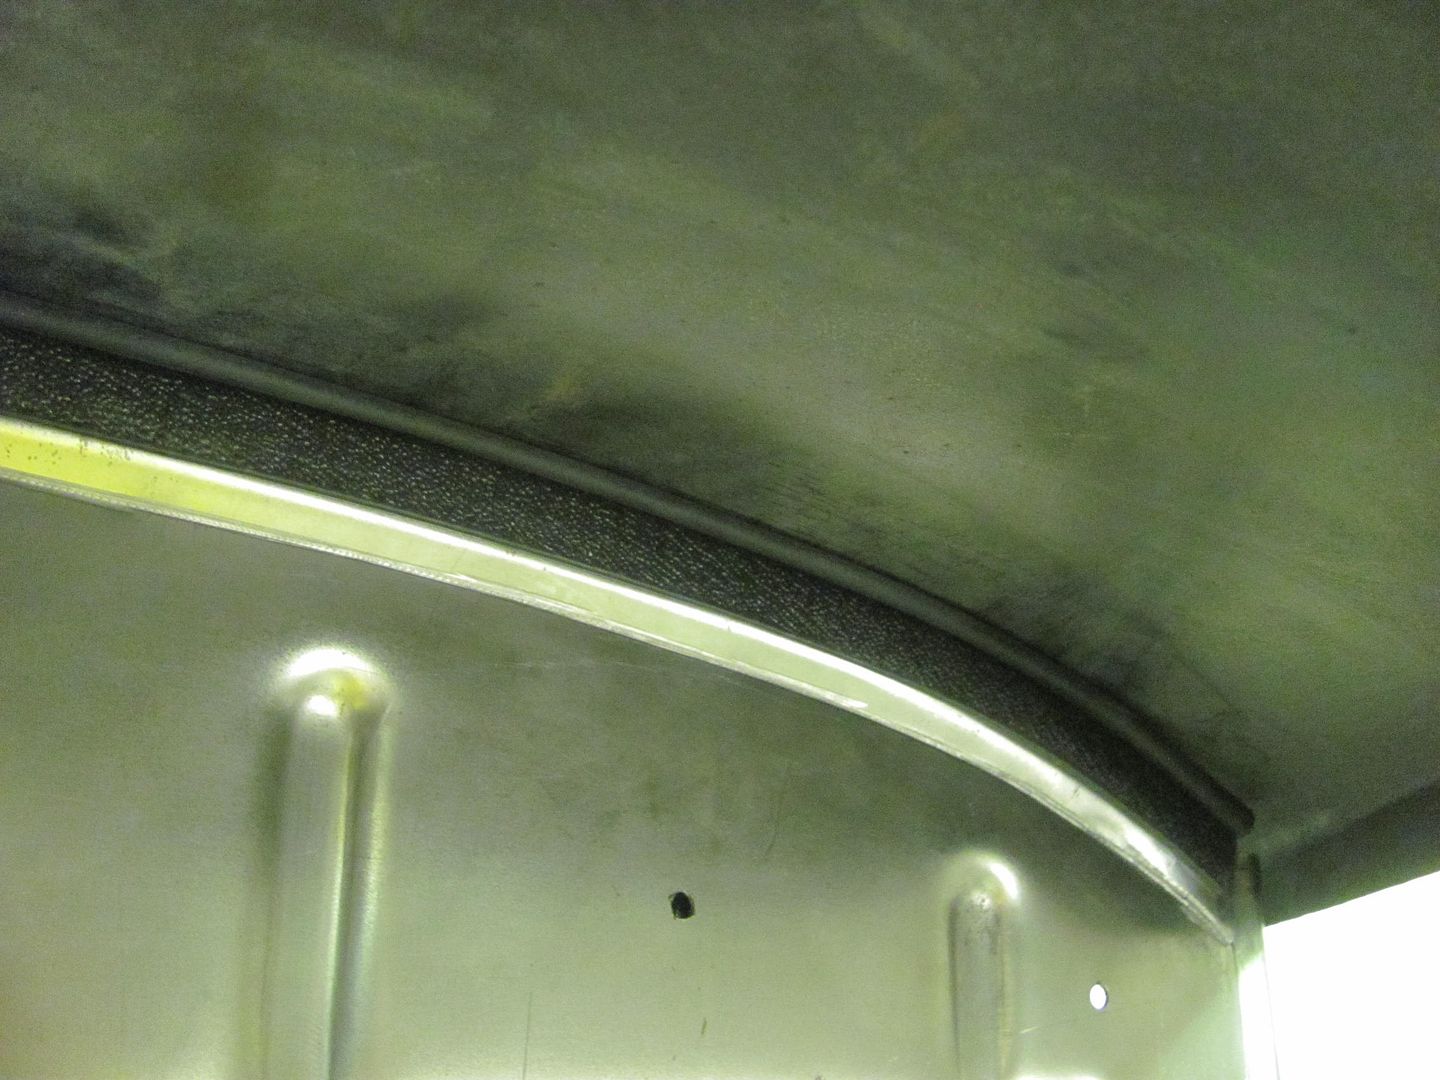
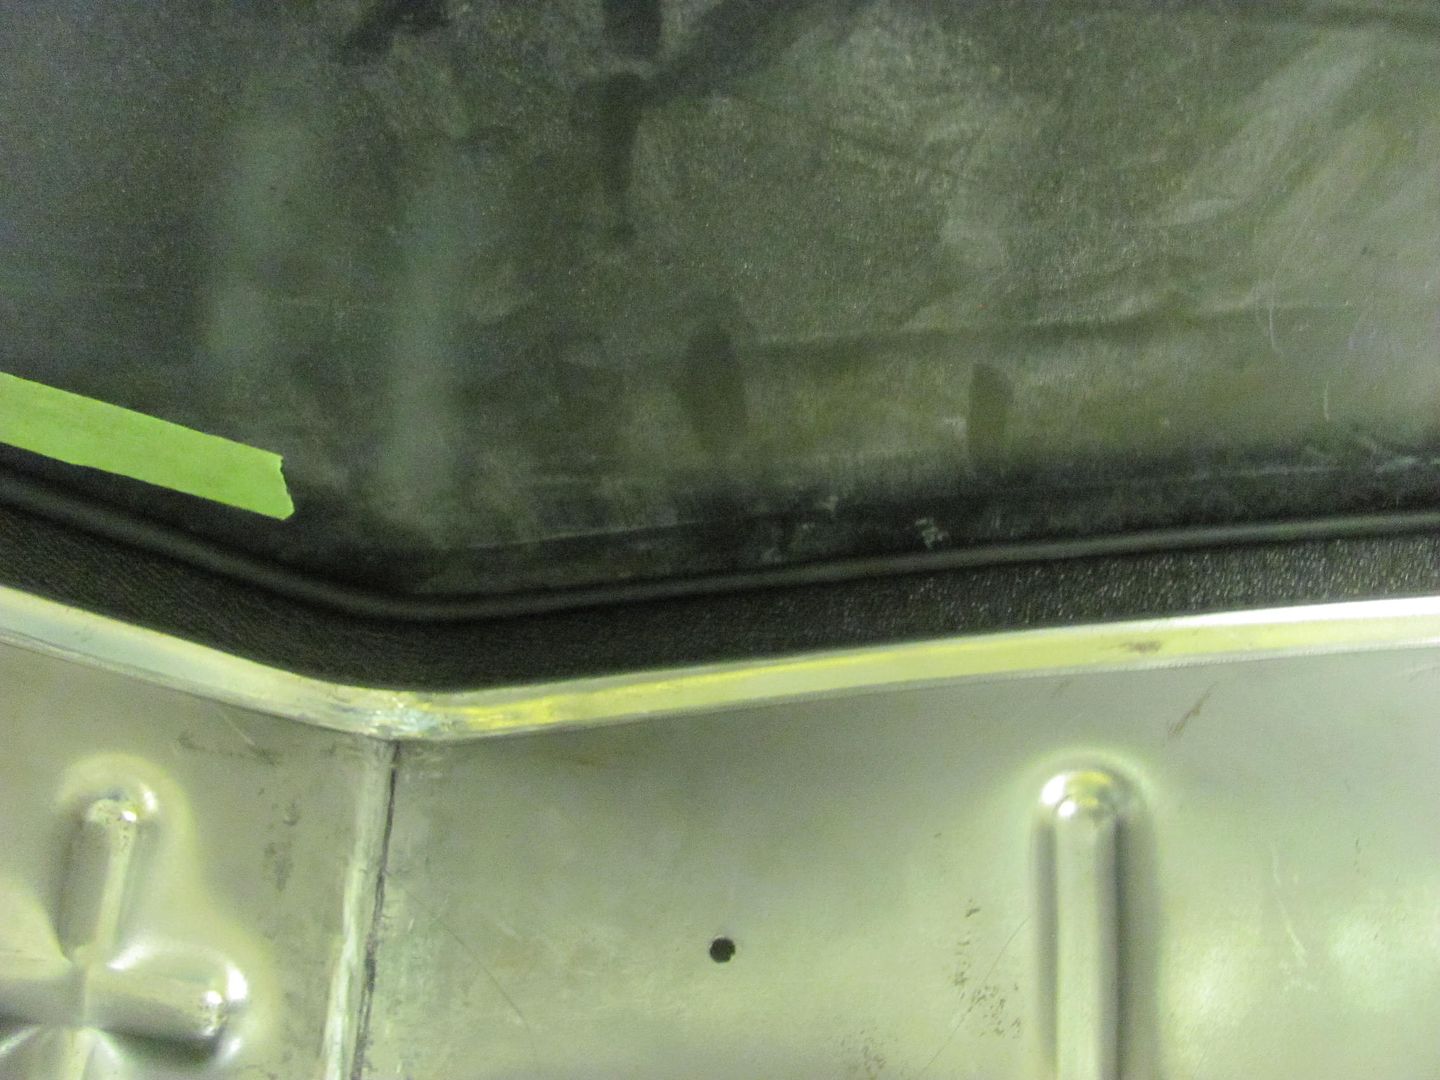
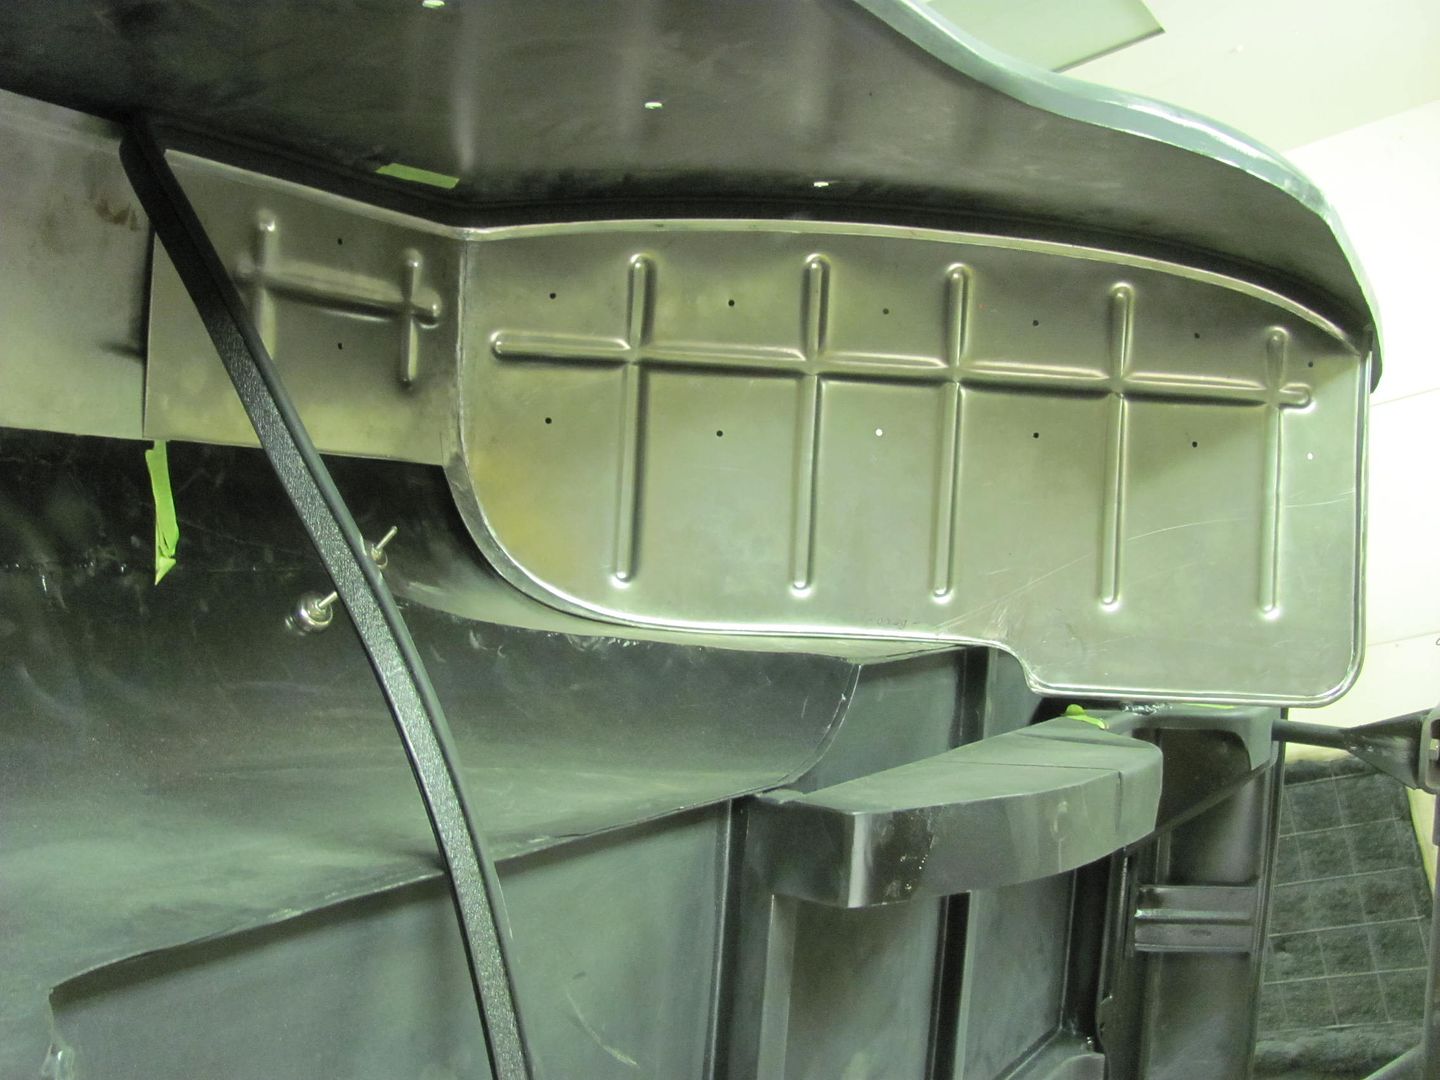
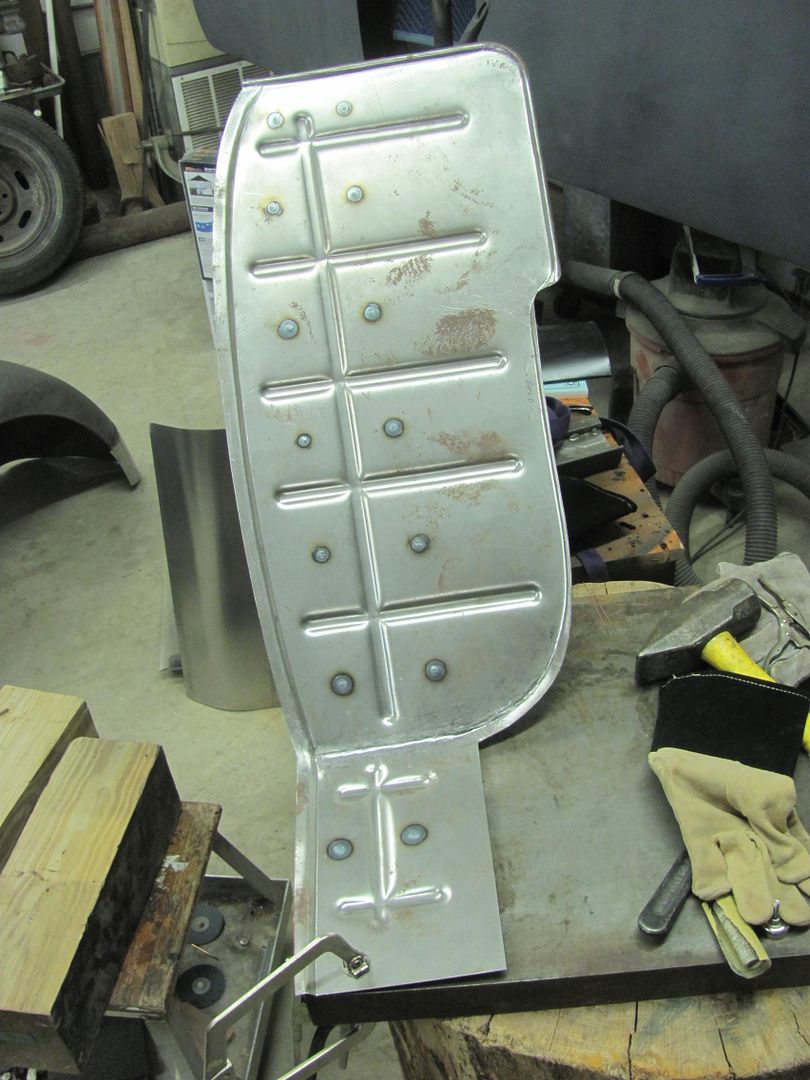
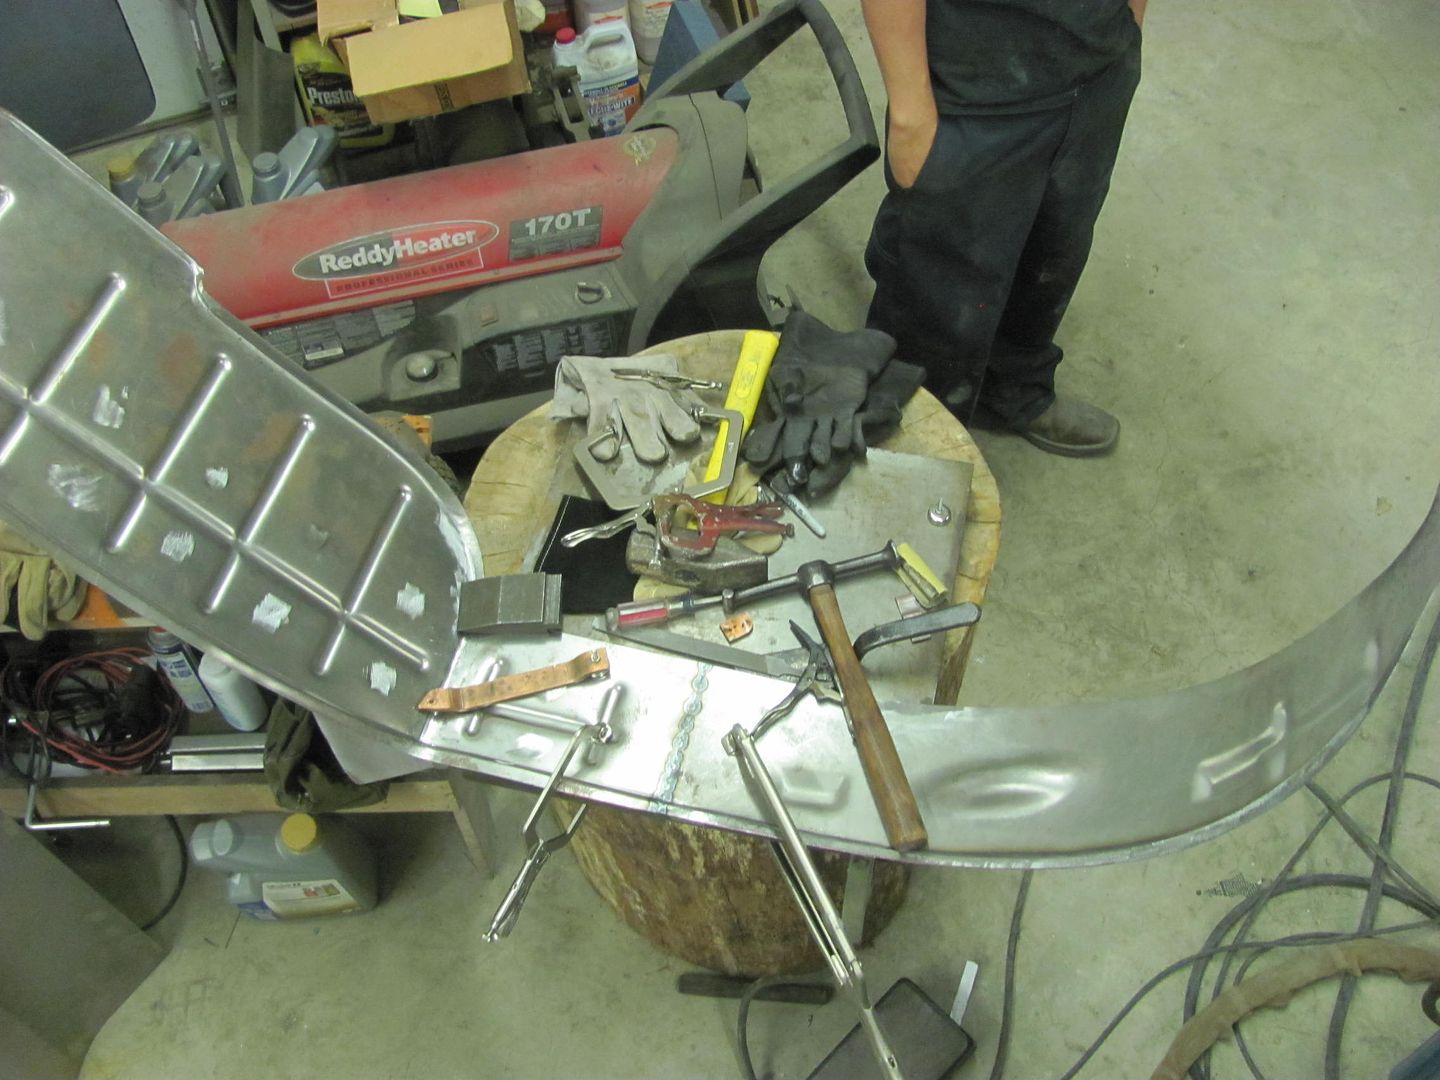
The baffle that sits above the wheel well is made differently as well, this time using a piece of 16 ga cold rolled steel, and trimmed to fill the void. We left a slight gap that we plan on sealing with seam sealer.
Shown here with bulb seal against the quarter....
The trouble with the factory version of sealing above the baffle is that the expanding foam encapsulates the surrounding area, to include surrounding the slot for trim hardware. It is here that water intrudes, and is held against the quarter causing rust.

Our version will leave this hole unobstructed so that any water intrusion that may occur will pass on through.
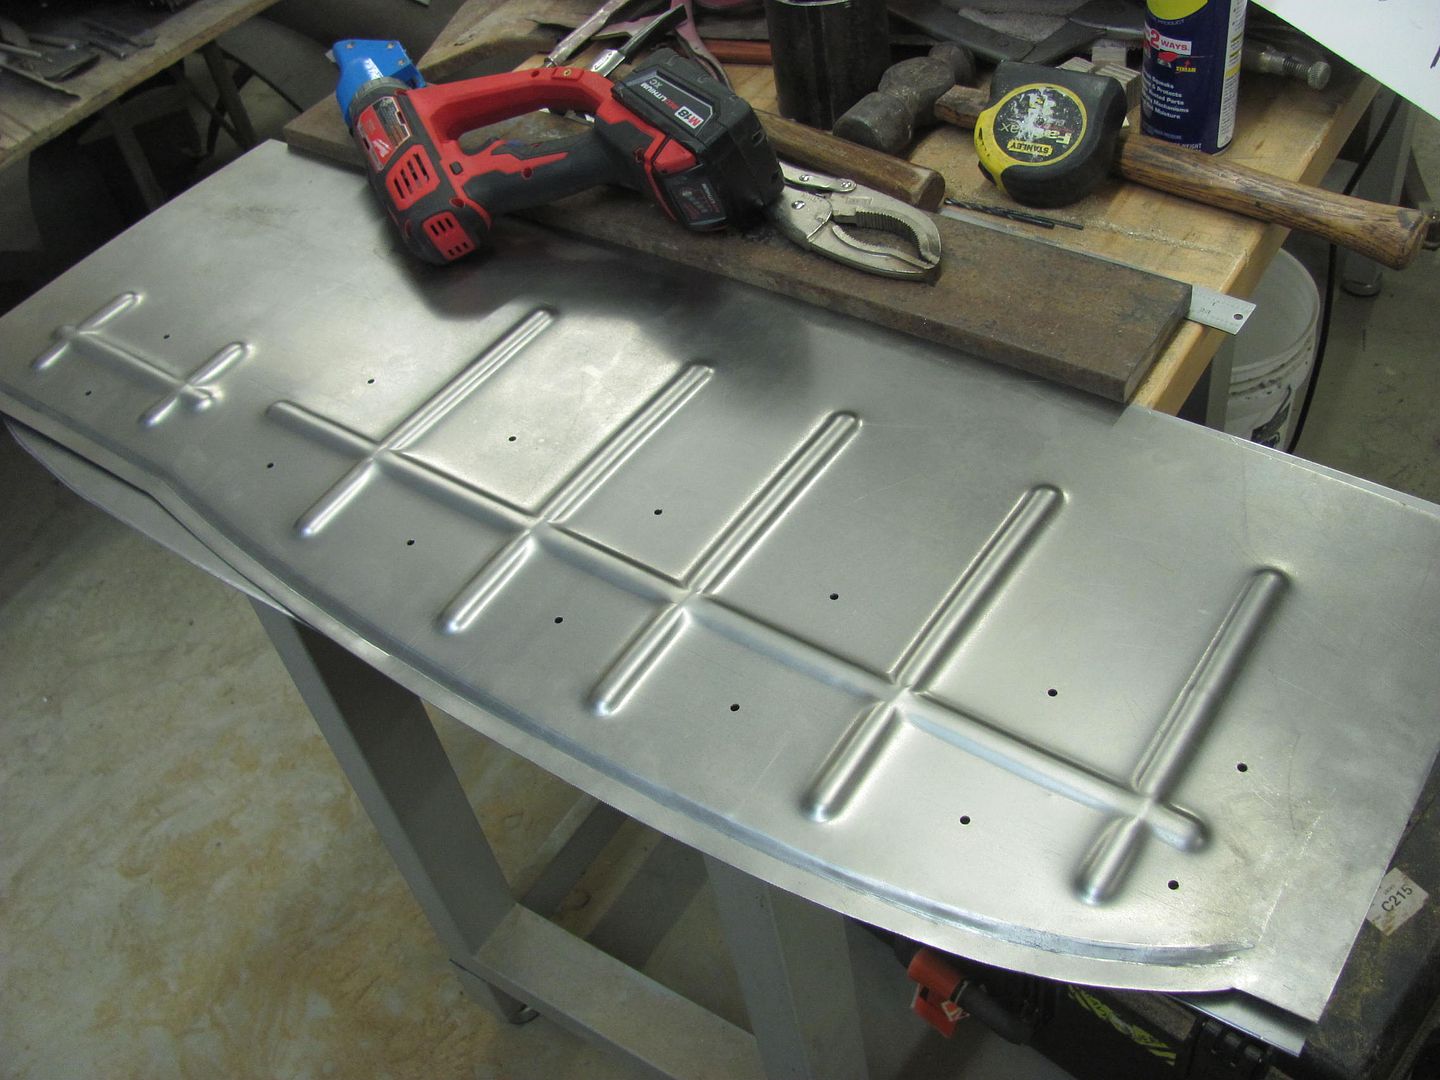
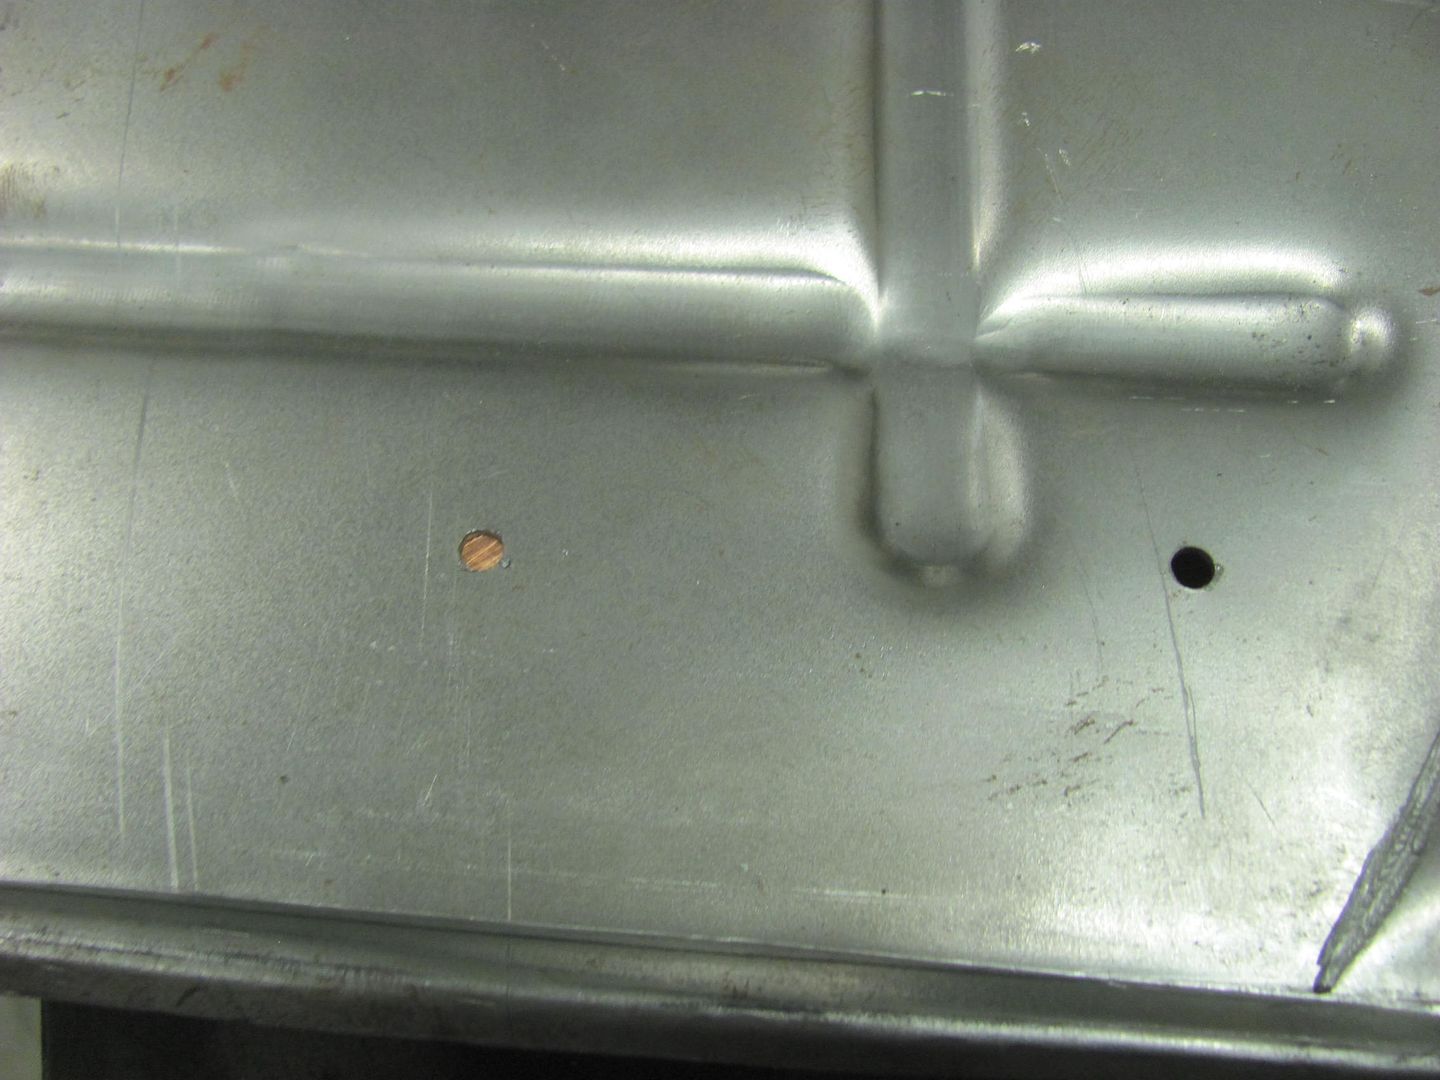
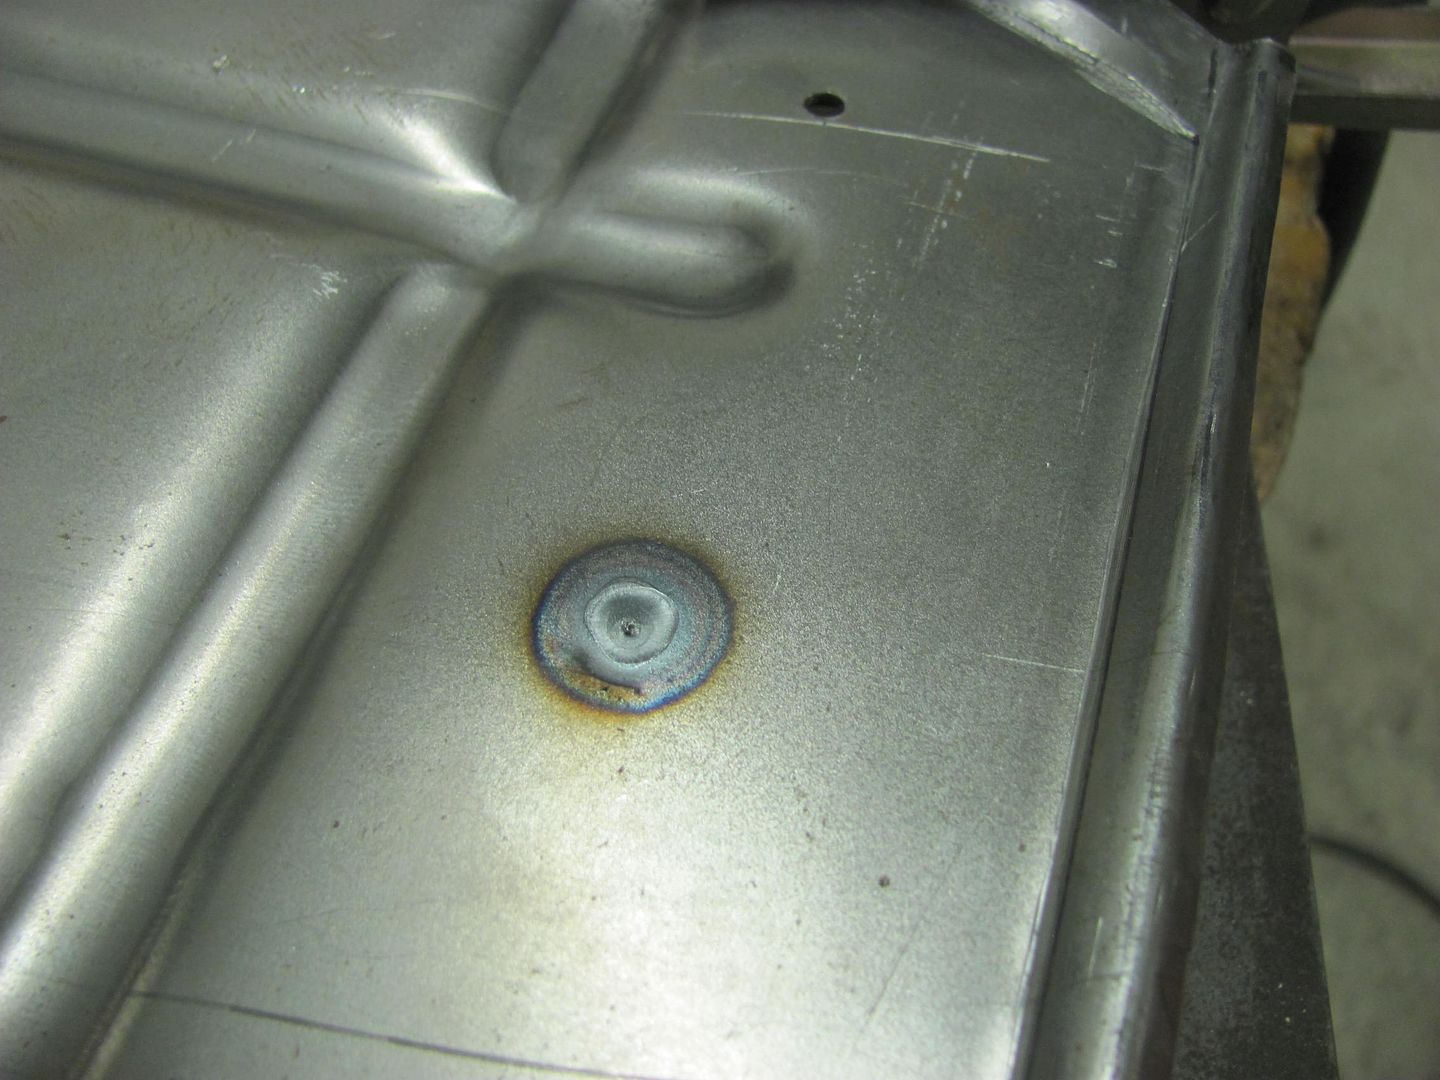
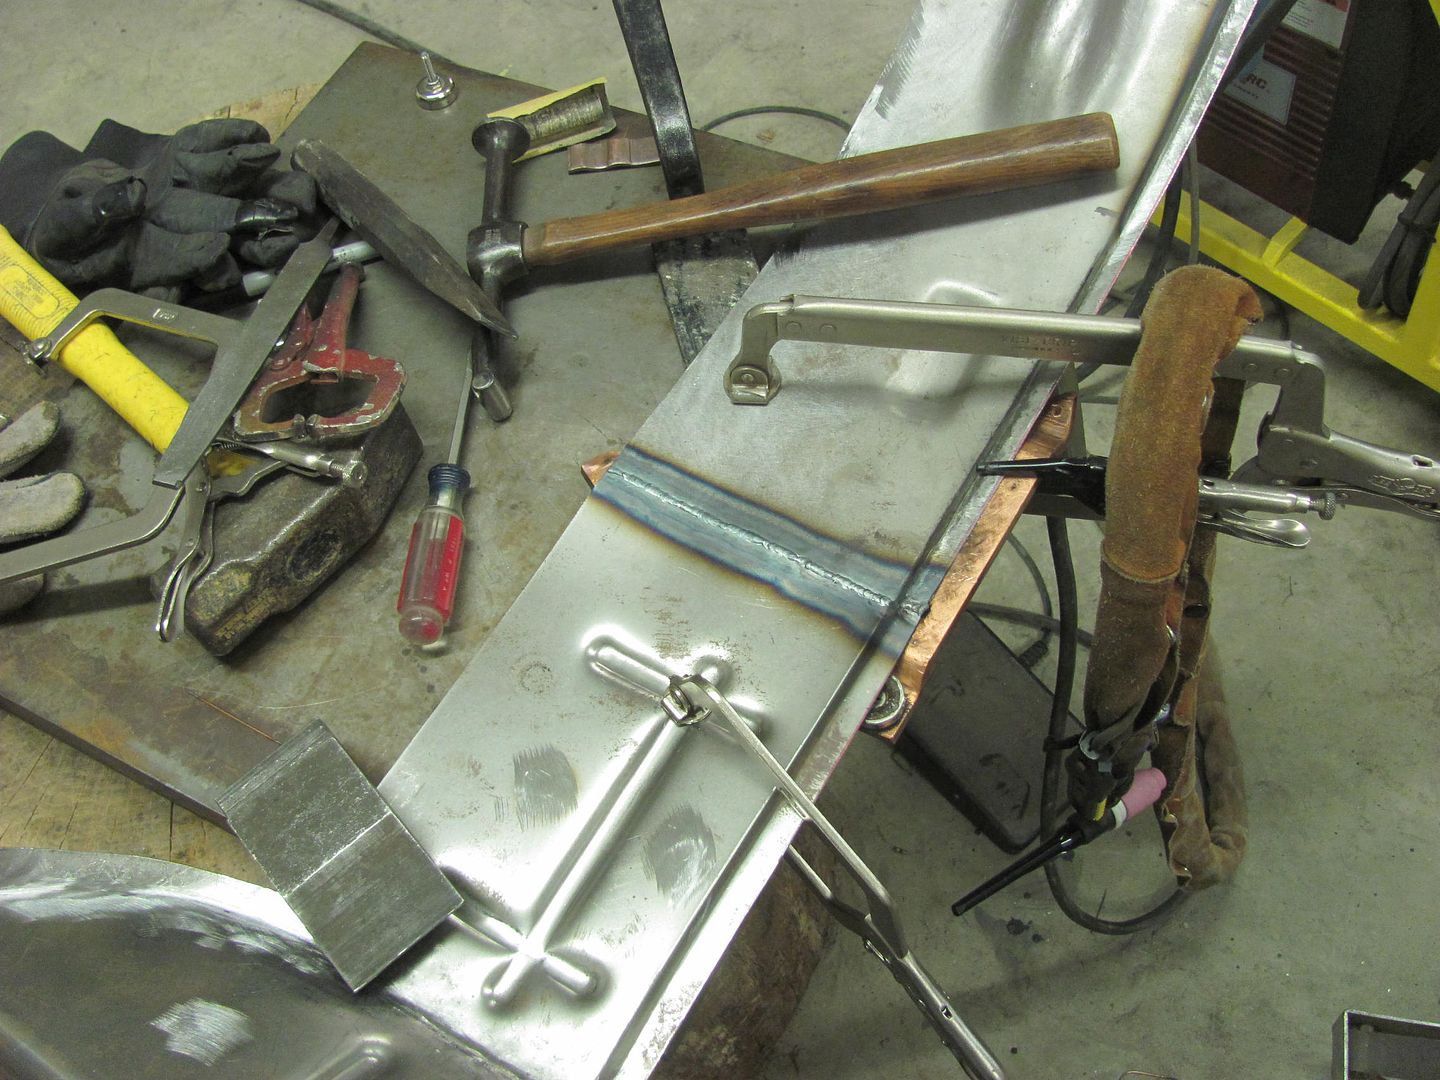
Now to fill in our screw holes that held together the "MDF Sandwich" that we used for beading the panel. A piece of 1/4" thick X 1" copper flat bar is used as a backer, I find it leaves the back side of the weld much cleaner than using flattened copper pipe.
Video version:
https://www.youtube.com/watch?v=H2k5_RqRnzc
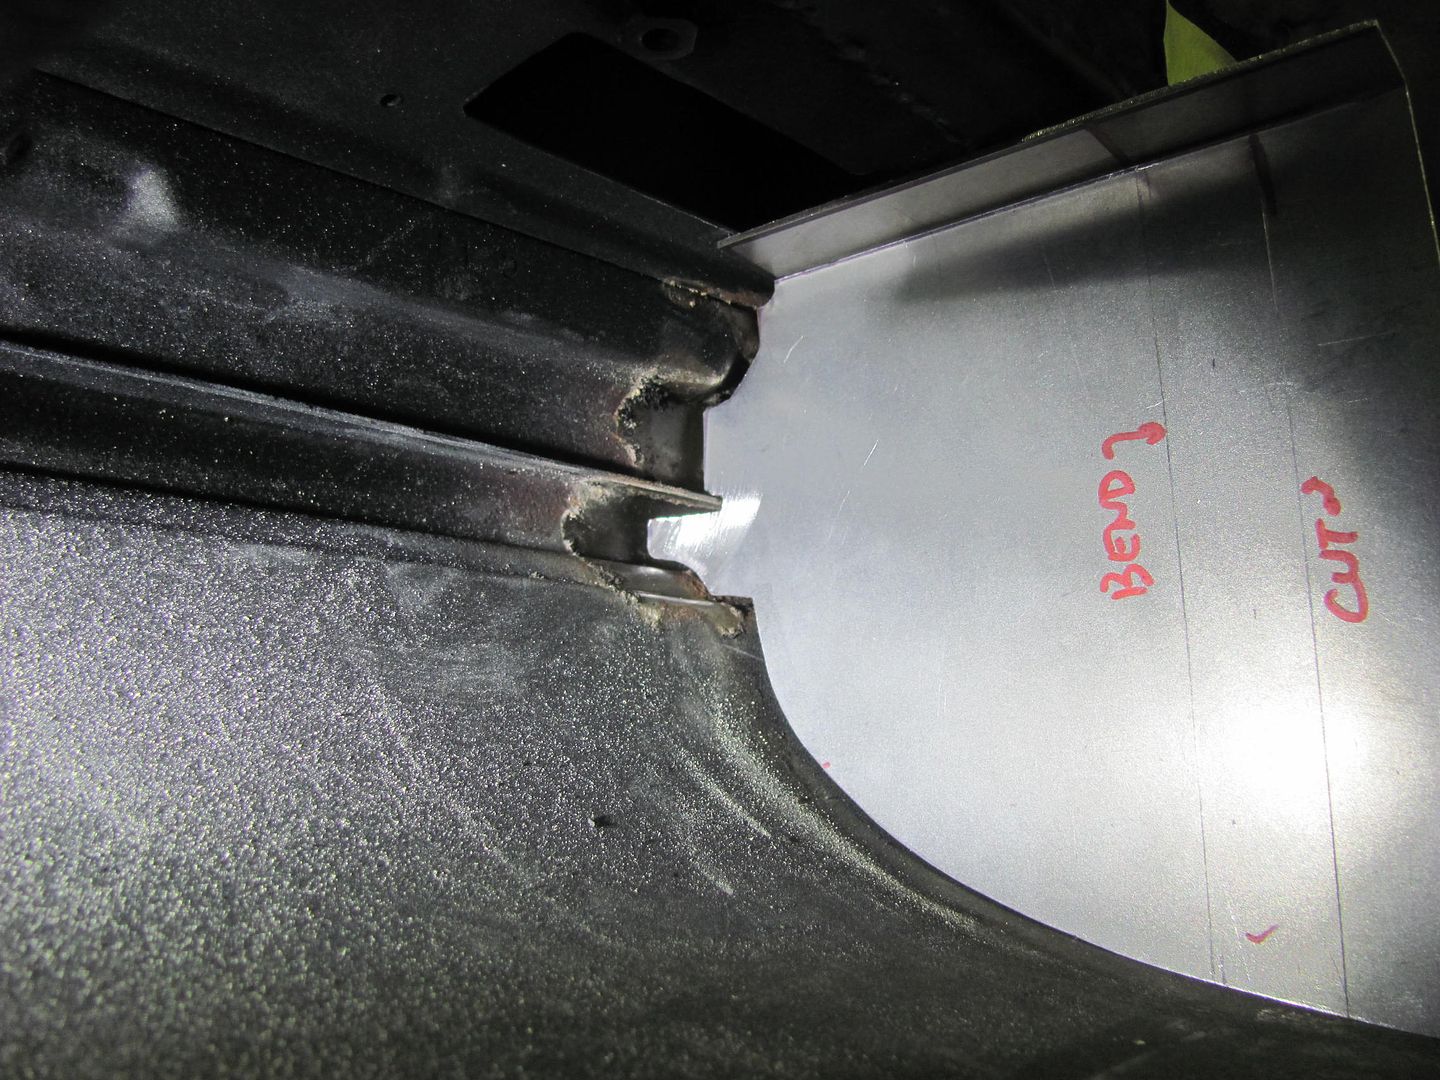
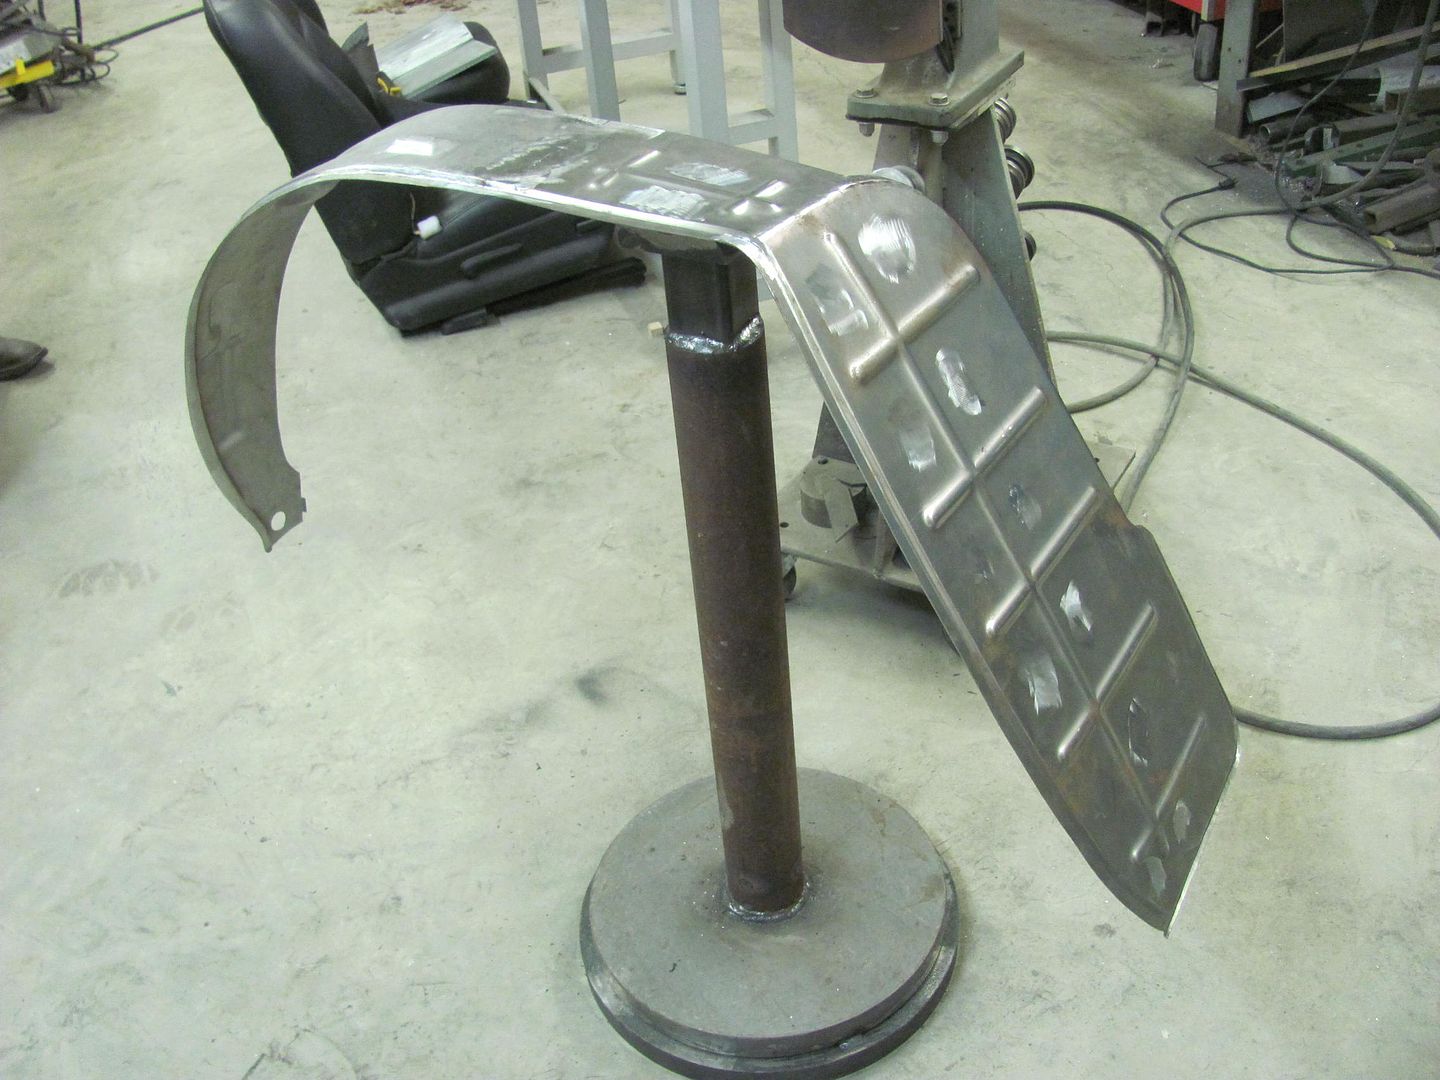
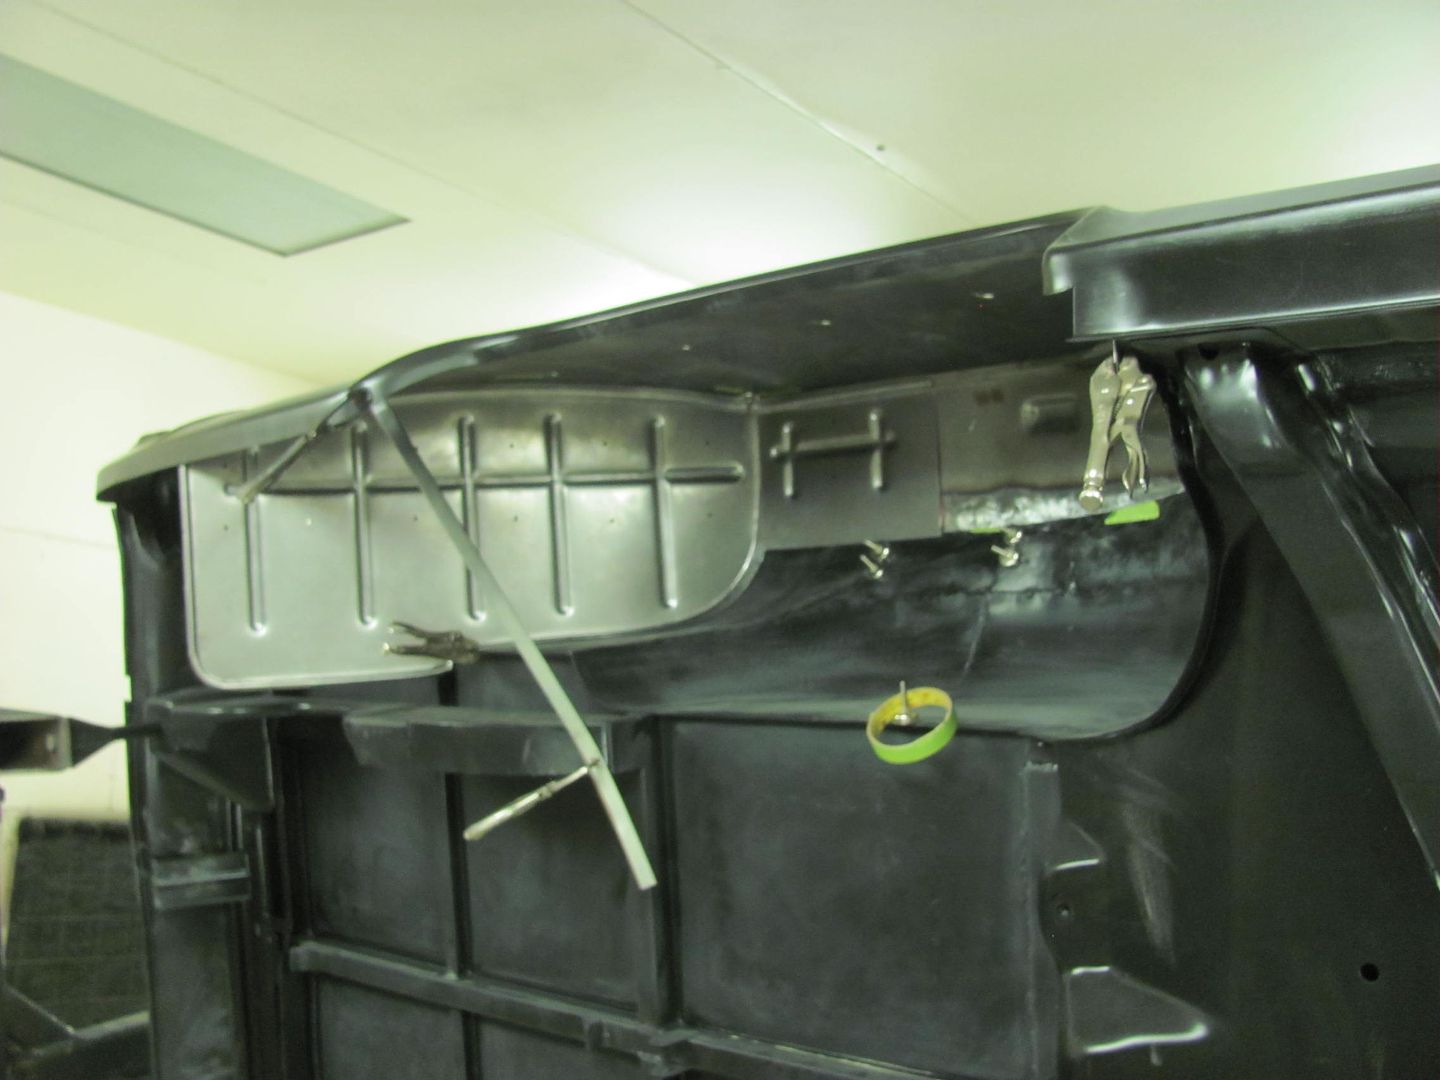
With the front and rear sections having been fitted and trimmed for a butt weld, next we tack the panels together with the TIG..
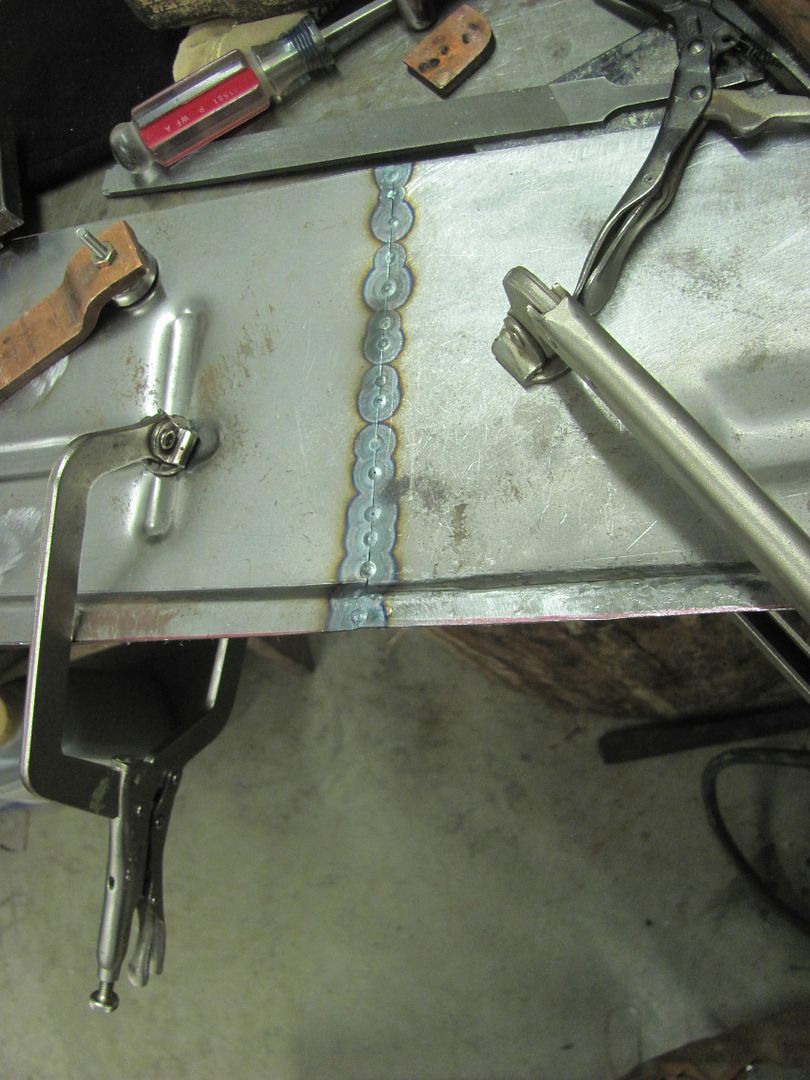
Now we have a one piece wheel well, no overlap joints to trap moisture and start rust, as the originals had done.
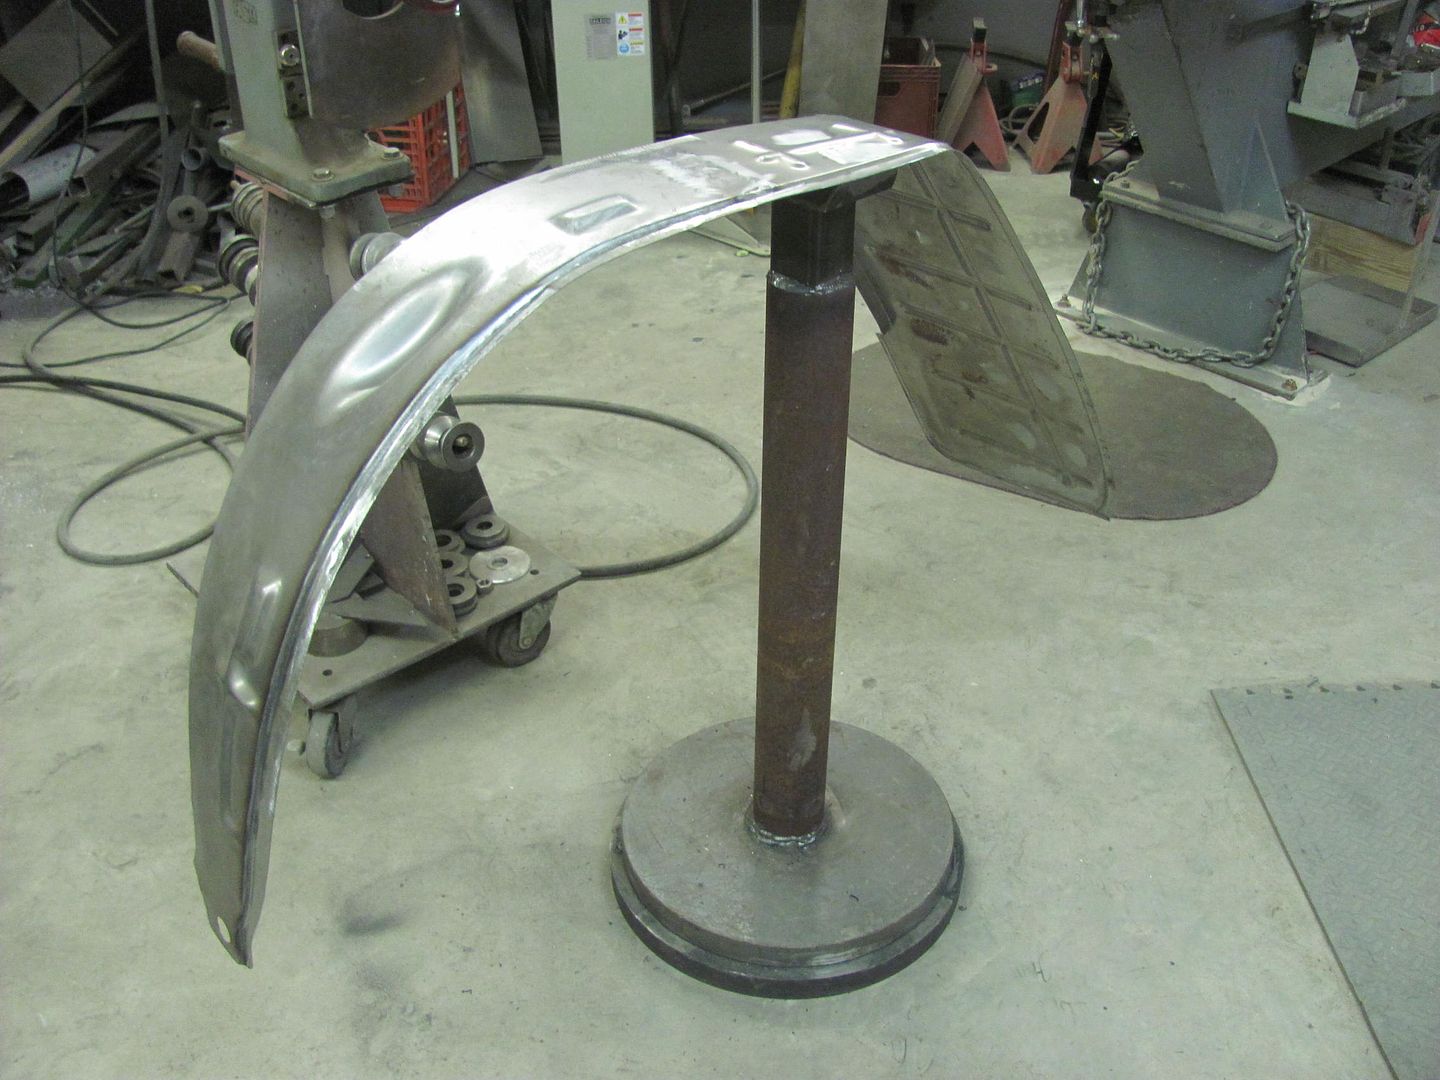
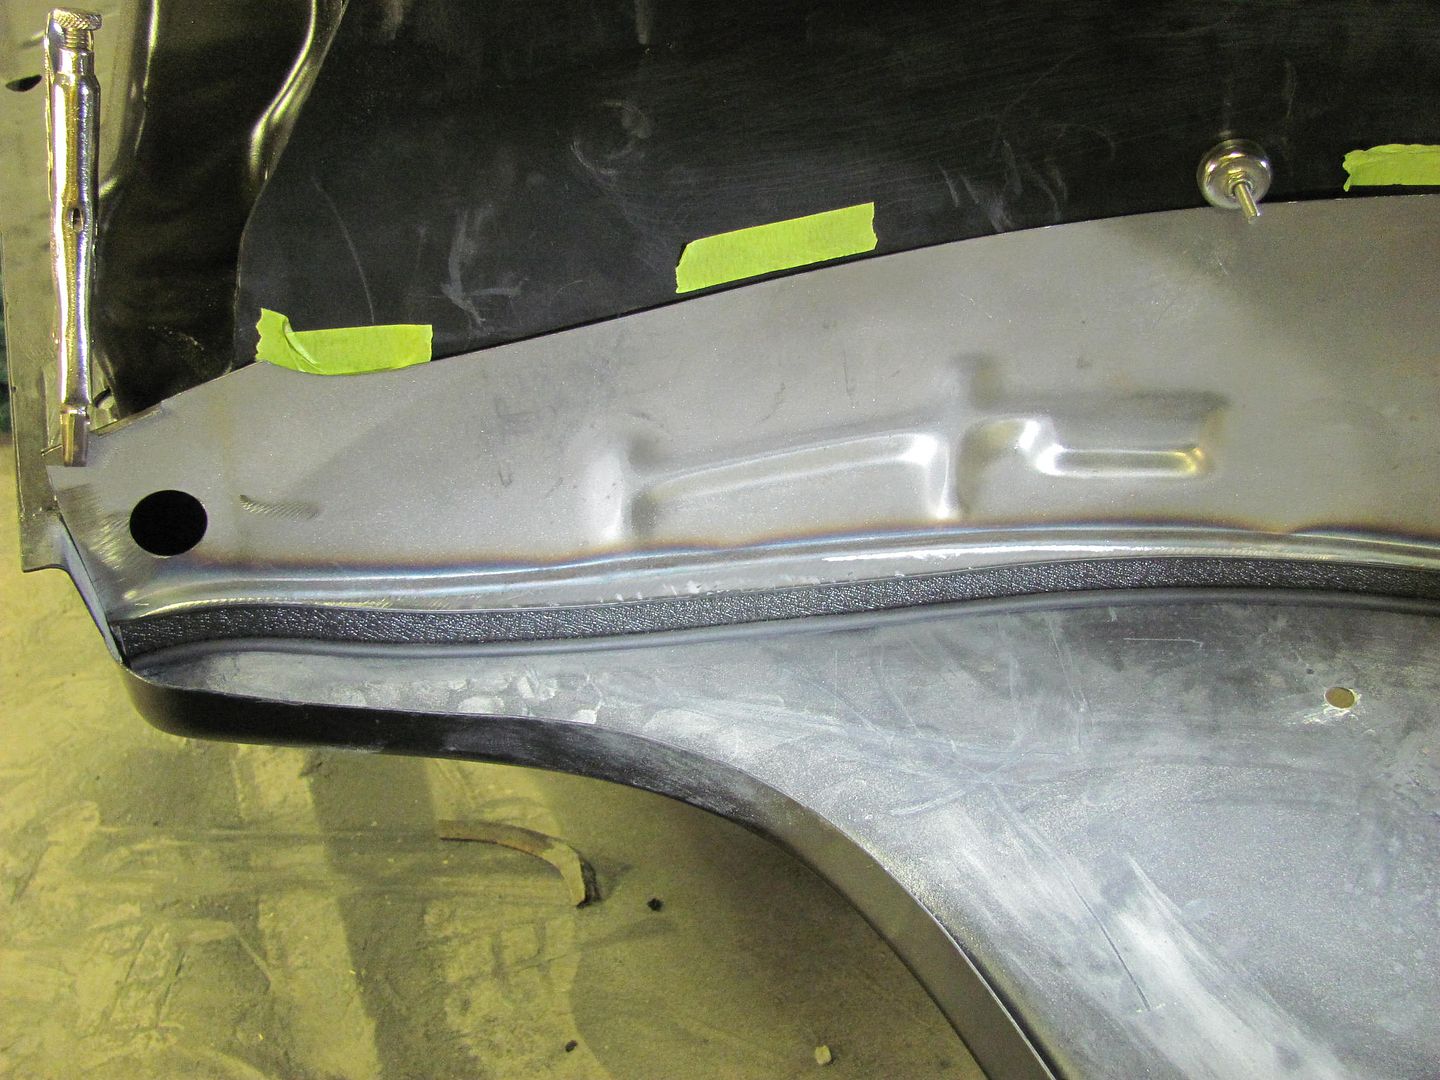
One piece wheel well test fitted using the bulb seal....
https://www.youtube.com/watch?v=ViIPhYNsEb0
Moving on to the passenger side, both front and back are trimmed and test fitted. Some minor tweaks and we will be ready to trim for a butt weld and TIG these together next time..
Robert
-
10-02-2016 08:46 AM #880
CHR Member
- Join Date
- Feb 2008
- Location
- Caldwell
- Car Year, Make, Model: 34 ford 3 window/461 pontiac
- Posts
- 918
Thanks Robert for the 1/4" copper backer tip. I've been using just any old piece of copper, usually just a thin piece of scrap lying around.
Jack.www.clubhotrod.com/forums/showthread.php?t=44081
-
10-02-2016 09:15 AM #881
CHR Member/Contributor
- Join Date
- Sep 2007
- Location
- Gardner, KS
- Car Year, Make, Model: '33 HiBoy Coupe, '32 HiBoy Roadster
- Posts
- 11,245
I liked the flattened copper tubing/pipe tip, myself. Hadn't really considered taking a piece of soft copper tube and whanging it with a hammer on the anvil to make a backing plate.... Originally Posted by Jack F

Roger
Enjoy the little things in life, and you may look back one day and realize that they were really the BIG things.
-
10-02-2016 10:33 AM #882
CHR Member
- Join Date
- Jun 2008
- Location
- Leonardtown
- Car Year, Make, Model: Walking
- Posts
- 1,228
Here's the flattened copper pipe using a rare earth magnet for hands free/clamp free operation..
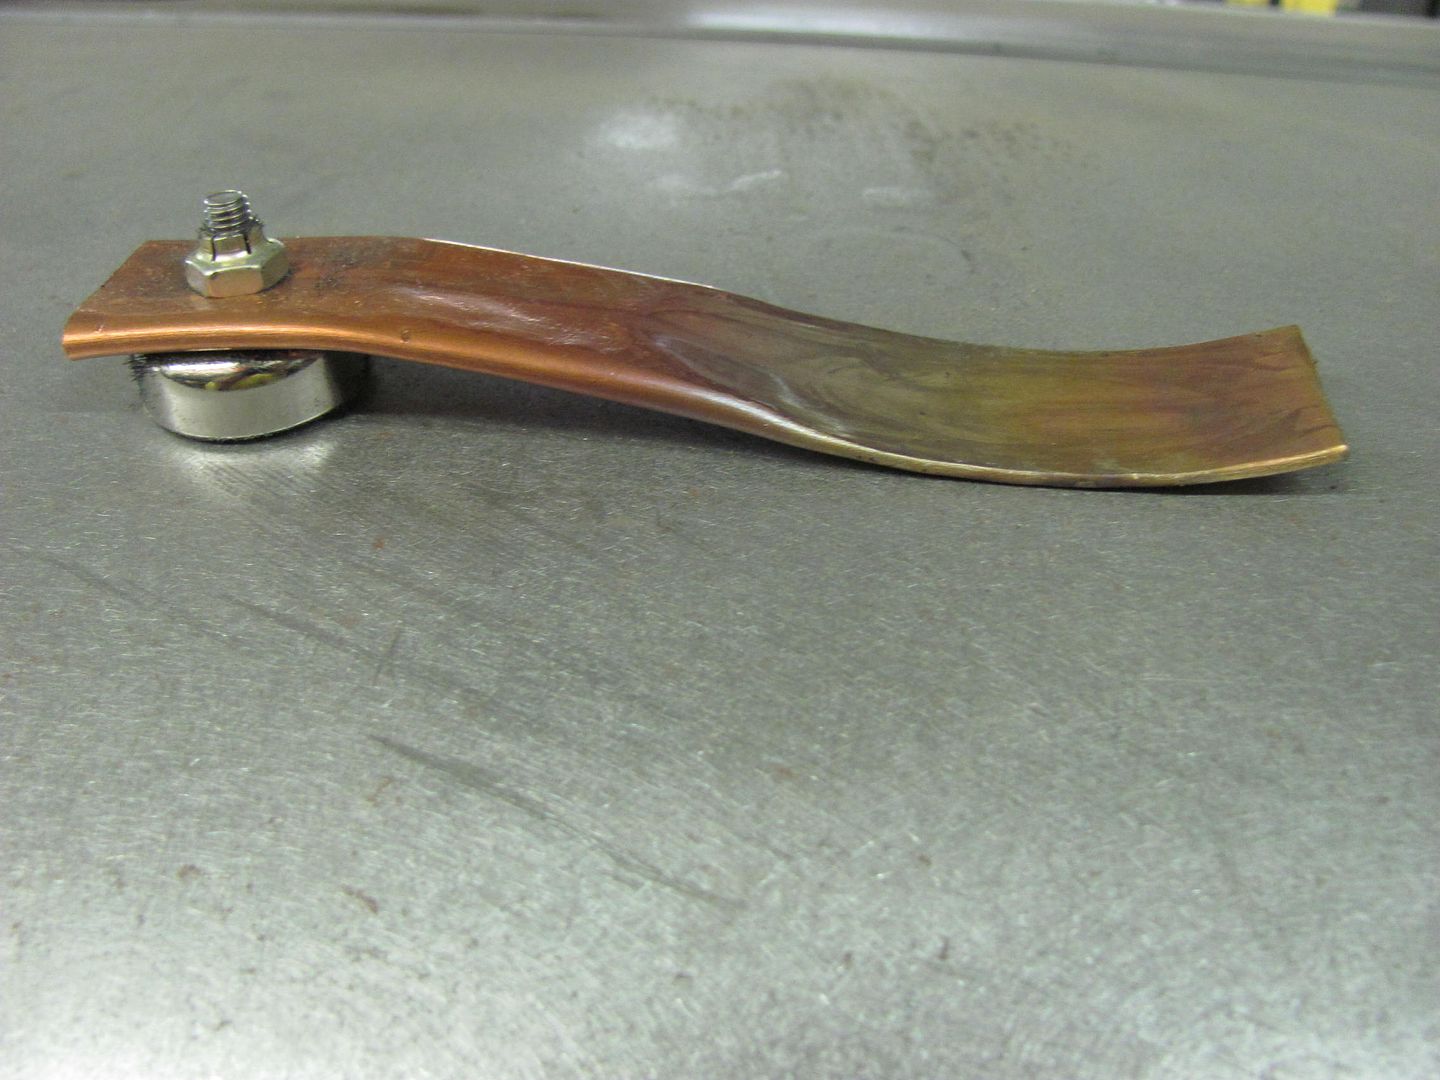
Shown here as a backer for filling too wide of a gap..
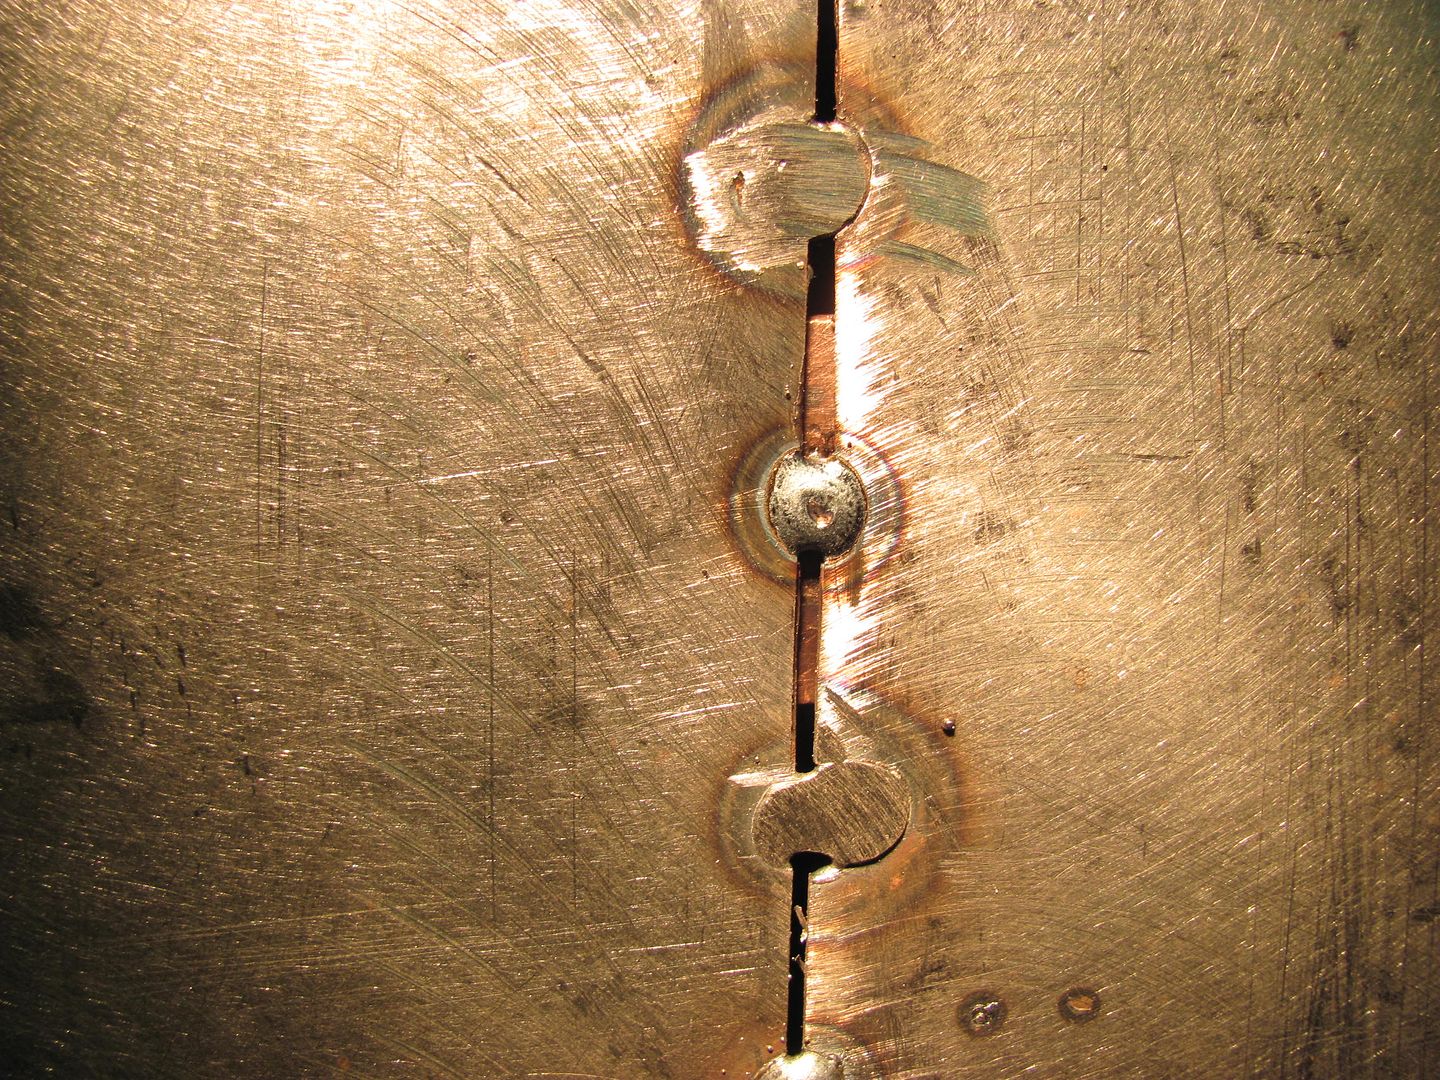
The problem we found was that the back side of the weld, which was against the copper, gets a bit of contamination/porosity.
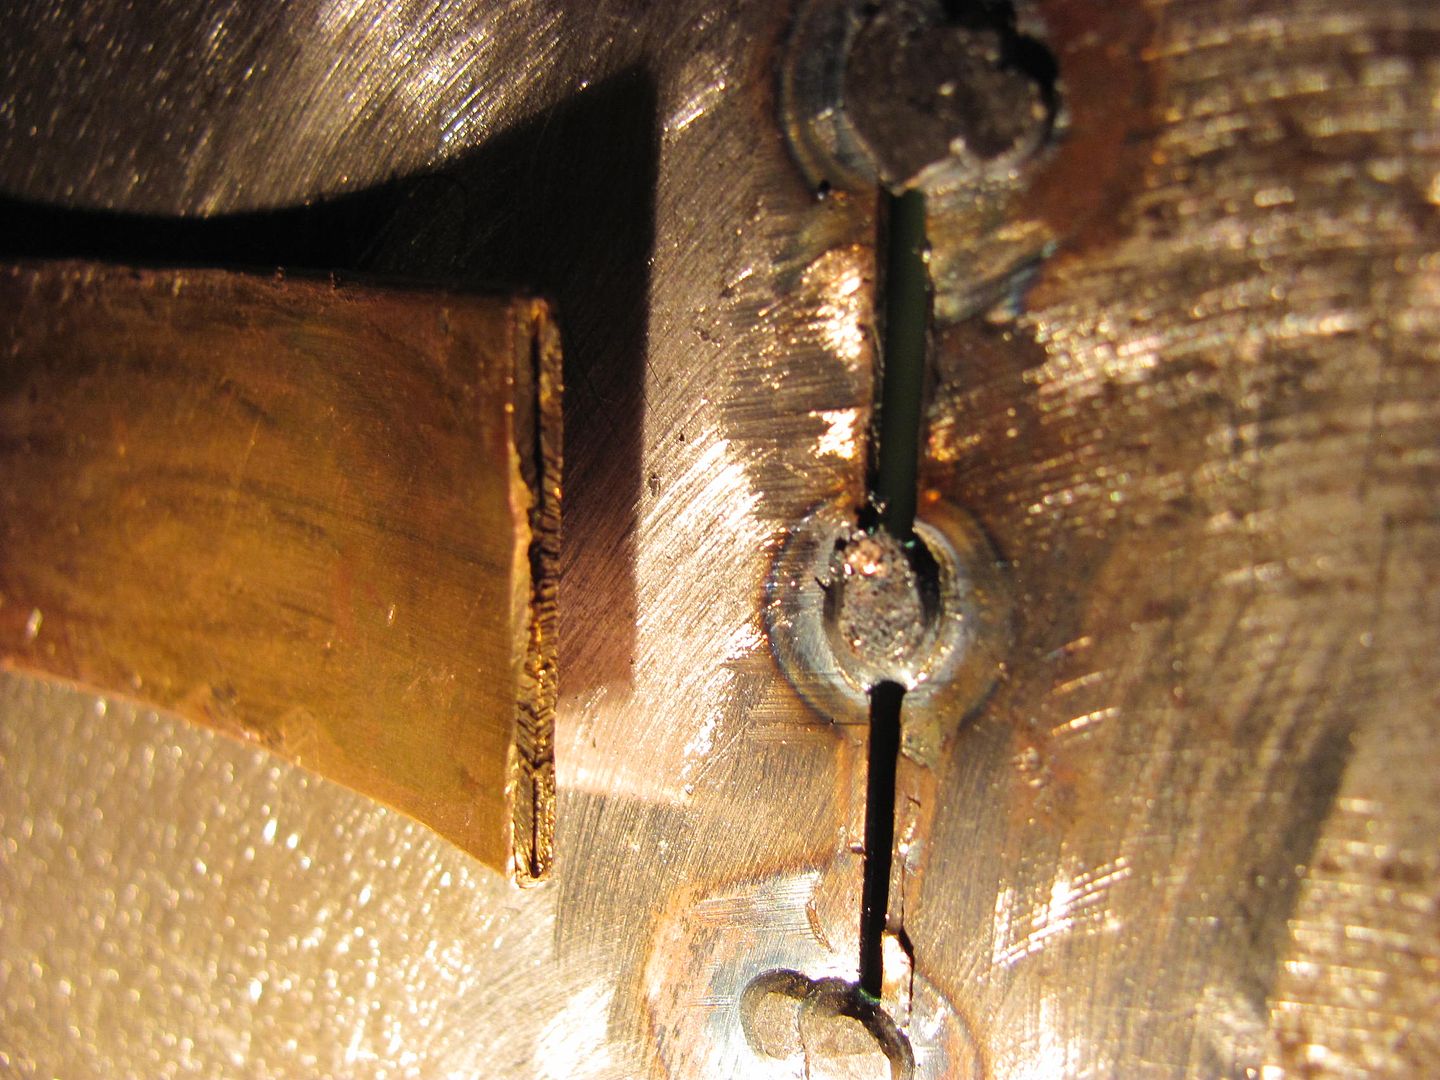
I've found that the copper buss bar (electrical) does not show this same issue. Not sure if the pipe has elements added to promote solder wetting, or what the issue is. But for the holes welded yesterday using the buss bar, the front and back looked the same. We have since stopped using the copper pipe. When we weld the holes in the passenger side wheel wells I'll have to get some comparison pictures. We also now have a section of the buss bar that's had offset bends added to the ends for attaching magnets where they will remain flush.Last edited by MP&C; 10-02-2016 at 10:41 AM.
Robert
-
10-03-2016 12:37 PM #883
CHR Member
- Join Date
- Apr 2011
- Location
- Prairie City
- Car Year, Make, Model: 40 Ford Deluxe, 68 Corvette, 72&76 K30
- Posts
- 7,301
- Blog Entries
- 1
Nice tips and thanks for using them. I had the same issues with copper pipe. I then switched to a large brass punch because I happened to have some. But, it was really hard to hold them and weld if you were by your self. I really liked your modified pipe holder. That is a great idea.Ryan
1940 Ford Deluxe Tudor 354 Hemi 46RH Electric Blue w/multi-color flames, Ford 9" Residing in multiple pieces
1968 Corvette Coupe 5.9 Cummins Drag Car 11.43@130mph No stall leaving the line with 1250 rpm's and poor 2.2 60'
1972 Chevy K30 Longhorn P-pumped 24v Compound Turbos 47RH Just another money pit
1971 Camaro RS 5.3 BTR Stage 3 cam, SuperT10
Tire Sizes
-
10-03-2016 08:07 PM #884
CHR Member
- Join Date
- May 2005
- Location
- Tataraimaka NZ
- Car Year, Make, Model: `47 Ford sedan, A.C.Cobra replica.
- Posts
- 2,895
Some years back, when I was running drain diggers, (track hoes to you Americans,) I'd lose a tooth off the bucket. The teeth were fixed to the stumps on the bucket with a locking pin. Sometimes it would be quite some time before I got around to replacing them, and the stump would get a bit worn, which meant I had to build it up with weld.
I had a brass (or copper, I can't remember which,) rod the exact same diameter as the hole for the locking pin which I would drive into the hole, weld around it, and knock it out again.
Instant perfectly sized hole for the pin, no drilling needed.johnboy
Mountain man. (Retired.)
Some mistakes are too much fun to be made only once.
I don't know everything about anything, and I don't know anything about lots of things.
'47 Ford sedan. 350 -- 350, Jaguar irs + ifs.
'49 Morris Minor. Datsun 1500cc, 5sp manual, Marina front axle, Nissan rear axle.
'51 Ford school bus. Chev 400 ci Vortec 5 sp manual + Gearvendors 2sp, 2000 Chev lwb dually chassis and axles.
'64 A.C. Cobra replica. Ford 429, C6 auto, Torana ifs, Jaguar irs.
-
10-04-2016 03:14 AM #885
CHR Member
- Join Date
- Sep 2007
- Location
- New Bedford
- Car Year, Make, Model: 34 Ford 3W Coupe Replica
- Posts
- 14,754
There are a couple different types of "pipe" / tubing in copper, the one most of us know is used for refrigeration, this is a different alloy than say regular water pipe. Just like brass fittings, there is a class known as red brass, again a different alloy which is used for higher pressure applications. Originally Posted by MP&C
 Reply With Quote

Posting Permissions
- You may not post new threads
- You may not post replies
- You may not post attachments
- You may not edit your posts

i've enjoyed the years here . made a lot of friends. most who have left. i see no reason to continue with this so hope to see you somewhere else. i dont think this site will ever be back. it's lived...
Dead!