


 1Likes
Thread: Aoto Body explained..


Results 16 to 30 of 61
 LinkBack URL
 About LinkBacks
-
02-10-2012 03:07 PM #16
 CHR Member

- Join Date
- Oct 2010
- Location
- Duluth
- Car Year, Make, Model: 37 Ford Tudor Slantback
- Posts
- 234
After reading over a few times on the panel repair. That dolly looks like a PVC 90. Is the what it is?? Also.. When the dolly is plsced over the low spot ( the front side ), and the hammer strikes the bottom of the panel ( the back side ) wouldn't that create a dent that looks like the dolly??
-
Advertising

- Google Adsense
- REGISTERED USERS DO NOT SEE THIS AD
-
02-10-2012 03:36 PM #17
CHR Member
- Join Date
- Jun 2008
- Location
- Leonardtown
- Car Year, Make, Model: Walking
- Posts
- 1,228
 Originally Posted by slantback37

Yes, the dolly is an elbow, it's what I had sitting loose in the shop. One of the pvc reducing adapters works well also, it seems to have a bit more mass for better results. As for the hammer strikes making dents, you're not looking at pounding the panel into submission. Light hammer taps, just enough to capture the high into the hollow of the dolly, without creating a dent going the other direction. The hammer and its strike should be aligned directly over the center of the dolly, for best results, and the force exerted on the hammer strikes should be consistent.
-
02-10-2012 03:44 PM #18
CHR Member
- Join Date
- Oct 2010
- Location
- Duluth
- Car Year, Make, Model: 37 Ford Tudor Slantback
- Posts
- 234
See.. Where the crease is on the 37 is in a location that I can't put all of the lines to match up against. In the bumping book it shows thath they wack the panel pretty hard. For what I have should I put the flat side of a heel dolly over the crease, and tap on the high point of the crease behind the panel?? If needed i could go out and take a pic of what I have?? With this crease it flows into a big dent in the panel behind the door..
-
02-10-2012 03:50 PM #19
CHR Member
- Join Date
- Jun 2008
- Location
- Leonardtown
- Car Year, Make, Model: Walking
- Posts
- 1,228
Yes, some pics of what you're working with would help to see the damage and better suggest a repair..
Here's another sample on a crowned panel, where I used a flatter hammer.
One of the guys over on the metal shaping web sites has a neat tool he sells called a donut dolly. It works more proficiently in off-dolly shrinking a crowned panel because it supports the bottom side in more than one spot (around the perimeter) as the panel is bumped from the top in the center of the donut dolly. This would seem to be useful in body repair, especially to address high spots found after blocking primer where heat would not be as feasible.
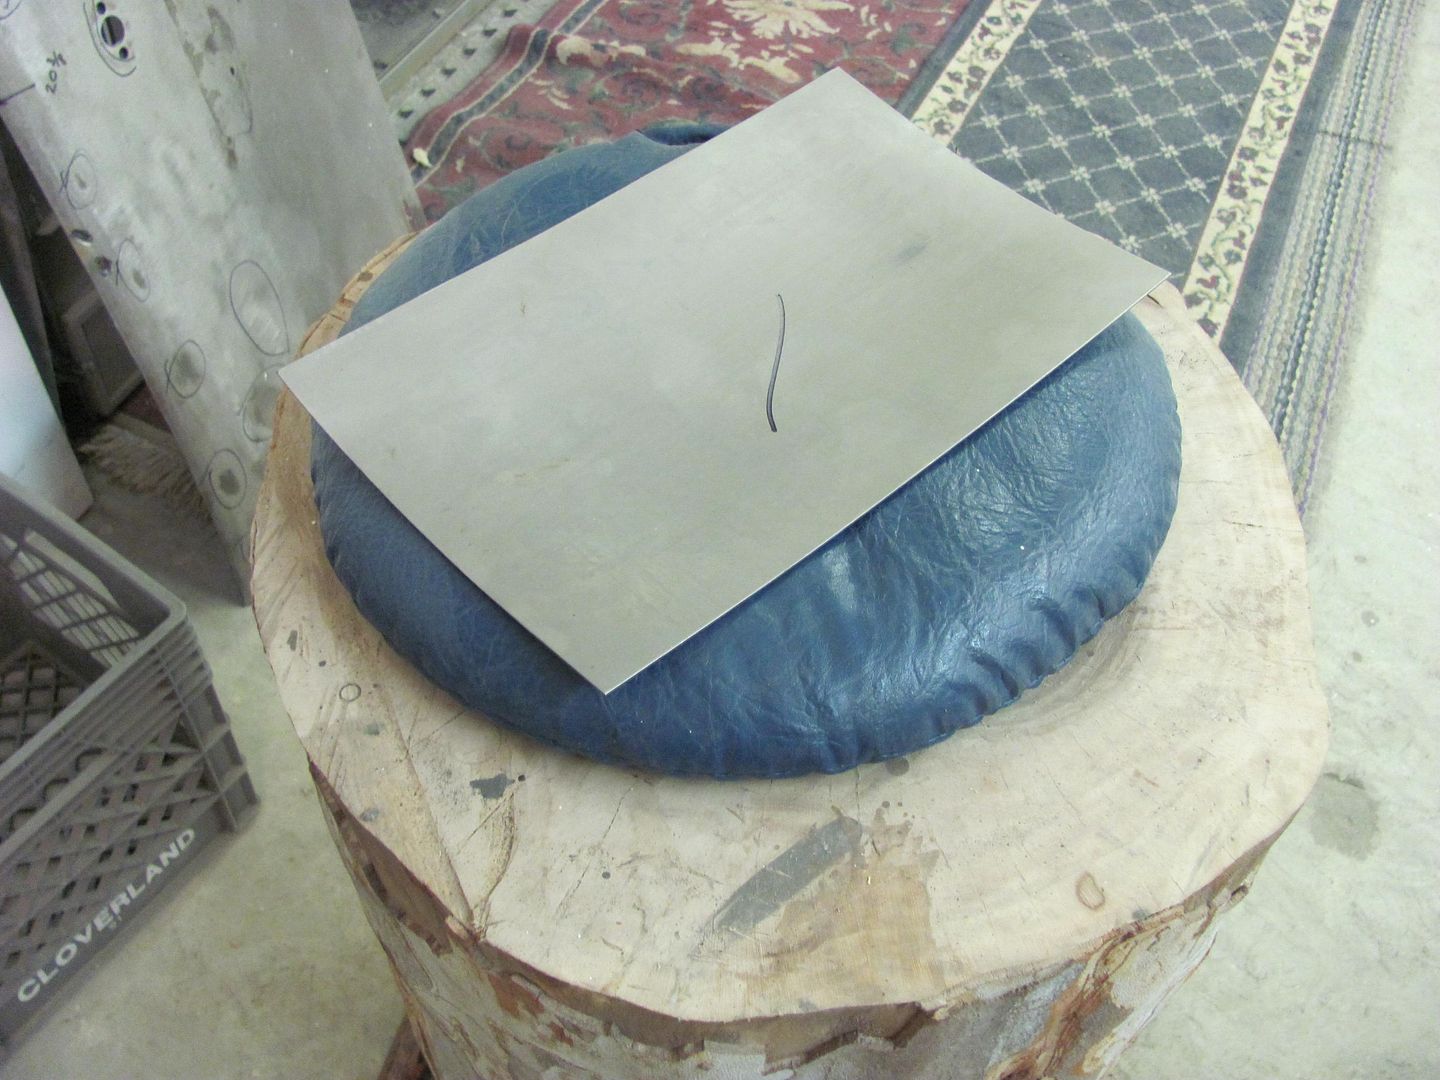
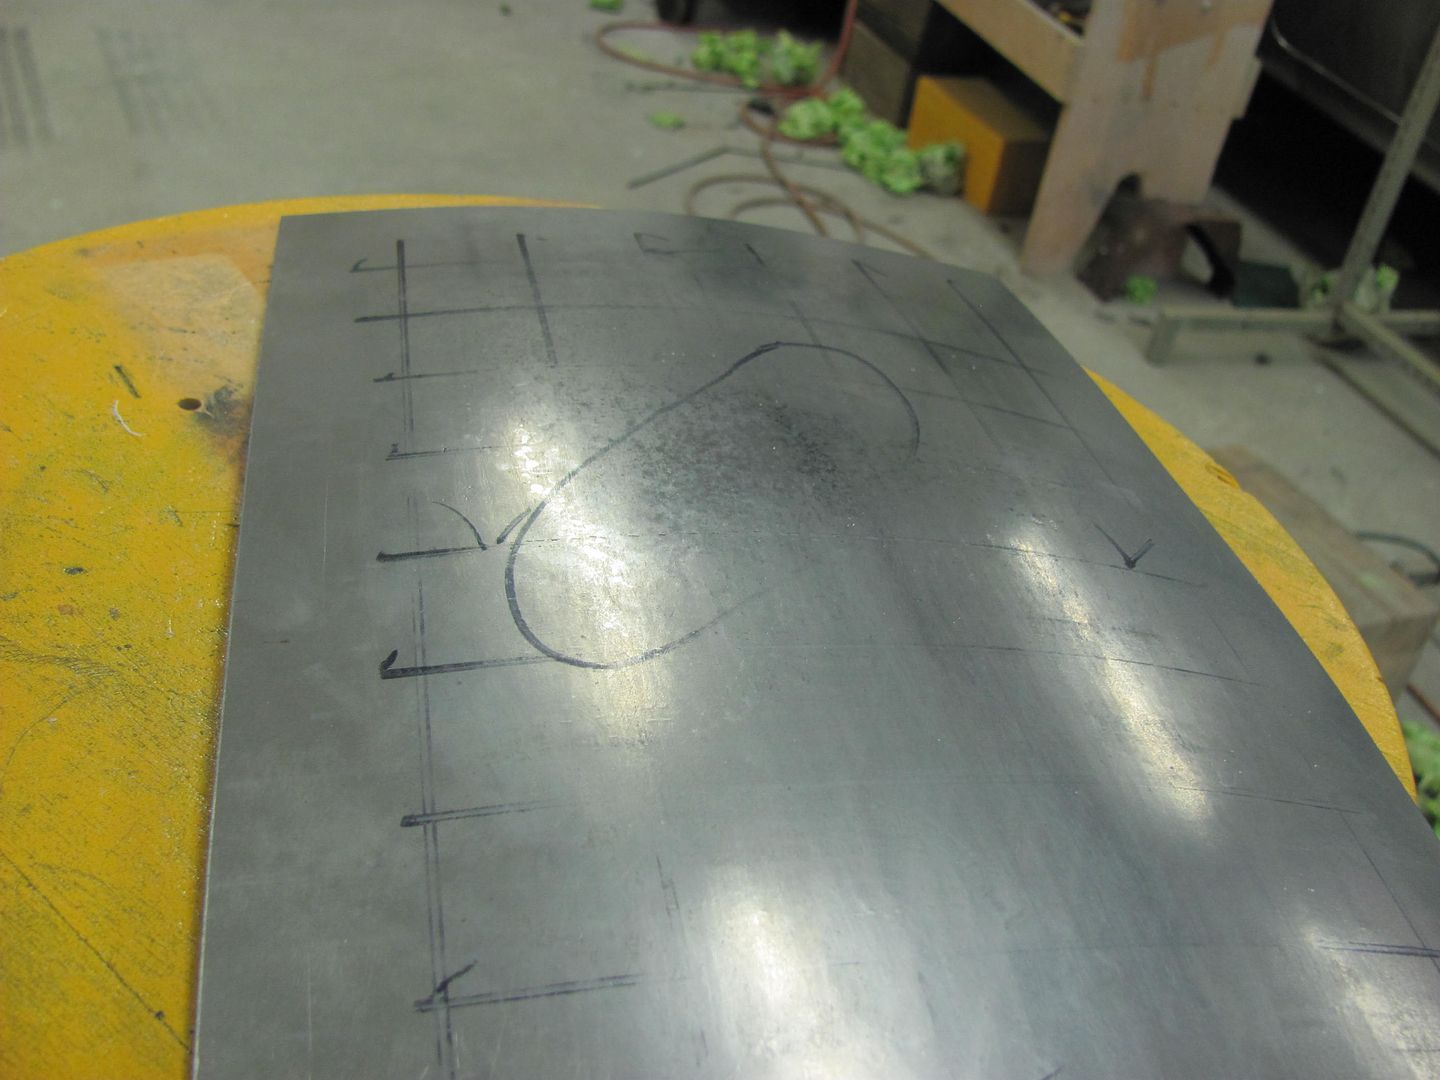
A few days ago, someone on another forum asked for advice in removing an outward roof dent. He got "happy" with a hammer and dolly fixing dents in the roof, and had too many instances of "on-dolly", resulting in stretching and outward dents. I suggested a low-buck alternative to the donut dolly, simply using a PVC pipe fitting. Where it may not work as aggressively as the donut dolly which has more mass, sometimes slower is better, especially when trying something new. To show him how this process worked, I went out in the shop to find a sample of metal, we will use a piece of 18 ga CRS to simulate a roof.
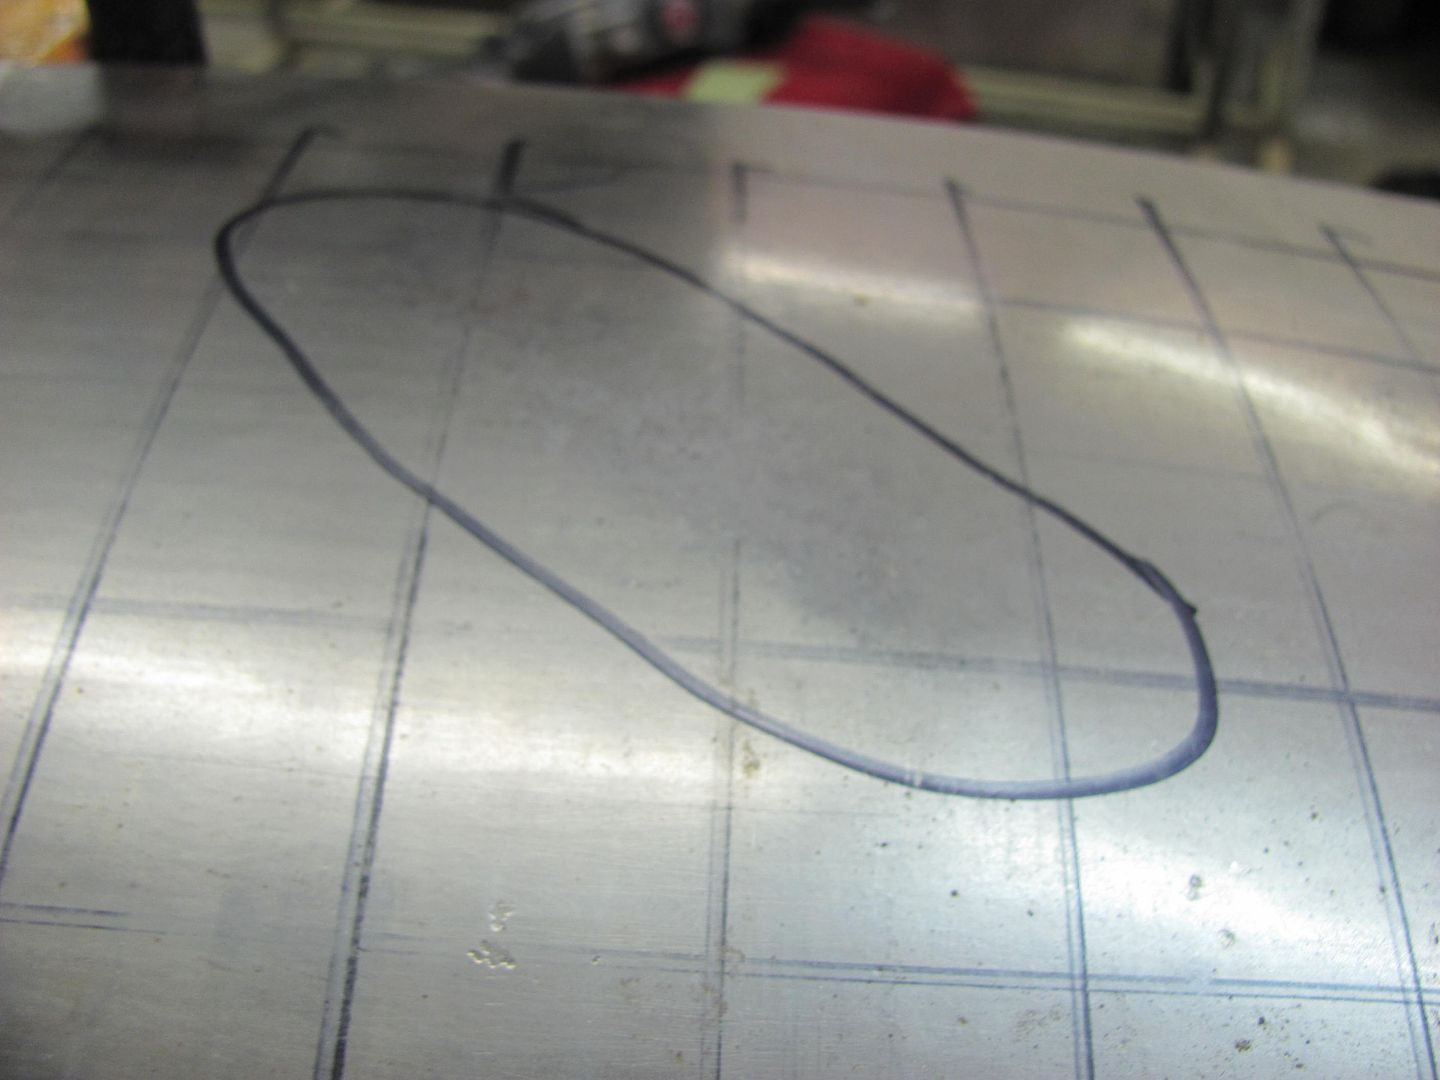
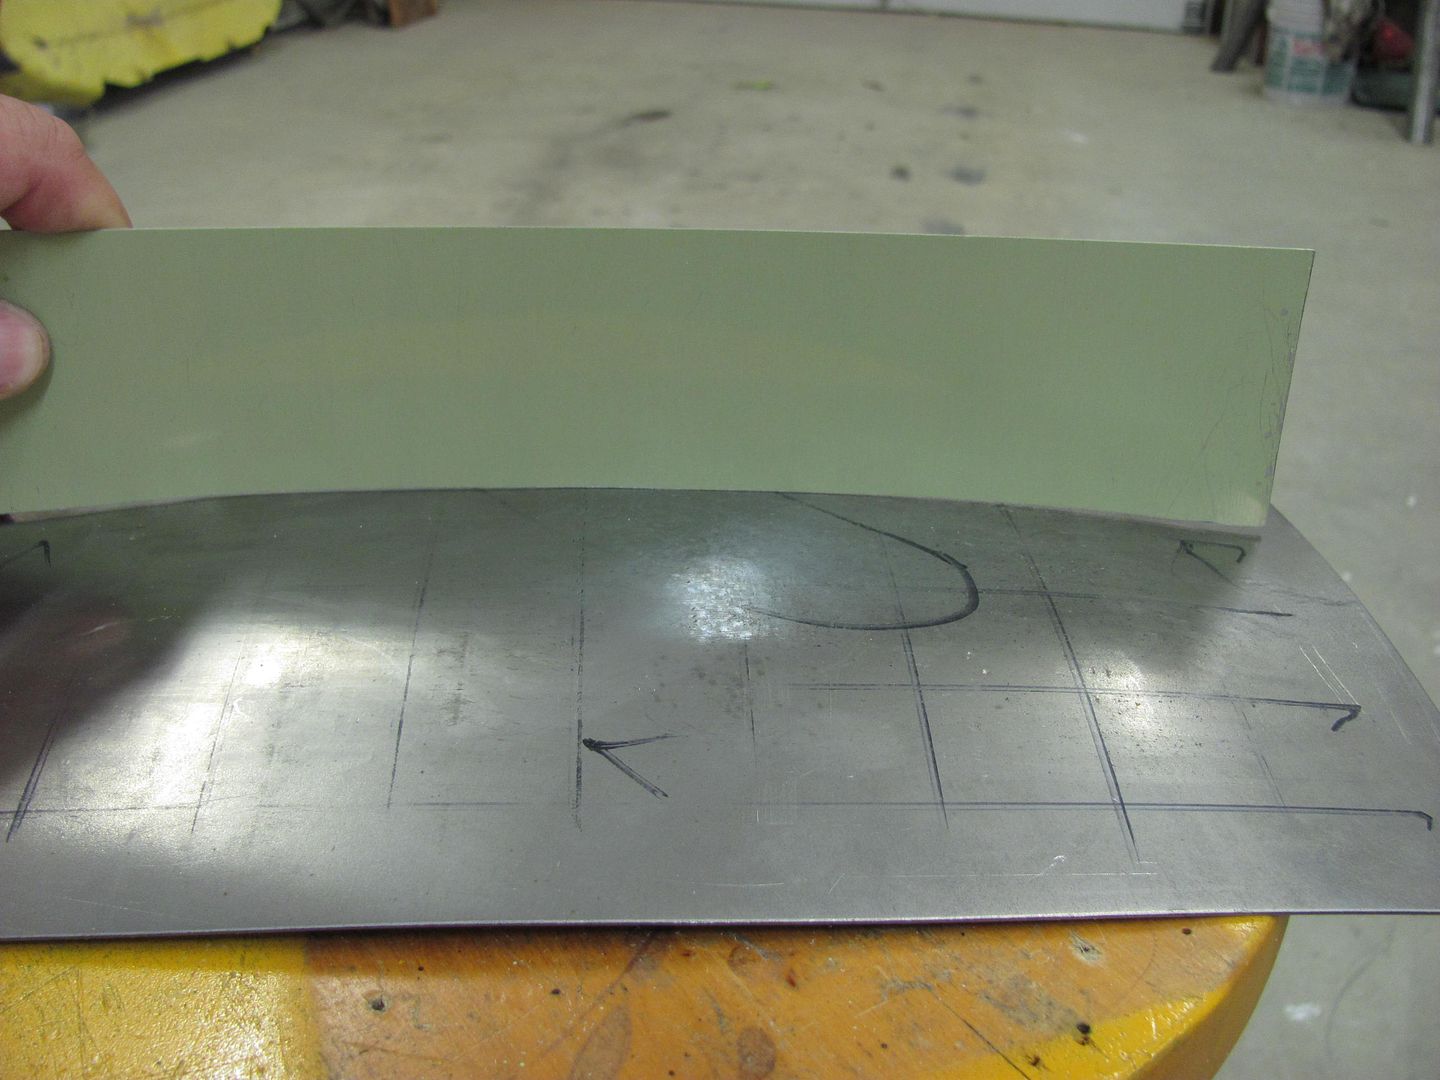
Grid layout for the Wheeling Machine, and completed "sample" roof...
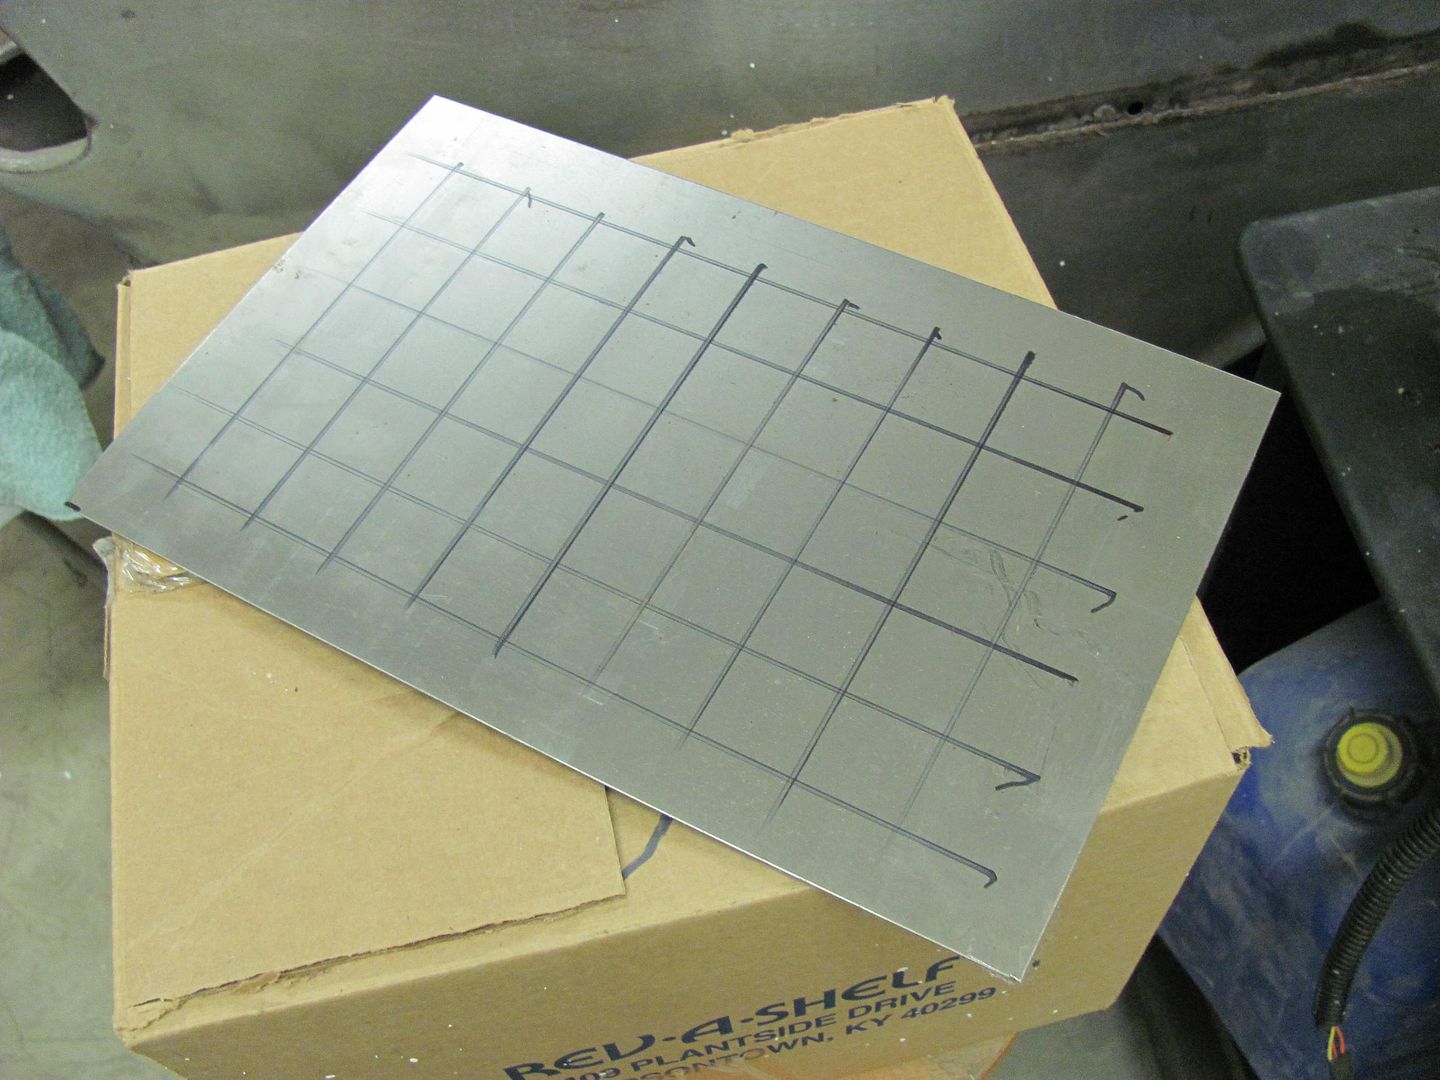
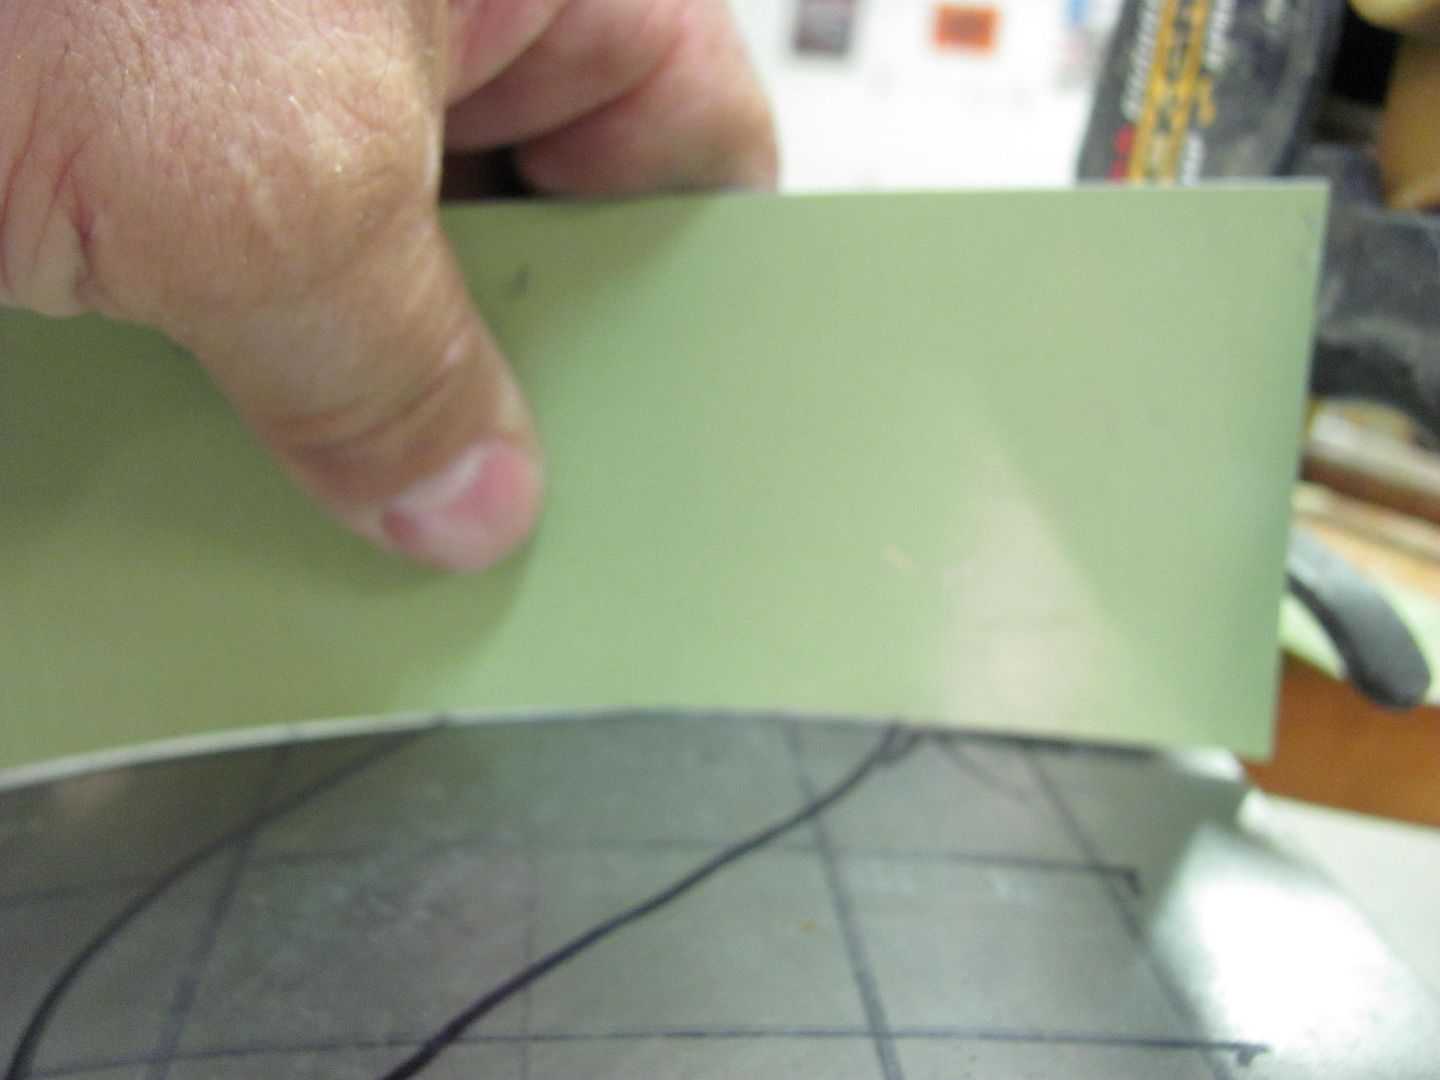
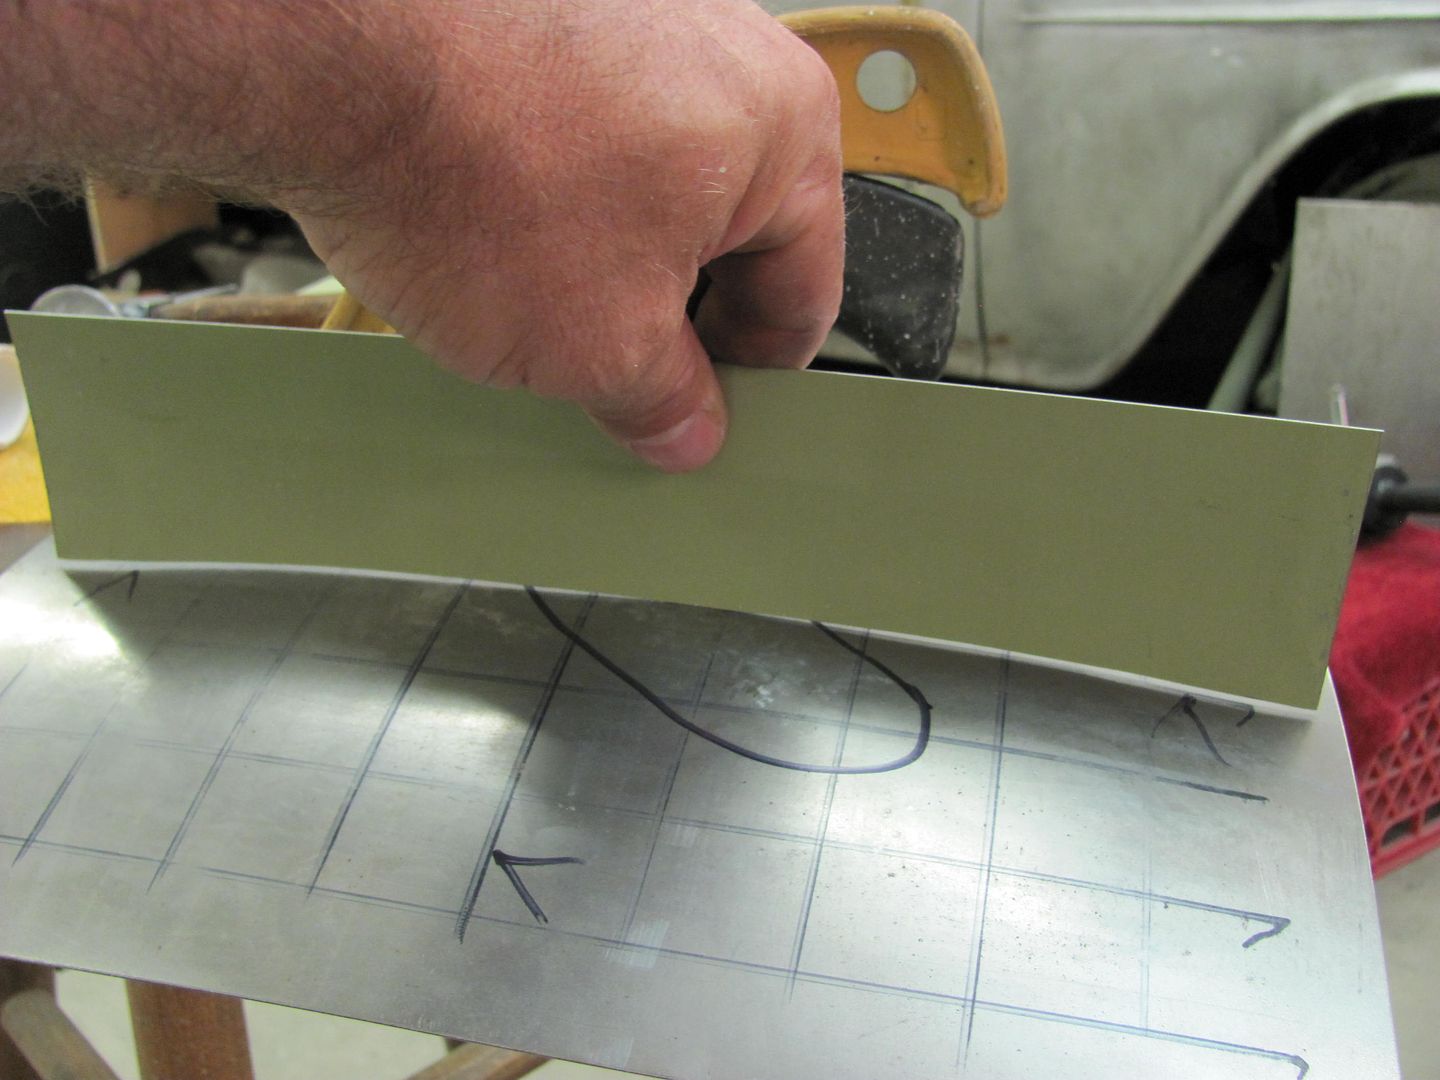
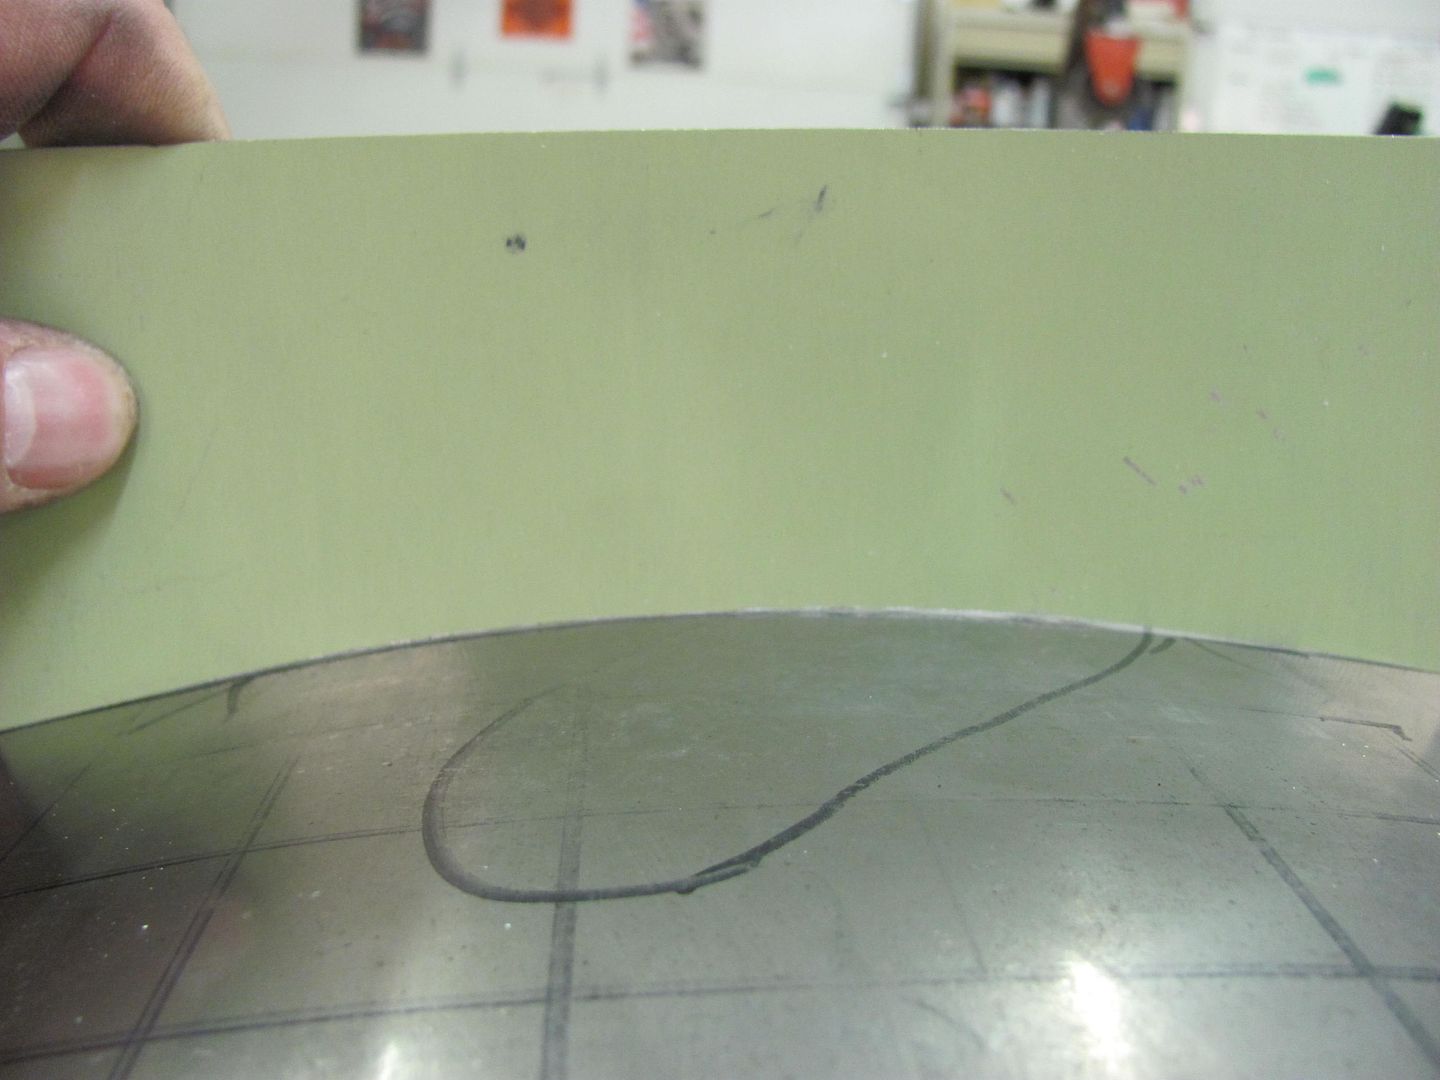
The first order of business should be to make some profile templates. In the case of an actual dented roof, use the opposite, undamaged side. This will allow you to check your progress as you go, and easily find the remaining high spots.
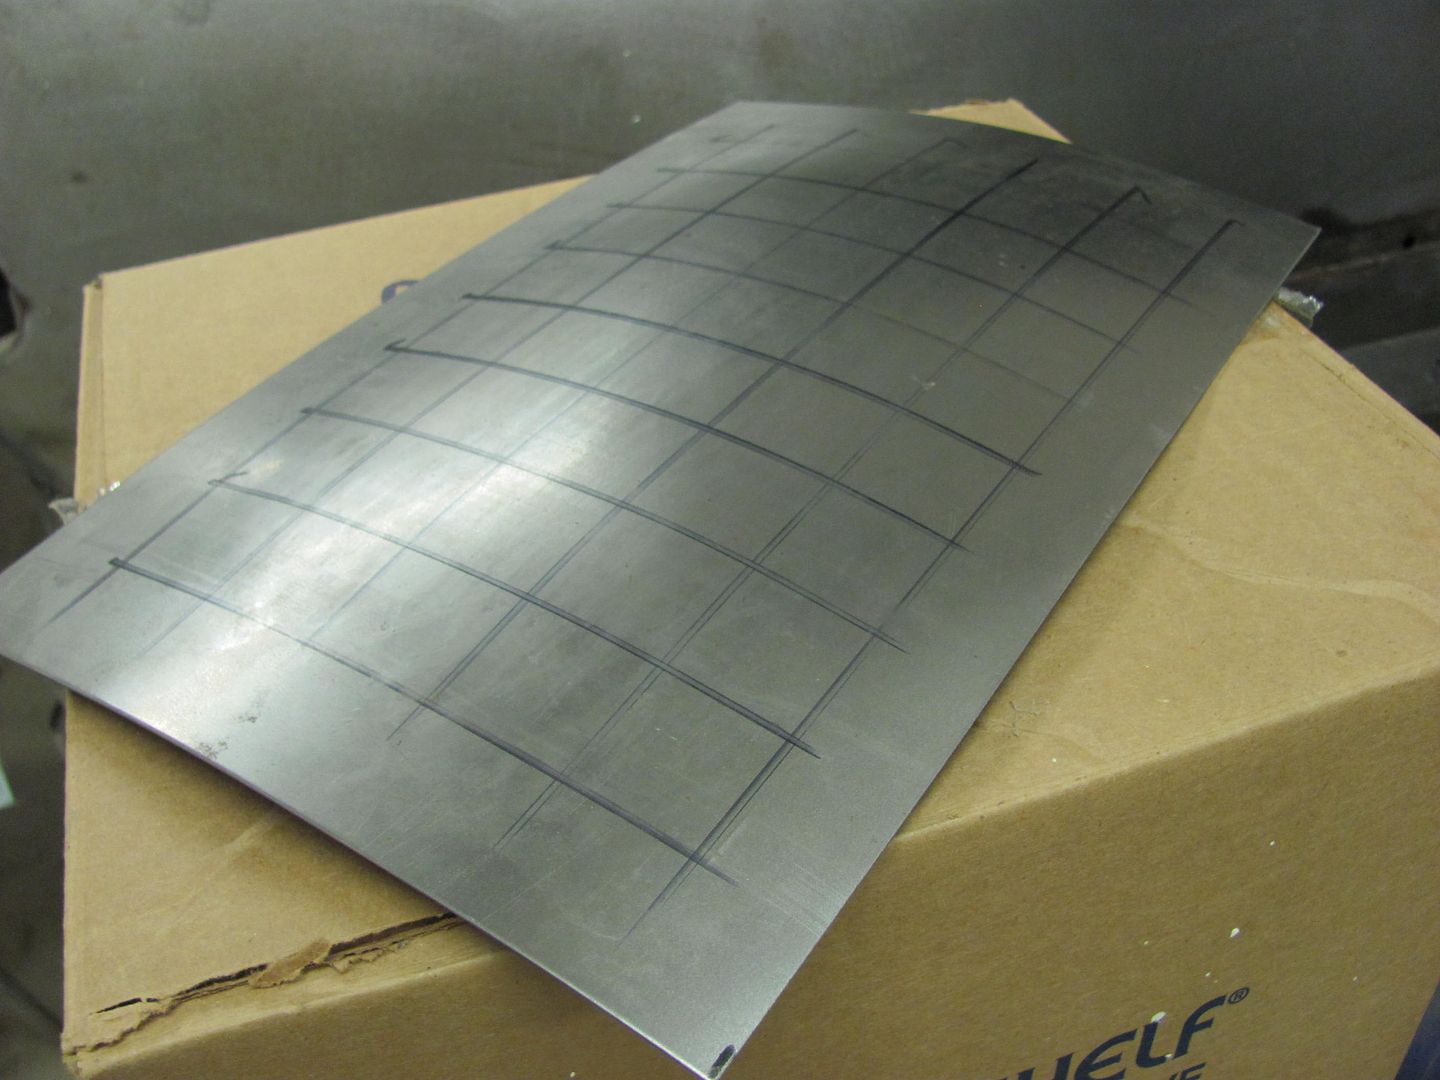
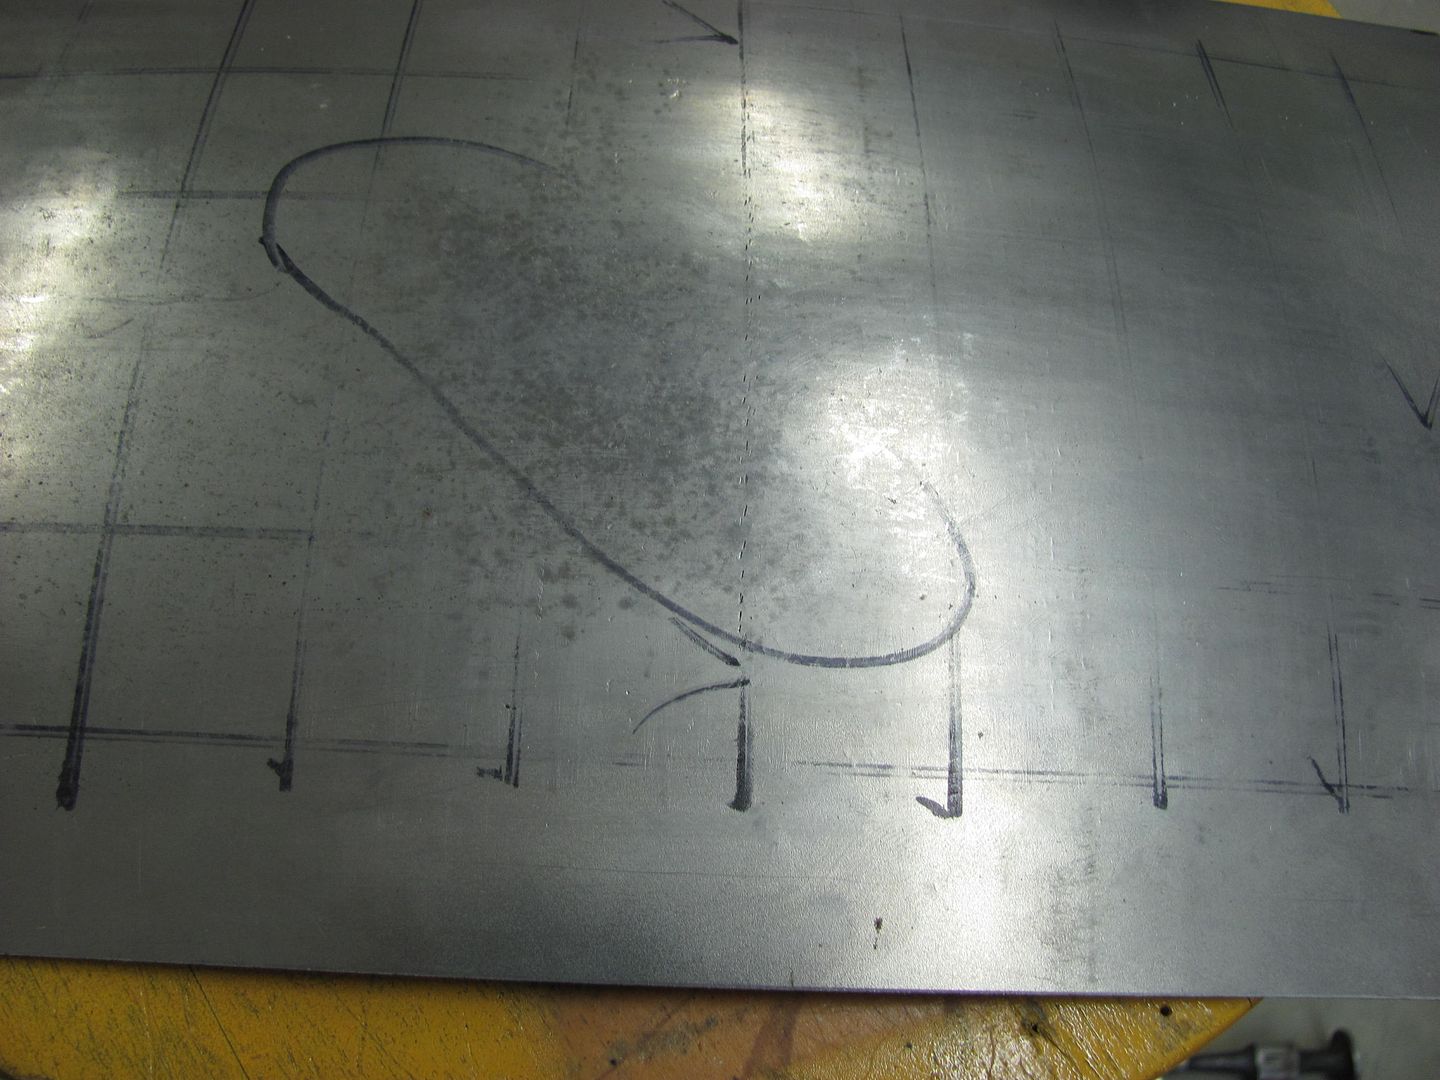
Using a crowned body hammer, a "dent" will be added from the back side, crossing both of our template areas, to simulate his outward dents in the roof.
With the dent added:
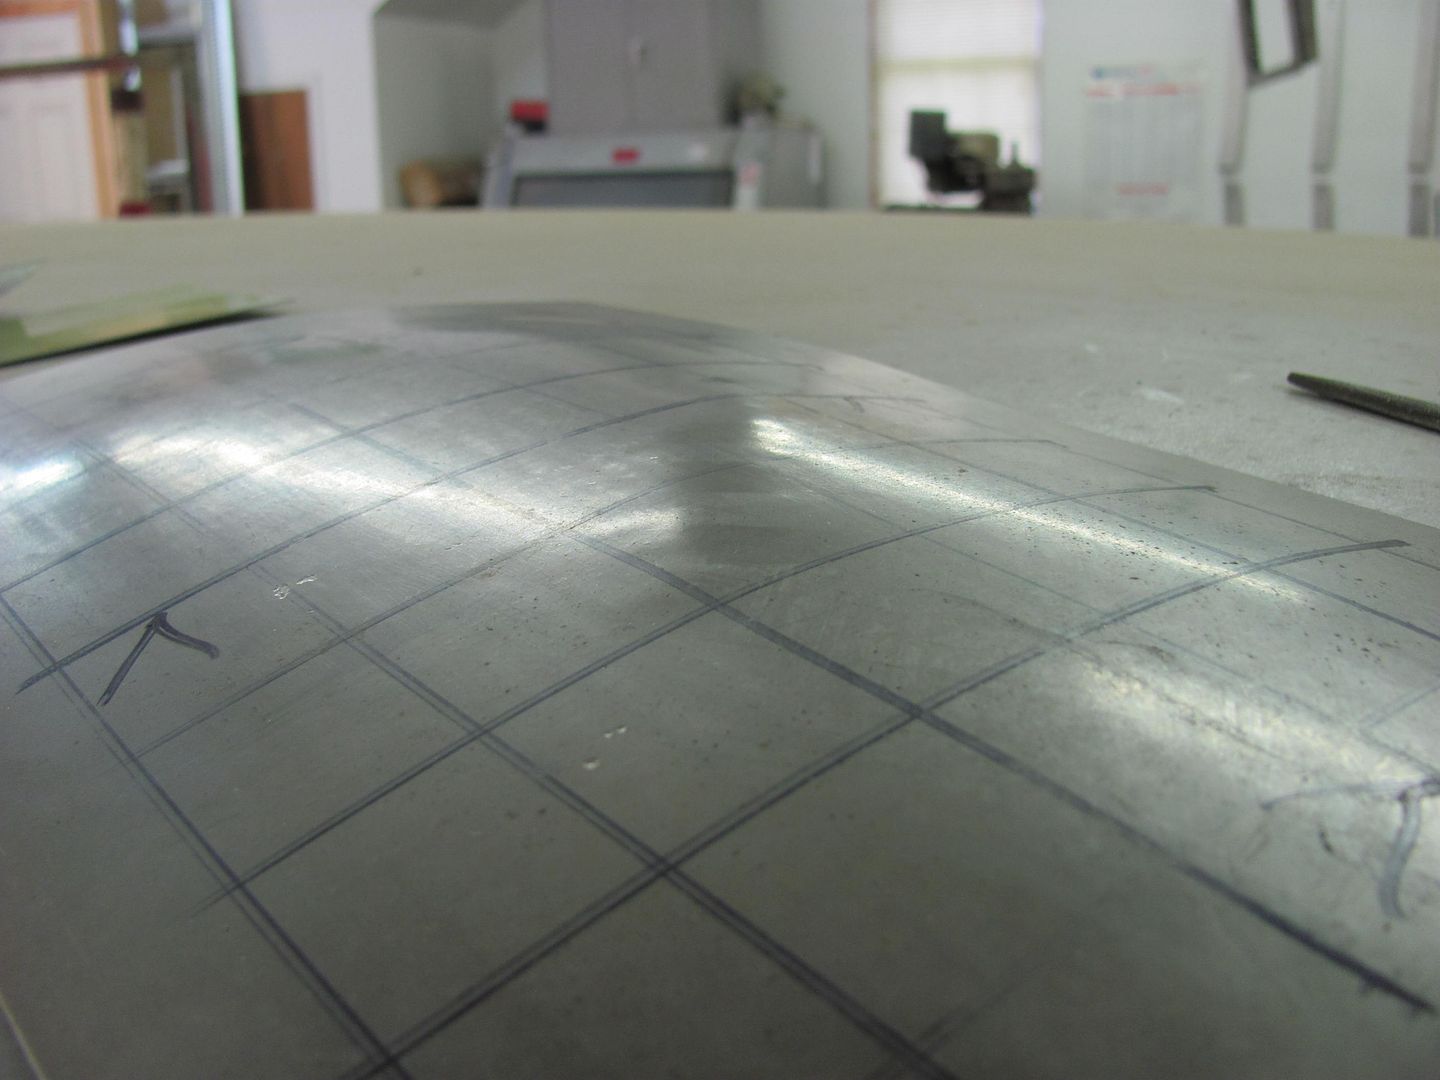
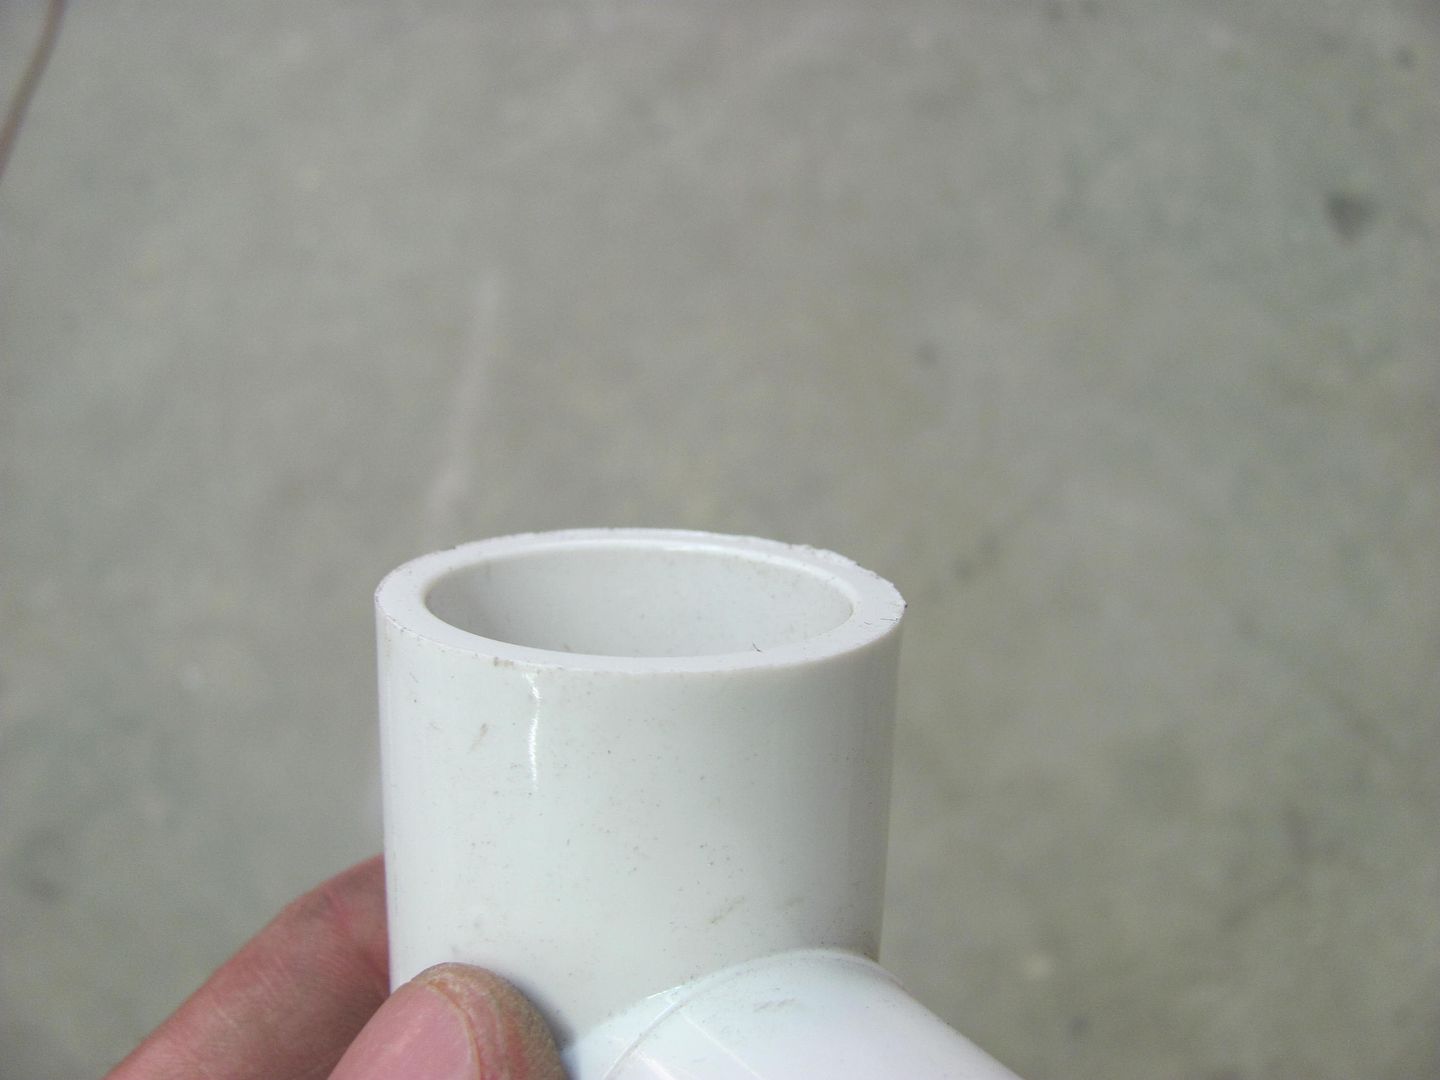
I chose to use a PVC elbow, it had two different sized ends for two tools in one. As with any body tool, they should be free of any burrs that may mar the metal surface. I also added a slight radius to the edges...

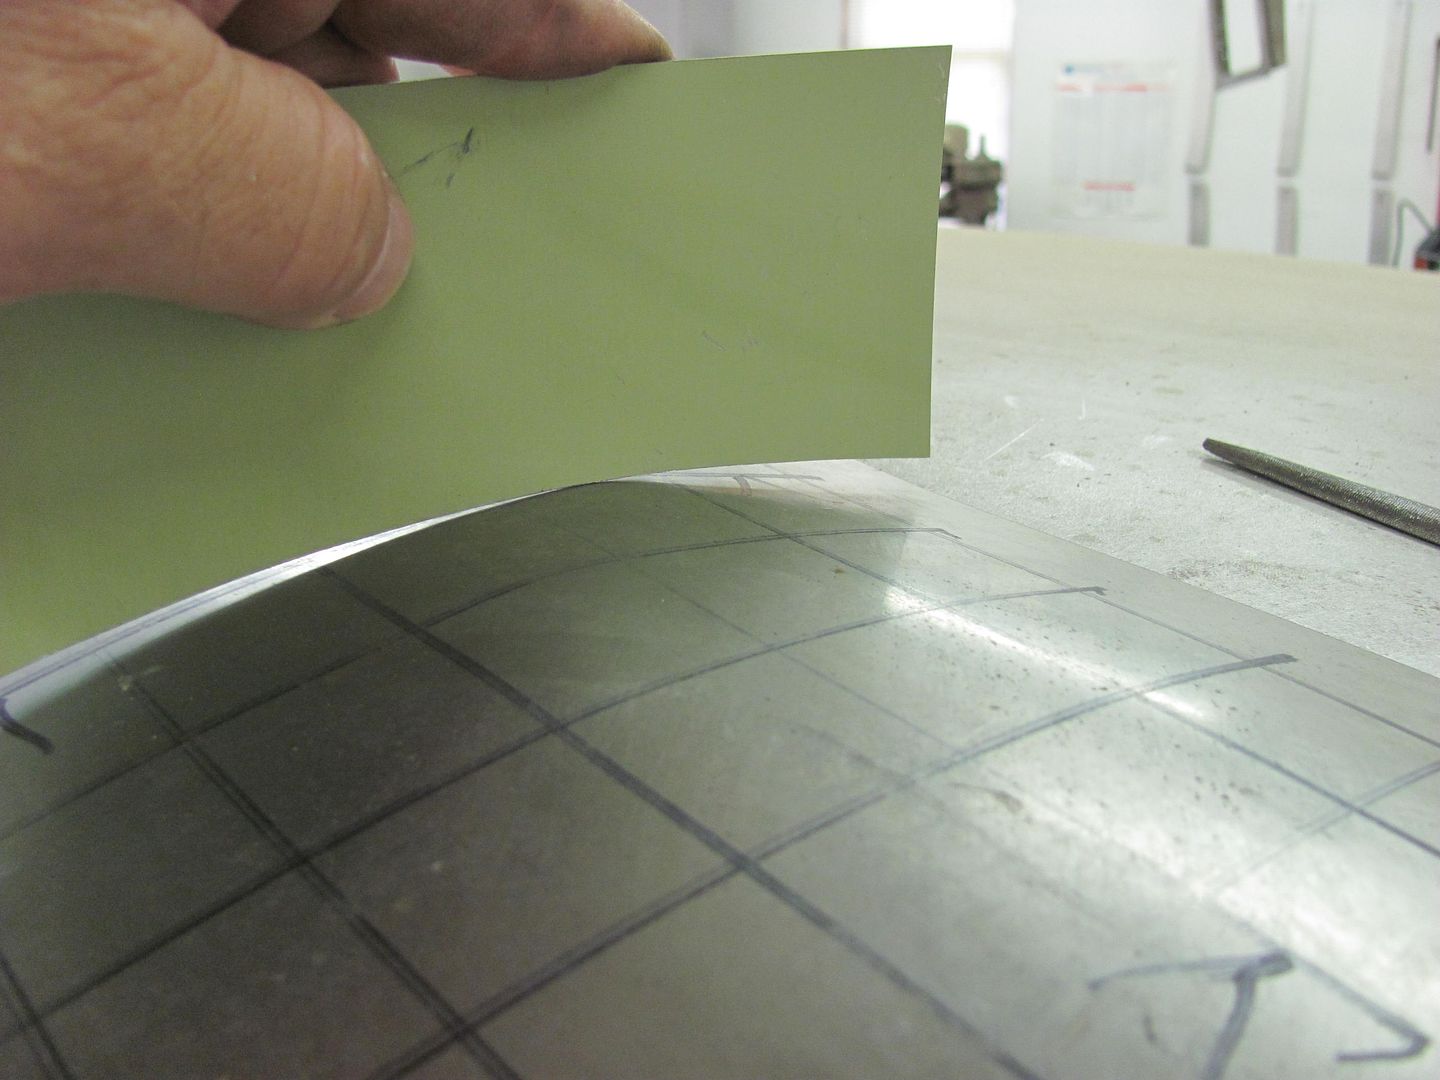
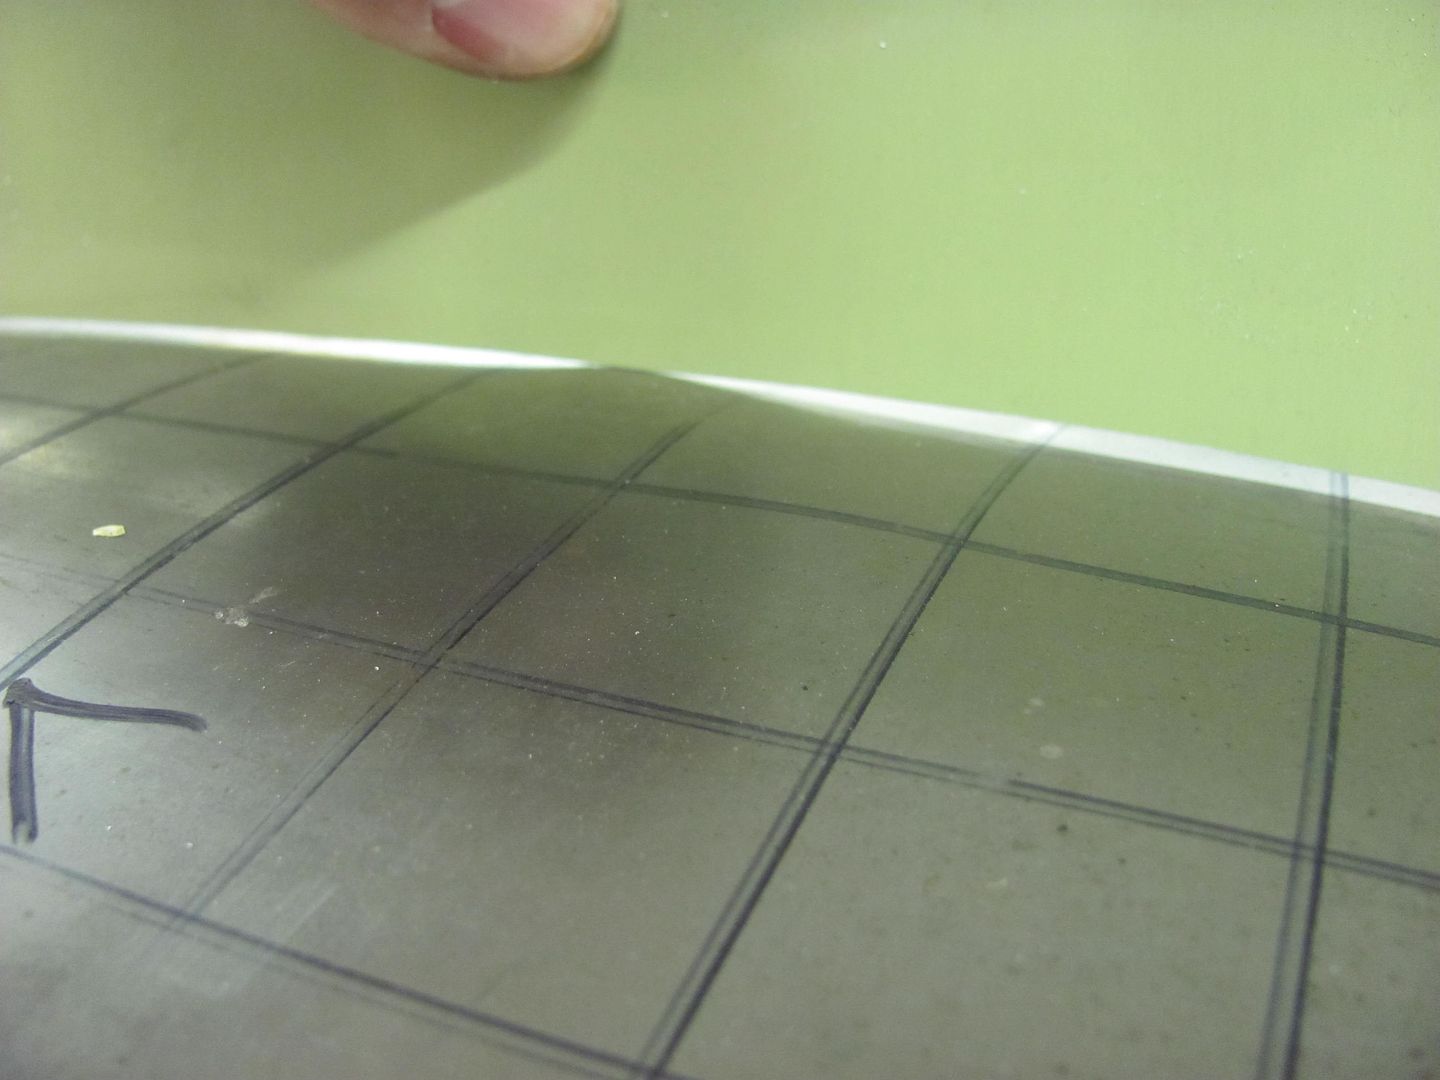
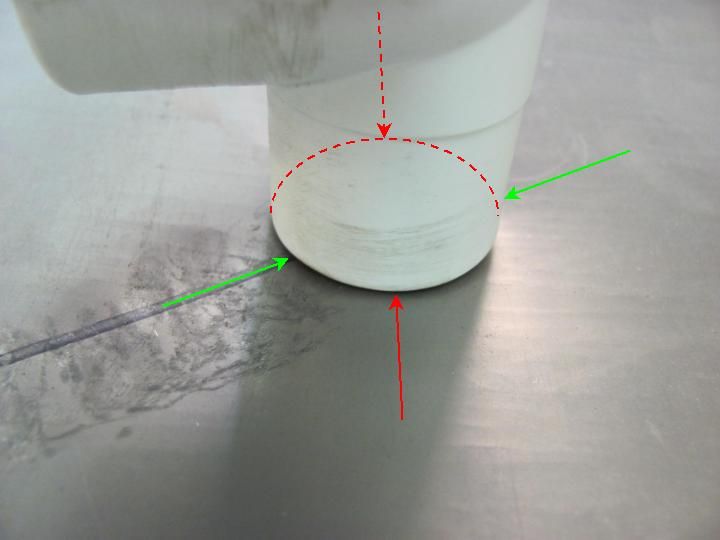
Holding the dolly against the bottom of the panel, you can see that due to the dents it only touches the panel at the red arrows. Based on off-dolly principle, the shrink would occur more prominently in the direction of the red arrows. Typically the panel will have more stretch across (perpendicular to) the dent crease, so more shrink is needed in this direction (red arrows)
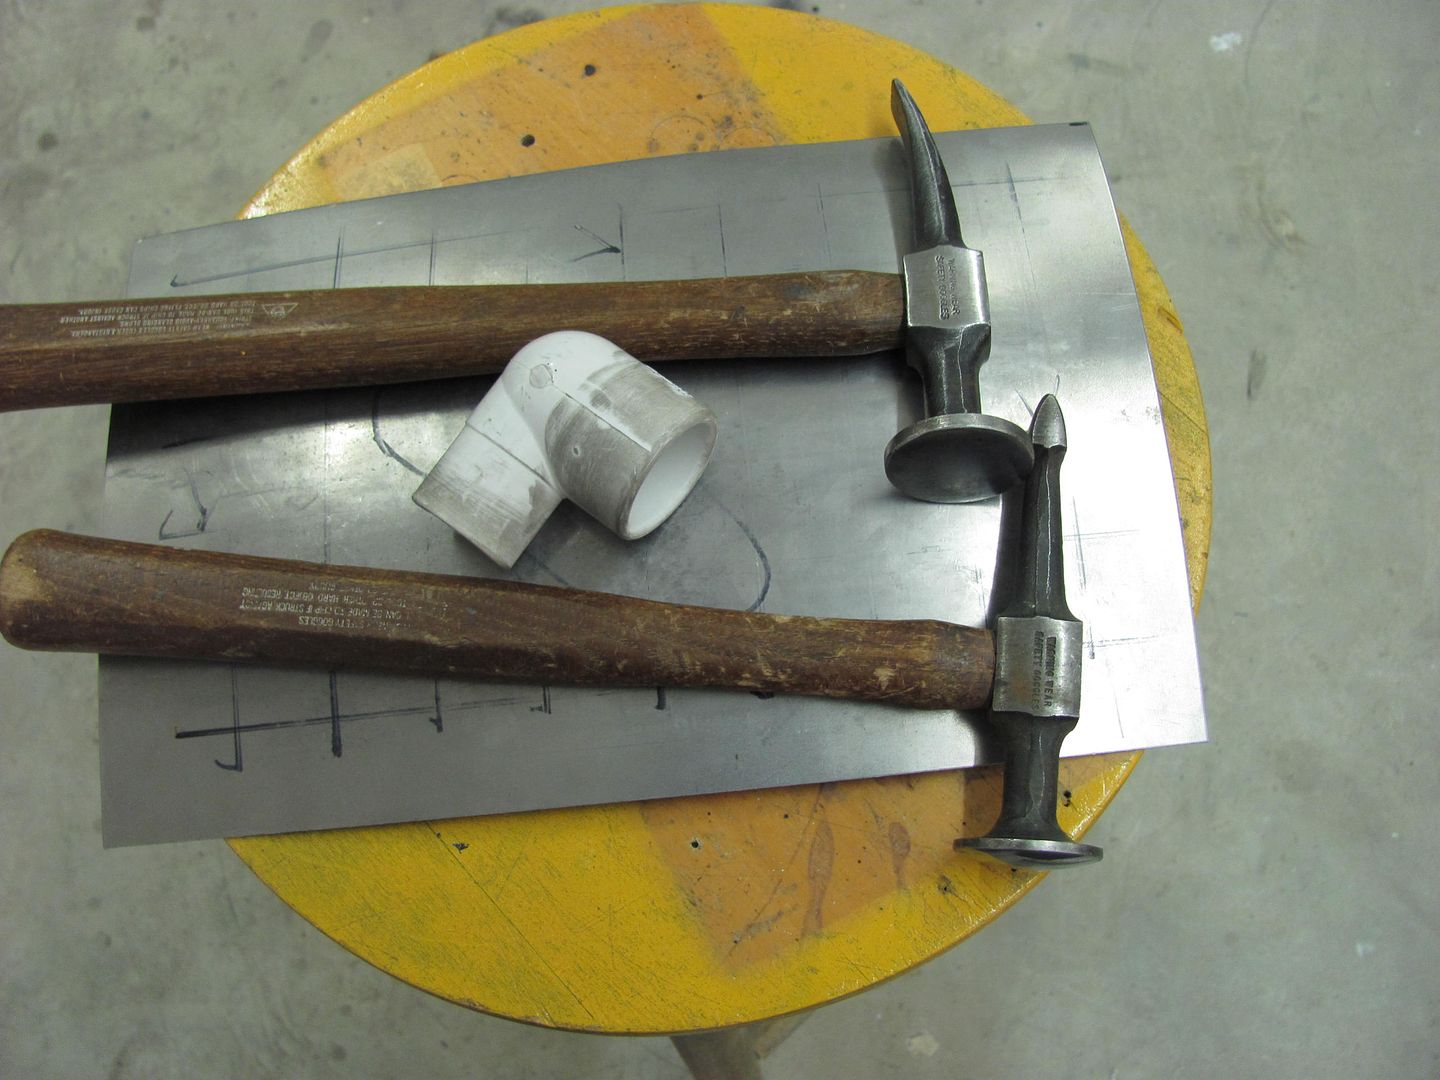
Here are the tools we will use today:
After some off-dolly bumping:
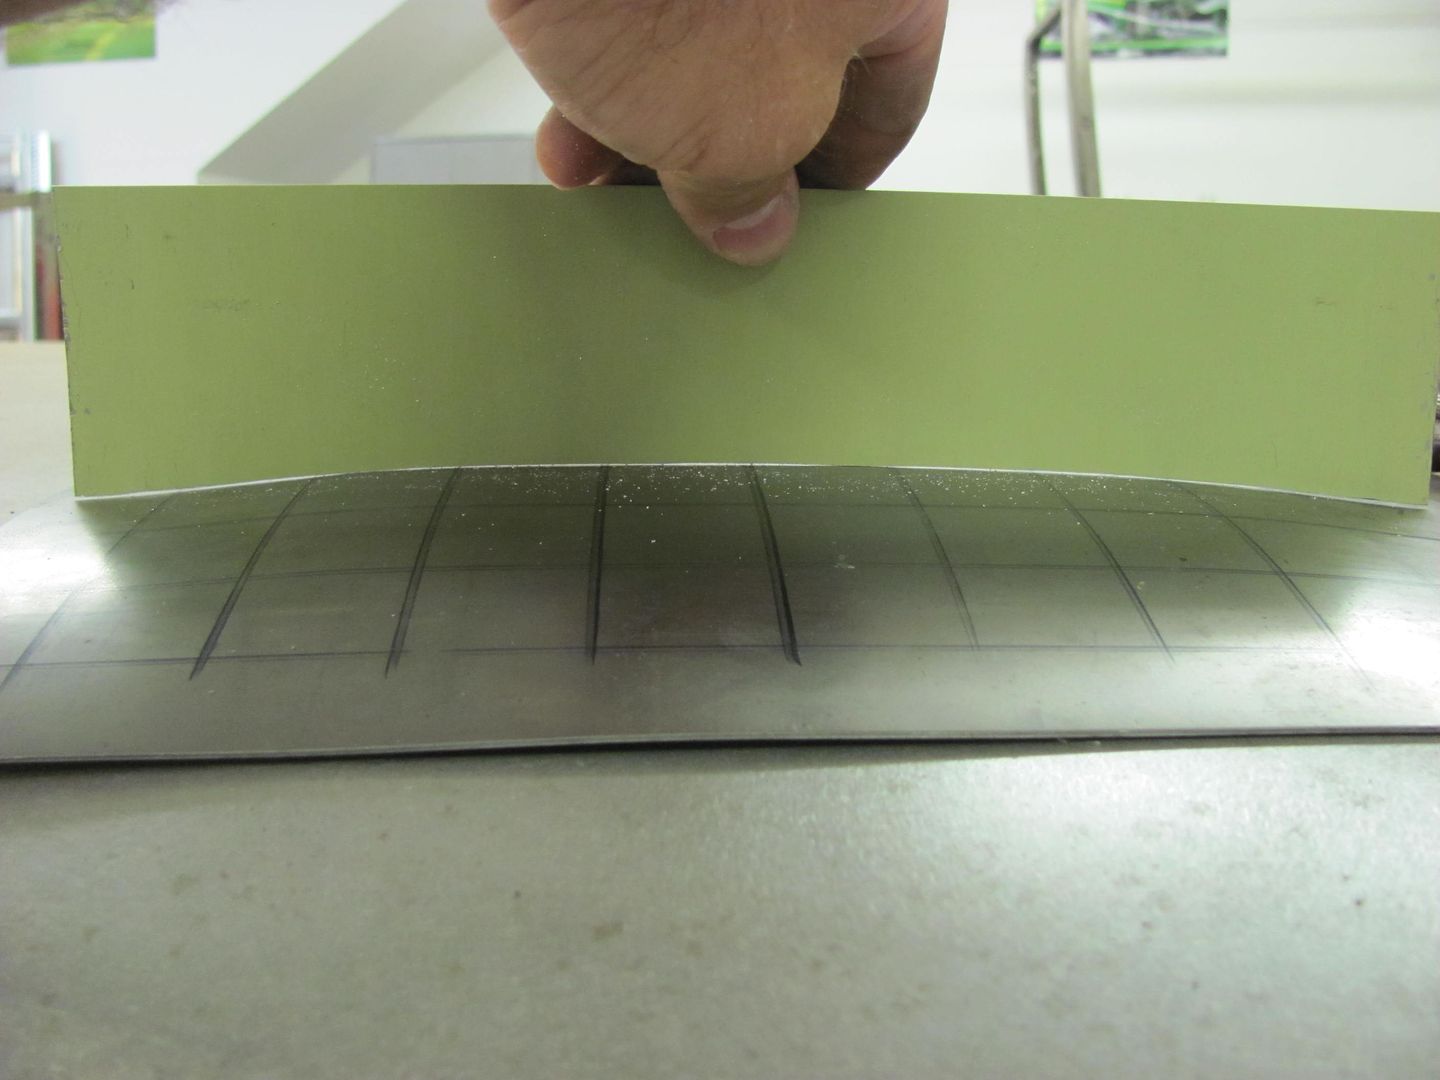
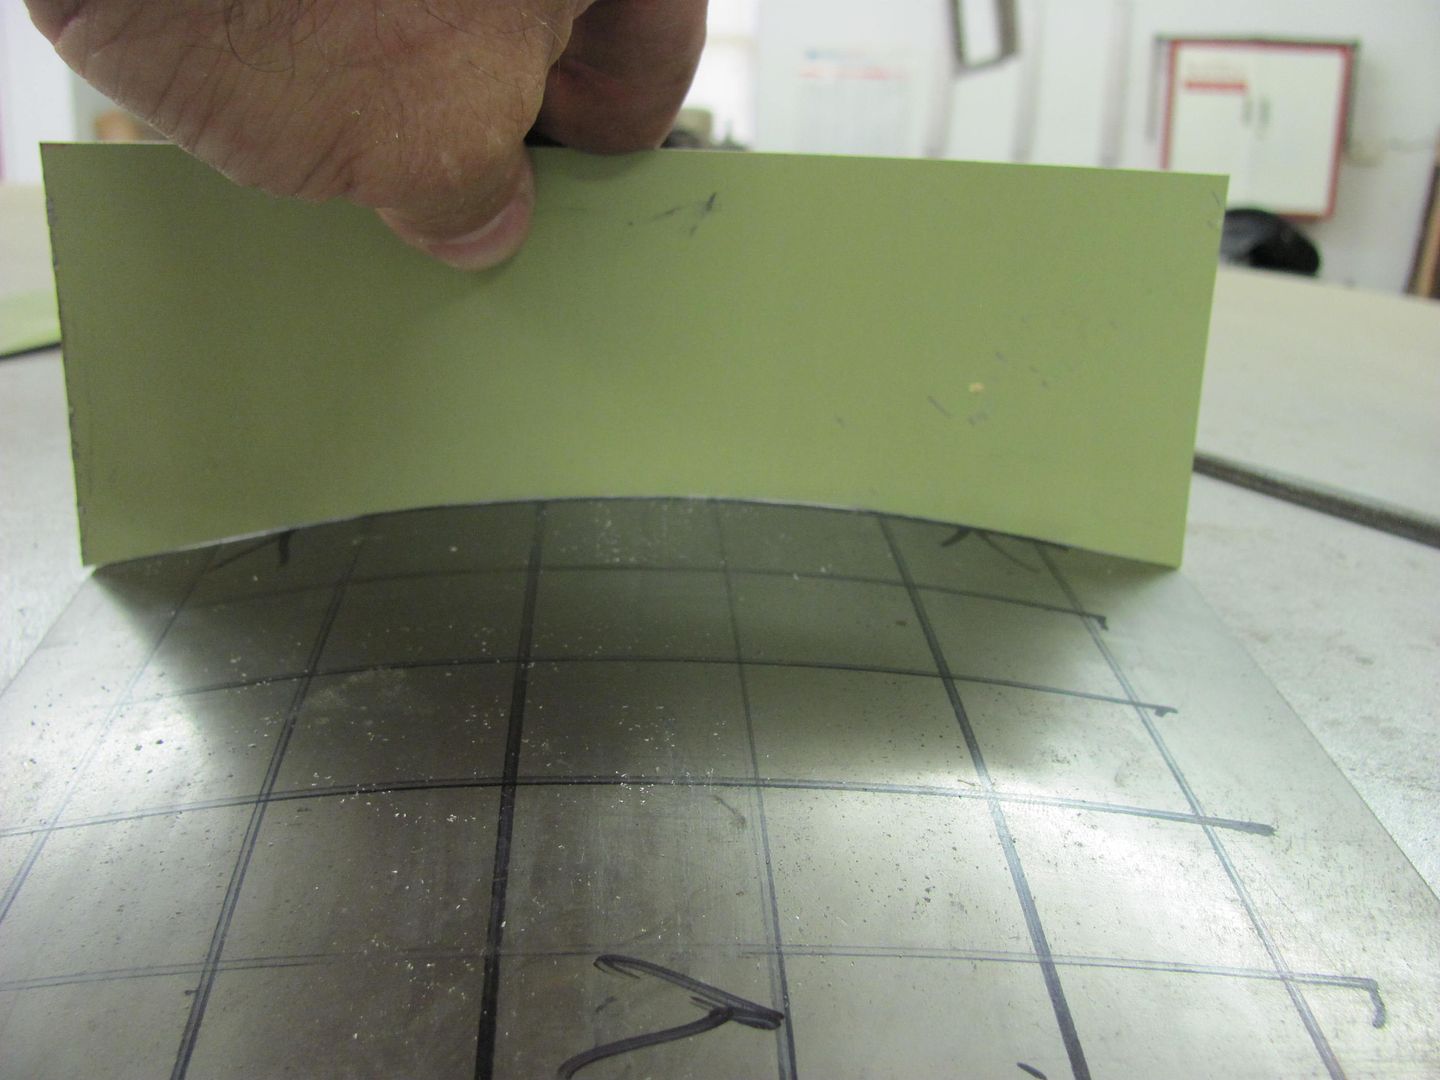
Check with the templates
Progress....these are light taps only with the hammer. We just want to bring down the high spots, not create craters.
Here's where I finished up...
I have a little over an hour in making the panel, denting, and removing the dent. Where I still could have gone a bit more, it was about to a point where high build primer should have masked any remaining imperfections. This dent removal could also have been accomplished with heat shrinking using an O/A torch, etc, but for those times where you may not wish to use heat and want another option, this seems to work well. I think with using the donut dolly and it's heftier mass, one could shave some additional time off the repair. You'll notice the flat bus door repair used a crowned hammer, and the crowned roof "panel" repair used a flat hammer. Basically you'll need a hammer that pushes some of the stretch into the hollow to capture some of the excess so it will shrink, without pushing so much that it causes a dent. Using a flat hammer on flat metal doesn't move enough, and using a crowned hammer on a panel that is crowned the other direction is likely to cause dents, so there the flat hammer is used. So hammer selection was used based on the shape of the panel.Last edited by MP&C; 02-10-2012 at 04:00 PM.
-
02-10-2012 04:26 PM #20
CHR Member
- Join Date
- Oct 2010
- Location
- Duluth
- Car Year, Make, Model: 37 Ford Tudor Slantback
- Posts
- 234
Boy i wish I could do something like that.. I took pictures. I have darker primer on it because of no heat in the garage, and the humidity is always there. I didn't want it to rust over the winter in the bare spots. I used the straight edge. It should be flat threw there. It is to start with, and where it ends. Just can't get to the back side all that well from the inside. I have to do another post to show that..
-
02-10-2012 04:27 PM #21
CHR Member
- Join Date
- Oct 2010
- Location
- Duluth
- Car Year, Make, Model: 37 Ford Tudor Slantback
- Posts
- 234
A pic from inside the car..
-
02-10-2012 04:57 PM #22
CHR Member
- Join Date
- Jun 2008
- Location
- Leonardtown
- Car Year, Make, Model: Walking
- Posts
- 1,228
On your outside pictures, can you get a shot from back aways to see the overall of that side?
-
02-10-2012 05:15 PM #23
CHR Member
- Join Date
- Oct 2010
- Location
- Duluth
- Car Year, Make, Model: 37 Ford Tudor Slantback
- Posts
- 234
I hope these will help some. Really doesn't show much detail unless I sand it down and leave the lows, and the highs..
-
02-11-2012 04:19 PM #24
CHR Member
- Join Date
- Jun 2008
- Location
- Leonardtown
- Car Year, Make, Model: Walking
- Posts
- 1,228
Is that the same fender that came on the car, was there damage on the fender as well?
Unfortunately the inner panel will limit how you can work the damage from the back side. It would almost be worth cutting out the inner panel to gain that access to be able to better straighten the panel. Short of that, some strategic placement of a broom handle from the access holes in the inner panel may help to persuade the panel outward, but it will likely need some shrinking and the use of a dent puller in the long run. How is the fit along the front of the fender against the quarter, does the wheelwell opening need to come out also, or not?
The other suggestion is to use some flashing material as I did in the post above and make some profile templates of the good side (if there is a good side) to better guage where this side really needs the work and by how much.....Last edited by MP&C; 02-11-2012 at 04:27 PM.
-
02-11-2012 06:17 PM #25
CHR Member
- Join Date
- Oct 2010
- Location
- Duluth
- Car Year, Make, Model: 37 Ford Tudor Slantback
- Posts
- 234
The fender has a kink in it about the center. The other side of the car has a few dents, but that one area seems to be ok..
Would the use of a palm nailer and a long carraige bolt work as a crowned hammer?? I would need to drill some holes in that panel to put the bolt threw. Then line it up on the ridge and tap on it using off dolly.. As far as the dent puller goes. The only way I know how to do that is with the drilling of holes down the center of the ridge. Start at the smallest point and give it a little pull. When it gets near level go to the next one and pull.
-
02-11-2012 06:26 PM #26
CHR Member
- Join Date
- Oct 2010
- Location
- Duluth
- Car Year, Make, Model: 37 Ford Tudor Slantback
- Posts
- 234
Here is a couple of that fender off the car. The whole works were inside the car when I bought it. They could have been from another car. I have no idea.
-
02-11-2012 07:49 PM #27
CHR Member
- Join Date
- Sep 2006
- Location
- New Lenox
- Car Year, Make, Model: 67 Mstg cpe , 37 Ford Coupe
- Posts
- 2,787
Great to see another 37 on here , i have one waiting in line . Another member here is doing a 37 humpback .
-
02-11-2012 08:18 PM #28
CHR Member
- Join Date
- Jun 2008
- Location
- Leonardtown
- Car Year, Make, Model: Walking
- Posts
- 1,228
Originally Posted by slantback37
You have a dent now, or better described as a stretch.... The palm nailer/planishing hammer are typically used for stretching, so it would be my last choice to use in this situation. Besides, for an attempted shrinking operation, even if it did work, it would be harder to manage restraint. When I suggested broom handle, it was more just to lightly push in various areas just to nudge the panel outward, not to planish. This is a repair that could be done from outside only, using a good dent puller and a shrinking tip, but would be a bit more challenging than if there were rear access. Rather than drilling holes, as you'd likely be limited in effectiveness with a minimum number of holes, IMO you'd be better suited to cut out one piece of the inner panel large enough to allow access to all the damage, if that's what you wanted to do. Of course, this is all to better metal finish the panel and keep any filler use to a minimum. You could still likely do the outside only repair with only a liberal amount of filler. Entirely up to what level of metalfinish you're looking for....
-
02-12-2012 05:42 AM #29
CHR Member
- Join Date
- Oct 2010
- Location
- Duluth
- Car Year, Make, Model: 37 Ford Tudor Slantback
- Posts
- 234
Could you explain a good dent puller? I saw on ebay the dent puller using a glue gun, some pins and something that would go across the dented area and pressure could be applied. Or on the other hand. How much filler can be applied before I would have to worry about it??
-
02-12-2012 08:12 AM #30
CHR Member
- Join Date
- Jun 2008
- Location
- Leonardtown
- Car Year, Make, Model: Walking
- Posts
- 1,228
Mine is a Snap On that I likely would never have bought new, but picked it and quite a bit of other stuff up used from the widow of a local bodyman. All his stuff was in a storage unit, and she was tired of the monthly bill.

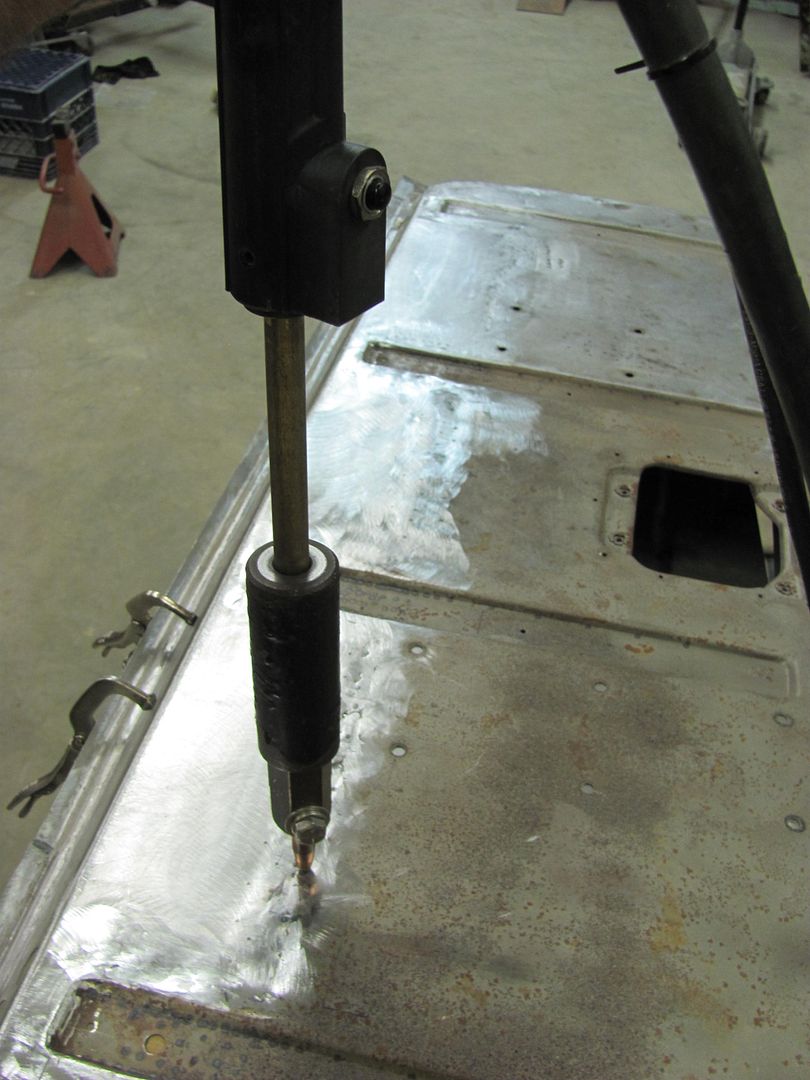
What I do like about this machine is that is uses the "throwing star" consumable, as compared to a stud welder. The slide hammer is built into the welding handle, so once the star gets welded to the panel, the slide hammer acts to pull the panel. A quick twist releases the star, ready for the next spot. This gets rid of the neccessity to grind off remnants of the pins used with a stud welder, so that when you are done shrinking/pulling, you have no more heat (and thus possible shrinking) further affecting the shape of the panel. My machine also has a shrinking tip that provides heat only, and works well when you need some heat to shrink but not the pulling feature. Shown here on an inner tailgate repair I did, fabricating the entire lower portion... The heating tip came in handy to smooth out the panel..
There are also some good stud welders out there that will be a bit more cost effective, the main difference being the stud welder consumable is a separate "pin" that you will then attach the separate slide hammer to in order to pull the metal out. in some severe cases, the area can get to looking like a porcupine with all the pins sticking up from the panel. Then, after all the pulling, the pins are removed by twisting off, cutting off (whatever works) and grinding any remaining residue flush. The stud welder can also accomodate a heating tip if shrinking is all you want to do. In either case, the benefit in your circumstance over the glue type version you mentioned, is that while also using the pulling feature, you are getting a slight shrink from the heat, so also helping to remove some of the stretch. I think either version of this tool would serve you well to straighten out this panel and keep filler to a minimum. IMO the main benefit to using one of these methods over a torch or shrinking disc, is that the shrinks are smaller in size (smaller area affected) so they are easier to control the results on a large affected panel like you have there. A shrinking disc seems very effective on isolated areas, such as a small dent or ding, but IMO on what you are working on there the disc would be more of a challenge to stop at the right moment where you don't wind up with a loose oi l can panel with loss of the panel shape. If you had access to both sides, this loose condition could be fixed with some on-dolly or planishing, so if trying to effect this repair from outside only, I would suggest the dent puller or stud welder using the puller as well as heating tip.
As far as filler, I try to keep this to a maximum of 1/16". As long as you are using a quality filler such as one of Evercoat's lines, then you will have better luck if you are on the thicker side (1/8" or so) in your depth of fill. Stay away from Bondo brand (if they are still around?) like the plague.Last edited by MP&C; 02-12-2012 at 08:20 AM.
 Reply With Quote

Posting Permissions
- You may not post new threads
- You may not post replies
- You may not post attachments
- You may not edit your posts

Down all day yesterday, up today, shit or get off the pot.
Where is everybody?