


 1Likes
Thread: Aoto Body explained..


Results 1 to 15 of 61
 LinkBack URL
 About LinkBacks
-
02-04-2012 11:23 AM #1
 CHR Member

- Join Date
- Oct 2010
- Location
- Duluth
- Car Year, Make, Model: 37 Ford Tudor Slantback
- Posts
- 234
Aoto Body explained..
Hi. Getting a little warmer out there, and I can get into the garage for a couple of hrs a day. I am starting body work on a 37 Ford Tudor. I took autobody in a trade school, but forgot most of it. Are there any good books out there that explain how to take out the dents?? I already did all of the patch panels needed. I have some dents, and a few creases in the rear side upper that I just can't get to. Wondering if you still drill holes and use a slide hammer to take them out?? I just can't remember. I don't want to use any if possiable bondo. Thanks..
-
Advertising

- Google Adsense
- REGISTERED USERS DO NOT SEE THIS AD
-
02-04-2012 11:29 AM #2
CHR Member/Contributor
- Join Date
- Sep 2007
- Location
- Gardner, KS
- Car Year, Make, Model: '33 HiBoy Coupe, '32 HiBoy Roadster
- Posts
- 11,245
Metal Bumping by Frank T. Sargent - Amazon.com: Martin BFB The Key to Metal Bumping Manual Instruction Book, 126 Pages: Industrial & Scientific I bought a copy, but have not spent much time with it yet. Said to be "the Bible" for dent removal.Roger
Enjoy the little things in life, and you may look back one day and realize that they were really the BIG things.
-
02-04-2012 11:54 AM #3
CHR Member
- Join Date
- Apr 2001
- Location
- Salado
- Car Year, Make, Model: 32, 40 Fords,
- Posts
- 10,898
Drilling holes and screwing in a slide hammer is about as neanderthal as it gets.............sure sign of hack body work. More prone to rusting and ruins good potential sheet metal.
For blind panels where you can't get behind for proper hammer/dolly work, take a look at this equipment:Autobody Store: Stud Welders This is just one source for the equipment, there are others if you search. Then go to youtube and search for "stud weld dent repair", lots of visuals to give you the basics to practice on. Note down the page linked above, there is a shrinking tip as well that works for small stretched areas, better control than a torch if you're not real experienced with live flame.Your Uncle Bob, Senior Geezer Curmudgeon
It's much easier to promise someone a "free" ride on the wagon than to urge them to pull it.
Luck occurs when preparation and opportunity converge.
-
02-04-2012 12:11 PM #4
CHR Member
- Join Date
- Oct 2010
- Location
- Duluth
- Car Year, Make, Model: 37 Ford Tudor Slantback
- Posts
- 234
Got it off ebay.. Thanks. I have done everything myself so far. I would like to finish it by doing it all myself.
-
02-04-2012 12:15 PM #5
CHR Member
- Join Date
- Oct 2010
- Location
- Duluth
- Car Year, Make, Model: 37 Ford Tudor Slantback
- Posts
- 234
That was what was done when I was in school back in 71. They would also drill a seris of holes and use hooks to pull out the dent.. Originally Posted by Bob Parmenter

-
02-04-2012 12:17 PM #6
CHR Member
- Join Date
- Oct 2010
- Location
- Duluth
- Car Year, Make, Model: 37 Ford Tudor Slantback
- Posts
- 234
As far as the stud welder goes.. I had one, but it would never do what I thought it would do. Even burned a hole threw the panel.
-
02-04-2012 01:39 PM #7
CHR Member/Contributor
- Join Date
- Jul 2003
- Location
- Madison
- Car Year, Make, Model: '67 Ranchero, '57 Chevy, '82 Camaro,
- Posts
- 21,160
I'd never give up my stud welder and go back to drilling holes!!!! Still works, just so much slower when you have to go back and weld the holes shut, plus even with the holes welded shut there's still a bare weld on the inside that's an invitation for rust to start!Yesterday is history, tomorrow is a mystery, Live for Today!
Carroll Shelby
Learning must be difficult for those who already know it all!!!!
-
02-04-2012 02:12 PM #8
CHR Member
- Join Date
- Oct 2010
- Location
- Duluth
- Car Year, Make, Model: 37 Ford Tudor Slantback
- Posts
- 234
Well I can get to the crease if I cut some of the bracing out where the rear window rolls up. Now just the thought. The car is up on blocks, so it won't move. I was thinking of taking a 2x4 and nailing on a pice of sheetmetal that is formed around it and nailed to the sides. I could then push it against the crease, and wedge it against the garage wall. Then lightly hammer on both sides of the crease to try to drive it out to near flussh.. I have already slid a bar down the window channel and tried to pry on it while heating the sides, but that didn't help either.. I will probably find out in that book when it comes..
-
02-04-2012 02:14 PM #9
CHR Member
- Join Date
- Oct 2010
- Location
- Duluth
- Car Year, Make, Model: 37 Ford Tudor Slantback
- Posts
- 234
Oh, and I bought my stud welder from Harbor Freight. The slide hammer didn't really work, and the gun most of the time wouldn't weld those nails on.
-
02-04-2012 02:42 PM #10
CHR Member
- Join Date
- Jan 2012
- Location
- Bensalem
- Car Year, Make, Model: 1952 Ford F-1 Pickup
- Posts
- 24
find the unispotter its a newer tool that replaced the screw in the slide hammer it welds little studs on and the slide hammer pulls out the dent and you can cut off the stud with a pair of dykes and grind it down and you will leave no holes
-
02-04-2012 03:26 PM #11
CHR Member/Contributor
- Join Date
- Jul 2003
- Location
- Madison
- Car Year, Make, Model: '67 Ranchero, '57 Chevy, '82 Camaro,
- Posts
- 21,160
Well, you get what you pay for. Bought mine off the Snap-on truck, had it for 10 years or so and it still works great... Originally Posted by slantback37
Yesterday is history, tomorrow is a mystery, Live for Today!
Carroll Shelby
Learning must be difficult for those who already know it all!!!!
-
02-04-2012 04:55 PM #12
CHR Member
- Join Date
- Oct 2010
- Location
- Duluth
- Car Year, Make, Model: 37 Ford Tudor Slantback
- Posts
- 234
Isn't that the truth. But then again. I bought what I could afford..
-
02-06-2012 05:24 AM #13
CHR Member
- Join Date
- Jun 2008
- Location
- Leonardtown
- Car Year, Make, Model: Walking
- Posts
- 1,228
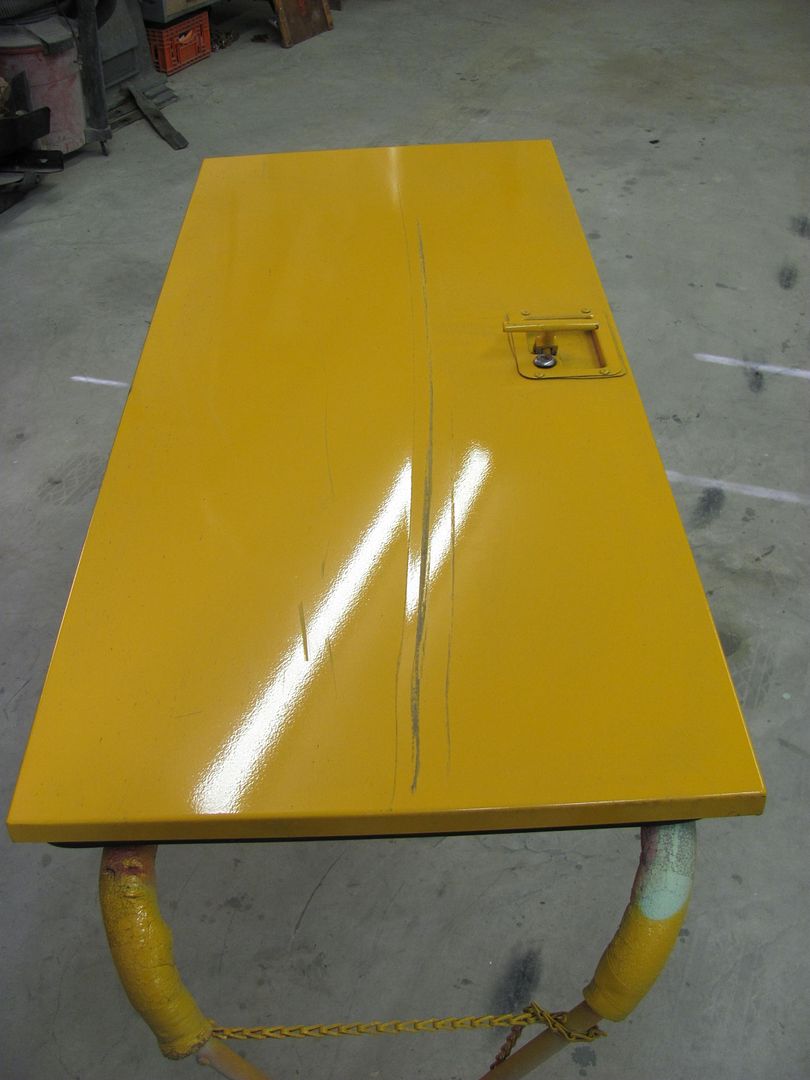
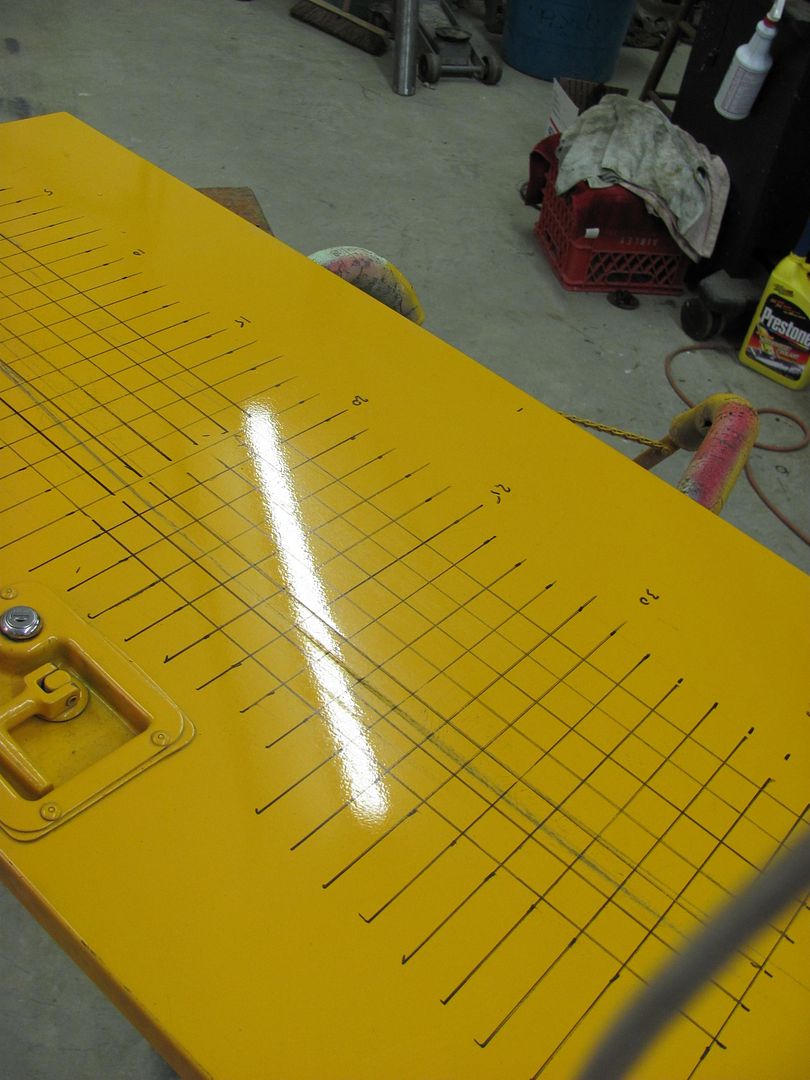
If you have access to both sides you will have more options for any area needing repair. Here is a School bus luggage door I repaired after someone ran down the side of it. This was the "good" door, the one in front was replaced with a new one.. But as new ones in primer go for just under 1K, we tried to save some money with a repair.....
This repair is done with a "donut dolly" and a crowned face body hammer. The theory here starts with the understanding of how the dent is formed, a direct force against the panel causes a stretch and deformity in the direction of that force. Then indirect forces (I call them springback) will tend to push back on the outer perimeter of the dent, noticeable as an outward bulge slightly higher than the surface of the metal.

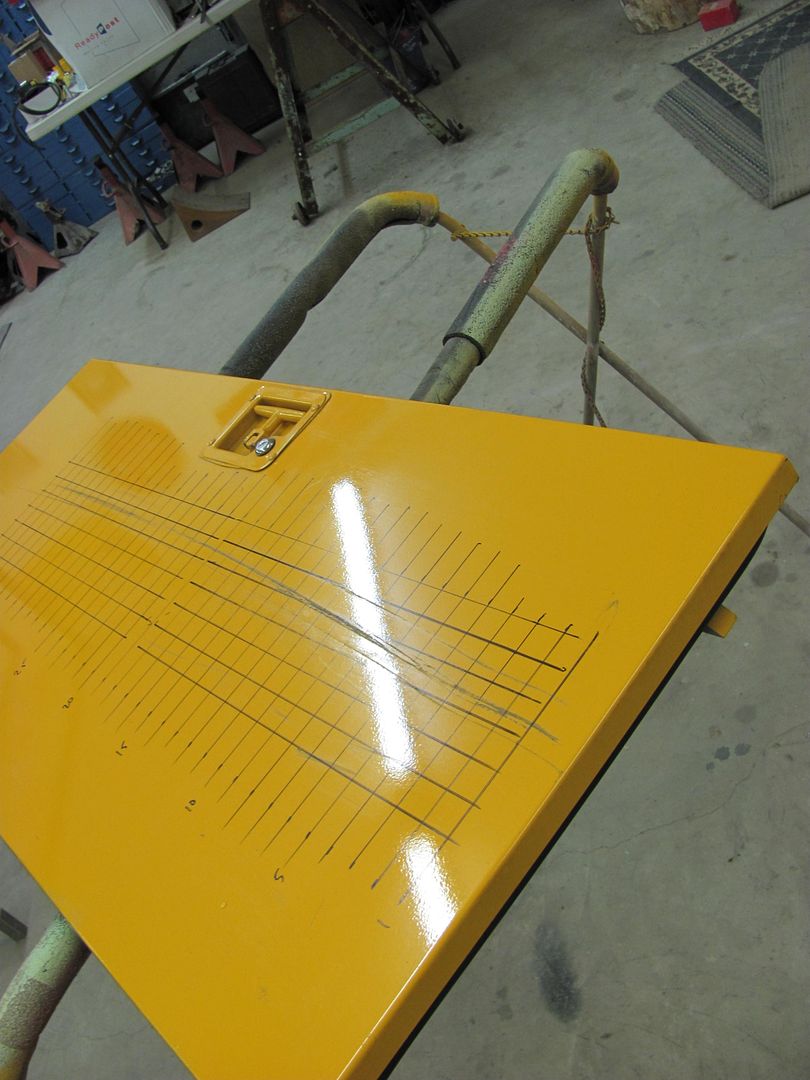
Here's our dented sample today, an aluminum door skin with a nice crease that travels just about the full length of the door.

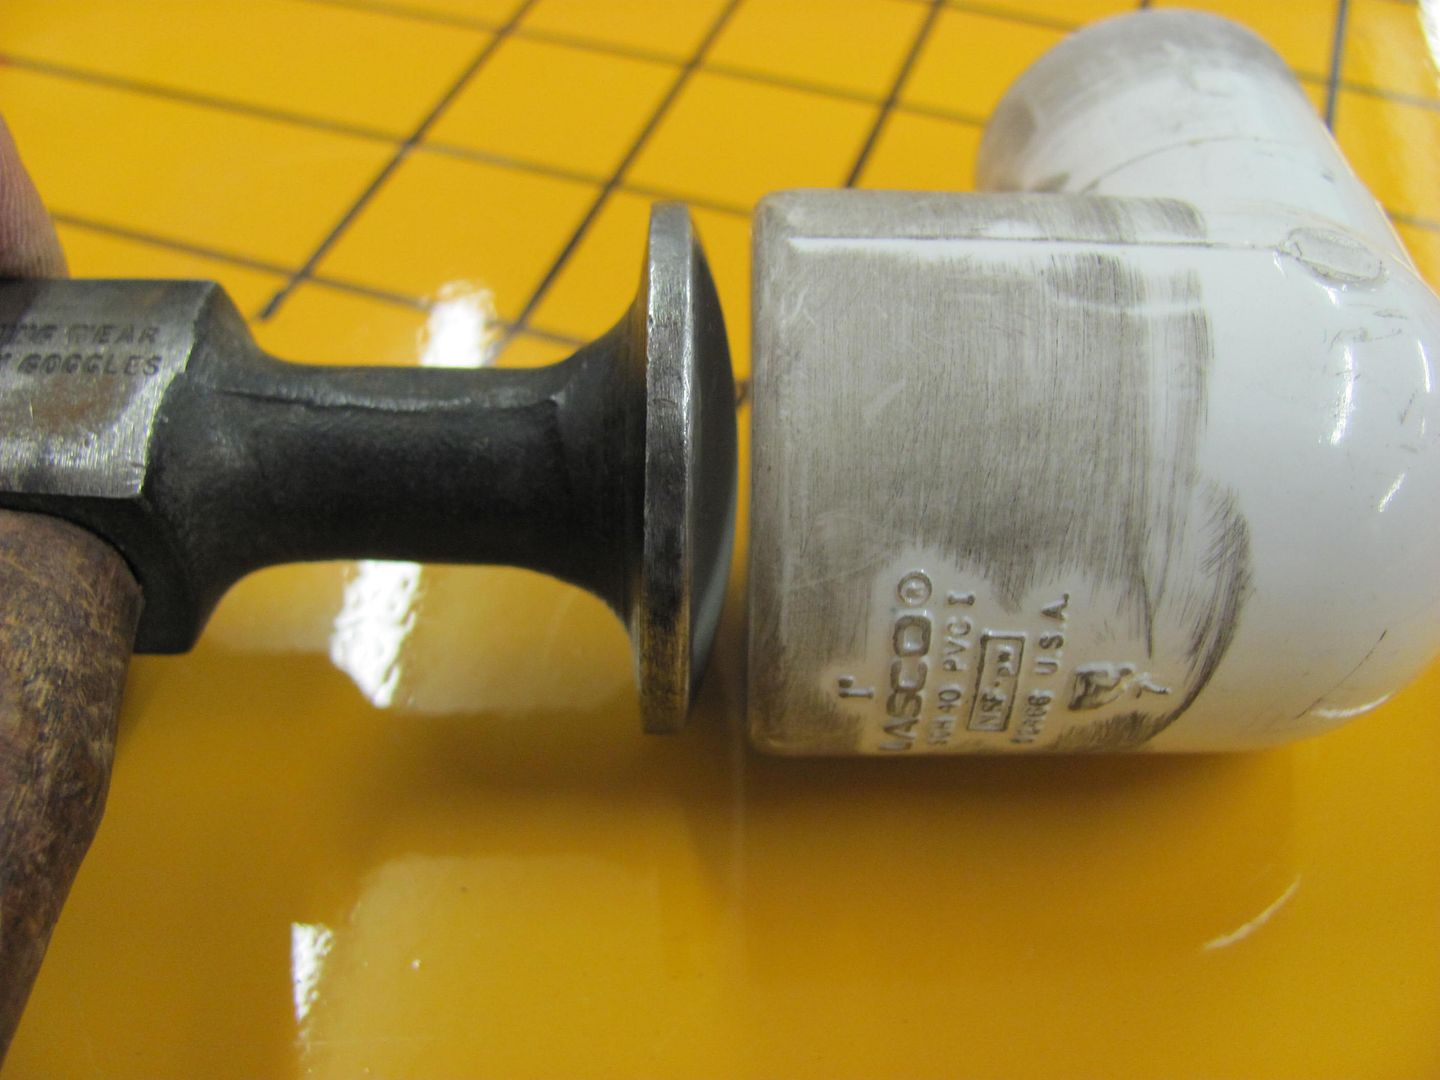
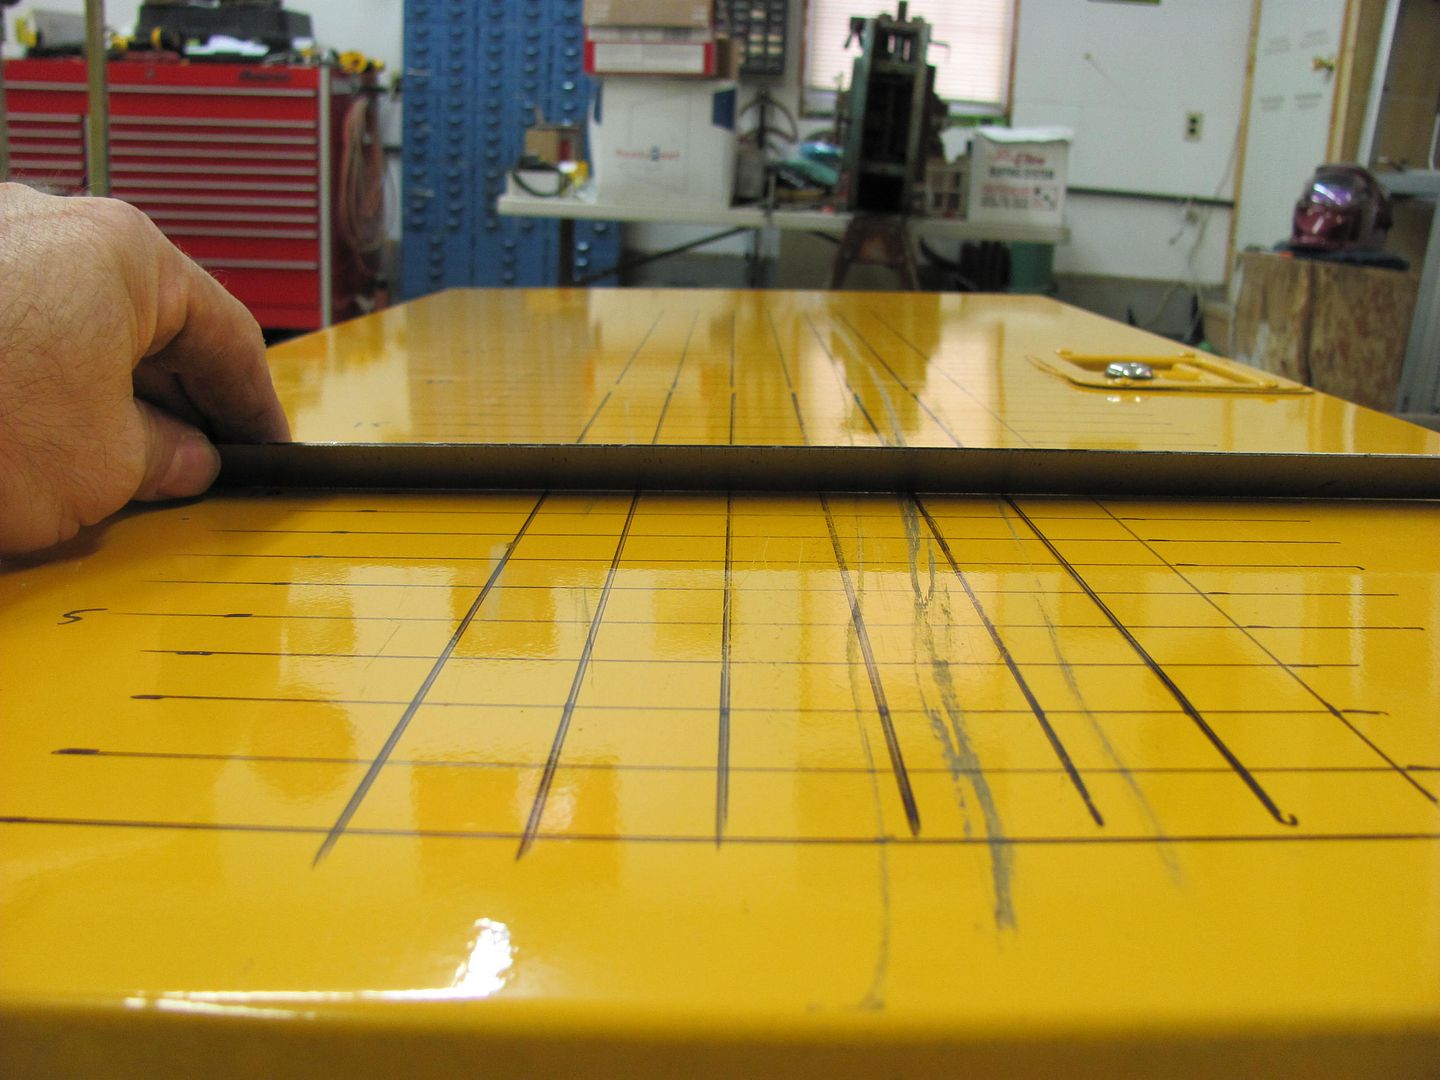
As the "donut dolly" is very closely matched in size to the hammer diameter, accuracy in locating the devices opposite each other is crucial. Depending on the panel you are repairing, this may be a challenge in itself. To keep the tools properly aligned and thus provide a more efficient shrink, I suggest a grid on either side, matched to identical starting points. Thinking back to the "springback" explained above in the formation of the dent, the objective in using these tools is to use just enough force that the high spot (the back side of the dent) is captured in the donut dolly such that once springback occurs the panel is flat/matches the crown of the surrounding panel, and not creating dents the other direction. We're looking for consistency and moderation in our hammer strikes...
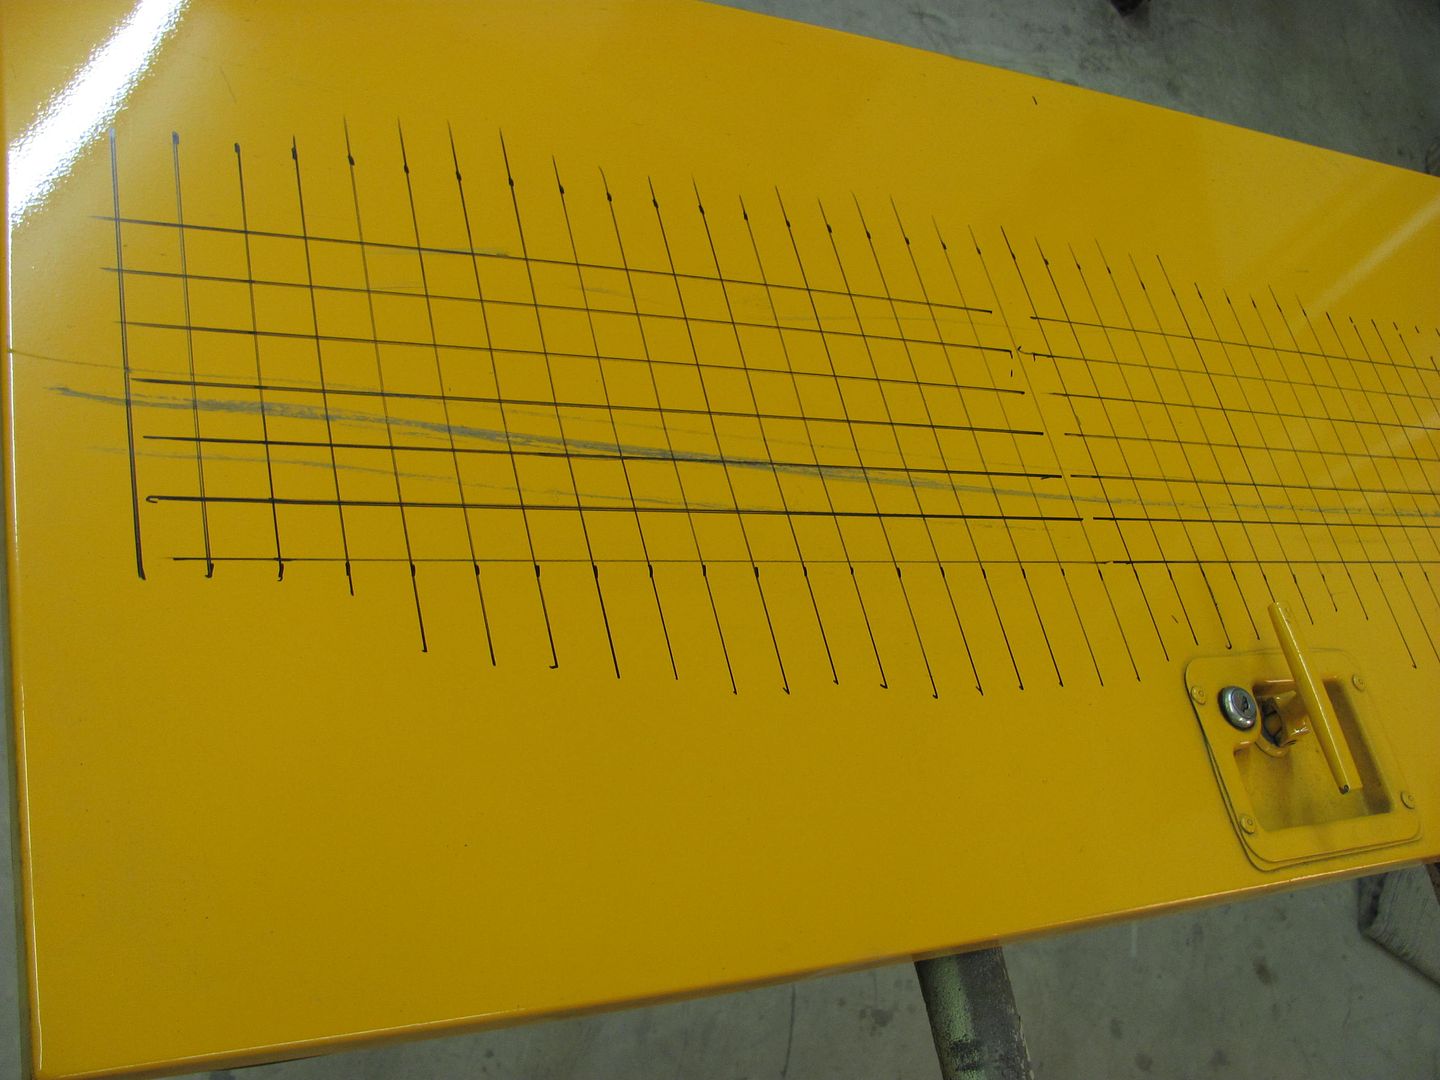
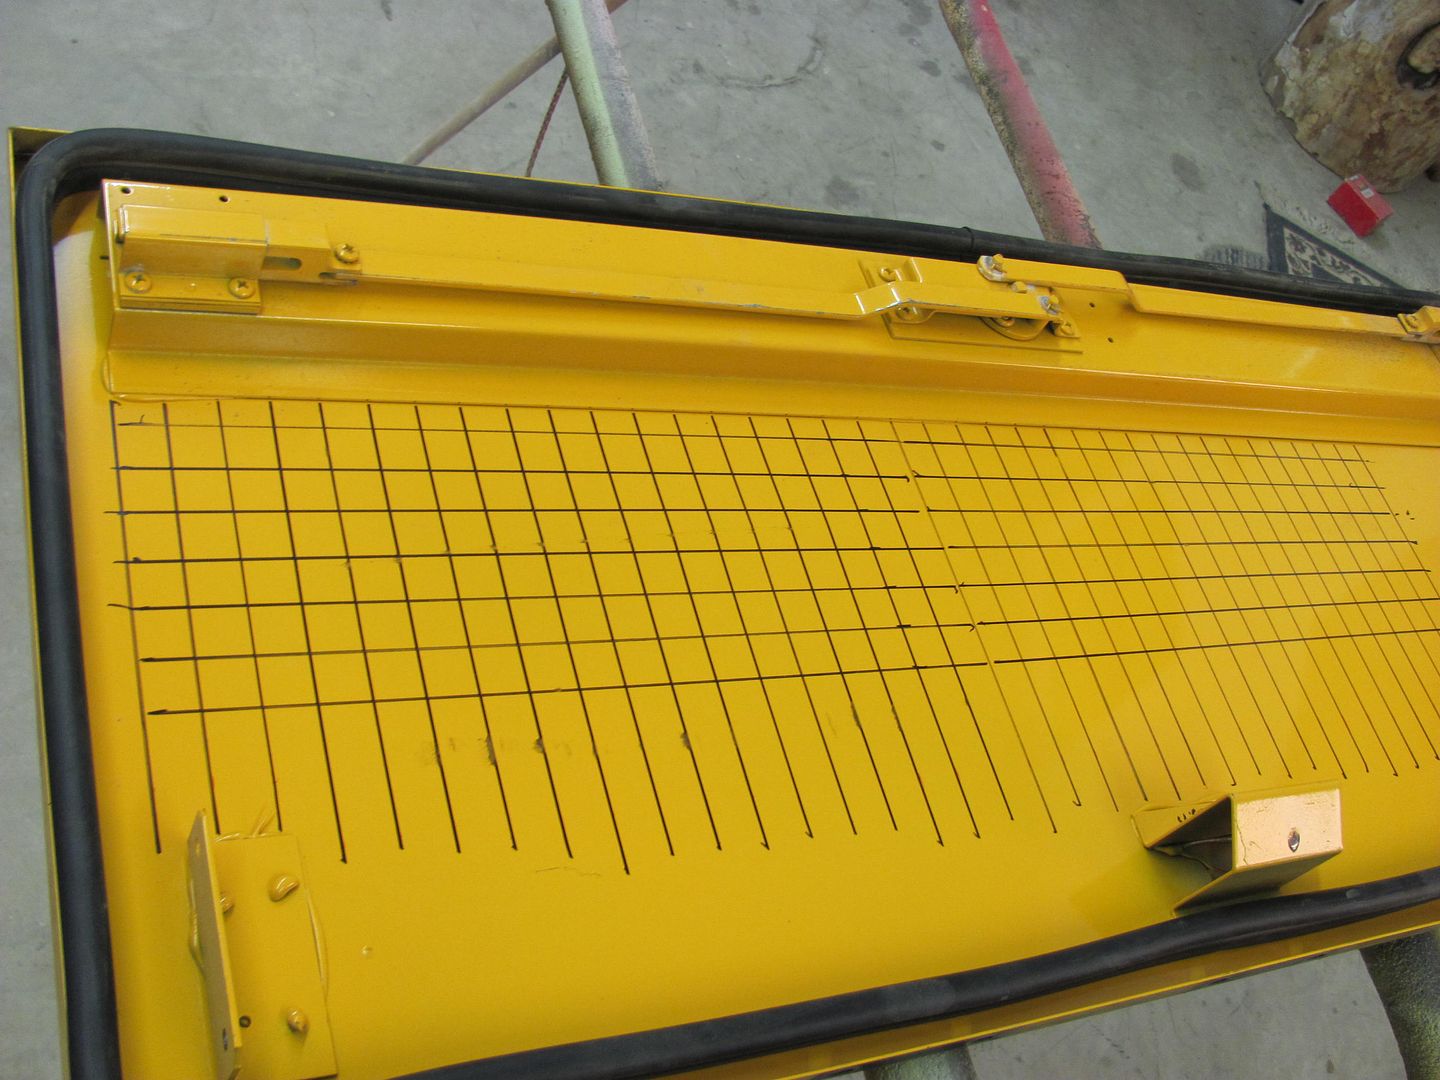
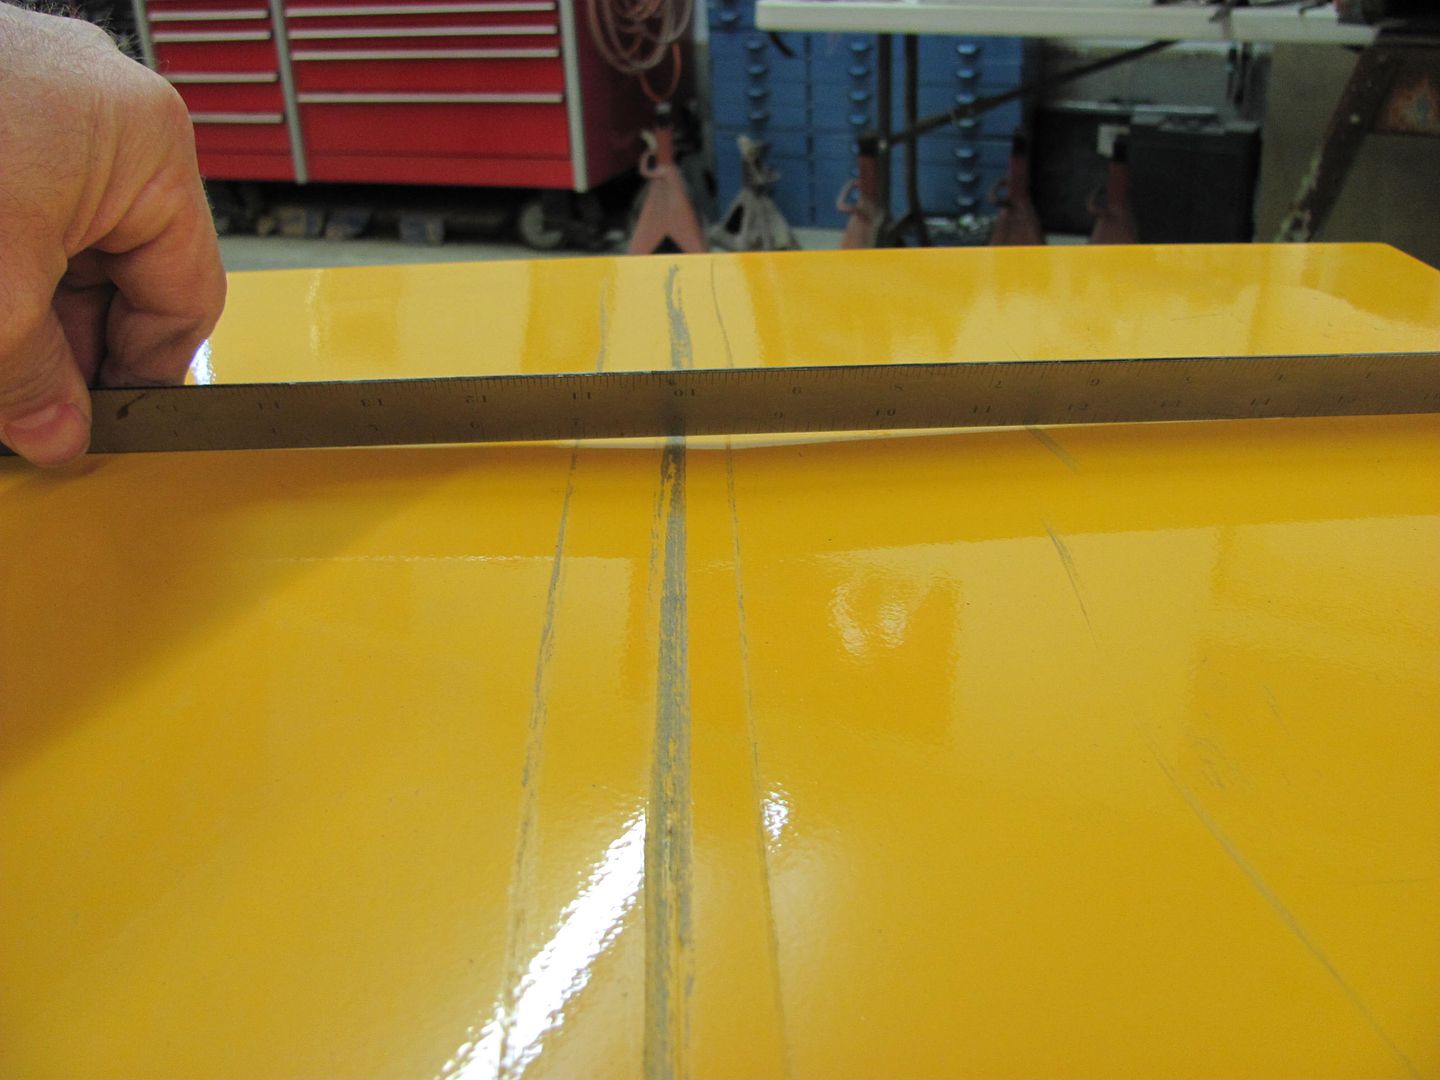
When laying out the grid, I numbered every fifth one just to keep better track of where I was. Some days you need all the help you can get. Different color sharpies could also help in keeping track of the lines. Also shown, using a straightedge for reference, is the damage before starting, located at grid 5, 10, and 15, to monitor any progress. The dolly is placed on the low side of the dent (the outside of the door) and the hammer is used on the high side of the dent (the inside of the door) so that the hammer strikes will force the excess metal into the donut dolly, creating a shrink.
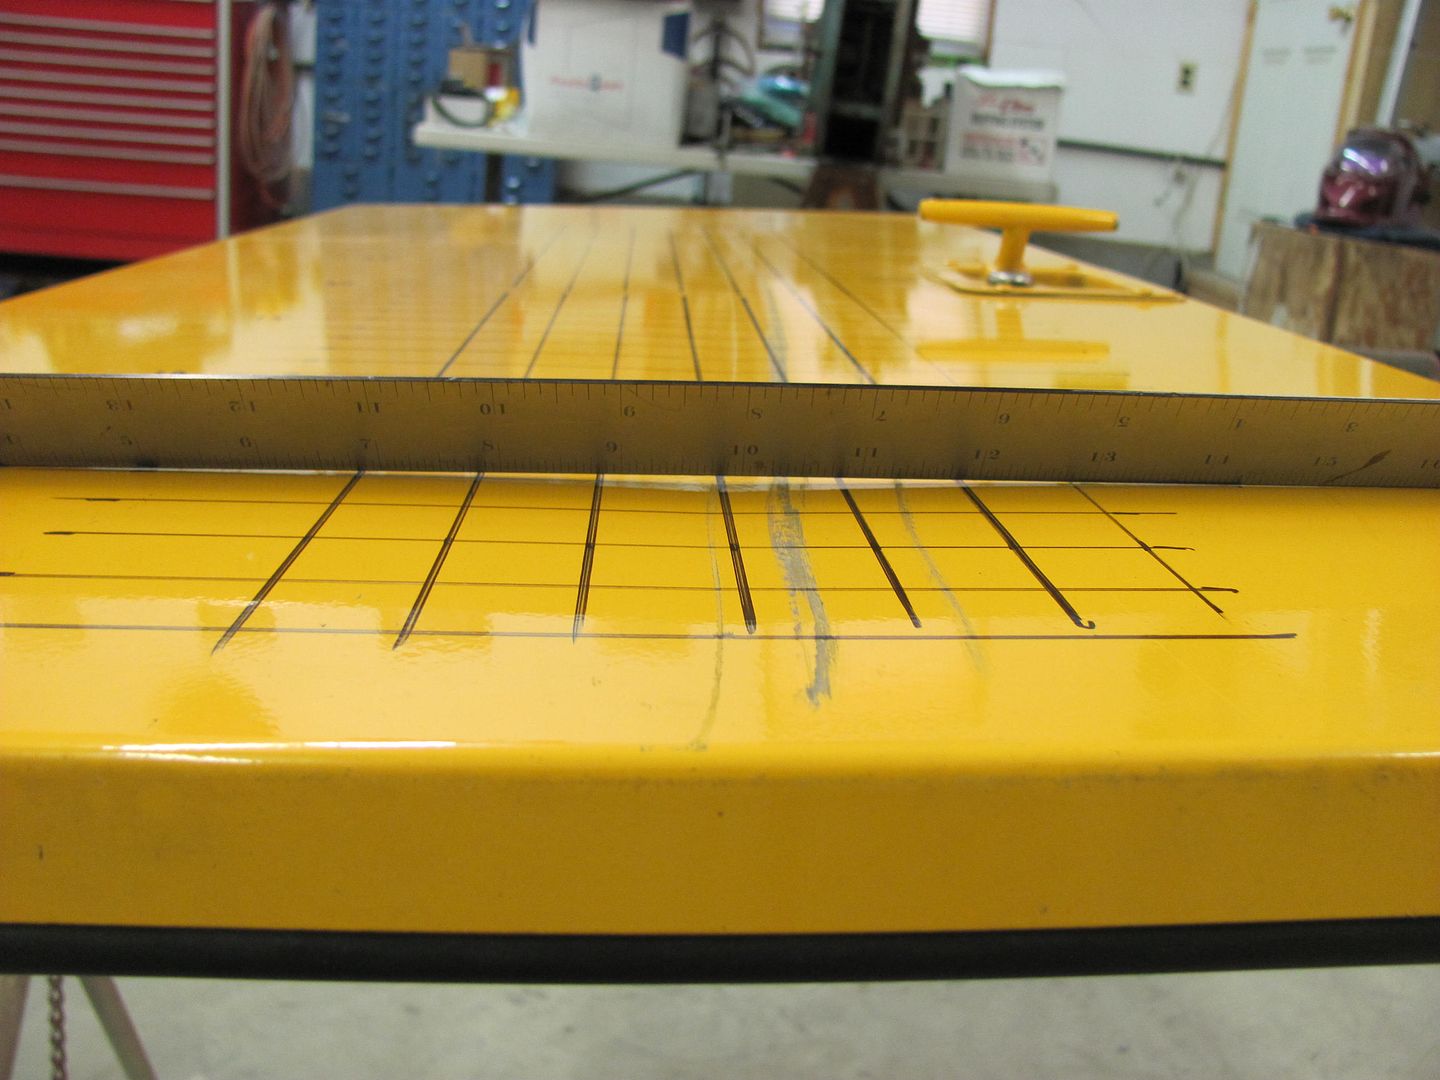

As I am working with a flat panel, I am able to use a straight edge to monitor the progress and see where additional shrinking may be needed. If you are using this process on a crowned panel, I would suggest making a profile template matched to the undamaged side of the car. Also, seldom does the crown on a panel remain consistent from one end of the panel to another, so it is very possible you may need different profile templates to accurately guage different sections along the panel.
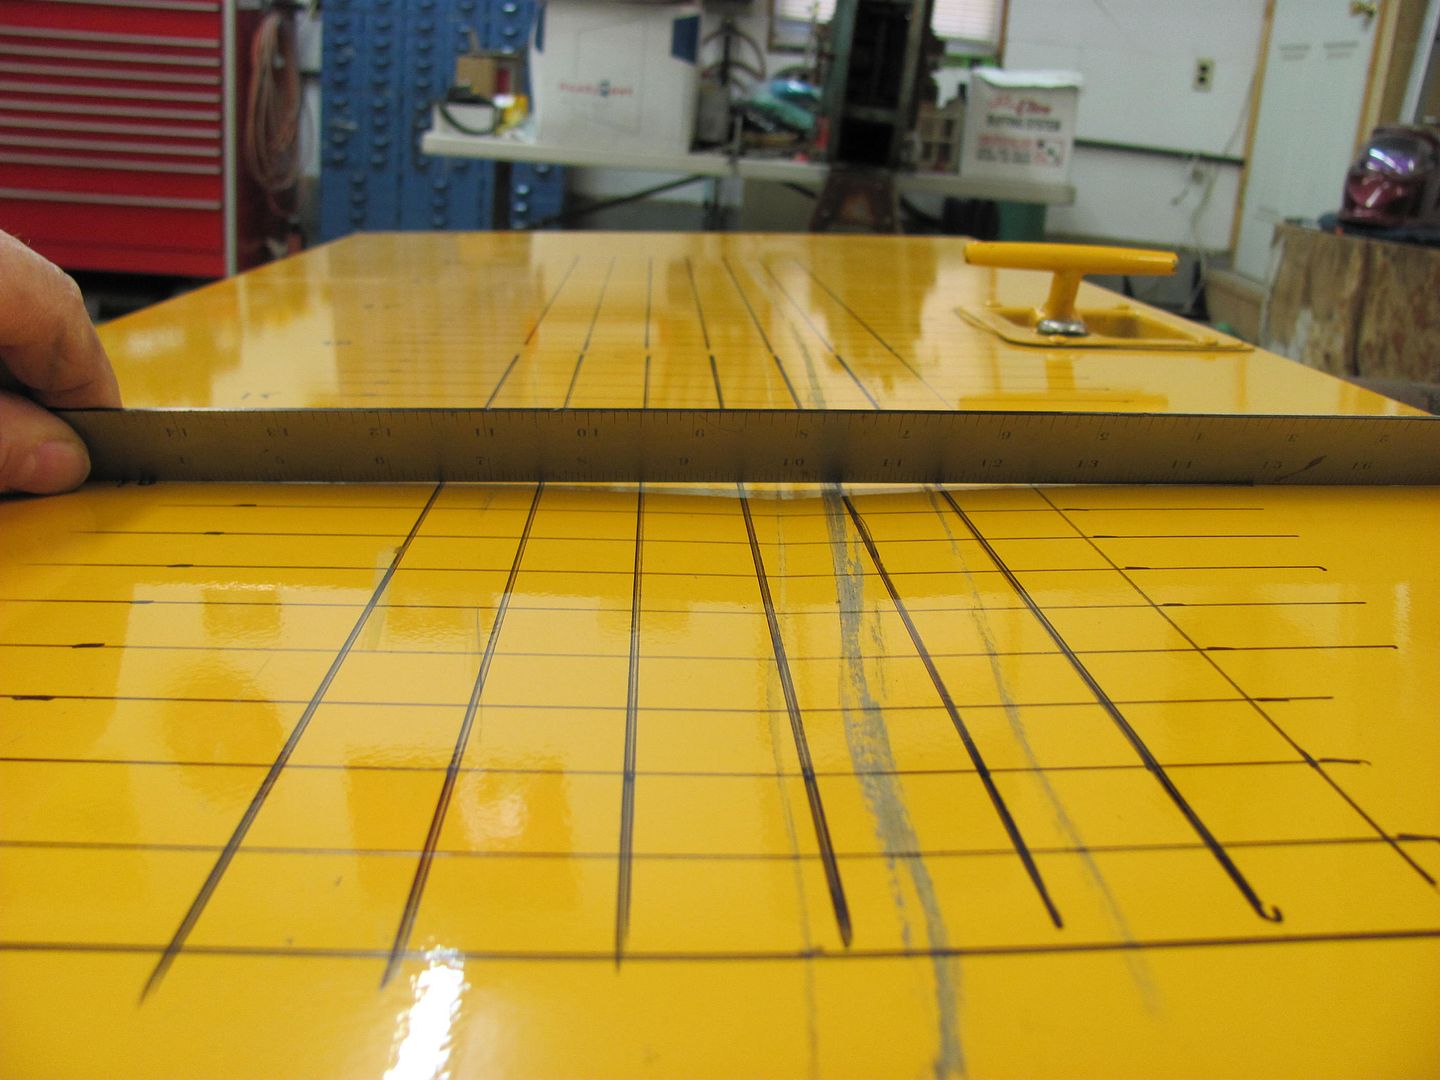
After about 30 minutes of work, here are the results, again located at grid 5, 10, and 15.
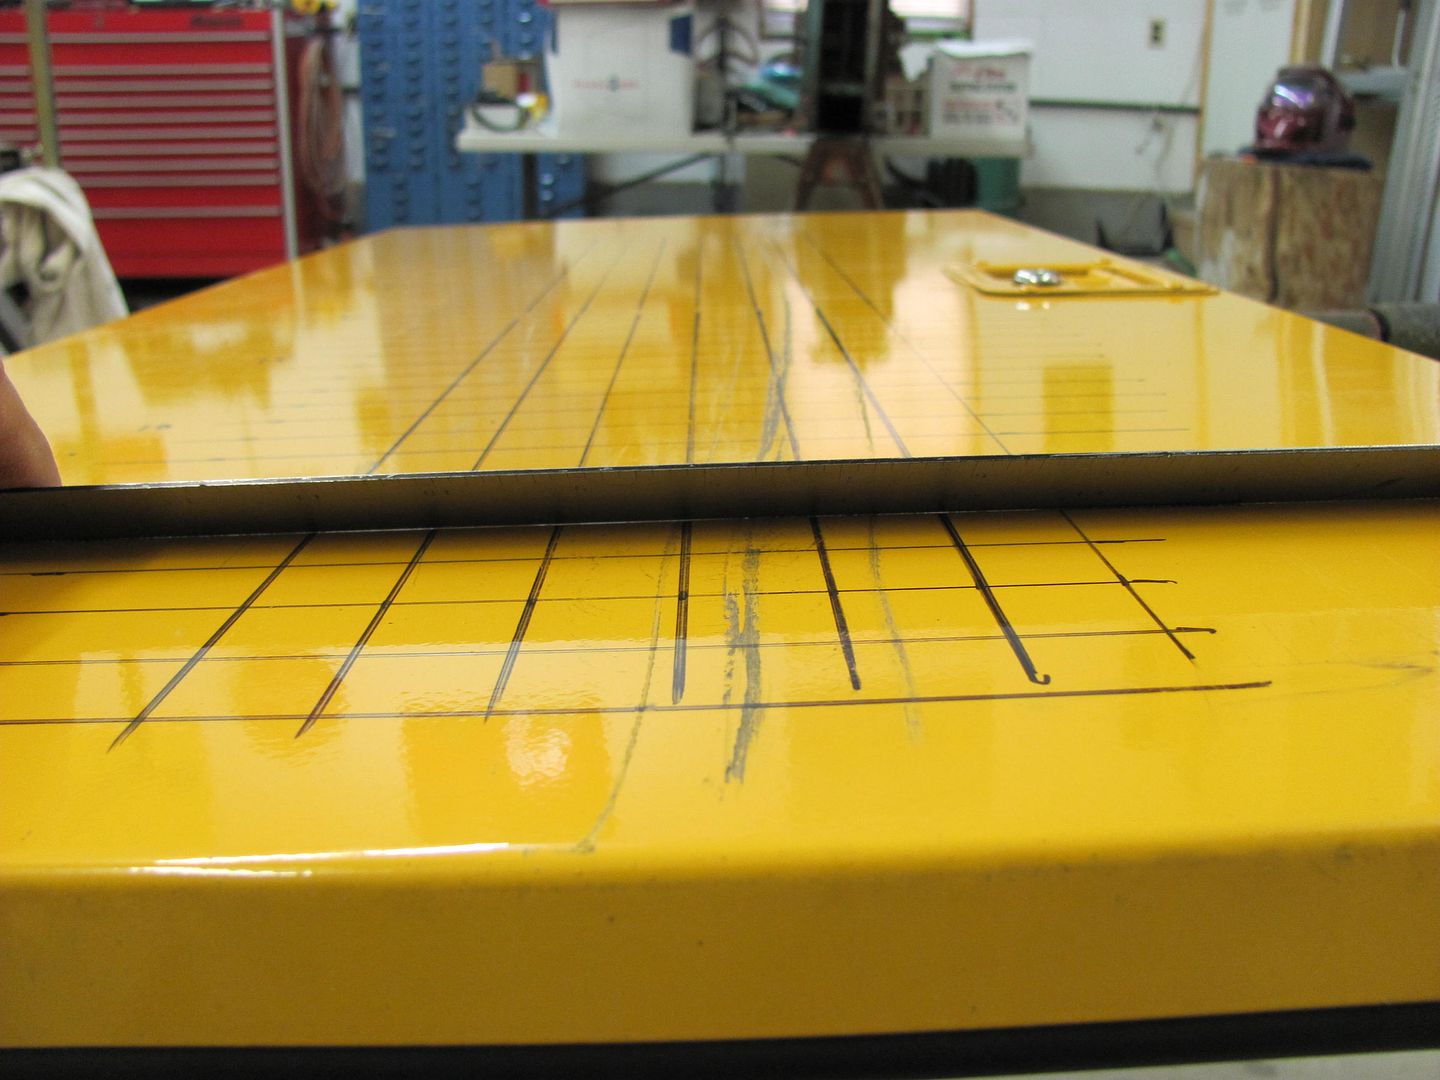
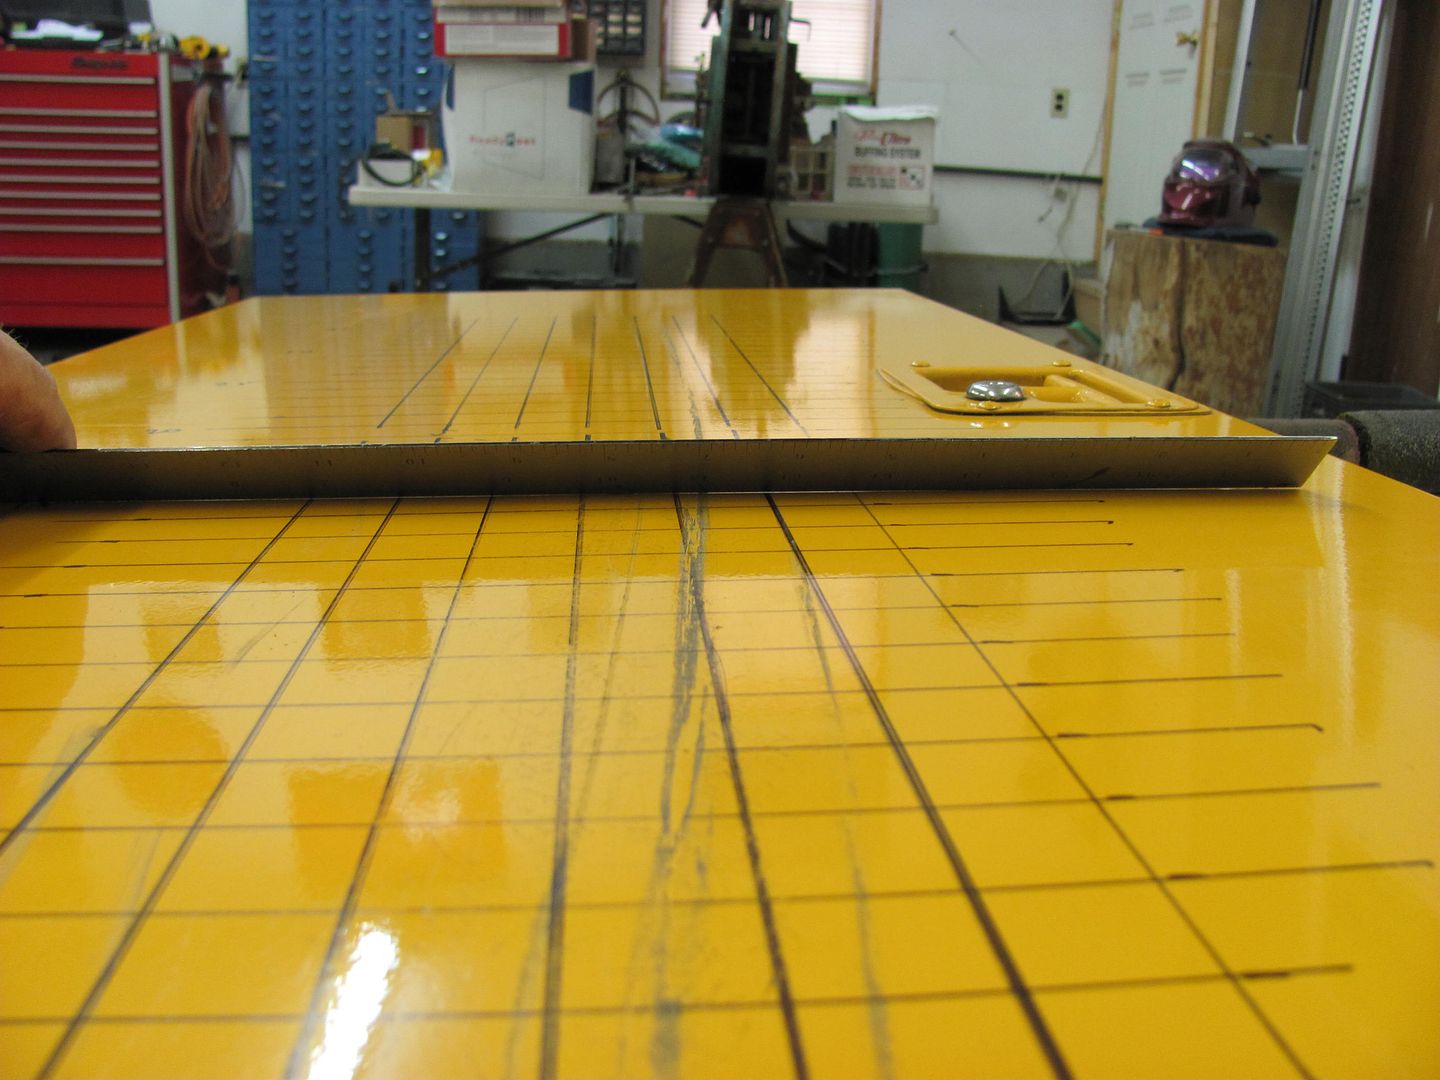
And the light reflection shows considerable improvement over the first pictures....
This is now at a point we could strip the paint off the door, and any remaining defects would be taken care of with high build primer. I have used this same process with other dents/dings/stretches from sandblast damage with similar success. As long as you have access to both sides, this is a relatively inexpensive option for dent removal.
-
02-06-2012 08:48 AM #14
CHR Member
- Join Date
- Jan 2004
- Location
- Macomb
- Car Year, Make, Model: '32 Ford 3W Coupe, 383 sbc
- Posts
- 1,593
Good explanation!
Lynn
'32 3W
There's no 12 step program for stupid!
http://photo.net/photos/Lynn%20Johanson
-
02-09-2012 08:25 AM #15
CHR Member
- Join Date
- Oct 2010
- Location
- Duluth
- Car Year, Make, Model: 37 Ford Tudor Slantback
- Posts
- 234
Thanks. I am now reading that book on bumping.. I do have a question.. I know this book was done by a tool manufacturer, but my tools came from Harbor Freight. Do you think I should look for better hammers?? The dolly I have was one I used back when I was in school. We had to buy the dolly back then, but the school provided the hammers..
 Reply With Quote

Posting Permissions
- You may not post new threads
- You may not post replies
- You may not post attachments
- You may not edit your posts

i've enjoyed the years here . made a lot of friends. most who have left. i see no reason to continue with this so hope to see you somewhere else. i dont think this site will ever be back. it's lived...
Dead!