


 1584Likes
Thread: Project Sebring GT Spyder


Results 16 to 30 of 838
 LinkBack URL
 About LinkBacks
-
11-06-2014 01:44 PM #16
 CHR Member

- Join Date
- Feb 2010
- Location
- Pukekohe, New Zealand
- Car Year, Make, Model: '23 Ford T Roadster
- Posts
- 2,199
Oh the other thing that really pisses me when people build cars like this is the placement of the rear vision mirrors, you wouldn't have a clear view of them sitting in the drivers seat so that makes them useless so they should be moved upto the doors where they were normally placed originally. They are the correct looking mirrors though and are becoming harder to find I believe unless the Chinese are making shitty replica's. Where I did my training many years ago in the Auto Crash repair industry we restored several of the 3000 Healeys and gladly only two Bug eye Healeys which only had the little 4 cylinder for a wealthy car collector.
I maybe a little crazy but it stops me going insane.
Isaiah 48: 17,18.
Mark.
-
Advertising

- Google Adsense
- REGISTERED USERS DO NOT SEE THIS AD
-
11-06-2014 07:17 PM #17
CHR Member
- Join Date
- Feb 2007
- Location
- Vidalia
- Car Year, Make, Model: 1946 Ford Coupe, 1962 Austin Healey 3000
- Posts
- 1,508
Thanks for the interest so far. I've got a little done and have pictures. I just have to find time to write it up.
Bob - I'm going more radical than just narrow arms. The plan is to replace the whole front with a narrowed setup. It'll be my own Mustang II based design.
Whiplash - I'm considering some options for the windshield. I probably won't change it completely, but I think it can be made to look better. The end caps make it look too "heavy" and bulky. Hopefully I can make an improvement.
I like the "racy" look of the fender mounted mirrors, but, as you said, they are pretty much useless for what they are intended to do. I will be moving them to the doors.
-
11-07-2014 07:07 AM #18
CHR Member
- Join Date
- Feb 2012
- Location
- Streator,
- Car Year, Make, Model: 87 Camaro
- Posts
- 348
Like the body style & wire wheels!
-
11-07-2014 10:33 AM #19
CHR Member
- Join Date
- Oct 2007
- Location
- Petaluma
- Car Year, Make, Model: 48 Ford F1
- Posts
- 9,795
Excellent start to a rebuild thread. Love the story home and the diagnostic skils you have to deal with the problems as the evolved. I also am looking foward to reading this thread. I have a major soft spot for the old healys and have also always wanted one, but have run into similar situation to you of trying to find a runner and not a rotter that fit in my budget! Around hear they go for a premium!
I'm guessing you were looking for a spoke style wheel that would accomodate a wider type tire. Looking forward to seeing the mods as you go. But nice looking car as it sits. Please post some more shots including the engine compartment."  "No matter where you go, there you are!" Steve.
-
11-07-2014 10:36 AM #20
CHR Member
- Join Date
- Oct 2007
- Location
- Petaluma
- Car Year, Make, Model: 48 Ford F1
- Posts
- 9,795
Here is a very high priced one
1962 Austin Healey 3000 MKII TriCarb Two Seater BN7." "No matter where you go, there you are!" Steve.
-
11-17-2014 06:06 PM #21
CHR Member
- Join Date
- Feb 2007
- Location
- Vidalia
- Car Year, Make, Model: 1946 Ford Coupe, 1962 Austin Healey 3000
- Posts
- 1,508
I thought it was time to get this thread caught up.
One reason it took so long for me to get started actually spinning wrenches was that I really didn't want to blow the car apart. I literally spent weeks trying to come up with a way to get all the work done with the car mostly whole. I finally decided that was impossible. The real decision maker was all the rust I was finding.
The body might be fiberglass, but the chassis is steel. When it was assembled, the builder coated it with what appears to be spray bomb undercoating and it was flaking off everywhere. The fact that it had spent many years in New Jersey on salty roads hadn't helped. It also looks like they put a lot of effort into sealing the joints where the steel and glass panels met, but didn't take into consideration that a roadster WOULD get wet inside. There were no drain holes in the floor and it looks like water puddled there at times for long periods. In addition, where the undercoating had pealed off the underside, rust was firmly established. Luckily, the steel is heavy and even where the rust looked really bad, it wasn't terminal. It was obvious though, that the steel needed sand blasting and painting.
Considering the rust and all the modifications that I want to make, I had to tear the whole car apart. That meant becoming something of an automotive archeologist and trying to decipher how the builder put it together in the first place. I did download an assembly manual off a forum site that is dedicated to these cars and learned a few things.
Here are some pics of the rust I found:

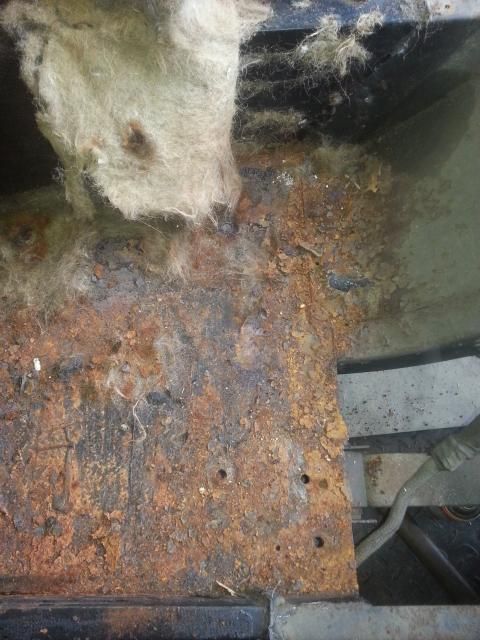

These look bad, but the steel is still very solid.
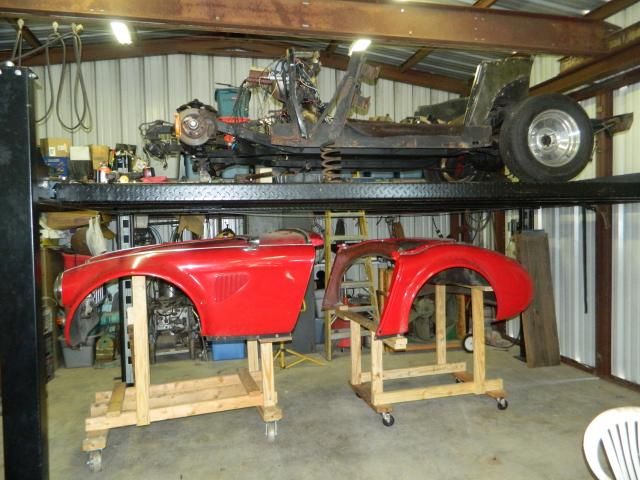
After several days and a few 2X4's, I was left with this:
-
11-17-2014 06:38 PM #22
CHR Member
- Join Date
- Feb 2007
- Location
- Vidalia
- Car Year, Make, Model: 1946 Ford Coupe, 1962 Austin Healey 3000
- Posts
- 1,508
Anyone that has remodeled anything will tell you that you always find things you didn't count on. This car was no exception. While the welds and engineering that the kit company did were not bad, the things that were built by the assembler were not so OK. My dad was a welder most of his life and he would have said these welds looked like a buzzard puked them up. Some weren't even partially burnt in. Some of the pieces just fell off on their own during disassembly.
 In addition the assembler's "engineering" left a little to be desired.


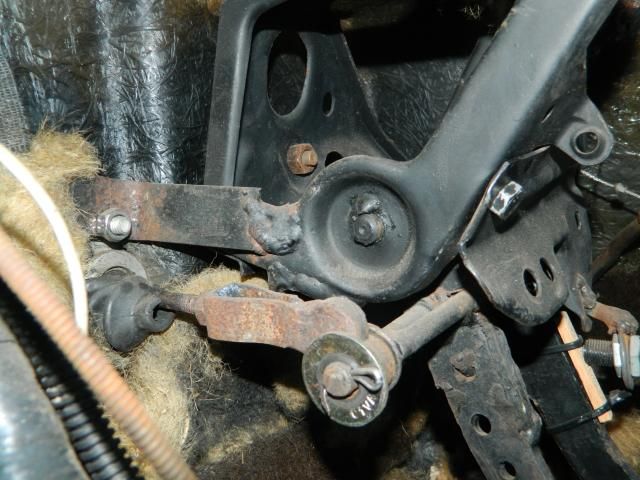

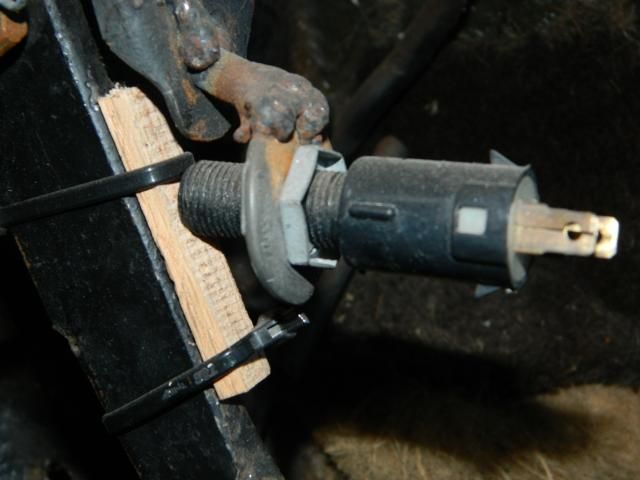
All of this will need to be redone, of course.
One thing good that came out of all this is that the chassis actually seems to be much stiffer than I had originally thought. I believe the flexing I was feeling is actually due to bad assembly in the cowl area. The original engineering was a little light in this area and I was getting a bad case of cowl shake (the Brits would call it scuttle shake). Not an uncommon issue with convertibles and something that I think can be remedied.Last edited by Hotrod46; 11-17-2014 at 06:43 PM.
-
11-17-2014 08:53 PM #23
CHR Member
- Join Date
- Feb 2007
- Location
- Vidalia
- Car Year, Make, Model: 1946 Ford Coupe, 1962 Austin Healey 3000
- Posts
- 1,508
After the tear down, I went in to "mock up" mode. Building a car is like playing chess, you can't just think about one thing at a time. You have plan many steps ahead. If I had a CAD program and more importantly knew how to use it, I could have whipped up some trick drawings in the comfort of my easy chair. Since I'm a 20th century neanderthal, I had no choice but to get my hands dirty.
One thing that had been worrying me was the transmission. The car had a T5 overdrive in it when I bought it, but being a non-world class trans, I was concerned about strength. GM never put the T5 behind a 350 for that reason and I was going to a 383. I found a T56 (6 speed) out of a 90's Camaro. Besides the extra OD gear, they are stronger than the T5. The only problem is physical size. They're much larger than their 5 speed cousins. I wasn't sure if the trans tunnel was big enough to take the new gearbox so I dropped it in to see.
It's a little tight, but I was pleasantly surprised to see that it fit just fine. There is one small area where the reverse lock out solenoid contacts the tunnel, but that can be fixed easily. You can see the small round projection on the left in the picture contacting the tunnel.
Even the shifter location was close, but I'll have to see if that works OK for my wife. I may need to relocate it further forward, since it's pretty far back and she needs the seat closer than me.
-
11-17-2014 09:26 PM #24
CHR Member
- Join Date
- Feb 2007
- Location
- Vidalia
- Car Year, Make, Model: 1946 Ford Coupe, 1962 Austin Healey 3000
- Posts
- 1,508
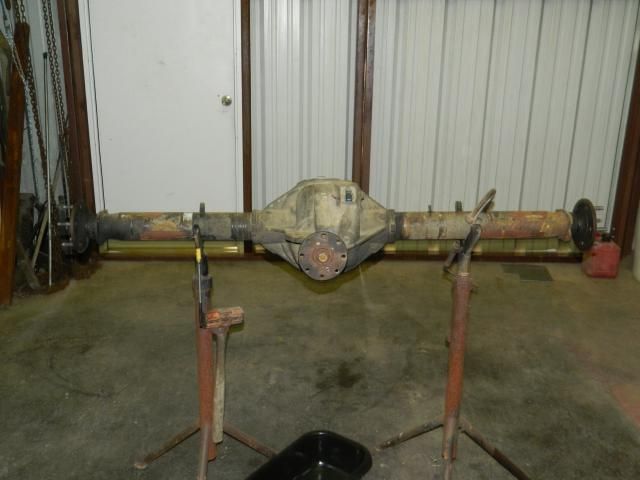
Another thing I needed to do was cut the new rear end down. I picked up a 1999 Explorer rear at the local U Pull It. For the money, it's hard to beat them. For $130 bucks I got 3.73 gears, Trac Lok limited slip, 5 hole axles and disc brakes. To convert the 8" that came in the car to all that would have taken about $700 - $800 and it wouldn't have been as strong. It would have been lighter, though.
The main problem is the width. The stock Explorer rear is 59 1/2" long wheel flange to wheel flange. I wanted something around 54". This would give me plenty of clearance for any reasonable wheels and tires I wanted to run. This should let me go as large as a 275 width tire on an 8" rim with 4 1/2" backspace and still get it under the fender lip. The wheels and tires I have planned are not quite that big, but it gives me future options.
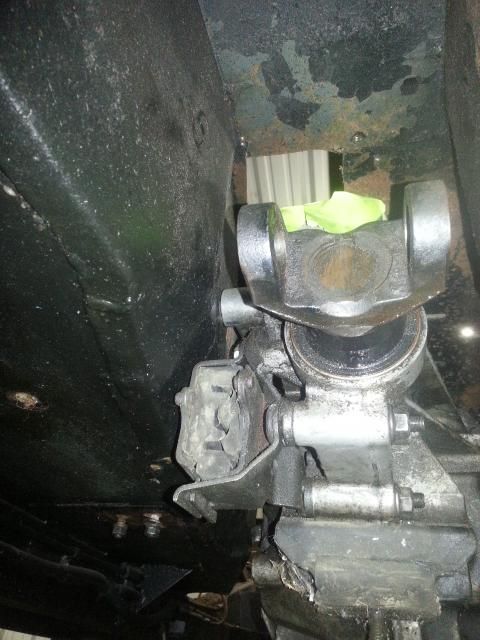
The other issue with the Explorer rear is the large offset pinion. It's several inches to the passenger side and I needed it pretty much centered.
I bought some shorter axles from Dutchman axles. I ordered them with a 1" difference in length since this would center the pinion.
You can see the offset in this pic and that it's pretty long.
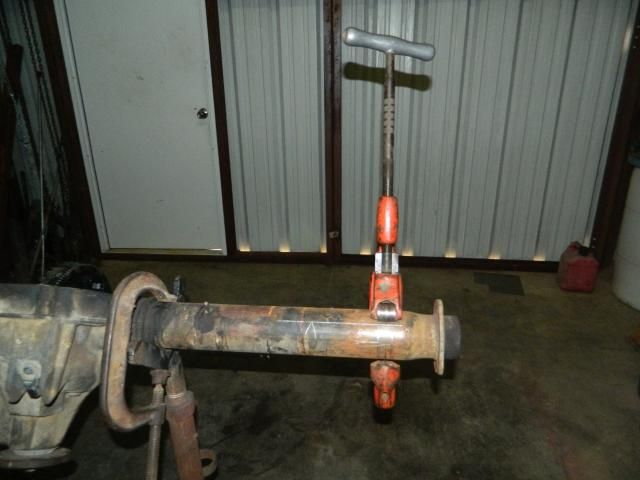
I cut it down with a large pipe cutter. It works just like a smaller tubing cutter, it just takes a lot more muscle!
Here is the new width with centered pinion.

Now before anyone says that it's not straight, it's just mocked up and tacked together right now. I'll line it up perfect and weld it up after I decide where the link brackets will go. Also, I have to make all the bushings to run the line up bar through.
-
11-18-2014 02:30 AM #25
CHR Member
- Join Date
- Sep 2007
- Location
- New Bedford
- Car Year, Make, Model: 34 Ford 3W Coupe Replica
- Posts
- 14,754
Wow, there sure were some "surprises" in there. You're making some great improvements that'll turn this one into a great ride.
-
11-18-2014 10:50 AM #26
CHR Member
- Join Date
- Oct 2007
- Location
- Petaluma
- Car Year, Make, Model: 48 Ford F1
- Posts
- 9,795
Yikes! Those were some pretty scary welds and patches.Good thing your able to tear it down and shore it up! X2 on the progress." "No matter where you go, there you are!" Steve.
-
11-18-2014 08:42 PM #27
CHR Member
- Join Date
- Apr 2011
- Location
- Prairie City
- Car Year, Make, Model: 40 Ford Deluxe, 68 Corvette, 72&76 K30
- Posts
- 7,301
- Blog Entries
- 1
Wow, great adventure and what a cool car! You definitely don't see them very often. I like your new ideas and look forward to you improving this sweet little ride!Ryan
1940 Ford Deluxe Tudor 354 Hemi 46RH Electric Blue w/multi-color flames, Ford 9" Residing in multiple pieces
1968 Corvette Coupe 5.9 Cummins Drag Car 11.43@130mph No stall leaving the line with 1250 rpm's and poor 2.2 60'
1972 Chevy K30 Longhorn P-pumped 24v Compound Turbos 47RH Just another money pit
1971 Camaro RS 5.3 BTR Stage 3 cam, SuperT10
Tire Sizes
-
06-21-2015 07:13 AM #28
CHR Member
- Join Date
- Feb 2007
- Location
- Vidalia
- Car Year, Make, Model: 1946 Ford Coupe, 1962 Austin Healey 3000
- Posts
- 1,508
I'm way, way overdue for an update on the Spyder so here's what has been going on.
For most of the last few months of 2014 and the first few of this year, I have been dealing with my mother having to have heart surgery. That didn't leave a lot of time for cars or writing. I also had to take her to Houston for some tests and everything hobby wise was pretty much on hold. The good news is that her recovery was great and the tests came out good.
I decided after all that to take a break and try the Hot Rod Power Tour, since the route was going to end 100 miles from my house. We decided to forgo the T bucket and take the 46 coupe. The coupe hasn't really been used much for about 7 years because we had been using the T and was in need of some repairs and maintenance. So all my time has been spent getting the coupe ready and the Sebring has been on the back burner. As usual, the more I did on the coupe, the more I found it needed. The old girl served us well, though, and we put 2700 miles on the clock before we got back home.
Now it's time to get back on track with the Spyder. I have made a change in plans, though. After spending a lot of time both designing and fabricating some on the new front end, I decided not to go any further in that direction. If I had finished the new front, I would have had to use a narrowed steering rack. This pretty much locked me in to a manual rack, since power racks are difficult to shorten. I want my wife to be able to drive this car and I was afraid she might need power steering. If she did my only options were a very expensive custom built power rack , a race built power rack ($$$) or equally expensive electric assist on the column. There are some DIY electric setups available in the salvage yards, but the add on controllers needed to make them work didn't look too confidence inspiring. Also, the electric units are reported to have a "dead steering" feel, in other words little or no feedback from the tires. That's definitely not what you want on a sports car! Keeping the stock crossmember and going with narrowed tubular arms (just what Bob suggested ) would give the tire clearance I wanted and I could keep a standard width rack. Narrowed arms create some new geometry issues, but I have a plan to work around them. I'll post more with some pics ASAP.
Mike
-
06-21-2015 08:53 AM #29
CHR Member
- Join Date
- Oct 2007
- Location
- Petaluma
- Car Year, Make, Model: 48 Ford F1
- Posts
- 9,795
Sounds good Mike. Glad to hear you Mom came thru well, and that your old 46 coupe got dusted off and racked up some fun miles!. The steering approach you're going with sounds like a good compromise, and helps conserve cash as well keep existing power steering unit. Post some pics when you get the chance, and some from the cruise!" "No matter where you go, there you are!" Steve.
-
06-21-2015 11:24 AM #30
CHR Member
- Join Date
- Feb 2007
- Location
- Vidalia
- Car Year, Make, Model: 1946 Ford Coupe, 1962 Austin Healey 3000
- Posts
- 1,508
Thanks Stovens. I'm thankful that she did so well.
Here are a couple of pictures of the front end I was working on. I bought a piece of software that allowed me to model the roll center and camber gain of various layouts. I thought I could do it with simple wooden models, but the changing relationships of all the pivot points made this nearly impossible. The program made it a lot easier.
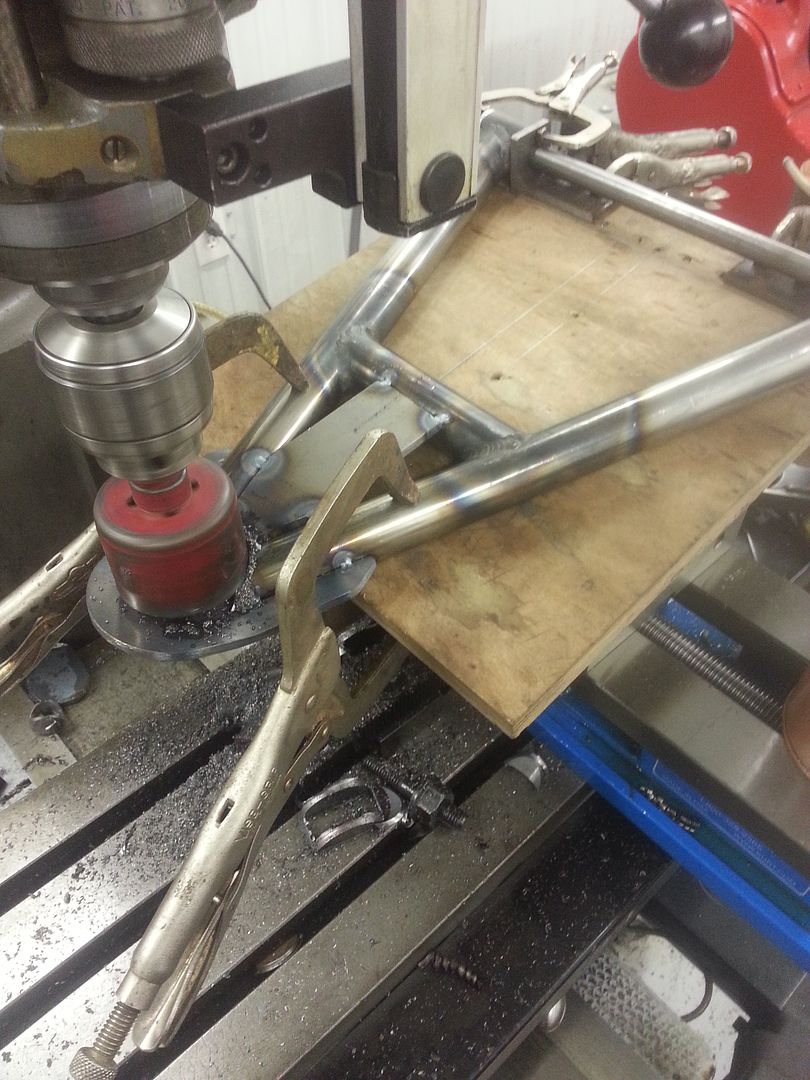
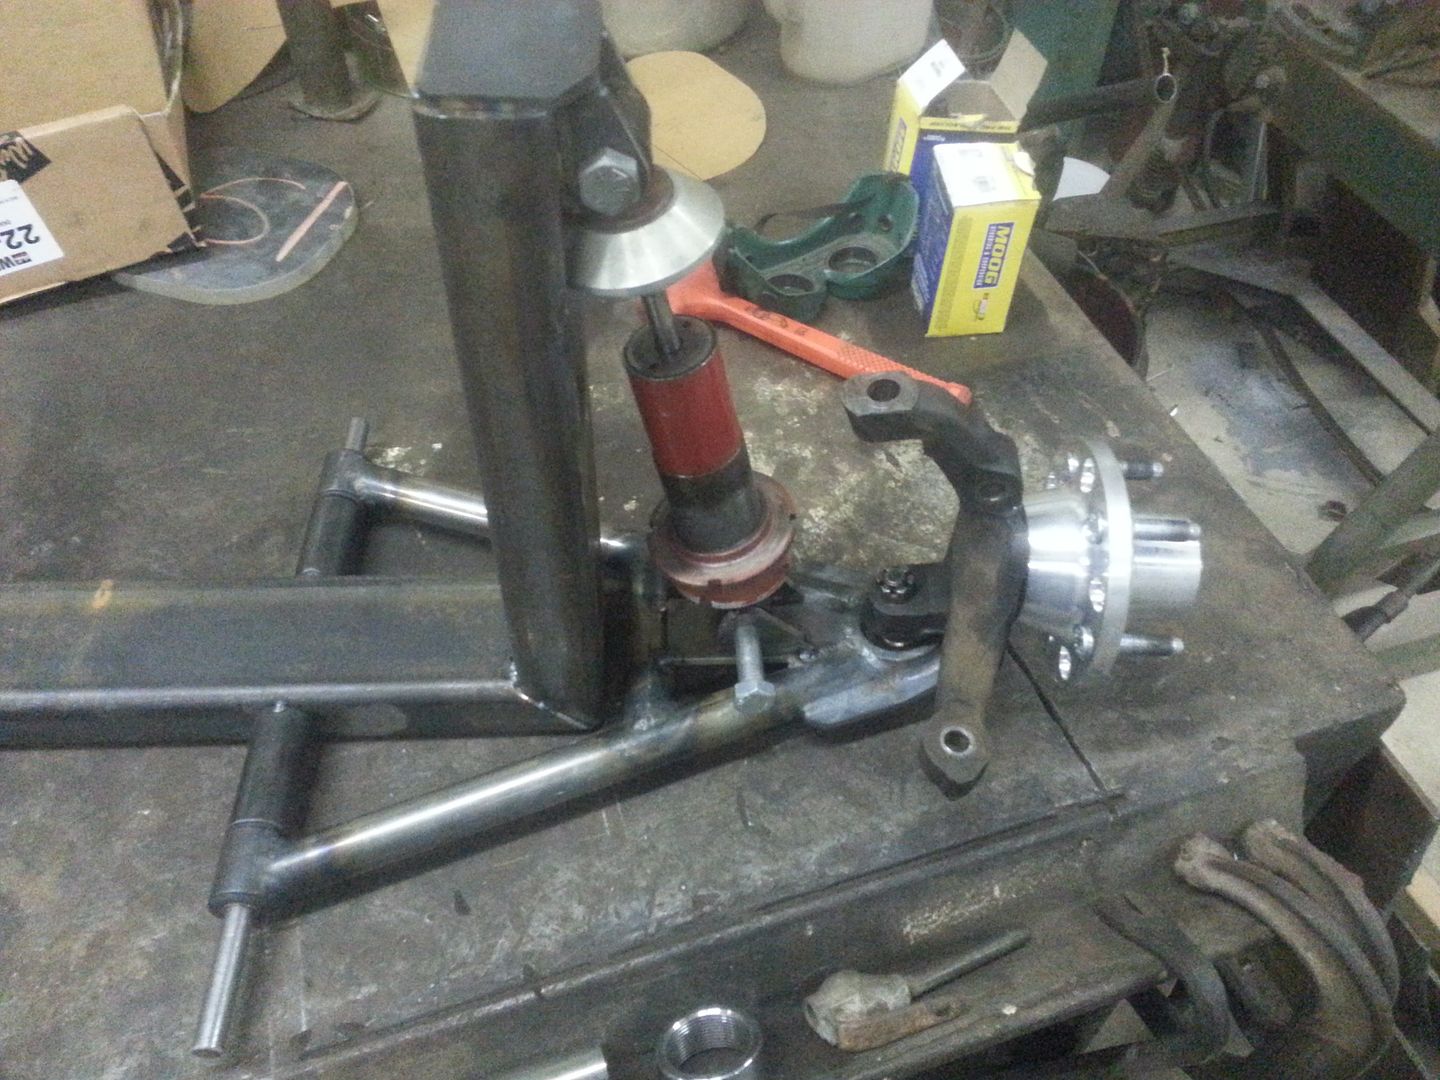
The upper and lower arms were going to be longer than the stock MII parts. I made a wide simple A arm and used off the shelf Energy Poly bushings. The strange square U shape would have fit the width of the frame rails. I planned to add heavy gussets for strength. I spent a lot of time working out the details and getting the fab work to the point in the pics, but I think abandoning it was the right decision.
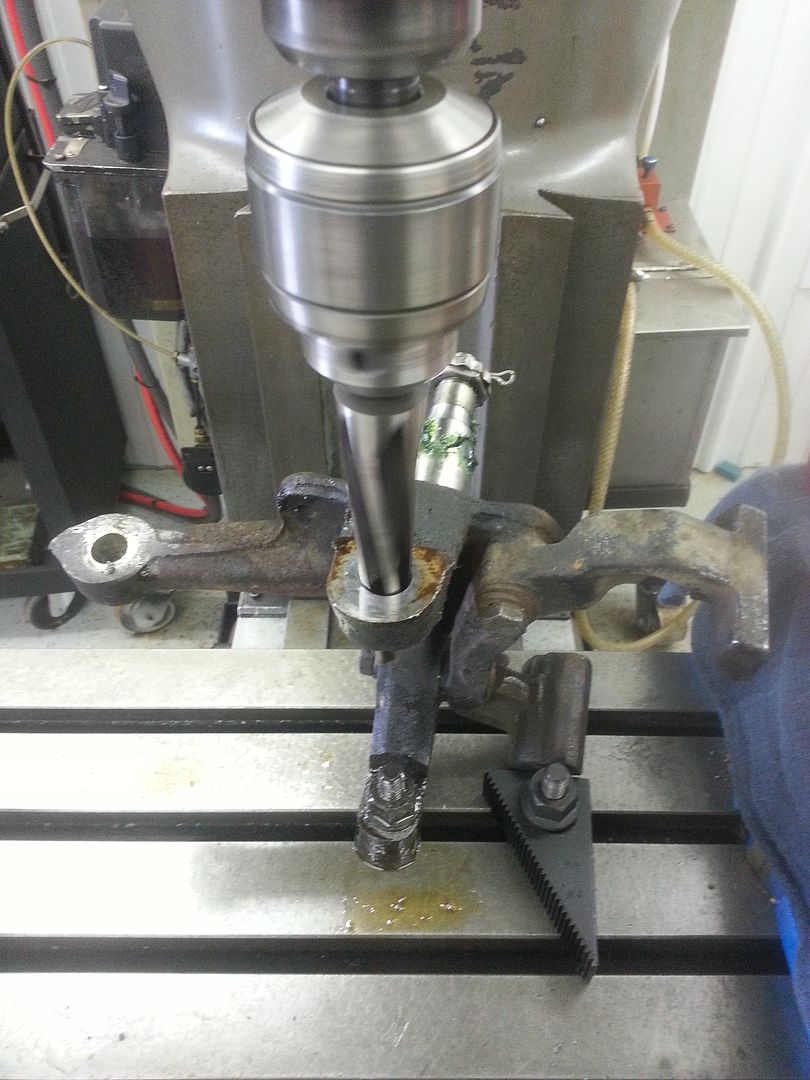
I also reamed the lower ball joint taper out to a larger size. There is a lot of debate over the suitability of using the Chrysler upper ball joint that fits the MII spindle as a lower BJ. The upper BJ's are used in nearly every aftermarket lower arm. I choose to be cautious and went with a regular lower ball joint, but it had a larger tapered stud. The one I used in my fabricated arms was a GM press in, but I'll be using a screw in lower BJ out of a Chrysler Imperial with the tubular arms. That should be plenty strong enough for my light weight little car!
Now, that's enough space wasted on things that I'm not using!
 Reply With Quote


Posting Permissions
- You may not post new threads
- You may not post replies
- You may not post attachments
- You may not edit your posts

i've enjoyed the years here . made a lot of friends. most who have left. i see no reason to continue with this so hope to see you somewhere else. i dont think this site will ever be back. it's lived...
Dead!