


 3390Likes
Thread: 55 Wagon Progress


Results 556 to 570 of 1865
 LinkBack URL
 About LinkBacks
-
07-06-2015 03:21 PM #556
 CHR Member

- Join Date
- Sep 2007
- Location
- New Bedford
- Car Year, Make, Model: 34 Ford 3W Coupe Replica
- Posts
- 14,754
Times 3! Awesome work.
-
Advertising

- Google Adsense
- REGISTERED USERS DO NOT SEE THIS AD
-
07-09-2015 07:46 PM #557
CHR Member
- Join Date
- Jun 2008
- Location
- Leonardtown
- Car Year, Make, Model: Walking
- Posts
- 1,228
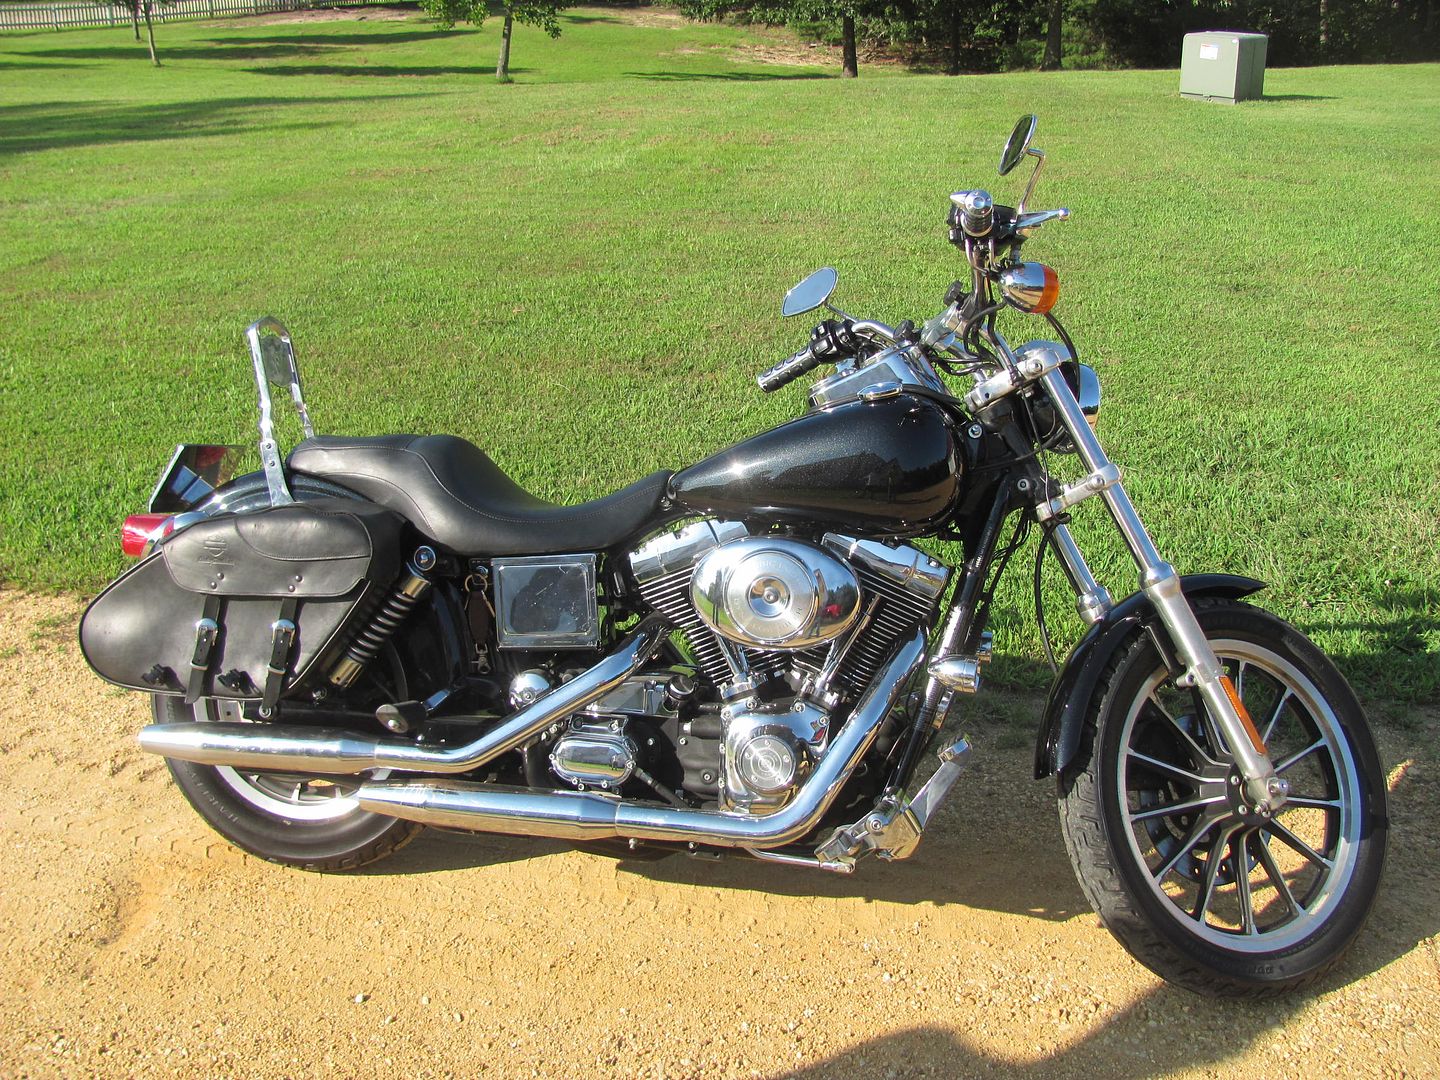
Thanks guys! Scott is supposed to call next week when he gets the Harley back together so we can get a picture of it.
Well, we had gotten some more sanding done......
.....and since it was still early in the evening, mixed up some more epoxy....
Robert
-
07-14-2015 09:33 PM #558
CHR Member
- Join Date
- Jun 2008
- Location
- Leonardtown
- Car Year, Make, Model: Walking
- Posts
- 1,228
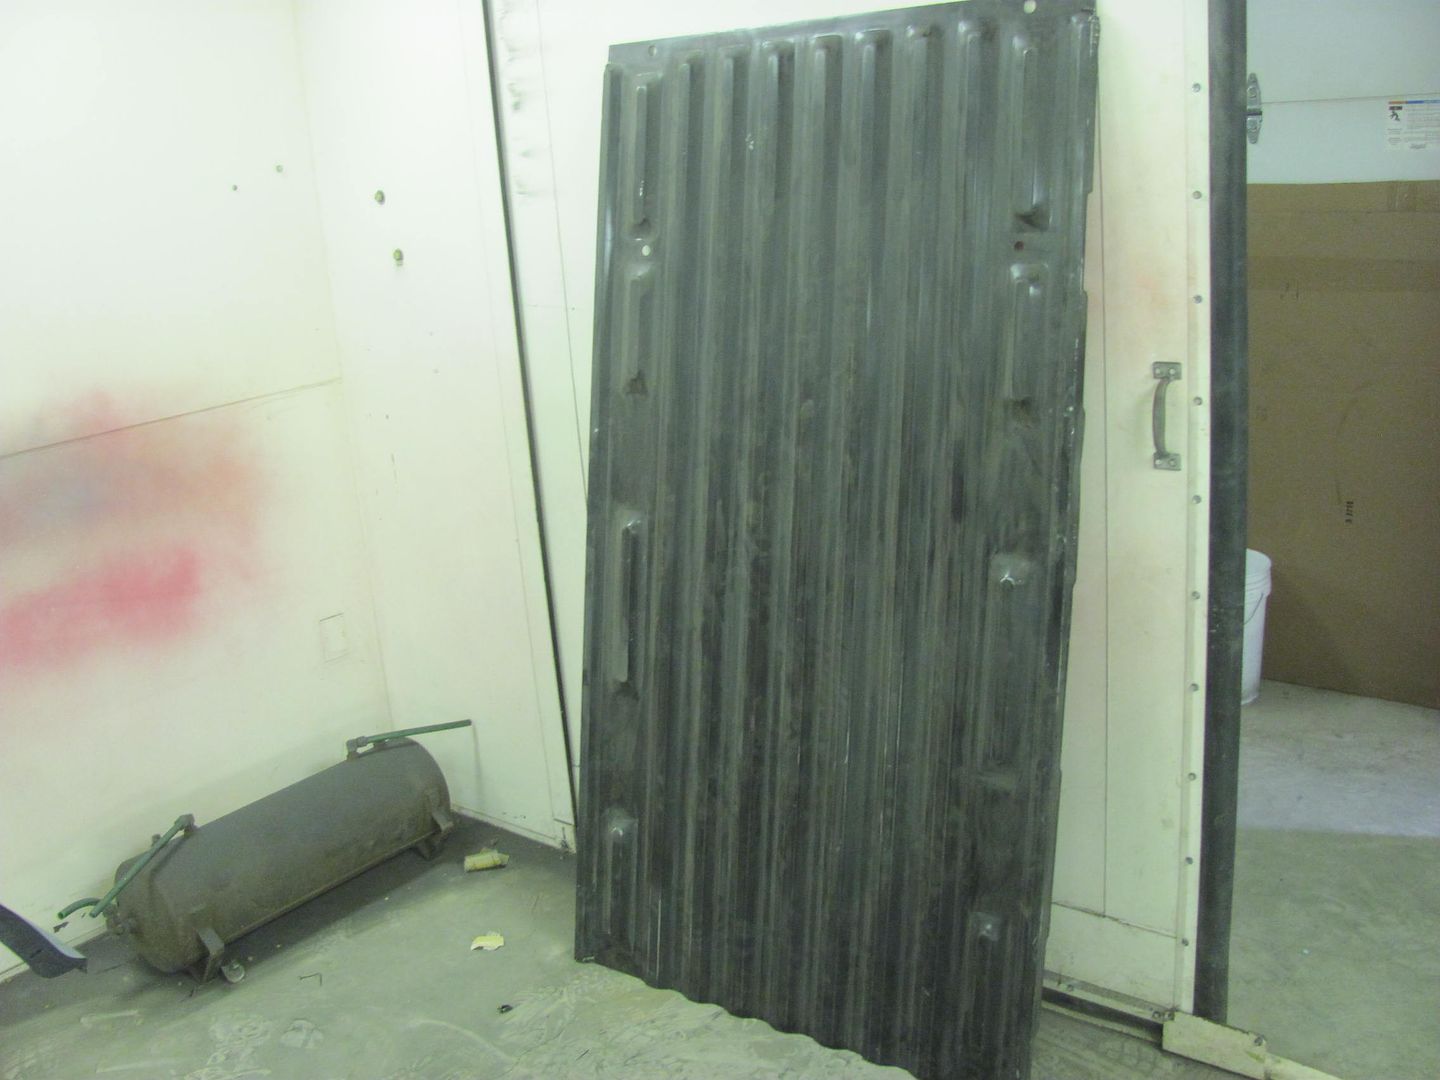
Doesn't seem like much to show, we're still sanding away....
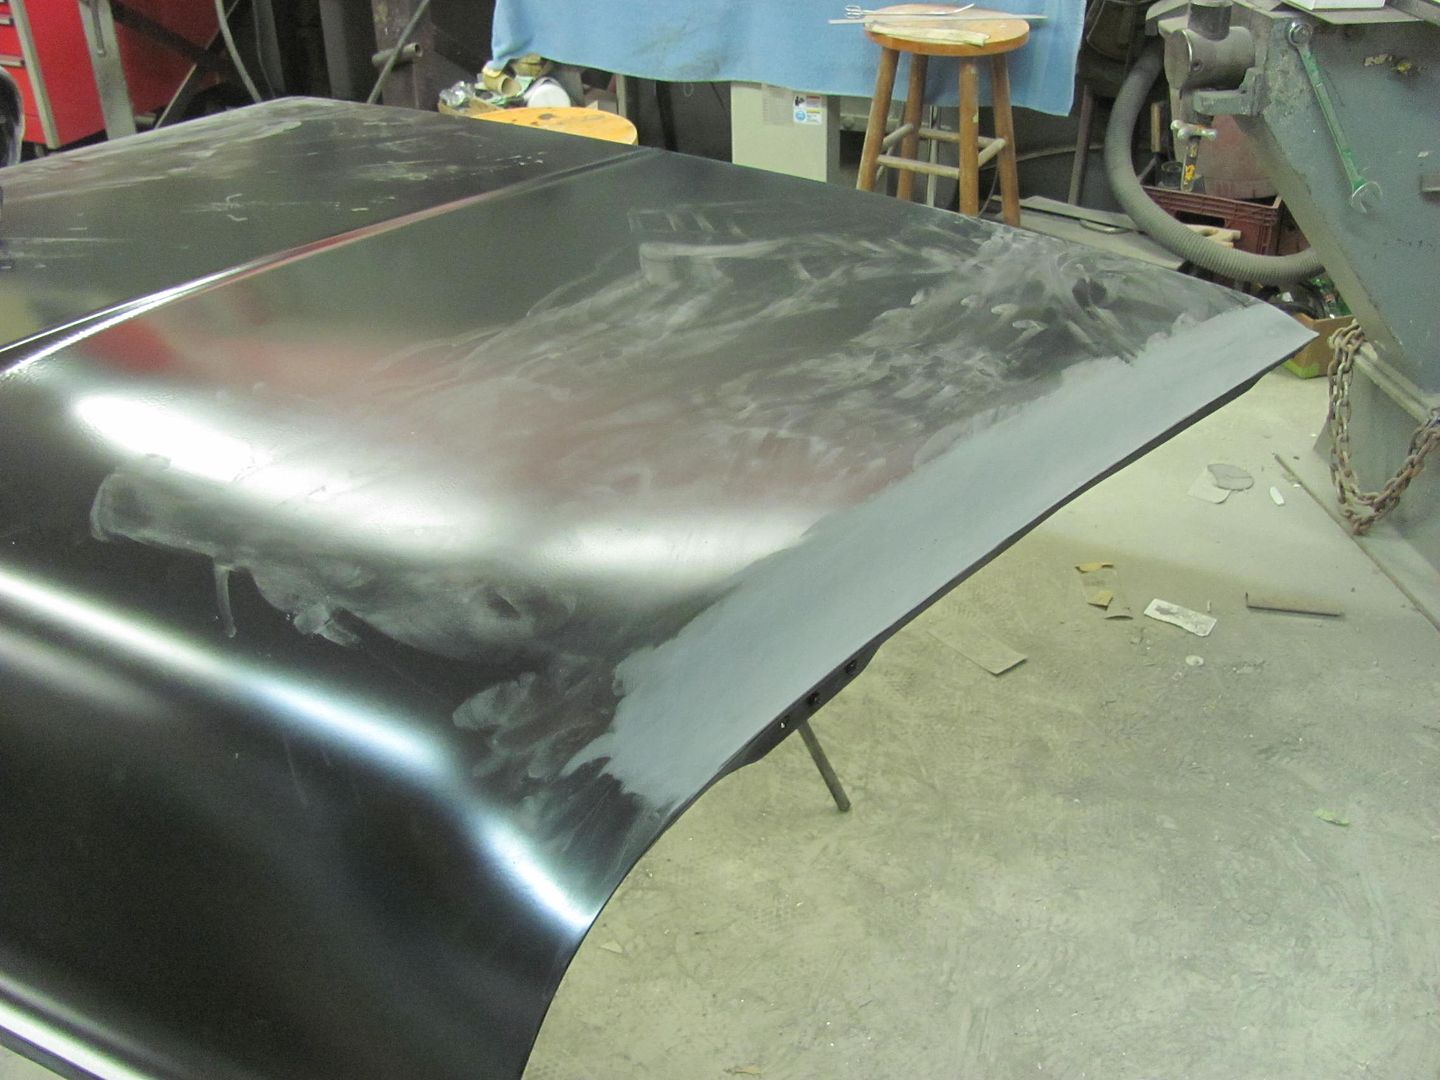
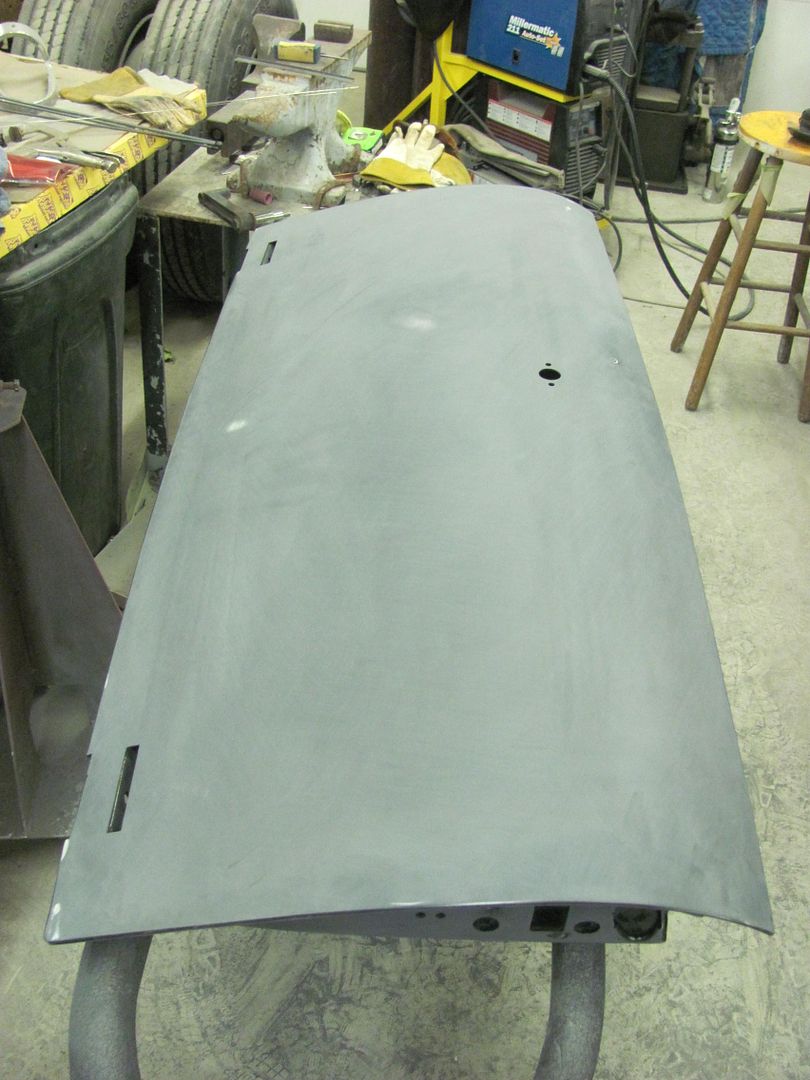
Got about half done with the tail gate and remembered we needed some holes drilled in the new skin for the emblem. Only issue was that I had done some spring cleaning earlier this year and the original skin with the hole pattern and location was now gone. So I sent an email to Mikey at The Stainless Shoppe, as he had an original, and he got me squared away... Thanks Mikey!
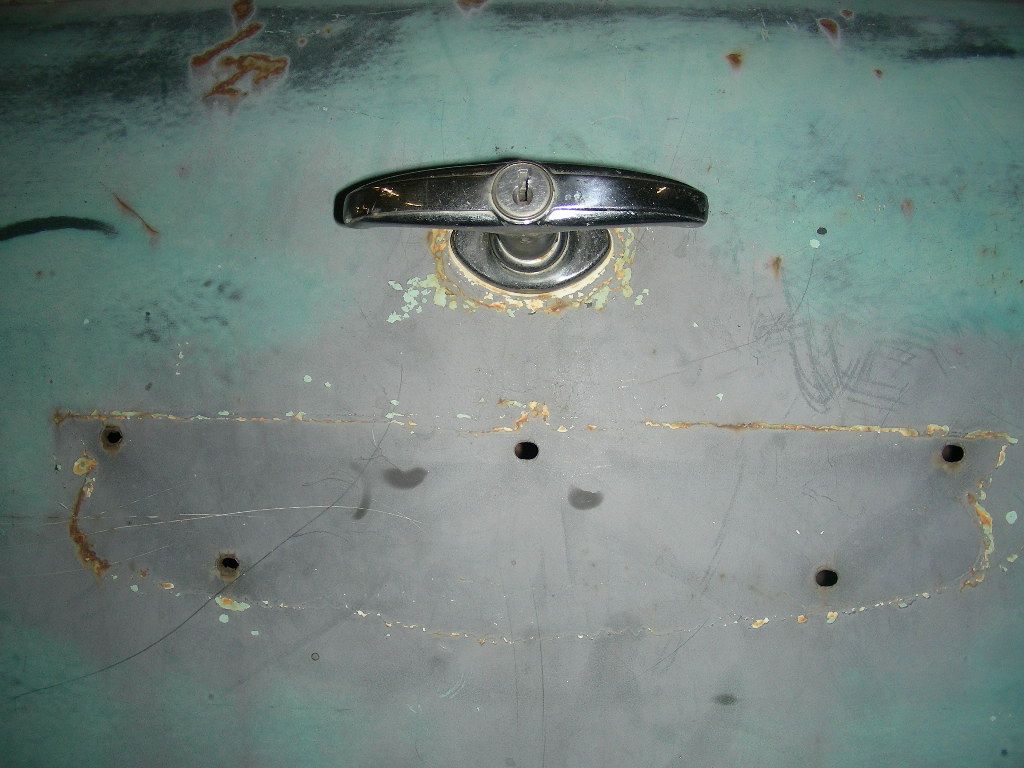
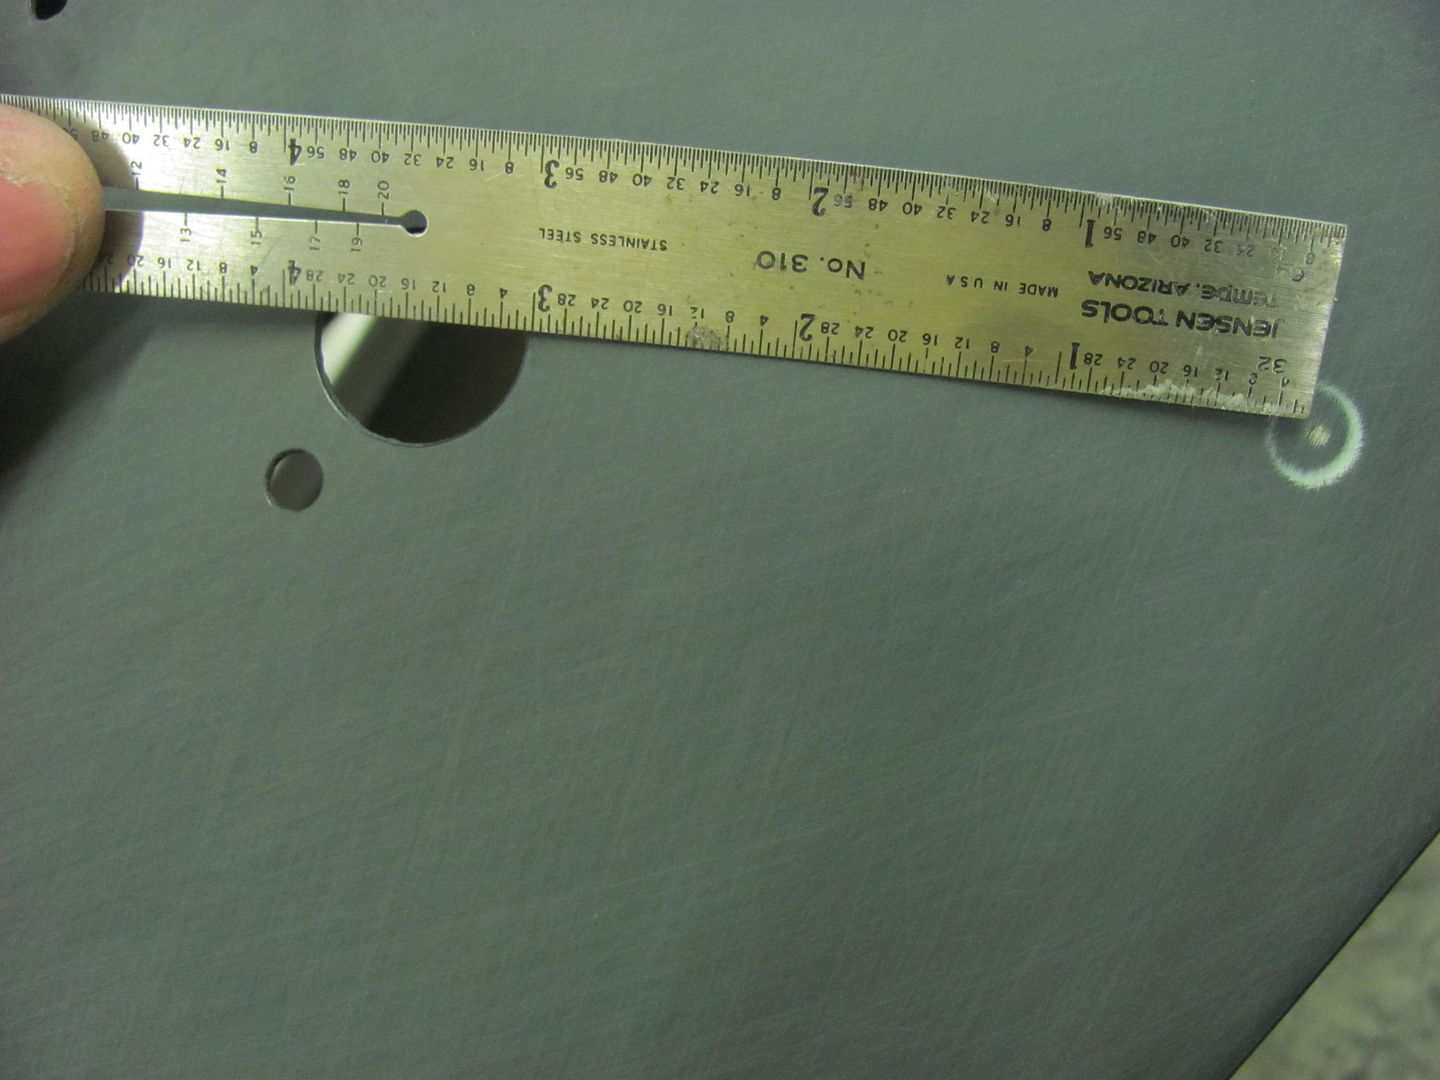
I located the hole for the center alignment pin first, and planned on using some spotters for the remaining 4 holes... Some measurements were taken to insure the emblem was on straight, and then some "backstops" used. The spotters come in a set of various sizes, and typically you never find the exact size you need...
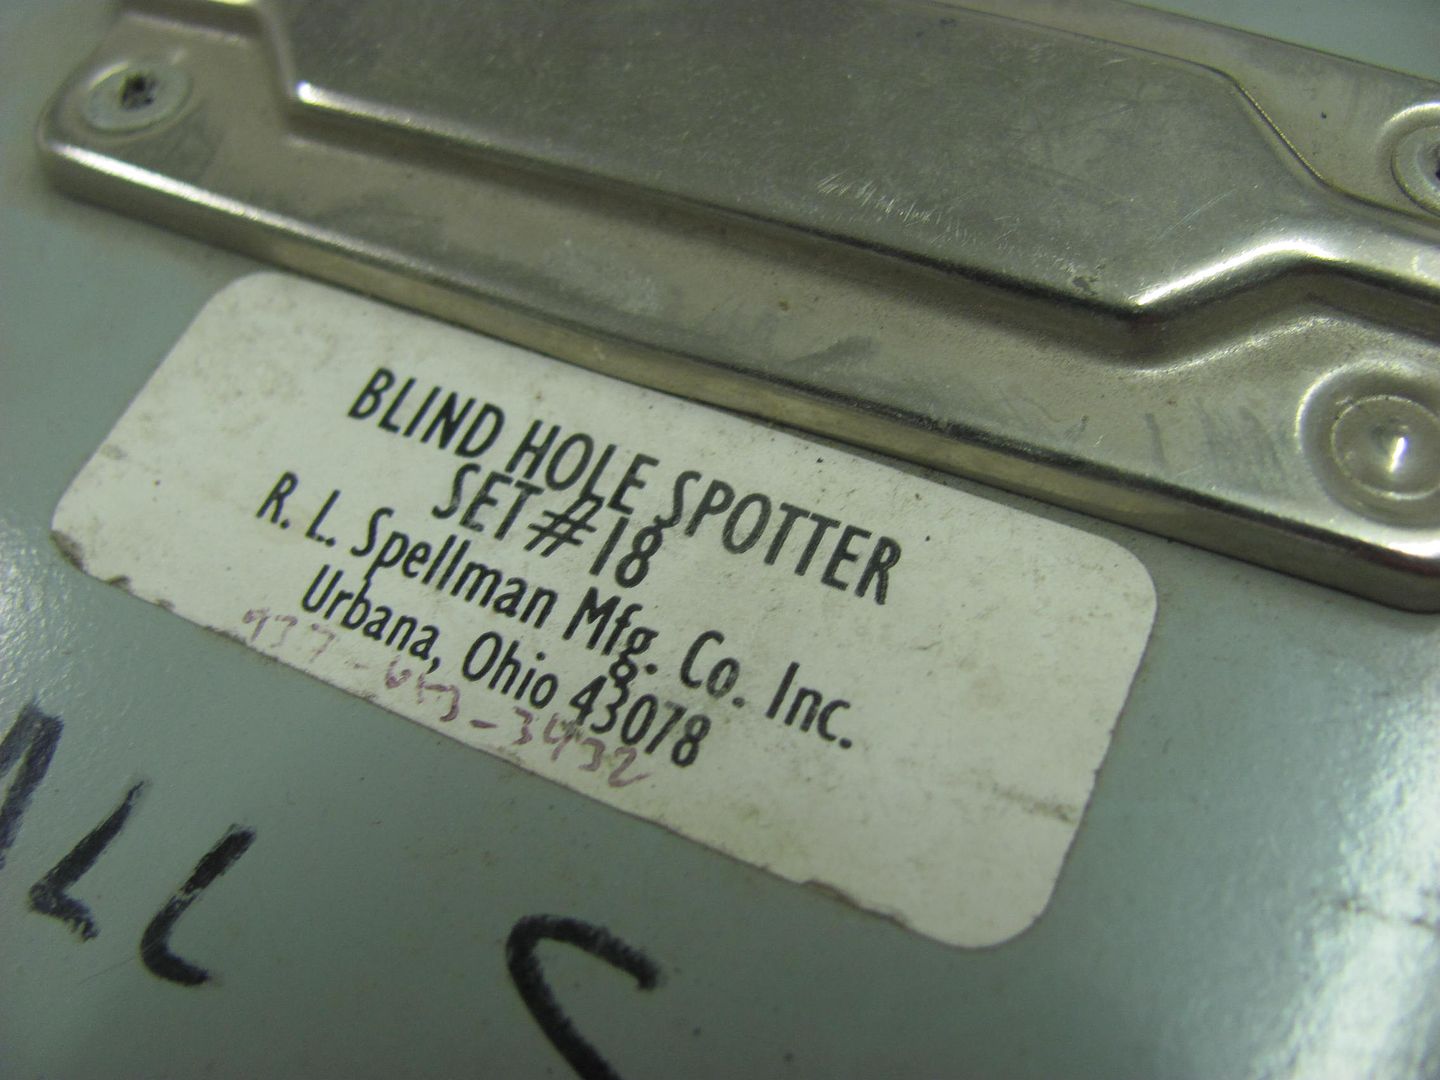
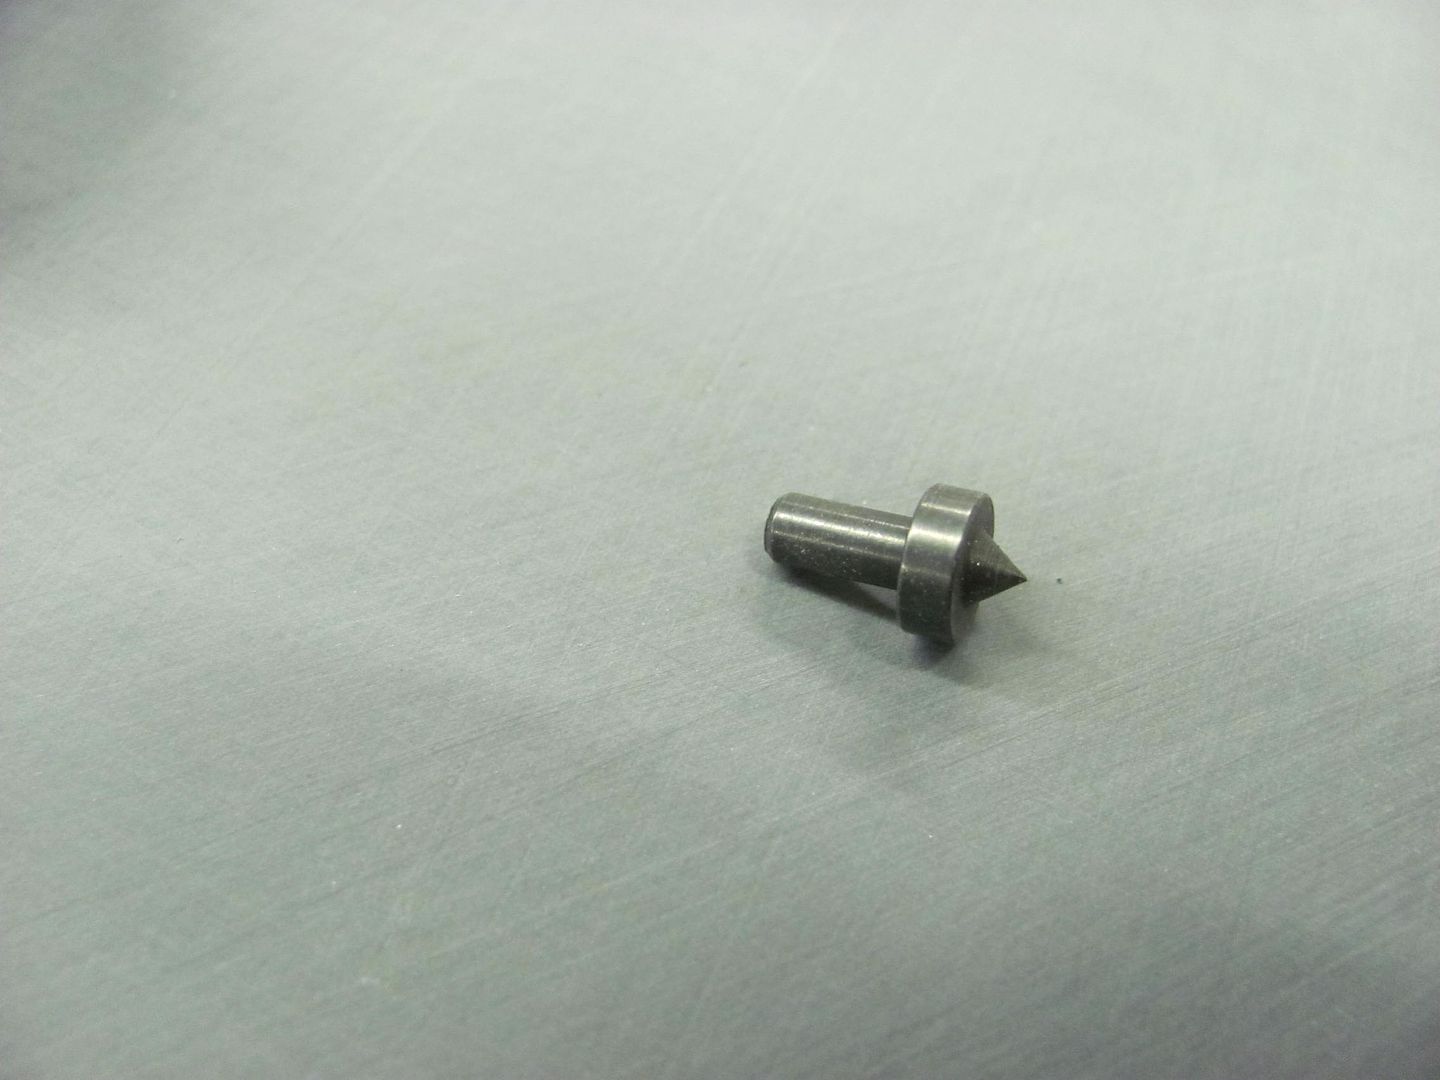
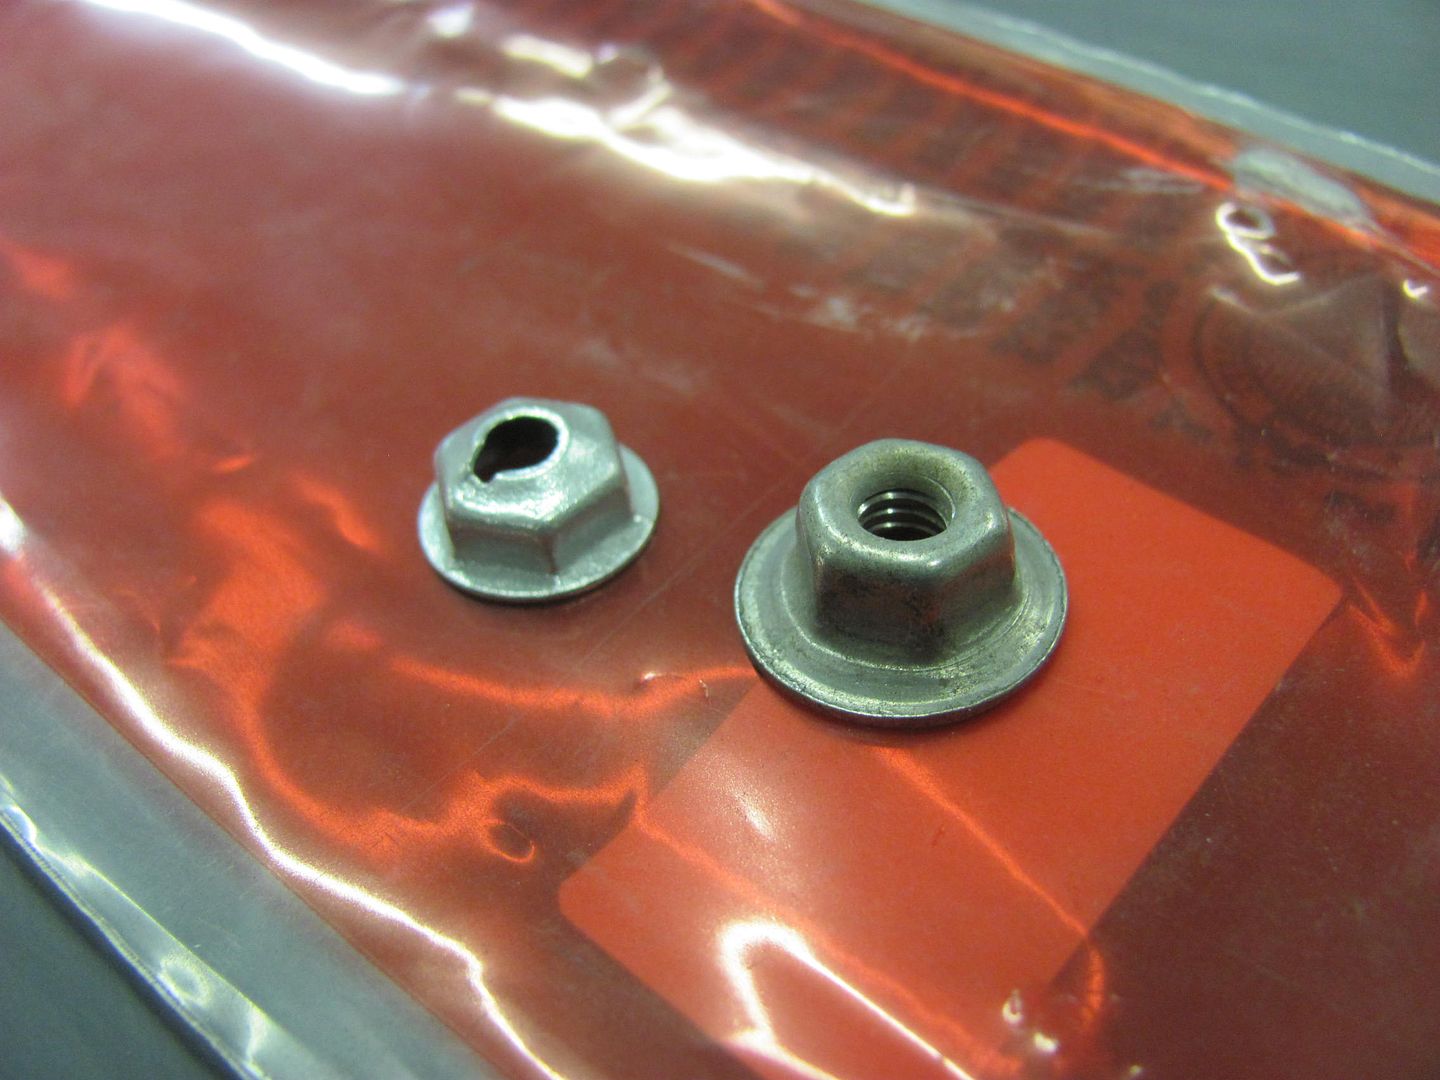
These will go in some 10-24 threaded holes on the emblem. The closest size was the 1/8" spotters, so we'll need to adjust the fit..
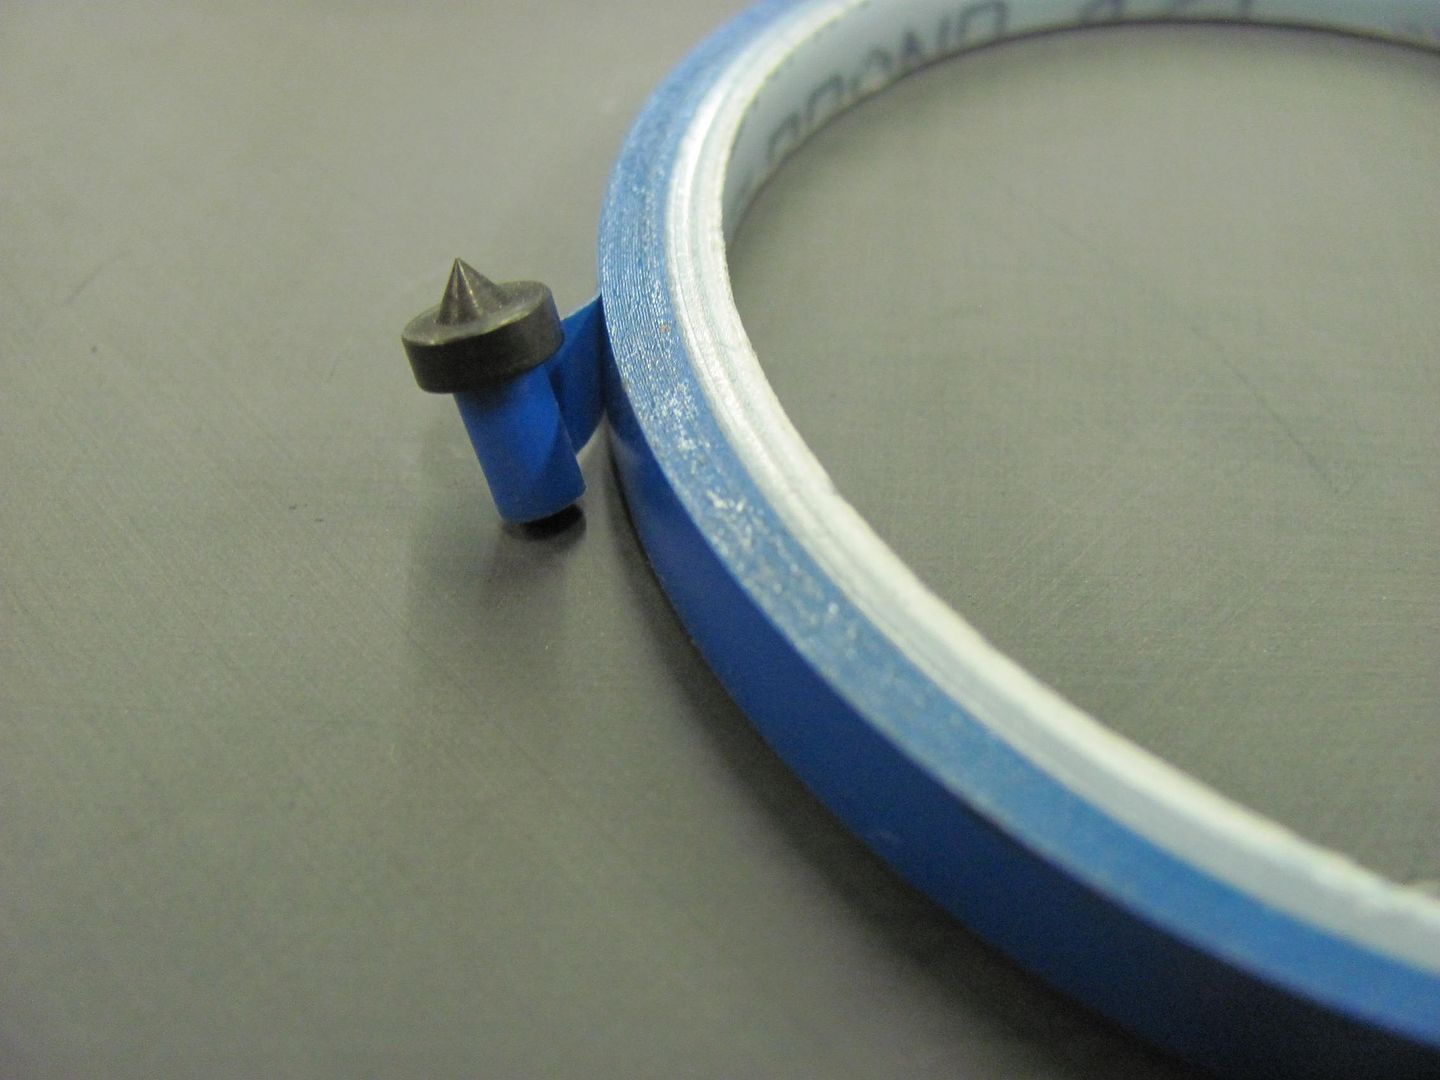
A couple wraps of fineline tape and we now have a snug fit so the spotters don't fall out..
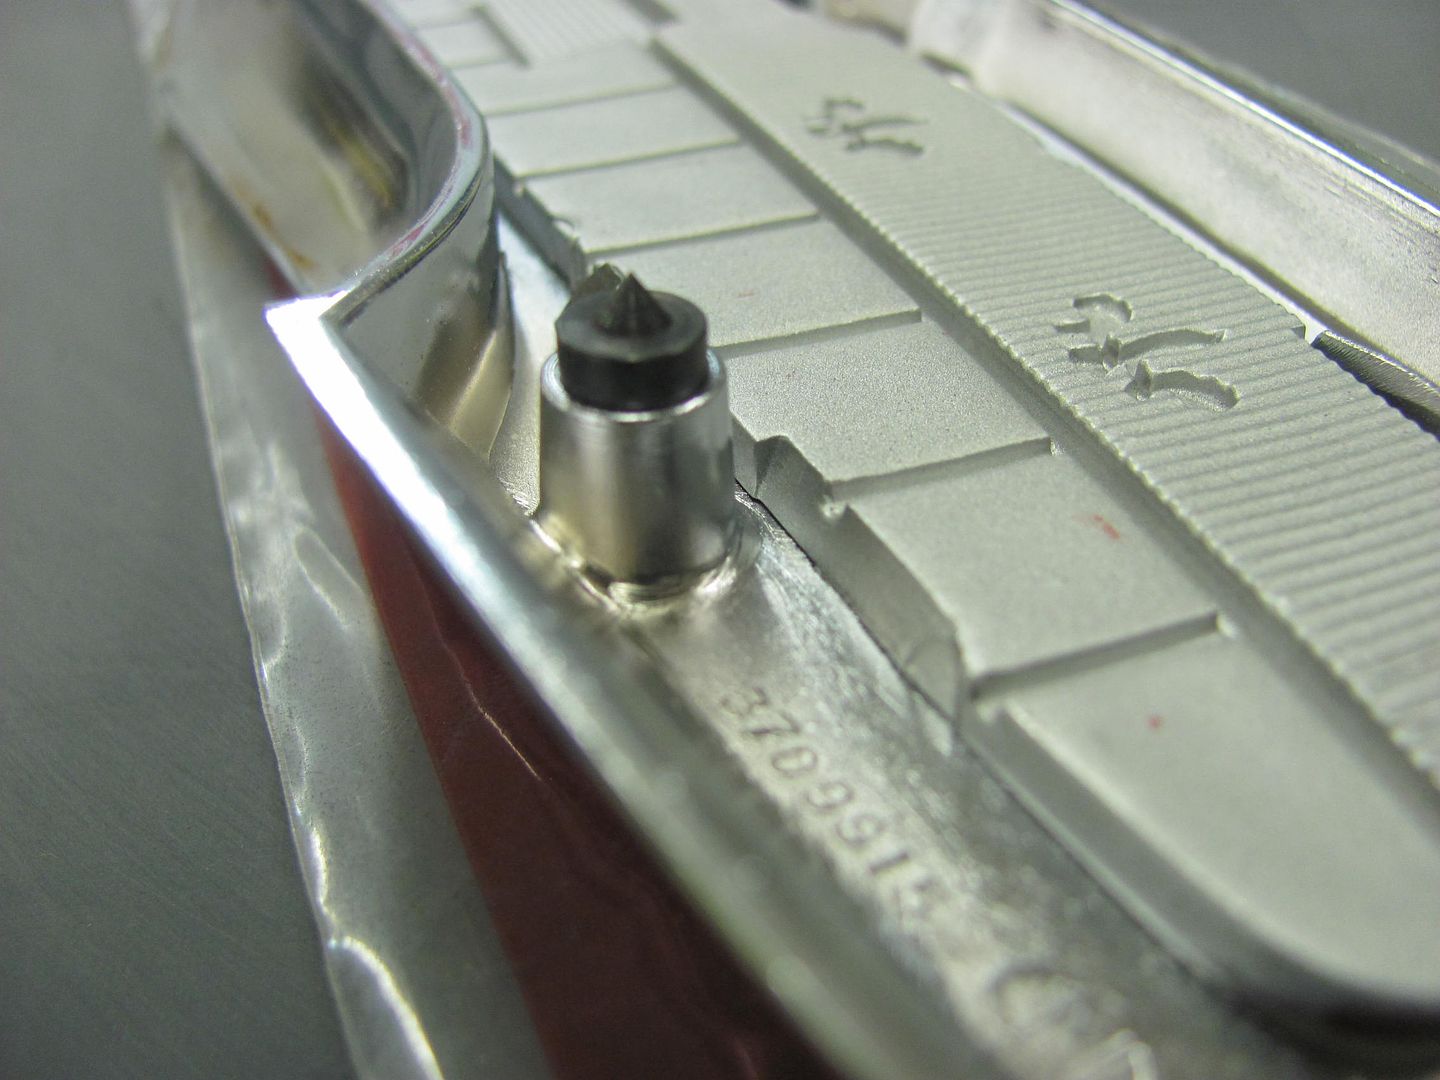
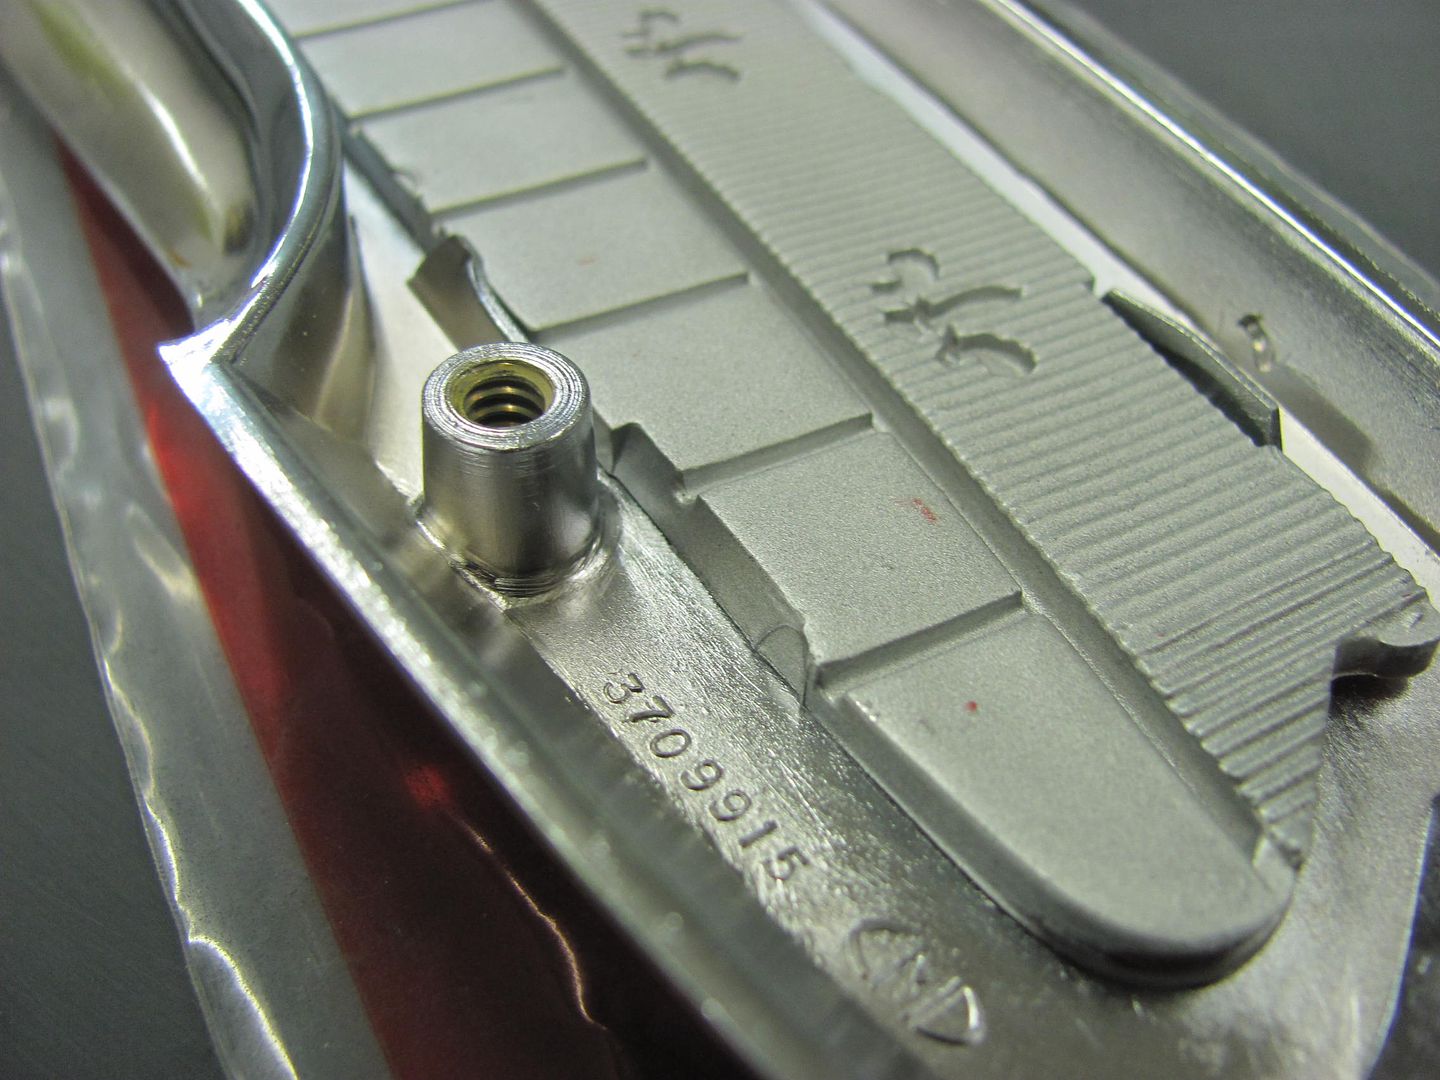
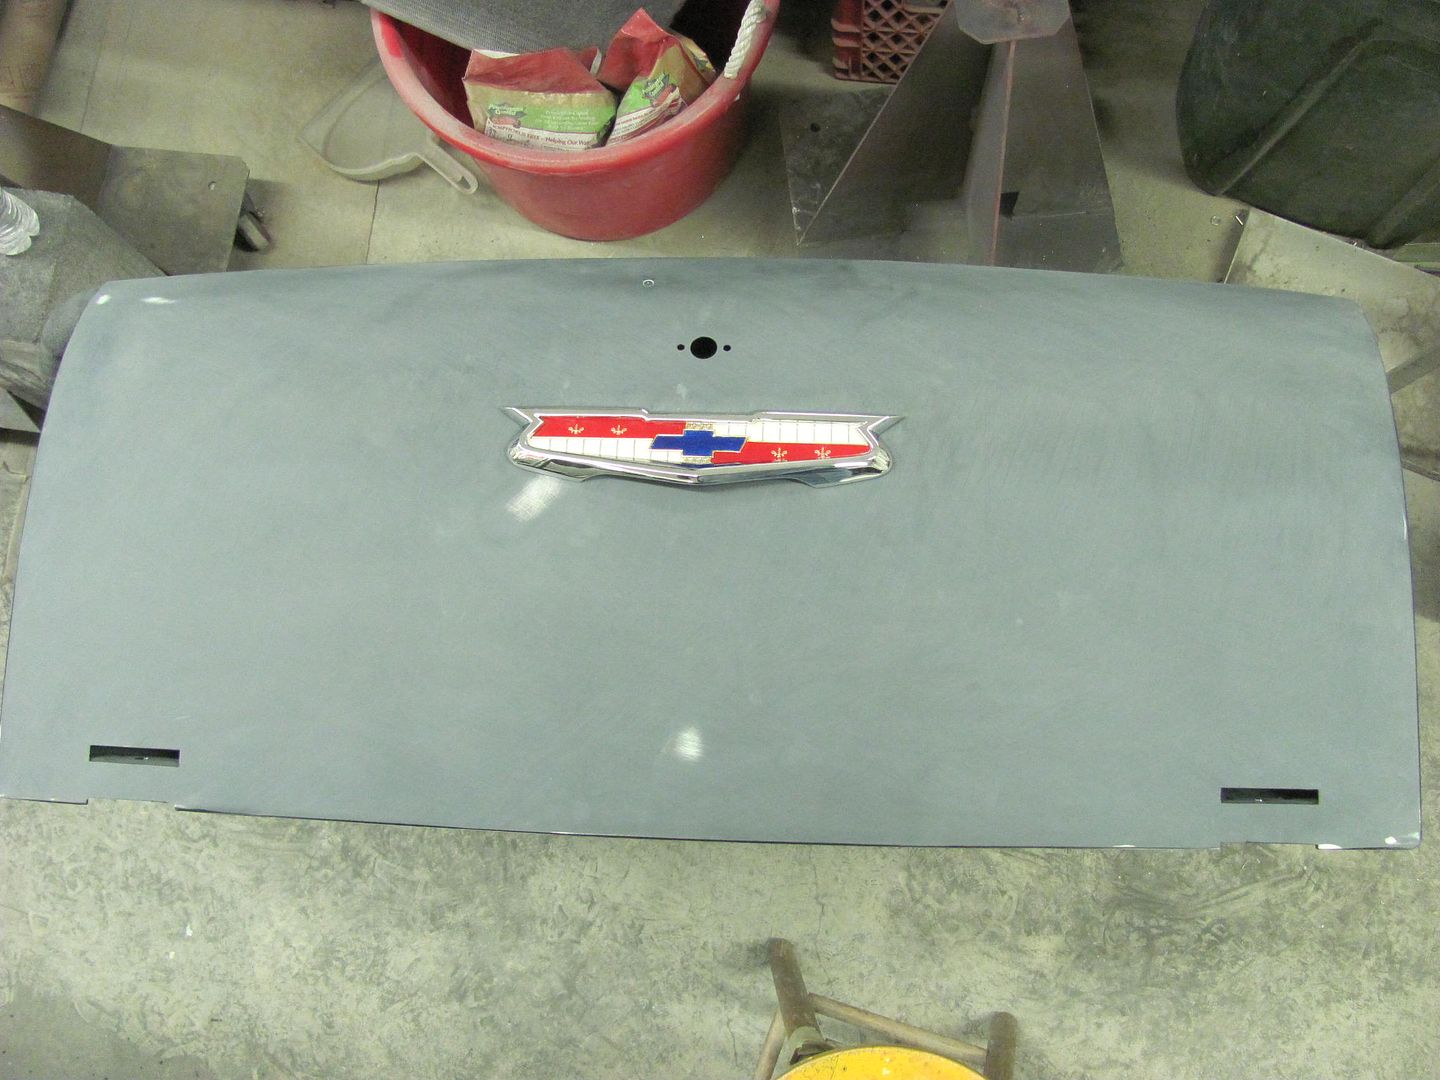
Then the emblem is located on the tail gate with the center alignment pin, then the back stops. The emblem is pressed onto the tail gate, and the spotters leave their mark on the epoxy paint finish..
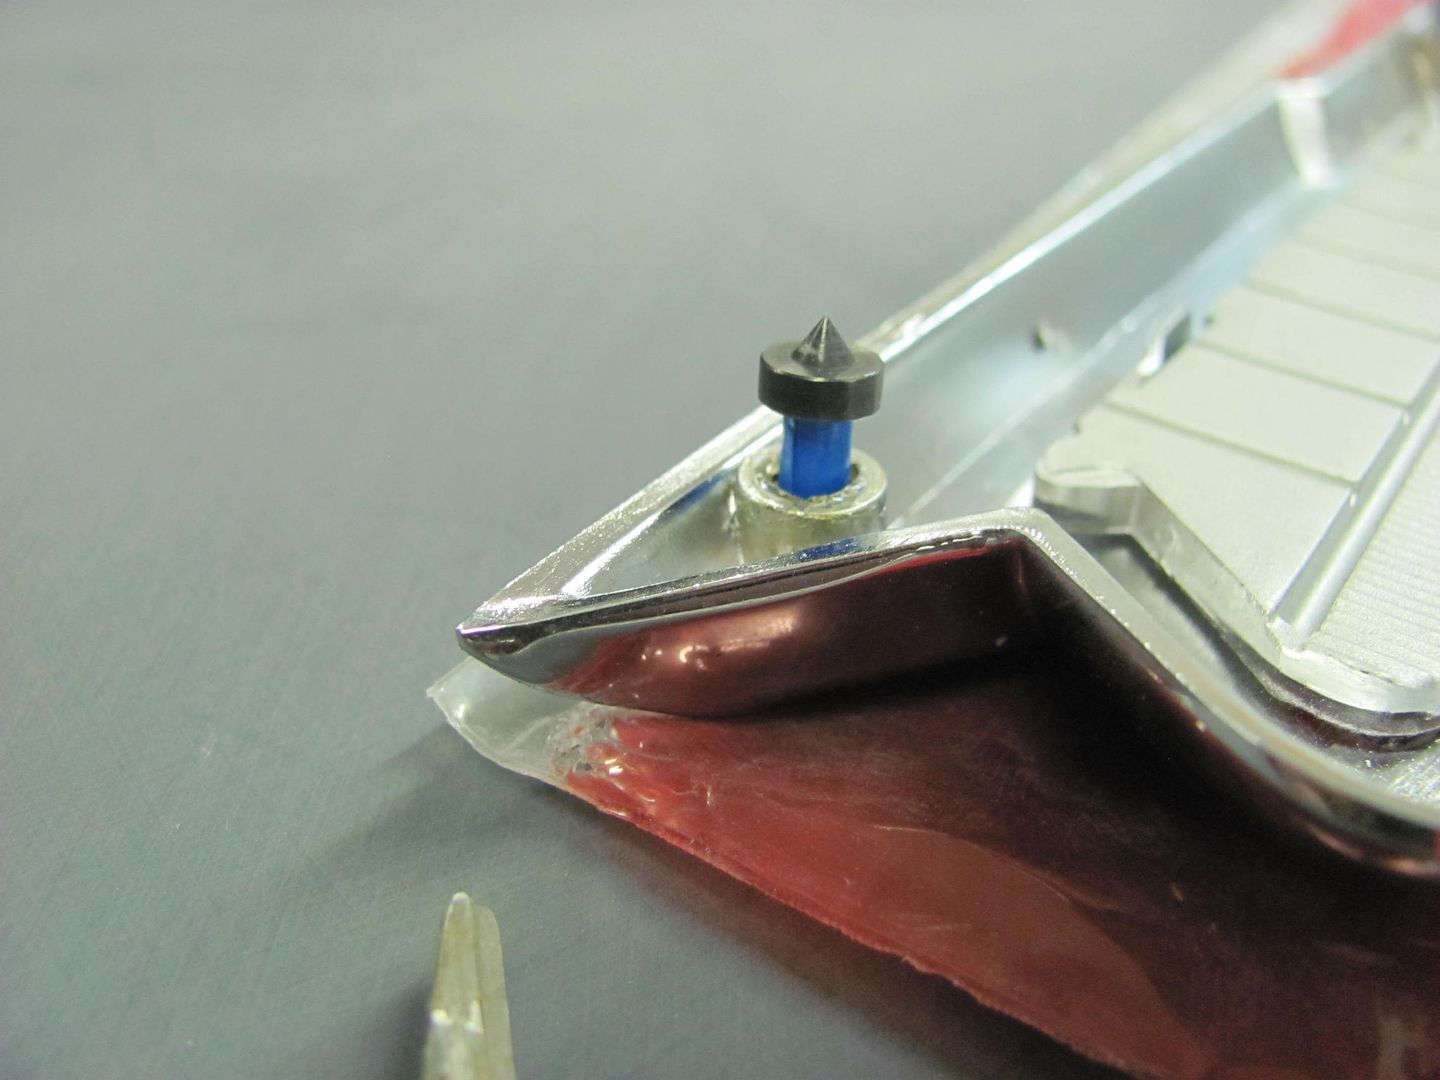
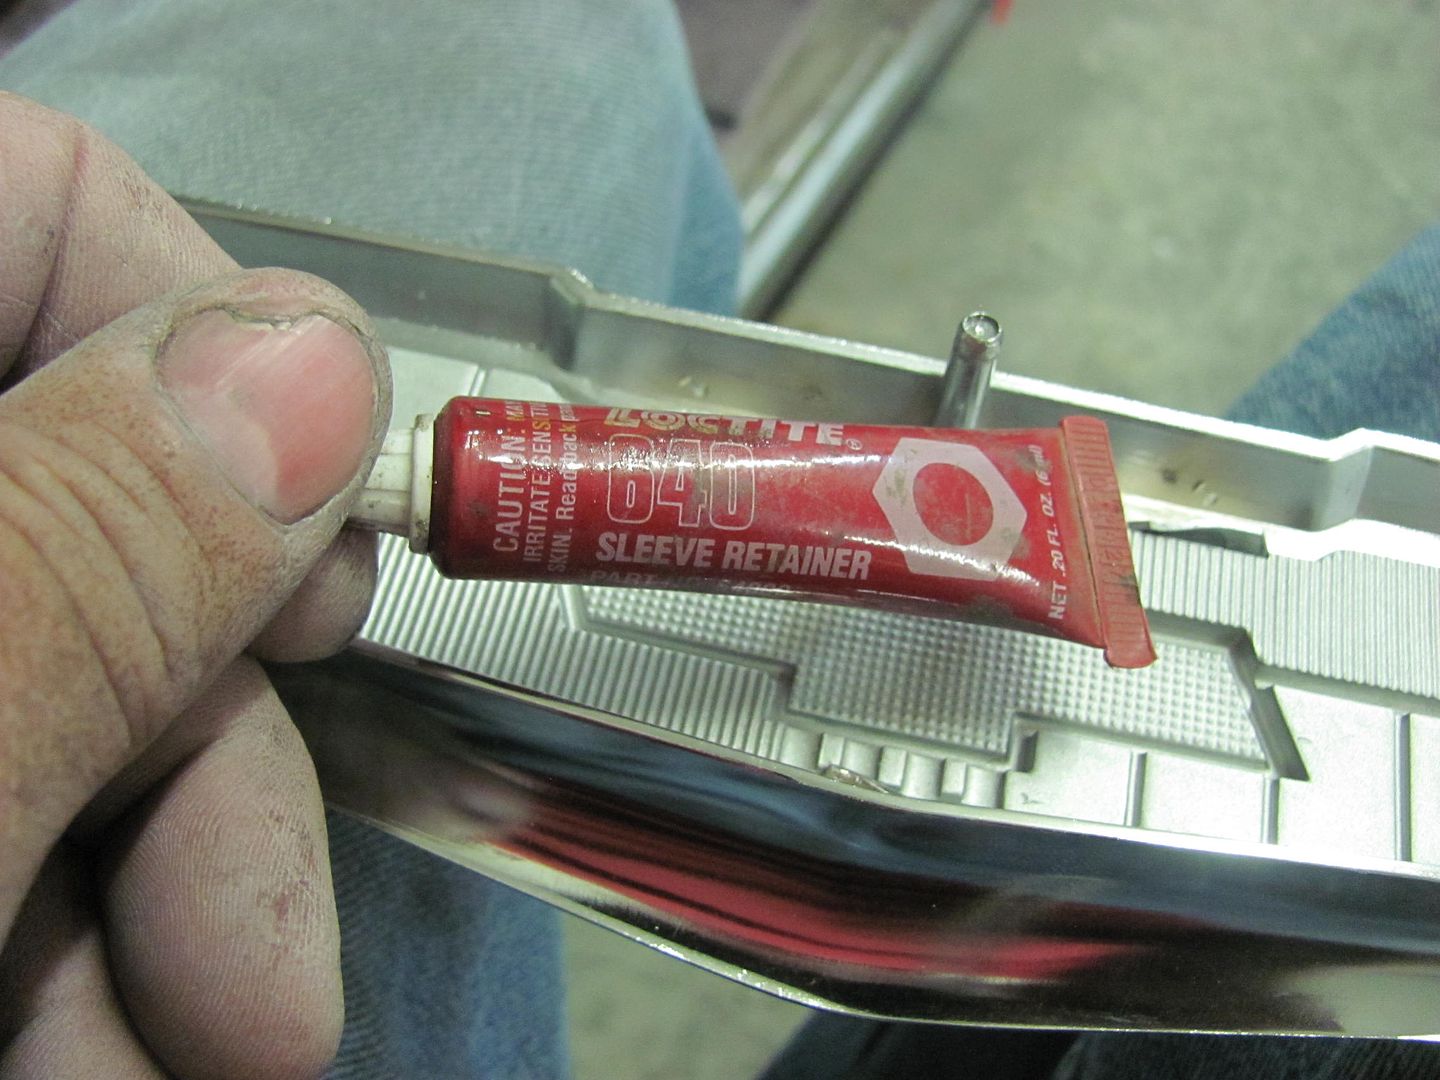
Next, the studs are installed finger tight using sleeve retainer. This will hopefully keep them from spinning inward any further risking possible damage to the chrome bezel...
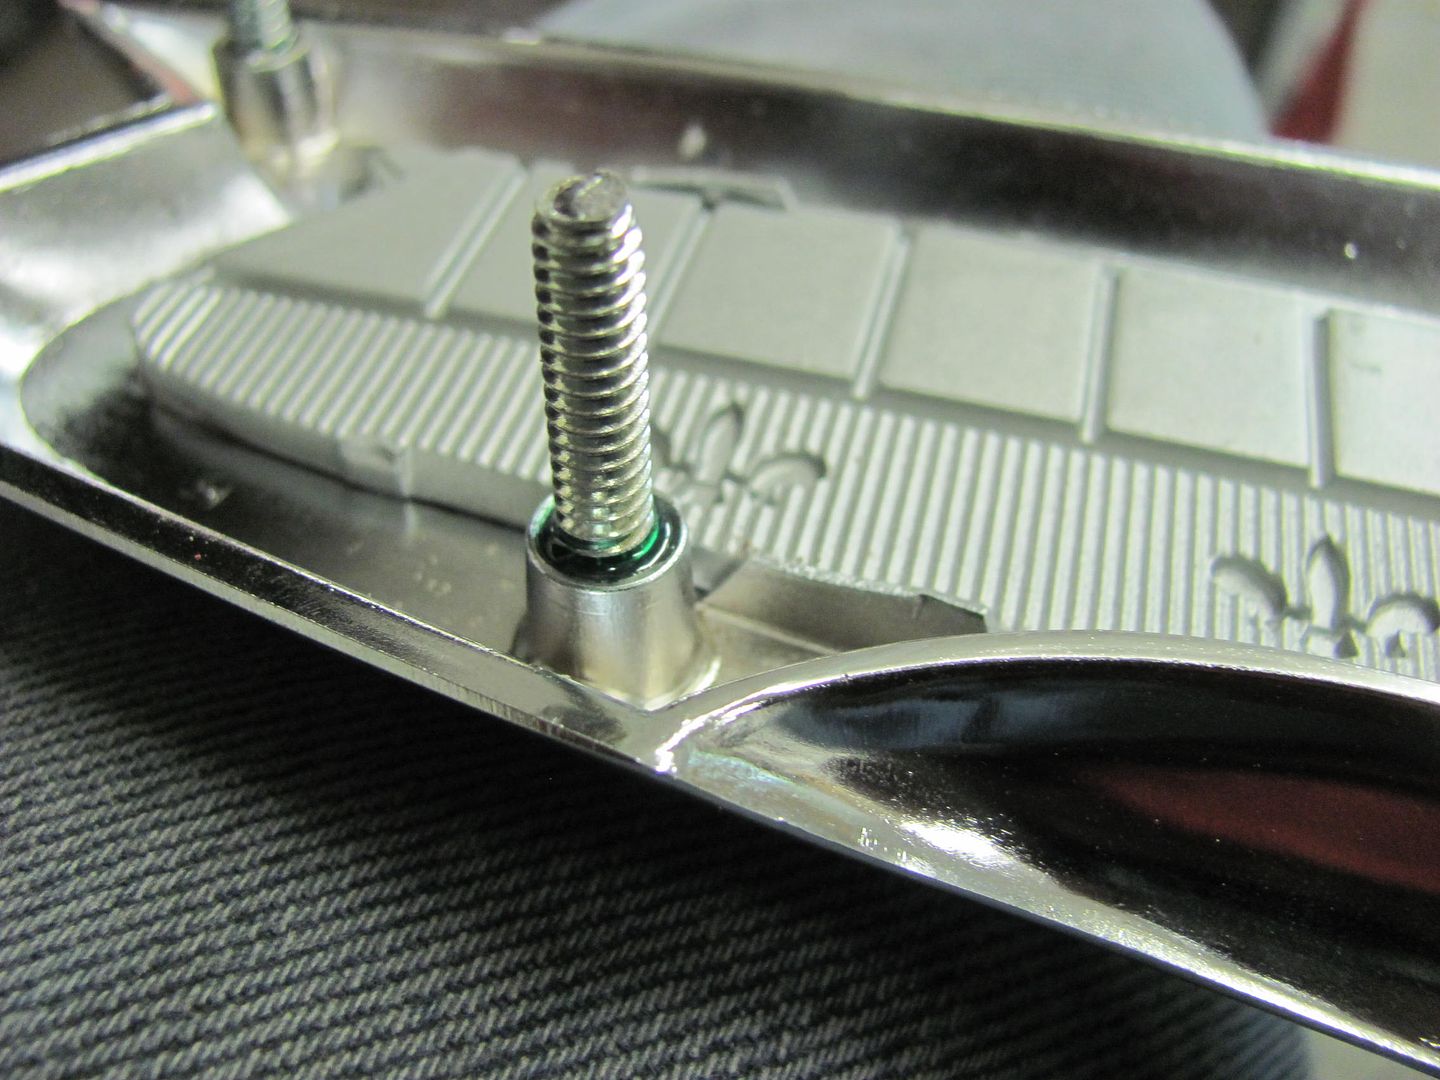
The nuts that come with the emblem are the split thread variety, and I had some threaded ones left over from the Fairlane build, that also are slightly larger in diameter, which may help out as the emblem also serves as a lift handle..
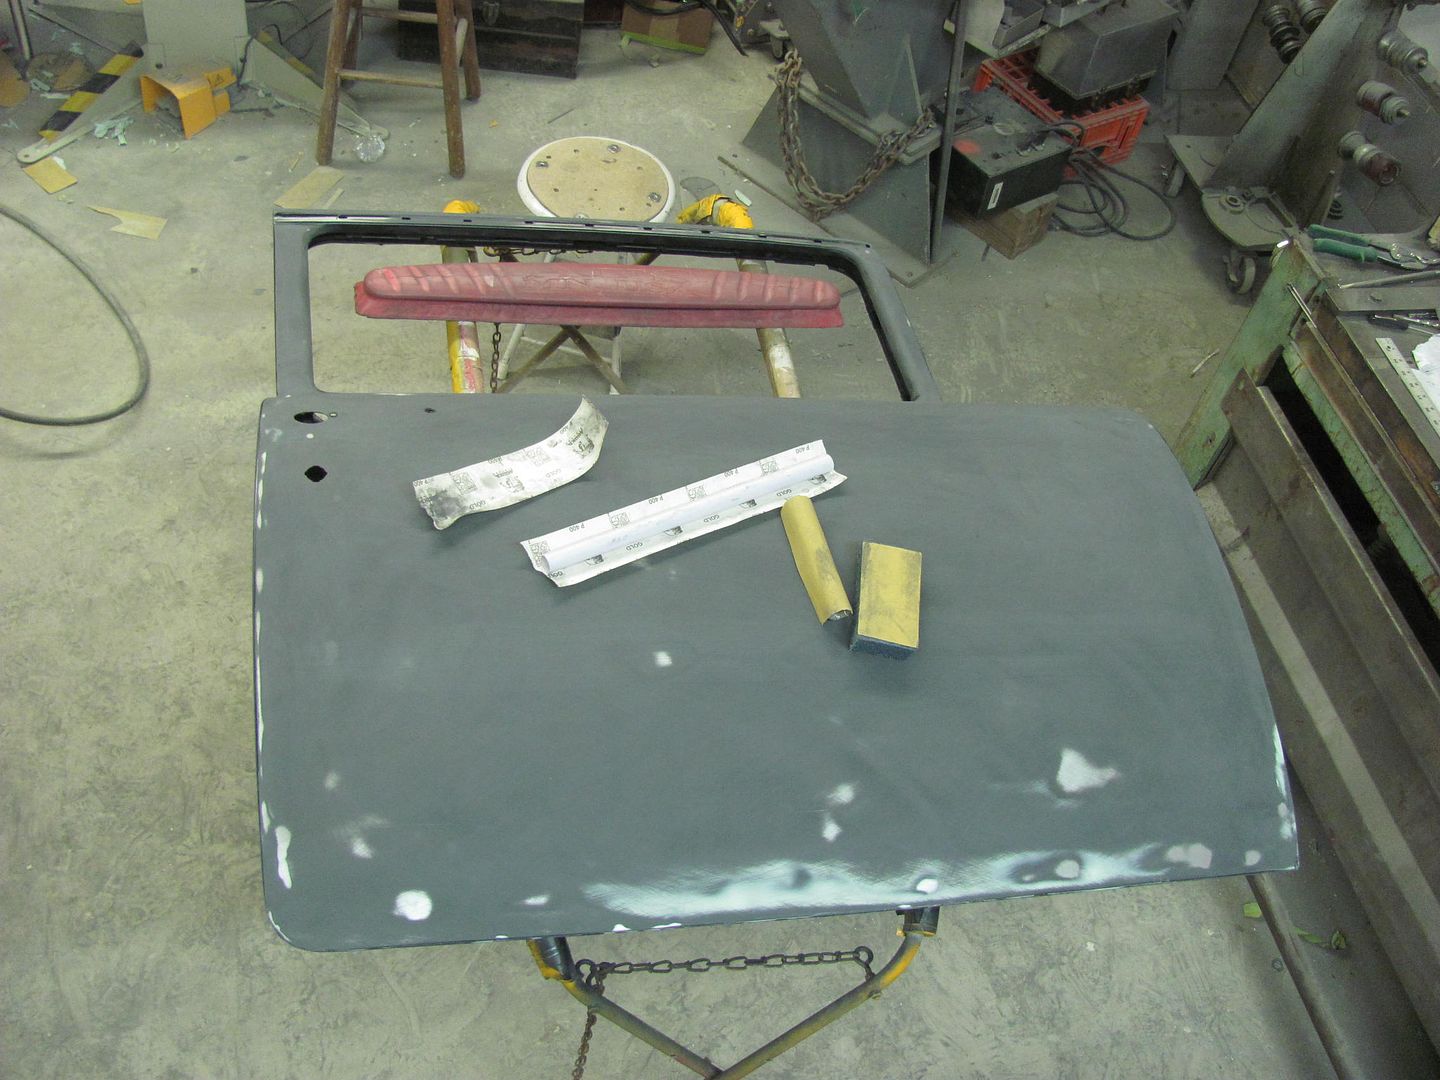
Holes drilled and emblem fitted
Robert
-
07-15-2015 08:56 AM #559
CHR Member
- Join Date
- Oct 2007
- Location
- Petaluma
- Car Year, Make, Model: 48 Ford F1
- Posts
- 9,795
Great work as usual!"  "No matter where you go, there you are!" Steve.
-
07-15-2015 04:53 PM #560
CHR Member
- Join Date
- Sep 2007
- Location
- New Bedford
- Car Year, Make, Model: 34 Ford 3W Coupe Replica
- Posts
- 14,754
Interesting for me was your "spotters" I have 2 sets and they are called transfer punches. 1 set is just like yours more or less.. the other is more like a pin punch that passes through the threads and you hit the punch to "transfer" the bolts center location.
As always, THANKS for the pics.. and say Hi to Kyle for us!!
-
07-15-2015 05:28 PM #561
CHR Member
- Join Date
- Jun 2008
- Location
- Leonardtown
- Car Year, Make, Model: Walking
- Posts
- 1,228
I have the transfer punches as well. The primary difference is the transfers are used on through holes as you described, the spotters are used in a closed hole where you can't use a punch.. On a budget, get a screw the correct thread, cut the head off, chuck up in a drill and use an angle sander to make the point, then screw into place. The spotters have a better point than I can do on the lathe, though..
Robert
-
07-15-2015 05:41 PM #562
CHR Member
- Join Date
- Sep 2007
- Location
- New Bedford
- Car Year, Make, Model: 34 Ford 3W Coupe Replica
- Posts
- 14,754
C'mon.. any one who works metal like you do.. can't do a point in a lathe?!?!?!
I'll never believe it!")
-
07-16-2015 04:31 AM #563
CHR Member
- Join Date
- Jun 2008
- Location
- Leonardtown
- Car Year, Make, Model: Walking
- Posts
- 1,228
I'm going to blame it on needing new cutters...
Robert
-
07-16-2015 01:47 PM #564
CHR Member
- Join Date
- Apr 2011
- Location
- Prairie City
- Car Year, Make, Model: 40 Ford Deluxe, 68 Corvette, 72&76 K30
- Posts
- 7,301
- Blog Entries
- 1
Thanks for posting that! I need to get me some spotters! Great work too.Ryan
1940 Ford Deluxe Tudor 354 Hemi 46RH Electric Blue w/multi-color flames, Ford 9" Residing in multiple pieces
1968 Corvette Coupe 5.9 Cummins Drag Car 11.43@130mph No stall leaving the line with 1250 rpm's and poor 2.2 60'
1972 Chevy K30 Longhorn P-pumped 24v Compound Turbos 47RH Just another money pit
1971 Camaro RS 5.3 BTR Stage 3 cam, SuperT10
Tire Sizes
-
07-16-2015 05:18 PM #565
CHR Member
- Join Date
- Sep 2007
- Location
- New Bedford
- Car Year, Make, Model: 34 Ford 3W Coupe Replica
- Posts
- 14,754
Check it out. I use the second set down from the top Originally Posted by 40FordDeluxe

Enco - Guaranteed Lowest Prices on Machinery, Measuring Tools, Cutting Tools and Shop Supplies
-
07-19-2015 04:46 AM #566
CHR Member
- Join Date
- Jun 2008
- Location
- Leonardtown
- Car Year, Make, Model: Walking
- Posts
- 1,228
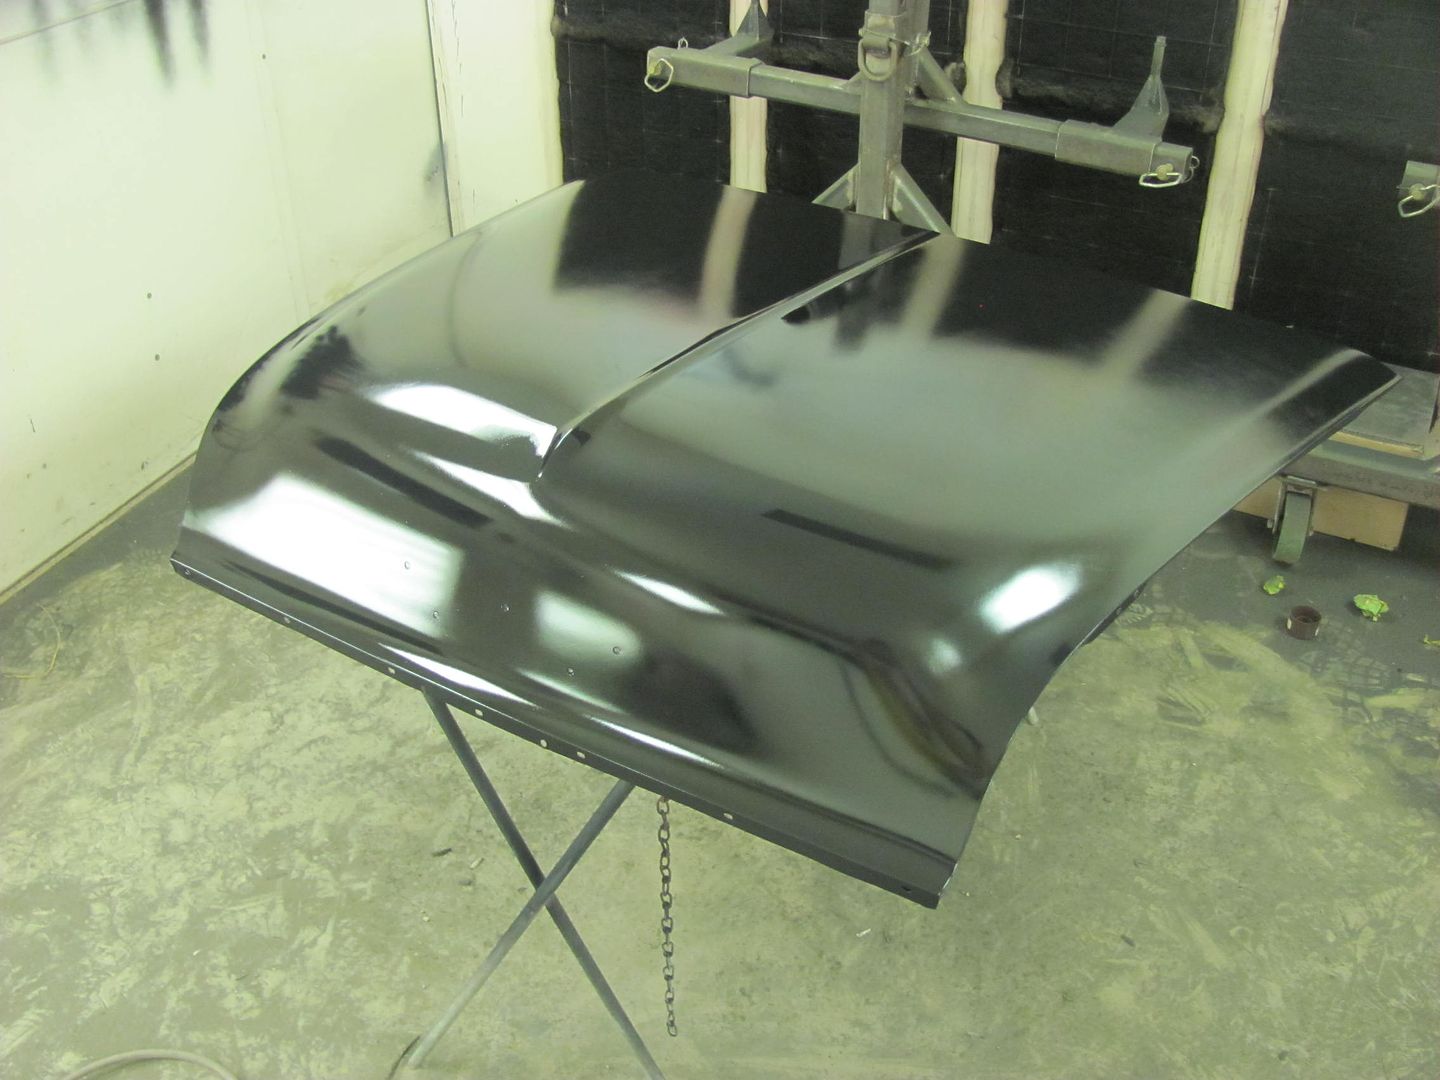
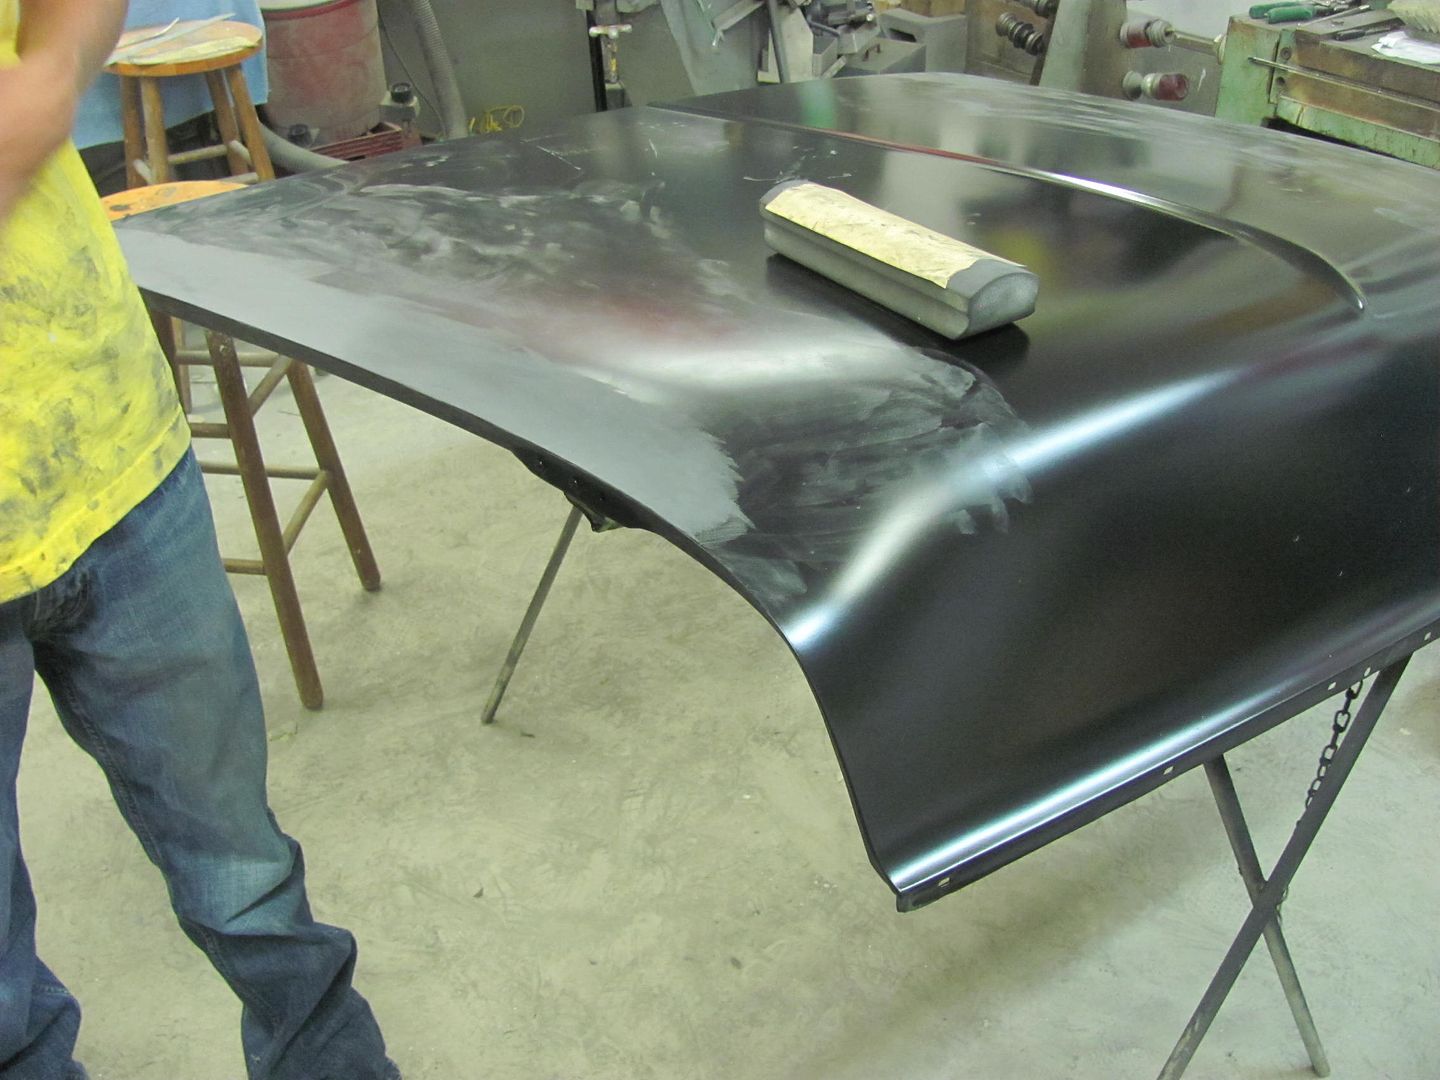
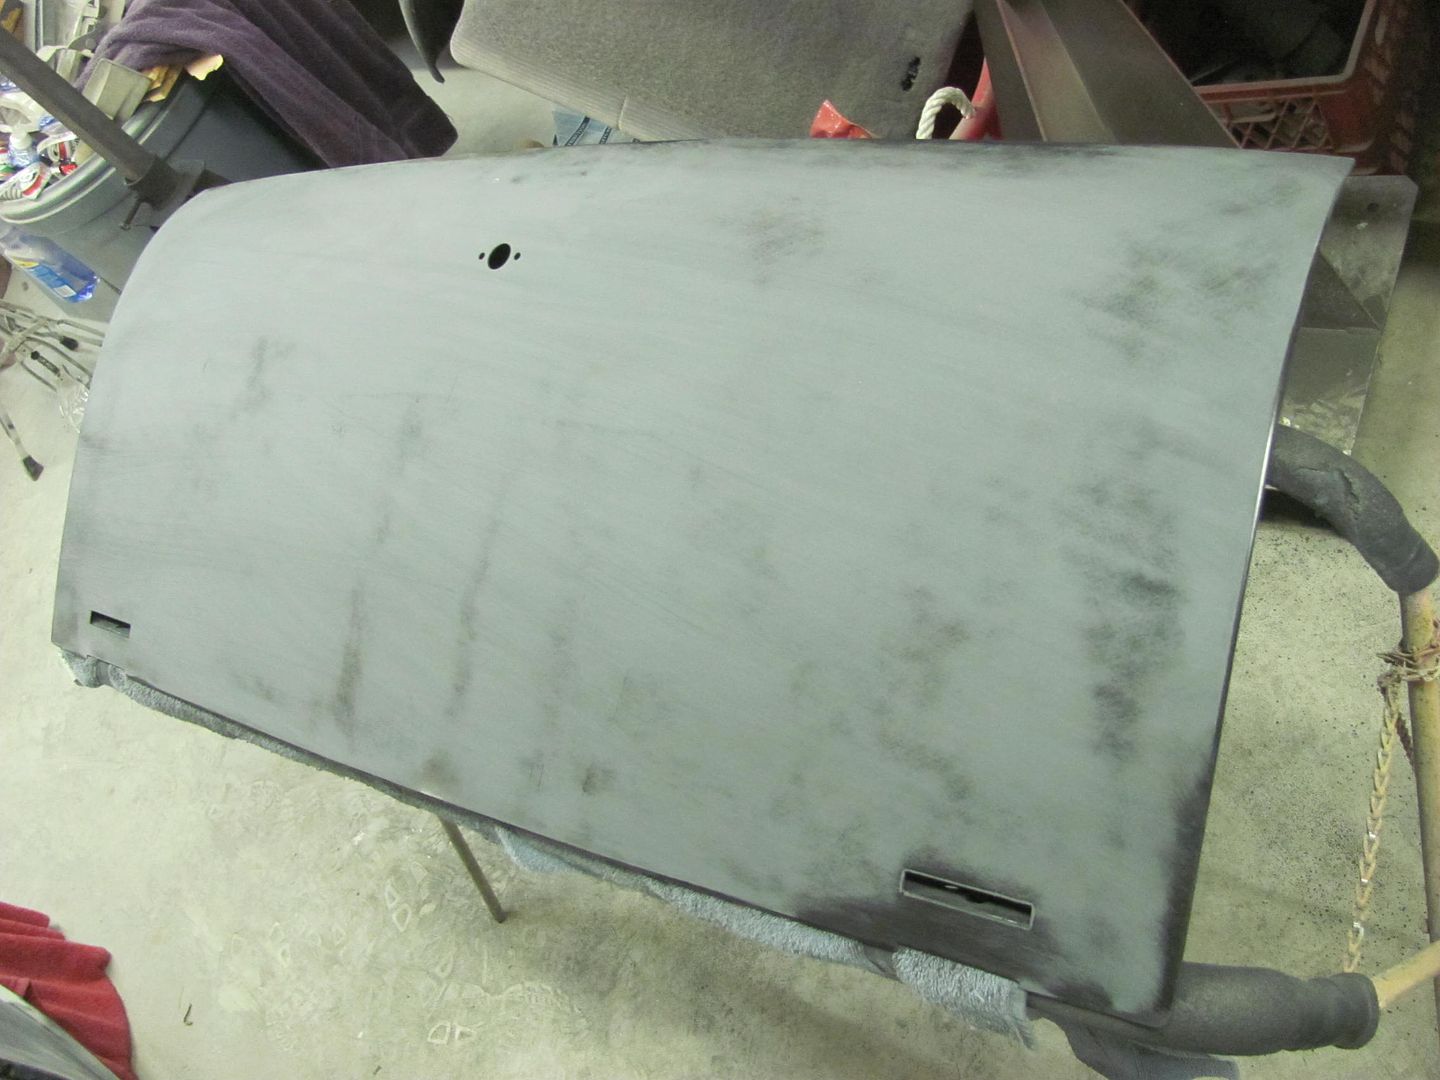
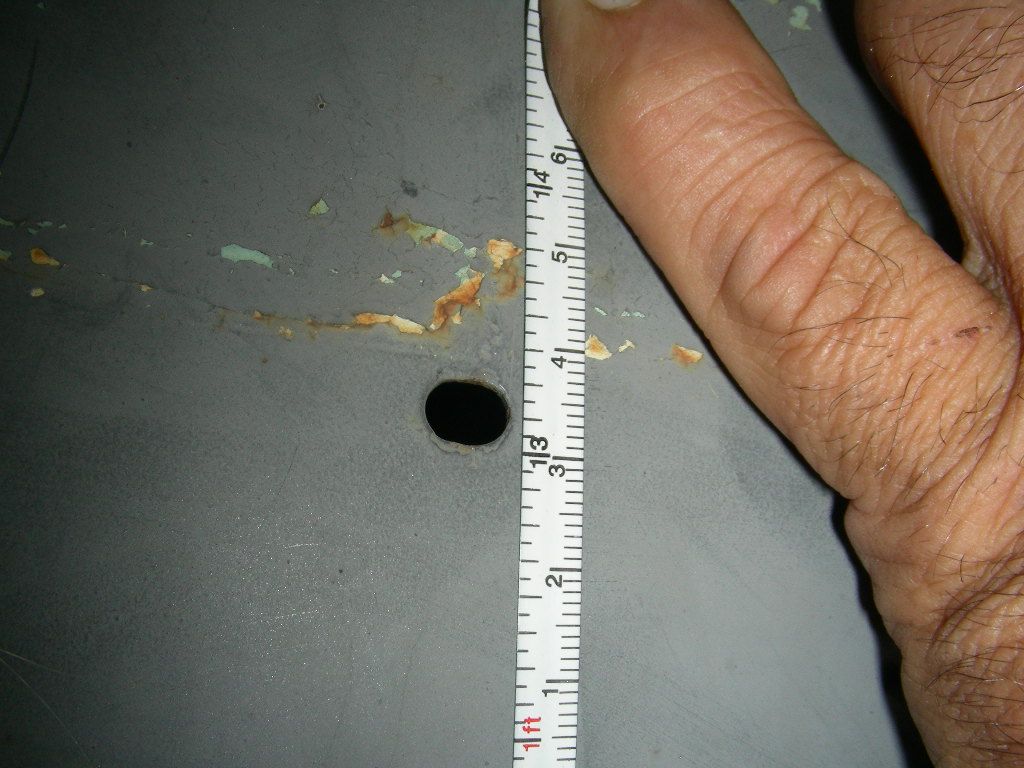
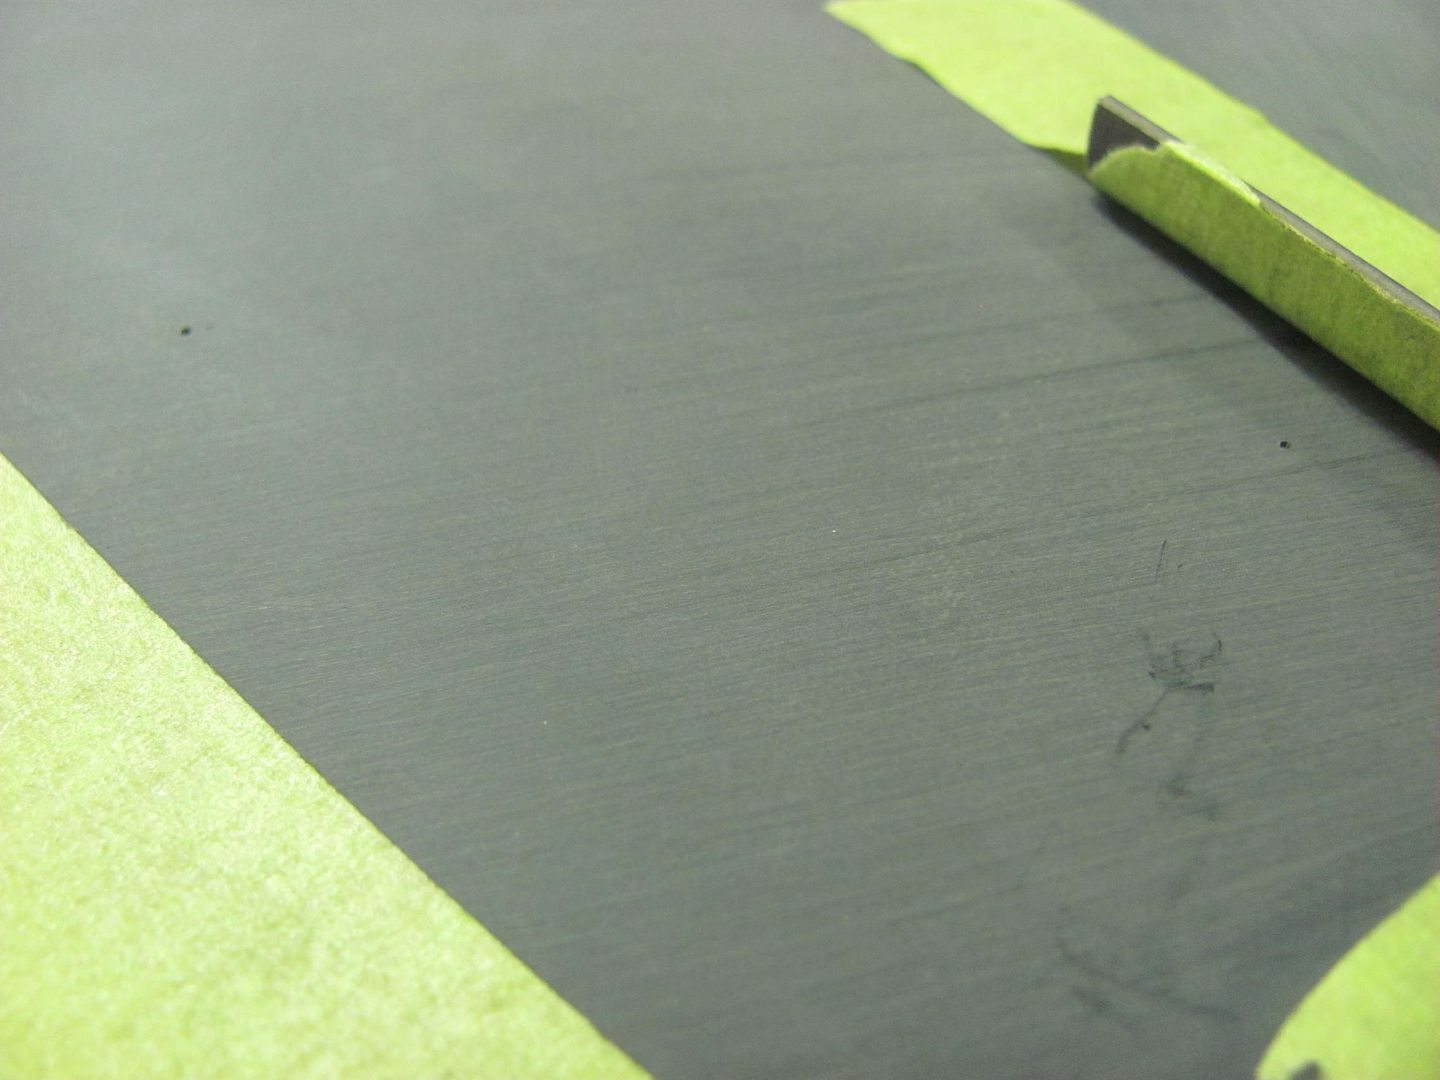
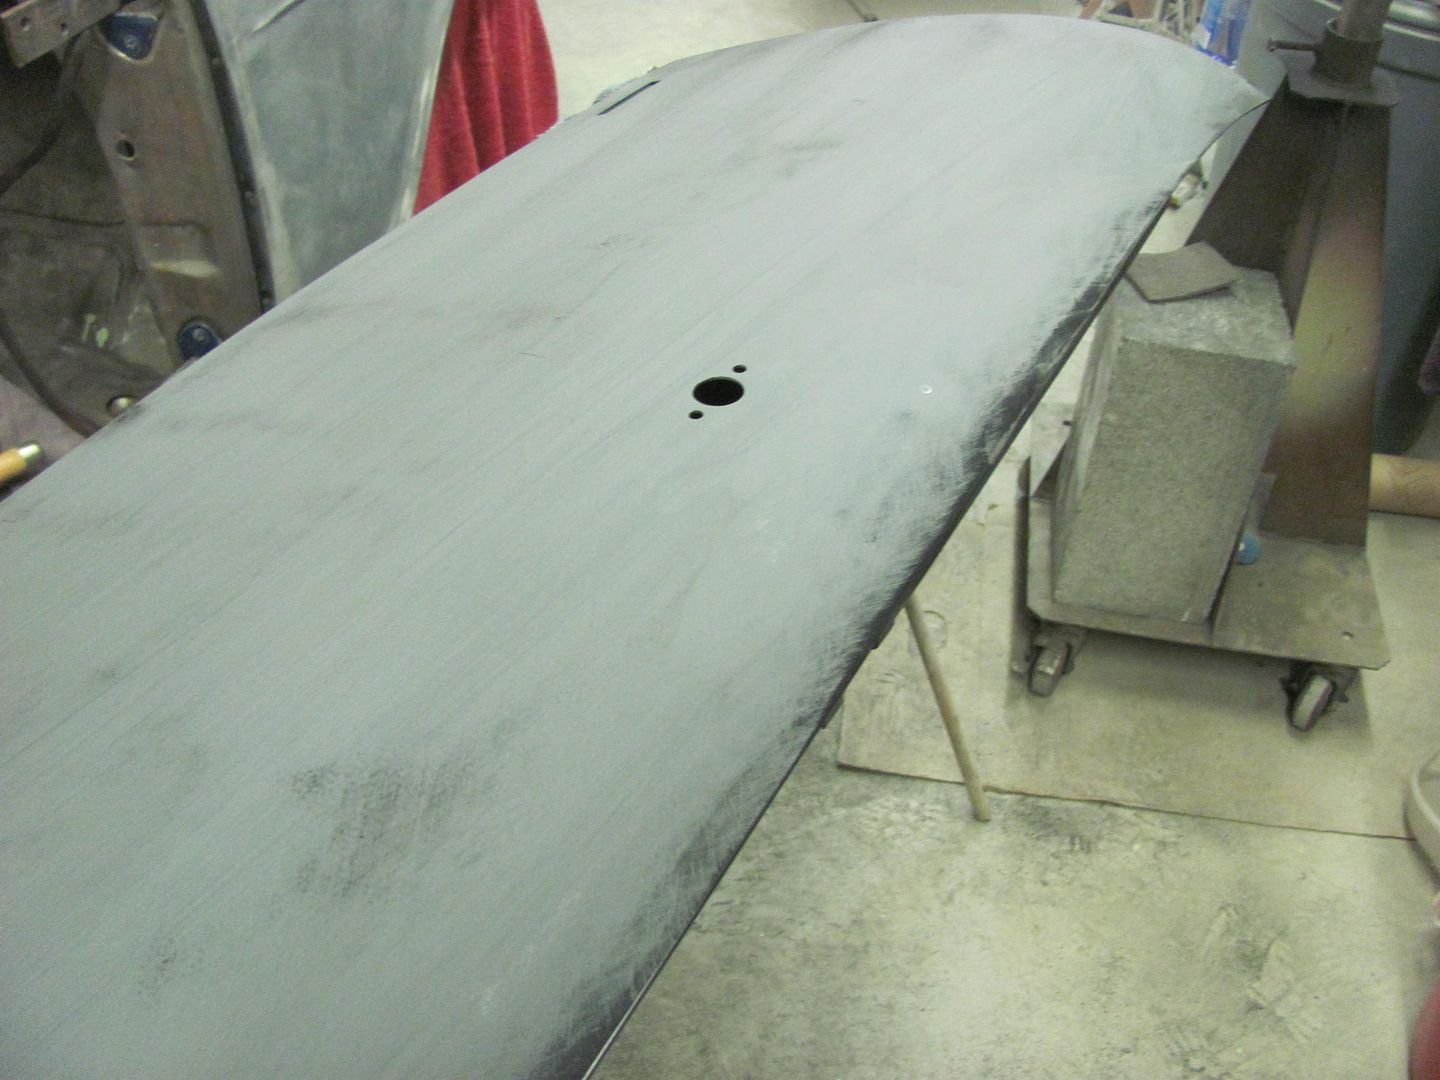
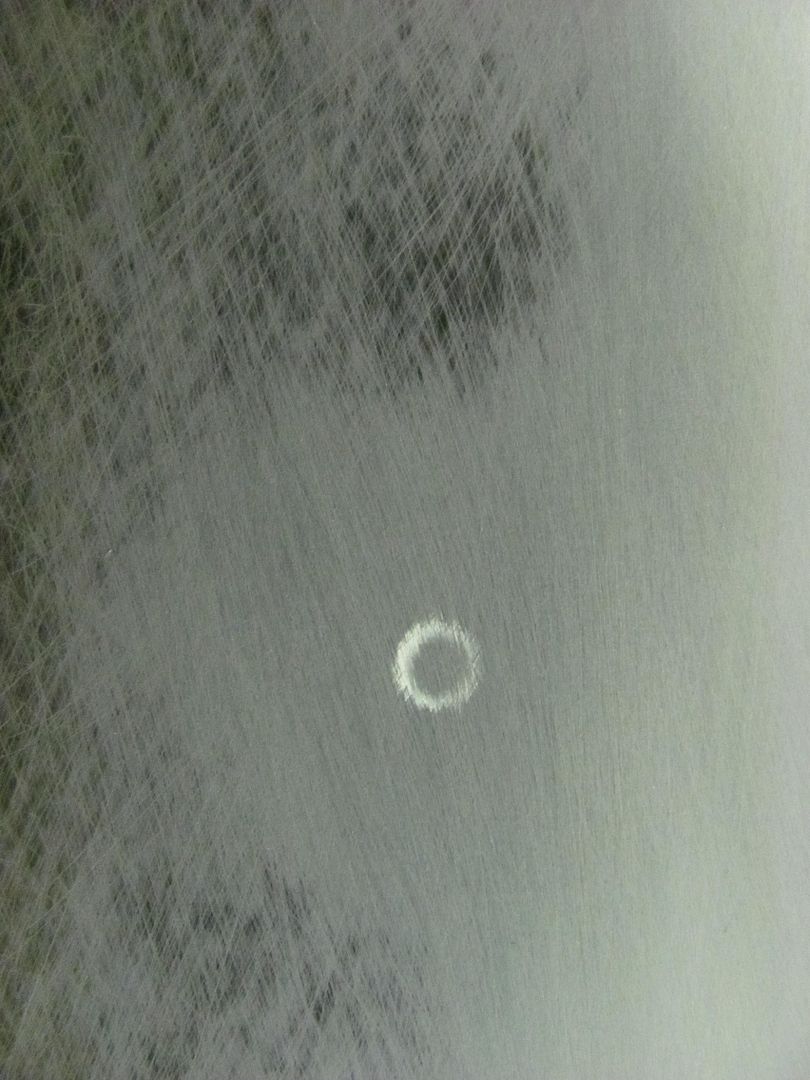
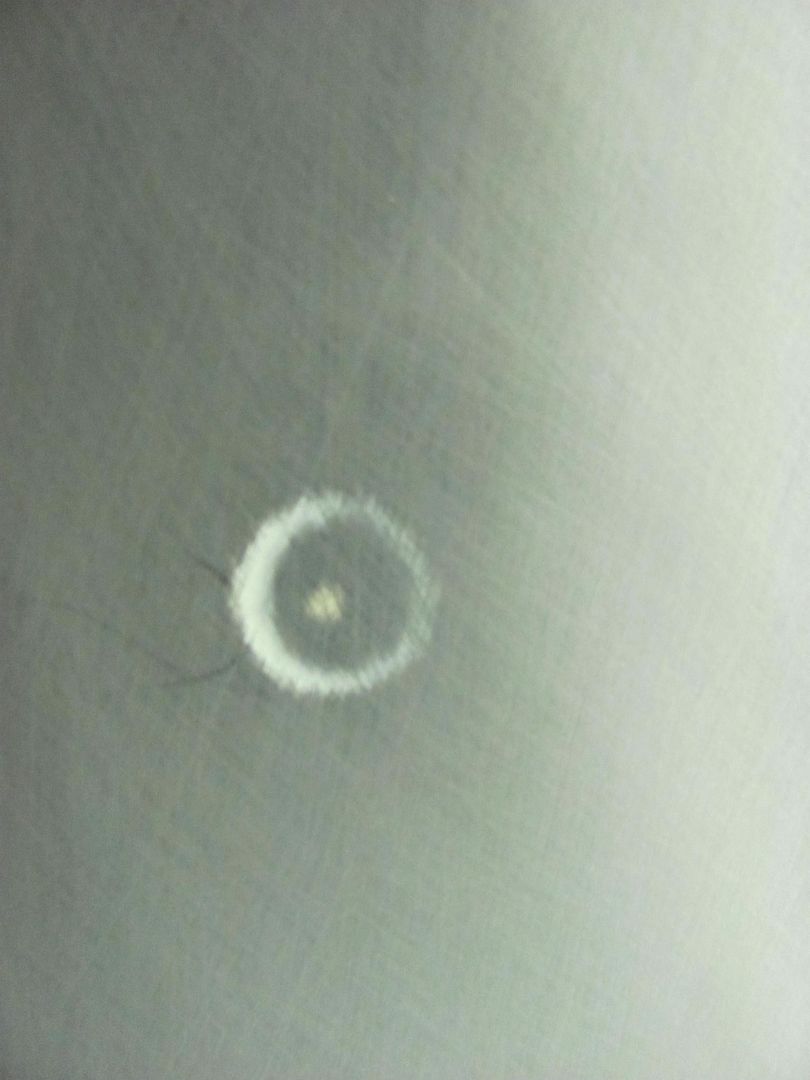
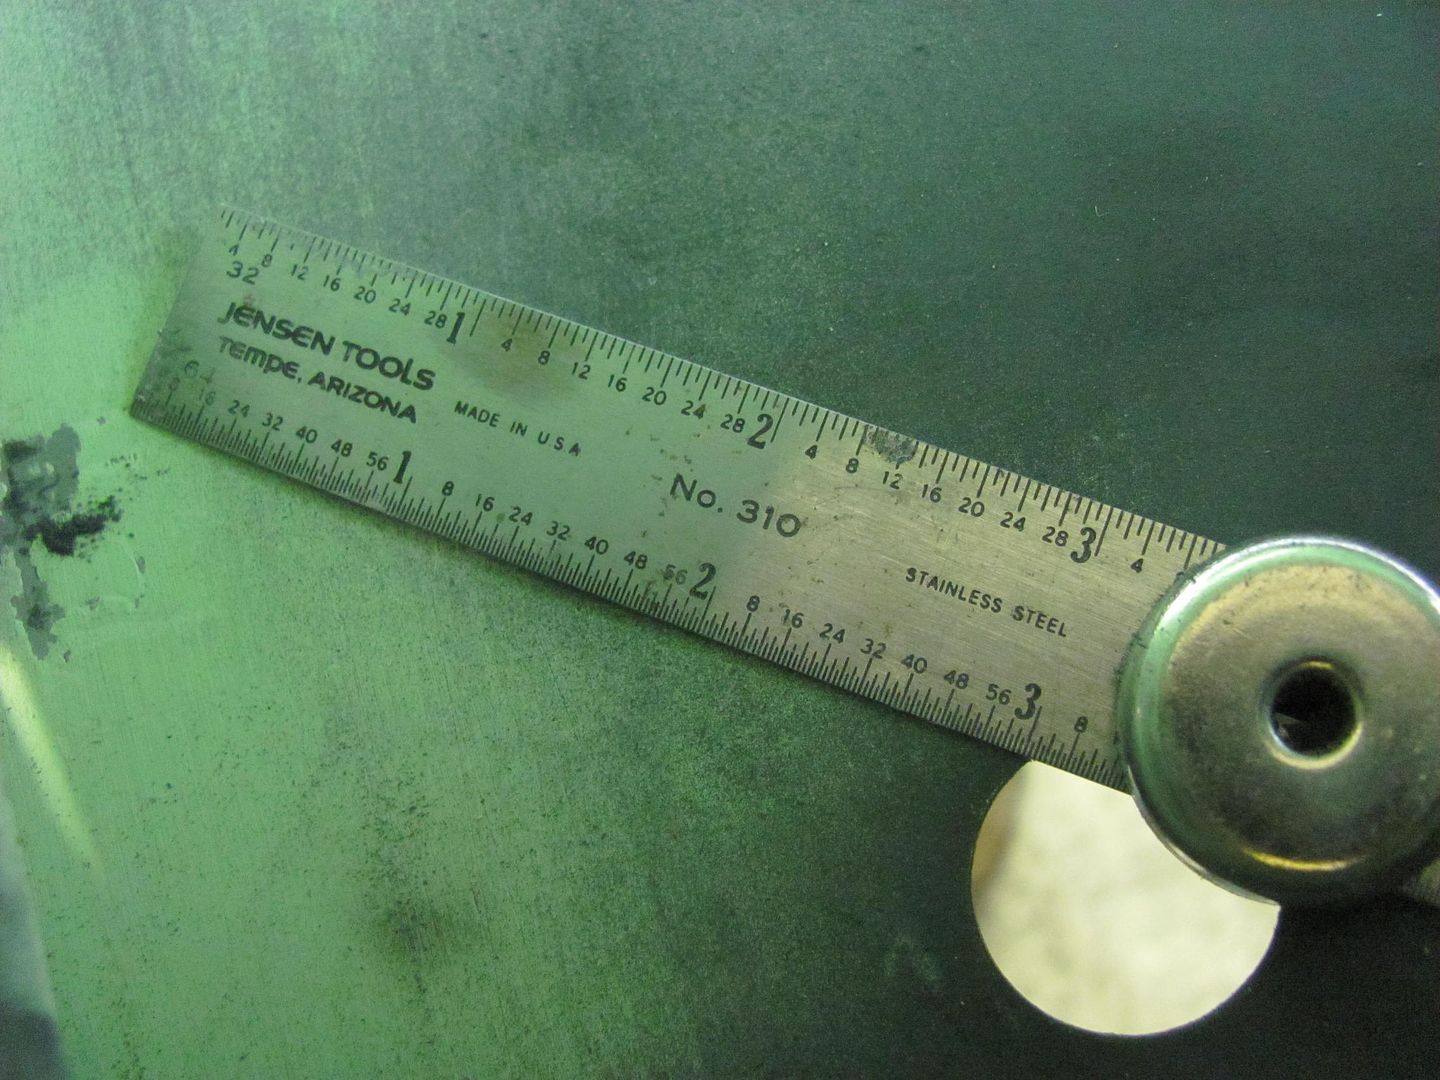
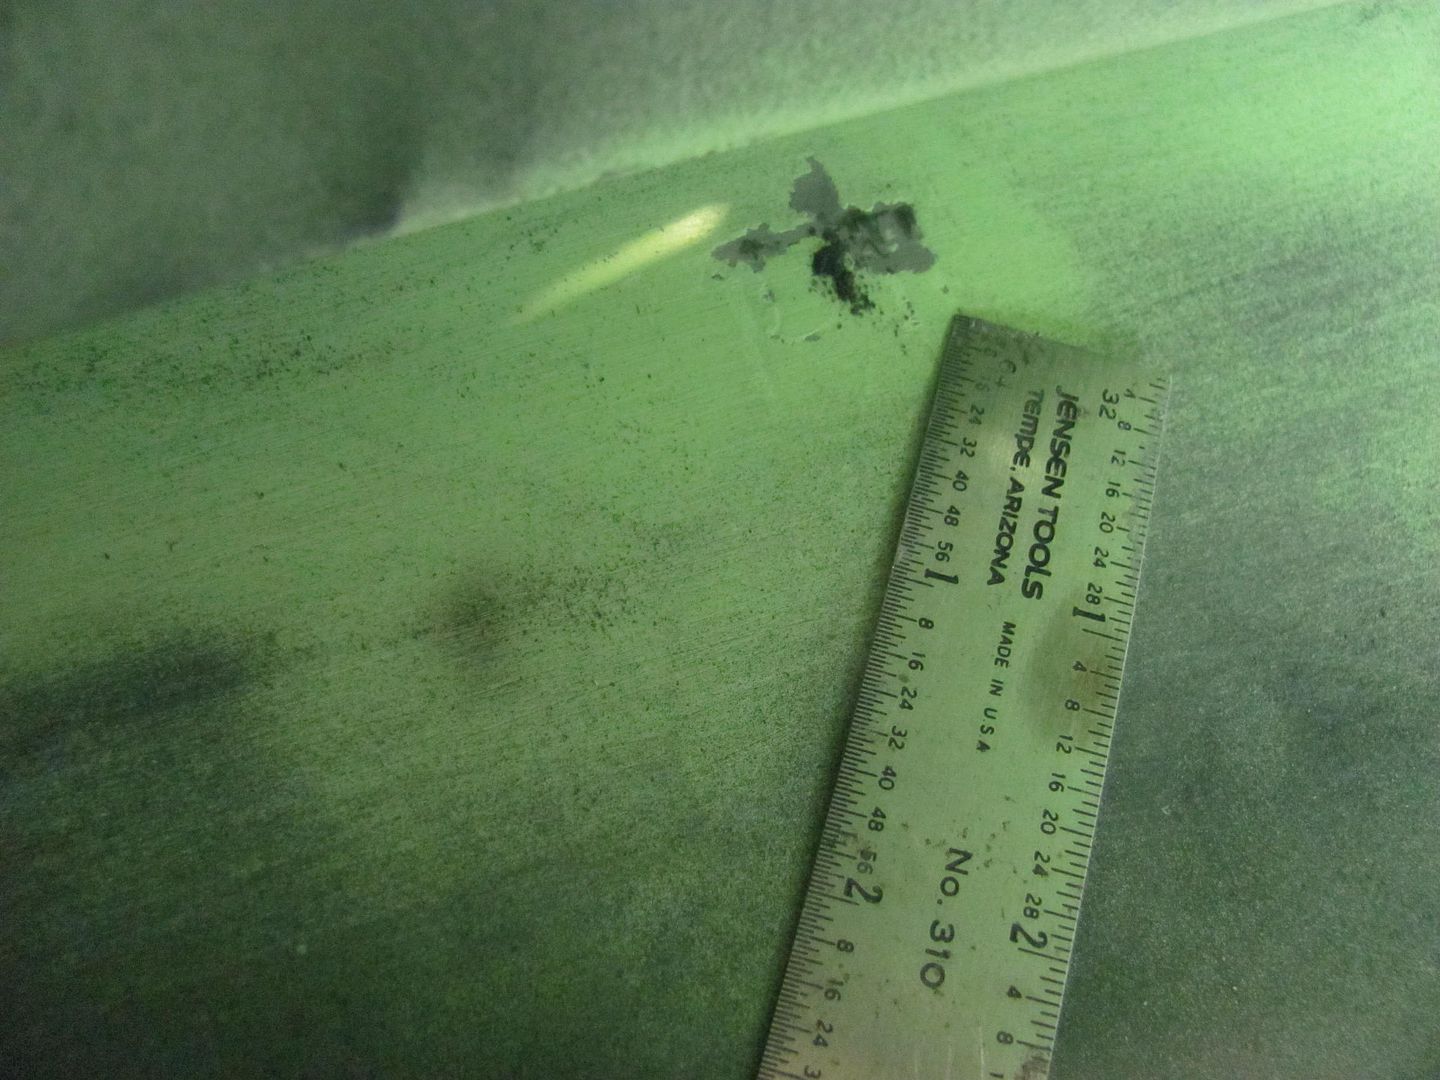
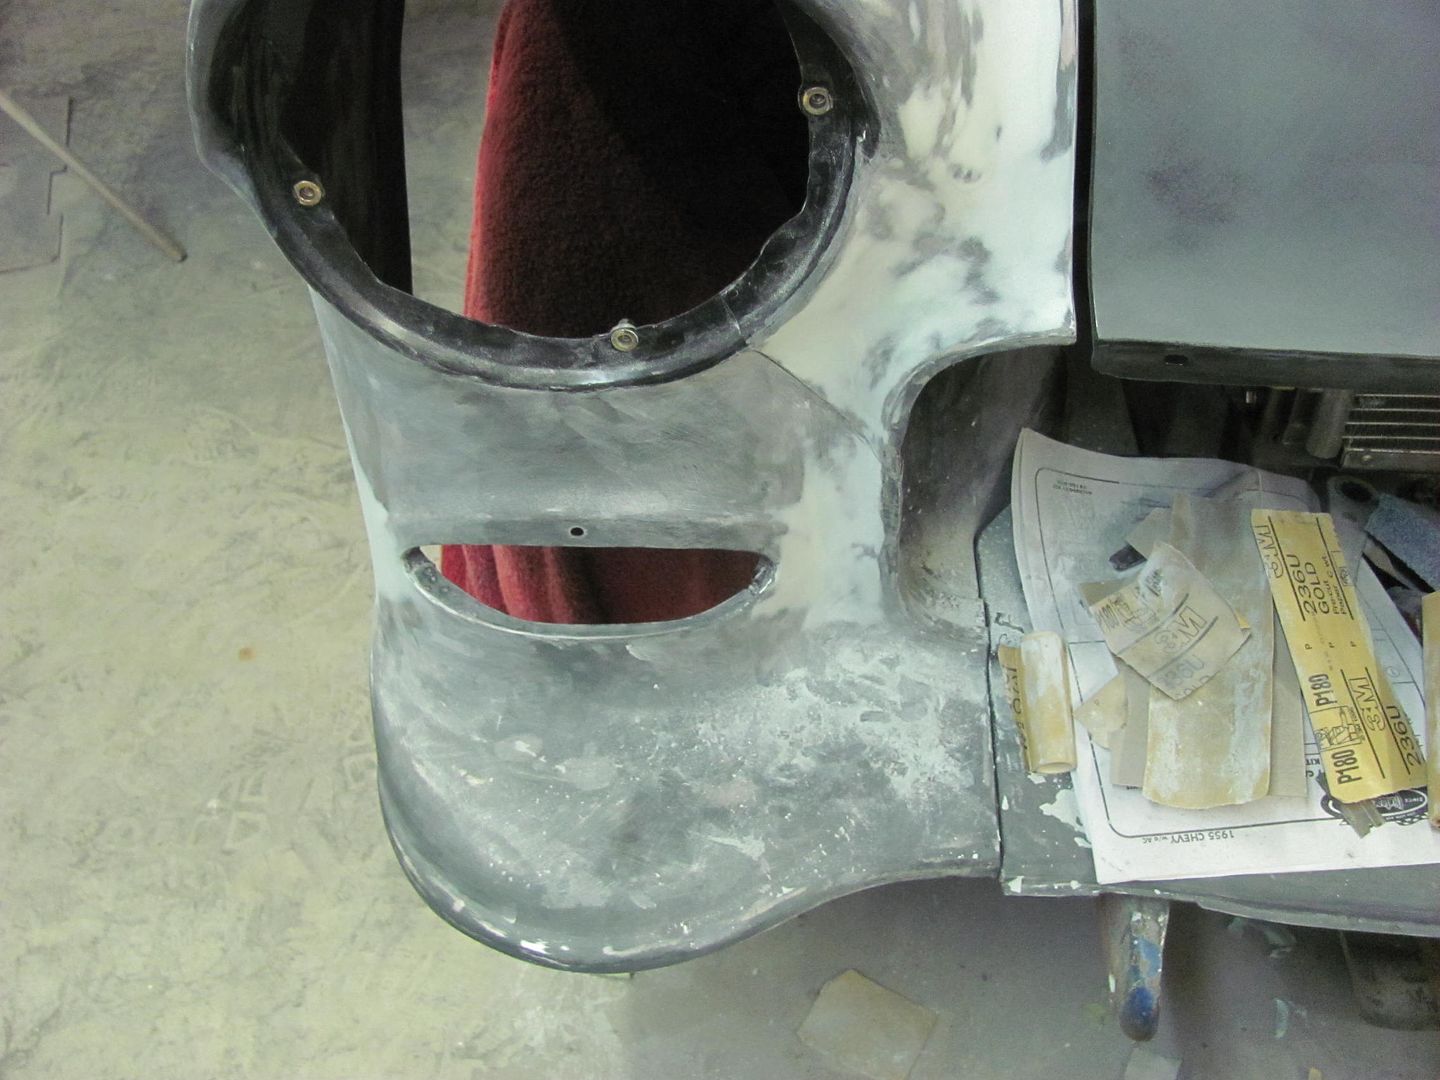
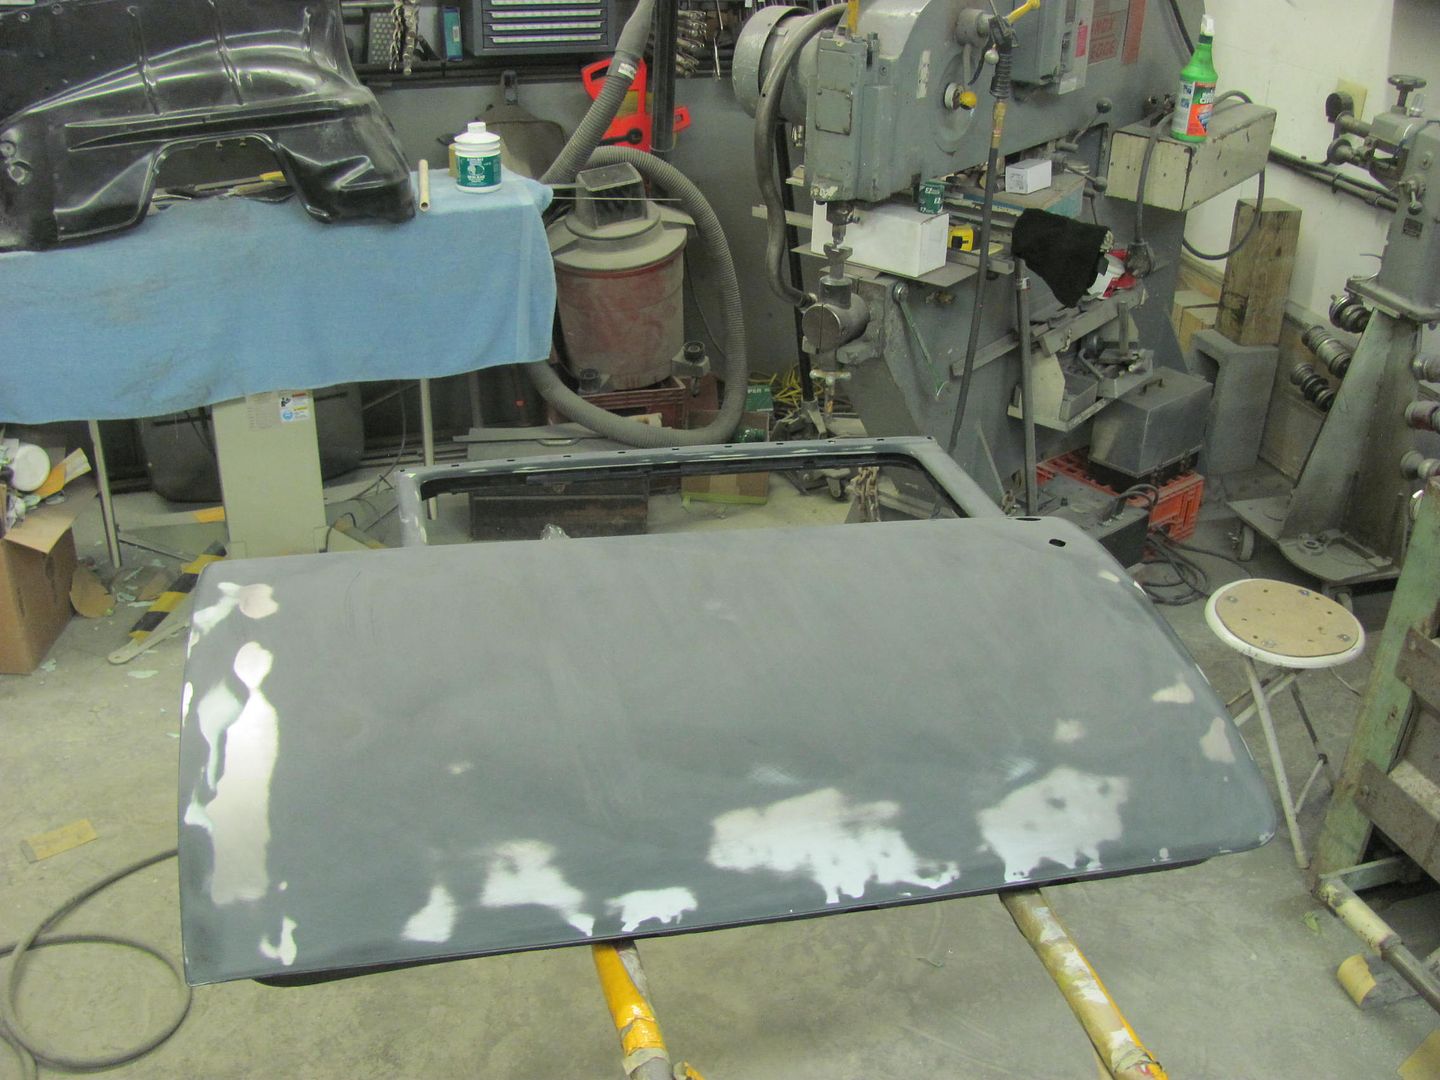
I was blocking out the tailgate the other day and had a "halo" effect appear in the epoxy, shown below just to the right of the latch hole. This has a light skim of Evercoat 416 beneath the epoxy in that area. It was nice and flat while in bare metal, after spraying epoxy, after blocking the Evercoat/ before spraying the last coat of epoxy. I was baffled at what would cause such a nicely formed circle in the paint...

Even scratched the area to see if there was any softness to the Evercoat, but no..
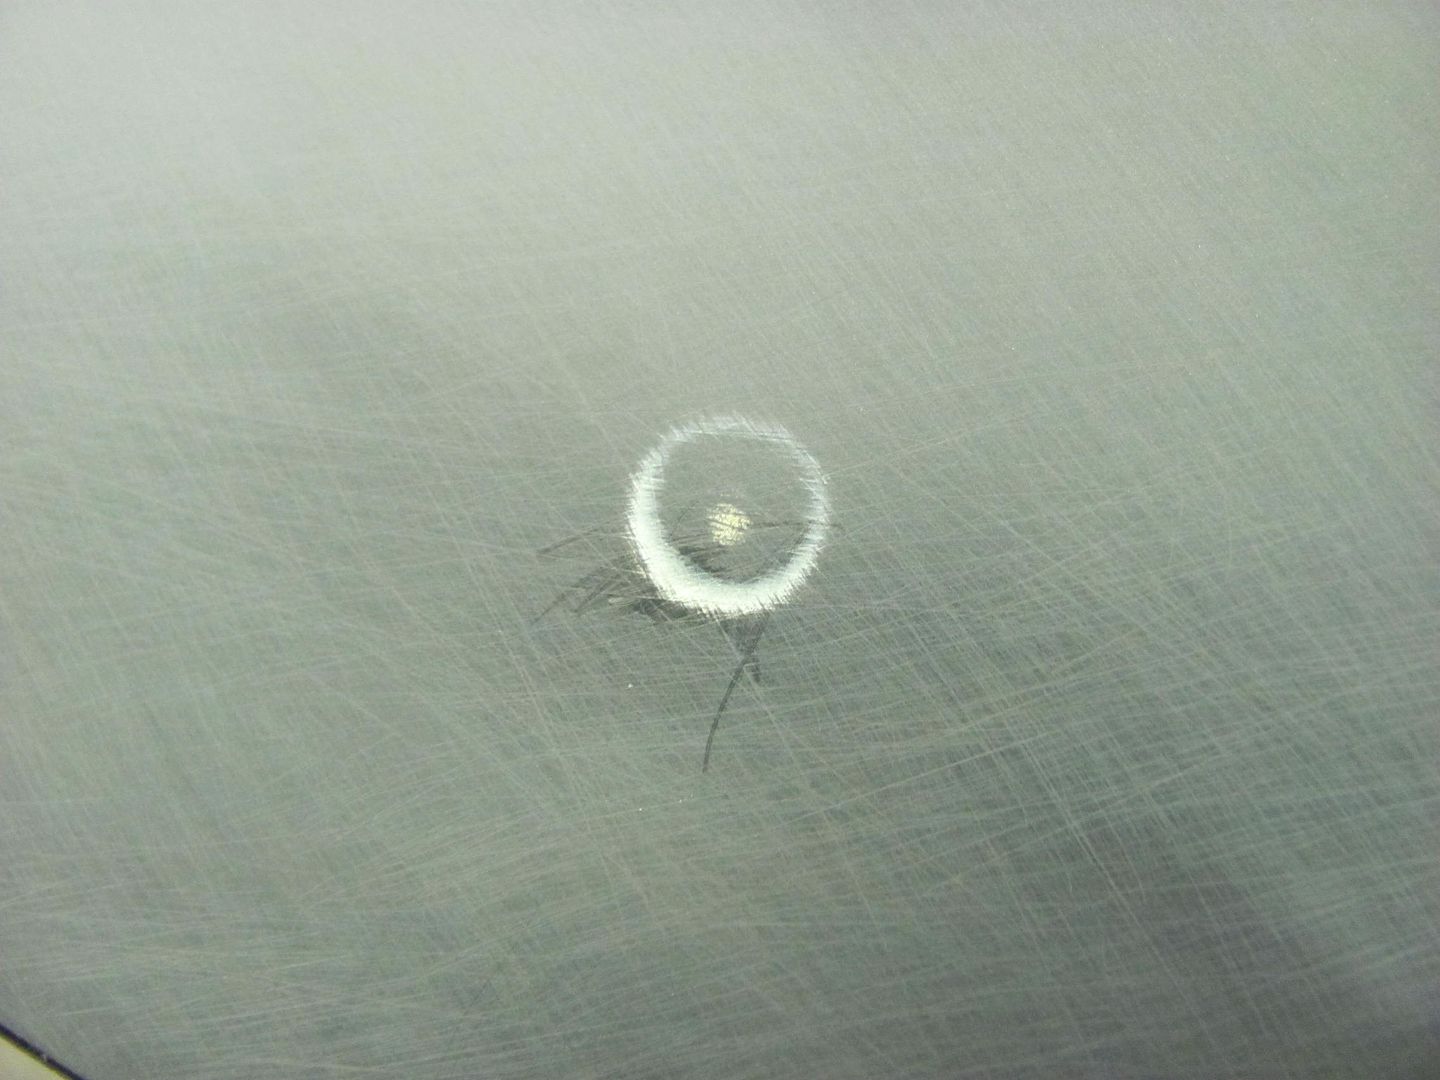
Here's the panel in bare steel before paint and after first coat of epoxy...
No dings, or defects otherwise seen. I had posted a query on the SPI forum to see if anyone had ever run into this. I don't know why I didn't think of this first, but it was suggested to: 1) look inside 2) only time this type of defect had been seen was dropping screwdriver inside door and left similar mark on outside of door bottom after sanding.
So in full investigative mode, I first measured the distance of the defect from the turn latch hole..
The Halo is approx. 3" away from the handle hole..
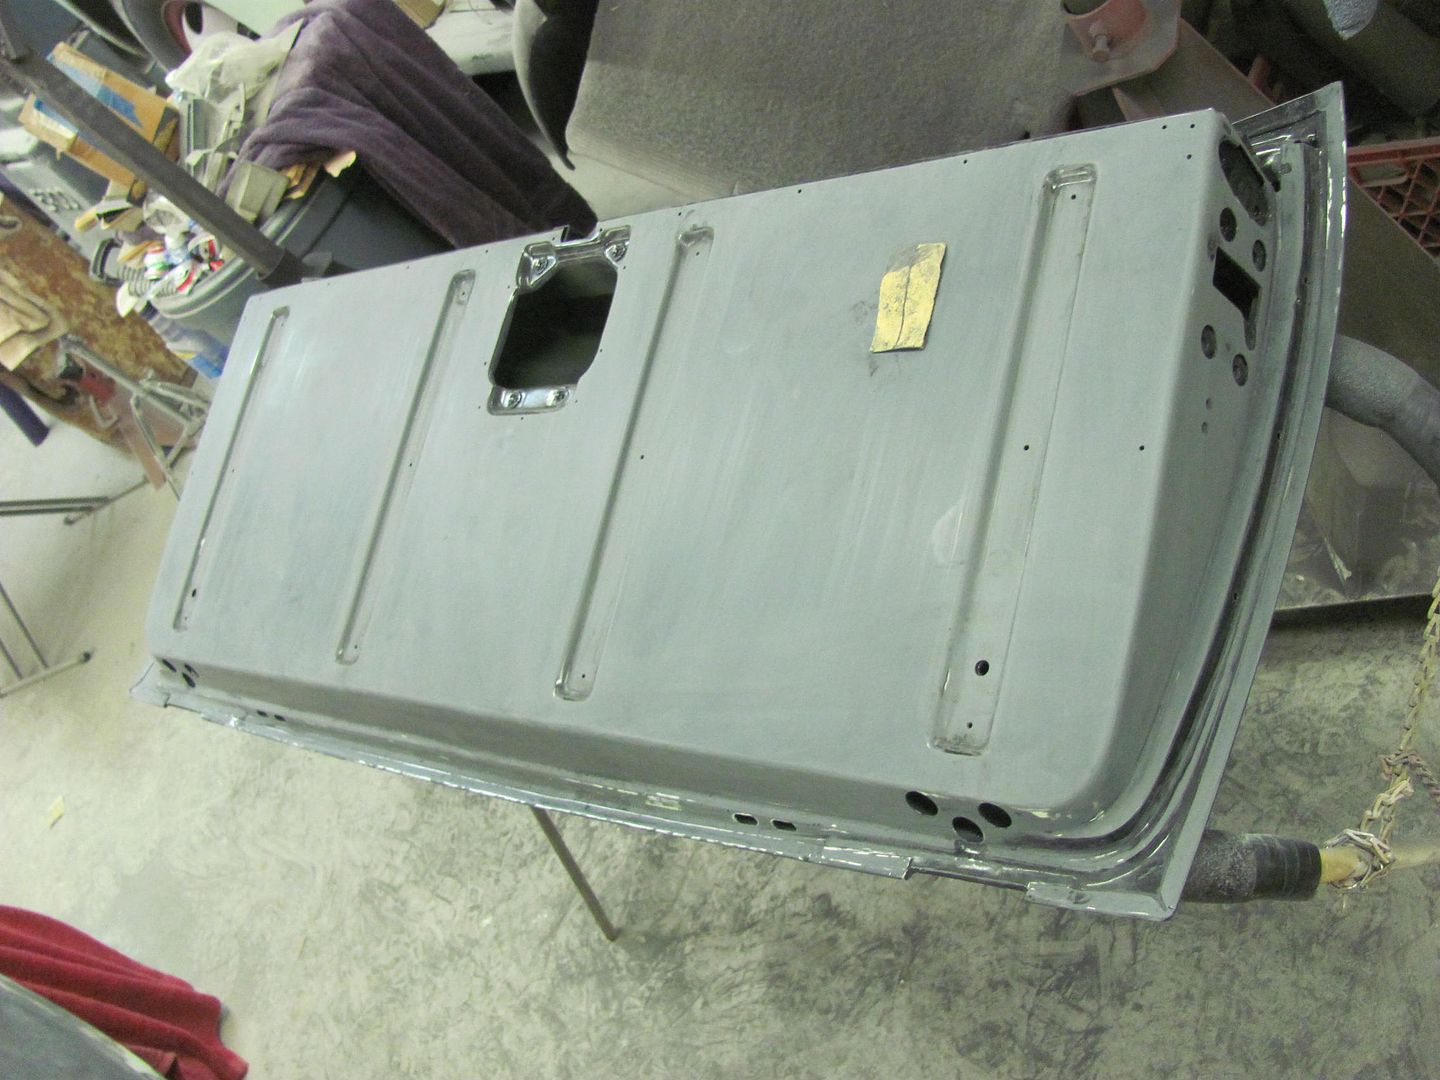
Measuring that distance on the inside shows.....oh wait....what's that bare metal?
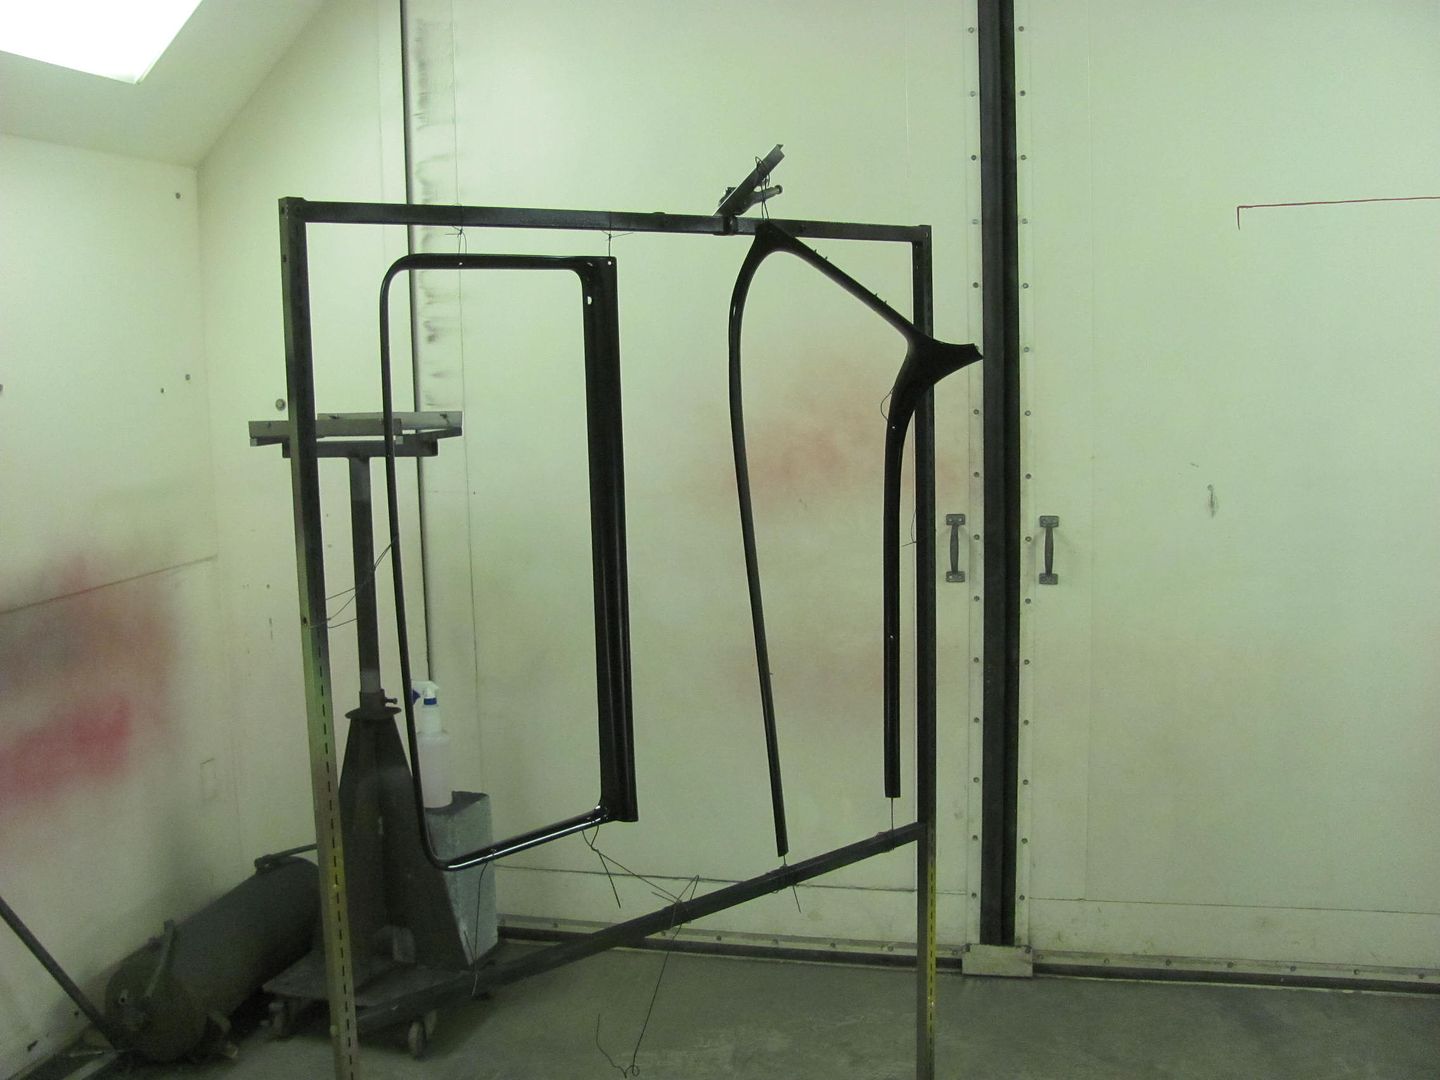
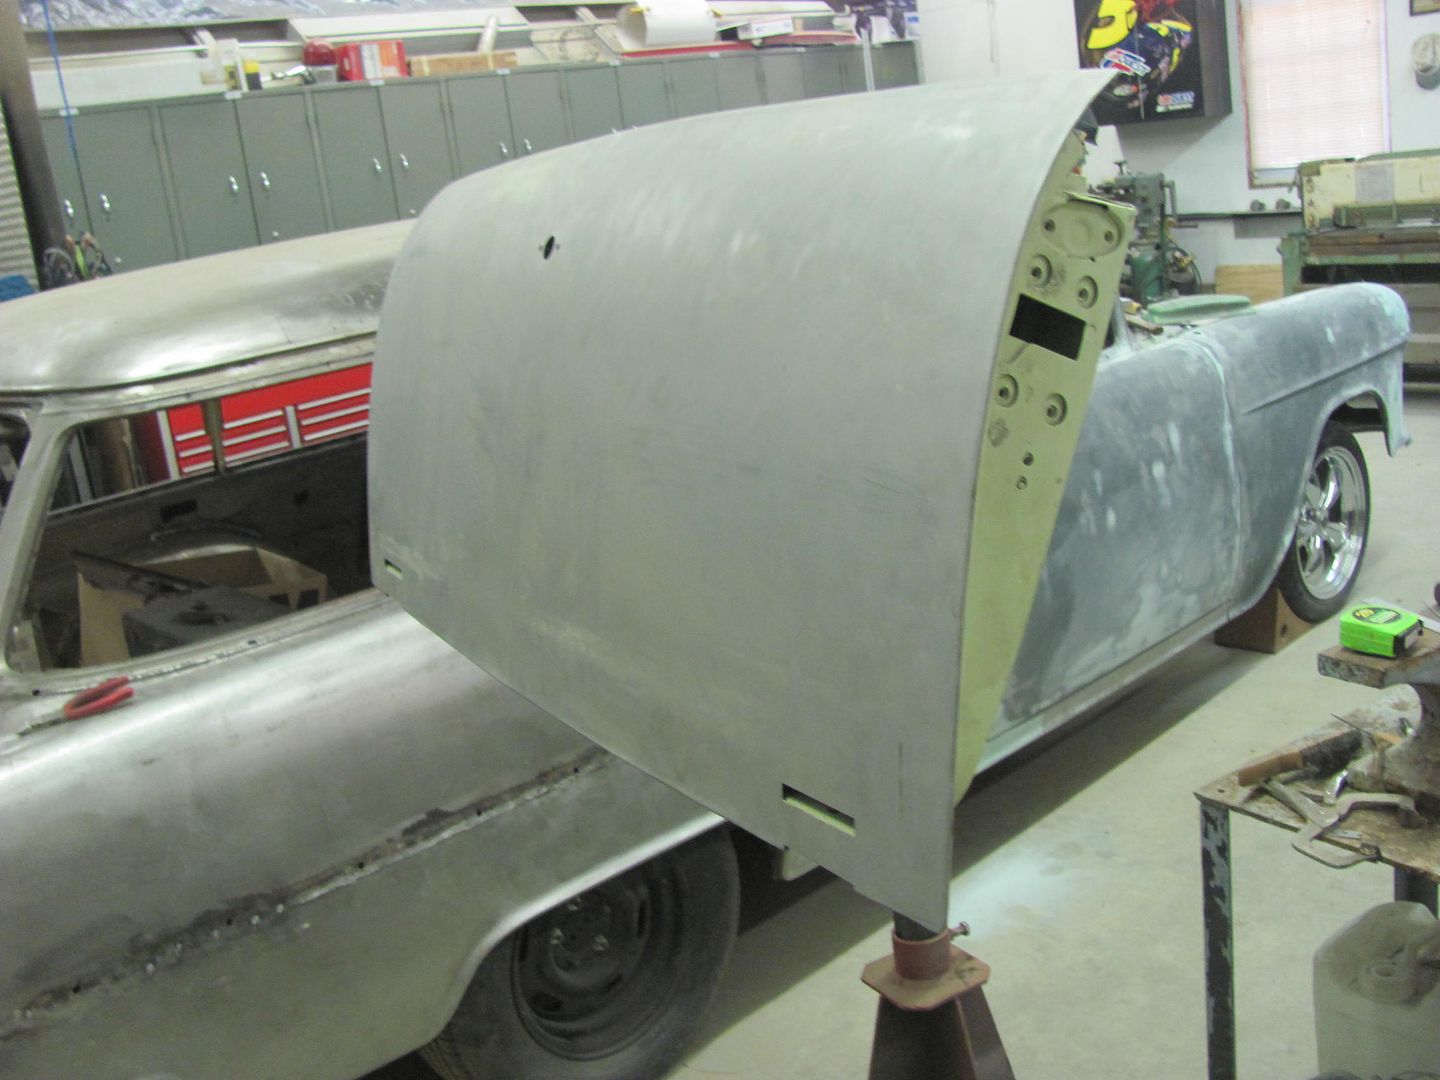
As soon as I saw this I realized there had only been one thing inside that could have caused it... the painting fixture we made..
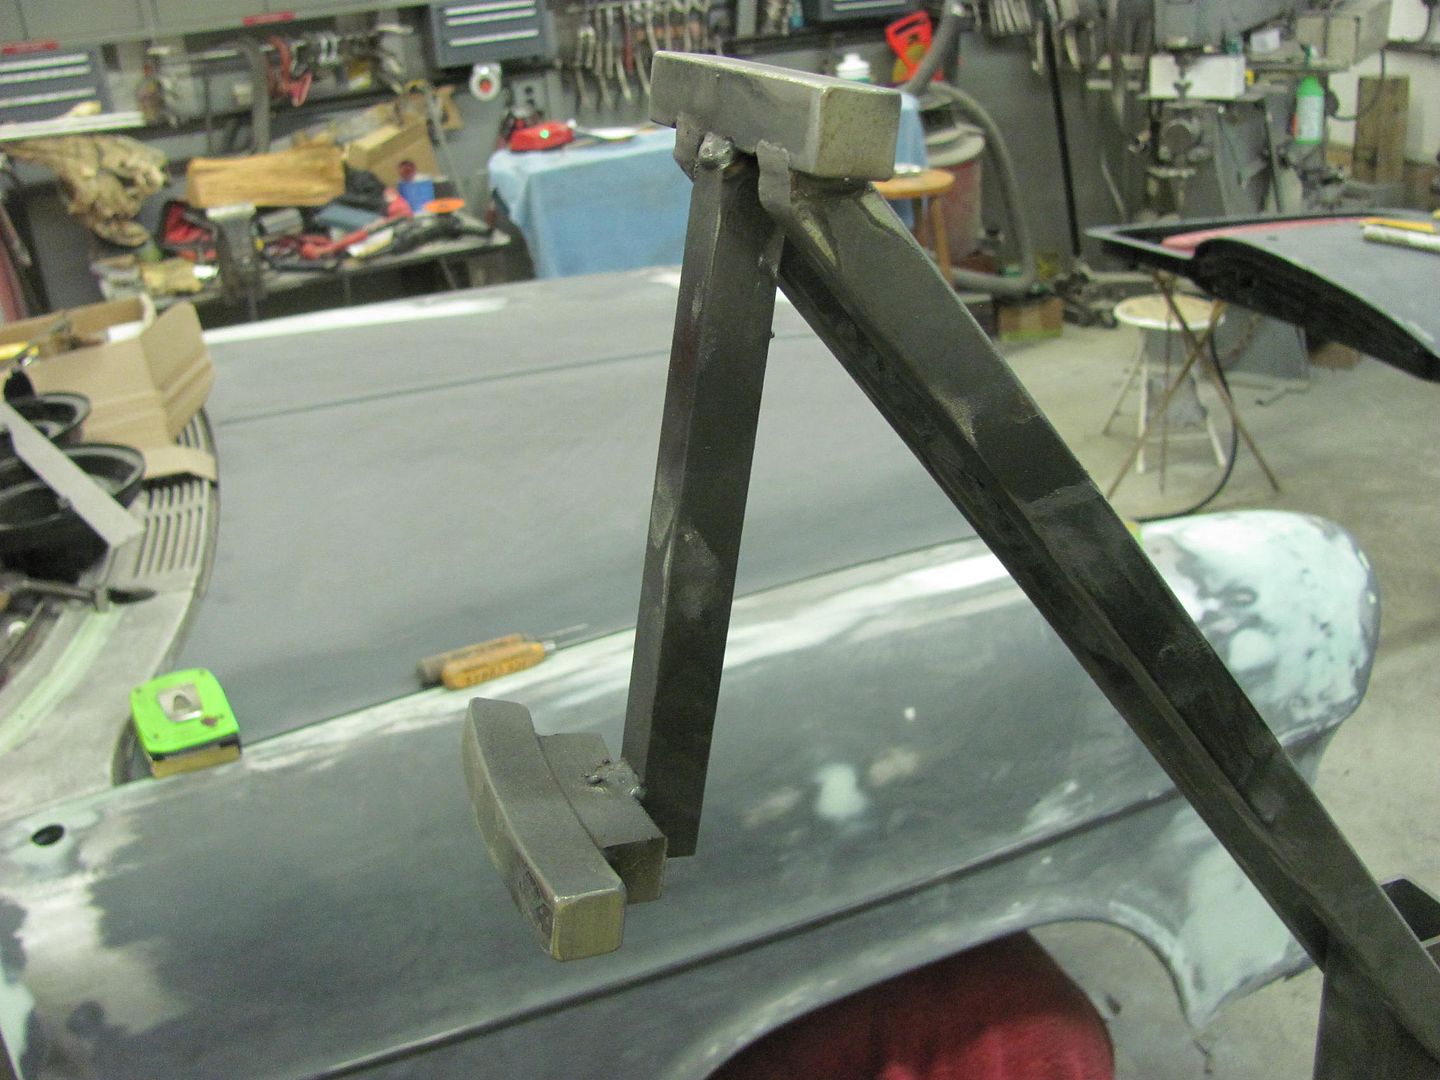
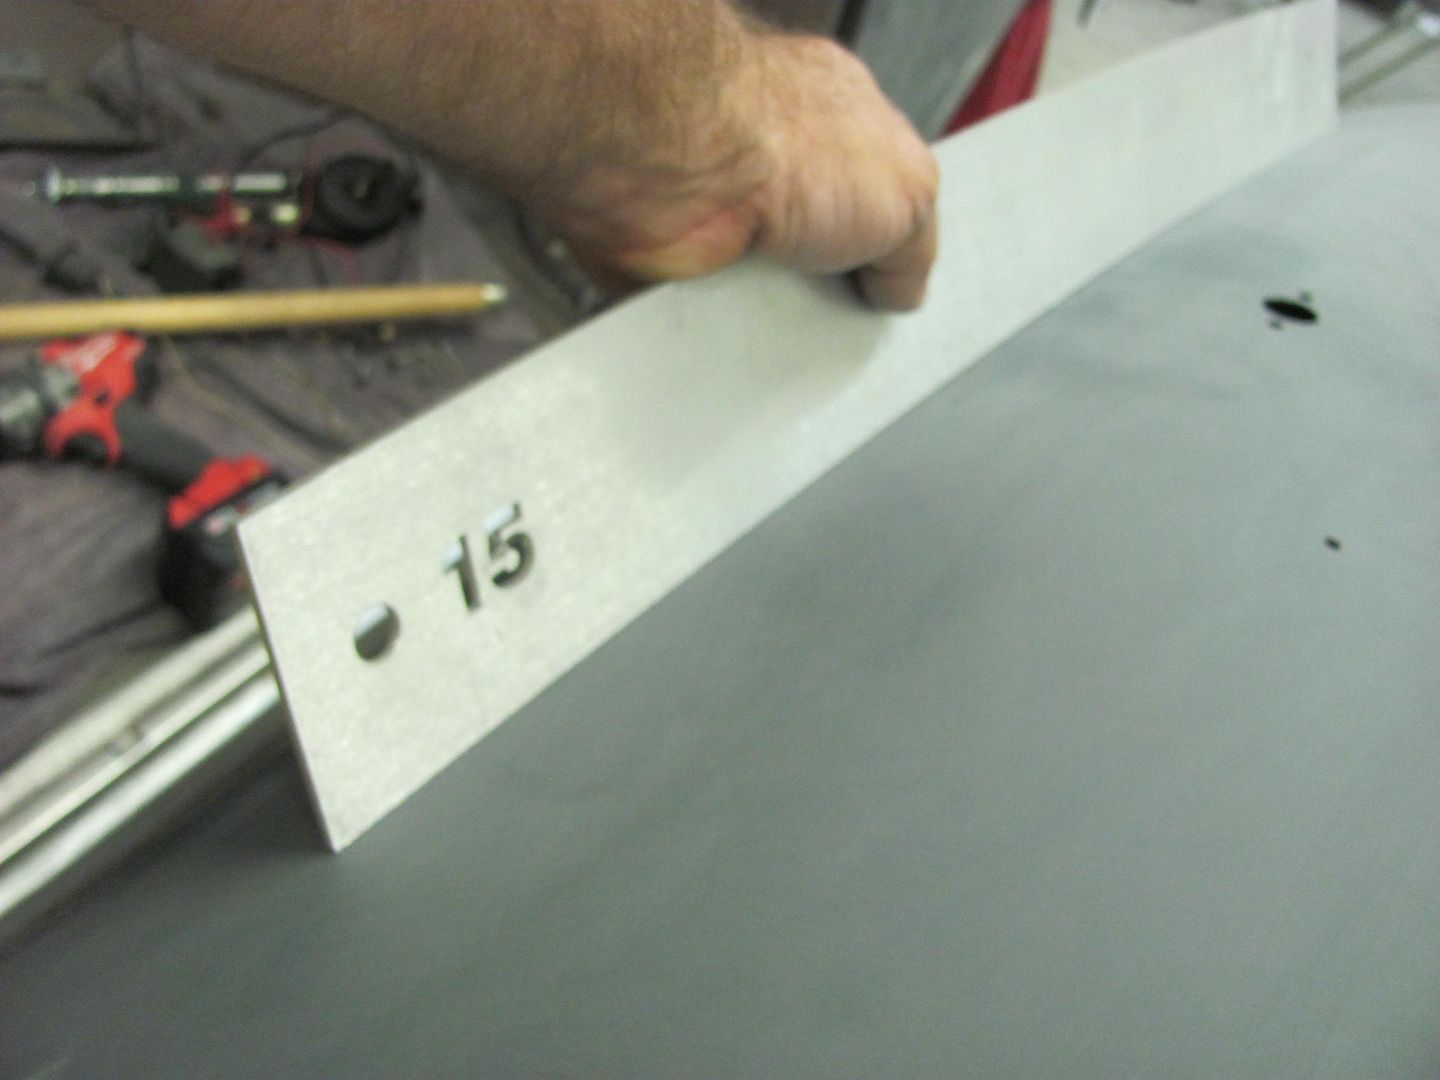
This was made to hold the tail gate in correct alignment as on the car for painting. I had radiused the lower bar but failed to do so on the top one. A check of the skin with body sweeps shows that a #15 sweep is about correct, so it was used to verify some relief grinding on the top bar...
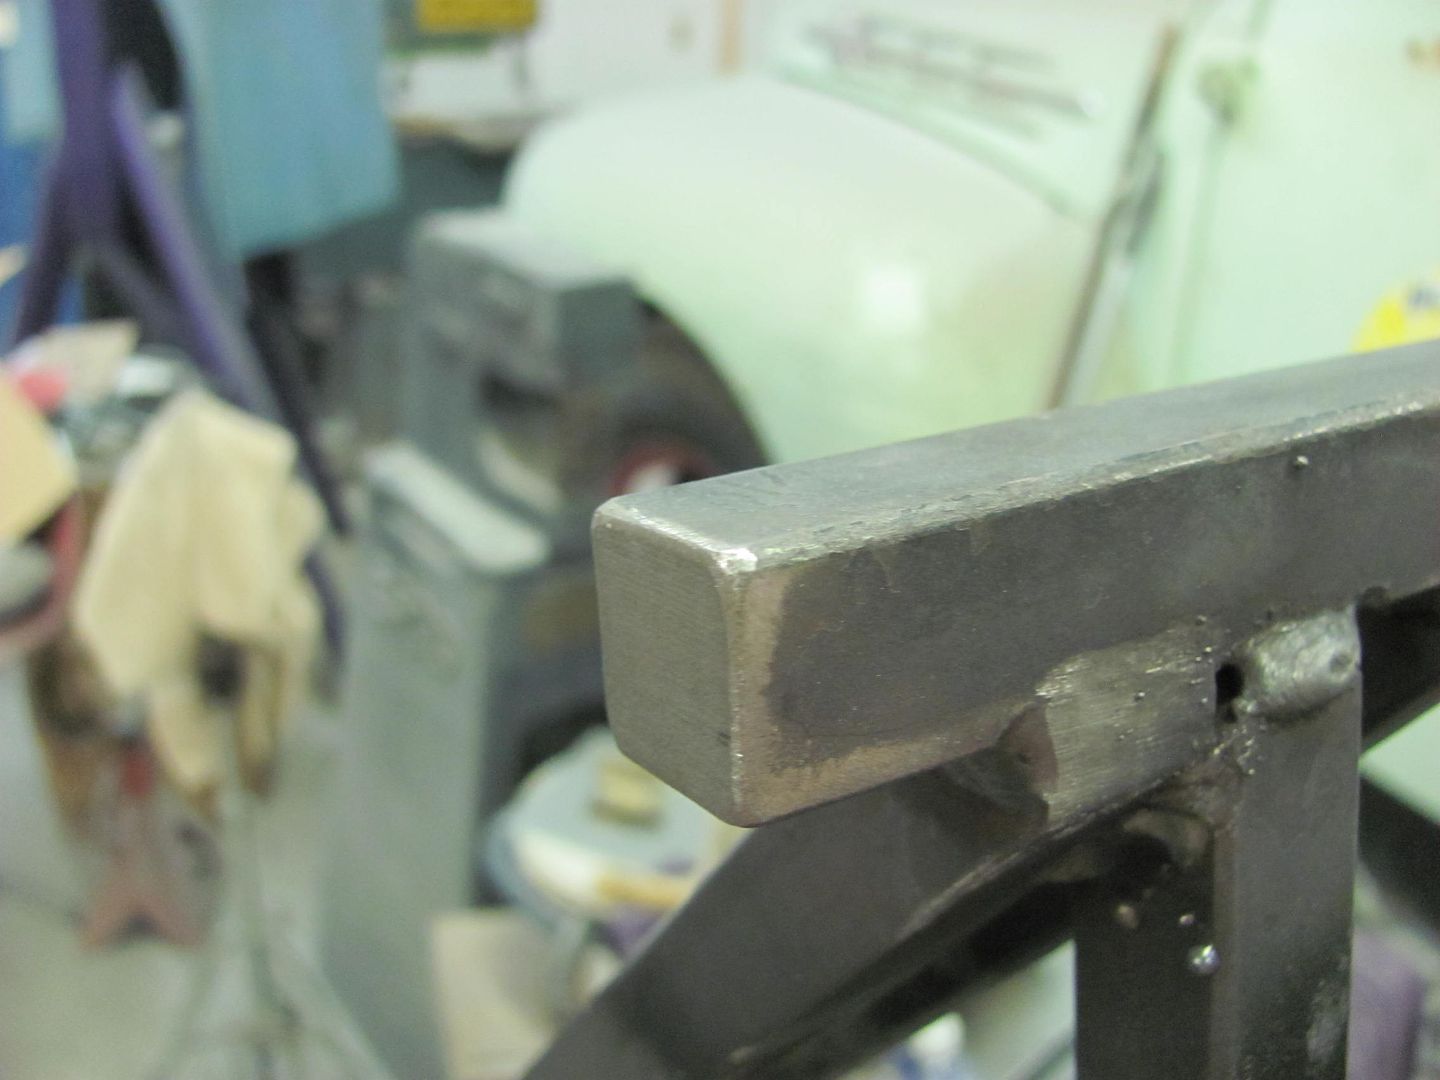

As added insurance, some truck cap gasket seal was added to further isolate the issue on both top and bottom bar....

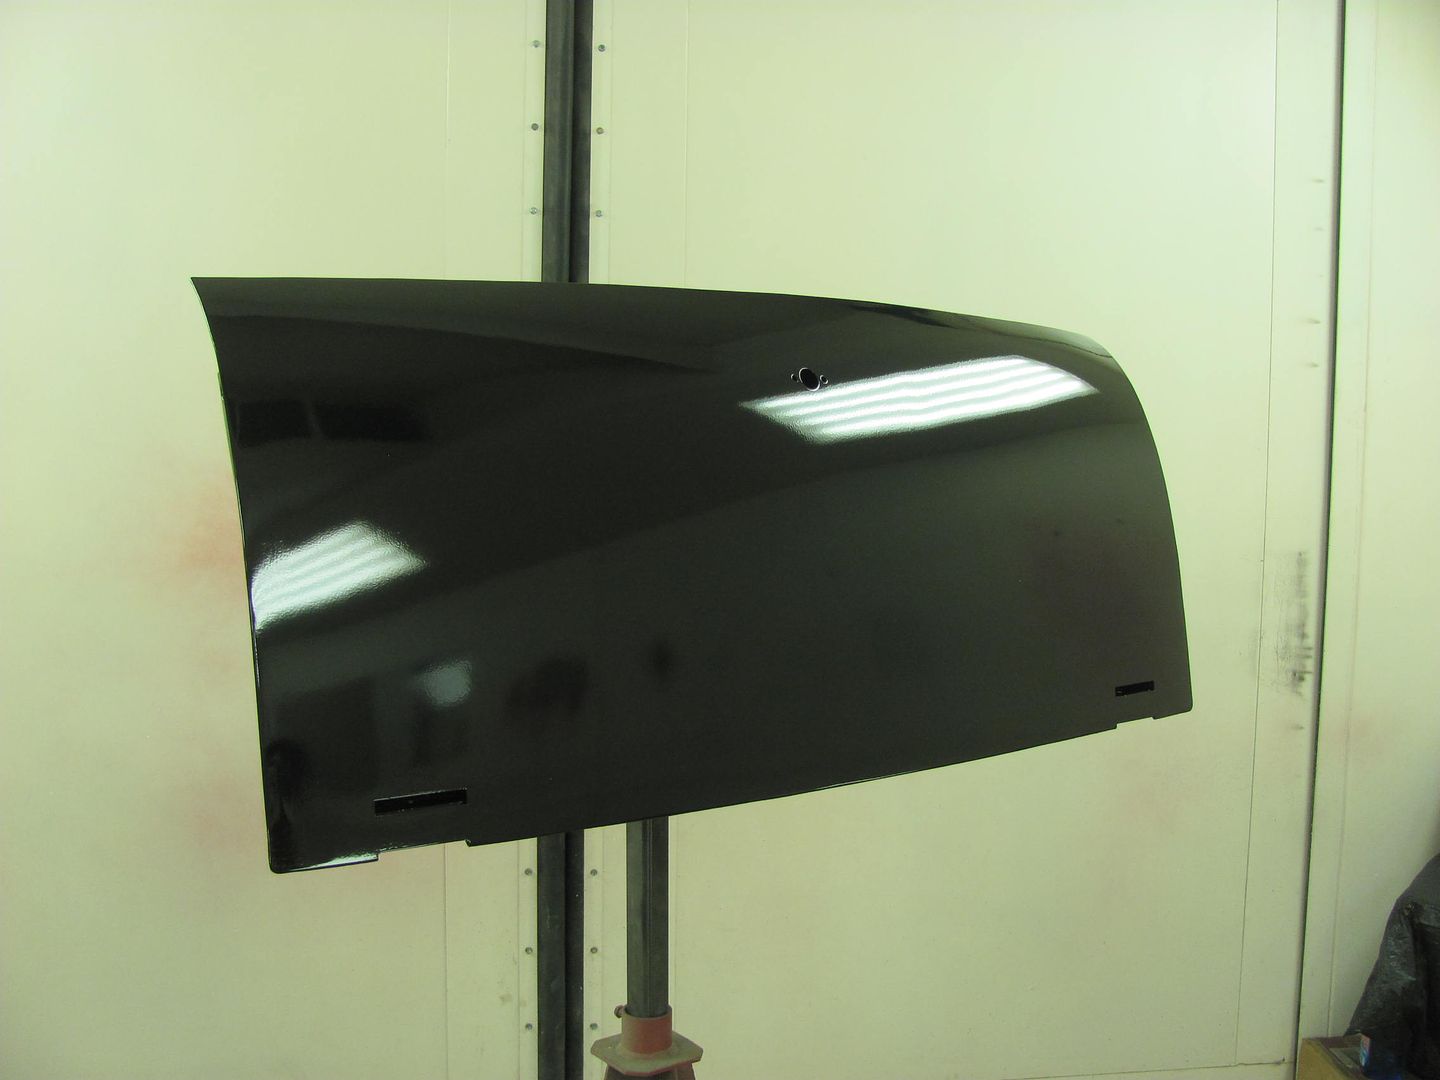
On a positive note, glad to find this issue in the primer stage......
But let's back up a second and look at this picture, it should have been my red flag. Where the second mark to the left in the picture was not as round, looking at it now does show a rather symmetrical device was causing this..
So please use my lesson in dumassery to prevent a similar occurrence.
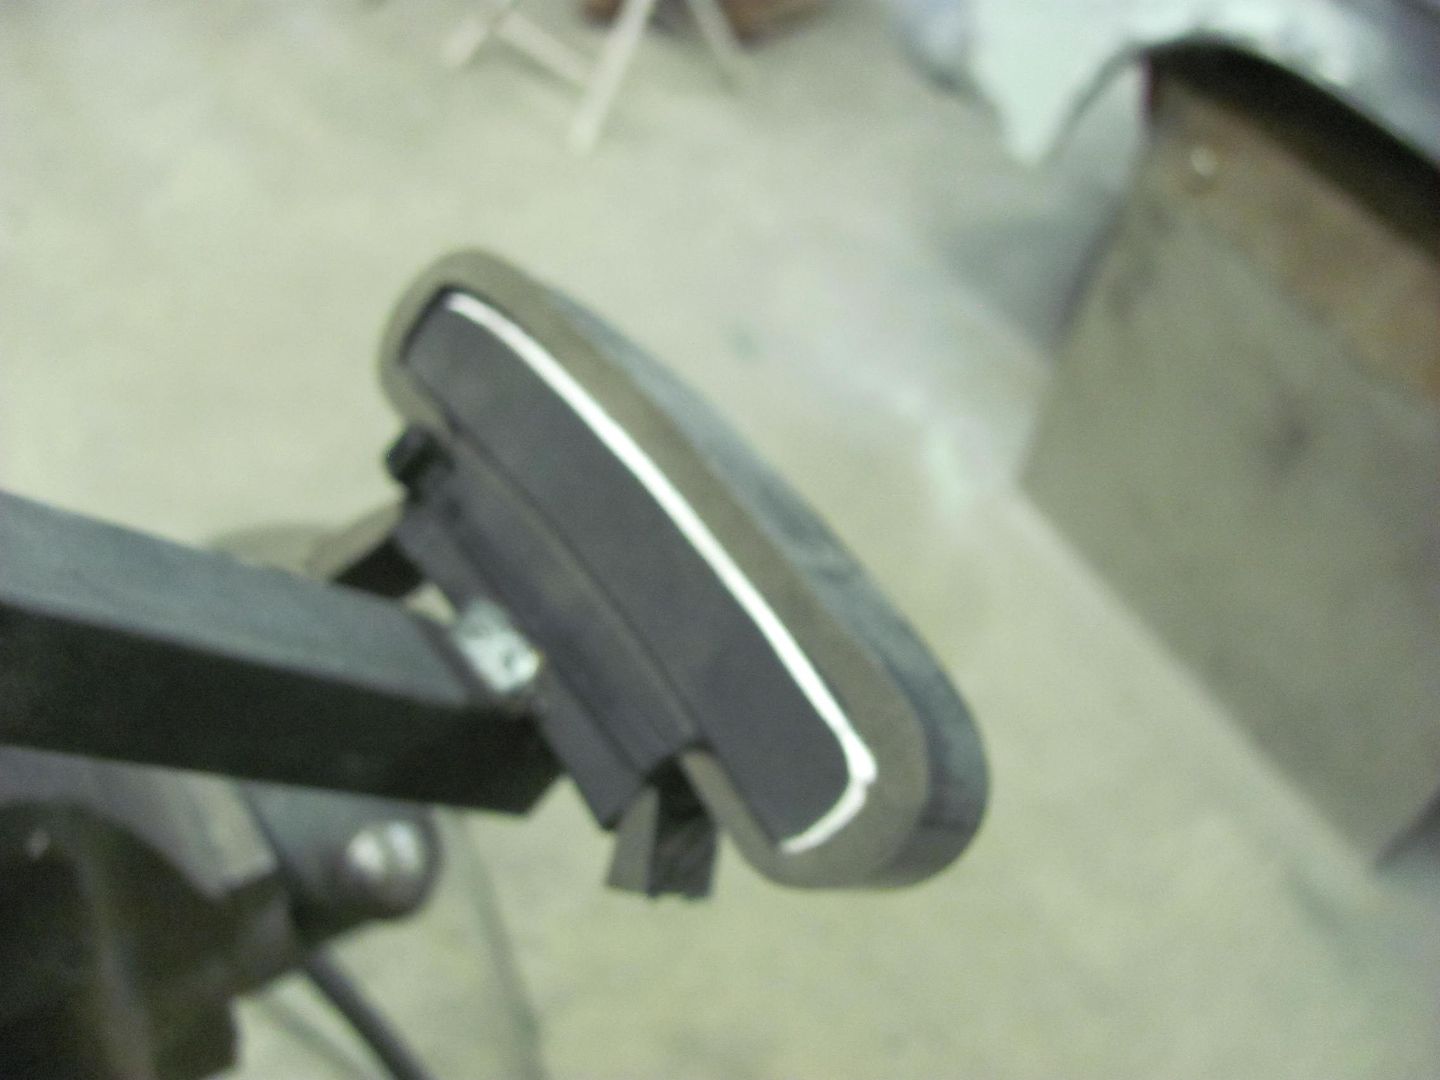
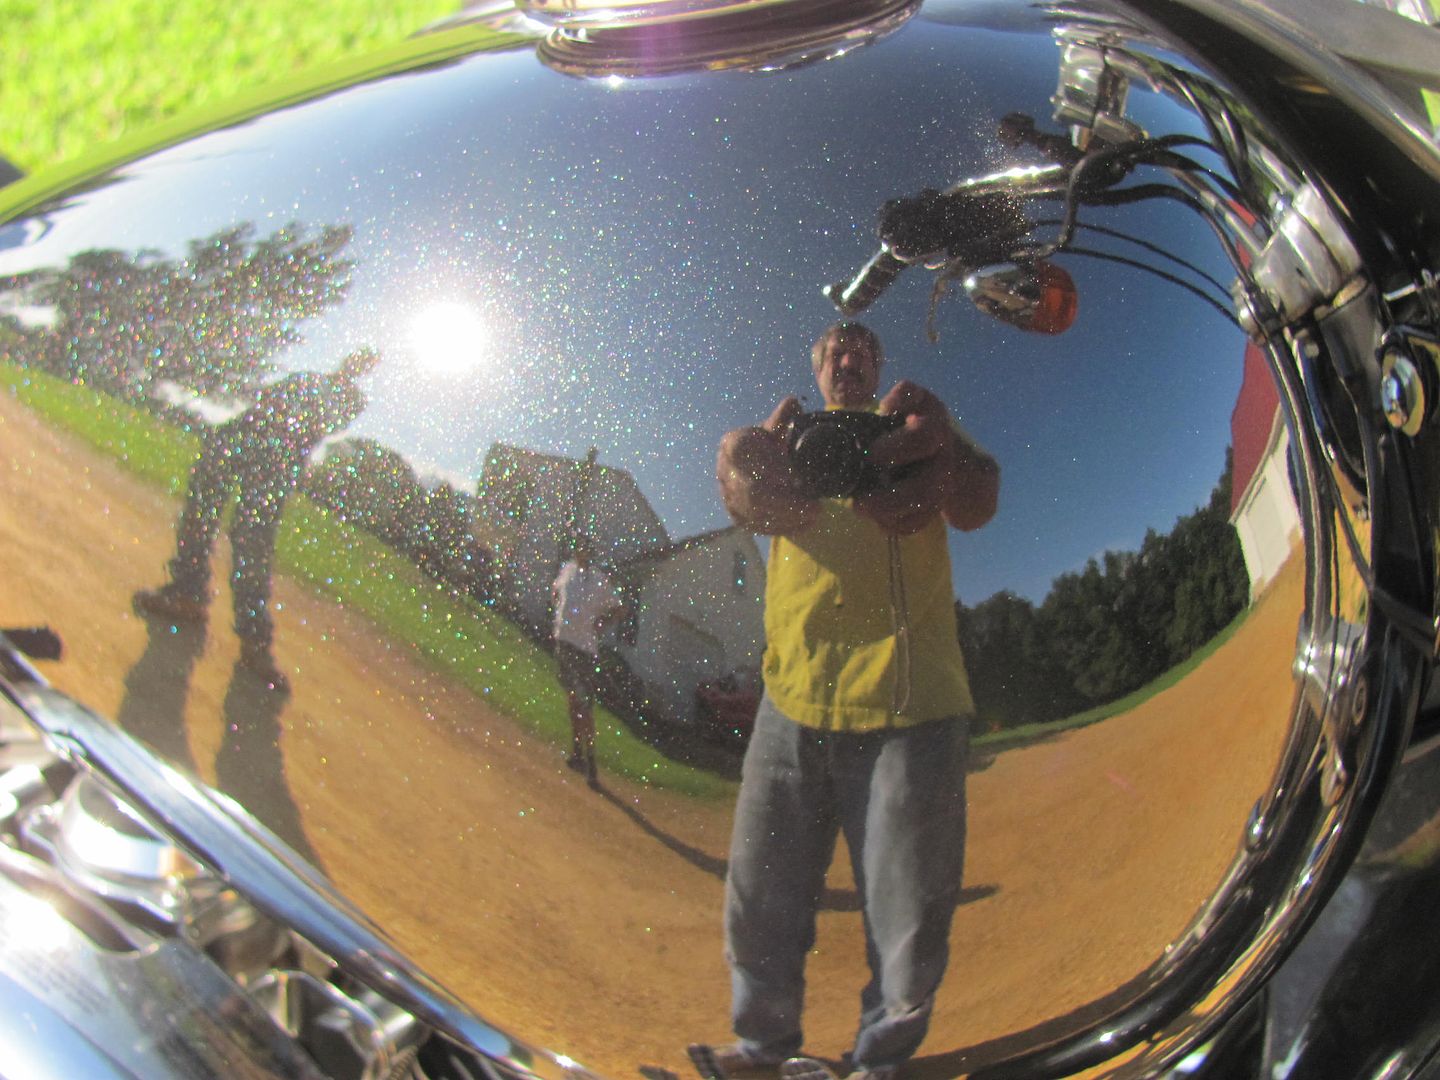
And on another note, Scott came by the other evening after getting the motorcycle back together... The owner had decided to leave off the decals, so it's all black with metallic...
Last edited by MP&C; 07-19-2015 at 04:59 AM.
Robert
-
07-19-2015 06:55 AM #567
CHR Member
- Join Date
- Sep 2005
- Location
- Hamilton
- Car Year, Make, Model: 69 nomad, 73 charger, 74 vega
- Posts
- 3,900
I had to read the halo effect three times, but I think I have it figured out.
You are saying that the fixture put a dent in the skin, which showed up as a high point. Which caused the halo upon sanding..
Education is expensive. Keep that in mind, and you'll never be terribly upset when a project goes awry.
EG
-
07-19-2015 09:59 AM #568
CHR Member
- Join Date
- Jun 2008
- Location
- Leonardtown
- Car Year, Make, Model: Walking
- Posts
- 1,228
Yes, the pointed corner at the top made a ding from the inside. Was kinda freaky to see that halo show up so perfectly formed as you are sanding... like where the heck did that come from?Robert
-
07-19-2015 02:08 PM #569
CHR Member
- Join Date
- Jun 2008
- Location
- Leonardtown
- Car Year, Make, Model: Walking
- Posts
- 1,228
Another job in the shop, here's one of the downfalls of the insulation blankets the factory used above exhaust systems...
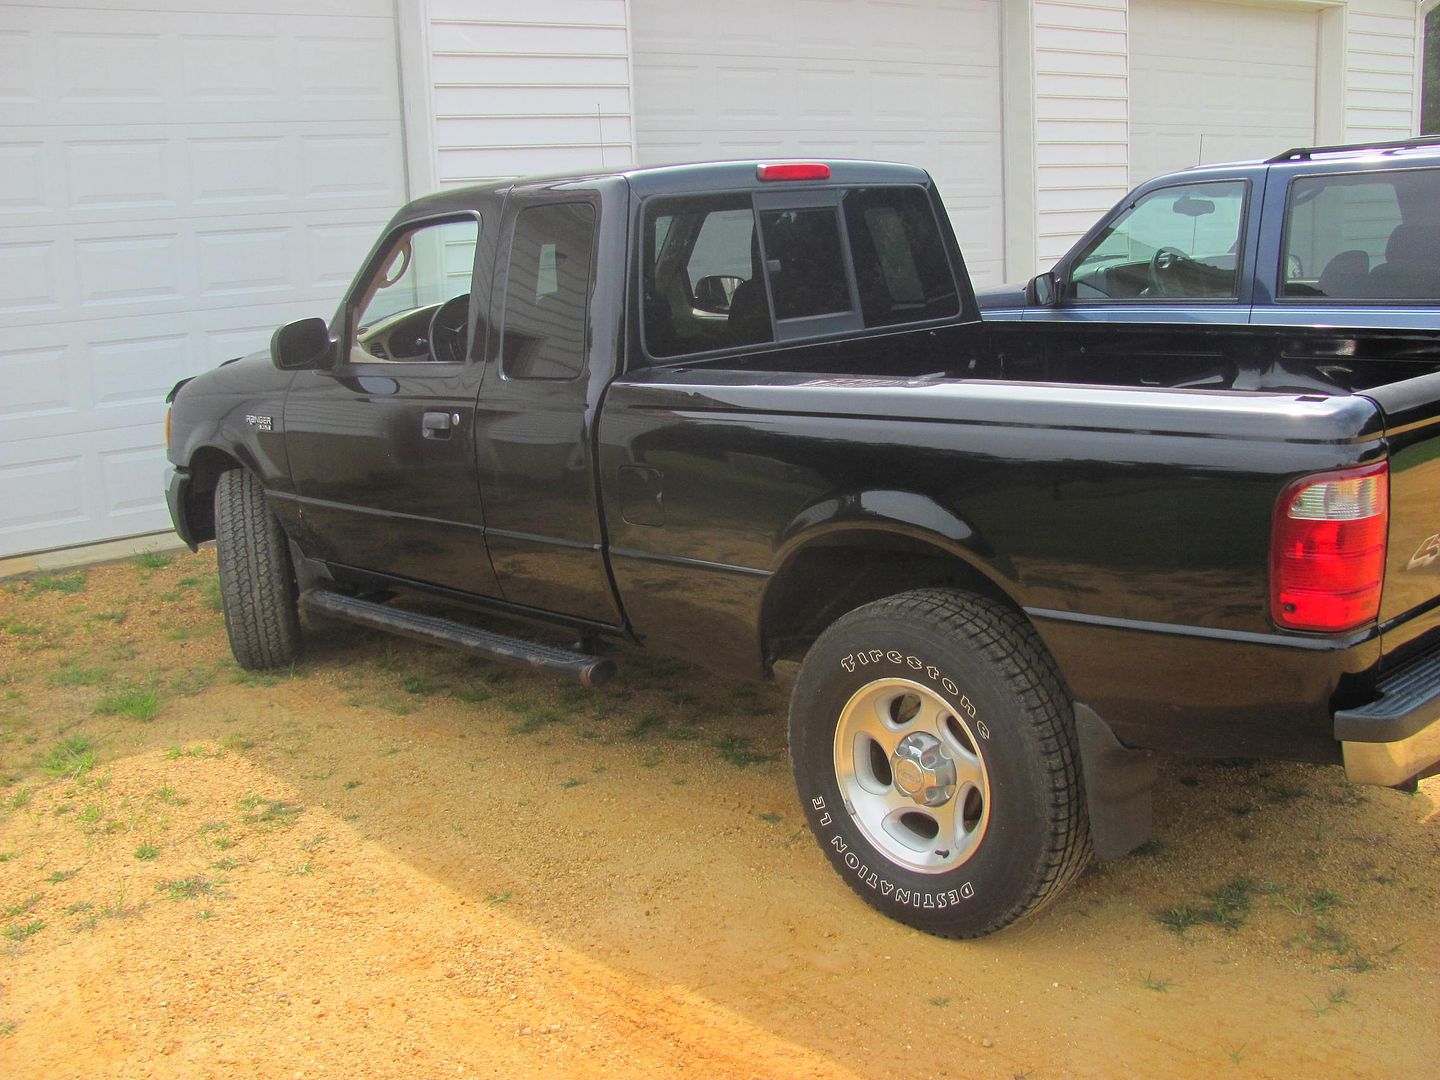
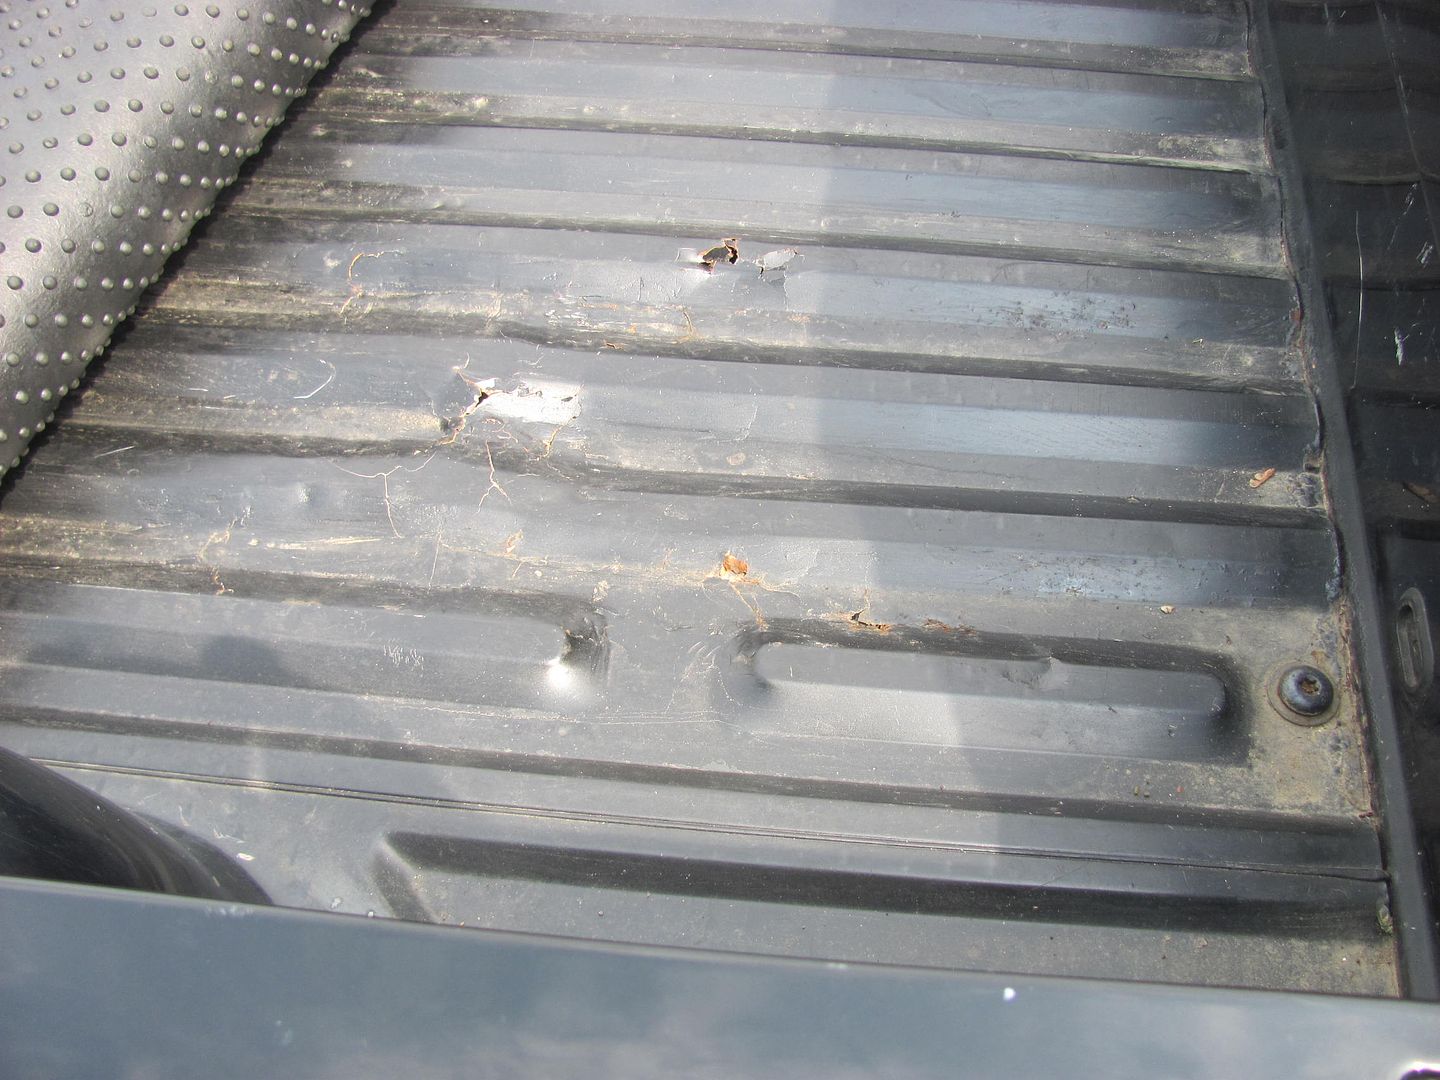
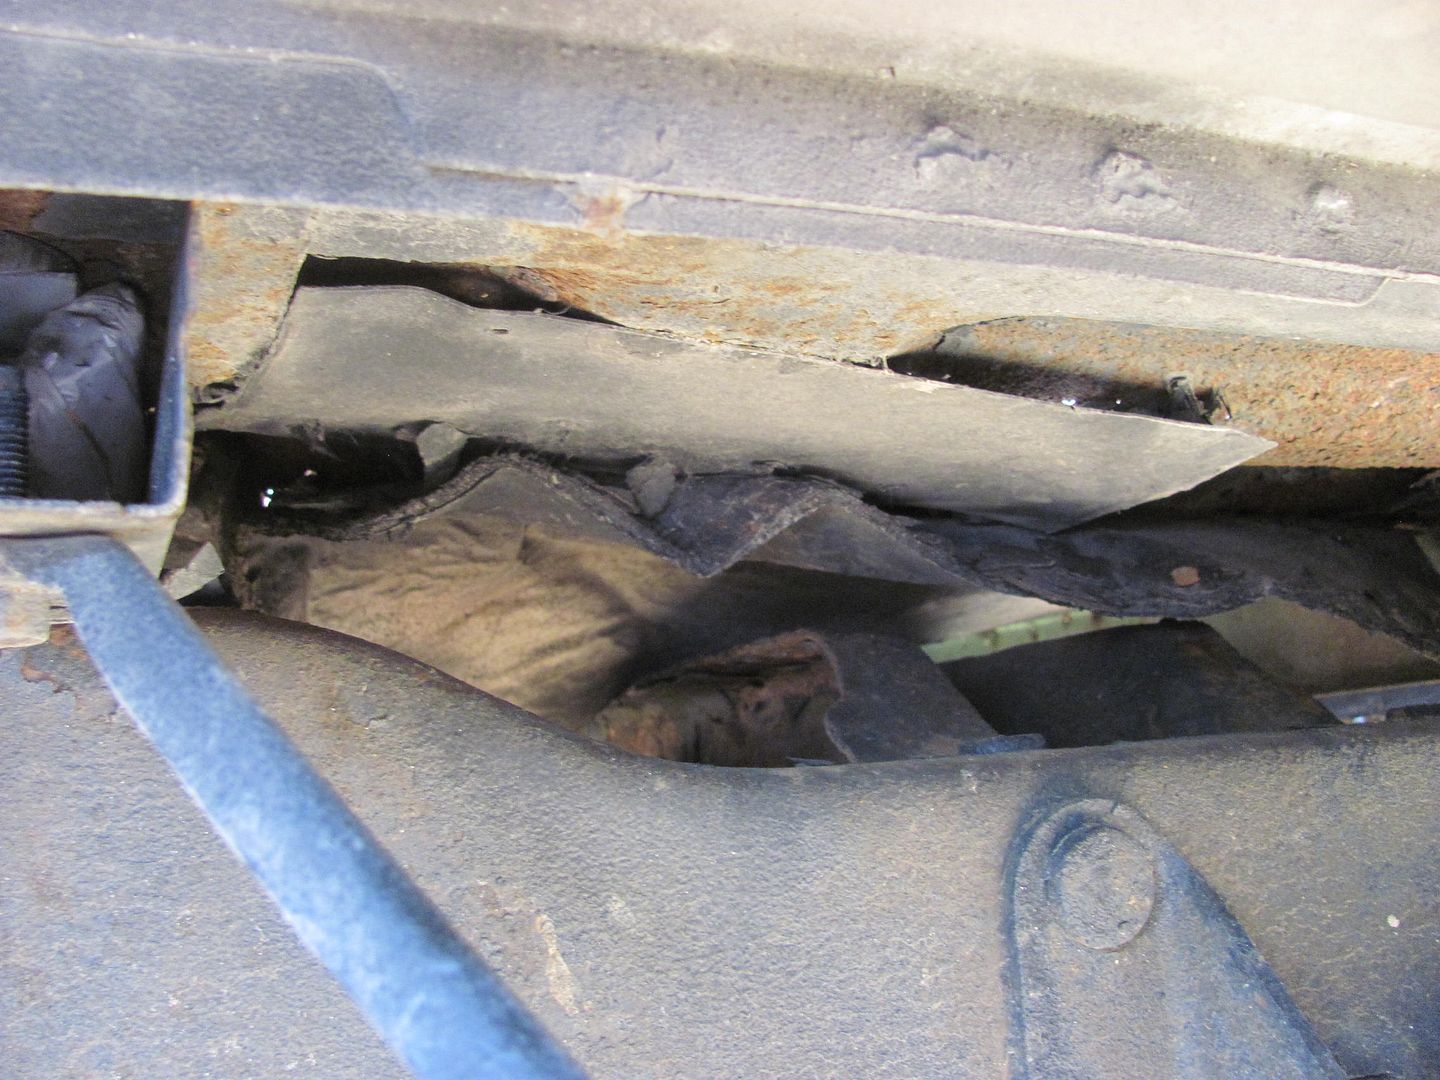
Nice moisture traps and rust generators. All the used beds found either had similar rust issues or the lower quarters rounded under where the salvage yards had removed them and set them down on the ground. So we went back to the local dealer and ordered the bed floor and new cross members. We have a couple cross members that still haven't arrived, but we can get started in prepping for epoxy primer on the parts we do have..
Scuffing up the floor using 400 grit. Here's the new apprentice for this job, my niece Katie. (her truck) She's not afraid of work and needed little instruction.
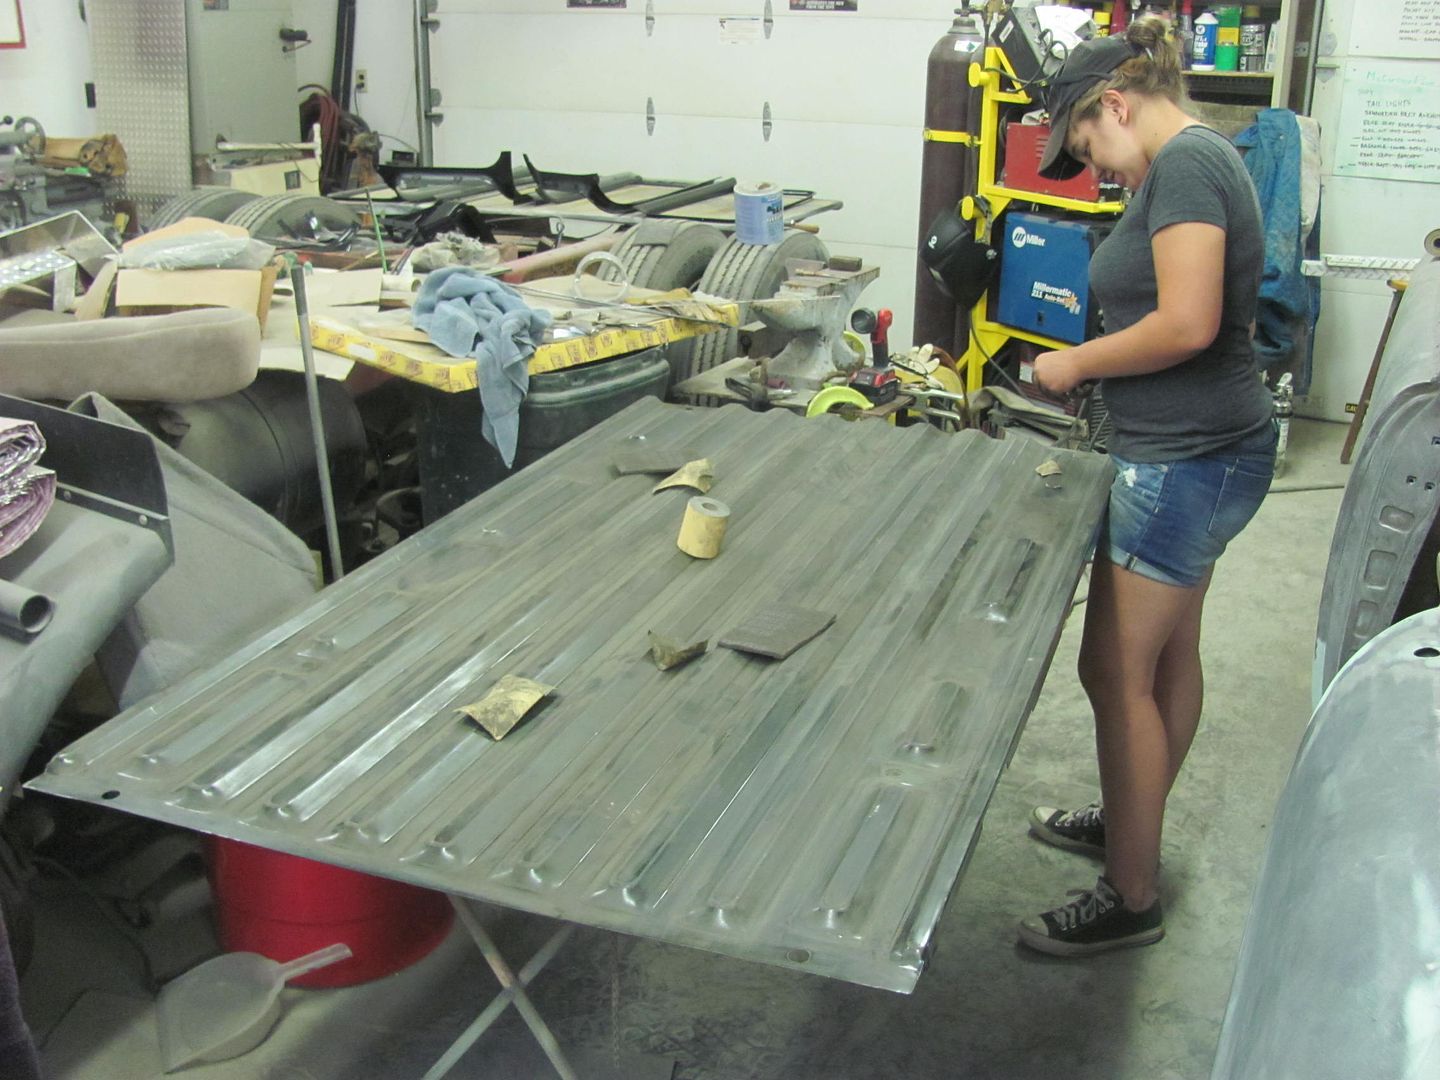
All scuffed, now to wait on the cross members to come in..
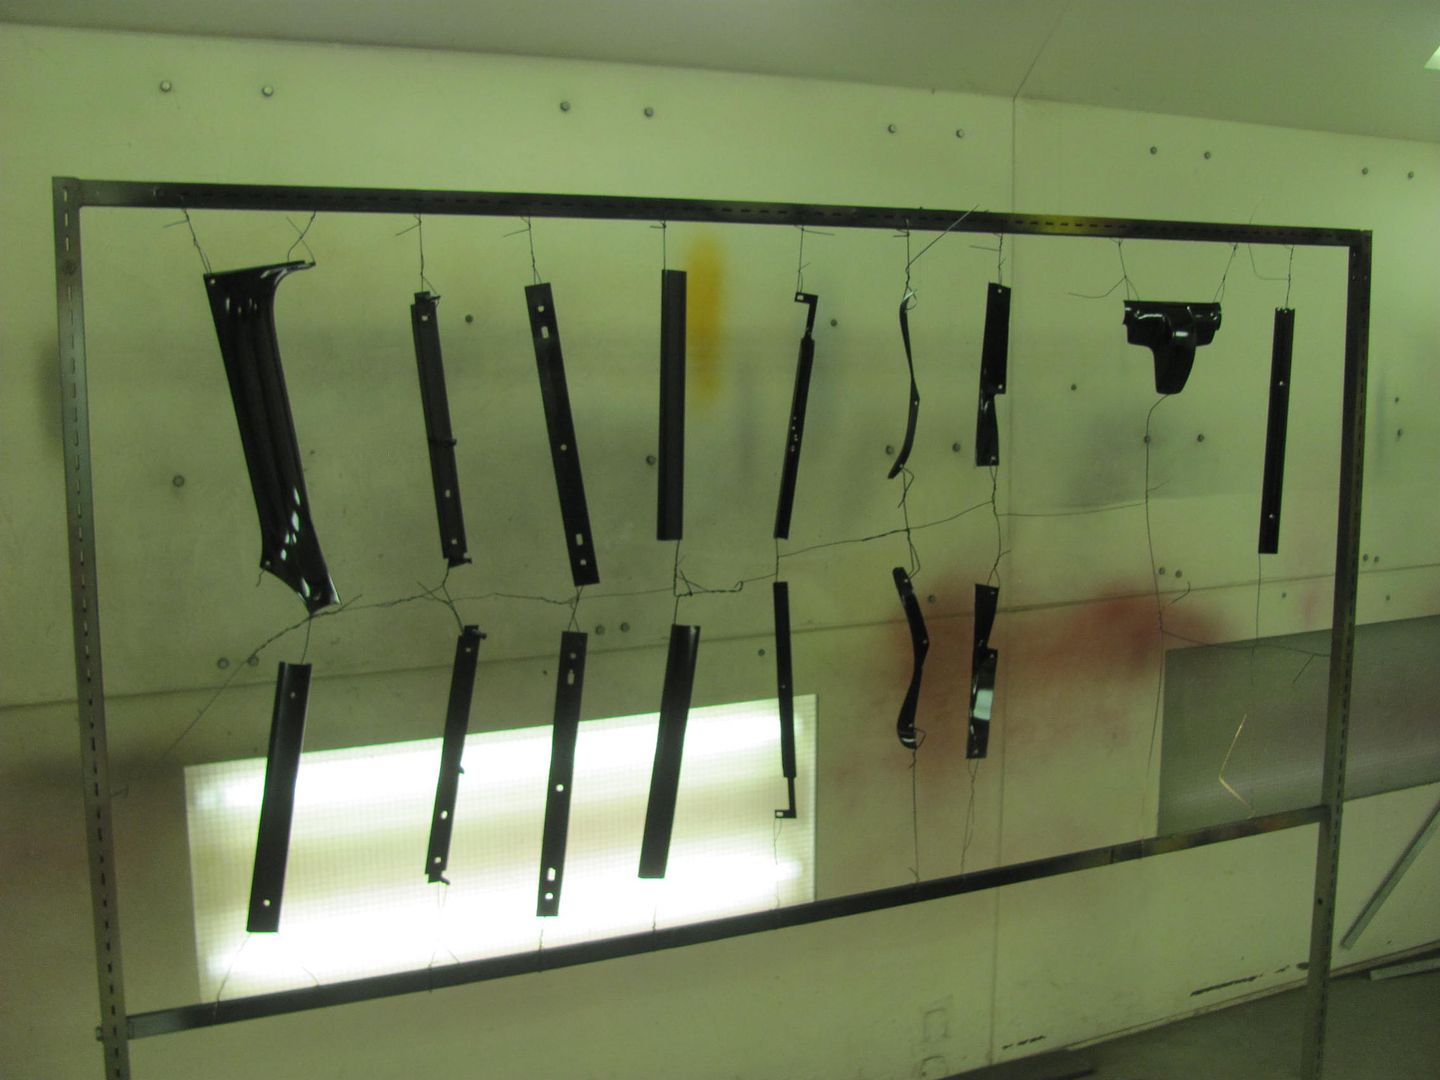
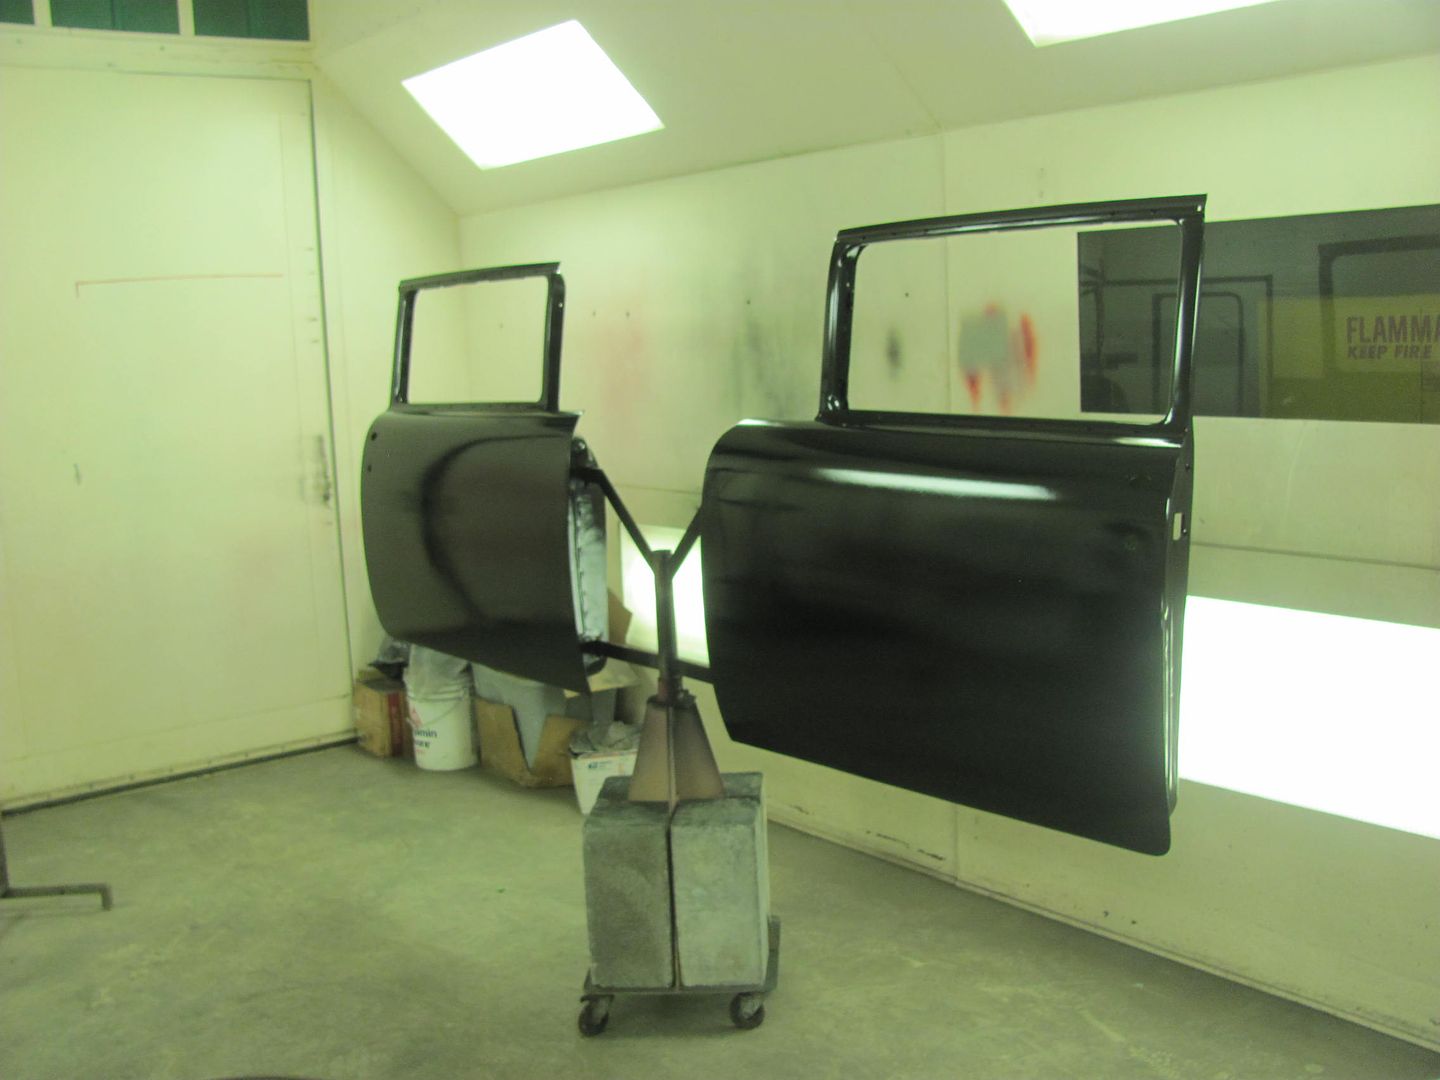
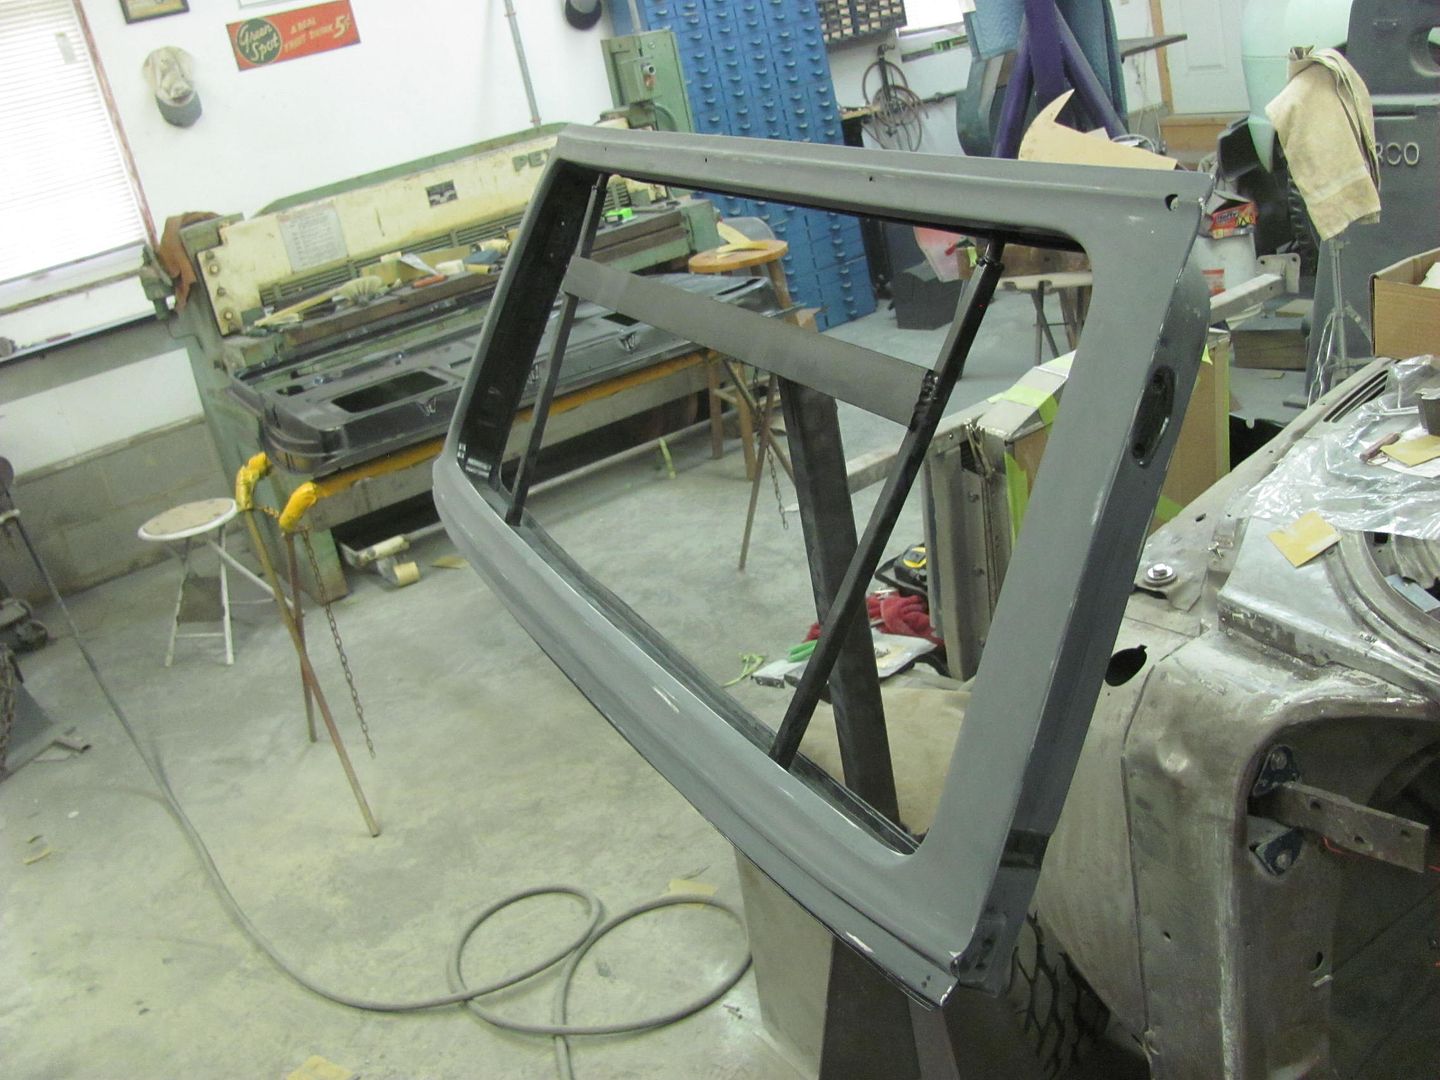
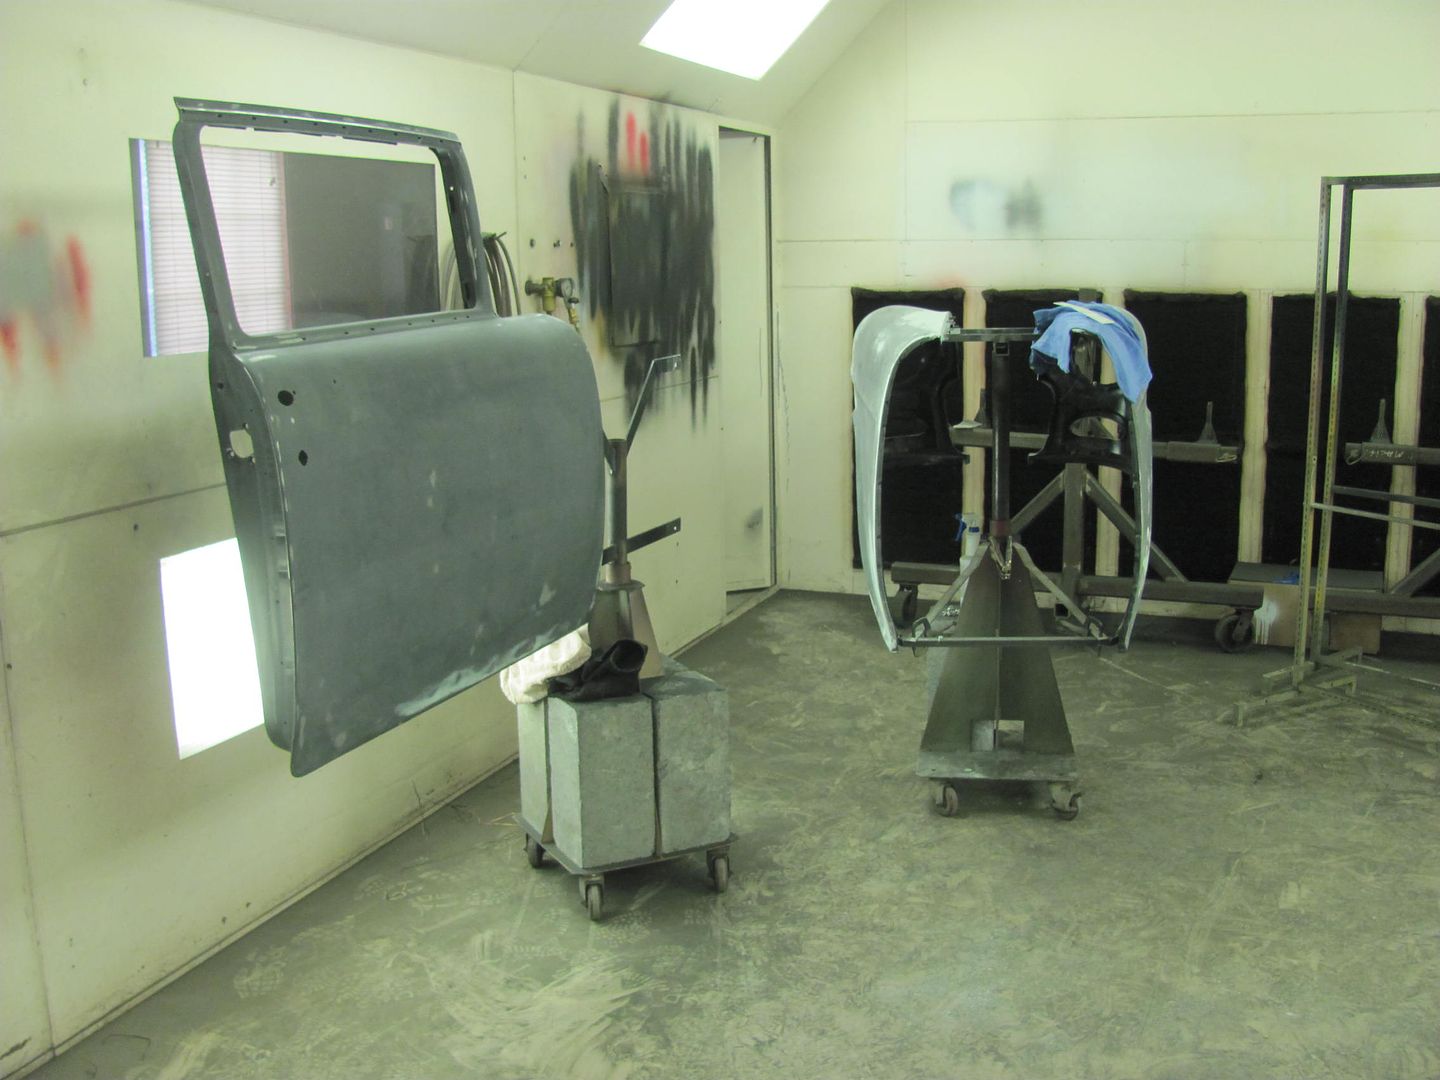
Meanwhile Kyle and I have continued blocking body parts for another dose of epoxy...
Robert
-
07-19-2015 02:59 PM #570
CHR Member
- Join Date
- Sep 2007
- Location
- New Bedford
- Car Year, Make, Model: 34 Ford 3W Coupe Replica
- Posts
- 14,754
Well.. I guess if ya gotta fix a rusty truck.. at least the help is easy on the eyes.. just sayin'..
Does Kyle get anything done while she's there??
 Reply With Quote

Posting Permissions
- You may not post new threads
- You may not post replies
- You may not post attachments
- You may not edit your posts

Turn out the lights, the party's over THIS PLACE IS DEAD!
Dead!