


 1Likes

Results 16 to 30 of 145
 LinkBack URL
 About LinkBacks
-
02-08-2007 07:06 PM #16
 CHR Member

- Join Date
- Apr 2005
- Location
- new bloomfield
- Posts
- 356
Very cool..... I have a '51 and I am going to pick up a '48 on Sunday
-
Advertising

- Google Adsense
- REGISTERED USERS DO NOT SEE THIS AD
-
06-14-2007 12:58 PM #17
CHR Member
- Join Date
- Jul 2003
- Location
- Kentucky
- Car Year, Make, Model: 47 Seagrave
- Posts
- 683
I guess its time for an update and the most recent pics.
I wasn't real happy with previous seating attempts, so I built the seat.
I used sheetmetal to form the seat back and seat bottom..
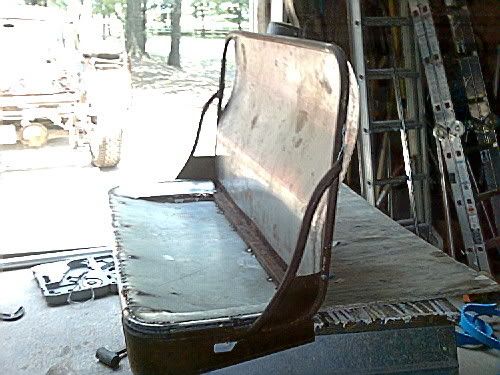
There is a steel subframe under the seat bottom to help carry my fat ass.
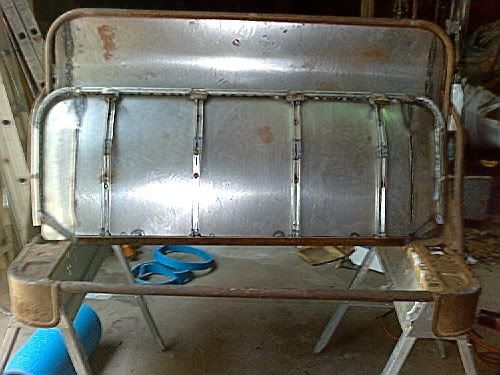
The seat back and bottoms are contoured more like a modern seat and will be padded with a couple of inches of foam. (This is just the first layer. Bottom layers are gonna be dense, top layers something more cushy)
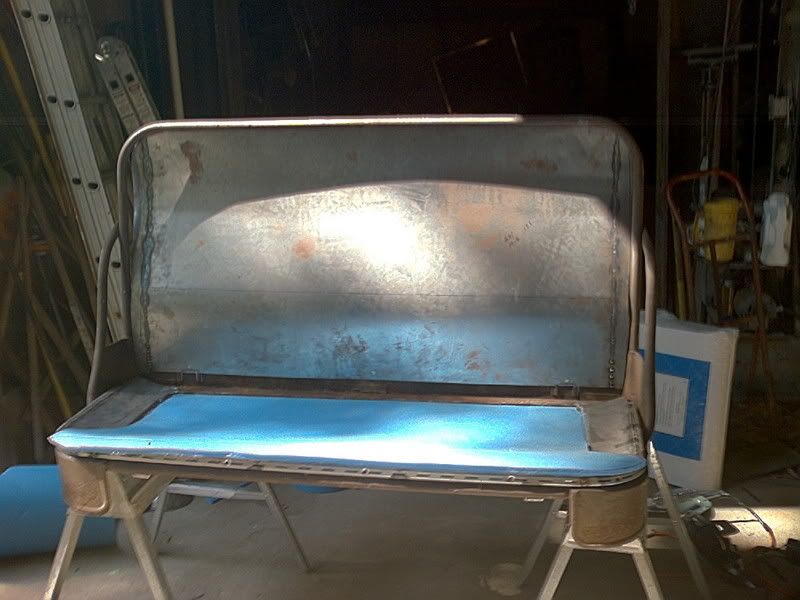
Doing the seat like this gains a bunch of interior space over the stock set-up. My seat back sheetmetal actually touches the back of the cab. I will sit 3-4 inches lower and about 5-6 inches farther back.
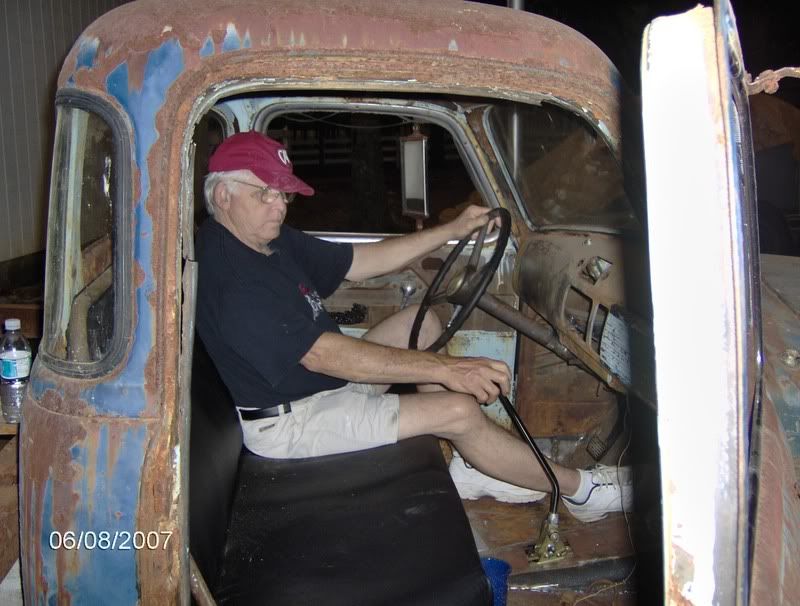
I padded the back with 2 inches of foam and the bottom with about six inches. Then covered it all in black vinyl (no sewing)
Here is the finished seat. Glad its vinyl.....rust dust comes from everywhere.
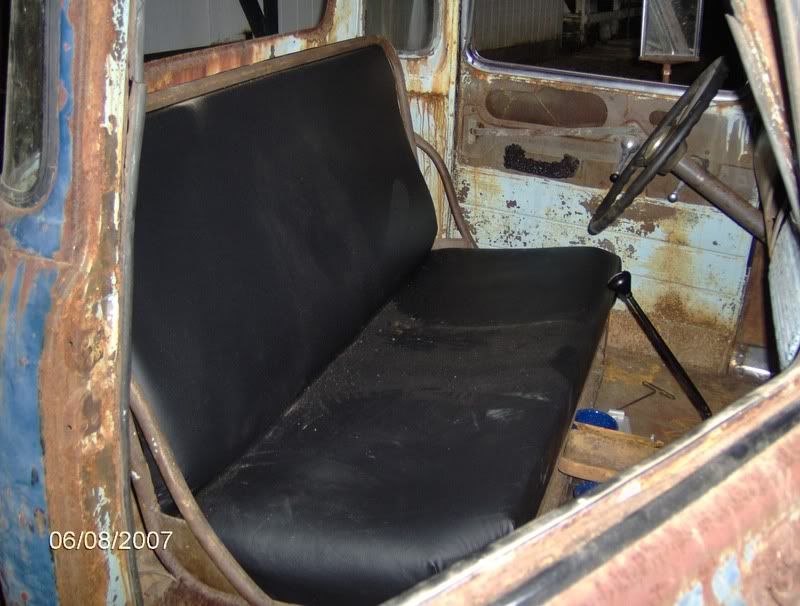
Here's my dad trying it out (while making motor noises)
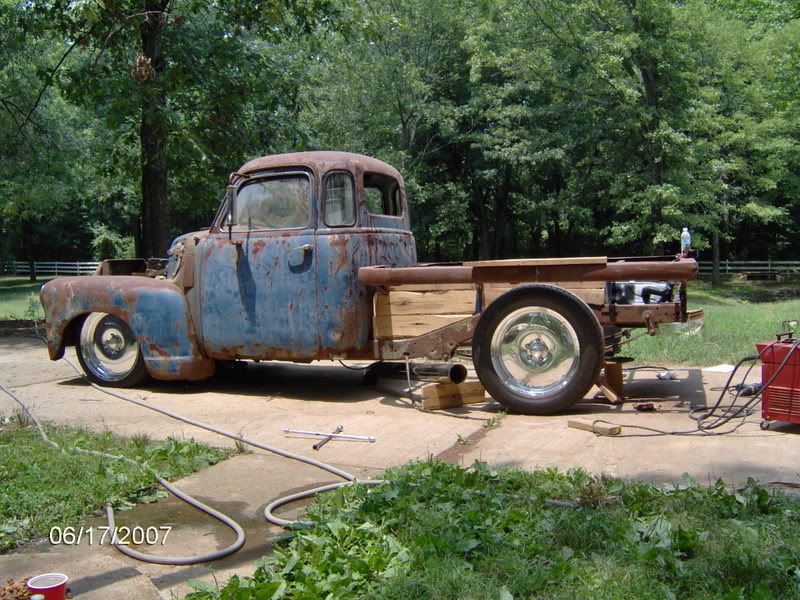
Workin' on the flatbed now.
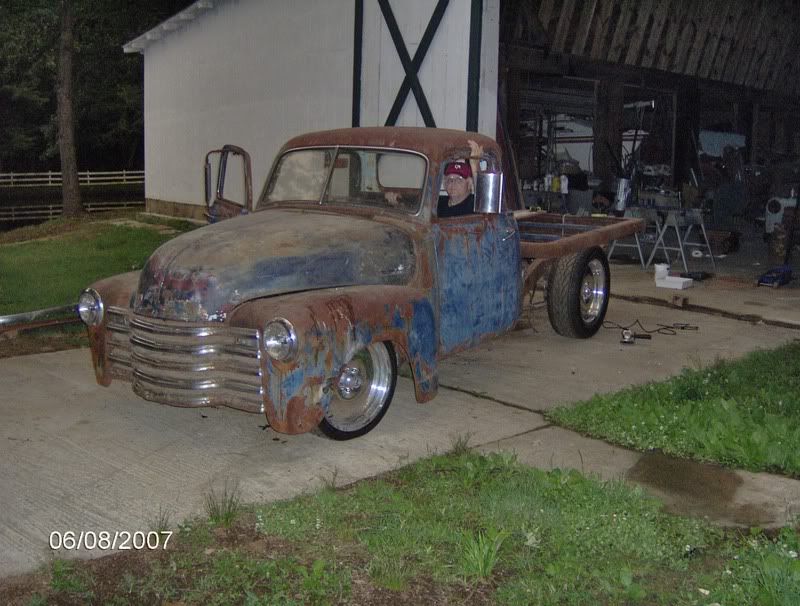
The front bumper is just mocked up for the pic.
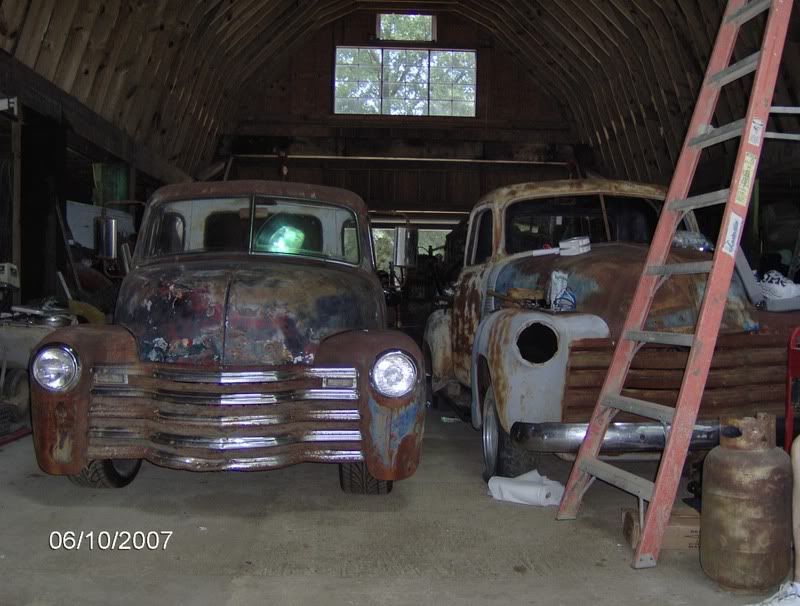
Sitting next to a stocker with flat tires. This is the next project. Its gonna be painted.
-
06-17-2007 08:02 PM #18
CHR Member
- Join Date
- Jul 2003
- Location
- Kentucky
- Car Year, Make, Model: 47 Seagrave
- Posts
- 683
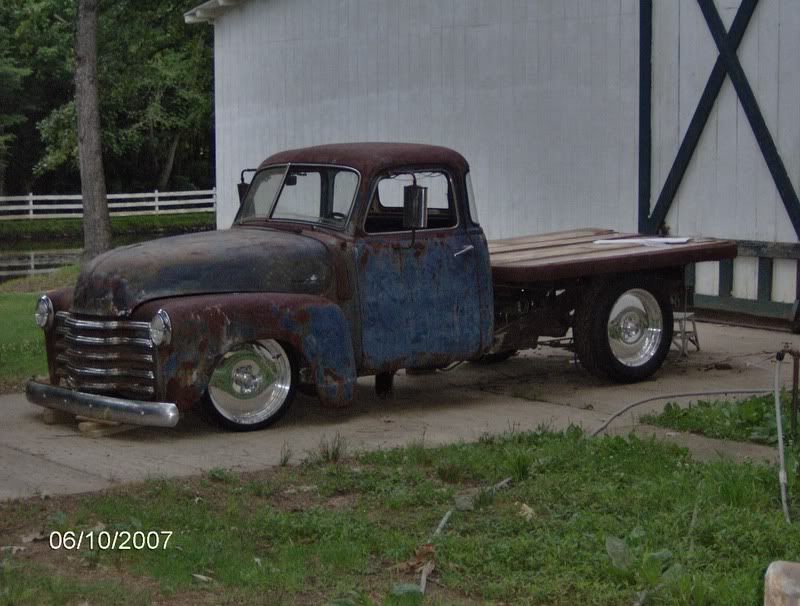
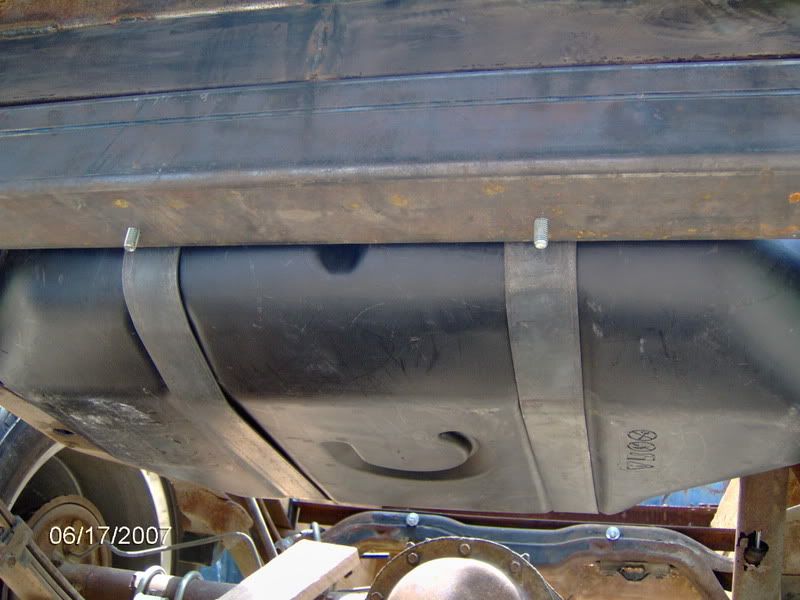
I put some more time in on it this weekend. I got the gas tank mounted.
It is a 2005 S-10 blazer tank (plastic tank...no rust flakes to deal with). It don't look like all that hard of a job, but it sure ate up the time. The filler neck is hidden under the edge of the bed.

I also got the boards cut the go under the flatbed. I didn't like being able to see through the truck (under the flatbed)
-
06-18-2007 01:27 PM #19
CHR Member
- Join Date
- Nov 2006
- Location
- Halifax County
- Car Year, Make, Model: 48 DeSoto Delux
- Posts
- 460
I know you still have a lotta work left, but you have gotten a lot done. I really like those wheels. They look perfect for that truck.
JackK.I.S.S. ")
-
06-18-2007 10:31 PM #20
CHR Member
- Join Date
- May 2004
- Location
- so.cal
- Car Year, Make, Model: 66 c 10 fleetside longbed
- Posts
- 1,942
Nice progress!
Are you going to use the stake bed holes ?I think it would look cool and also be usefull to have some cool lookin stakes for the sides to match the other wood on the side...........Its gunna take longer than u thought and its gunna cost more too(plan ahead!)
-
06-18-2007 11:39 PM #21
CHR Member
- Join Date
- Feb 2007
- Location
- Zimmerman
- Posts
- 101
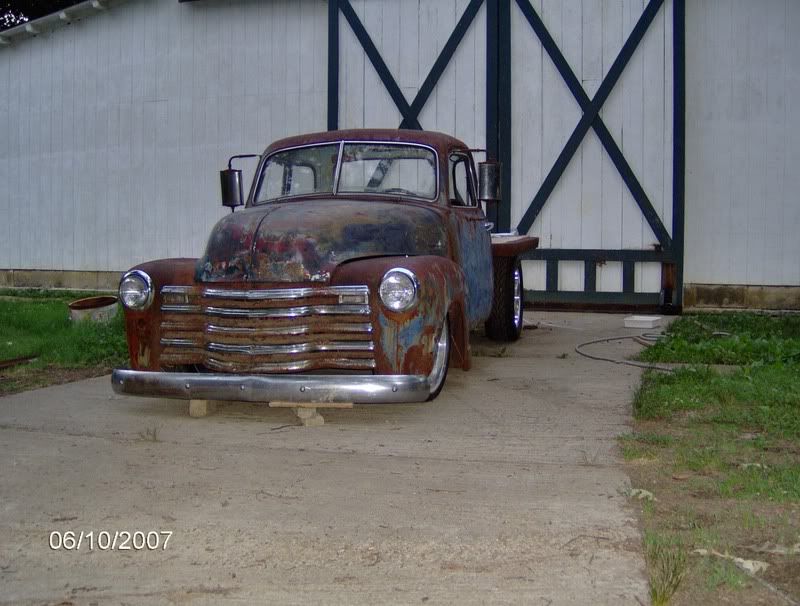
Wow, you have so many "right" things going on with this truck. The flat bed really makes it look nice. I do like the wheels, however, if you were to age, or wheather them using paint, like to make them have spots of rust, that would throw this truck over the top. But thats just me, you know I like the rusty look.
Zach
Keep it up, the more pics the better, plus when you are done you can go back to the pics to remember how you did things!
-
06-19-2007 09:08 AM #22
CHR Member
- Join Date
- Jul 2003
- Location
- Kentucky
- Car Year, Make, Model: 47 Seagrave
- Posts
- 683
All the rust is real. No fake rust for me Originally Posted by Last-Call

-
06-24-2007 05:12 PM #23
CHR Member
- Join Date
- Jul 2003
- Location
- Kentucky
- Car Year, Make, Model: 47 Seagrave
- Posts
- 683
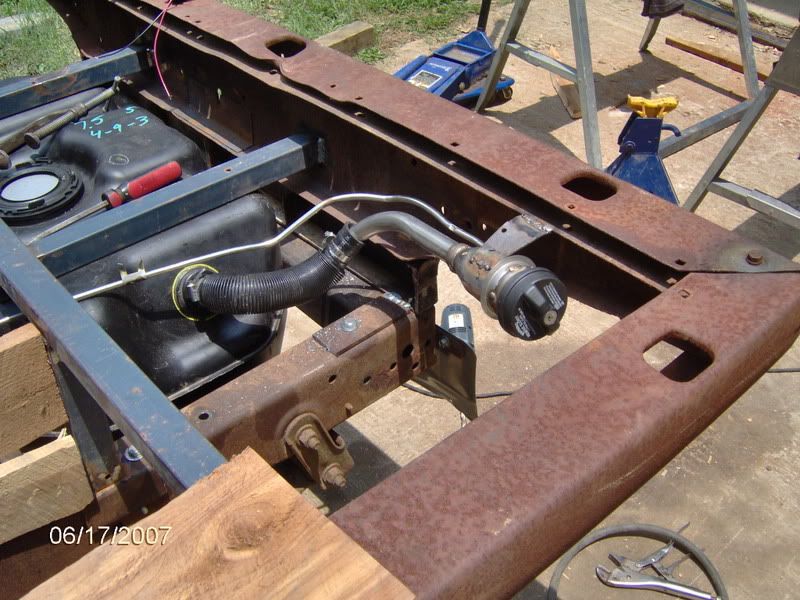
I ran brake lines this weekend.
That sucked on a mostly assembled truck.
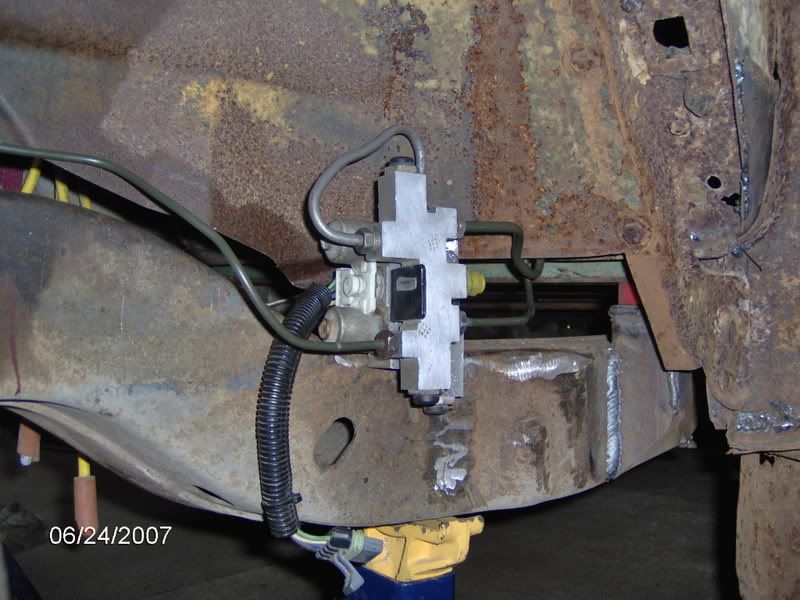
Lines go back to the firewall and then down.
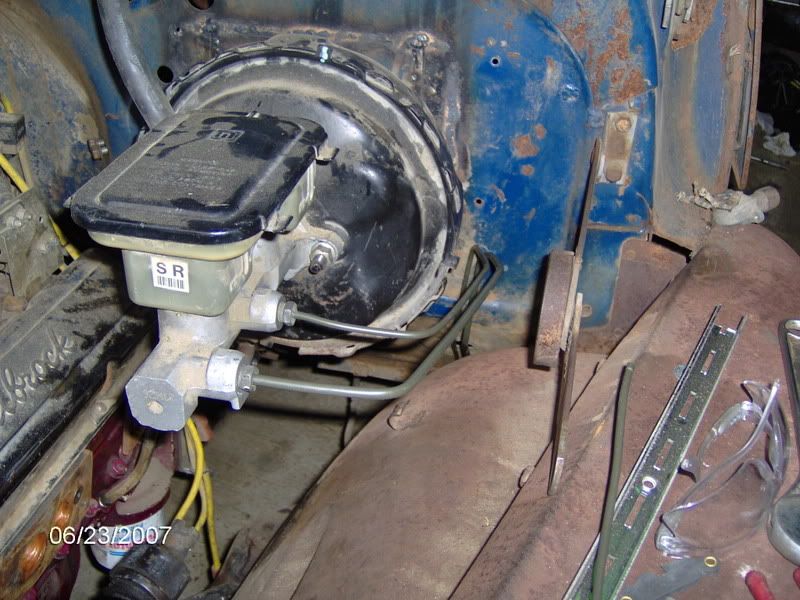
The proportioning valve is tucked under the drivers side fenderwell.
-
06-24-2007 07:33 PM #24
CHR Member
- Join Date
- Jul 2003
- Location
- Kentucky
- Car Year, Make, Model: 47 Seagrave
- Posts
- 683
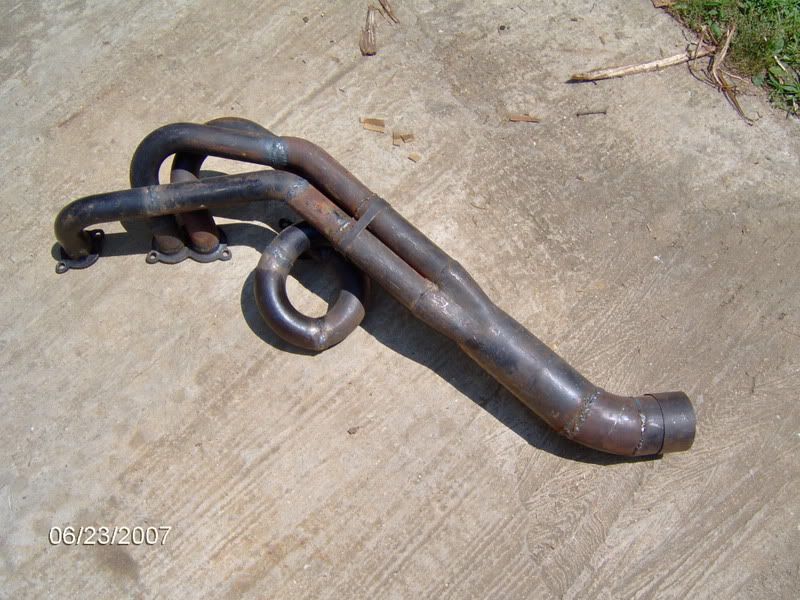
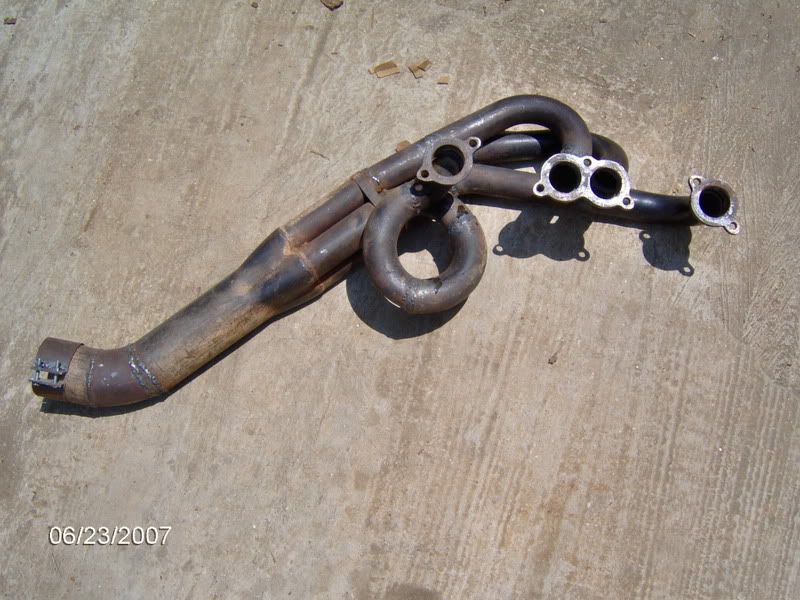
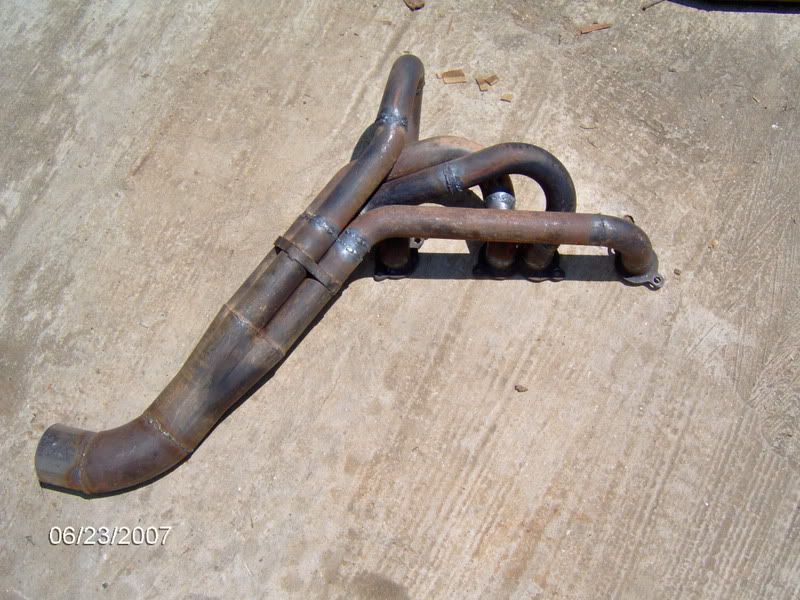
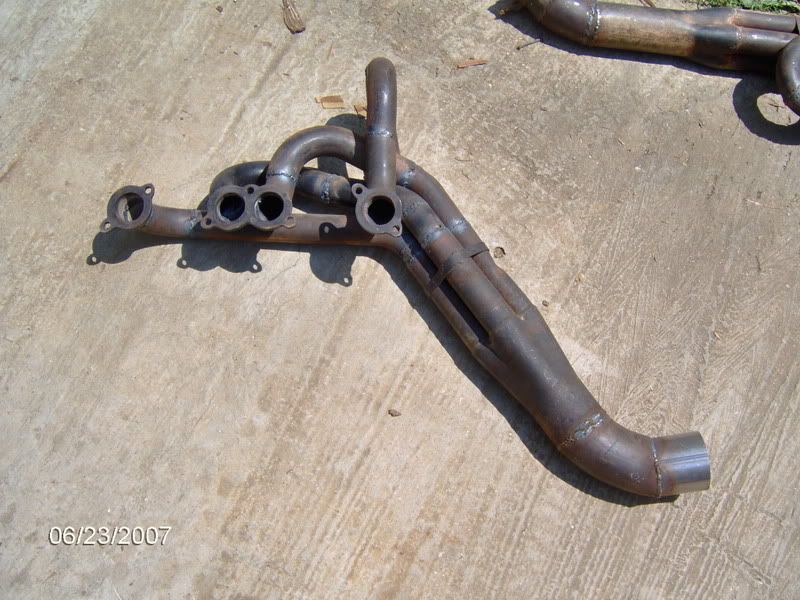
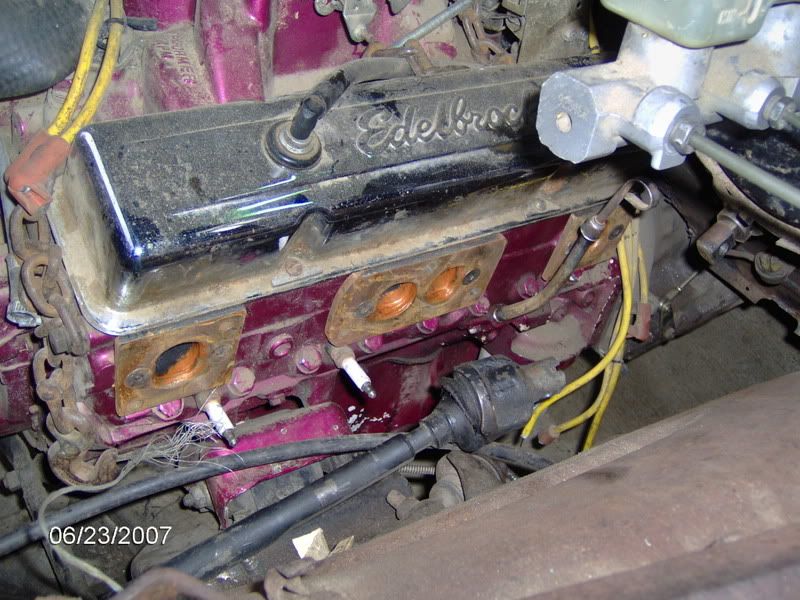
I had to pull the headers to do the brake lines. I took pics while they were out.
-
06-24-2007 07:35 PM #25
CHR Member
- Join Date
- Jul 2003
- Location
- Kentucky
- Car Year, Make, Model: 47 Seagrave
- Posts
- 683
They were built from used World Of Outlaws type sprint car header pieces with spread ports. We built adapters to bolt them to regular SBC heads.
-
06-25-2007 12:08 PM #26
Registered User
- Join Date
- May 2006
- Location
- Holly
- Posts
- 6
Very cool truck and i enjoy your build with these pictures. I'm sort of new around here and just look at all the posts more than anything. I was just wondering(if you don't mind telling me), how much did you have to pay for these trucks? There are a few old trucks around my area that I am looking at, and was JW what kind of prices these do run for. Thanks in advance.
-
06-25-2007 02:50 PM #27
CHR Member
- Join Date
- Jul 2003
- Location
- Kentucky
- Car Year, Make, Model: 47 Seagrave
- Posts
- 683
I paid $450 for the 48 flatbed I am building now. The S-10 that it is on was a $400 truck (running and driving).
The next in line was $800. It may also look rough in pictures, but it is virtually rust free structurally and has very minor damage.
-
07-03-2007 08:28 PM #28
CHR Member
- Join Date
- Jul 2003
- Location
- Kentucky
- Car Year, Make, Model: 47 Seagrave
- Posts
- 683
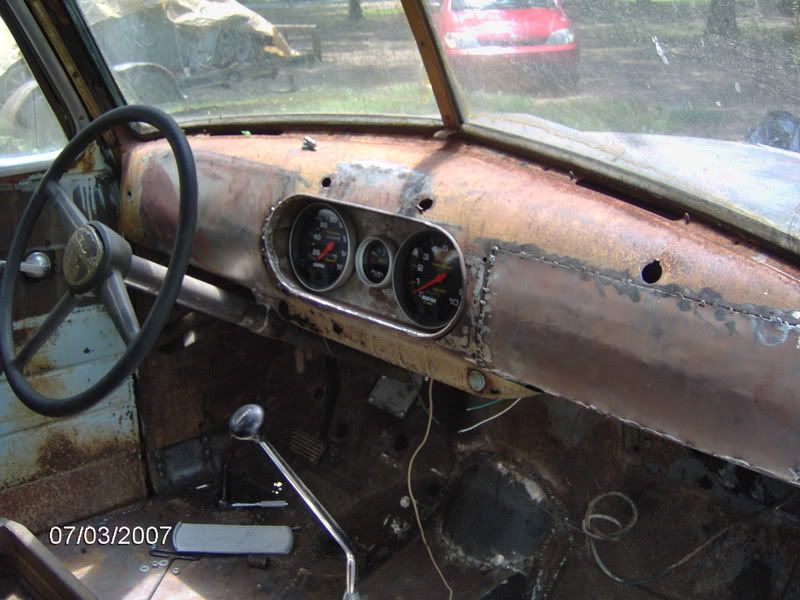
I beat my dash into submission. Glovebox is gone and I fabbed a gauge panel.
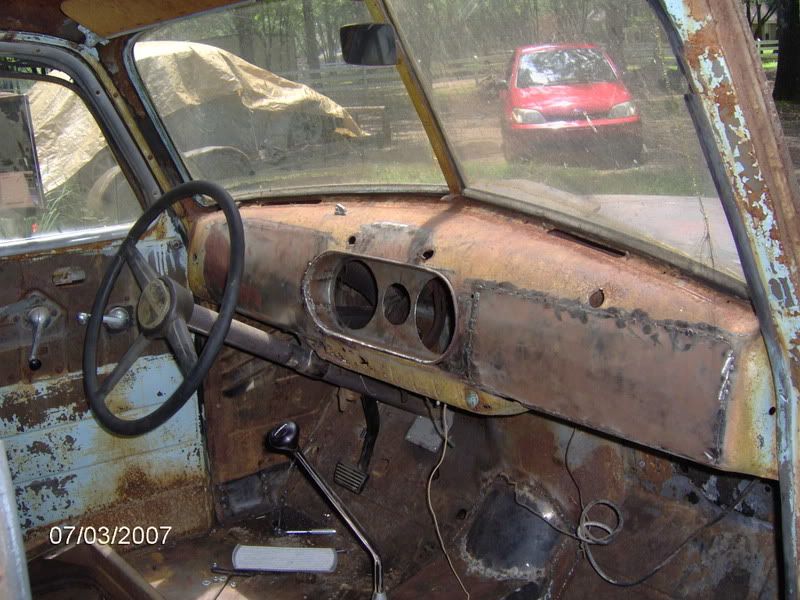
I know the gauges aren't traditional.....but I have owned them for something like 18 years now and am going to use them.
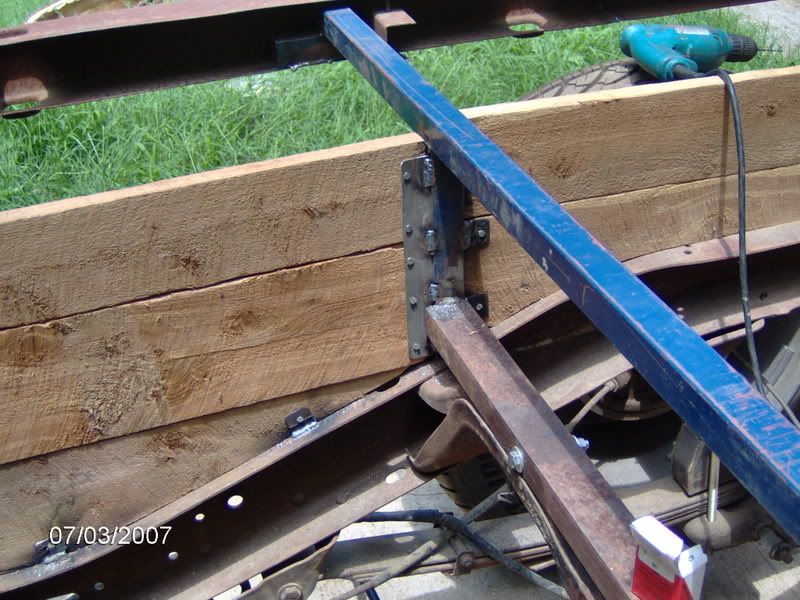
My wood for the underbed area is attached
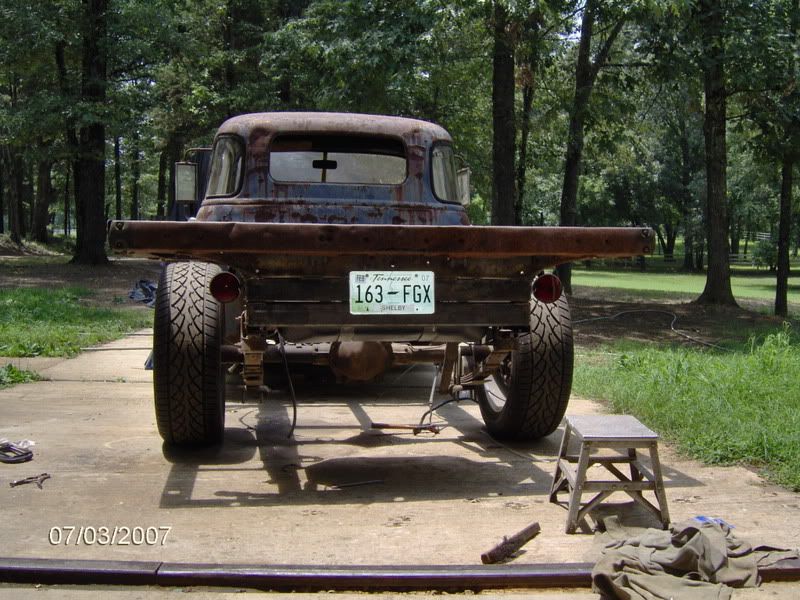
Tail lights are attached
-
07-10-2007 02:50 PM #29
CHR Member
- Join Date
- Jul 2007
- Location
- Portland
- Car Year, Make, Model: 1971 Ford F-100 Custom, 351 Windsor
- Posts
- 44
Very nice. i love what youve done.
-
07-11-2007 09:56 AM #30
CHR Member
- Join Date
- Jun 2007
- Location
- Springfield
- Car Year, Make, Model: 1932 Ford Roadster, 1935 Ford P/U,
- Posts
- 44
I love how those wheels look on that truck.
 Reply With Quote

Posting Permissions
- You may not post new threads
- You may not post replies
- You may not post attachments
- You may not edit your posts

i've enjoyed the years here . made a lot of friends. most who have left. i see no reason to continue with this so hope to see you somewhere else. i dont think this site will ever be back. it's lived...
Dead!