


 9Likes
Thread: 41 New Yorker Coupe


Results 46 to 60 of 153
 LinkBack URL
 About LinkBacks
Hybrid View
-
05-28-2011 03:52 PM #1
 CHR Member

- Join Date
- Nov 2010
- Location
- Markham, ON
- Car Year, Make, Model: 41 Chrysler New Yorker
- Posts
- 444
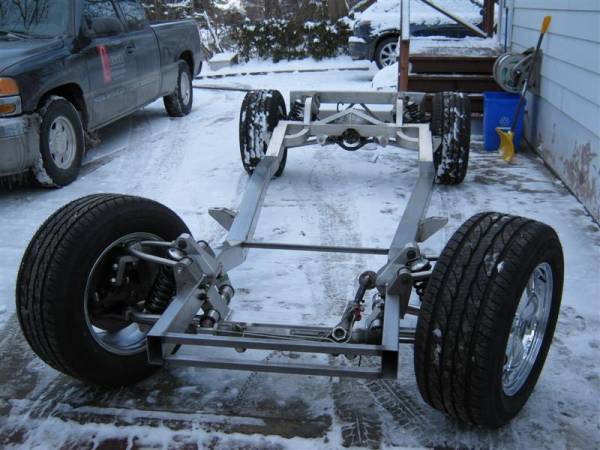
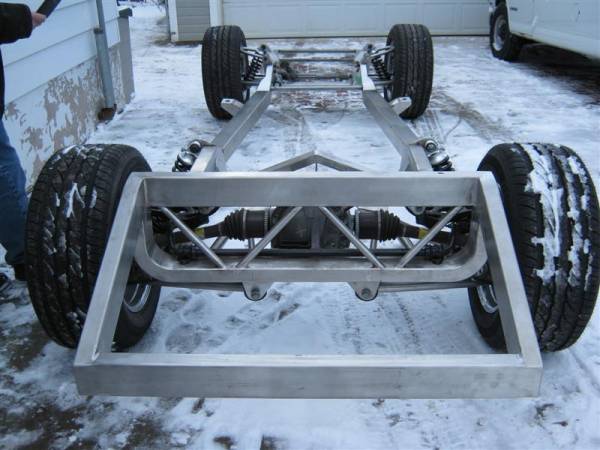
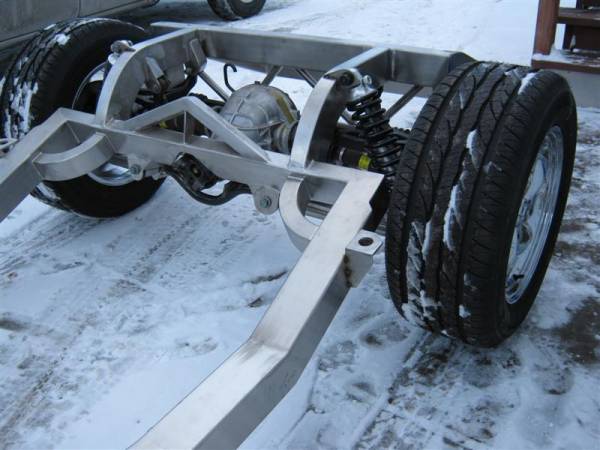
Thanks Steve.
I got the chassis rolling and pushed it outside for the first time.
-
05-28-2011 04:20 PM #2
CHR Member
- Join Date
- Jun 2004
- Location
- In the Boonies of Ontario
- Car Year, Make, Model: 40 Graham Sharknose :58 MGA/Ford V6
- Posts
- 1,307
Beautiful work Pugsy but I hope those shots weren't taken recently.....your weather usually comes our way and I hoped we were through with the white stuff. Originally Posted by 123pugsy

Remember, Freedom isn't Free, thousands have paid the price so you can enjoy what you have today.
Duct tape is like 'The Force.' It has a light side and a dark side, and it holds the universe together.
-
05-28-2011 04:28 PM #3
CHR Member
- Join Date
- Nov 2010
- Location
- Markham, ON
- Car Year, Make, Model: 41 Chrysler New Yorker
- Posts
- 444
[QUOTE=RestoRod;428505]Beautiful work Pugsy but I hope those shots weren't taken recently.....your weather usually comes our way and I hoped we were through with the white stuff.[/QUOTE
I guess those pics were done about February.
I've almost got this build thread up to present day.
-
05-28-2011 04:01 PM #4
CHR Member
- Join Date
- Nov 2010
- Location
- Markham, ON
- Car Year, Make, Model: 41 Chrysler New Yorker
- Posts
- 444
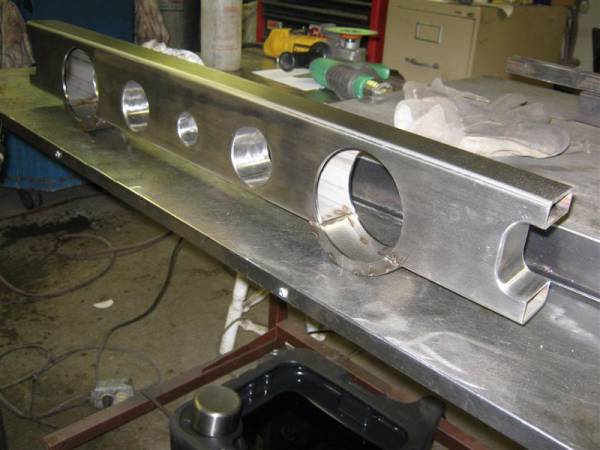
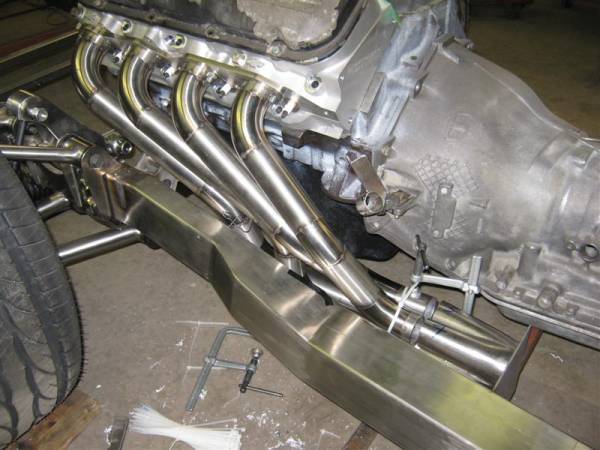
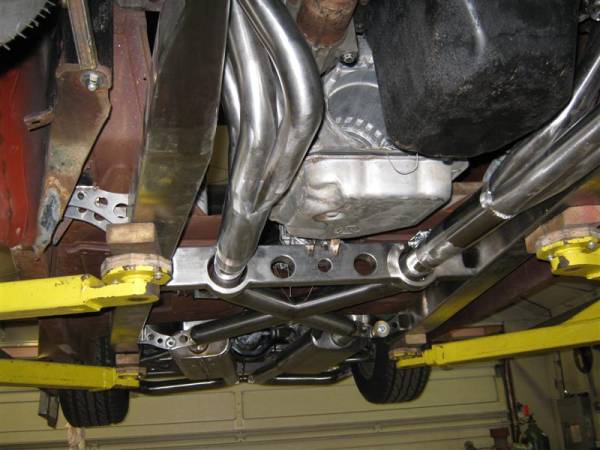
Next thing was to make up some motor mounts to hold up the big block Chevy.
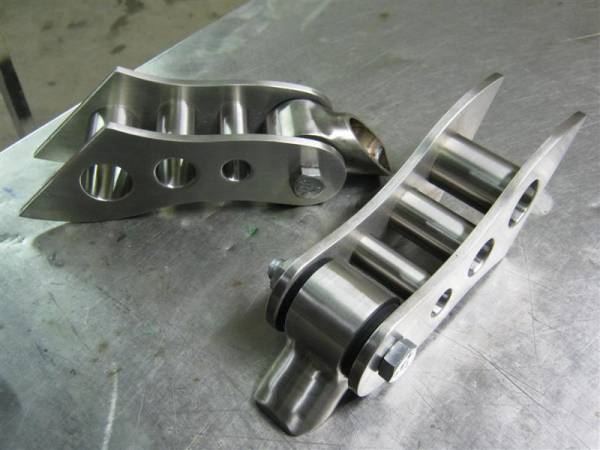
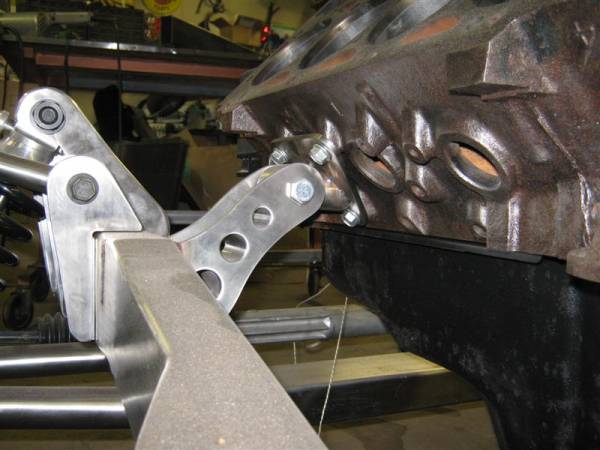
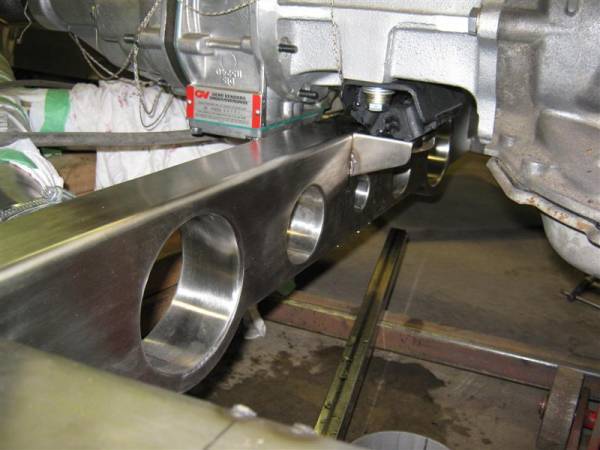
Then a crossmember for the tranny.
Its actually going to hold up the Gearvendors overdrive unit so I will be able to weld it in and still be able to pull the tranny no problem.
The exhaust pipes will run thru the 4'' holes.
-
05-28-2011 04:15 PM #5
CHR Member
- Join Date
- Jan 2006
- Location
- Constantine
- Car Year, Make, Model: 57 chevy 2 dr wagon
- Posts
- 9,476
Man nice work ..You still have snow on the ground and I was (am) complaining about rainCharlie
Lovin' what I do and doing what I love
Some guys can fix broken NO ONE can fix STUPID
W8AMR
http://fishertrains94.webs.com/
Christian in training
-
05-28-2011 05:19 PM #6
CHR Member
- Join Date
- Nov 2010
- Location
- Markham, ON
- Car Year, Make, Model: 41 Chrysler New Yorker
- Posts
- 444
Thanks Charlie. Originally Posted by cffisher
No snow. Its quite warm.
I think I've finally got this thread up to date now.
-
05-28-2011 05:31 PM #7
CHR Member
- Join Date
- Nov 2010
- Location
- Markham, ON
- Car Year, Make, Model: 41 Chrysler New Yorker
- Posts
- 444
Now at current date
I've now got the thread caught up to the current timeline.
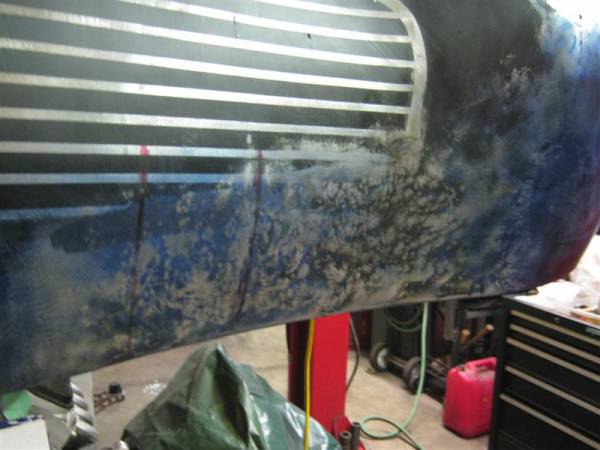
I mentioned a few posts back about assembling the front end sheet metal prematurely.
I'm working on it now as I'm waiting for the rad to arrive.
I checked the shape either side of center and got a nice shock:

I held the profile guage at the same location on the driver's side:

I've got the shape coming along very slowly.
It looks as though I'll be caking the bondo on.
-
05-28-2011 04:25 PM #8
CHR Member
- Join Date
- Nov 2010
- Location
- Markham, ON
- Car Year, Make, Model: 41 Chrysler New Yorker
- Posts
- 444
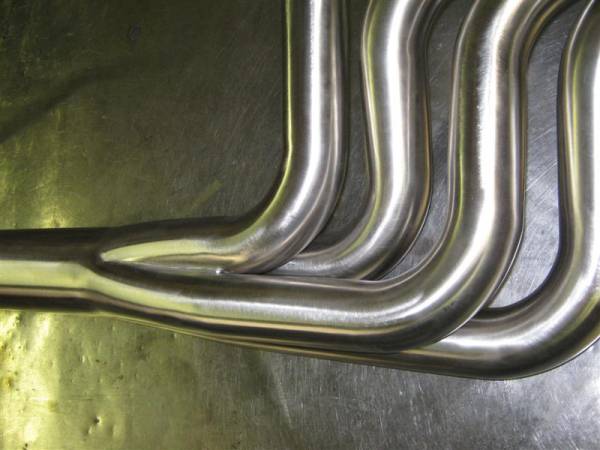
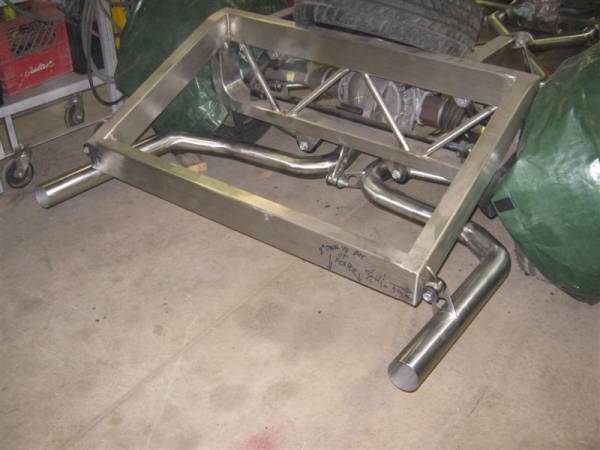
Next thing to do was to start the exhaust system.
I started with 4 pcs of 3'' dia stainless for the X pipe.

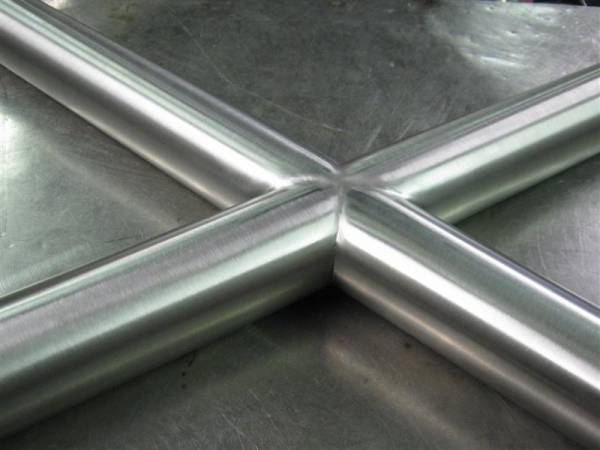
Then some elbows were added at the front and back.
I'm using Dynamax Ultraflow Welded mufflers. I hope its not too loud.
-
05-28-2011 04:47 PM #9
CHR Member
- Join Date
- Nov 2010
- Location
- Markham, ON
- Car Year, Make, Model: 41 Chrysler New Yorker
- Posts
- 444
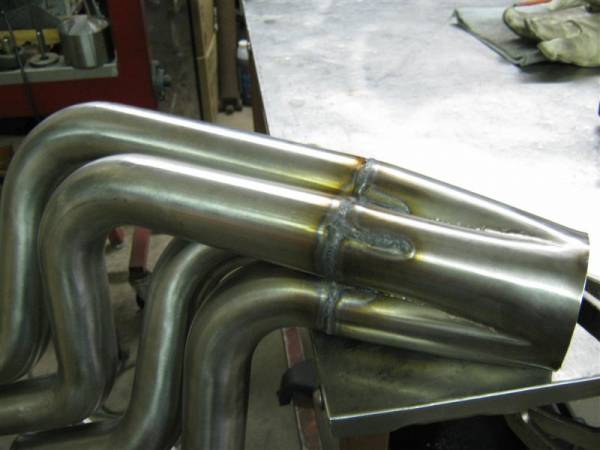
Headers:
First thing I did on the headers was to make the 4 into one merges.
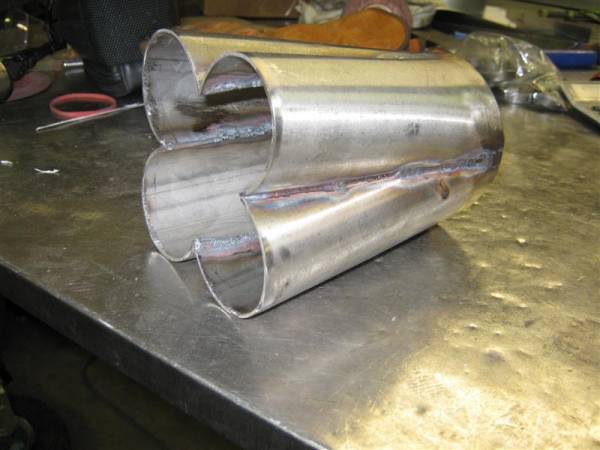
I saw this mockup system on the website from where I got my header flanges.
Pretty slick idea I thought and the mockup really helped.
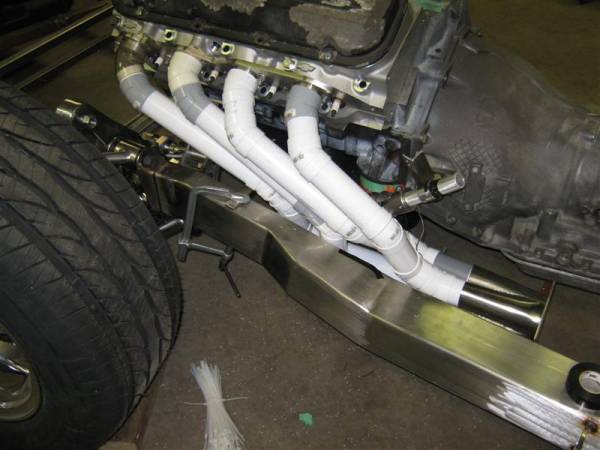
I had to get both sides pretty much done before I could knock the merges from the jig and add them to the headers.
They didn't fit so well so a bit of slicing and welding was in order.

Last edited by 123pugsy; 05-28-2011 at 04:59 PM.
-
05-28-2011 04:56 PM #10
CHR Member
- Join Date
- Nov 2010
- Location
- Markham, ON
- Car Year, Make, Model: 41 Chrysler New Yorker
- Posts
- 444
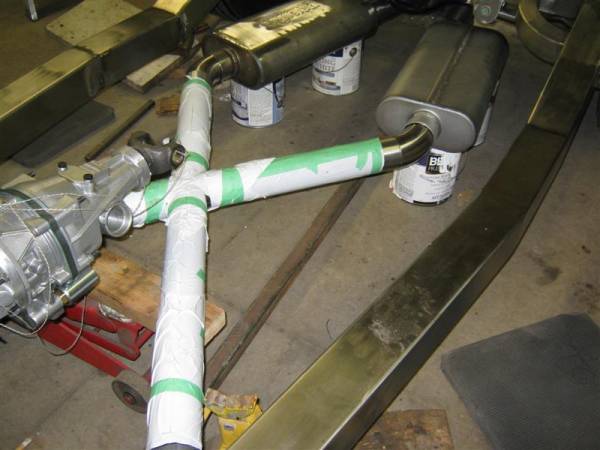
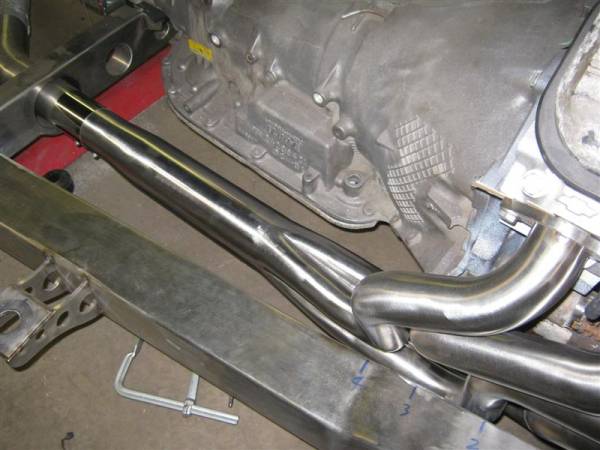
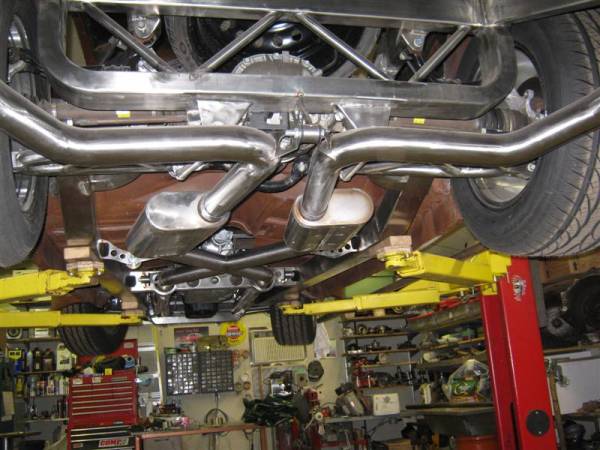
A few pics of the almost completed exhaust.
Just needs some polishing here and there and something's got to be done with the tailpipes.
Not sure what to do with them yet.
-
05-28-2011 10:39 PM #11
CHR Member
- Join Date
- Oct 2007
- Location
- Petaluma
- Car Year, Make, Model: 48 Ford F1
- Posts
- 9,795
man it just keeps looking better. Very nice job, once again." "No matter where you go, there you are!" Steve.
-
05-29-2011 07:33 AM #12
CHR Member
- Join Date
- Nov 2010
- Location
- Markham, ON
- Car Year, Make, Model: 41 Chrysler New Yorker
- Posts
- 444
Thanks Steve.
I'm OK with the chassis and exhaust but I'm in bit of trouble at present with the sheet metal work.
I guess I'll just keep tapping away and see what happens......
-
05-29-2011 07:55 AM #13
CHR Member/Contributor
- Join Date
- Sep 2007
- Location
- Gardner, KS
- Car Year, Make, Model: '33 HiBoy Coupe, '32 HiBoy Roadster
- Posts
- 11,245
Beautiful work, Pugsy. The exhaust collectors turned out fantastic, as did the whole exhaust system. I envy your metal working skills.Roger
Enjoy the little things in life, and you may look back one day and realize that they were really the BIG things.
-
05-29-2011 07:52 AM #14
CHR Member/Contributor
- Join Date
- Jul 2003
- Location
- Madison
- Car Year, Make, Model: '67 Ranchero, '57 Chevy, '82 Camaro,
- Posts
- 21,160
Ahhh yes, the beloved dingin' and pingin'!!! Sheet metal work is fun, but it sure can get frustrating and time consuming sometimes!Yesterday is history, tomorrow is a mystery, Live for Today!
Carroll Shelby
Learning must be difficult for those who already know it all!!!!
-
05-29-2011 08:50 AM #15
CHR Member
- Join Date
- Feb 2006
- Location
- Bartlett
- Posts
- 6,831
Nice work---
For anyone wanting merge collectors for building headers---WWW.CONEENG.COM---I use them for merge collector parts
Trying to get the sheet metal panels exactly the same on both sides---back then---30s---and even now---both sides of everything isn't exact opposite
Very nice work--you must use a lot of vacume cleaner filters cleaning up all your grinding residue-----
 Reply With Quote

Posting Permissions
- You may not post new threads
- You may not post replies
- You may not post attachments
- You may not edit your posts

i've enjoyed the years here . made a lot of friends. most who have left. i see no reason to continue with this so hope to see you somewhere else. i dont think this site will ever be back. it's lived...
Dead!