


 9Likes
Thread: 41 New Yorker Coupe


Results 1 to 15 of 153
 LinkBack URL
 About LinkBacks
Hybrid View
-
05-06-2011 06:09 AM #1
 CHR Member

- Join Date
- Nov 2007
- Location
- Bonita Springs
- Car Year, Make, Model: 23 Ford T, 2004 ZO6 Vette, 99 Mustang
- Posts
- 542
looks like a cool car. More pics please. Don Jr.Don Jr.
"Once again I have thoroughly disgusted myself"
-
05-06-2011 12:46 PM #2
CHR Member
- Join Date
- Nov 2010
- Location
- Markham, ON
- Car Year, Make, Model: 41 Chrysler New Yorker
- Posts
- 444
More coming after this weekend. Originally Posted by Mr Blue

I'll be leaving for a regional Metal Shaping gathering soon.
Originally Posted by Dave Severson
Thanks.
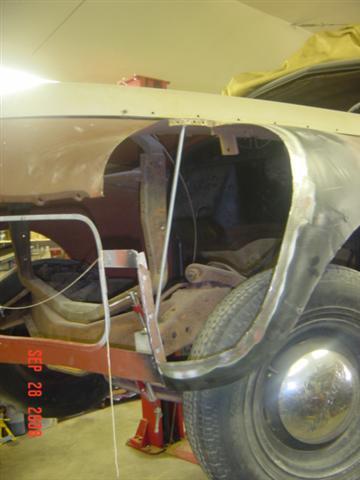
Actually, I'm going to move the fender back to get to the bezel.
Originally Posted by rumrumm
Thanks.
It does have a long wheelbase kind of giving the illusion of a low roof.
I will chop it about 1-1/2'' just to give a bit nicer look.
I did want something different and I think I'll have no problem getting it with this car and mods.
-
05-06-2011 01:06 PM #3
CHR Member
- Join Date
- Nov 2010
- Location
- Markham, ON
- Car Year, Make, Model: 41 Chrysler New Yorker
- Posts
- 444
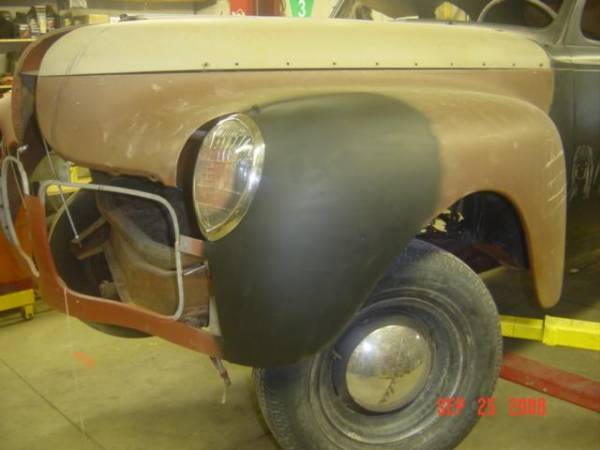
Next thing to do was to bring the metal in and back to meet the bezel. I made a plate the same shape as the headlight to start the process.
Then a slathering of bondo to see how she looks with the 37 headlights.....
It was at this point I started visiting the metalshaping sites and learned how to make a flexible shape pattern.
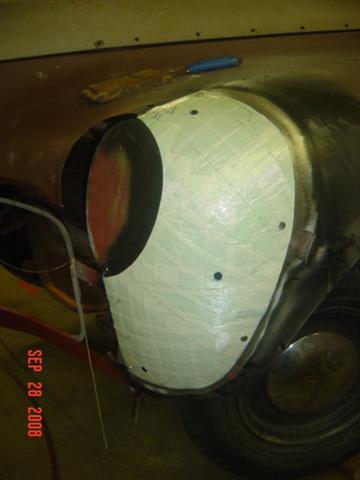
It was about the exact time I was doing this that one of the guys on MetalMeet invited me and a few other guys down to his place to learn a bit.
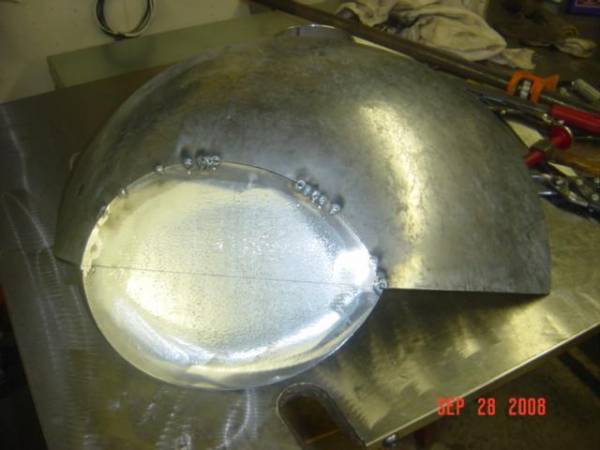
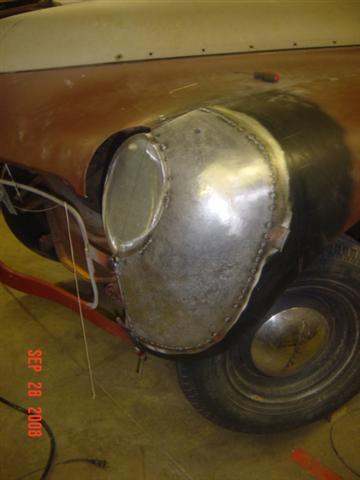
I took a flat sheet of metal with me and came back with my first shaped piece.
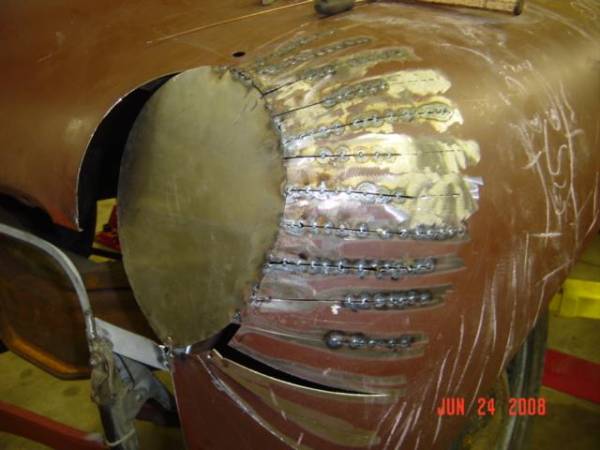
I tacked it to a new, thicker plate and then it was time to operate....
-
05-06-2011 01:11 PM #4
CHR Member
- Join Date
- Nov 2010
- Location
- Markham, ON
- Car Year, Make, Model: 41 Chrysler New Yorker
- Posts
- 444
I cut out the bondo and junk using the pattern to mark the cut.
Then it was time to check out what would happen.
I had previously cut the patch panel using the flexible pattern as a guide.
I then tacked the new piece into the opening.
-
05-08-2011 01:37 AM #5
CHR Member
- Join Date
- Sep 2006
- Location
- New Lenox
- Car Year, Make, Model: 67 Mstg cpe , 37 Ford Coupe
- Posts
- 2,787
I too like the 37 Ford look in the front for the headlights . The 37 Lincoln Zephyr have a bit more pronunciation but you are on the right track it seems .
HPIM1502.jpg
-
05-09-2011 02:27 PM #6
CHR Member
- Join Date
- Nov 2010
- Location
- Markham, ON
- Car Year, Make, Model: 41 Chrysler New Yorker
- Posts
- 444
Thanks.
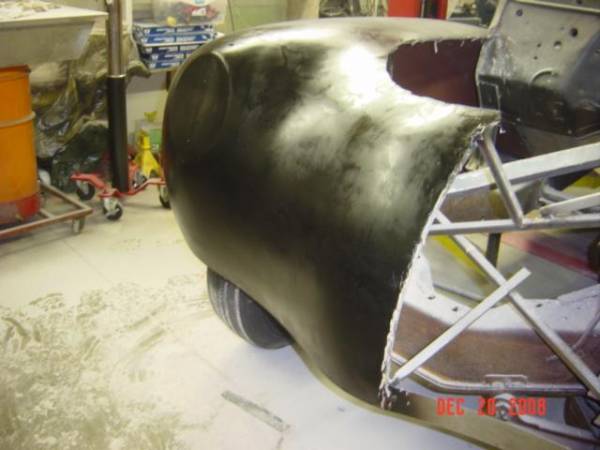
The next step was to get started on the front nose between the headlights.
I matched the passenger side with the same piece and then made one identical to the driver's side and tacked it to the inboard side of the new passenger side piece.
I got out the chicken wire and screwed it to the front of the car so I could slide some ''Burt'' buck strips thru to create the shape.
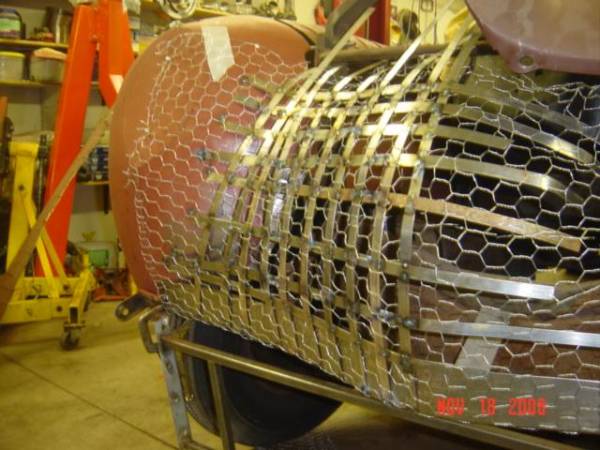
I then tacked all the strips together to maintain the shape and added foil tape to accept the bondo for the finished buck.
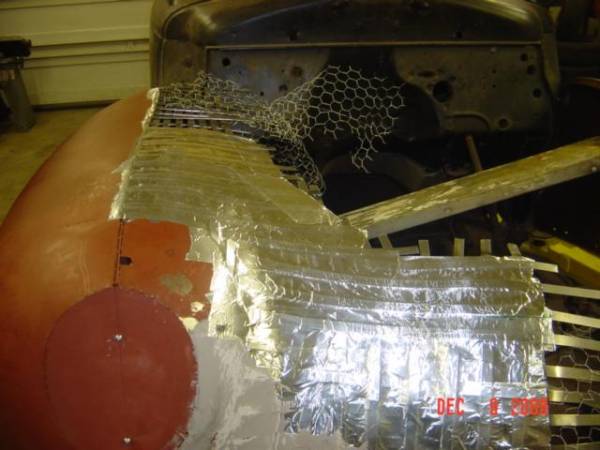
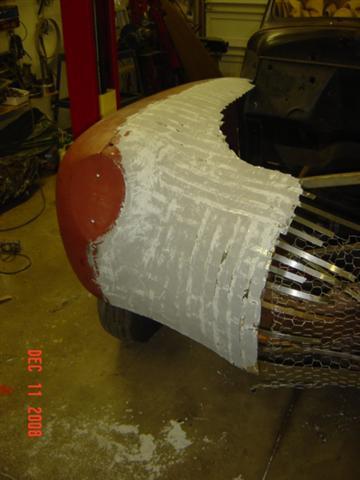
I did all this to see how she looked before comitting to the shape.
I thought it looked OK so I used this buck to take patterns from to shape the new panels.
-
05-11-2011 12:36 AM #7
CHR Member
- Join Date
- Sep 2006
- Location
- New Lenox
- Car Year, Make, Model: 67 Mstg cpe , 37 Ford Coupe
- Posts
- 2,787
123 this is looking good so far , waiting to see the finished product of your build .
 Reply With Quote

Posting Permissions
- You may not post new threads
- You may not post replies
- You may not post attachments
- You may not edit your posts

Even though I know he won't see this, I still want to wish a Happy Birthday to my best friend, Richard Moore aka techinspector1
Happy Birthday techinspector1