


 258Likes
Thread: 41 Willys Gasser project


Results 1,351 to 1,365 of 1724
 LinkBack URL
 About LinkBacks
-
04-09-2013 12:14 PM #1351
 CHR Member

- Join Date
- Jan 2006
- Location
- Constantine
- Car Year, Make, Model: 57 chevy 2 dr wagon
- Posts
- 9,476
That is cool but I like Rain-X
Charlie
Lovin' what I do and doing what I love
Some guys can fix broken NO ONE can fix STUPID
W8AMR
http://fishertrains94.webs.com/
Christian in training
-
Advertising

- Google Adsense
- REGISTERED USERS DO NOT SEE THIS AD
-
04-09-2013 02:58 PM #1352
CHR Member
- Join Date
- Apr 2011
- Location
- Prairie City
- Car Year, Make, Model: 40 Ford Deluxe, 68 Corvette, 72&76 K30
- Posts
- 7,301
- Blog Entries
- 1
Nice work! I didn't have any wiper arms on my 40 for a couple years, and I was really surprised how well the rain-x actually worked! My wipers never worked that great, so I may not put the crappy elec conv set up back on it.
Ryan
1940 Ford Deluxe Tudor 354 Hemi 46RH Electric Blue w/multi-color flames, Ford 9" Residing in multiple pieces
1968 Corvette Coupe 5.9 Cummins Drag Car 11.43@130mph No stall leaving the line with 1250 rpm's and poor 2.2 60'
1972 Chevy K30 Longhorn P-pumped 24v Compound Turbos 47RH Just another money pit
1971 Camaro RS 5.3 BTR Stage 3 cam, SuperT10
Tire Sizes
-
04-09-2013 06:10 PM #1353
CHR Member
- Join Date
- Feb 2010
- Location
- Pukekohe, New Zealand
- Car Year, Make, Model: '23 Ford T Roadster
- Posts
- 2,199
Well Charlie, according to my Brother who lives in the North of England, their summer is counted in hours not days or like most countries, months so although Rain-x is good and helps, but one needs wipers for sure in England .
I maybe a little crazy but it stops me going insane.
Isaiah 48: 17,18.
Mark.
-
04-10-2013 01:14 AM #1354
CHR Member
- Join Date
- Apr 2009
- Location
- watford
- Car Year, Make, Model: 26T Coupe, 32 Roadster, 41 Willys Coupe
- Posts
- 2,363
 Originally Posted by cffisher

Unfortunately our road laws are far more stringent than yours Charlie, I could never get away with running no wipers, would be points on my license and a fine, we have to have washers too along with handbrake, our cars go through a stringent Ministry of Transport test every year and everything gets checked, brakes are checked on a electronic rolling brake meter, a blown bulb and your off the road till its fixed
You guys in the states have it really easy when it comes to building Hotrods
.Its aweful lonesome in the saddle since my horse died.
-
04-10-2013 01:16 AM #1355
CHR Member
- Join Date
- Apr 2009
- Location
- watford
- Car Year, Make, Model: 26T Coupe, 32 Roadster, 41 Willys Coupe
- Posts
- 2,363
Ain't that the truth Whip Originally Posted by Whiplash23T
.Its aweful lonesome in the saddle since my horse died.
-
04-12-2013 04:08 AM #1356
CHR Member
- Join Date
- Mar 2009
- Location
- miami,coconut grove
- Car Year, Make, Model: 28rodster 292Y-block and HenryJ Olds V8
- Posts
- 262
Fun detail stuff too,love the build.
-
04-12-2013 02:00 PM #1357
CHR Member
- Join Date
- Apr 2010
- Location
- Mechanicsburg
- Car Year, Make, Model: 1941 Willys Pickup
- Posts
- 168
That car is looking really nice! Question for ya though, when you cut in your headlights how were you sure that your light bucket was in there perfectly straight. The template is great but I dont want the thing to be slightly tilted at all. I guess with some good measuring it will work out.
-
04-17-2013 11:37 AM #1358
CHR Member
- Join Date
- Apr 2009
- Location
- watford
- Car Year, Make, Model: 26T Coupe, 32 Roadster, 41 Willys Coupe
- Posts
- 2,363
I just set the template up with a plumb bob, the holes give you a small amount of adjustment. Originally Posted by 1923tbucket
.Its aweful lonesome in the saddle since my horse died.
-
04-18-2013 12:26 PM #1359
CHR Member
- Join Date
- Apr 2009
- Location
- watford
- Car Year, Make, Model: 26T Coupe, 32 Roadster, 41 Willys Coupe
- Posts
- 2,363
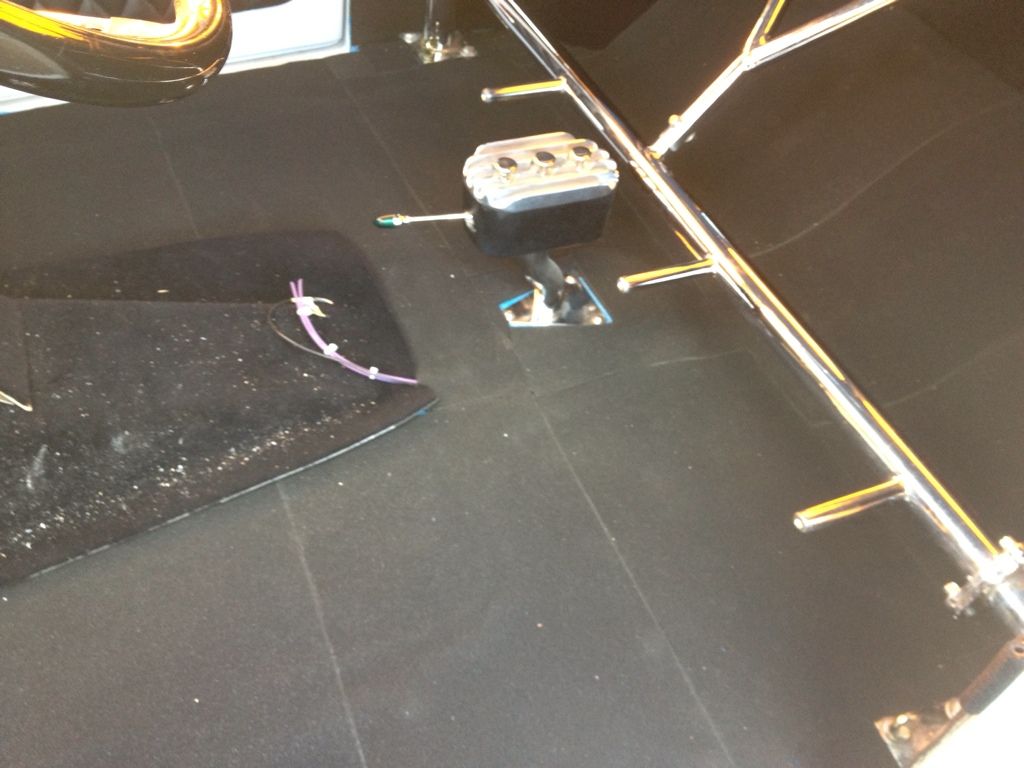
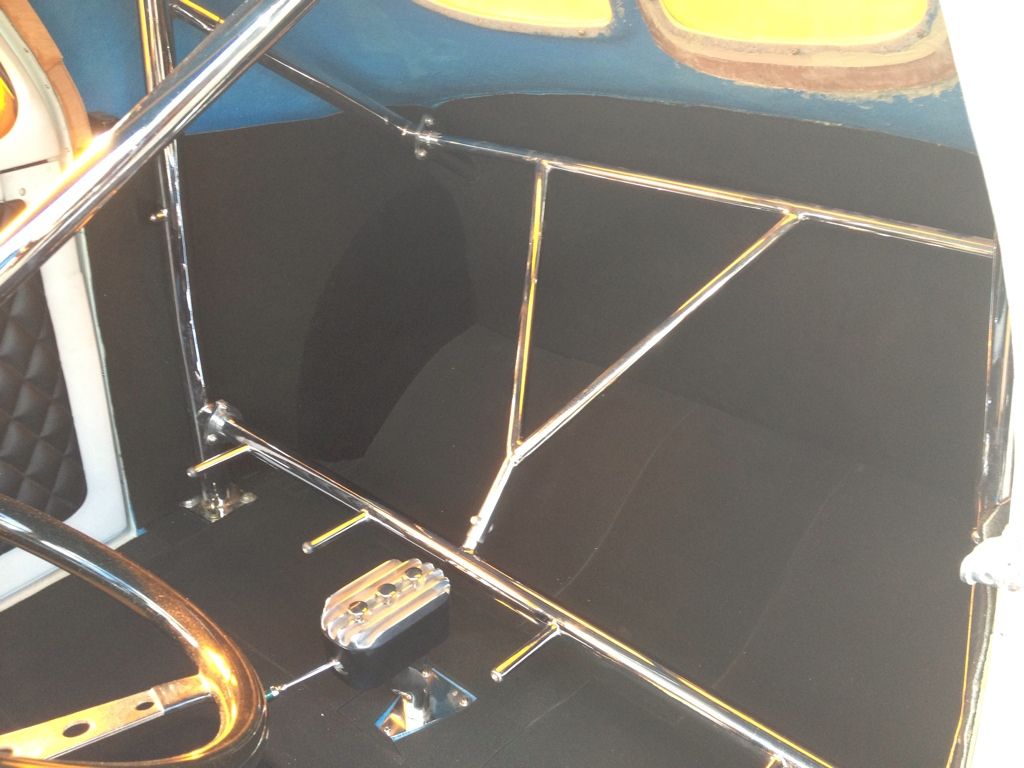
We were blessed with some sunshine today so knocked off a bit earlier as I needed to get some of my interior sorted as my mate steve will be ready to do the headliner soon.
Made up some rear quarter panels in 3mm ply, had to make these in 2 pieces to get around the cage bits, doesn't matter as i'm covering everything in black carpet anyway, nice and cheap and looks tidy.
I had a few rolls of adhesieve backed acoustic foam on the shelf so decided to put that in, I have 2 thicknesses 3/8" & 1/4", I used to use this for silencing mobile generators, its excellent stuff, nice thing about it is its a dense foam so carpet can be glued to it, it also goes over wiring etc and leaves a perfectly smooth surface, its also extremely sticky and once stuck down it stays there, you can't make no mistakes applying it for sure.
Got the carpet on the rear firewall and 1/4 panels but run out of time, Hopefully get the rest covered in carpet tomorrow evening.
.Its aweful lonesome in the saddle since my horse died.
-
04-18-2013 02:59 PM #1360
CHR Member/Contributor
- Join Date
- Jul 2003
- Location
- Madison
- Car Year, Make, Model: '67 Ranchero, '57 Chevy, '82 Camaro,
- Posts
- 21,160
Lookin' good Steve! Getting closer to the time you get to go out and test hammer the beast????
PS--Be grateful for the sunshine, 5" of snow here today!
Yesterday is history, tomorrow is a mystery, Live for Today!
Carroll Shelby
Learning must be difficult for those who already know it all!!!!
-
04-19-2013 10:33 AM #1361
CHR Member
- Join Date
- Oct 2007
- Location
- Petaluma
- Car Year, Make, Model: 48 Ford F1
- Posts
- 9,795
Sun peeking out here in big way this week too Steve. Spring is sprung officially, so it's back to the trucktime!" "No matter where you go, there you are!" Steve.
-
04-19-2013 11:44 AM #1362
CHR Member
- Join Date
- Jan 2006
- Location
- Constantine
- Car Year, Make, Model: 57 chevy 2 dr wagon
- Posts
- 9,476
looking good even with a shop I don't(Can't) find the time I need.Charlie
Lovin' what I do and doing what I love
Some guys can fix broken NO ONE can fix STUPID
W8AMR
http://fishertrains94.webs.com/
Christian in training
-
04-21-2013 12:17 PM #1363
CHR Member
- Join Date
- Apr 2009
- Location
- watford
- Car Year, Make, Model: 26T Coupe, 32 Roadster, 41 Willys Coupe
- Posts
- 2,363
Wow 5" !!! Originally Posted by Dave Severson
Its aweful lonesome in the saddle since my horse died.
-
04-21-2013 12:19 PM #1364
CHR Member
- Join Date
- Apr 2009
- Location
- watford
- Car Year, Make, Model: 26T Coupe, 32 Roadster, 41 Willys Coupe
- Posts
- 2,363
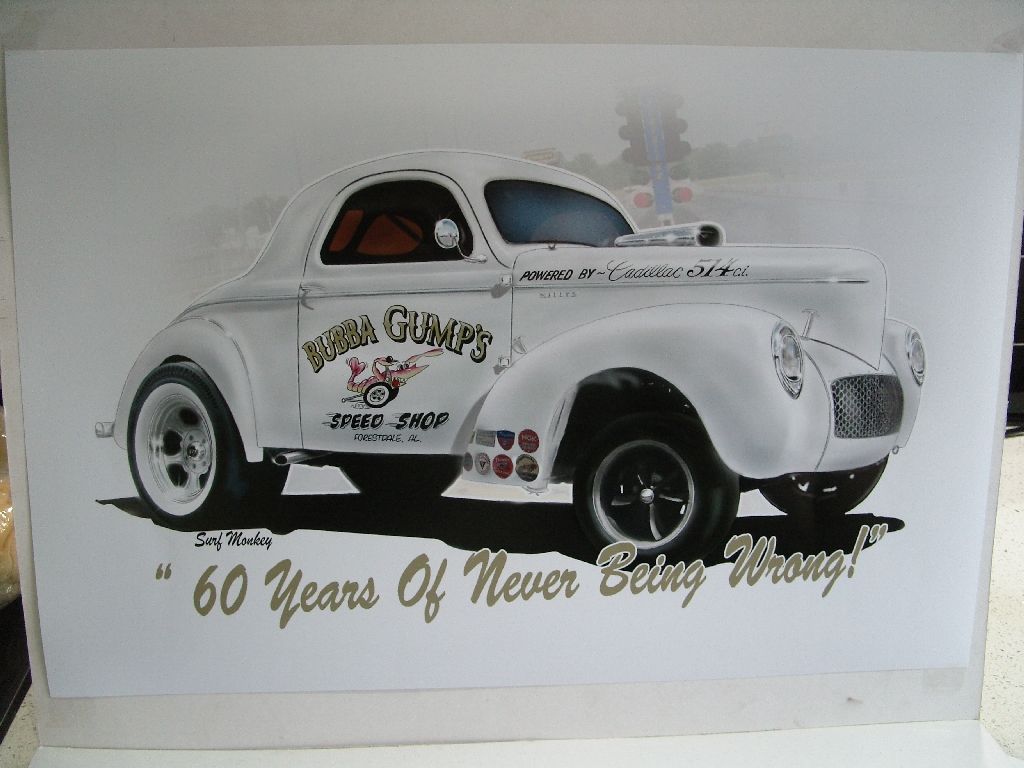
Got presented with this at my birthday party last night by my friends Jason & Anne, Absolutely brilliant artwork by Surfmonkey, Needless to say I was gobsmacked !!! The detail is awesome, So a big thank you to Jason, Anne & Tim. Need to find a frame for it now.
.Its aweful lonesome in the saddle since my horse died.
-
04-21-2013 02:00 PM #1365
CHR Member
- Join Date
- Jan 2006
- Location
- Constantine
- Car Year, Make, Model: 57 chevy 2 dr wagon
- Posts
- 9,476
HOLY COW another year gone??? Happy Birthday youngenCharlie
Lovin' what I do and doing what I love
Some guys can fix broken NO ONE can fix STUPID
W8AMR
http://fishertrains94.webs.com/
Christian in training
 Reply With Quote


Posting Permissions
- You may not post new threads
- You may not post replies
- You may not post attachments
- You may not edit your posts

i've enjoyed the years here . made a lot of friends. most who have left. i see no reason to continue with this so hope to see you somewhere else. i dont think this site will ever be back. it's lived...
Dead!