


 11Likes
Thread: My 26T Coupe build thread


Results 1 to 15 of 426
 LinkBack URL
 About LinkBacks
-
05-30-2010 09:09 AM #1
 CHR Member

- Join Date
- Apr 2009
- Location
- watford
- Car Year, Make, Model: 26T Coupe, 32 Roadster, 41 Willys Coupe
- Posts
- 2,363
My 26T Coupe build thread
A few friends on here have asked why my project isn't in the projects section, so here it is
Just started collecting parts for a new project, Hopefully my 32 will be soon finished and I'm really getting the urge for some track action again, Was going to uprate my T but it would mean some major modification which would spoil the look to be honest so decided to start afresh. It goes to Finland nect week for the Helsinki show so maybe it won't come back ???
New project will be a street & strip car and as my T will have crossplys, Body will be channeled 4" over the frame but full height.
I've picked up a 26T Coupe body which will have a heavier duty version of my T chassis under it as the motor is going to be a Cadillac 500ci I picked up, I had a bit of luck as I was going to buy all the parts for the engine from MTS who are one of the Caddy experts but when I joined their forum I managed to pick up all the parts for the engine from a guy in the states as brand new parts still in the boxes 30% cheaper than new :-)
These engnes are very under rated and its quite easy to see 800bhp quite cheaply, There is a guy in the U.S. with the same spec as mine running 9.2 quarters with a Model A sedan !!!
According to Marty at MTS the motor should be making in the region of 600bhp @ 5500rpm & 700 odd ft lbs of torque @ 3000rpm (should be interesting on
crossplys)
Engine should end up at 500+ cubic inches and has the following spec
10-1 Keith Black +60 pistons
Scat forged rods
MT20 very lairy Cam
MTS Valve train conversion
MTS Heads
Edelbrock ported intake
Edelbrock EPS 830 carb
Full balance
Cloyes heavy duty timing chain
2" Headers
Art Carr TH400 with transbake (Thanks Crusty)
B&M 2200 stall convertor
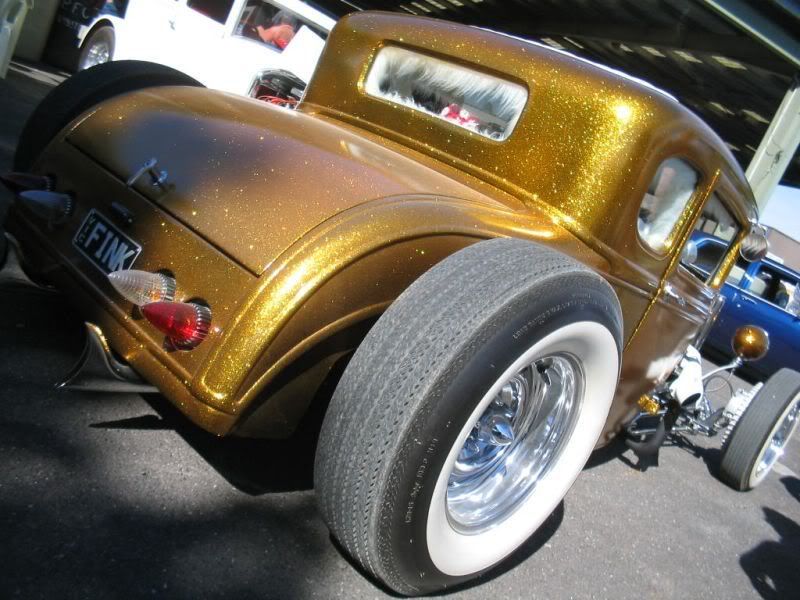
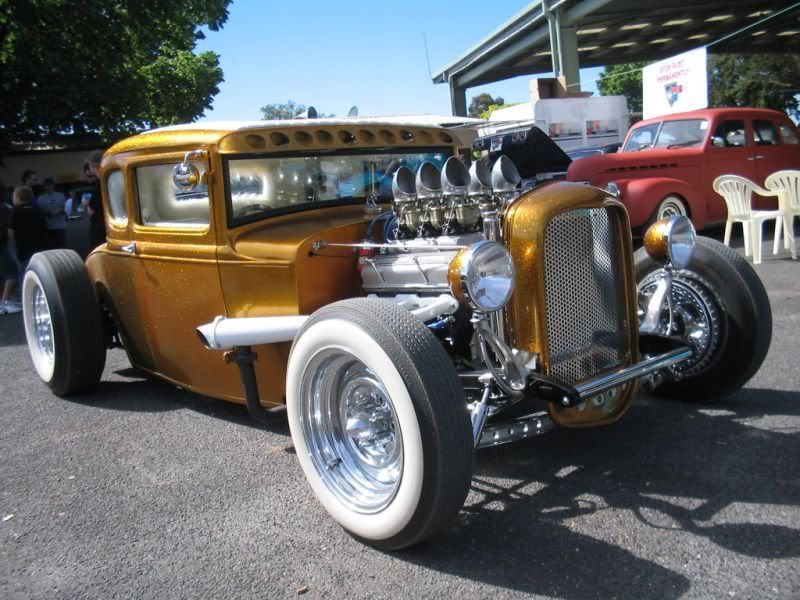
My aim is to build a 60's style T again with Radir Tri ribs, Copper metalflake paint & a White fur interior !!! Hope to run very low 11's or maybe high 10's on crossplys, Maybe more on slicks.
I'm aiming for this kind of look but with Copper flake and obviously a 26T body
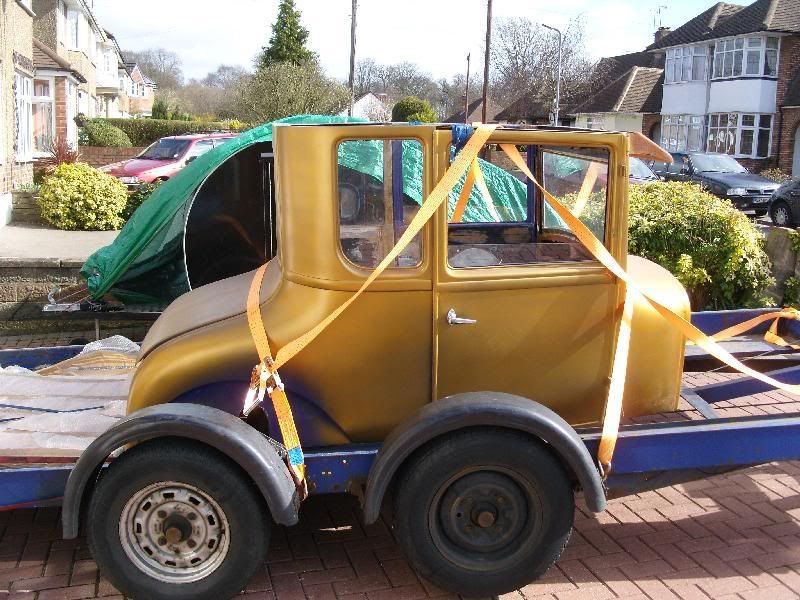
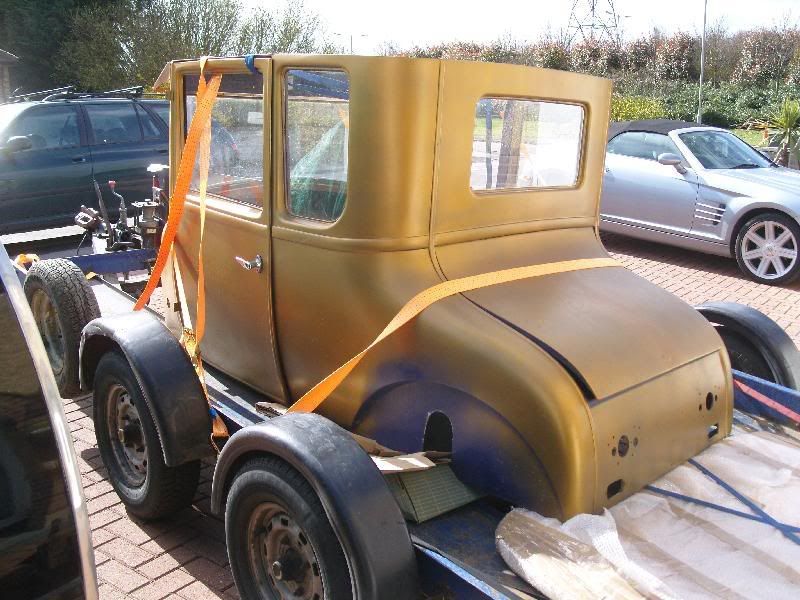
Picked up the body last night so here are a few pics, Its pretty good but there are a few things i will be changing. Ben the previous owner had a very nice Ash roof insert made but i'm not sure if i will be using it.
i have most of the parts for it now so won't be long before i can make start.
Ordered up the Stainless for the chassis yesterday, its going to be different from the norm.
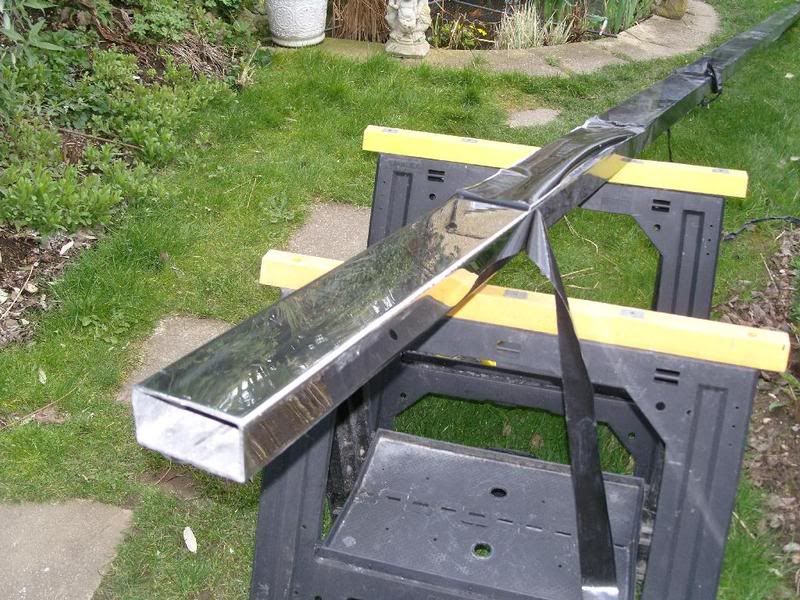
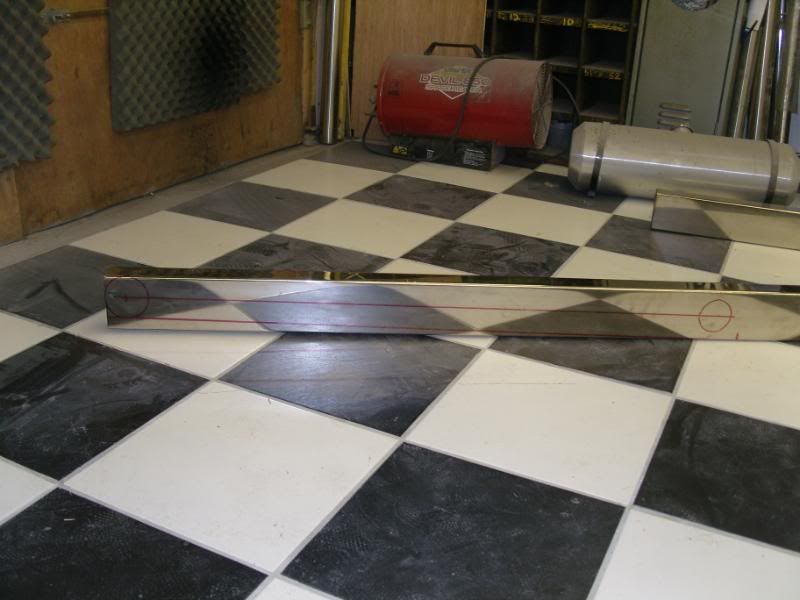
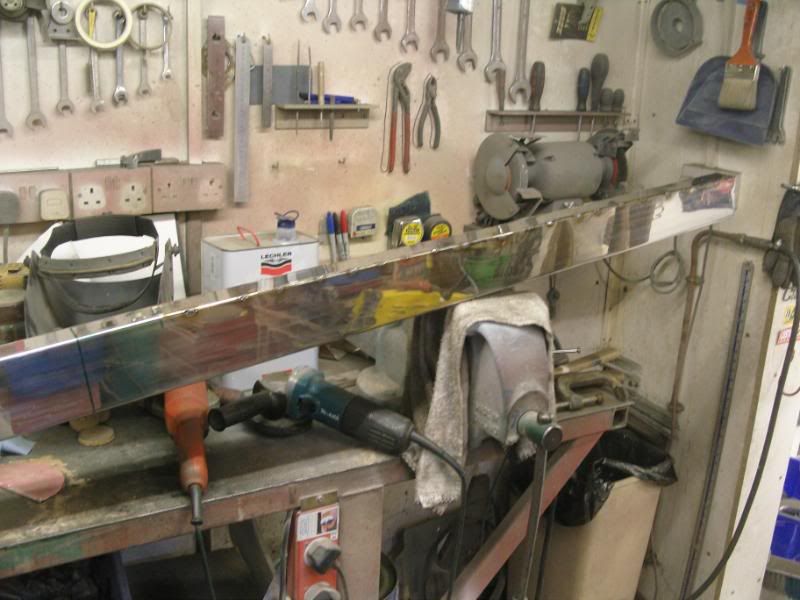
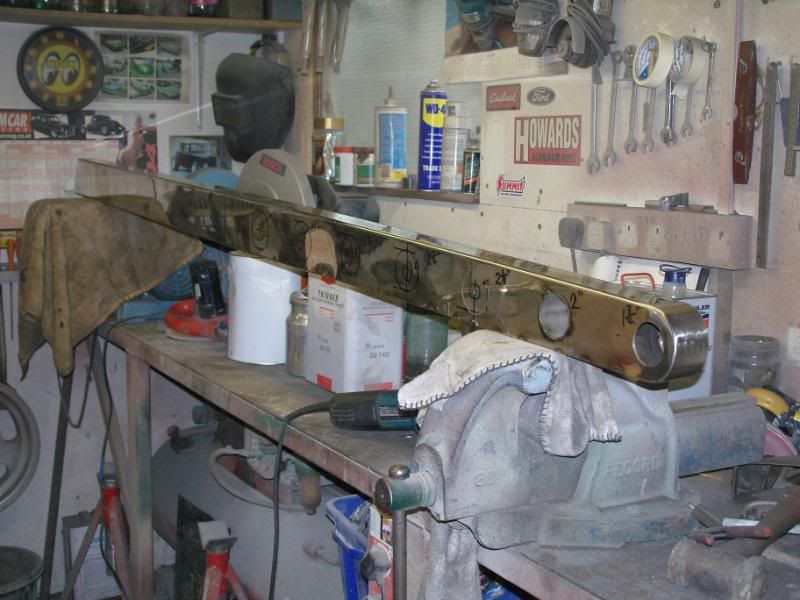
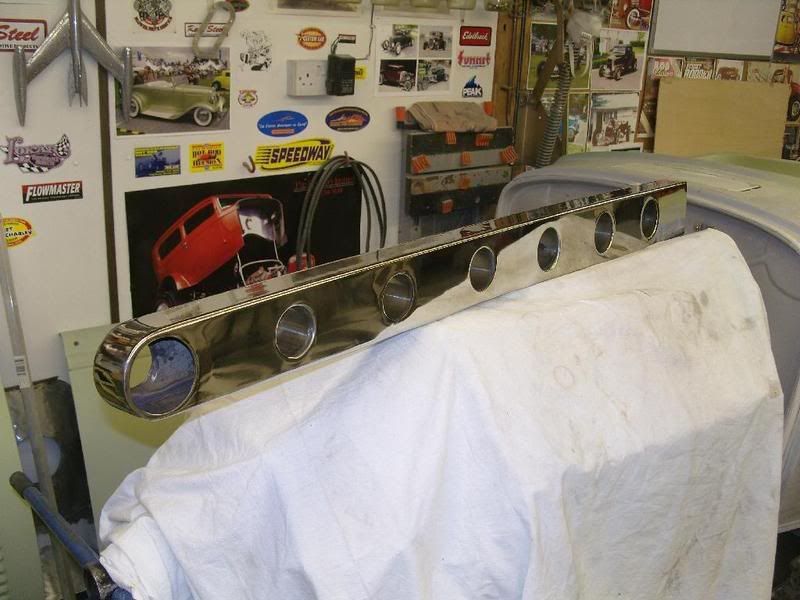
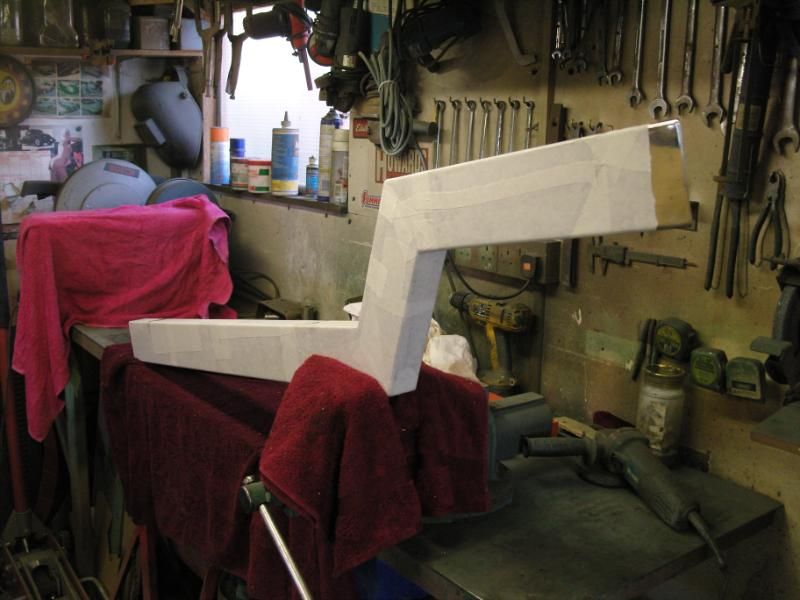
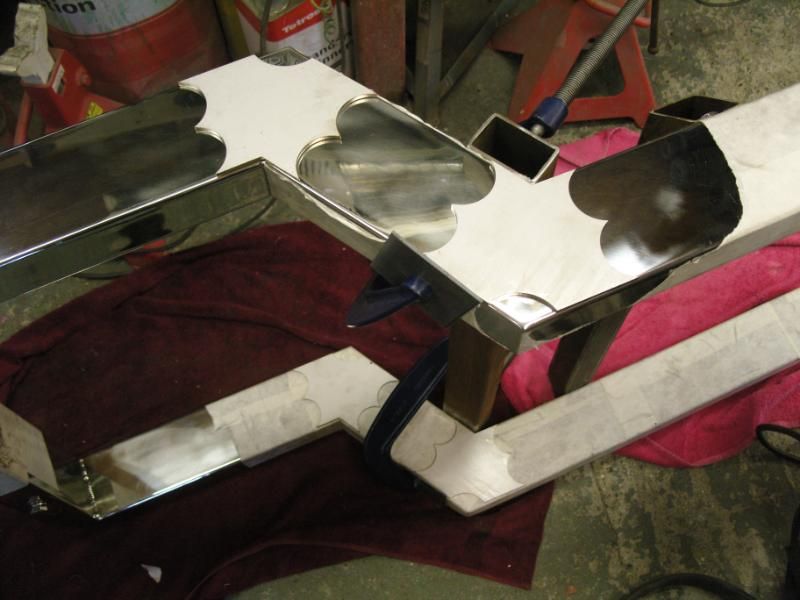
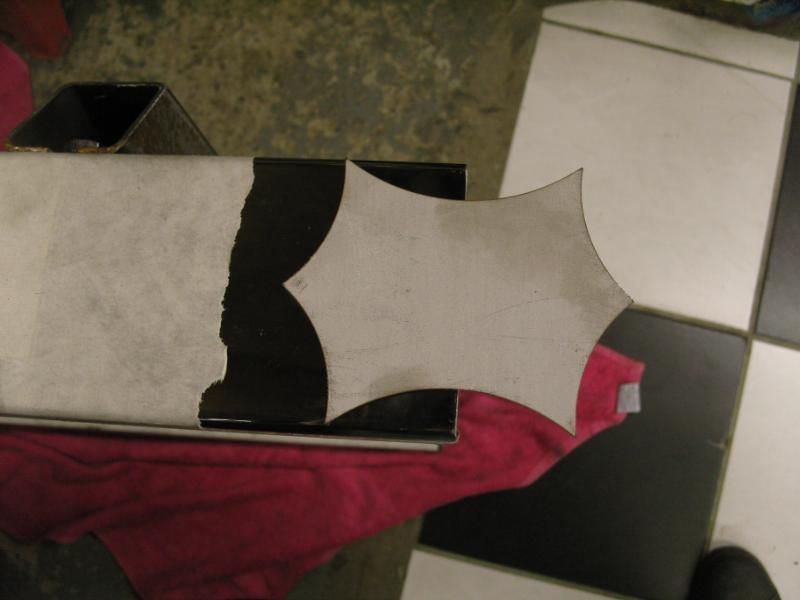
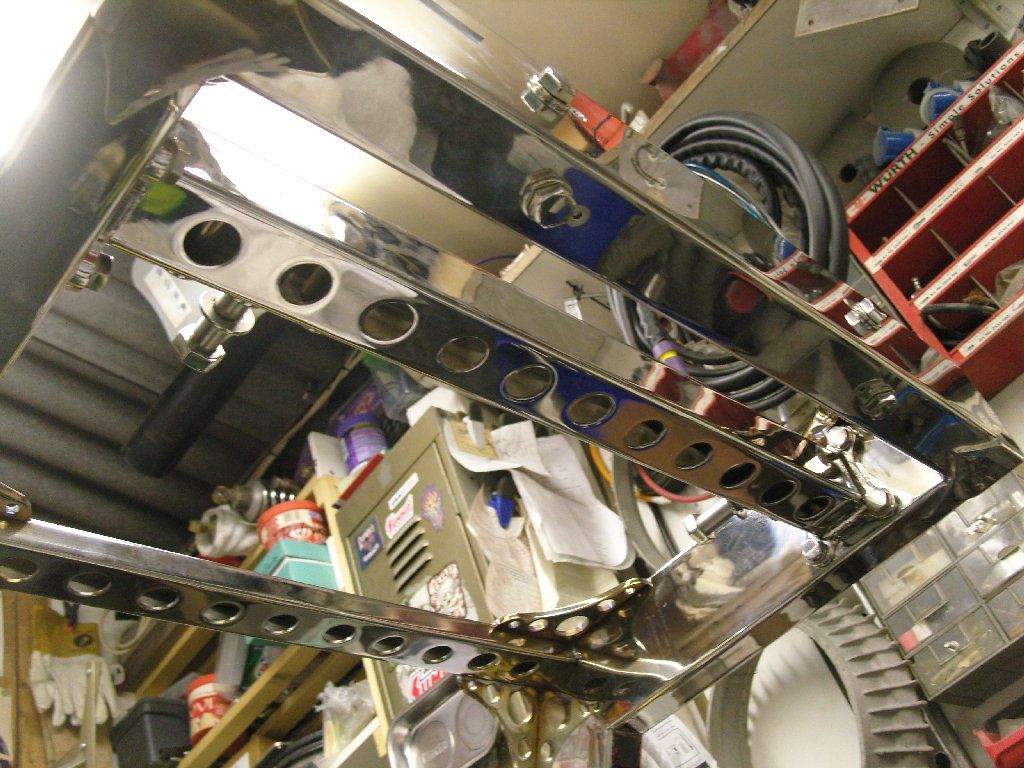
Did a bit on the 26T project today, Sue has been telling me to move the 6metre length of polished 100mm x 50mm stainless box from the side of the house, wasn't quite sure where to put it so decided to cut it up to size, I got a bit carried away and ended up making the side frame rails, still save having to do it later !!!
Its virtually ready for final welding so will probably pop over my mates in the week where I keep my chassis table and weld her up.
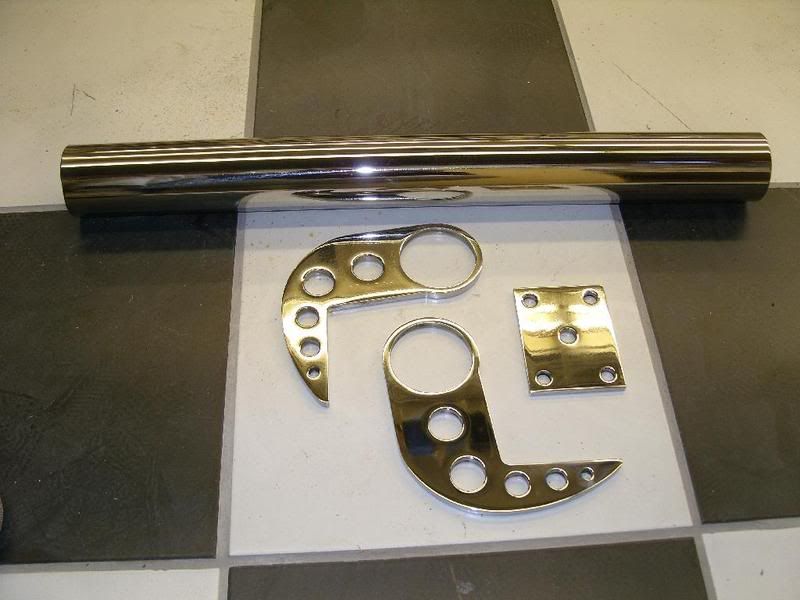
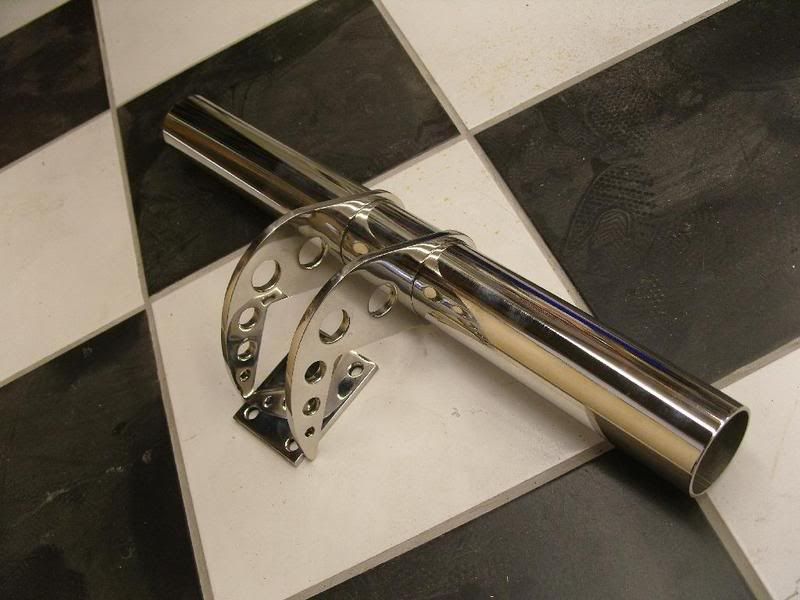
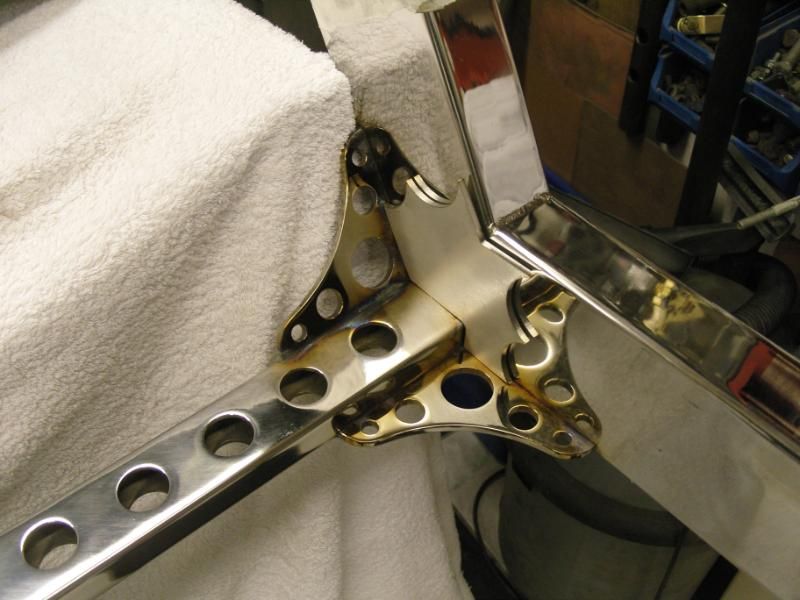
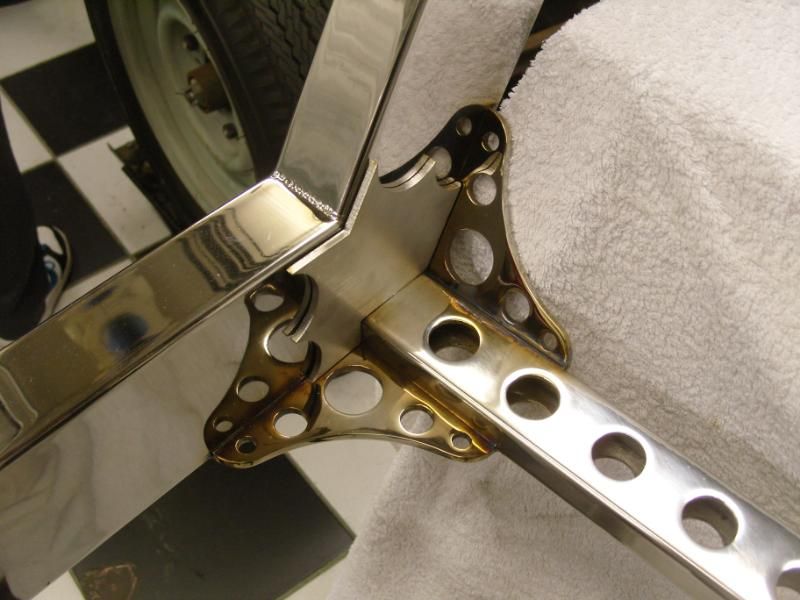
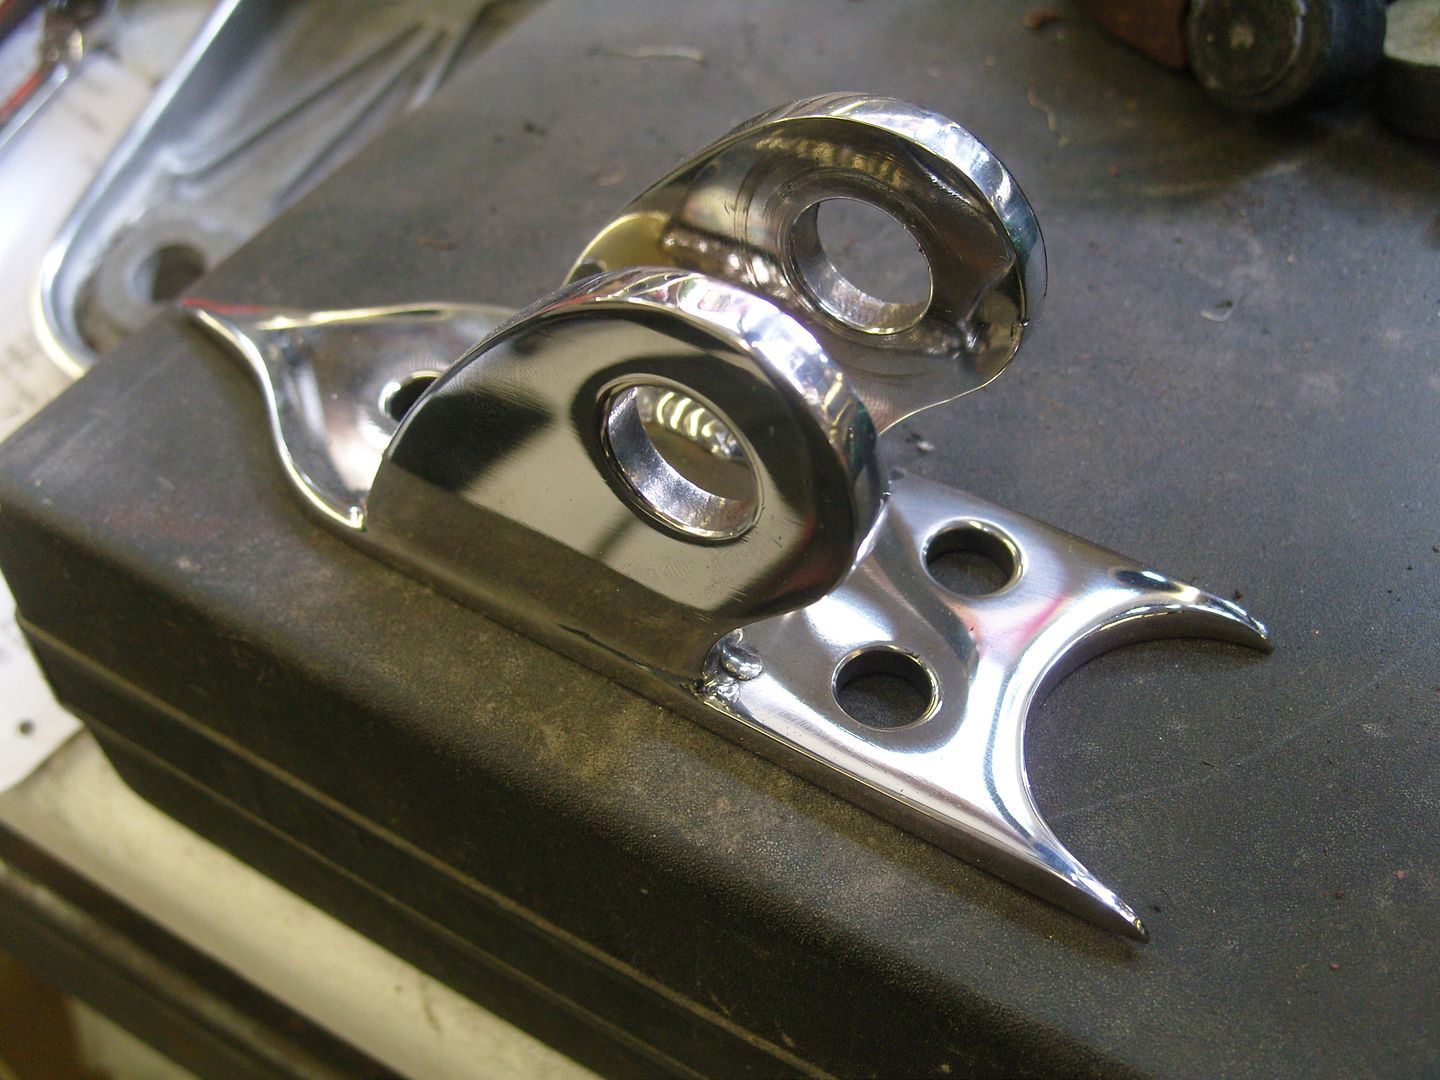
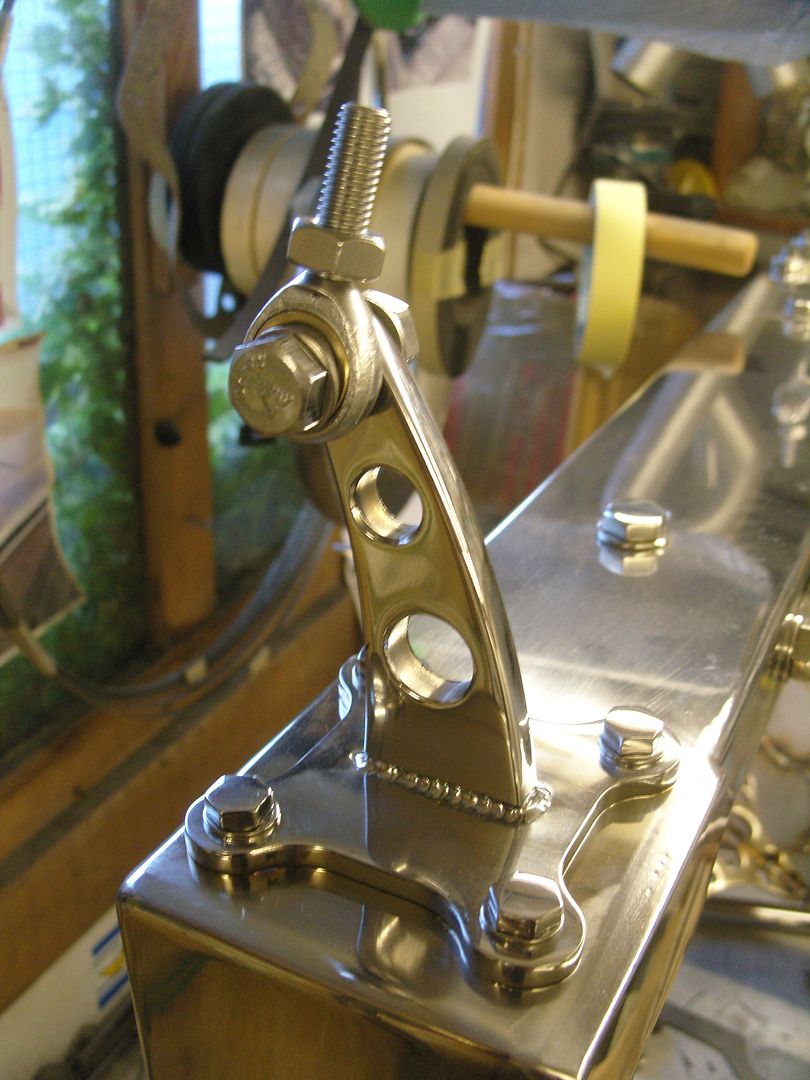
These are the sides for the front spring suicide perch, they are laser cut from 6mm stainless, thanks Paul
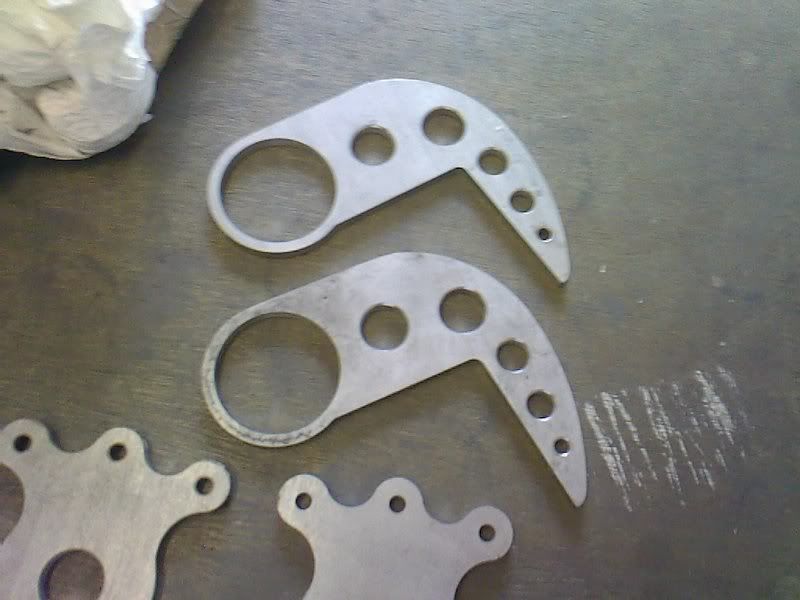
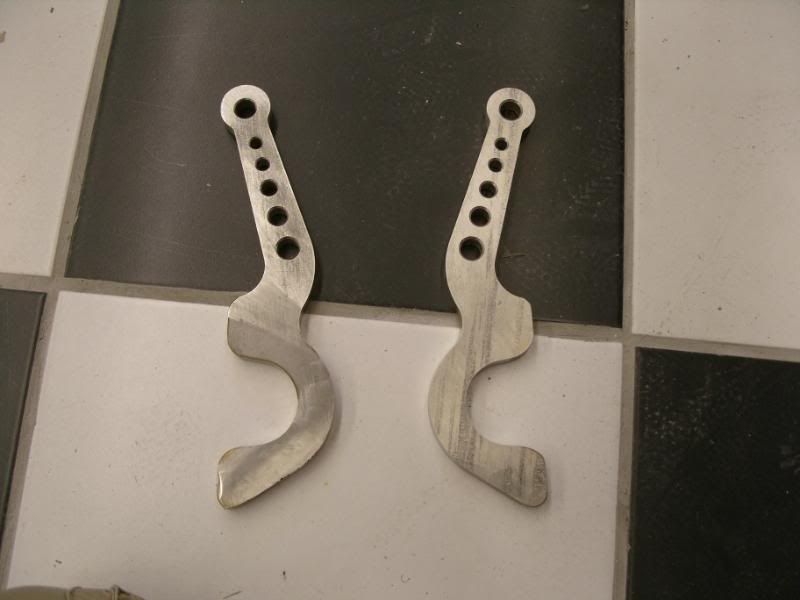
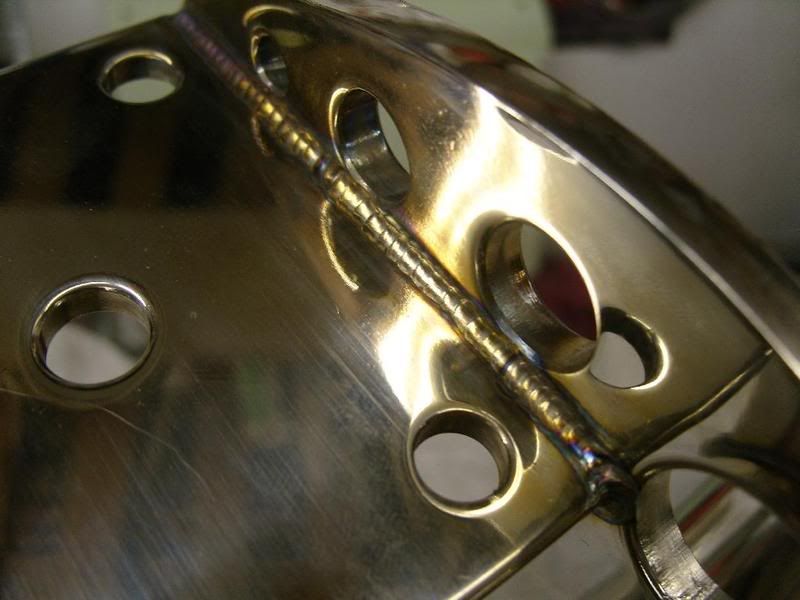
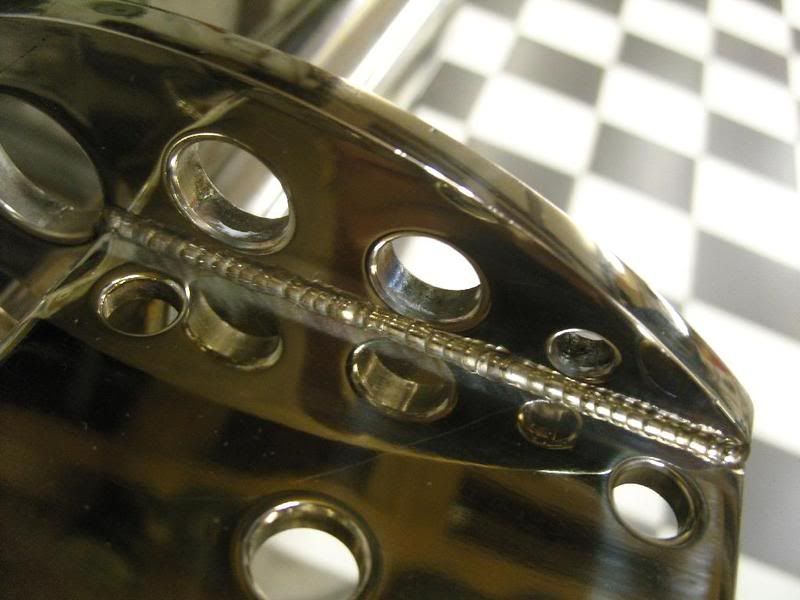
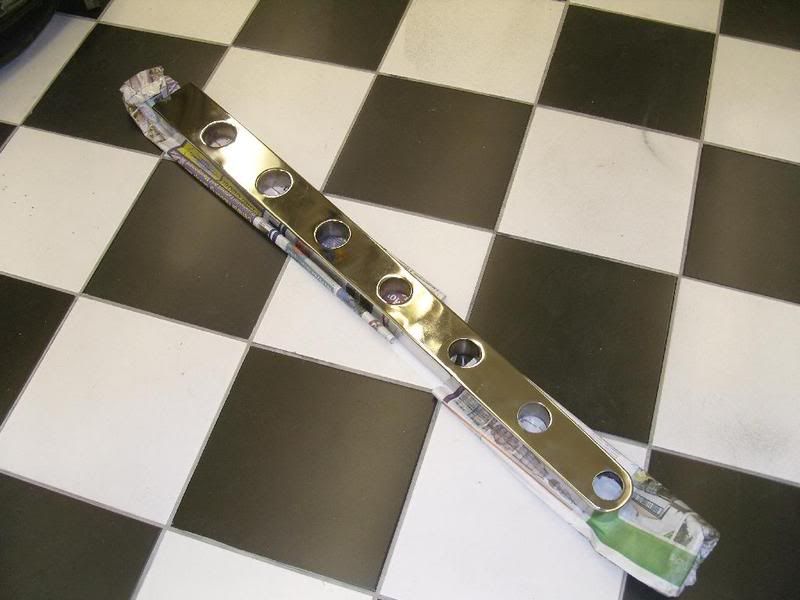
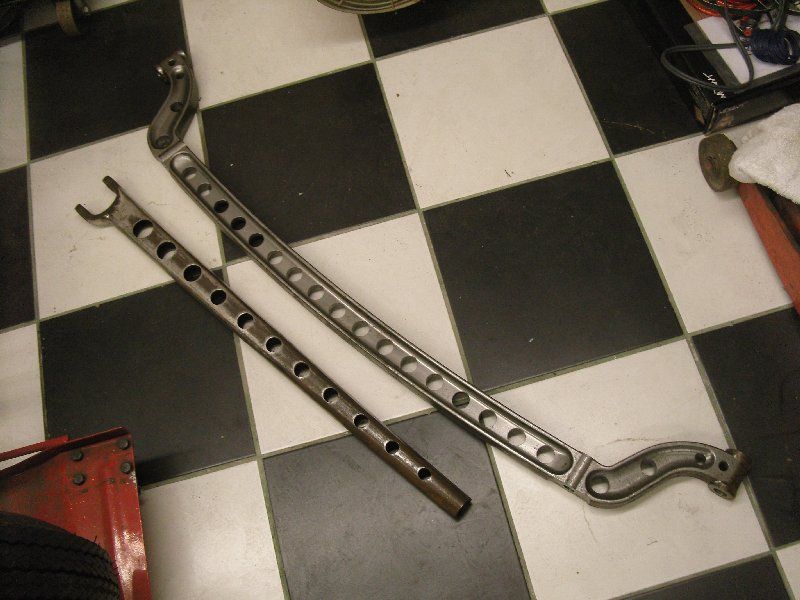
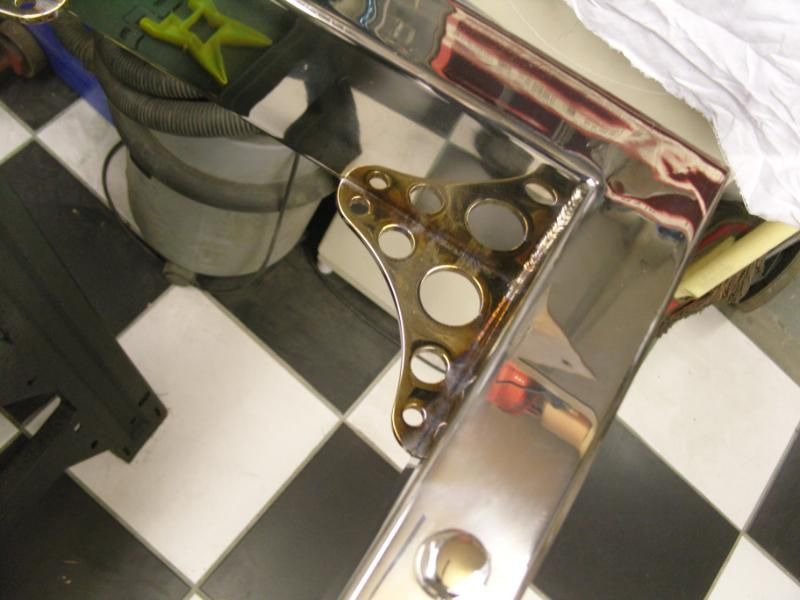
These are the front steering arms which were laser cut from 12mm stainless and then i drilled the graduated lightning holes.
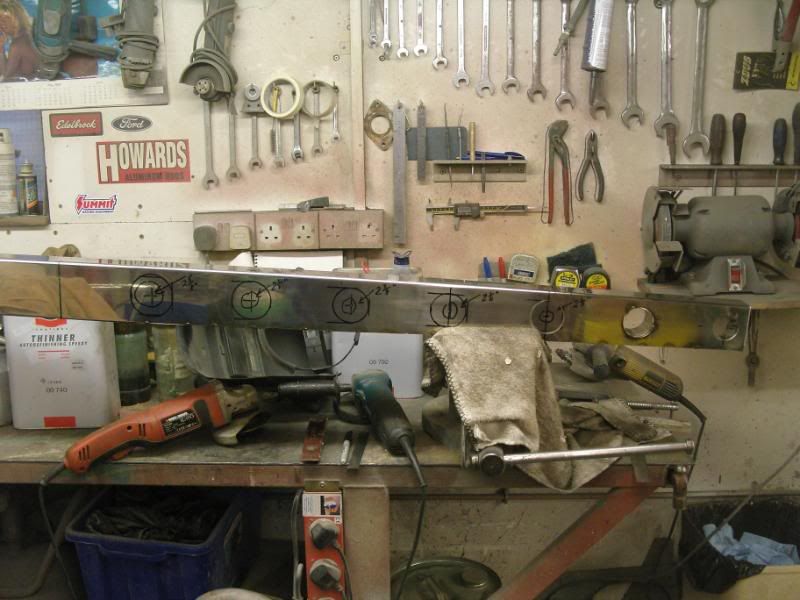
Here the side frame rails are marked out, the chassis design is the same as my 23T but i've goneup a size on the box as the Caddy motor has twice as much BHP and Torque as the 23T. The 100mm x 50mm looks very klunky on the front of a T so from the firewall forward will taper to 3".
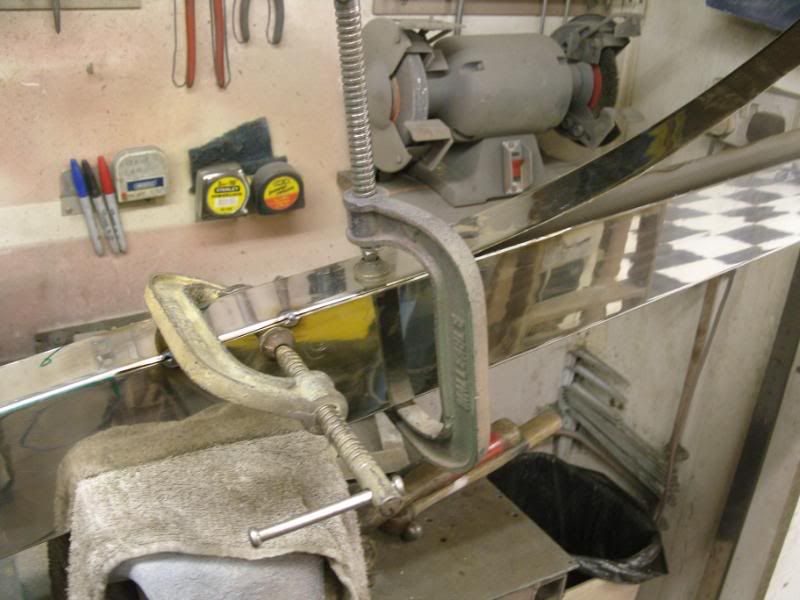
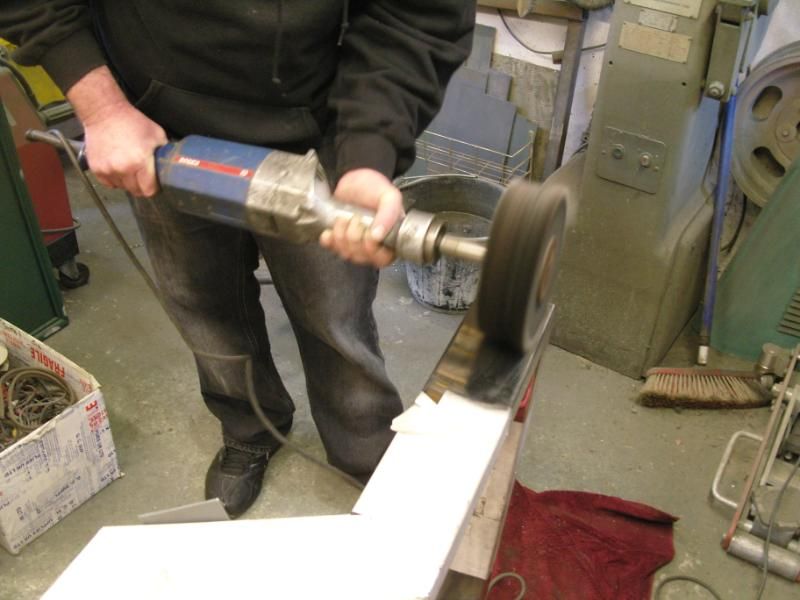
Once i had the side rails marked out it was time to get the 9" grinder out which was fitted with a 1mm stainless cutting disc and the sides were sliced. once i had finished cutting i noticed that the sides of the box had moved all over the place, this will be corrected with clamps before tack welding.

Here is the side rail being clamped back together and tack welded.
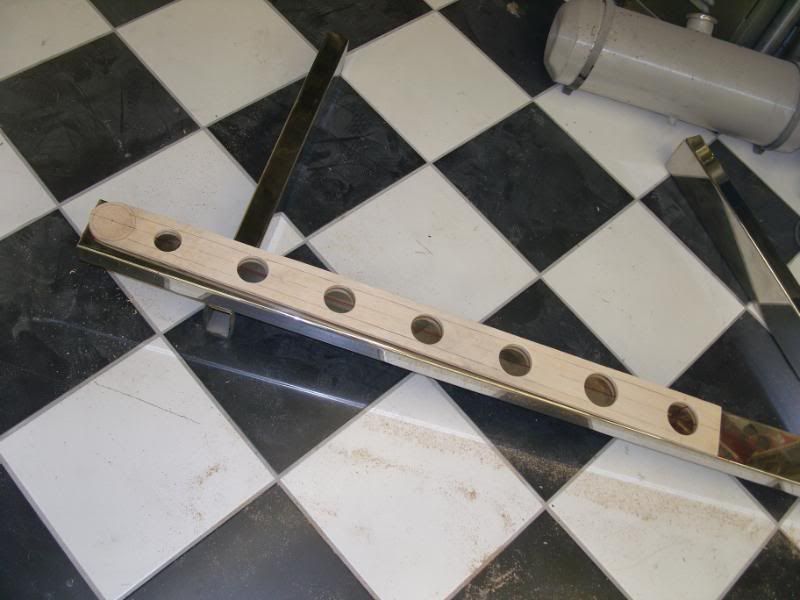
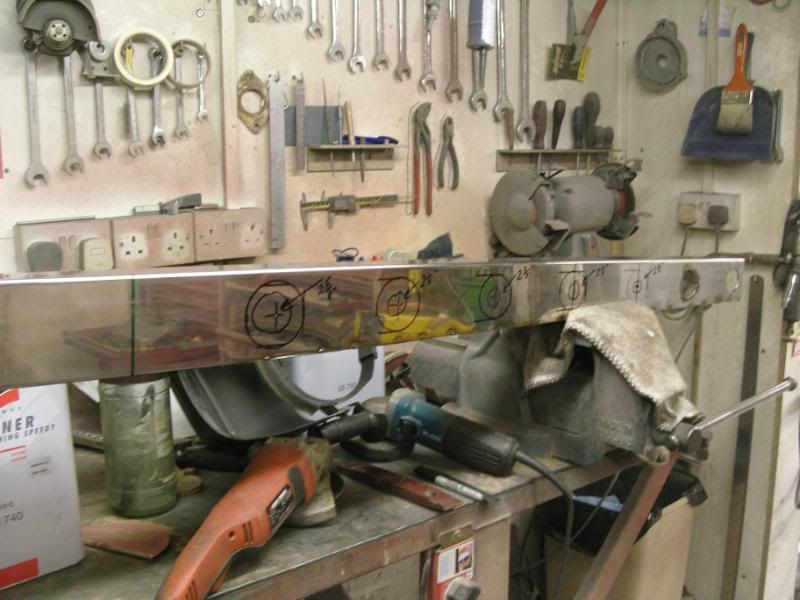
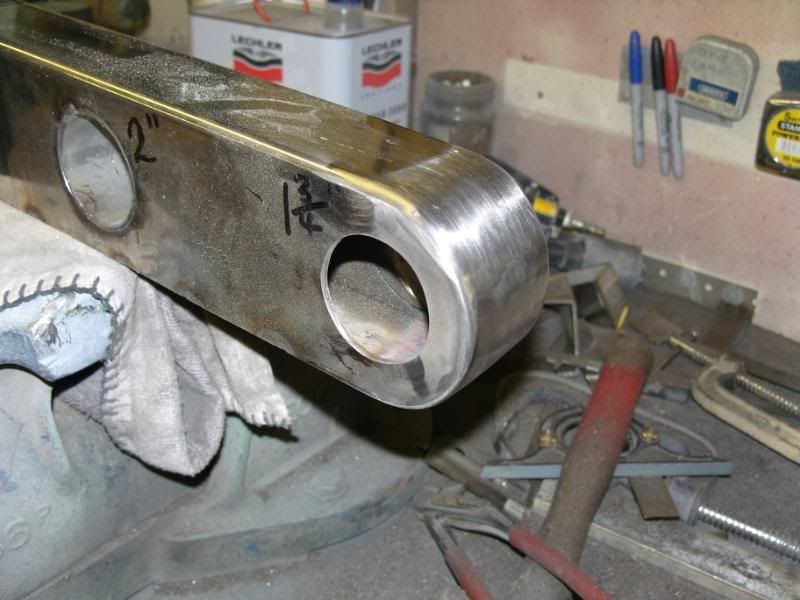
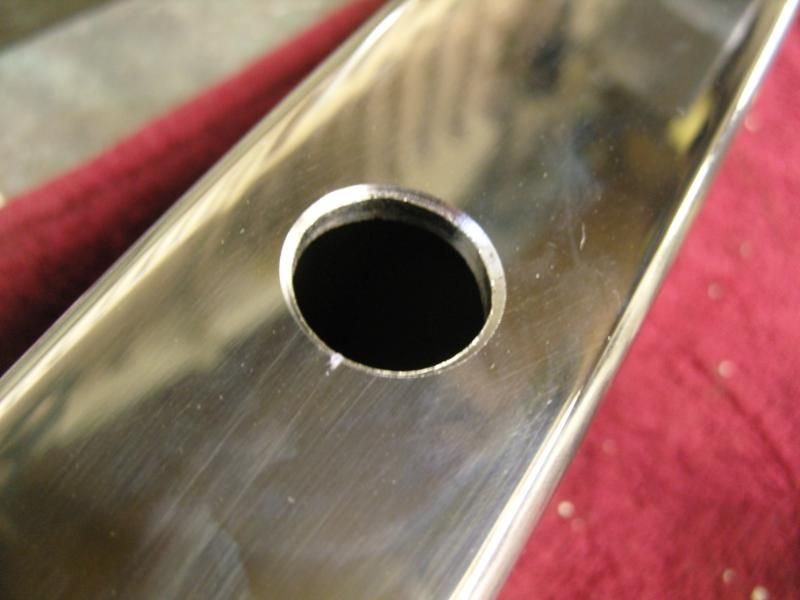
Here i'm marking out the lightning holes in the side rail, they are graduated to suit the taper and will be sleeved
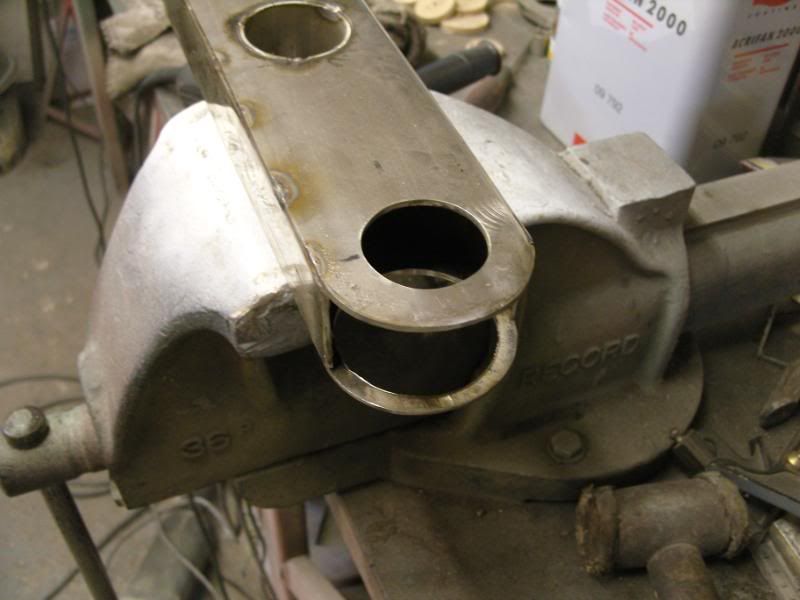
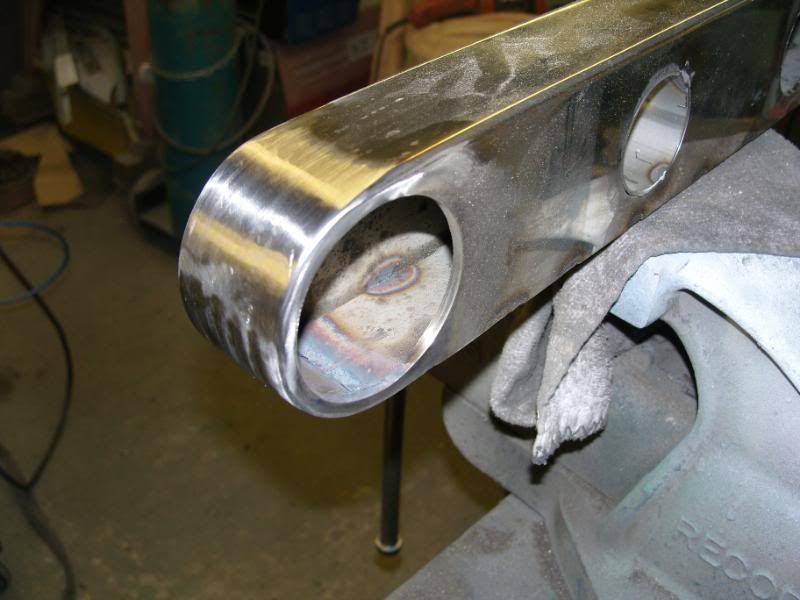
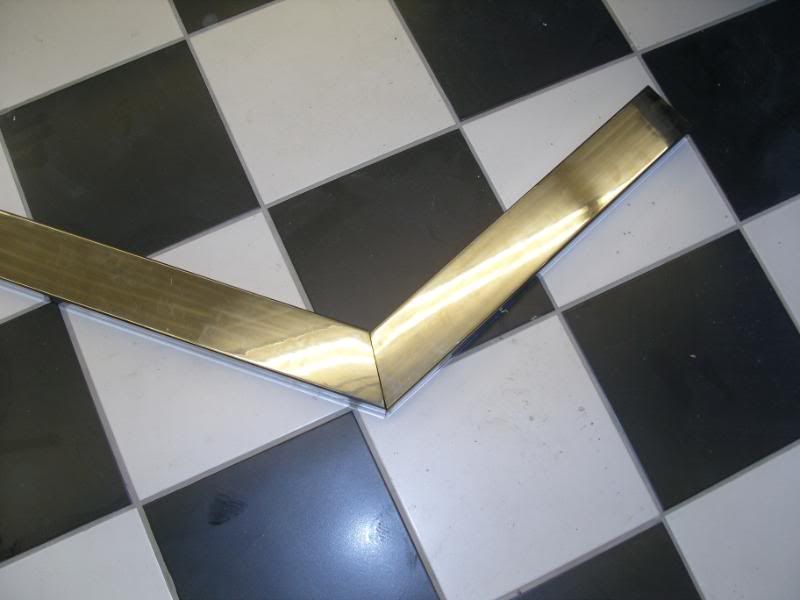
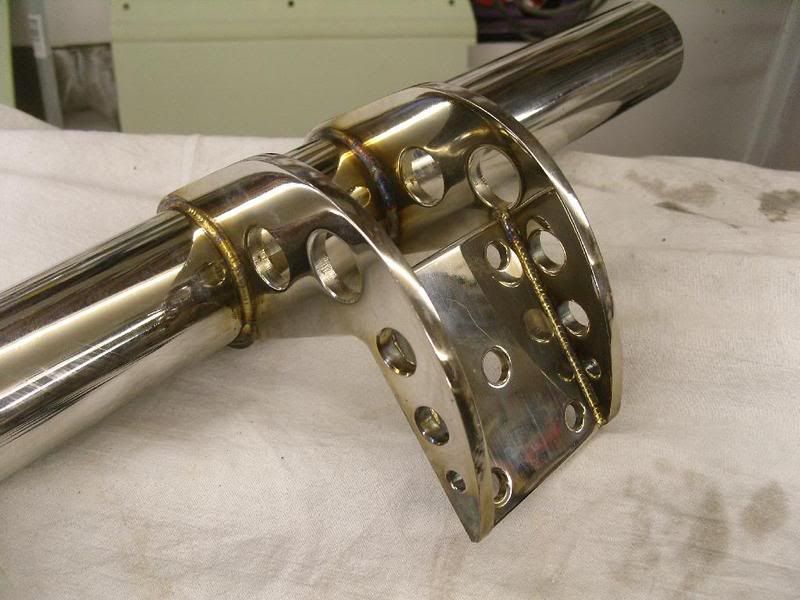
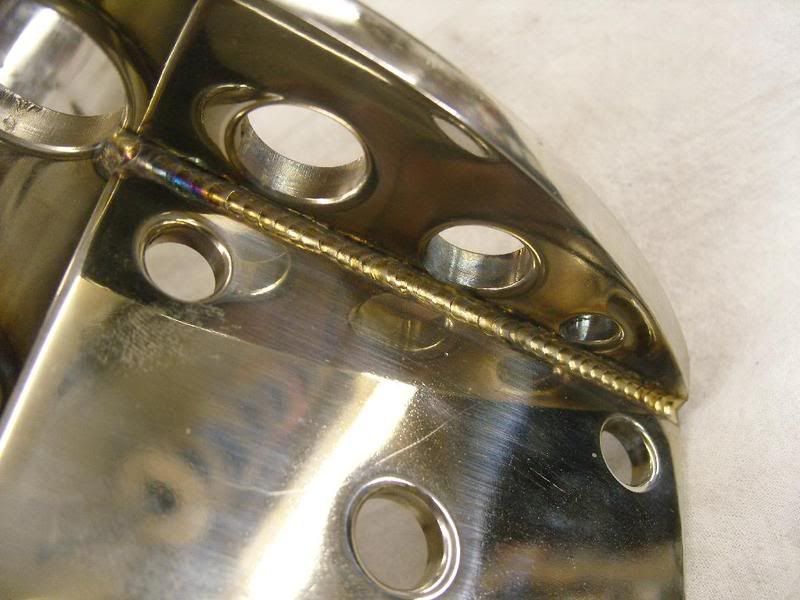
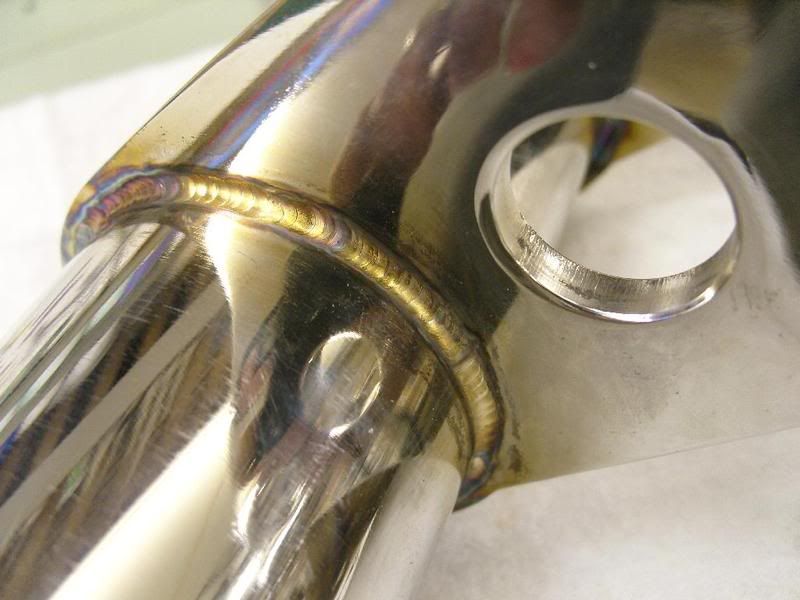
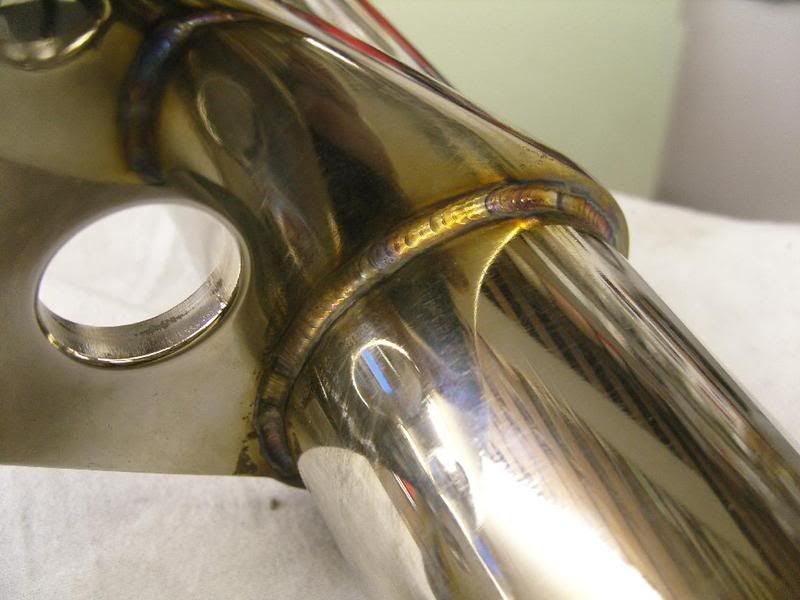
The front chassis horns are radiused and boxed off with 3mm plate that was curved with a 3" radius.
After TIG welding the curved plates in place everything was cleaned up ready for polishing.

Its aweful lonesome in the saddle since my horse died.
-
Advertising

- Google Adsense
- REGISTERED USERS DO NOT SEE THIS AD
-
05-30-2010 09:22 AM #2
CHR Member
- Join Date
- Apr 2009
- Location
- watford
- Car Year, Make, Model: 26T Coupe, 32 Roadster, 41 Willys Coupe
- Posts
- 2,363
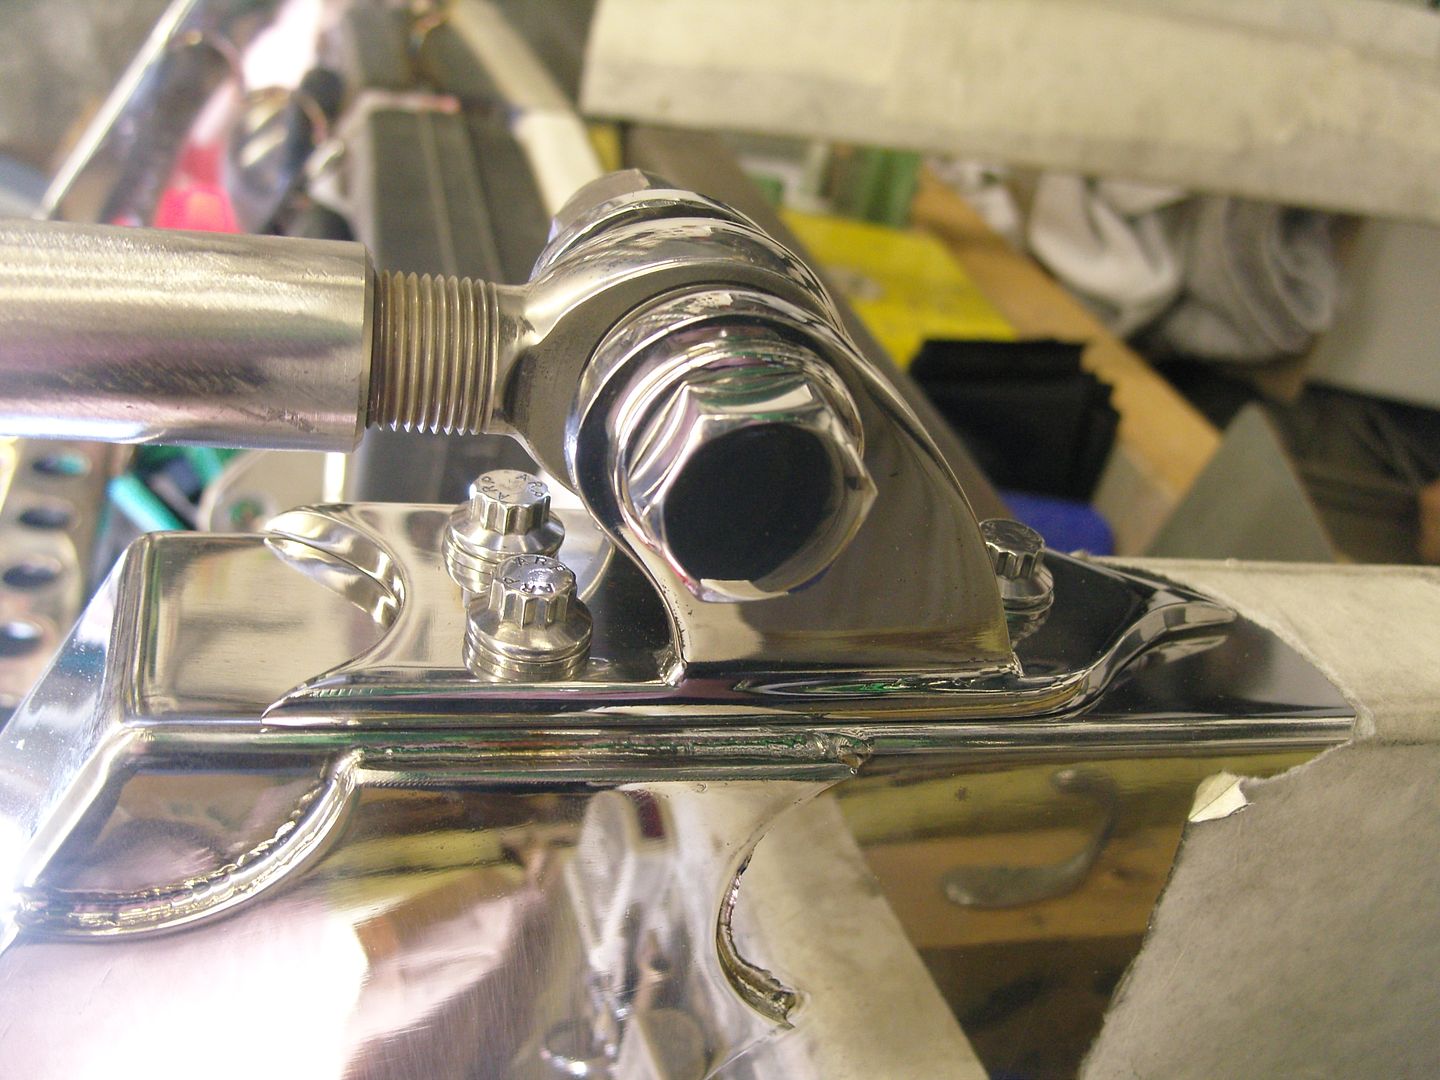
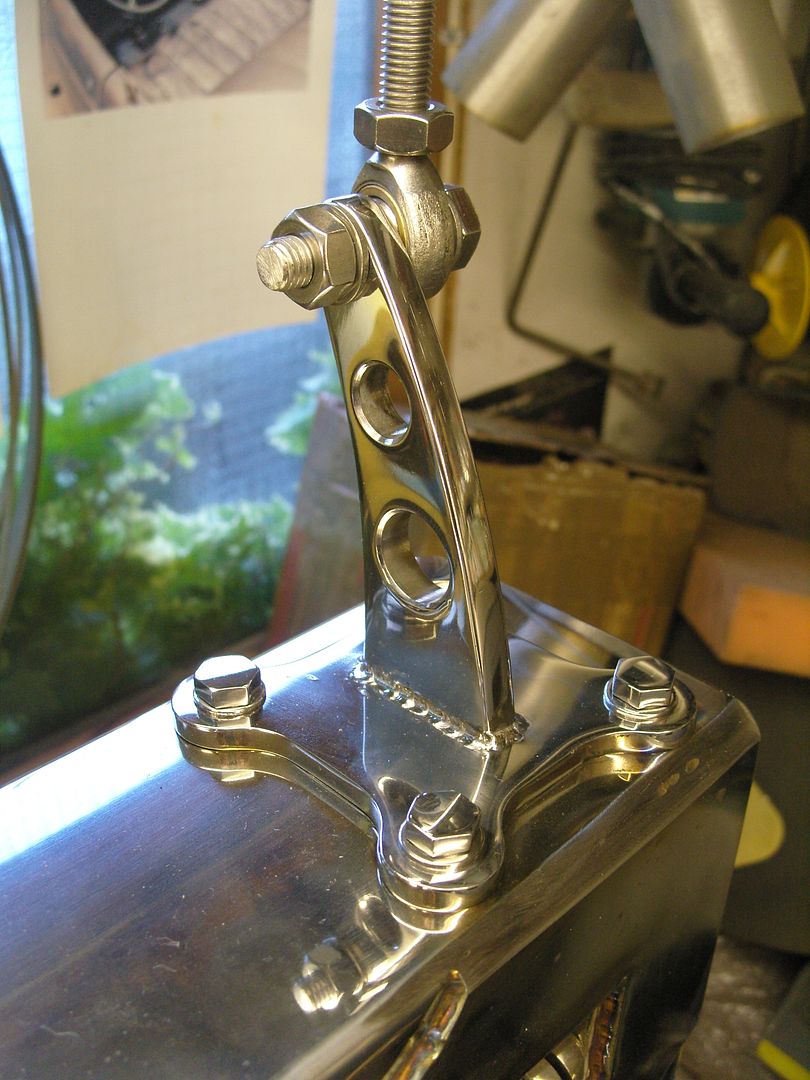
Got the suicide front polished up so just need to TIG together tomorrow and polish out the welds.
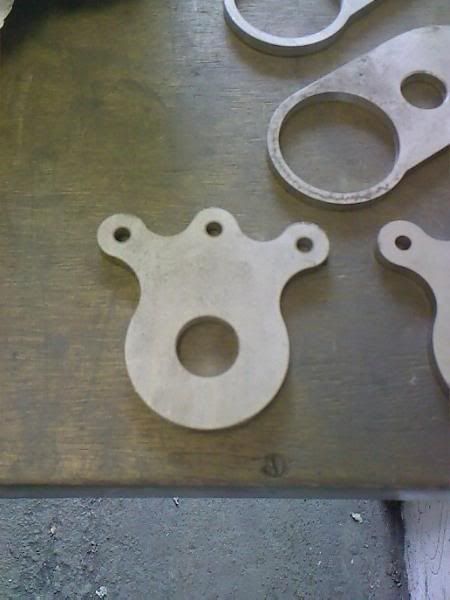
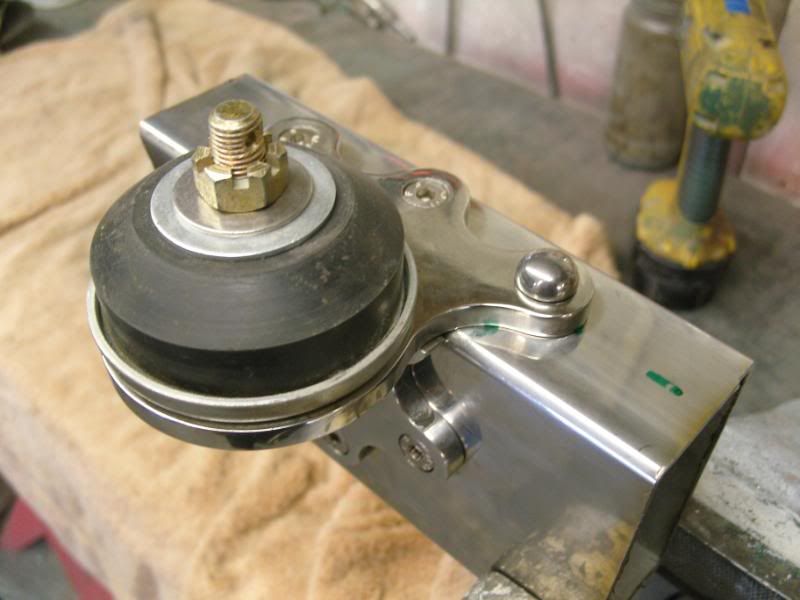
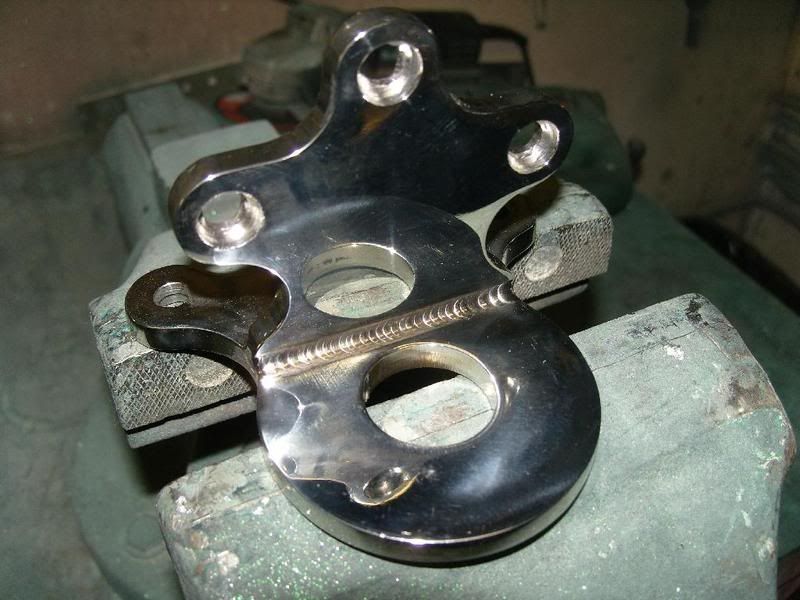
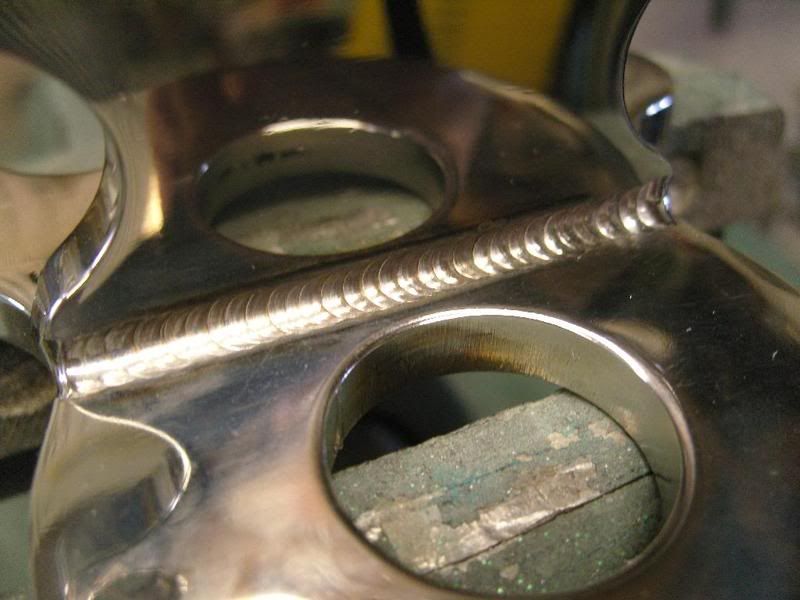
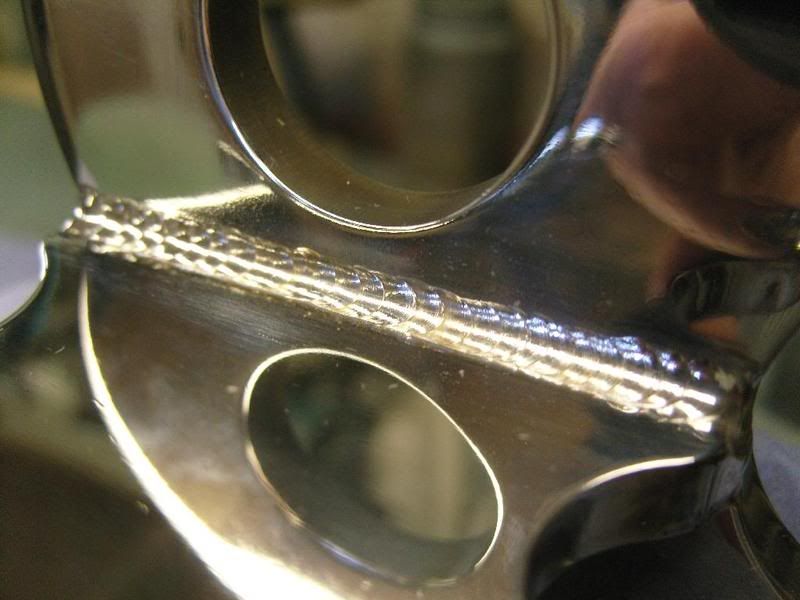
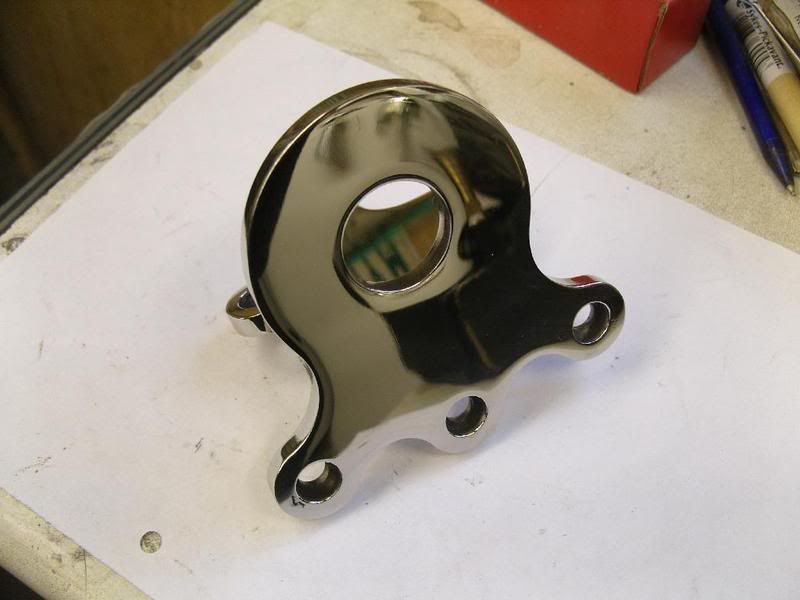
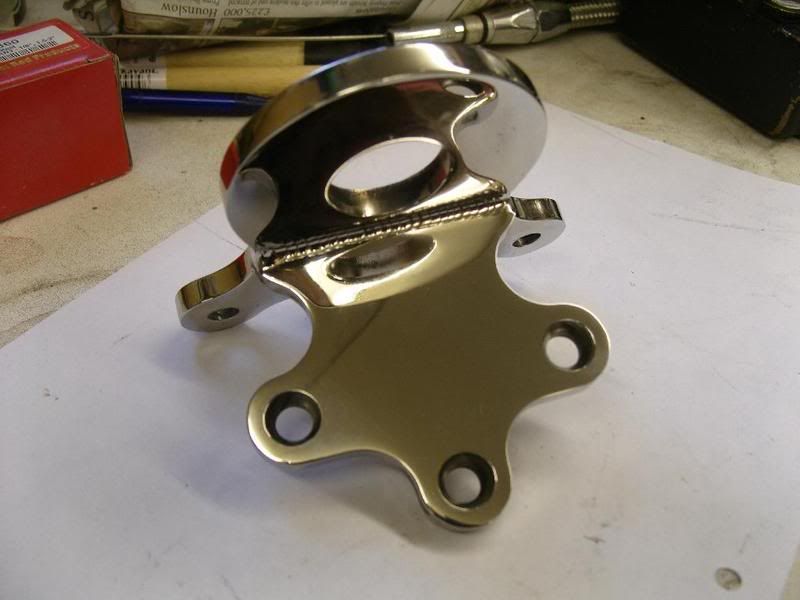
These are the other half of the engine mounts and the Trans mounts, And the engine steady bar.
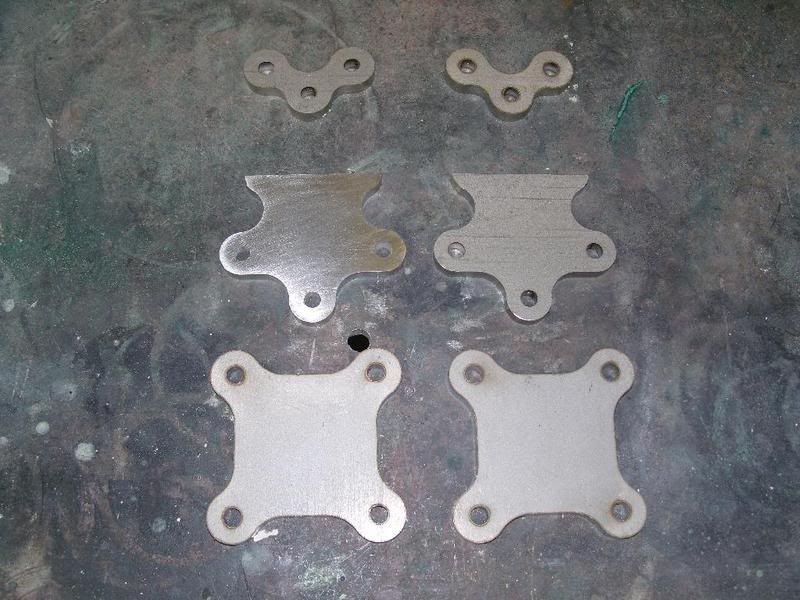
This is how the engine mounts go together, They will be TIG welded through the holes and then dummy rivets put in to cover the holes and give the look that they are rivetted in place.
A bit more progress, The front spring perch and front chassis legs are finish welded and had a light polish. Next it will all be finish welded on the chassis jig.
Its aweful lonesome in the saddle since my horse died.
-
05-30-2010 09:25 AM #3
CHR Member
- Join Date
- Apr 2009
- Location
- watford
- Car Year, Make, Model: 26T Coupe, 32 Roadster, 41 Willys Coupe
- Posts
- 2,363
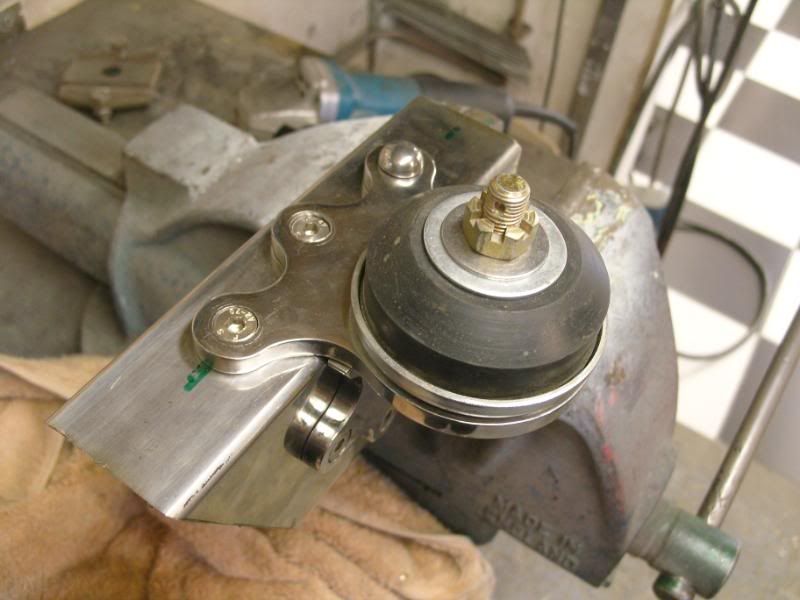
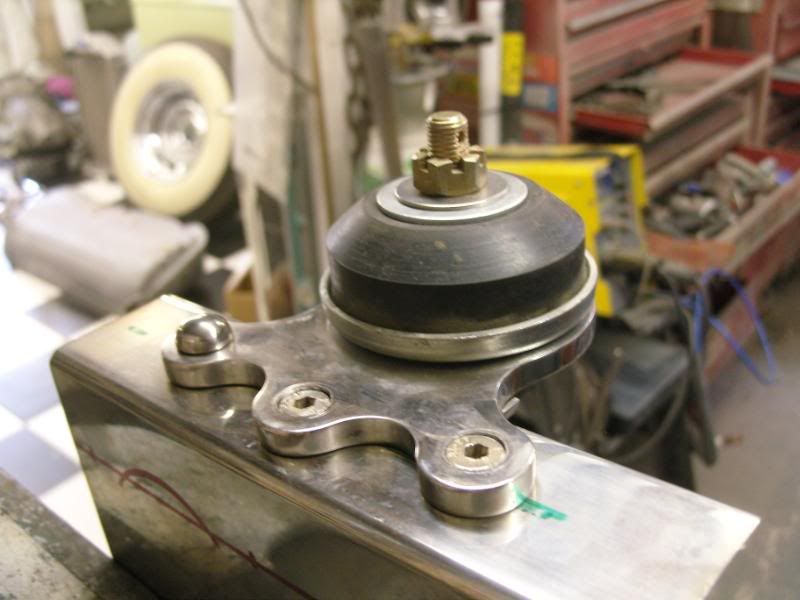
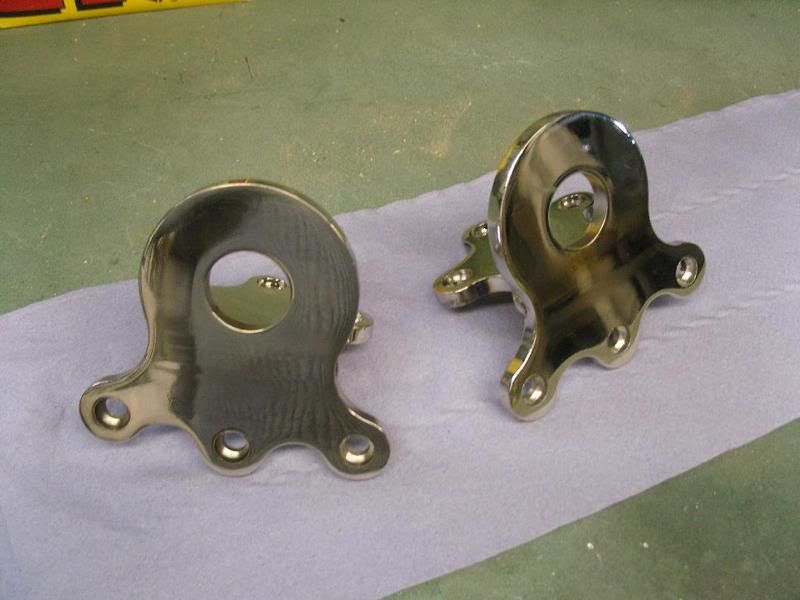
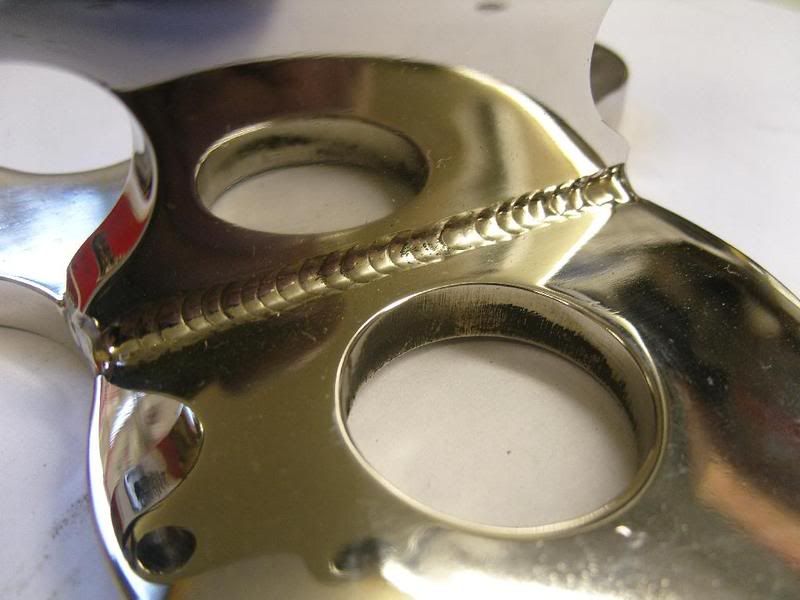
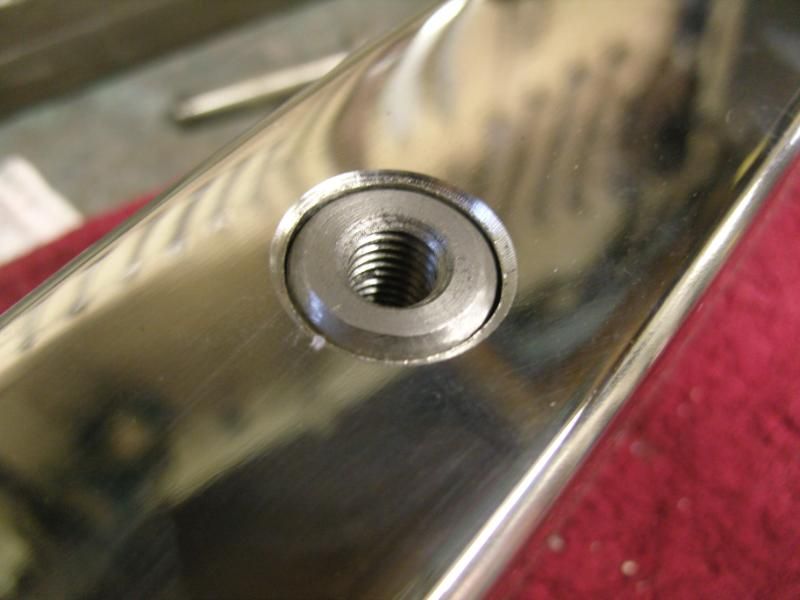
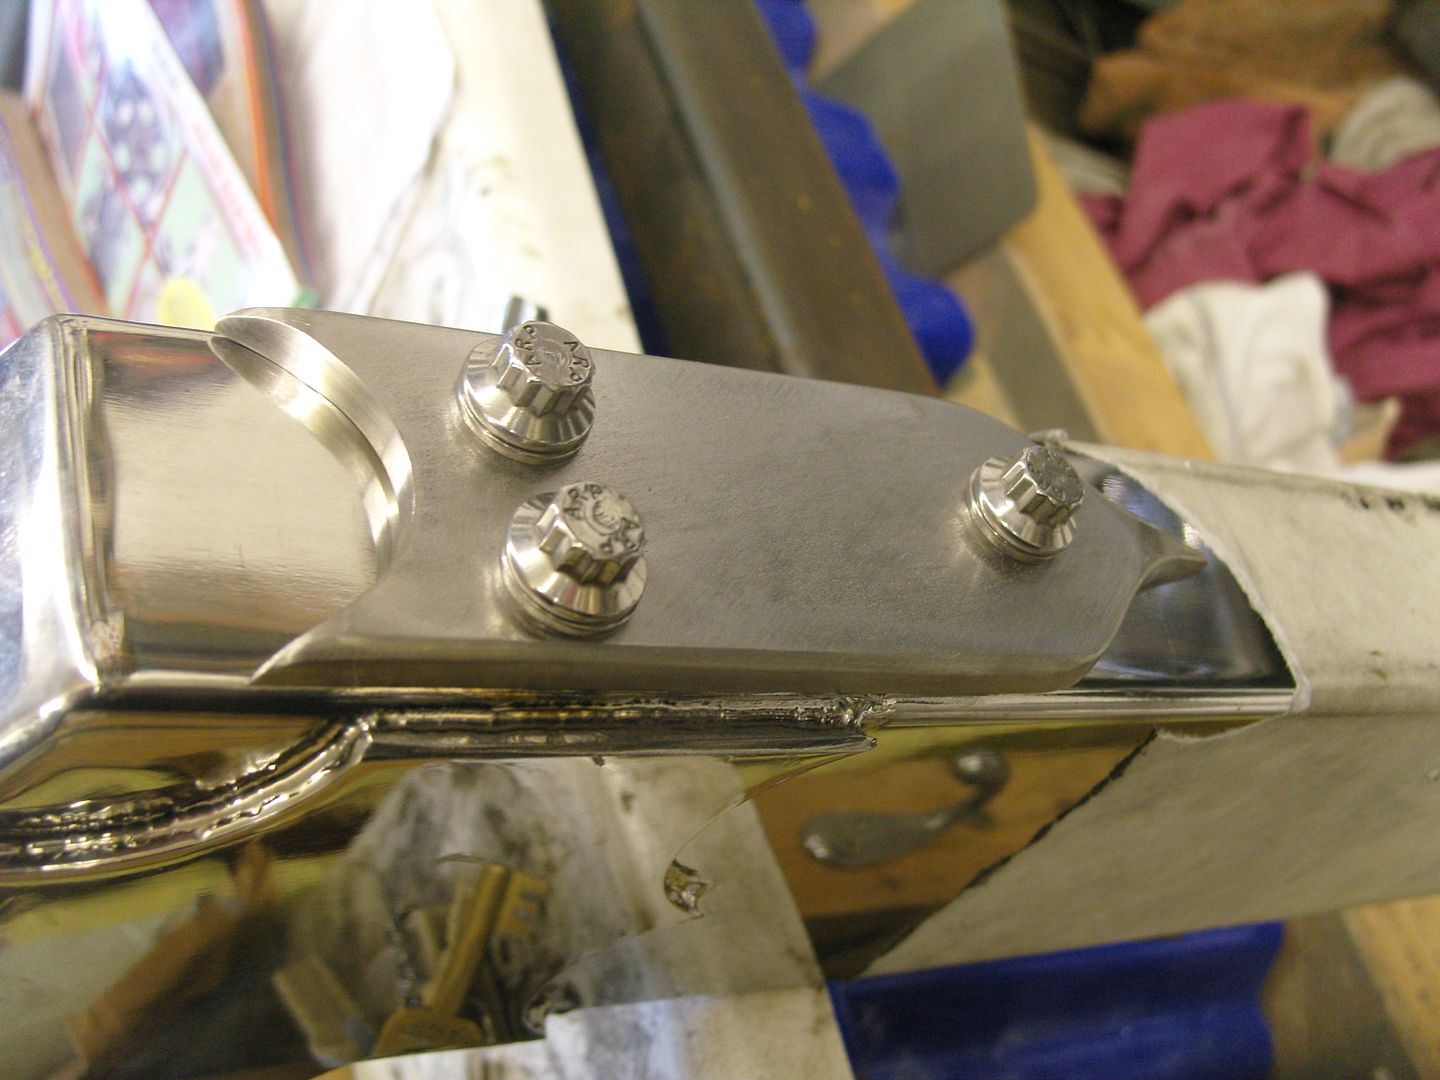
Had to make a slight modification to the engine mounts, The original method of fixing was to weld down through the holes and cap off with a rivet, this turned out to be a pain so instead the holes have been counterbored and they will now bolt into threaded inserts welded into the frame and then capped off with rivets to complete the look. I'm afraid progress is going to be a bit slow on this project as i'm in the middle of painting my 32 roadster, just working on this when i'm waiting for paint to dry :-)
Its aweful lonesome in the saddle since my horse died.
-
05-30-2010 09:32 AM #4
CHR Member
- Join Date
- Apr 2009
- Location
- watford
- Car Year, Make, Model: 26T Coupe, 32 Roadster, 41 Willys Coupe
- Posts
- 2,363
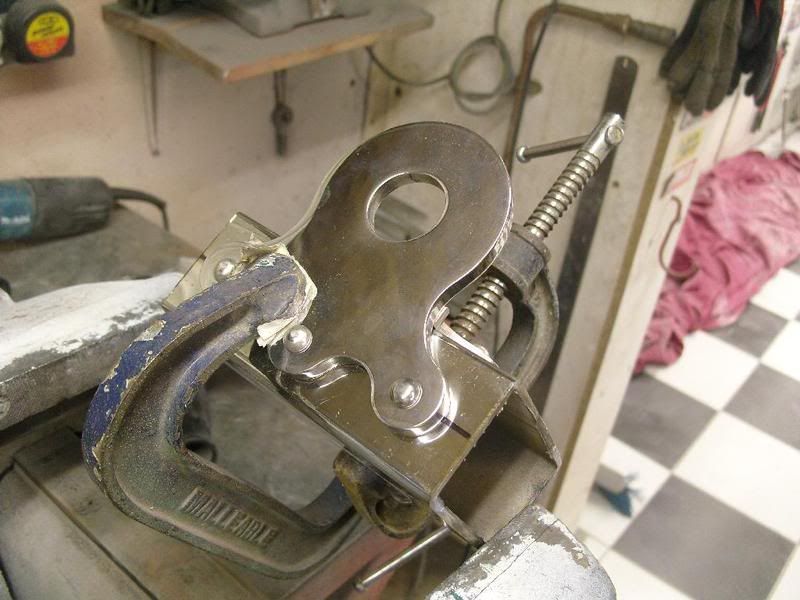
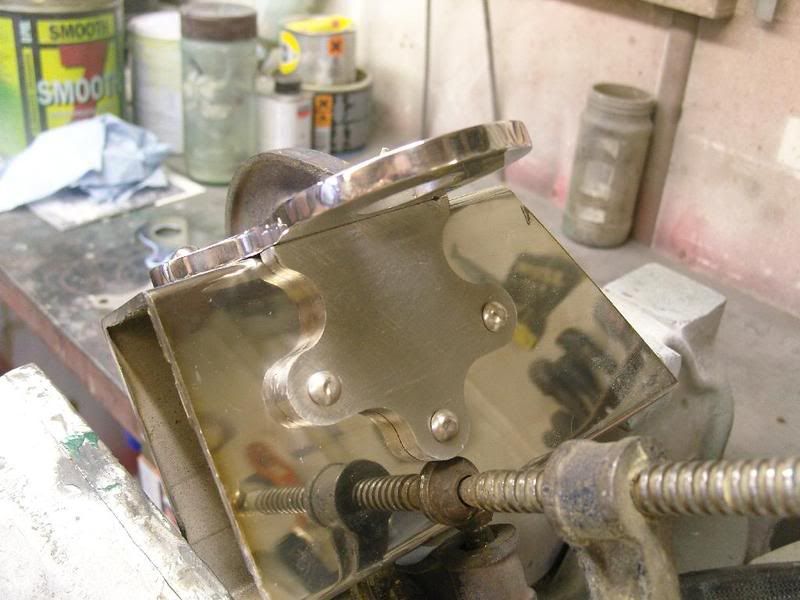
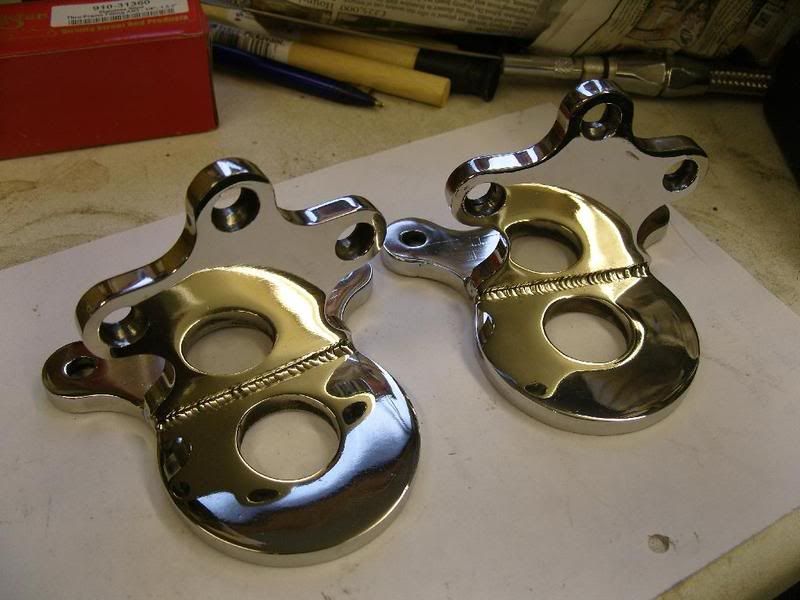
Not much i'm afraid but engine mounts welded.
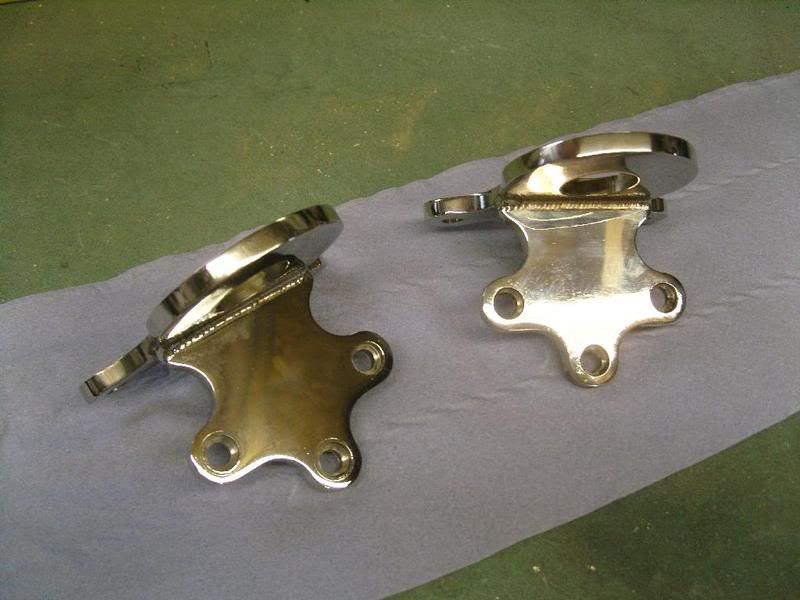
Finally got round to polishing the engine mounts today.
Its aweful lonesome in the saddle since my horse died.
-
05-30-2010 09:42 AM #5
CHR Member
- Join Date
- Apr 2009
- Location
- watford
- Car Year, Make, Model: 26T Coupe, 32 Roadster, 41 Willys Coupe
- Posts
- 2,363
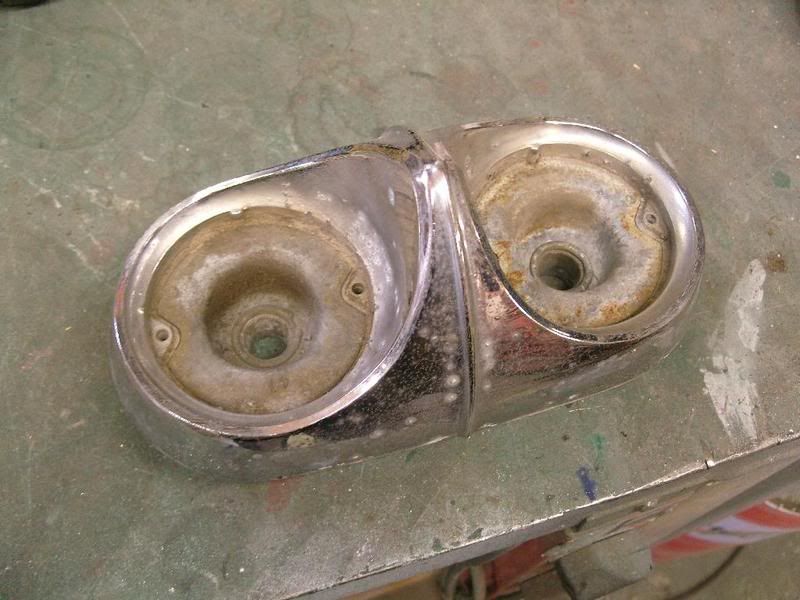
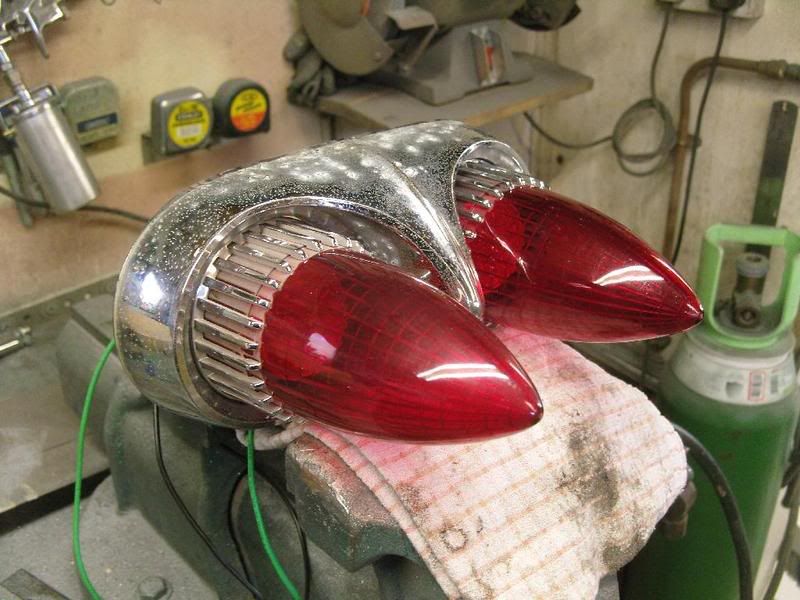
Got lucky at the swapmeet and picked up a pair of Impala rear light bezels that i've been looking for over the last 12 months (thanks 58delray)
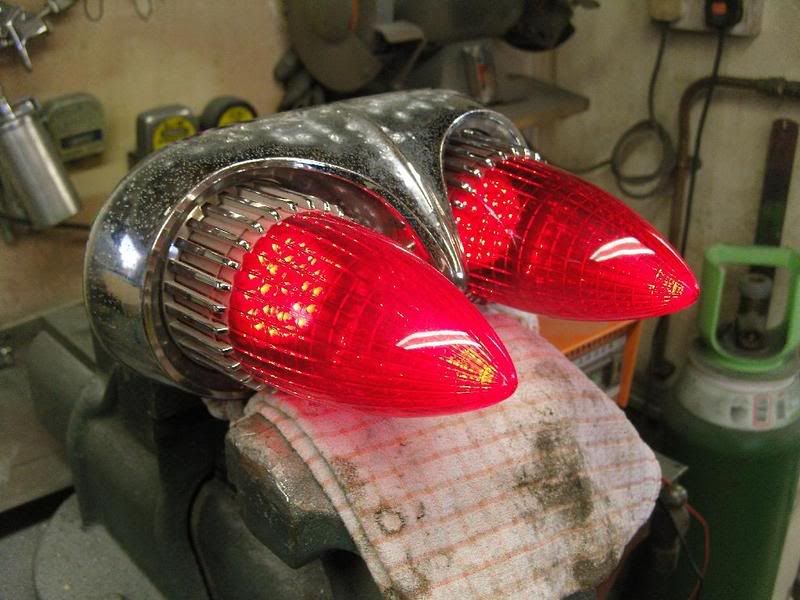
I've fitted them with dual 59 Caddy tail lights, should look cool lit up on the rear panel
Took them to the chromer next day and he said he could return them to show quality despite them being quite pitted
First job was to drill out the old bases.
Next job was to remove all the sticky out bits.
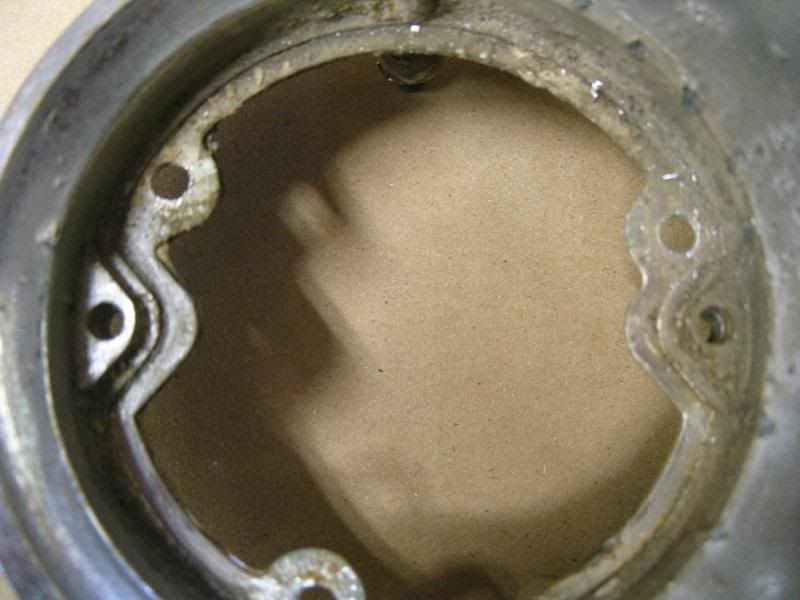
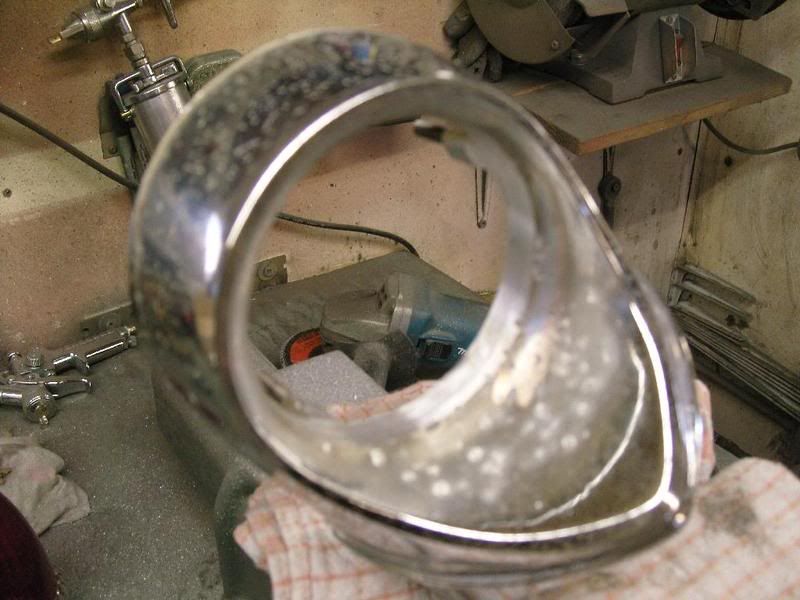
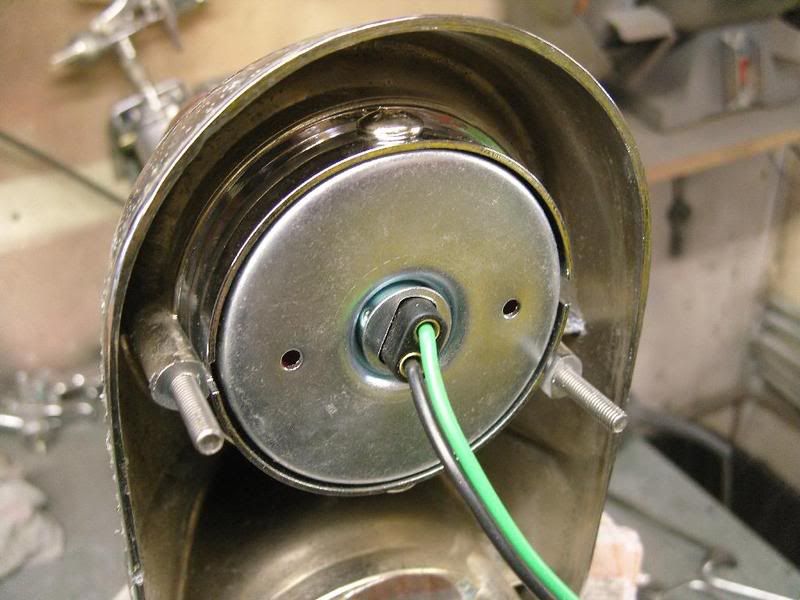
Next some simple brackets were made up after shortening the stud posts the thickness of the bracket material.
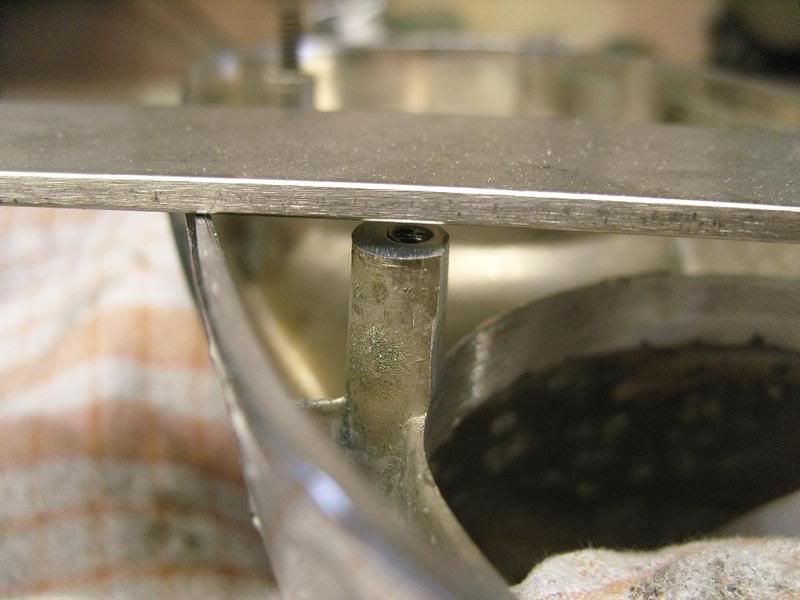
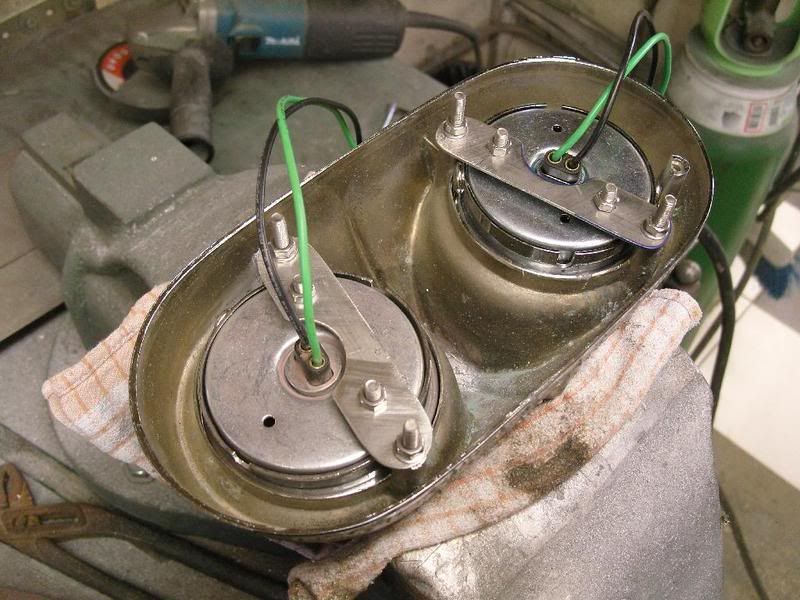
The lights now fit in the bezels nice and snug and nice and deep

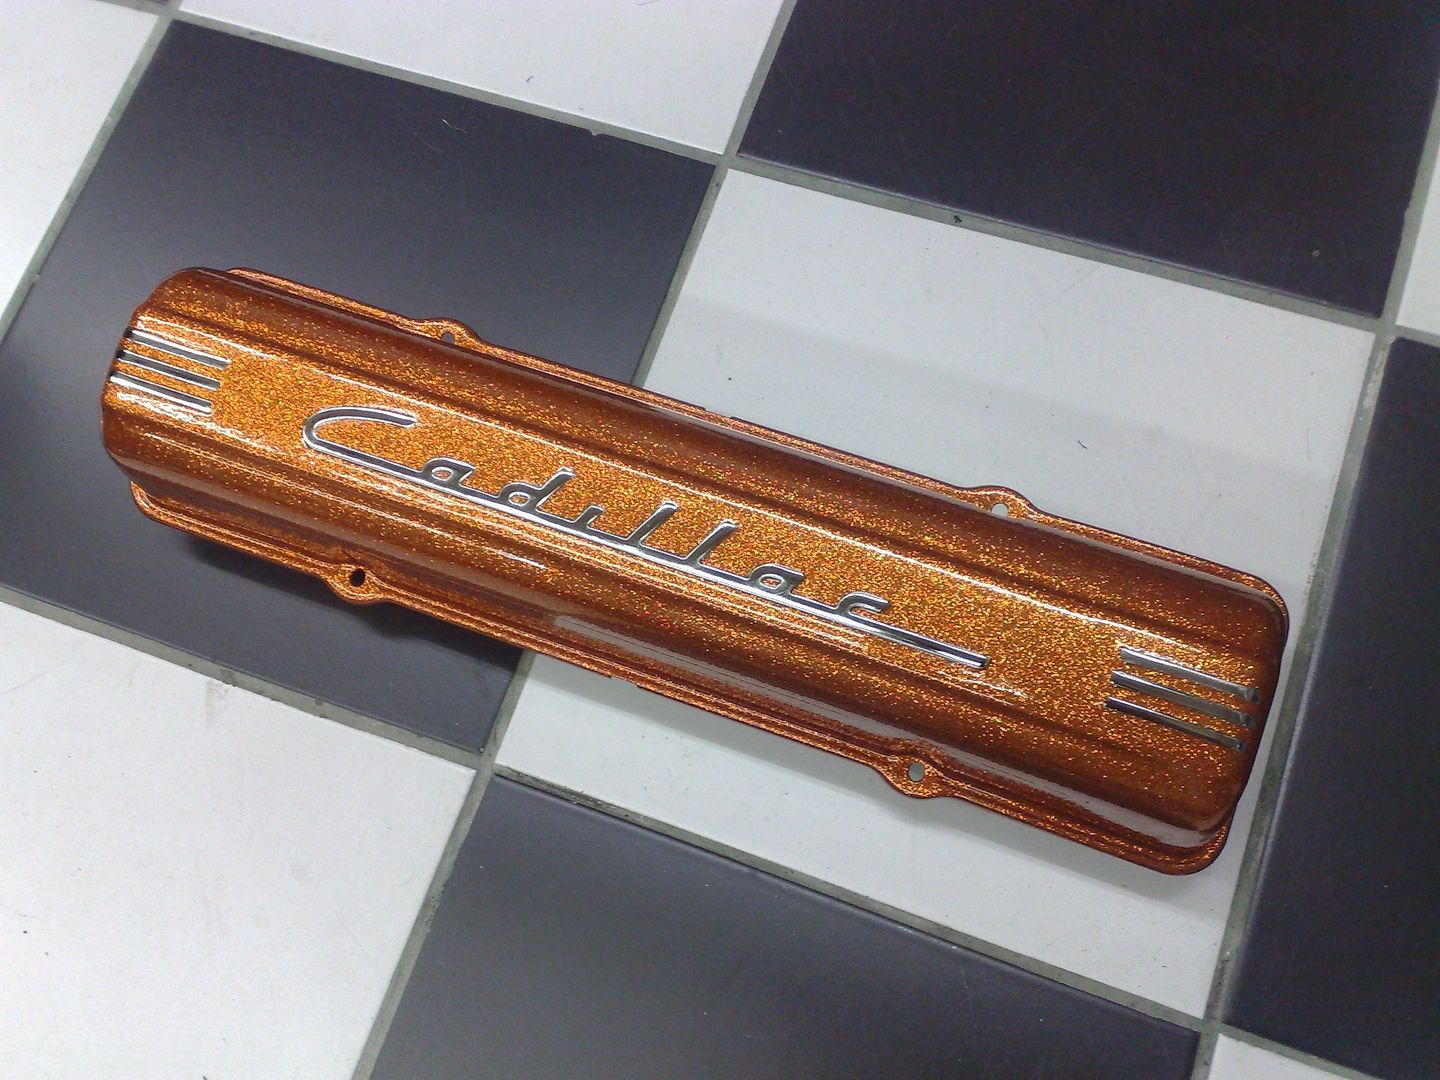
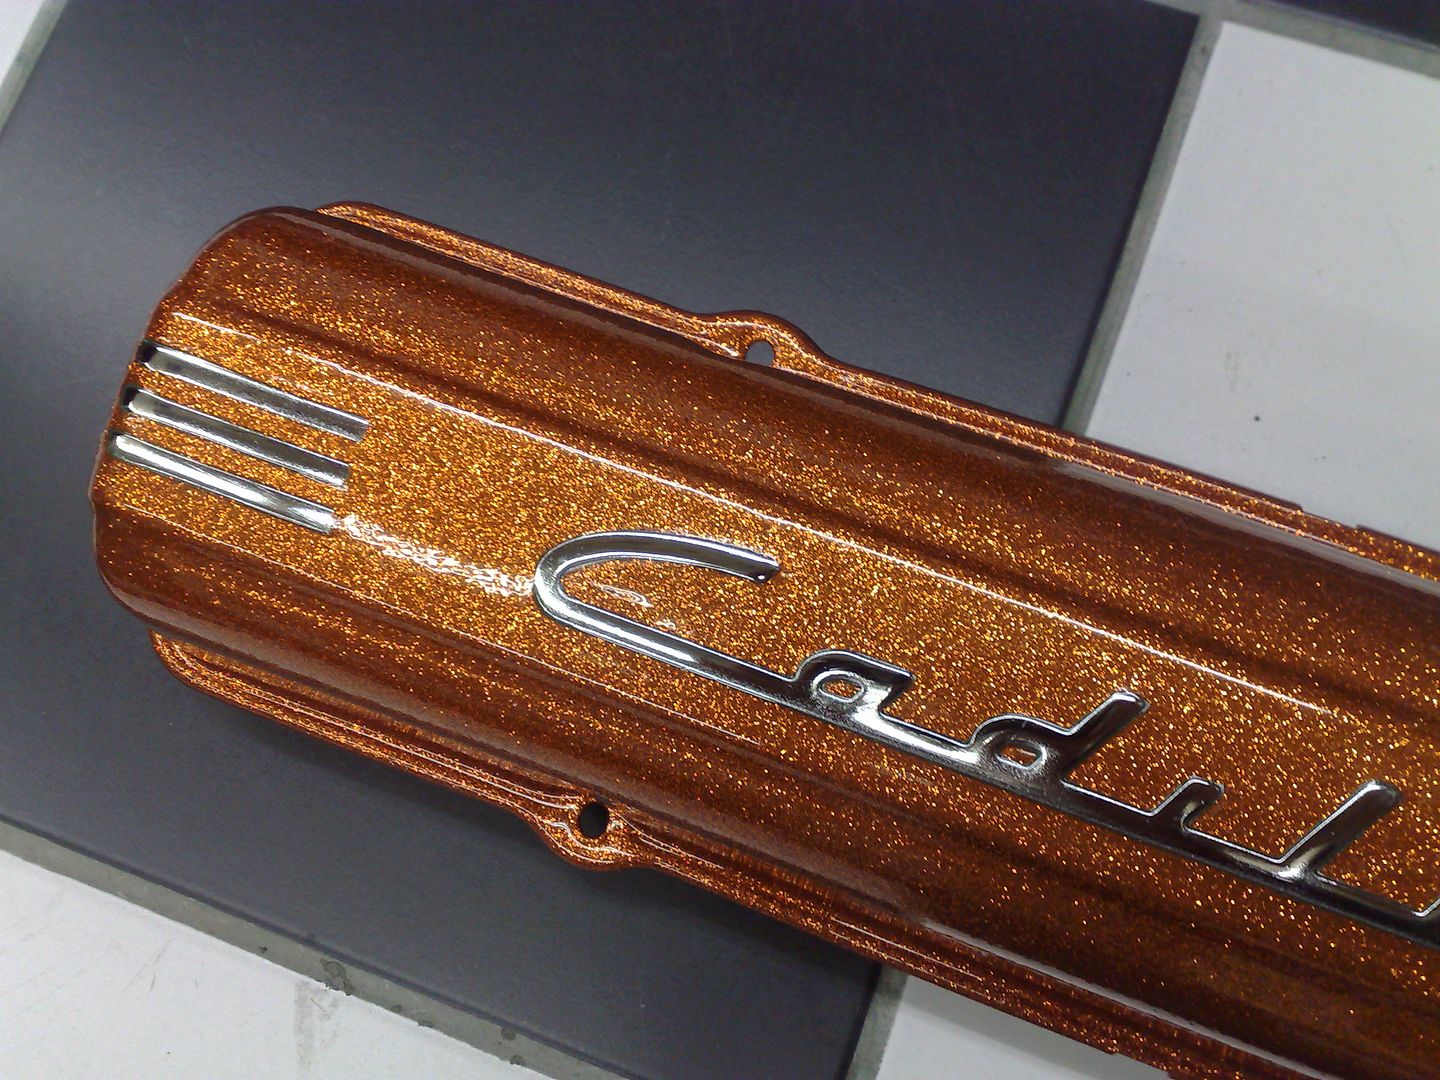
Was playing with colours a couple of days ago, I was looking for a burnt Copper flake, anyway i came up with this colour so tried it on my Caddy valve covers (I chromed them first) as a test.
What do ya reckon ???
media blasted
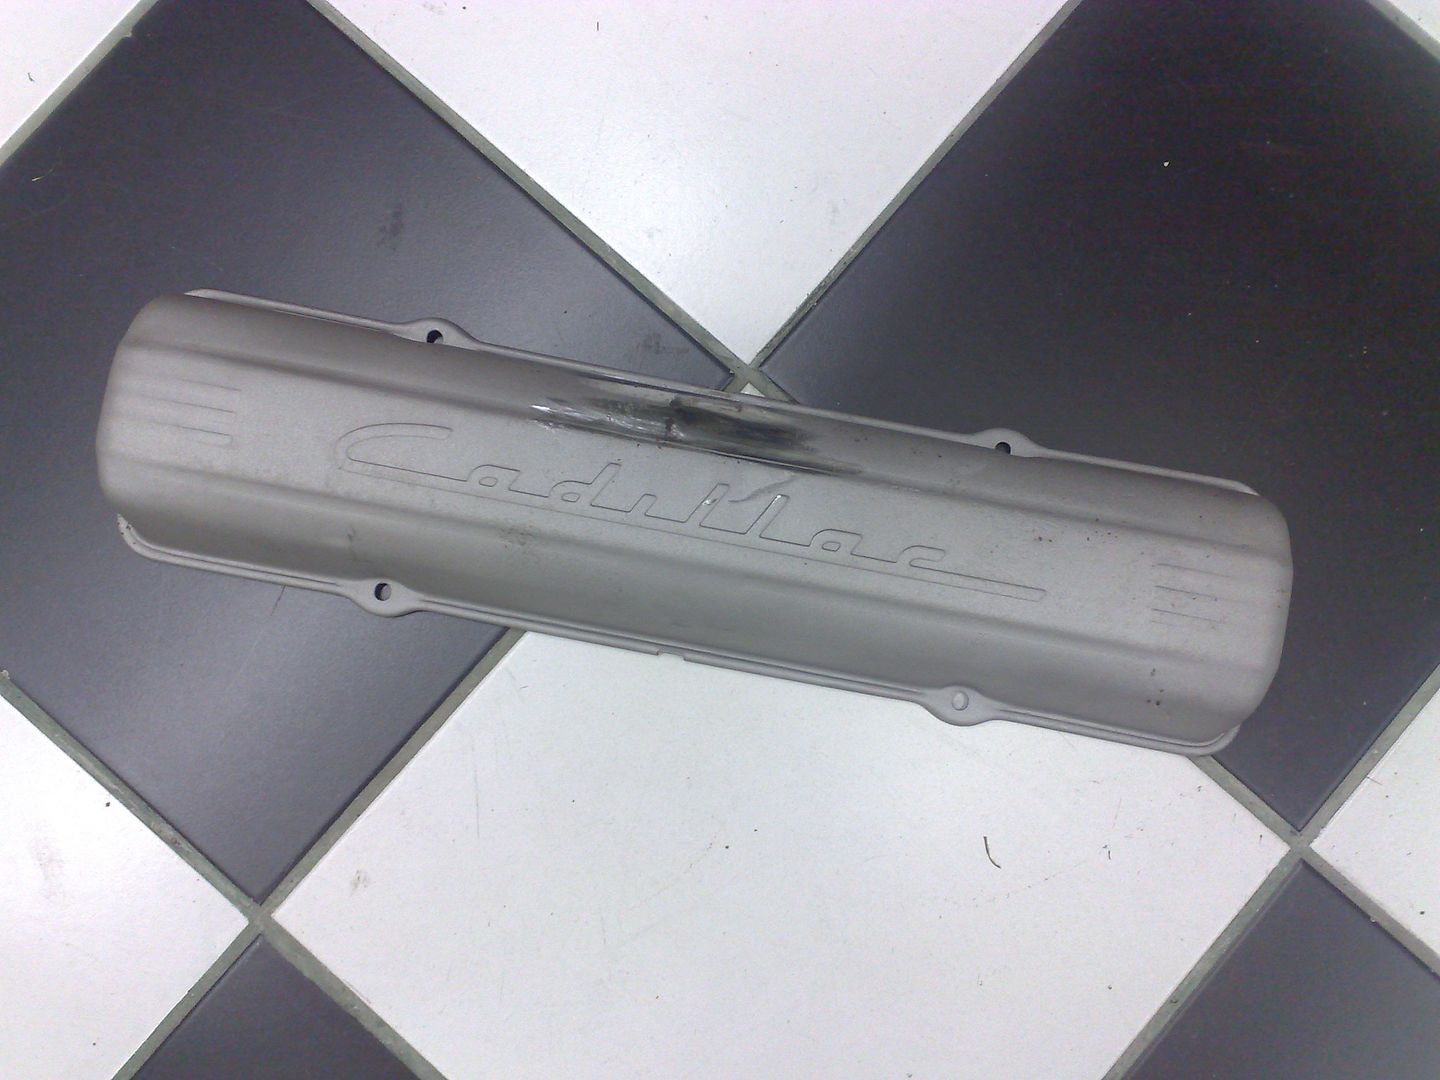
Epoxy primed
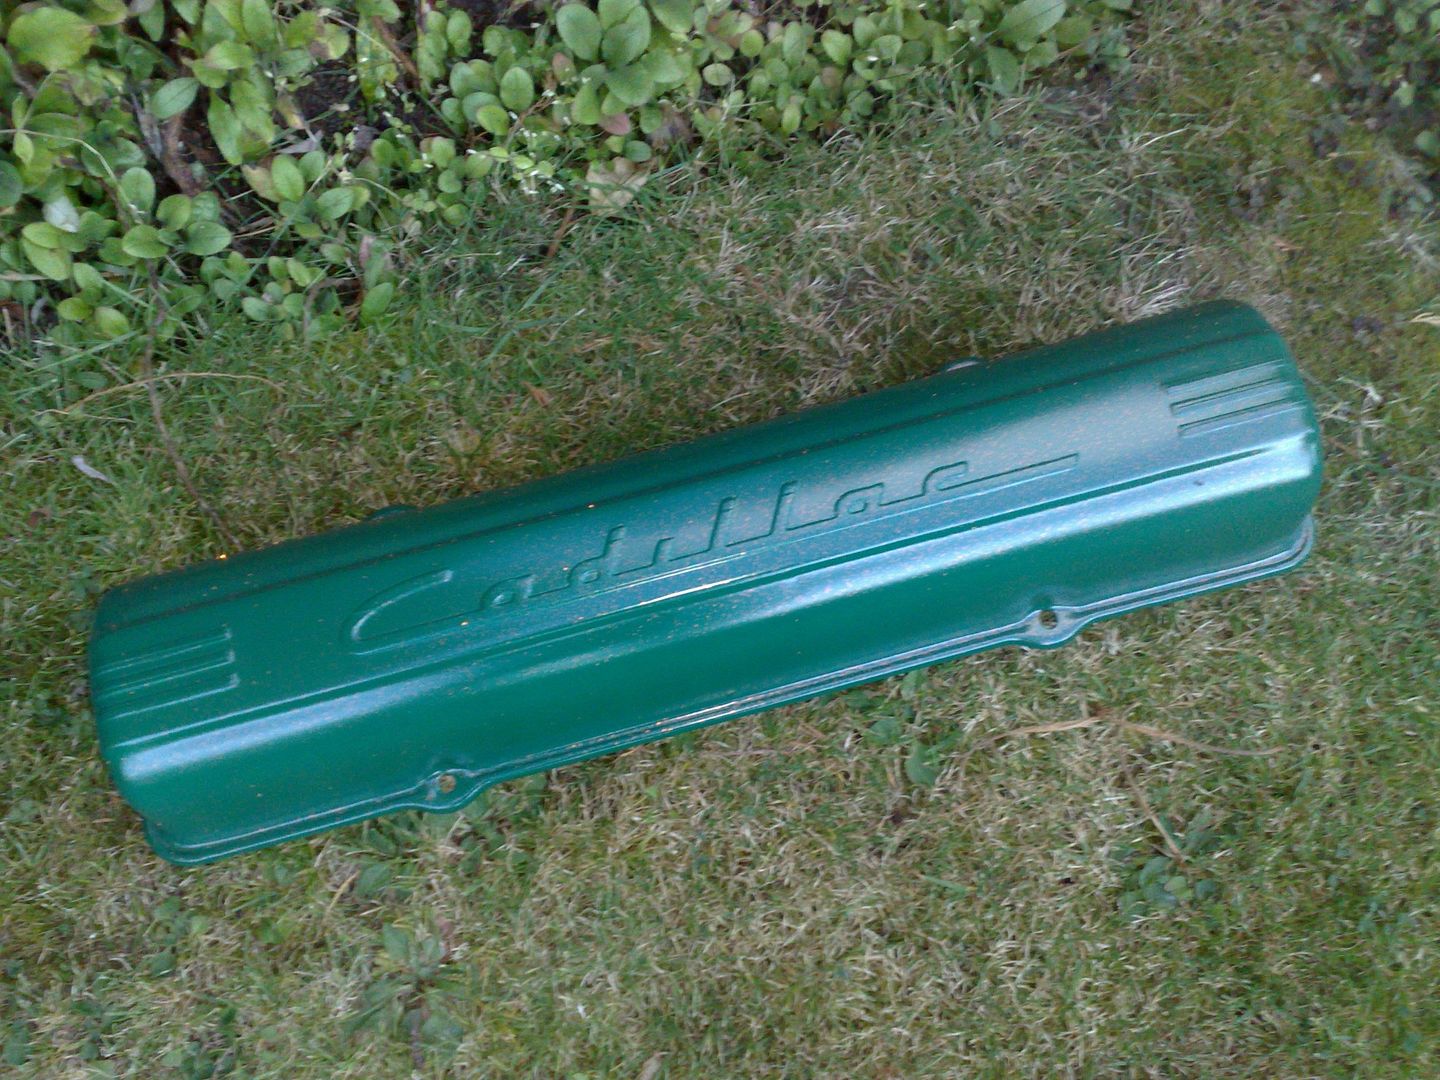
Painted
Its aweful lonesome in the saddle since my horse died.
-
05-30-2010 10:14 AM #6
CHR Member
- Join Date
- Jan 2006
- Location
- fort myers
- Car Year, Make, Model: '27 ford/'39 dodge/ '23 t
- Posts
- 11,033
Just last night Dan and I were talking while at the shop and he asked me "have you seen the stainless steel frame Steve is building for his T?" I told him it has been a while since I've seen any updates, but that it is truly amazing. I'm glad to see you posting the build on here as I miss it sometimes on that other forum.
BTW, you know that Pub we went to for lunch that day? They are out of business..........big surprise, huh? Guess they weren't authentic enough. Next trip we'll do Italian.
Don
-
05-30-2010 11:05 AM #7
CHR Member
- Join Date
- Apr 2009
- Location
- watford
- Car Year, Make, Model: 26T Coupe, 32 Roadster, 41 Willys Coupe
- Posts
- 2,363
Italian is good for me Don
We might well be over in October so tell Dan to get on with that car as i want a ride, also when you take Sue out next time don't forget i want a ride too
Oh nearly forgot tell Don jnr to get the boat fired up
off to add a bit more to this thread.
Hope you are all well bud.
 Originally Posted by Itoldyouso

Its aweful lonesome in the saddle since my horse died.
-
05-30-2010 01:29 PM #8
CHR Member
- Join Date
- Apr 2009
- Location
- watford
- Car Year, Make, Model: 26T Coupe, 32 Roadster, 41 Willys Coupe
- Posts
- 2,363
Well the new year is nearly here and i had a spare day so decided to drill my front axle and wishbones, Hopefully i can get the various chassis parts assembled on the chassis jig sometime next week and get it all finish welded, I should hopefully have a rolling frame in the next couple of weeks
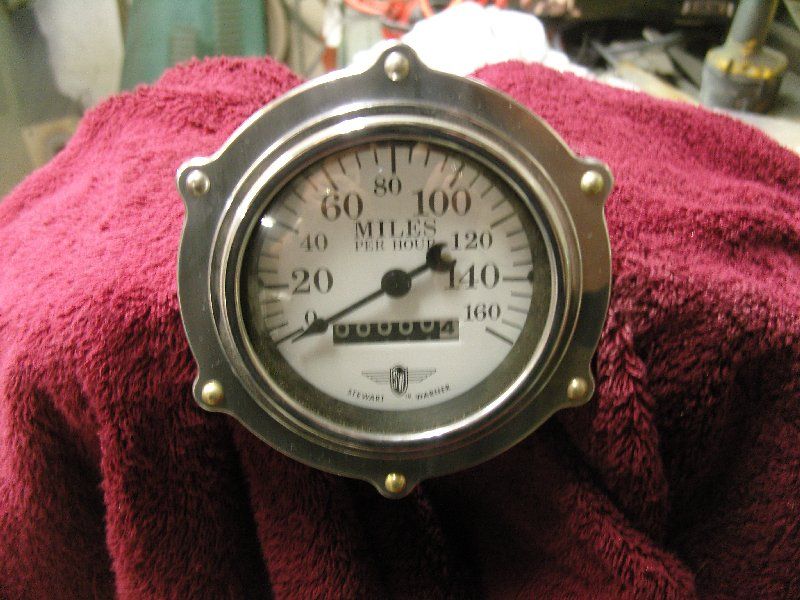
I've been dabbling with some different designs for mounting the gauges in and came up with these, they will be riveted to the dash.
Well made a bit of headway but its taking longer than i thought Its a real pain working with polished stainless as even your fingers leave marks if your not careful and after each stage it needs to be repolished
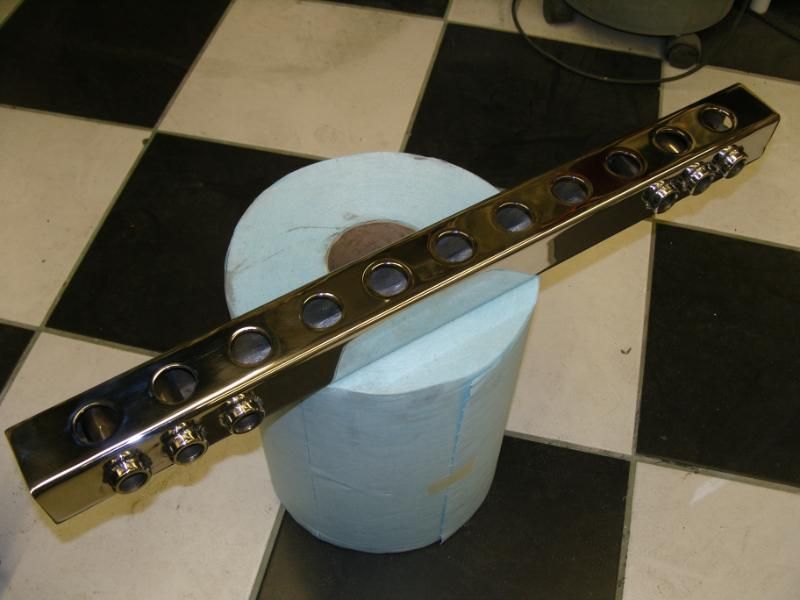
Well i got the body mounts all in the frame while its not welded together as its easier to handle, they go right through the frame rails and are welded top & bottom. They are tapped 10mm x 1.25
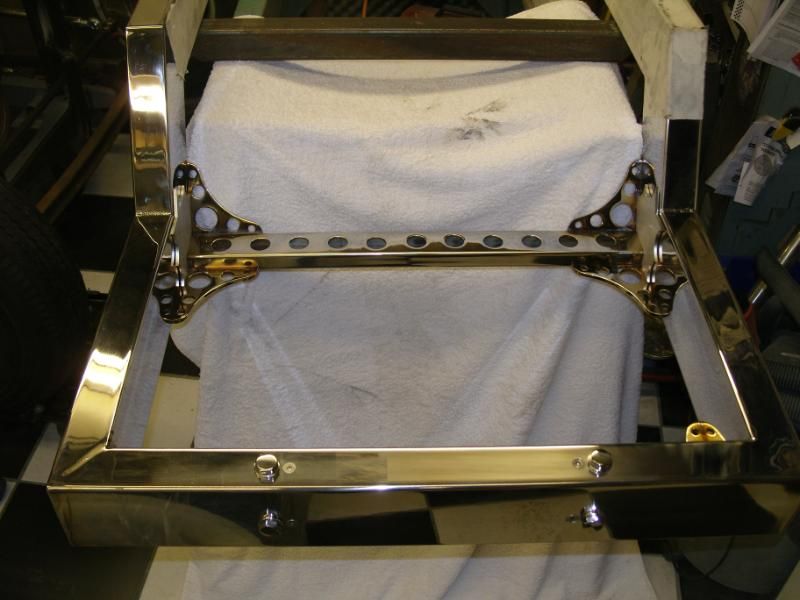
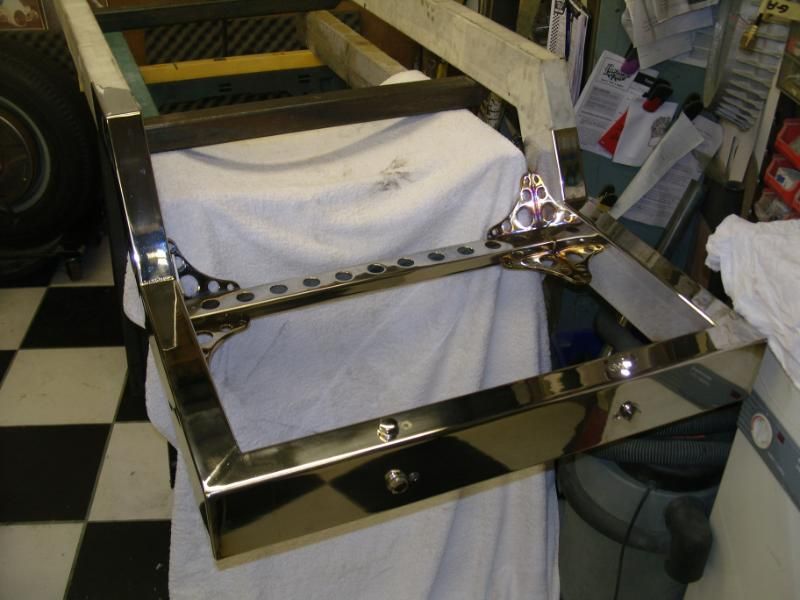
Got the rear x member made up with 3 positions for rear coilovers for adjustability.
This was the worse bit of stainless i've had so far, real grainy and a pig to polish. Maybe i should of used round tube as that always seems to have a really good finish which means less polishing
Its a bolt in jobbie so end caps will be welded on when in the jig.
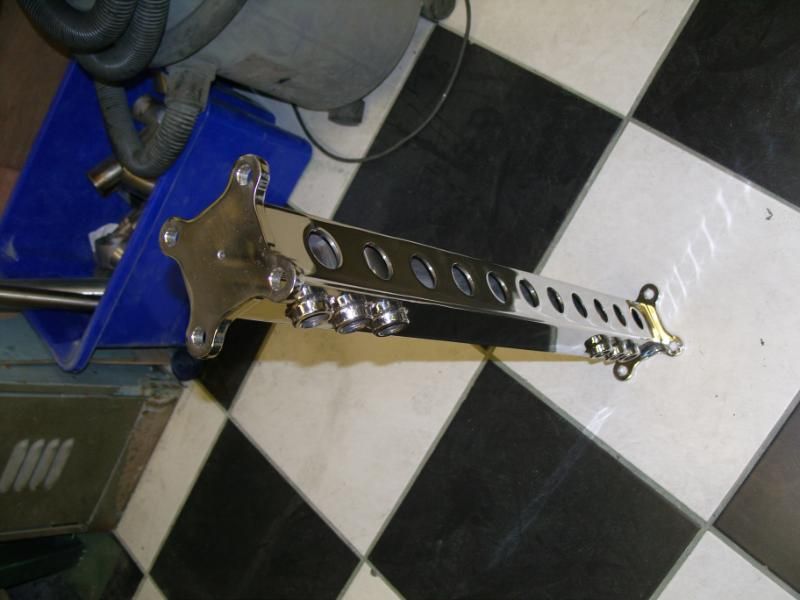
The chassis is now on the jig ready to be welded so hopefully some more interesting pics next couple of days.
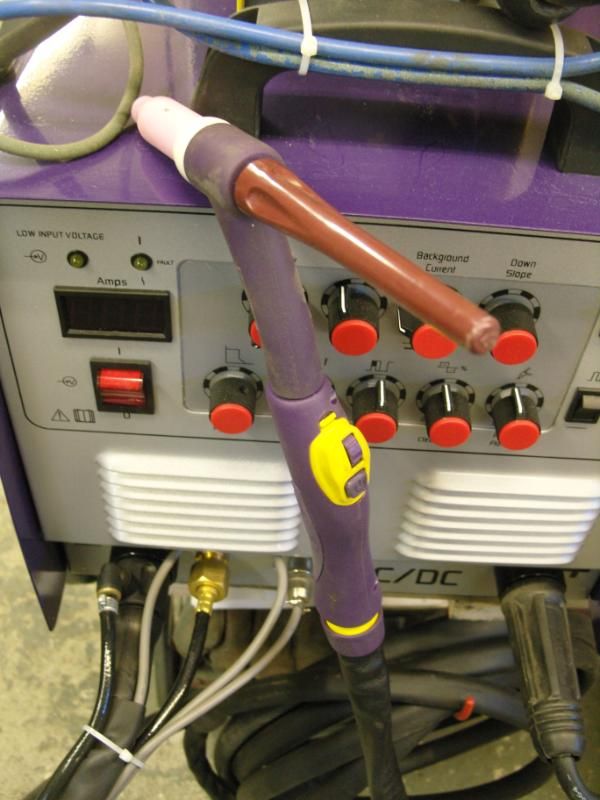
I bought a new TIG torch as welding on the chassis is difficult with the pedal, this one has a roller button on the torch for varying the current, I need to practise for a couple of days to get used to it but so far its very good, another useful feature is it has a flexible head which saves bending your wrist for those awkward bits.
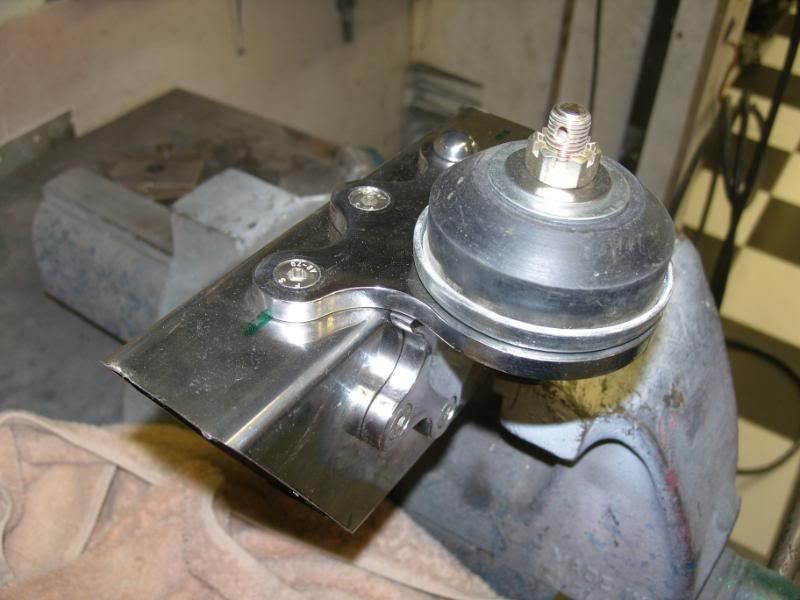
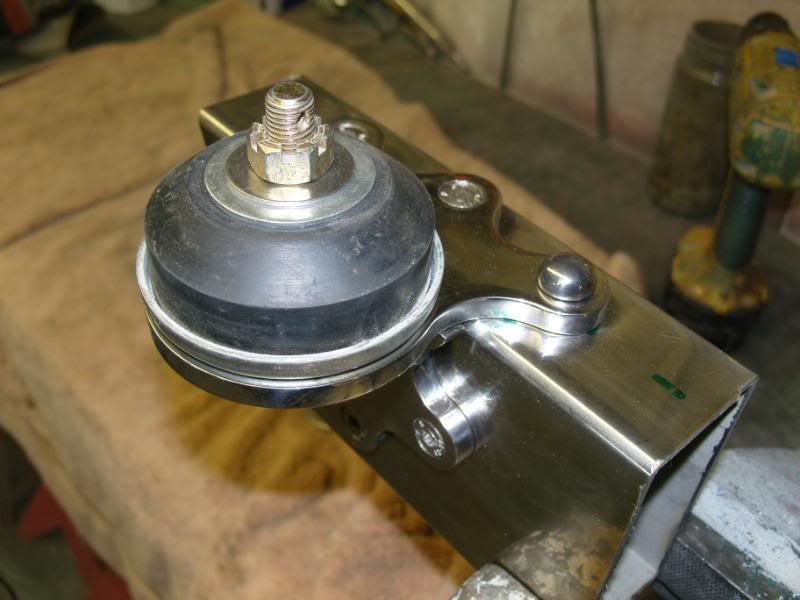
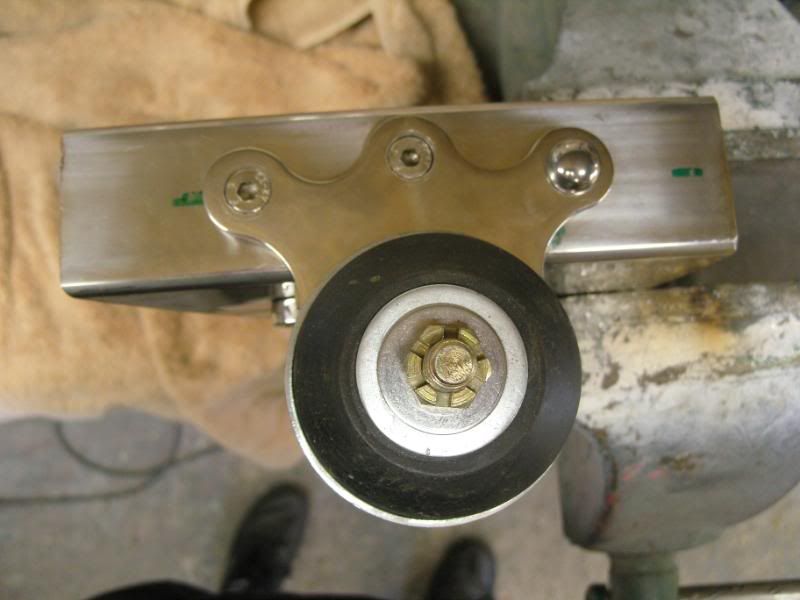
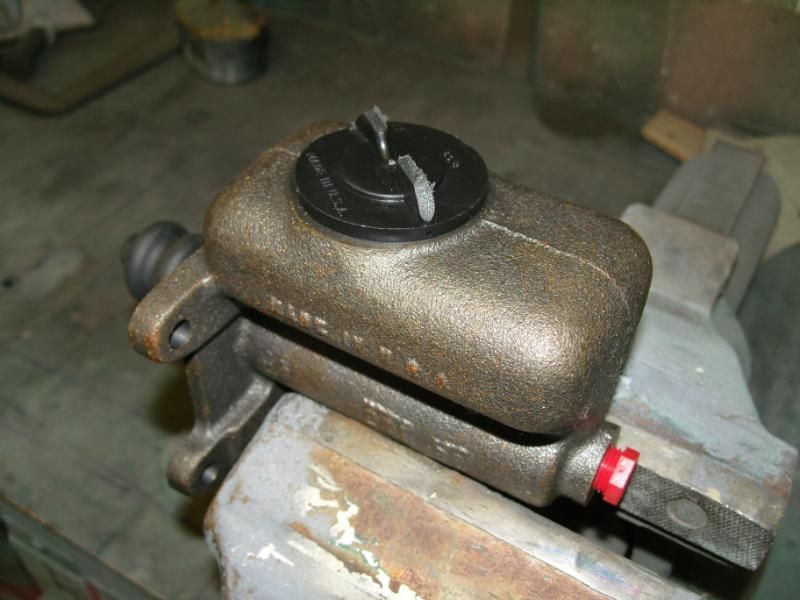
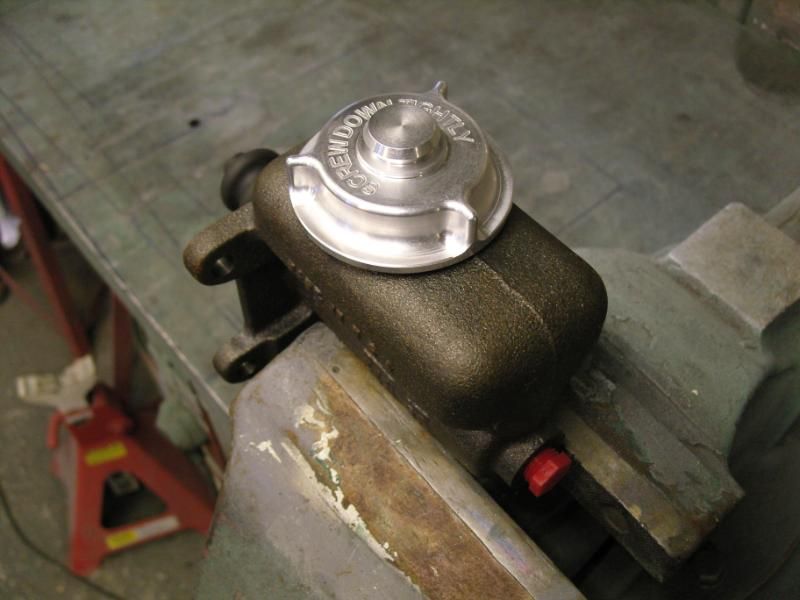
I'm using a 55 f100 master cylinder that will be chromed, I didn't like the black plastic cap it came with and was wondering what to do with it when steve (rustycoupe) produced this aircraft cap, i had to chuck it in the lathe and remove the theaded portion but now fits a treat, thanks Stevie.
It will get polished to take off the billet look later.
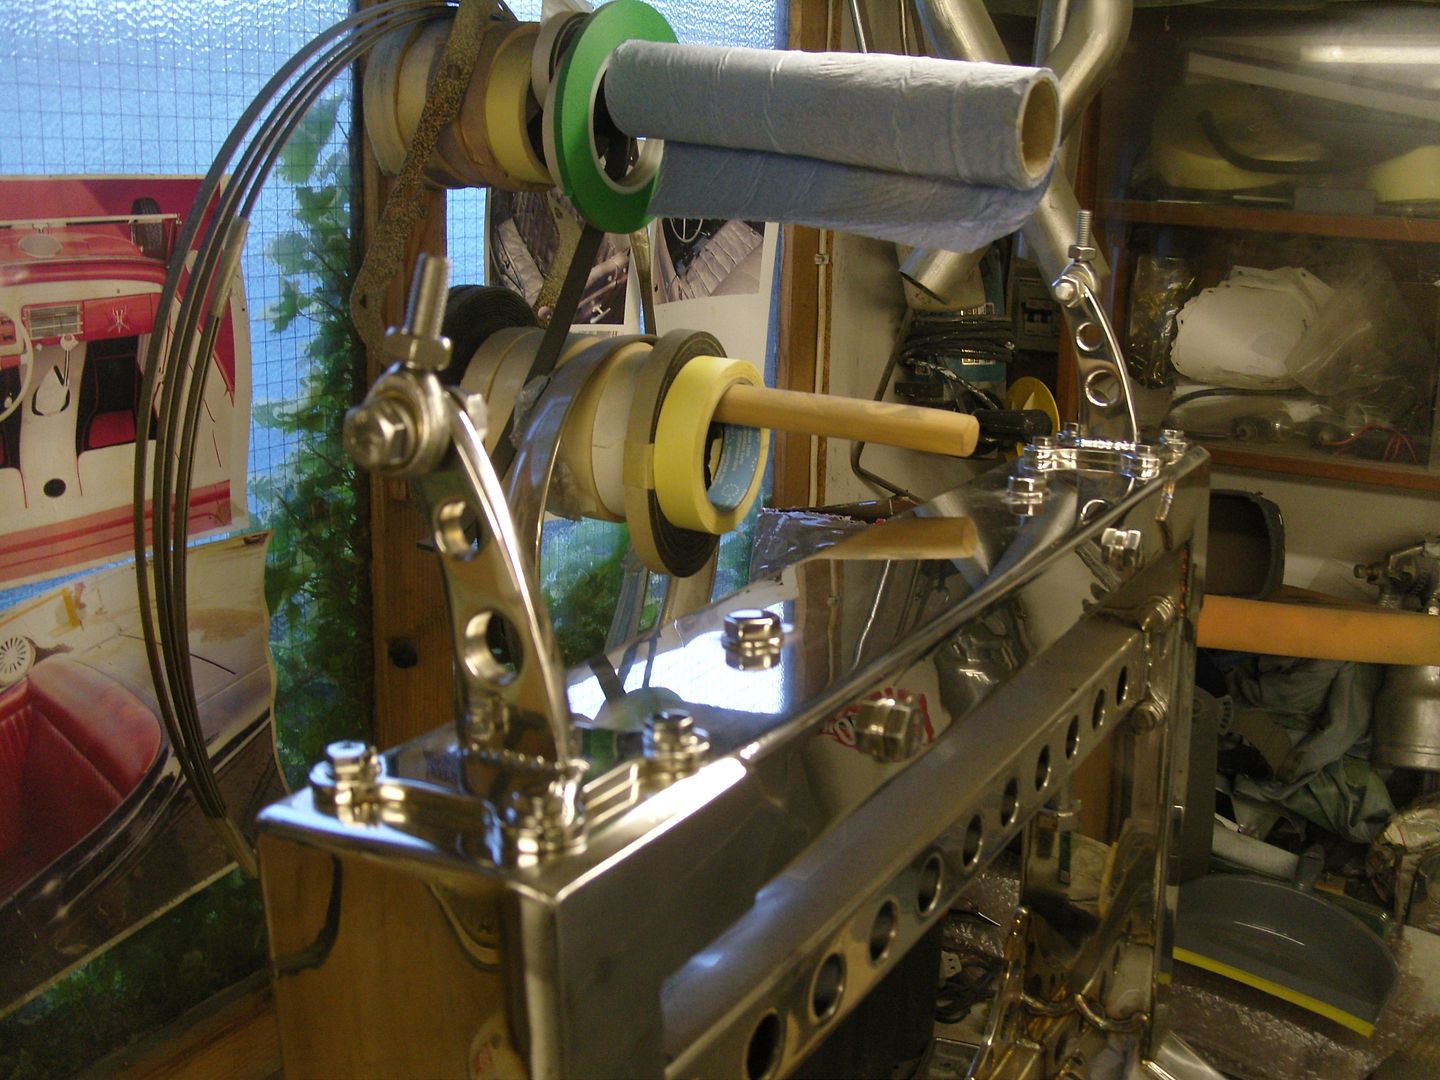
Well took a day off today as I needed a hand with the frame and my good mate Des (Tiki Des) came over to help, He was quickly dispatched on polishing duty while i welded some bits up.
The chassis is made in 2 halves as it needs repolishing after each bout of welding with a hand held polisher.
Another good mate Ian (Bigbossman) got me some low tack vinyl stuff to protect the polished surface as its very easy to mark so the rails were covered up.
The postman came this morning with some bits i've been waiting for, They are the fishplates for the inside and outside of the kick up and also the firewall joint in the main side rails, The fit a treat but need polishing before being welded in place. thanks Paul.
Kickup fishplates
Firewall joint fishplates
The main rear section rails are now fully welded so needed to add the rear crossmember to tie them together, also added a kickup spreader and weld in some gussets I had laser cut.
Hope to get the front section finished as soon as and get the 2 halves put together .
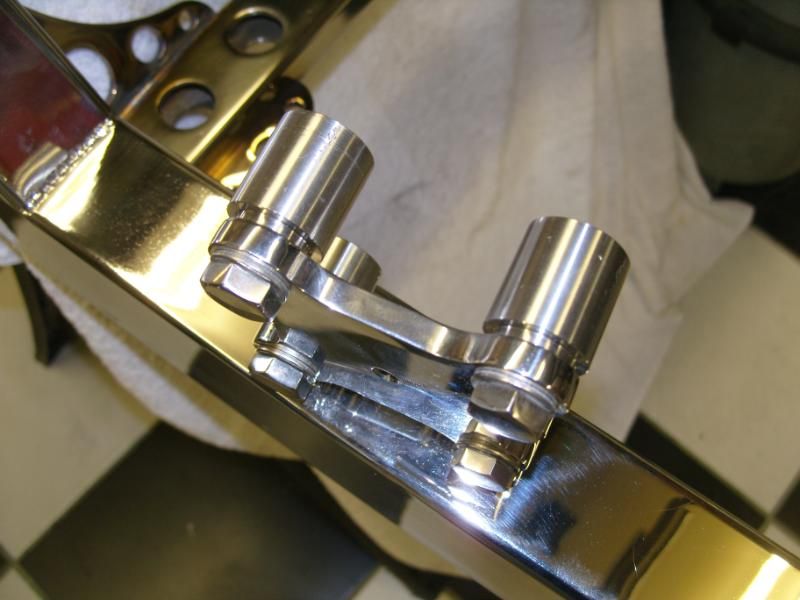
the rear x member, So here's how i fitted the rear x member
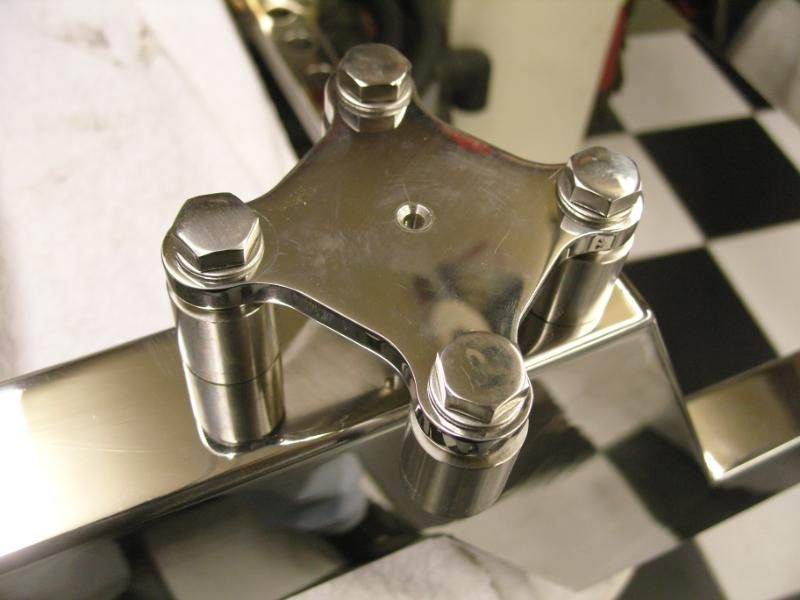
first the holes are marked and also the large hole in the middle, this is where the bungs get put in. then the 8 bolt holes are drilled to 20mm to locate the shoulder on the bungs, then they are welded in from the outside.
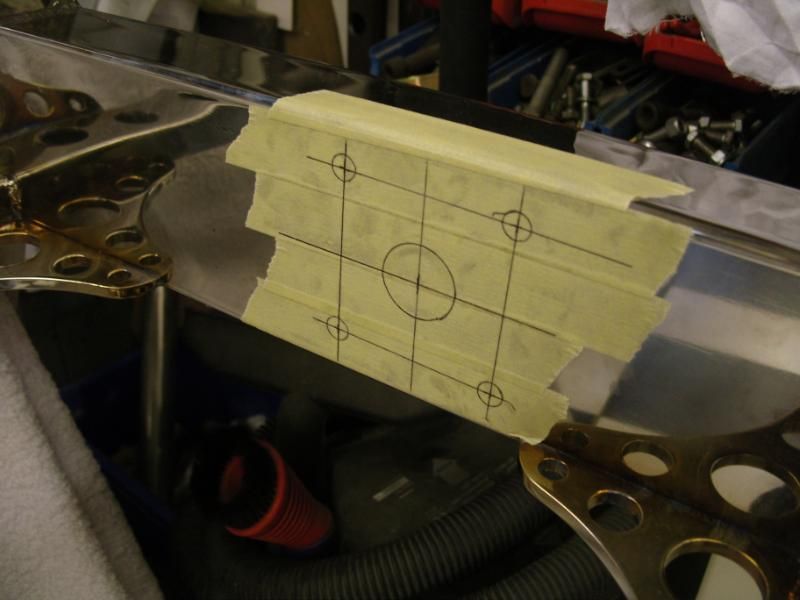
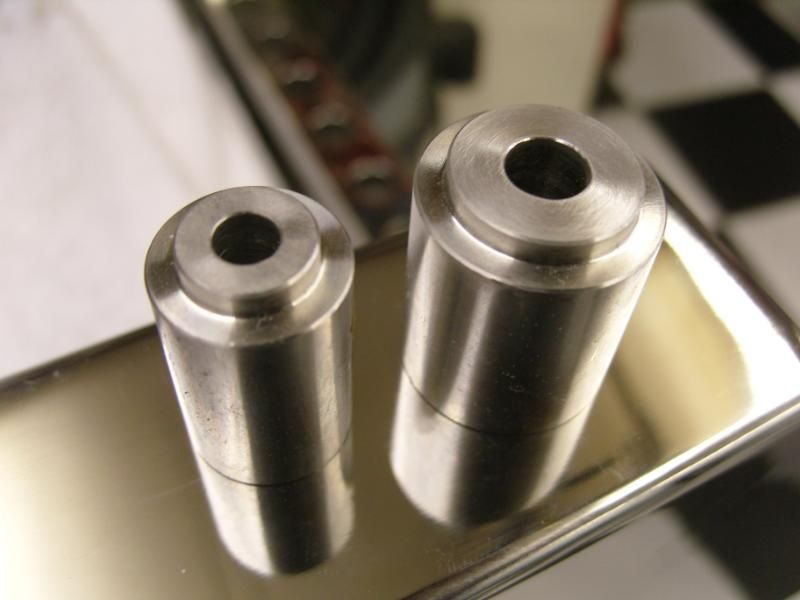
The bungs were spun up for me in 316L stainless on a CNC lathe as there is a few of them, cheers Dazza, There are 2 different sizes, I drill and tap to suit.

Then the plates are bolted in and the x member welded to them.
Its aweful lonesome in the saddle since my horse died.
-
05-30-2010 01:32 PM #9
CHR Member
- Join Date
- Apr 2009
- Location
- watford
- Car Year, Make, Model: 26T Coupe, 32 Roadster, 41 Willys Coupe
- Posts
- 2,363
Well sometimes things in hotrodding world don't go smoothly
I had welded up the rear corner fishplates and were polishing out the welds amd daydreaming and the next thing i knew i had made an undercut in the main rail It looked terrible and i couldn't believe i had done such a stupid thing, My trusty helper Gomez said it wouldn't show but i just wasn't happy with them, anyways i had to carefully cut off the plates and make 2 more which were slightly longer to cover the c0ckup
They probably don't show in the pic but they are quite deep.
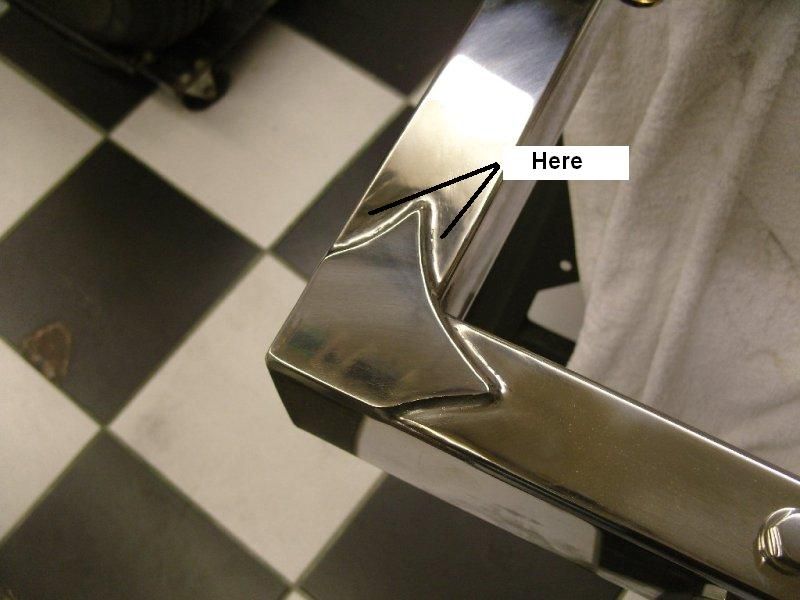
At least i think i got away with it

Coilover x member now finished and towbar fixings installed.
A bit of progress in that I started making up the rear triangulated 4 bar, was originally going with ladder bars but seeing as traction is gonna be an issue i'm hoping the 4 bar will be better
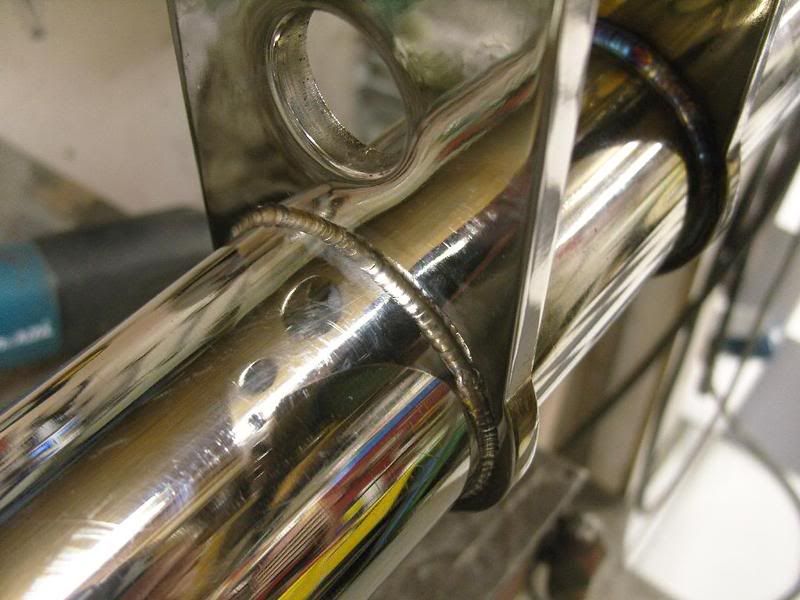
Bars are made from 1" od 316L stainless tube, the ends are bungs that are tapped and welded into the tube. I'm using stainless urethane joints (5/8" UNF thread with 1/2" eye) at the axle end and stainless rose joints (3/4" UNF thread with 5/8" UNF eye) at the chassis end.
Chassis brackets bolt on into threaded bungs that are welded into the chassis, they attach with ARP stainless bolts (3/8" UNF) , these were not lazer cut as i couldn't wait for them so were cut out with a thin cutting wheel and shaped on the linisher, they are 5mm 316L flat bar.
the bars bolt to the brackets with 5/8" UNF bolts and will have castle nuts and split pins as soon as i find some, I may have to make them
These took me 3 long evenings to make so you can see why progress is slow
Here are the bits made up before polishing

Here after polishing and welding
Not much to post i'm afraid, I did get the flip body rear chassis mounts made. Base plate is 8mm and the upright is 10mm, nice and sturdy stainless steel threaded inserts were welded into the chassis first for the attaching bolts.
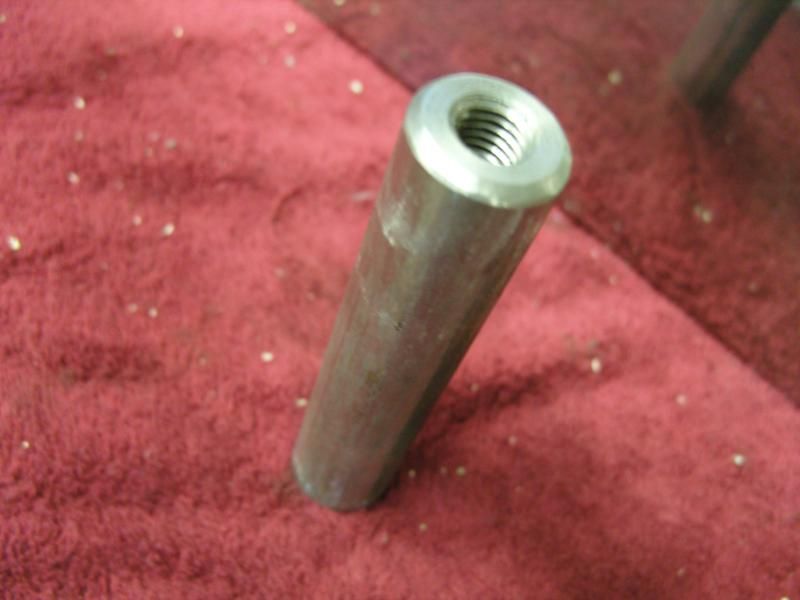
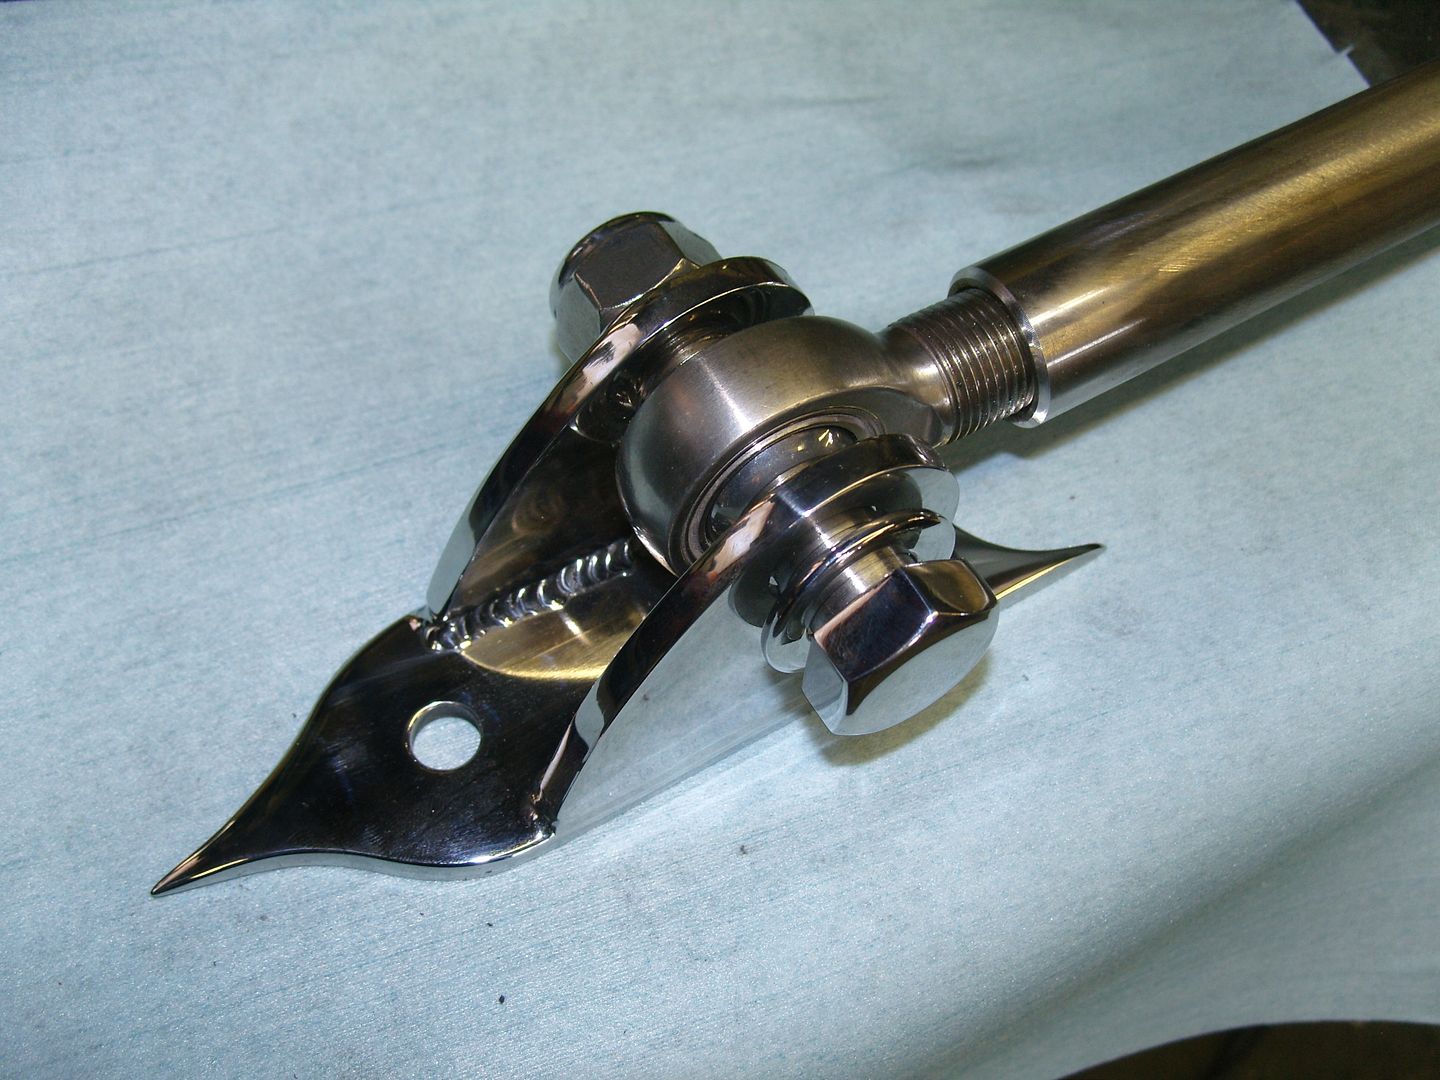
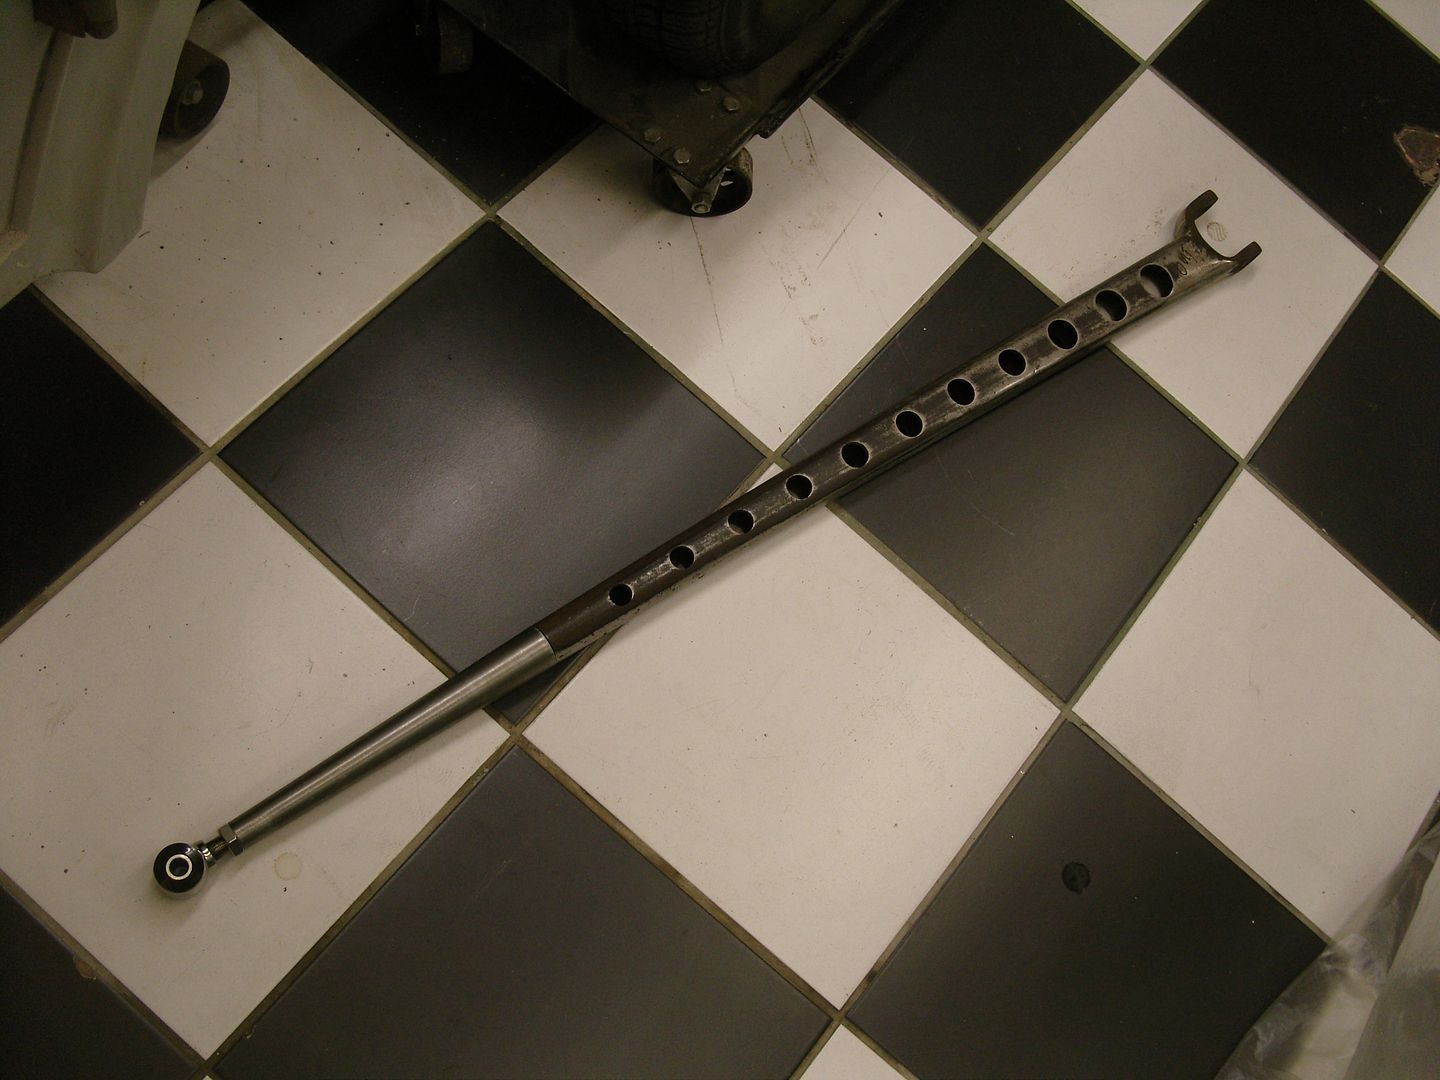
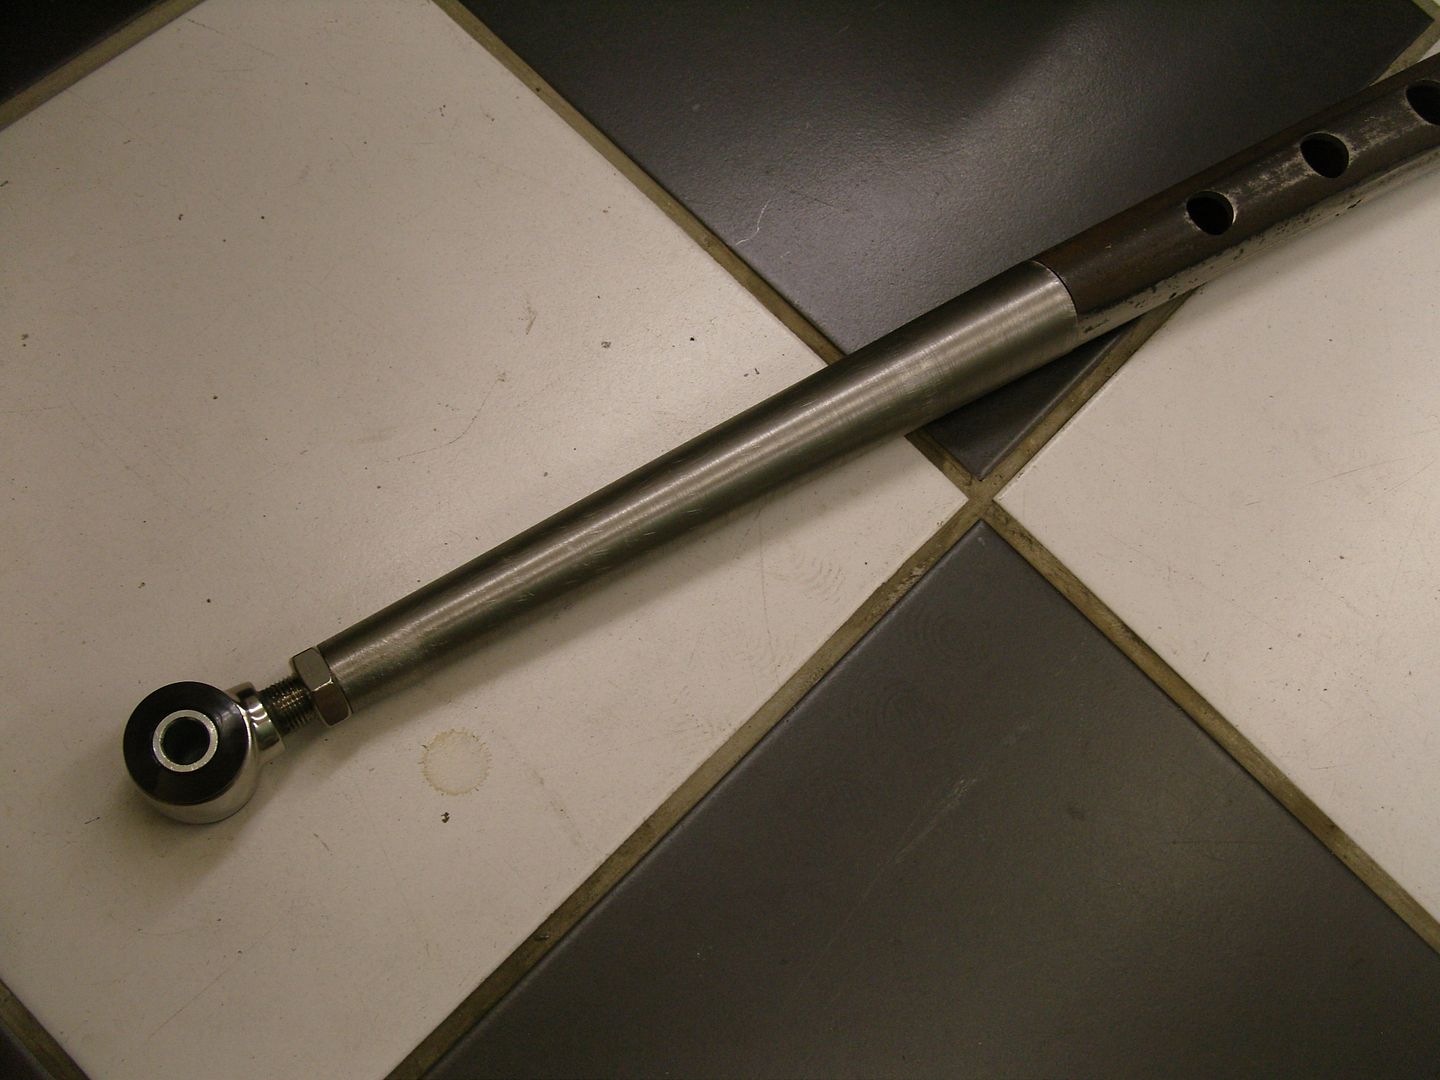
Also got around to making extensions for the model A wishbones i'm using, they are a little on the short side so i spun up some tapered extensions in the lathe, They are now a nice 47" long, these will be tig welded in to the bones at the weekend so they can go to the chrome platers on monday, rear joints are urethane stainless rodends 5/8" UNF
Its aweful lonesome in the saddle since my horse died.
-
05-30-2010 01:36 PM #10
CHR Member
- Join Date
- Apr 2009
- Location
- watford
- Car Year, Make, Model: 26T Coupe, 32 Roadster, 41 Willys Coupe
- Posts
- 2,363
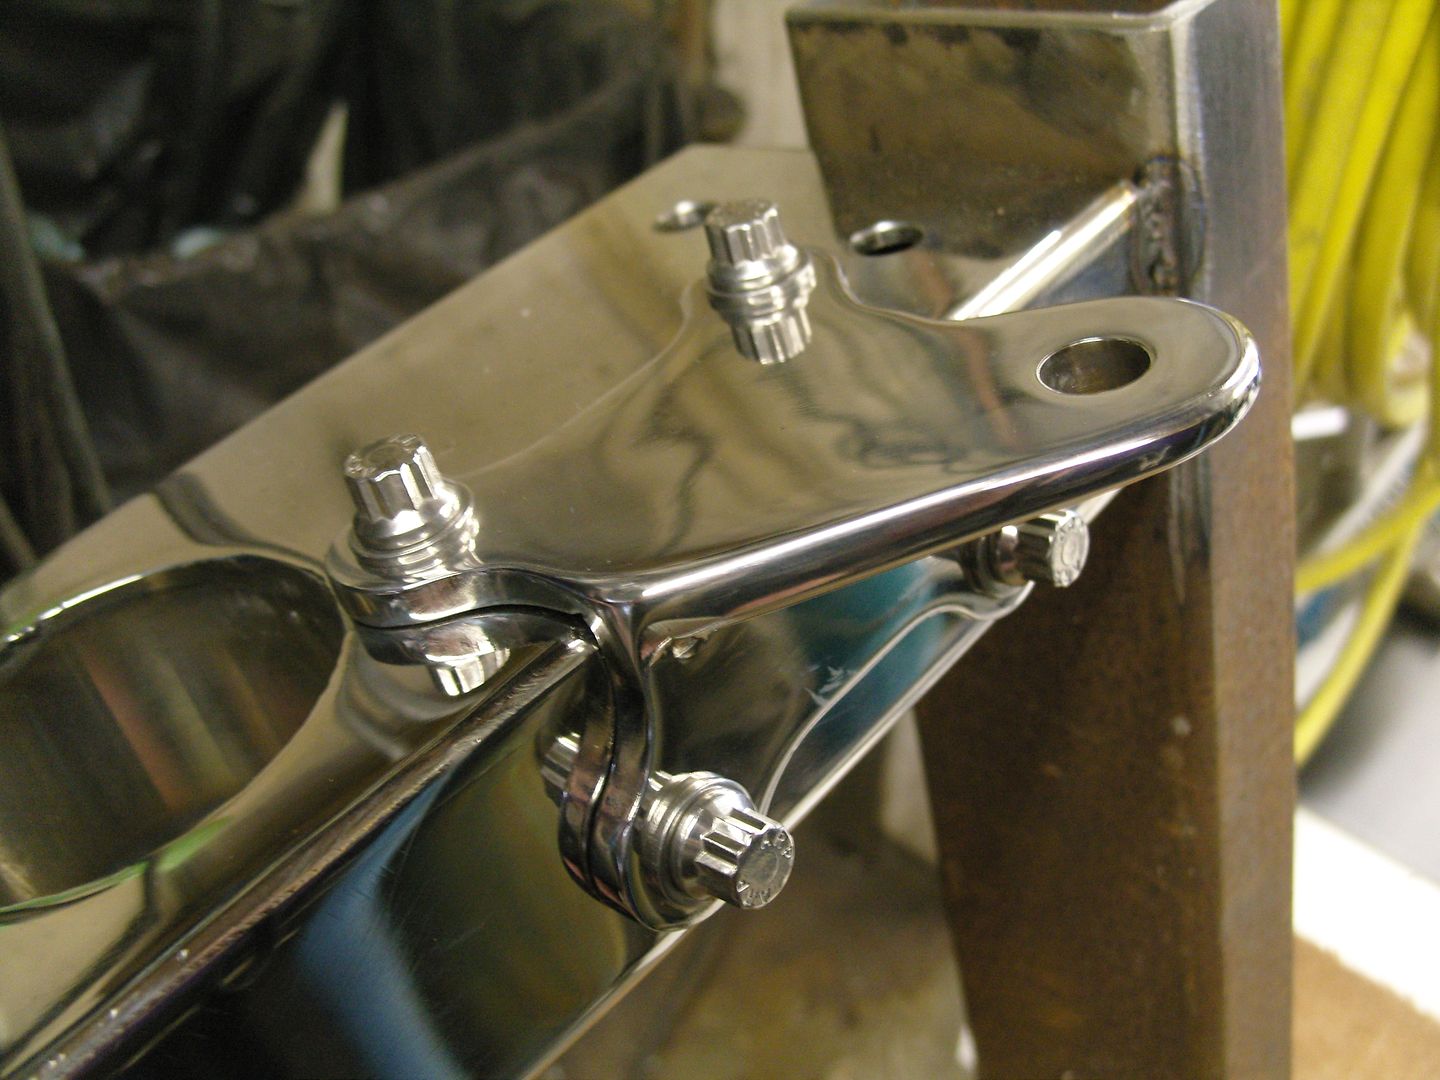
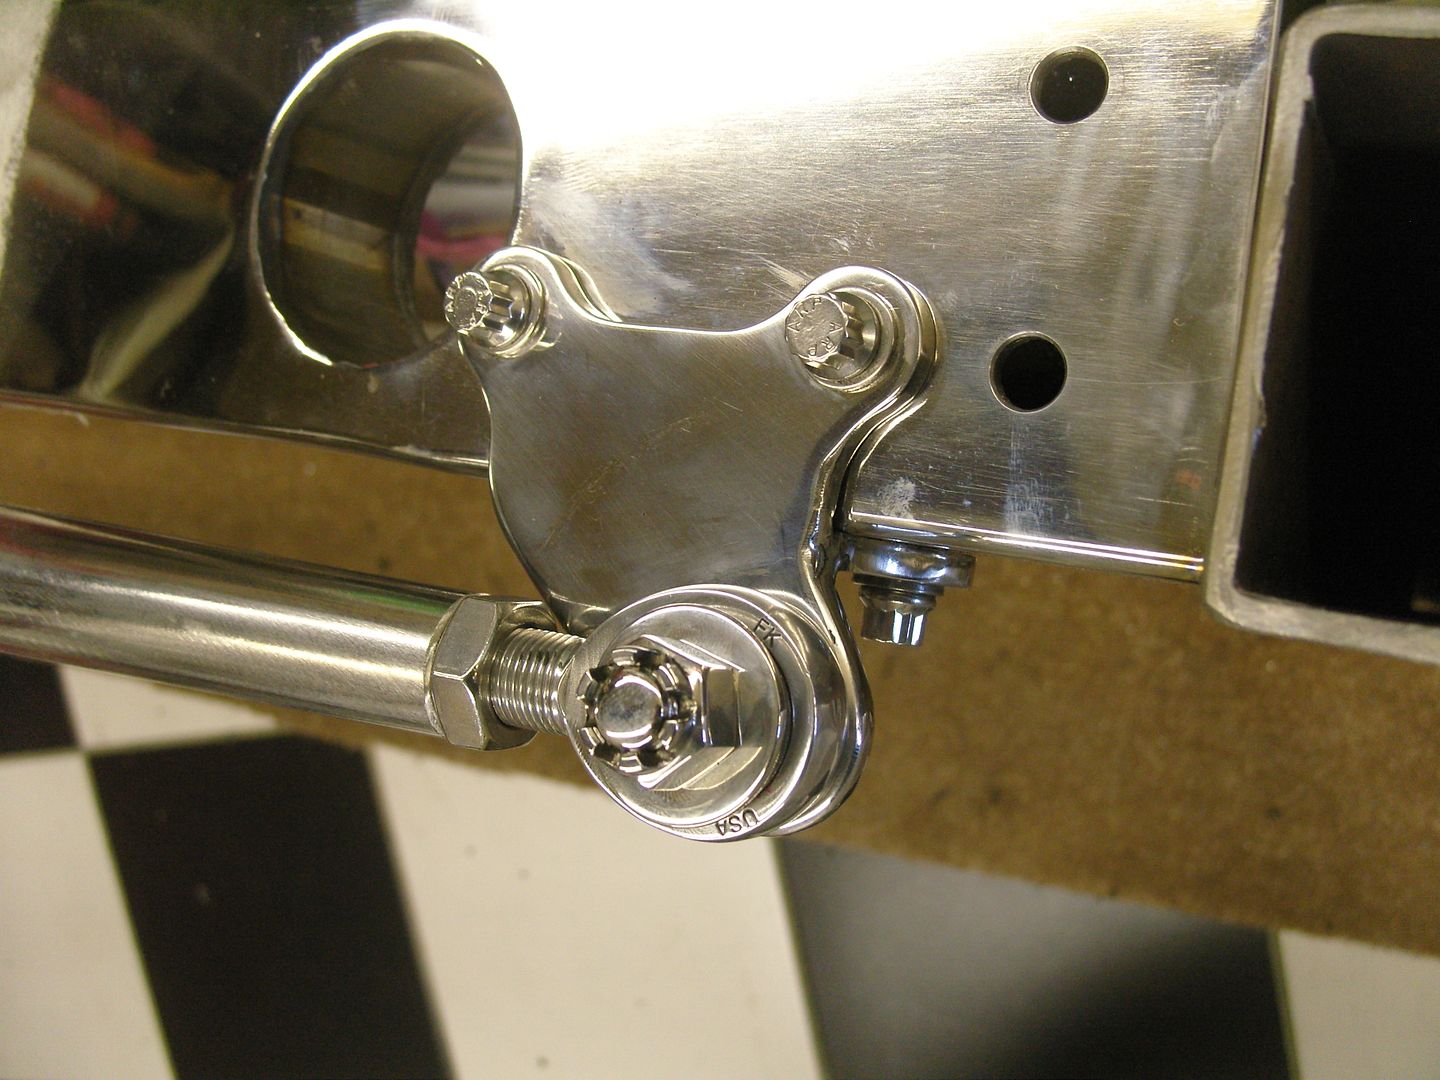
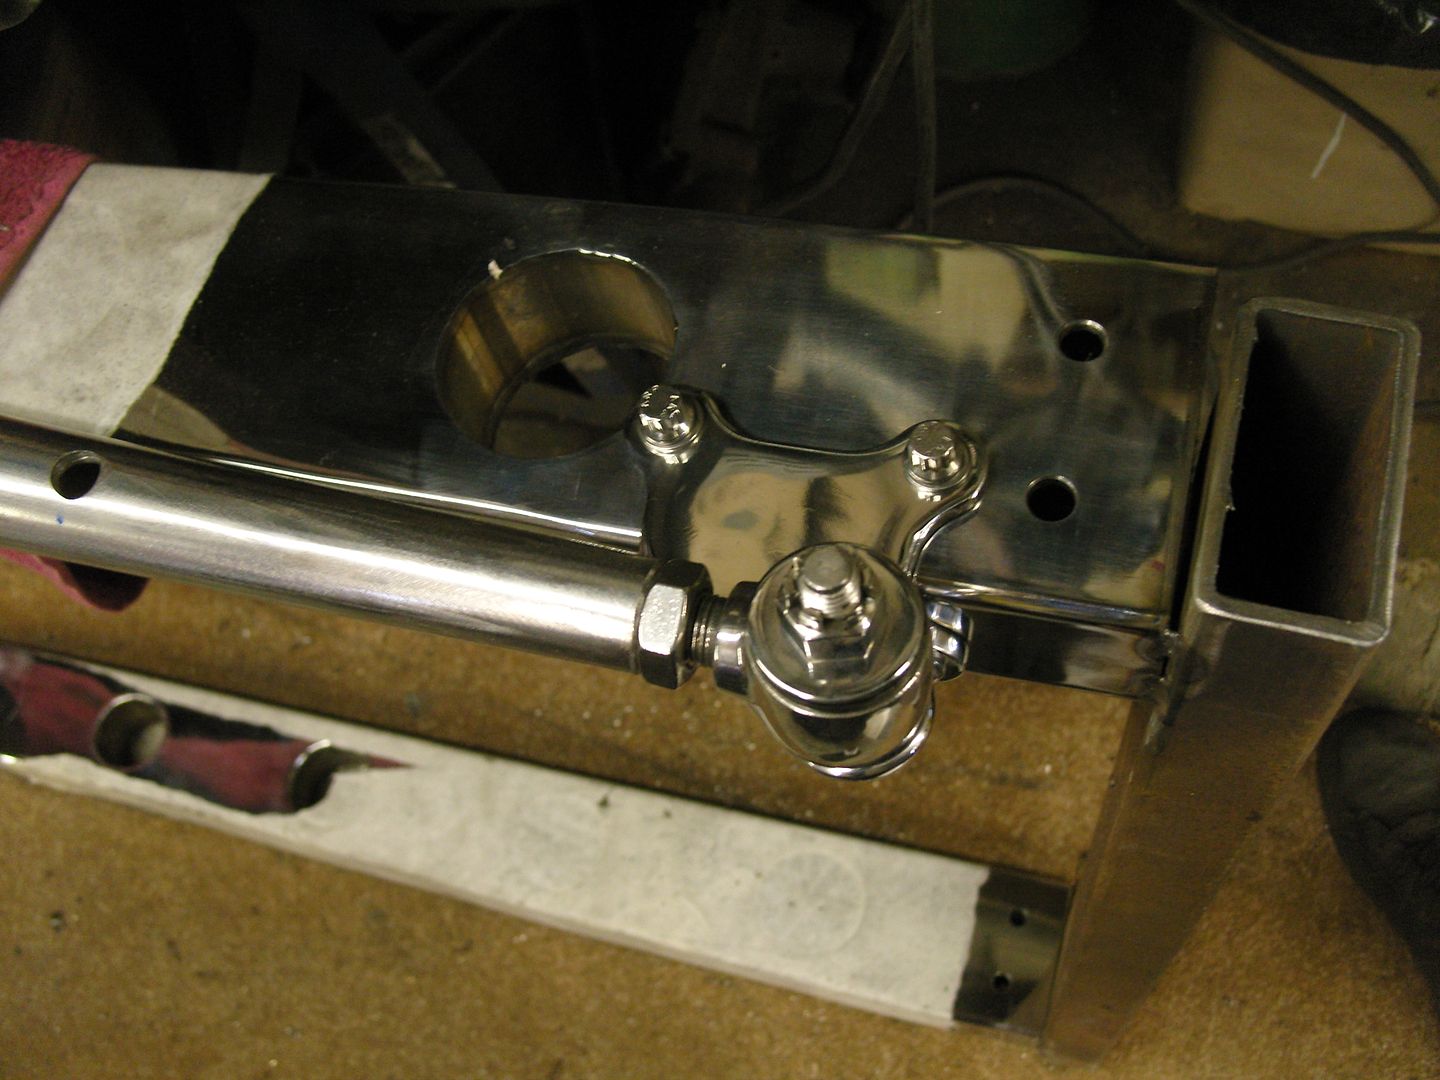
Well i'm pretty close to joining the 2 halves together at last, got the wishbone mounts made up and fitted. I'm still not sure whether to use the urethane stainless joint or stainless rose joints on the end of the wishbones or stainless track rod ends, urethane joints look a little klunky whereas the rose joints look more slinky and the track rod ends stick out a fair way ???

All the bolts thread into stepped threaded inserts that insert from the inside of the rails and are welded on the outside.
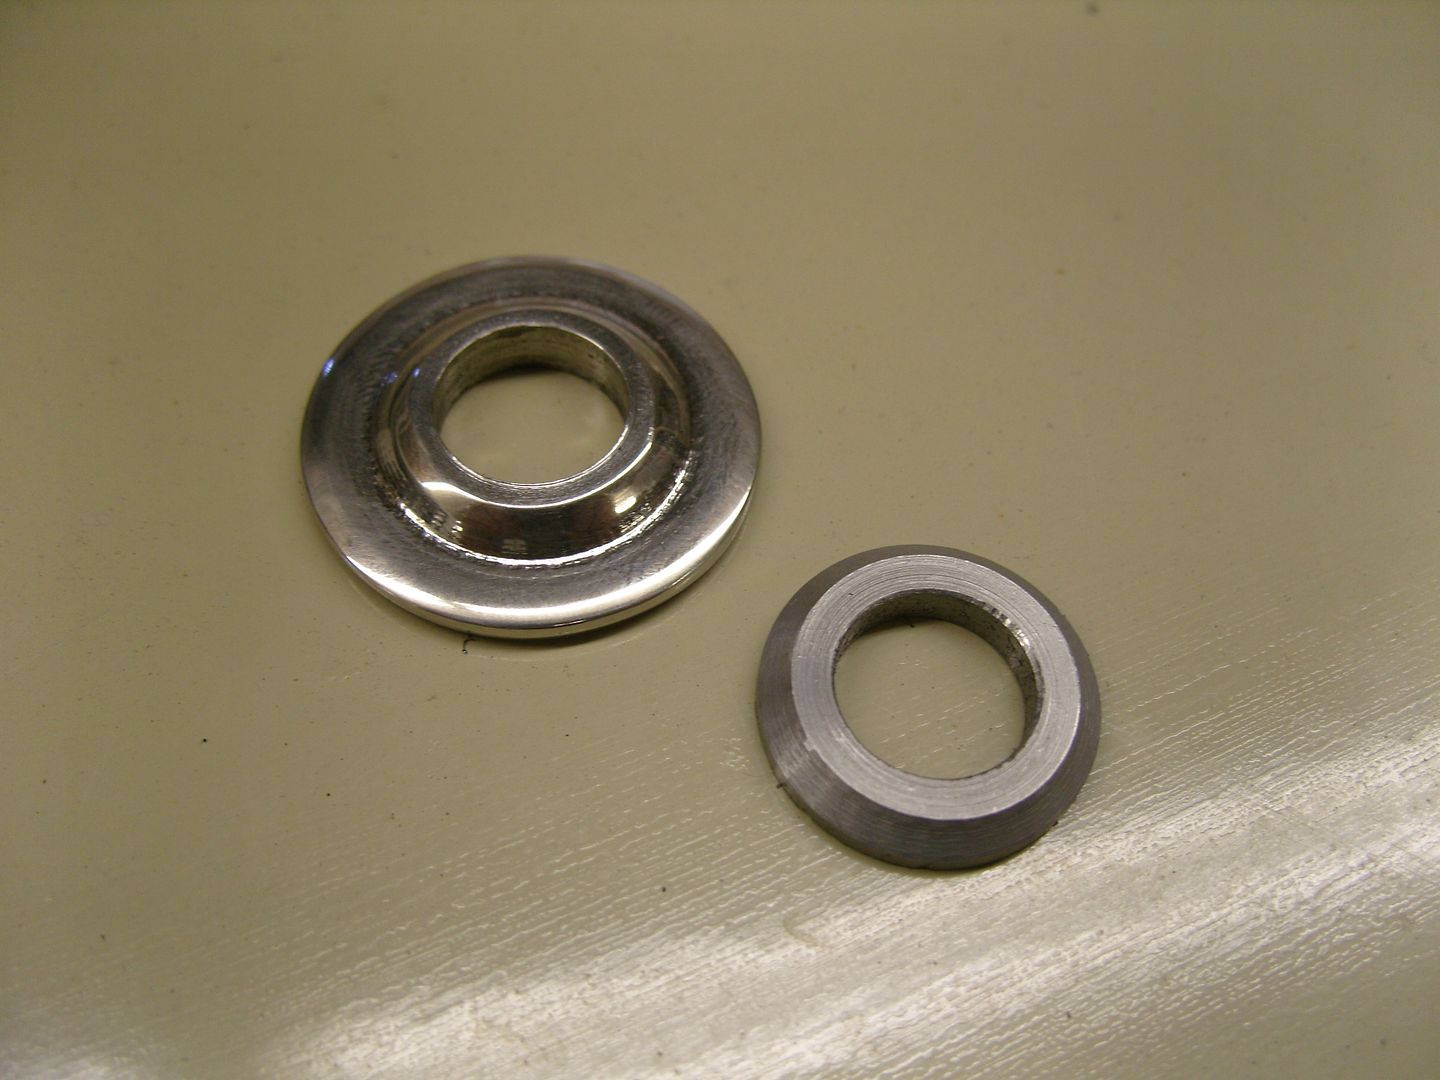
I made up some stainless cone washers to allow the rose joints to articulate slightly, the larger one goes under the nut in case a joint fails. Suppose i had better polish the inside one too.
Heres the 2 styles of joint.
Its aweful lonesome in the saddle since my horse died.
-
05-30-2010 03:23 PM #11
CHR Member
- Join Date
- Feb 2010
- Location
- Pukekohe, New Zealand
- Car Year, Make, Model: '23 Ford T Roadster
- Posts
- 2,199
Absolutely brilliant workmanship Steve, (roadster32) and I 'm envious of your welding skills ,heck of everything, that I have had the pleasure of reading so far.. Keep the posts coming please as I will be following this build..Love the colour you have chosen too..
-
05-30-2010 05:27 PM #12
CHR Member
- Join Date
- Sep 2009
- Location
- Georgetown
- Car Year, Make, Model: 48 Ford Truck
- Posts
- 471
Absolutly AWSOME! I am speachless. Can't wait to see the whole frame together. But I'll have to get my shades first. Keep up the great work, and look forward to updates as the come.
-
05-30-2010 06:32 PM #13
CHR Member
- Join Date
- Jan 2006
- Location
- fort myers
- Car Year, Make, Model: '27 ford/'39 dodge/ '23 t
- Posts
- 11,033
We are going to have to introduce you to Ken Thurm on here, Steve. You both share a passion for absolute perfection. I think you would like each other and have a lot to talk about.
Don
-
05-30-2010 07:15 PM #14
CHR Member
- Join Date
- Jul 2008
- Location
- Edgewood, New Mexico, United States
- Car Year, Make, Model: 30,34,39,50,54,65,68,70,71,72
- Posts
- 571
Wow, absolutely beautiful!Livin' on Route 66
-
05-30-2010 07:20 PM #15
CHR Member
- Join Date
- Aug 2006
- Location
- apollo
- Car Year, Make, Model: 96mustang,56dodgepu,39fordpu,69camaro
- Posts
- 256
Thats amazing, True craftsman...
Thanks for posting your build..
Harmon
 Reply With Quote

Posting Permissions
- You may not post new threads
- You may not post replies
- You may not post attachments
- You may not edit your posts

i've enjoyed the years here . made a lot of friends. most who have left. i see no reason to continue with this so hope to see you somewhere else. i dont think this site will ever be back. it's lived...
Dead!