


 4Likes
Thread: my 48 Vauxhall


Results 46 to 60 of 100
 LinkBack URL
 About LinkBacks
Hybrid View
-
08-17-2011 10:30 AM #1
 CHR Member

- Join Date
- Oct 2007
- Location
- Petaluma
- Car Year, Make, Model: 48 Ford F1
- Posts
- 9,795
Ditto what Dave said. Glad you are enjoying some car time."  "No matter where you go, there you are!" Steve.
-
08-18-2011 08:40 PM #2
CHR Member
- Join Date
- Oct 2007
- Location
- Harrison AR
- Car Year, Make, Model: 36 Chevrolet Low Cab
- Posts
- 1,023
I really dig that car Barnsey!!! I rather enjoy watching your progress. Keep up the good work.Do not lift a rock only to drop it on your own foot 
-
04-09-2012 03:56 AM #3
CHR Member
- Join Date
- Dec 2009
- Location
- central west new south wales
- Car Year, Make, Model: 48 vauxhall
- Posts
- 270
Time flys when your having fun lol
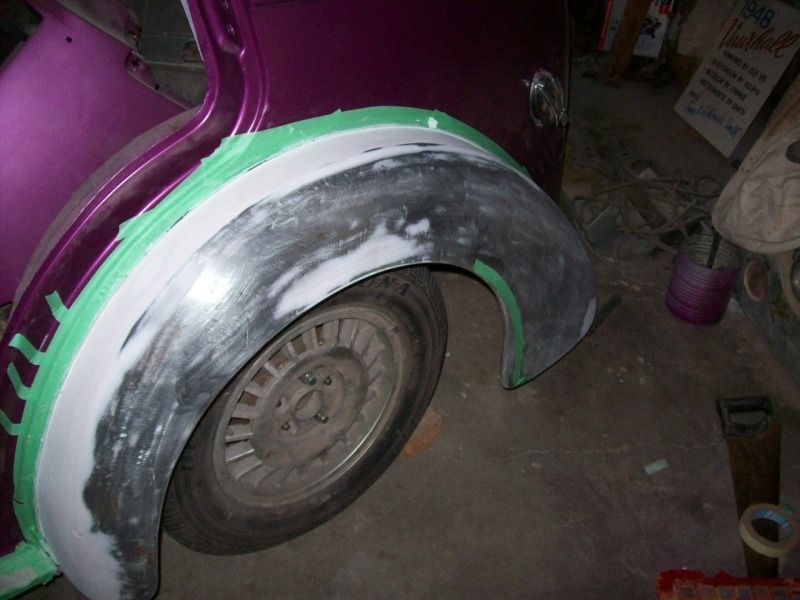
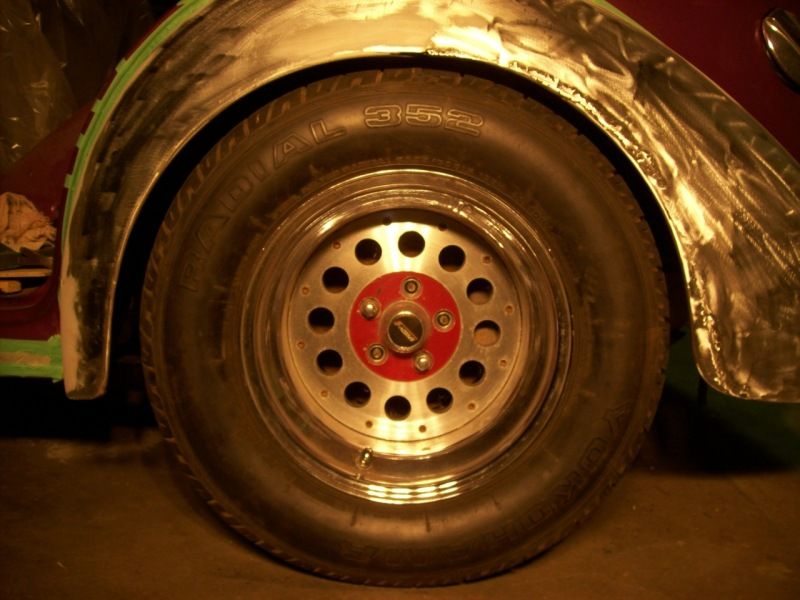
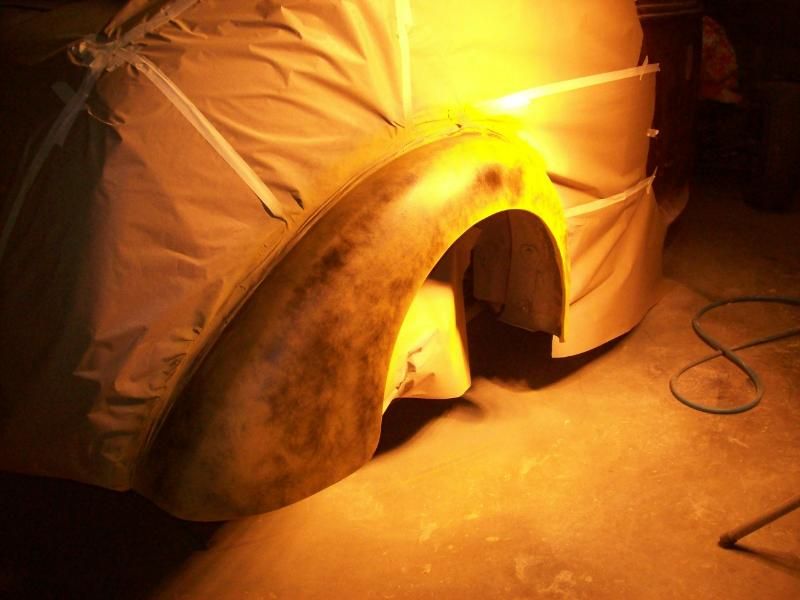
got a chance to get back out in the shed on sunday and today, first i spent 4 hours cleaning up the shed, then I dragged my rear guards out of the garden shed and stripped them back to metal, there must have been an inch of bog all over them, I fitted them up to the car and re bogged where the stepped joint is where they have been widened and skimmed a bit where it needed it, they came up pretty good and shouldnt need too much work to finish,...........well that was before i decided that now is as good a time as any to get the grinder out and fix something that has been nigleing at me since i first got the car, the back guards needed opening up a little, I sat and looked at the guard and looked at the grinder for some time before getting up the courage to make the first cut lol, I started thinking if i really needed to do this, then i thought its now or never lol so i cut a bit out and put a bit back in lol
now all i have to do is do the same to the drivers side then pull them off and clean the insides of them up then smooth them and get them ready for paint,
it sure makes a difference being able to find the tools you need and not to be tripping over everything

Last edited by barnsey; 04-09-2012 at 04:00 AM.
-
04-09-2012 05:57 AM #4
CHR Member/Contributor
- Join Date
- Jul 2003
- Location
- Madison
- Car Year, Make, Model: '67 Ranchero, '57 Chevy, '82 Camaro,
- Posts
- 21,160
Matches the radius of the tire much nicer now! Good work!Yesterday is history, tomorrow is a mystery, Live for Today!
Carroll Shelby
Learning must be difficult for those who already know it all!!!!
-
04-09-2012 06:43 AM #5
CHR Member
- Join Date
- Nov 2006
- Location
- Truckee
- Car Year, Make, Model: 53 Willys Pickup 29 Ford Sedan
- Posts
- 225
Yeh definitely looks better,nice work.
-
04-09-2012 07:08 AM #6
CHR Member
- Join Date
- Jan 2006
- Location
- Constantine
- Car Year, Make, Model: 57 chevy 2 dr wagon
- Posts
- 9,476
Looks a lot better.. I have done that a few times but welded in a 1/4" or 5/16" rod to creat the radius on the edge. Your almost there, and I know about the triping over things
Charlie
Lovin' what I do and doing what I love
Some guys can fix broken NO ONE can fix STUPID
W8AMR
http://fishertrains94.webs.com/
Christian in training
-
04-09-2012 08:01 AM #7
CHR Member
- Join Date
- Dec 2009
- Location
- central west new south wales
- Car Year, Make, Model: 48 vauxhall
- Posts
- 270
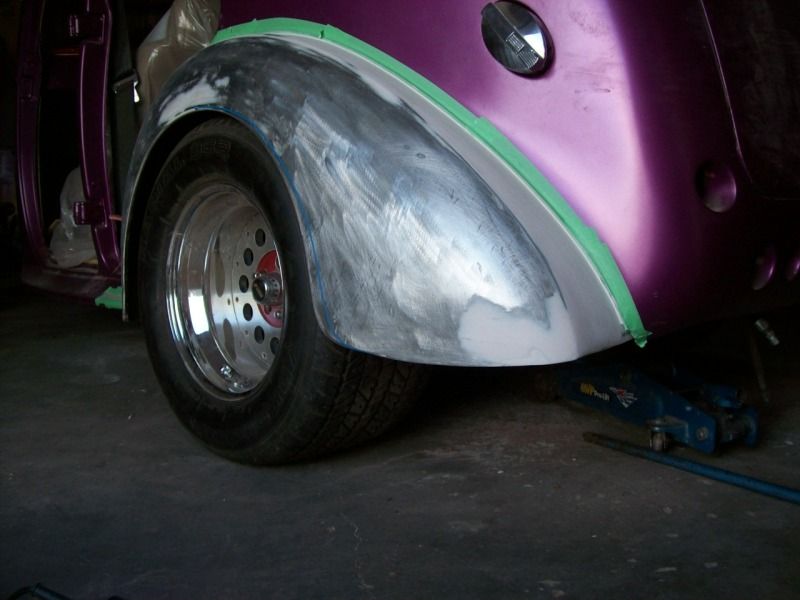
yeah i was going to do that but its a public holiday and everything was closed, if i put it off who knows when i would have done it, now theres no turning back and i will have to repeat the prosess on the other guard, I ended up trimming out a bit more from where i cut the piece out then welded the piece that i cut out back in, that moved it all back about an inch, just need to remove the guard from the car and dress the welds at the top of the radius, i cant weld upside down lol it will be much easier when its not on the car and i wont have to worry about the grinder cutting my tyre. Originally Posted by cffisher

cheers barnsey
-
04-12-2012 07:31 AM #8
CHR Member
- Join Date
- Jan 2003
- Location
- Centreville
- Car Year, Make, Model: 35 ford 5 window coupe
- Posts
- 691
It looks good now, nice and even, but I can't help but think that the rearend was just an inch too far back. If the rear was moved forward you would have had a nice tight fender/tire gap. It's just personal preference, but I prefer not to see the top of the tire. As it is now, if you lower the back of the car at all you'll lose the even gap between the tire and fender.'35 Ford coupe- LT1/T56, '32 Ford pickup, 70 GTO convertible, 06 GTO
Robert
-
04-13-2012 04:53 AM #9
CHR Member
- Join Date
- Dec 2009
- Location
- central west new south wales
- Car Year, Make, Model: 48 vauxhall
- Posts
- 270
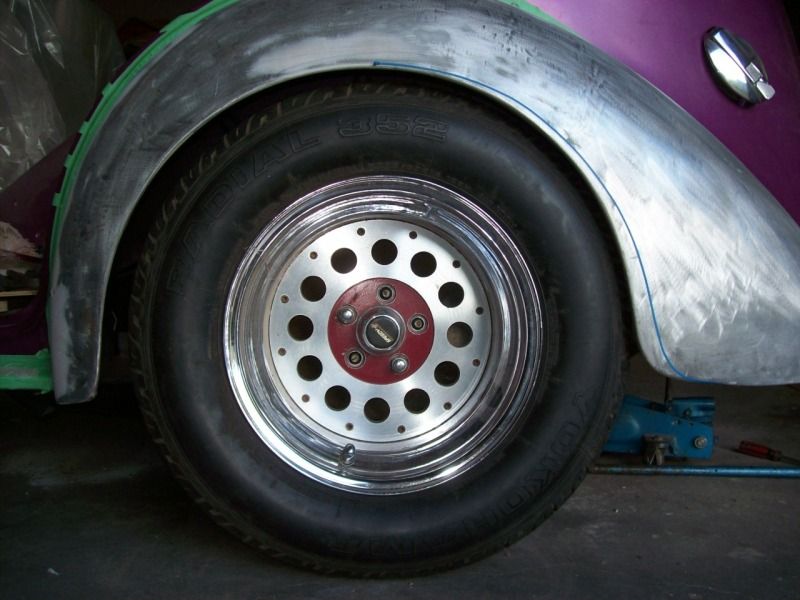
the tyre was bigger than the opening, and being 15x10 inch wide rims i had to lever it in and out of the opening whenever i removed the wheel and every time i did it i had to bend the rear of the guard and leaver it over each part of the tread, when i fit the coilovers i should be able to get the rear of the car down a few more inches. that should fill the guards a bit more.
barnsey
-
04-18-2012 07:58 AM #10
CHR Member
- Join Date
- Dec 2009
- Location
- central west new south wales
- Car Year, Make, Model: 48 vauxhall
- Posts
- 270
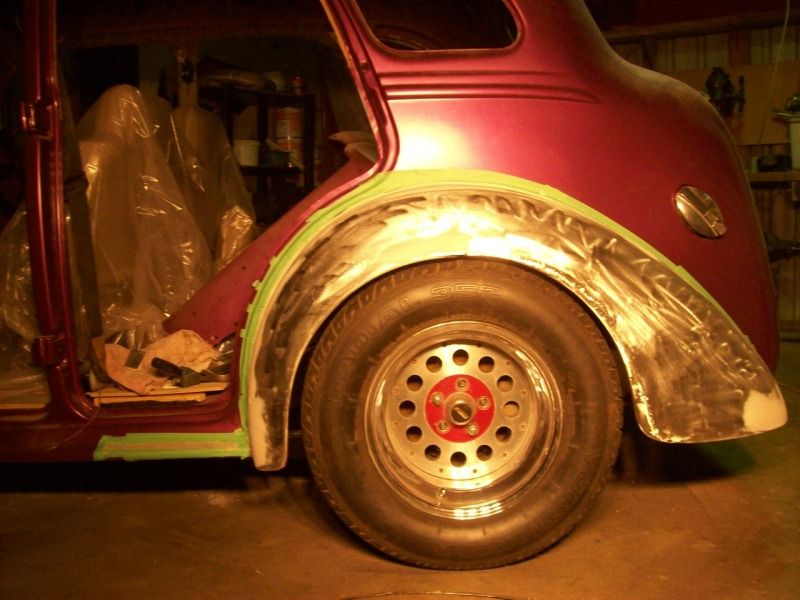
finished getting both rear guards in high fill tonight, then repaired the front guard that fell from the roof of the car and landed on top of the tail shaft yoke, things are moving forwards again
cheers barnsey

-
04-18-2012 08:21 AM #11
CHR Member/Contributor
- Join Date
- Jul 2003
- Location
- Madison
- Car Year, Make, Model: '67 Ranchero, '57 Chevy, '82 Camaro,
- Posts
- 21,160
Lookin' good Barnsey, Just a small ding sure does slow you down, huh???Yesterday is history, tomorrow is a mystery, Live for Today!
Carroll Shelby
Learning must be difficult for those who already know it all!!!!
-
04-18-2012 08:44 AM #12
CHR Member
- Join Date
- Dec 2009
- Location
- central west new south wales
- Car Year, Make, Model: 48 vauxhall
- Posts
- 270
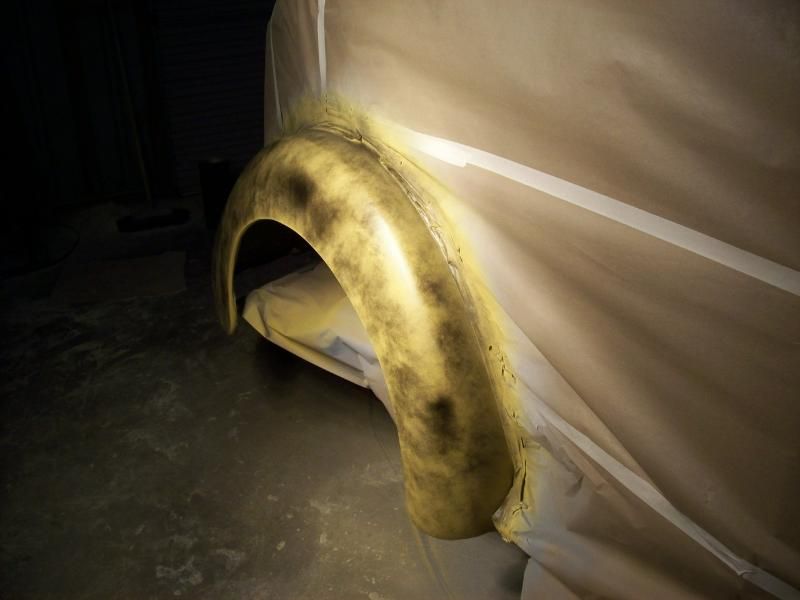
the fun part starts tomorrow, lots of elbow grease dry rubbing them all down and getting them ready to undercoat and in there first coat of color, once all of the panels have the first coat of color i will spend a day wet sanding the whole car and all of the panels then hopefully get the final coat of color and clear top coat on the car the next day, still one more front guard to repair, then its onto the hood and 3 more doors inside and out, i am going to finish coat all of the inside of the doors and door shuts including clear coating them first so i can start getting the outside ready for final paint.
I am going to try and get all of the paint finished by mid may or there abouts, then its onto the wiring and trim, still lots to do but if i keep spending time in the shed after work instead of in front of the TV or computer i should start to see some results.
cheers and thanks for the comments.
barnsey
-
04-18-2012 09:07 AM #13
CHR Member
- Join Date
- Oct 2007
- Location
- Petaluma
- Car Year, Make, Model: 48 Ford F1
- Posts
- 9,795
Fenders came out real nice. I hate the paint and sand part(mostly because I don't do it well!)
" "No matter where you go, there you are!" Steve.
-
06-24-2012 03:09 AM #14
CHR Member
- Join Date
- Dec 2009
- Location
- central west new south wales
- Car Year, Make, Model: 48 vauxhall
- Posts
- 270
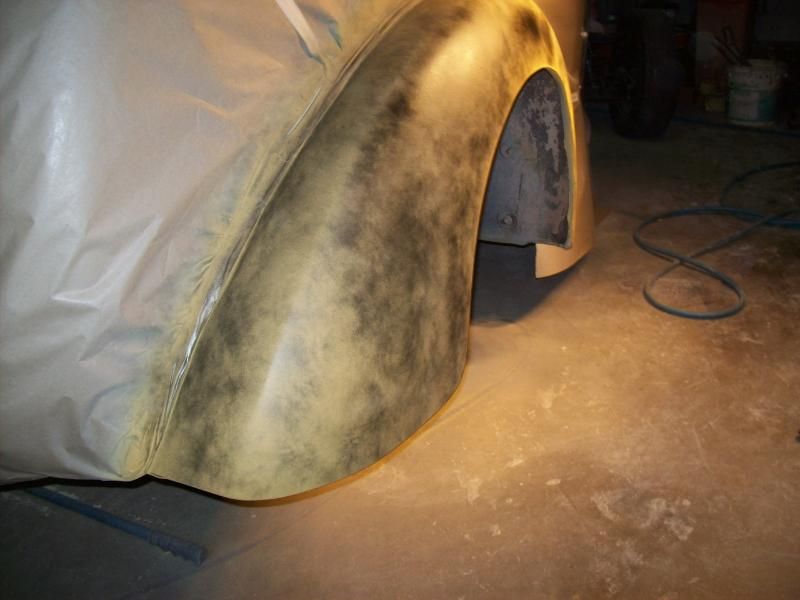
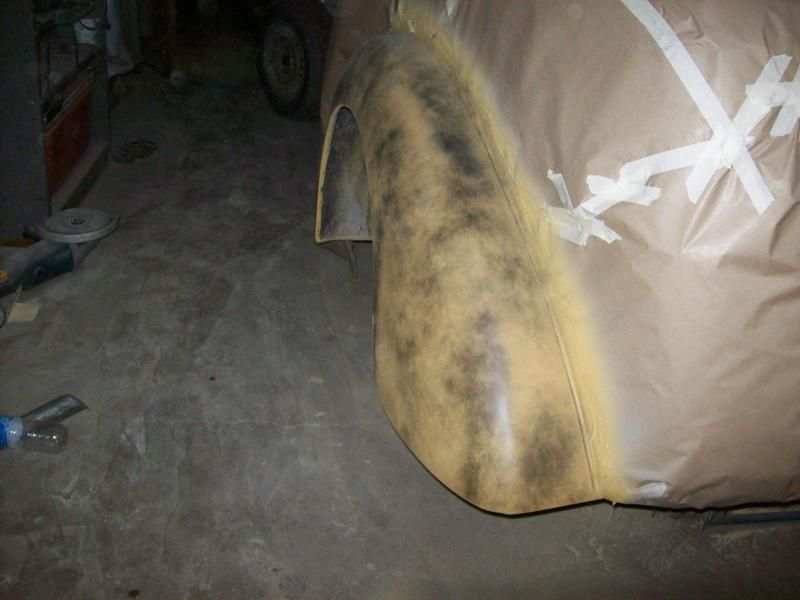
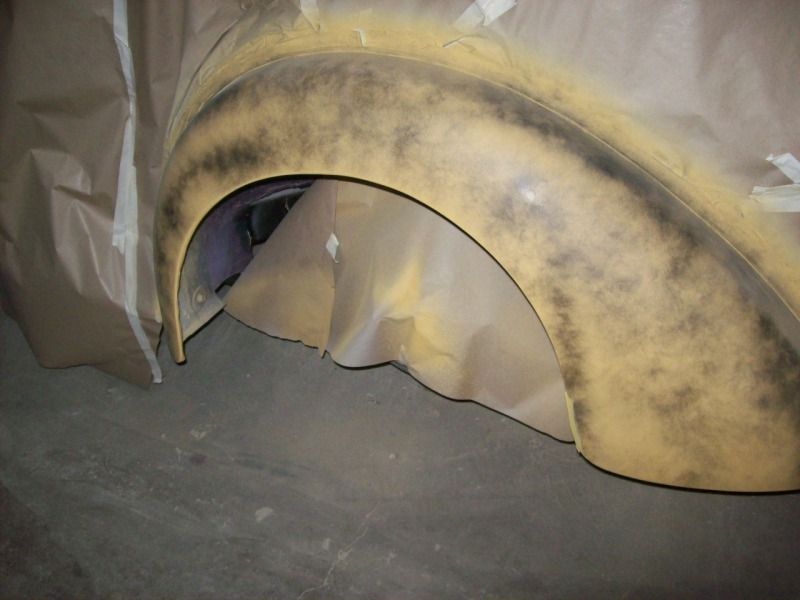
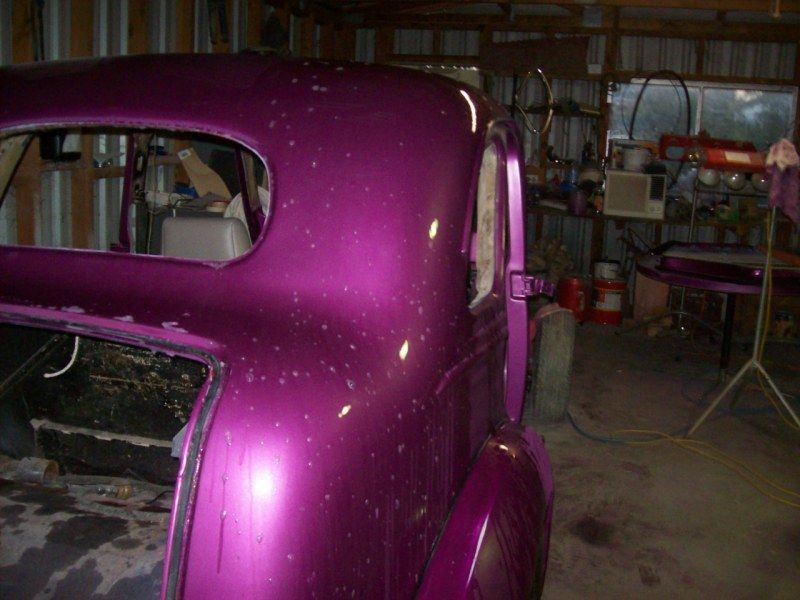
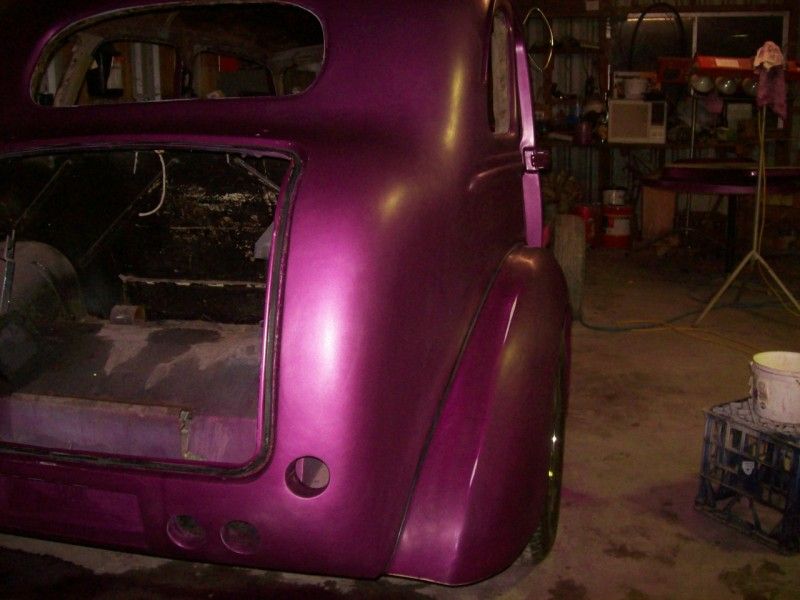
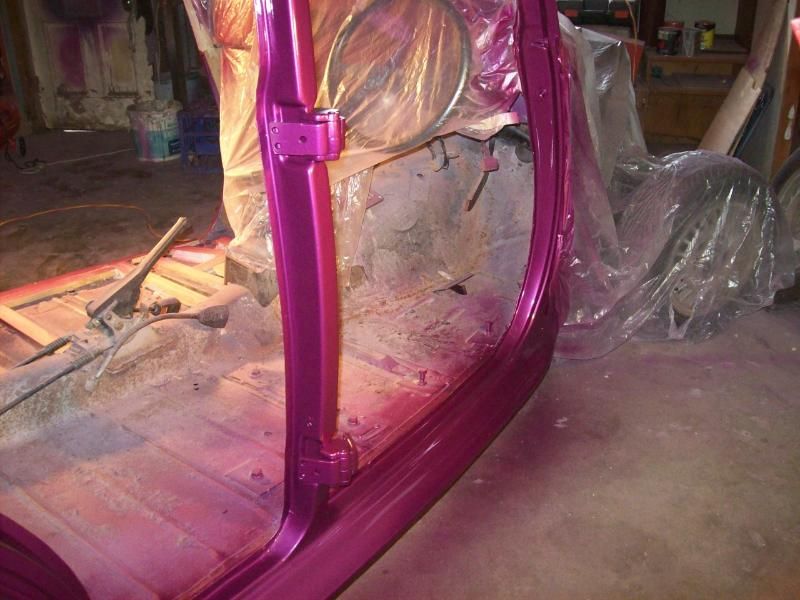
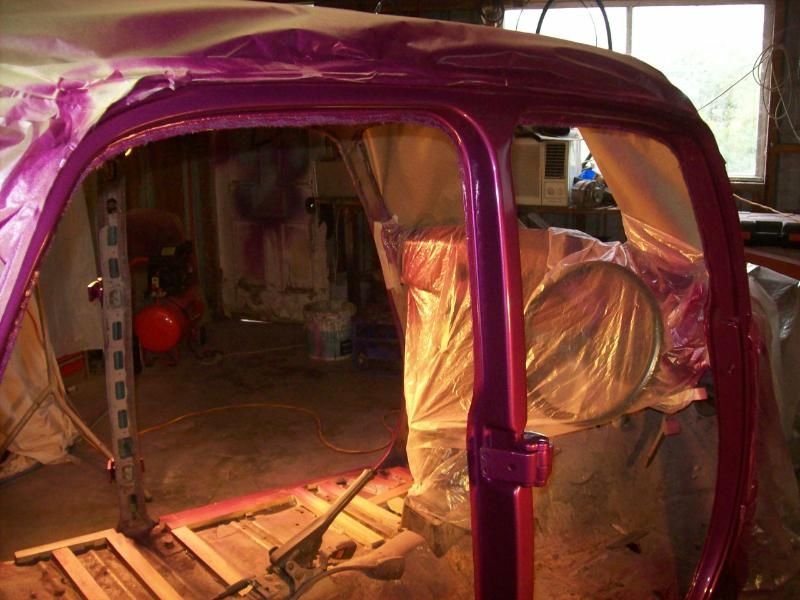
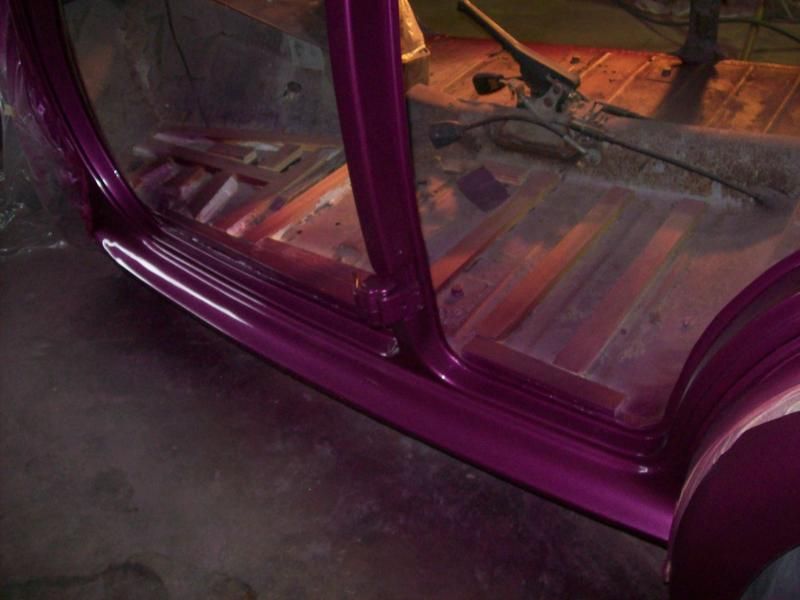
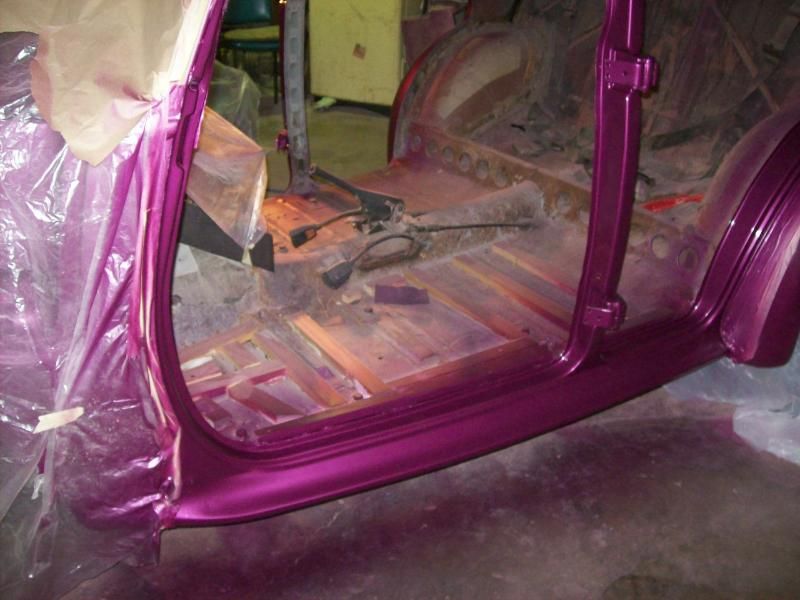
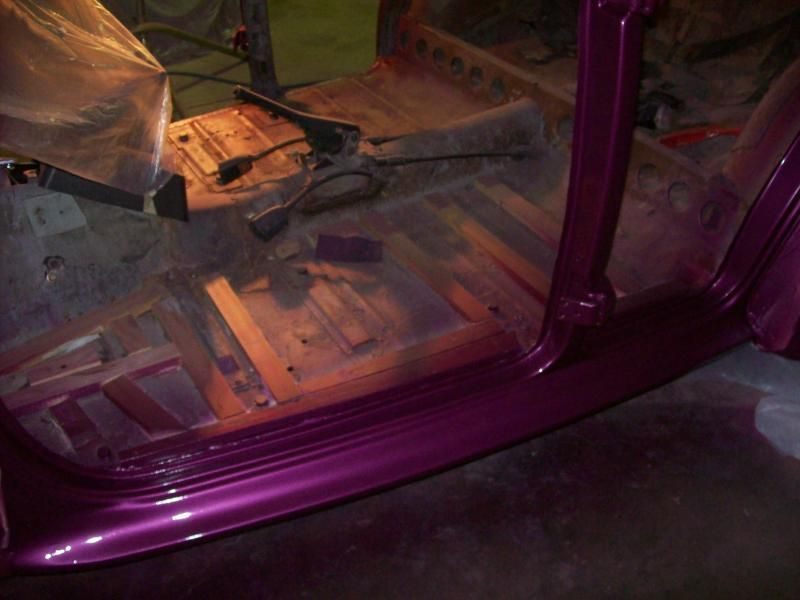
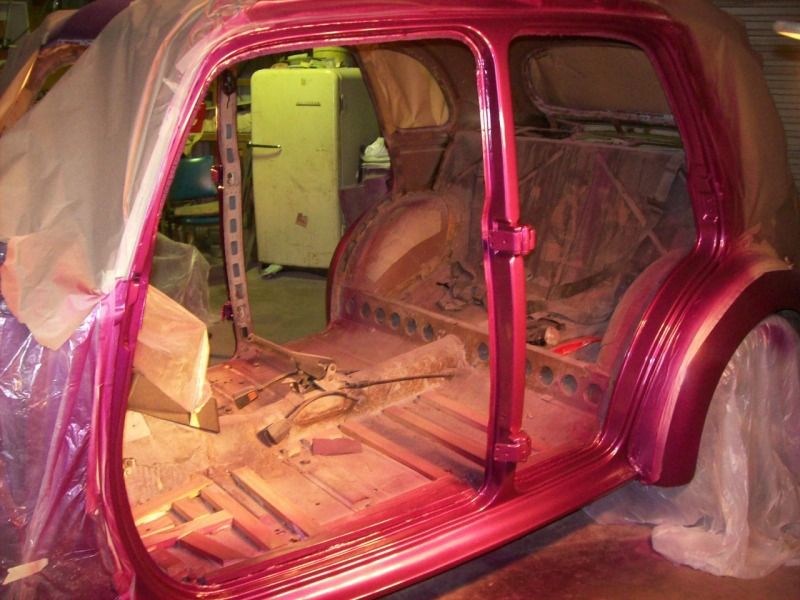
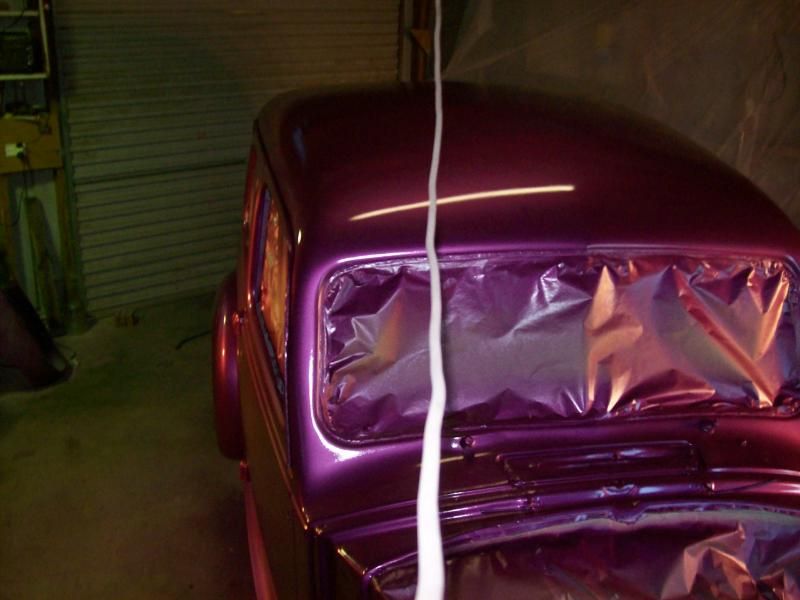
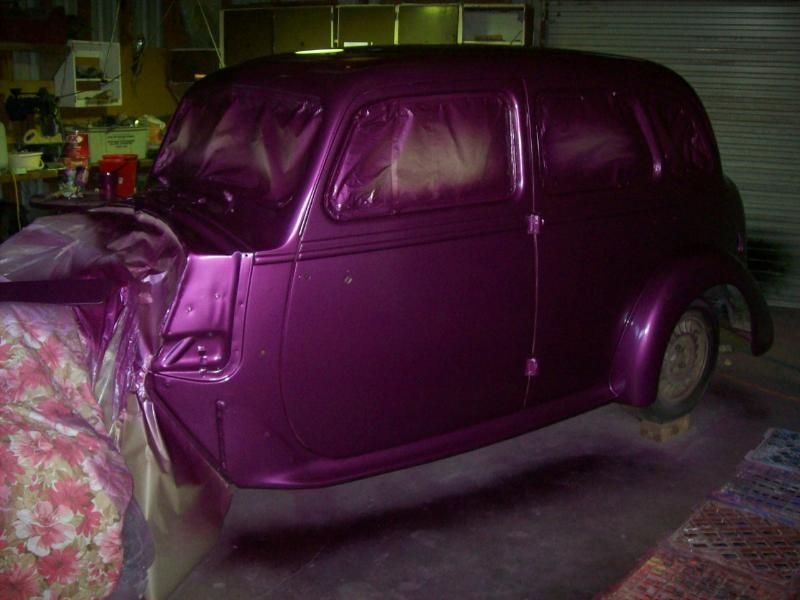
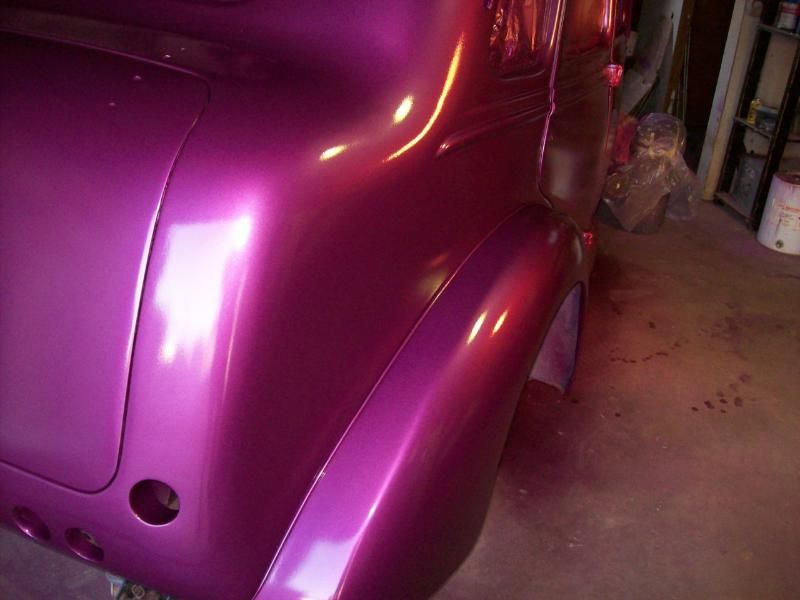
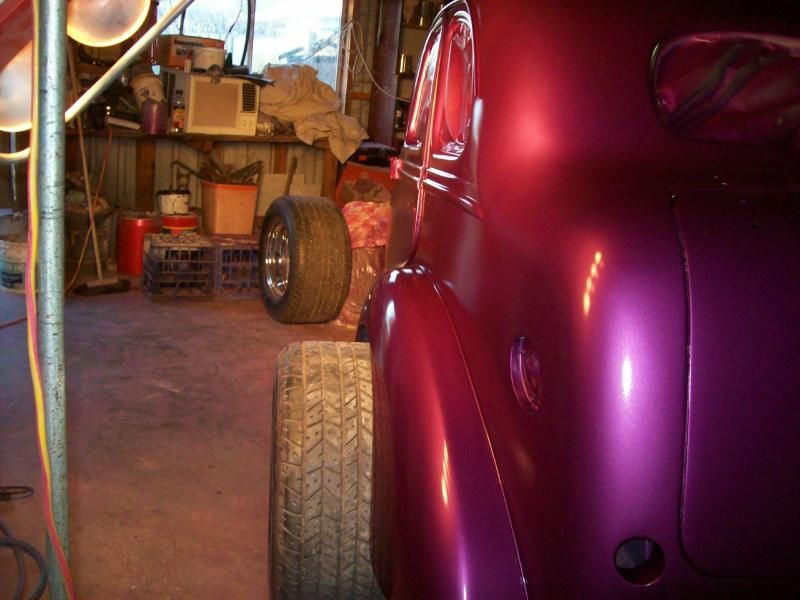
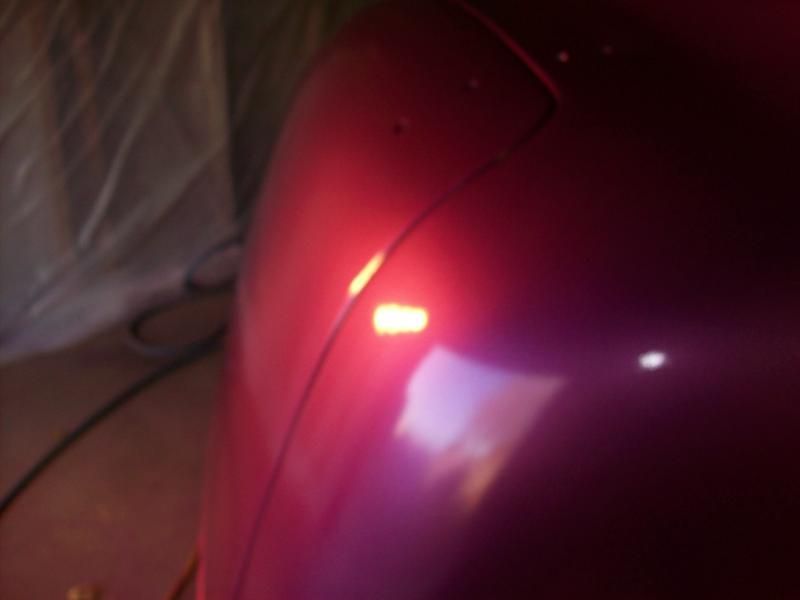
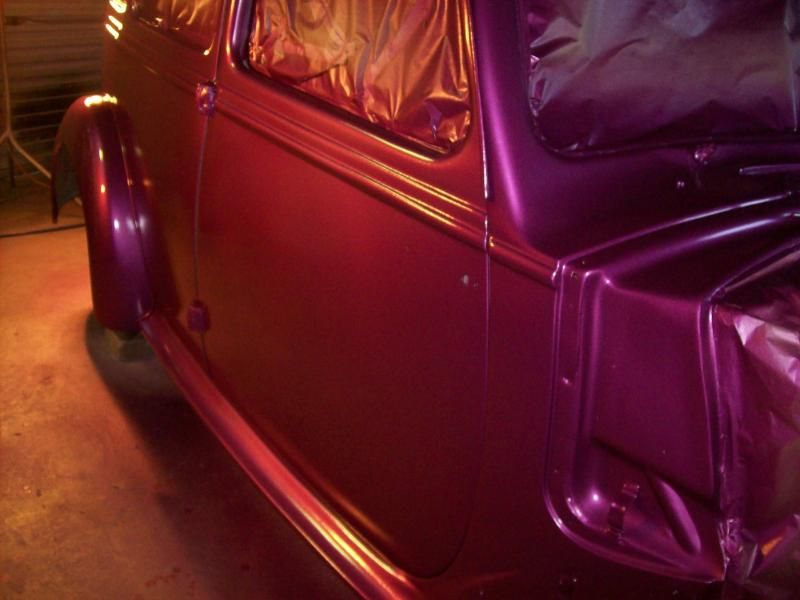
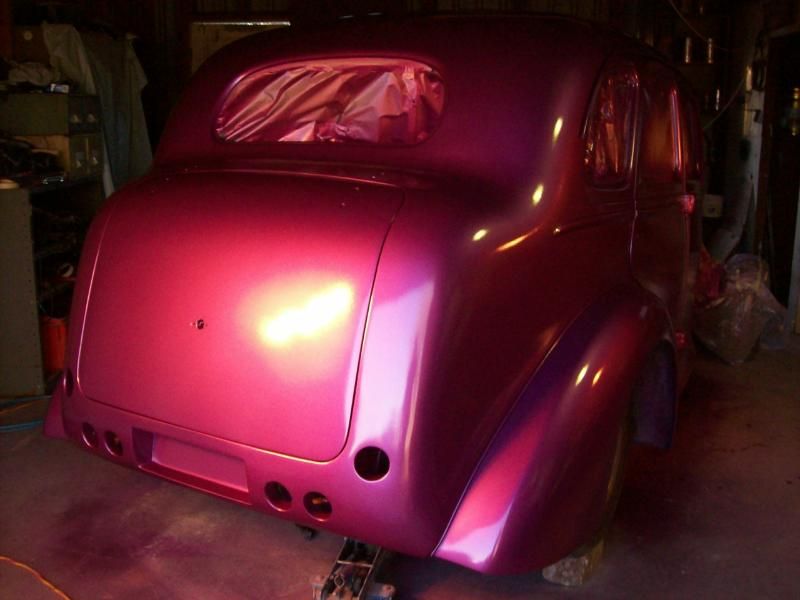
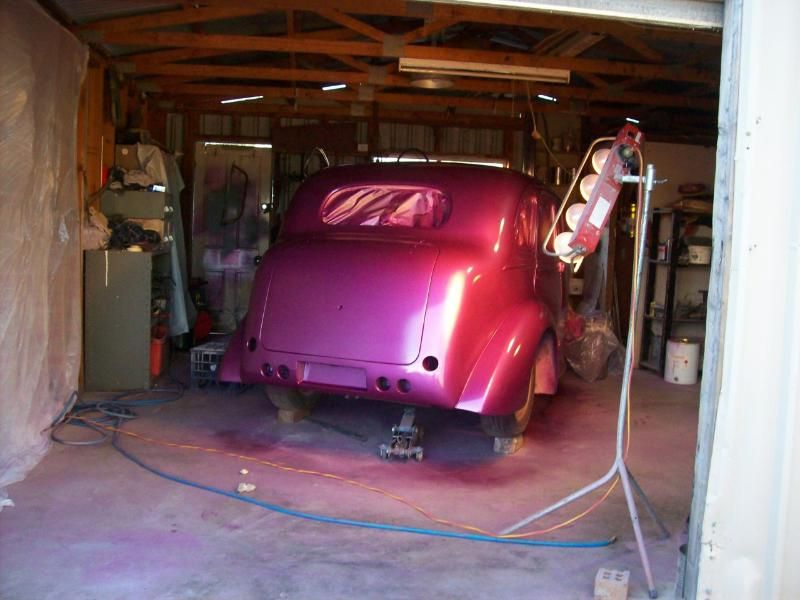
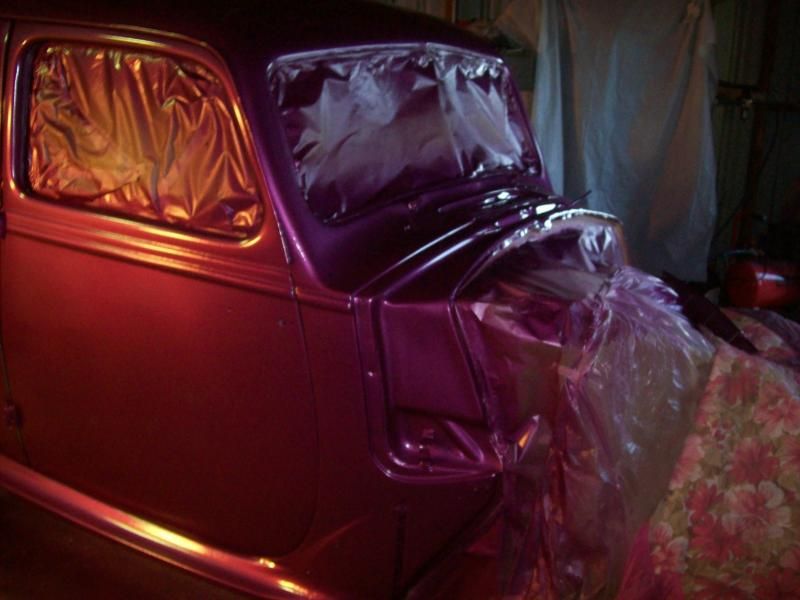
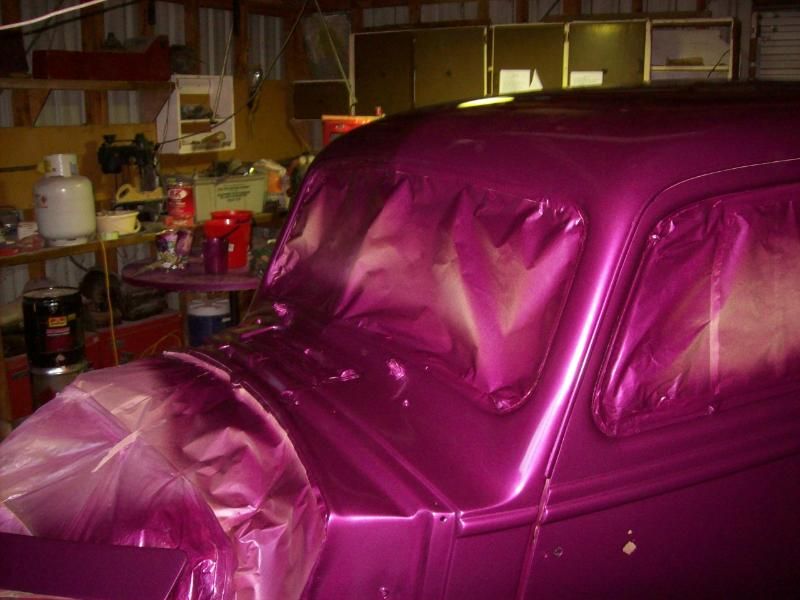
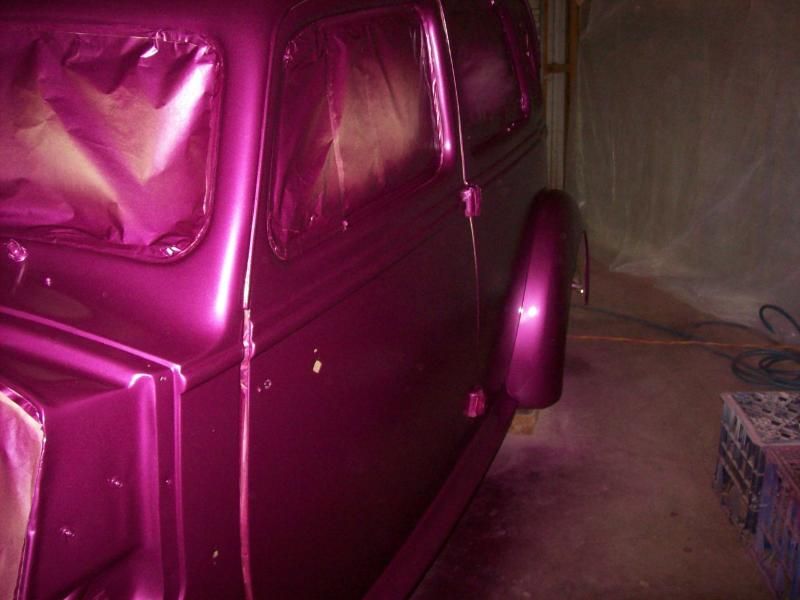
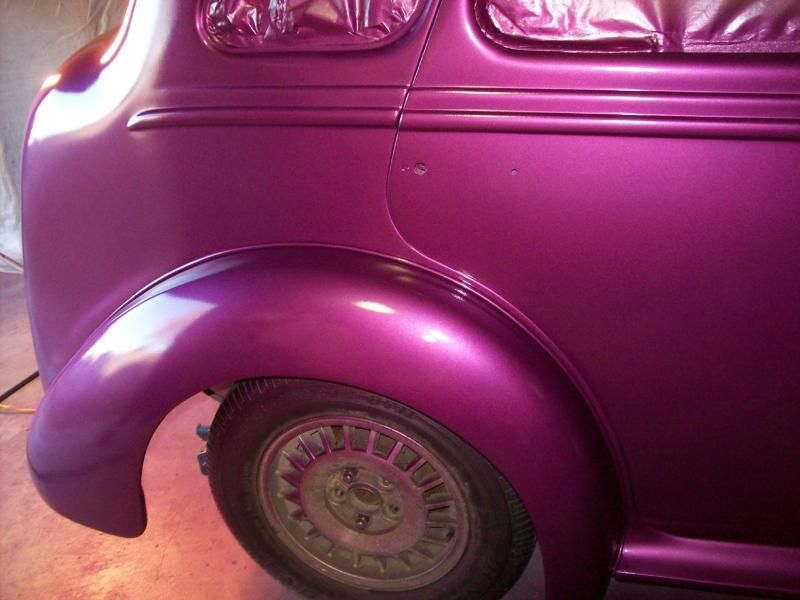
finished painting today and the last three days inside and out
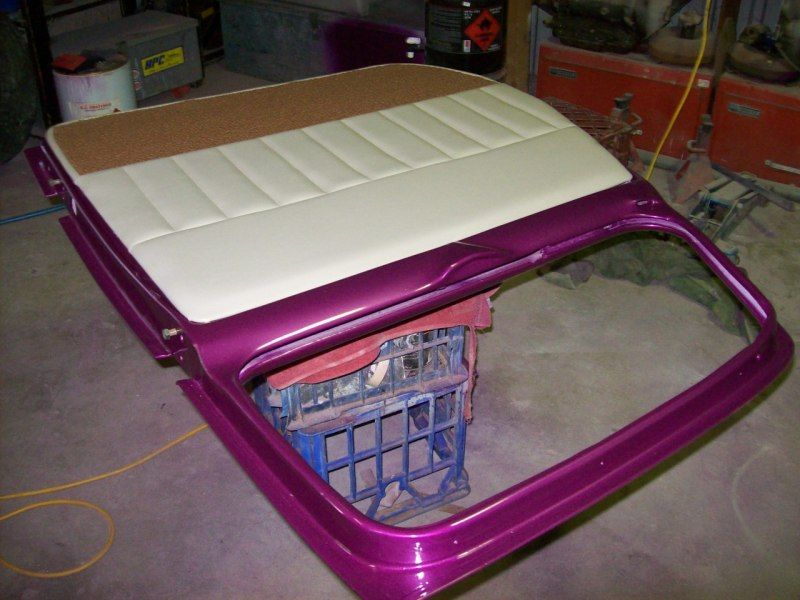
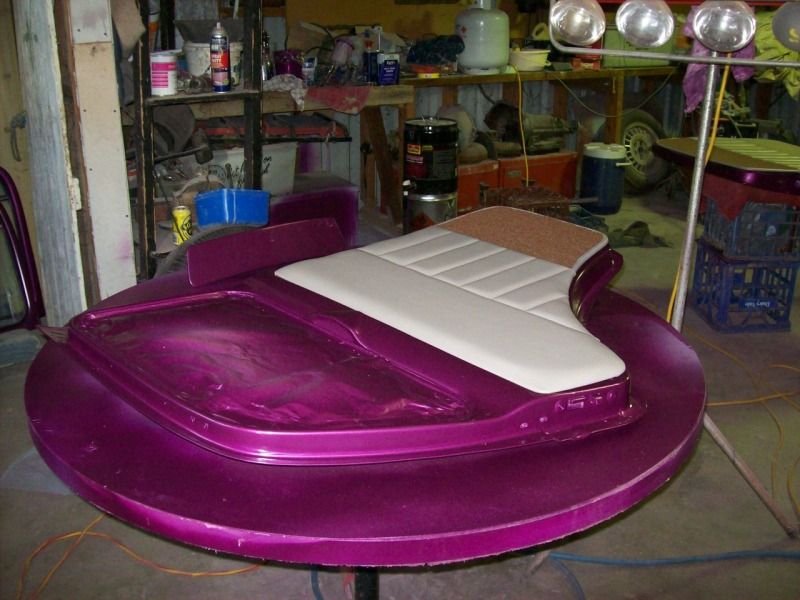

a couple of pics wet sanding with 600 grit.
-
06-24-2012 03:11 AM #15
CHR Member
- Join Date
- Dec 2009
- Location
- central west new south wales
- Car Year, Make, Model: 48 vauxhall
- Posts
- 270
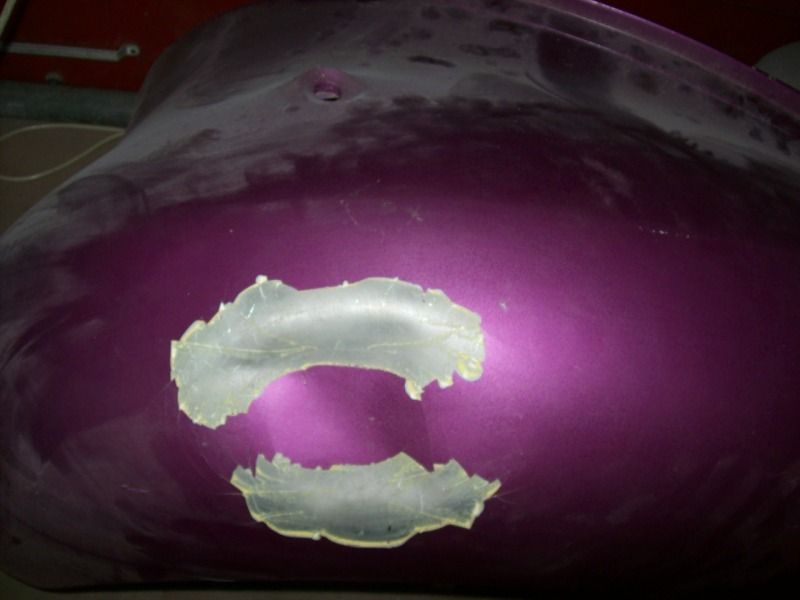
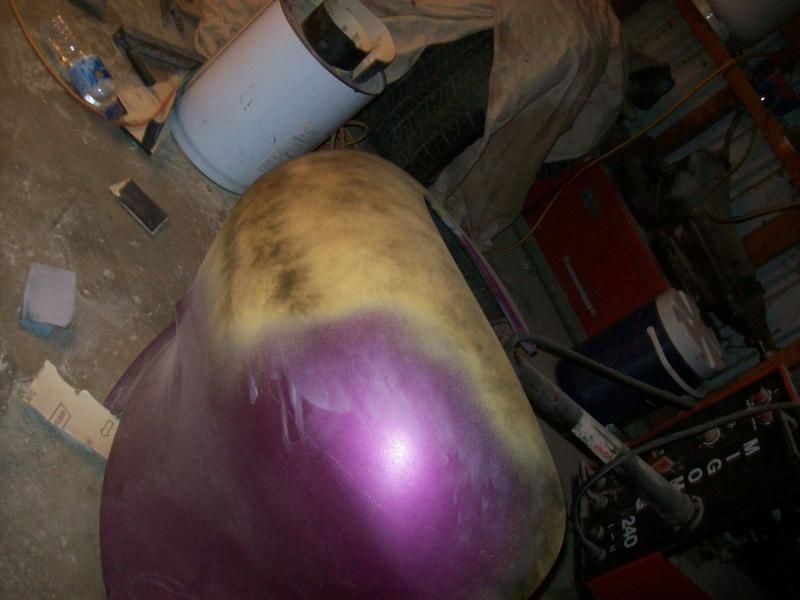
here's a few pics, its hard trying to get a decent pic in the shed with the different lights and the flash on the camera keeps going off and changing the color lol
cheers barnsey

 Reply With Quote

Posting Permissions
- You may not post new threads
- You may not post replies
- You may not post attachments
- You may not edit your posts

This site is up more often lately, but very little traffic.
Dead!