


 282Likes

Results 61 to 75 of 176
 LinkBack URL
 About LinkBacks
-
11-26-2019 07:17 PM #61
 CHR Member

- Join Date
- Jan 2006
- Location
- Constantine
- Car Year, Make, Model: 57 chevy 2 dr wagon
- Posts
- 9,476
You keep digging you'll get to the bottom of it.Charlie
Lovin' what I do and doing what I love
Some guys can fix broken NO ONE can fix STUPID
W8AMR
http://fishertrains94.webs.com/
Christian in training
-
Advertising

- Google Adsense
- REGISTERED USERS DO NOT SEE THIS AD
-
11-27-2019 05:41 PM #62
CHR Member
- Join Date
- Sep 2007
- Location
- New Bedford
- Car Year, Make, Model: 34 Ford 3W Coupe Replica
- Posts
- 14,754
I guess only the "pretty colors" can help get you through this job.
But it sounds like you're almost there..
On the road to recovery! rotflmao!!!


-
11-29-2019 03:57 PM #63
CHR Member
- Join Date
- Apr 2001
- Location
- Byron, Mi.
- Car Year, Make, Model: '88 Astro Van-BAD AST
- Posts
- 871
Thanks guys! We are getting there, major step today!
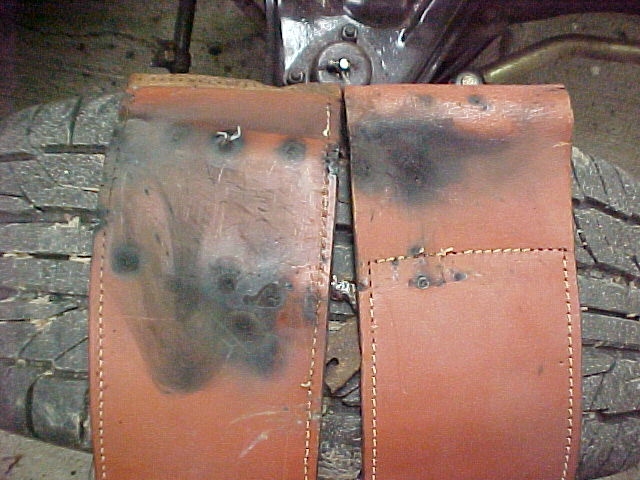
I've been picking away at the patch panels. I had some scrap leather I was "saving" for something. I used a couple of strips to protect the wiring and fuse box from the welding heat. Seemed to work fairly well. I did start a couple of small fires but I was keeping my eye on the interior AND I had a blowgun and the air hose already staged inside because I knew this would happen. No big deal, and I used the air gun to cool off the welds from the inside as I was doing them. Took me most of the day but going slow was a good thing.
The leather strips were from a Wassely chair I refurbished a couple of years ago.
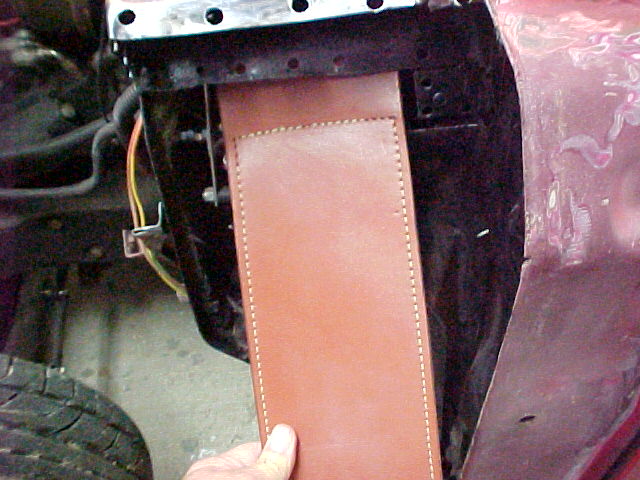
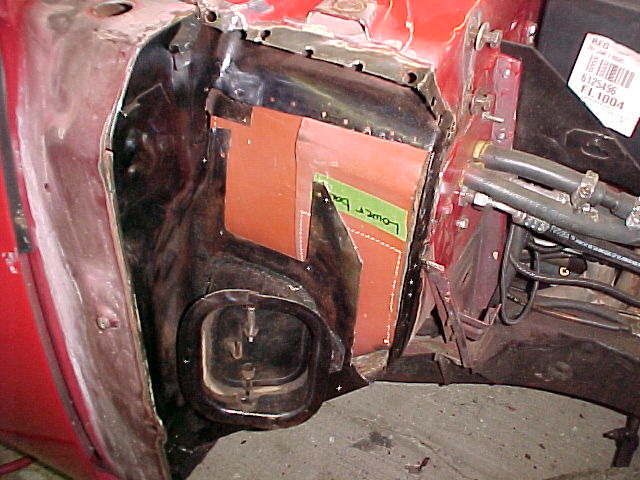
Stuffed up into the top of the dash they covered all of the wiring and down to the floor.
With all of the panels in place.
That all happened Wednesday. I didn't get out to the shop yesterday. This morning I went out and hit all of the weld holes with a cartridge roll on the angle grinder.
Getting the welding started.
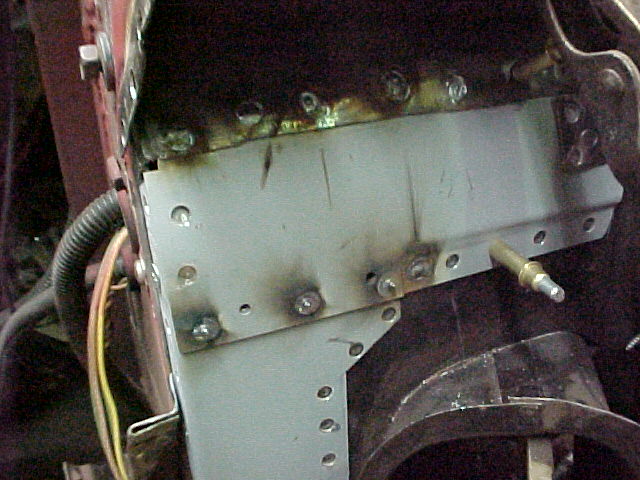
The welding went "okay". Had no issues where there was new steel. The old rusted steel was pretty thin and I had to go easy with very short trigger pulls on the gun. had to "build up" the thin steel to get it heavy enough to support the heat from a full spot weld pull.
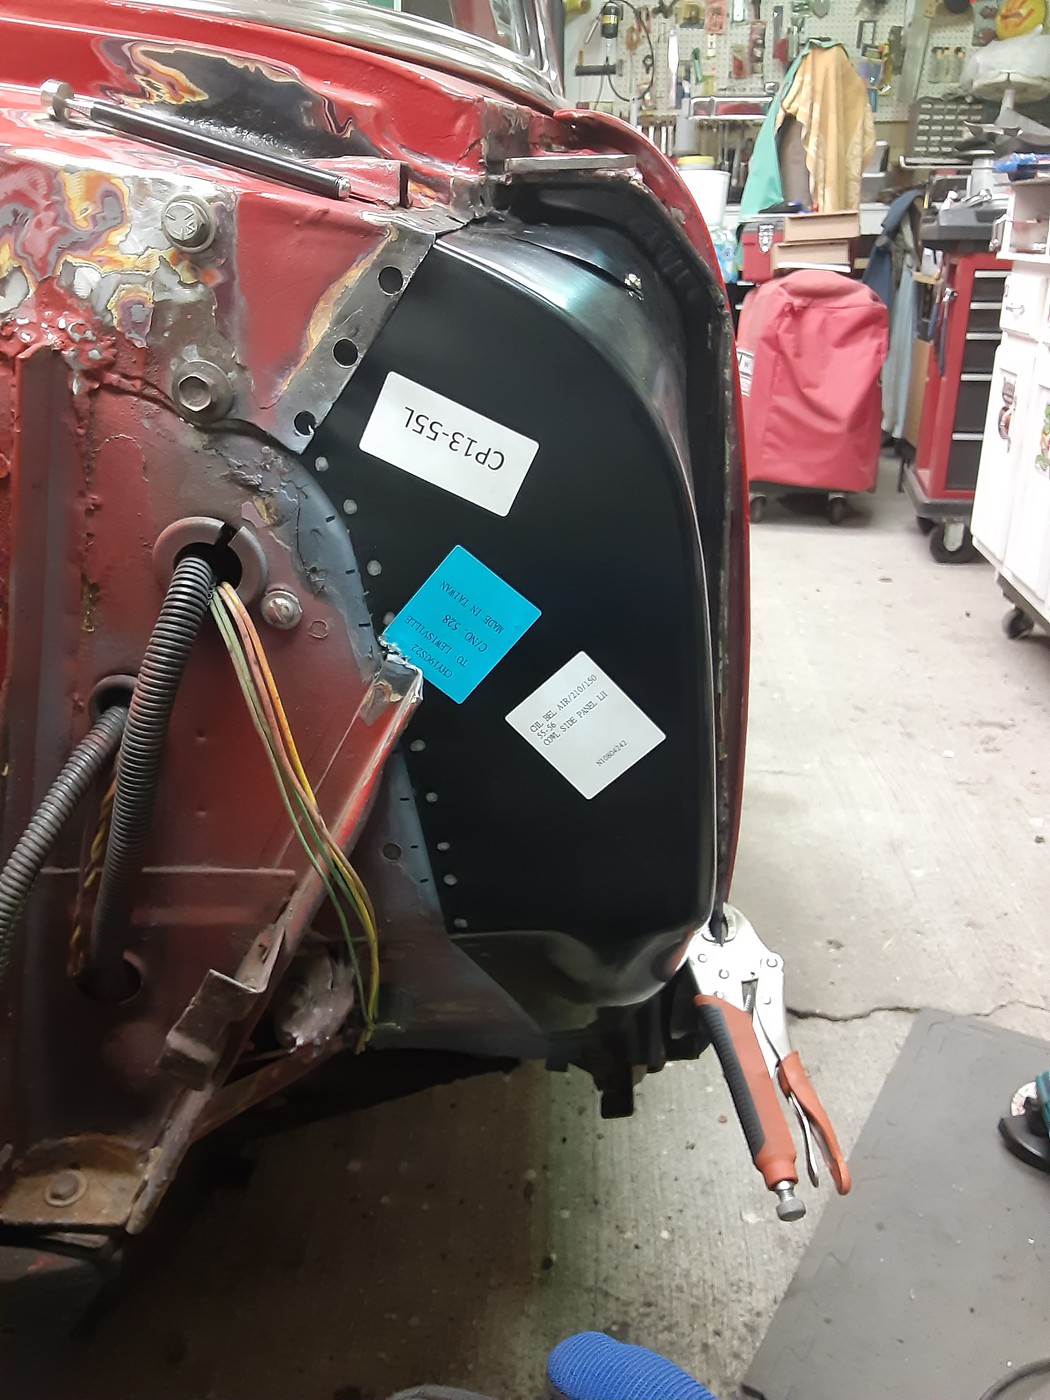
Everything is pretty complete at this point. Still have two loose panels to put in but I needed to knock down the height on the welds a bit to get them to fit correctly.
Everything welded in and primed. Definetly not very pretty but it will do the job. Still need to fit the drain channels in but I was running out of steam by the time this was done.
Got a lot done today, won't get too much done tomorrow but Sunday should see the passenger side welded up and possibly the drain channels as well.
Thanks for looking.
MarkIf money is the root of all evil... Women must be the fertilizer...
Link to my BAD AST Build Thread:
http://www.clubhotrod.com/suspension...van-build.html
-
11-29-2019 07:13 PM #64
CHR Member
- Join Date
- May 2005
- Location
- Tataraimaka NZ
- Car Year, Make, Model: `47 Ford sedan, A.C.Cobra replica.
- Posts
- 2,895
That idea with the leather was a cracker.
To be able to use something that is (essentially) waste shows why we keep 'unused good stuff' (ugs) in our sheds.johnboy
Mountain man. (Retired.)
Some mistakes are too much fun to be made only once.
I don't know everything about anything, and I don't know anything about lots of things.
'47 Ford sedan. 350 -- 350, Jaguar irs + ifs.
'49 Morris Minor. Datsun 1500cc, 5sp manual, Marina front axle, Nissan rear axle.
'51 Ford school bus. Chev 400 ci Vortec 5 sp manual + Gearvendors 2sp, 2000 Chev lwb dually chassis and axles.
'64 A.C. Cobra replica. Ford 429, C6 auto, Torana ifs, Jaguar irs.
-
11-30-2019 03:49 PM #65
CHR Member
- Join Date
- Apr 2001
- Location
- Byron, Mi.
- Car Year, Make, Model: '88 Astro Van-BAD AST
- Posts
- 871
Thanks jb, wish I could claim it. It was mentioned on another site and I had the scrap strapping so I gave it a shot. Seems to have worked very well.
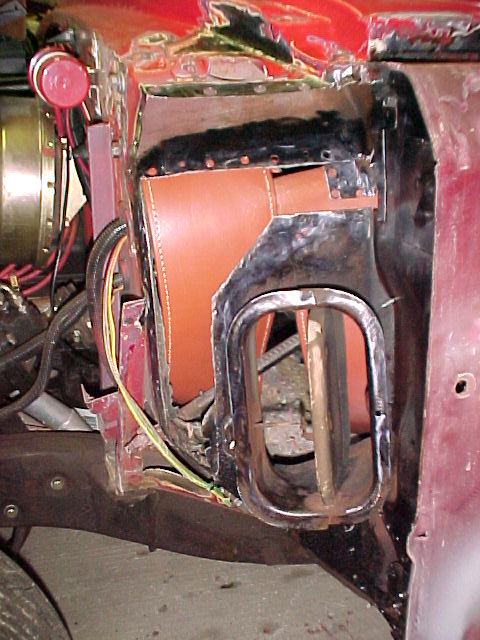
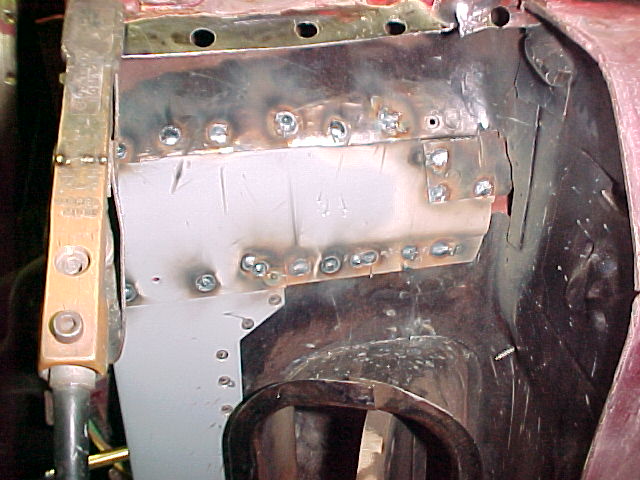
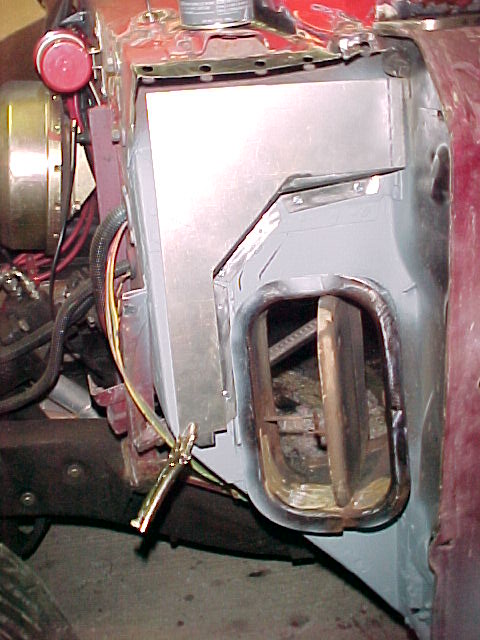
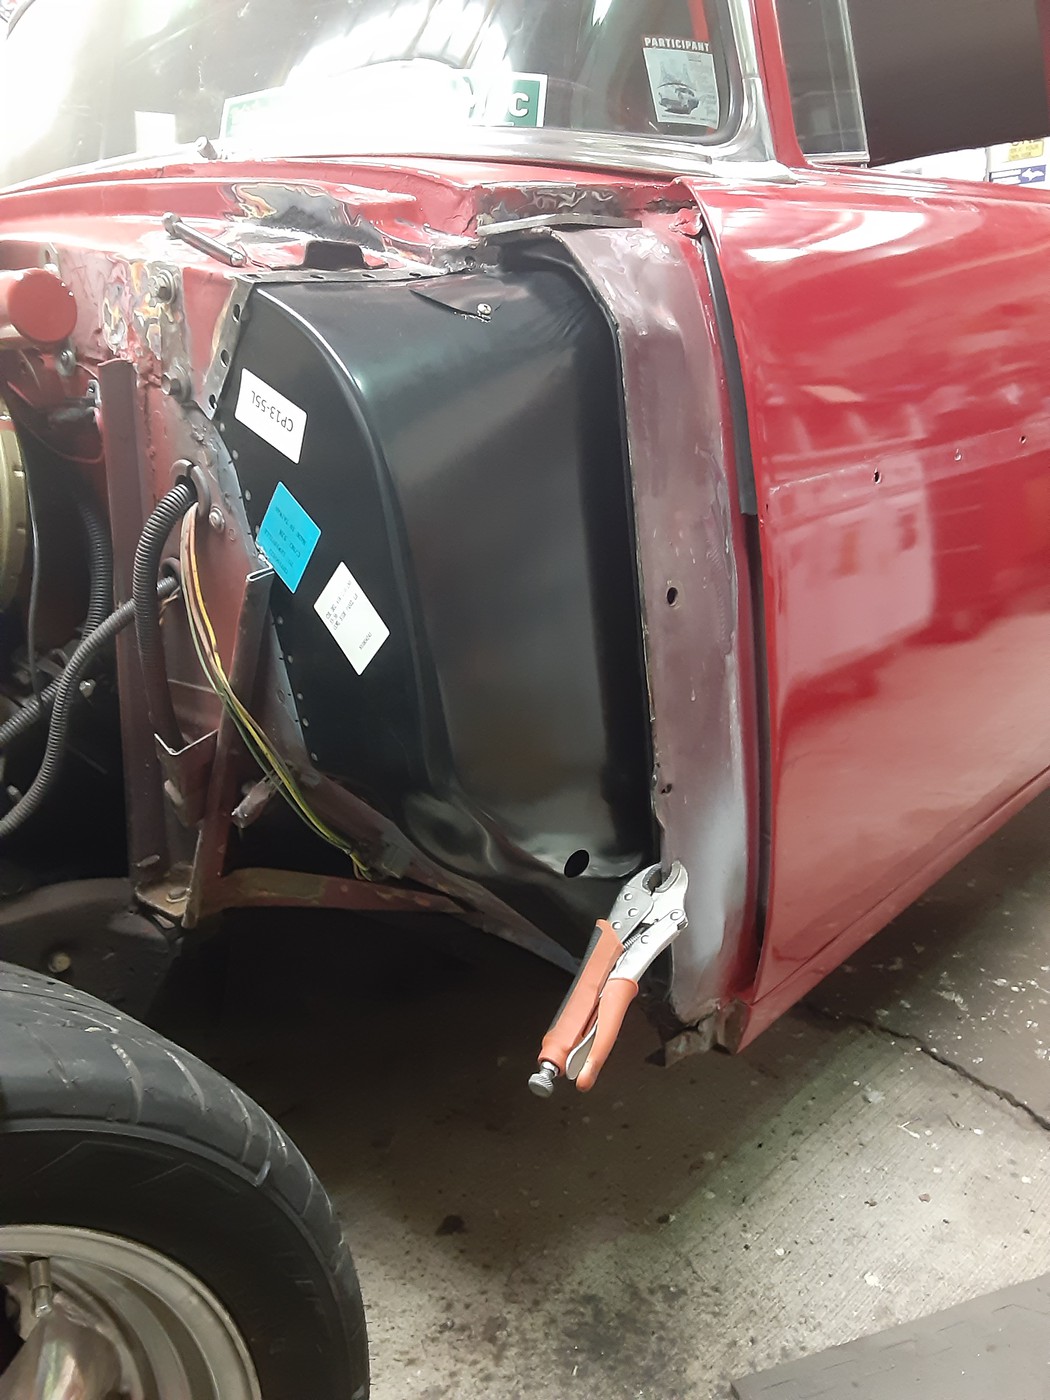
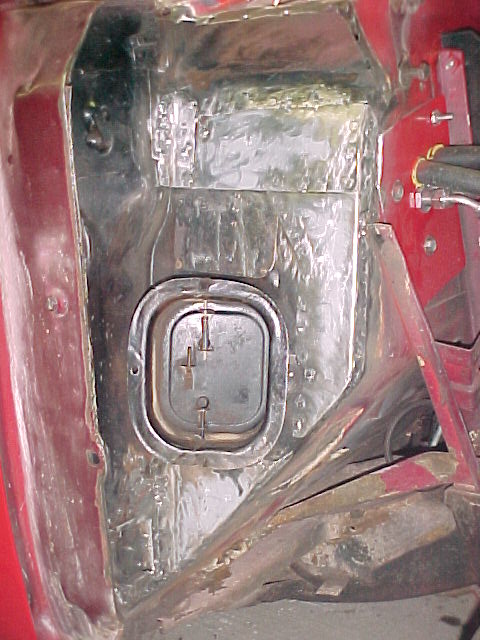
Here is a pic of the damage after welding.
The other side all ready for welding tomorrow. I used the same pieces, just turned them end for end. Don't think that would matter but the A/C lines are right under them where the plug welding will be happening.
If money is the root of all evil... Women must be the fertilizer...
Link to my BAD AST Build Thread:
http://www.clubhotrod.com/suspension...van-build.html
-
11-30-2019 06:16 PM #66
CHR Member
- Join Date
- Sep 2007
- Location
- New Bedford
- Car Year, Make, Model: 34 Ford 3W Coupe Replica
- Posts
- 14,754
All this work should certainly make cruising a LOT quieter and less drafty. I would think anyway..
Keep at it Mark, you're on the crest of going downhill.. meaning it should get easier soon. LOL..
-
11-30-2019 07:10 PM #67
CHR Member
- Join Date
- Apr 2001
- Location
- Byron, Mi.
- Car Year, Make, Model: '88 Astro Van-BAD AST
- Posts
- 871
Thanks for the vote of confidence! Floors and rockers are next. Those will definitely quiet things down as they will get a good dousing of sound deadener before the carpet goes back in. Originally Posted by 34_40

If money is the root of all evil... Women must be the fertilizer...
Link to my BAD AST Build Thread:
http://www.clubhotrod.com/suspension...van-build.html
-
11-30-2019 08:54 PM #68
CHR Member
- Join Date
- Jan 2005
- Location
- Doon, Ia
- Car Year, Make, Model: 53 Chevy 3100
- Posts
- 2,716
It's looking Soo much better! I still can't get over what can be hiding under pretty paint!Seth
God cannot give us a happiness and peace apart from Himself, because it is not there. There is no such thing. C.S.Lewis
-
12-01-2019 07:01 AM #69
CHR Member
- Join Date
- Apr 2001
- Location
- Byron, Mi.
- Car Year, Make, Model: '88 Astro Van-BAD AST
- Posts
- 871
Thanks Seth! Yea, I knew the rust was there but what we found on the front fenders was a complete surprise! Had no idea all of that was under there...
Got out to the shop early Saturday morning, didn't have much time as we were headed to the west side of the state for family stuff.
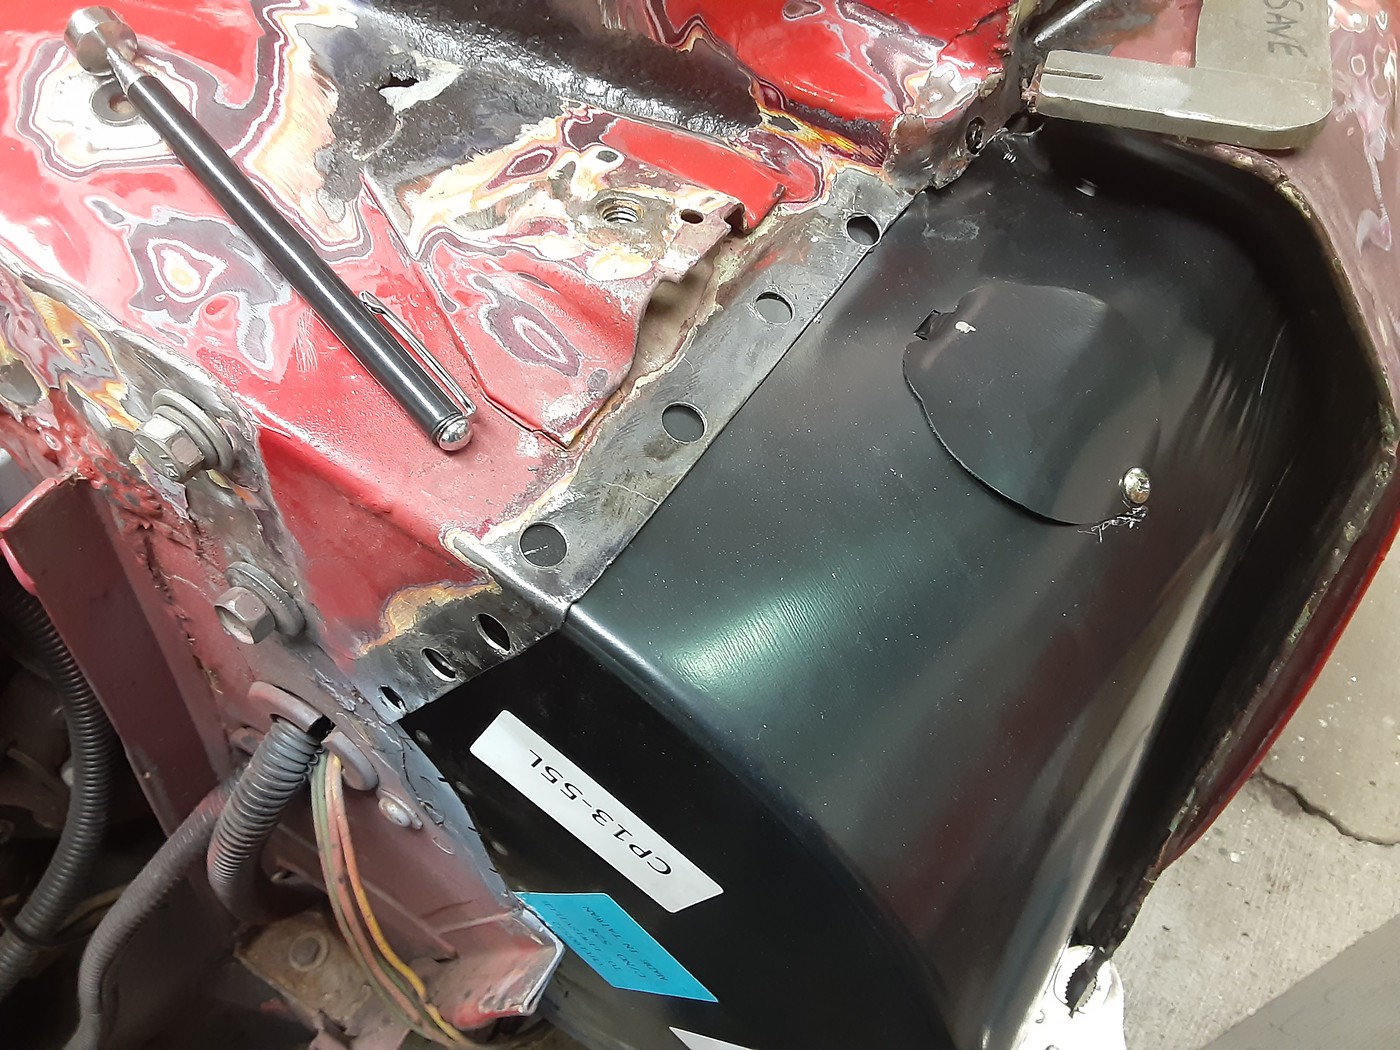
I got the drivers side drain channel fit up and screwed into place.

I was going to weld all of this in but right now I think I will just run a couple more screws into it and leave it at that. It's not structural so, doing it this way, will let me coat the entire flange with seam sealer, screw it down and then smooth out the transitions. No welding means the seam sealer will cover the whole flange so it will be fully sealed up.
I'll do the same with the big cover plate.
Once everthing is primed and the rest of the cowl seam sealed this will be a permanent fix. I will probably have to do some trimming to this anyway to get the outer cowl to slip over it but that will be easy if it is removable.
Mark
If money is the root of all evil... Women must be the fertilizer...
Link to my BAD AST Build Thread:
http://www.clubhotrod.com/suspension...van-build.html
-
12-01-2019 09:54 AM #70
CHR Member
- Join Date
- Sep 2007
- Location
- New Bedford
- Car Year, Make, Model: 34 Ford 3W Coupe Replica
- Posts
- 14,754
good idea in getting the bottom layers sealed and protected. The next owner 30 years from now will appreciate it!
(yeah just funnin' with ya"!)
-
12-01-2019 05:46 PM #71
CHR Member
- Join Date
- Apr 2001
- Location
- Byron, Mi.
- Car Year, Make, Model: '88 Astro Van-BAD AST
- Posts
- 871
Sealing up the backside, especially if you're welding in patch panels, is a must do. If the welded area isn't cleaned up and sealed all of your hard work will be rusted out again in a very short time.
I didn't get near as much done as I had hoped today. I started working on the drivers side outer cowl fit-up. It is pretty close but I need to get it snuggled up along the bottom of the firewall a bit more. I am having to tweak the original metal and the new tin along the top seam. I will be raising the original metal another 1/16th inch and lowering the new piece 1/16th to bring the whole cowl piece up about an 1/8th.
I also got a lot done on the other side but still have some work to do in prepping for the spot welding.
I was out there most of the morning, took a break for some lunch and ended up going with the wife to get groceries. Her folks are under 24/7 home care and my wife is the only one out of six siblings that can get the groceries... Anyway it's easier with the two of us so I went with her to do that.
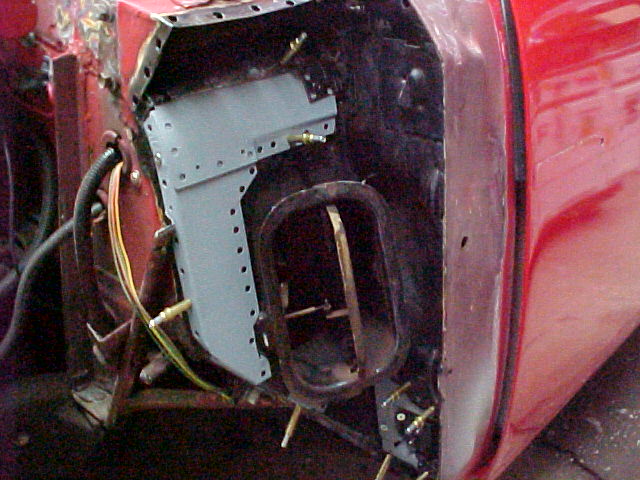
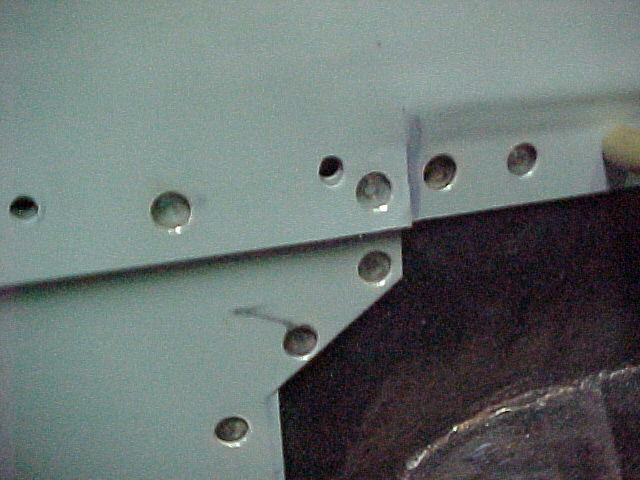
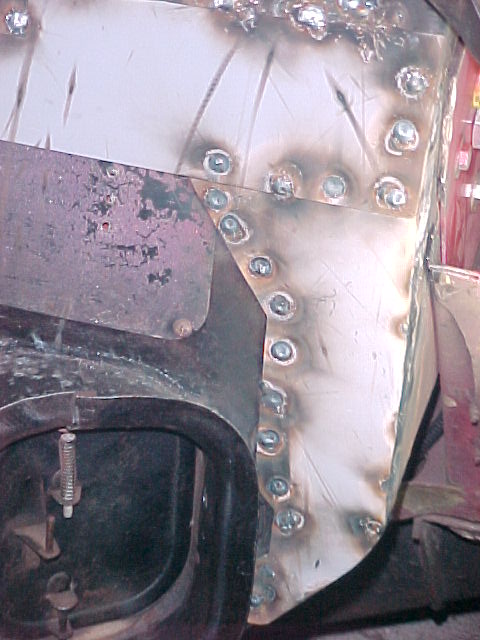
Here are some pics of the progress.
Mostly fit up. The silver dots are where the plug weld holes will be punched.
MarkLast edited by astroracer; 12-02-2019 at 07:20 AM.
If money is the root of all evil... Women must be the fertilizer...
Link to my BAD AST Build Thread:
http://www.clubhotrod.com/suspension...van-build.html
-
12-02-2019 01:32 PM #72
CHR Member
- Join Date
- Sep 2007
- Location
- New Bedford
- Car Year, Make, Model: 34 Ford 3W Coupe Replica
- Posts
- 14,754
The finished job should look very nice.. all the pics that I see above, just to the left of the repaired area makes me wanna sing out.... INNA GADDA DA VIDA BABY.... 8-)
-
12-03-2019 04:36 AM #73
CHR Member
- Join Date
- Apr 2001
- Location
- Byron, Mi.
- Car Year, Make, Model: '88 Astro Van-BAD AST
- Posts
- 871
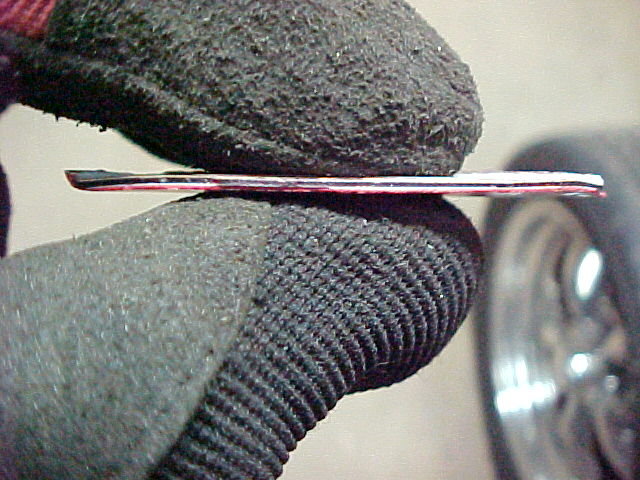
Yea... I have counted upwards of 11 layers of paint on this thing! I chipped off a big chunk of paint from the top of the cowl. It is 1/16th of an inch thick!
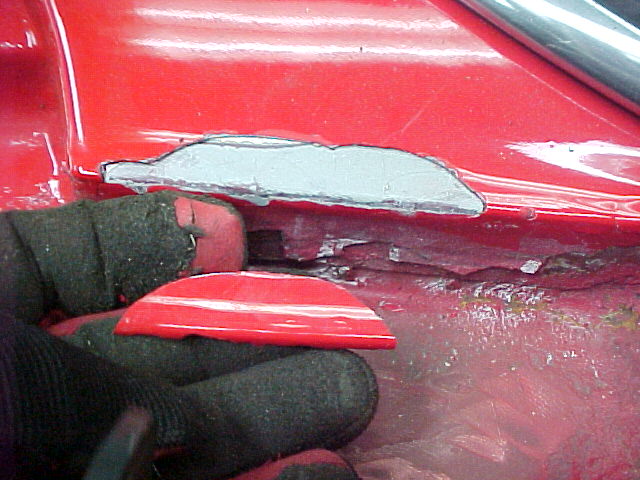
The firewall is the only place I have seen the yellow so far...
If money is the root of all evil... Women must be the fertilizer...
Link to my BAD AST Build Thread:
http://www.clubhotrod.com/suspension...van-build.html
-
12-04-2019 09:57 AM #74
CHR Member
- Join Date
- Jan 2004
- Location
- Macomb
- Car Year, Make, Model: '32 Ford 3W Coupe, 383 sbc
- Posts
- 1,593
That accident may end up being a blessing in disguise. All that rust is now gone and you will wind up with a much better, more solid car. I hope you received a good settlement from Haggerty. Even so, I doubt it comes close to covering your time.
Lynn
'32 3W
There's no 12 step program for stupid!
http://photo.net/photos/Lynn%20Johanson
-
12-04-2019 06:20 PM #75
CHR Member
- Join Date
- Apr 2001
- Location
- Byron, Mi.
- Car Year, Make, Model: '88 Astro Van-BAD AST
- Posts
- 871
A blessing... ahh, no... Not really. yea, I am getting the car fixed up but i was not planning to be doing this right now. i had been putting my efforts into getting the Astro rolling around and this is now taking all of my time...
The settlement was fine, it did not cover an entire repaint though, or the work I am putting into the cowl and floors or what will need to be done in the rockers. That's on me as well as getting the car stripped for paint.
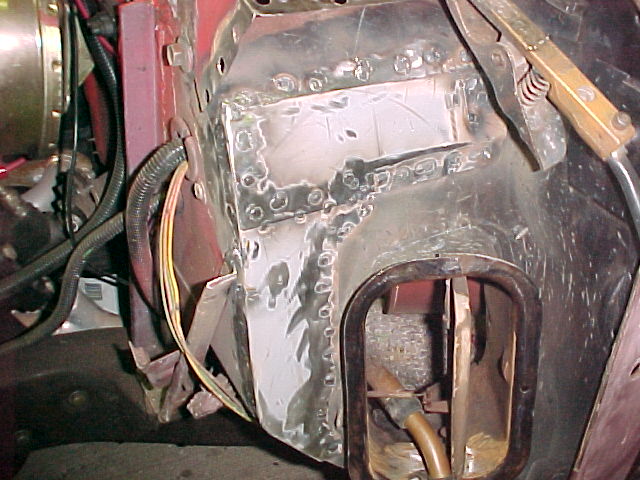
Tuesday afternoon I got the passenger side all ready for welding. Did some re-fitting of the A pillar patches and got all of the plug weld holes punched and drilled. I also did some clean up in the interior and made sure the carpet was pulled back.
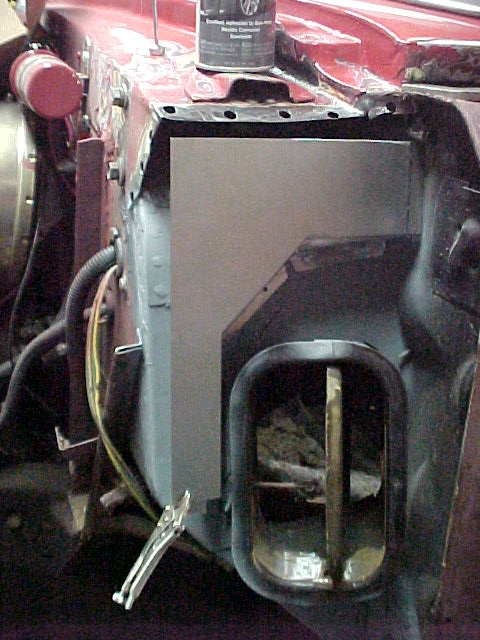
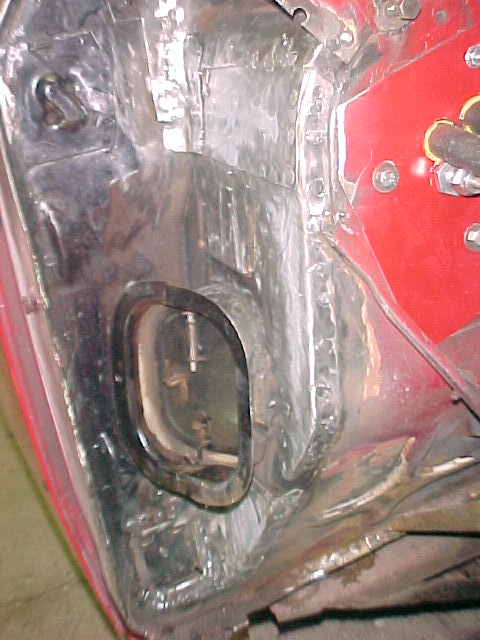
After some welding.
Just right of center you can see where I was chasing a burn thru. The original tin would just vaporize when I started the welding. I had to go very slow and use very quick, short trigger pulls to try and keep as much heat out of the material as I could until I built up a layer thick enough to handle a full pull. I would change the setting on the spot weld control from .1 second to about .3 second to slowly build the weld puddle. Most of the time I use a 1 second pull and that works fine on the new metal.

Most of the new metal welds look pretty good and I didn't have to fight the welder to get them done.
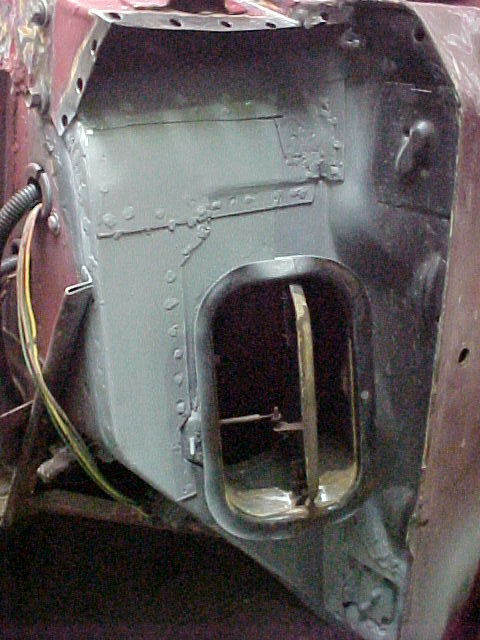
After a bit grinder and wire wheeling this is ready for etch primer.
I will do a bit more work down in the hinge pocket but the original steel down there is horrible to try to weld to. Going slow and cooling after every weld is working okay but it gets tiresome real quick...
It's getting there! Tomorrow I will get the pass side drain channel fit up and start prepping the outers to go on.
MarkIf money is the root of all evil... Women must be the fertilizer...
Link to my BAD AST Build Thread:
http://www.clubhotrod.com/suspension...van-build.html
 Reply With Quote

Posting Permissions
- You may not post new threads
- You may not post replies
- You may not post attachments
- You may not edit your posts

i've enjoyed the years here . made a lot of friends. most who have left. i see no reason to continue with this so hope to see you somewhere else. i dont think this site will ever be back. it's lived...
Dead!