


Results 31 to 45 of 50
 LinkBack URL
 About LinkBacks
-
06-17-2011 06:05 AM #31
 CHR Member/Contributor

- Join Date
- Jul 2003
- Location
- Madison
- Car Year, Make, Model: '67 Ranchero, '57 Chevy, '82 Camaro,
- Posts
- 21,160
Probably 3 or 4 good supports, 1" X 1" running crossways just below the roof, and another one front to rear. Then 2 or 3 braces on each side running at an angle to the opposite side on the floor. Big thing is to get the sides, door jambs, front and rear from moving when the old roof is removed.... Shut and latch all the doors, might even want to use some straps to temporarily tack weld them shut. Keeping everything and anything from moving is the key to keep things in position...no such thing as overbracing....Yesterday is history, tomorrow is a mystery, Live for Today!
Carroll Shelby
Learning must be difficult for those who already know it all!!!!
-
Advertising

- Google Adsense
- REGISTERED USERS DO NOT SEE THIS AD
-
06-17-2011 06:47 AM #32
Banned
- Join Date
- Feb 2010
- Location
- Roch
- Car Year, Make, Model: 1985 high top Astro van
- Posts
- 2,520
The high top roof is a key part of the van for storage of extra containers of selling product and I am going to delete the slider door and handle for a cleaner look.Then build a sleeper bed across the van right behind the seats with a wall between the sleeper and the rear cargo area.If it wasn't for all that,I wouldn't cut it.
Thank you for the reply.When I spoke to the handicap van place who doesn't want to do the job,he said it was because of all the steel they would have to add.Kind of hinted it was because of some legal requirement.I'm not sure if all these unitli body conversion vans over time shift somewhat .I am going to look hard to weld in a solution for the long term and try to get as much info out of the handicap installer as I can.I do agree to brace it as much as I can temporary while cutting it and permanently.Sure wish I had a tubing bender.Maybe a halo bar that went all around the top and tied into the base and top.
Thanks again Dave.I'll take that advise and put it to good use.
What do you think about big corner gussets top and bottom??.Good Bye
-
06-17-2011 08:22 AM #33
CHR Member/Contributor
- Join Date
- Jul 2003
- Location
- Madison
- Car Year, Make, Model: '67 Ranchero, '57 Chevy, '82 Camaro,
- Posts
- 21,160
Corner gussets won't do much, the big problem is the door openings at the jambs on top!!! They need very good support, if the jambs move and you don't catch it and straighten them, you'll have a van full of grief forever!!! Don't know that a halo would do much, good bracing with a few X's for added strength would be better. Bracing is more to do with the correct structure then anything else.Yesterday is history, tomorrow is a mystery, Live for Today!
Carroll Shelby
Learning must be difficult for those who already know it all!!!!
-
06-17-2011 06:24 PM #34
Banned
- Join Date
- Feb 2010
- Location
- Roch
- Car Year, Make, Model: 1985 high top Astro van
- Posts
- 2,520
Dave I looked again at the(yellow) shop van.Only the one rear door is not lining up.All the rest of the body lines are ok as well as the other doors.Beginning to think it is the hinges on that one door.There is a fair amount of play.Still want to play it safe.I think I know what you are talking about with a x'ed in braces.We will do that as a safety measure.I can also leave the roof bows in place until the high top is attached.I'll get up some pics as we go along.
Thanks.Good Bye
-
06-24-2011 08:56 PM #35
Banned
- Join Date
- Feb 2010
- Location
- Roch
- Car Year, Make, Model: 1985 high top Astro van
- Posts
- 2,520
Here I am showing a example of a pipe lift on the sub frame that is a 4" lift.You can see where it is welded to the sub frame mounts and the stock rubber mounts then are slipped into the pipes by opening the stock frame mount holes so you can use the stock normal length bolts.Mine will be only 3"s.
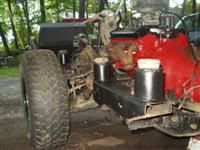
This makes working on a V8 conversion very easy and allows for a bigger tire.Good Bye
-
06-25-2011 06:08 AM #36
CHR Member
- Join Date
- Mar 2007
- Location
- festus
- Car Year, Make, Model: 48 Plymouth, 48,54 Heap
- Posts
- 3,407
That's cool, Gary. I always though Astrovans could make a neat hot rod shop truck. Lots of them out there and a very versitile vehicle.
-
06-25-2011 07:23 AM #37
Banned
- Join Date
- Feb 2010
- Location
- Roch
- Car Year, Make, Model: 1985 high top Astro van
- Posts
- 2,520
Some details I need to add to the lift pipe spacers for anyone who reads this thread later is things you need to do.
The E-brake bracket has to be moved.
The intermediate steering shaft is good to go up to a 2" lift.After that Overland Vans sells one.The other way to go about it is the newer full size vans have shafts long enough to cover up to 4" lifts and are the same size I.D. and bolt pattern.
The coils of the brake lines are normally long enough to spread out and be ok with the lift.
The fan shroud needs to be trimmed for clearance.
Top rad hose needs extension depending on how big of a lift.
You can build your own bumper brackets to relocate the bumper or buy them from Overlands.Good Bye
-
06-26-2011 12:11 AM #38
Banned
- Join Date
- Feb 2010
- Location
- Roch
- Car Year, Make, Model: 1985 high top Astro van
- Posts
- 2,520
This is a photochop of somewhat the van looks like with the slider delete.Good Bye
-
07-05-2011 01:58 AM #39
Banned
- Join Date
- Feb 2010
- Location
- Roch
- Car Year, Make, Model: 1985 high top Astro van
- Posts
- 2,520
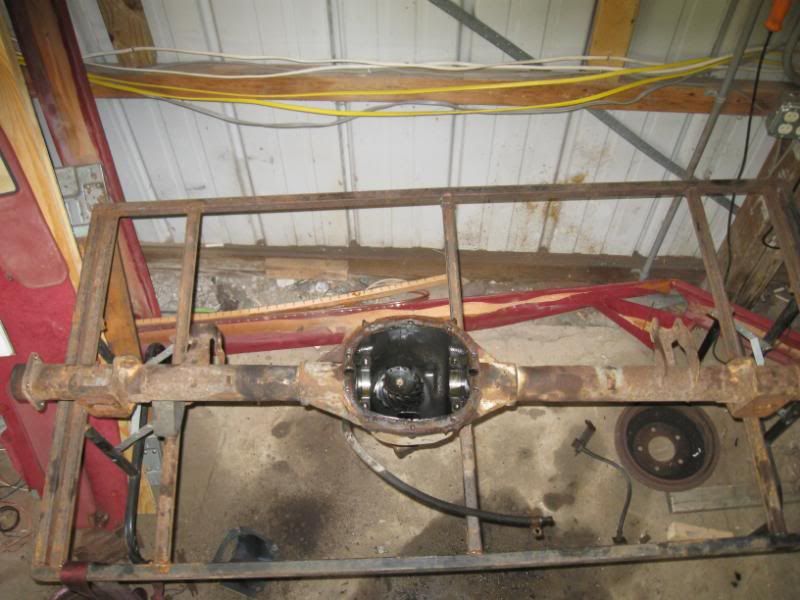
The Astro vans have a one of a kind Clam shell spring mount and a 10 bolt one of a kind offset.I have taken the rear end housing out of the shop van that is going to the junk yard so i have a housing for a rear end shop to copy the mounts to build a Ford 9" for the van.


The axles side by side show how much different the offset is.Longer one on the driver's side.GM did that for more foot area.
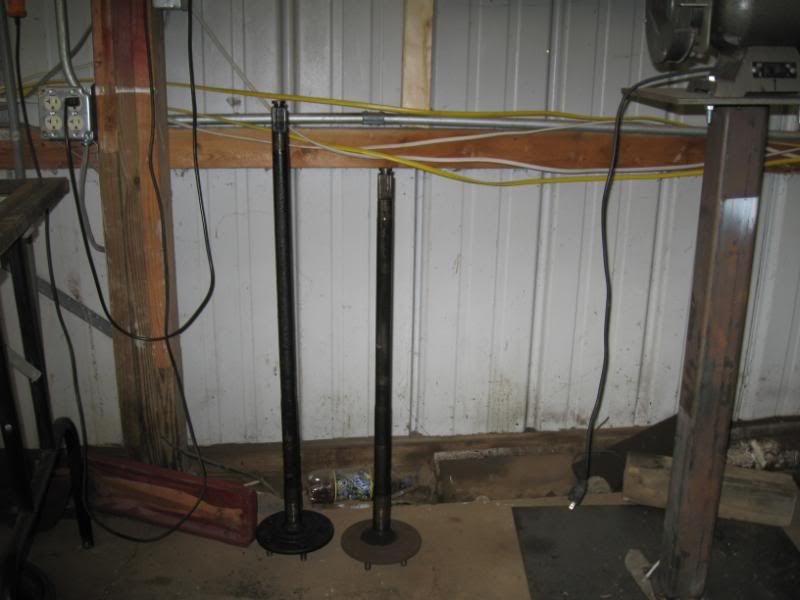
Good Bye
-
07-19-2011 12:08 PM #40
Banned
- Join Date
- Feb 2010
- Location
- Roch
- Car Year, Make, Model: 1985 high top Astro van
- Posts
- 2,520

Fairwell to a friend.....................
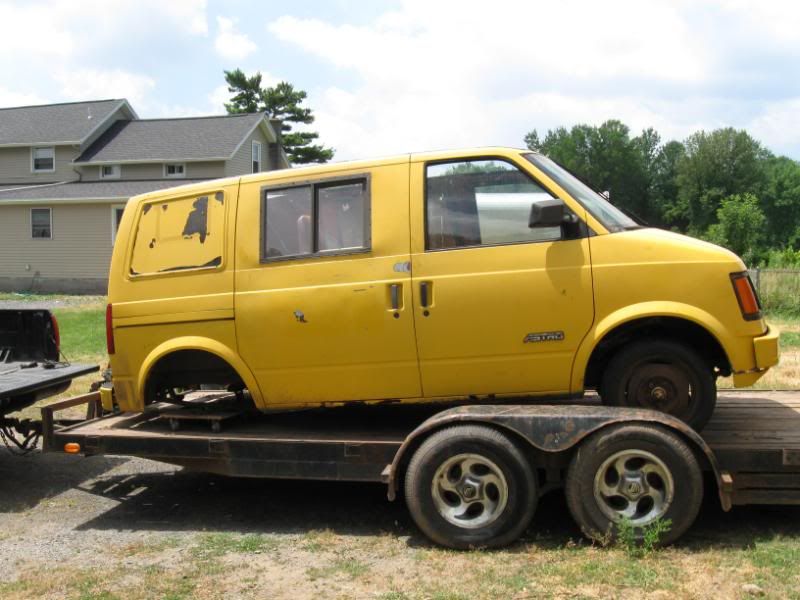

Couldn't see spending anymore time on this.Got the parts I needed and the measurements for the cutout for Ole Yellar.Still sorry to see it go.It has been a good van for me.
Good Bye
-
07-19-2011 12:11 PM #41
Banned
- Join Date
- Feb 2010
- Location
- Roch
- Car Year, Make, Model: 1985 high top Astro van
- Posts
- 2,520
Yes-90 degree weather,broke the winch cable,sure wasn't easy to get it on the trailer without a rear end.Good Bye
-
07-19-2011 01:31 PM #42
CHR Member
- Join Date
- Feb 2007
- Location
- SLC
- Car Year, Make, Model: 52 Chevy 2-door Sedan w/ a 350/350 combo
- Posts
- 341
So it put up a fight huh?
Pride Runs Deep
-
07-19-2011 02:52 PM #43
Banned
- Join Date
- Feb 2010
- Location
- Roch
- Car Year, Make, Model: 1985 high top Astro van
- Posts
- 2,520
Yep a trooper right to the end.Good Bye
-
01-10-2012 08:52 PM #44
Banned
- Join Date
- Feb 2010
- Location
- Roch
- Car Year, Make, Model: 1985 high top Astro van
- Posts
- 2,520
This project has been 7 yrs in the making with 3 vans bring me to the point I am at now.So if it seems I'm abit picky about rust repair/restoration it is because of that and want to get as close as I can to a daily driver show quality.
The floor pan/wheel well is more visible because of a 3" pipe lift that is planed.I have a second sub frame that I am going to build up with the sbc 383 on it.It will look somewhat like this:
The matting I spoke of:
There is more...hang on for a minute;
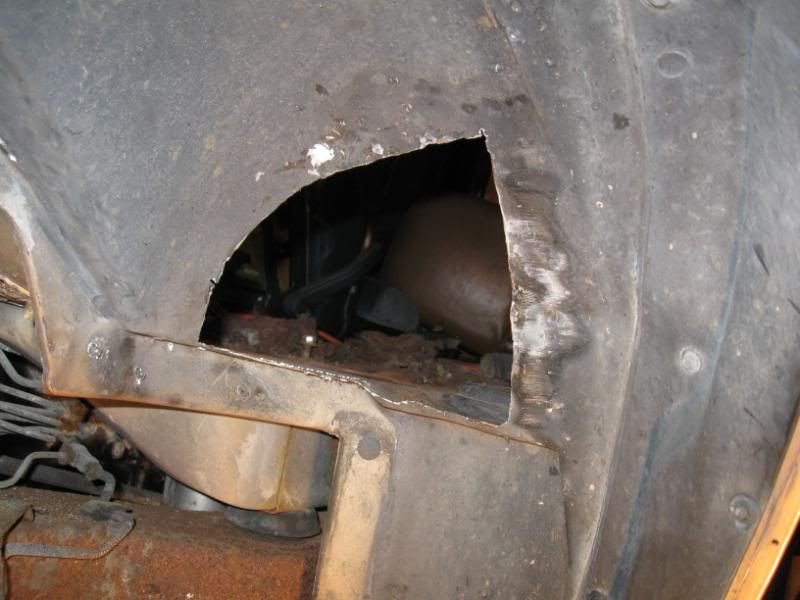
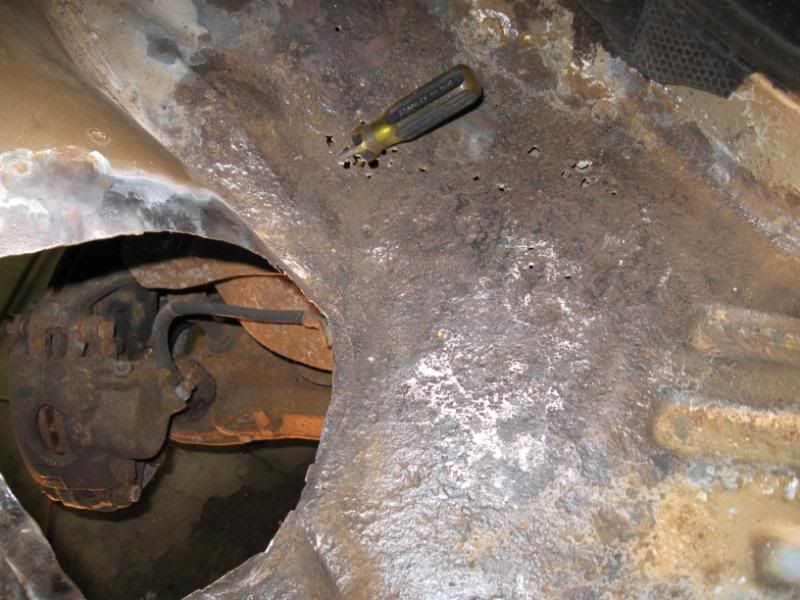
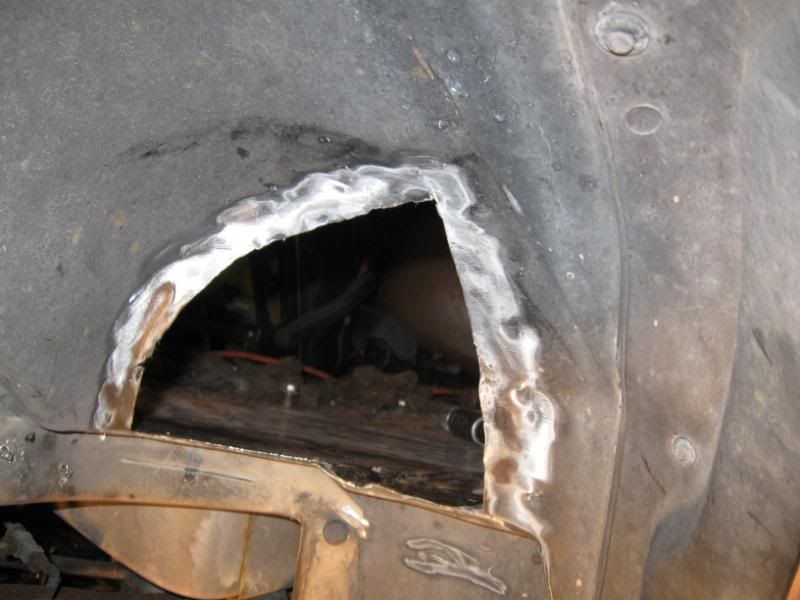
Kind of ticks me off the main reason I am involved in this repair is the precious owner hammered down the driver's wheel well for more foot room taring a hole in the wheel well.It is truly a rust free Florida van.He let it go that way to allow the matting under the rubber mat to wick moisture on the floor pan and create rust.This is the cut out of the tare/wheel well area.
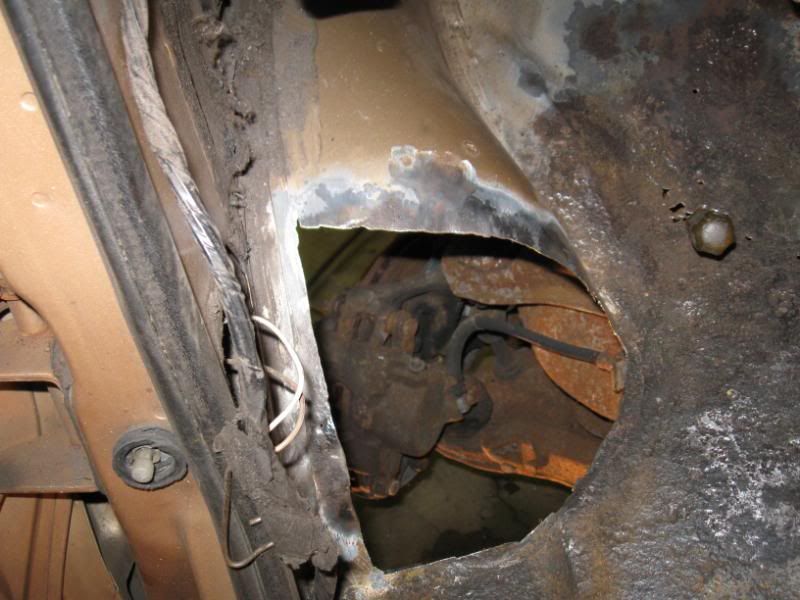
That will expose the wheel well/inter wheel well more and is the primary reason why this rust repair needs to look original.
I wanted to work on this for the most part standing up.So I found if I jack the van part way with a floor jack,I can then use the bumper jack I have to get it up in the air.
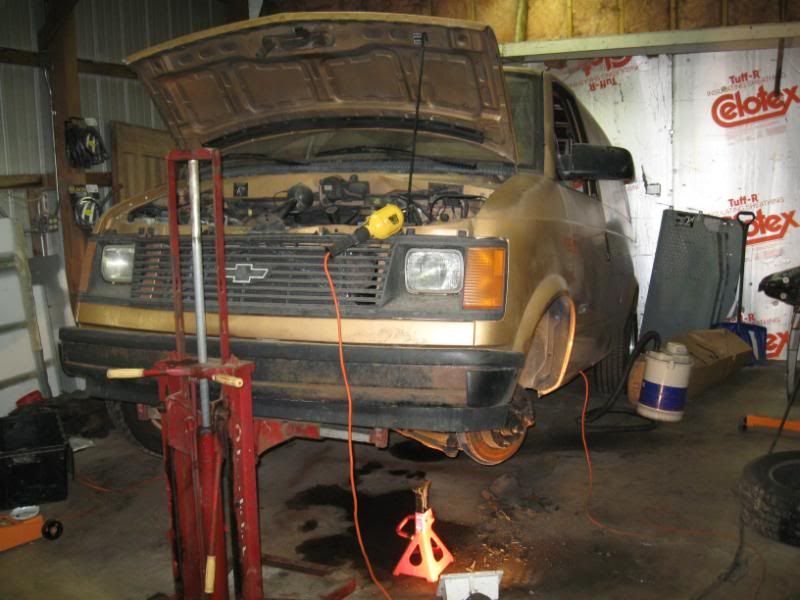
Good Bye
-
01-10-2012 09:07 PM #45
Banned
- Join Date
- Feb 2010
- Location
- Roch
- Car Year, Make, Model: 1985 high top Astro van
- Posts
- 2,520
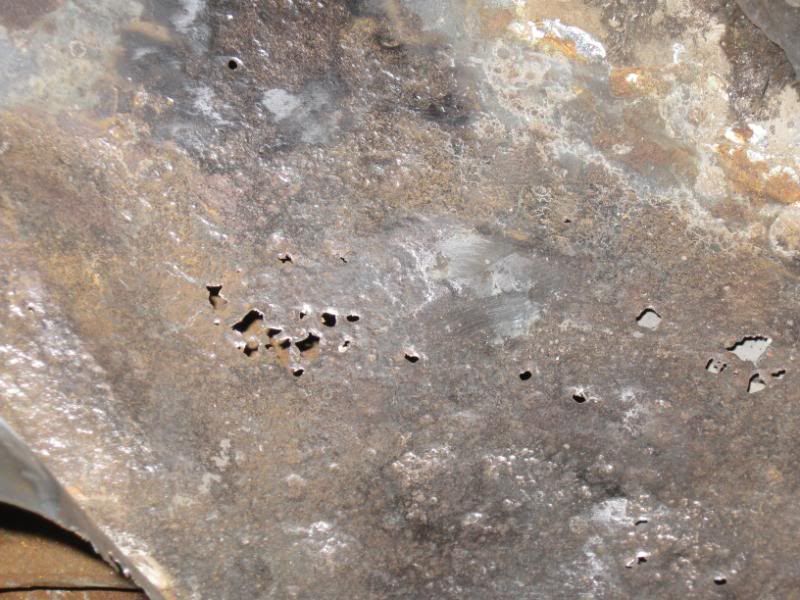
So the wet matting rusted the floor pan by the area on the drive's gas/brake peddle.
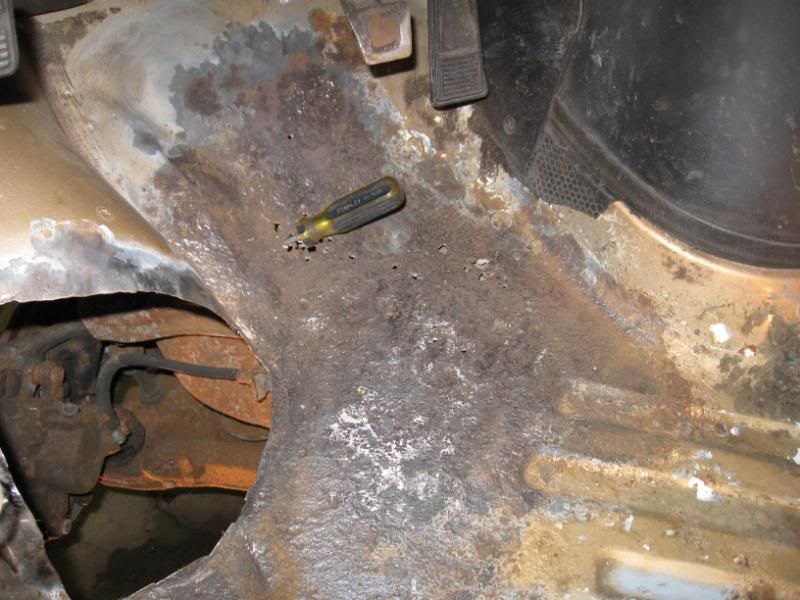
It's pretty pitted and has pin holes.It isn't easy to get to it under the van because it towards the inside of the sub frame too.

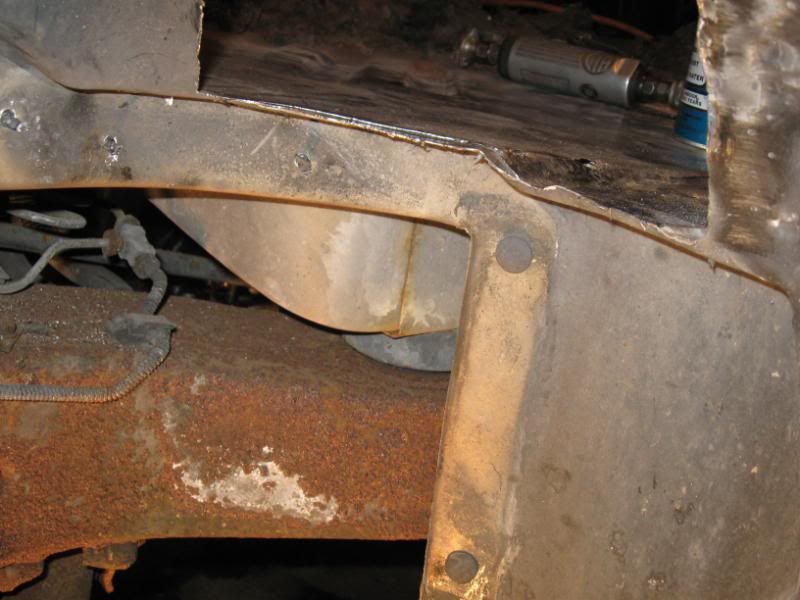
It is a sensitive area as well because the center sub frame mount is towards the back of the effected floor pan.
More of the pitted floor pan;
Cleaned up some more:
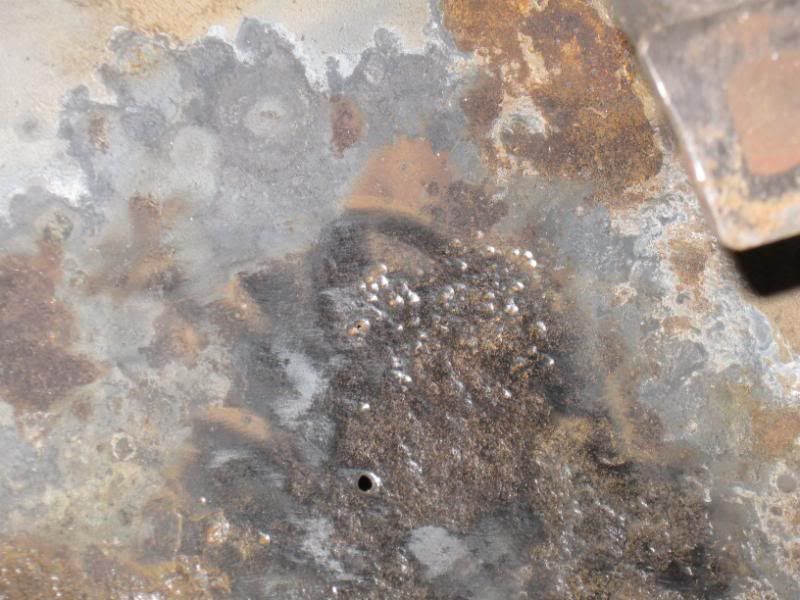
So that is where I left it for now.I shot it with this weld threw primer.Not POR yet,but will be.
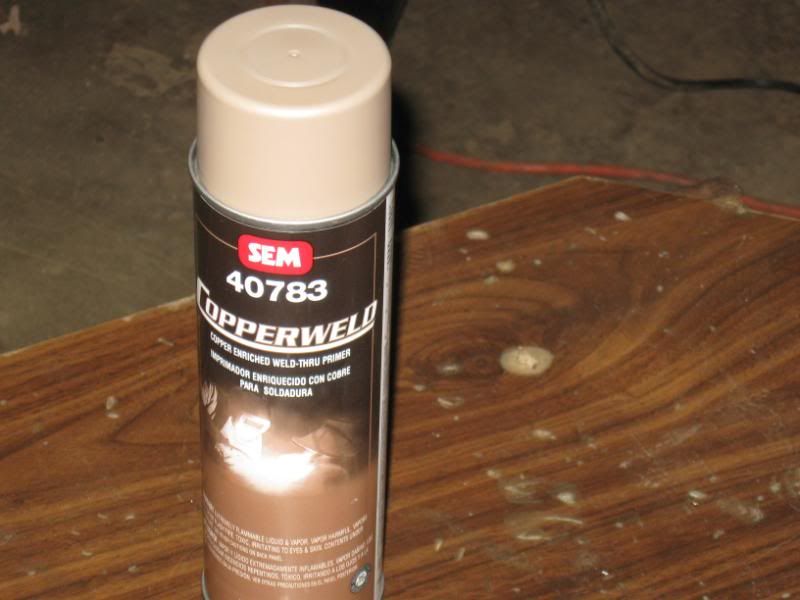
Good Bye
 Reply With Quote

Posting Permissions
- You may not post new threads
- You may not post replies
- You may not post attachments
- You may not edit your posts

i've enjoyed the years here . made a lot of friends. most who have left. i see no reason to continue with this so hope to see you somewhere else. i dont think this site will ever be back. it's lived...
Dead!