


 22Likes

Results 16 to 30 of 53
 LinkBack URL
 About LinkBacks
-
12-22-2009 08:45 PM #16
 CHR Member

- Join Date
- Jul 2008
- Location
- Edgewood, New Mexico, United States
- Car Year, Make, Model: 30,34,39,50,54,65,68,70,71,72
- Posts
- 571
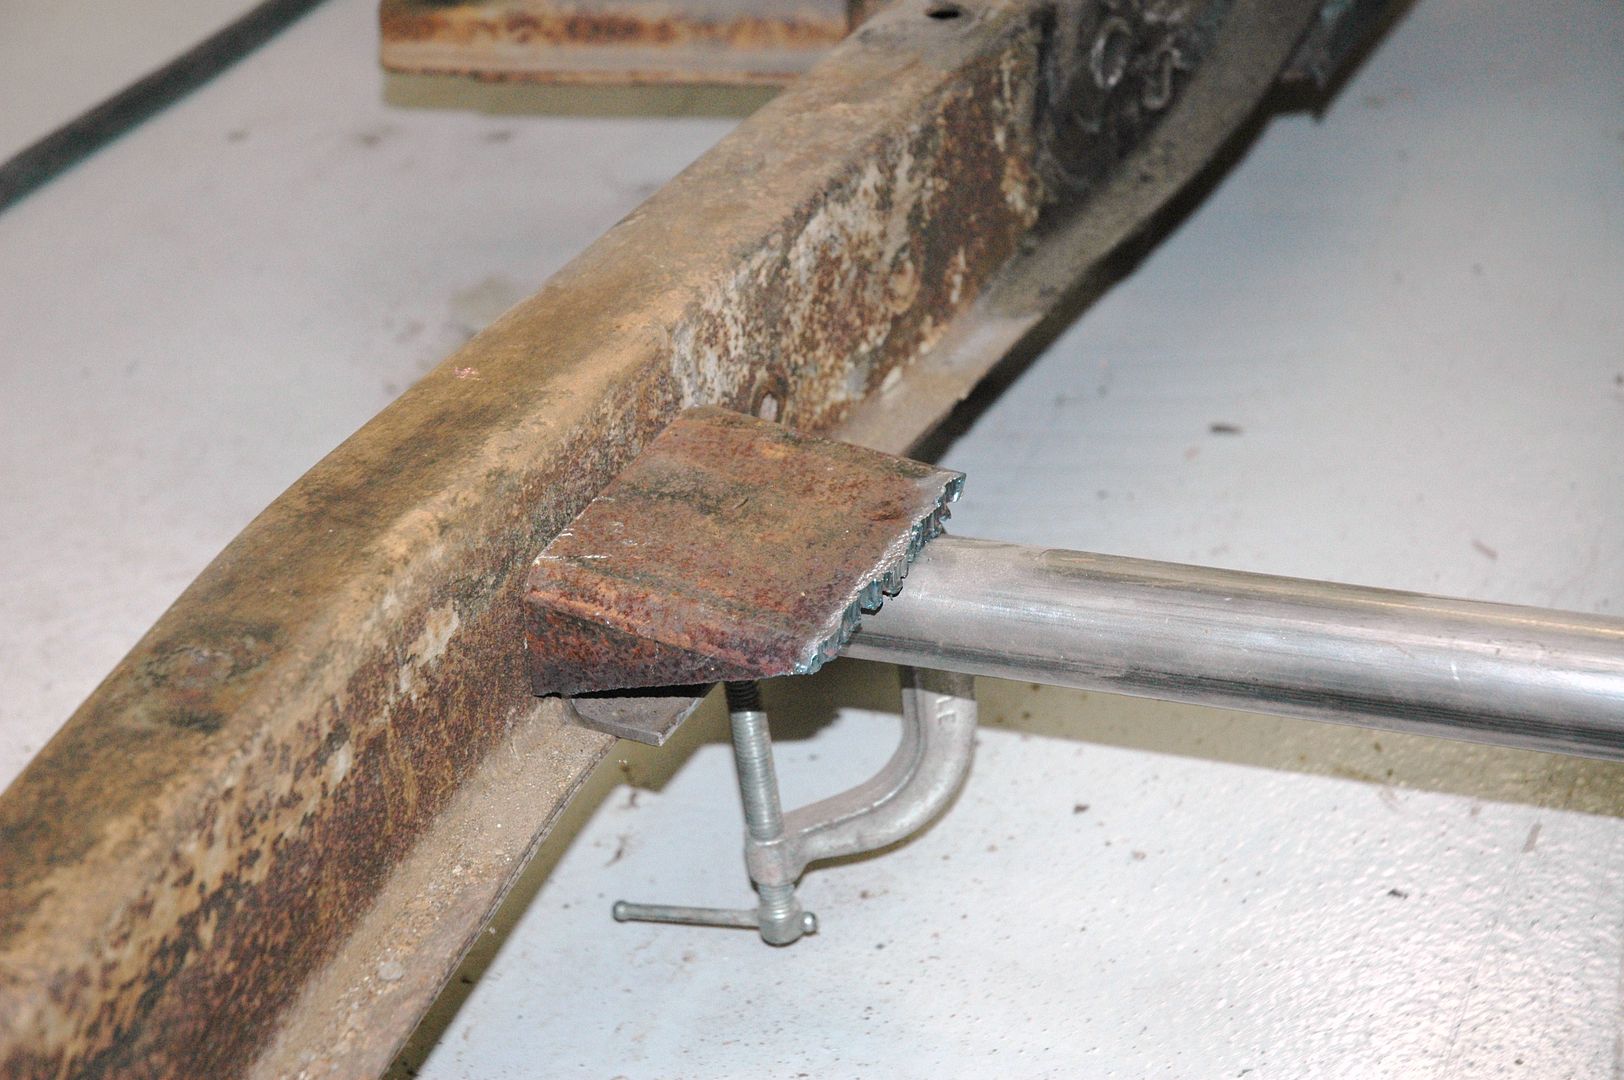
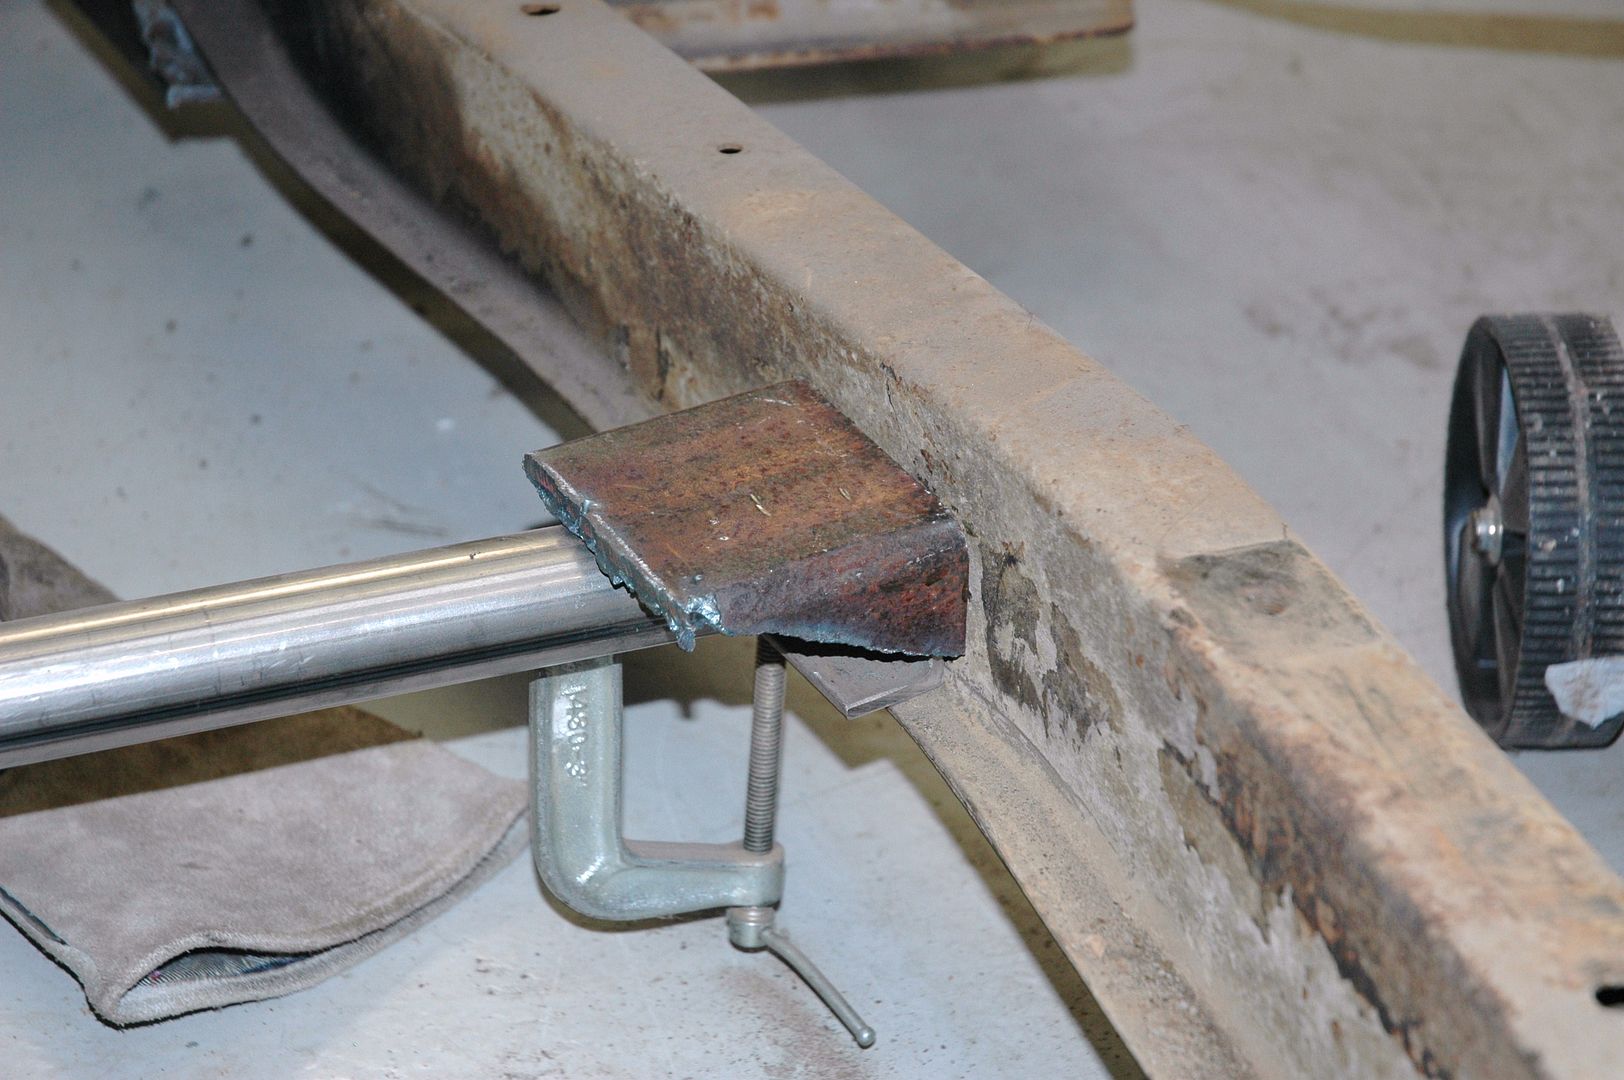
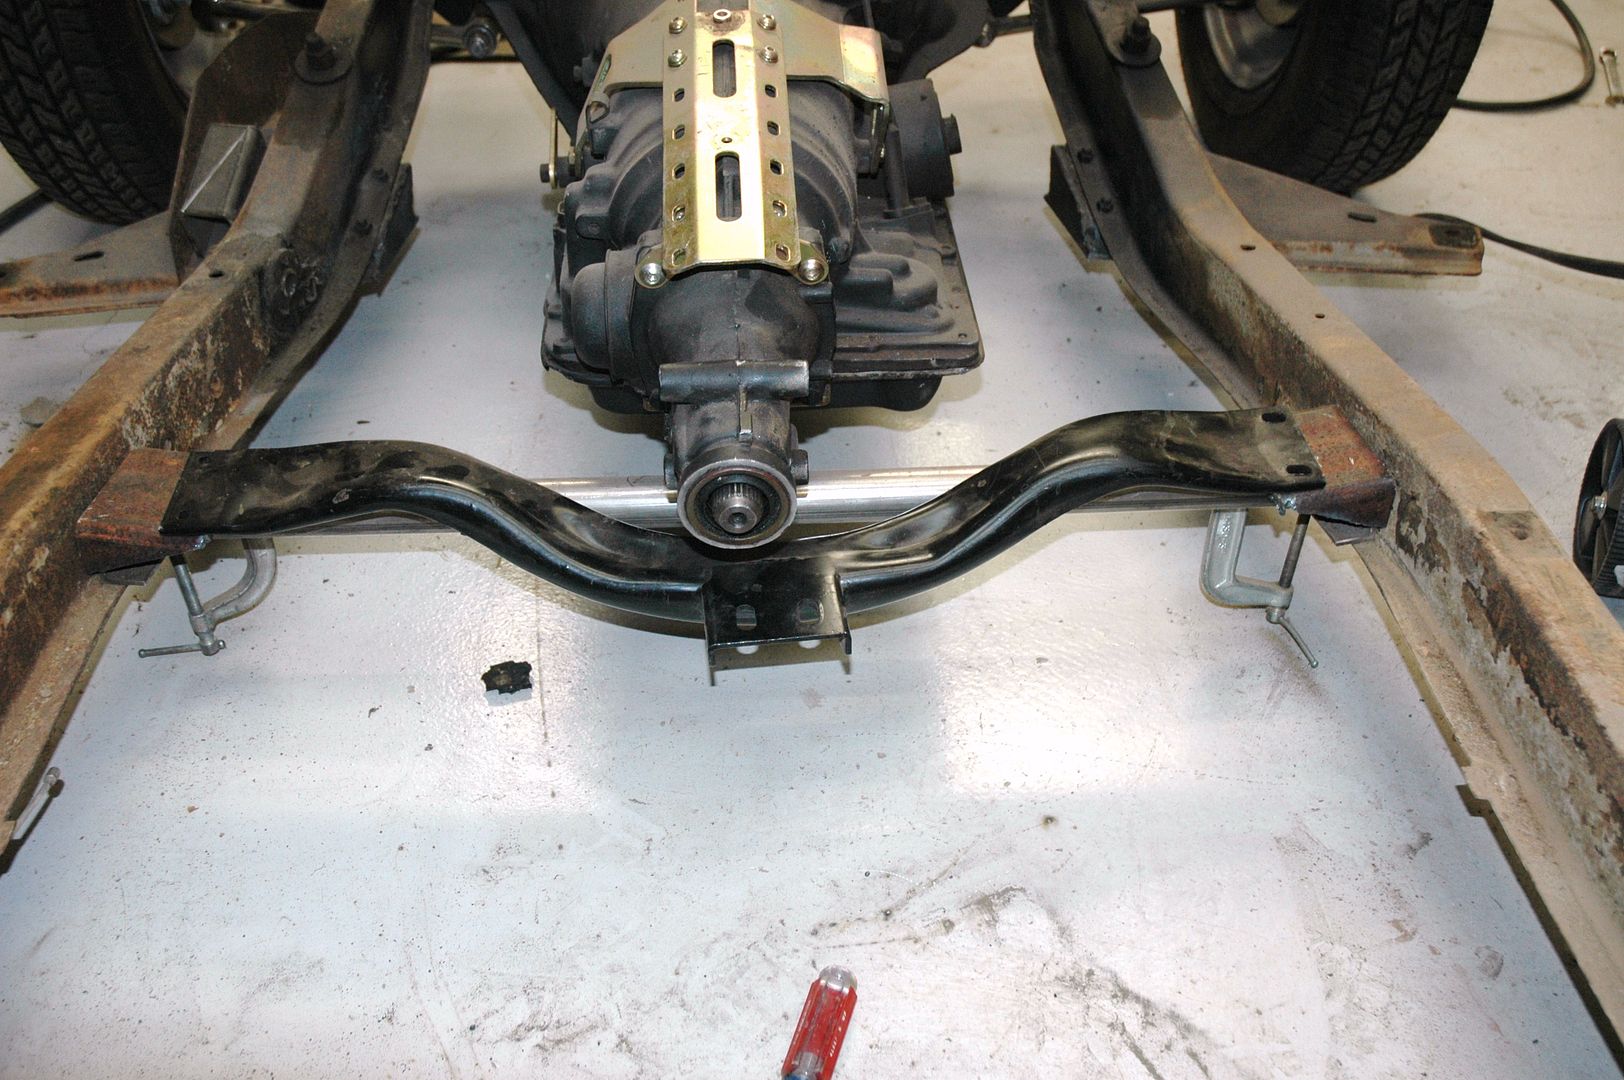
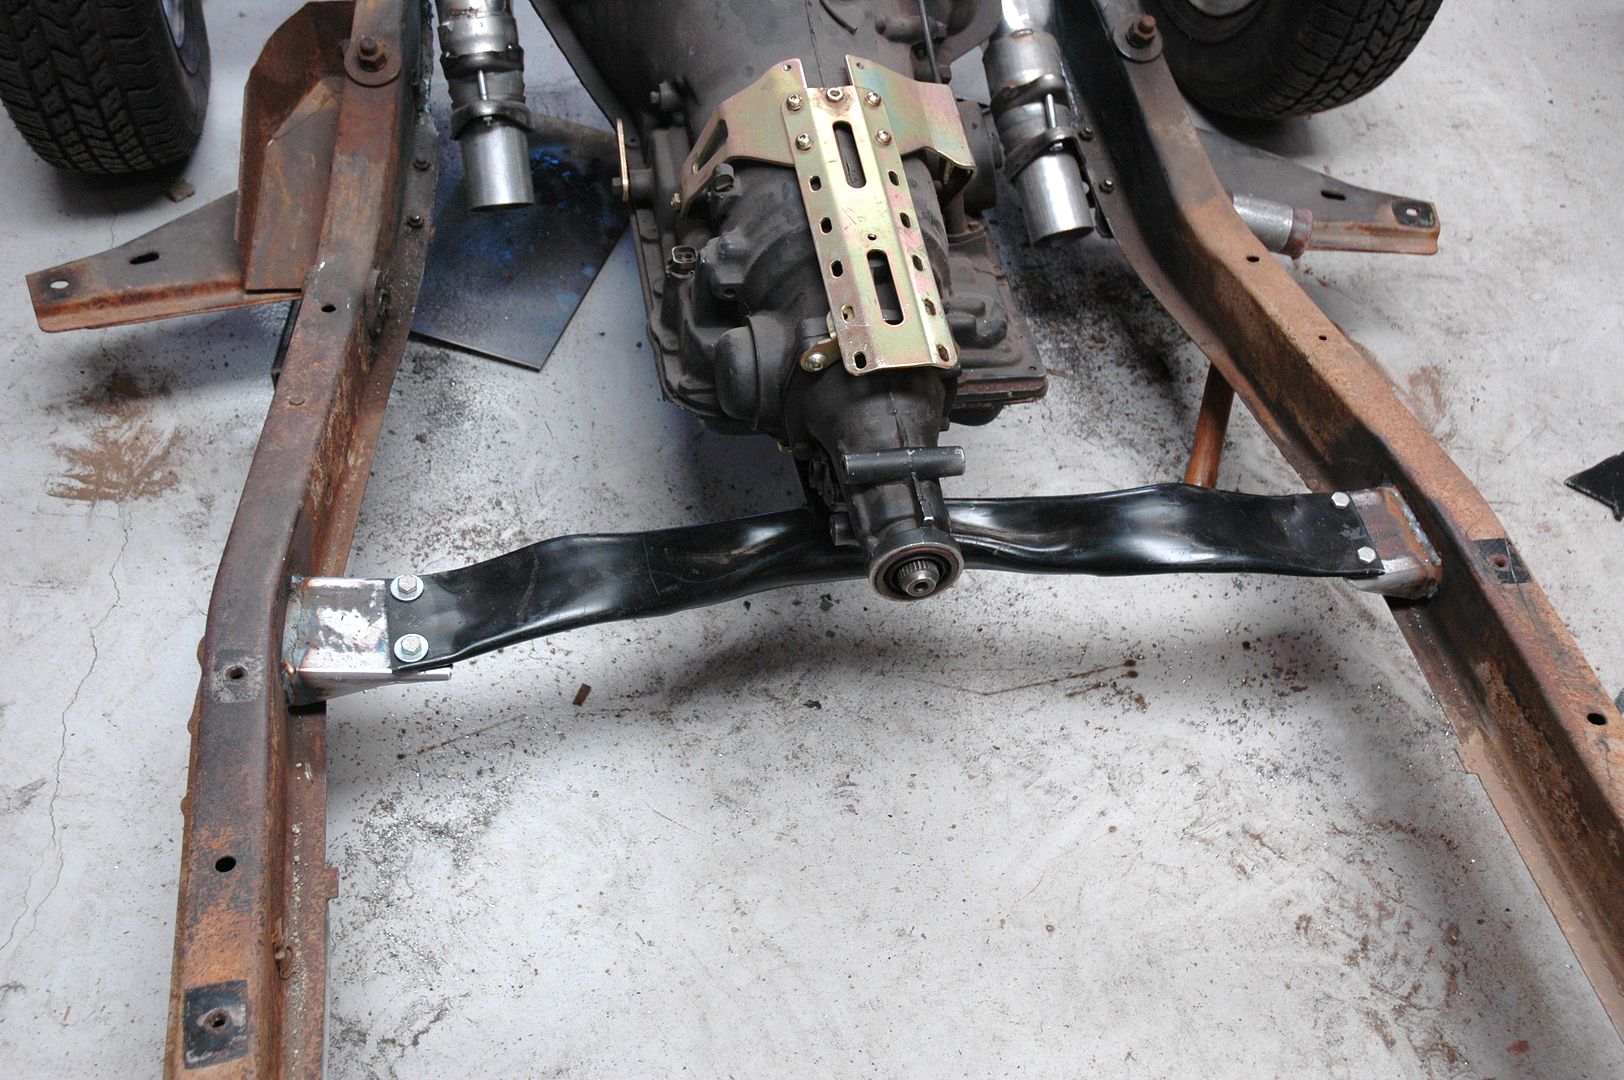
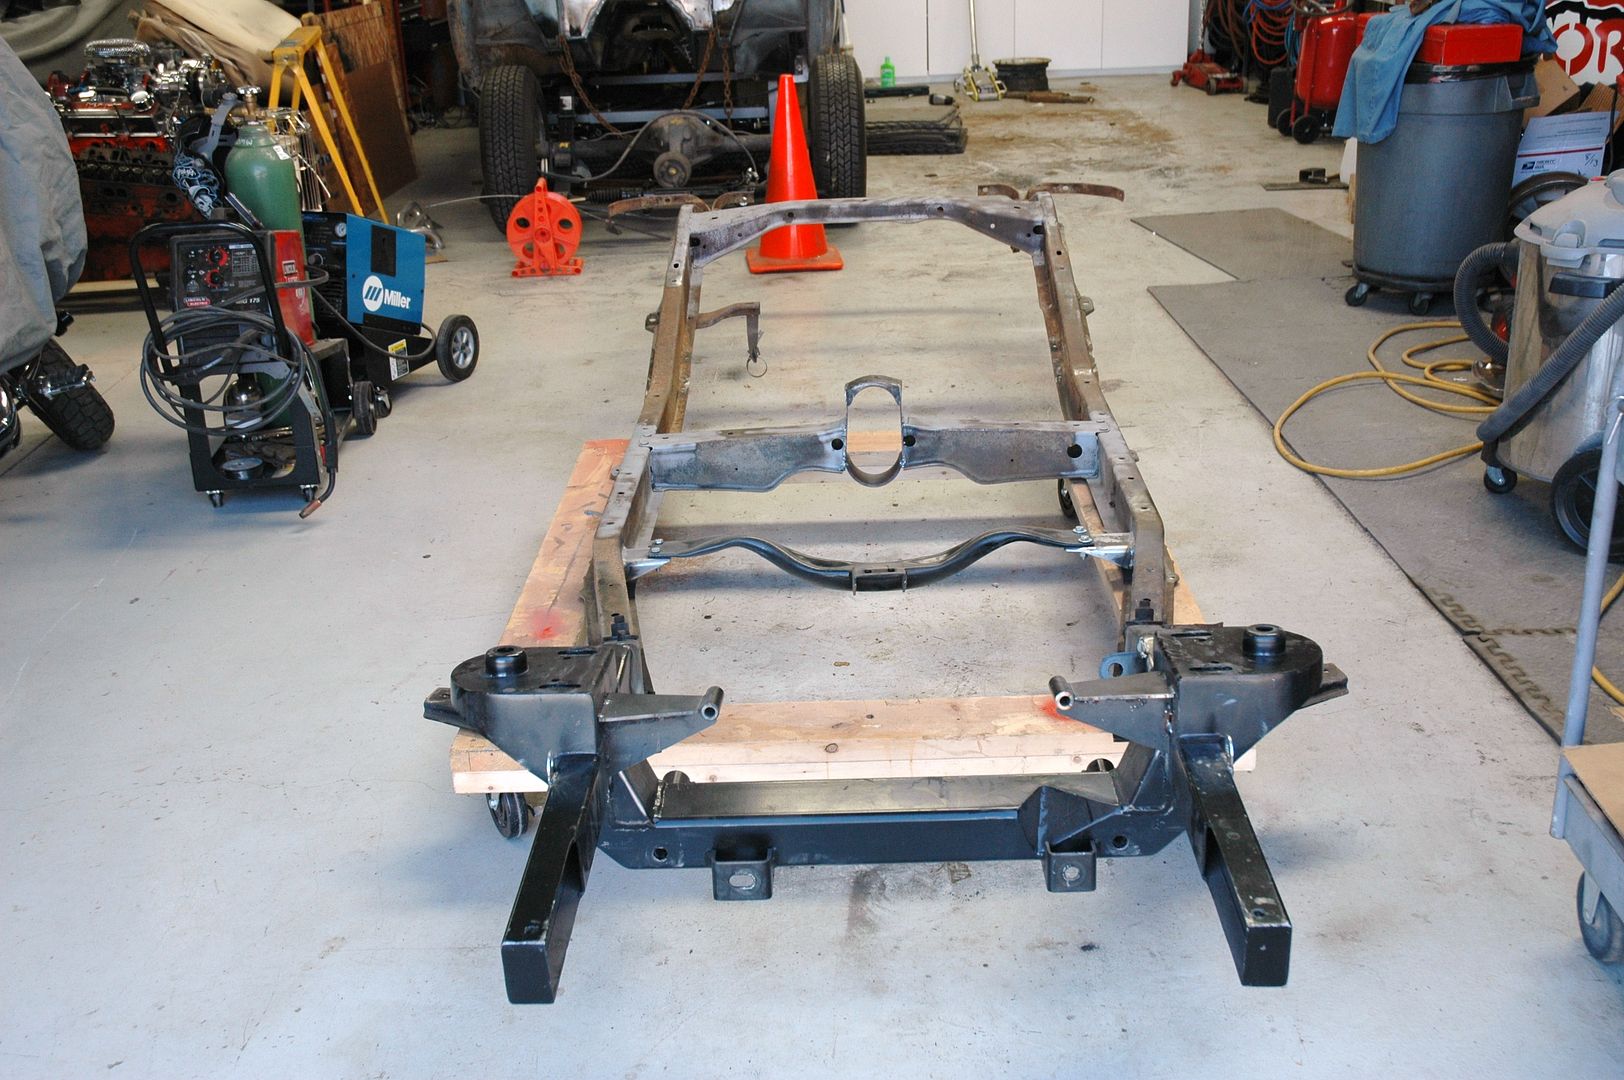
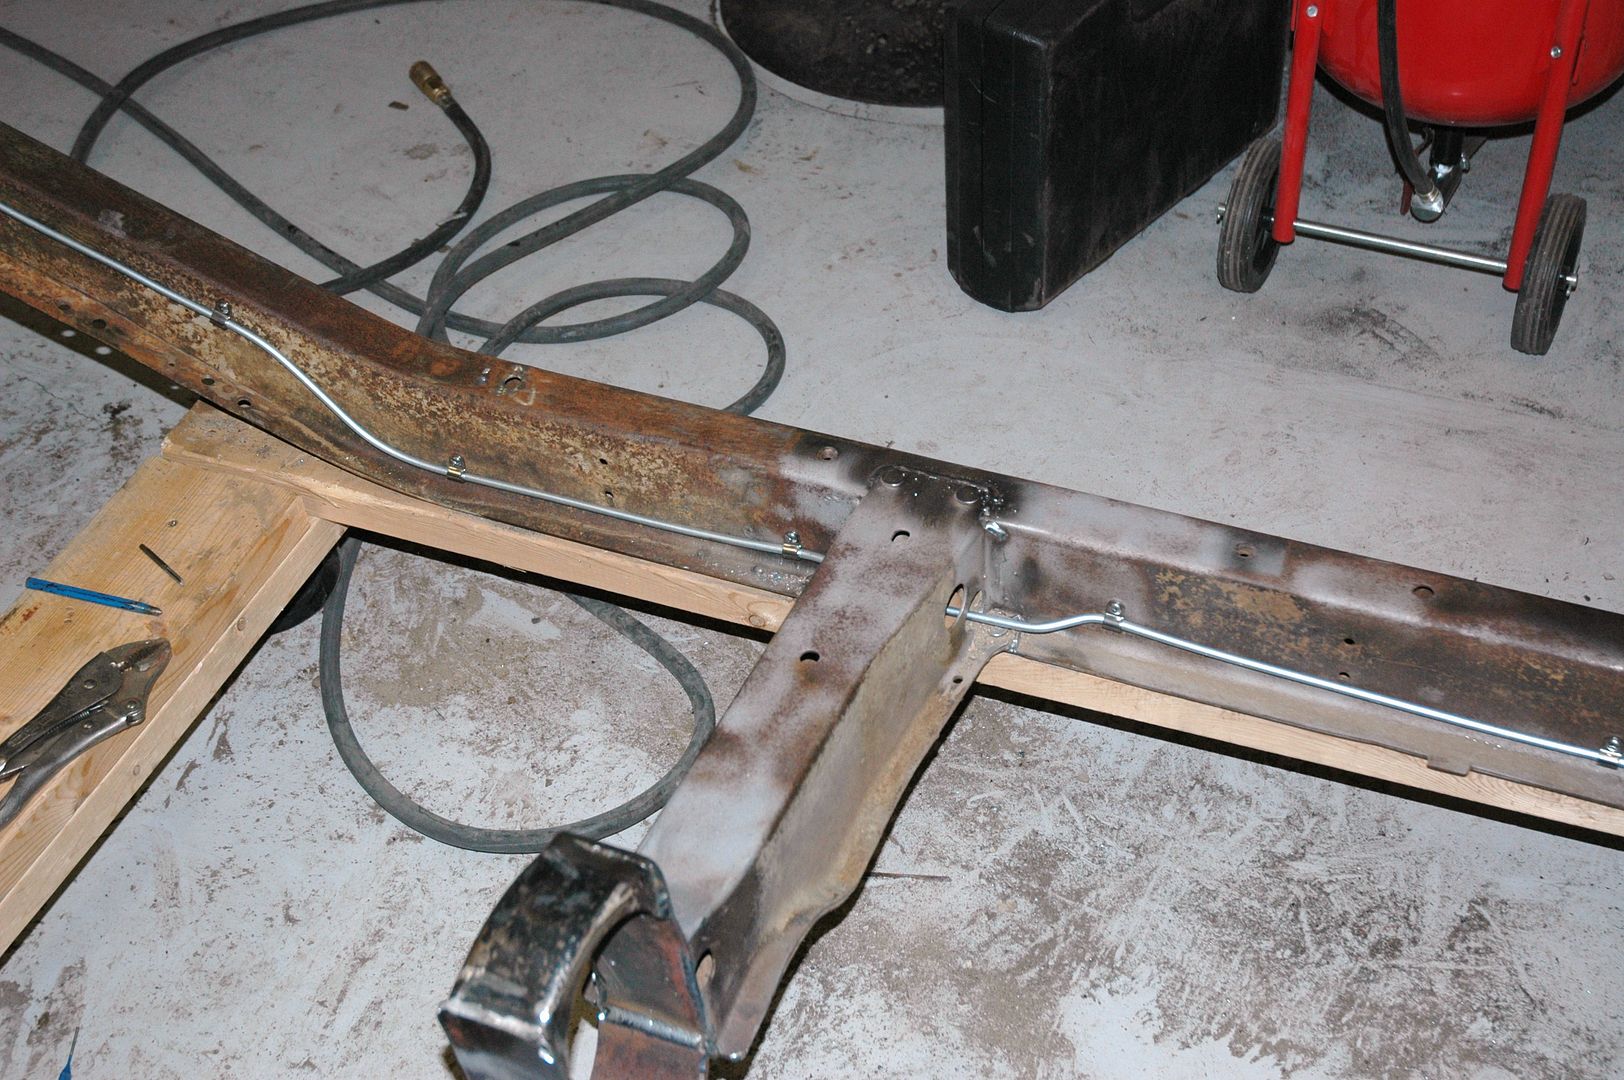
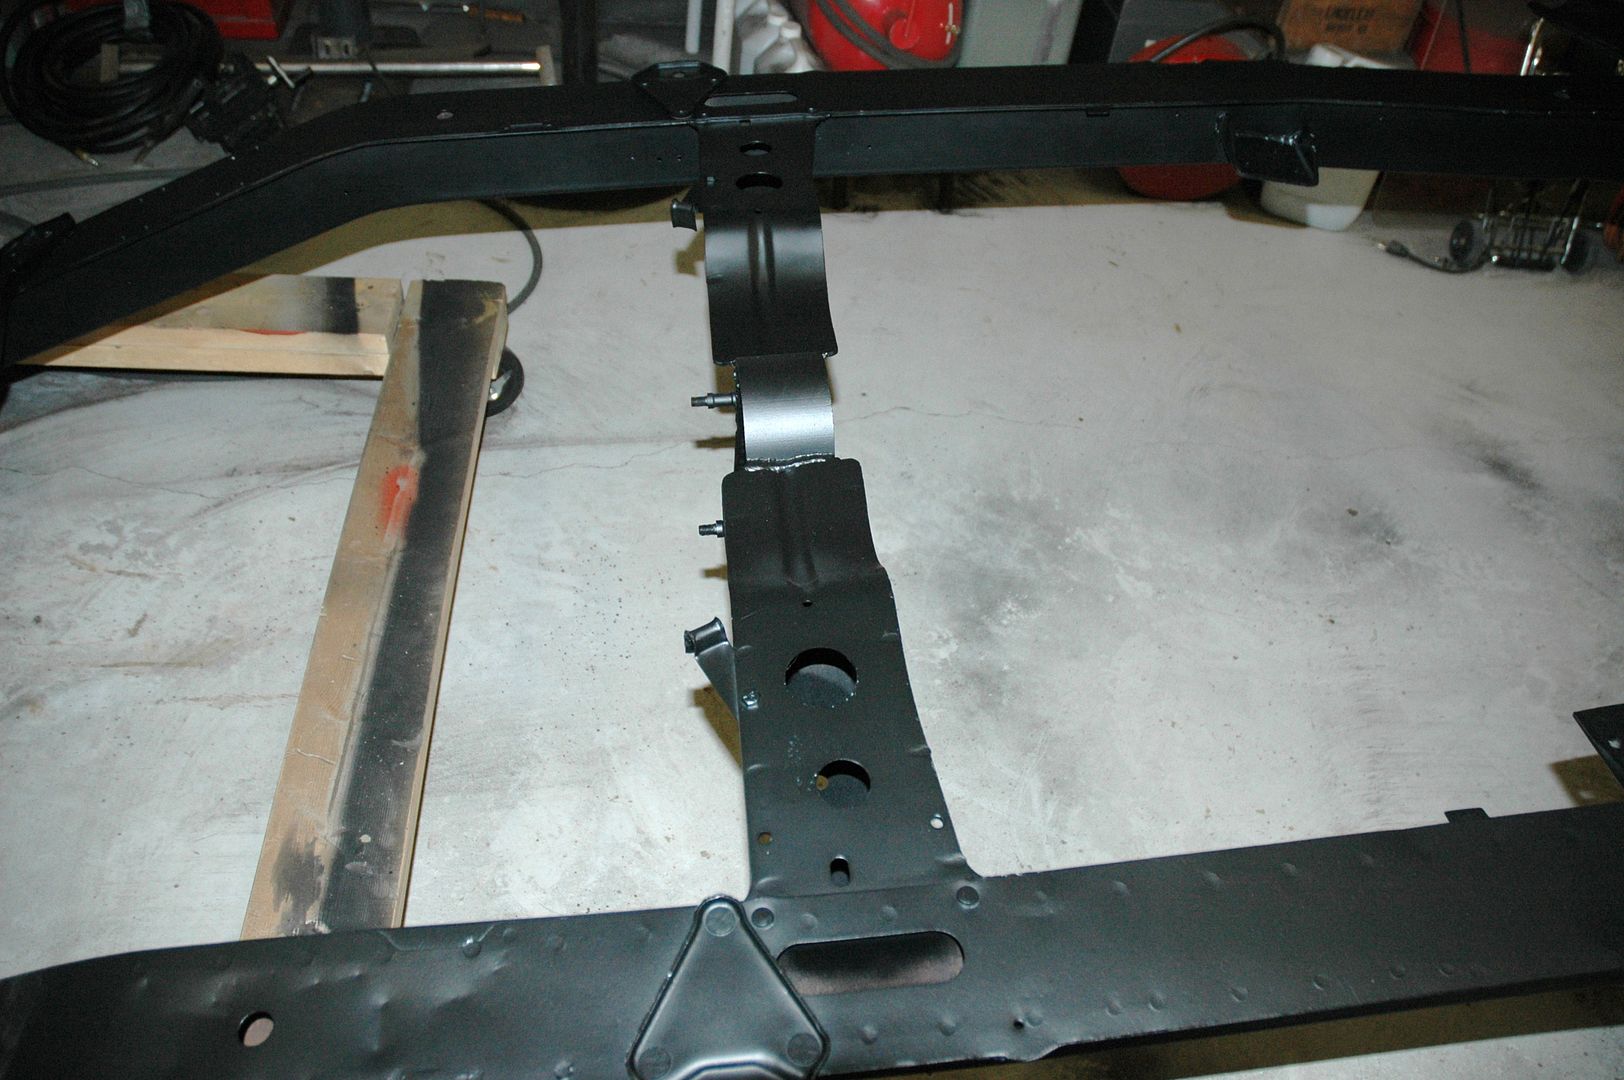
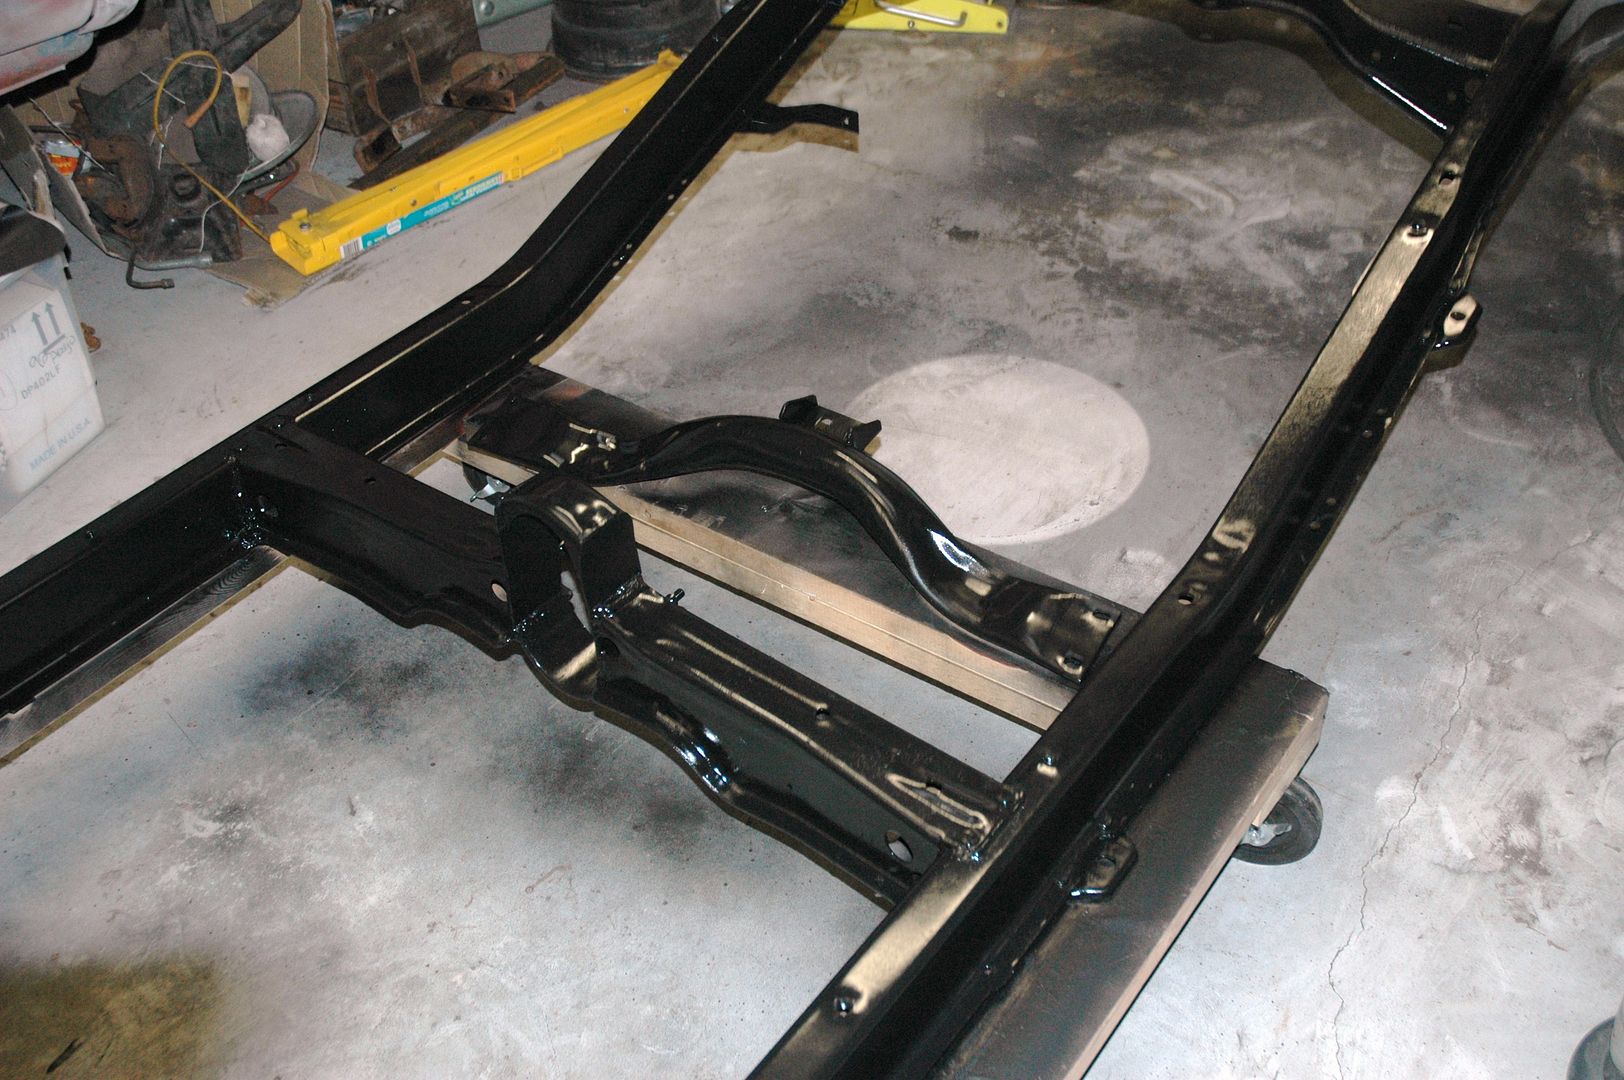
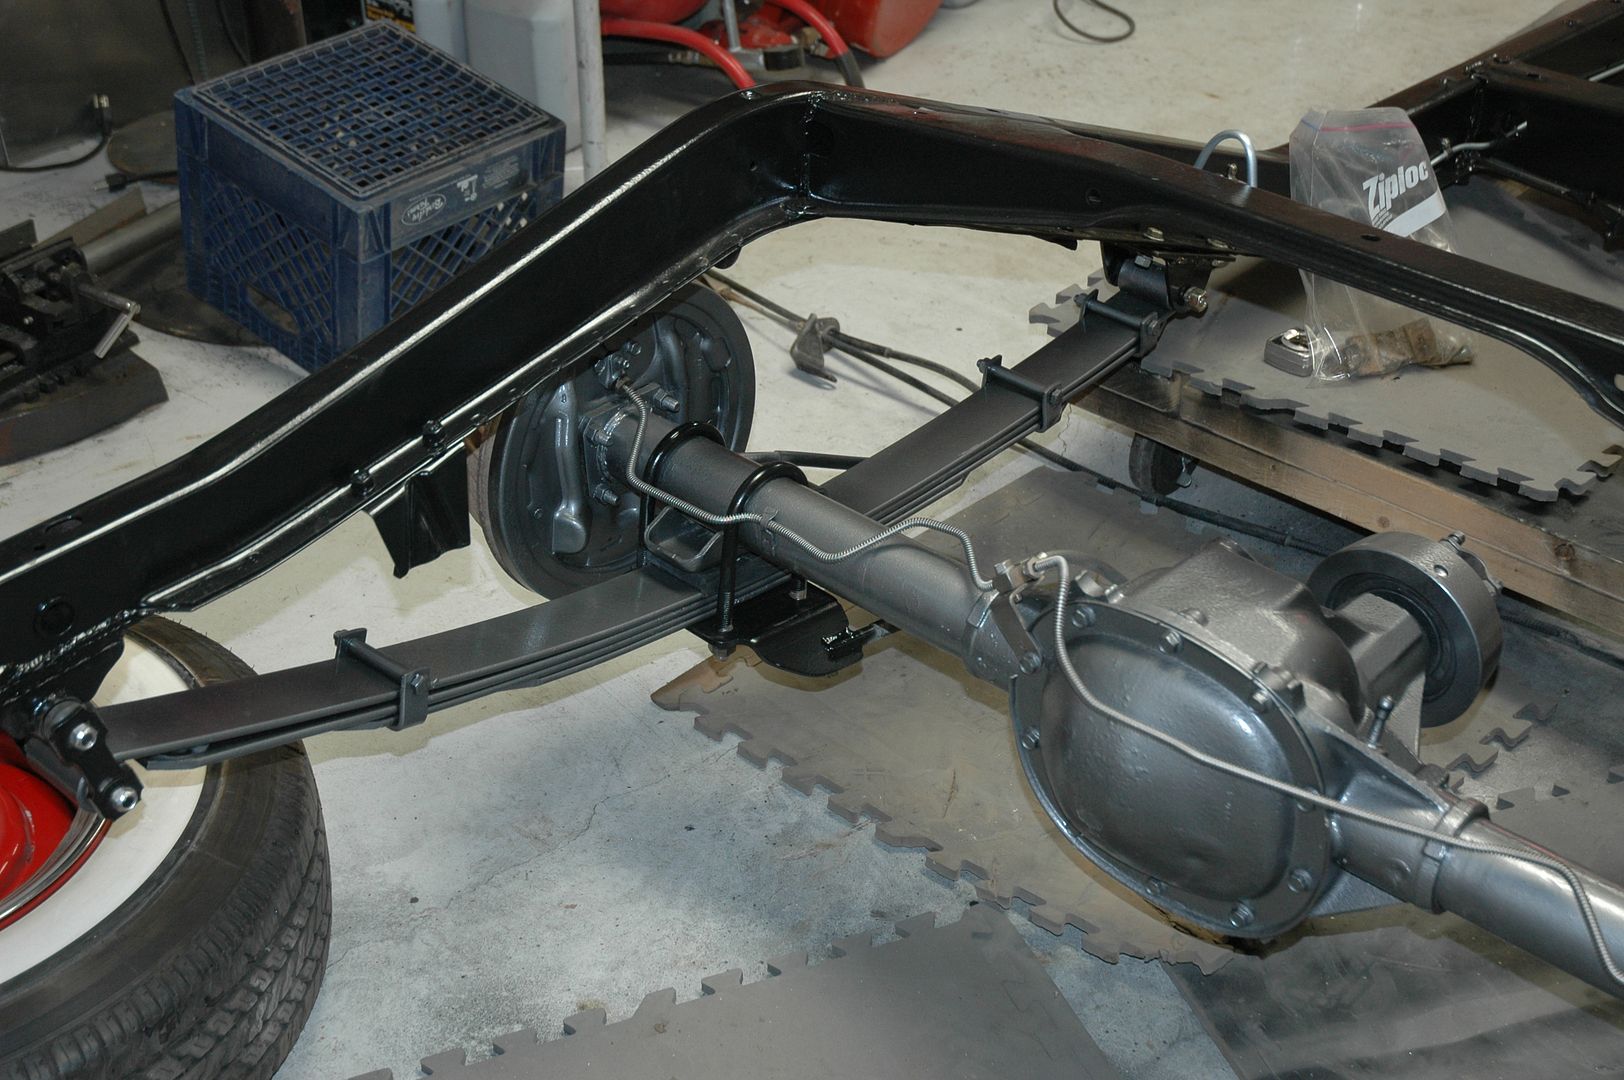
Worked on the transmission crossmember next. I had made one before but didn't make anything for the exhaust pipe to runn through. So I got one off some Chevy and will use it.
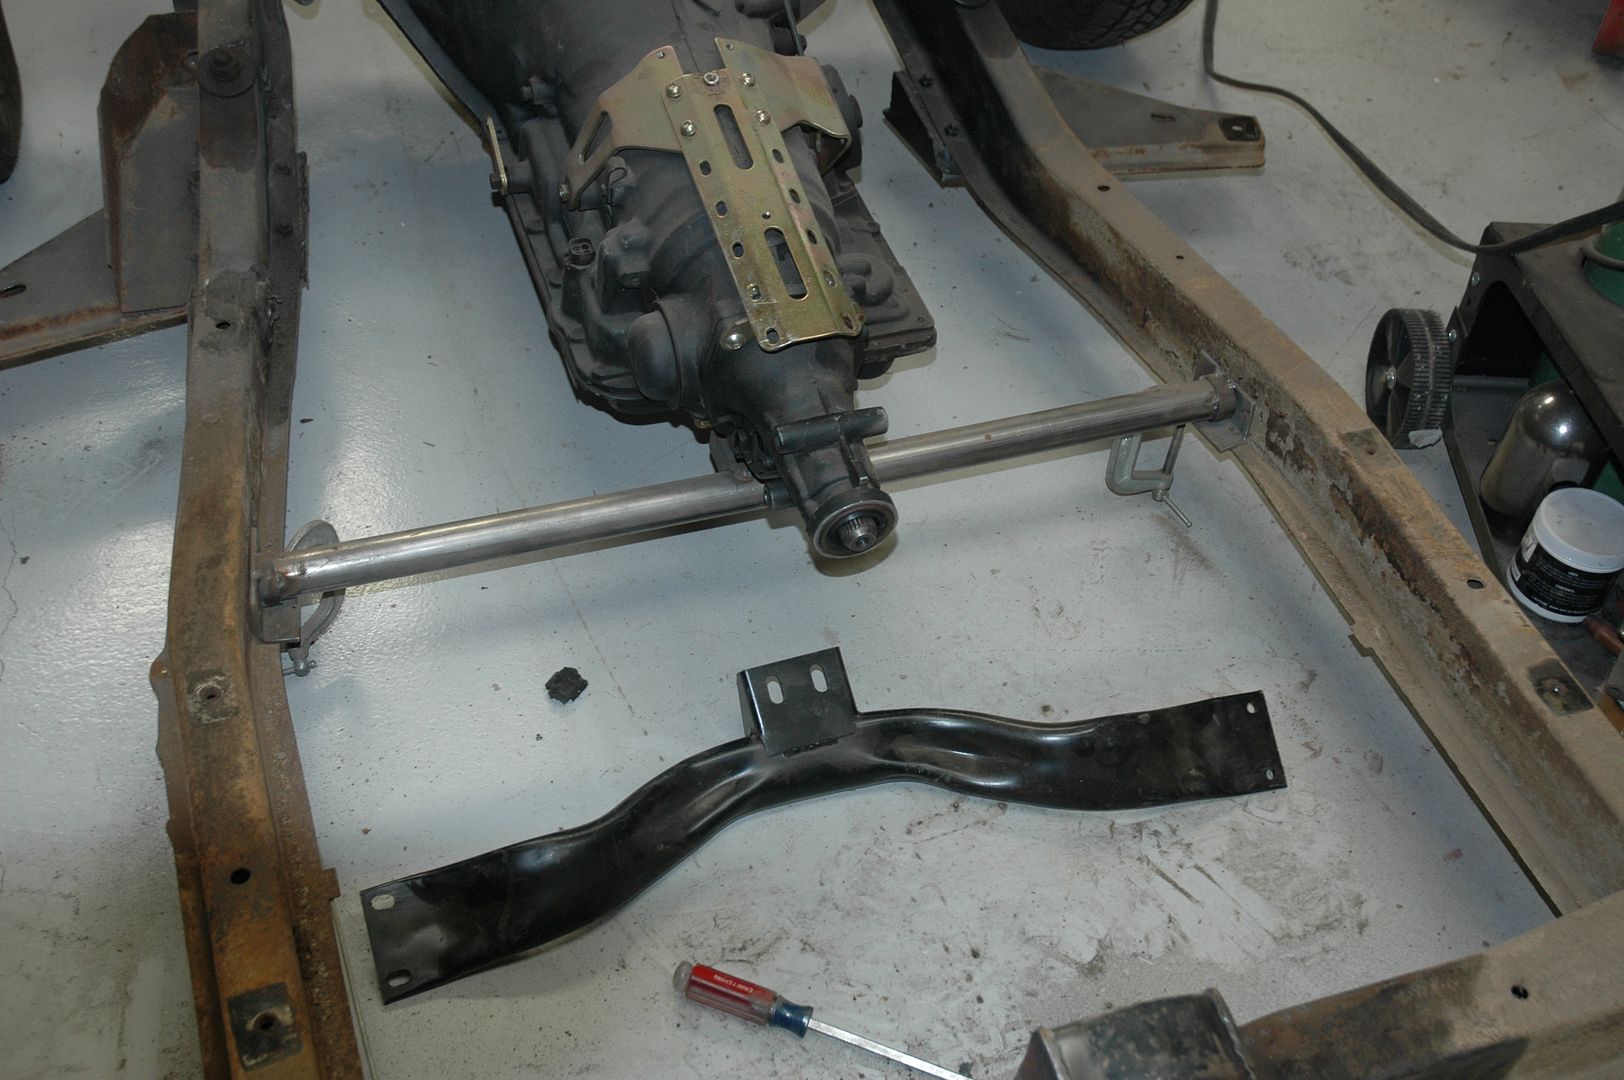
Cut out some brackets to support the ends. I still need to finish them up and will weld them in later once I get the pinion angles set.
I know its backwards. Just set it up there to see how it fits.
Last edited by dmw56; 02-20-2010 at 10:29 PM.
Livin' on Route 66 
-
Advertising

- Google Adsense
- REGISTERED USERS DO NOT SEE THIS AD
-
12-22-2009 08:46 PM #17
CHR Member
- Join Date
- Jul 2008
- Location
- Edgewood, New Mexico, United States
- Car Year, Make, Model: 30,34,39,50,54,65,68,70,71,72
- Posts
- 571
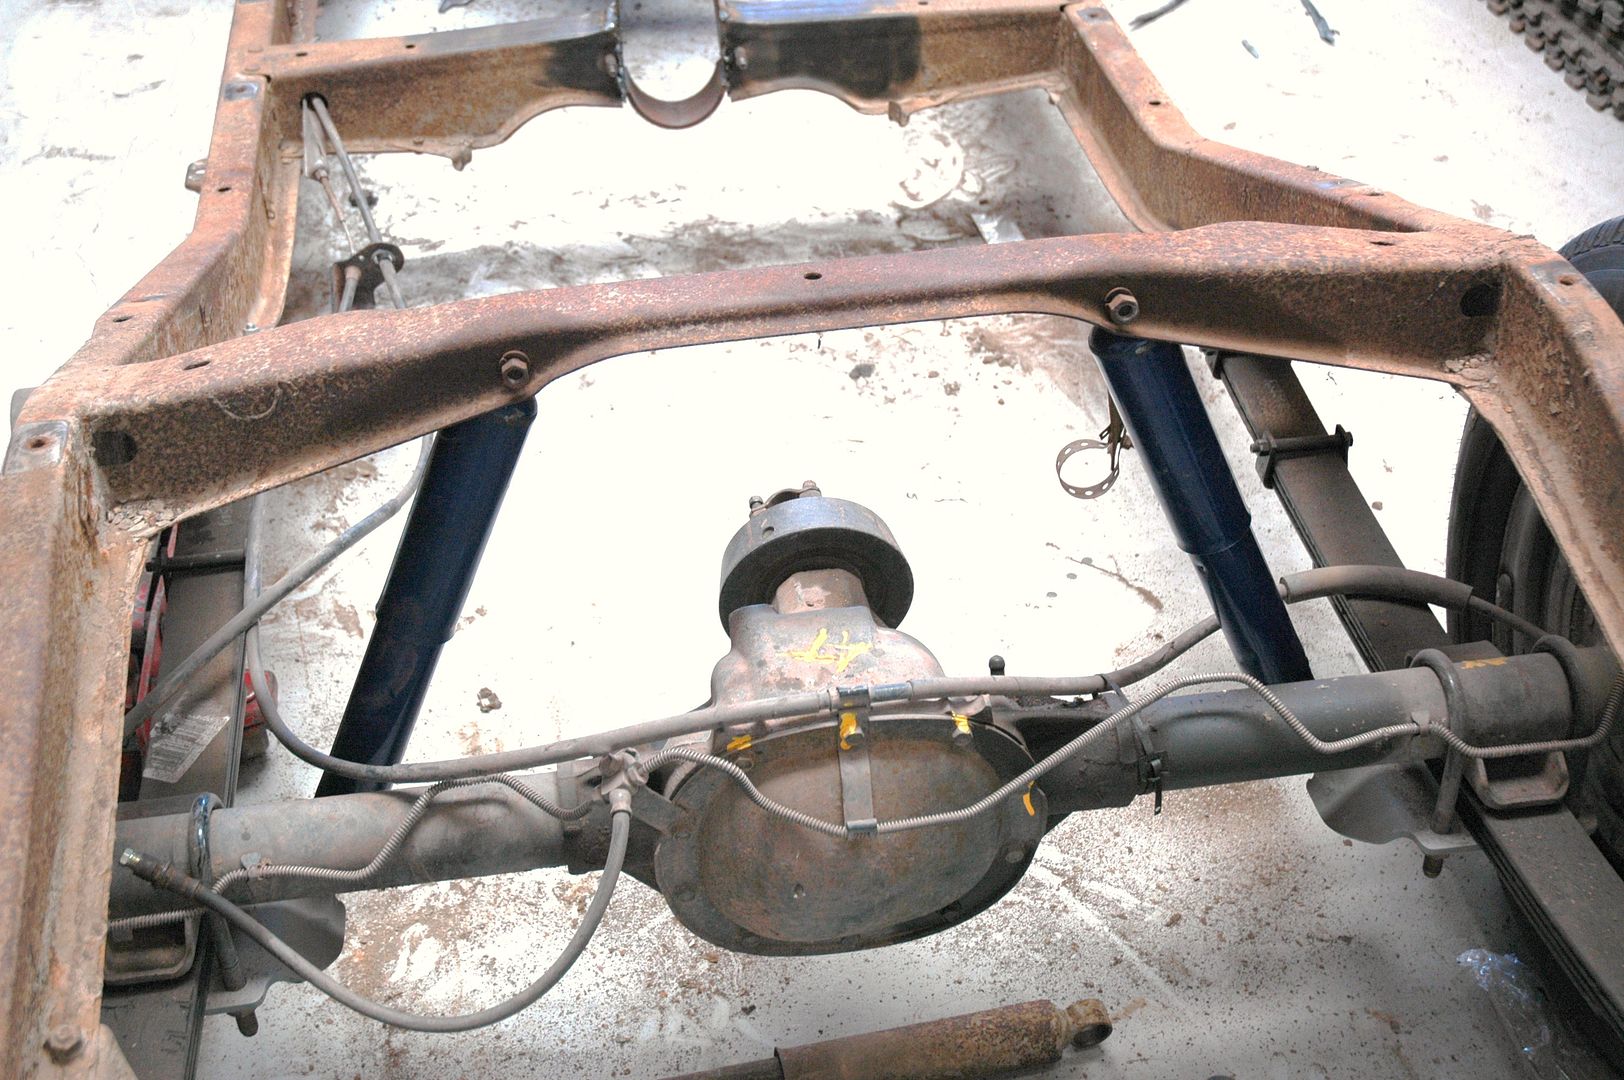
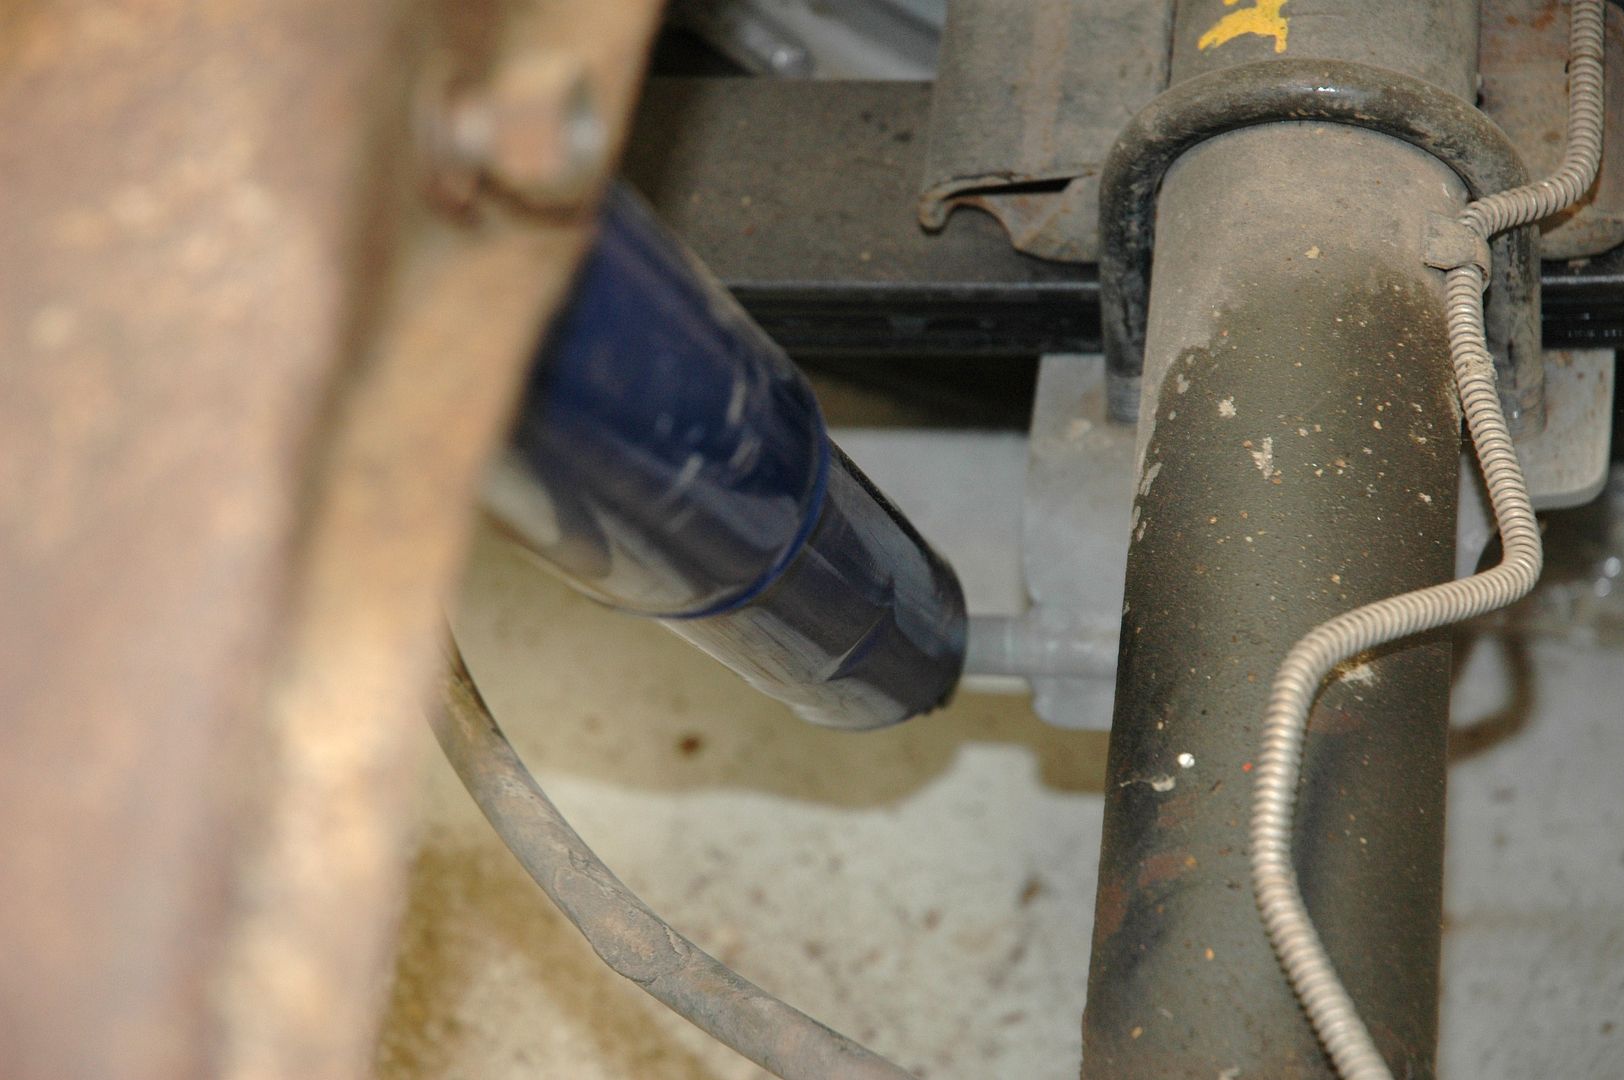
I extended the left side trans mount and welded both on.
Here are some pictures of the rear shocks. I just need to cut a couple os spacers for the stude and go to the Pull-a Part and find some shock washers.
Livin' on Route 66
-
12-22-2009 08:48 PM #18
CHR Member
- Join Date
- Jul 2008
- Location
- Edgewood, New Mexico, United States
- Car Year, Make, Model: 30,34,39,50,54,65,68,70,71,72
- Posts
- 571
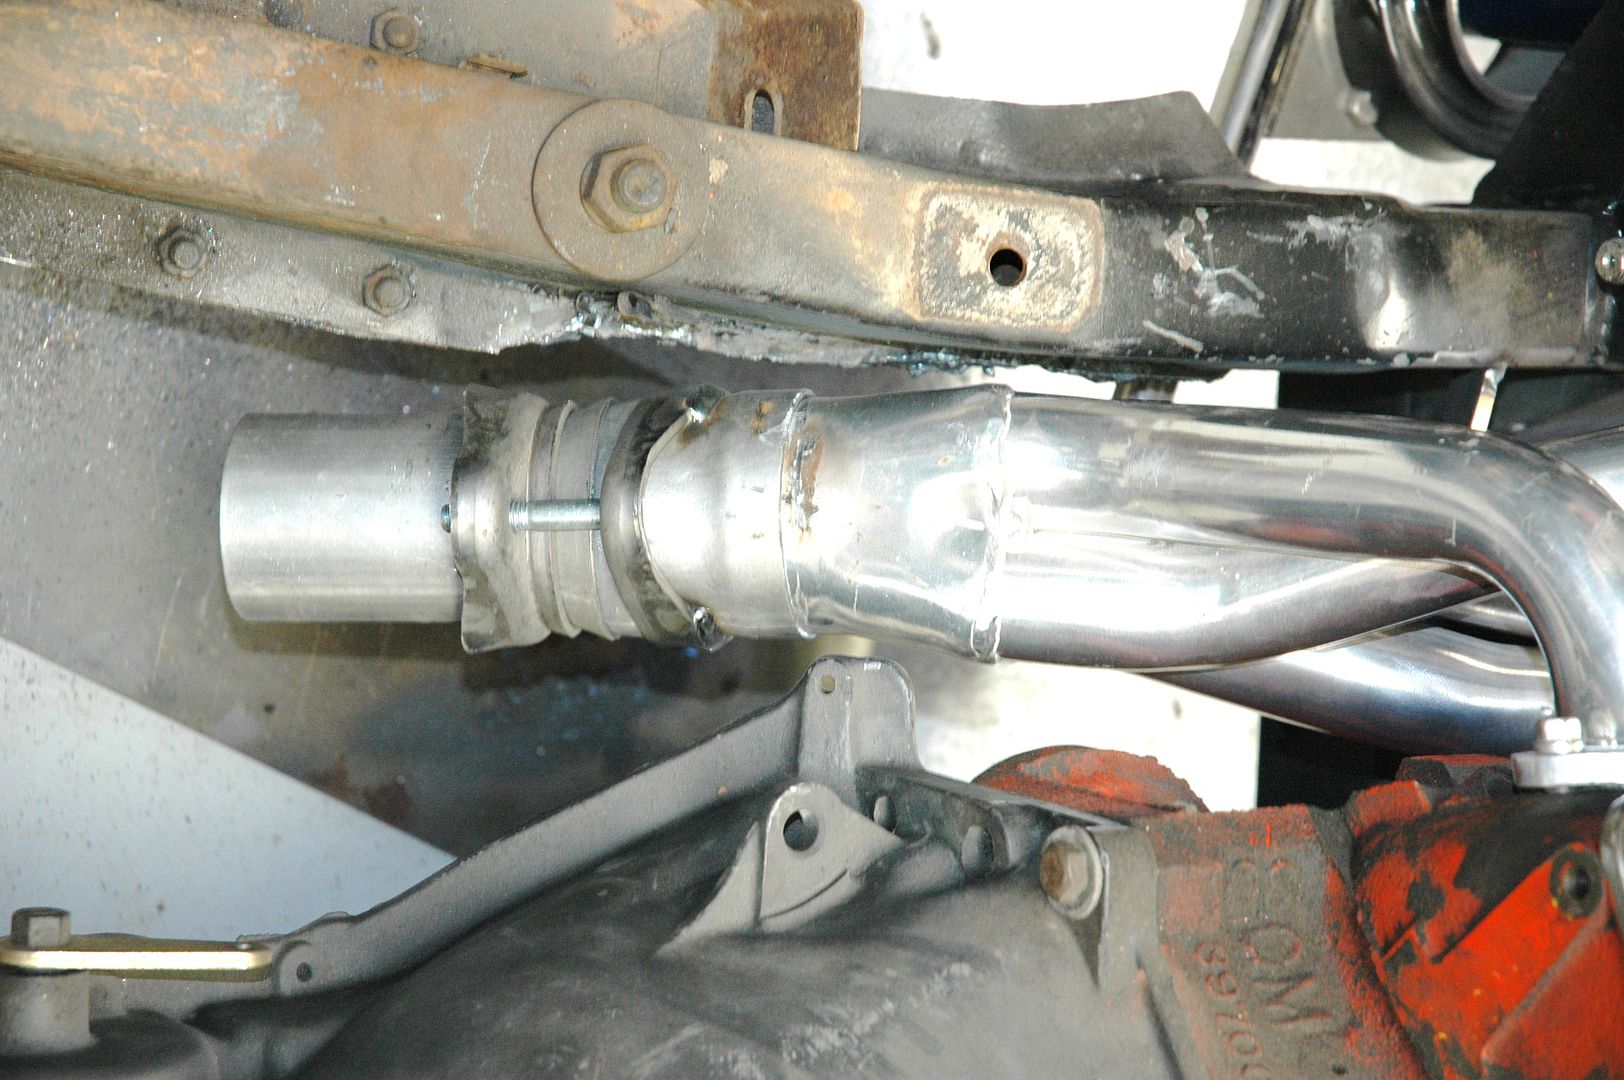
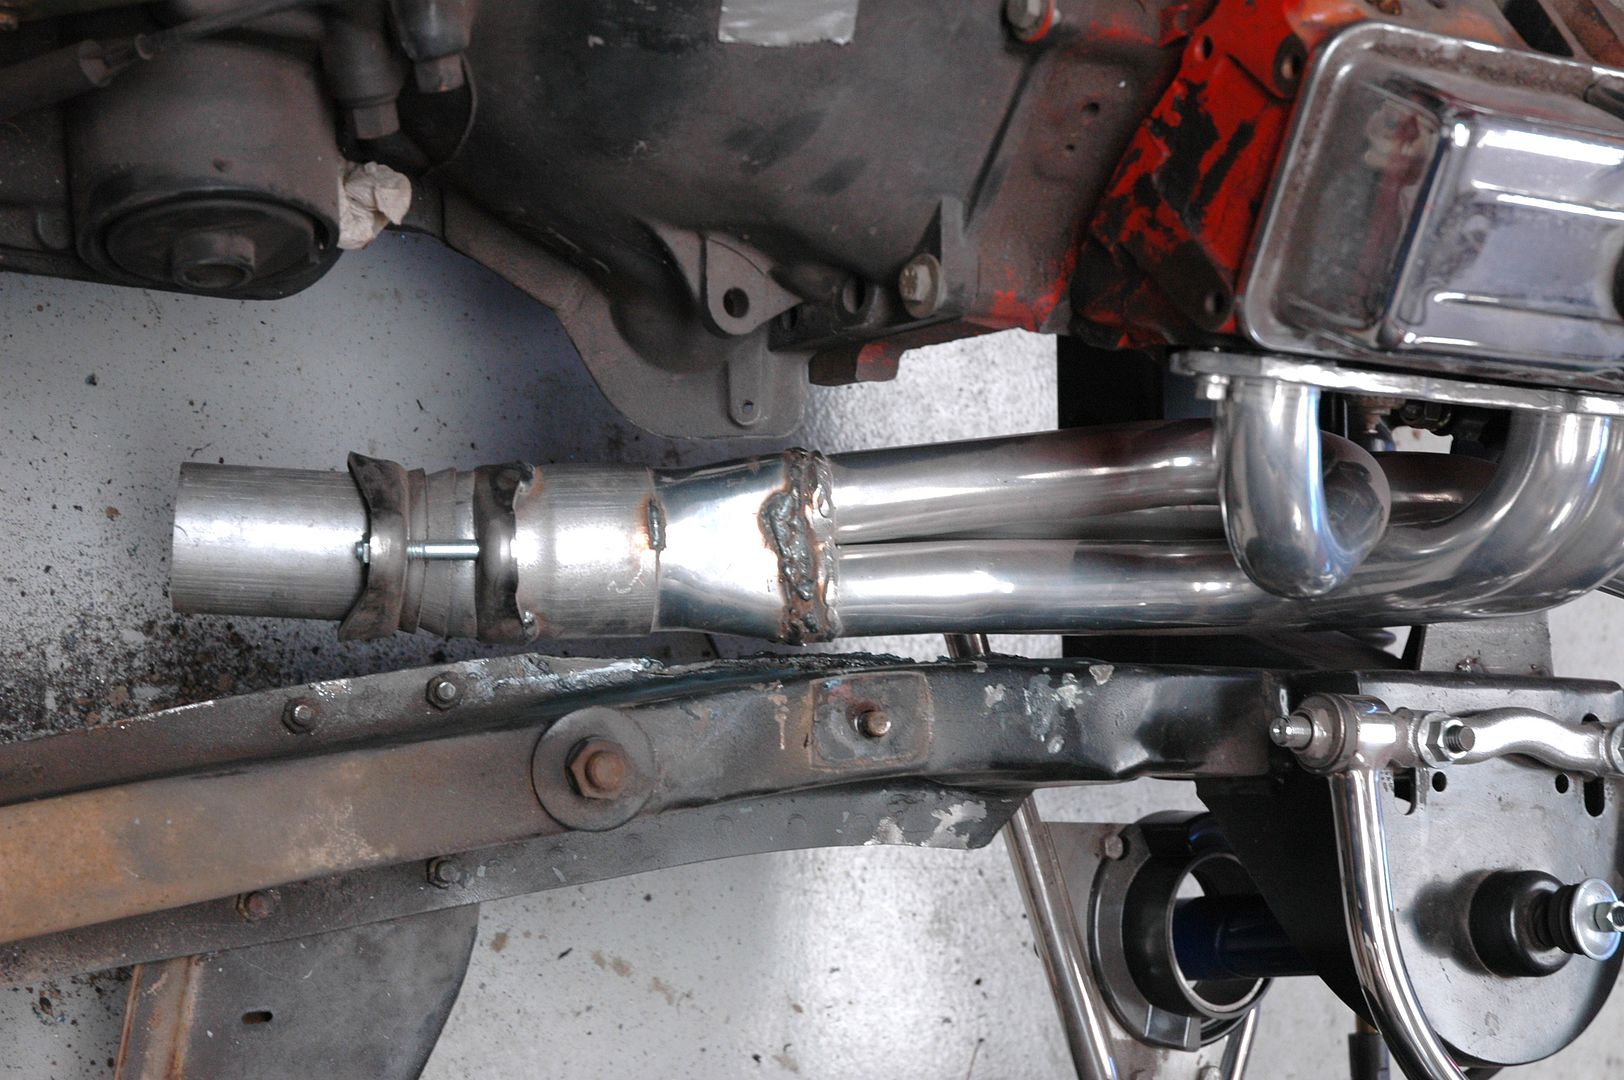
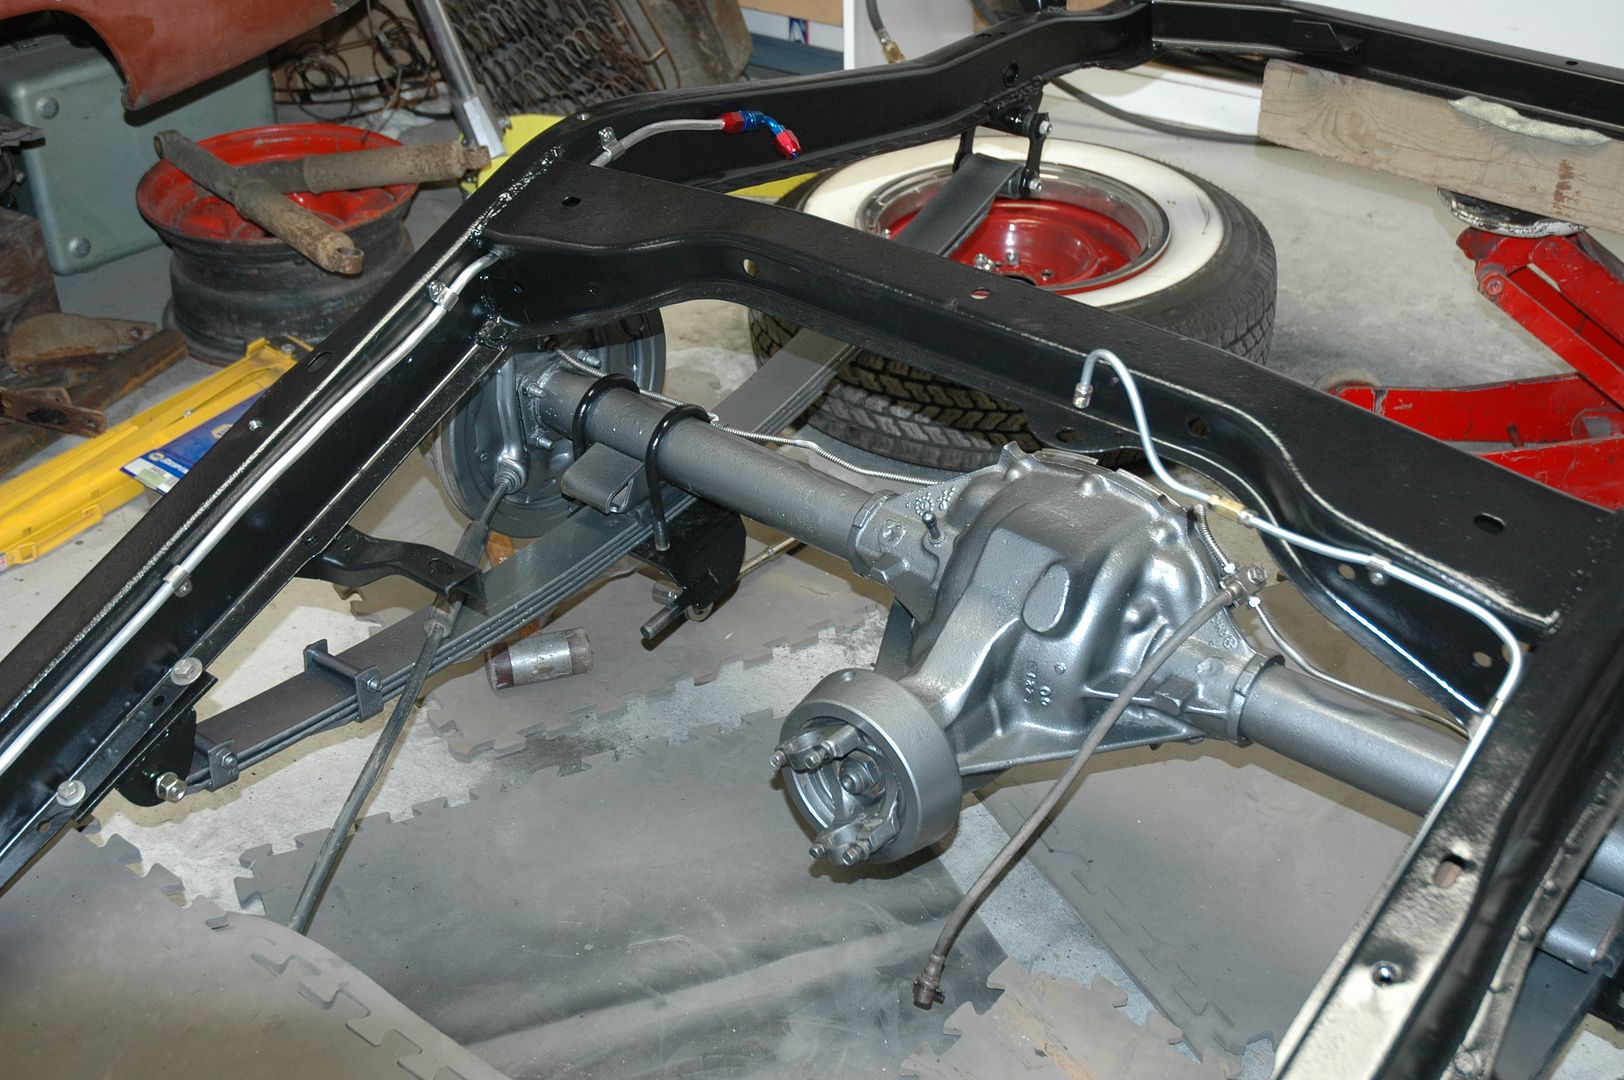
I also put the headers on the mock-up engine to check clearances. I needed to trim a little off the inside flange on the frame.
Livin' on Route 66
-
12-22-2009 08:51 PM #19
CHR Member
- Join Date
- Jul 2008
- Location
- Edgewood, New Mexico, United States
- Car Year, Make, Model: 30,34,39,50,54,65,68,70,71,72
- Posts
- 571
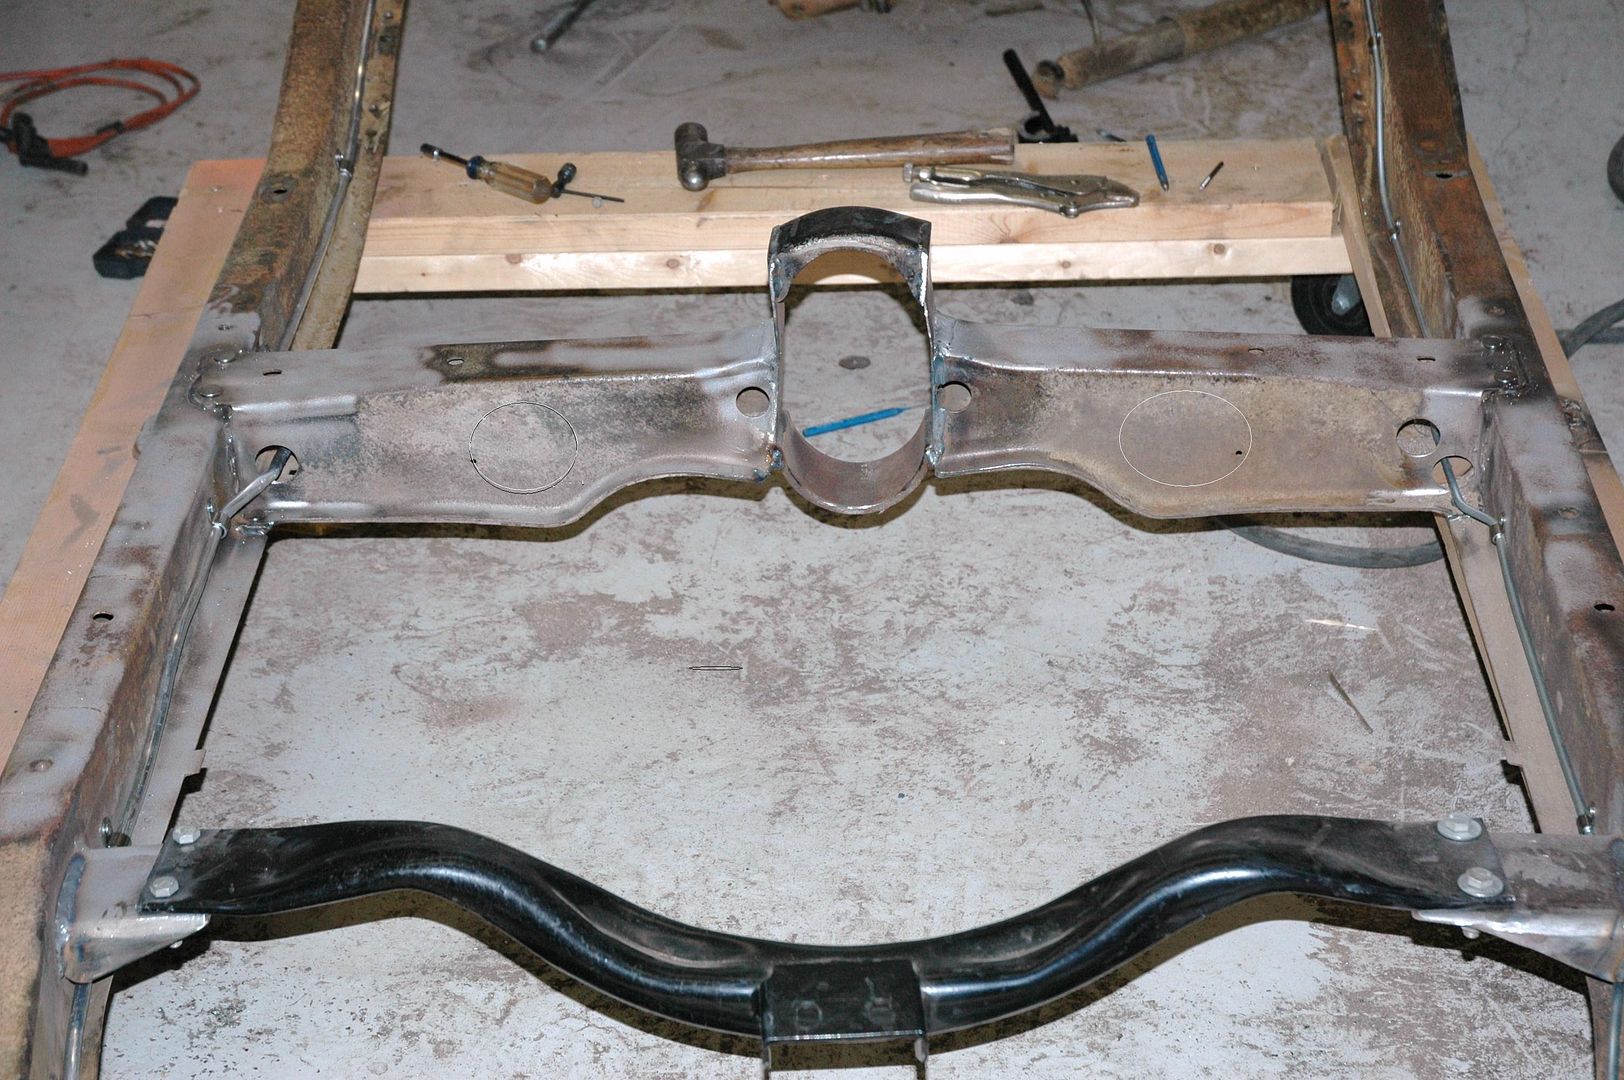
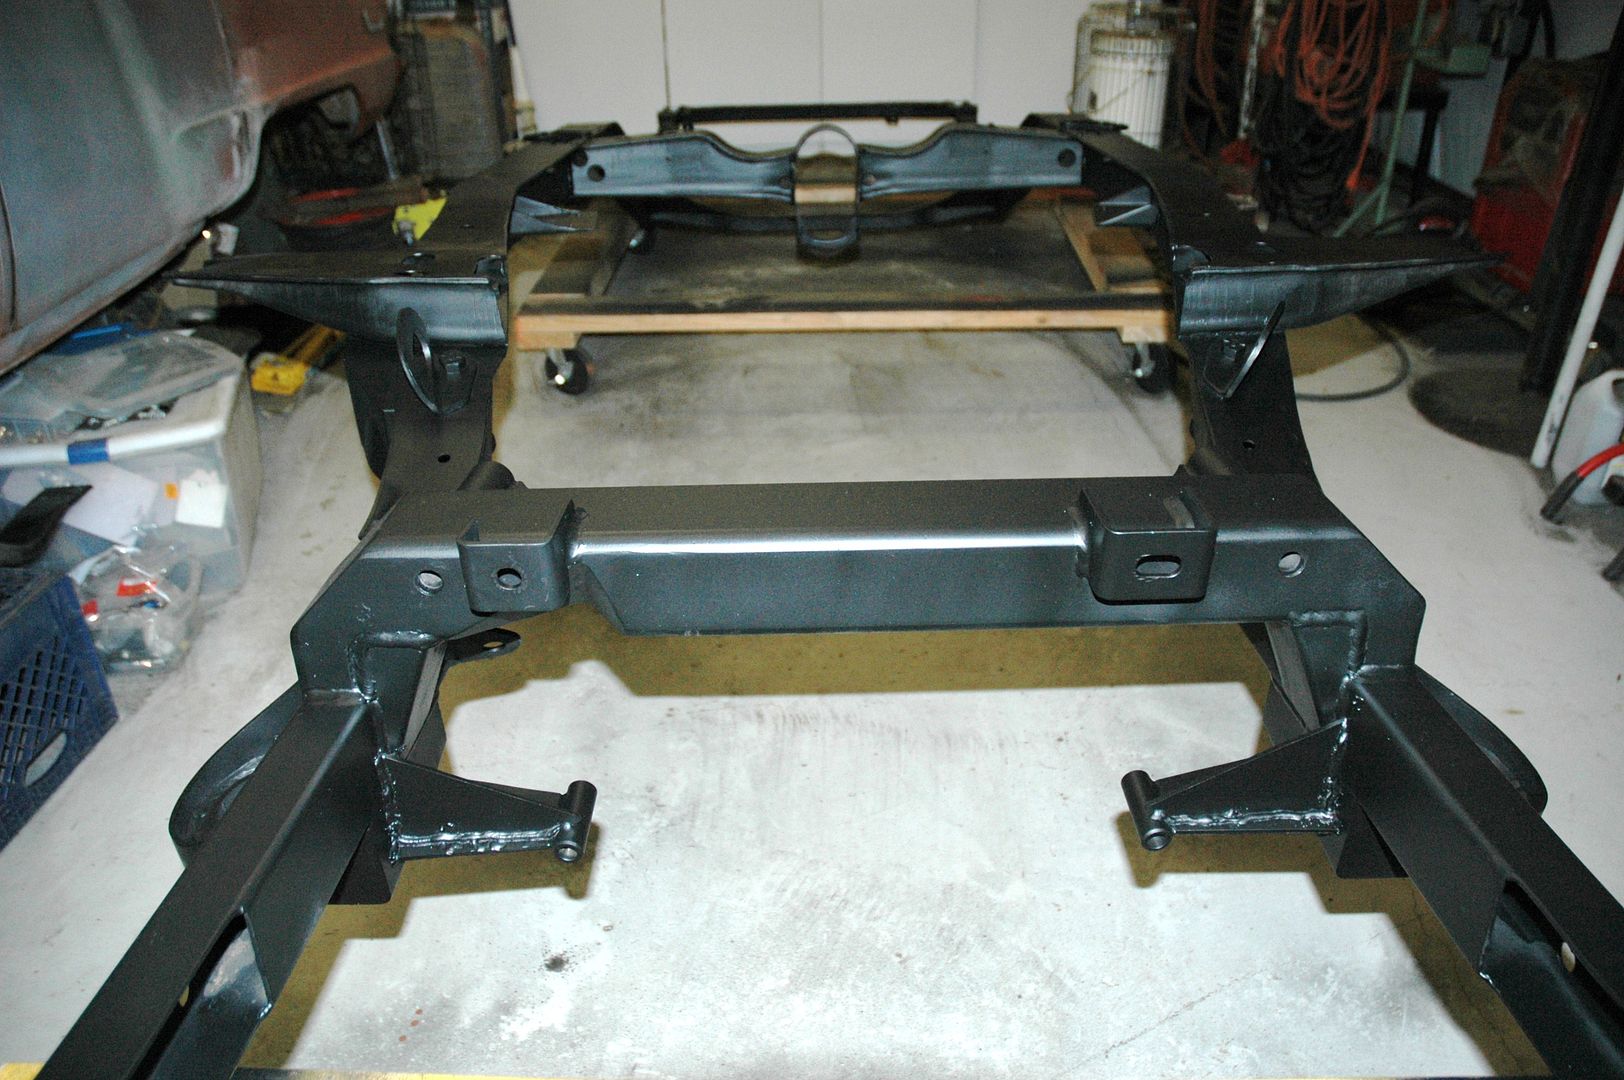
Stripped every thing off of the frame and I'll finish welding up a few things and grind some others.
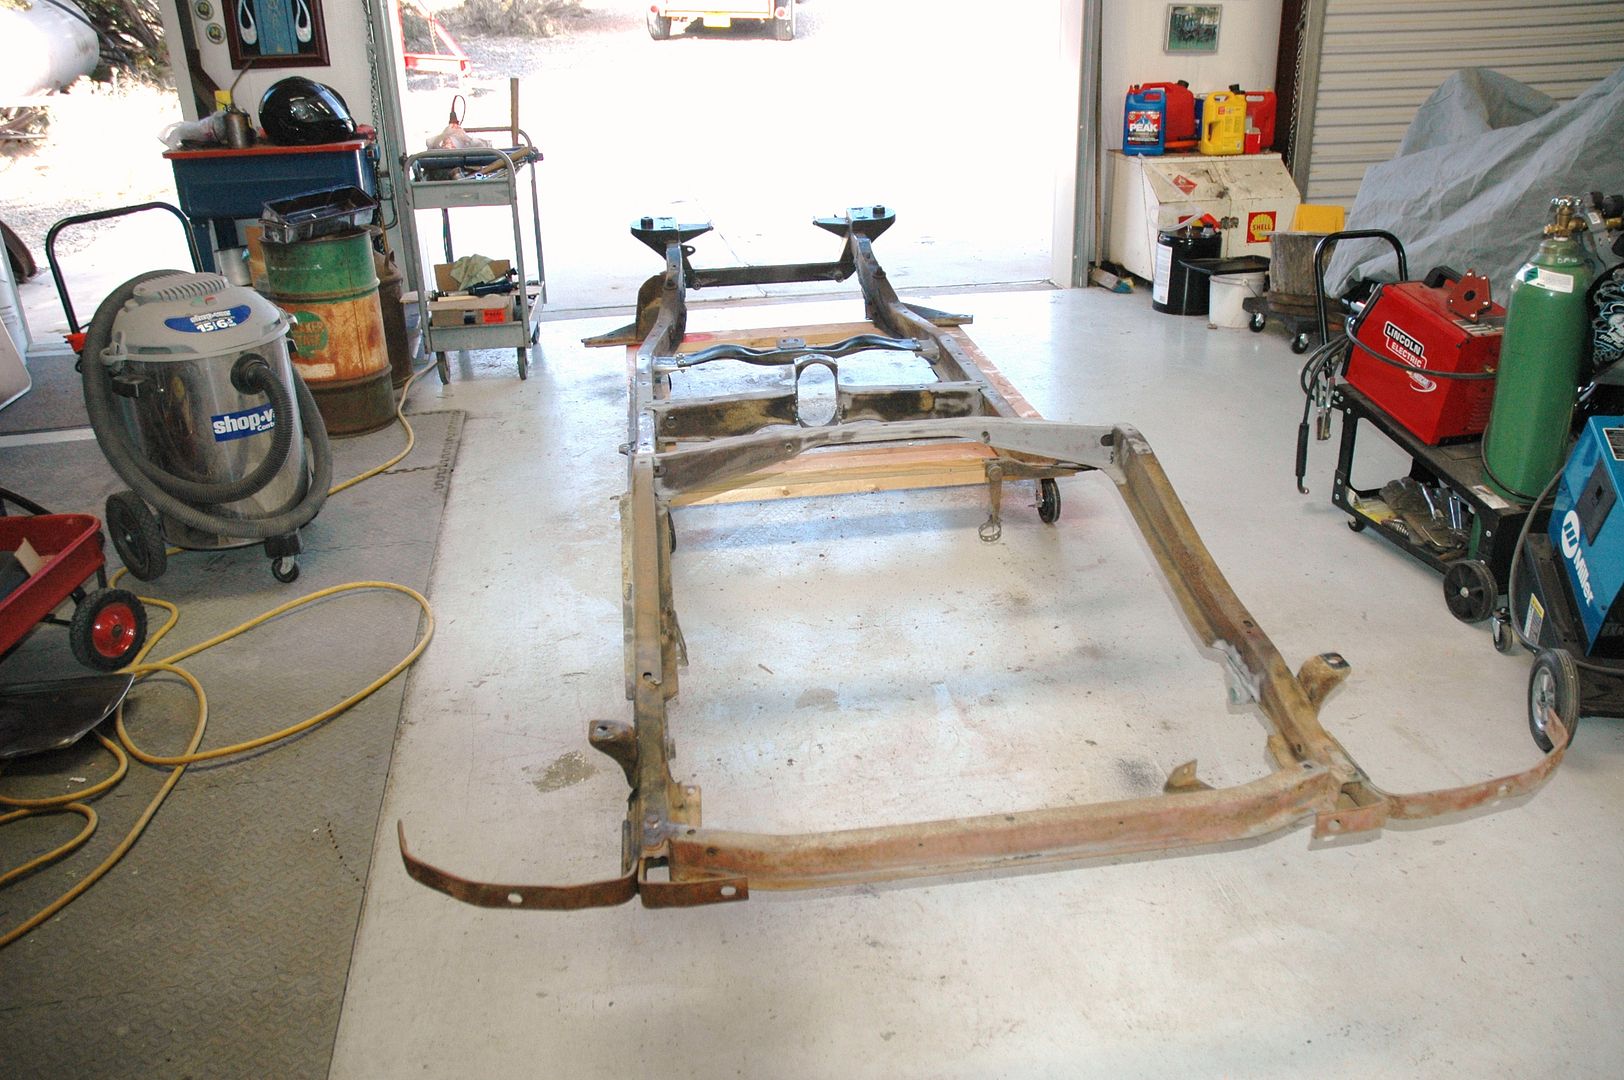
Got all the mounts and crossmembers welded up. I was going to to put some angled braces in but i think the frame will be strong enough without them.
Now I just have to blast the frame and get it all cleaned up. Then I'll primer and paint with single stage epoxy. The frame will be satin black.
All the brackets and non-stainless steel suspension parts will be powder coated. My neighbor has a walk-in size oven for powder coating. Not big enough for the frame but everything else can fit. I'll buy the powder and he'll just charge me for the baking.
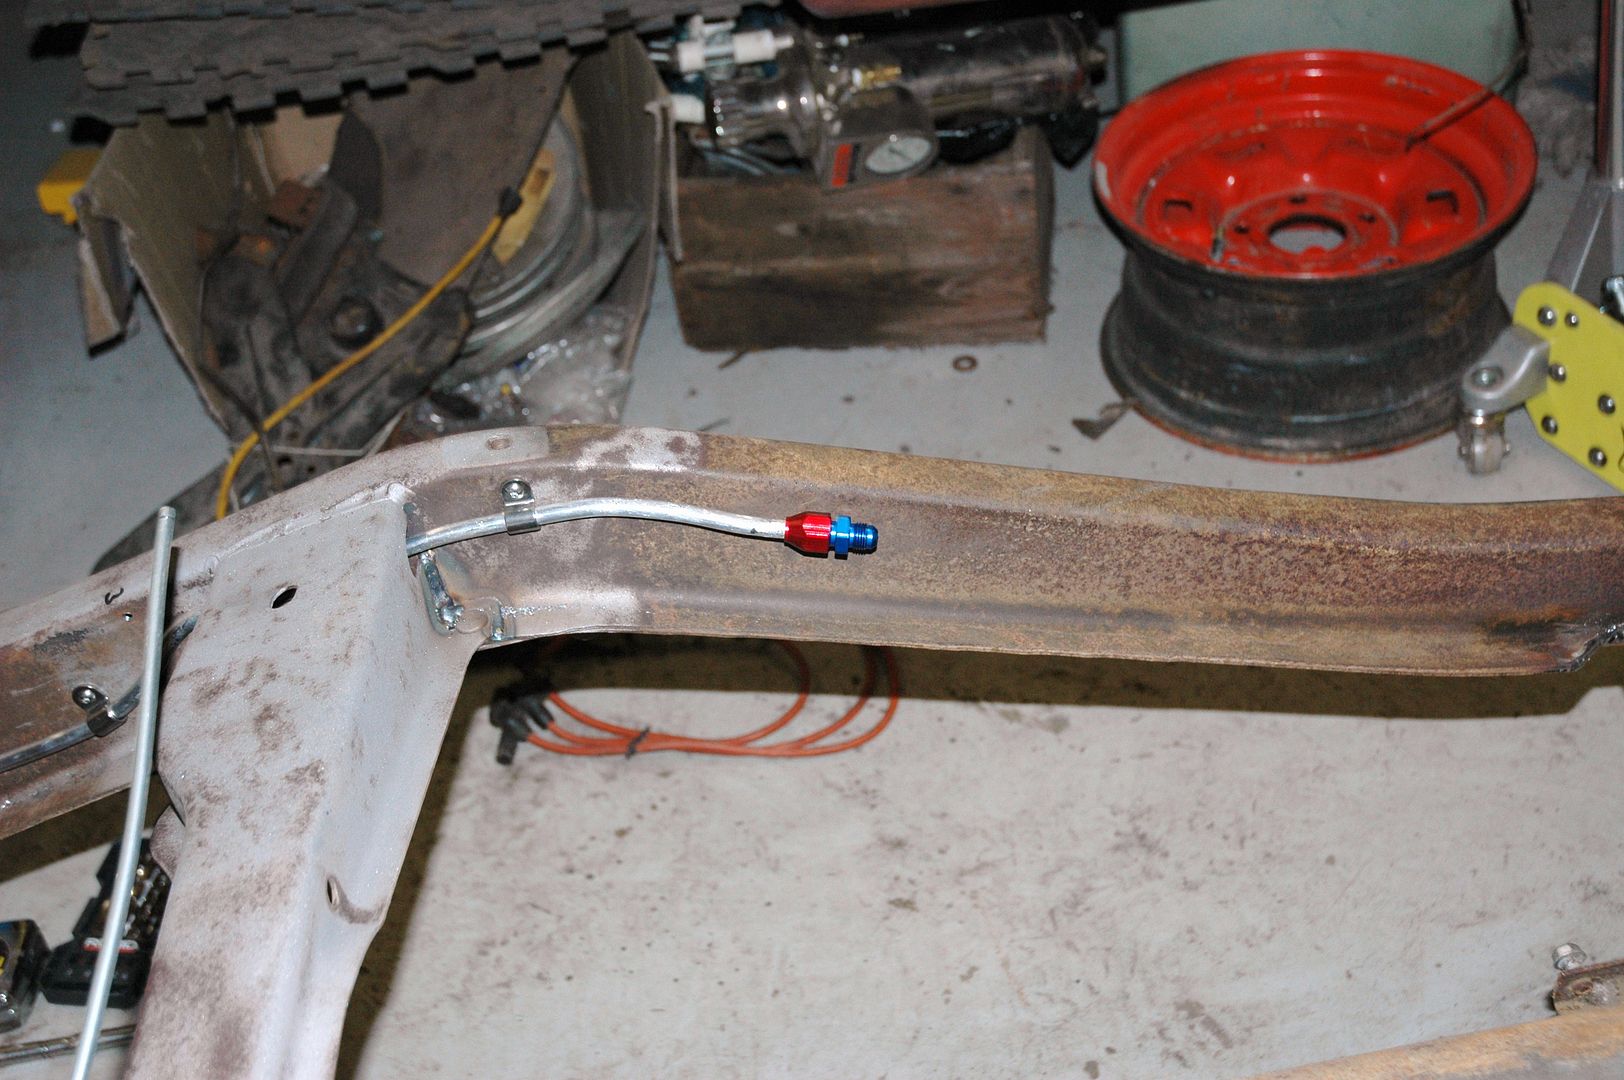
Got the fuel line run along the inside of the frame on the passenger side for a Chevy engine. I used 3/8" aluminum tubing with stainless steel tubing clamps.
On the ends I used 3/8" compression fittings X 6 AN hose to the tank and fuel pump.
 [/QUOTE
Livin' on Route 66
-
12-22-2009 08:54 PM #20
CHR Member
- Join Date
- Jul 2008
- Location
- Edgewood, New Mexico, United States
- Car Year, Make, Model: 30,34,39,50,54,65,68,70,71,72
- Posts
- 571
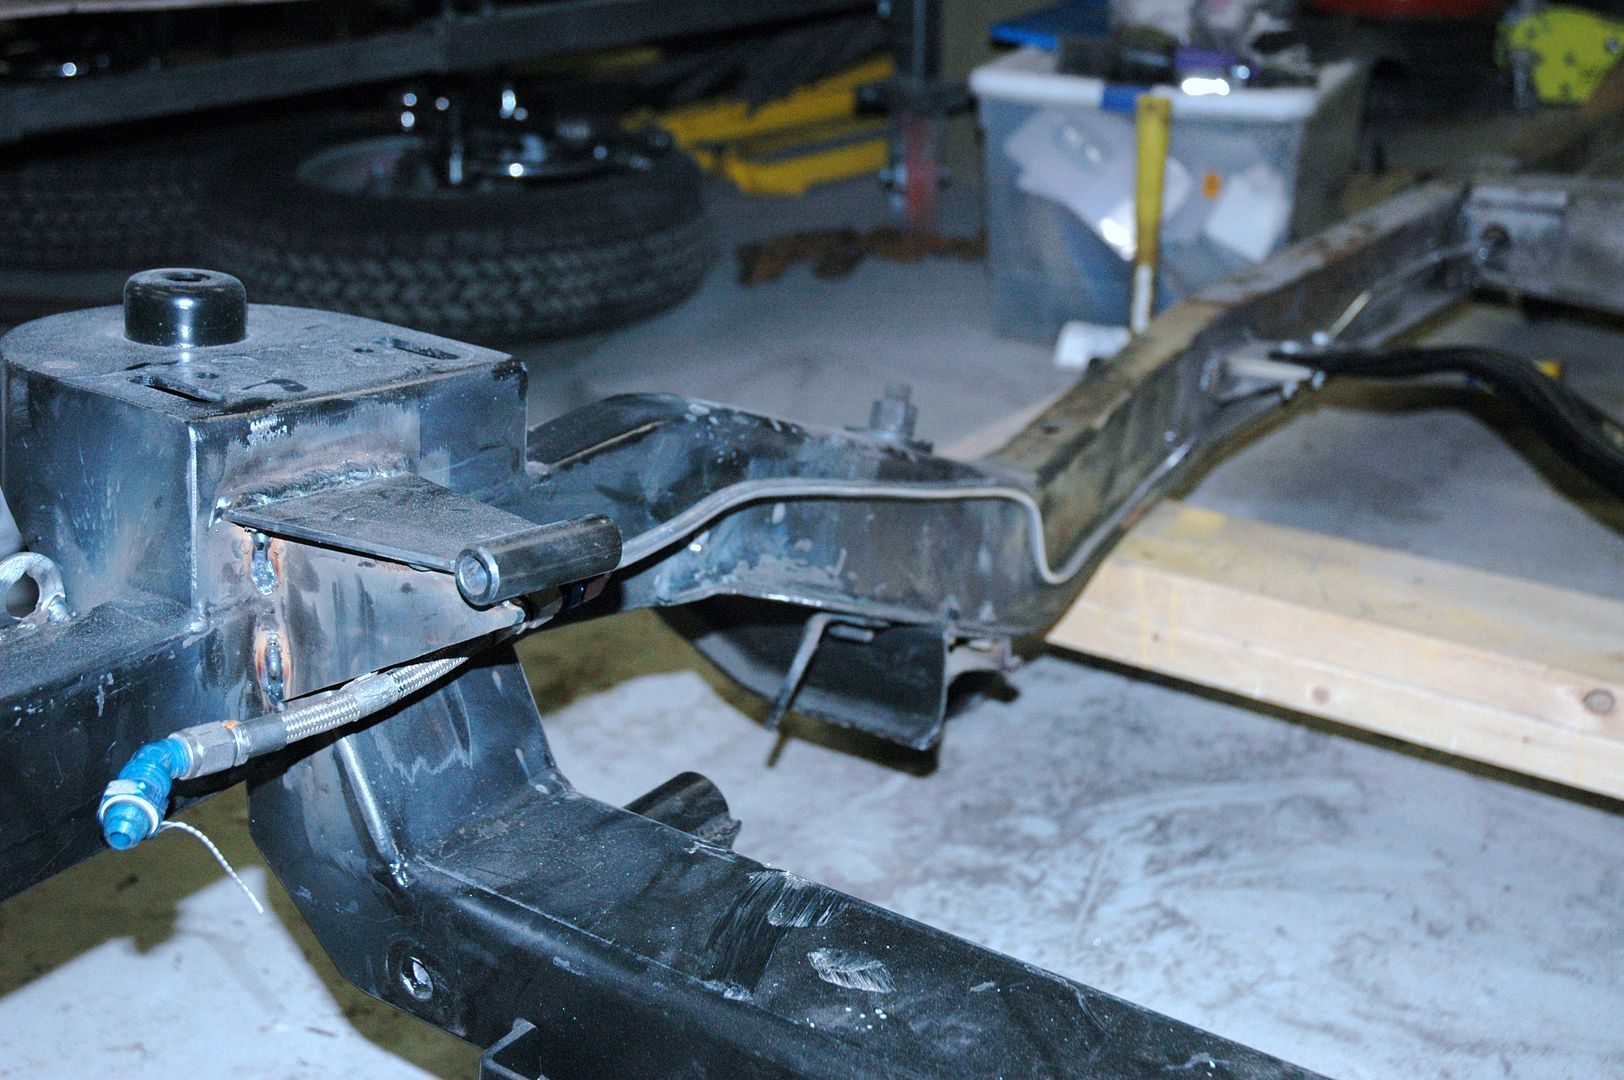
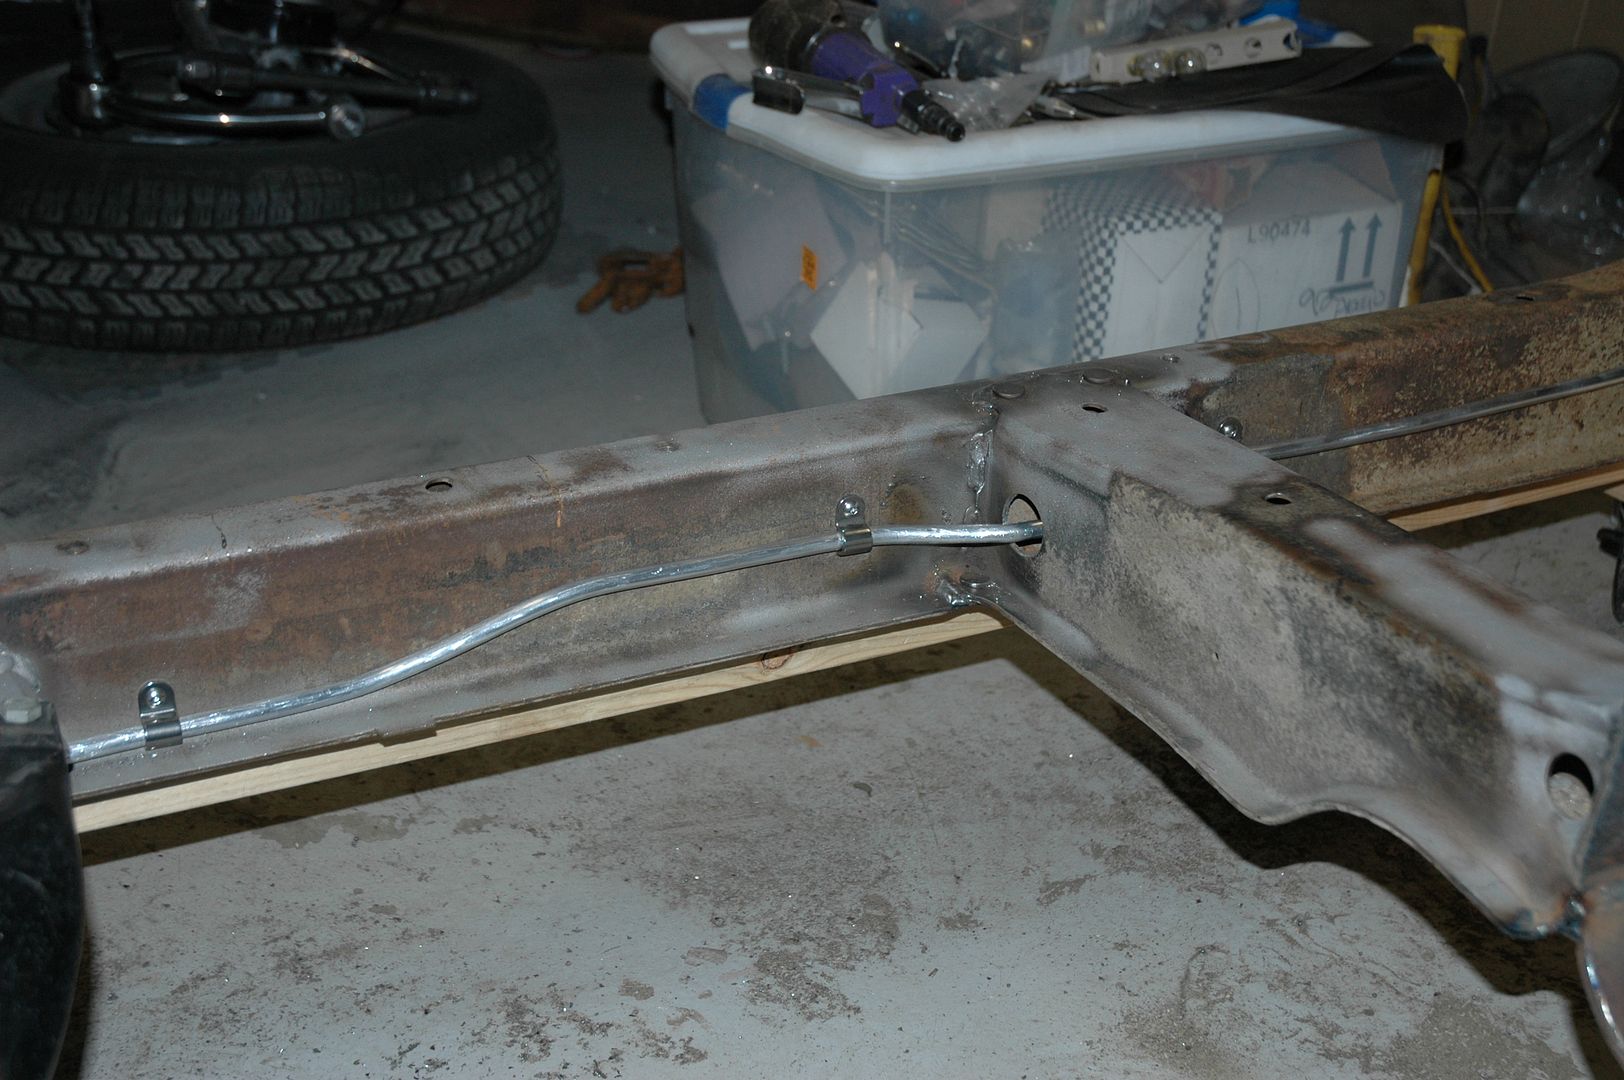
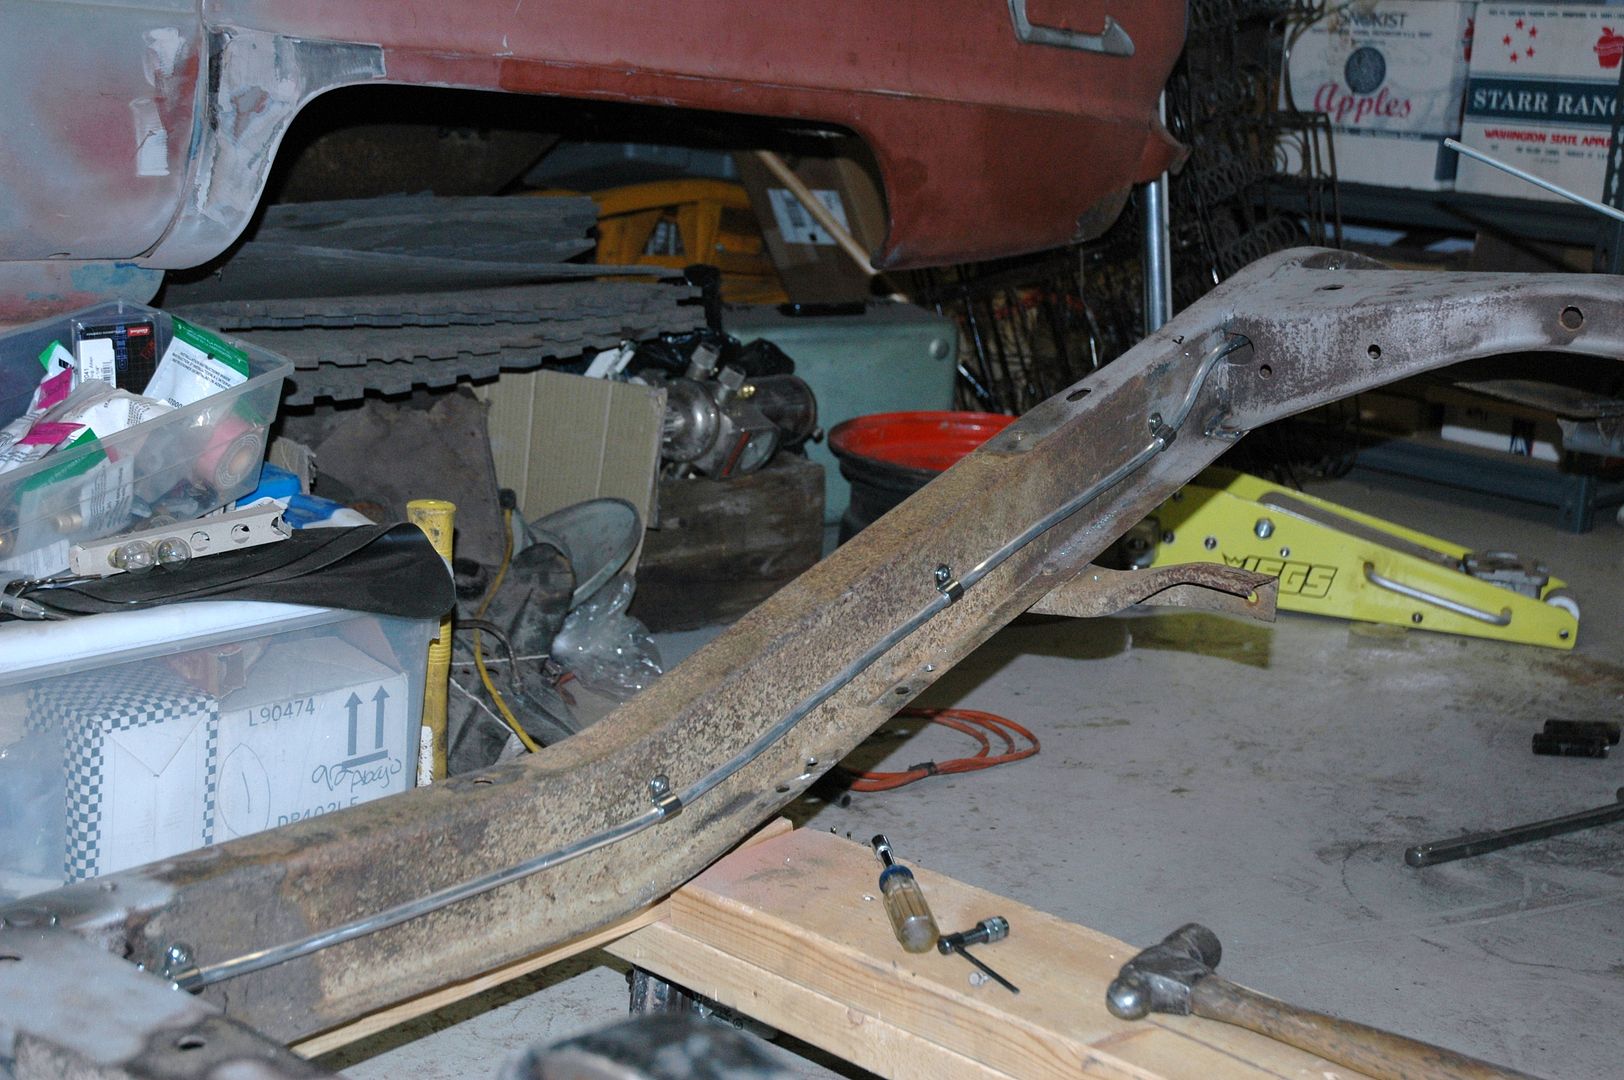
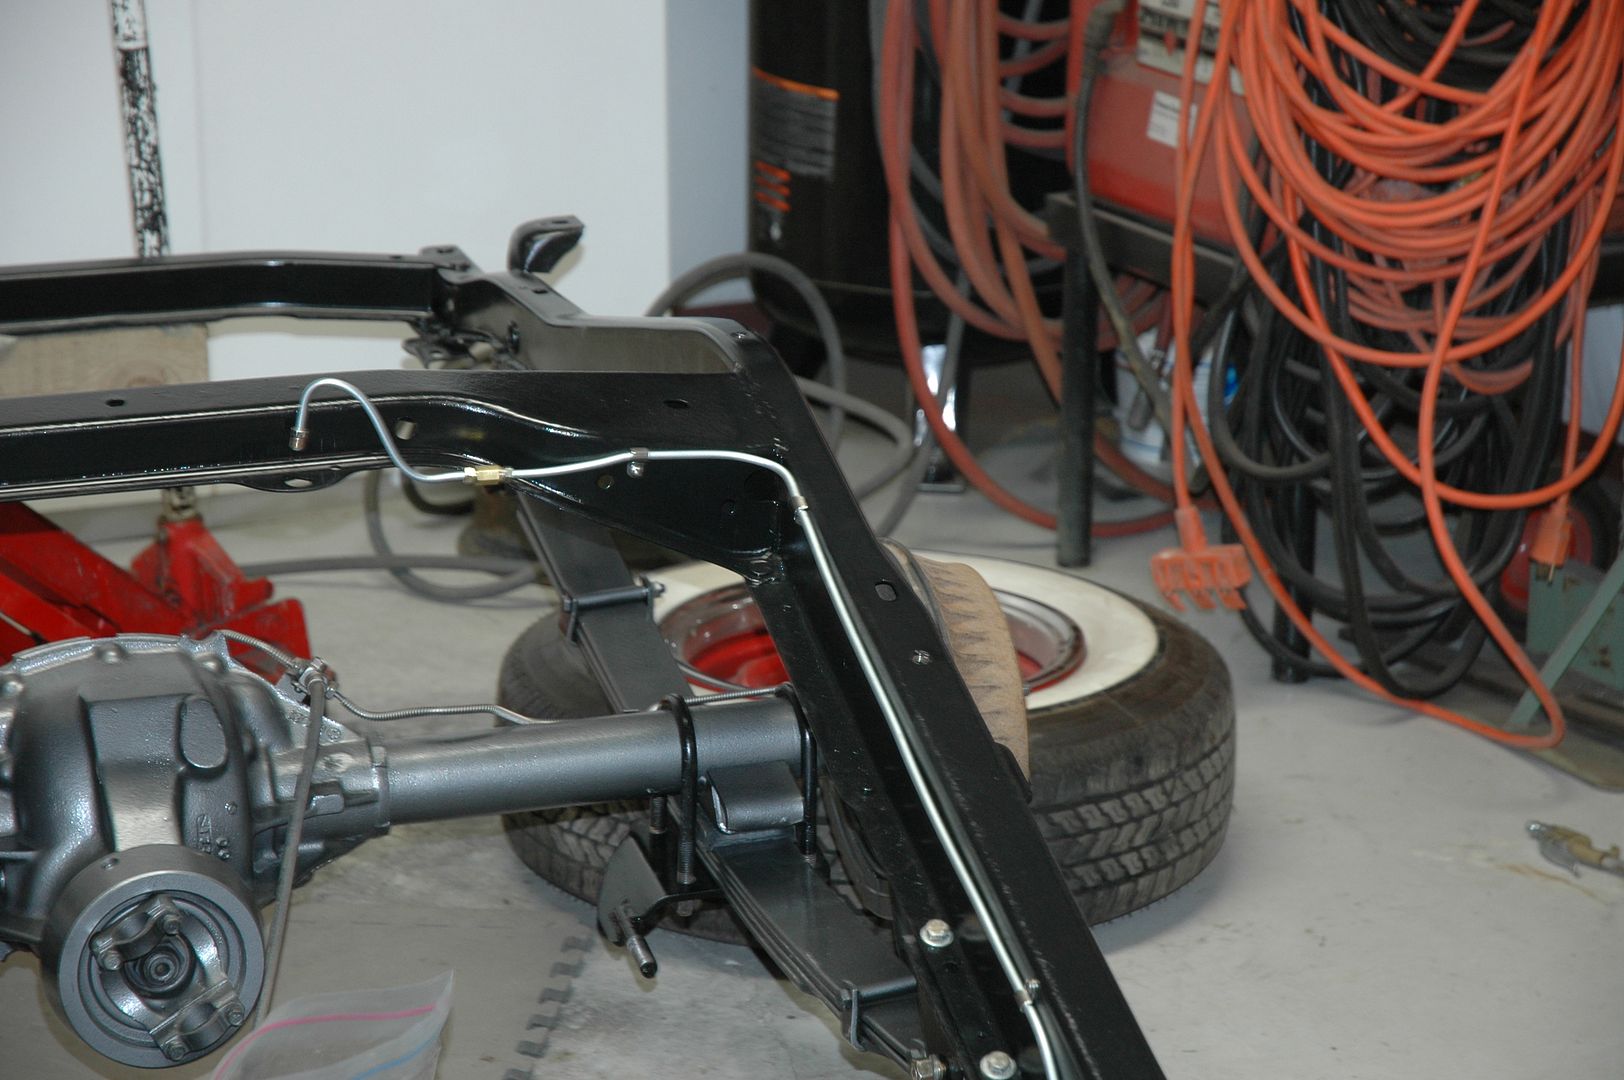
Ran the rear brake line on the inside of the drives side. Used 1/4" steel.
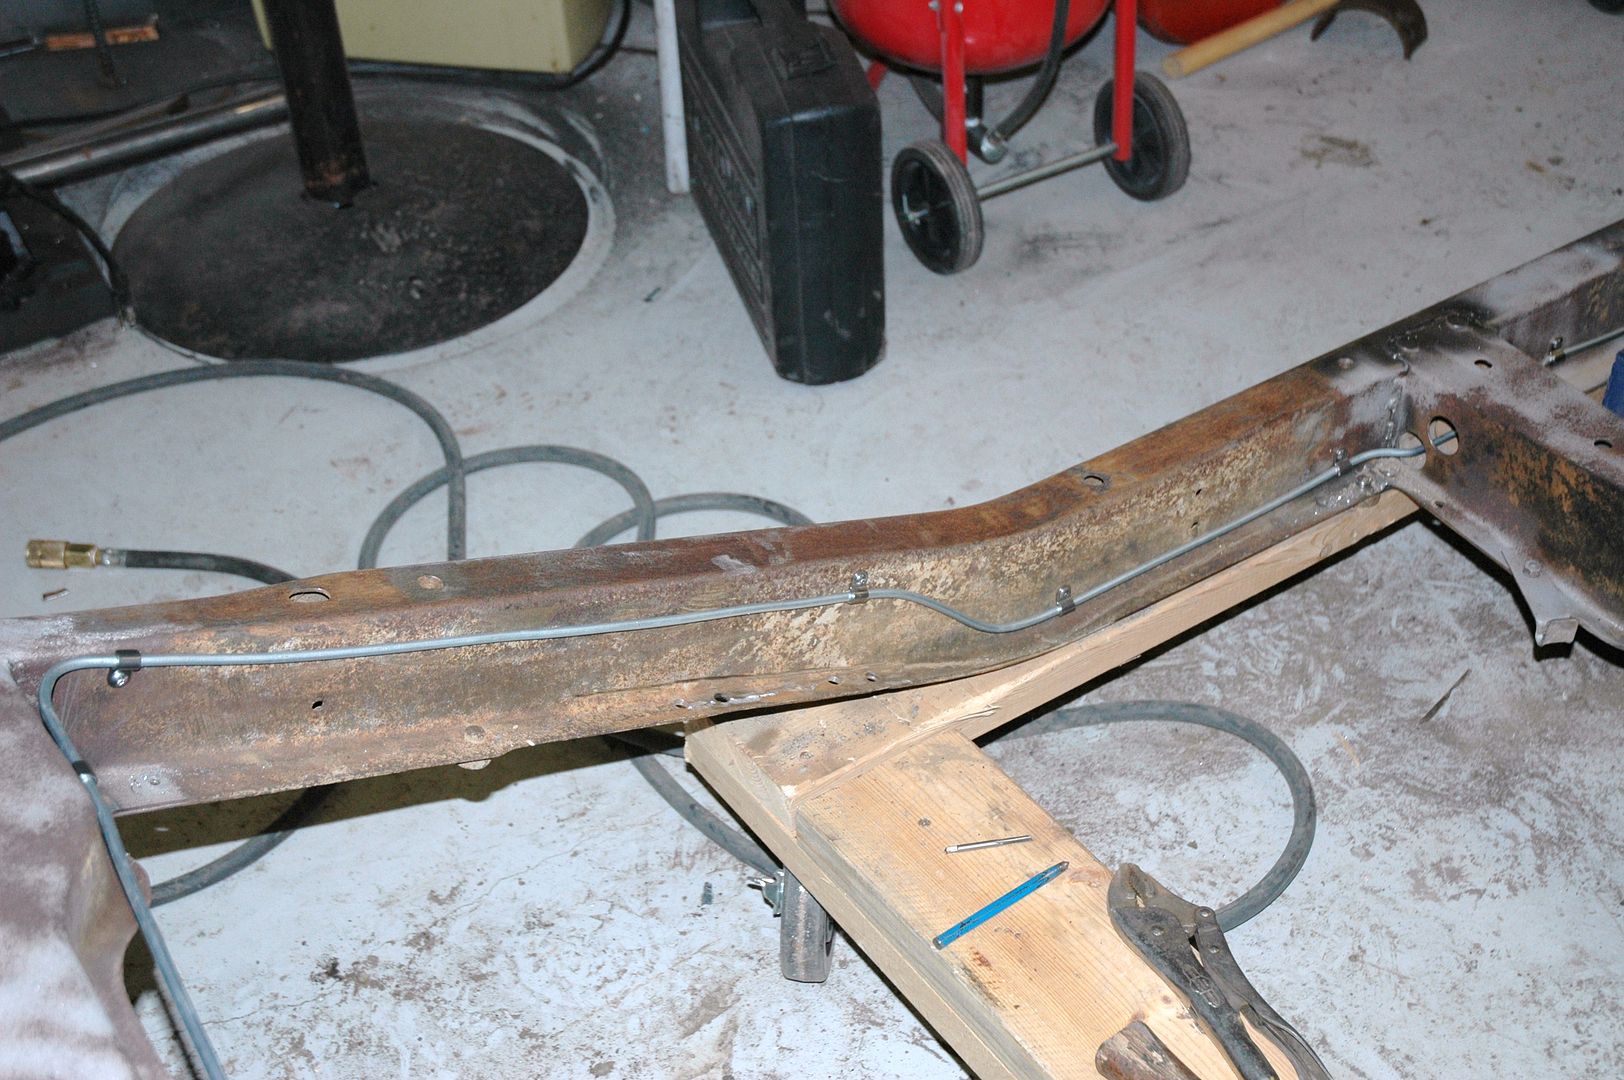
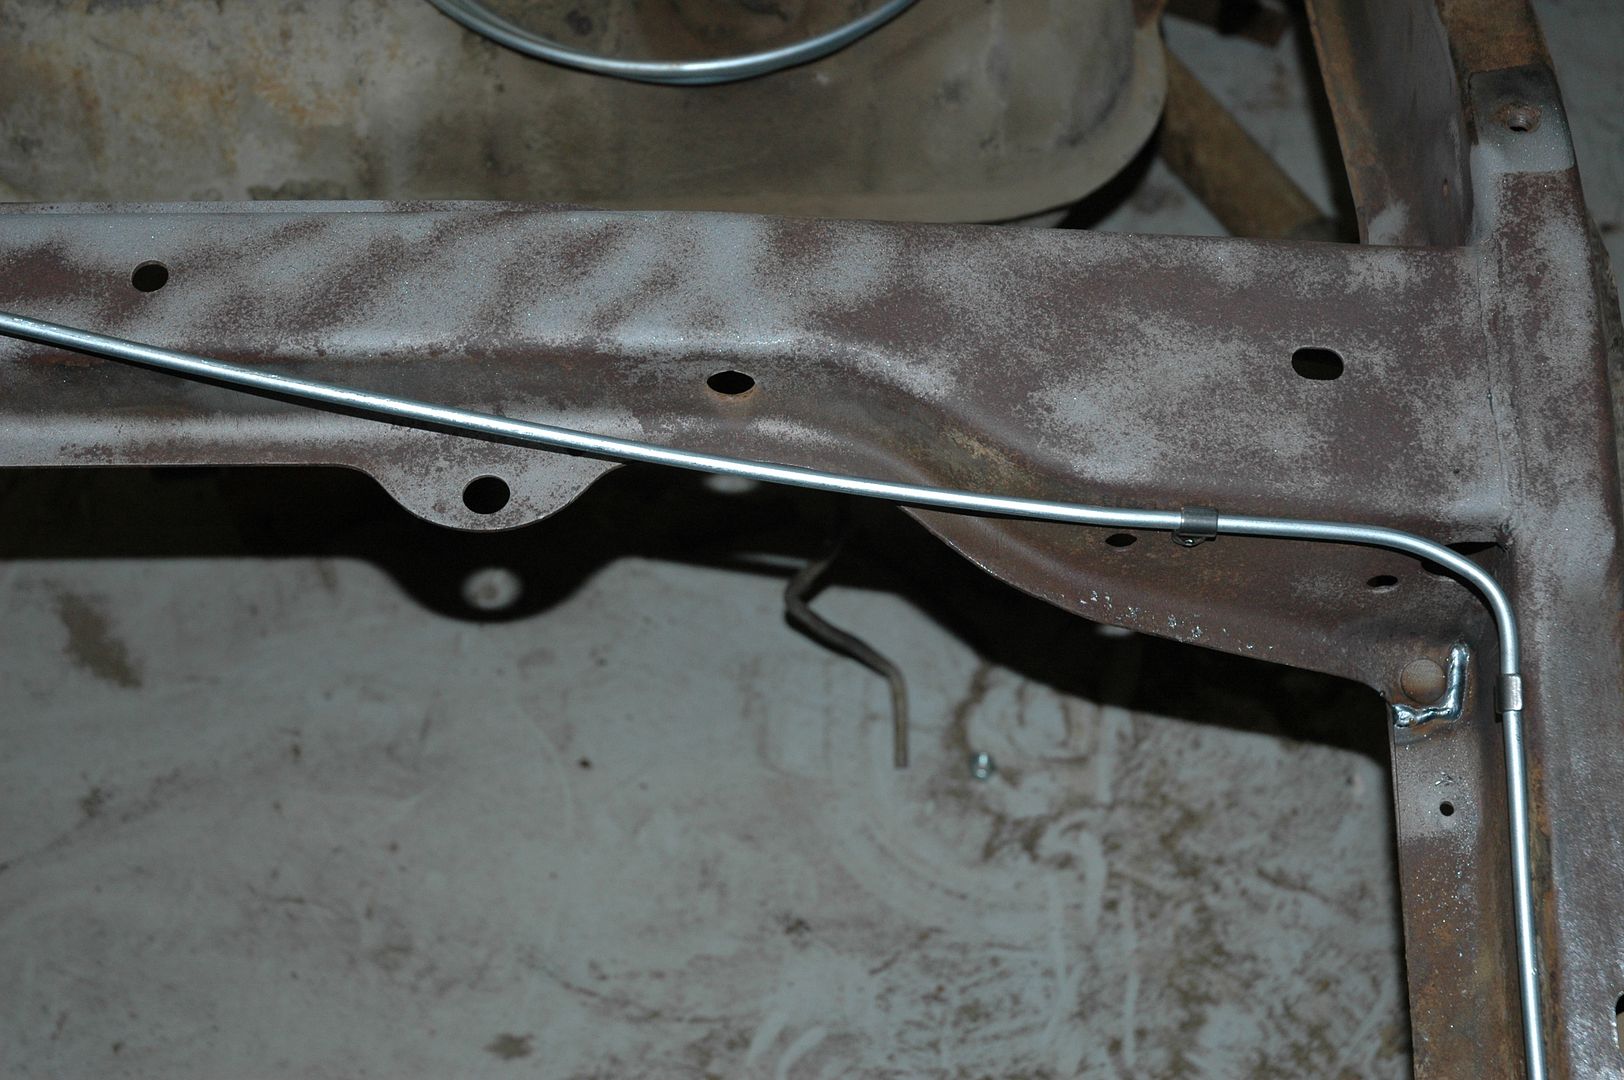
I will probably cut 2- 3 1/2" holes and sleeve them to run the exhaust pipe through the center crossmember. I will be able to make a straight run from under the trans crossmember and keep the pipes up high out of the way.
I did finish media blasting the frame and hope to get it primered soon. But it's been cold here. I need to just turn the heater on in the shop for half a day or so so it will be warm enough to paint.Last edited by dmw56; 12-23-2009 at 06:28 AM.
Livin' on Route 66
-
12-23-2009 04:40 AM #21
CHR Member
- Join Date
- Aug 2009
- Location
- The Motor City
- Posts
- 61
So, is that all you were able to get done?
Looks great, I really need to get out in the garage and get my project going.
We had a 50 Commander when I was growing up, really good looking cars!
Great project
Mark35 Chevy Master 4-Door-Look ma, no trunk!
72 Porsche 914 DZ
email: info@newvintageusa.com
http://community.webshots.com/user/marksurel
-
12-23-2009 10:23 AM #22
CHR Member
- Join Date
- Jul 2008
- Location
- Edgewood, New Mexico, United States
- Car Year, Make, Model: 30,34,39,50,54,65,68,70,71,72
- Posts
- 571
Hey, I never received that check for the truck. So I'm keeping it! Originally Posted by Evolvo

No, we have real winters here. Iit snowed yesterday and has been highs of 40's. We may be desert but we get 2-4 feet of snow where I live in NM. We are at 6,800 feet altitude.
Thanks, I like to get this a least drivable by mid summer 2010.Livin' on Route 66
-
12-26-2009 05:37 PM #23
CHR Member
- Join Date
- Jul 2008
- Location
- Edgewood, New Mexico, United States
- Car Year, Make, Model: 30,34,39,50,54,65,68,70,71,72
- Posts
- 571
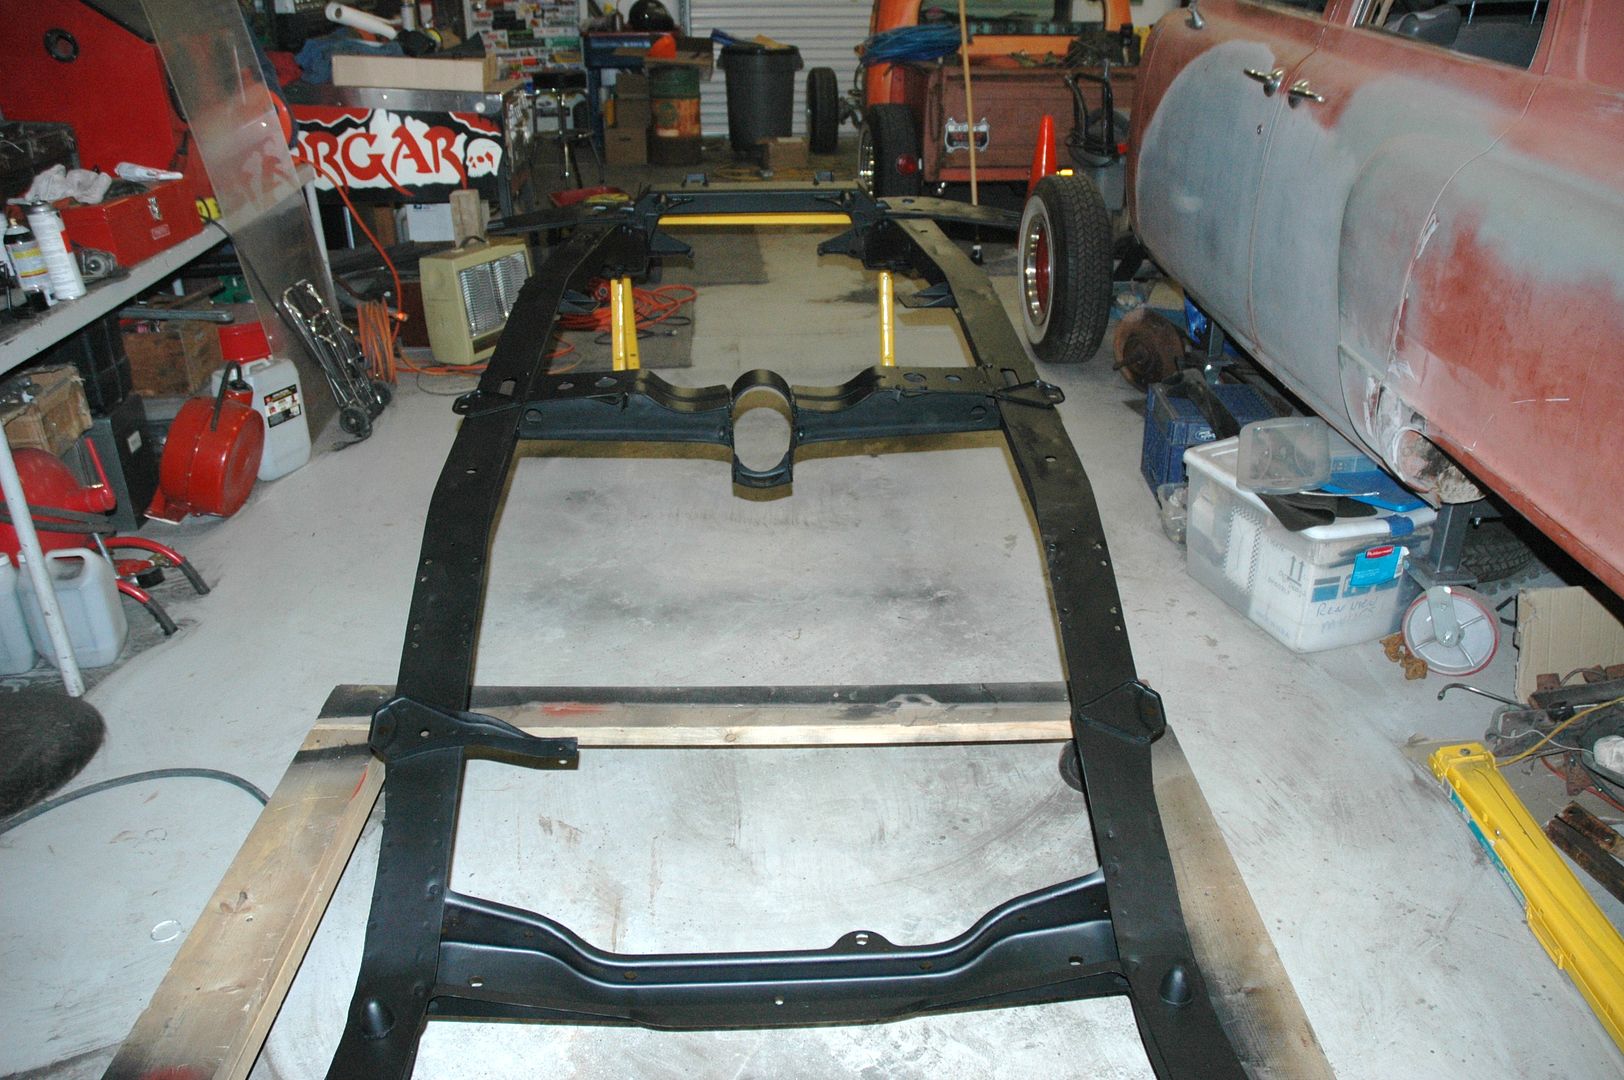
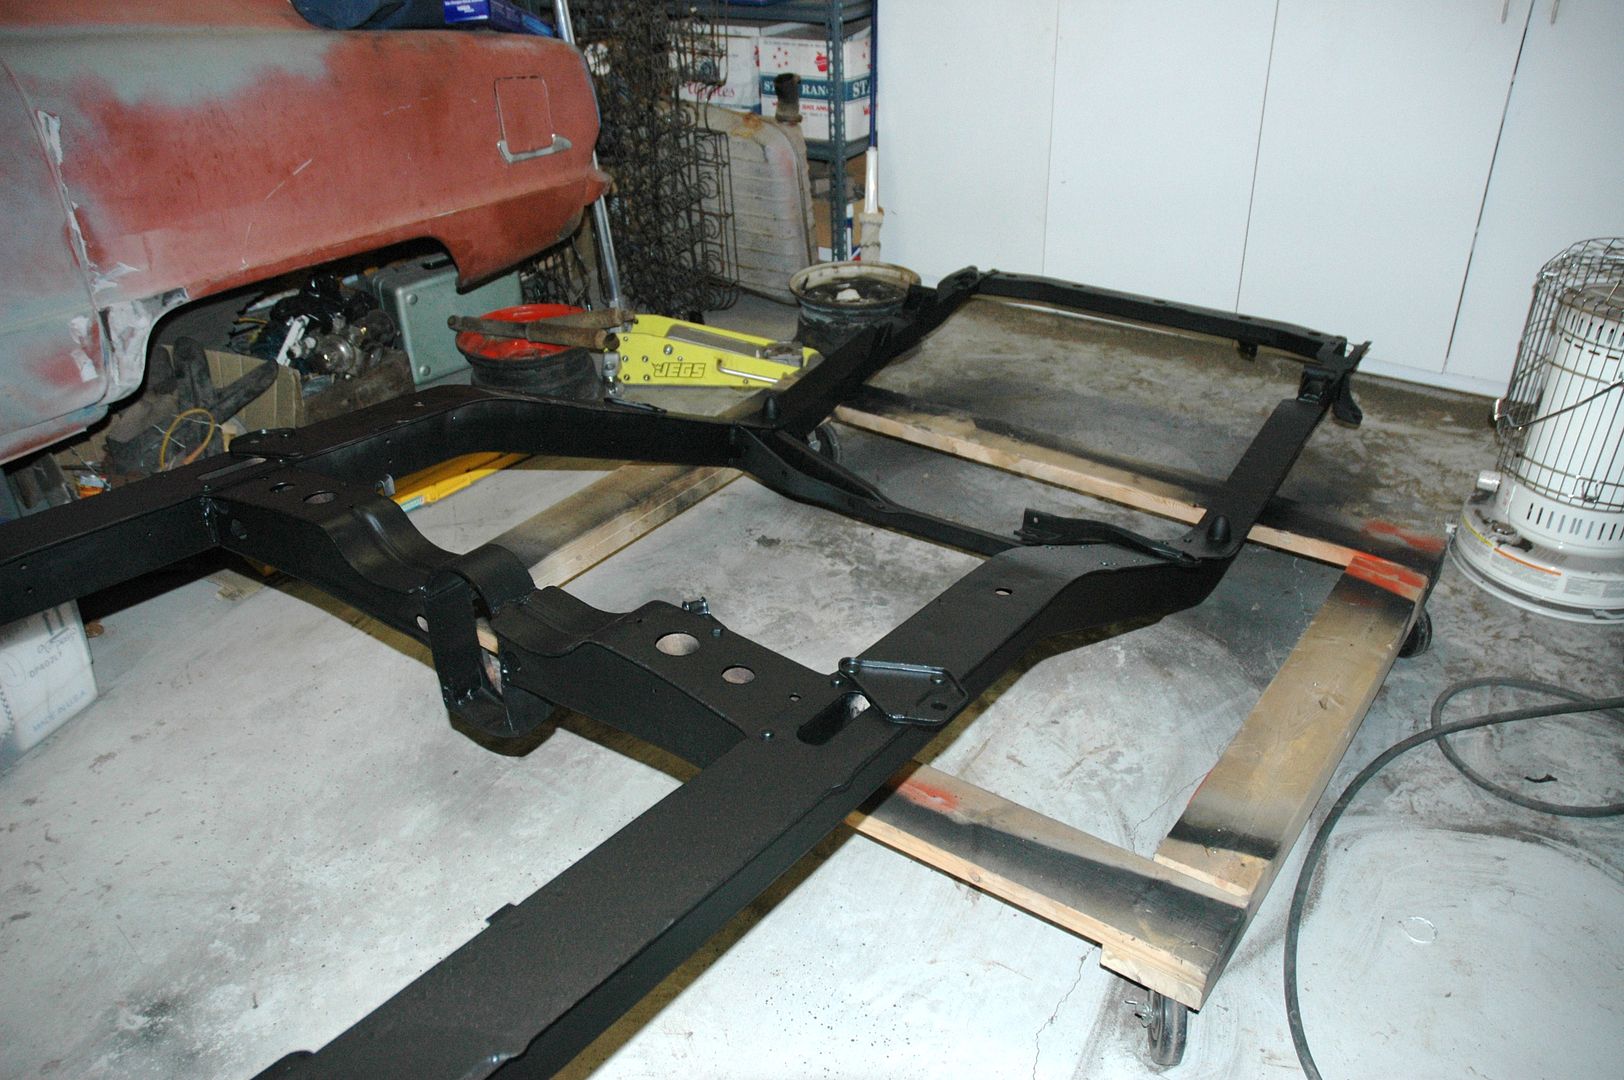
I finished media blasting the frame last weekend. Today I got the bottom half of the frame primered. Went out ot the the shop about 9 am and fired up my 2 heaters by about 2 PM it was almost 60 degrees inisde. High of 26 degrees today and 15 mph winds. Tomorrow I'll flip it over and get the top primered and try to finish it on Monday. Then I'm going to CA for a week. Should have just stayed home and worked on the car!!
I'm using Eastwood Extreme Chassis Black.
Last edited by dmw56; 02-20-2010 at 10:32 PM.
Livin' on Route 66
-
12-26-2009 07:23 PM #24
CHR Member
- Join Date
- Sep 2006
- Location
- New Lenox
- Car Year, Make, Model: 67 Mstg cpe , 37 Ford Coupe
- Posts
- 2,787
Very nice work . Also that car is is some great condition being with the one family so many years .
-
12-30-2009 08:42 PM #25
CHR Member
- Join Date
- Jul 2008
- Location
- Edgewood, New Mexico, United States
- Car Year, Make, Model: 30,34,39,50,54,65,68,70,71,72
- Posts
- 571
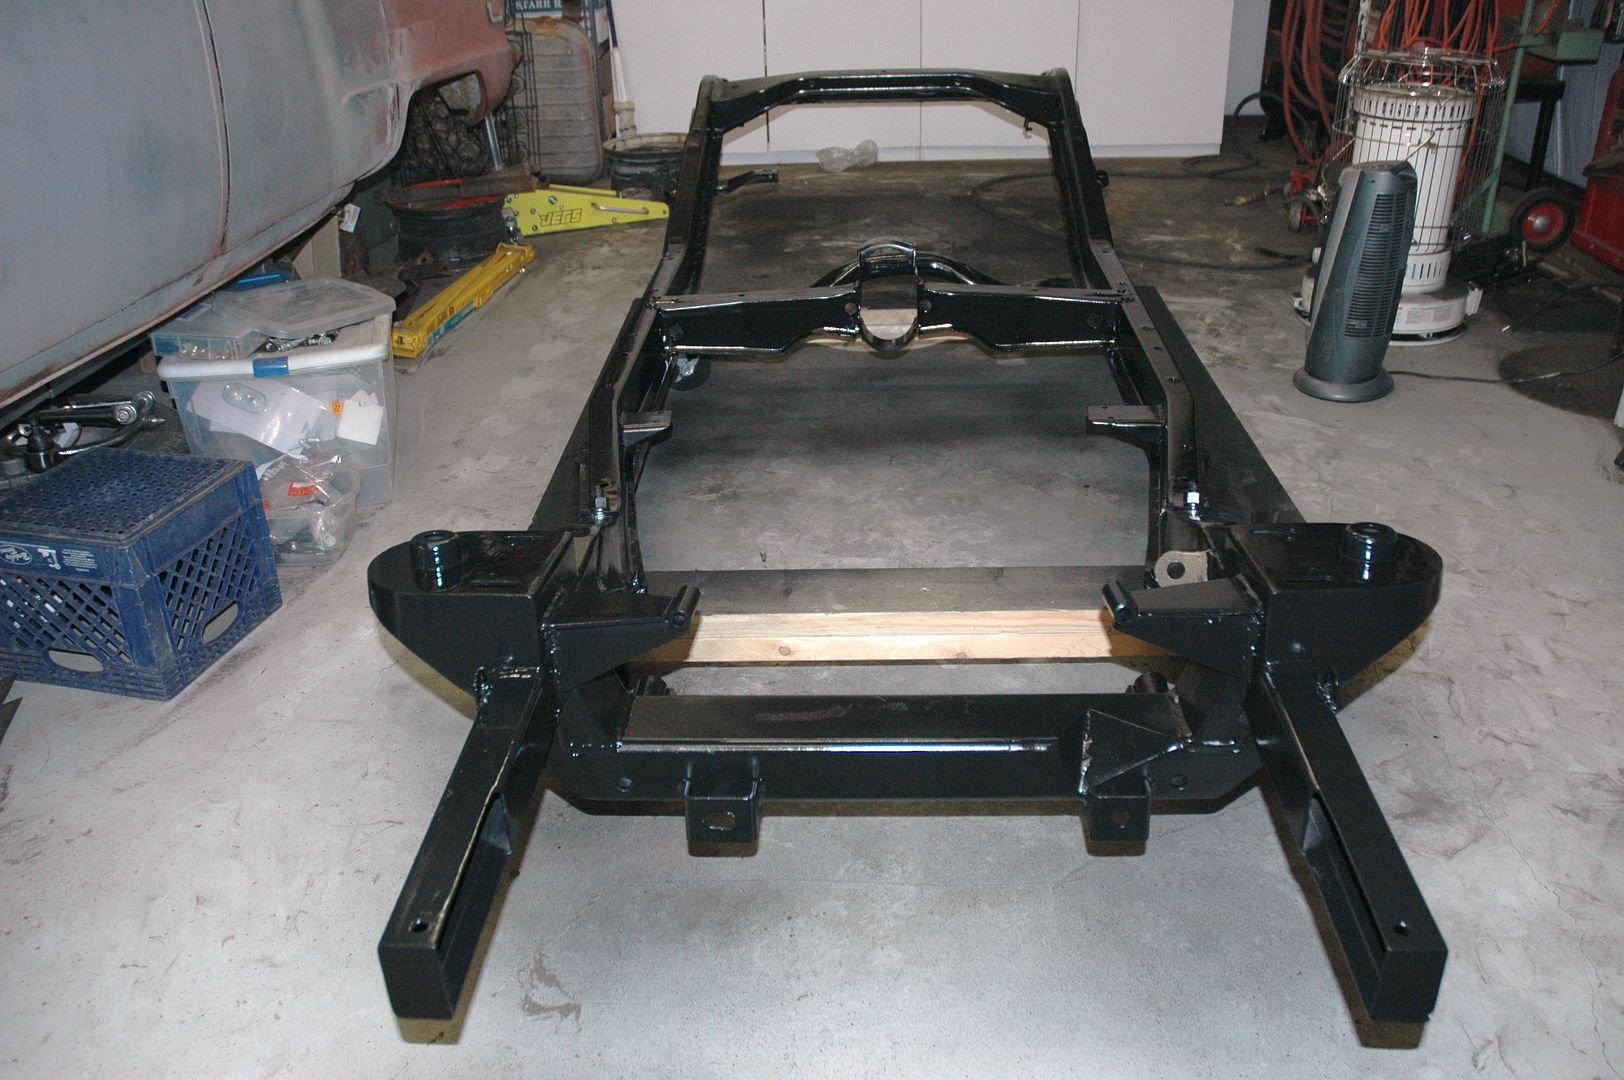
This won't look any different than the other pictures but got the finish coat on the frame.
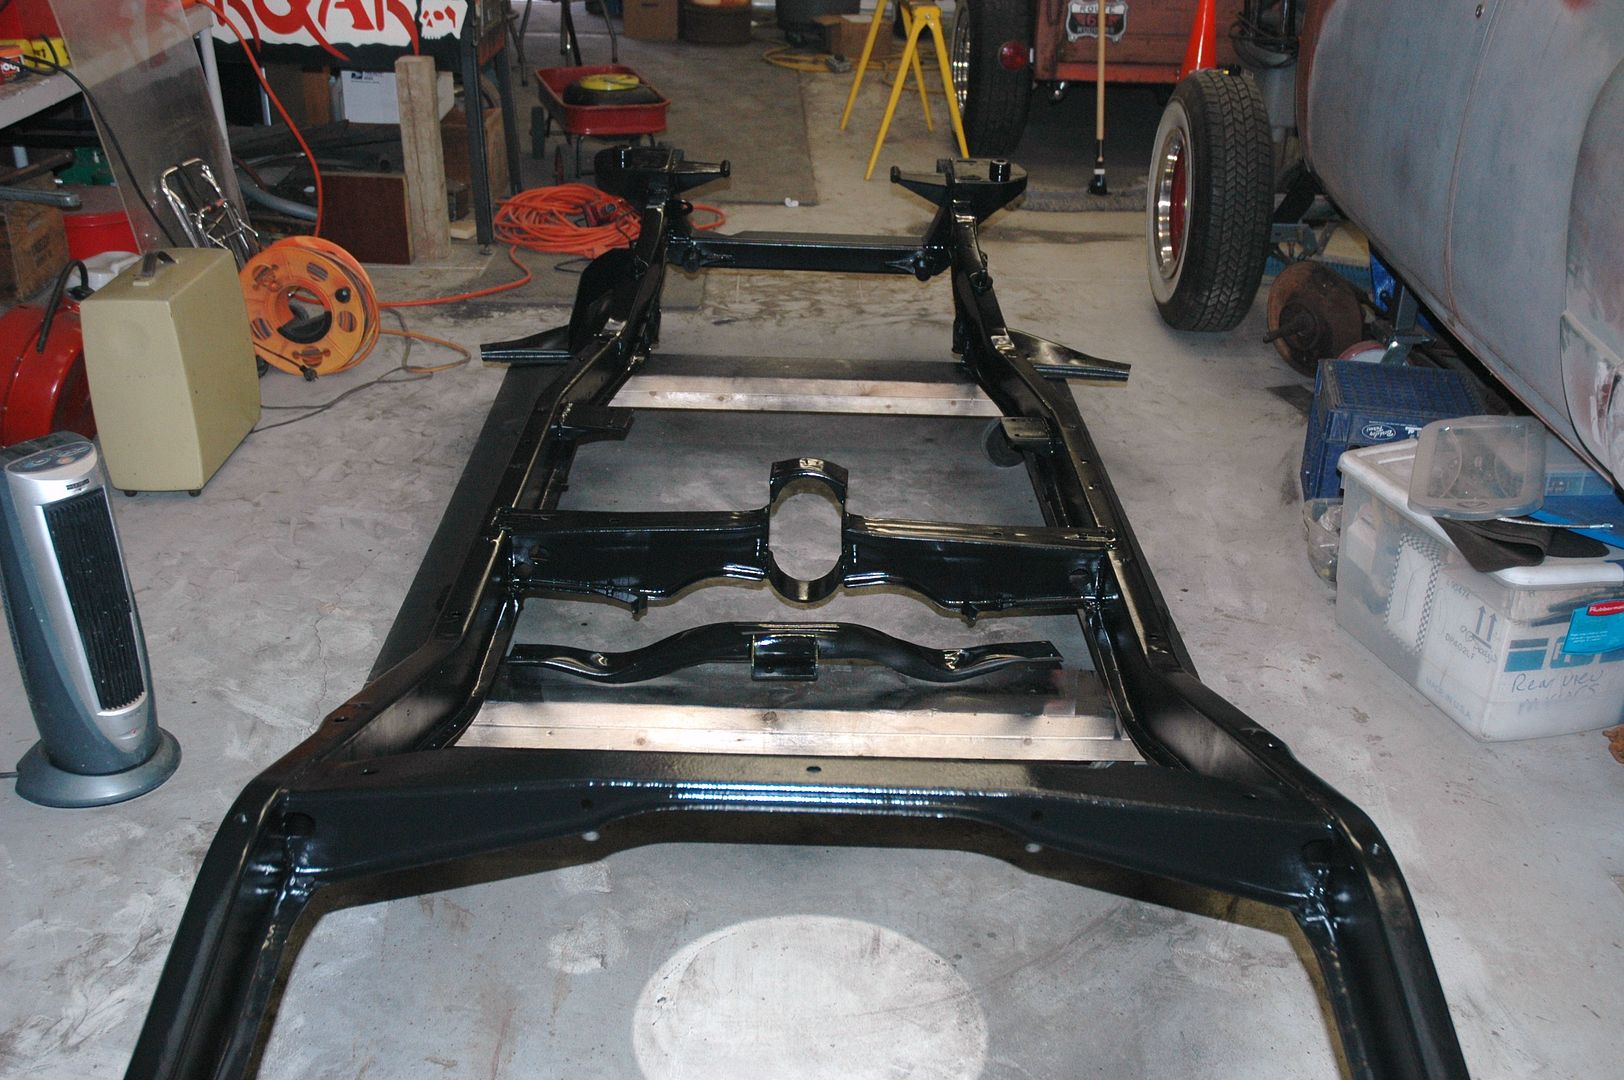
Livin' on Route 66
-
12-31-2009 06:28 AM #26
CHR Member
- Join Date
- Jan 2003
- Location
- Centreville
- Car Year, Make, Model: 35 ford 5 window coupe
- Posts
- 691
looks like a cool build! Is that a drawing of the finished car on the windshield? If so post a picture of it!
'35 Ford coupe- LT1/T56, '32 Ford pickup, 70 GTO convertible, 06 GTO
Robert
-
12-31-2009 03:01 PM #27
CHR Member
- Join Date
- Jul 2008
- Location
- Edgewood, New Mexico, United States
- Car Year, Make, Model: 30,34,39,50,54,65,68,70,71,72
- Posts
- 571
Thank! Originally Posted by 35fordcoupe
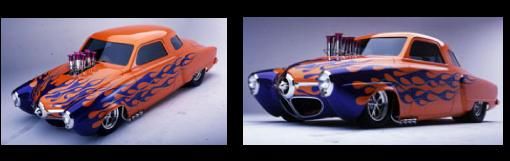
No, not a drawing of my car. Its a photo of the full size Panic Parrot Muscle Machine. It's up there for inspiration!
Livin' on Route 66
-
02-20-2010 07:25 PM #28
CHR Member
- Join Date
- Jul 2008
- Location
- Edgewood, New Mexico, United States
- Car Year, Make, Model: 30,34,39,50,54,65,68,70,71,72
- Posts
- 571
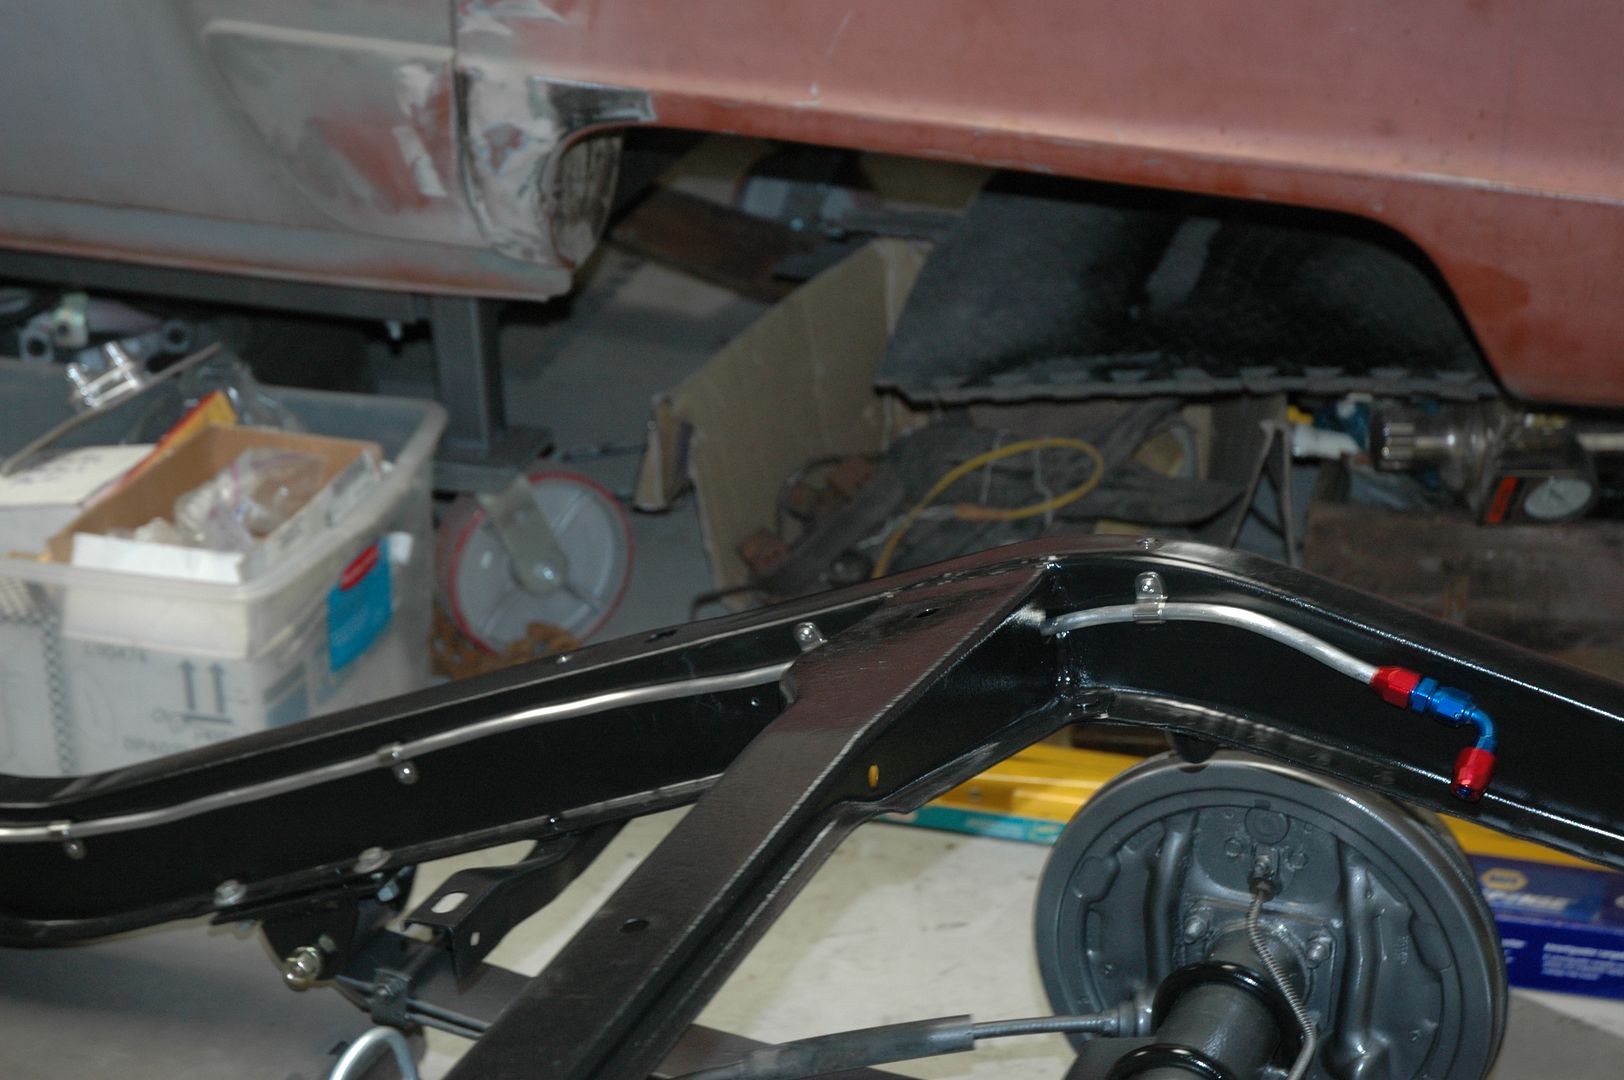
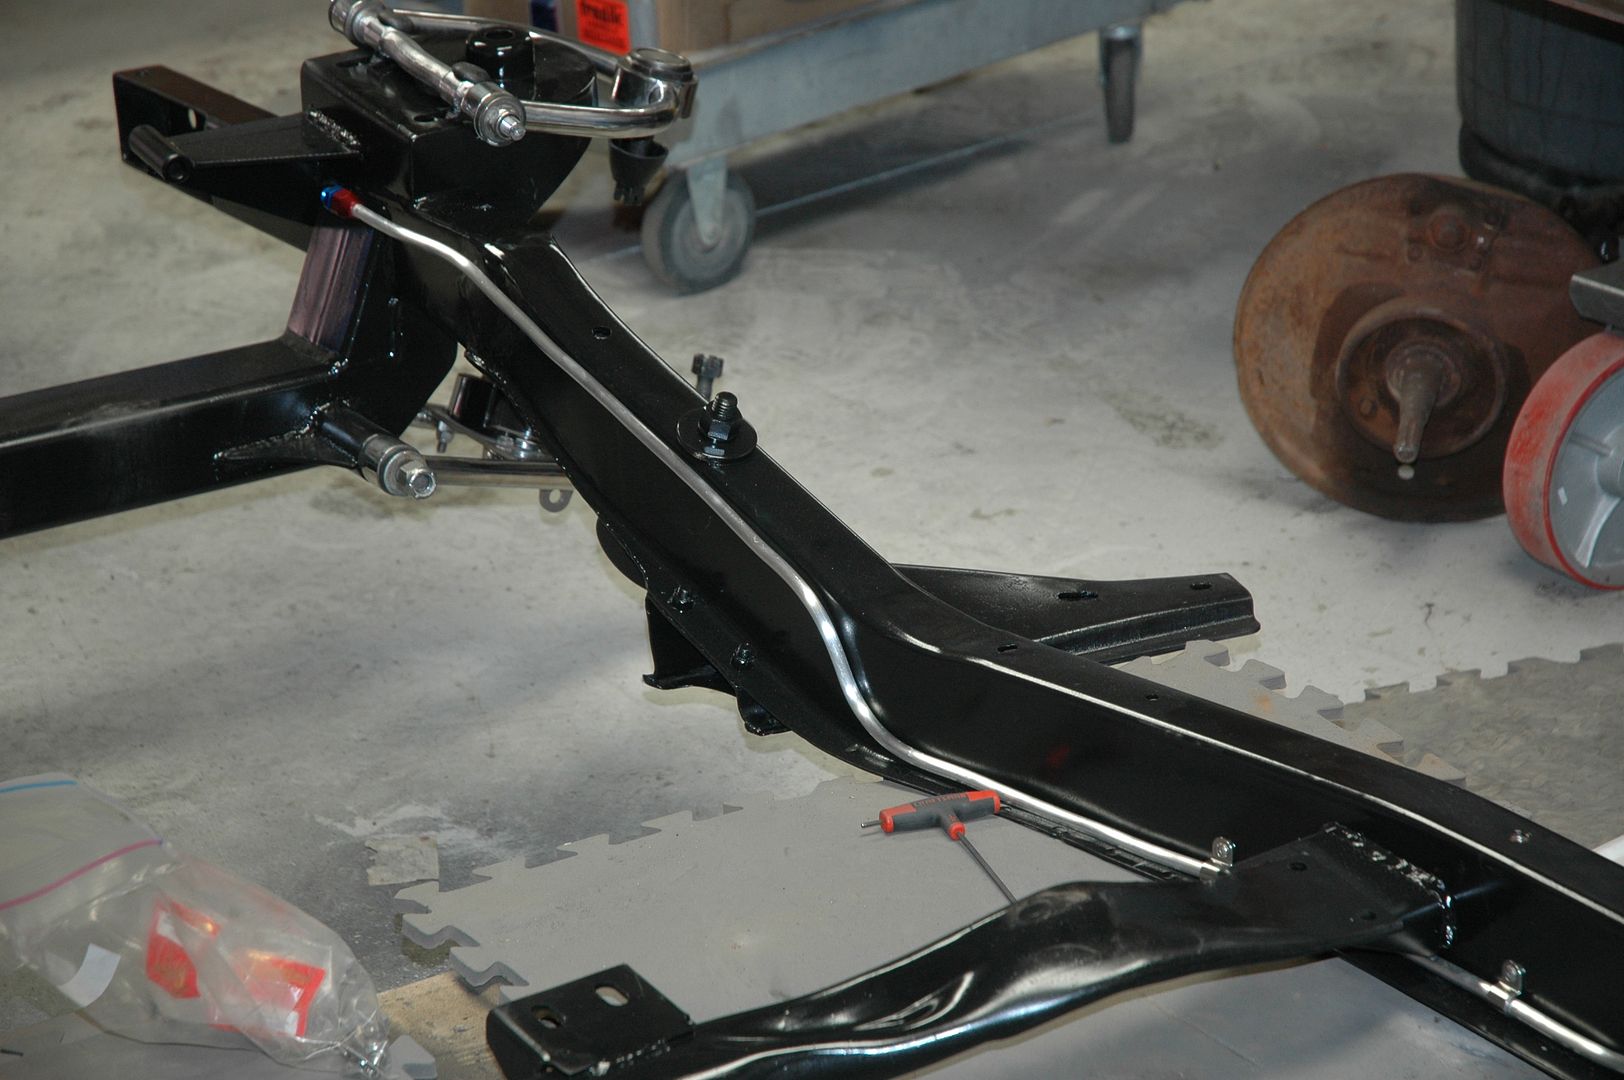
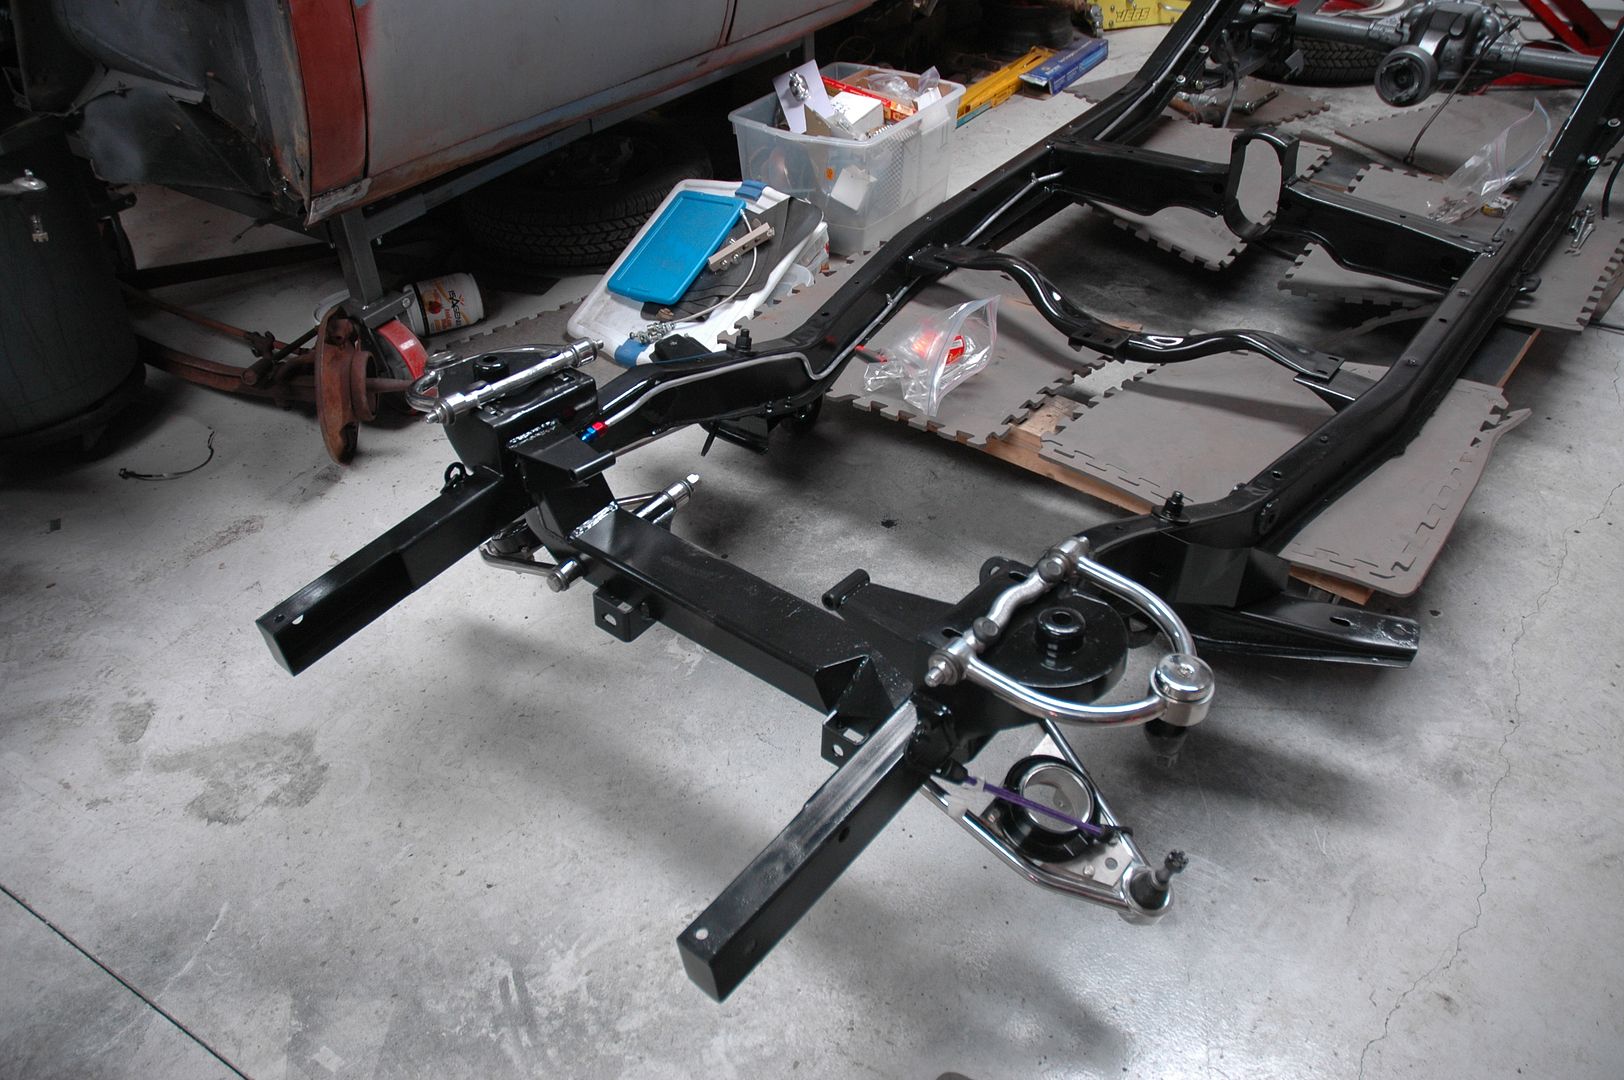
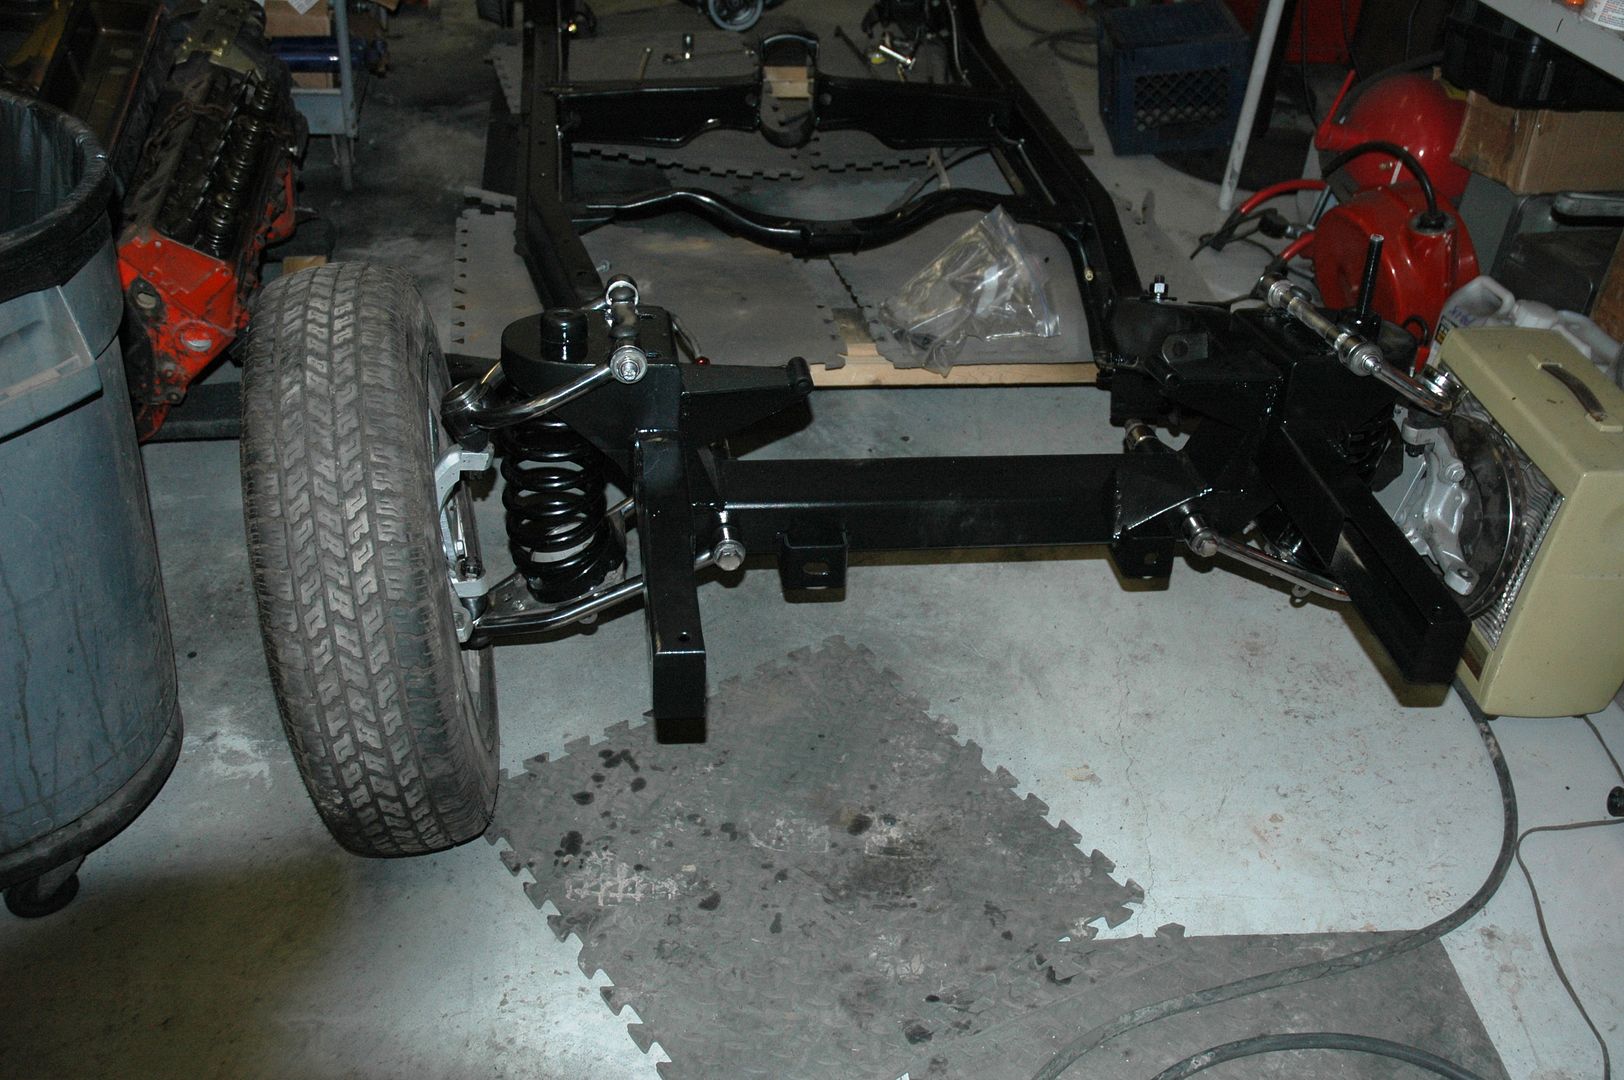
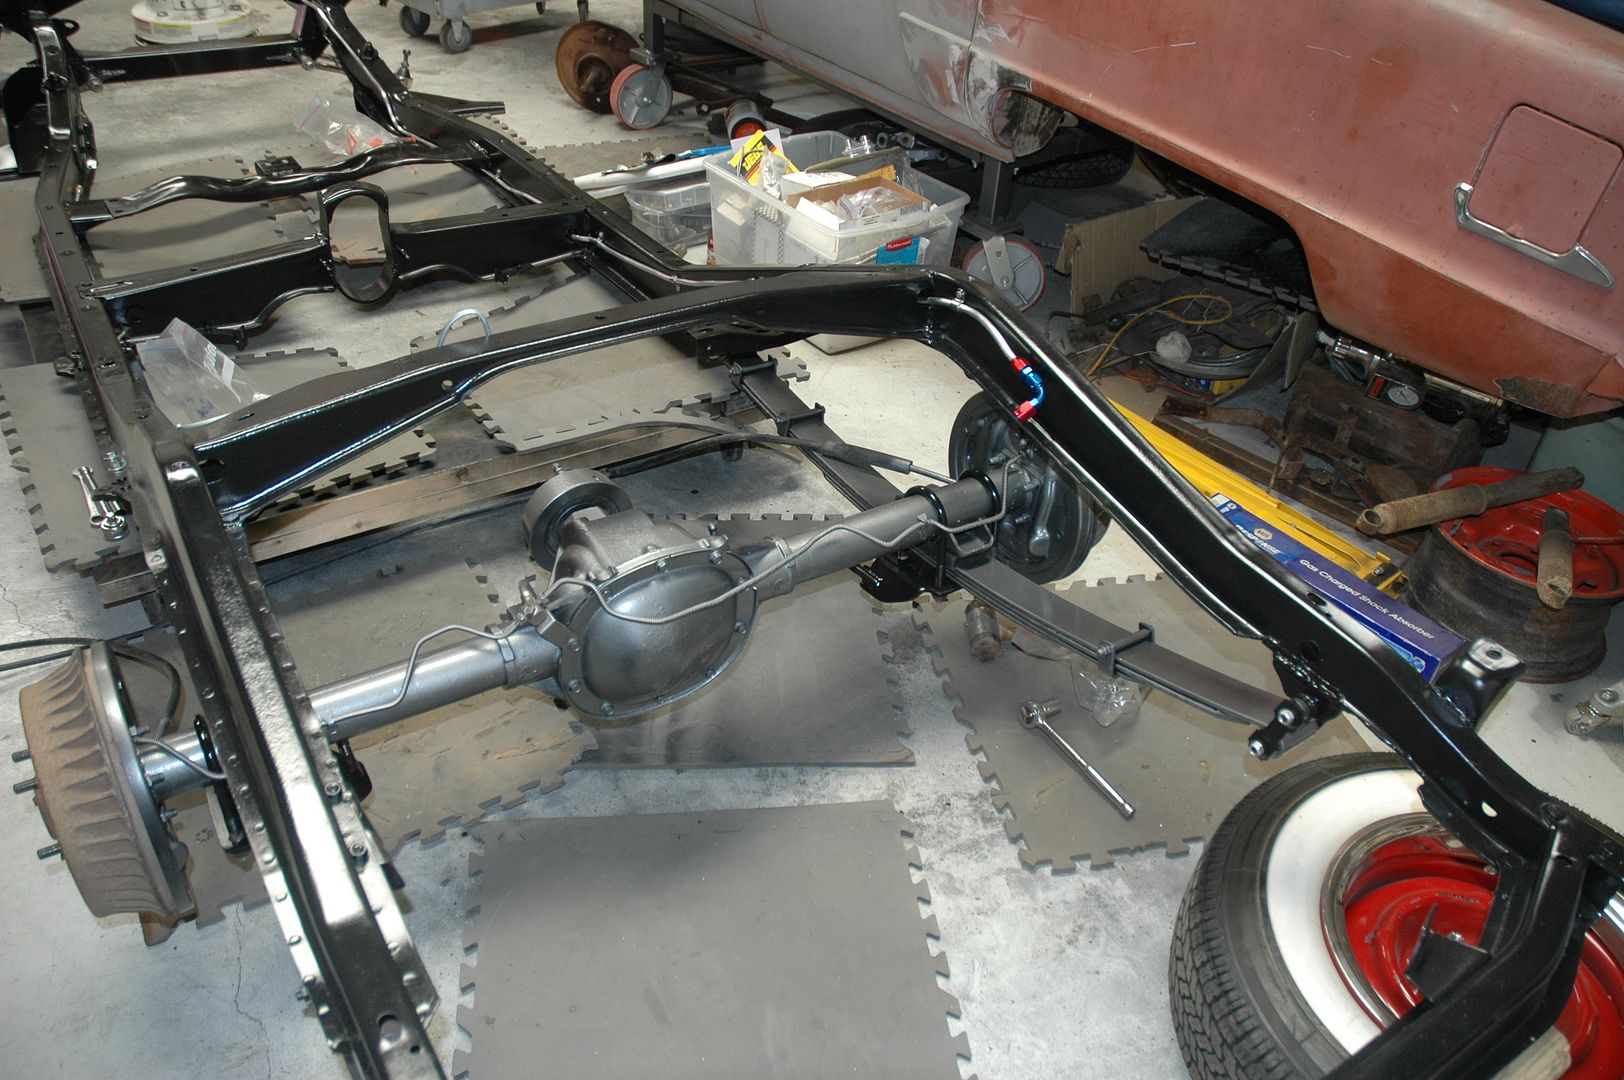
I've started assembling the suspension on the finished fram and running brake and fuel lines.
Livin' on Route 66
-
02-20-2010 07:30 PM #29
CHR Member
- Join Date
- Jul 2008
- Location
- Edgewood, New Mexico, United States
- Car Year, Make, Model: 30,34,39,50,54,65,68,70,71,72
- Posts
- 571
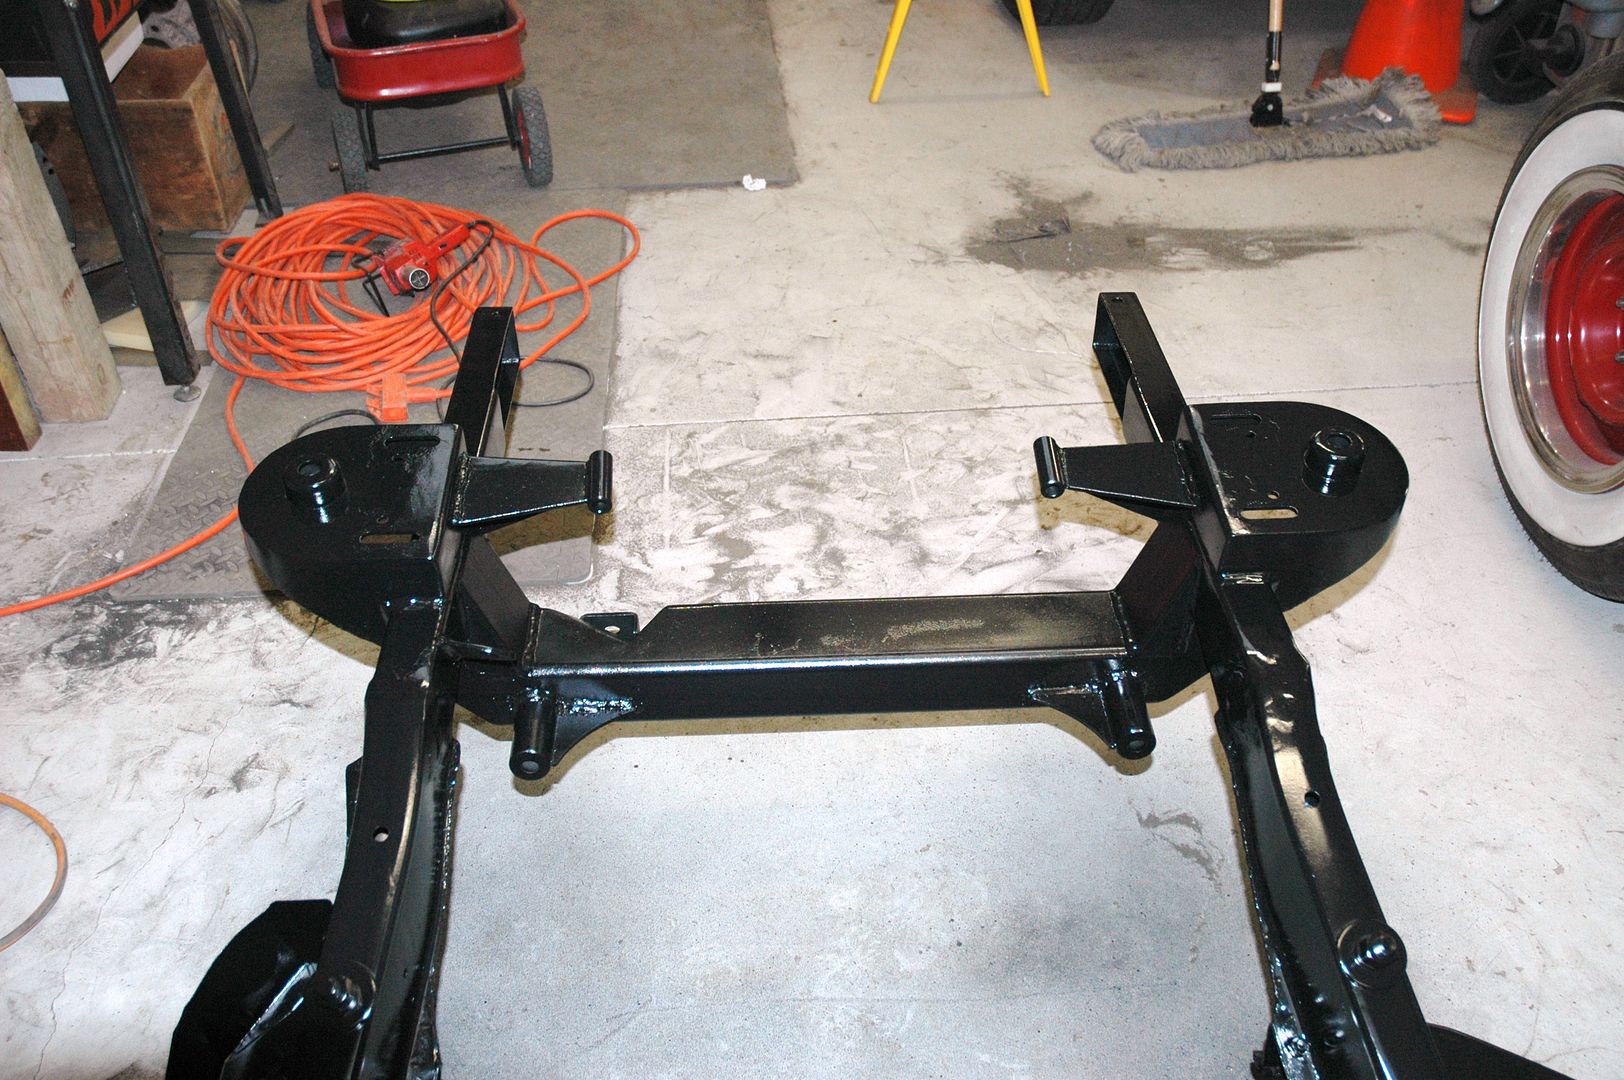
Putting the front suspension together. I cut one coil off the springs and will set the engine in the frame to see how it sits.
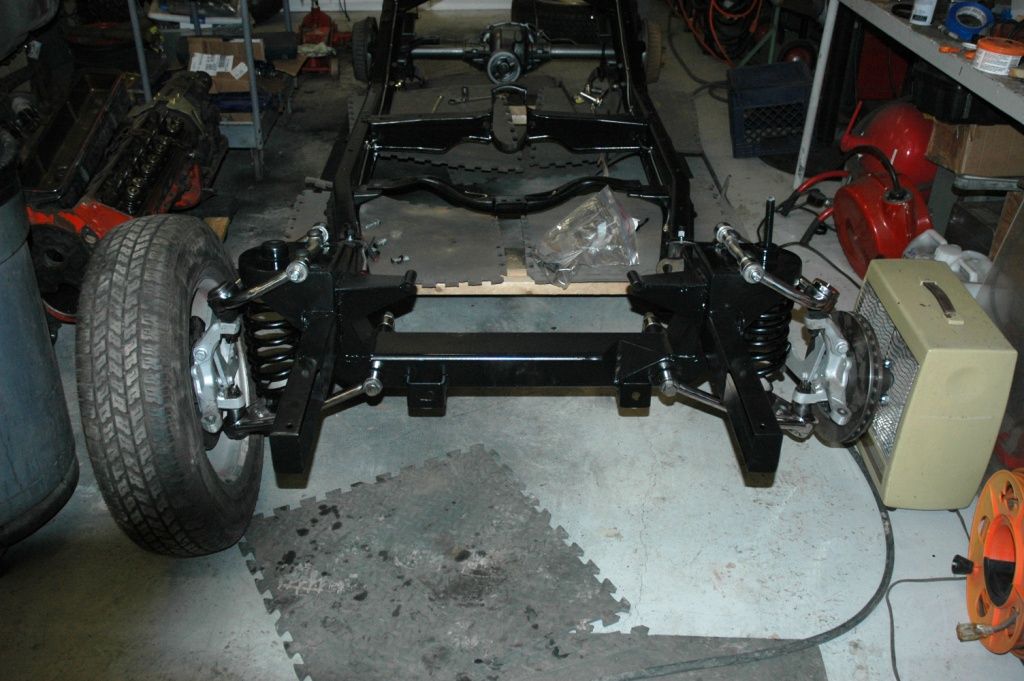
Livin' on Route 66
-
02-20-2010 11:28 PM #30
CHR Member
- Join Date
- Feb 2008
- Location
- Inglewood
- Car Year, Make, Model: 60 F100 truck
- Posts
- 6,339
All kool,I think the Studes are overlooked too often..They look quite mean with the right stance,and they arent belly buttons,..Your car should look pretty nice when finished,with all the detailing..Suppose I should get some more done to my wifes Customline...,but work keeps getting in the way.
Micah 6:8
If we aren't supposed to have midnight snacks,,,WHY is there a light in the refrigerator???
Robin.
 Reply With Quote


Posting Permissions
- You may not post new threads
- You may not post replies
- You may not post attachments
- You may not edit your posts

i've enjoyed the years here . made a lot of friends. most who have left. i see no reason to continue with this so hope to see you somewhere else. i dont think this site will ever be back. it's lived...
Dead!