


Thread: The Roofus Special


Results 61 to 75 of 375
 LinkBack URL
 About LinkBacks
-
04-16-2009 11:02 PM #61
 CHR Member

- Join Date
- May 2003
- Location
- Zephyrhills, Florida, USA
- Car Year, Make, Model: '32 Henway
- Posts
- 12,423
Referring to post 51. The torque arm is attached at the housing with what looks like heims, so you could raise or lower the torque arm at the front of the arm and adjust the heims in or out to keep the housing at the point you want it for correct pinion angle. The two outboard bars also have heims at each end. Those are the ones I was referring to with the LH and RH heims. If you have a RH heim on one end of the bar and a LH heim on the other end of the bar with a large nut drilled out and slipped onto the bar and welded to the bar, you could just loosen the heim jam nuts and turn the welded-on nut to lengthen or shorten the outer bars. Originally Posted by Flipper_1938

If I'm looking at this wrong, tell me and I'll shut up.
-
Advertising

- Google Adsense
- REGISTERED USERS DO NOT SEE THIS AD
-
04-17-2009 06:43 AM #62
CHR Member
- Join Date
- Jul 2003
- Location
- Kentucky
- Car Year, Make, Model: 47 Seagrave
- Posts
- 683
Originally Posted by techinspector1
Sorry, I was referring to the one posted in #53. It is built like a tank.There are two things in life where penetration is really important.....and one of them is welding.
-
04-18-2009 02:04 PM #63
CHR Member
- Join Date
- Jul 2003
- Location
- Kentucky
- Car Year, Make, Model: 47 Seagrave
- Posts
- 683
Damn, I've exceeded my monthly bandwidth allowance for my free photobucket account.
That is the first time it has happened.
I guess I have to wait 12 more days to do an update.There are two things in life where penetration is really important.....and one of them is welding.
-
04-18-2009 05:49 PM #64
CHR Member
- Join Date
- Jul 2003
- Location
- Kentucky
- Car Year, Make, Model: 47 Seagrave
- Posts
- 683
Pictures are back. I upgraded my photobucket account.There are two things in life where penetration is really important.....and one of them is welding.
-
04-19-2009 06:00 PM #65
CHR Member
- Join Date
- Jul 2003
- Location
- Titusville, FL
- Car Year, Make, Model: 31 Ford Coupe; 32 Ford 3-window
- Posts
- 1,793
You don't have to use Photobucket unless you just want to. All you have to do is click on the button "Go Advanced". Scroll down to "Manage Attachments" and load your pics directly to this site & thread. It helps a lot if you resize your pics first to 640 x 480.
Jim
Racing! - Because football, basketball, baseball, and golf require only ONE BALL!
-
04-22-2009 07:36 PM #66
CHR Member
- Join Date
- Jul 2003
- Location
- Kentucky
- Car Year, Make, Model: 47 Seagrave
- Posts
- 683
I've been thinking about what I am going to do to it this weekend....
I think I made it too big. I may narrow and shorten the cowl. It looks really big in some of those pics.
I think I am also going to play with the size of the passenger compartment opening. I think the dash may need to come back...or move the seat up just a little.
Oh, and I think I am going three link on the rear suspension.There are two things in life where penetration is really important.....and one of them is welding.
-
05-02-2009 02:10 PM #67
CHR Member
- Join Date
- Jul 2003
- Location
- Kentucky
- Car Year, Make, Model: 47 Seagrave
- Posts
- 683
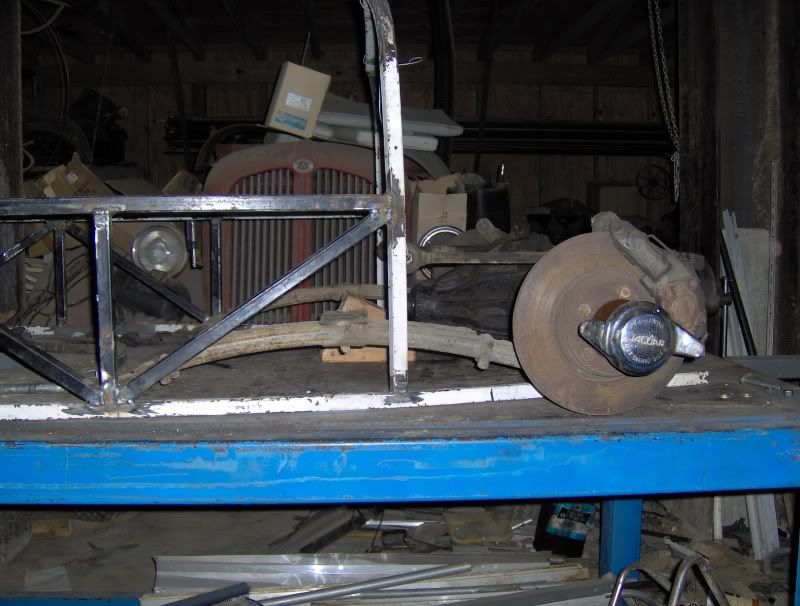
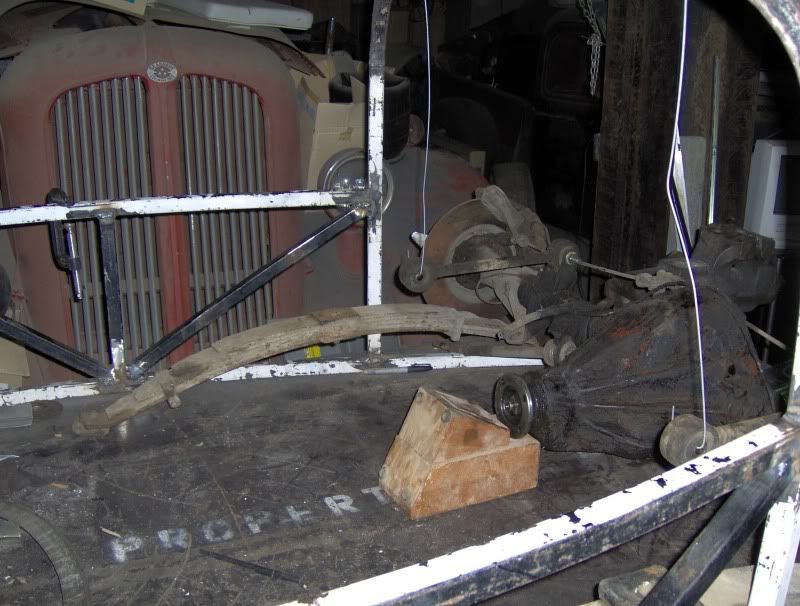
I decided to try and see how the stock jag rear suspension fit. It fits better than I thought it would. I don't think the springs would have cleared the last set of verticle pieces.
Not really sure how the springs are supposed to be mounted. Dad pulled the rear suspension out of the jag. At the time, I had no plans to use anything except the axle. Anybody got any good ideas?
Last edited by Flipper_1938; 05-02-2009 at 02:14 PM.
There are two things in life where penetration is really important.....and one of them is welding.
-
05-02-2009 07:37 PM #68
CHR Member
- Join Date
- Jul 2003
- Location
- Kentucky
- Car Year, Make, Model: 47 Seagrave
- Posts
- 683
So, does anybody have any guesses as to how to hold a spring tight enough in the middle so that it acts like a quarter eliptic, but loose enough that the other quarter of the spring still works?There are two things in life where penetration is really important.....and one of them is welding.
-
05-02-2009 10:15 PM #69
CHR Member
- Join Date
- Nov 2004
- Location
- waldeck
- Car Year, Make, Model: 66 ford custom,27 t bucket
- Posts
- 683
I think the cernter pad fit into a pocket onthe bottom of th chassy and the front would be bolted in. the shackle movement if you could call it that is the rear axle and the upper mount. different setup
I looked at your pics and envisioned a 4 link, using both axle mounts on a staggered mount on the frame and a angled forward coilover like on a older dirtbike.
-
05-03-2009 03:57 AM #70
CHR Member
- Join Date
- Jul 2003
- Location
- Titusville, FL
- Car Year, Make, Model: 31 Ford Coupe; 32 Ford 3-window
- Posts
- 1,793
If memory serves me, I believe that older Jag setup was called "cantilevered leaf springs".")
 Anyway, the center spring perch is mounted on a pivot and the front of the spring is trapped in a bracket on the frame that allows the end to move fore and aft slightly without binding, but not up & down. Everything is mounted in rubber to ensure against squeaks. It works a lot like a quarter-elliptic spring, but the ride is softer and rebound is less "choppy".
Jim
Racing! - Because football, basketball, baseball, and golf require only ONE BALL!
-
05-03-2009 04:47 AM #71
CHR Member
- Join Date
- Jun 2004
- Location
- In the Boonies of Ontario
- Car Year, Make, Model: 40 Graham Sharknose :58 MGA/Ford V6
- Posts
- 1,307
Why not just cut the forward part of the springs off, solidly mount the center part to the frame and use them as quarter elliptics. You probably don't want the soft ride that cantilevered leafs would provide in this type of build anyway, and the "choppy" rebound can be controlled with a good set of shocks. Even those upper control arms could be lengthened to give you, essentially, a four link suspension.
-
05-03-2009 06:51 PM #72
CHR Member
- Join Date
- Jul 2003
- Location
- Kentucky
- Car Year, Make, Model: 47 Seagrave
- Posts
- 683
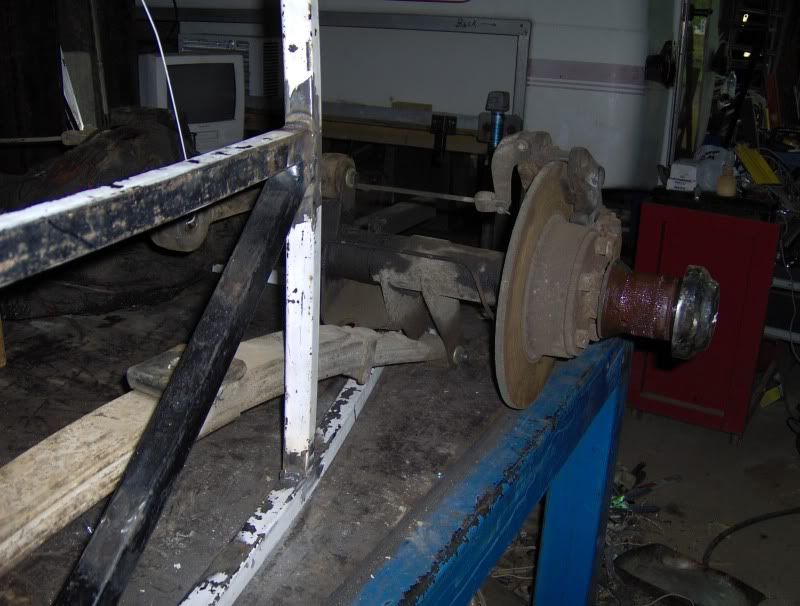
Finally figured out how the stock jag suspension worked....I think.
It pivoted on the lower half of the spring pin. The upper half was mounted in rubber such that the pin couldn't catch anything. as the spring cycled, the top portion of the spring pack could move front to back.
Here is my attempt to immitate the function.

more almost free material was used for my spring boxes. ....cop car roll bars that dad bought at an auction. I used the 1/8" panel at the bottom.
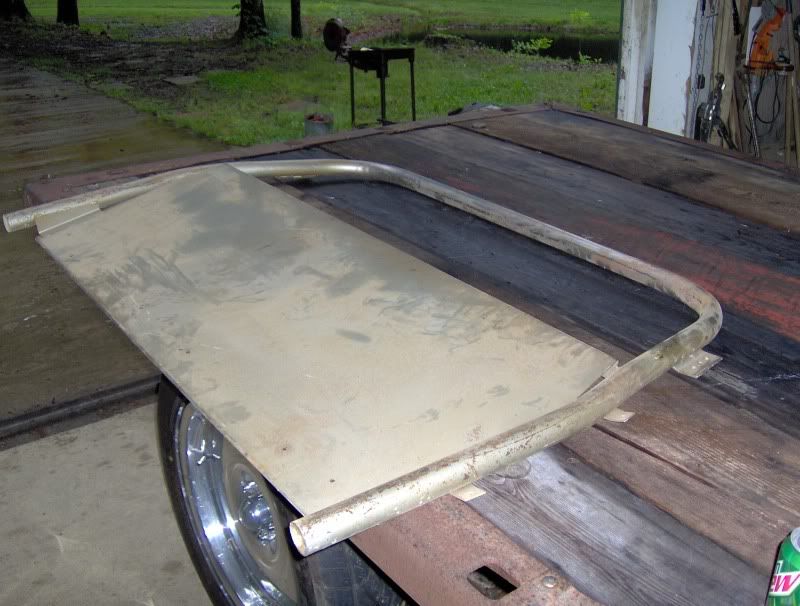
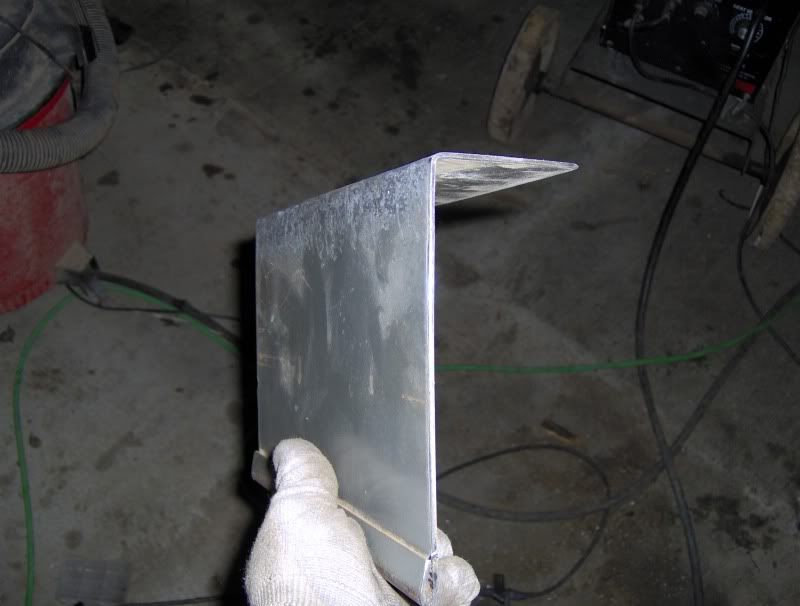
I overlapped the tops so I'd have double thickness on top.
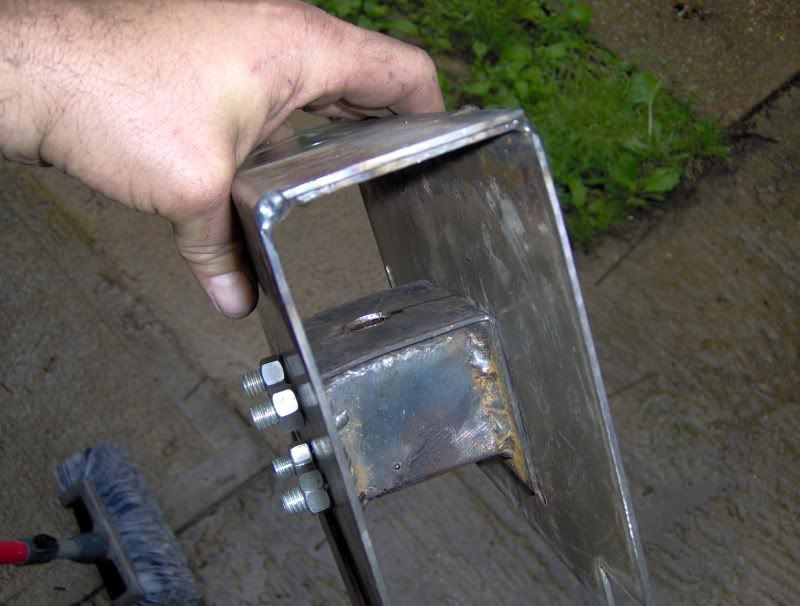
The insert captures the spring pin. It is secured by four 3/8" bolts and really beefs up the spring box when it is all bolted tight.There are two things in life where penetration is really important.....and one of them is welding.
-
05-03-2009 07:07 PM #73
CHR Member
- Join Date
- Jul 2003
- Location
- Kentucky
- Car Year, Make, Model: 47 Seagrave
- Posts
- 683
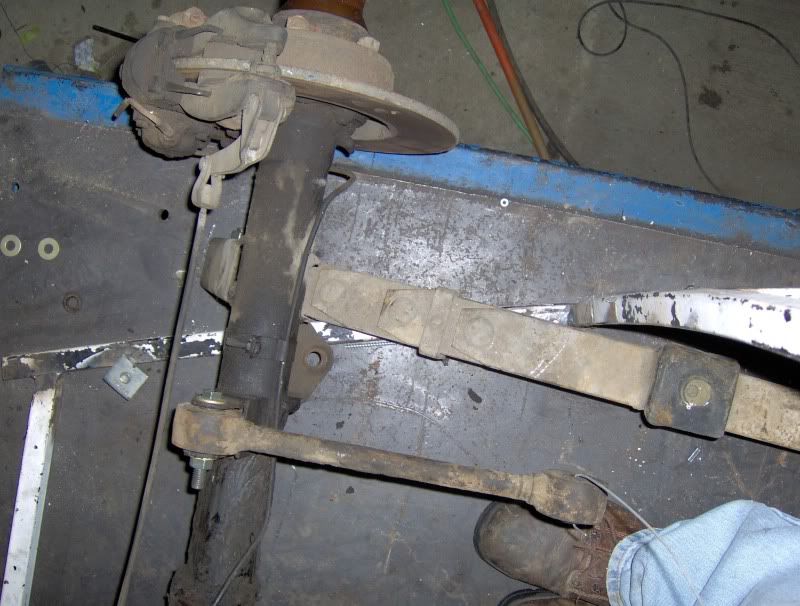
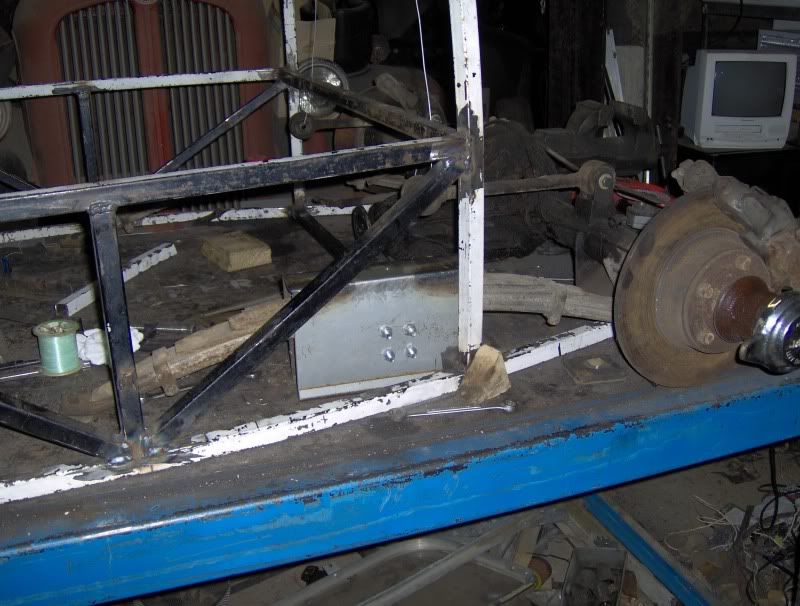
Here's how the box fits into the overall car. The box I just made made will be behind the seat. The front bucket (upside down box) will be under the seat.


Here is a view that shows the eurothane bushing inside the box. It sits over the spring pin.

Still have a lot of figuring out to do. the nuts will be welded to the side of the box to make it easier to re-assemble in a finished car. Need to remeber to keep the bolts accesible when I build more of the rear bulkhead.There are two things in life where penetration is really important.....and one of them is welding.
-
05-03-2009 07:56 PM #74
CHR Member
- Join Date
- Jul 2003
- Location
- Kentucky
- Car Year, Make, Model: 47 Seagrave
- Posts
- 683
Originally Posted by RestoRod
I think the longer leaf will make it easier to distribute the spring loads onto the unibody chassis. Without a "real" frame, it would be hard to build a mount that could handle the torque of a quarter eliptic spring.There are two things in life where penetration is really important.....and one of them is welding.
-
05-03-2009 08:26 PM #75
CHR Member
- Join Date
- Jun 2004
- Location
- In the Boonies of Ontario
- Car Year, Make, Model: 40 Graham Sharknose :58 MGA/Ford V6
- Posts
- 1,307
I guess it would depend on the frame structure and how it is integrated into the unibody. The Austin Healey Sprite/MG Midget used a quarter elliptic rear suspension albeit with much lower HP than you are using. Originally Posted by Flipper_1938
 Reply With Quote

Posting Permissions
- You may not post new threads
- You may not post replies
- You may not post attachments
- You may not edit your posts

Even though I know he won't see this, I still want to wish a Happy Birthday to my best friend, Richard Moore aka techinspector1
Happy Birthday techinspector1