


Thread: madmax nova


Results 1 to 15 of 41
 LinkBack URL
 About LinkBacks
-
03-22-2009 04:26 PM #1
 CHR Member

- Join Date
- Sep 2005
- Location
- Hamilton
- Car Year, Make, Model: 69 nomad, 73 charger, 74 vega
- Posts
- 3,900
madmax nova
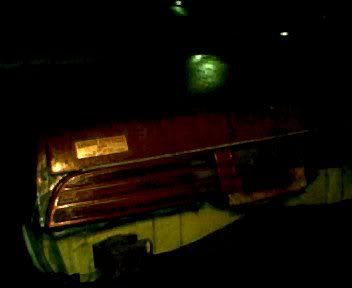
OK, so I got the six headlights installed in the 76 nova. The extras aren't wired yet. Going to put them all on a relay fired off the highbeam circuit, probably straight off the battery for convience.
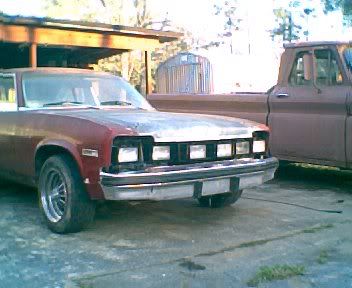
Everyone whom looks at it says MAD MAX.
.
Education is expensive. Keep that in mind, and you'll never be terribly upset when a project goes awry.
EG
-
Advertising

- Google Adsense
- REGISTERED USERS DO NOT SEE THIS AD
-
03-22-2009 05:05 PM #2
CHR Member
- Join Date
- Apr 2007
- Location
- West Point, Virginia, United States
- Car Year, Make, Model: 1971 monte carlo
- Posts
- 2,772
now thats cool.BARB
LET THE FUN BEGIN
-
03-22-2009 05:14 PM #3
CHR Member
- Join Date
- Nov 2004
- Location
- waldeck
- Car Year, Make, Model: 66 ford custom,27 t bucket
- Posts
- 683
And whats wrong with that
Now faba aluminum grill head light filler assy and away you go, Maybe checkerplate
-
03-22-2009 05:39 PM #4
CHR Member
- Join Date
- Mar 2005
- Location
- Midland park
- Car Year, Make, Model: 48 Ford Conv,54 Ford Vict
- Posts
- 193
????? Why
-
03-22-2009 06:07 PM #5
CHR Member/Contributor
- Join Date
- Jul 2003
- Location
- Madison
- Car Year, Make, Model: '67 Ranchero, '57 Chevy, '82 Camaro,
- Posts
- 21,160
Looks like lots of tickets and cop hassles to me......Yesterday is history, tomorrow is a mystery, Live for Today!
Carroll Shelby
Learning must be difficult for those who already know it all!!!!
-
03-23-2009 07:18 PM #6
CHR Member
- Join Date
- Jul 2006
- Location
- Gulf Coast, Ms.
- Car Year, Make, Model: 37 Chevy coupe Gasser/ 51 Chevy Bel Air
- Posts
- 464
What the......Oh nevermind......
Trust everyone once. Just be cautious of what may be lost.

-
03-23-2009 09:20 PM #7
CHR Member
- Join Date
- Sep 2005
- Location
- Hamilton
- Car Year, Make, Model: 69 nomad, 73 charger, 74 vega
- Posts
- 3,900
Im am thinking a couple of rocker switches would be good.. one switch fires them all in series, the other fires them parallel... low/hi sweet.
Education is expensive. Keep that in mind, and you'll never be terribly upset when a project goes awry.
EG
-
04-02-2009 11:26 PM #8
CHR Member
- Join Date
- Sep 2005
- Location
- Hamilton
- Car Year, Make, Model: 69 nomad, 73 charger, 74 vega
- Posts
- 3,900
Ok, so the headlights aren't wired up yet, but I am pushing to get it on the road.
TO WIT:
tail lights. The old ones are a mess, and replacements aren't in the budget. On ebay, a ratty set will go for $80. Anyway, the sockets are bad, the buckets are dry rotted and deteriorated. the lenses are melted from bulb heat, and the left is busted up to boot. BUT.. I have the firebird the wife wrecked as a donor car, so off we go!
The trunk pan is a mess..
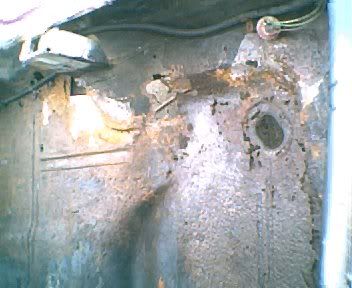
but I'll address that later.
There was a lot of bondo and great stuff ( foam ) all around the seal channel, and of course the channel was totally rotted out. So that came out first. I'll pull the front seal channel off the bird's trunk and weld it in. come to think of it, the little sail panel in front of the trunk lid will work nicely for donor steel. The steel around the left side tail light was pretty rotten too. Lucky I won't be needing it.
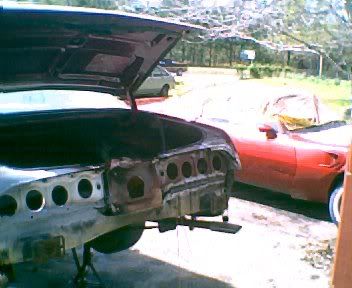
First thing, stripped down the rear ends of the nova and the firebird, to get a better look at what's what. Then, I cut out the tail panel from the bird. Then I cut a preliminary hole for installing them into the nova.
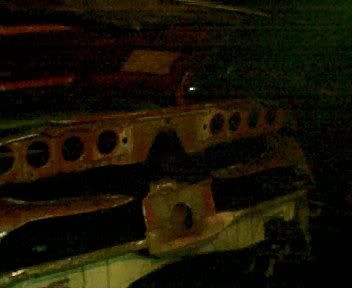
Next, more cutting as I got a better idea of how it was going to work. Then I got to do some welding. Lucky me, the acetylene was running out just as I was finishing up. Not that it's done, I need some little odd pieces of donor steel to finish it out.
Not bad. thought I was going to have to notch the trunk lid, but it seems to clear. At least for now.. the trunk lid is too far back on the hinges, will have to adjust it right and see if it still clears. Ok, one side is in.. and the other side should go a little quicker!.
Education is expensive. Keep that in mind, and you'll never be terribly upset when a project goes awry.
EG
-
04-09-2009 01:41 PM #9
CHR Member
- Join Date
- Sep 2005
- Location
- Hamilton
- Car Year, Make, Model: 69 nomad, 73 charger, 74 vega
- Posts
- 3,900
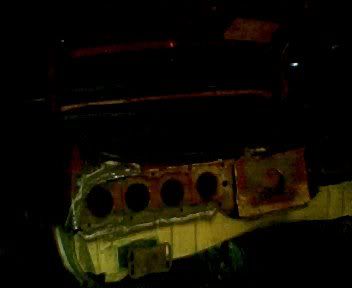
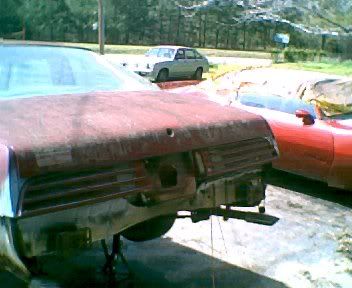
Man what a chore this is turning out to be. Thought I had the lights in nice and straight, but nope. They both angled down some, and the pass side was way off. Didn't know how the heck I got it so messed up. Decided to go ahead and adjust the trunk lid in, just to see if I would have to slot out for the tail lights. discovered that the quarter panels had leaned in when I cut everything loose. Either that, or they were already misadjusted from some repair / damage in the past, as the trunk lid was adjusted almost an inch too far back. Just knew that gap at the rear window looked odd.
SO I cut them both loose, and stretched the quarters back into position, and welded them back up. I was happy with the drivers side, but the pass still got skewed. Two more tries and I think I can live with it. Not that it is perfect by any means.. If I were to do it over again, I would have taken the extra work to put the tail panel in as one piece, and of course, BRACED THE QUARTERS before I started cutting. But then again, judging by the adjustment of the trunk lid, they were off anyway.
SO.. here is the latest effort.
I would like to be out there right now, piecing in around the donor sections, but the sun is really cooking me. Got a pretty good sunburn as it is..
Education is expensive. Keep that in mind, and you'll never be terribly upset when a project goes awry.
EG
-
04-09-2009 01:44 PM #10
CHR Member
- Join Date
- May 2003
- Location
- Zephyrhills, Florida, USA
- Car Year, Make, Model: '32 Henway
- Posts
- 12,423
That's why they make long-sleeve shirts and wide-brim straw hats.
-
04-10-2009 09:13 PM #11
CHR Member
- Join Date
- Sep 2005
- Location
- Hamilton
- Car Year, Make, Model: 69 nomad, 73 charger, 74 vega
- Posts
- 3,900
Weld sparks and straw hats are a bad combination. Originally Posted by techinspector1

.
Education is expensive. Keep that in mind, and you'll never be terribly upset when a project goes awry.
EG
-
04-12-2009 10:20 PM #12
CHR Member
- Join Date
- Sep 2005
- Location
- Hamilton
- Car Year, Make, Model: 69 nomad, 73 charger, 74 vega
- Posts
- 3,900
Today I went to trace-and-splice in the tail harness from the 78 firebird into the 76 nova. Low and behold -- it just plugged right in, and everything works fine! Well, after I replaced two bulbs, and adjusted the bottom contact on one socket, that is. The nova licence plate light is in the trunk lid, and won't be needed now, so I didn't splice into the harness to wire it back in. Instead, I used the socket to fix the front side lamp, drivers side..
Education is expensive. Keep that in mind, and you'll never be terribly upset when a project goes awry.
EG
-
04-22-2009 02:15 PM #13
CHR Member
- Join Date
- Sep 2005
- Location
- Hamilton
- Car Year, Make, Model: 69 nomad, 73 charger, 74 vega
- Posts
- 3,900
Since the trunk pan holds 20 gallons of fuel weight, I decided to address this next. First, cut out all the rot.
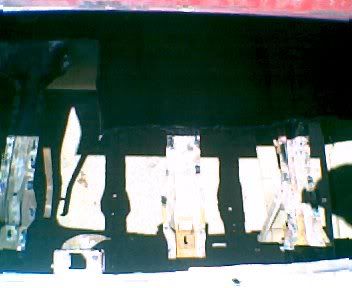
Trunk rails look good, but frame rail on pass side will need a few small patches. Probably should have done that first, would have been easier, but I got impatient to get the trunk patched up. Have some 16GA sheet sitting around, so I cut a patch and got it spot welded in. What would be a good caulk for the seams?
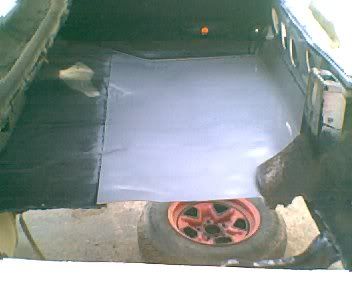
The 16 GA is tough to shape, but easy to weld..
Education is expensive. Keep that in mind, and you'll never be terribly upset when a project goes awry.
EG
-
04-24-2009 10:52 AM #14
CHR Member
- Join Date
- Sep 2005
- Location
- Hamilton
- Car Year, Make, Model: 69 nomad, 73 charger, 74 vega
- Posts
- 3,900
Piecing it together. Would be nice if I had a metal brake. Maybe one day.
Meantime, I'm piecing it together. One strip left..
Education is expensive. Keep that in mind, and you'll never be terribly upset when a project goes awry.
EG
-
04-24-2009 12:52 PM #15
CHR Member
- Join Date
- Apr 2007
- Location
- West Point, Virginia, United States
- Car Year, Make, Model: 1971 monte carlo
- Posts
- 2,772
keep the pictures coming. really enjoying this build.BARB
LET THE FUN BEGIN
 Reply With Quote

Posting Permissions
- You may not post new threads
- You may not post replies
- You may not post attachments
- You may not edit your posts

i've enjoyed the years here . made a lot of friends. most who have left. i see no reason to continue with this so hope to see you somewhere else. i dont think this site will ever be back. it's lived...
Dead!