


 4Likes

Results 151 to 165 of 334
 LinkBack URL
 About LinkBacks
Hybrid View
-
07-24-2008 05:48 PM #1
 CHR Member

- Join Date
- Oct 2007
- Location
- Petaluma
- Car Year, Make, Model: 48 Ford F1
- Posts
- 9,794
I have to run super bright 1157's in the Harley tail light. It has a thick glass lens on the tombstone tail light, that cars can't seem to see, when I'm braking during the daylight. I tried a led bulb that cost 29 bucks for a replacement, but same,problem, so now I just use the super brights, and carry a spare as the vibration of the softtail seems to eat bulbs! Originally Posted by J. Robinson

"  "No matter where you go, there you are!" Steve.
-
06-20-2008 07:11 PM #2
CHR Member
- Join Date
- Mar 2004
- Location
- west plains
- Car Year, Make, Model: '48 chev Stylemaster
- Posts
- 1,390
Hot Rod the car is looking fantastic, minor things to finish aside you should be very proud of a finely built car that looks really cool, well done.
How tall is Dan, Don? I am thinking that is him in that shot? Fine shot by the way! I am curious pushing 6'2" myself and wider every year how low a big feller can seat himself in a T body. We have bugs here that will knock your head off at 60 mph and they fly in swarms! June bugs alone are the size of marbles! I love the way you are seated in yours Don.Last edited by brickman; 06-20-2008 at 07:23 PM.
"Sunshine, a street rod and a winding beautiful Ozarks road is truely Bliss!"
-
07-24-2008 05:42 PM #3
CHR Member
- Join Date
- Feb 2007
- Location
- Vidalia
- Car Year, Make, Model: 1946 Ford Coupe, 1962 Austin Healey 3000
- Posts
- 1,508
Well, the machine shop called today with some bad news.
The block for the 283 that I was going to use is bad. There are some rust pits in a couple of cylinders that probably won't clean up at .060 over.
I know that .120 was acceptable years ago, but I really don't want to take a chance on that much overbore.
I'm going back to the original plan and use the 350 I have. It will have a late model Vortec roller cam block and early camel hump heads. I had trouble finding a decent pair of Vortec heads. They might flow good, but the Vortecs have to be the weakest heads Chevrolet ever made! I'm going to use a mild roller cam(Comp XE258HR).
Too bad, I think the 283 would have been perfect.
-
07-24-2008 06:23 PM #4
CHR Member
- Join Date
- Jul 2003
- Location
- Titusville, FL
- Car Year, Make, Model: 31 Ford Coupe; 32 Ford 3-window
- Posts
- 1,793
Mike,
Years ago, 283's were commonly bored .125" over to make what we called a 301. They were commonly used in sprint cars, dirt track modifieds, and all kinds of drag racing classes (as well as on the street). The 283 had enough meat in the block to withstand the 1/8" overbore with no adverse effects and little if any increased cooling problems. The short 3" stroke made them real screamers; with a good balance job, they were consistenly wound up to 7,000 rpm with a stock bottom end!  I've been told a large number of 265's and 283's had forged crankshafts.
If you do the math, it actually figures out to 301.66 cubic inches. When Chevrolet finally did what hotrodders had been doing for years, they called it a 302... (1968 - 69 Z-28 Camaro)") Look at it this way - .125" over pistons cost about the same as .060" over pistons... On the other hand, parts for a 350 are the least expensive of all... If I lived closer, I'd take that 283 off your hands; I love those things...
Look at it this way - .125" over pistons cost about the same as .060" over pistons... On the other hand, parts for a 350 are the least expensive of all... If I lived closer, I'd take that 283 off your hands; I love those things...
Jim
Racing! - Because football, basketball, baseball, and golf require only ONE BALL!
-
07-24-2008 07:05 PM #5
CHR Member
- Join Date
- Jul 2008
- Location
- Loveland
- Car Year, Make, Model: 1929 Ford AA; 1927 Ford roadster
- Posts
- 81
Originally Posted by J. Robinson
I agree, in mid 60's my brother had one in his daily '55. Only thing back then was the stock starter would not start it after motor warmed up. I think he ran 12.5:1 comp. (this was long before high torque starters). A co-worker used one in a modified production '60 vette drag car. those motors would scream.
Some of the blocks would not pass the .125 bore, almost all would however. I'd bore it out if it was mine. One of the best small block setups going. One of the reasons Chevy went that way for the Z-28.Last edited by OFT; 07-24-2008 at 08:44 PM.
-
07-25-2008 01:36 AM #6
CHR Member
- Join Date
- Feb 2007
- Location
- Vidalia
- Car Year, Make, Model: 1946 Ford Coupe, 1962 Austin Healey 3000
- Posts
- 1,508
I'm still not convinced that this block is that bad. I'm going to keep it and have it checked by another shop since it had never been bored.
I'm going to build the 350 right now just to keep this project moving. The 283 will have to be a future project.
JR - I agree about the little motors being real screamers. I had one in a 64 Chevy when I was a teen.
Mike
-
11-05-2008 06:47 AM #7
CHR Member
- Join Date
- Feb 2007
- Location
- Vidalia
- Car Year, Make, Model: 1946 Ford Coupe, 1962 Austin Healey 3000
- Posts
- 1,508
I thought it was time for some more updates on my progress with the T. Between work,car shows, hurricanes and a few honey-do jobs, I haven't gotten as far as I had hoped, but I am moving forward. My car show and cruising season is pretty much over, so I won't be taking it to any shows this year, but that won't stop me from driving and enjoying it. I sure did want to take it to Cruisin' the Coast, though. The weather was fantastic and a roadster would have been a blast. Oh well, maybe next year.
I hope to post several updates over the next few days. My camera died(they do that when you drop 'em on a concrete floor!). I have a replacement, so I have to take some pics and get them resized.
While at CTC, I did find to someone to do the upholstery.
I realised after my last update that there were still several things left to be finished. Mostly small "detail" type things, but still time consuming.
One problem area showed up after pulling the body off the frame and sitting it on the floor for a while. A crack developed in the door jamb where the interior section was glued in. This area didn't have enough material overlap to form a good glue joint and apparently had more stress than I first thought. This spot is where I installed the adjustable brace during the build. Stress isn't a problem when it's on the frame since the brace takes the load, but it still needs to support itself. So....I had to put the body back on the frame, realign the door and the reenforce the offending area. A couple layers of fiberglass cloth and some filler and everything was OK. Trouble was, it was in a terrible area to finish. No power tools, everything had to be sanded and shaped by hand. Getting this one small area smooth enough for paint took way longer than I would have thought! Sure makes you appreciate a DA sander! I finished the rest of the door opening while I was at it. Sorry no pics of this, wasn't very photo worthy.
Smoothing the glue joint on the top of the body went pretty good, except for a couple of places that didn't line up well. They had to be built up with fiberglass. At least I could use power tools. I had installed some threaded steel bars in the wood frame of the body to eventually hold down a top. The jig I made to relocate them after glueing everything together worked perfect
I'll try to get pics up ASAP.
Mike
-
11-05-2008 06:10 PM #8
CHR Member
- Join Date
- Feb 2007
- Location
- Vidalia
- Car Year, Make, Model: 1946 Ford Coupe, 1962 Austin Healey 3000
- Posts
- 1,508
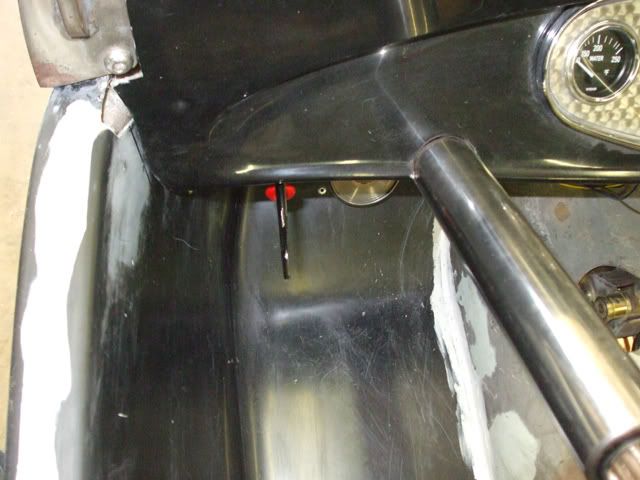
I didn't want to wait to the last minute for the wiring. It really can't be completed until the car is finished, but it's never too early to figure out how it's going to be laid out.
I had originally thought about putting the switches on the front of the seat frame, but came up with another idea. I made a small panel to mount behind the dash on the steering column drop. This puts the switches within easy reach and keeps them fairly well out of sight. Keeps them out of the weather too. I didn't like the look of the signal switch on the column so I made a mount that puts it under the dash with just a short section of the handle showing.


-
11-06-2008 04:44 PM #9
CHR Member/Contributor
- Join Date
- Jul 2003
- Location
- Madison
- Car Year, Make, Model: '67 Ranchero, '57 Chevy, '82 Camaro,
- Posts
- 21,160
Looking good, 46!!!! Getting the electrics to be functional and look decent is always a tough one, looks like you have it handled!!!!!!Yesterday is history, tomorrow is a mystery, Live for Today!
Carroll Shelby
Learning must be difficult for those who already know it all!!!!
-
11-06-2008 06:01 PM #10
CHR Member
- Join Date
- Feb 2007
- Location
- Vidalia
- Car Year, Make, Model: 1946 Ford Coupe, 1962 Austin Healey 3000
- Posts
- 1,508
Thanks guys.
Dave. I hope I can keep it looking professional.
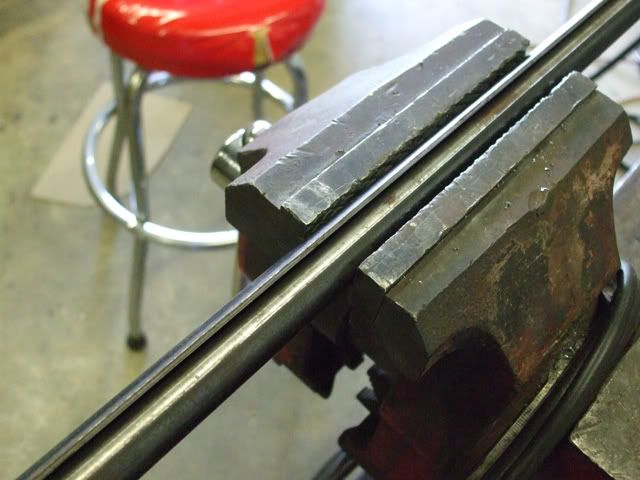
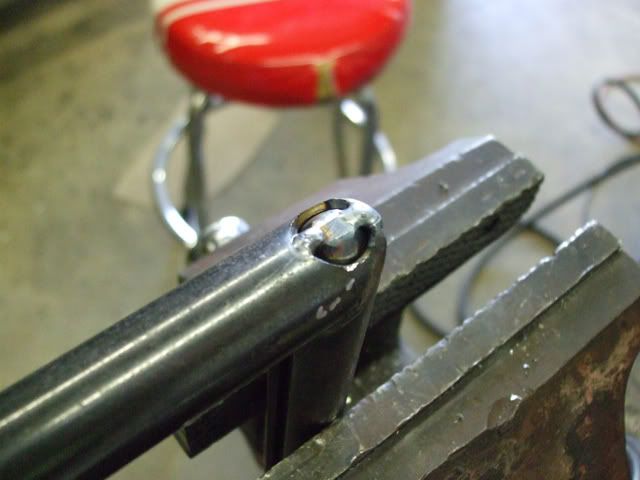
The windshield frame needed some attention too. After the slot was cut for the glass, the bottom section of tubing lost most of it's torsional stiffness. It twisted pretty bad and I knew that wasn't going to work. Without any support, the glass would eventually crack(probably sooner than later). I drilled the ends and welded a piece of 1/2" cold roll on the inside length of the frame. Problem solved! It's plenty stiff now. A local glass shop knocked out a windshield for me.
-
11-06-2008 06:04 PM #11
CHR Member
- Join Date
- Feb 2007
- Location
- Vidalia
- Car Year, Make, Model: 1946 Ford Coupe, 1962 Austin Healey 3000
- Posts
- 1,508
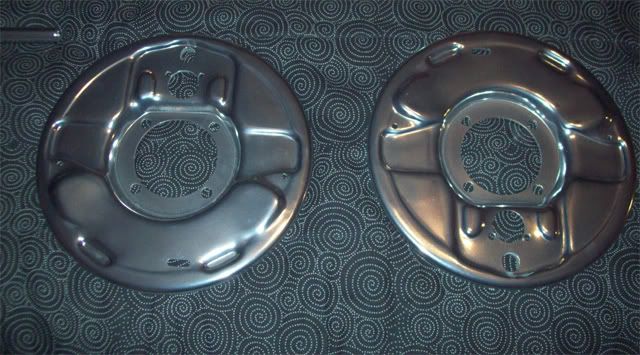
There is a coating place about 2 hours from my house that does a ceramic coating similar to Jethot's Sterling. Looks a lot like nickel or polished aluminum to me. I haven't seen too many cars that use this finish extensively instead of chrome, but the coating place said they are doing a lot of it strictly for decoration. I decided to try it on a few pieces to brighten things up a little and add a some contrast. The parts turned out great. I had most of the suspension either powder coated or ceramic coated. The rear nerf ,windshield frame and intake manifold got ceramic.
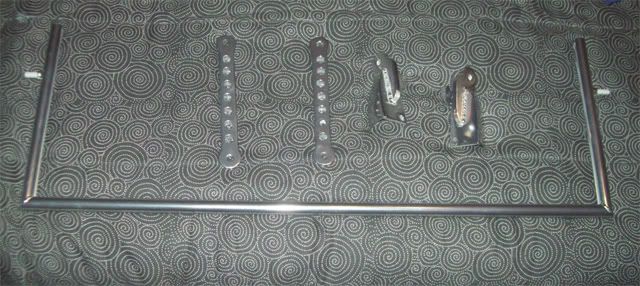
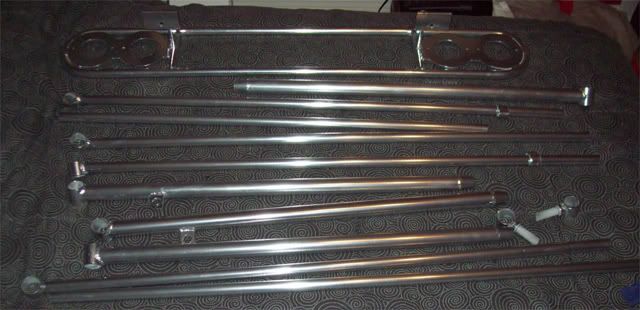
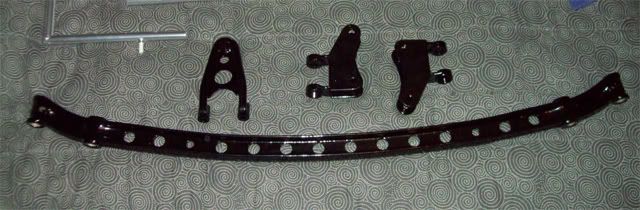
You can see in the last pic that I also drilled the axle. I guess sawed would be a better description since I used a 7/8" hole saw to do the job.
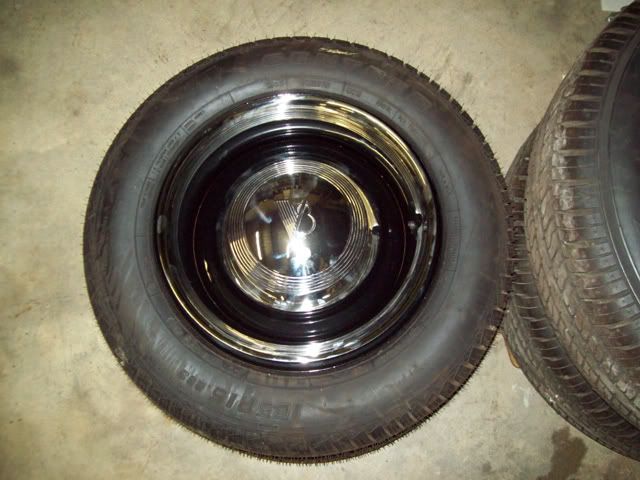
Here's a little teaser on the wheels.
-
11-06-2008 06:55 PM #12
CHR Member/Contributor
- Join Date
- Jul 2003
- Location
- Madison
- Car Year, Make, Model: '67 Ranchero, '57 Chevy, '82 Camaro,
- Posts
- 21,160
Nice fix on the windshield frame!
That's some nice looking coatings on the parts!!! Looks like you found a really first rate shop!!!! Tough to do these days!Yesterday is history, tomorrow is a mystery, Live for Today!
Carroll Shelby
Learning must be difficult for those who already know it all!!!!
-
11-06-2008 07:28 PM #13
CHR Member
- Join Date
- Feb 2007
- Location
- Vidalia
- Car Year, Make, Model: 1946 Ford Coupe, 1962 Austin Healey 3000
- Posts
- 1,508
Dave
The owner of the coating place is a car guy(has a Superformance Cobra dealership). Seems to really care about his work. Hot rod stuff isn't his main business. They do a lot of oil field work for corrosion resistance offshore.
The name of the company is Streamline Coatings in Lafayette, LA.
Hope naming the company doesn't violate any board rules.
-
11-06-2008 08:02 PM #14
CHR Member/Contributor
- Join Date
- Jul 2003
- Location
- Madison
- Car Year, Make, Model: '67 Ranchero, '57 Chevy, '82 Camaro,
- Posts
- 21,160
Sure don't know why it would.... Especially if he not only does good work but has decent prices, too!!!!!!!!
Yesterday is history, tomorrow is a mystery, Live for Today!
Carroll Shelby
Learning must be difficult for those who already know it all!!!!
-
11-06-2008 09:21 PM #15
CHR Member
- Join Date
- Jan 2006
- Location
- fort myers
- Car Year, Make, Model: '27 ford/'39 dodge/ '23 t
- Posts
- 11,033
Your parts look fantastic. I've never seen that shade of coating, but I like it a lot. It will contrast with the black parts very well.
Don


 Reply With Quote

Posting Permissions
- You may not post new threads
- You may not post replies
- You may not post attachments
- You may not edit your posts

I saw last night on fb about John. The world sure lost a great one. I'm going to miss his humor, advice, and perspective from another portion of the world. Rest in Peace Johnboy.
John Norton aka johnboy