


 262Likes
Thread: '37 Oze build


Results 301 to 315 of 518
 LinkBack URL
 About LinkBacks
-
10-18-2014 12:56 PM #301
 CHR Member

- Join Date
- Feb 2013
- Location
- Loveland
- Posts
- 427
Removed by author.Last edited by daveS53; 08-28-2015 at 04:03 PM.
-
Advertising

- Google Adsense
- REGISTERED USERS DO NOT SEE THIS AD
-
10-19-2014 01:04 PM #302
CHR Member
- Join Date
- Feb 2004
- Location
- Tucson
- Car Year, Make, Model: 39 Ford Coupe, 32 Ford Roadster
- Posts
- 2,334
Dave, for all your misery with the purchase of the Oze product, it should make some shiney-suited lawyer eager to gather a list of othe Oze purchasers that had the same sad experience.....he could file suit....from the story you have told so far, their products have been grossly misrepresentated, possibly fradulent stuff going on. Just think, if the lawyer were successful, you just might own a piece of a body manufacturer!!
-
10-19-2014 07:52 PM #303
CHR Member
- Join Date
- Oct 2014
- Location
- Clinton
- Car Year, Make, Model: '32 Ford Hi Boy, '37 wildrod sedan
- Posts
- 561
Dave, Don't give up, I am nearing a wildrod sedan project I bought from them when they where in Canada in 2006, been working hard on it the past 4 years. The stainless grill mine has is very nice and was made by Alumicraft, you could always powder coat the grill in a polished aluminum easily after getting it fit. I had fitment issues as well on the body, alot is because the builder/owner see's every imperfection, until the body work I was always impressed how great a fit everything was (just like we see'em at the shows when they where selling them), but while doing body work I realized it wasn't and it took alot of work too. I did not have the shabby workmanship on layup though it sounds like you have got, just fitment issues and gap issues. If I can be of any help let me know. My body did get about 5 years to cure before I touched it!! Matthyj
-
10-20-2014 12:51 PM #304
CHR Member
- Join Date
- Feb 2013
- Location
- Loveland
- Posts
- 427
Removed by author.Last edited by daveS53; 08-28-2015 at 04:04 PM.
-
10-27-2014 08:20 AM #305
CHR Member
- Join Date
- Feb 2013
- Location
- Loveland
- Posts
- 427
Removed by author.Last edited by daveS53; 08-28-2015 at 04:04 PM.
-
10-29-2014 01:37 PM #306
CHR Member
- Join Date
- Feb 2013
- Location
- Loveland
- Posts
- 427
more grille problems
I did some more work on my poorly made grille today. Since I've already filed through the chrome in a couple of places, I decided to do some more grinding to make the fit at the top even better. Only a few minutes with a belt sander accomplished that.
I still needed to get the top fin up higher, so I bent the lower portion where it wraps under the nose, in order to allow the grille to come up a little higher. While I was doing that, I noticed what looked liked bubbles in the chrome, so I got out an Xacto knife and poked on one of the bubbles, to see if it was hollow. Sure enough, the chrome was coming loose. I easily scraped a long stretch right off. The under side of the chrome was black, indicating that it was applied to dirty metal. The bare spot is along the top edge of the lowest part, on the right side. There's even a little curled up chrome hanging along the edge. If you click on the picture, it should take you to my photo bucket library. There you can zoom in on the picture for a closer look. One of the other things that you can see is the big globs of mig weld on the under side of the fins, at the center. While this places then out of your direct view when standing in front of the car, you still see the welds as a reflection in the fin just below the weld. The welds all need to be behind the fin, where they can't be seen.
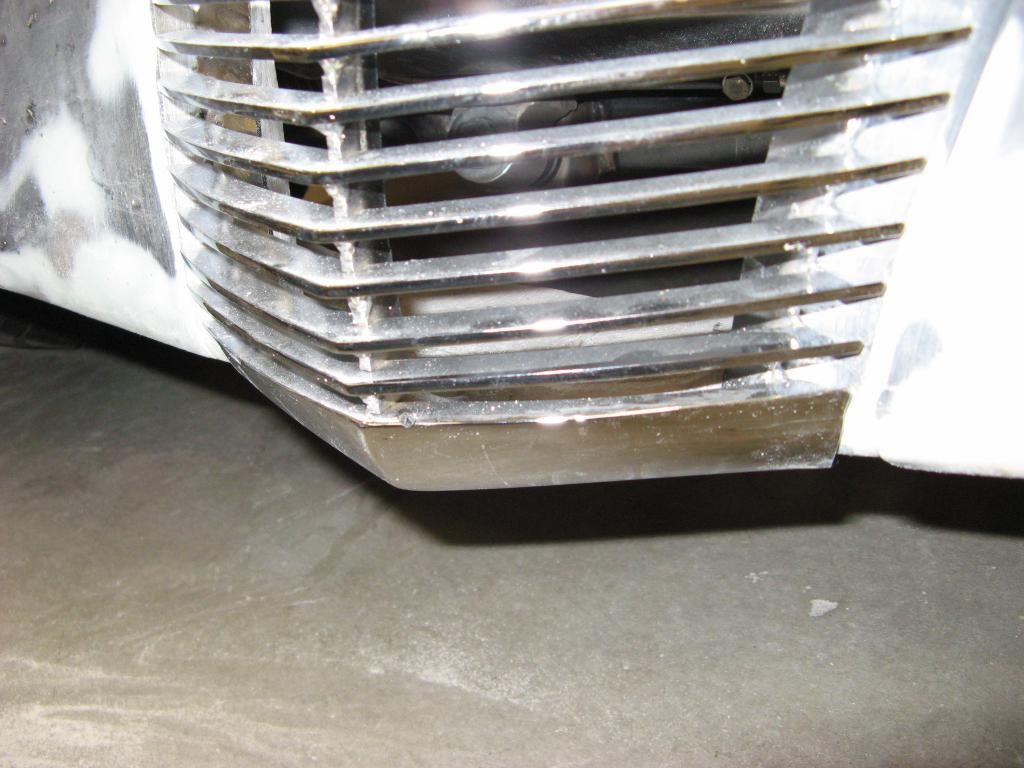
I noticed that the grille rattled a little some times, so I inspected the fins more closely and found a broken weld along the center rib, on the 9th fin from the top. With a MIG welder, it's easy to place a big glob of metal, but have no penetration.
If I want to have the grille powder coated, it looks like I need to take it to a plating shop, just to have the chrome stripped off. I was thinking of just a light sand blast to improve the powder coat adhesion, but if more chrome falls off, then so will the powder coat. It's bad if you have to pay extra, just to get a paint-grade grille.Last edited by daveS53; 12-15-2014 at 09:34 AM.
-
11-03-2014 02:34 PM #307
CHR Member
- Join Date
- Feb 2013
- Location
- Loveland
- Posts
- 427
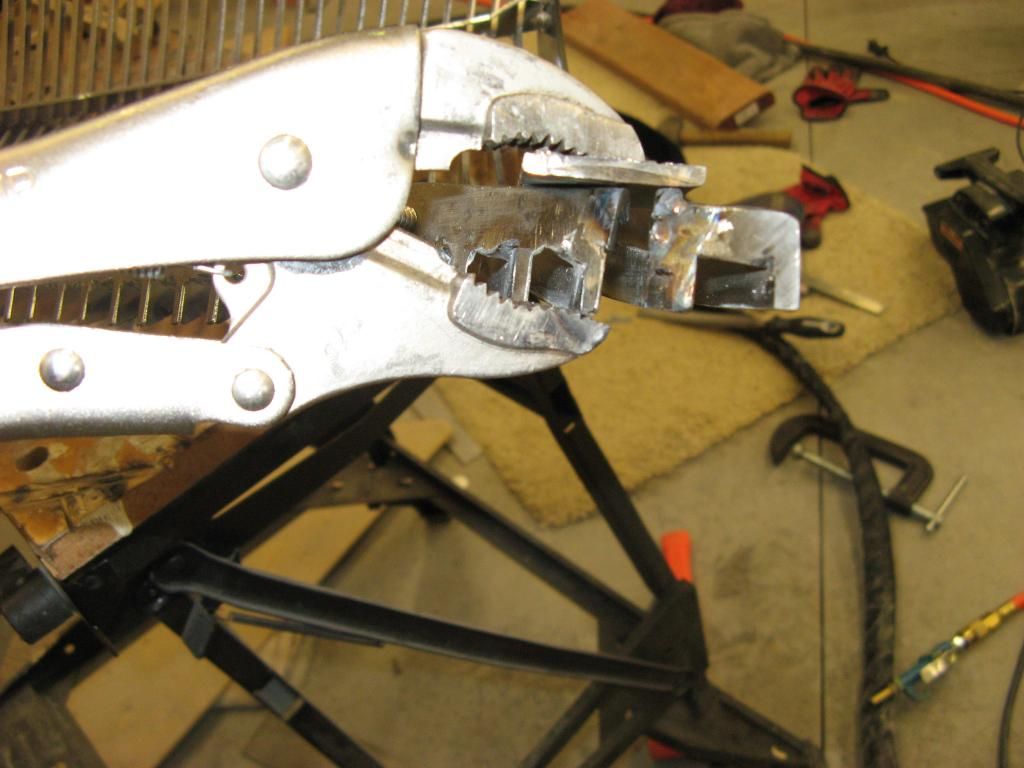
I decided to work on the grille some more, to try to improve the fit. The spacing between the 2nd and 3rd fins was obviously too narrow. Making it wider, to match the others would both look better and reduce the gap between the top fin and the hood. Unfortunately, it was easier said than done. As soon as I cut through the mounting flange, the top two fins moved inward, indicating the builder had pulled the top fin into a wider position, before welding. The top fin is about 1-3/4" wide and requires a substantial force to spread the ends wider. I corrected the fin spacing on one side with no problem, but getting the other side moved out to it's original width proved impossible. After one botched attempt to use vise grips to force the fin into position, I finally gave up and cut the top fin nearly all the way through, so it could easily be bent to the desired width. I spent the better part of two days getting the grille welded back together. Along the way, I discovered a second broken weld and fixed that too.
I found that cutting the mounting flange (1/8" thick by 1" wide bar stock) and bridging a 1/4" wide gap was not easy. Both sides required a small filler strip, to bridge a 1/4 inch gap.
After all that work, the grille still doesn't have the desired angle on the top fin. It needs to be a little lower at the very tip.
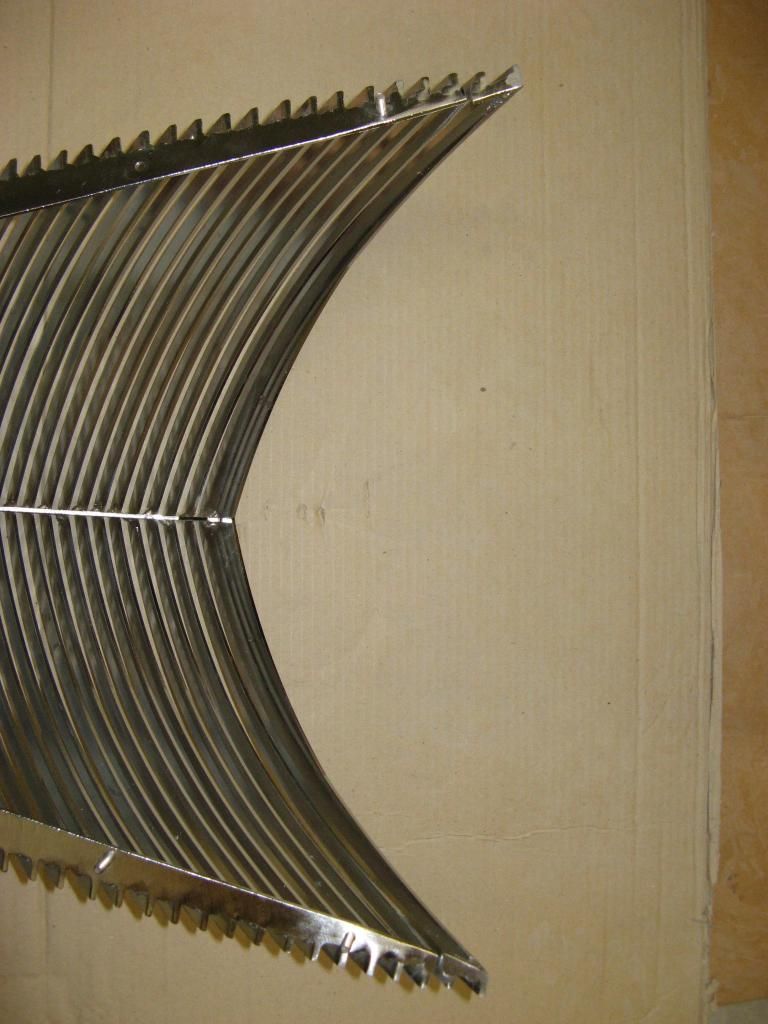
URL=http://s1282.photobucket.com/user/dashepherd298/media/IMG_3437_zps6dda27c3.jpg.html] [/URL]
Last edited by daveS53; 08-28-2015 at 07:07 PM.
-
11-06-2014 02:22 PM #308
CHR Member
- Join Date
- Oct 2014
- Location
- Clinton
- Car Year, Make, Model: '32 Ford Hi Boy, '37 wildrod sedan
- Posts
- 561
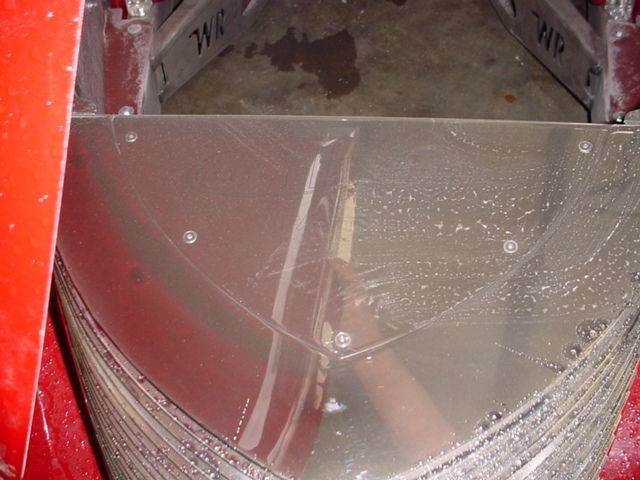
Dave, One thing I have done on interior panels that saves a ton of time and makes it a lot easier is to make your patterns out of clear plastic, like whats use for convertible top windows, cut it rough size of your panel, go to Dollar General and get some really cheap Elmers spray tack glue (for temporary bonds), spray the clear plastic with the spray tack, stick it to the door, mark all the holes and locations of bolt heads etc. on the surface because you can see through it! You can use the stuff to make patterns for all upholstery, even seats, draw the pattern you want on the door, copy to the plastic then tack the plastic to your upholstery board and drill and cut right through it, peel it off and throw it away. I wish I could stake claim to this trick but it came from a great interior shop. Best of luck MatWhy is mine so big and yours so small, Chrysler FirePower
-
11-12-2014 11:09 AM #309
CHR Member
- Join Date
- Feb 2013
- Location
- Loveland
- Posts
- 427
Thanks for the tip! Originally Posted by Matthyj

-
11-12-2014 11:21 AM #310
CHR Member
- Join Date
- Feb 2013
- Location
- Loveland
- Posts
- 427
I finally managed to make contact with Dan Baker at Alumicraft. Soon, I'm going to send my grille to Alumicraft, to be used as a mock-up grille. My grille is mostly junk anyway. I ran into more problems while trying to improve the fit of my grille. I needed to lengthen the mounting flange on the driver's side, so I picked a couple of places where the fin spacing was too close together, so they could be spread slightly, then welded back together. When I cut through one of them, a group of about 15 fins all moved outward close to 1/8", making them wider than the body. There was no way I'd ever be able to apply enough force to moved the fins back to their original width, so I got out the belt sander and spent several hours sanding them back to a width that would match the body.
I also applied some bondo to the grille, just to show Alumicraft the exact width and curvature of the mounting flange, in a couple of areas. The angle on the top fin is now a lot closer to matching the angle of the hood, but still not perfect. I decided to quit while I was ahead, rather than risk any more cutting that would allow the internal stresses to distort the grille.

Last edited by daveS53; 11-13-2014 at 02:44 PM.
-
11-12-2014 02:42 PM #311
CHR Member
- Join Date
- Feb 2013
- Location
- Loveland
- Posts
- 427
Removed by author.Last edited by daveS53; 08-28-2015 at 04:04 PM.
-
11-27-2014 07:18 PM #312
CHR Member
- Join Date
- Oct 2014
- Location
- Clinton
- Car Year, Make, Model: '32 Ford Hi Boy, '37 wildrod sedan
- Posts
- 561
Dave, Let us know if you have any problems filling the tank, I have a 1 1/2" hose about 6" long go straight down into my tank on my '32 from the filler and I can hardly get fuel into it due to it backing us and shutting the nozzle off, takes forever! On my 37 I actually went over kill and used 2 1/2" hose due to all the problems with the '32. I guess you could yank the hose off and put on a gas can with the filler and take to the station and try it, maybe it will all work fine (I hope so) but it sure looks great! MattWhy is mine so big and yours so small, Chrysler FirePower
-
12-01-2014 02:51 PM #313
CHR Member
- Join Date
- Feb 2013
- Location
- Loveland
- Posts
- 427
I put some gas in the car (at the gas station), soon after I installed the gas cap and had no trouble at all. Maybe it helps that I have over 12 inches of vertical drop in the hose, before it bends to nearly horizontal.
-
12-15-2014 10:07 AM #314
CHR Member
- Join Date
- Feb 2013
- Location
- Loveland
- Posts
- 427
I finally got word from Alumicraft, that they can build an aluminum grille for my car, using the mock-up grille that I sent them, as a model. It will require modifications to their welding fixture, to make a grille that matches mine.
I will also have them add an aluminum top plate to cover the area between the grille and radiator, just like the grilles that they make for the '37 Wild Rod bodies.
Last edited by daveS53; 12-15-2014 at 10:16 AM.
-
12-17-2014 12:50 PM #315
CHR Member
- Join Date
- Feb 2013
- Location
- Loveland
- Posts
- 427
Removed by author.Last edited by daveS53; 08-29-2015 at 03:36 AM.


Posting Permissions
- You may not post new threads
- You may not post replies
- You may not post attachments
- You may not edit your posts

i've enjoyed the years here . made a lot of friends. most who have left. i see no reason to continue with this so hope to see you somewhere else. i dont think this site will ever be back. it's lived...
Dead!