


 3390Likes
Thread: 55 Wagon Progress


Results 1,591 to 1,605 of 1865
 LinkBack URL
 About LinkBacks
-
02-10-2021 05:55 AM #1591
 CHR Member

- Join Date
- Jun 2008
- Location
- Leonardtown
- Car Year, Make, Model: Walking
- Posts
- 1,228
 Originally Posted by hammer-time

We've done some stainless repair before using small hammers and handmade punches to match the rear side of the profile, but during the last metalshaping workshop I attended at Will Cronkrite's shop in SC a couple years back, I picked up a stainless dent/ding removal fixture that he had made up.. The blue sleeve at the top works on the premise of a slide hammer, with the force applied controlled by the operator. The die at the bottom (punch) is removable to allow a wide variety of specialized punches to fit the application.
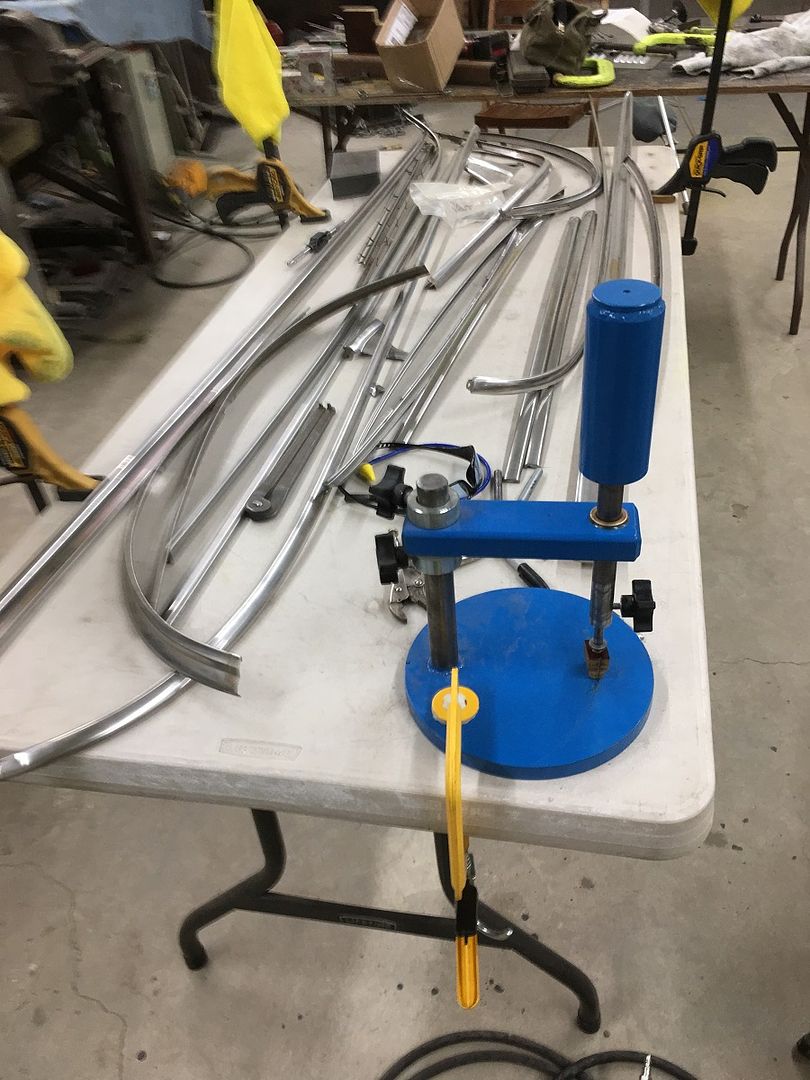
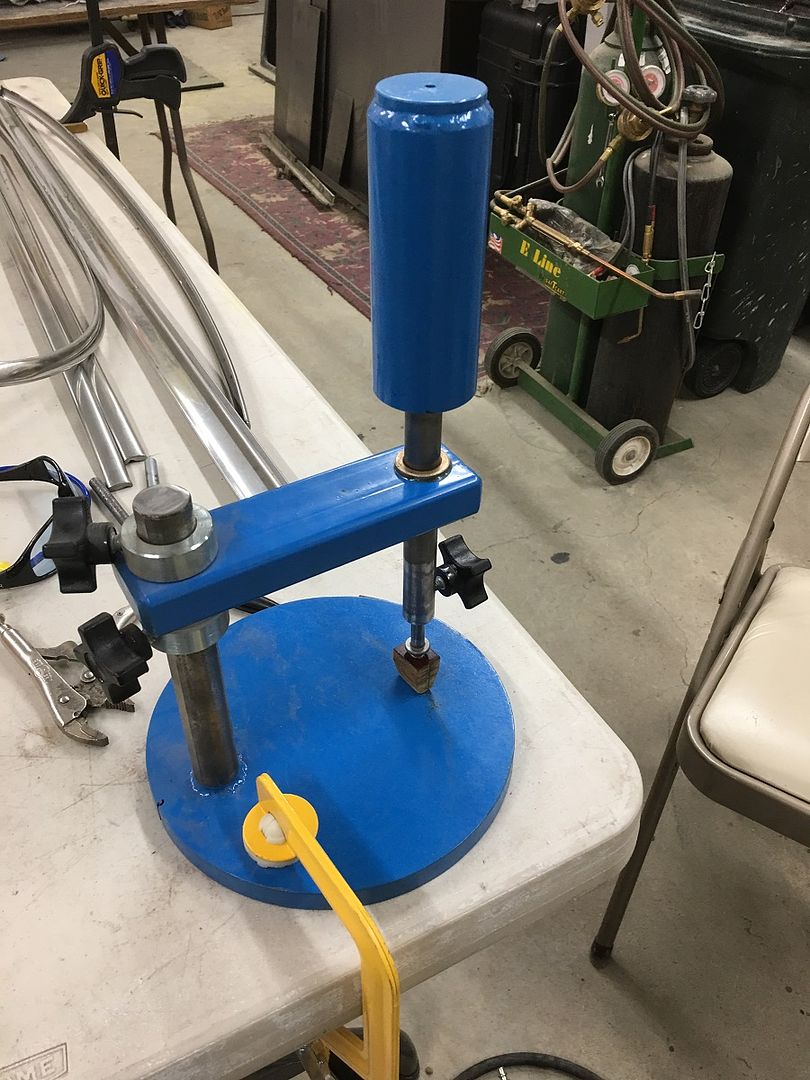
This tool allows more controlled manipulation, especially to those of us that don't do this type of repair every day...
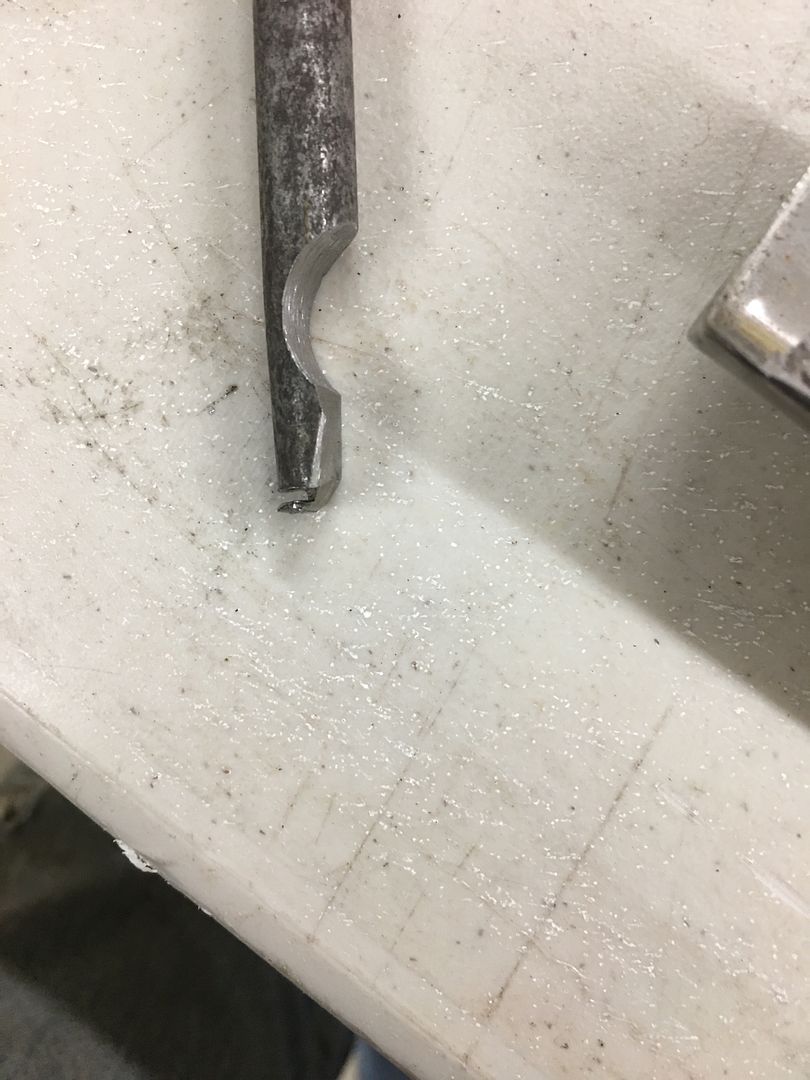
Here's one of the purpose built punches made for the trim...
Here's some of our efforts in polishing out the trim after ding removal, filing, and about 6 steps of progressively finer grits of w/d and trizact .
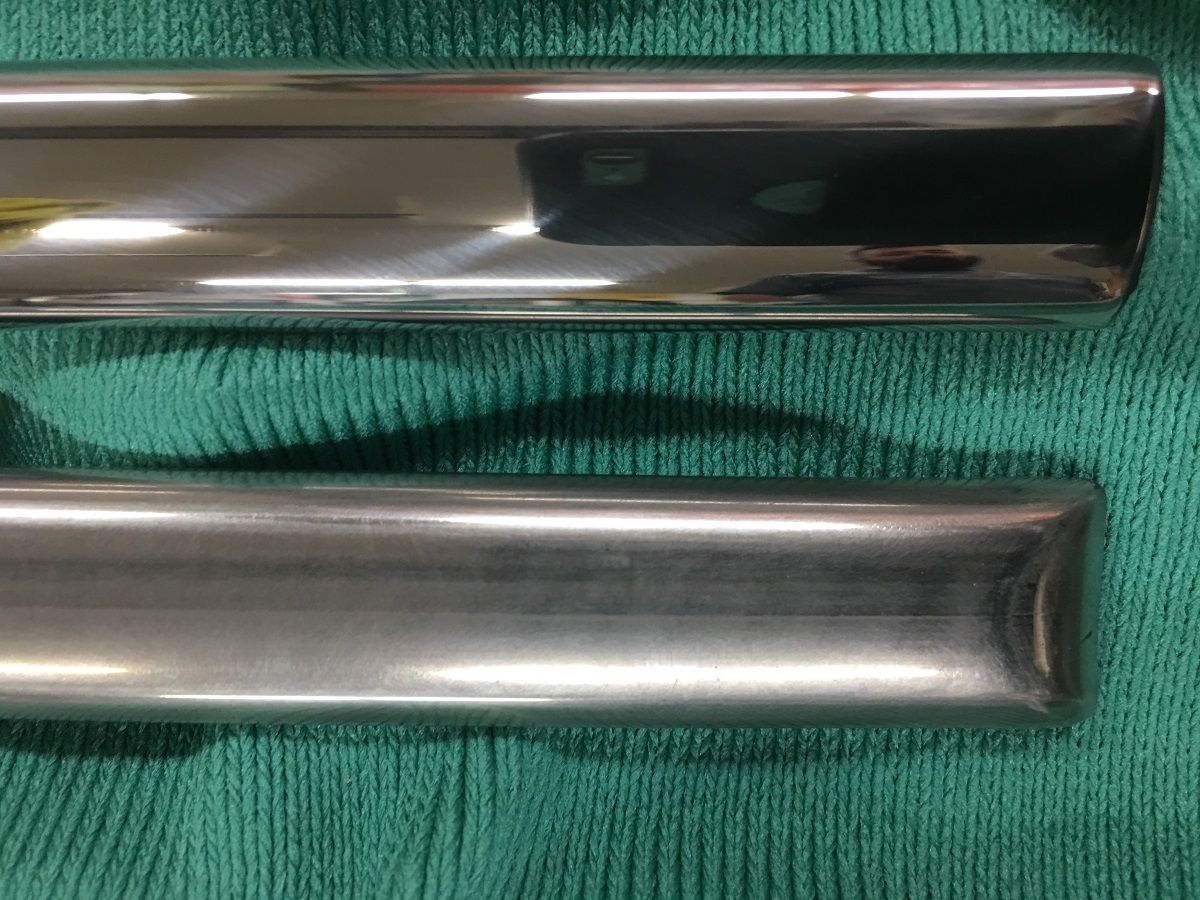
Reflection....
The "rods" that pass through the arm have shouldered bushings pressed in, the "slide hammer" at the top also is made with bronze bushings. For someone like myself who doesn't straighten stainless on a regular basis, this allows you to have one hand free to position/hold the stainless in position while the "hammer" can be lifted with the other and dropped as little or as much is needed to remove dings.. I will say that less is more, so being able to sneak up on something is key..
The gentleman who made this is retired and has taken up penning a couple of books, this one fresh on the market... For those interested in a birds eye view of Nascar in the earlier years, this is a must read. He was the crew chief where Dale Earnhardt got his start...
https://nascarredneck.com/
At any rate, he is no longer making these, but did say I was free to share any details for anyone else to make their own. Let me know if you would like any dimensional data....Robert
-
Advertising

- Google Adsense
- REGISTERED USERS DO NOT SEE THIS AD
-
02-10-2021 06:31 AM #1592
CHR Member/Contributor
- Join Date
- Sep 2007
- Location
- Gardner, KS
- Car Year, Make, Model: '33 HiBoy Coupe, '32 HiBoy Roadster
- Posts
- 11,245
That's a very cool dent/ding removal fixture/tool! Simple design, well thought out and well made. Very cool!Roger
Enjoy the little things in life, and you may look back one day and realize that they were really the BIG things.
-
02-10-2021 08:24 AM #1593
CHR Member
- Join Date
- Aug 2003
- Location
- Springfield
- Car Year, Make, Model: '66 Mustang, 76 Corvette
- Posts
- 5,444
IIRC, in the 60's one of the contributors on Hot Rod magazine had a beautiful 40 Ford coupe and he did all of the work on the car. He also was good at most everything he touched and I remember a few articles on stainless steel trim dent removal. His procedure was all by hand and very slow and tedious. That tool is a major improvement and I believe there will be folks wanting the specs.Ken Thomas
NoT FaDe AwaY and the music didn't die
The simplest road is usually the last one sought
Wild Willie & AA/FA's The greatest show in drag racing
-
02-10-2021 10:34 AM #1594
CHR Member
- Join Date
- Aug 2014
- Location
- Rochester
- Posts
- 27
Your stainless trim looks great! That tool is the bomb. How heavy is the sliding hammer? I'm sure that you don't have to use much force to make it work.
-
02-11-2021 02:17 PM #1595
CHR Member
- Join Date
- Jun 2008
- Location
- Leonardtown
- Car Year, Make, Model: Walking
- Posts
- 1,228
Forgot I had done a video on the stainless tool. Will try and get some dimensions this weekend.
https://youtu.be/Njw3X8dDRko
.Robert
-
02-15-2021 10:44 PM #1596
CHR Member
- Join Date
- Jun 2008
- Location
- Leonardtown
- Car Year, Make, Model: Walking
- Posts
- 1,228
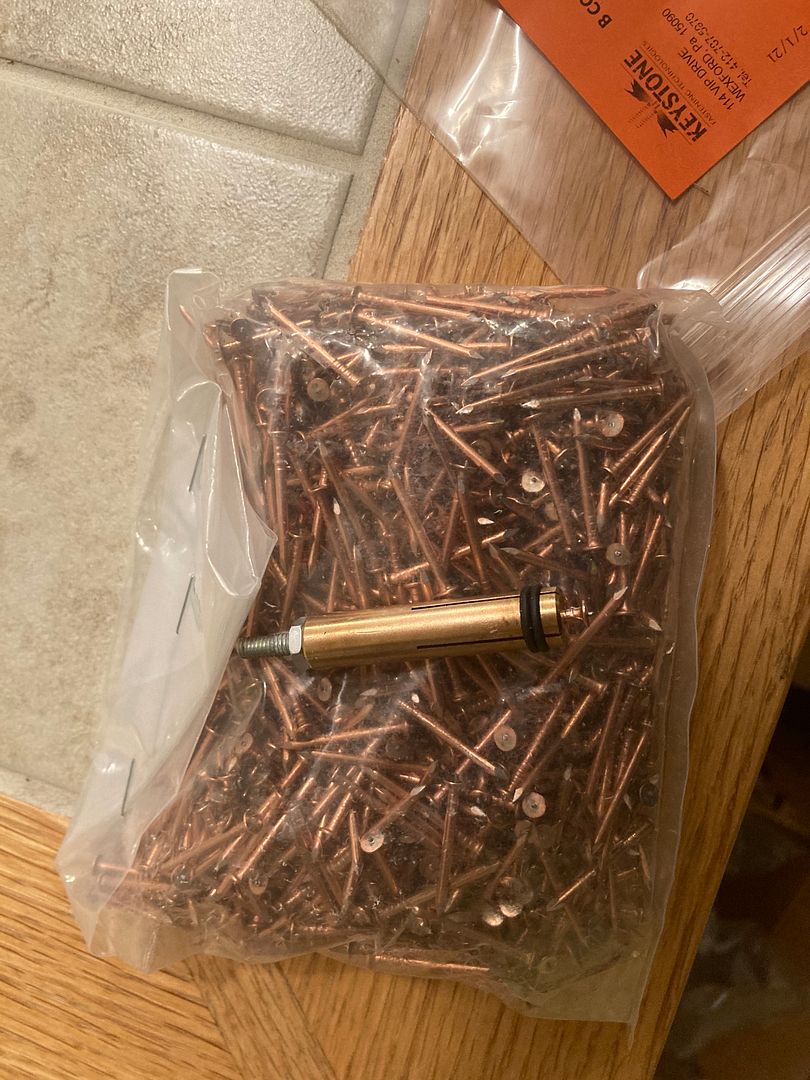
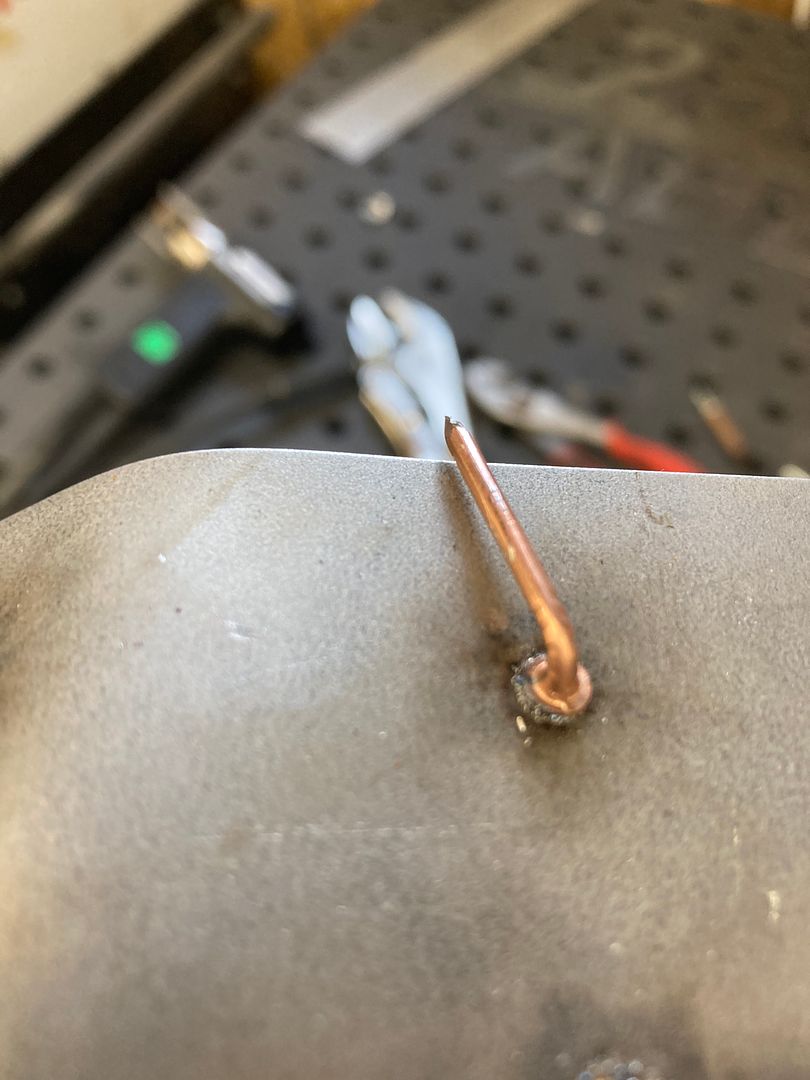
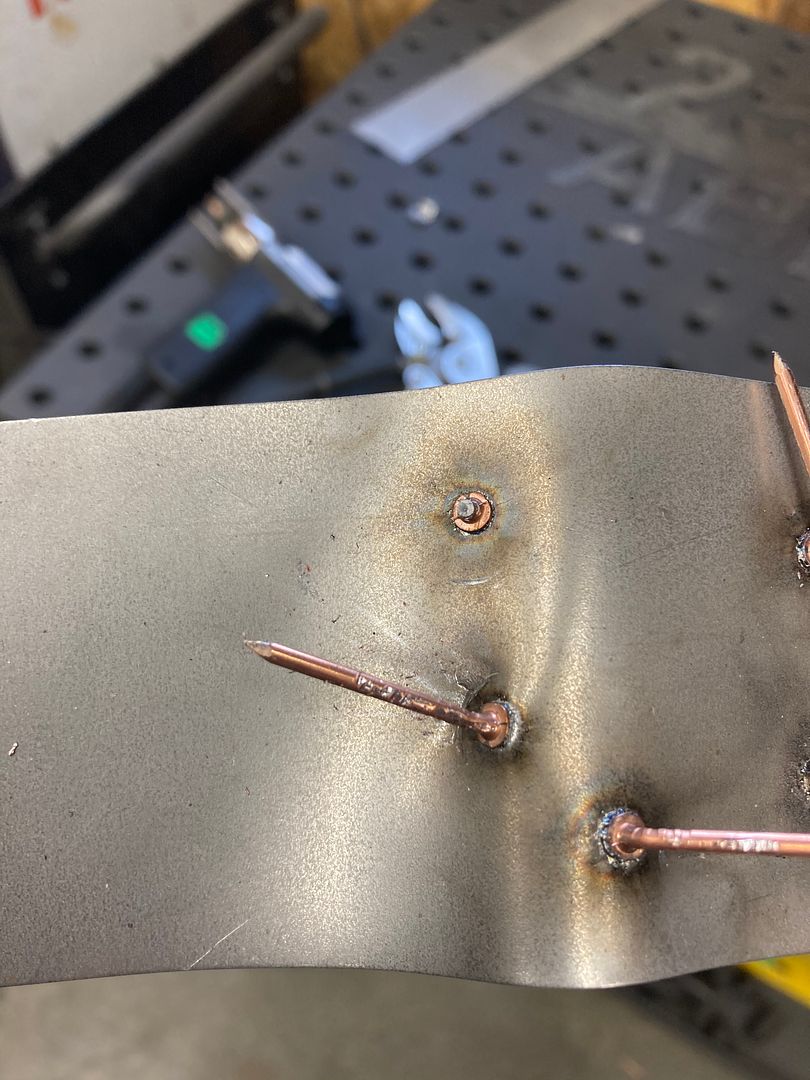
Back to our door panel stainless, the correct studs came in for the CD stud welder, and tests have shown them to provide the solution we need..
These studs have much less mass at the end, for a lesser capacitive charge needed.
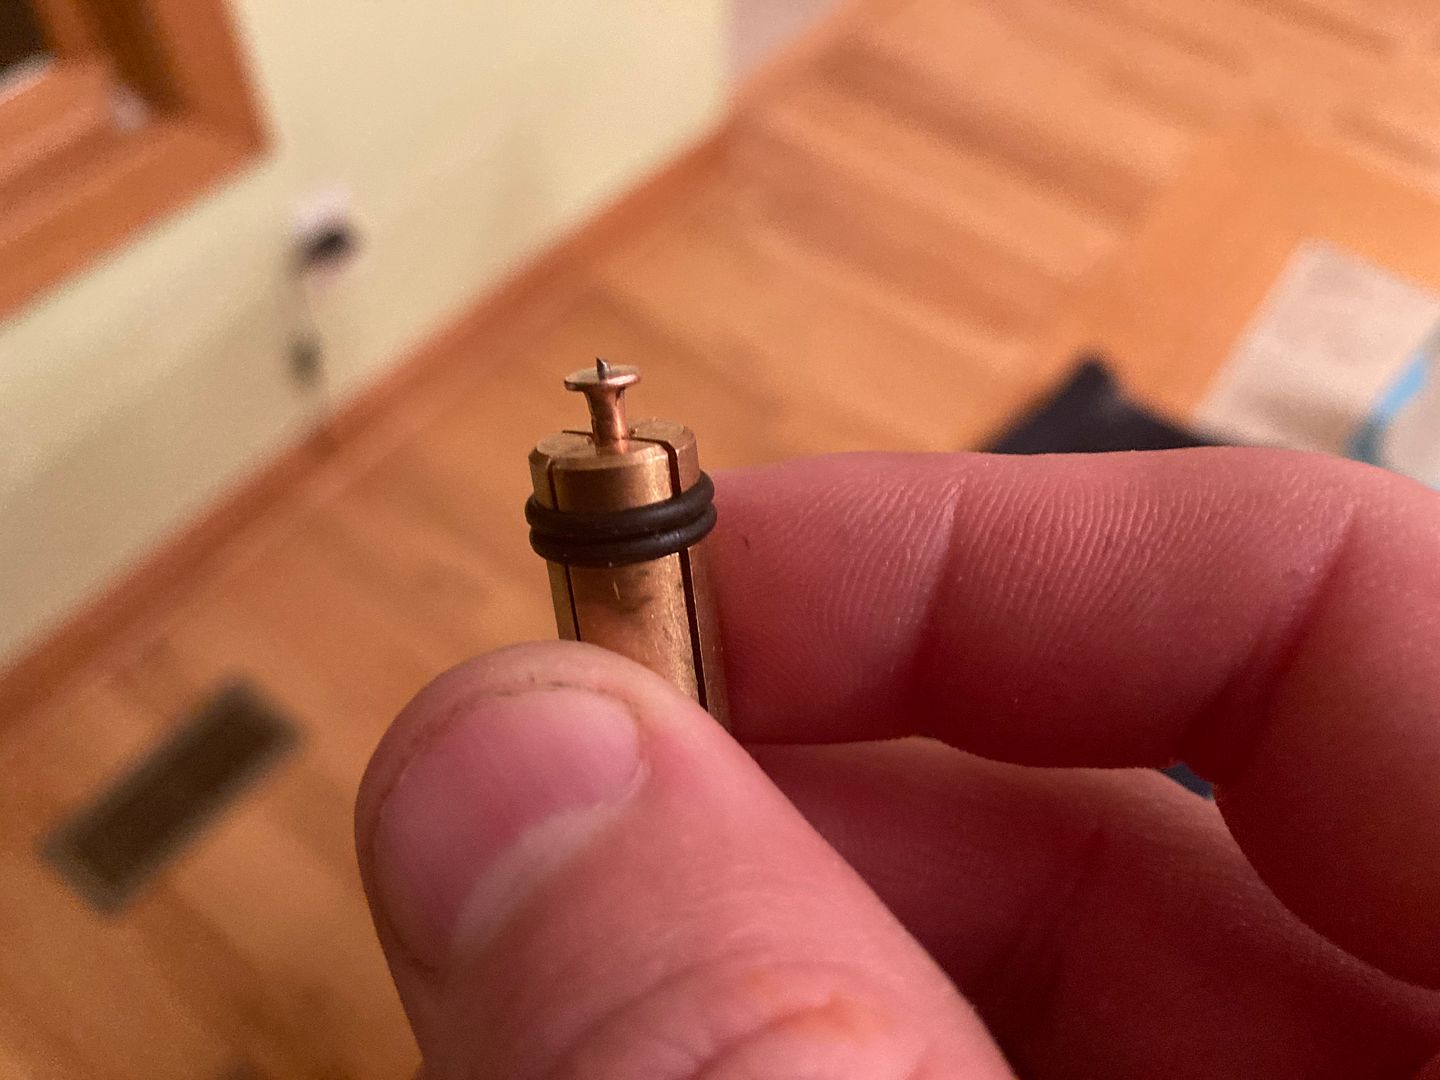
Tested on a piece of 19 gauge steel, note the back side has no discoloration whatsoever. Allen used a pair of Vise grips to give it a twist test to see if the weld would release. Where the one that is cut got too close to the cutters, the others did not release, and in fact distorted the shape of the metal because they held so well. The one pin shows a good 90* bend, which is what will be used to hold the stainless onto the door panel per the same design as original.
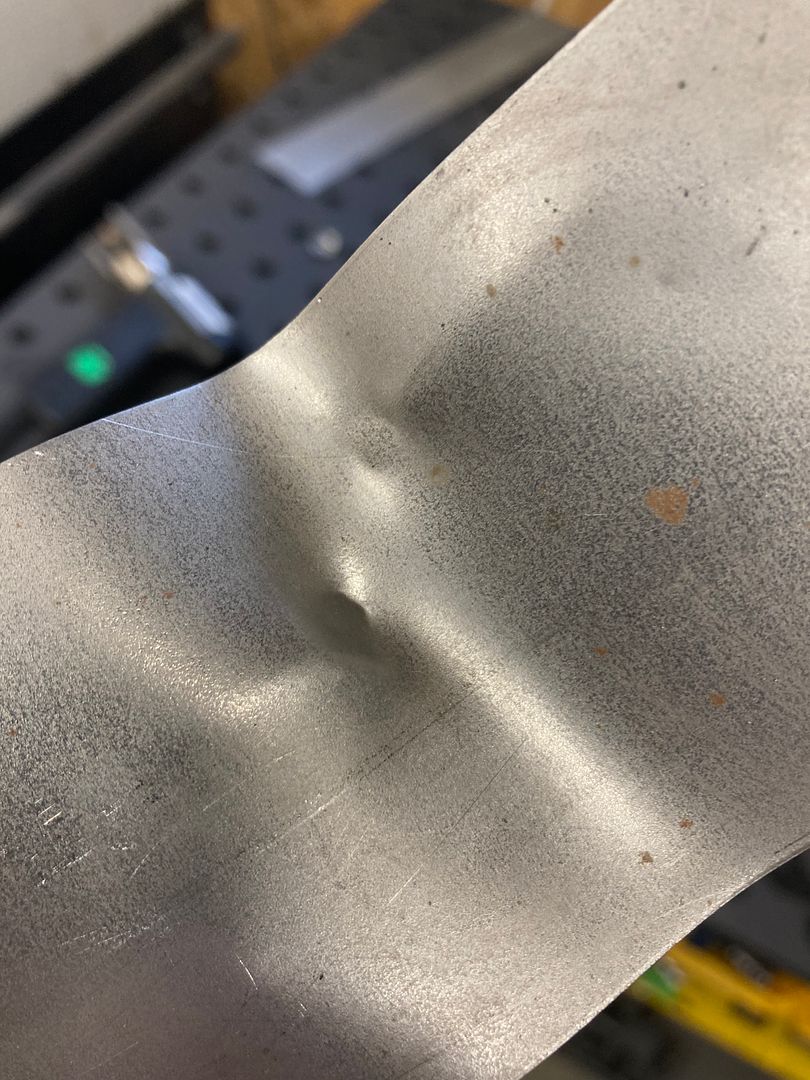
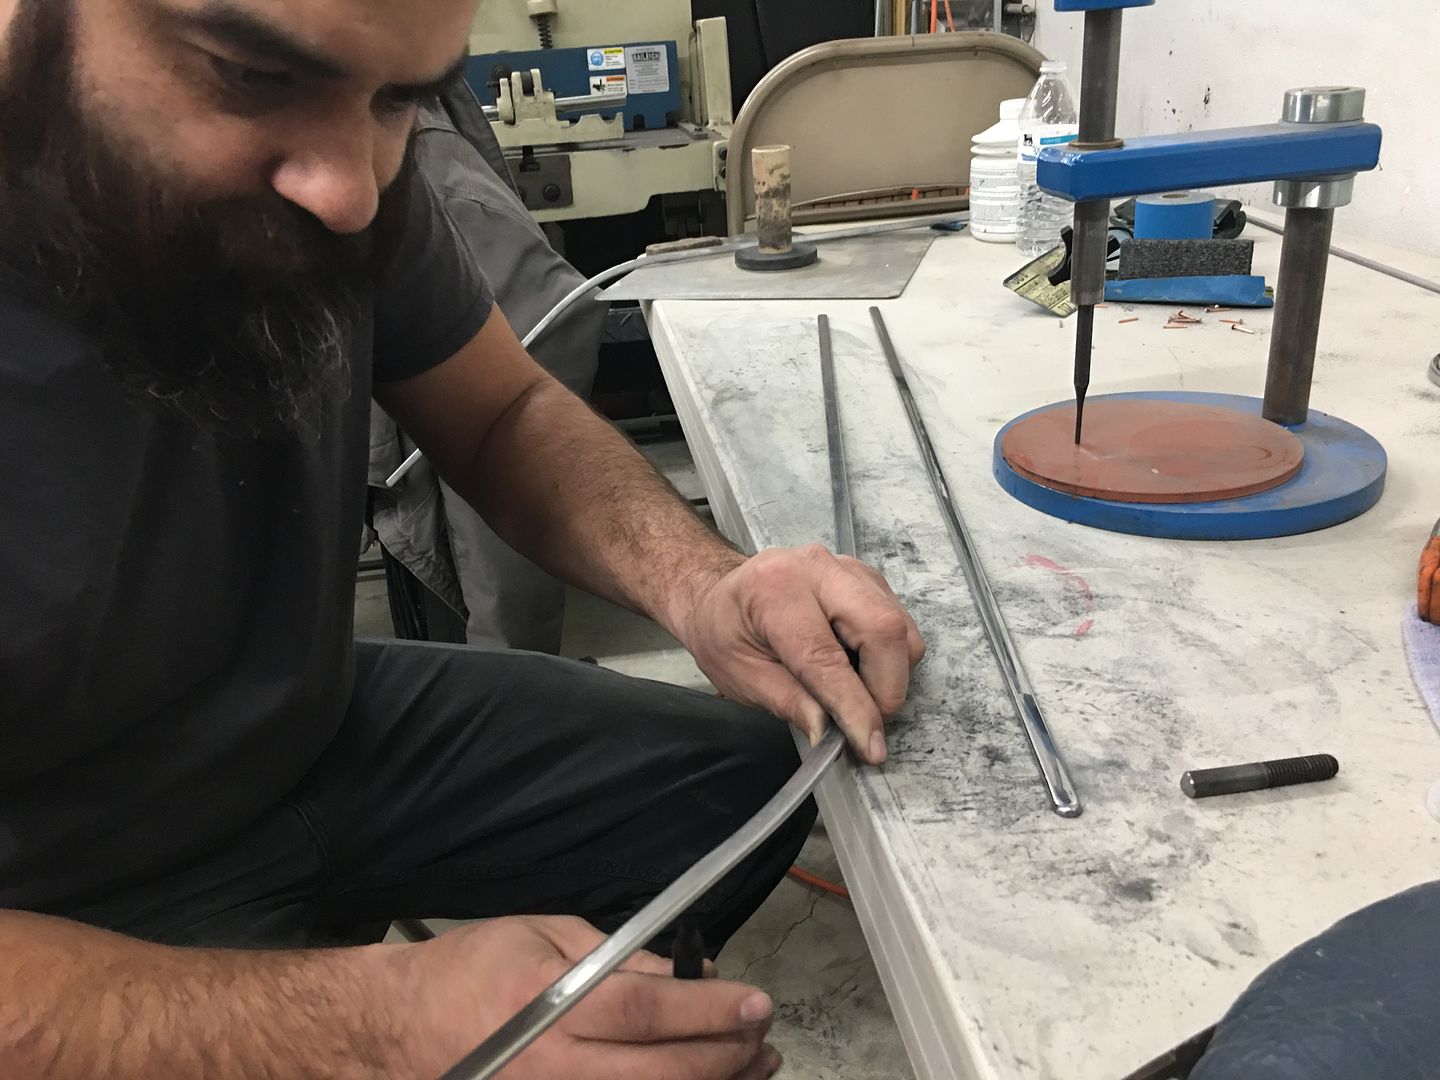
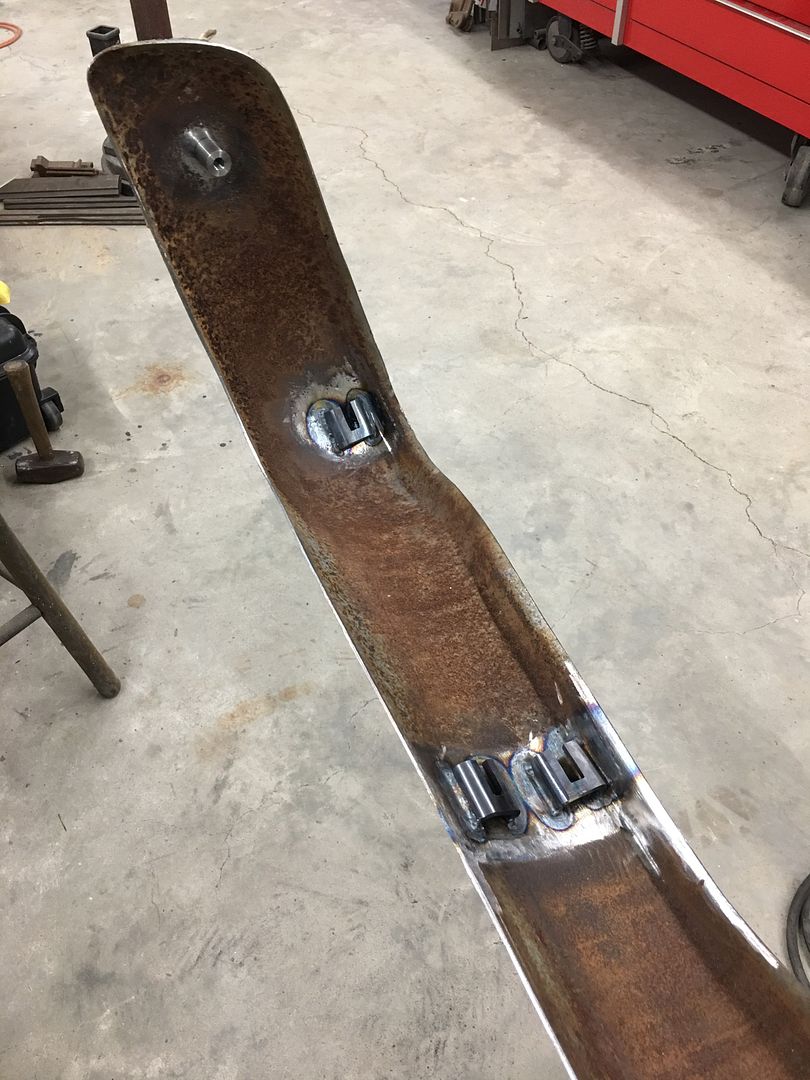
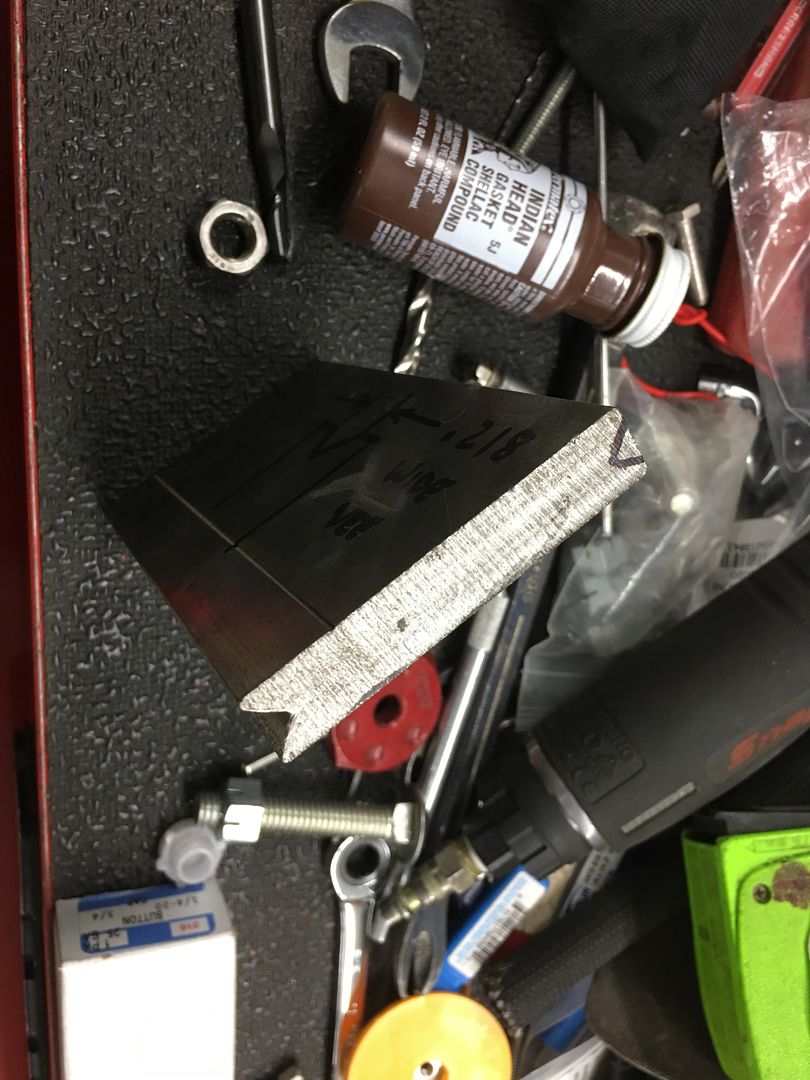
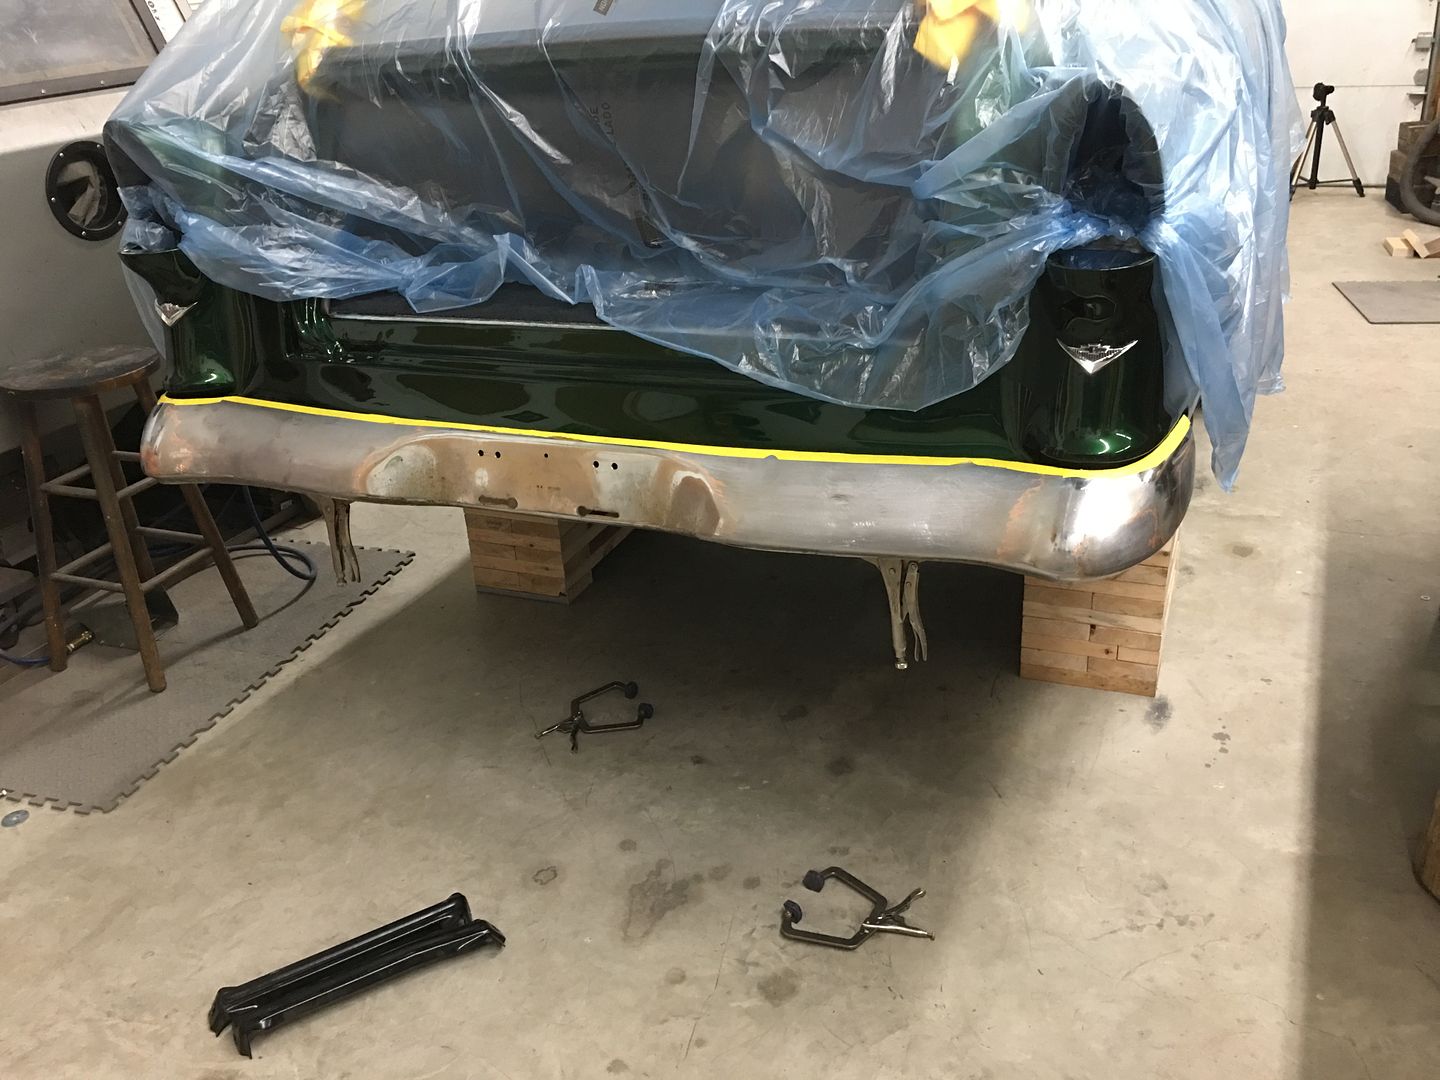
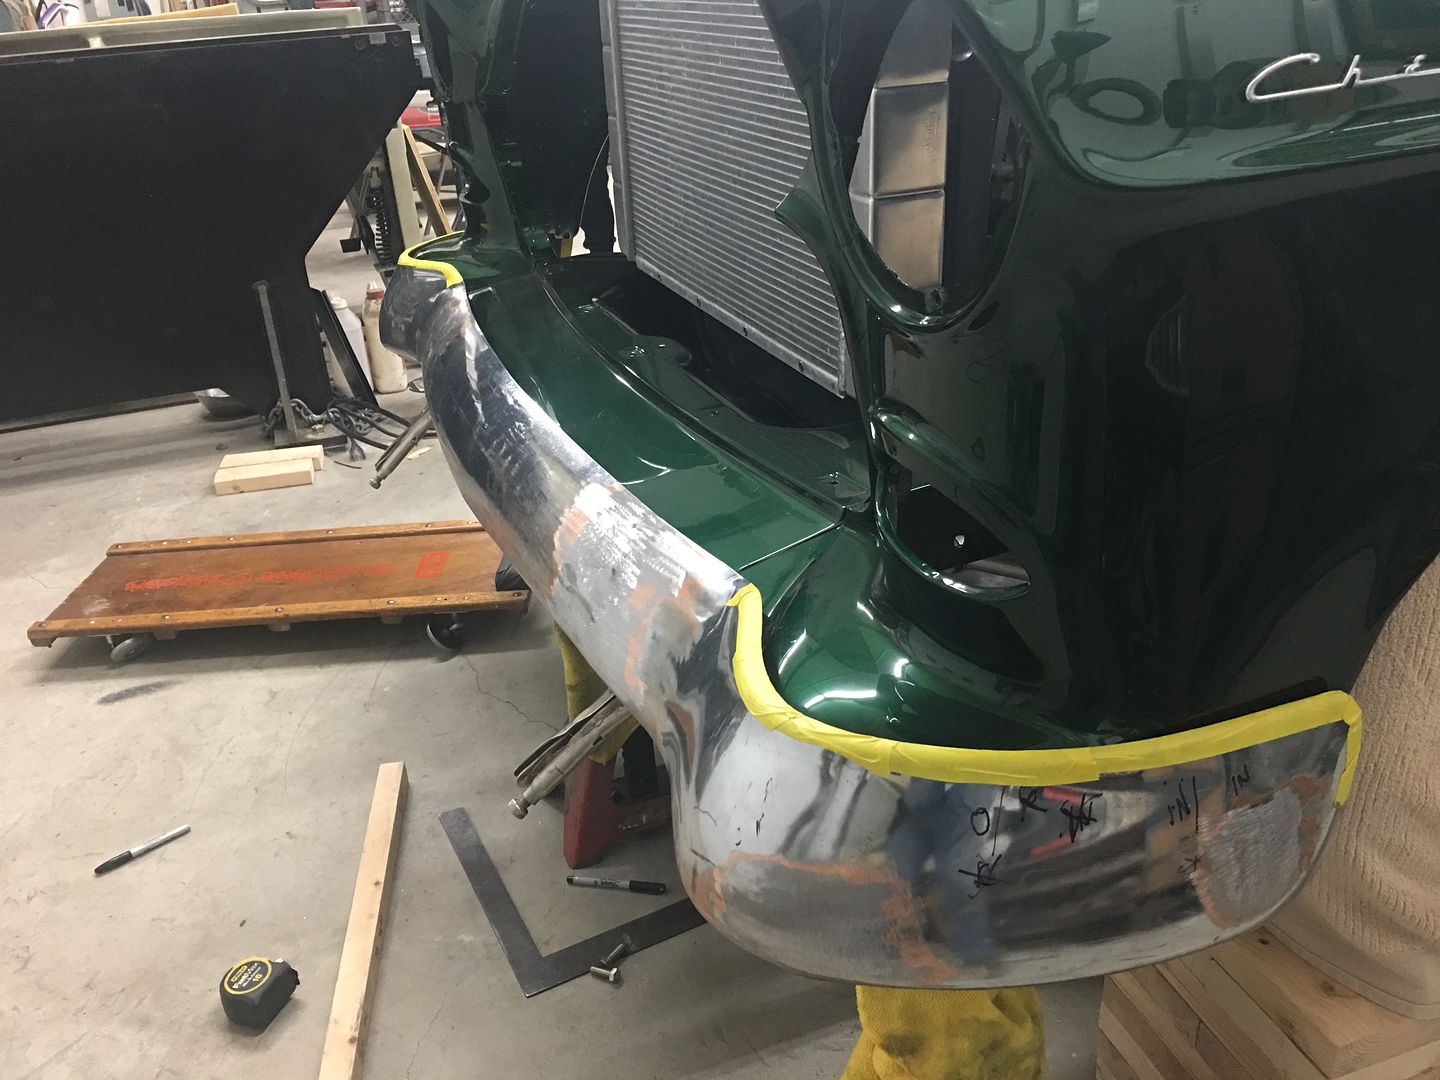
And now for the next wrench thrown in our bumper modifications.. Welding causes shrinking, so TIG welding the slotted brackets onto the back side of the bumper invariably causes flat spots on the front side of where the brackets reside.. So some quick work on the South Bend to make a purpose built punch so we can do some metal bumping on the bumper..

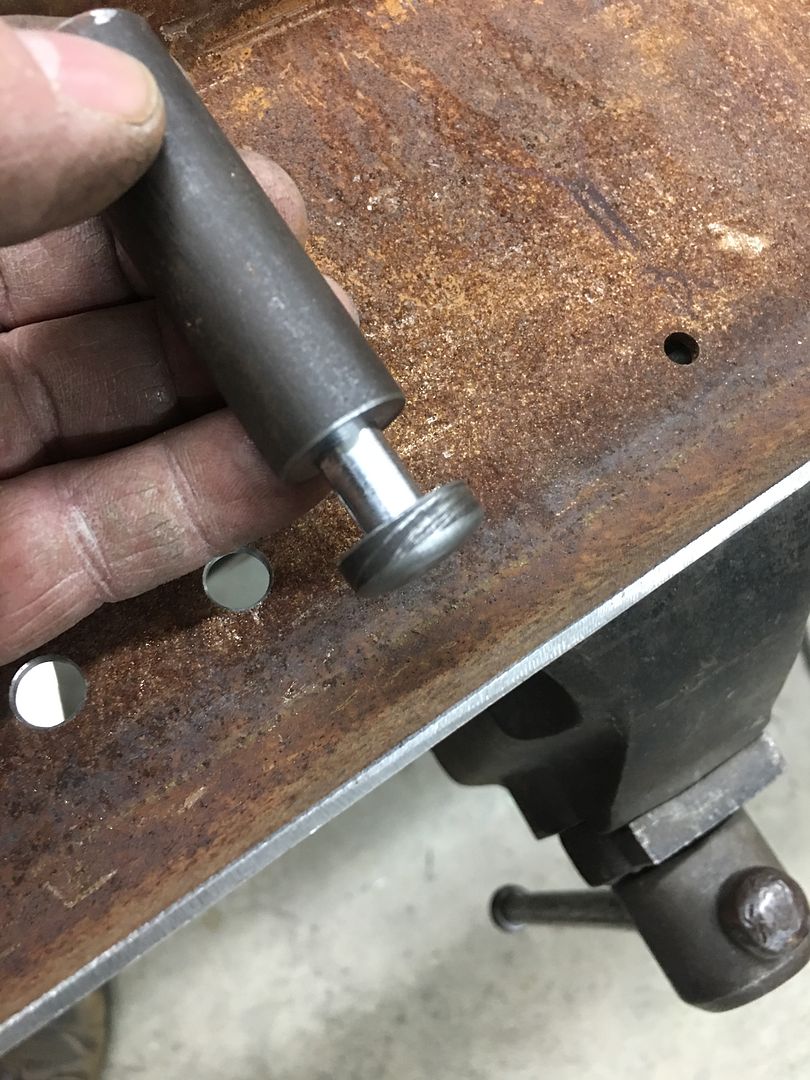
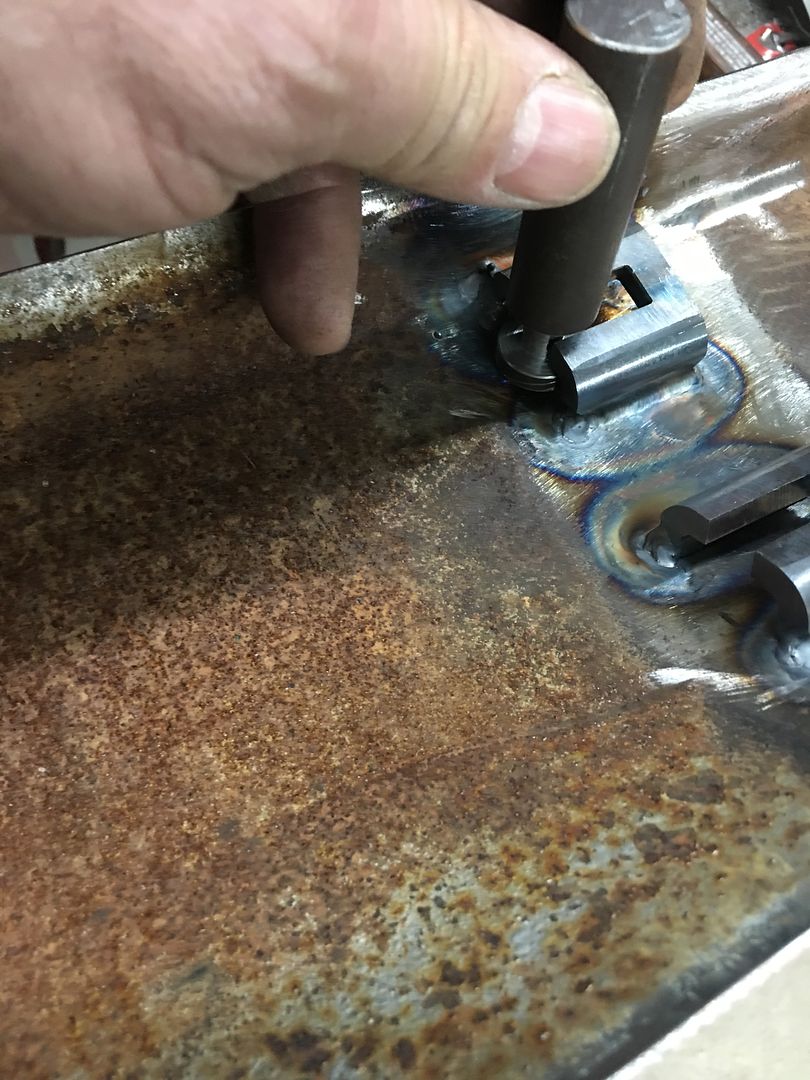
….or the motion picture visual....
https://www.youtube.com/watch?v=dH5F7VZRwvI
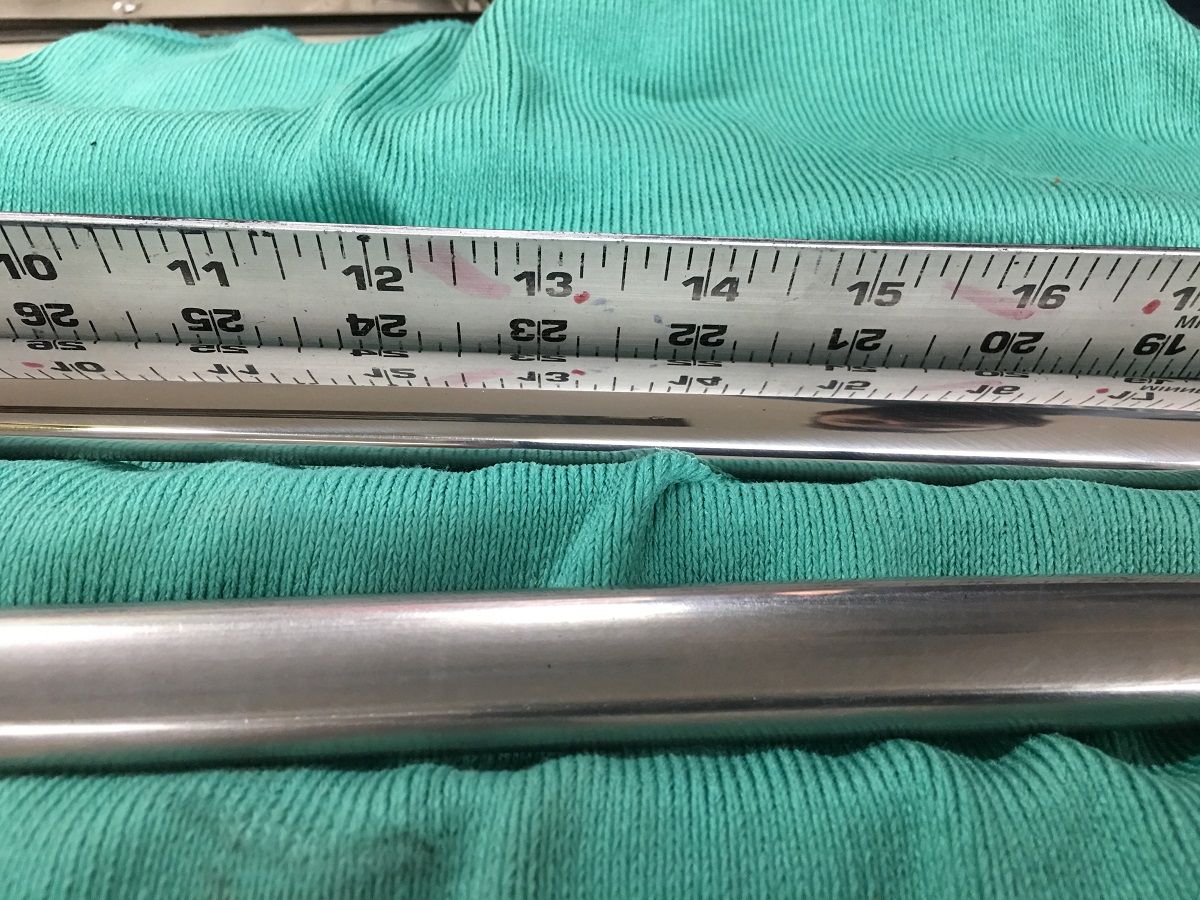
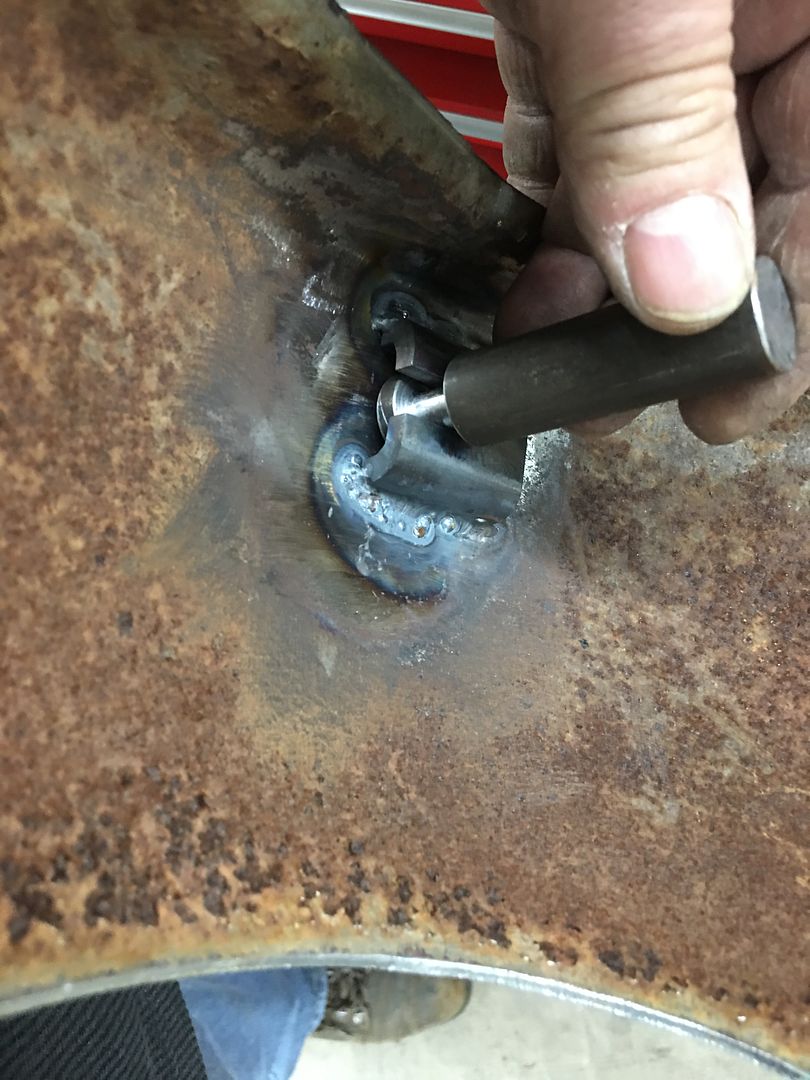
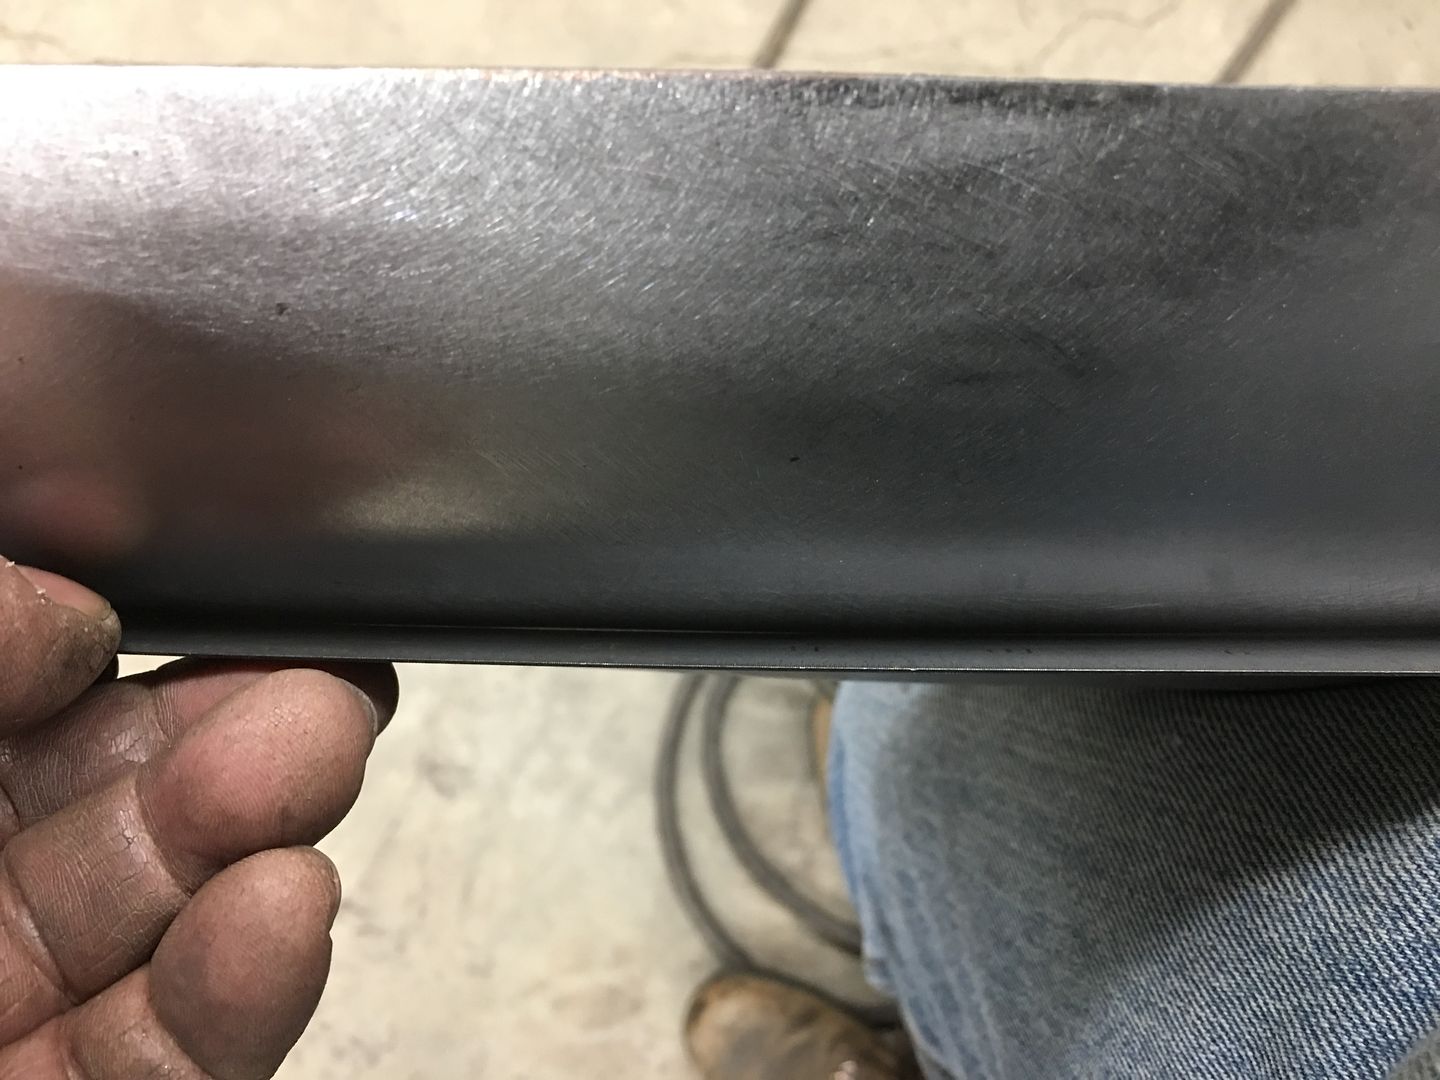
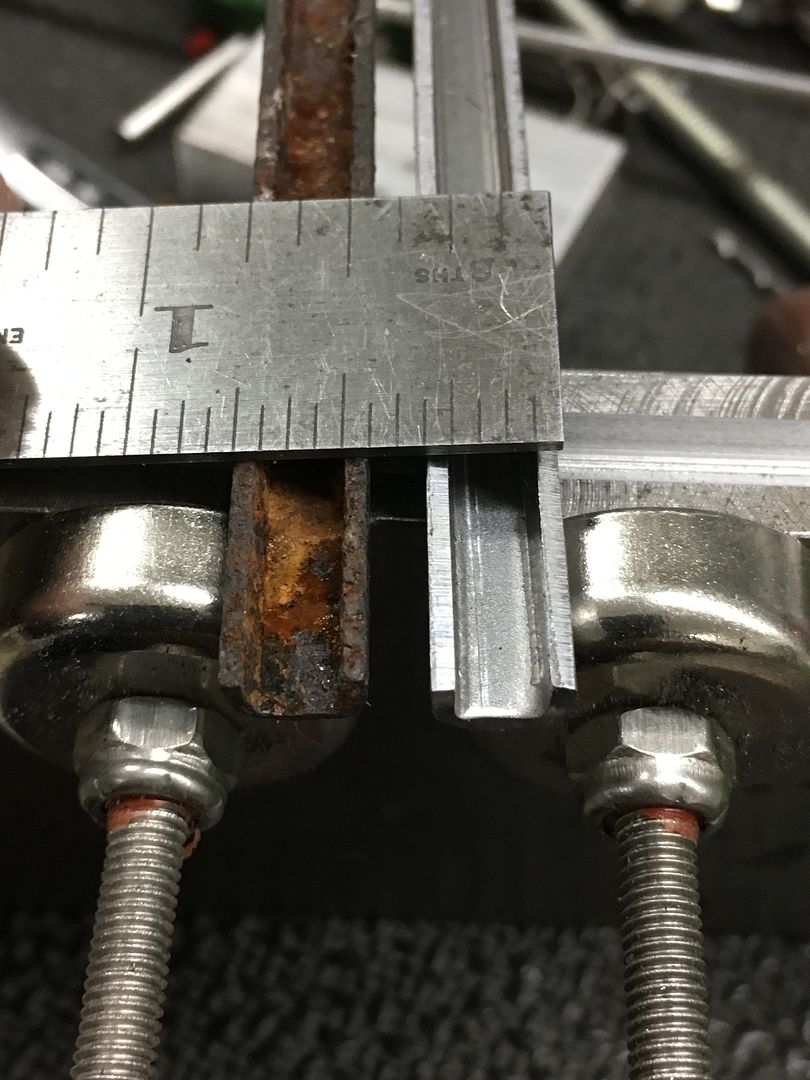
And after a bit of metal bumping, we have the area down to less than a 1/32 depression, which should be just fine for the copper stage of plating..
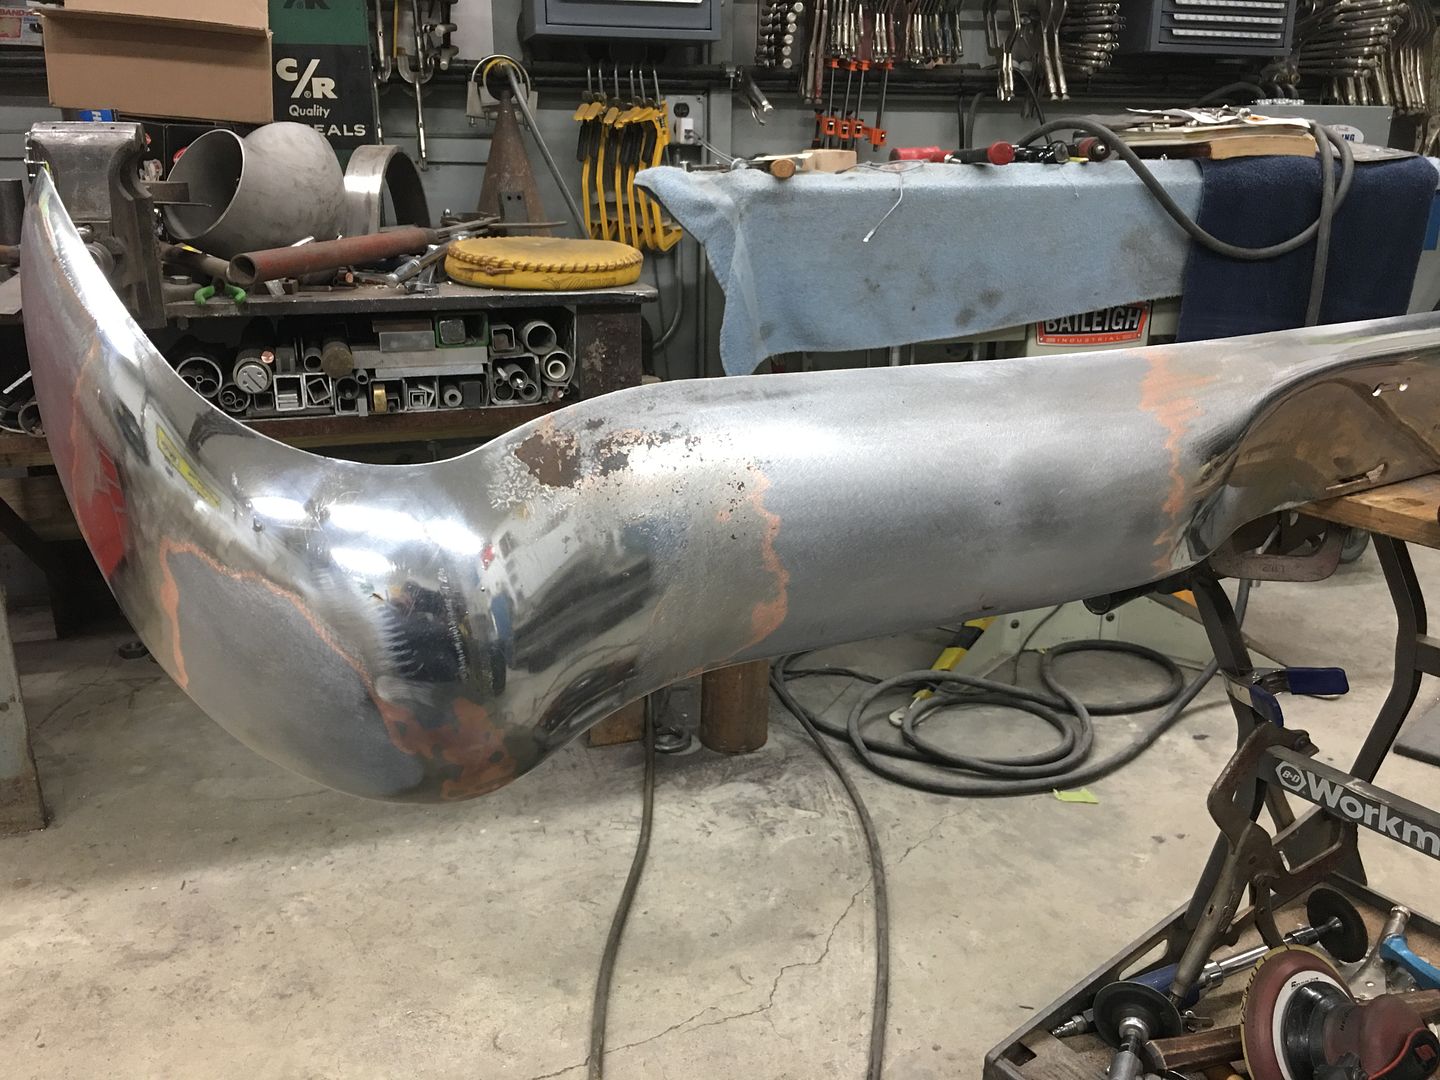
Note the minimal gap behind the straightedge. One down, three to go...
Robert
-
02-16-2021 10:01 AM #1597
CHR Member/Contributor
- Join Date
- Mar 2005
- Location
- Tigard
- Car Year, Make, Model: 63 Nova SS
- Posts
- 2,591
What a masterpiece, Robert!
I continue to visit this thread and am always amazed at not only the craftsmanship but the ingenuity you have shown. I often "ponder" how to accomplish a task for which there is no known (at least to me) tool and have made a few adaptions (as have most hot rodders) to common hand tools, but when I see the creativity displayed here I'm blown away. I hope you're able to continue imparting your creative genius to some younger folks as I fear we're loosing such to automated systems and computer controlled devices. Not that I'm against progress and the innovations CAD/CAM brings to the party but there is something almost sacred about "hand made" items - especially in restorations that touches me deeply.
I also enjoy seeing the pictures that include your hands - rough and well worn - attesting to the time and sacrifice that you have spent mastering your craft.
And the color..... Oh my goodness - it is truly the perfect green for this car. In my humble opinion, you're a modern day Michelangelo working with metal.
Regards,
Glenn"Where the people fear the government you have tyranny. Where the government fears the people you have liberty." John Basil Barnhil
-
02-17-2021 10:19 PM #1598
CHR Member
- Join Date
- Jun 2008
- Location
- Leonardtown
- Car Year, Make, Model: Walking
- Posts
- 1,228
Glenn, thanks for the kind words. During a stint at my previous employer I did some ISO work instruction writing, so somehow the threads I post seem to follow a similar format, to explain something that perhaps others can do the same. Mike, who works with me on Saturdays, works at a test lab where they always ask him where he comes up with some of the stuff he does. He tells them, I work with this old guy on the weekends, and.....
So I know some of it's rubbing off onto the younger crowd...
Robert
-
03-03-2021 07:00 AM #1599
CHR Member
- Join Date
- Jun 2008
- Location
- Leonardtown
- Car Year, Make, Model: Walking
- Posts
- 1,228
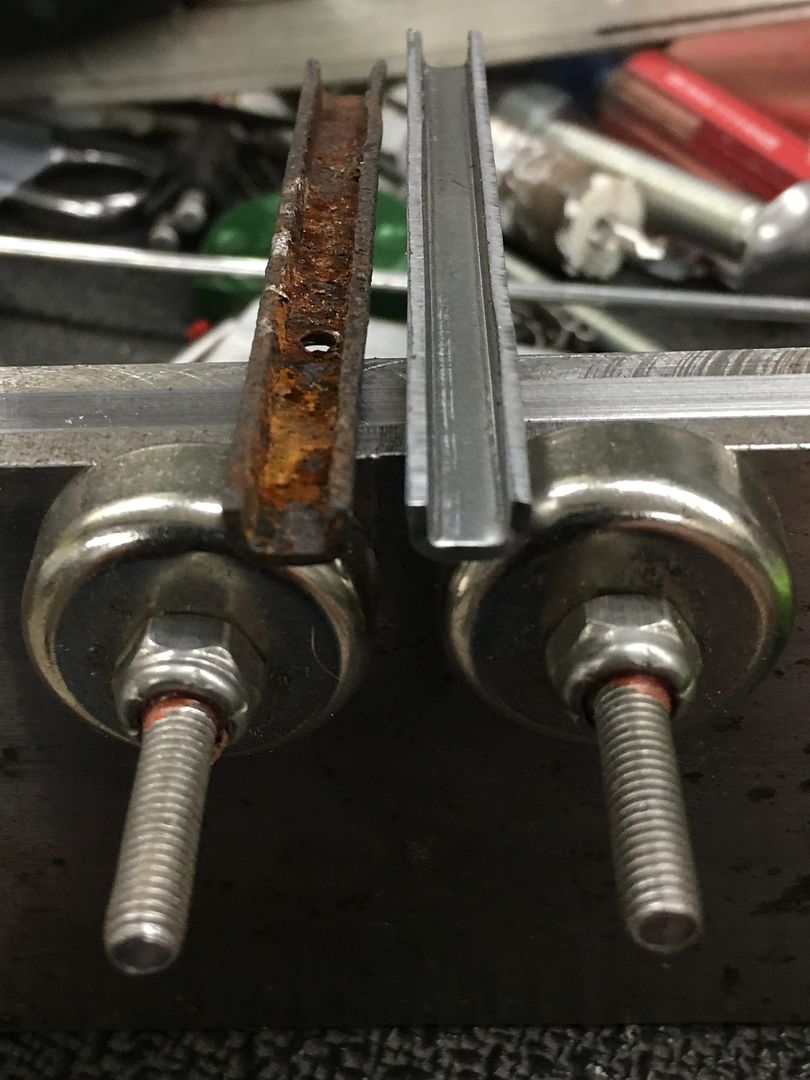
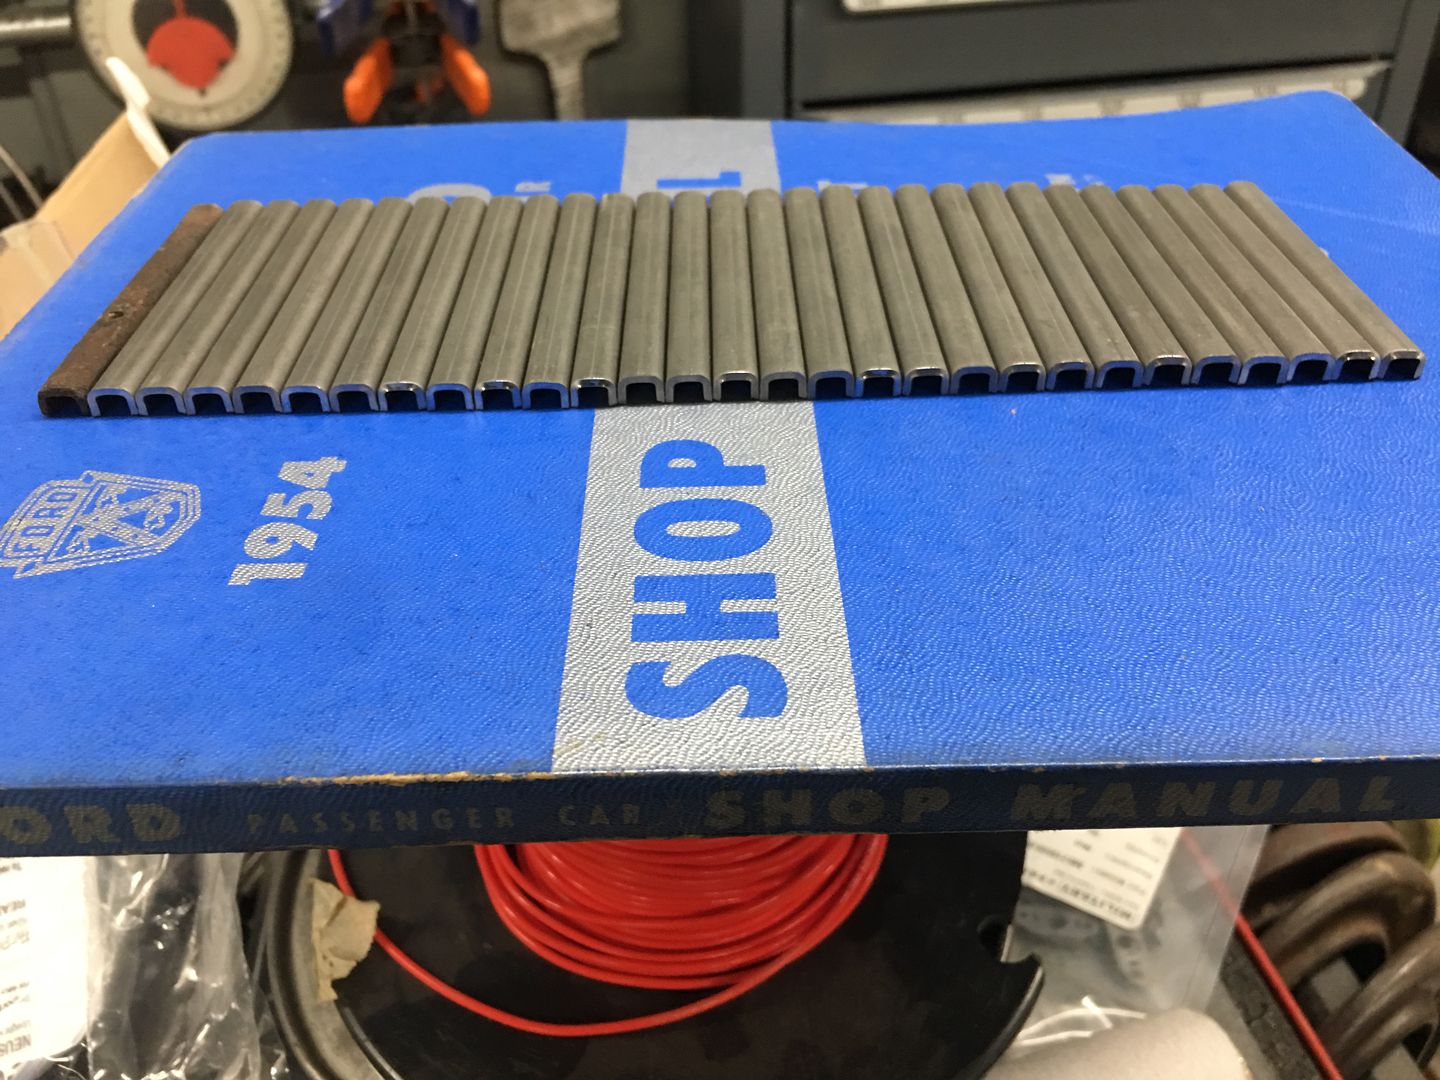
So we had some tilt in windows we were cleaning up and found one with one of the "pivots" rusted off at the end. So another was pulled as a sample, got to be able to make one of these. They were a folded "pin" made of 16 gauge steel sheet, approx. .312 wide and two folded sides approx. .20 high. I attempted a die set for the Lennox, but that attempt failed miserably (picture later....) The magnetic brake has never worked well with anything having such a short fold, so that attempt saw the piece slipping, to no avail. So we are back to a press brake operation. I had some 1/2" wide dies, but the VEE relief was too wide for such a short flange. Since the press brake dies have two sides, why not cut another VEE on the bottom side?
The overall width of the VEE needed to be less than 1/4 per initial estimates. I took the die section to Combs Prototype and Fabrication so Josh could cut the VEE for me, we settled on approximately .20 wide.

Finished cut, fresh from Josh's HAAS machining center, and then I bent up a back gauge held on by magnets...
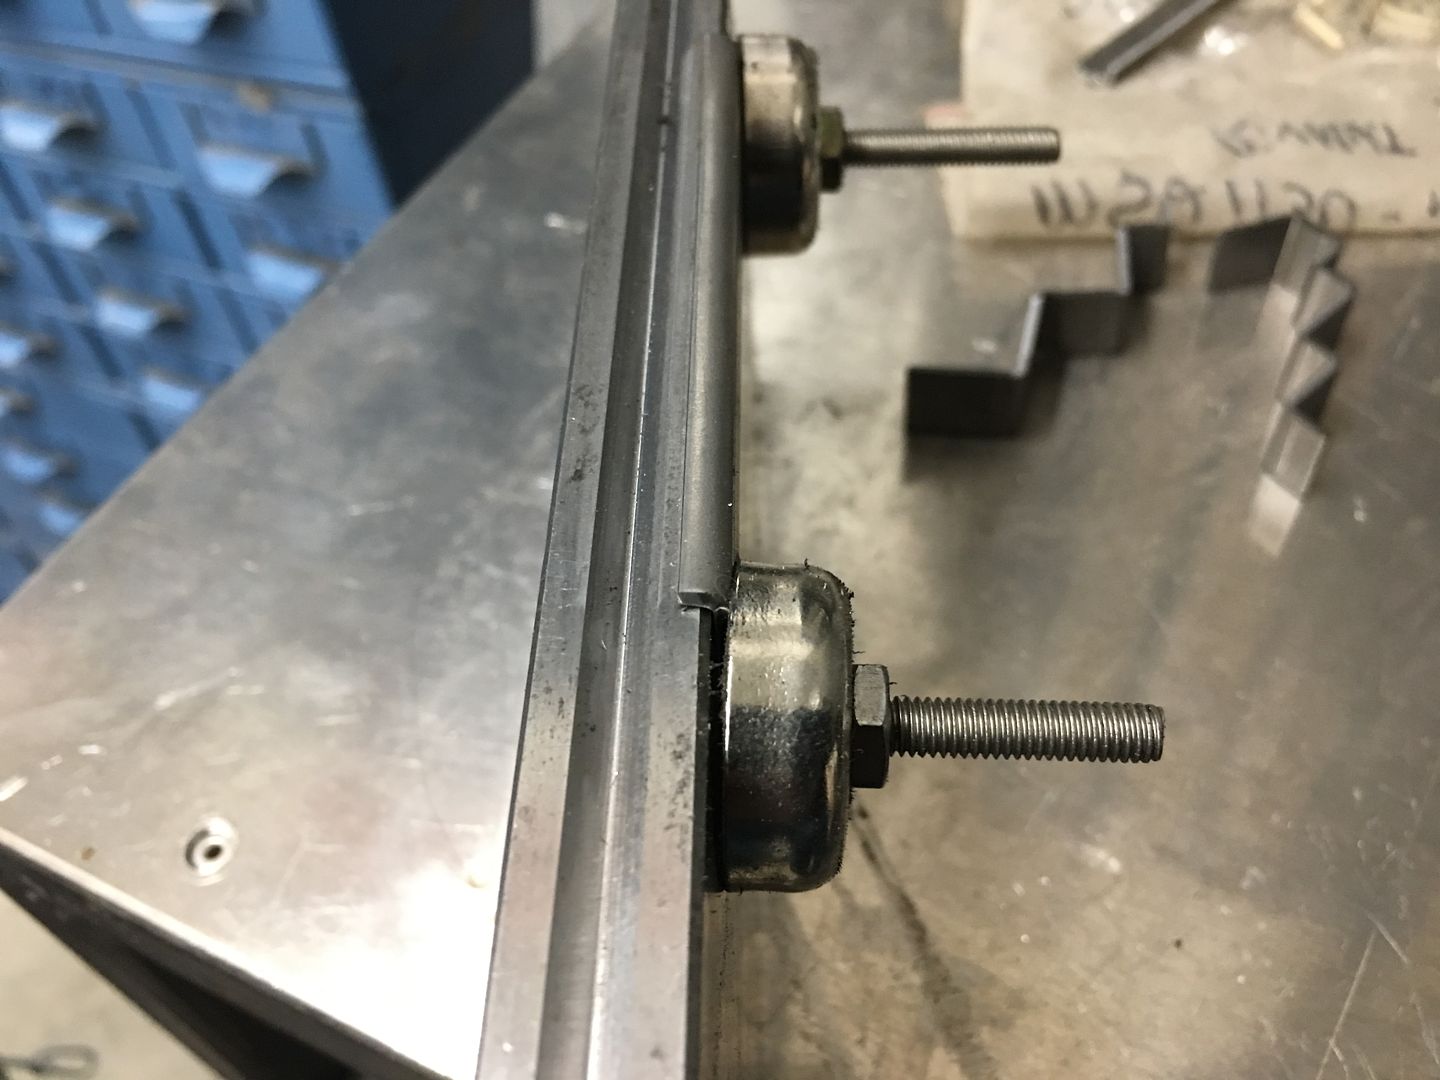
Since Josh's VEE bit was a 90, springback effect gave us a slightly gapped opening of the flanges, so this prototype was snugged down in the bench vise.. Here's the side by side comparison...
While the machine was set up, we made multiples in case we ran into any other rust issues elsewhere. Next, for consistency in the side folds, the dies in the press brake were changed out to flat sides out, and set up the limit stop to provide the perfect 90* fold for the sides. To properly position the part, magnets were used to keep the bottom flat perpendicular to the die faces. Then all the parts were pressed to overcome the springback. Now all the parts will have 90* folds.
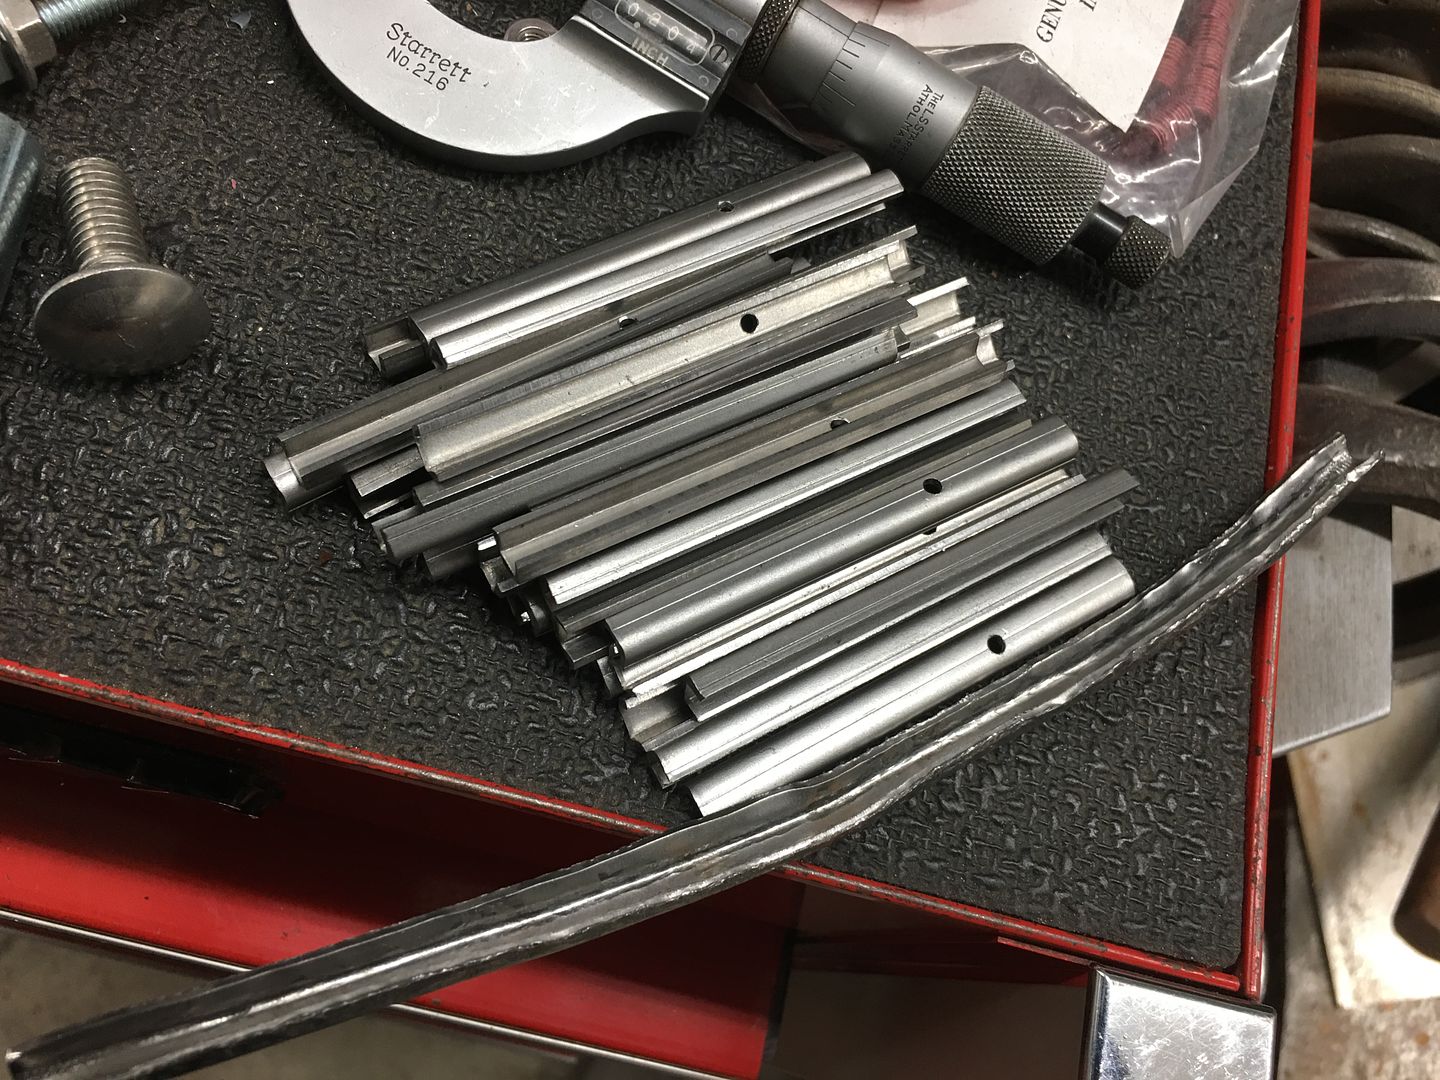
Comparison....
Holes pre-drilled for our self tapping screws .and a comparison to our mangled up mess from the attempt on the Lennox.
I missed getting a picture of the gooseneck die setup in the brake, so here is a simulation on the bending process....
https://www.youtube.com/watch?v=KdFFxLnwiFg
.Robert
-
03-09-2021 04:40 AM #1600
CHR Member
- Join Date
- Jun 2008
- Location
- Leonardtown
- Car Year, Make, Model: Walking
- Posts
- 1,228
In another back up and punt moment, we found some interference with the new bumper brackets and the rear tailpan. In order to tuck things in nice and close, we need to trim a portion of the rear channel in the tail pan. Nothing a pair of tin snips and a file can't resolve. Pay no attention to that green paint. The bare edges will be touched up with SPI epoxy primer..
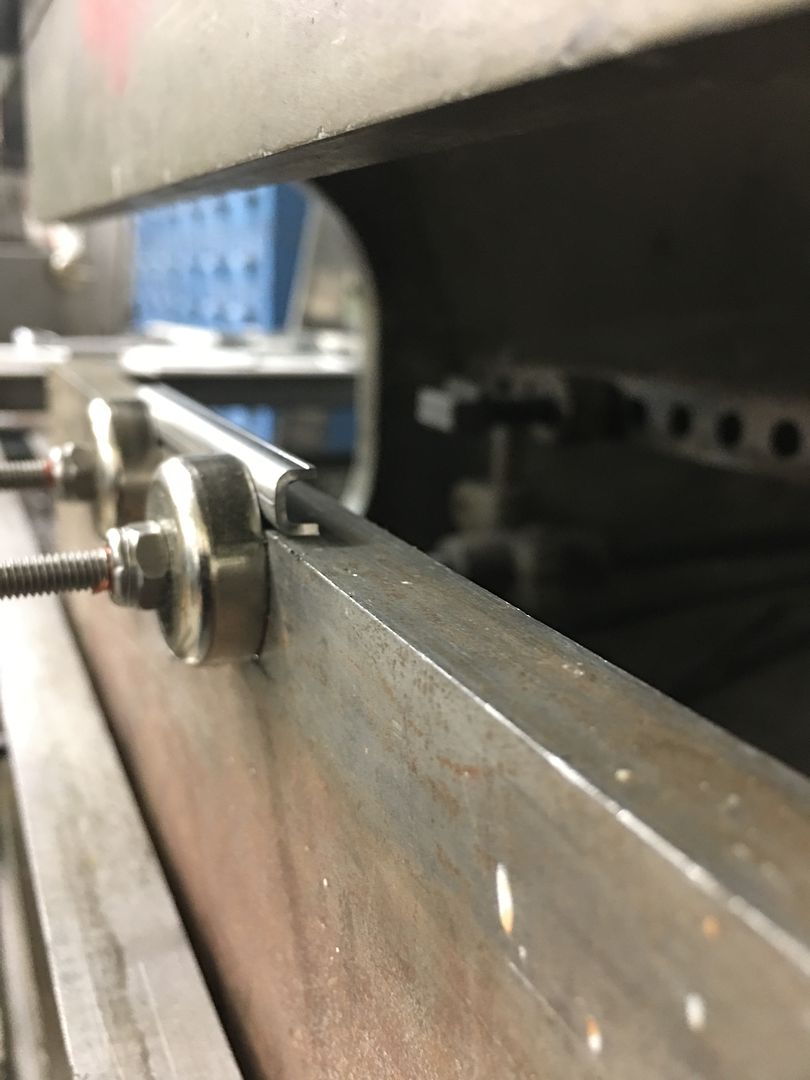
Our final test fit on the back bumper before chroming:
https://www.youtube.com/watch?v=MzeOzhcYrSg
On to our tail light hidden fuel fill...…
https://www.youtube.com/watch?v=848V2PbuQJw
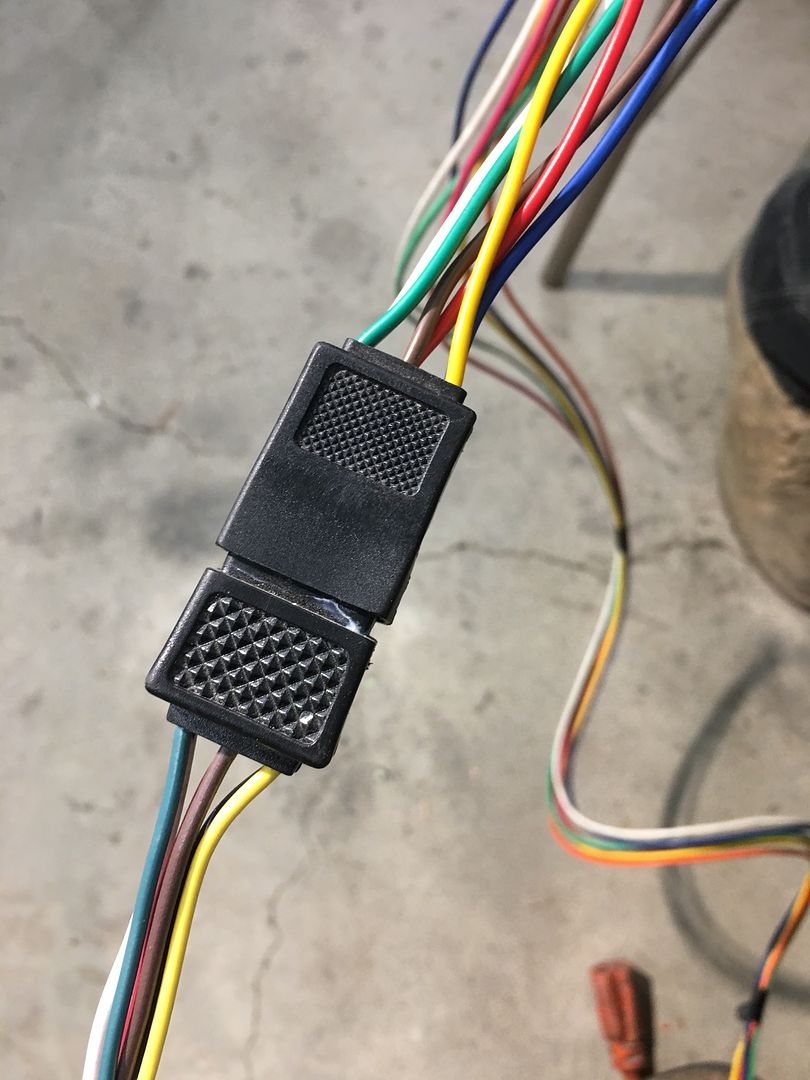
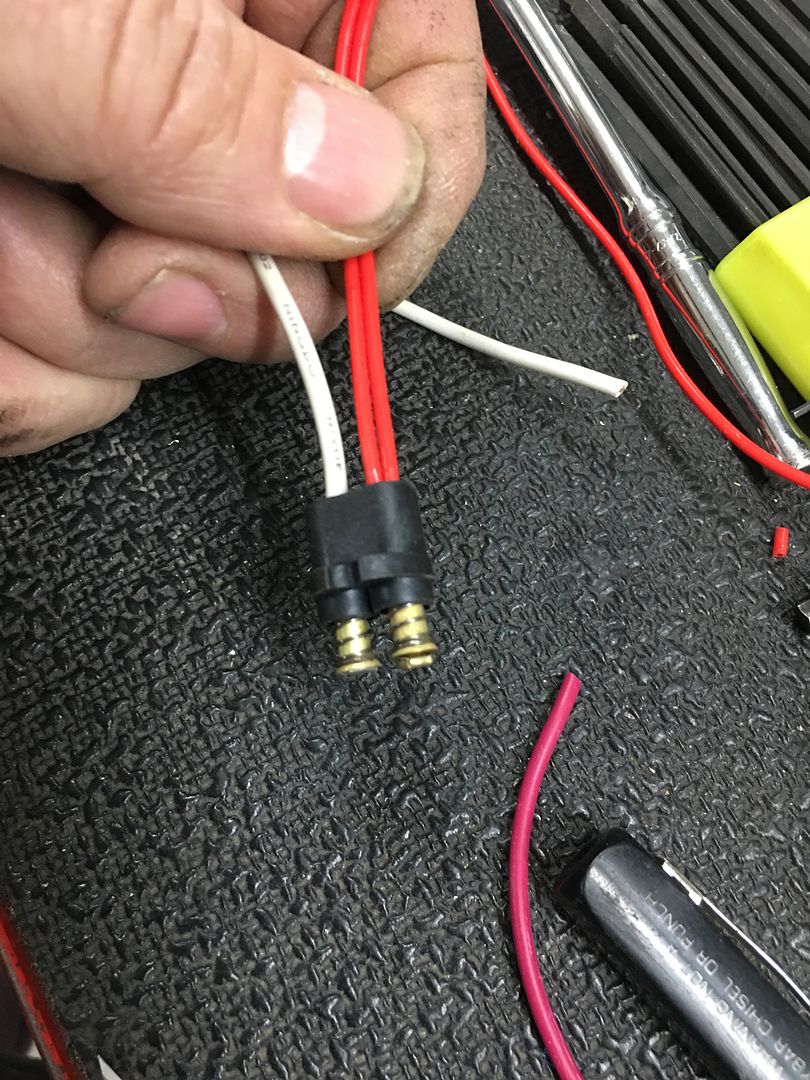
This thing had been giving us fits in intermittent operation, and it hasn't even been exposed to water yet. Looking at the wiring (why can't we keep the colors consistent through?)…..
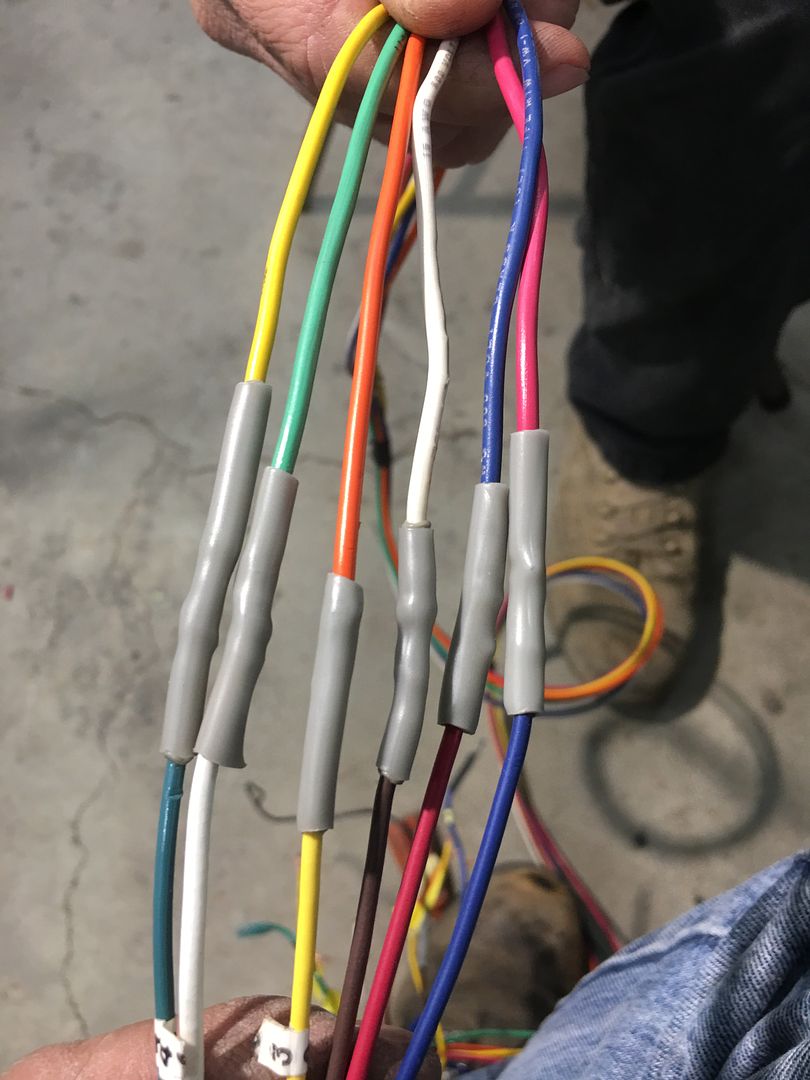
Well this isn't part of the problem... found a couple loose terminals..

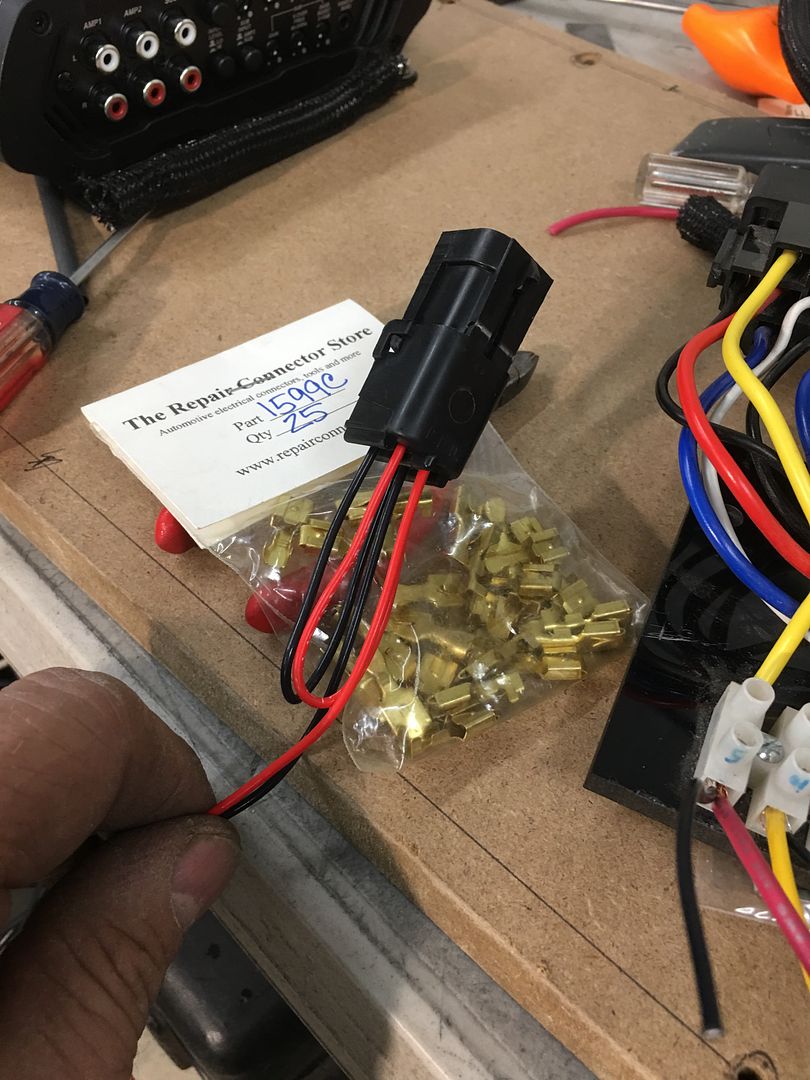
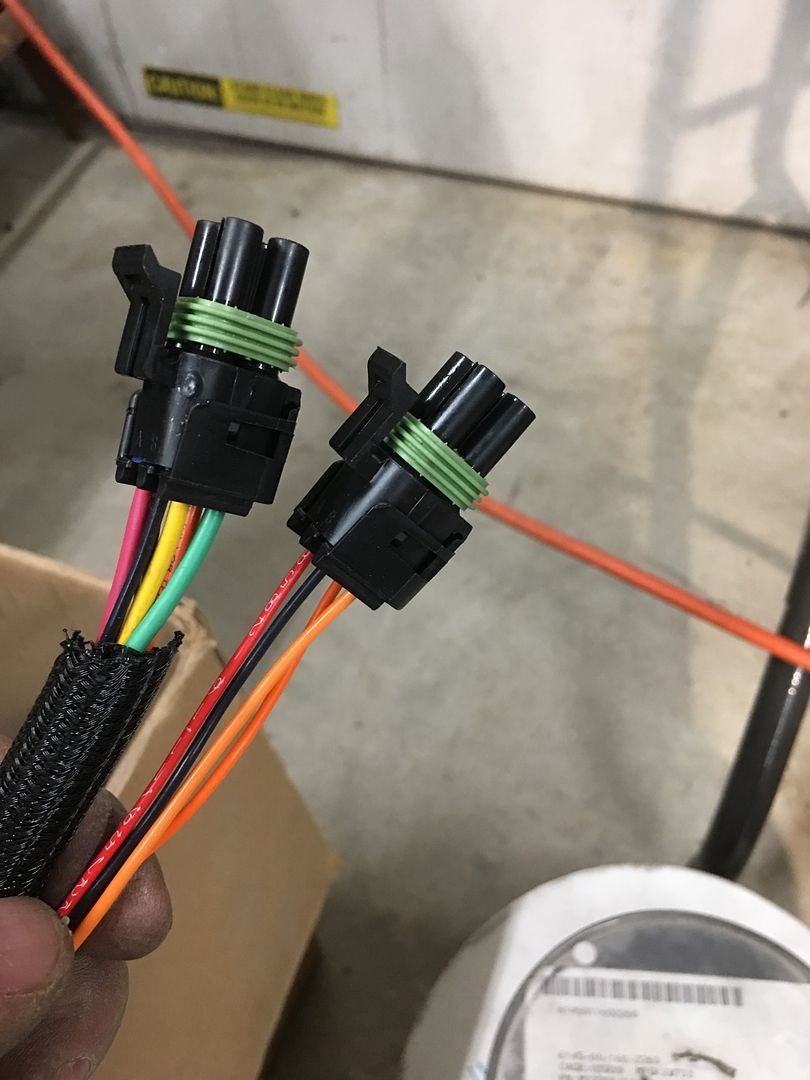
So we decided to eliminate the original trailer connector and term board connections and replace with Weather Pack connectors. The relays will be mounted behind the rear seat for a closer proximity to the tail light, and the DPDT toggle switch will be replaced with a DPDT momentary rocker.
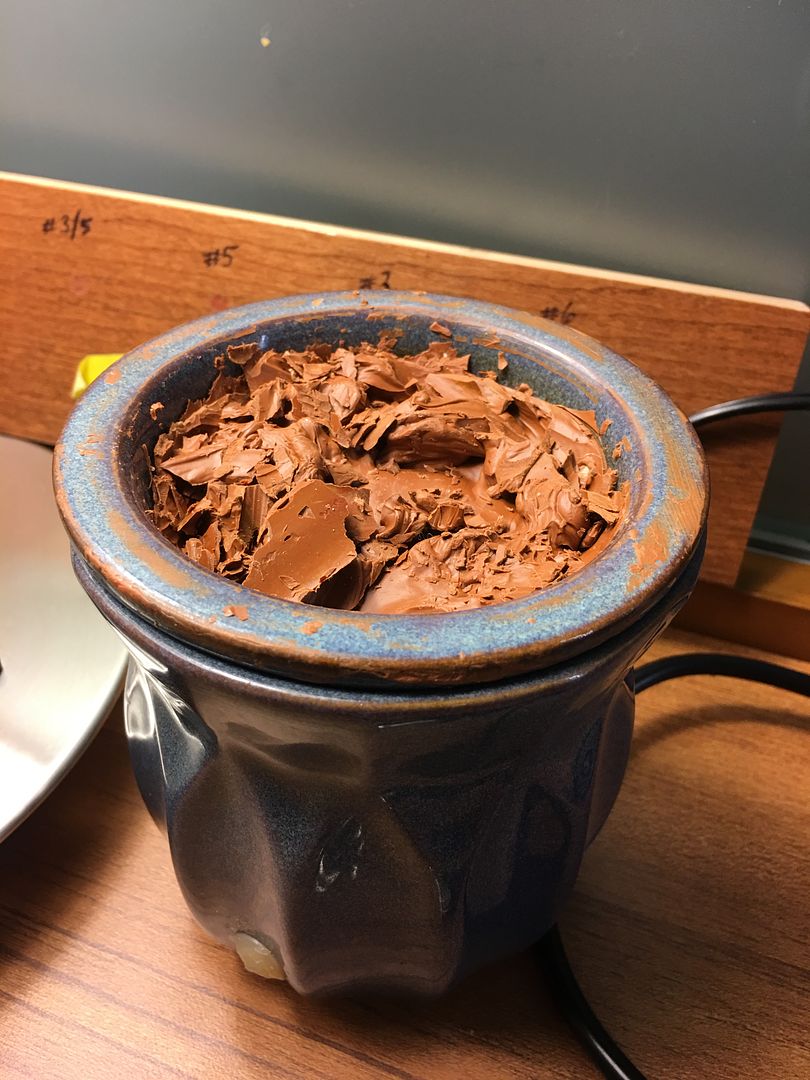
On a side note, a recent task for the day job involved some cherry trim boards that were pre-stained and we had difficulty finding a match using Minwax blend-fill pencils. The Number 3, 5, and 6 were all off....
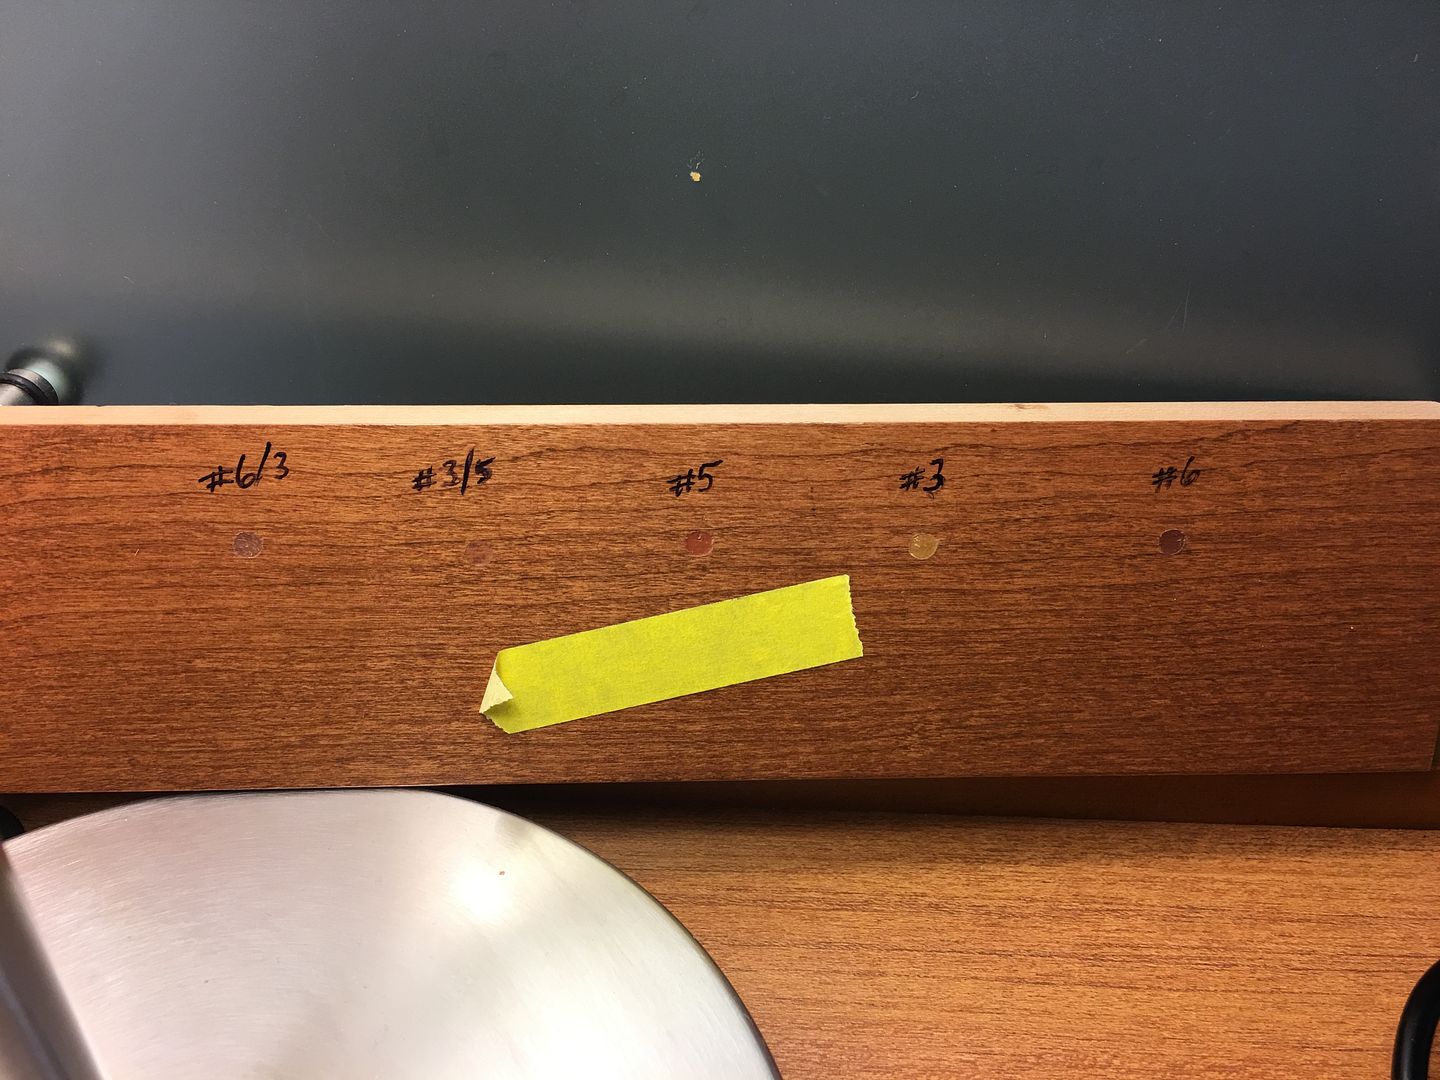
However, kneading the 3 and 5 together showed promise. But how to do that on a larger, less time consuming scale. I will say none of the wife's wax melting pots were harmed in this experiment, but the trim screw holes in stained trim were all but invisible when done. The pencils were unwrapped, cut up into 1" lengths, then melted and mixed together. In case someone else needs to do the same...
Robert
-
03-19-2021 10:40 AM #1601
CHR Member
- Join Date
- Jun 2008
- Location
- Leonardtown
- Car Year, Make, Model: Walking
- Posts
- 1,228
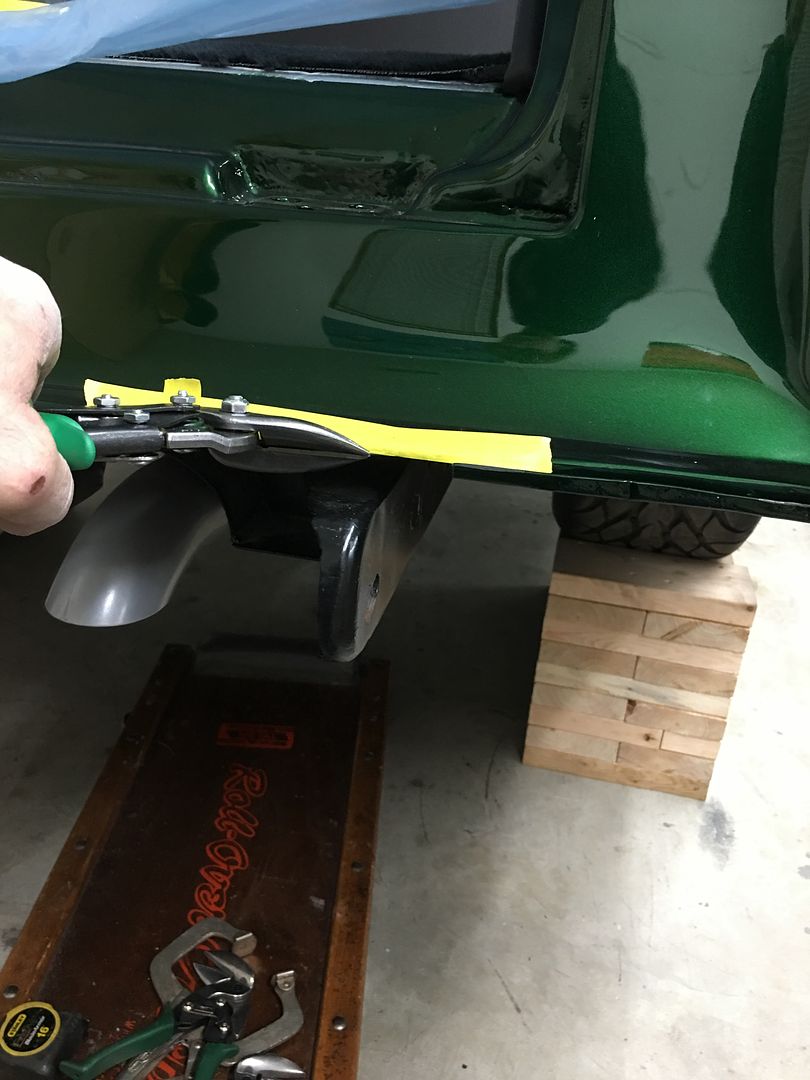
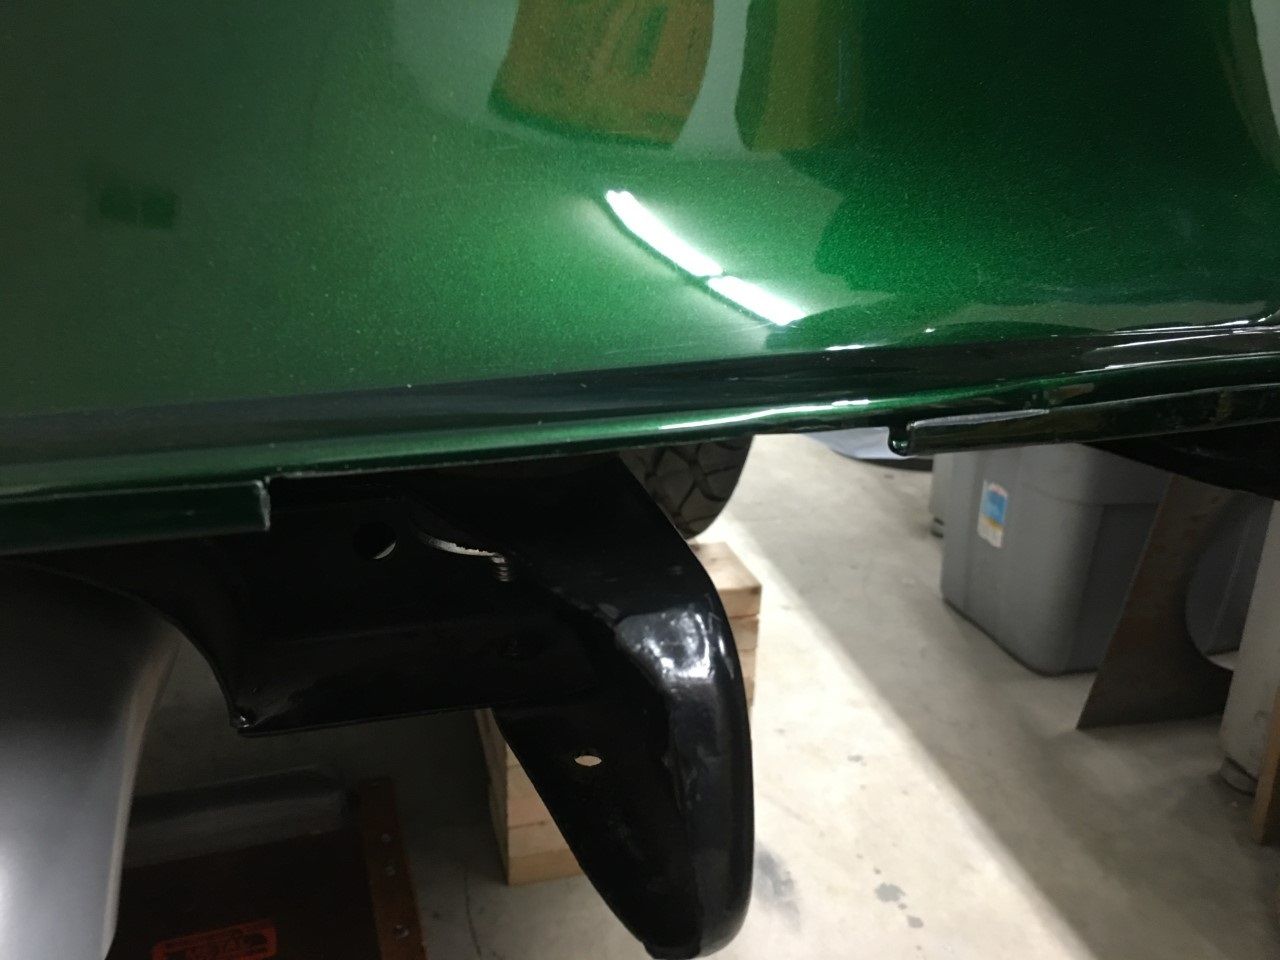
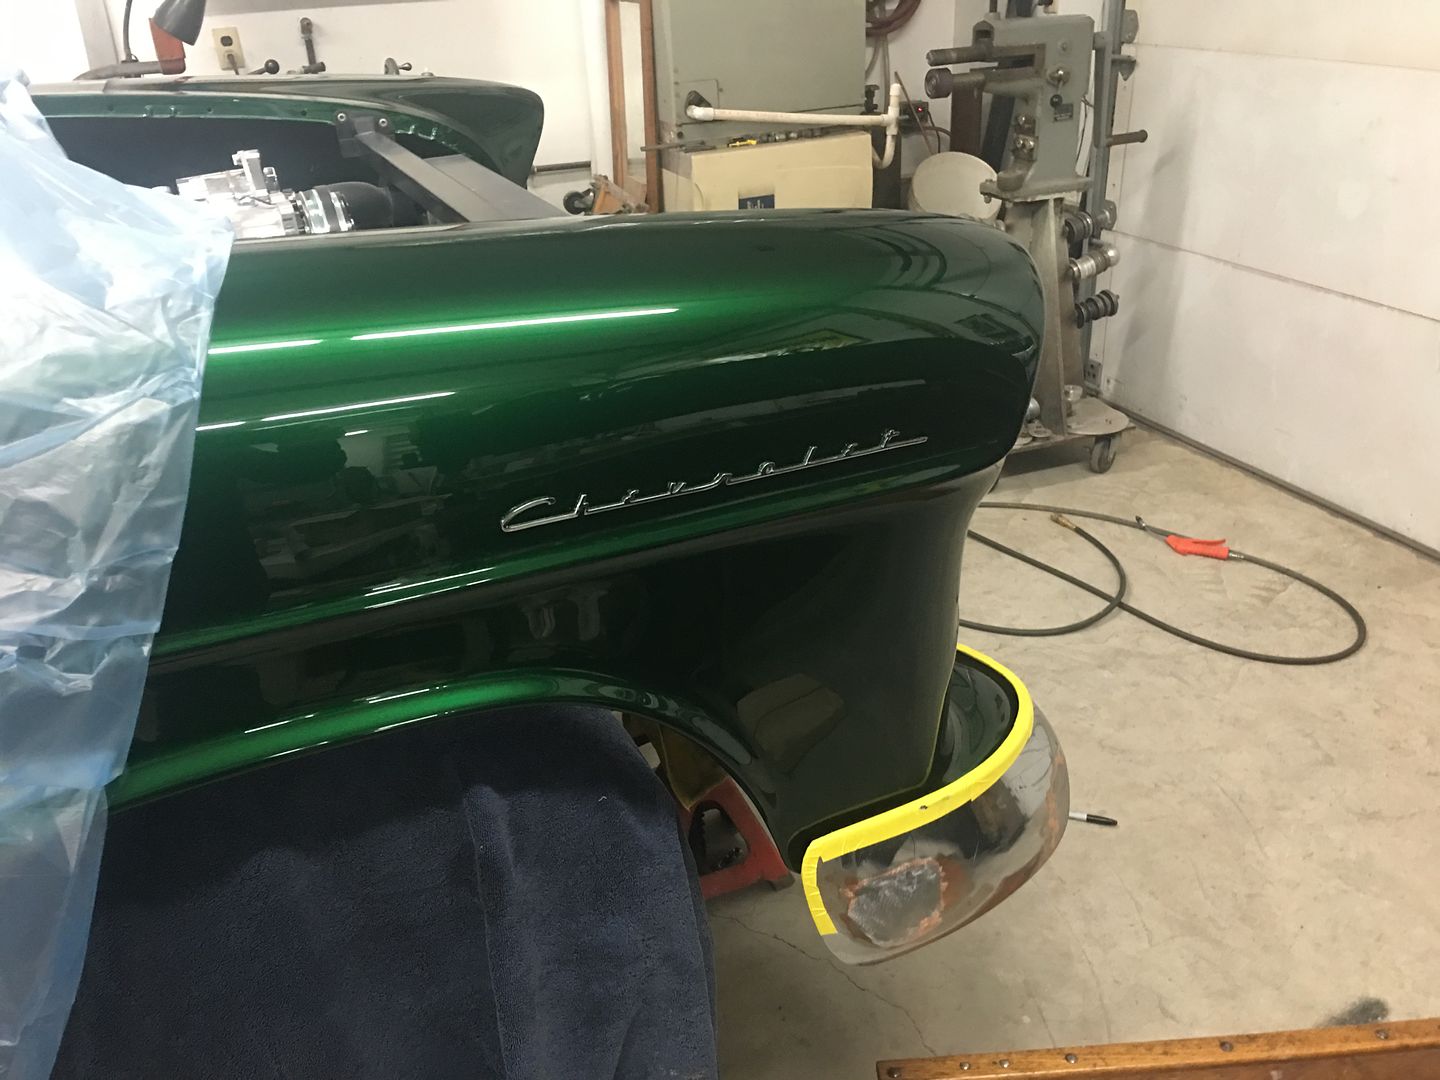
So part of our fitment exercises with the bumpers has been to get them in a little closer to the body for more consistent gaps to the body. The rear bumper had it's challenges with needing to notch out the lower lip of the tailpan.
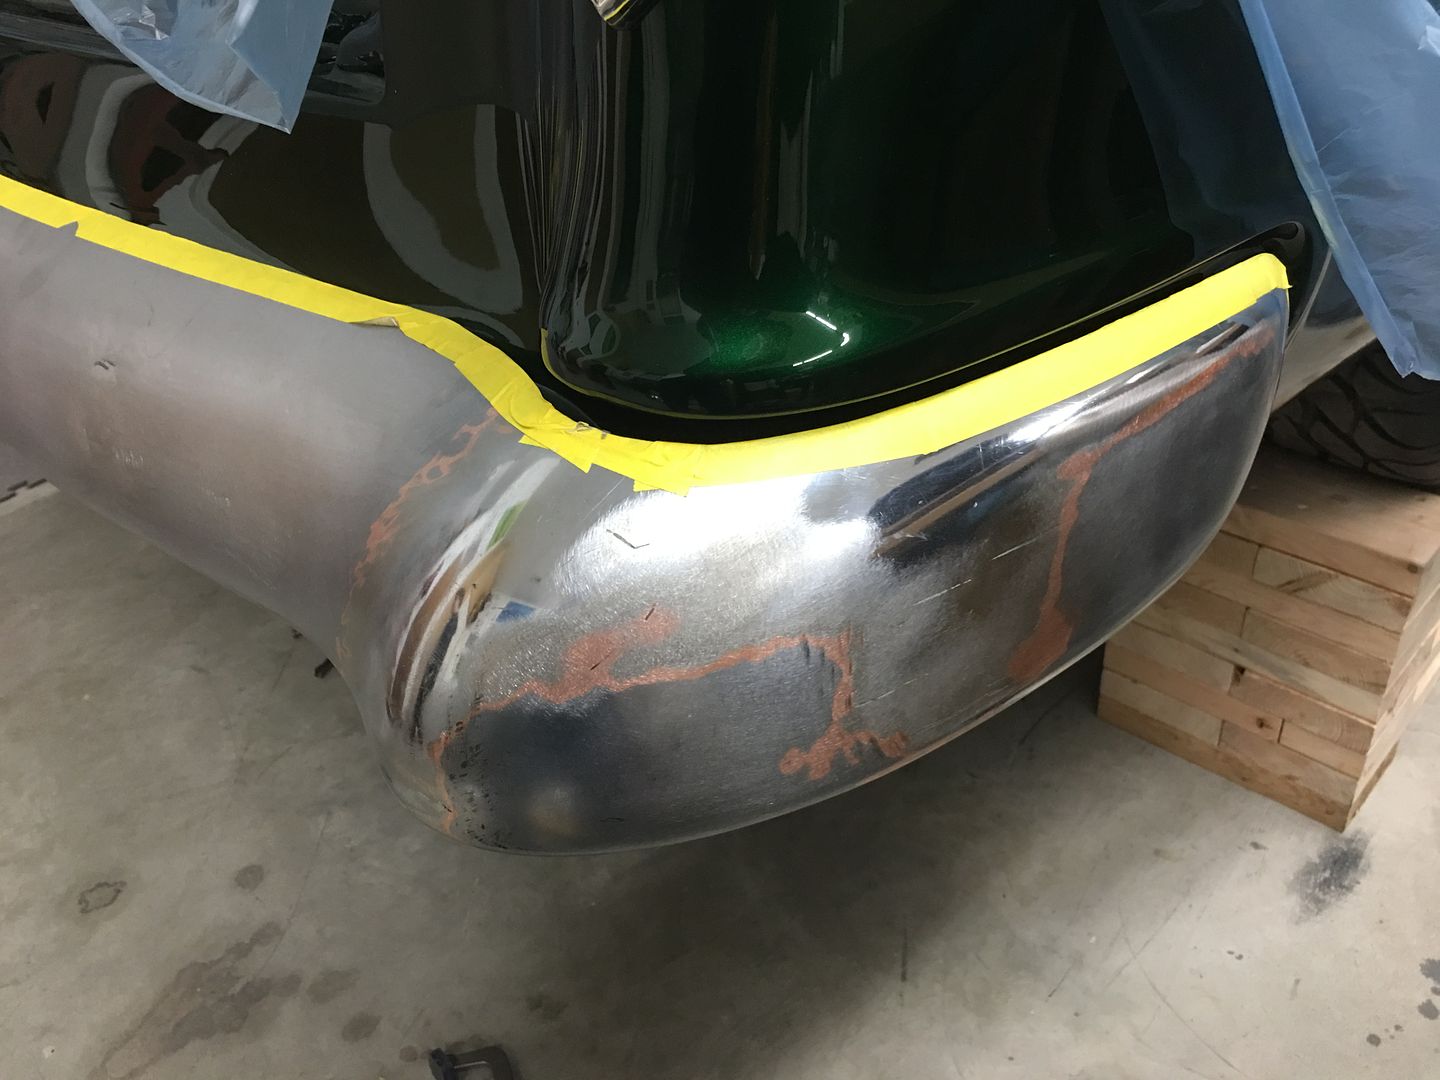
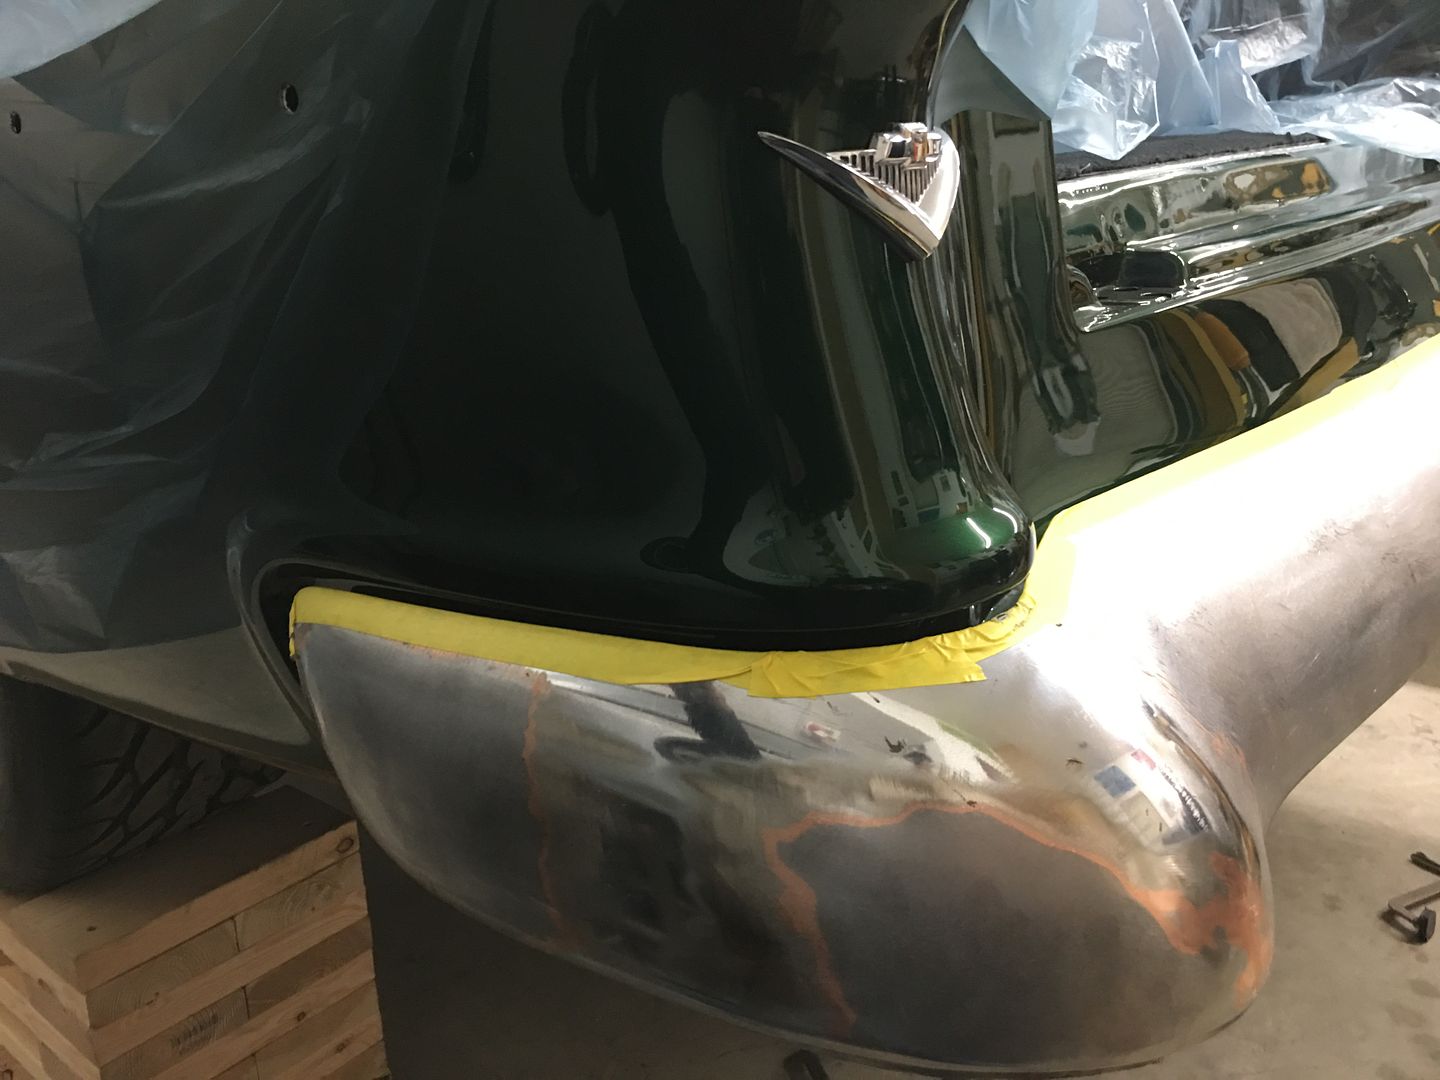
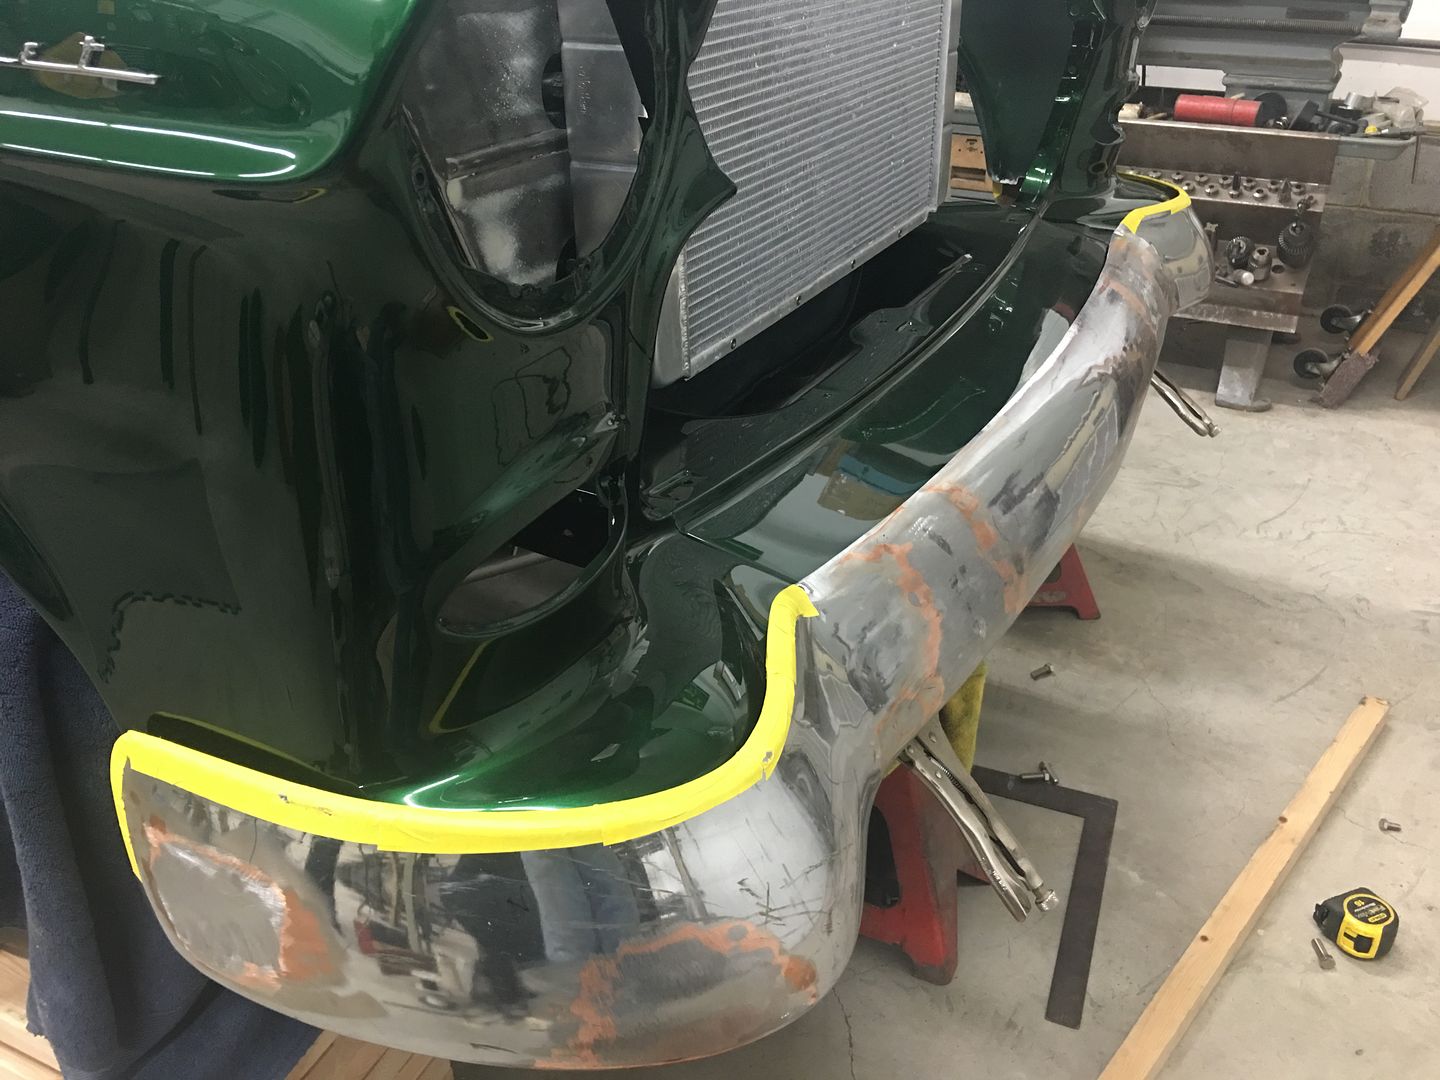
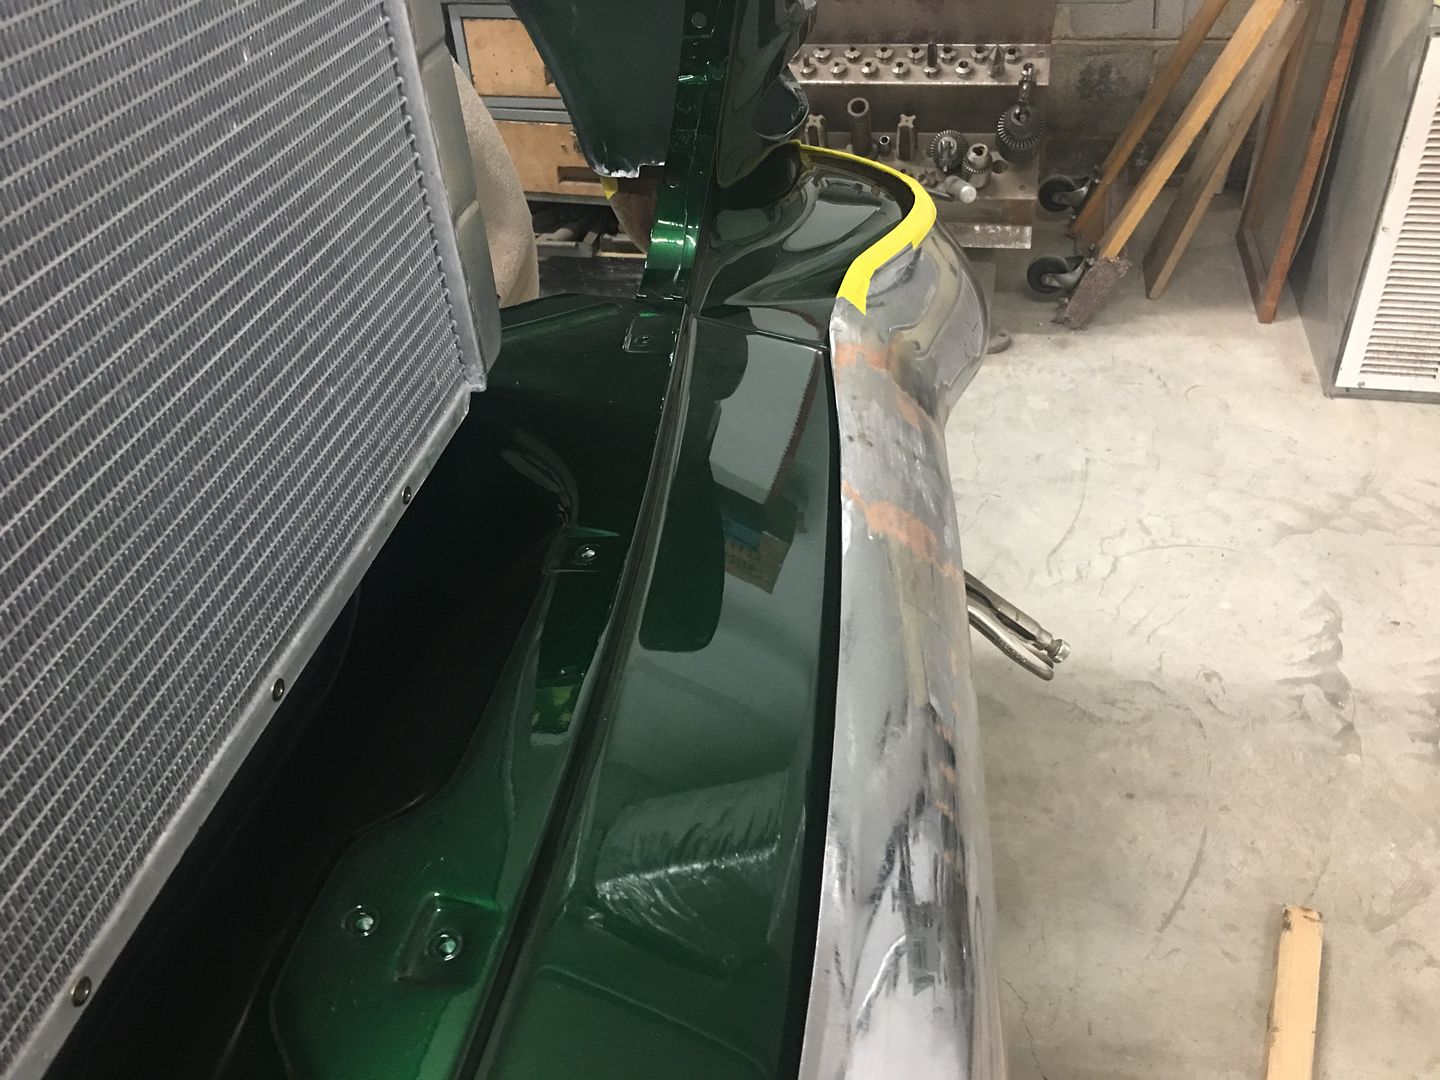
The front would be no different. The front nose of the frame rails was hitting the rear side of the factory brackets and preventing us from locating the bumper for a good consistent gap..
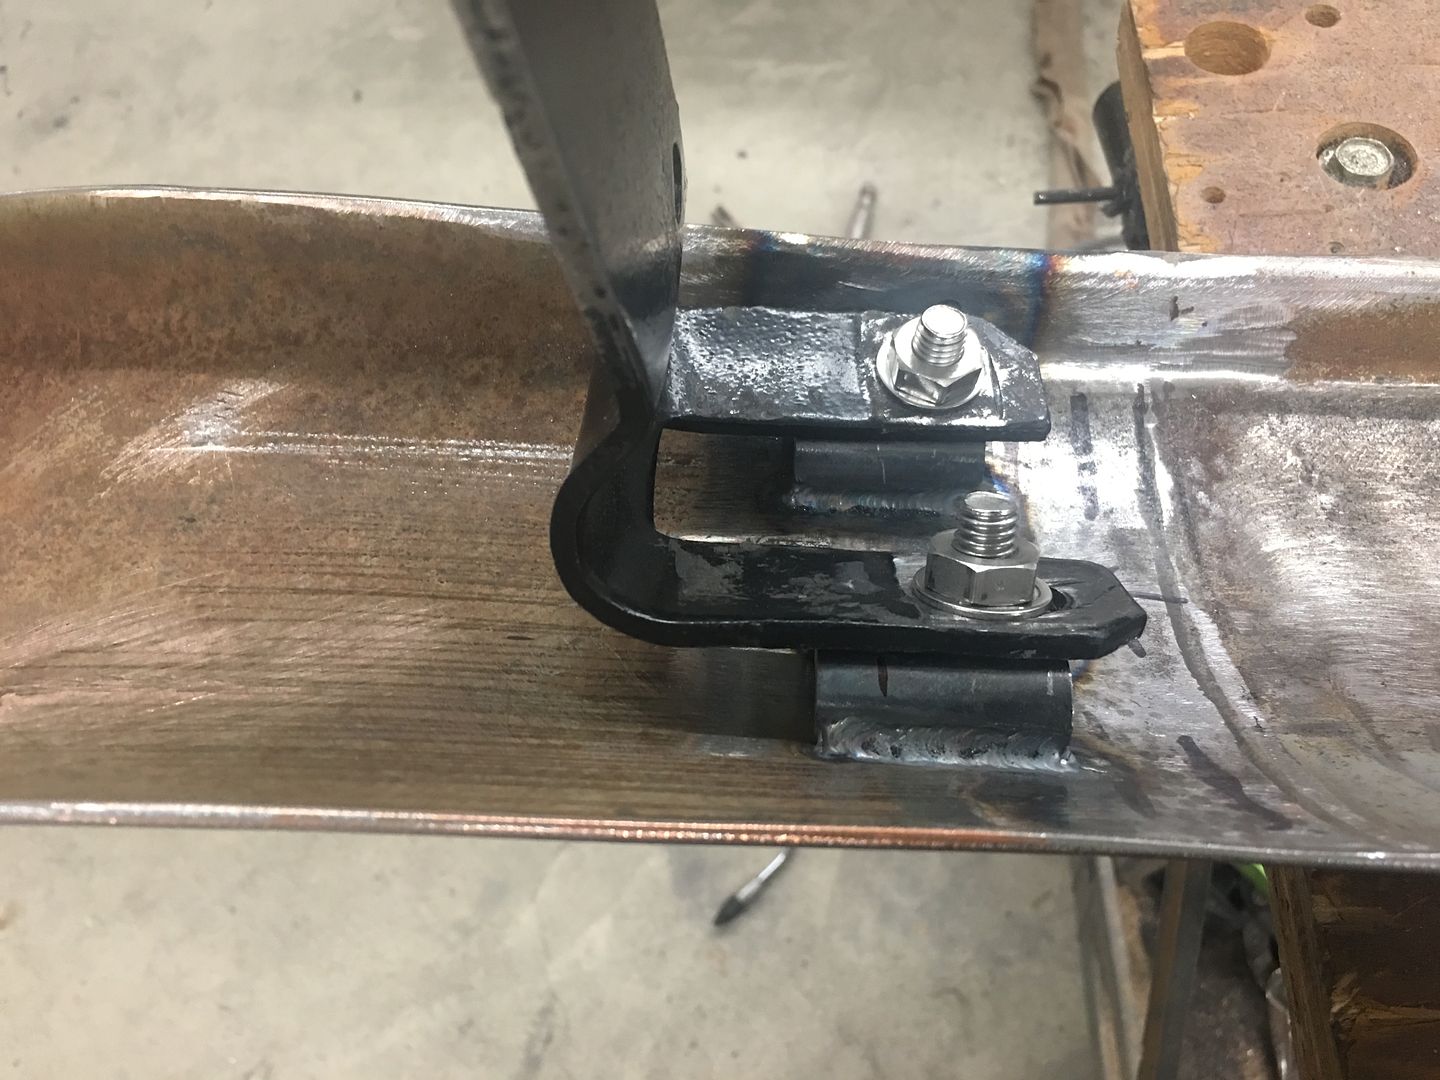
So some modification was in order so that the frame horn could fit in closer to the rear side of the bumper..
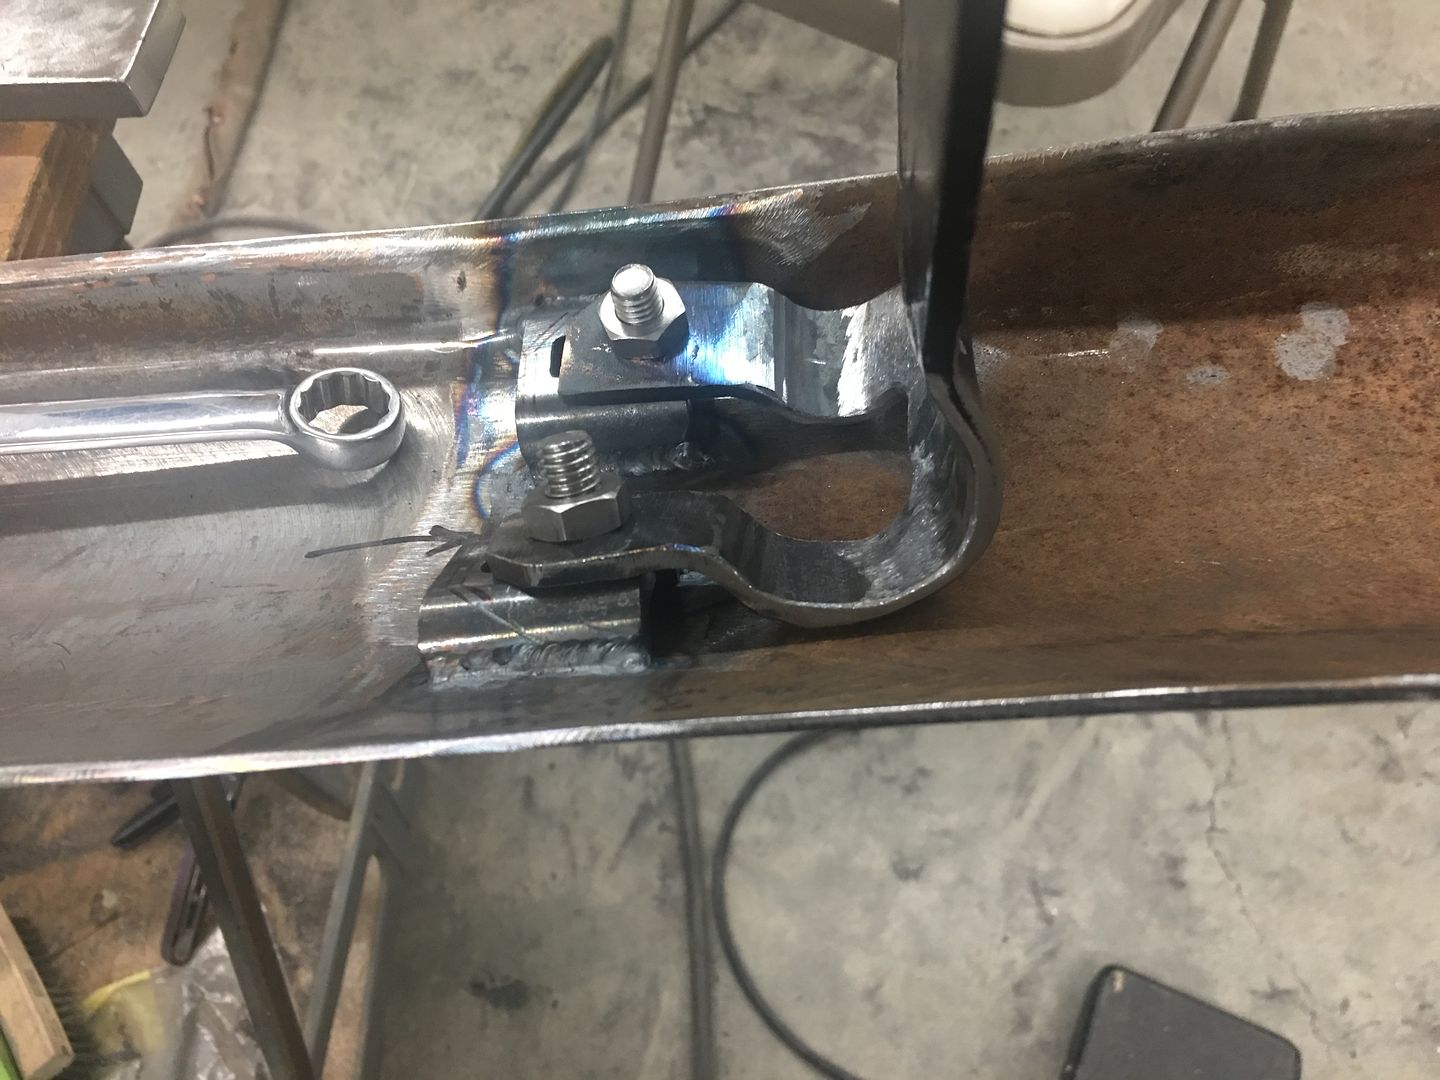
We now have a much better fit..
Robert
-
03-20-2021 03:23 AM #1602
CHR Member
- Join Date
- Sep 2007
- Location
- New Bedford
- Car Year, Make, Model: 34 Ford 3W Coupe Replica
- Posts
- 14,754
As I'm flipping through your pictures from the last few posts... my brain is screaming "Are you Nuckin' Futs???"
Cutting on brand new paint? to fit a bumper... it's not even my car or job and my heart is in my throat!
While I would never doubt your skills or talent... dang that was painful to review.. LOL..
-
03-23-2021 10:22 AM #1603
CHR Member
- Join Date
- Jun 2008
- Location
- Leonardtown
- Car Year, Make, Model: Walking
- Posts
- 1,228
Originally Posted by 34_40
Not my favorite back up and punt moment, I have to admit..
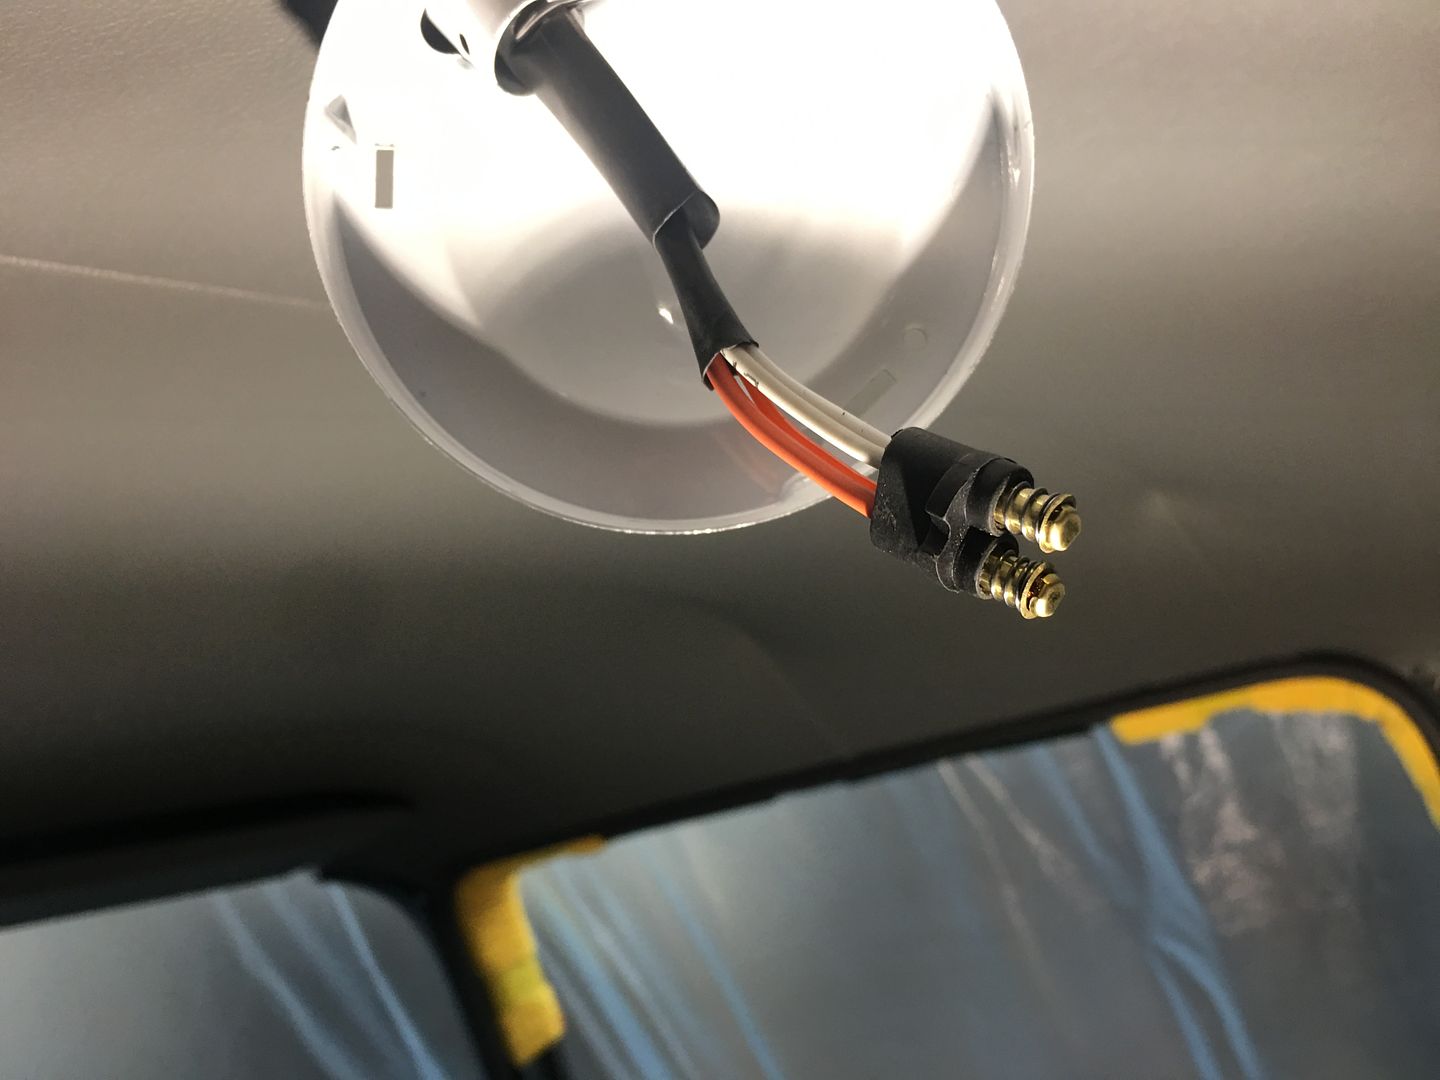
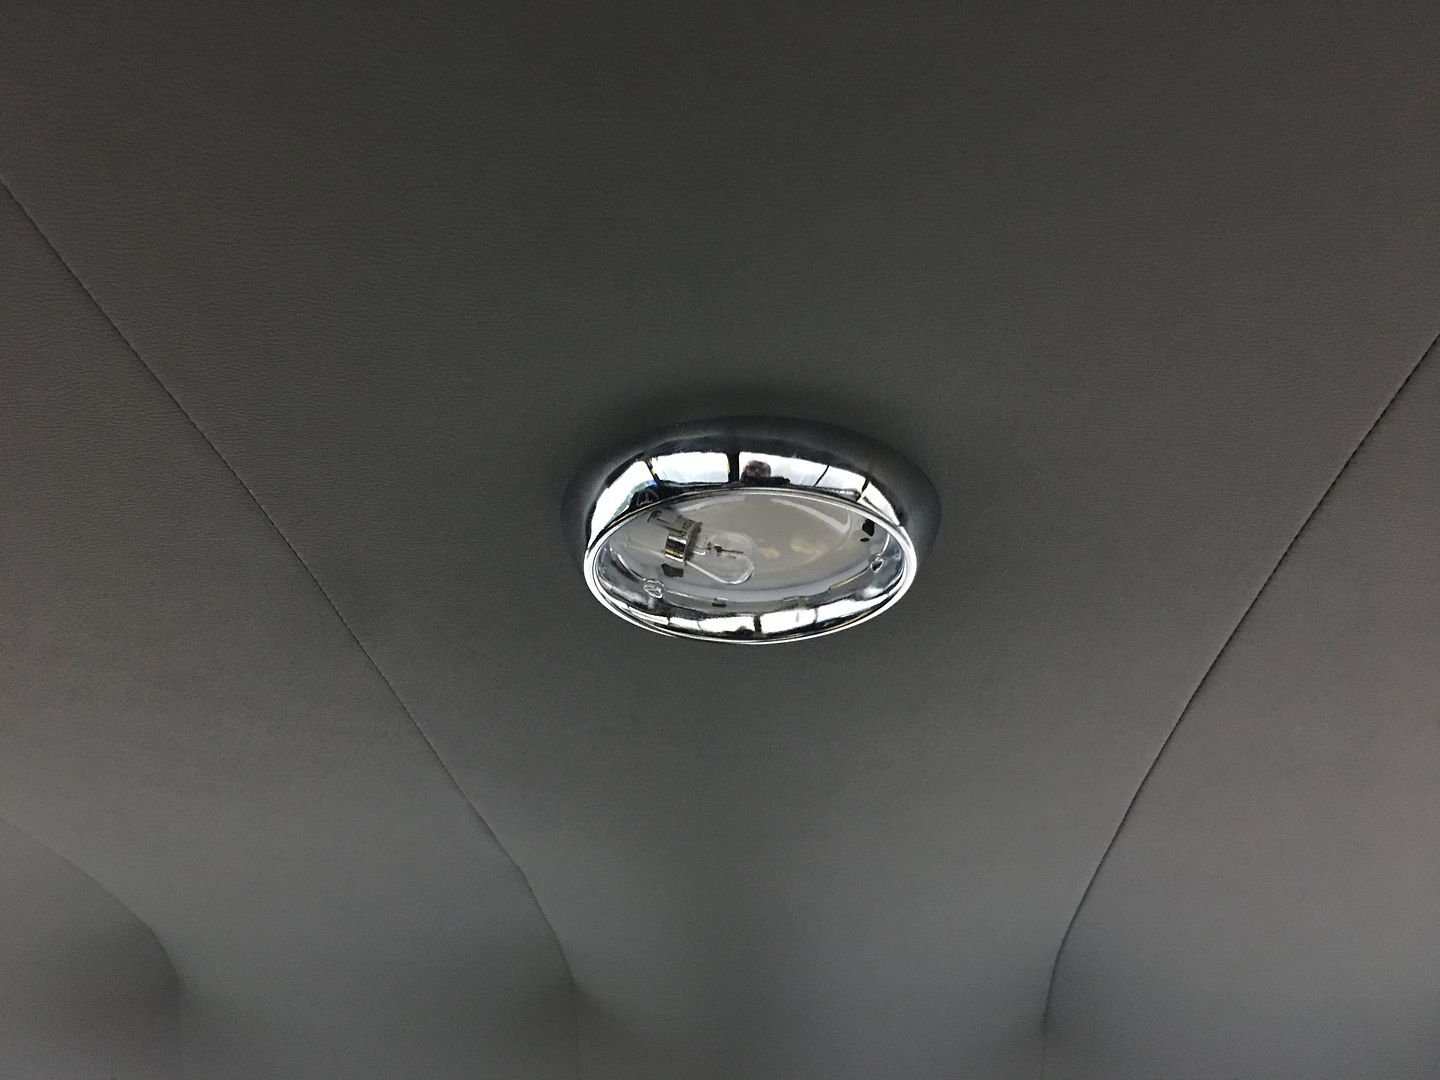
So we've started on our wiring, what can go wrong? First item on the list is the interior lights, we had run the wires before the headliner went in. We had installed a second light just behind the rear seat and the plans were to gang it to the front light by putting two wires into a 12 gauge pin in the weatherpack connector. This should be a 5 minute job.
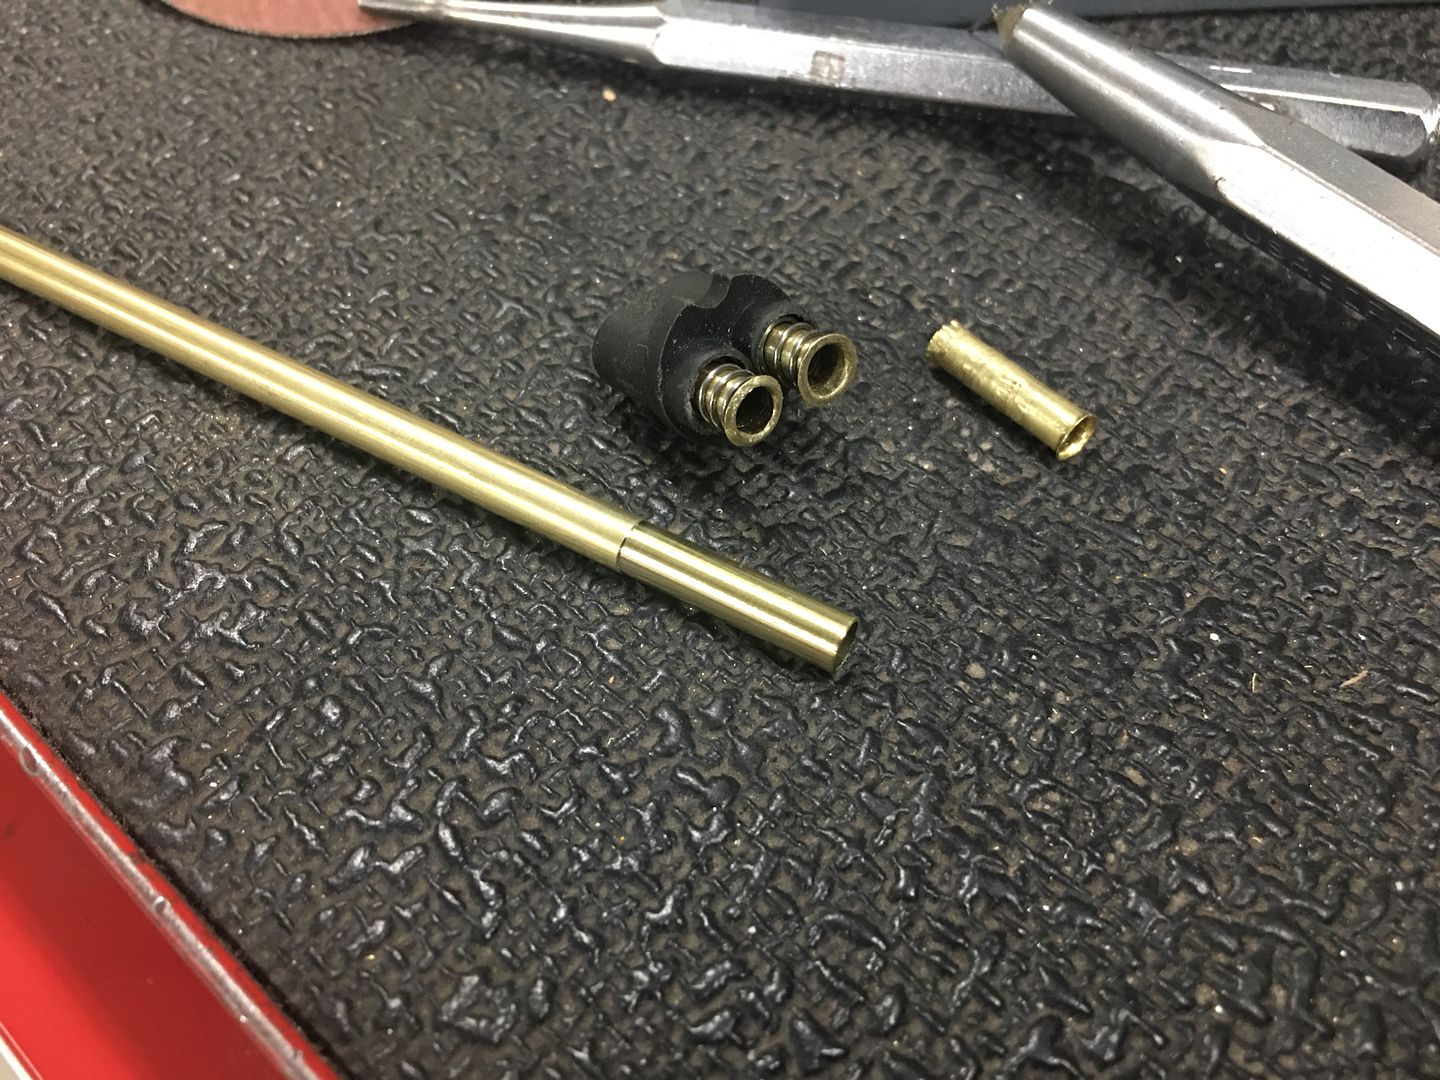
Only the weatherpack connector would not fit inside the void in the ceiling. Since we don't intend on using butt splices, we had tried installing two wires previously into the w-crimp lamp base contacts as shown:
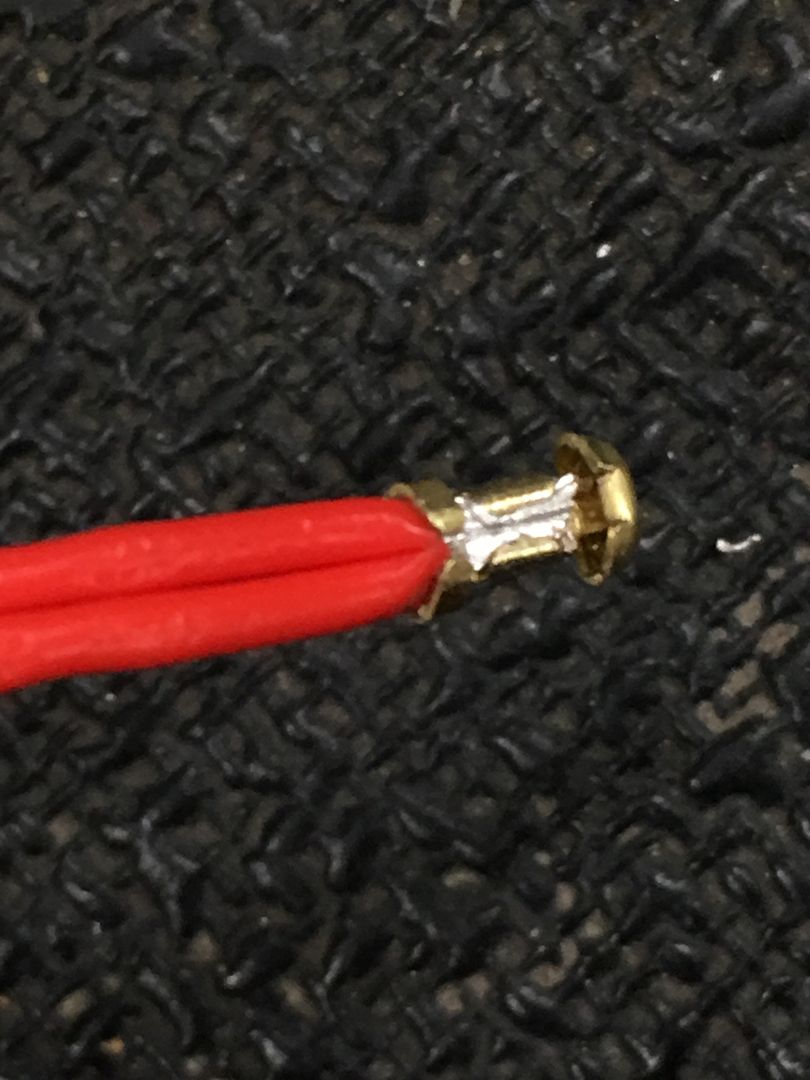
This sample we did using the red Teflon insulation fit inside the brass "tubes" of the lamp base perfectly. But the insulation on AAW wiring is much thicker. Ahhh, the dominoes they do fall. So let's see what we can do to modify the brass tubes to better accept the wiring going in. Our local Ace hardware has a good selection of "model" tubing in aluminum and brass, so with fingers crossed, we picked up the 3/16 size.
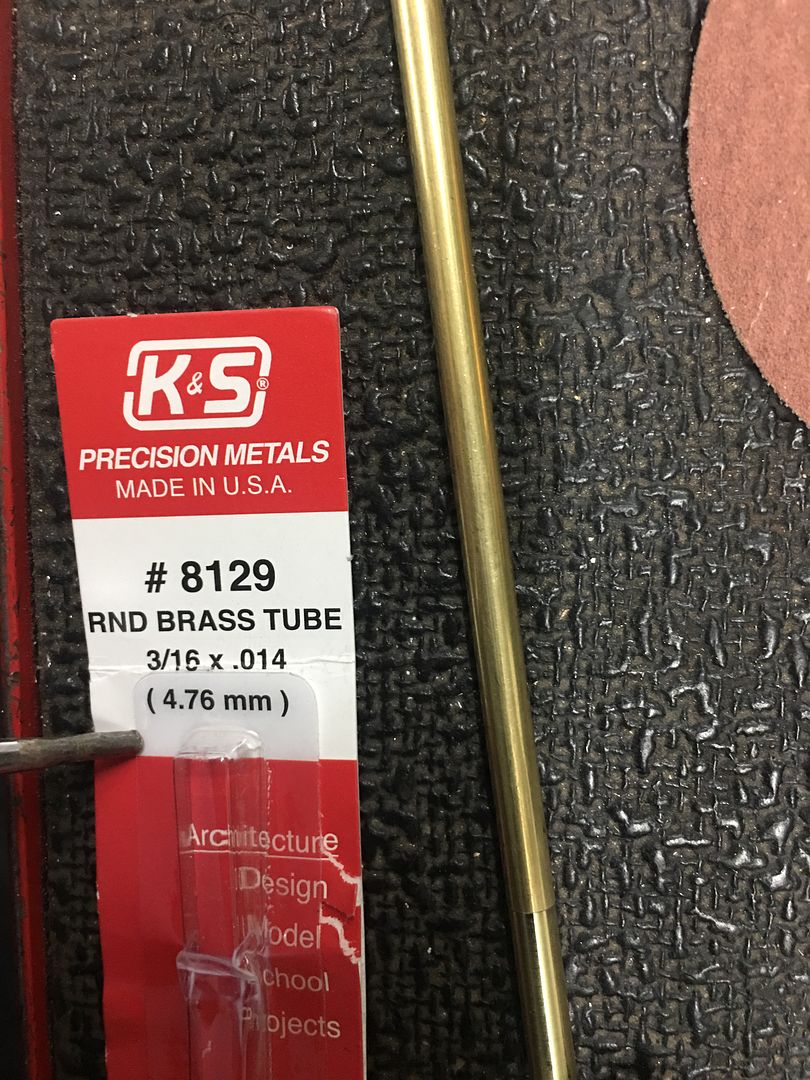
The ID measured out to .154, about .010 larger than what the lamp base came with. The outside diameter of the tube was turned down on the lathe to a size that would play nice inside the plastic housing and not bind on the spring.
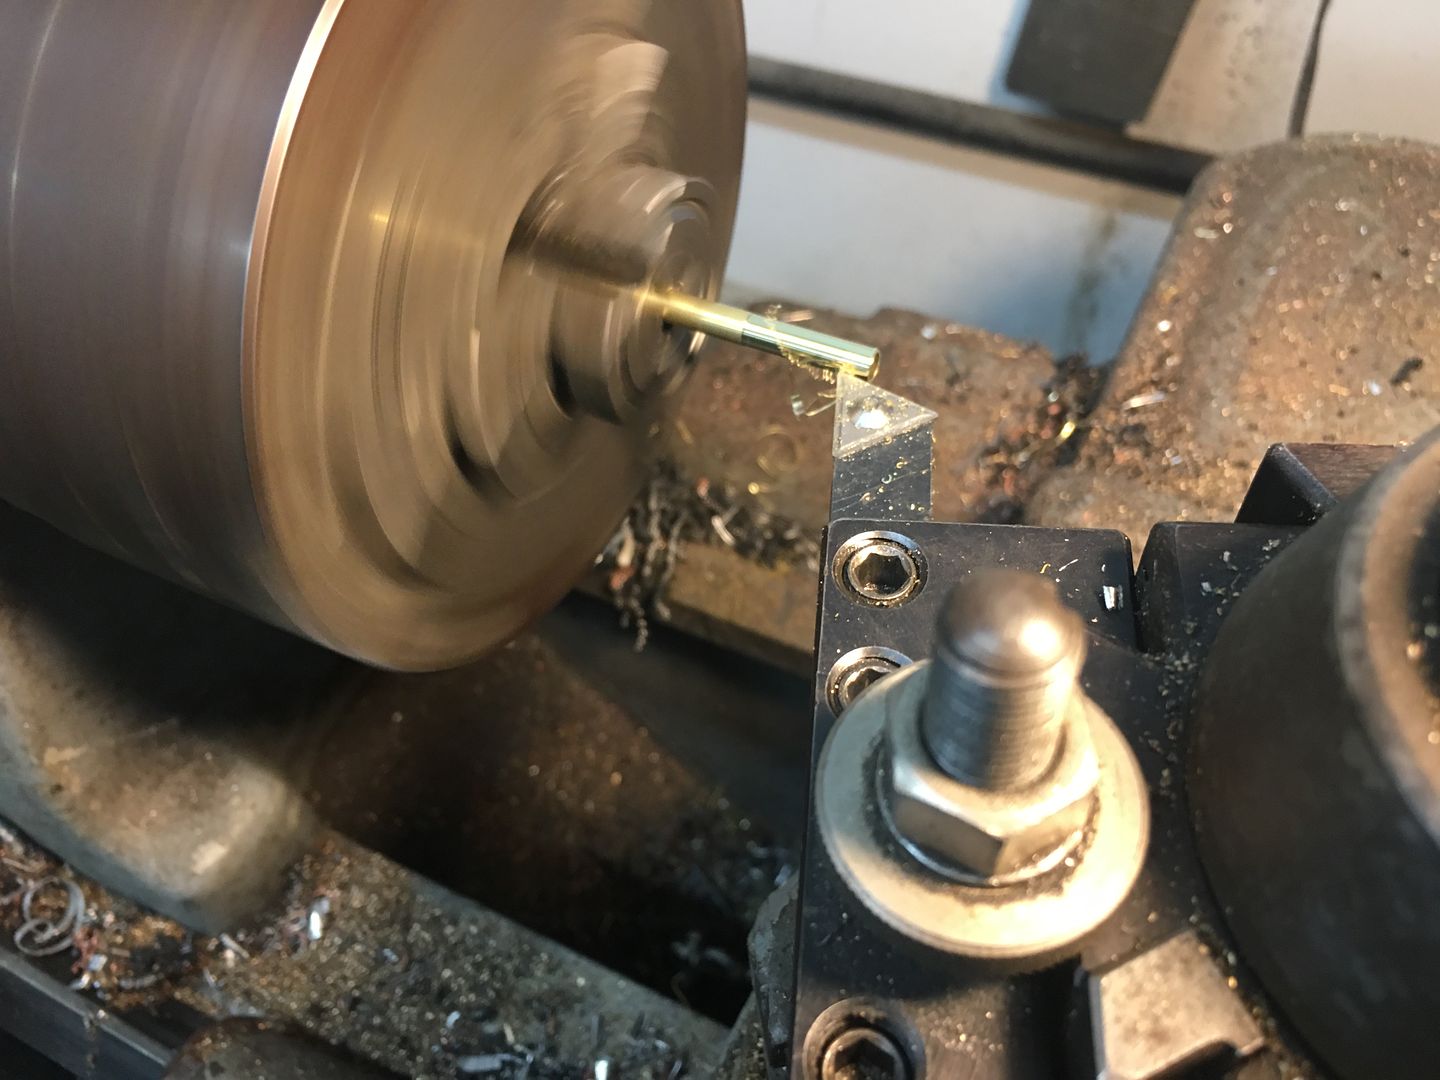
Some aluminum bar stock was drilled with a tight clearance hole for our new tube, and served as a fixture to swage one end for spring retention. Sorry, missed pictures of some of the details (fire the photographer). The opposite end was swaged after insertion into the housing..
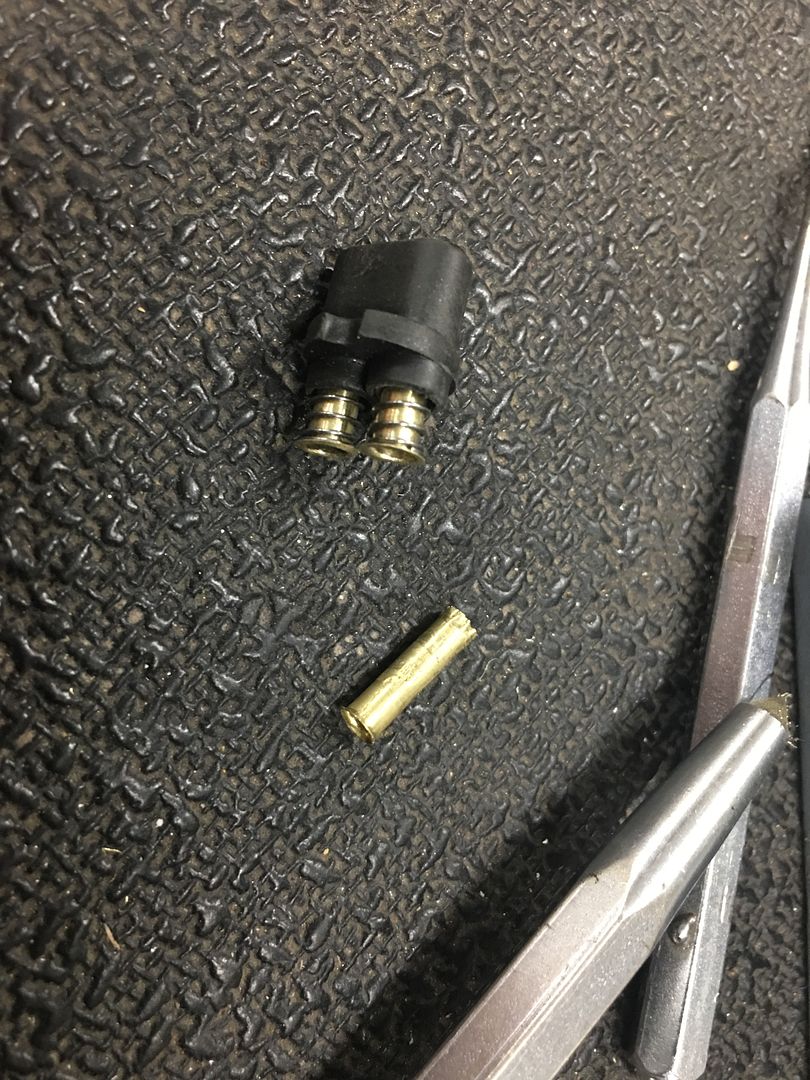
With the tubes now sized for two wires, we got the front light installed. The rear light and its single wires should now be a breeze.
Robert
-
03-23-2021 08:38 PM #1604
CHR Member
- Join Date
- Jan 2005
- Location
- Doon, Ia
- Car Year, Make, Model: 53 Chevy 3100
- Posts
- 2,716
Could you Jimmy rig one thing together on this build to make me feel better lol. Everything is you do is impressive!Seth
God cannot give us a happiness and peace apart from Himself, because it is not there. There is no such thing. C.S.Lewis
-
03-24-2021 07:16 AM #1605
CHR Member
- Join Date
- Nov 2016
- Location
- rocklin
- Posts
- 656
Good grief! The attention to detail is off the charts.

 Reply With Quote

Posting Permissions
- You may not post new threads
- You may not post replies
- You may not post attachments
- You may not edit your posts

i've enjoyed the years here . made a lot of friends. most who have left. i see no reason to continue with this so hope to see you somewhere else. i dont think this site will ever be back. it's lived...
Dead!