


 3390Likes
Thread: 55 Wagon Progress


Results 211 to 225 of 1865
 LinkBack URL
 About LinkBacks
-
04-30-2014 07:18 PM #211
 CHR Member

- Join Date
- Jun 2008
- Location
- Leonardtown
- Car Year, Make, Model: Walking
- Posts
- 1,228
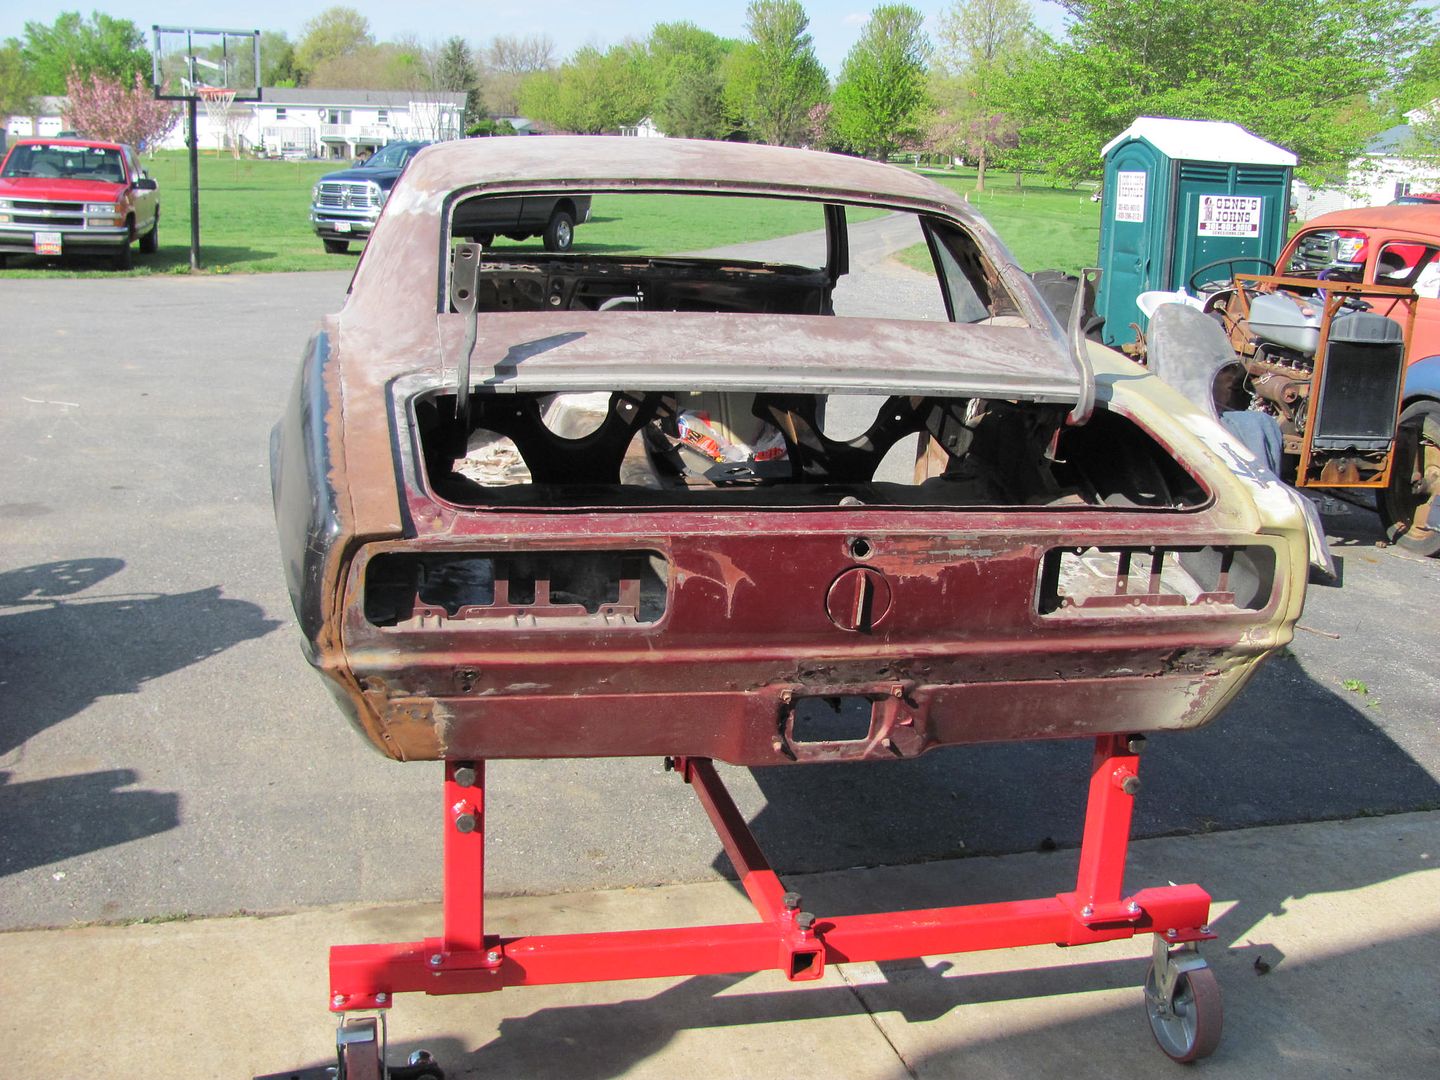
Thanks for the comments guys. Got the tail gate and lift gate gaps done this evening.
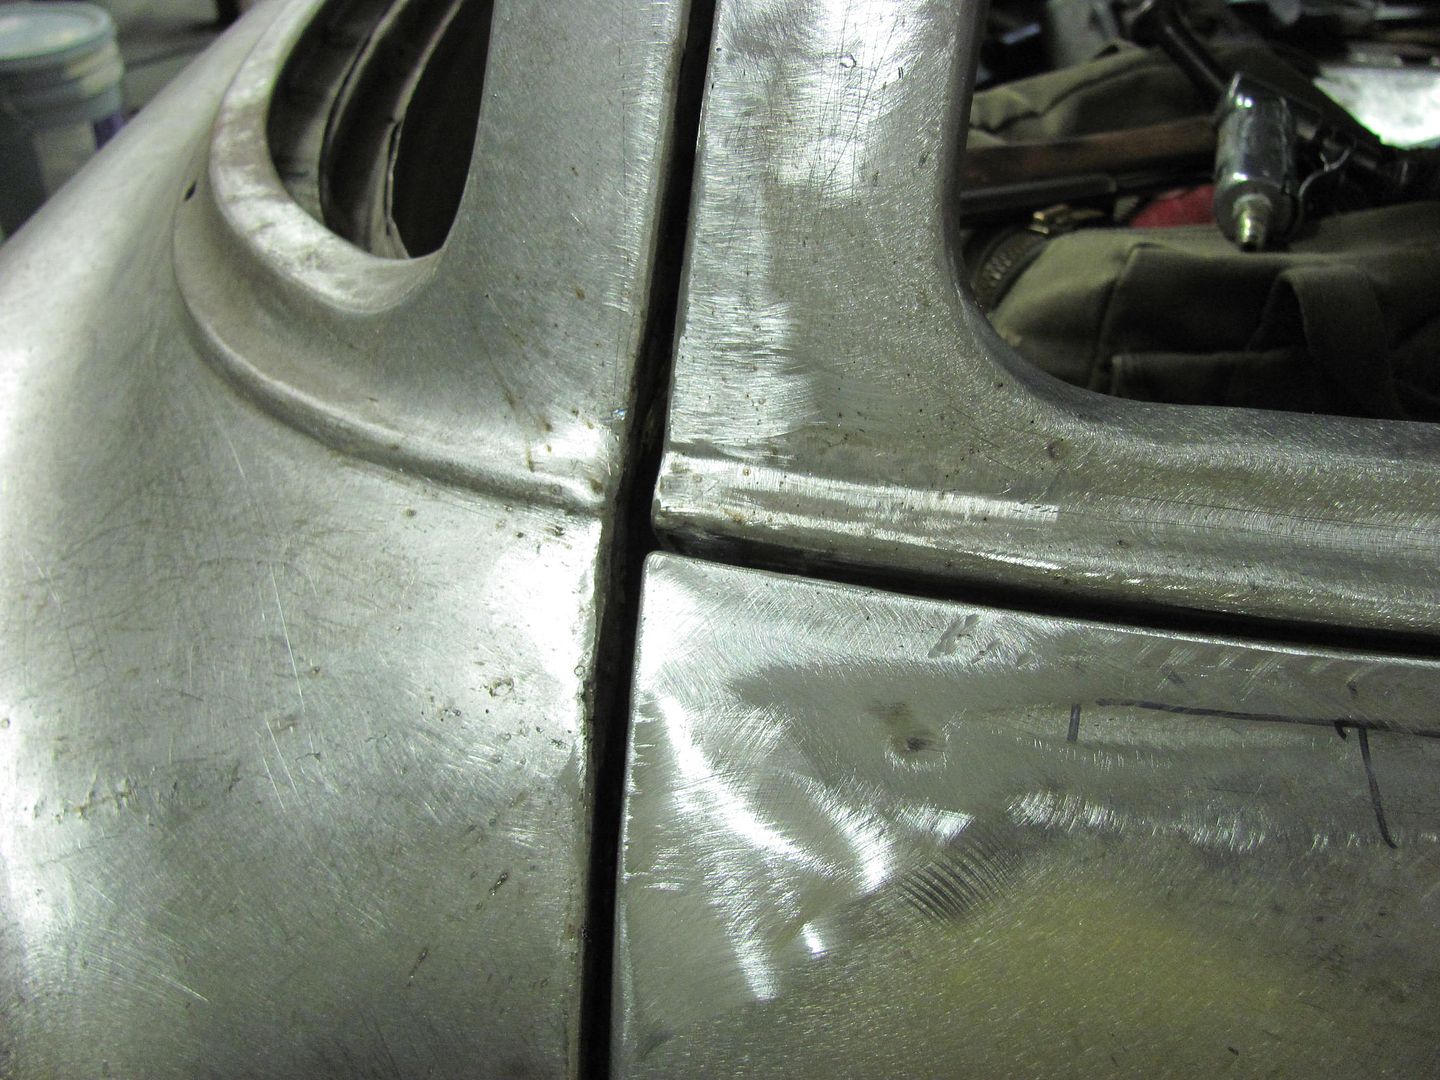

Now on to some quarter panel weld planishing..Robert
-
Advertising

- Google Adsense
- REGISTERED USERS DO NOT SEE THIS AD
-
05-05-2014 11:53 AM #212
CHR Member
- Join Date
- Apr 2011
- Location
- Prairie City
- Car Year, Make, Model: 40 Ford Deluxe, 68 Corvette, 72&76 K30
- Posts
- 7,301
- Blog Entries
- 1
That looks great! Looking really nice compared to what you started with!Ryan
1940 Ford Deluxe Tudor 354 Hemi 46RH Electric Blue w/multi-color flames, Ford 9" Residing in multiple pieces
1968 Corvette Coupe 5.9 Cummins Drag Car 11.43@130mph No stall leaving the line with 1250 rpm's and poor 2.2 60'
1972 Chevy K30 Longhorn P-pumped 24v Compound Turbos 47RH Just another money pit
1971 Camaro RS 5.3 BTR Stage 3 cam, SuperT10
Tire Sizes
-
05-06-2014 09:16 PM #213
CHR Member
- Join Date
- Jun 2008
- Location
- Leonardtown
- Car Year, Make, Model: Walking
- Posts
- 1,228
Thanks!
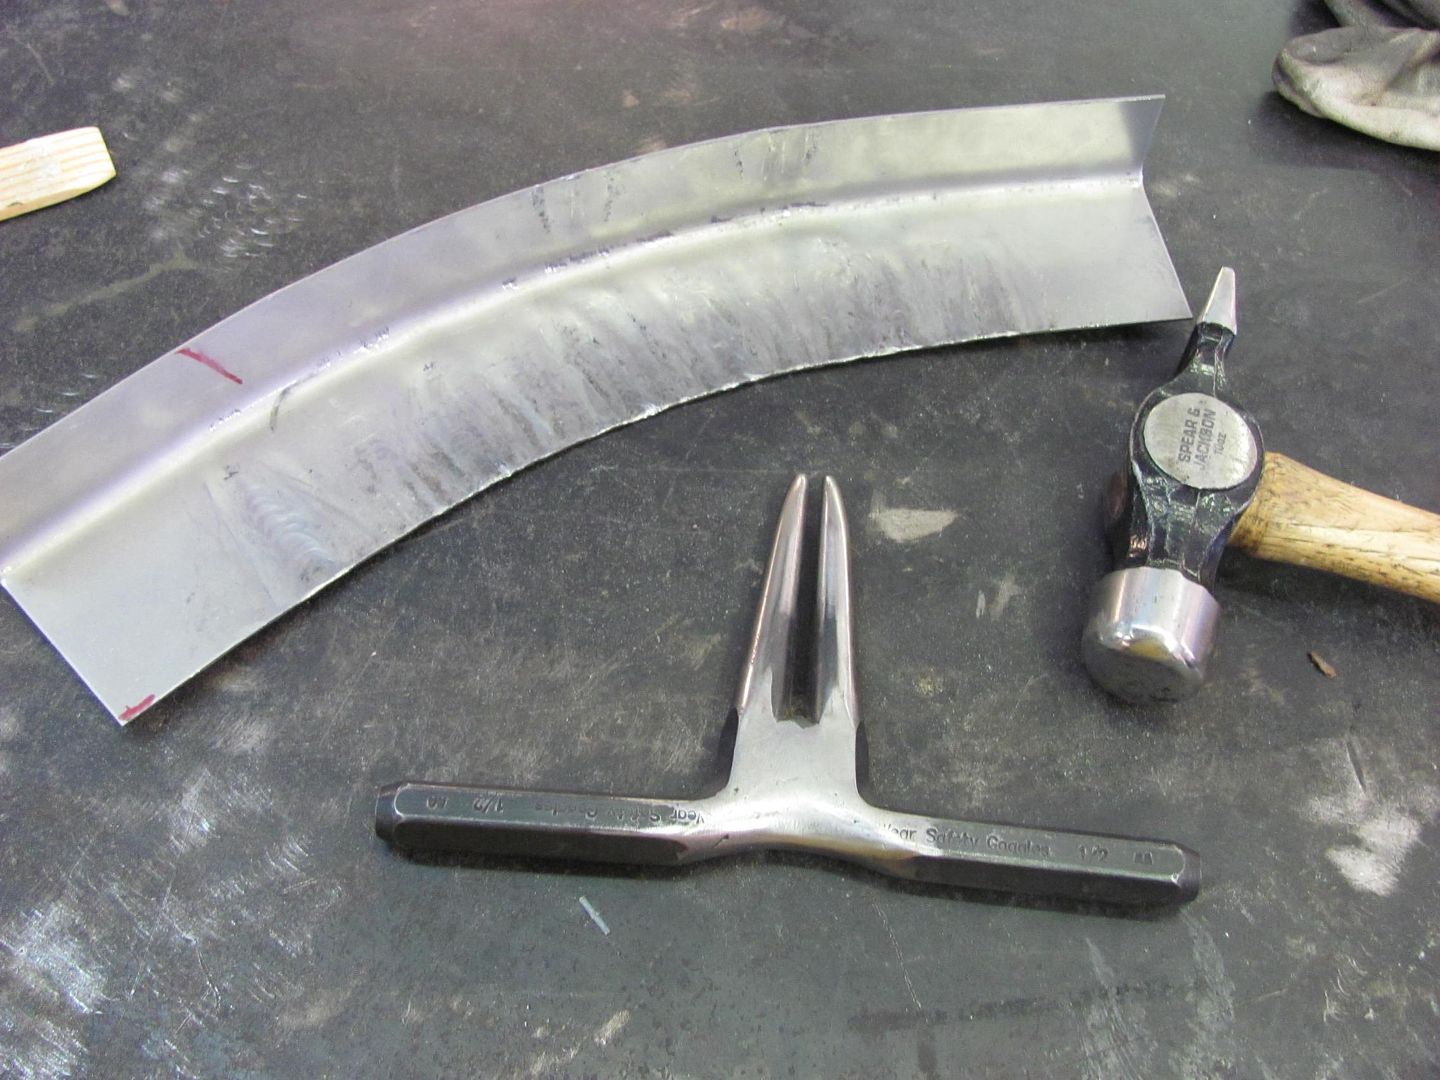
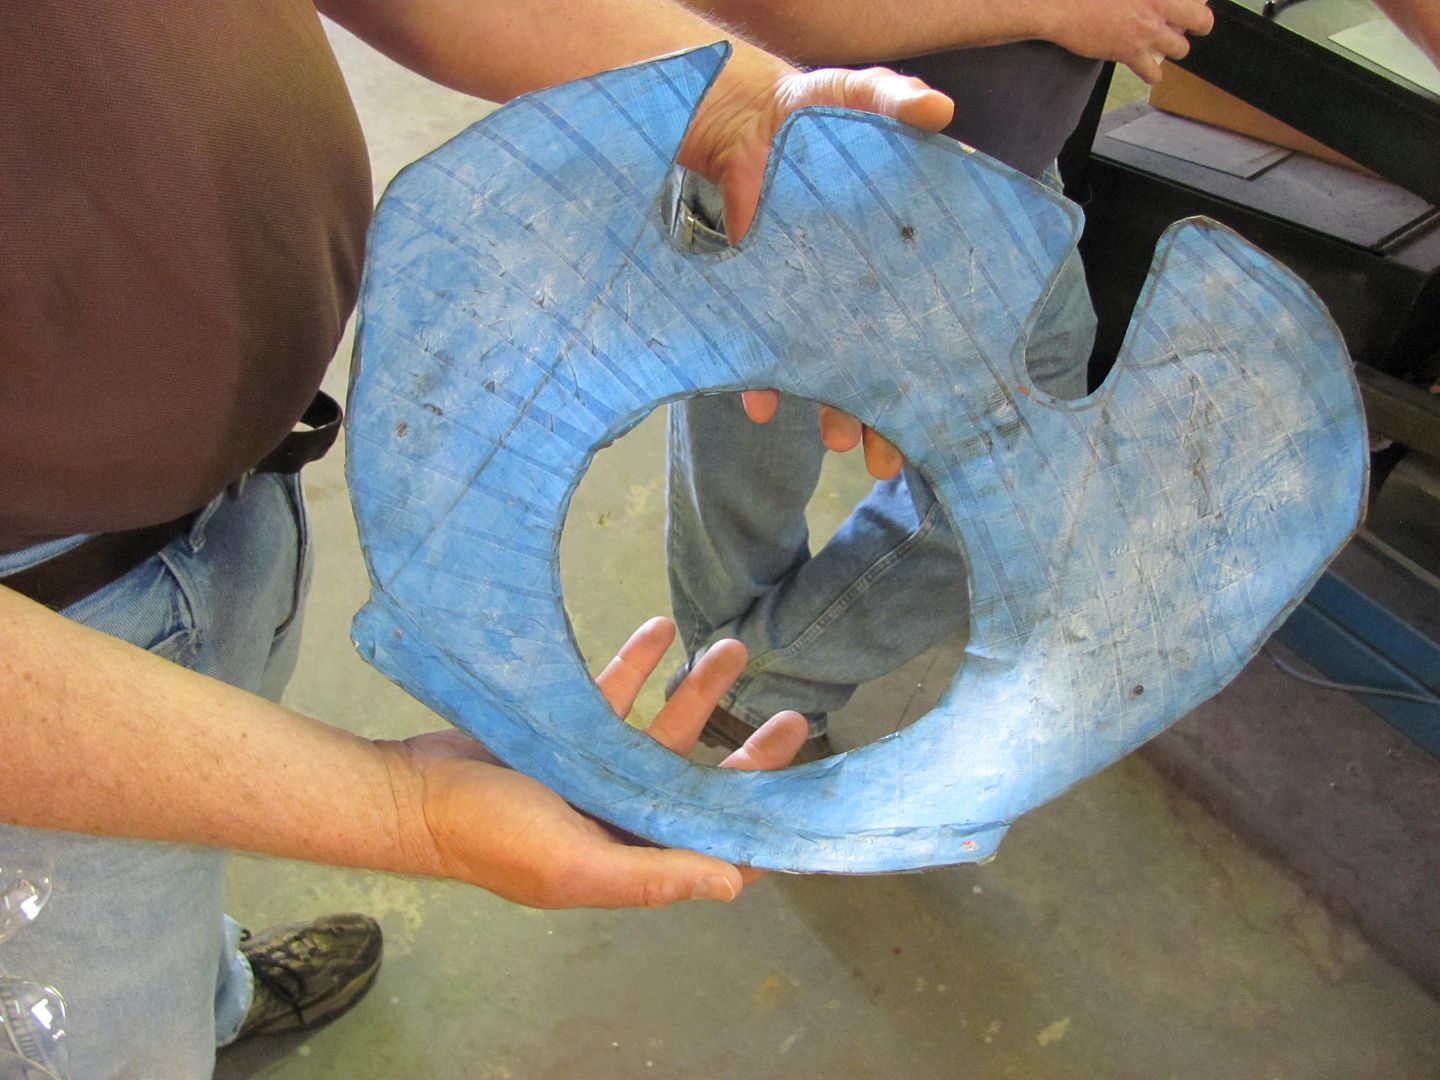
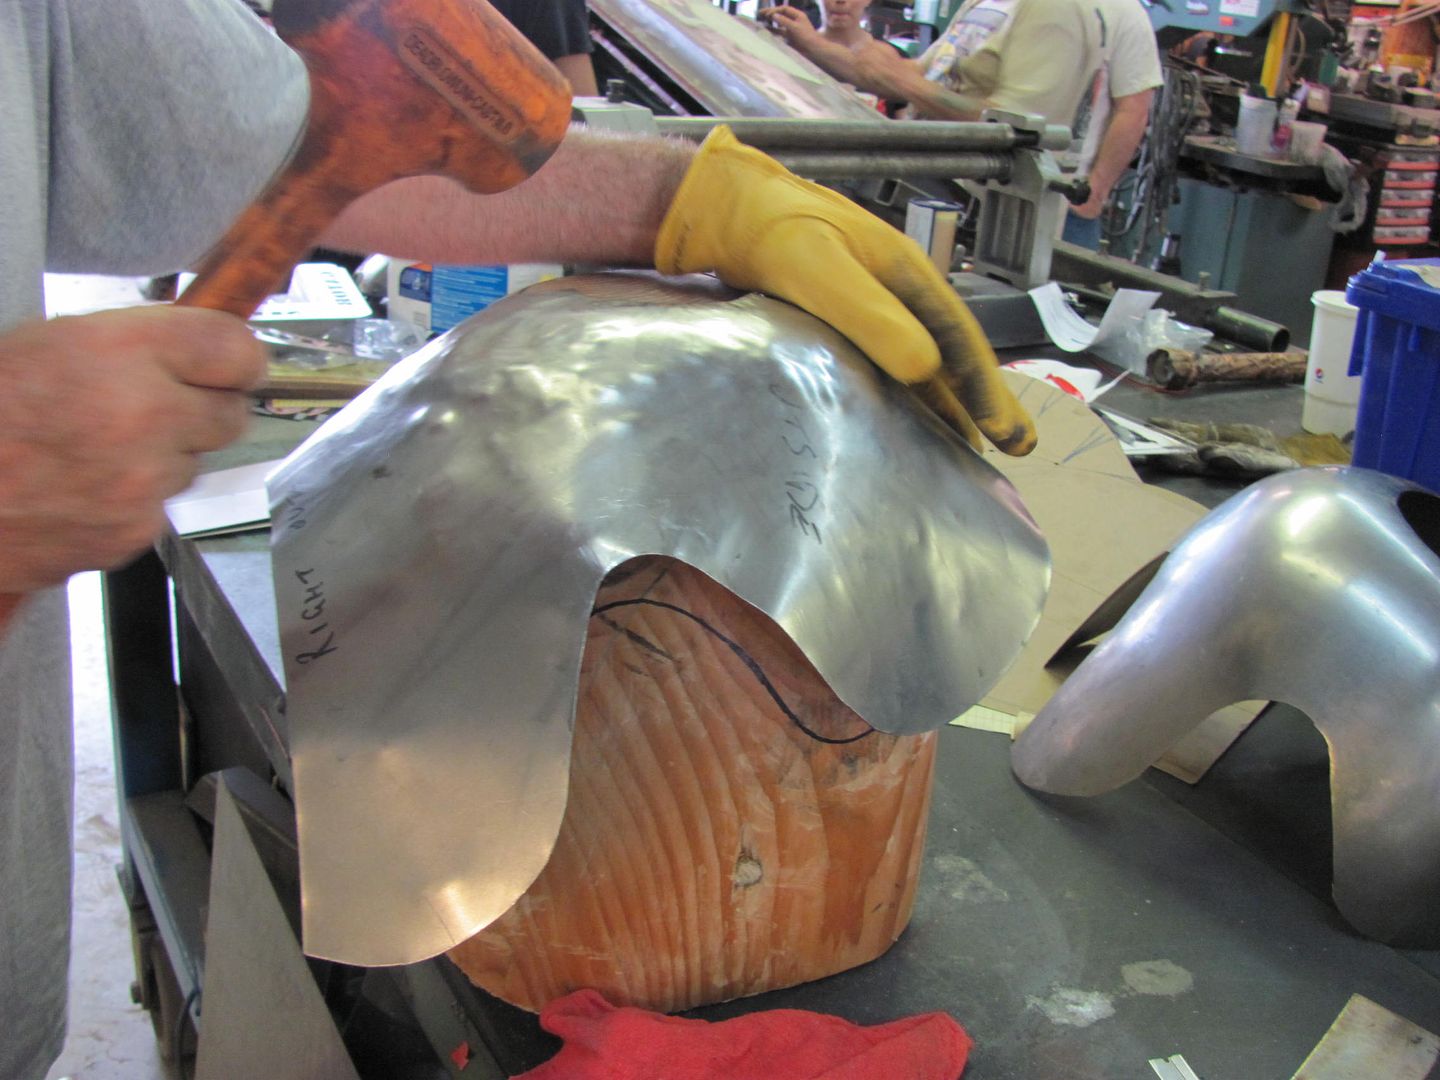
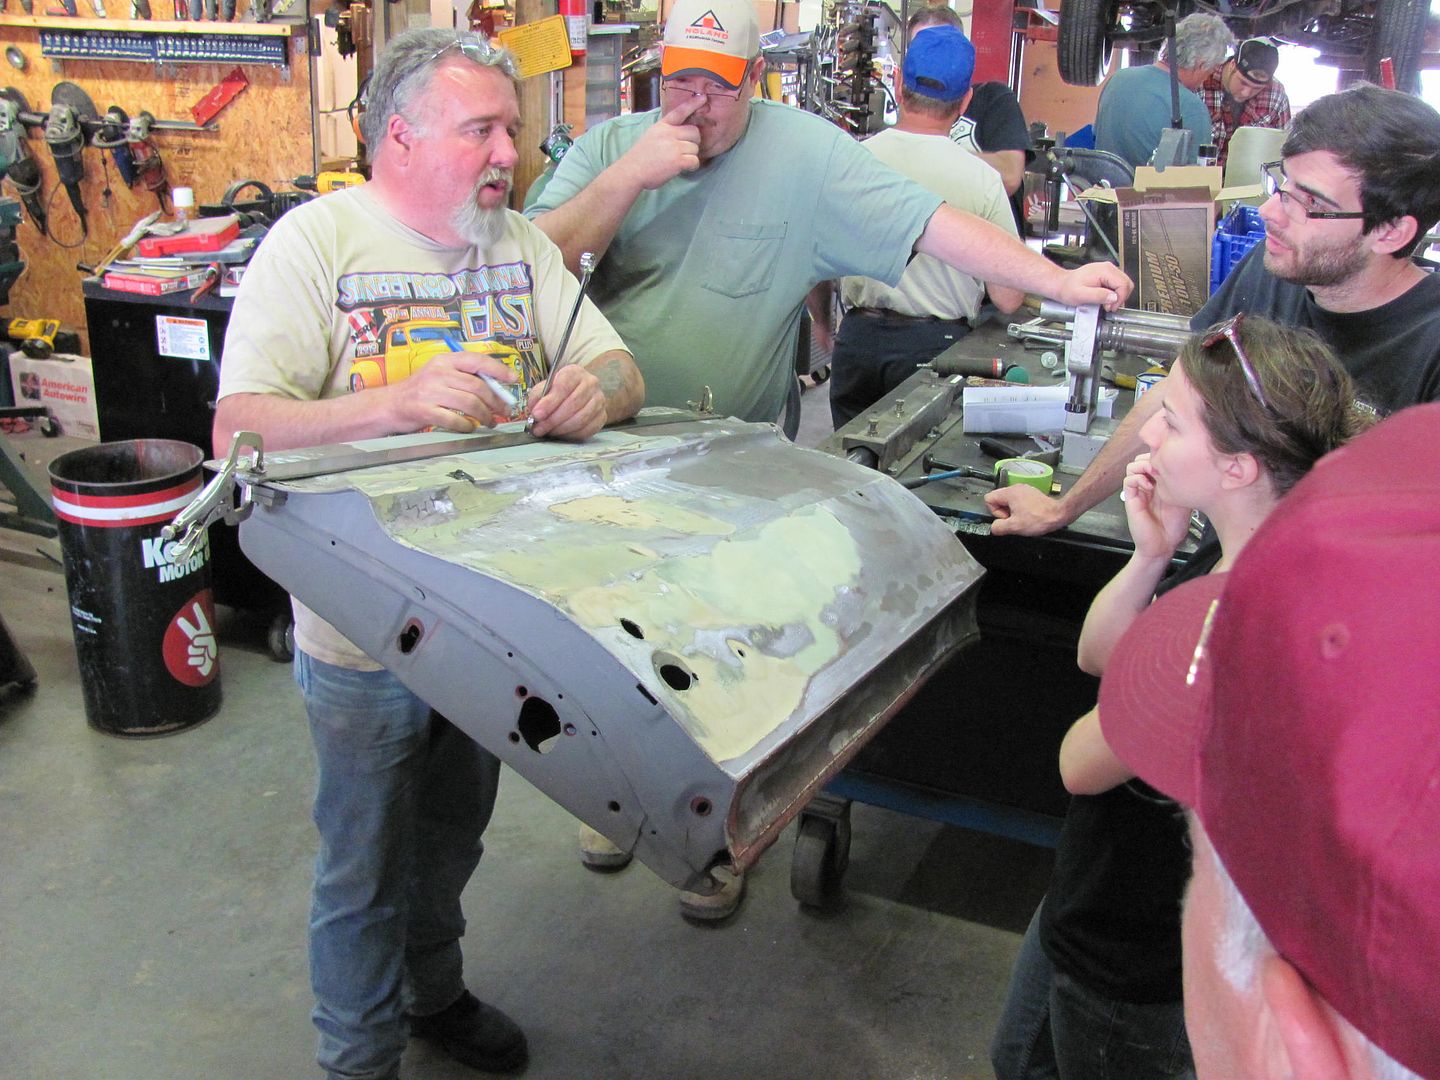
Spent this past weekend at Gatormeet for a metal shaping workshop.
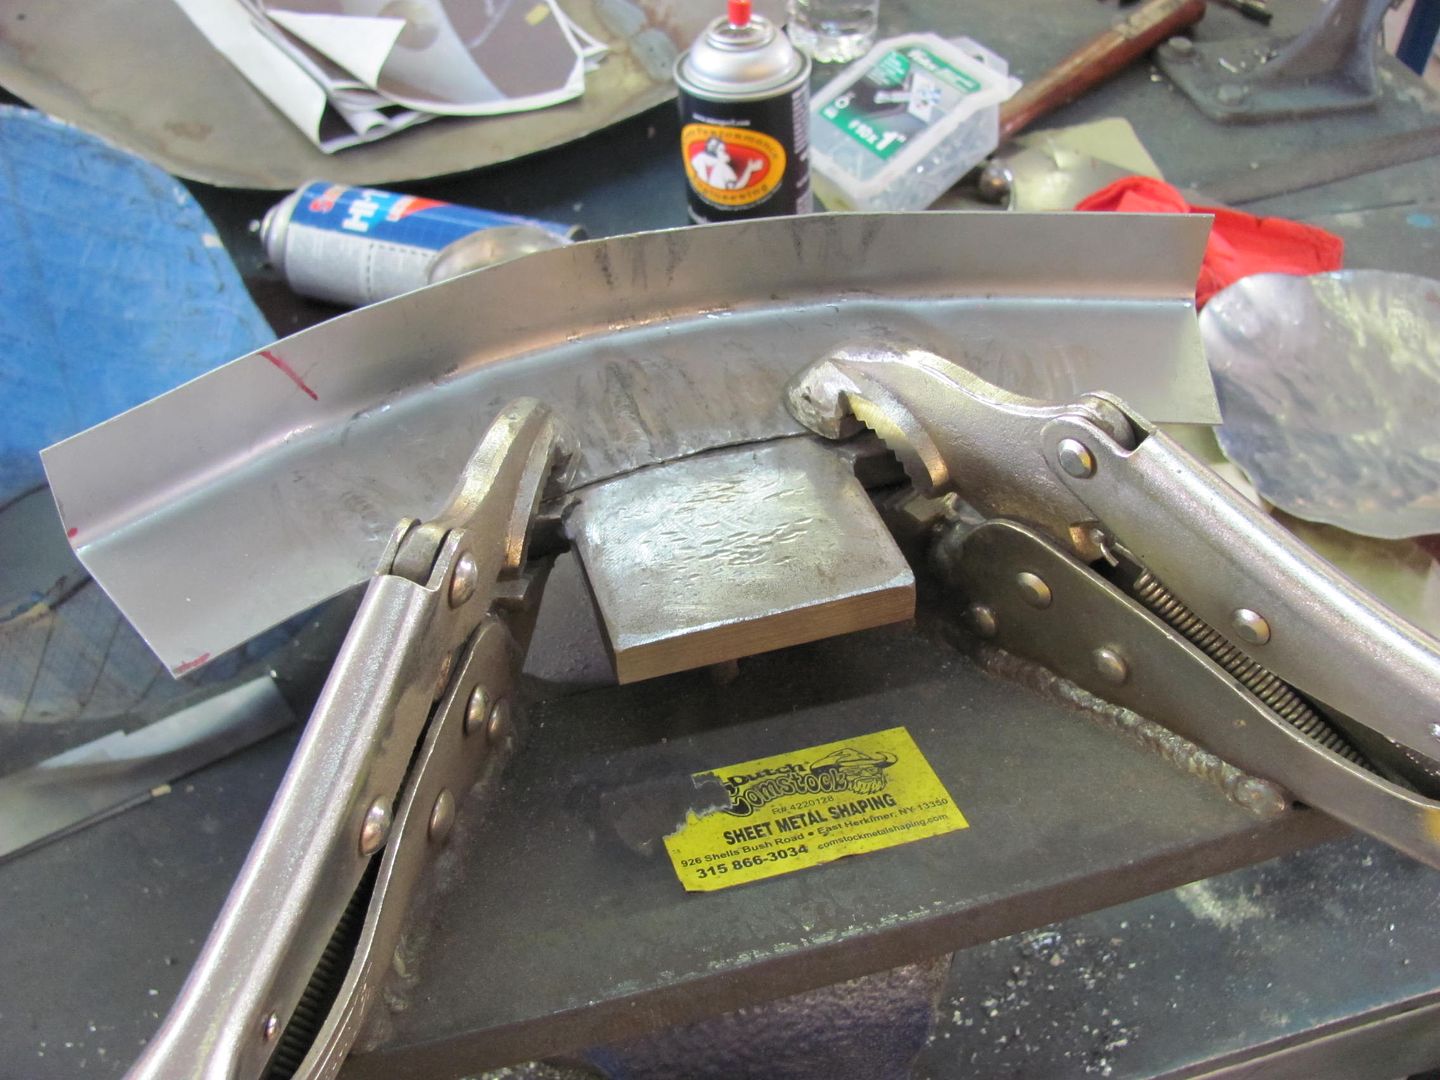
The first day started with a tuck shrinking demo, and showing the basics of the process and how the metal reacts. We also had the tuck shrinking fixture to use.
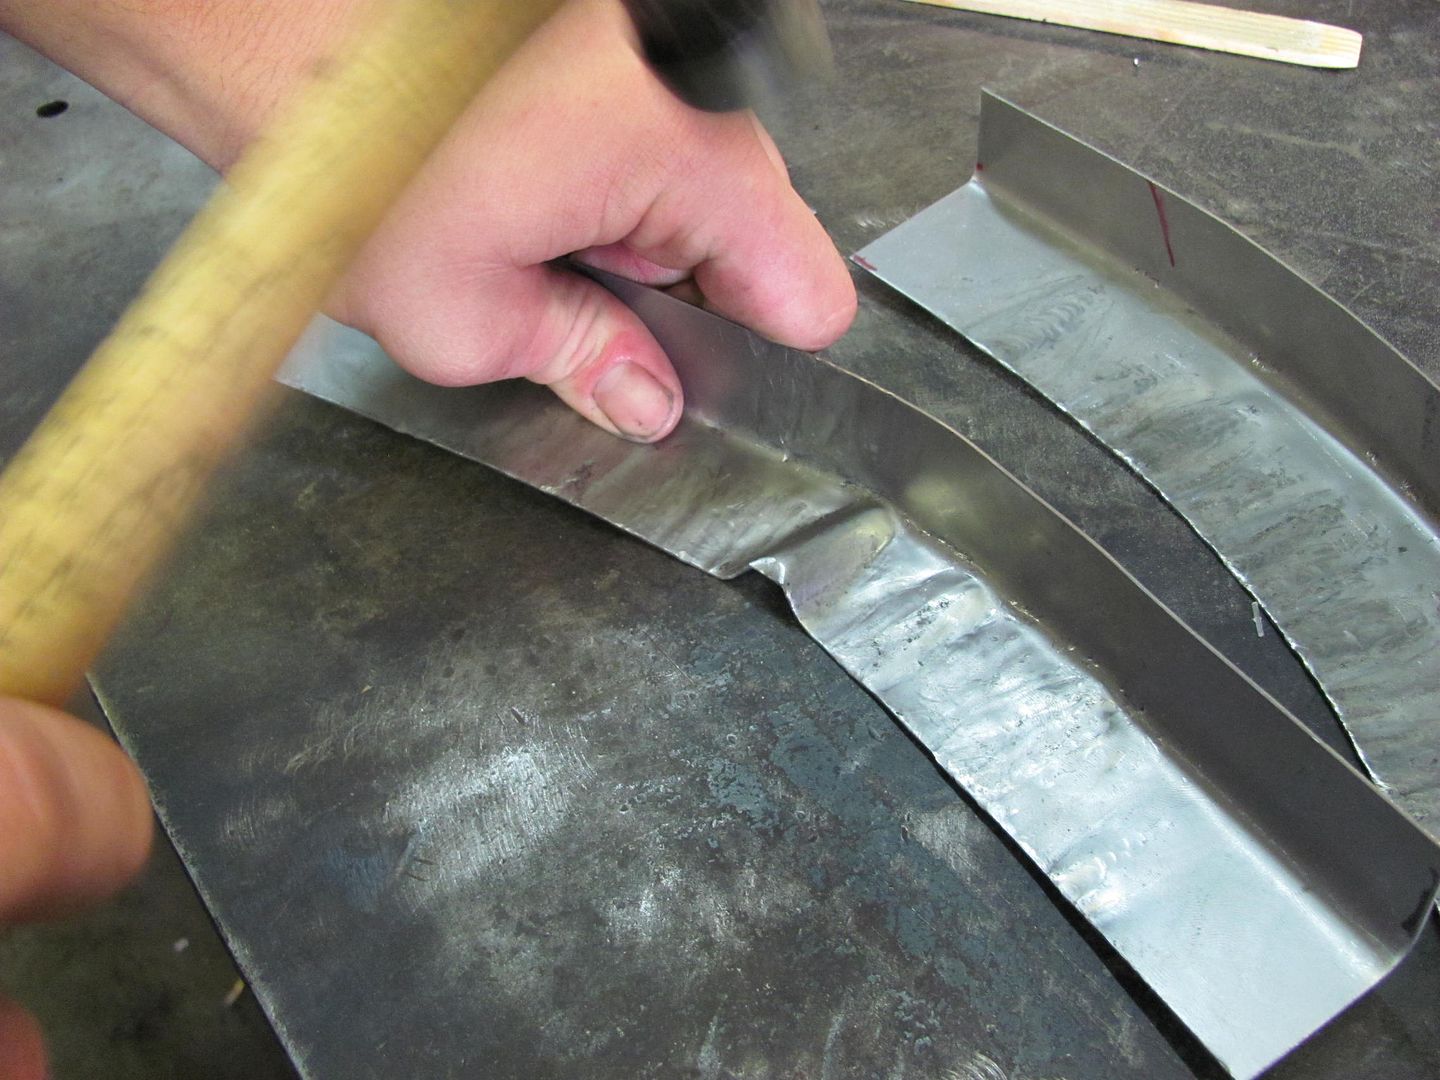
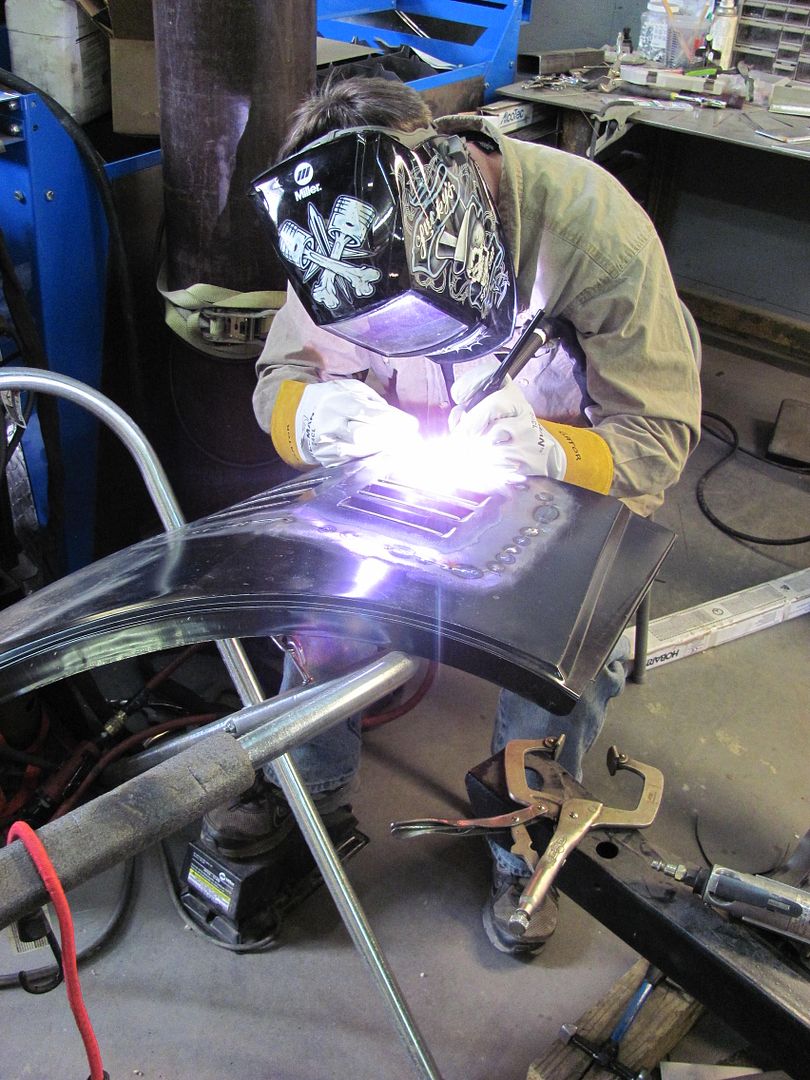
Camaro quarter panels are being fitted with gills for installation on a Firebird. This included fit up, trimming, Tig welding, and planishing..
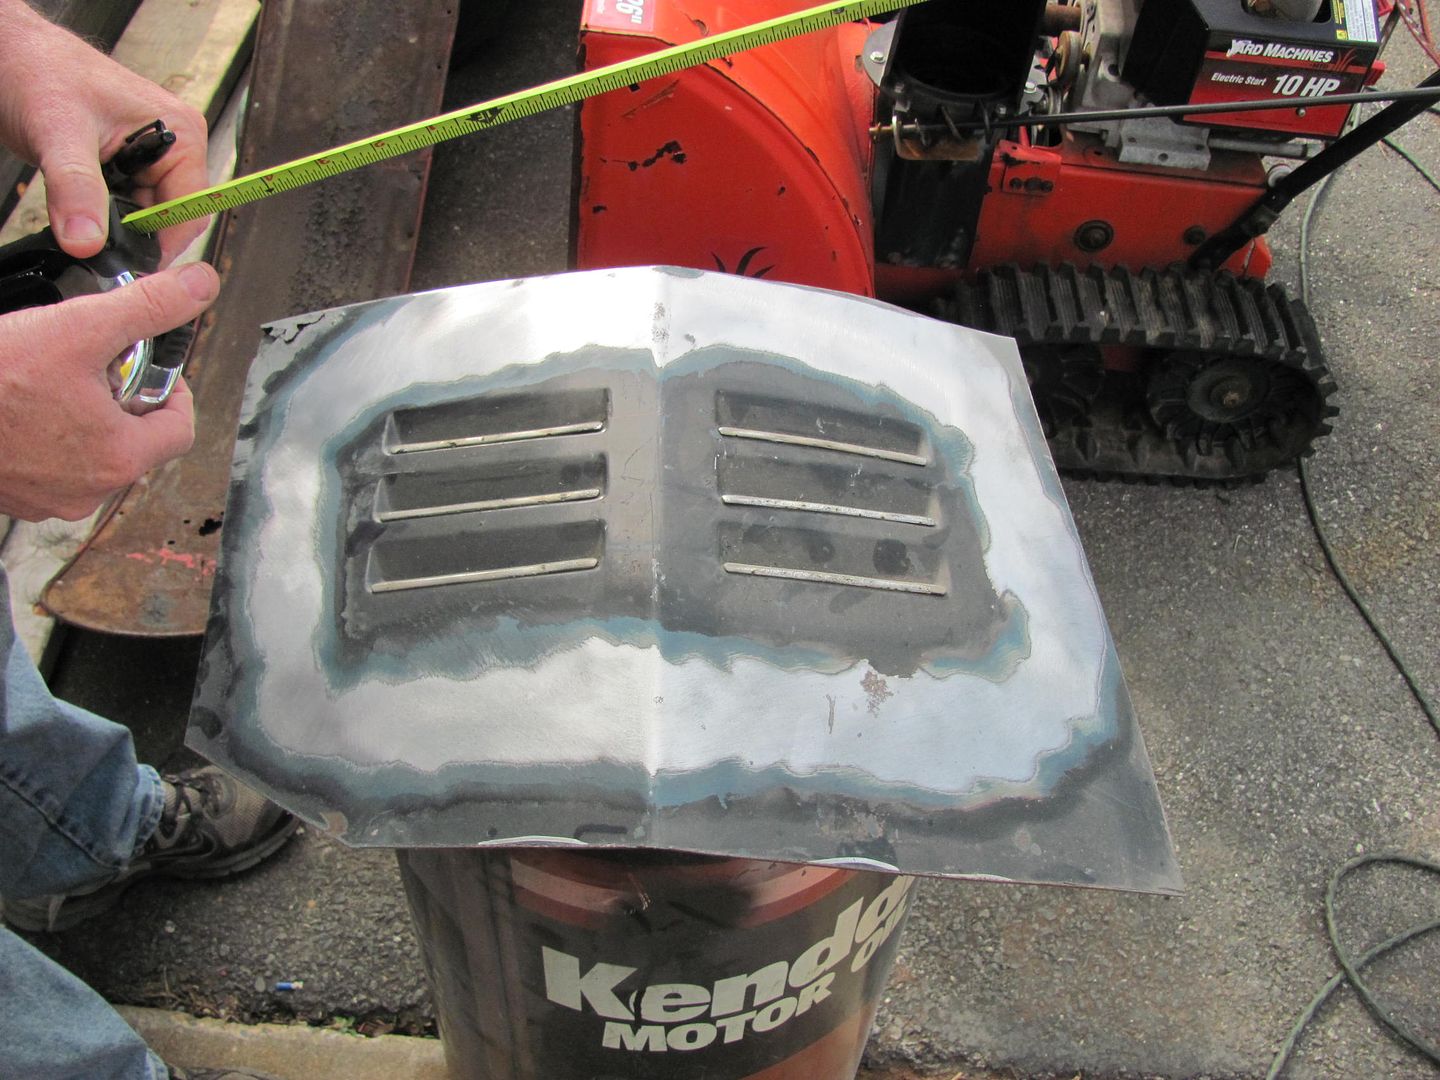
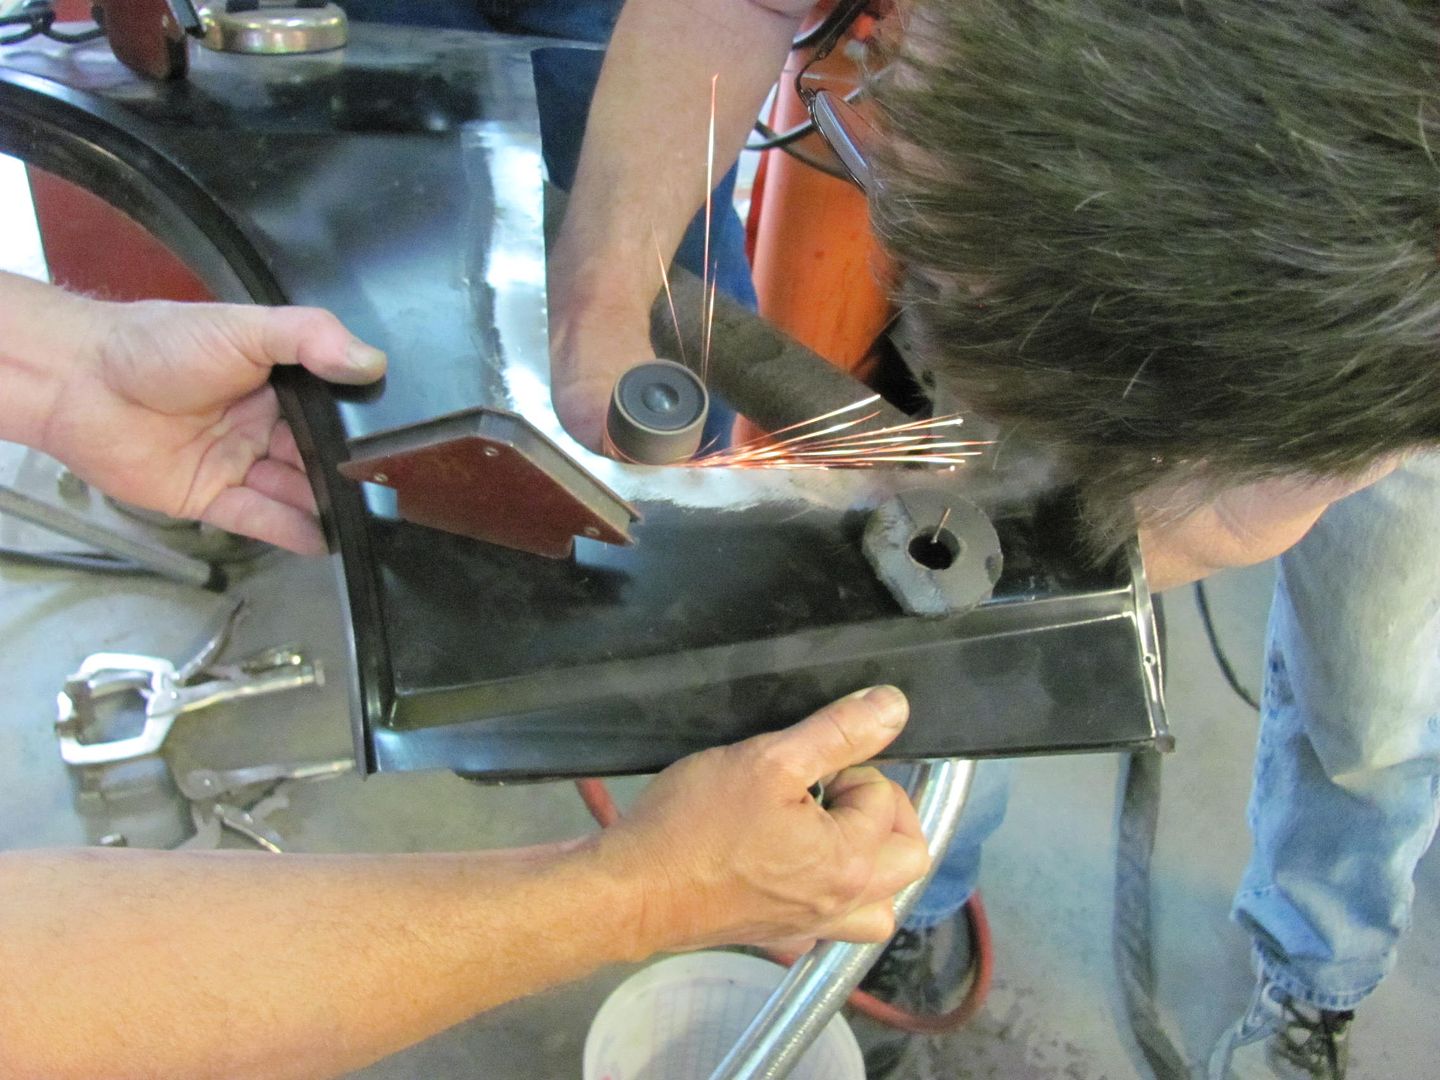
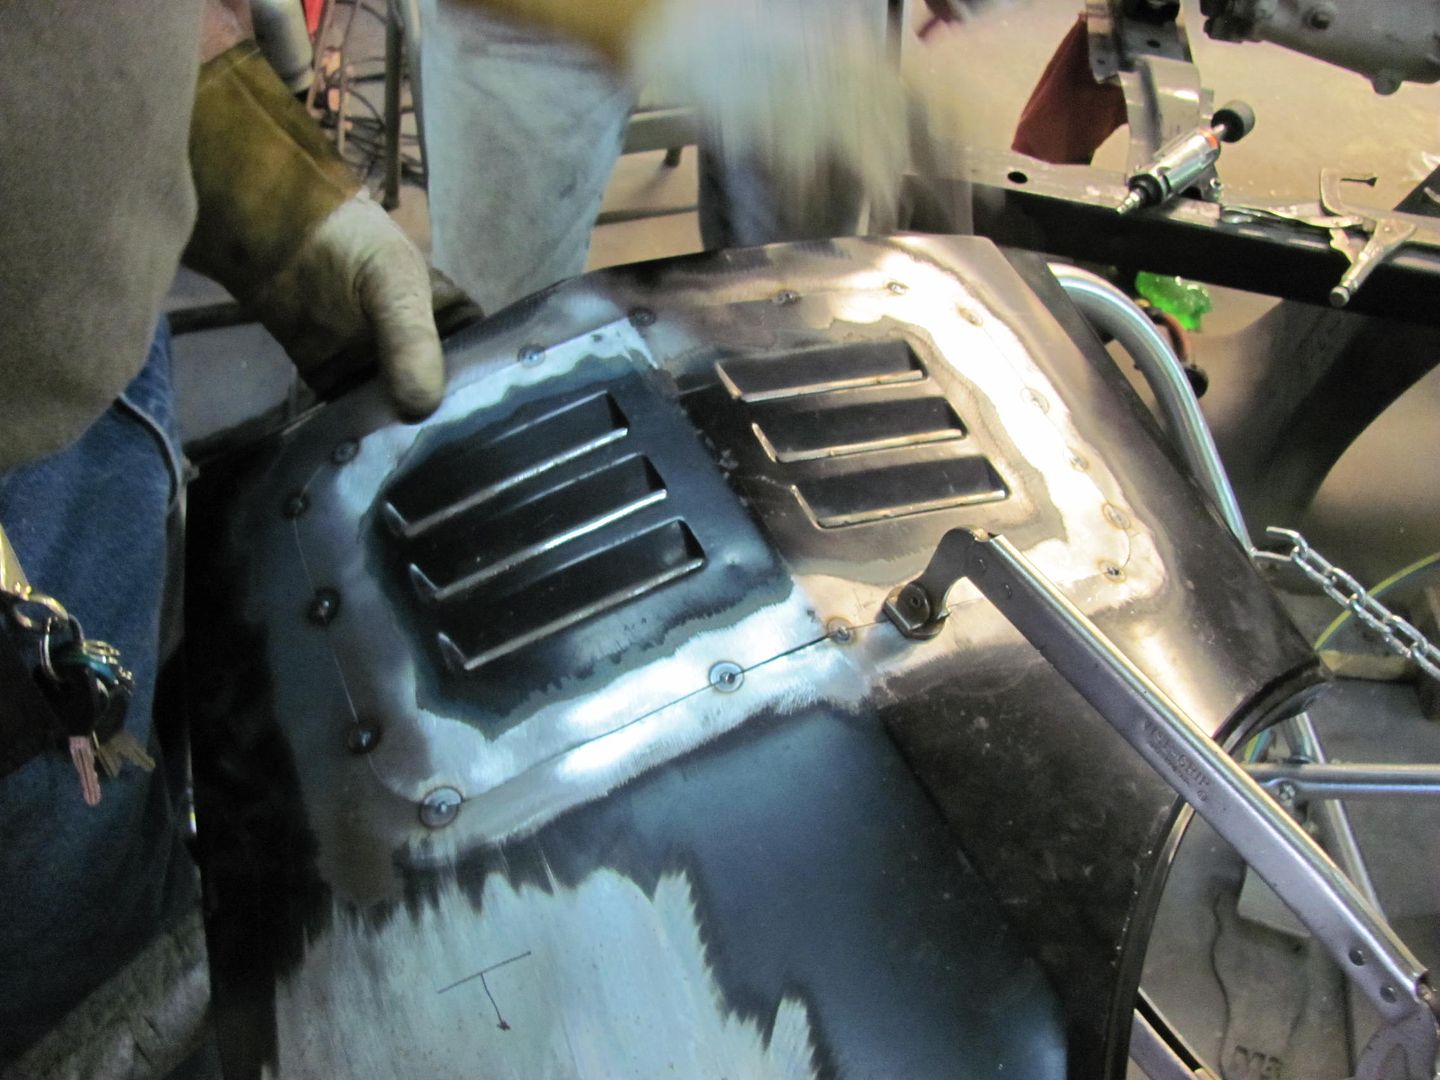

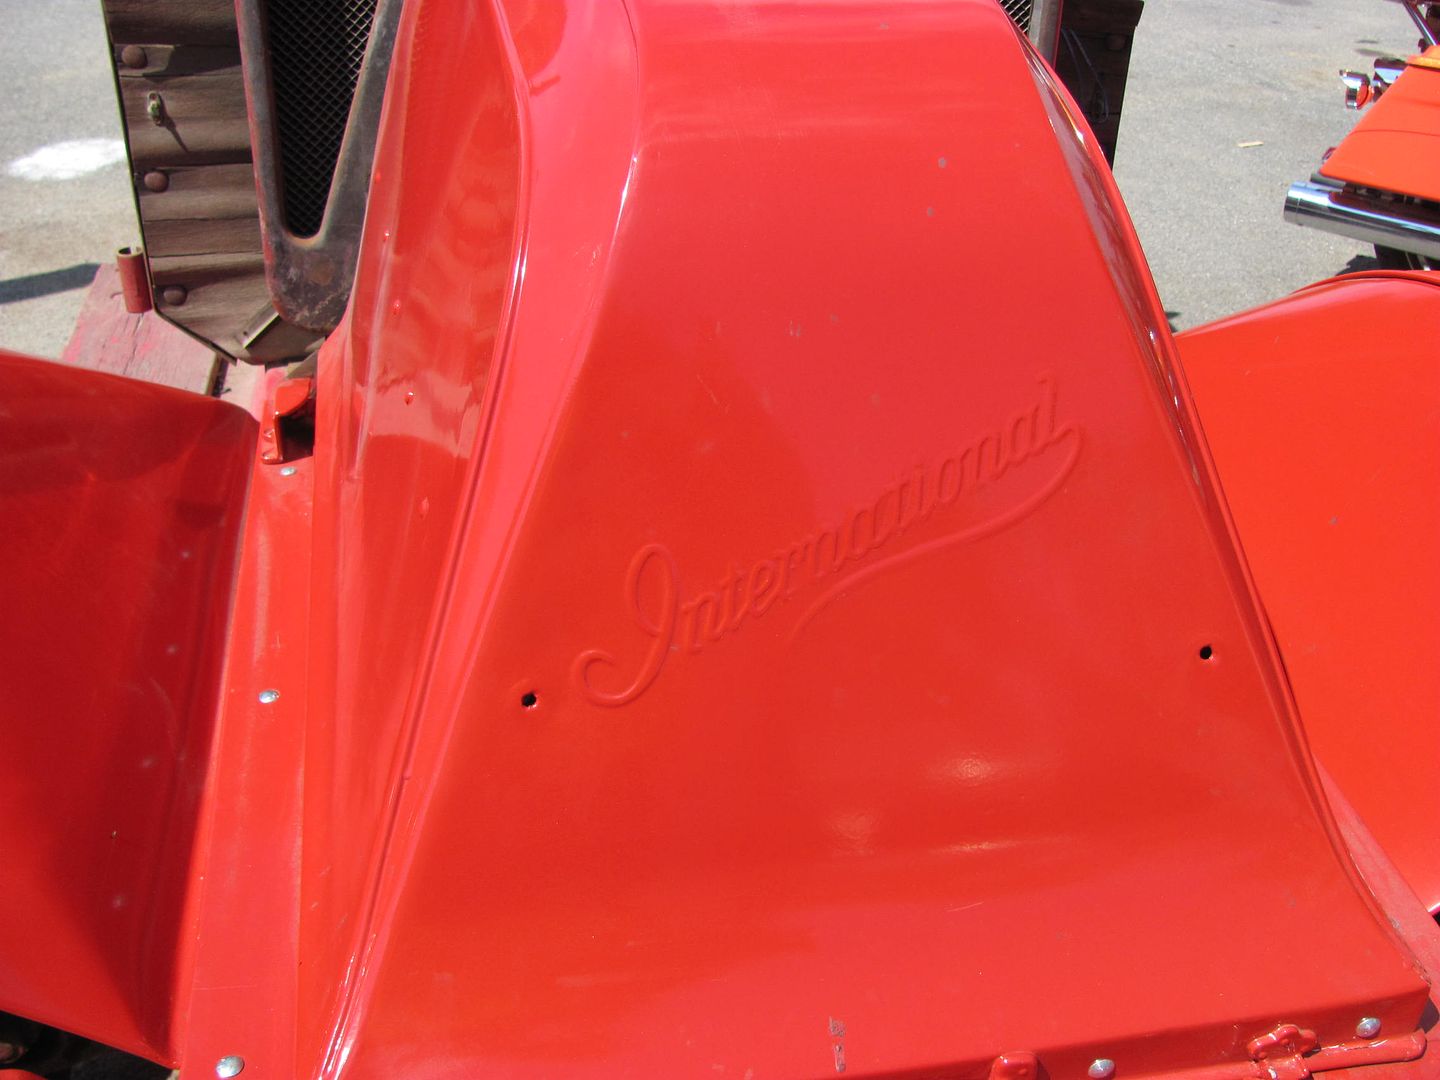
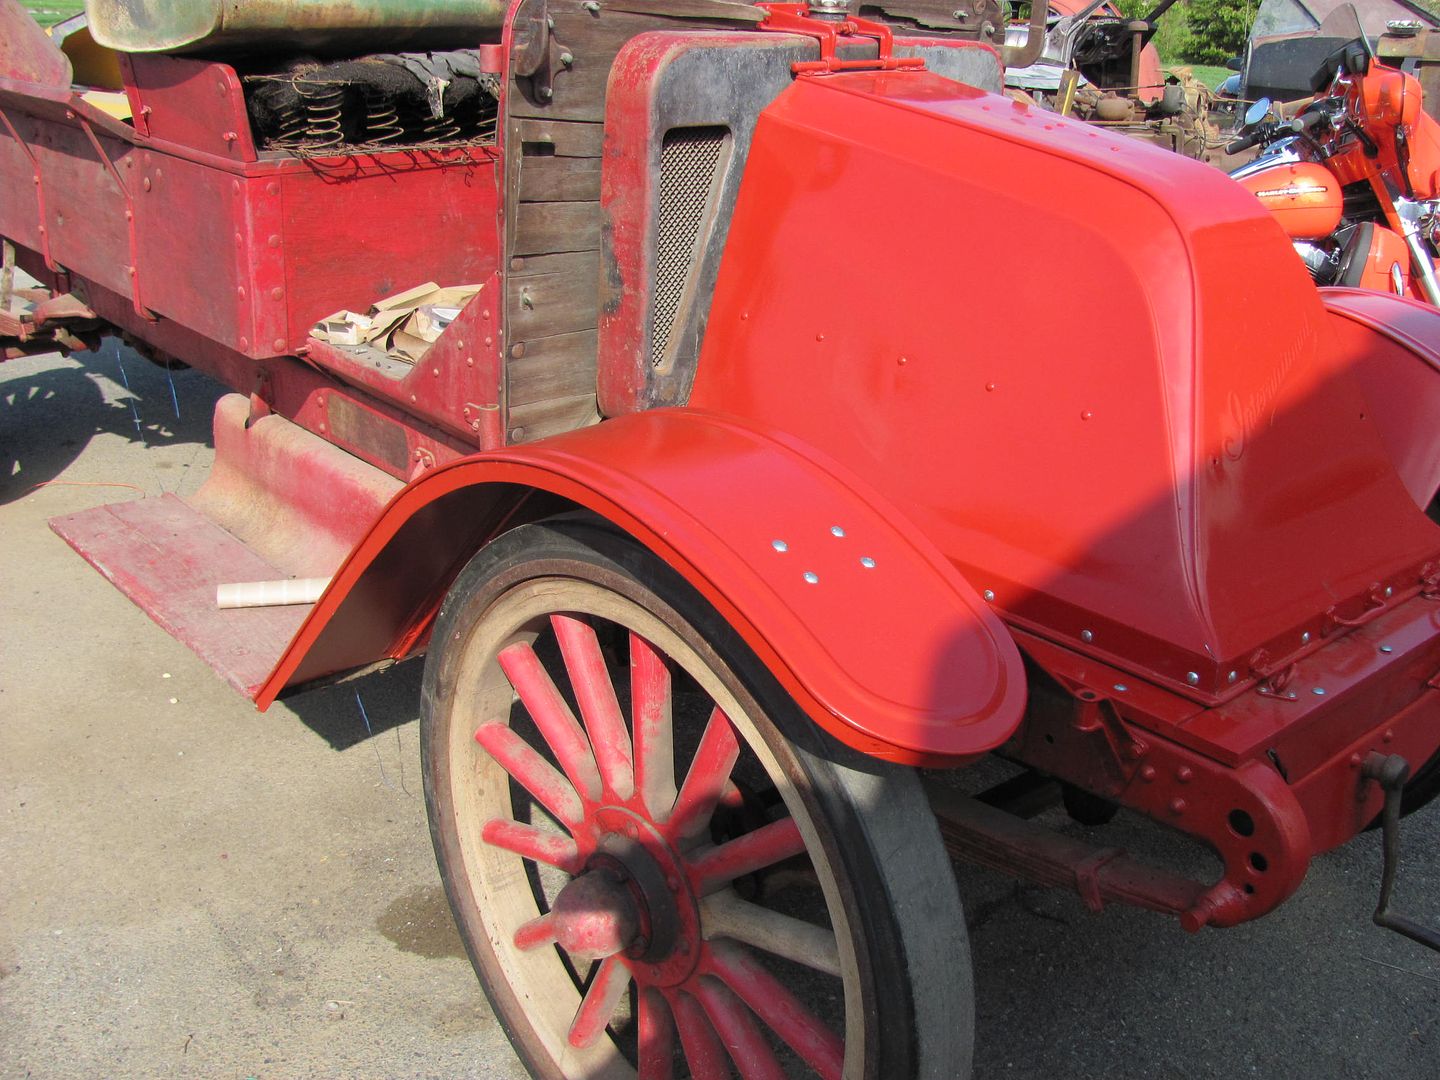
The International farm truck had returned, so we were able to see the finished fenders from last year..
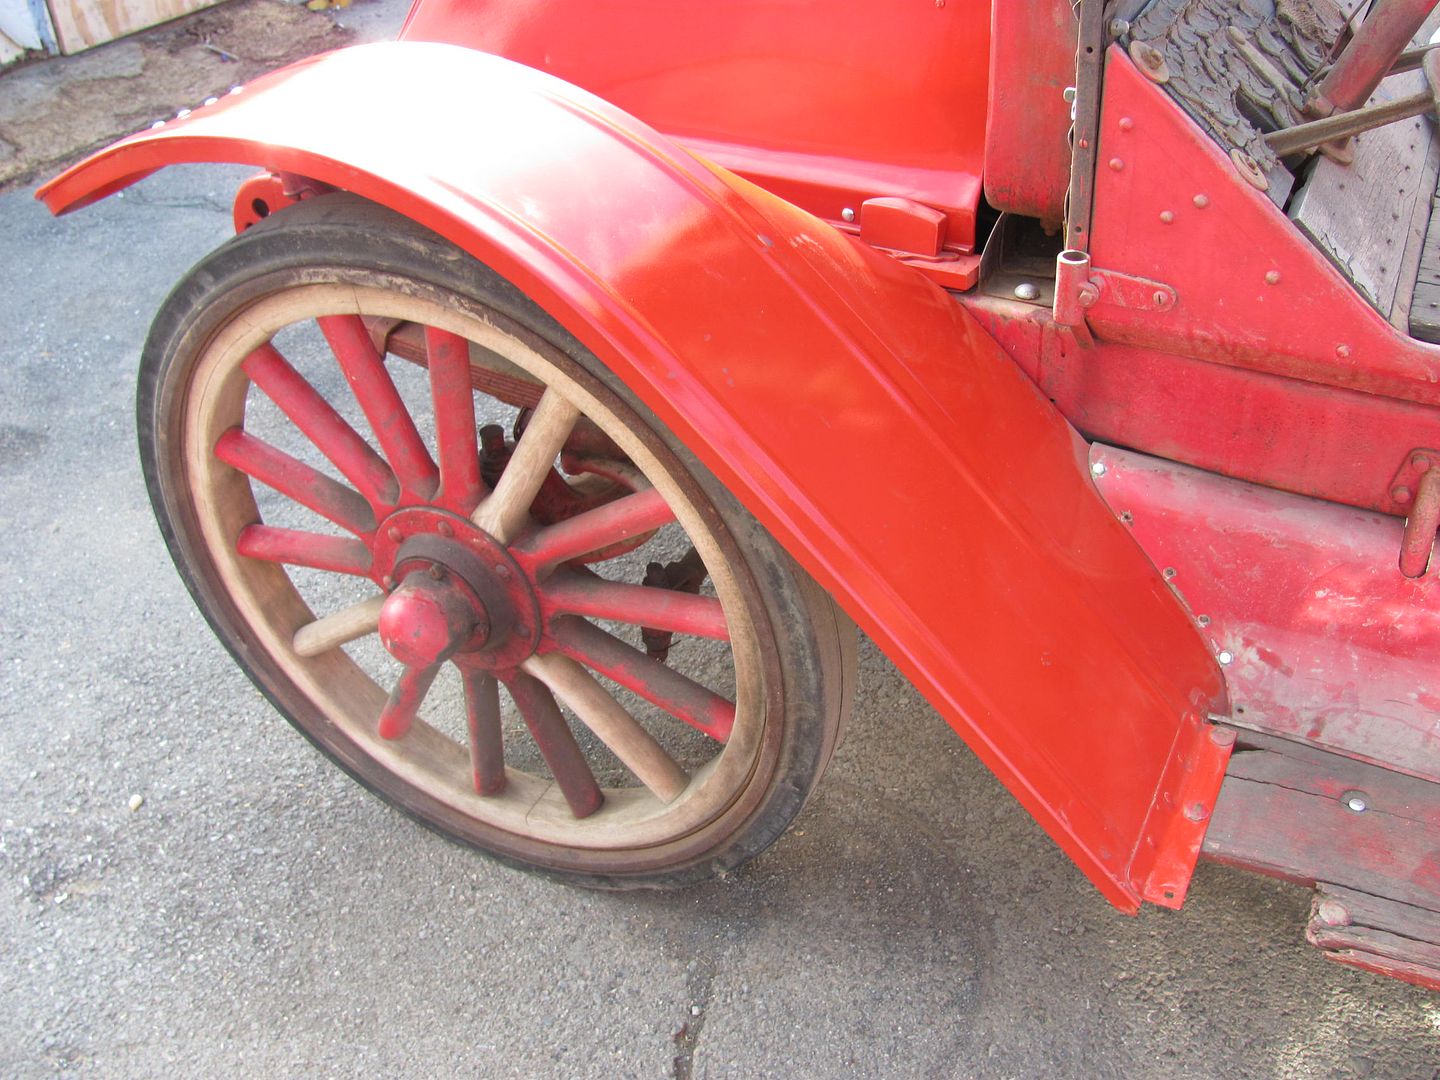
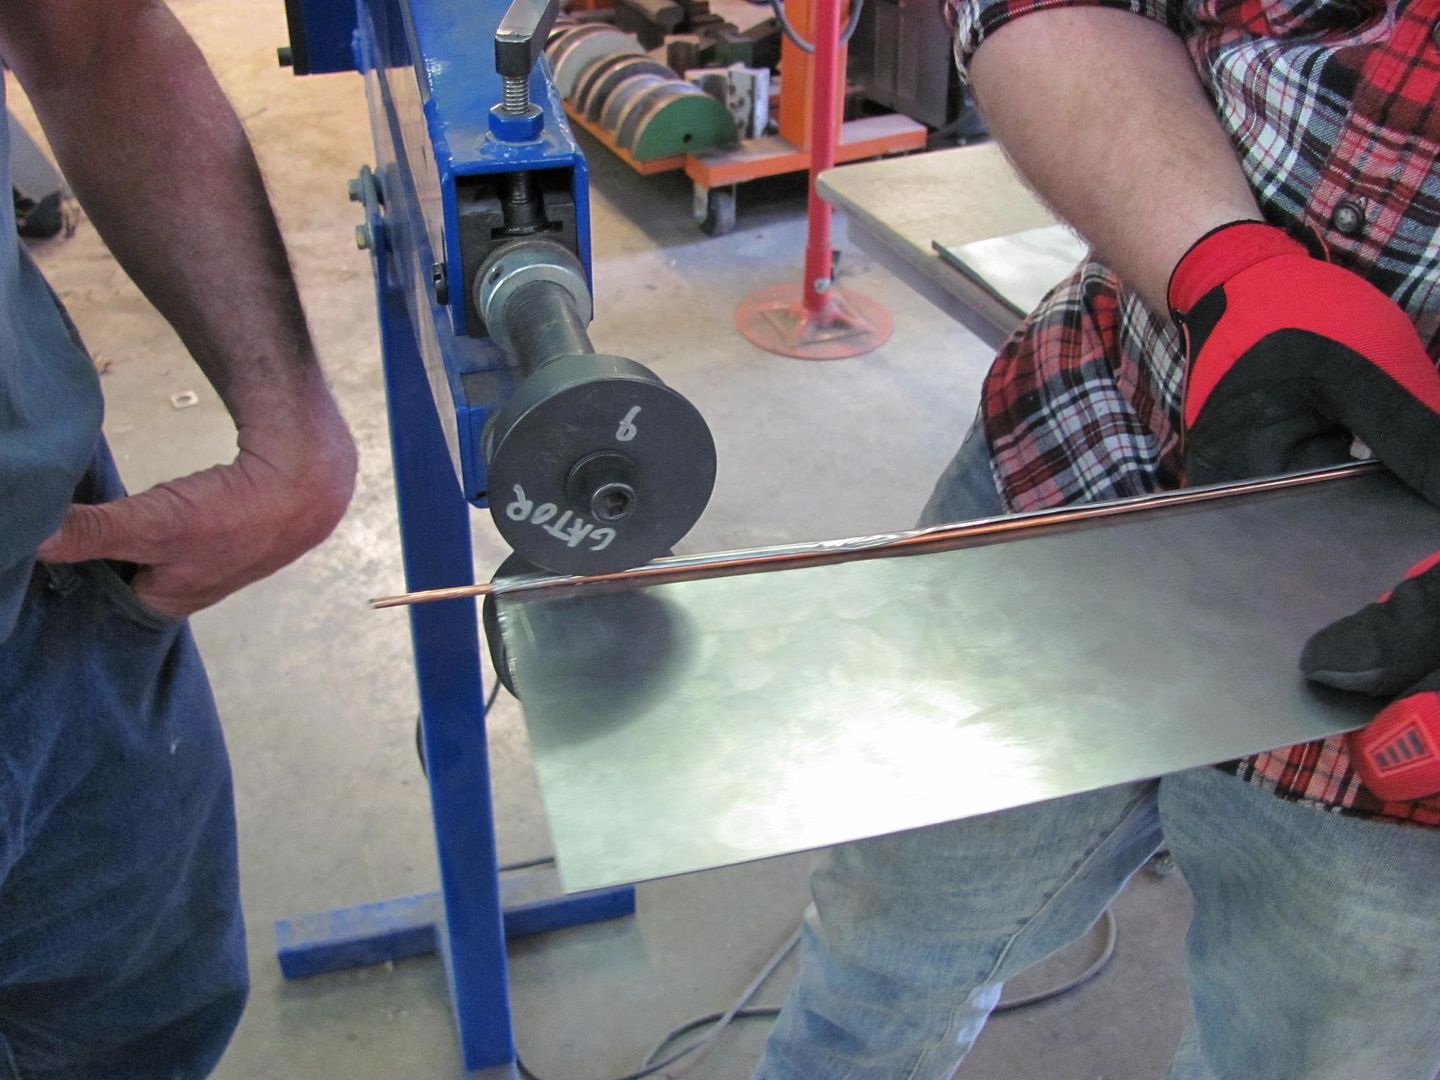
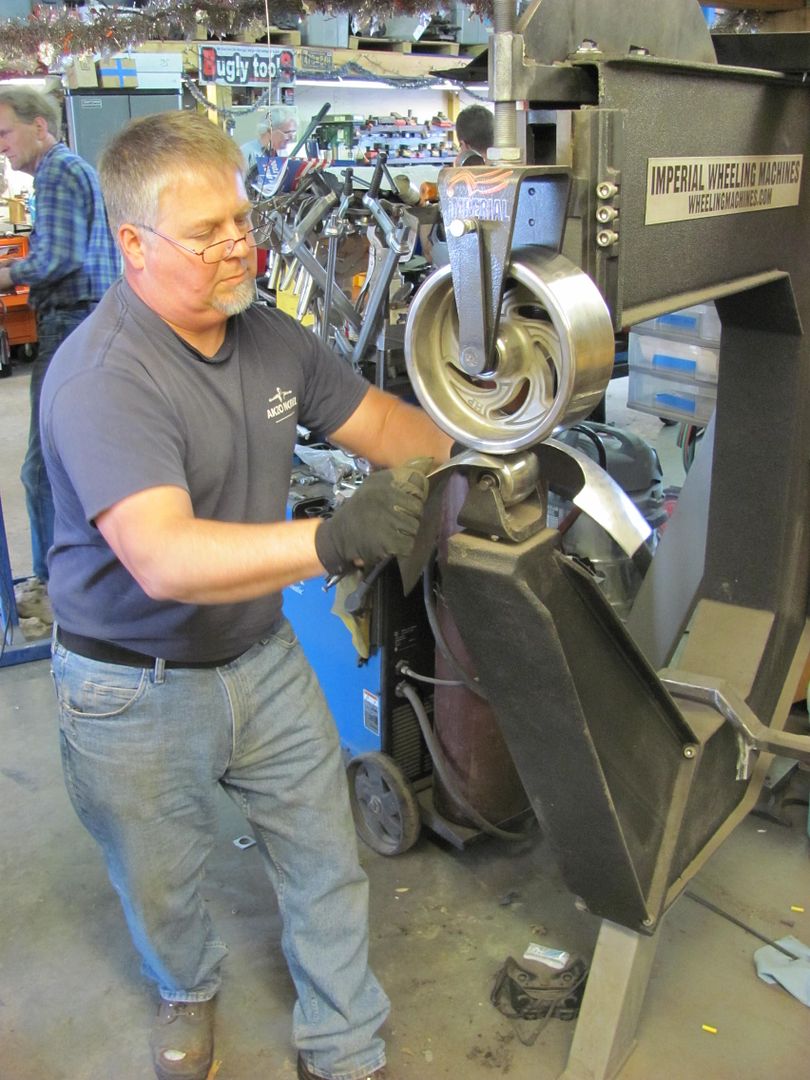
The rear fenders need reproducing as well, so the wire edging this year used bead roller dies..
We also discussed using hammer forms, and various pattern methods to determine shape..
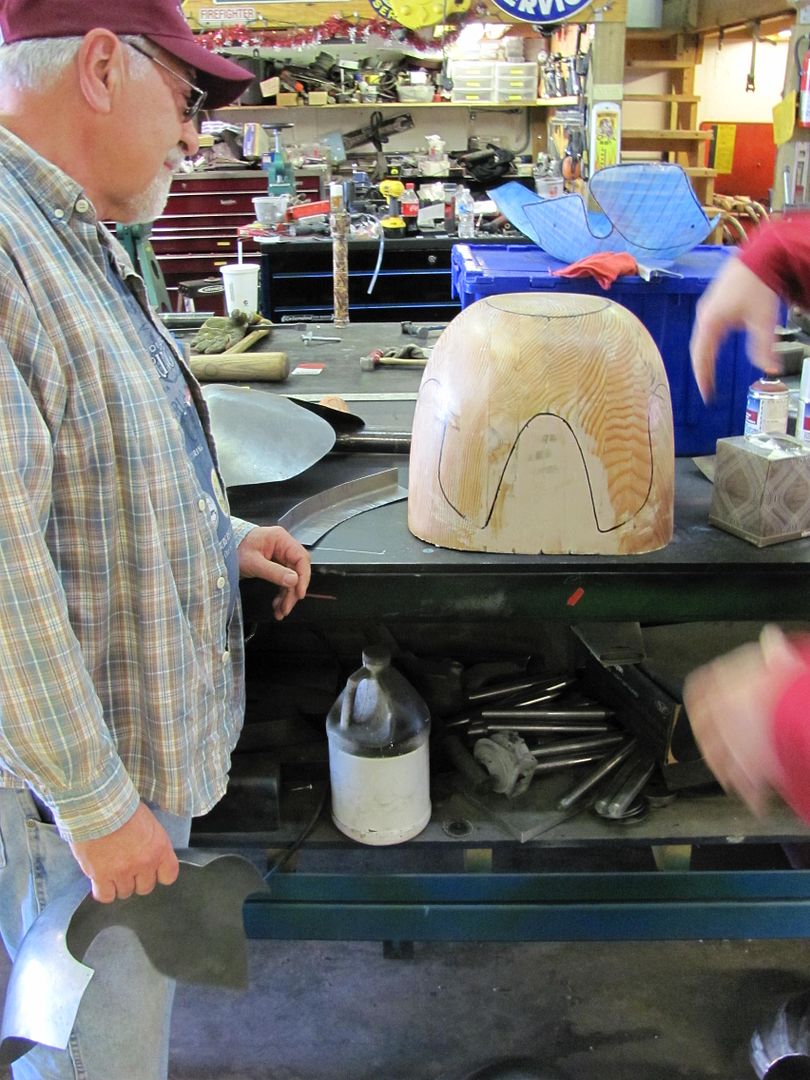

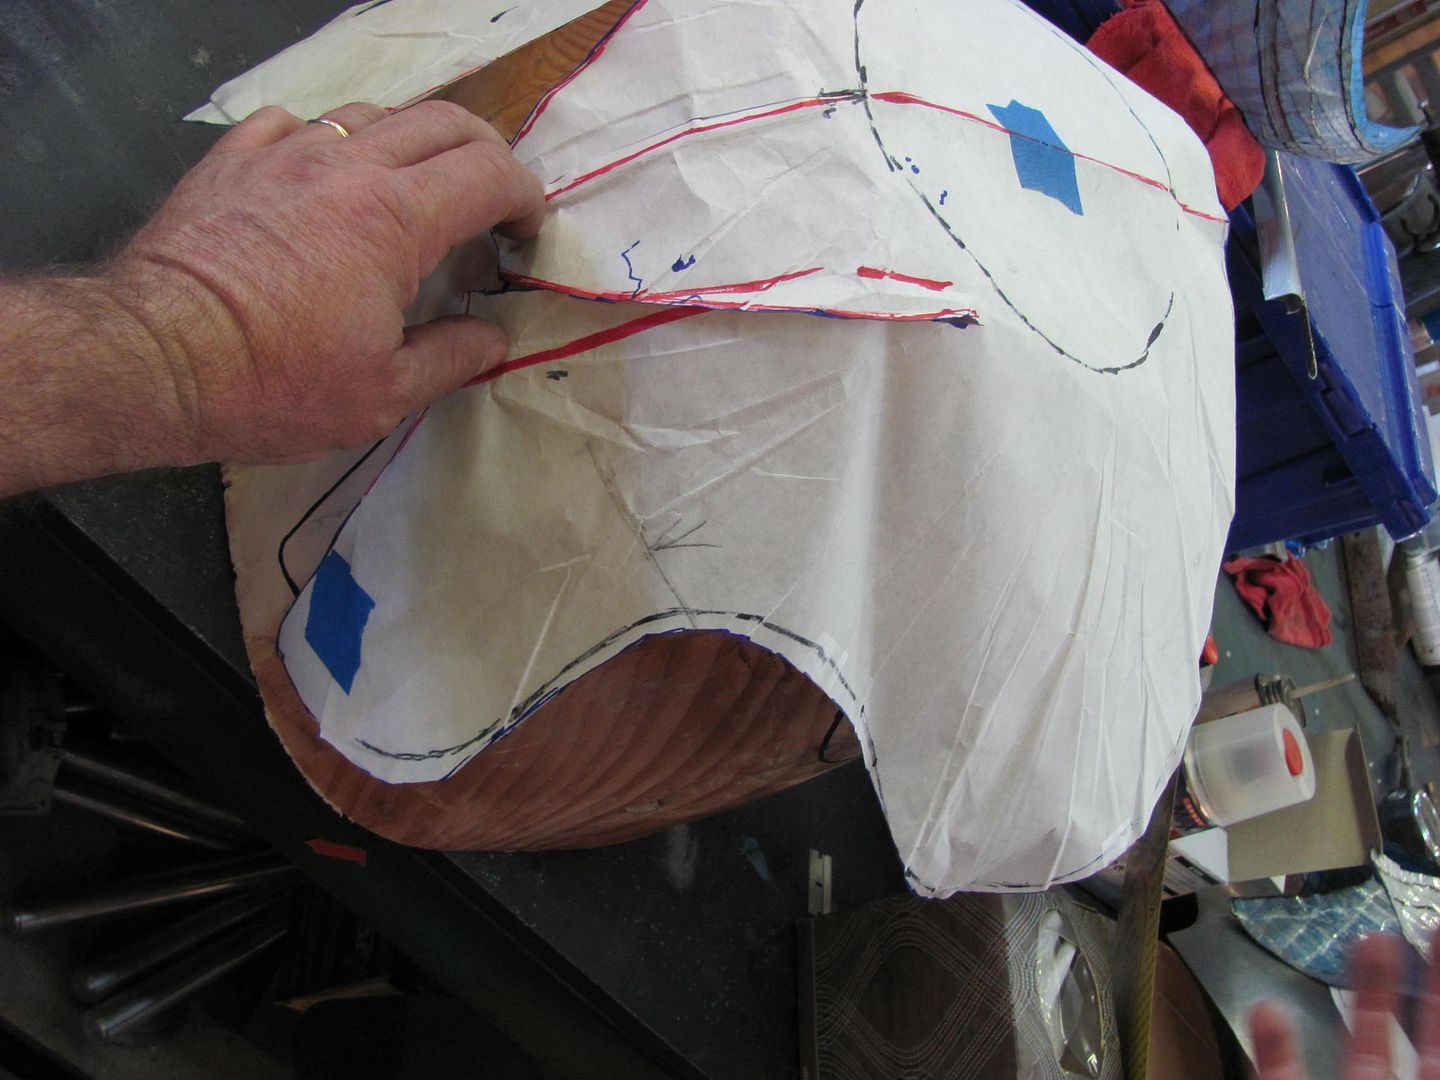
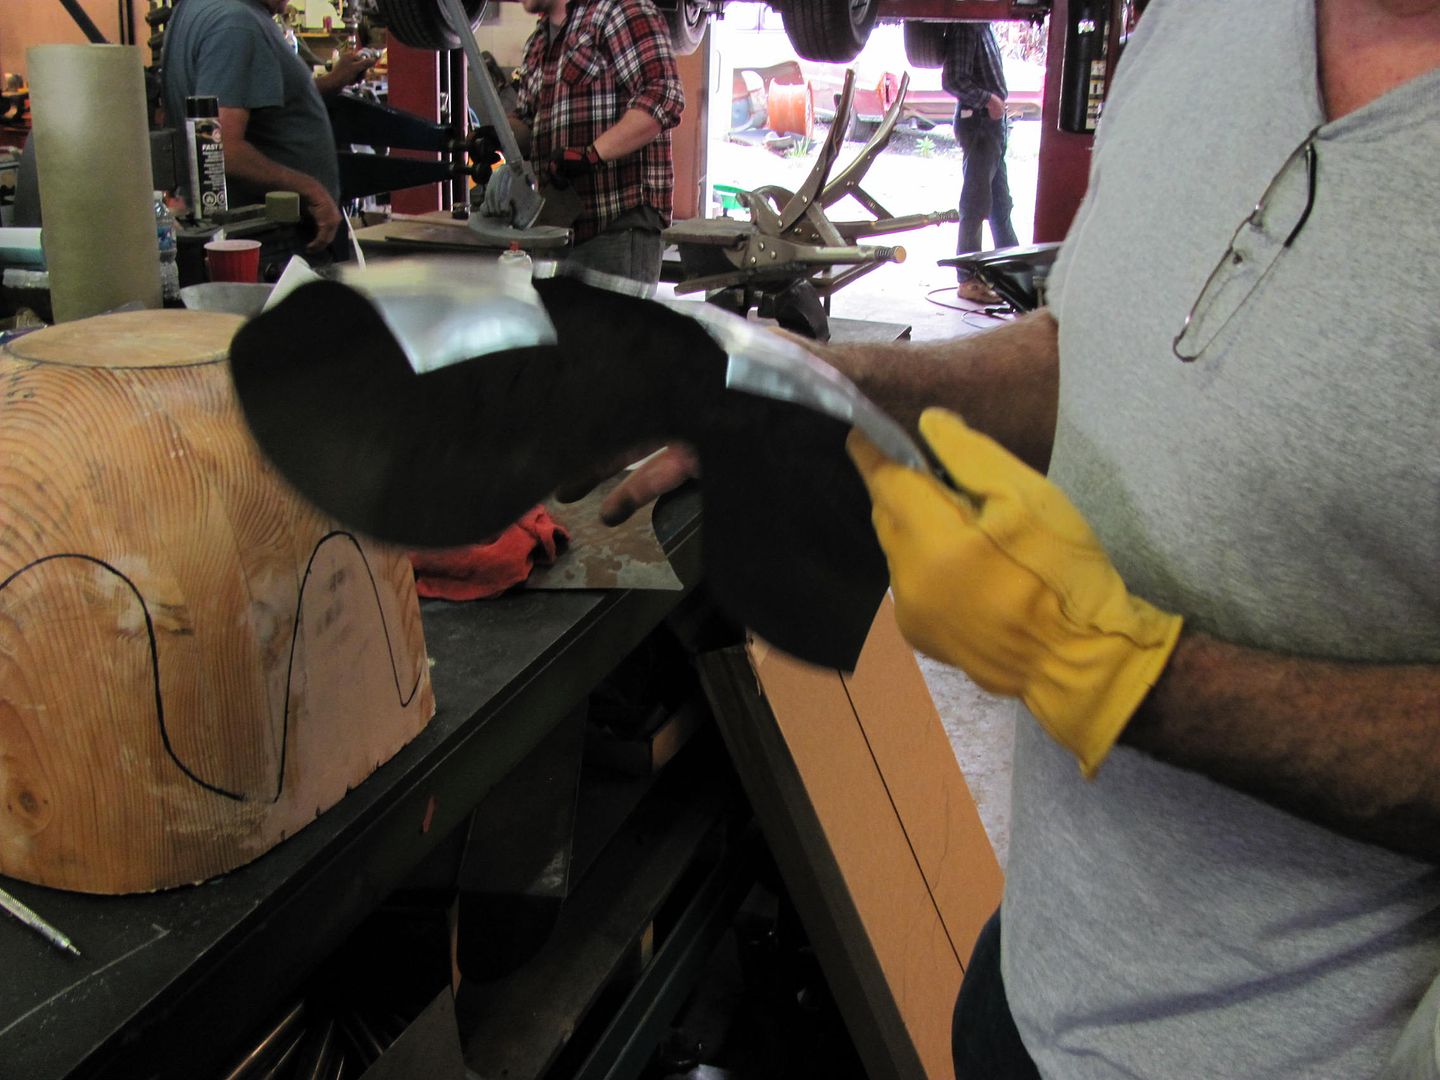
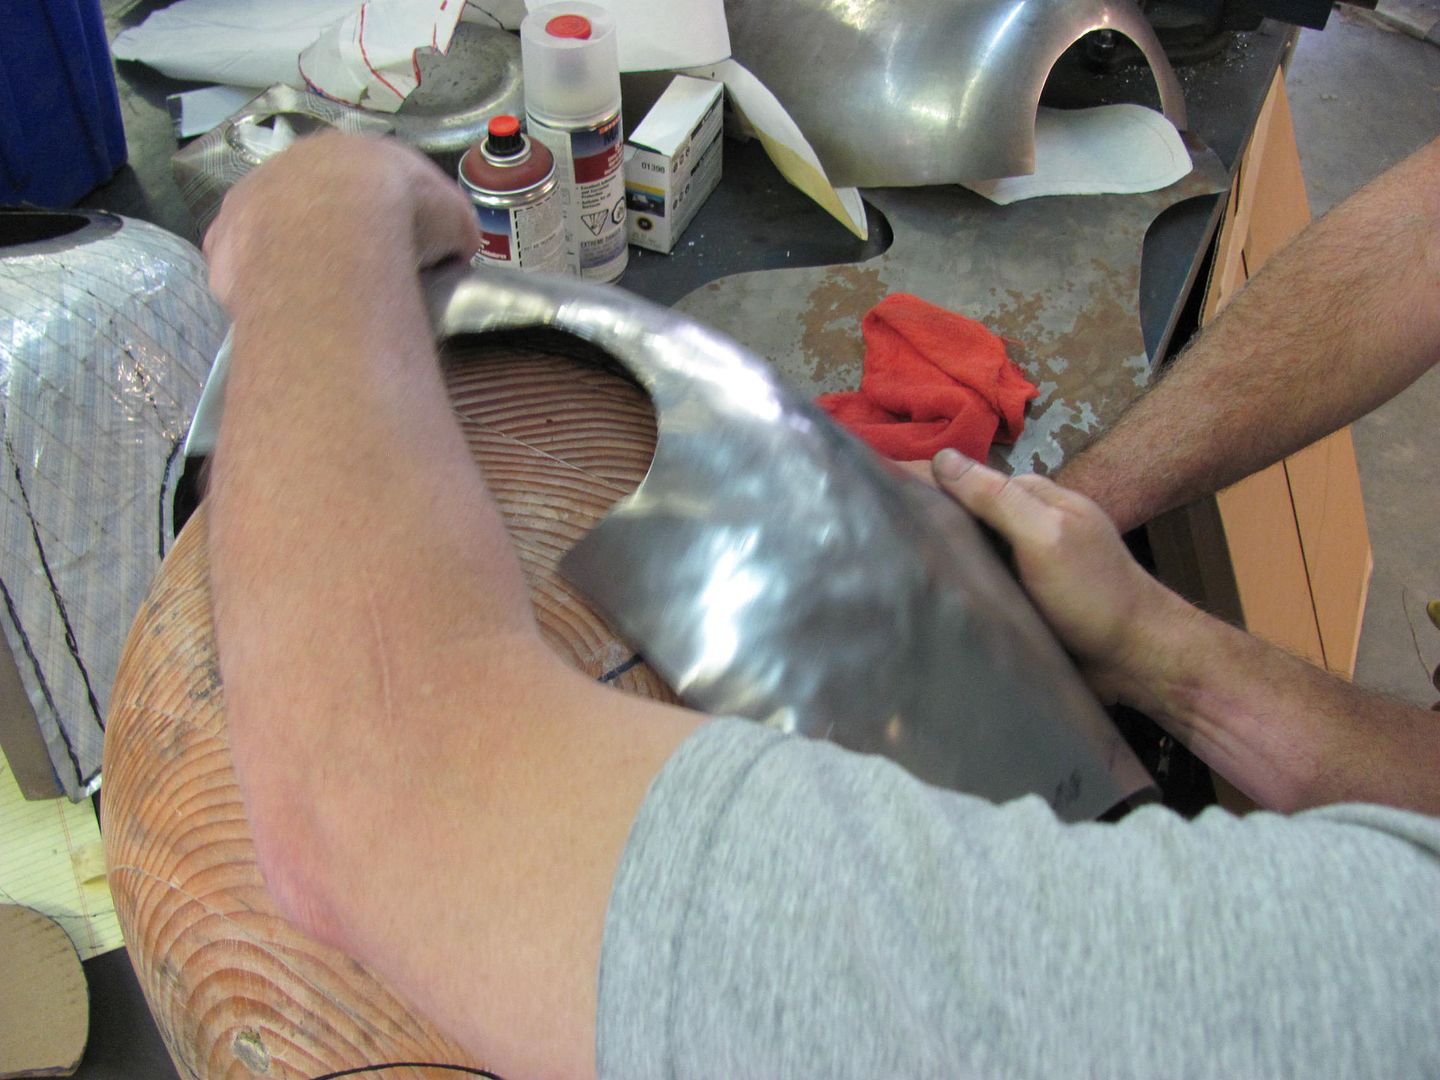
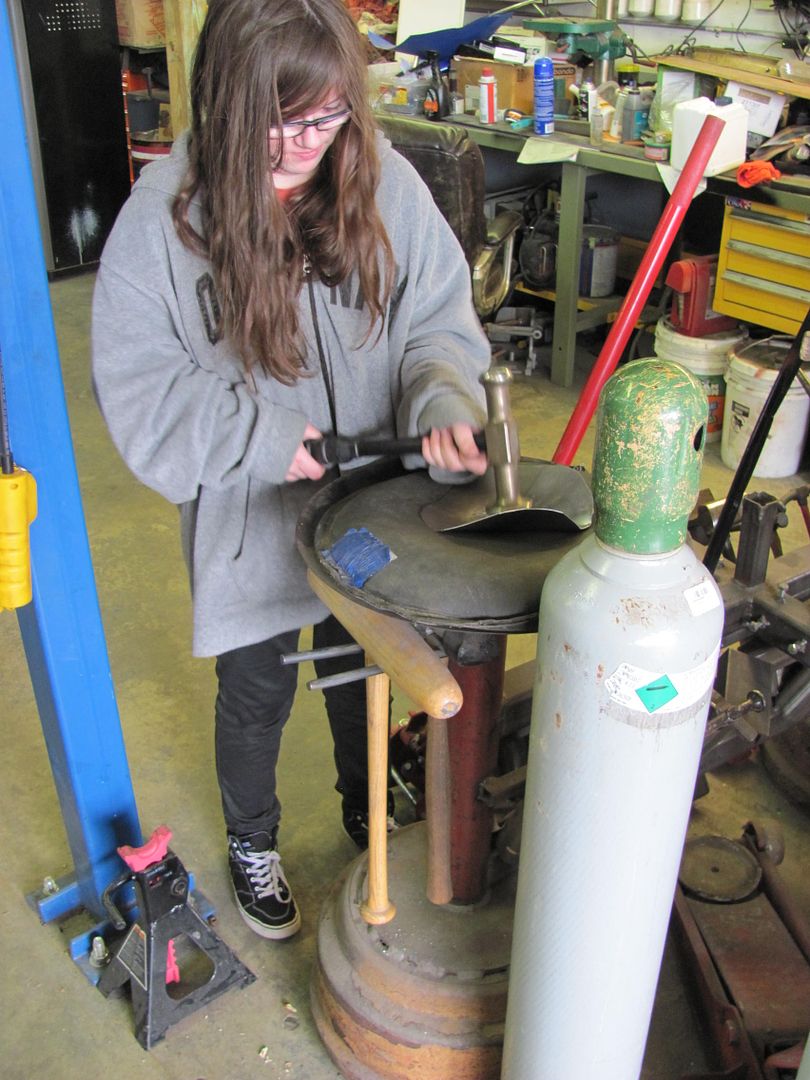
Our new attendee this year learning some shaping...
Some rear corners fabricated for a truck bed..
Some practice at fusion welding using the Tig, here's the front showing some slight undercutting..
The rear side shows some good weld penetration in some areas and needs more practice in others..
Just to show that slight undercutting on fusion welding was not an issue in the joint's strength, the seam was clamped in the apron brake and bent to 135 degrees, with no detriment to the weld..
Saturday afternoon we spent some time discussing tips and tricks to help productivity and also to help open up to new methods and ideas. Here is a rotisserie style mount for a door, helping to locate it for ease of welding or other panel repairs....

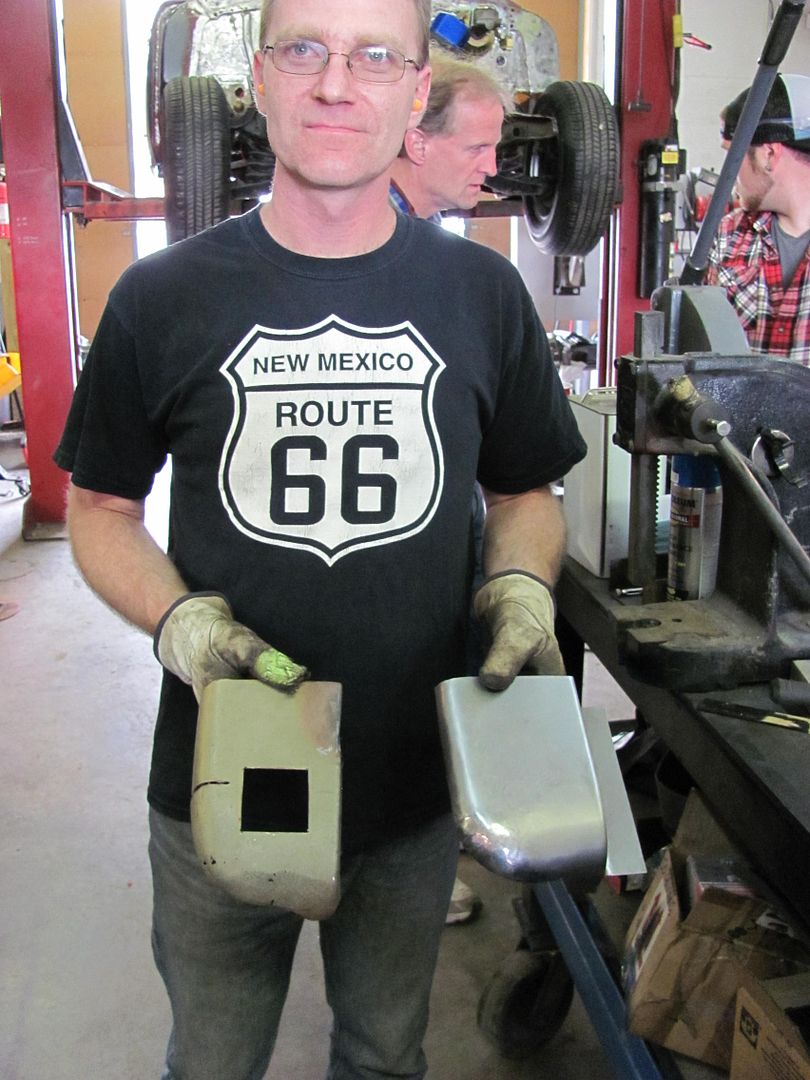
Another project that Gator just picked up was this Camaro. The previous owner's substandard welding attempts severely warped and damaged many of the panels where most of the exterior panels will need replacing..
Looks like a project for the next Gatormeet! All in all, an awesome weekend for sharing and learning methods and ideas..Robert
-
05-07-2014 10:21 AM #214
CHR Member
- Join Date
- Oct 2007
- Location
- Petaluma
- Car Year, Make, Model: 48 Ford F1
- Posts
- 9,795
What a cool Class! I wish we had something like that around here."  "No matter where you go, there you are!" Steve.
-
05-07-2014 01:06 PM #215
CHR Member
- Join Date
- Apr 2011
- Location
- Prairie City
- Car Year, Make, Model: 40 Ford Deluxe, 68 Corvette, 72&76 K30
- Posts
- 7,301
- Blog Entries
- 1
Very cool and thanks for sharing! A guy can be over loaded with cool info and good tips at that I'm sure. On your tuck shrinking tool, did it start out as 2 punches or center punches bent and welded together? Just curious. I may make one some day to try out.Ryan
1940 Ford Deluxe Tudor 354 Hemi 46RH Electric Blue w/multi-color flames, Ford 9" Residing in multiple pieces
1968 Corvette Coupe 5.9 Cummins Drag Car 11.43@130mph No stall leaving the line with 1250 rpm's and poor 2.2 60'
1972 Chevy K30 Longhorn P-pumped 24v Compound Turbos 47RH Just another money pit
1971 Camaro RS 5.3 BTR Stage 3 cam, SuperT10
Tire Sizes
-
05-07-2014 01:37 PM #216
CHR Member
- Join Date
- Sep 2007
- Location
- New Bedford
- Car Year, Make, Model: 34 Ford 3W Coupe Replica
- Posts
- 14,754
As the others have said, thanks for sharing.. (seems like I'm always saying that to you! LOL)
I was thinking the tuck tool started out as a couple of allen wrenches maybe?? I'd like to see more of that - I've never seen it before! Hint Hint!
-
05-07-2014 02:48 PM #217
CHR Member
- Join Date
- Jun 2008
- Location
- Leonardtown
- Car Year, Make, Model: Walking
- Posts
- 1,228
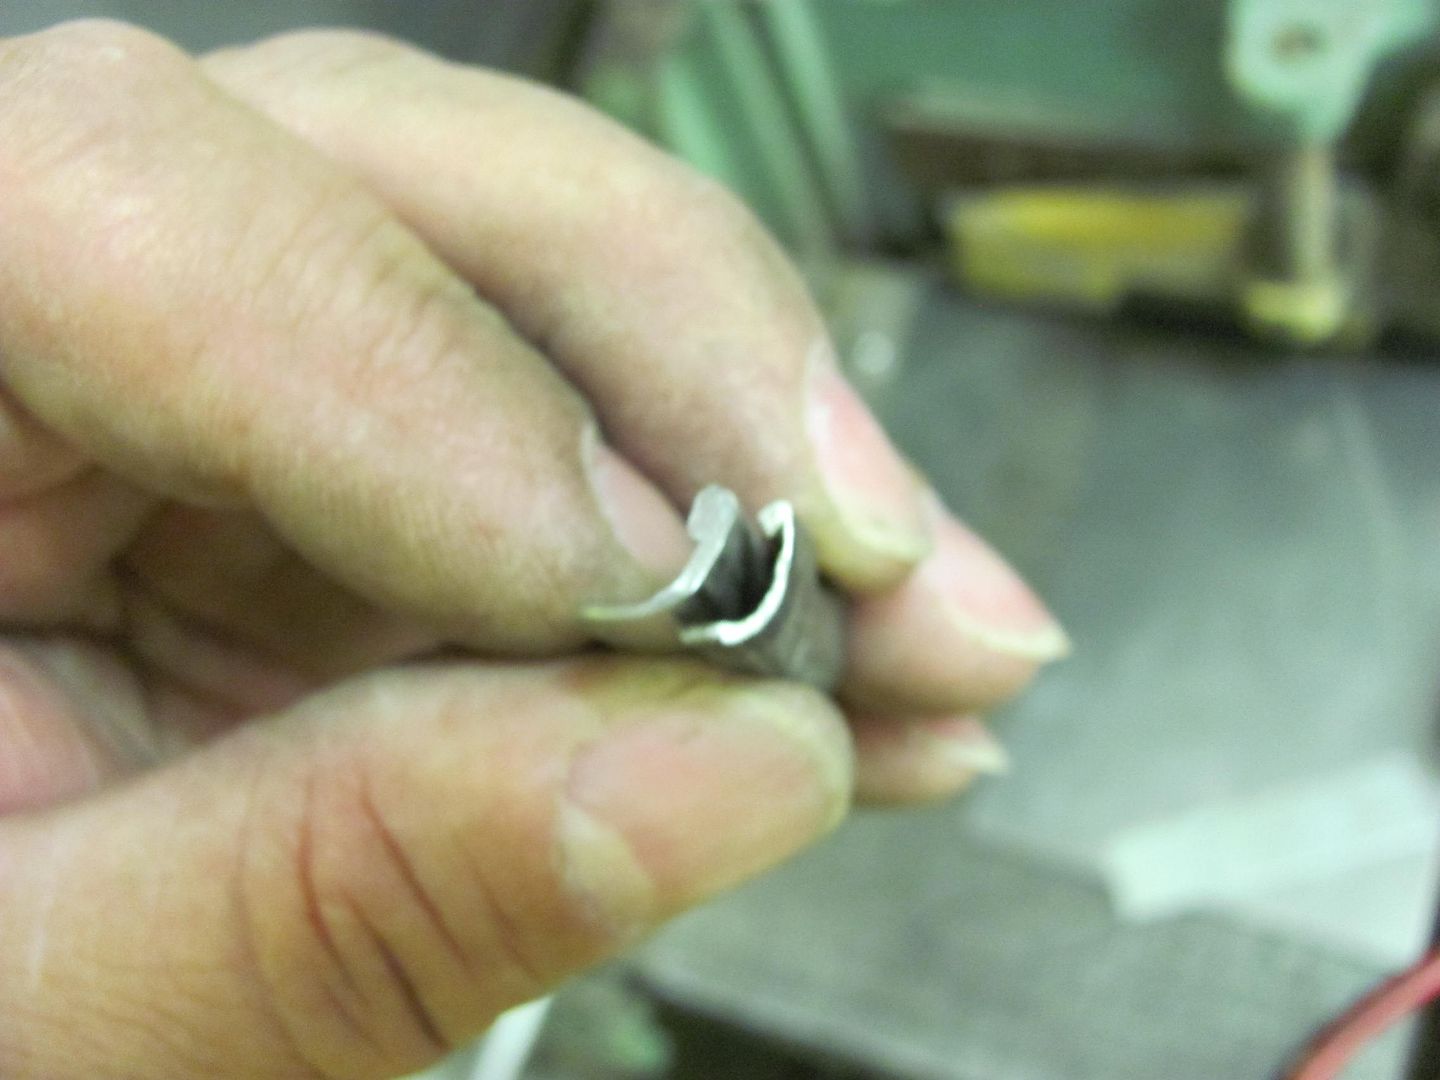
The tuck tool wasn't mine, it was built by Capt Kirk. It started out as two craftsman punches, the spacing between is critical, as is the shape on the end. The plans to build them are on WestCoastMetalshapers, but will require signing up to the site.Robert
-
05-07-2014 03:56 PM #218
CHR Member
- Join Date
- Apr 2011
- Location
- Prairie City
- Car Year, Make, Model: 40 Ford Deluxe, 68 Corvette, 72&76 K30
- Posts
- 7,301
- Blog Entries
- 1
Robert, thanks for that. I may have to venture over there some day. It never hurts to learn new sheet metal skills for a guy with minimal. HahaRyan
1940 Ford Deluxe Tudor 354 Hemi 46RH Electric Blue w/multi-color flames, Ford 9" Residing in multiple pieces
1968 Corvette Coupe 5.9 Cummins Drag Car 11.43@130mph No stall leaving the line with 1250 rpm's and poor 2.2 60'
1972 Chevy K30 Longhorn P-pumped 24v Compound Turbos 47RH Just another money pit
1971 Camaro RS 5.3 BTR Stage 3 cam, SuperT10
Tire Sizes
-
05-24-2014 01:23 PM #219
CHR Member
- Join Date
- Jun 2008
- Location
- Leonardtown
- Car Year, Make, Model: Walking
- Posts
- 1,228
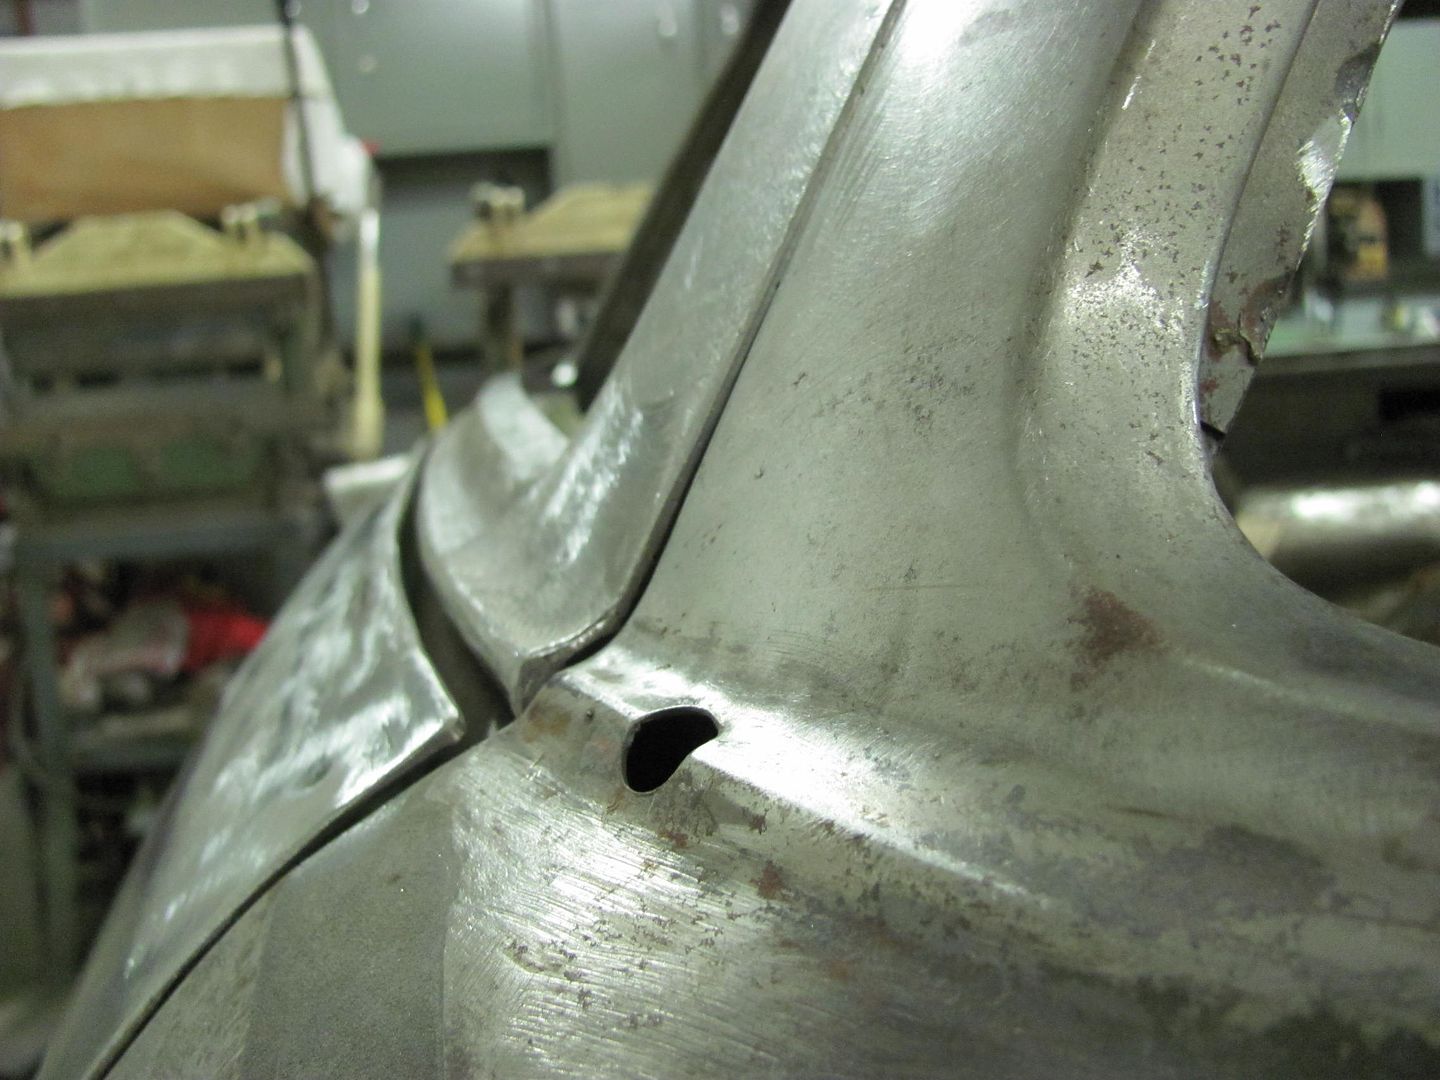
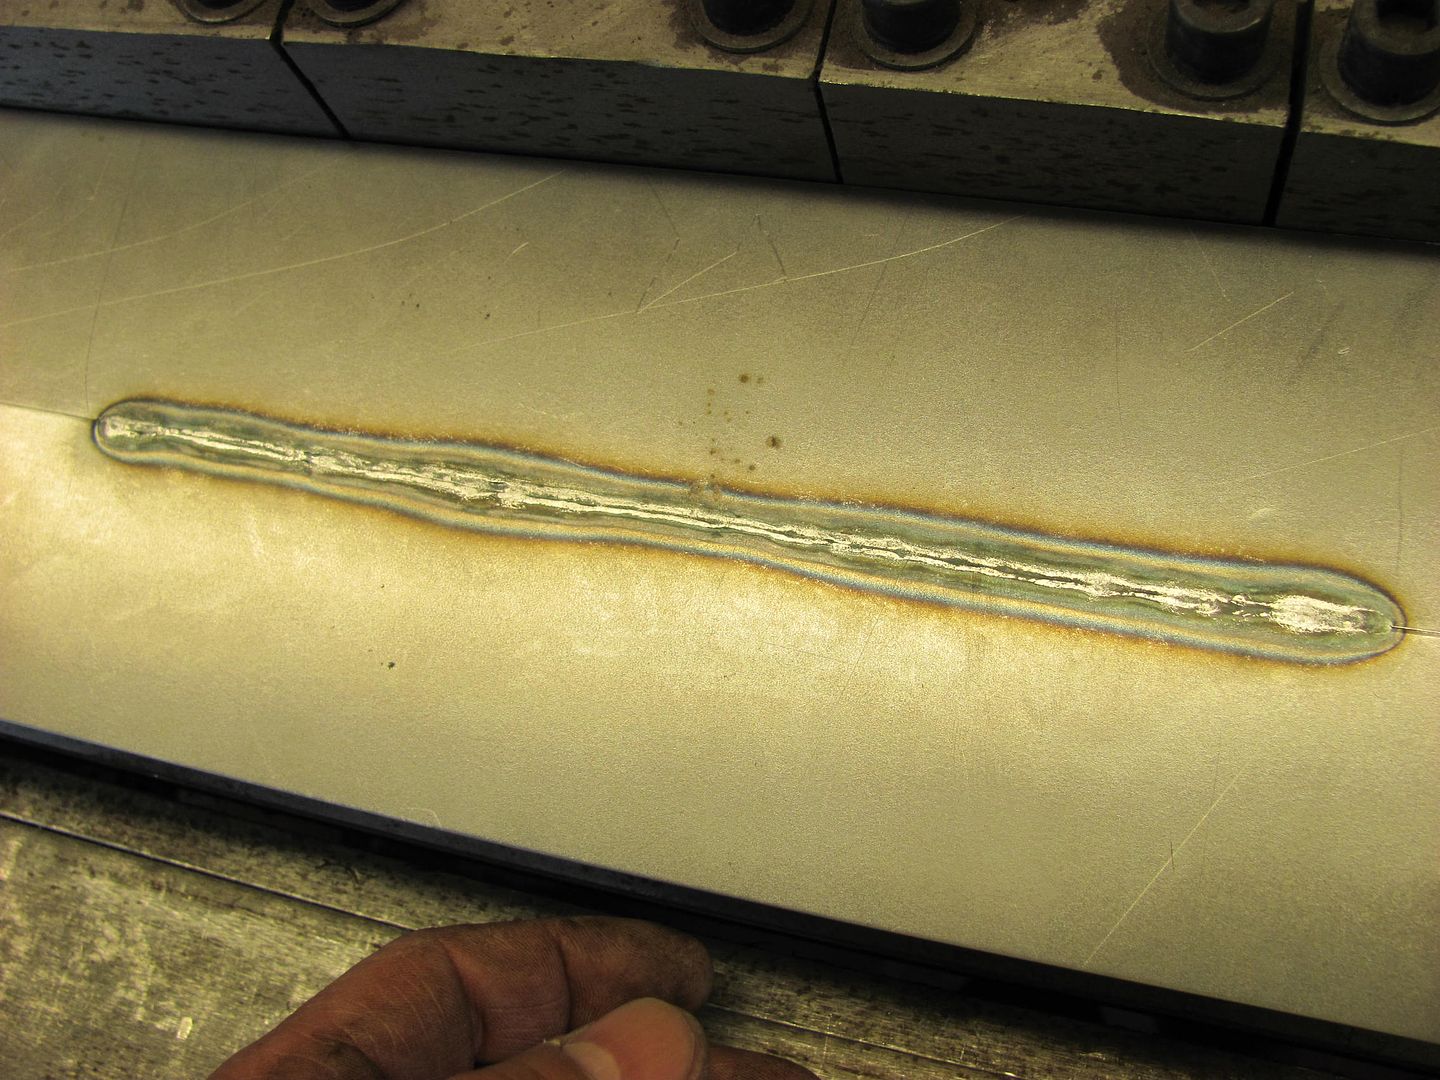
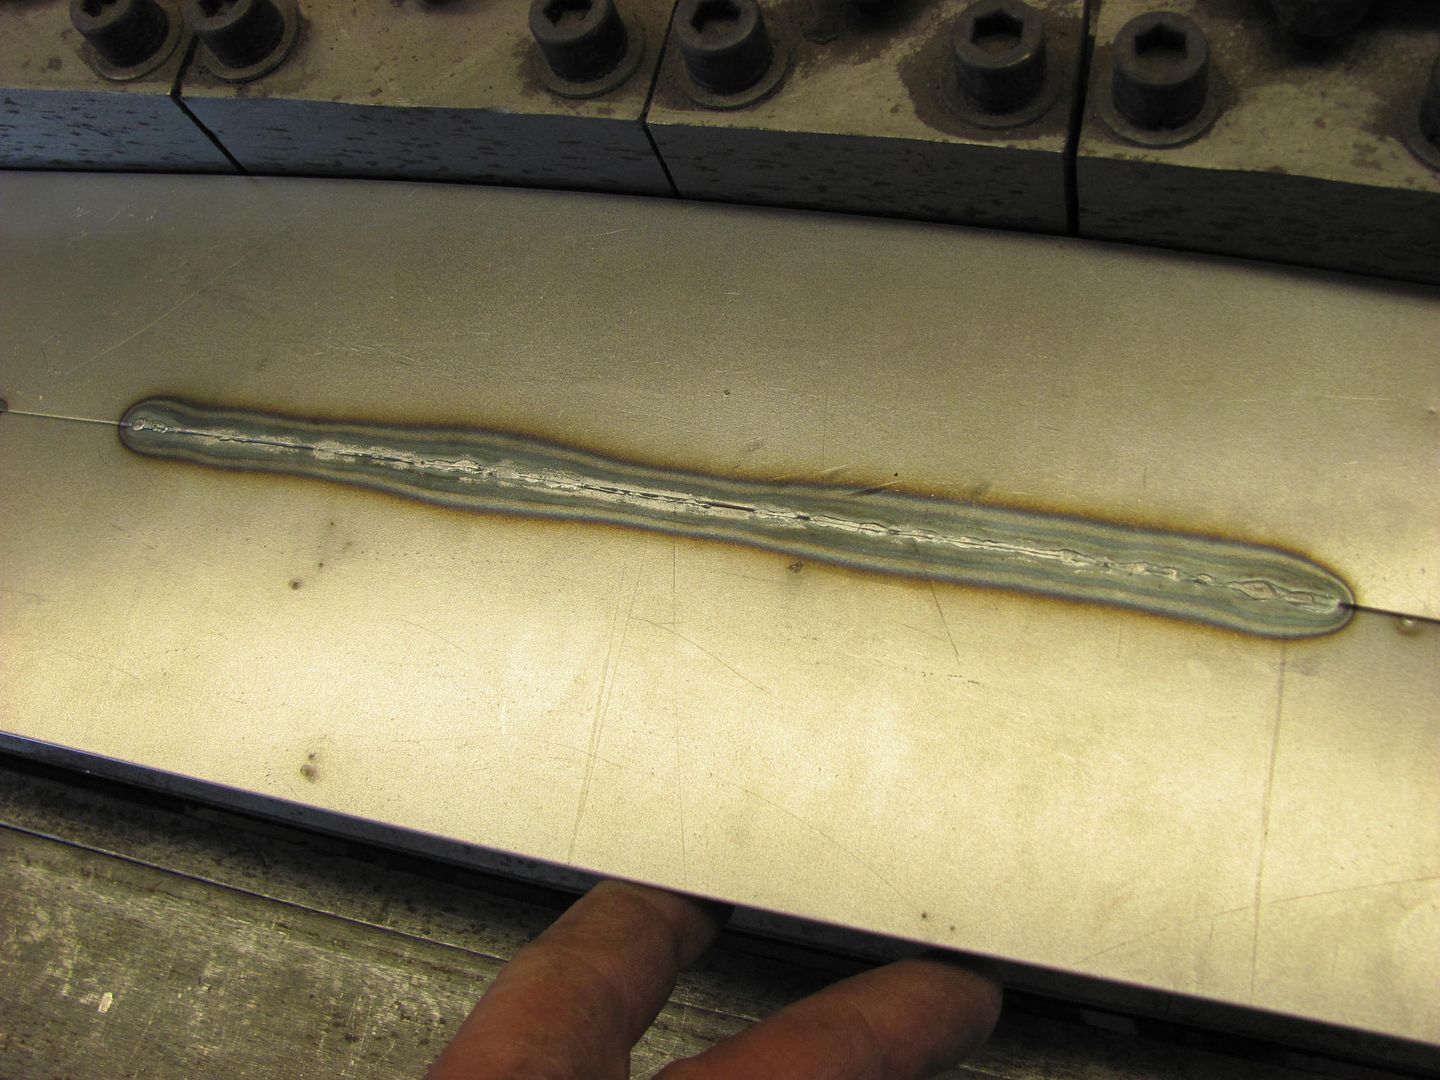
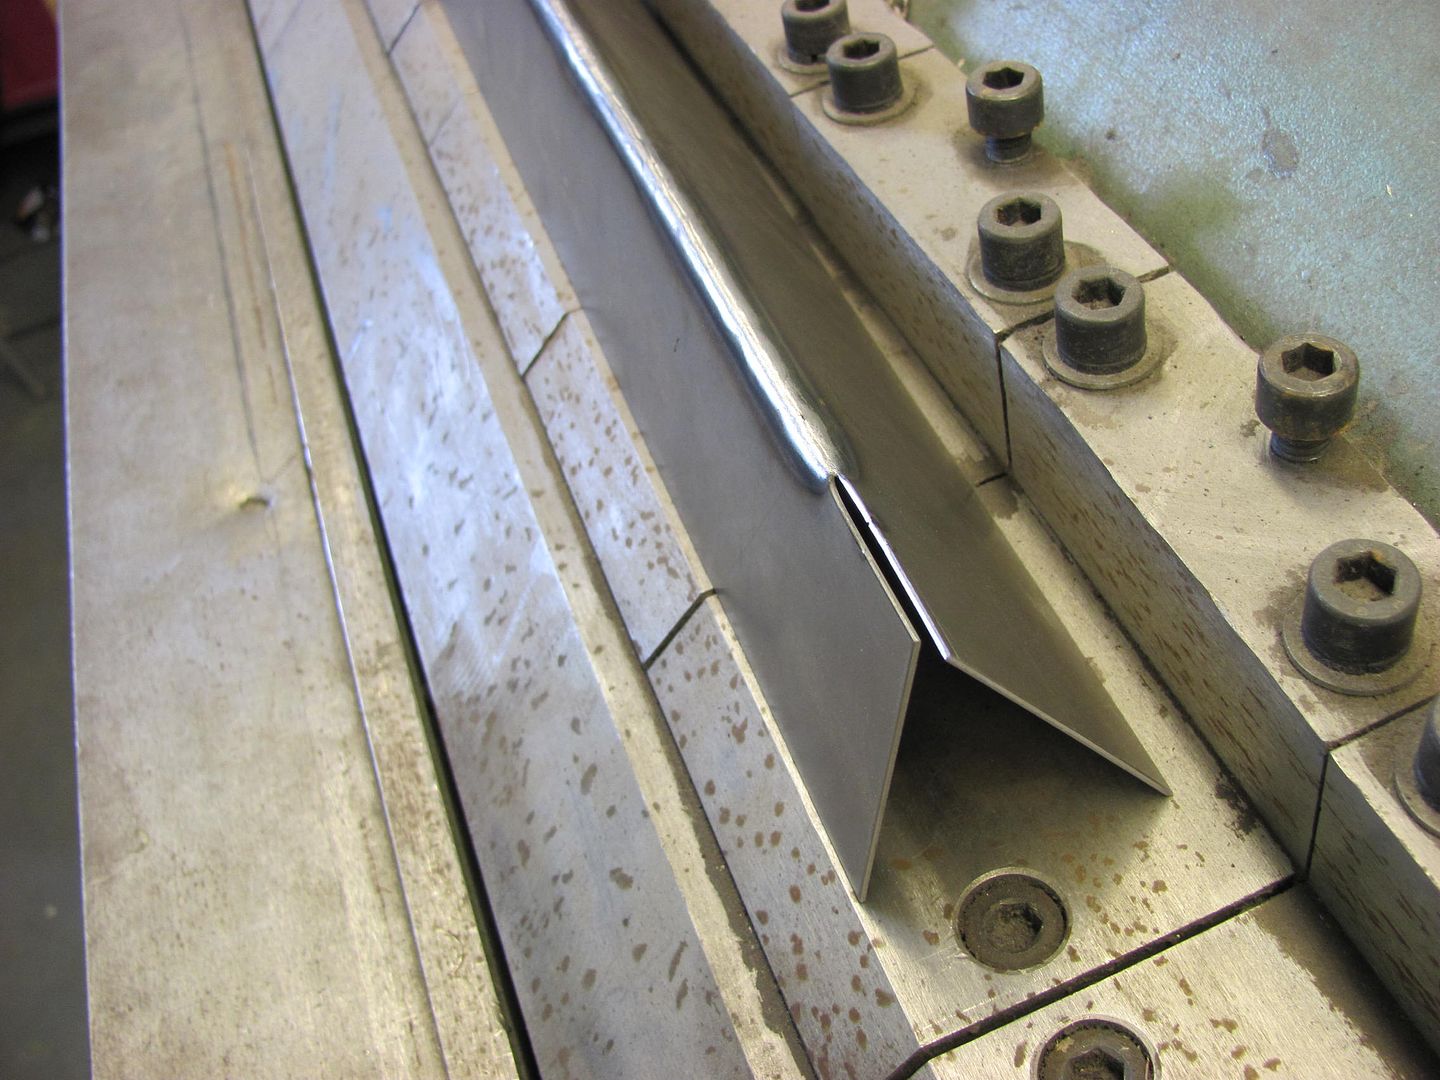
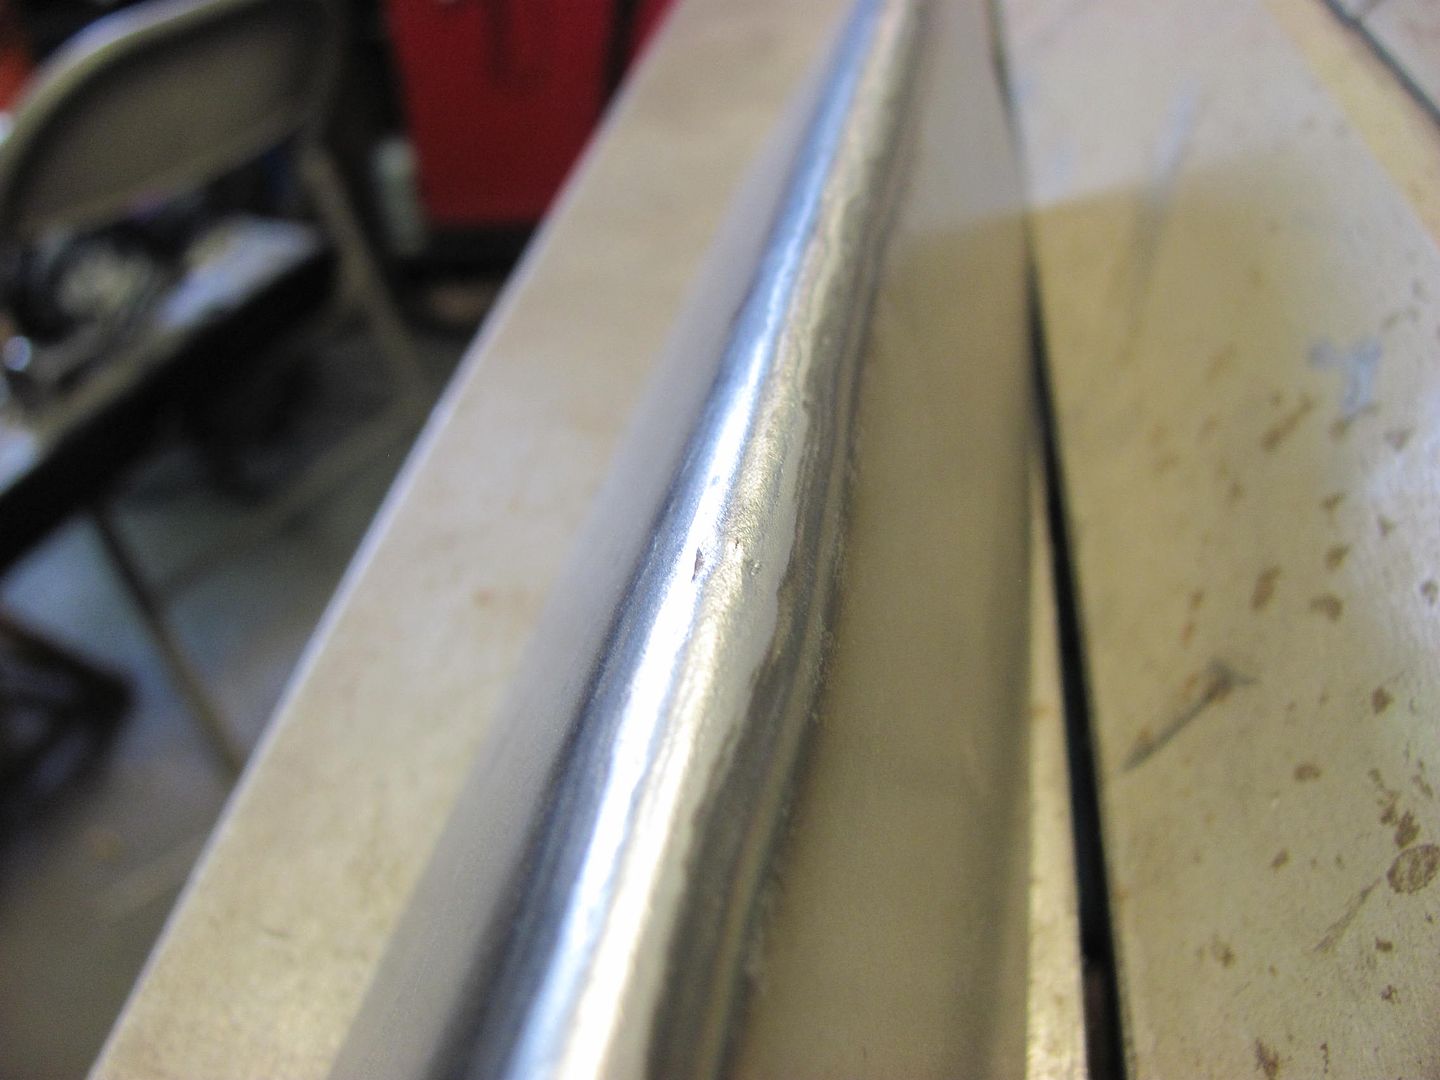
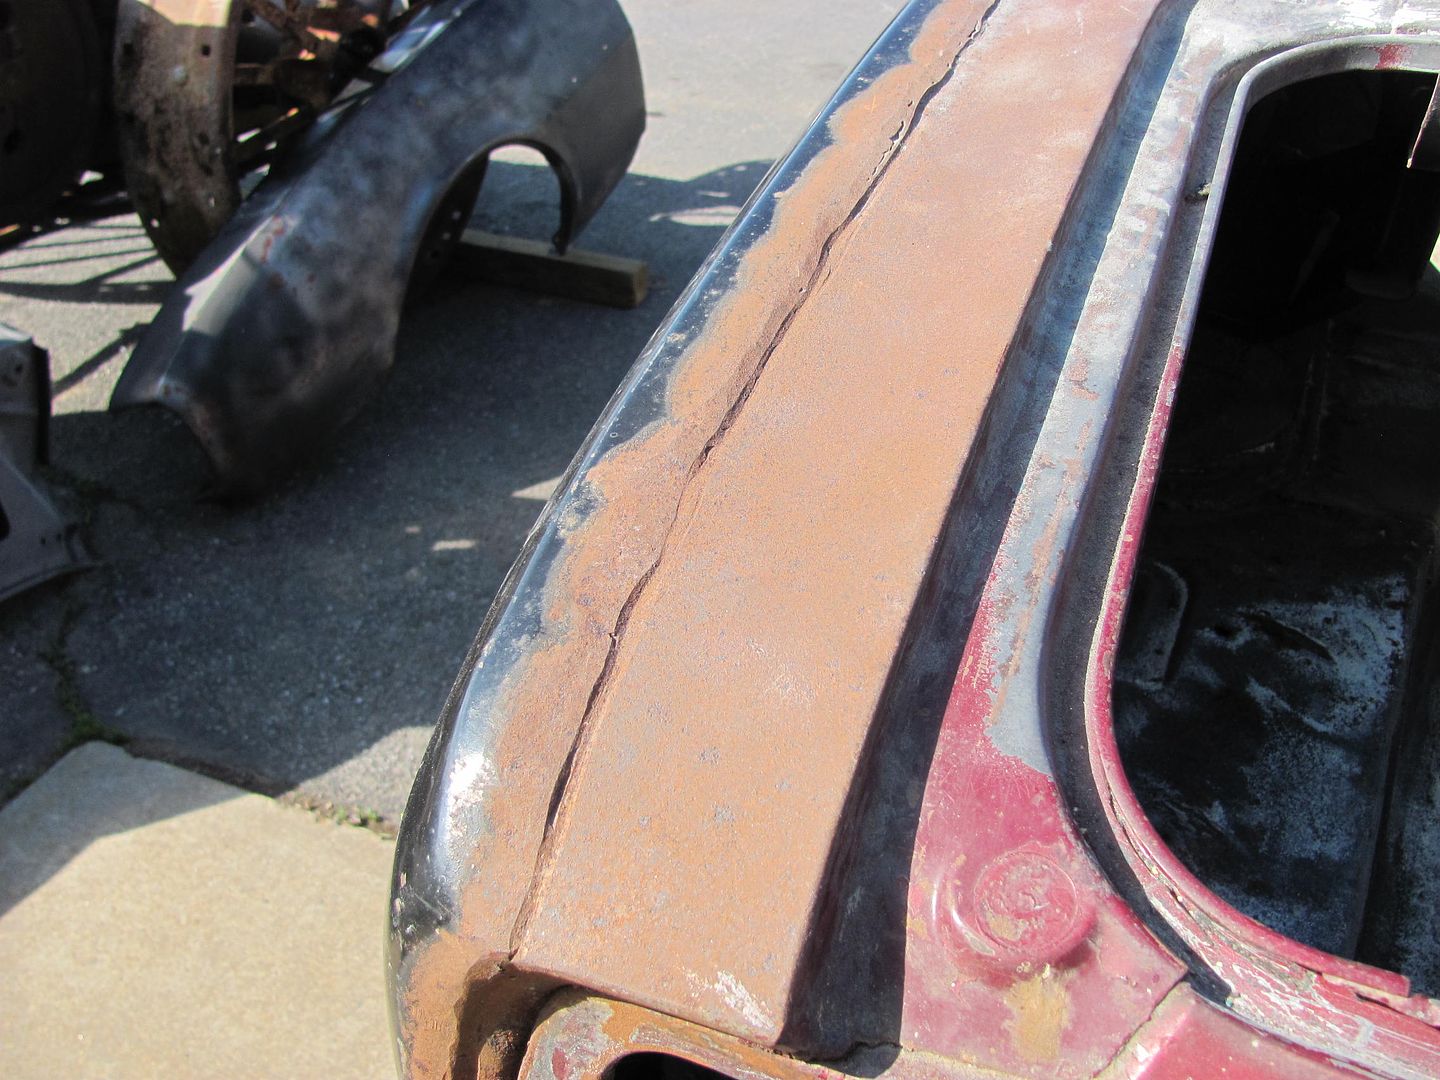
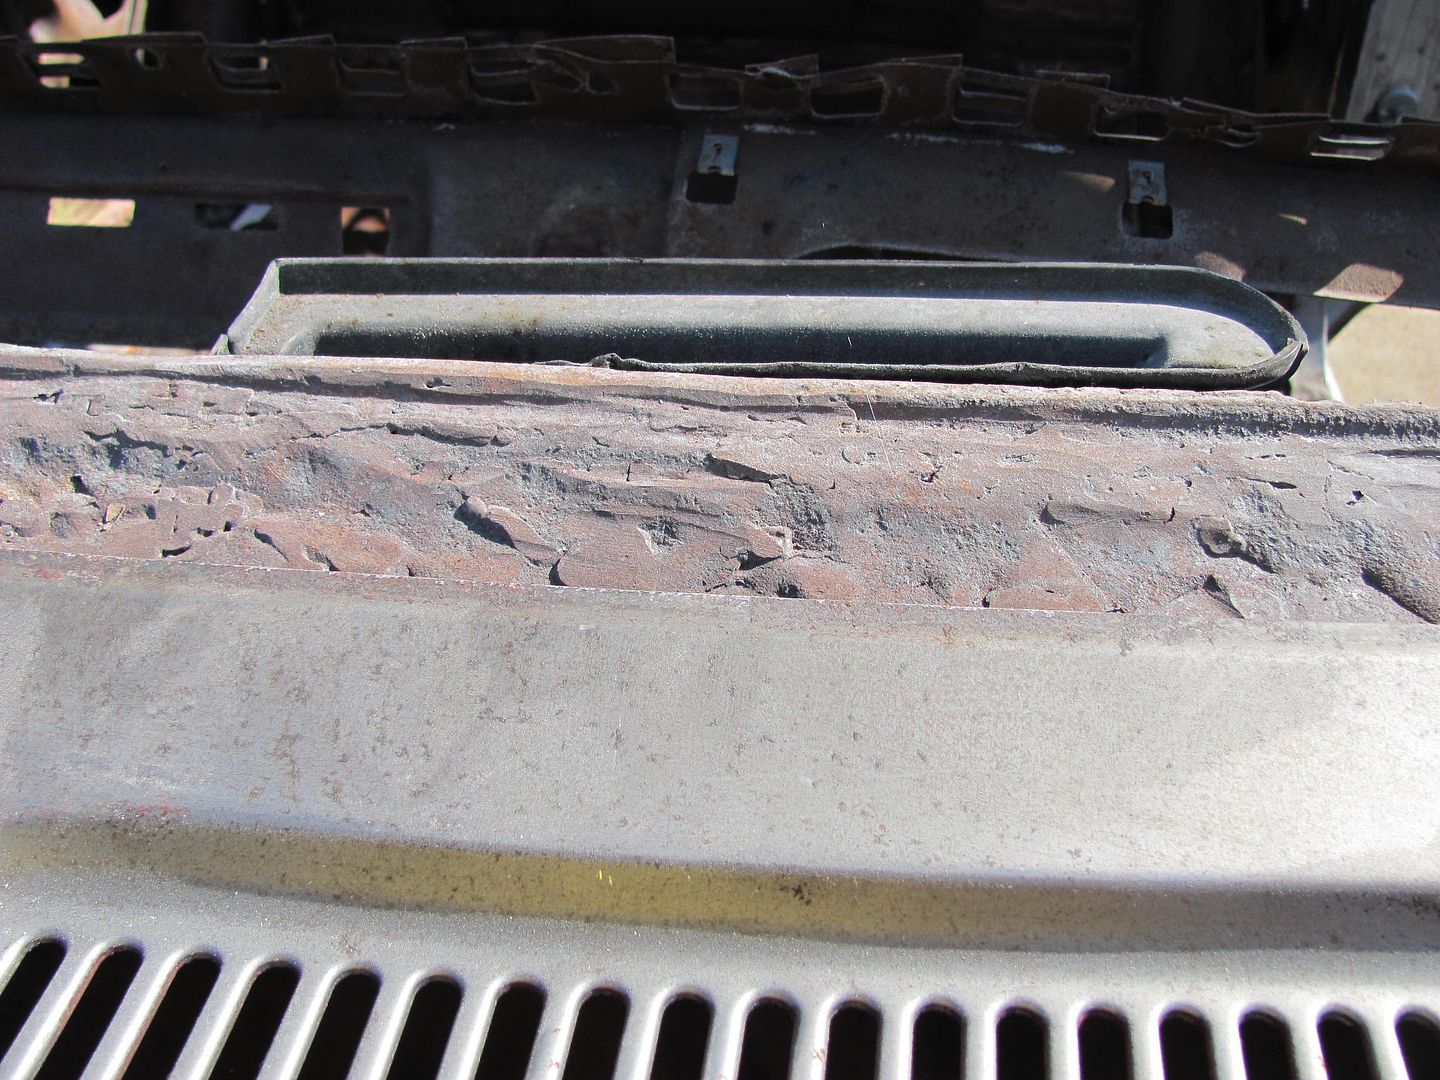
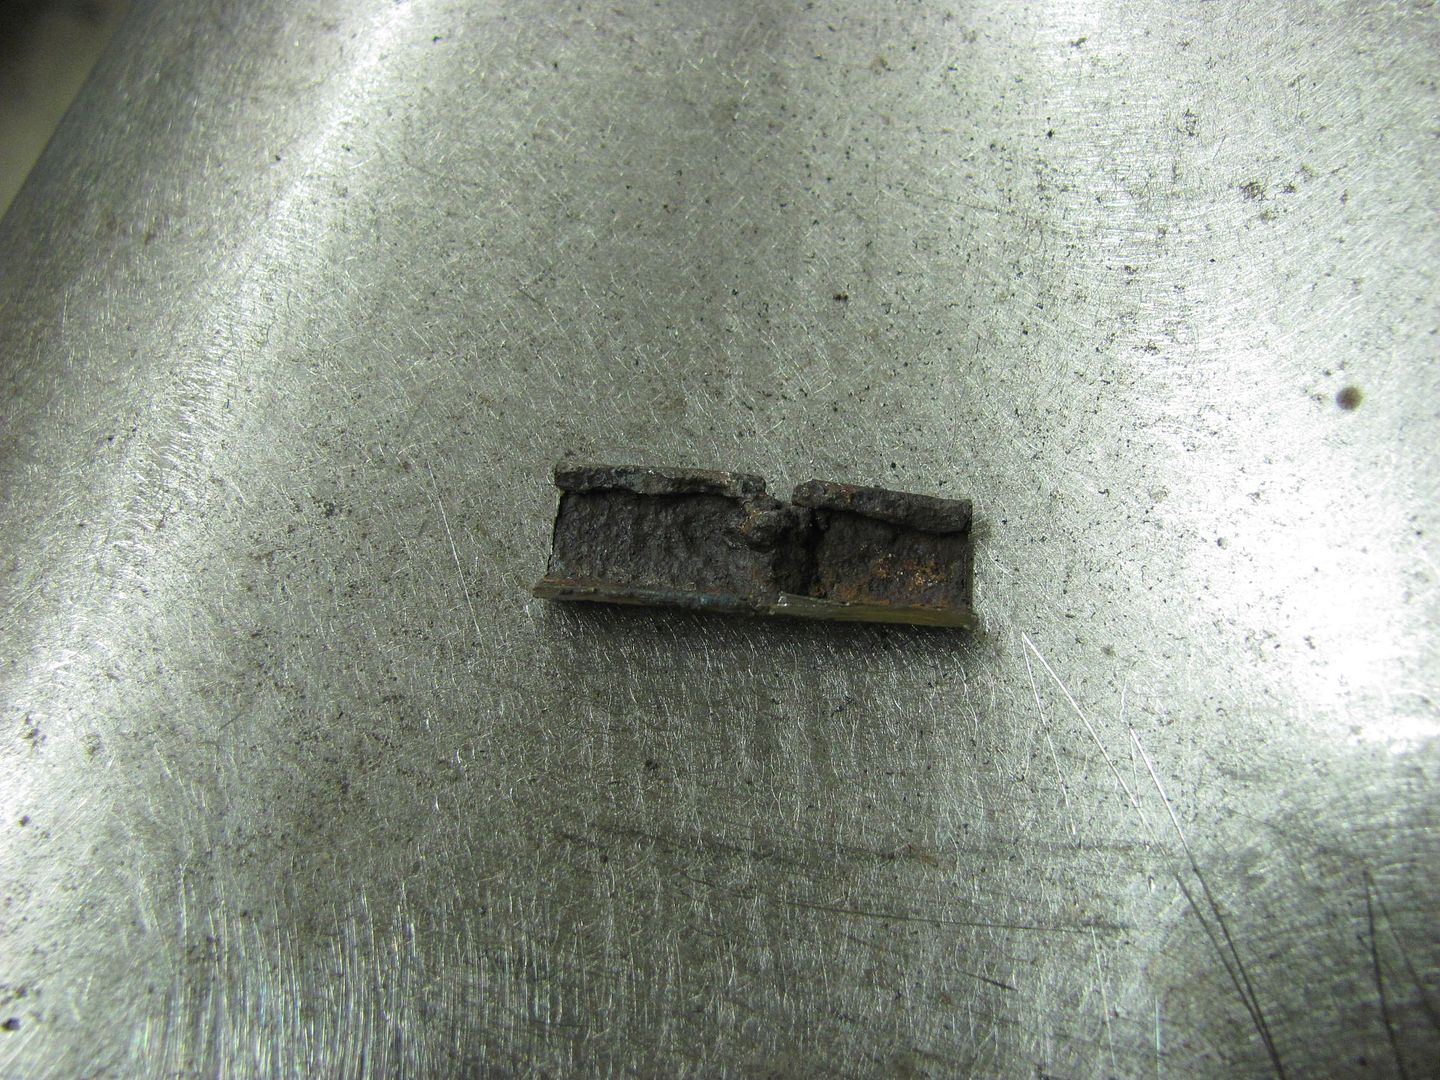
Another item to get crossed off the list, there was a questionable spot on the drip rail above the lift gate.
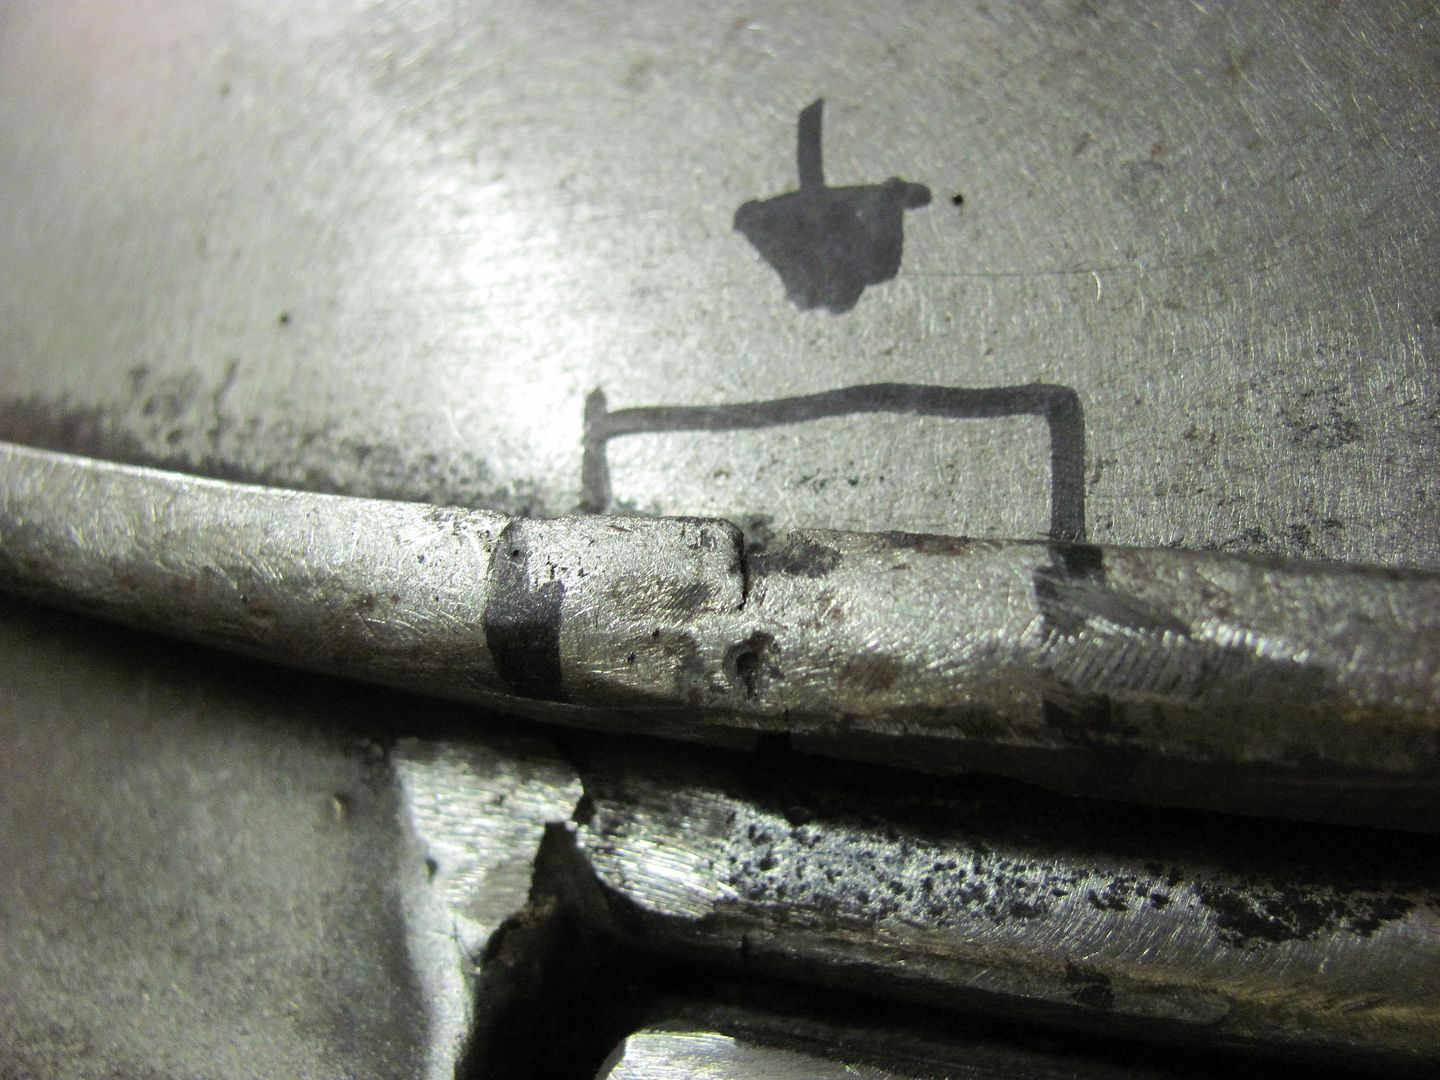

After cutting it out, this appears to be the factory seam for joining two sections.
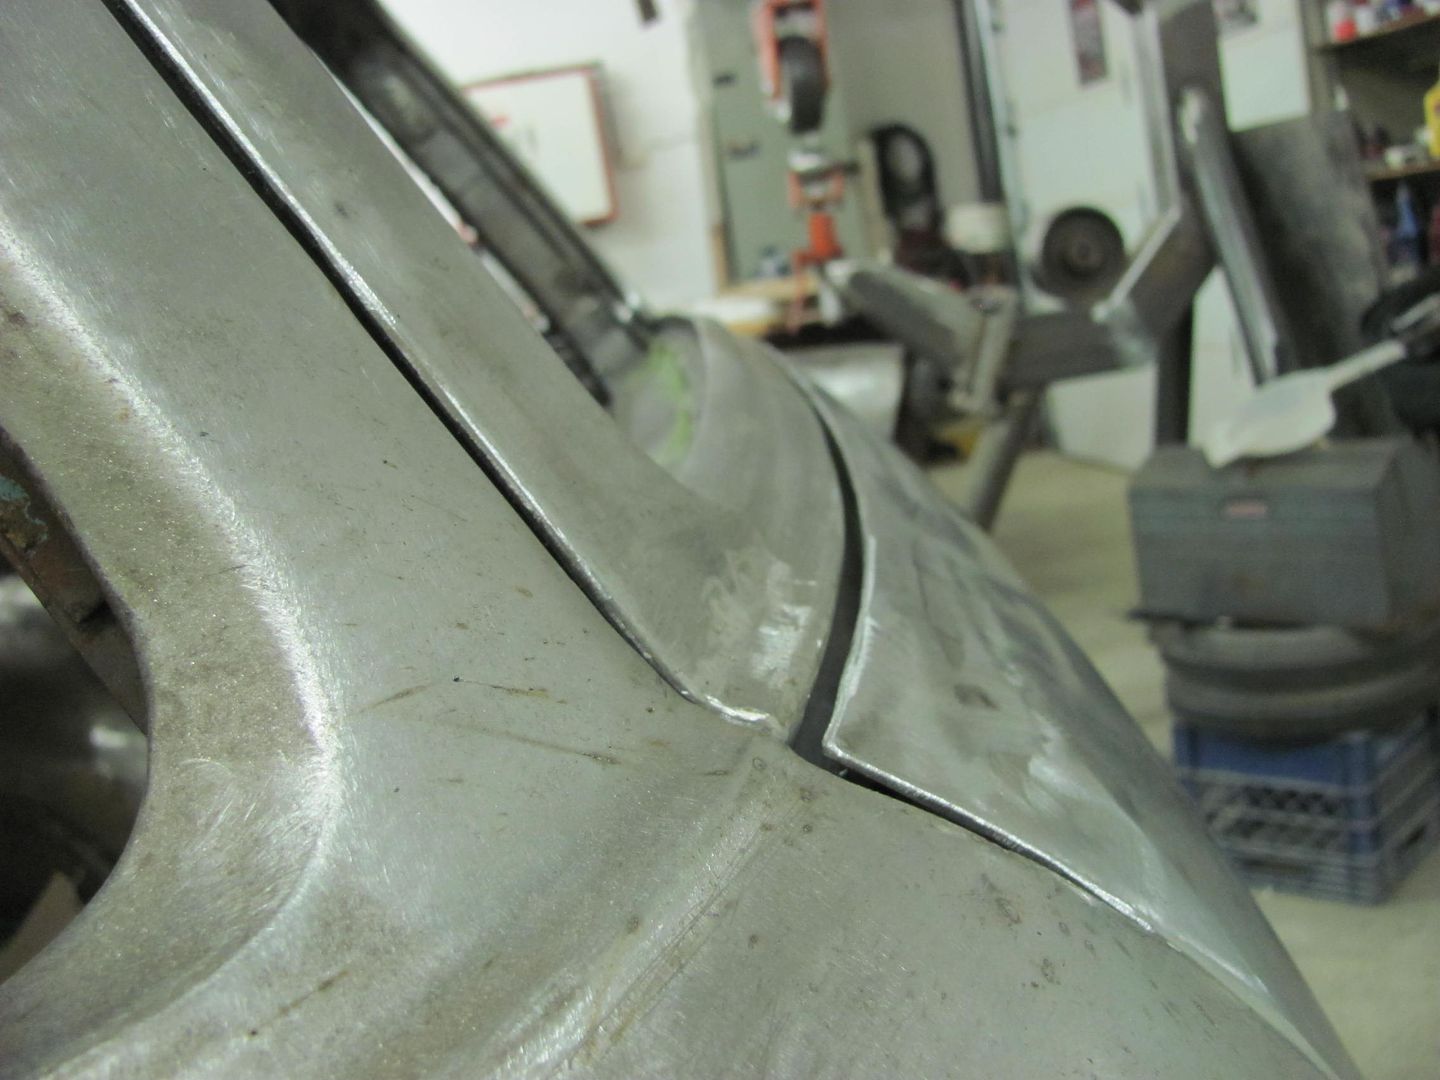
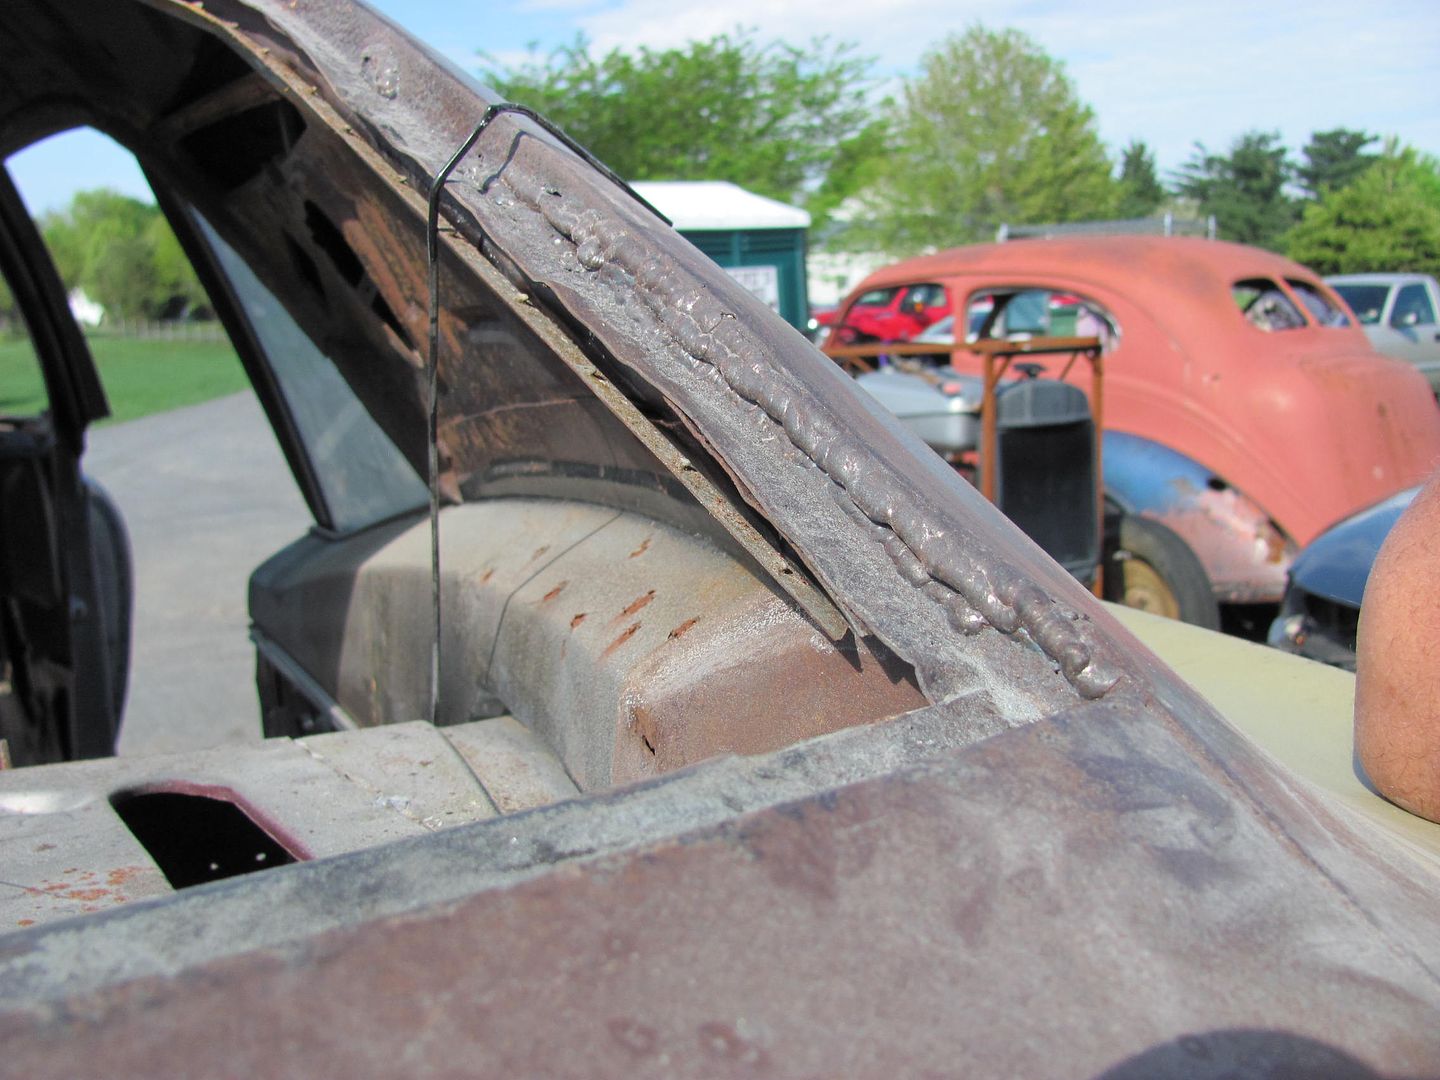
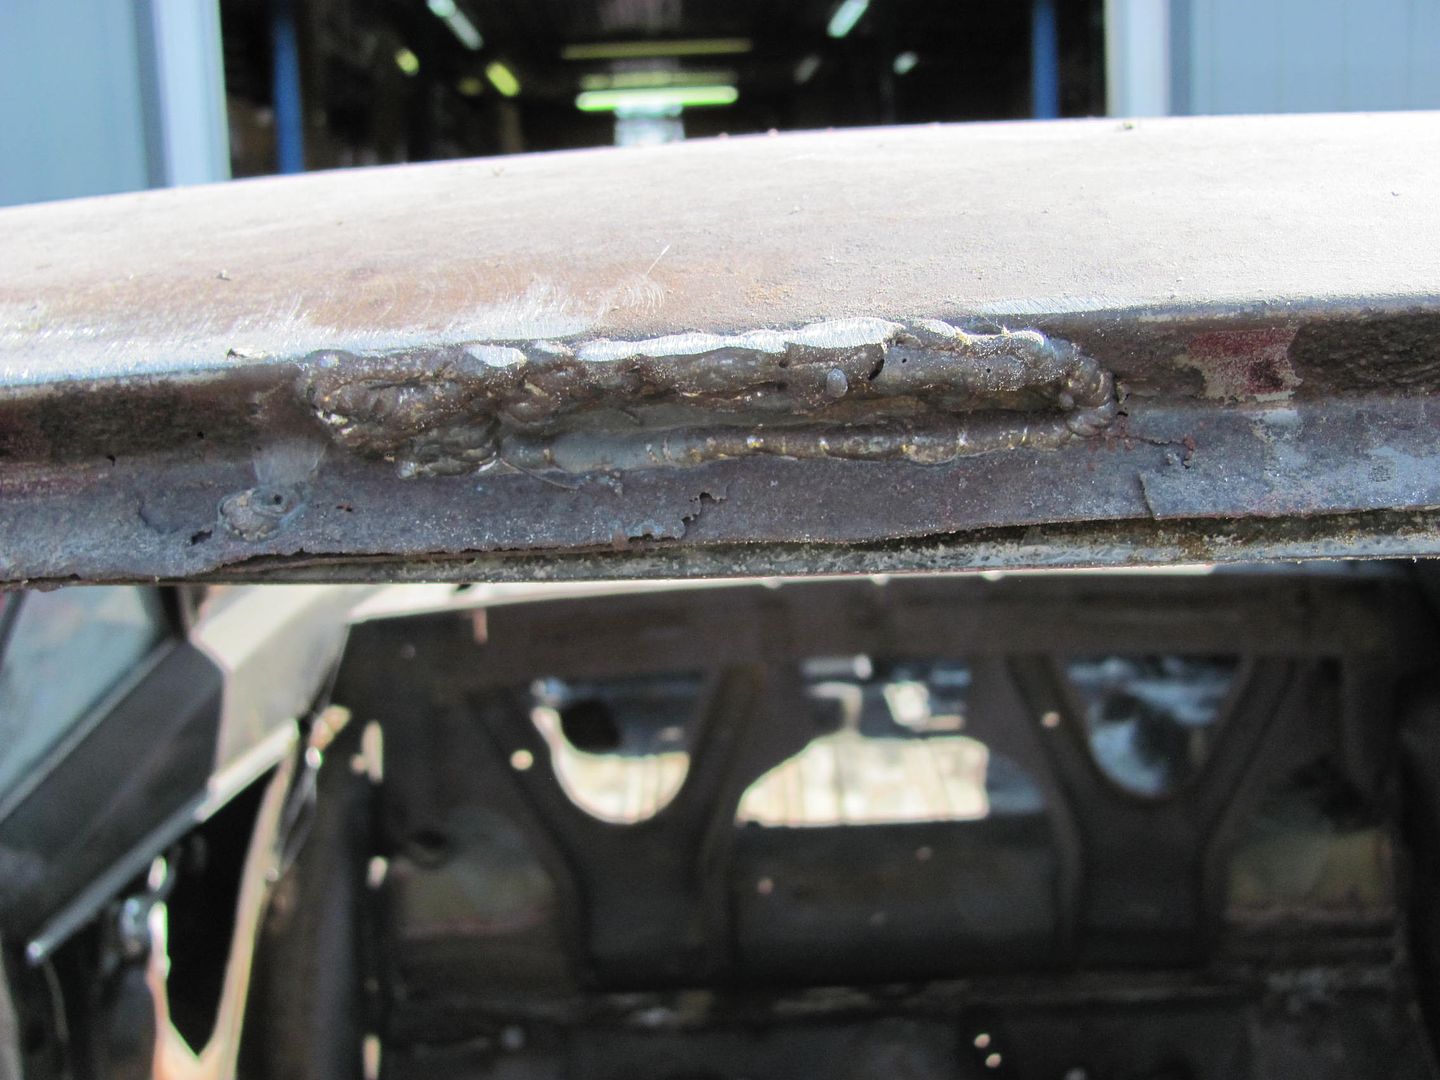
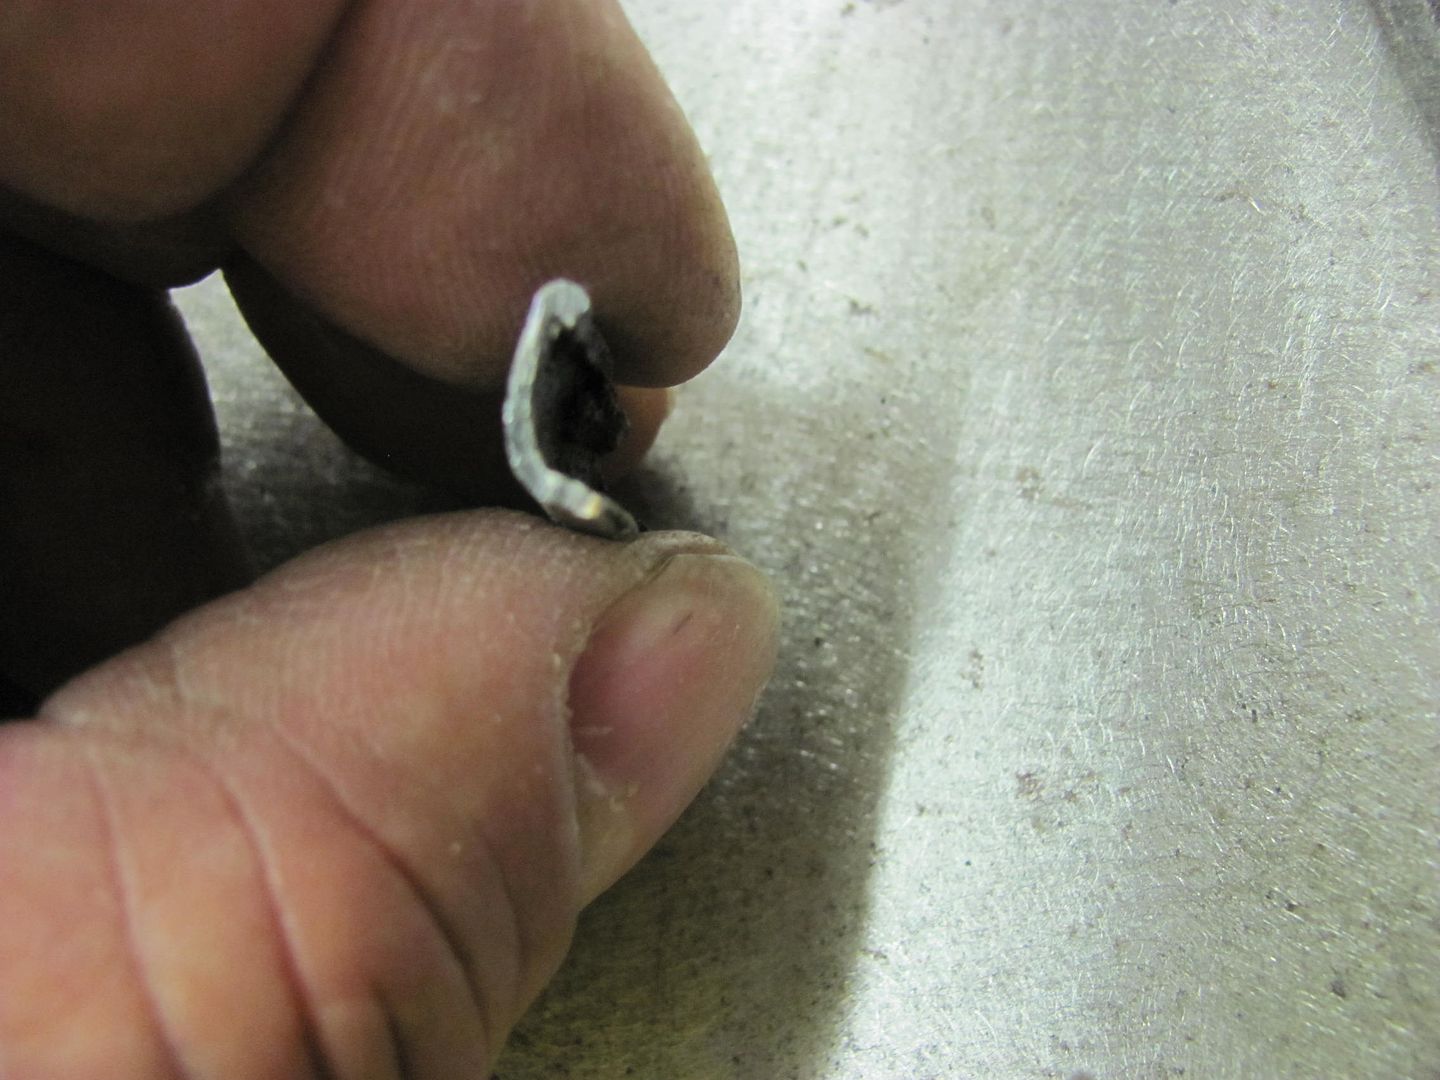
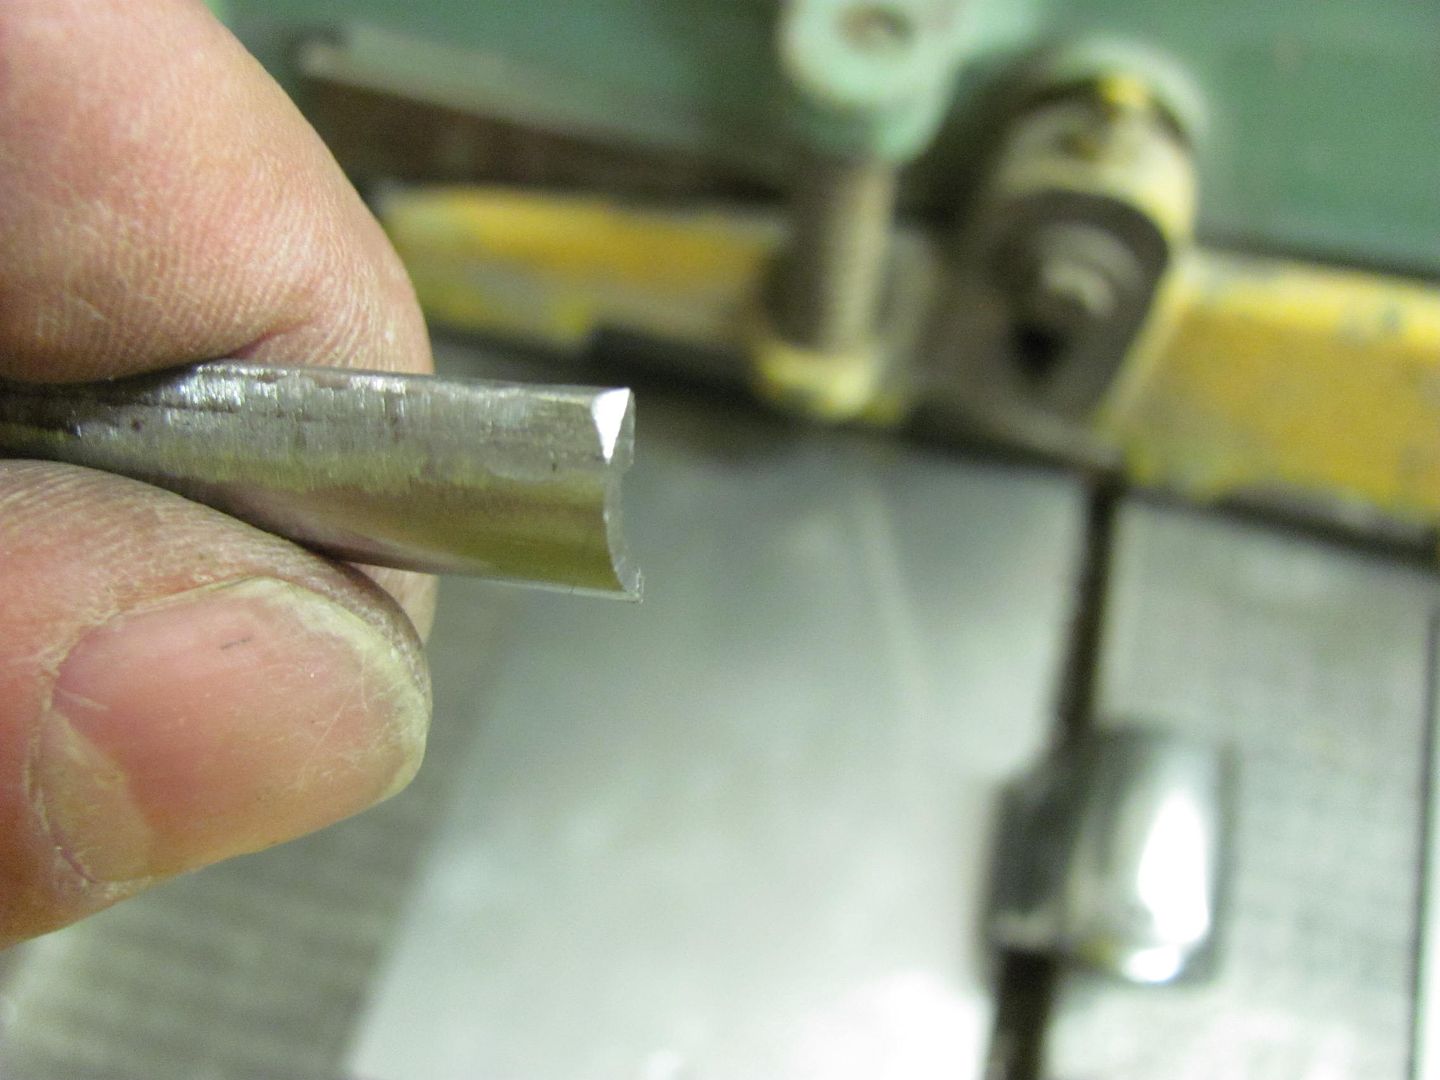
Looking at the profile, we'll add the top hem first...
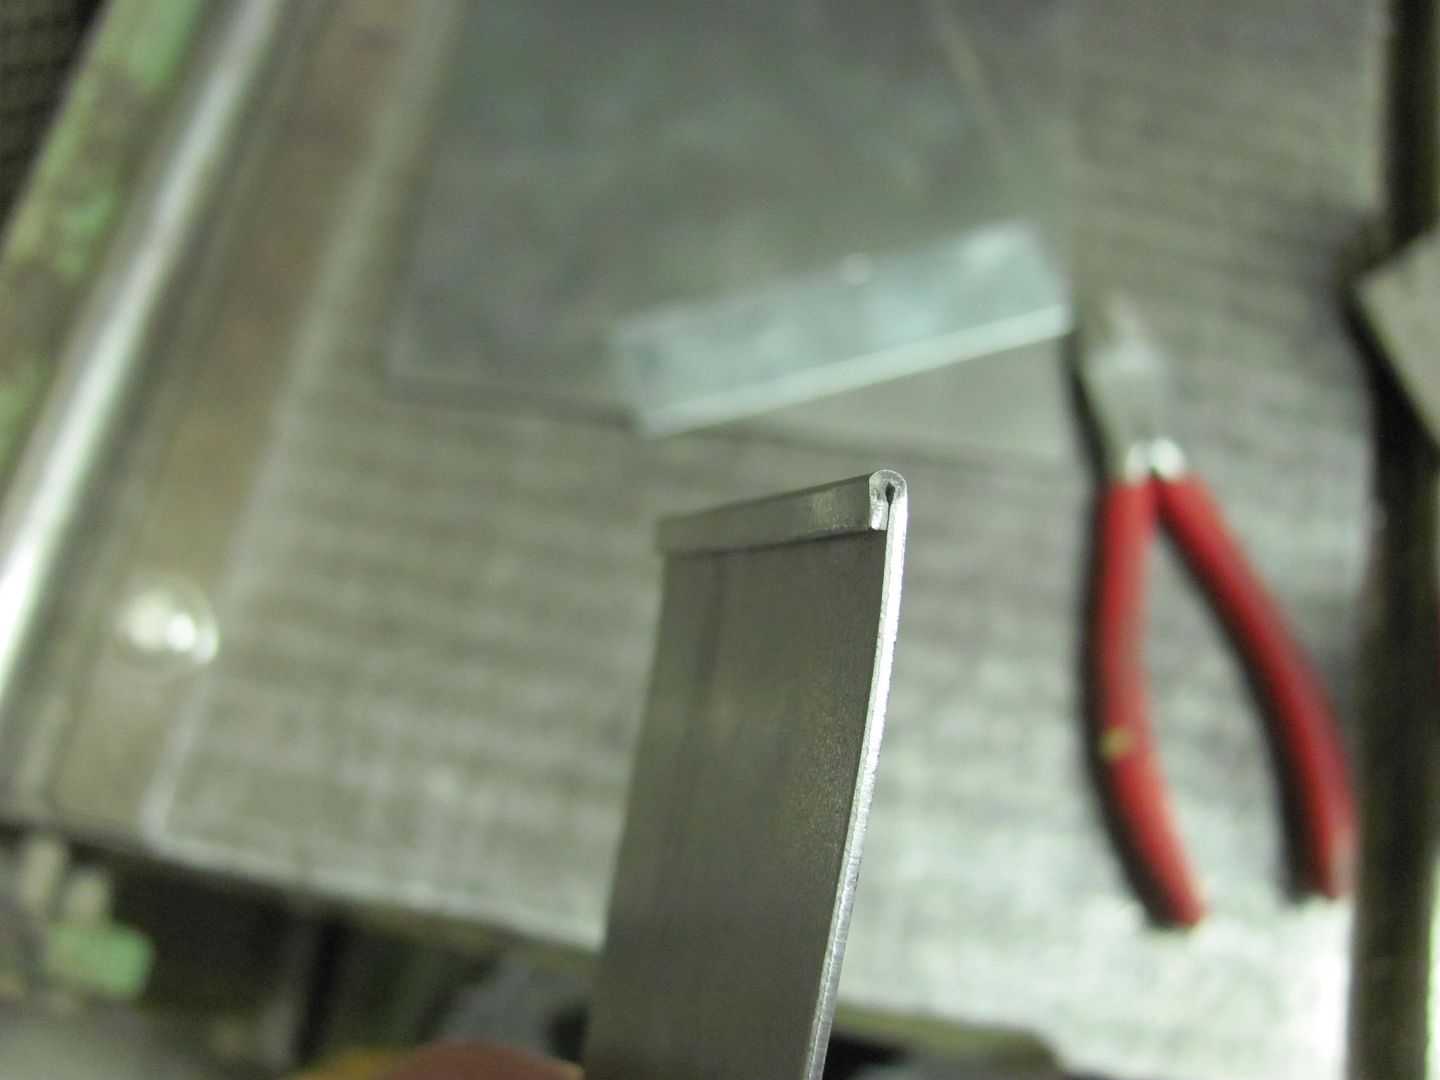
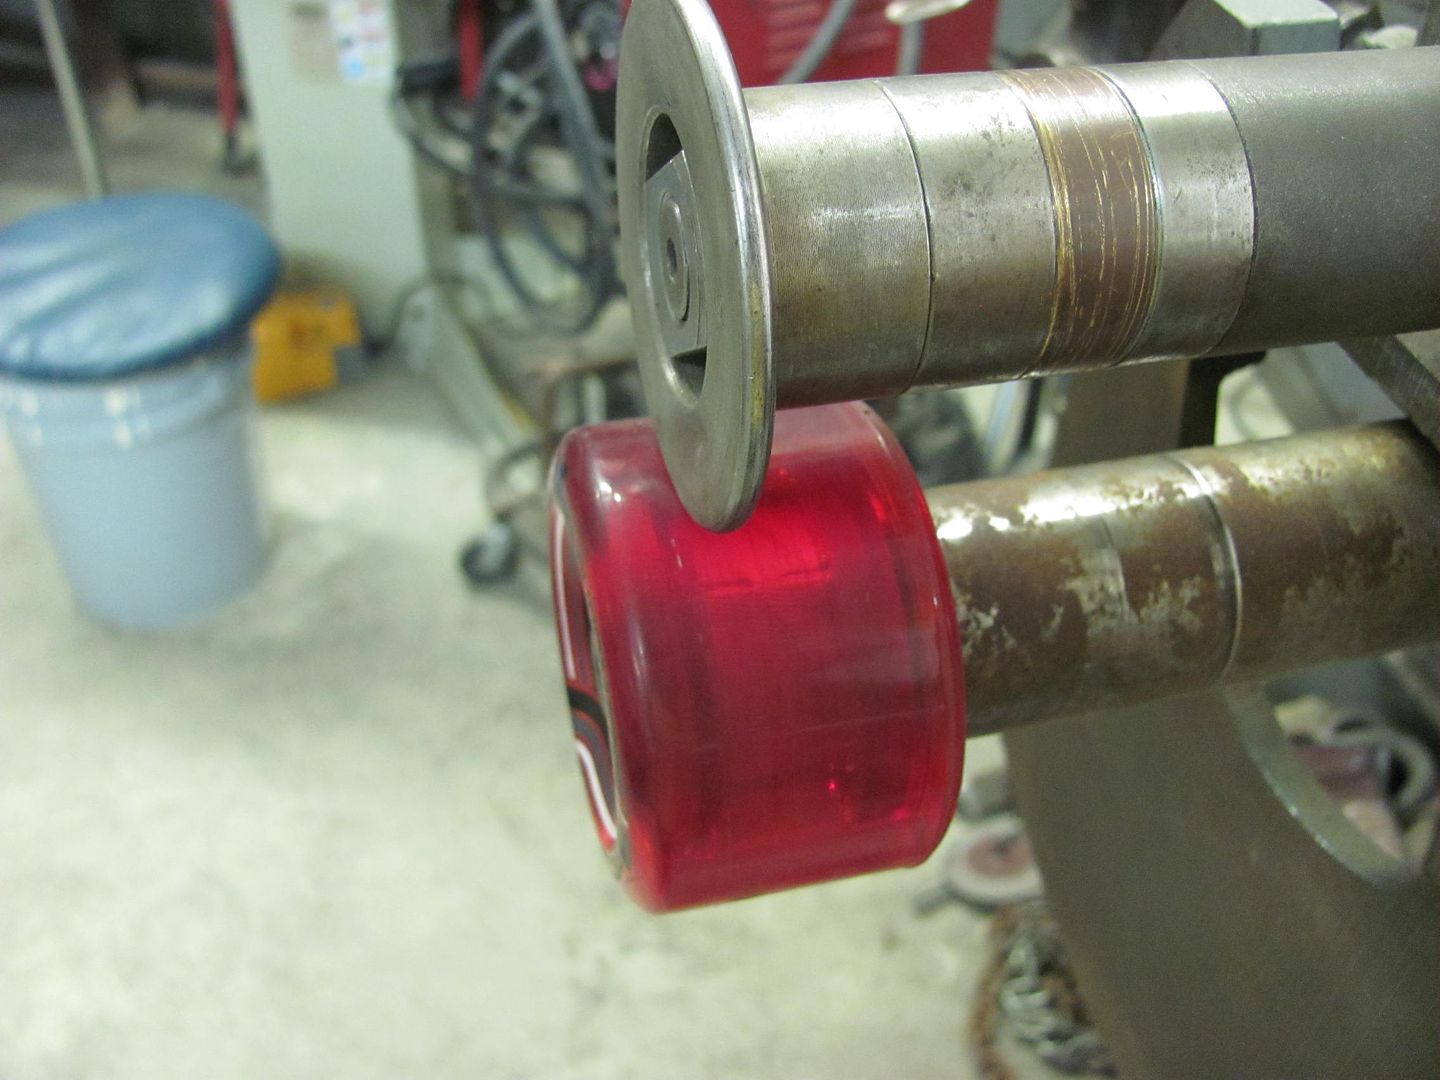
Then a radius die and the skateboard wheel in the bead roller was used to add the profile to the replacement...
The area where the hem adds another thickness is chamfered to insure good weld penetration...
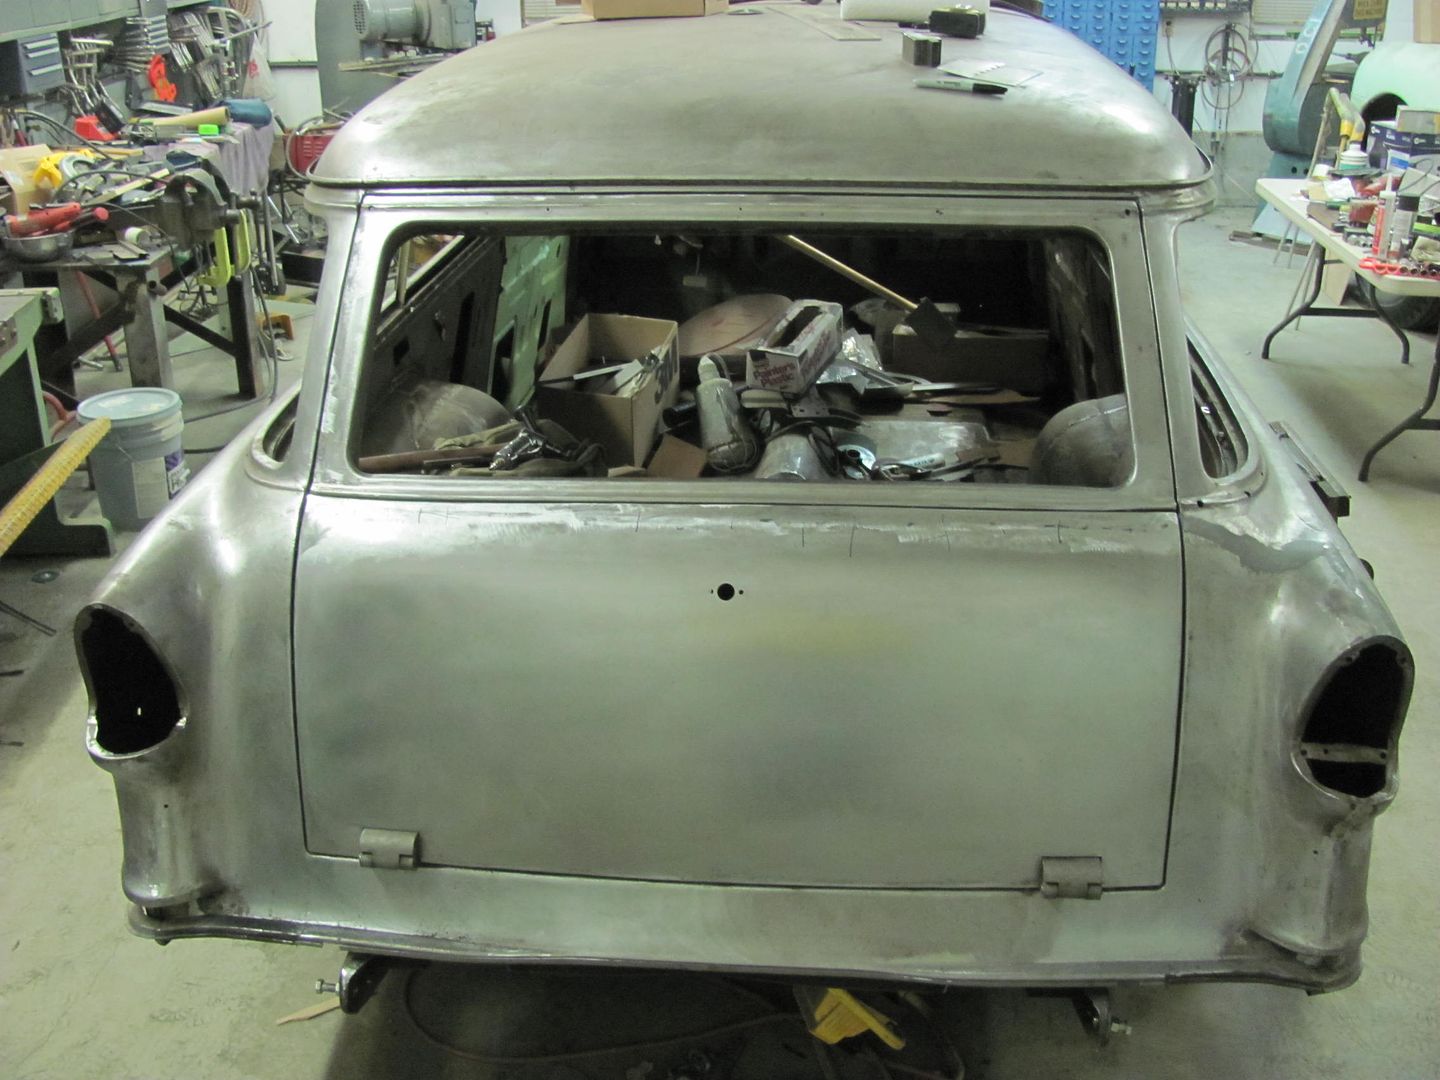
All welded in place and welds dressed...
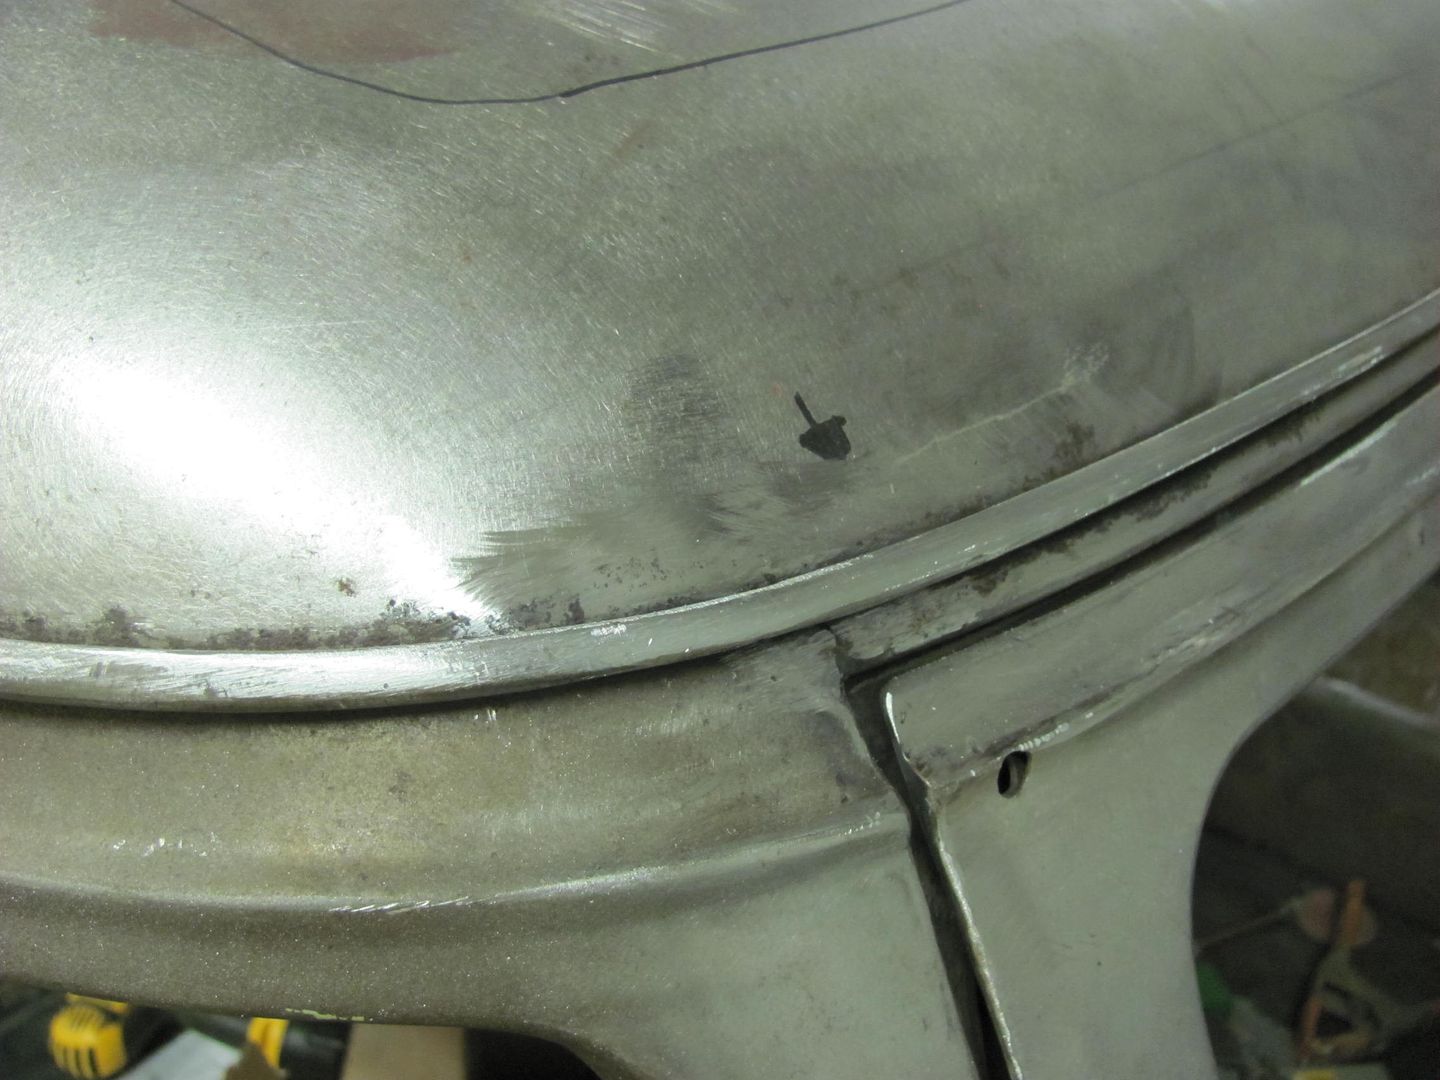
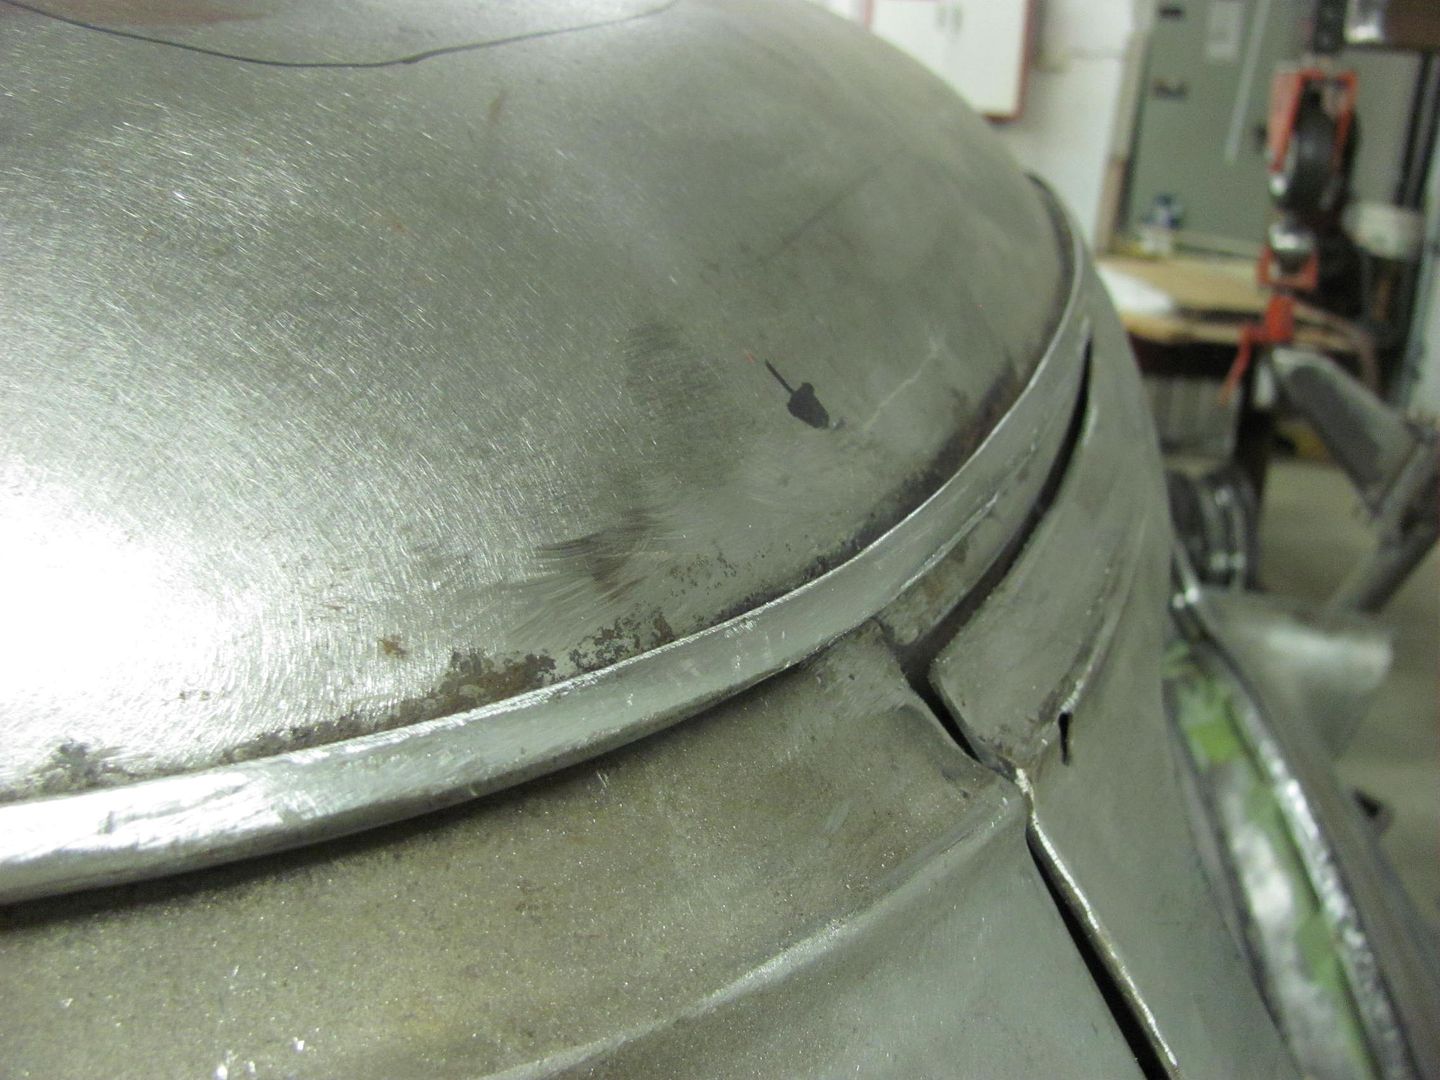
Much better!Robert
-
05-25-2014 10:12 AM #220
CHR Member
- Join Date
- Oct 2007
- Location
- Petaluma
- Car Year, Make, Model: 48 Ford F1
- Posts
- 9,795
Nice patch!" "No matter where you go, there you are!" Steve.
-
05-29-2014 05:33 PM #221
CHR Member
- Join Date
- Apr 2011
- Location
- Prairie City
- Car Year, Make, Model: 40 Ford Deluxe, 68 Corvette, 72&76 K30
- Posts
- 7,301
- Blog Entries
- 1
Very nice work!Ryan
1940 Ford Deluxe Tudor 354 Hemi 46RH Electric Blue w/multi-color flames, Ford 9" Residing in multiple pieces
1968 Corvette Coupe 5.9 Cummins Drag Car 11.43@130mph No stall leaving the line with 1250 rpm's and poor 2.2 60'
1972 Chevy K30 Longhorn P-pumped 24v Compound Turbos 47RH Just another money pit
1971 Camaro RS 5.3 BTR Stage 3 cam, SuperT10
Tire Sizes
-
05-29-2014 10:33 PM #222
CHR Member
- Join Date
- Dec 2009
- Location
- rotorua/new zealand
- Car Year, Make, Model: 34 oldsmobile sedan
- Posts
- 340
nice job on what seems an insignificant area.
really enjoying your metalwork photos-thanksmark
1969 chev C10 stepside-305/4speed/12bolt
1934 oldsmobile sedan-350/350/12bolt
1928 model a roadster-project-283/350/9"
1924 dodge modified - 292 i6/pwrglde/quickchange rear
"its only a hobby " --- no its not , its a lifestyle !!!!
-
05-30-2014 07:19 AM #223
CHR Member
- Join Date
- May 2014
- Location
- Lafayette
- Car Year, Make, Model: 35 Ford, 67 Jeep Gladiator
- Posts
- 258
Ditto - (The message you have entered is too short. Please lengthen your message to at least 10 characters.)nice job on what seems an insignificant area.
really enjoying your metalwork photos-thanksThe truth is incontrovertible. Malice may attack it, ignorance may deride it, but in the end, there it is.
Winston Churchill
-
06-06-2014 02:27 PM #224
CHR Member
- Join Date
- May 2014
- Location
- Lafayette
- Car Year, Make, Model: 35 Ford, 67 Jeep Gladiator
- Posts
- 258
As a student I am asking: On Post #219 was it possible to mig weld and file the problem area? Why cut the area out?The truth is incontrovertible. Malice may attack it, ignorance may deride it, but in the end, there it is.
Winston Churchill
-
06-08-2014 08:41 PM #225
CHR Member
- Join Date
- Jun 2008
- Location
- Leonardtown
- Car Year, Make, Model: Walking
- Posts
- 1,228
 Originally Posted by August Mariner

That would have been a viable option had I looked at it a bit closer. With any damage that even remotely suggests rust, I tend to lean more toward cut out and replace. Where this wasn't a clear cut rust issue, I had made these drip rails previously, so I felt the end result would be better once some cutting opened the area for exploratory poking around to see how structurally sound that area actually was.Robert
 Reply With Quote

Posting Permissions
- You may not post new threads
- You may not post replies
- You may not post attachments
- You may not edit your posts

i've enjoyed the years here . made a lot of friends. most who have left. i see no reason to continue with this so hope to see you somewhere else. i dont think this site will ever be back. it's lived...
Dead!