


 57Likes
Thread: 1932 Ford Coupe Project Thread


Results 46 to 60 of 224
 LinkBack URL
 About LinkBacks
-
05-20-2012 06:31 AM #46
 CHR Member

- Join Date
- Sep 2007
- Location
- New Bedford
- Car Year, Make, Model: 34 Ford 3W Coupe Replica
- Posts
- 14,754
Nice pile o' parts! I see you chose the same spray guns as I . I was happy with them and hope you're the same. Thanks for all the photos.
-
Advertising

- Google Adsense
- REGISTERED USERS DO NOT SEE THIS AD
-
05-20-2012 06:35 AM #47
CHR Member/Contributor
- Join Date
- Jul 2003
- Location
- Madison
- Car Year, Make, Model: '67 Ranchero, '57 Chevy, '82 Camaro,
- Posts
- 21,160
Lots of nice stuff, but that BBF is still the best feature of the car!!!!Yesterday is history, tomorrow is a mystery, Live for Today!
Carroll Shelby
Learning must be difficult for those who already know it all!!!!
-
05-20-2012 06:23 PM #48
CHR Member
- Join Date
- Oct 2011
- Location
- Glen Burnie
- Car Year, Make, Model: 1932 5W Coupe
- Posts
- 138
I bought those headlight shock mount brackets from this place 1928-1948 FORD LIGHTS Scroll down to part number BD-3375-S. They are a nice heavy piece and put those speedway 7" lamps in the right spot.
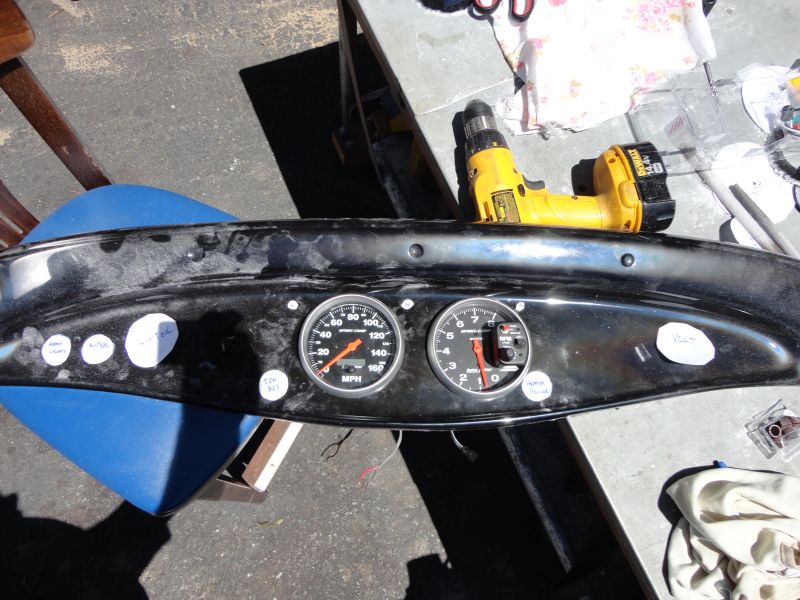
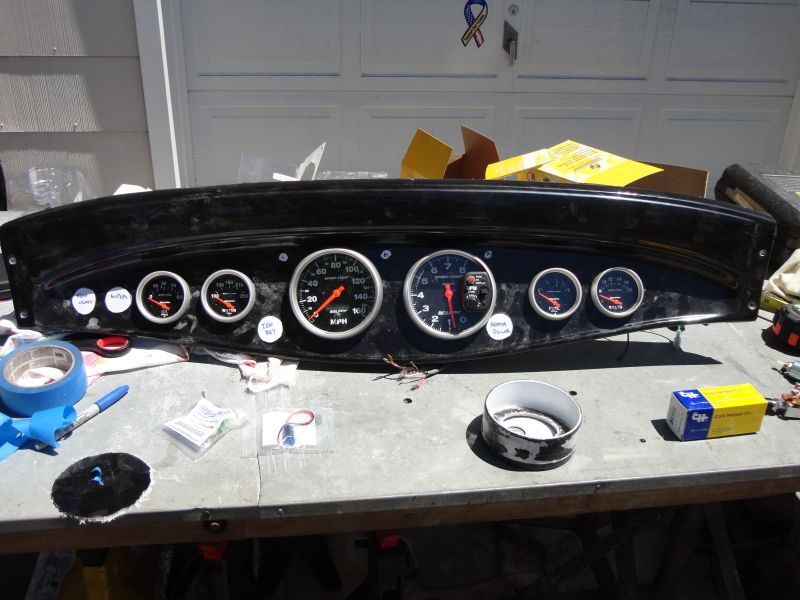
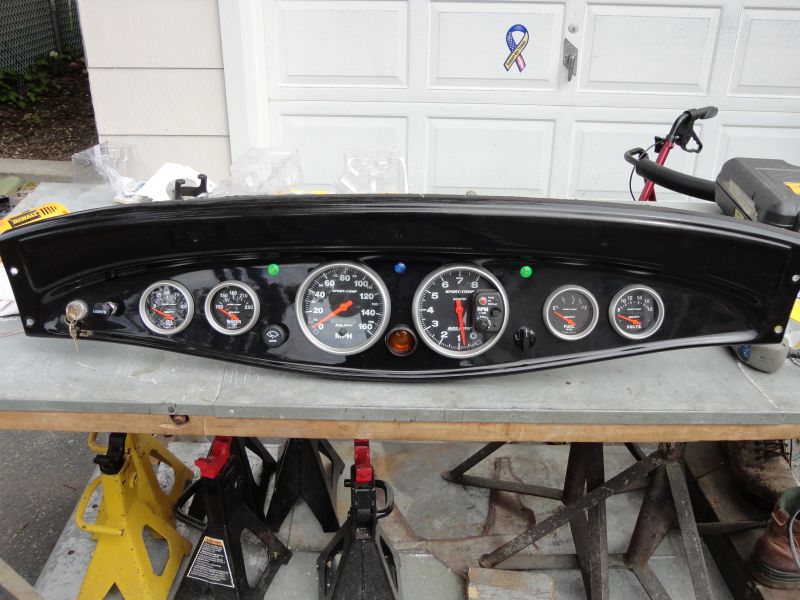
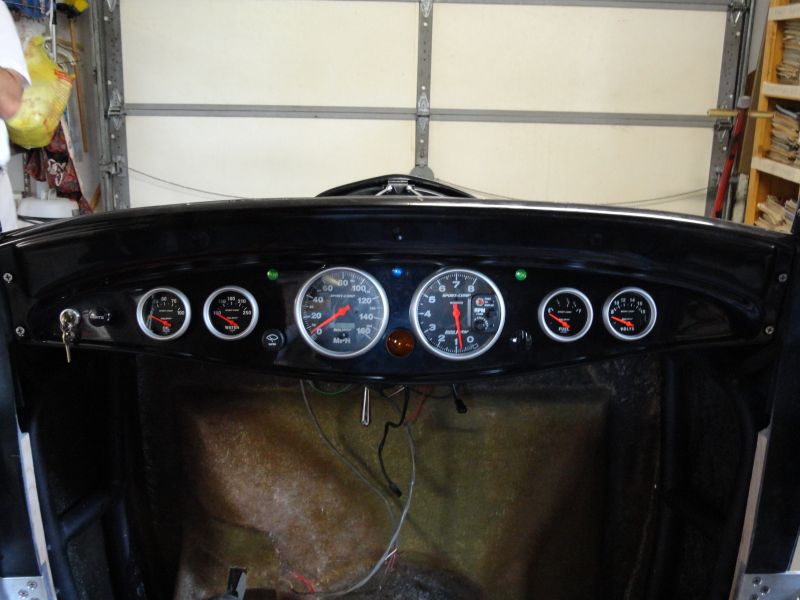
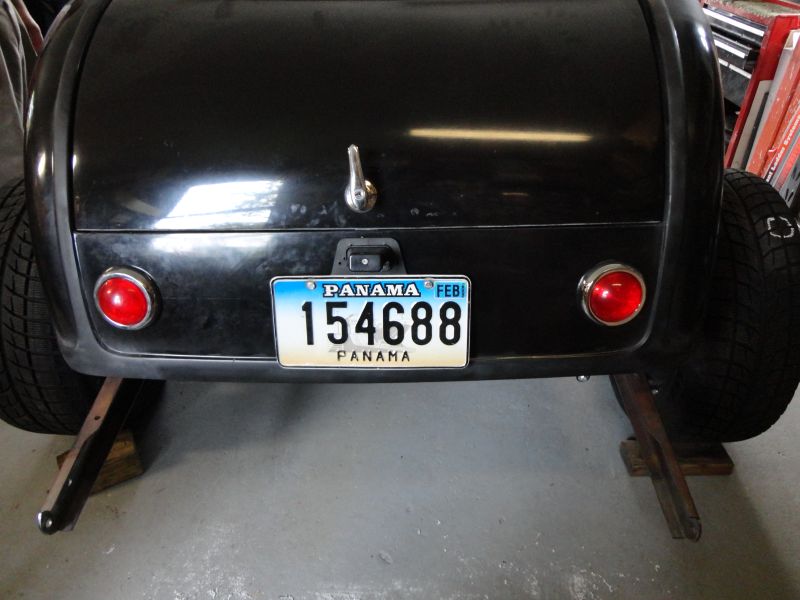
Today I smoothed the holes for the speedo and tach with a Dremel and little sanding rolls. The other gauges I used a 2 5/8 holesaw (much easier). I must say, it came out pretty good. I love this instrument panel! I reused the 5" speedometer and tach from my Fairlane, and I have 2 5/8" gauges for the rest. I'm so glad they all fit, and they just made the "smiley" bar behind the panel. The switches left to right are; ignition, headlights, wiper, blower. I added two green LED lights for the turn signals, and a blue LED light for the high beam. The shift light for the tack fit perfect in between the speedo and tach. I'm going to install a bracket off the "smiley" bar to the shift light bracket. I also installed the Pontiac 50's style LED tail lights and license plate bracket, with LED light too. I bought it for my trailer awhile ago, but it didn't fit. I'm glad it didn't go to waste.  Thanks guys for the good words.
  It felt so good to get working on it the past two days. I can't wait until next weekend.
New Age Motorsports 32 5/W 521/C6
-
05-20-2012 06:34 PM #49
CHR Member/Contributor
- Join Date
- Jul 2003
- Location
- Madison
- Car Year, Make, Model: '67 Ranchero, '57 Chevy, '82 Camaro,
- Posts
- 21,160
Good looking dash, very nicely done!Yesterday is history, tomorrow is a mystery, Live for Today!
Carroll Shelby
Learning must be difficult for those who already know it all!!!!
-
05-20-2012 06:57 PM #50
CHR Member
- Join Date
- Oct 2011
- Location
- Glen Burnie
- Car Year, Make, Model: 1932 5W Coupe
- Posts
- 138
Thanks Dave! This is going to be the first thing that I paint. I don't want to wire it up, and then have to take it all apart again. I'm going to have connectors for the panel, so I can just unplugged and remove the panel when I want. It was so nice working on it the past two days!New Age Motorsports 32 5/W 521/C6
-
05-20-2012 08:38 PM #51
CHR Member/Contributor
- Join Date
- Sep 2007
- Location
- Gardner, KS
- Car Year, Make, Model: '33 HiBoy Coupe, '32 HiBoy Roadster
- Posts
- 11,245
Pat,
One thing I ran into - I bought a multi-pin connector from Radio Shack for my dash, using seven of nine positions for power, ground and signals. My tach started reading low, and I found that the connector was adding resistance to the circuit. Once I cycled the connector, the tach reading improved, but still not right, and I lost my oil pressure signal. Ended up cutting out the big nine-pin connector, and using individual M/F spade connectors for all connections. My lesson learned is that the connectors on those bulk multi-pin connectors need to be soldered to be good.Roger
Enjoy the little things in life, and you may look back one day and realize that they were really the BIG things.
-
05-21-2012 07:13 AM #52
CHR Member
- Join Date
- Feb 2006
- Location
- Bartlett
- Posts
- 6,831
the Radio Shack stuff might work for radios, but for automotive, aircraft, military,etc, use the good stuff
Oh, yeh---what are your plans for the rear frame horns???? and show us pics of the drivers foot area when you get the pedals and steering in---
-
05-21-2012 07:58 AM #53
CHR Member
- Join Date
- Jul 2008
- Location
- Tampa Bay area
- Car Year, Make, Model: 32 Ford 3w Hi-Boy Project
- Posts
- 851
Pat and Roger, Jerry is right about the Radio Shack connectors. I like to use Deutsch connectors, they are available in many sizes from 2 wire and up, they are sealed which makes them excellent for a wet environment and they are one of the easiest connectors to disassemble if repairs are necessary. The downside is they require a very small, tight crimp on the terminal that the average home hobbyist wire crimp tool will not provide. Some of the Deutsch crimp tools can be very expensive but a good crimper can be picked up for $30 on ebay. I use an MSD crimp tool and the Deutsch die from Summit. In the past I've ordered the connectors from Batts Racing but I'm sure there are other sources such as Del City and others.
Mike
-
05-21-2012 08:24 AM #54
CHR Member/Contributor
- Join Date
- Sep 2007
- Location
- Gardner, KS
- Car Year, Make, Model: '33 HiBoy Coupe, '32 HiBoy Roadster
- Posts
- 11,245
Mike, Originally Posted by Mike52

I picked up a set like this (not this exact set, but just like it) but I'm not sure it does the type crimp you're calling out. It does have the dies to "roll" the barrel sides into themselves. S&G Tool Aid 18960 Quick Change Ratcheting Terminal Crimping KitRoger
Enjoy the little things in life, and you may look back one day and realize that they were really the BIG things.
-
05-21-2012 09:43 AM #55
CHR Member
- Join Date
- Jul 2008
- Location
- Tampa Bay area
- Car Year, Make, Model: 32 Ford 3w Hi-Boy Project
- Posts
- 851
Roger, from your description (and a look at the link) I'd say you've got it.
Mike
-
05-21-2012 10:12 AM #56
CHR Member/Contributor
- Join Date
- Sep 2007
- Location
- Gardner, KS
- Car Year, Make, Model: '33 HiBoy Coupe, '32 HiBoy Roadster
- Posts
- 11,245
Mike, Originally Posted by Mike52
Do you solder the connectors after crimp, or does the crimp alone work OK for you?
RogerRoger
Enjoy the little things in life, and you may look back one day and realize that they were really the BIG things.
-
05-21-2012 11:02 AM #57
CHR Member
- Join Date
- Jul 2008
- Location
- Tampa Bay area
- Car Year, Make, Model: 32 Ford 3w Hi-Boy Project
- Posts
- 851
I know this is subject for heated debate but if the crimp is done properly, soldering isn't necessary. To answer your question regarding me specifically, at the Deutsch pin (terminal), I crimp only.
Mike
-
05-21-2012 01:41 PM #58
CHR Member
- Join Date
- Feb 2006
- Location
- Bartlett
- Posts
- 6,831
Crimp only--if you solder , the connection will fail as it is then too stiff and will break all the strands of the wire instead of flexing----aircraft are crimped
-
05-21-2012 02:50 PM #59
CHR Member
- Join Date
- Oct 2011
- Location
- Glen Burnie
- Car Year, Make, Model: 1932 5W Coupe
- Posts
- 138
Thank you for the link to those nice connectors! That's exactly what I'm looking for. I didn't plan on Radio Shack stuff, because I want them to look and function like a factory connector. Thanks again!New Age Motorsports 32 5/W 521/C6
-
05-21-2012 02:53 PM #60
 CHR Member
- Join Date
- Aug 2003
- Location
- Springfield
- Car Year, Make, Model: '66 Mustang, 76 Corvette
- Posts
- 5,445
Originally Posted by jerry clayton
I hate to disagree with you Jerry but, all of the radar connectors on the DC-9 are soldered as are a few others and a lot of the connectors on the old A-4 were soldered, military requirement, with others being crimped. Douglas used Amphenol and Burndy for the most part, at least when I worked there they did. I believe the connectors Roger was referring to are Molex and I have used them extensively for various projects where moisture was not a consideration. They will hold 16 gauge wire easily but 14 gauge is pushing the envelope. I always solder and have never had a problem but then again I was military certified to solder.
BTW, FWIW DC-8's were full of splices while DC-9's and 10's used bulkhead connectors.Ken Thomas
NoT FaDe AwaY and the music didn't die
The simplest road is usually the last one sought
Wild Willie & AA/FA's The greatest show in drag racing
 Reply With Quote

Posting Permissions
- You may not post new threads
- You may not post replies
- You may not post attachments
- You may not edit your posts

This site is up more often lately, but very little traffic.
Dead!