


 23Likes

Results 16 to 30 of 30
 LinkBack URL
 About LinkBacks
-
03-05-2013 06:21 PM #16
 CHR Member

- Join Date
- Jun 2008
- Location
- Leonardtown
- Car Year, Make, Model: Walking
- Posts
- 1,228
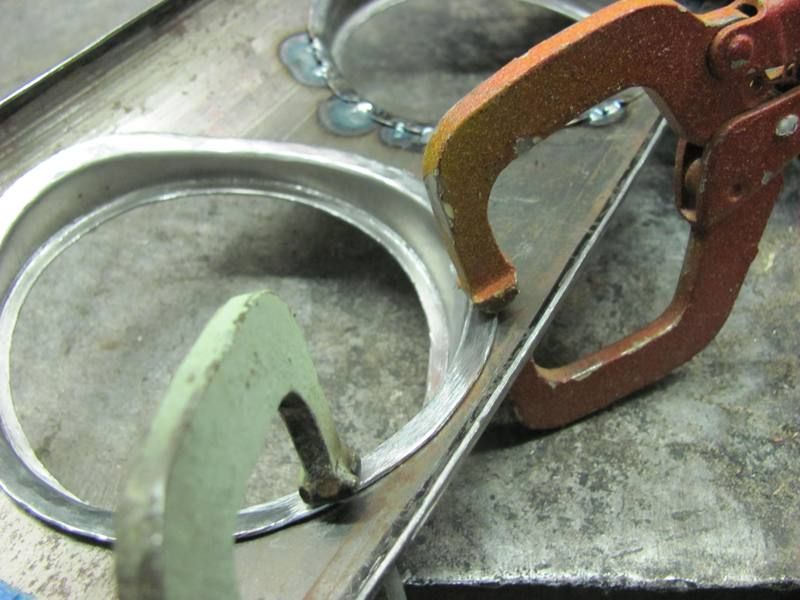
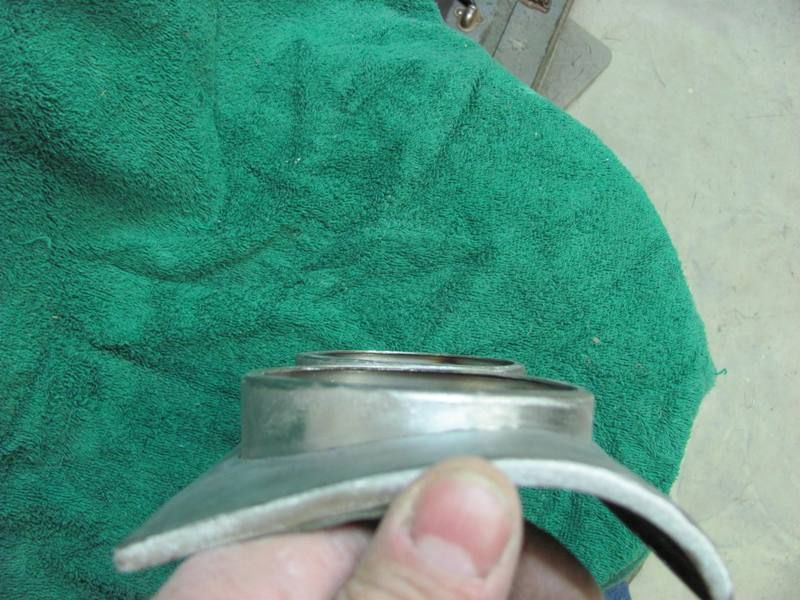
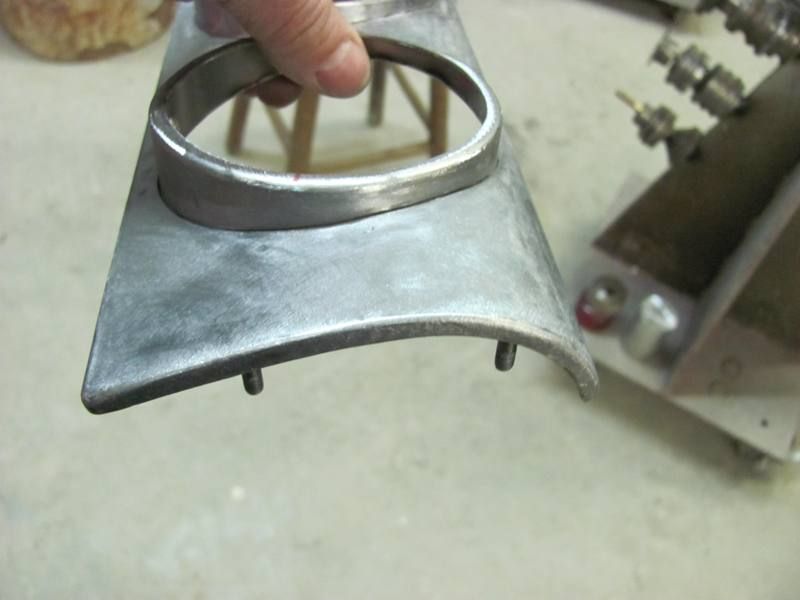
Worked on the dash panel again tonight, used the Tig to tack in the first ring...
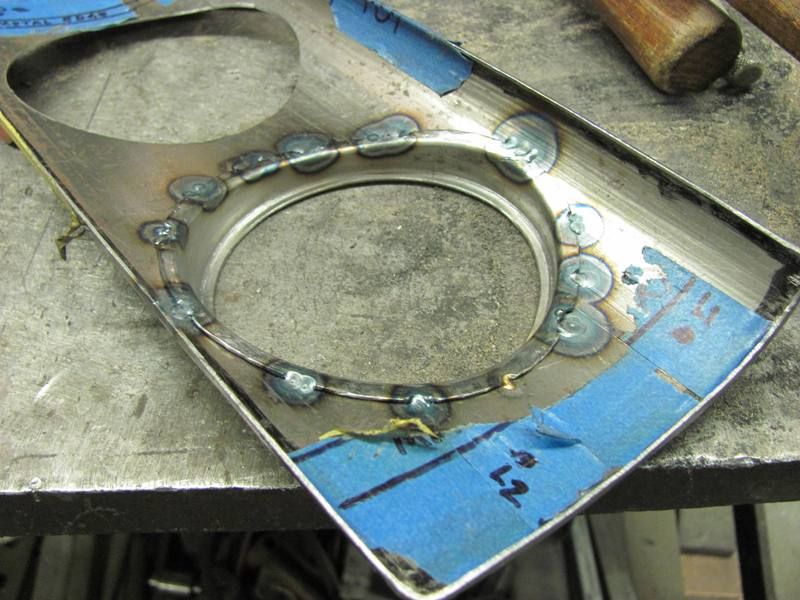
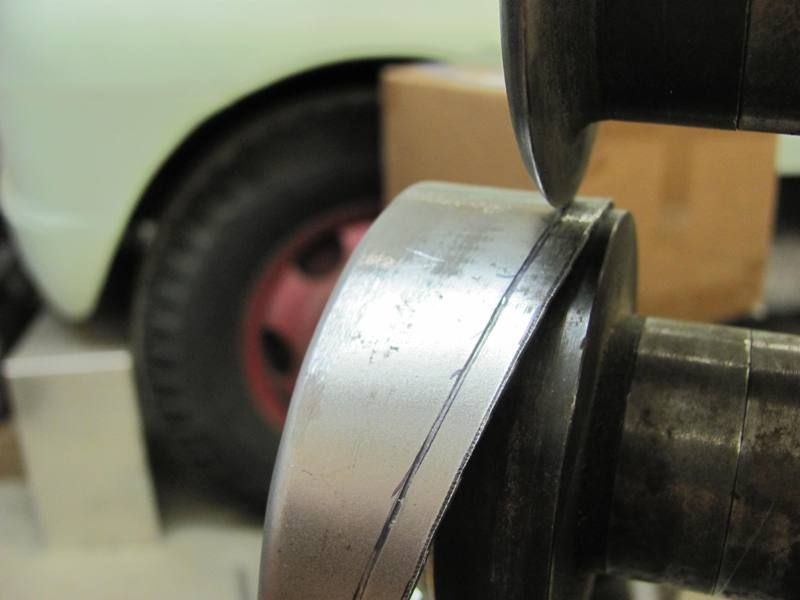
Then worked on the second, marked the flange at 3/16", trimmed, and made one revolution to mark the bend line, then tipped the inner flange as before...
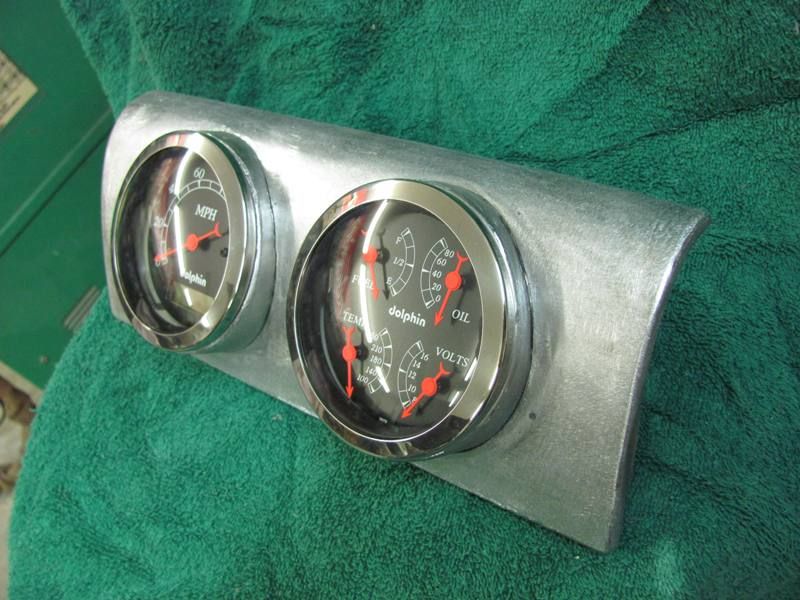
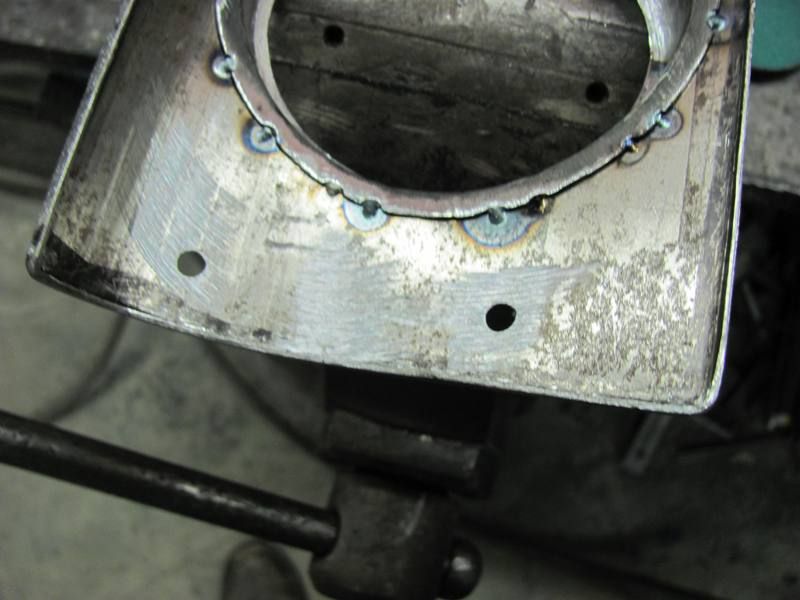
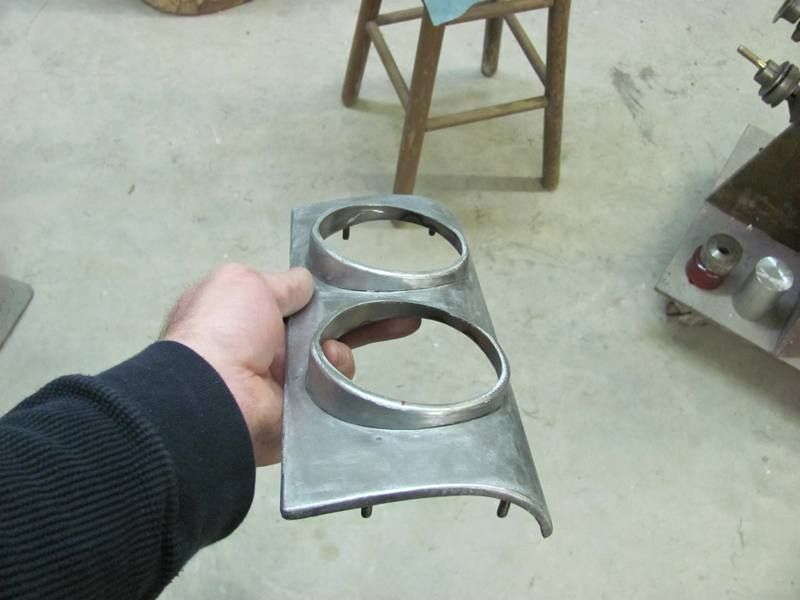
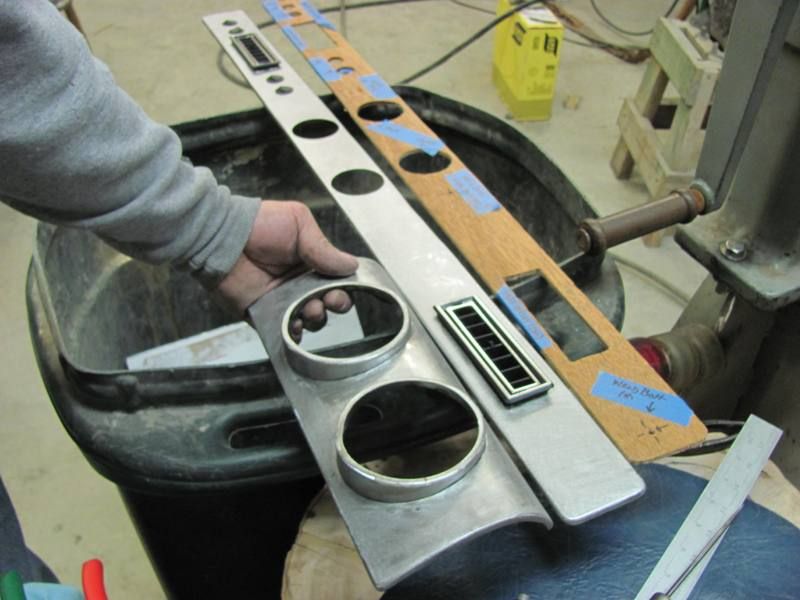
Second ring clamped, tacked in place, panel dressed a bit, and gauges test fit....bolted in this time..


A couple small depressions at some of the weld tacks, some glaze will address any remaining imperfections. All in all, pretty pleased with the results...
Last edited by MP&C; 03-05-2013 at 07:02 PM.
Robert
-
Advertising

- Google Adsense
- REGISTERED USERS DO NOT SEE THIS AD
-
03-05-2013 06:38 PM #17
CHR Member/Contributor
- Join Date
- Dec 2006
- Location
- Woodstock
- Car Year, Make, Model: 34,stroker,32pu,2020 MustangGTpp2
- Posts
- 1,109
Nice and even, the guy is going to flip when he see these, who's installing them? I assume red is the color, going to pop with the chrome bezels. Please take a shot or two when they are installed.I have two brains, one is lost and the other is out looking for it
-
03-08-2013 07:10 PM #18
CHR Member
- Join Date
- Jun 2008
- Location
- Leonardtown
- Car Year, Make, Model: Walking
- Posts
- 1,228
The owner is installing them. A previous owner had added the orange paint, not sure what color we're in for but will get some finished pictures when it gets that far...
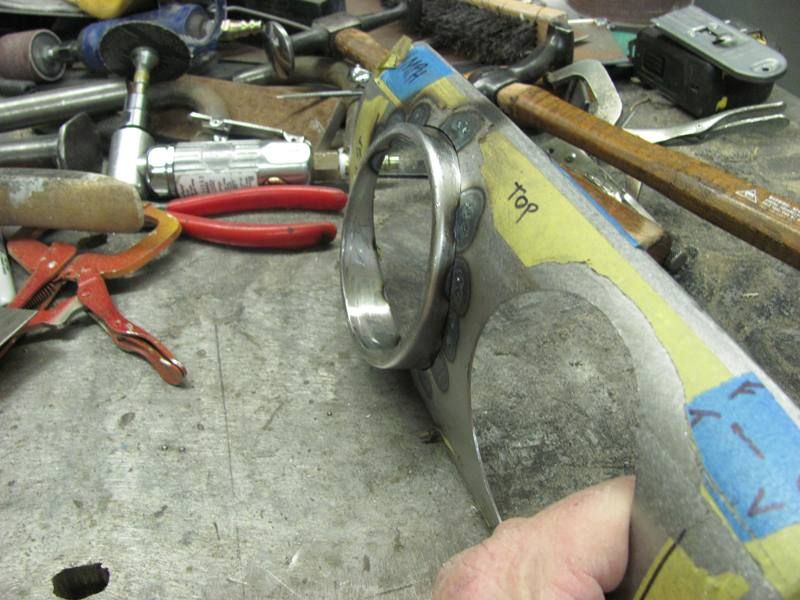
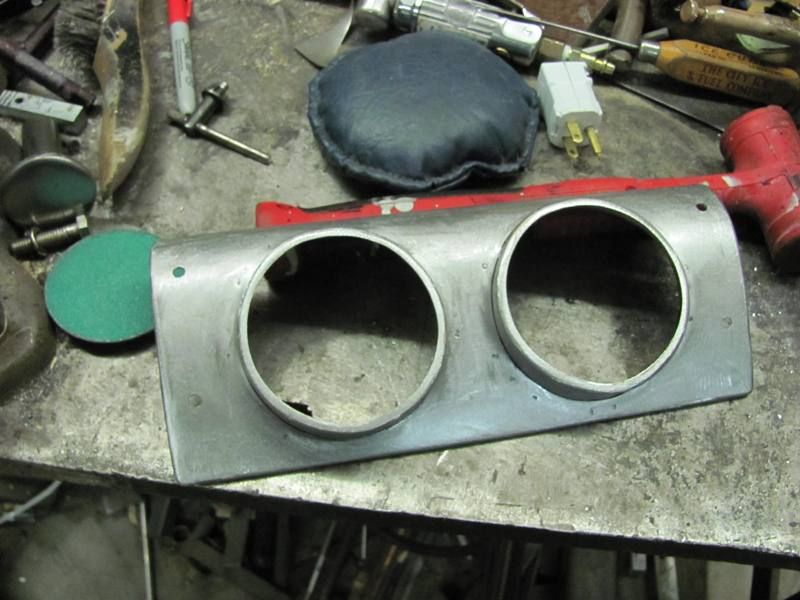
Wrapping this up, drilled four holes where the owner had marked them on the back, and cleaned up the burrs...
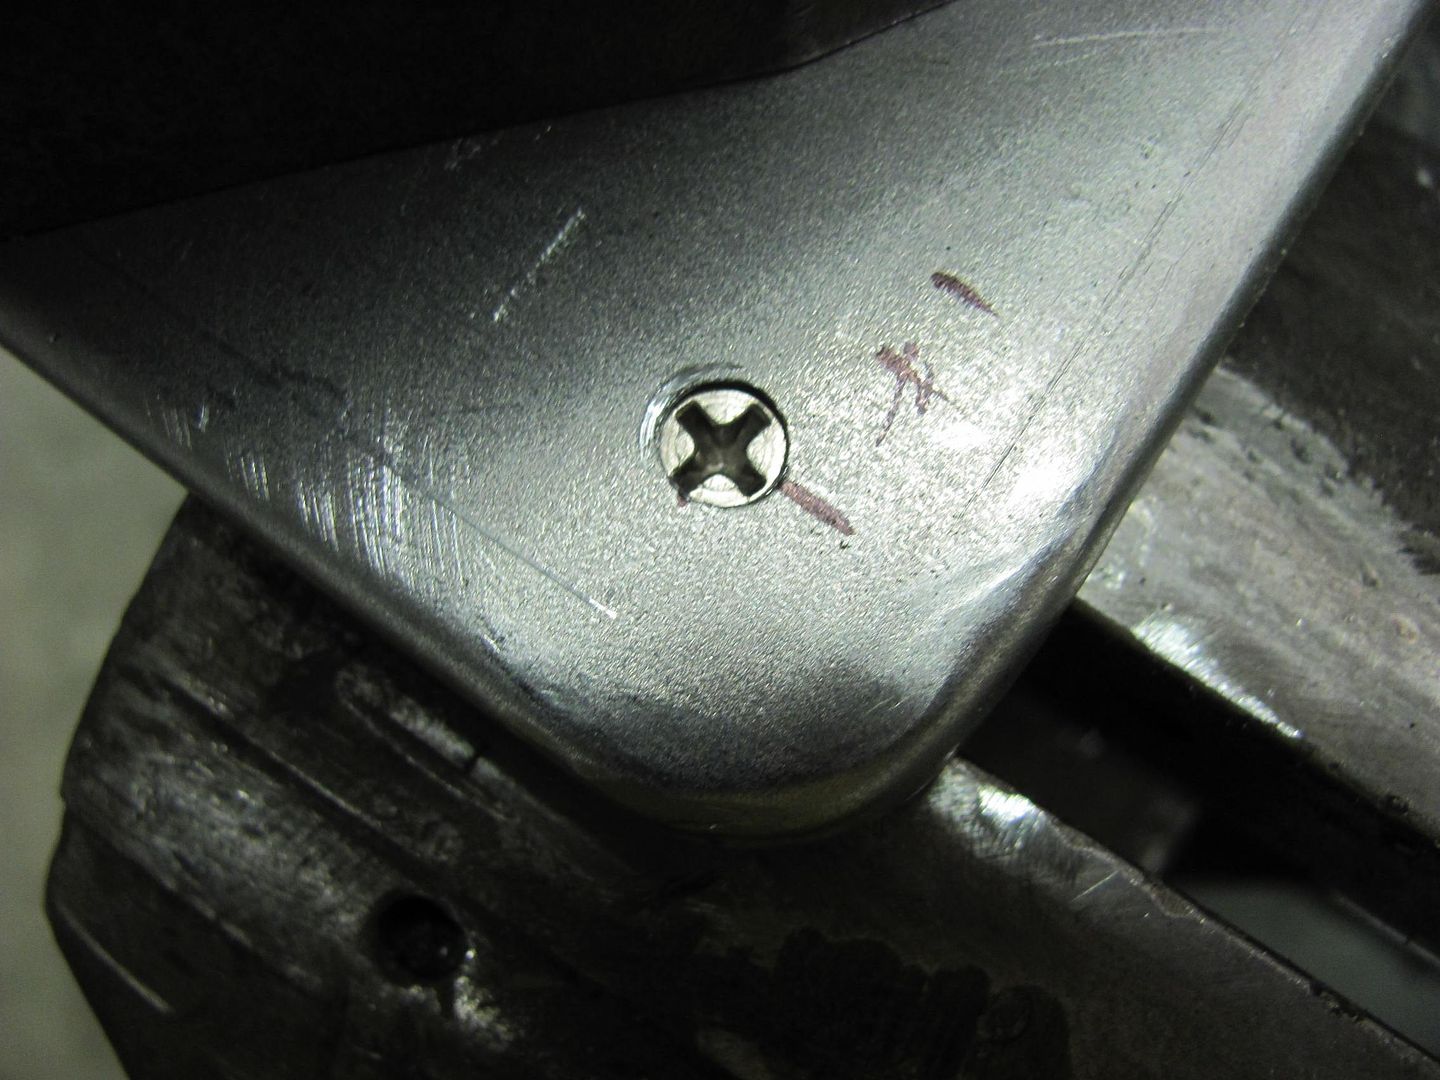
Used some 10-32 machine screws, ground the heads at an angle to match the profile of the dash panel...
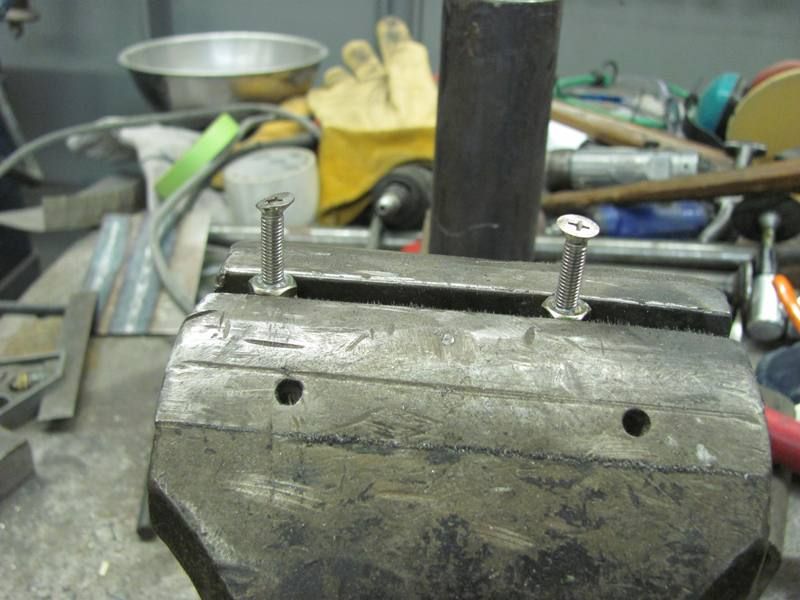
Note the anti-seize in the threads. Any time your weld circuit may cross hardware threads, the anti-seize will prevent the threads from galling.
Screws aligned with the holes...
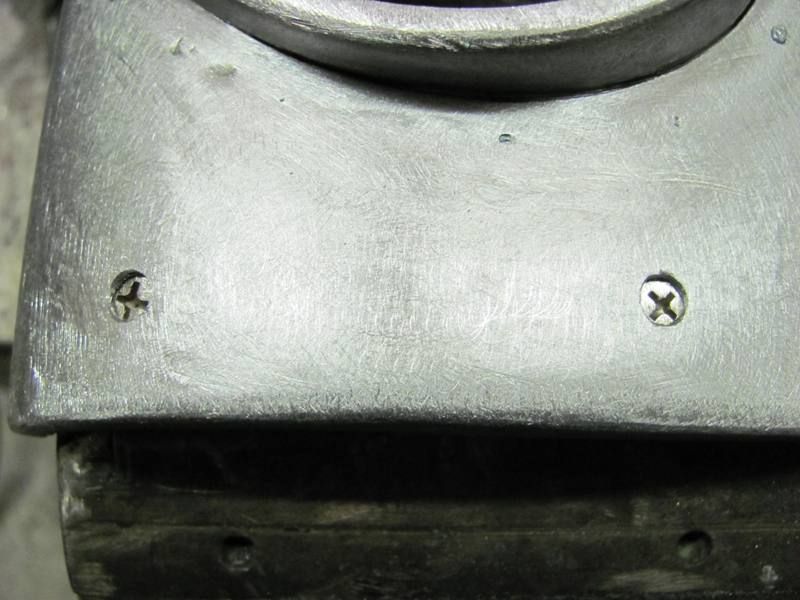
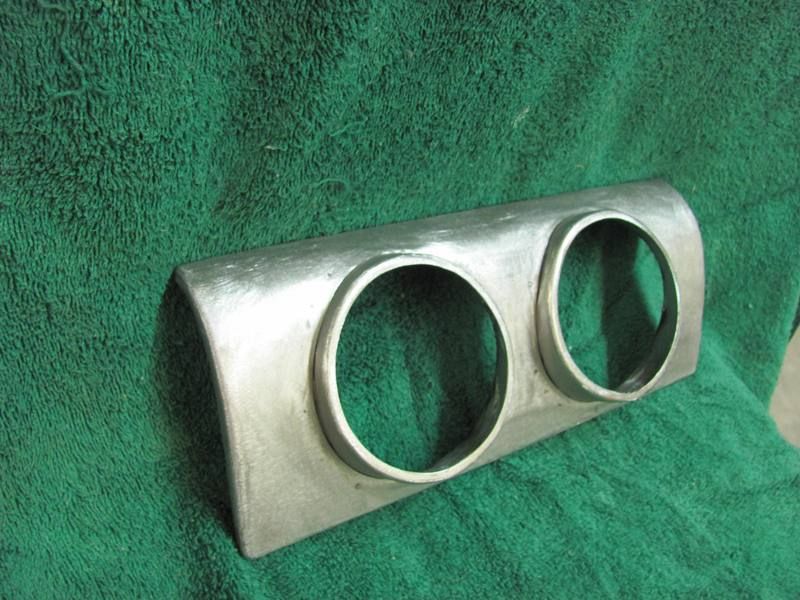
Then I ground down the front side of the welds, ready to test fit the dashboard....
Robert
-
03-08-2013 07:37 PM #19
CHR Member/Contributor
- Join Date
- Dec 2006
- Location
- Woodstock
- Car Year, Make, Model: 34,stroker,32pu,2020 MustangGTpp2
- Posts
- 1,109
Yeah I like the studs much cleaner the owner is in for a surprise. That's a happening piece.I have two brains, one is lost and the other is out looking for it
-
03-08-2013 08:30 PM #20
CHR Member
- Join Date
- Jul 2008
- Location
- Edgewood, New Mexico, United States
- Car Year, Make, Model: 30,34,39,50,54,65,68,70,71,72
- Posts
- 571
Wow, I've learned so much for this thread and it's only 2 pages! Thanks for documenting this.Livin' on Route 66 
-
03-08-2013 09:00 PM #21
CHR Member
- Join Date
- Feb 2007
- Location
- Santa Monica
- Car Year, Make, Model: 37 Ford tudor humpback
- Posts
- 1,988
All of his threads are like this! Do a search. It's totally worth it! Originally Posted by dmw56

"It is not much good thinking of a thing unless you think it out." - H.G. Wells
-
03-17-2013 04:12 PM #22
CHR Member
- Join Date
- Jun 2008
- Location
- Leonardtown
- Car Year, Make, Model: Walking
- Posts
- 1,228
Thanks for the comments guys..
Back to instrument panels today......
This one was just shy of 40" wide, really testing my 22 ga capacity apron brake... shown with the plywood pattern by the owner...
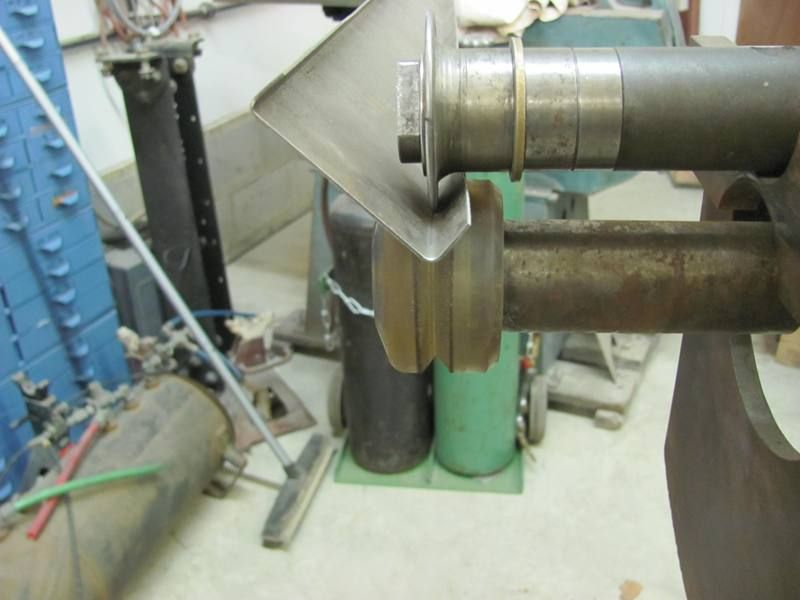
To sharpen up the bend just a bit, I ran it through the bead roller using the tipping dies...
Trimmed the folded flanges down a bit. Final flange will be about 3/16", bent them using 1/2" so the apron brake would cooperate a little better..

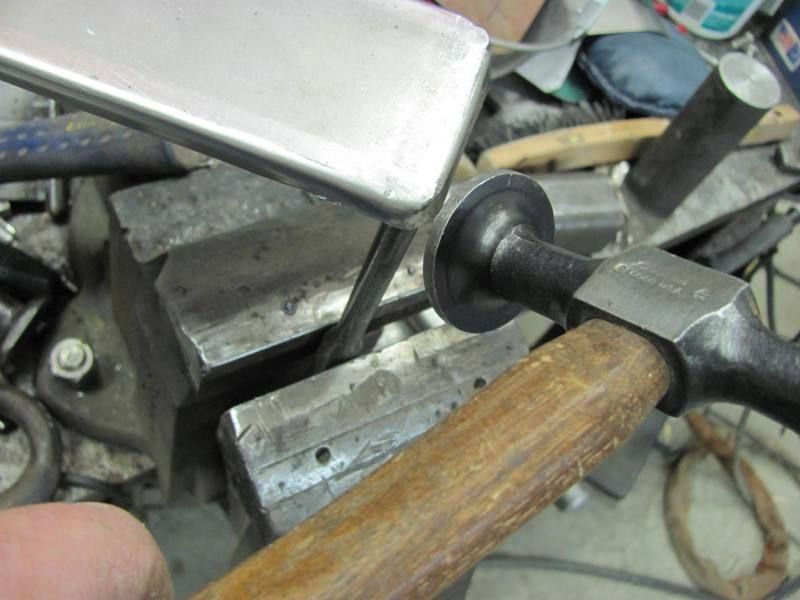
Used a 3/8 diameter punch as an anvil and hammered the corner radiuses (radii?)
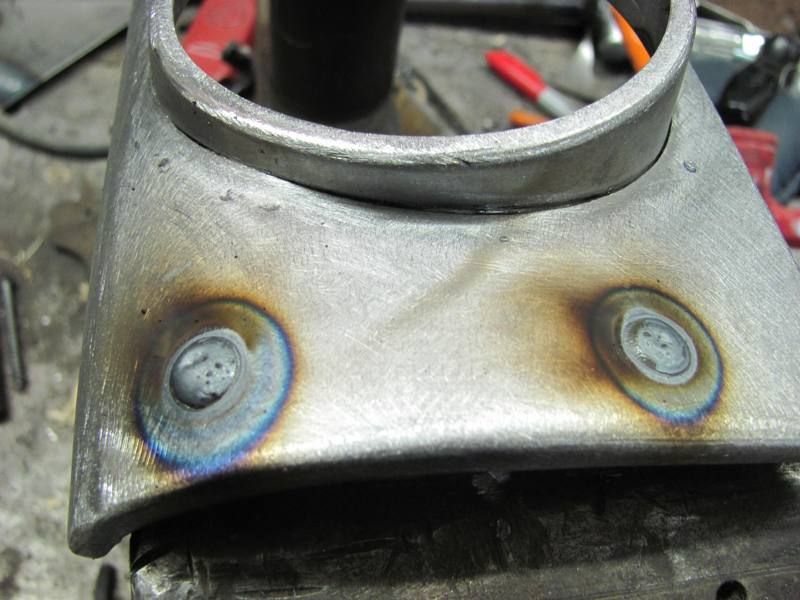
Adding holes...
Welding on the "hidden studs"
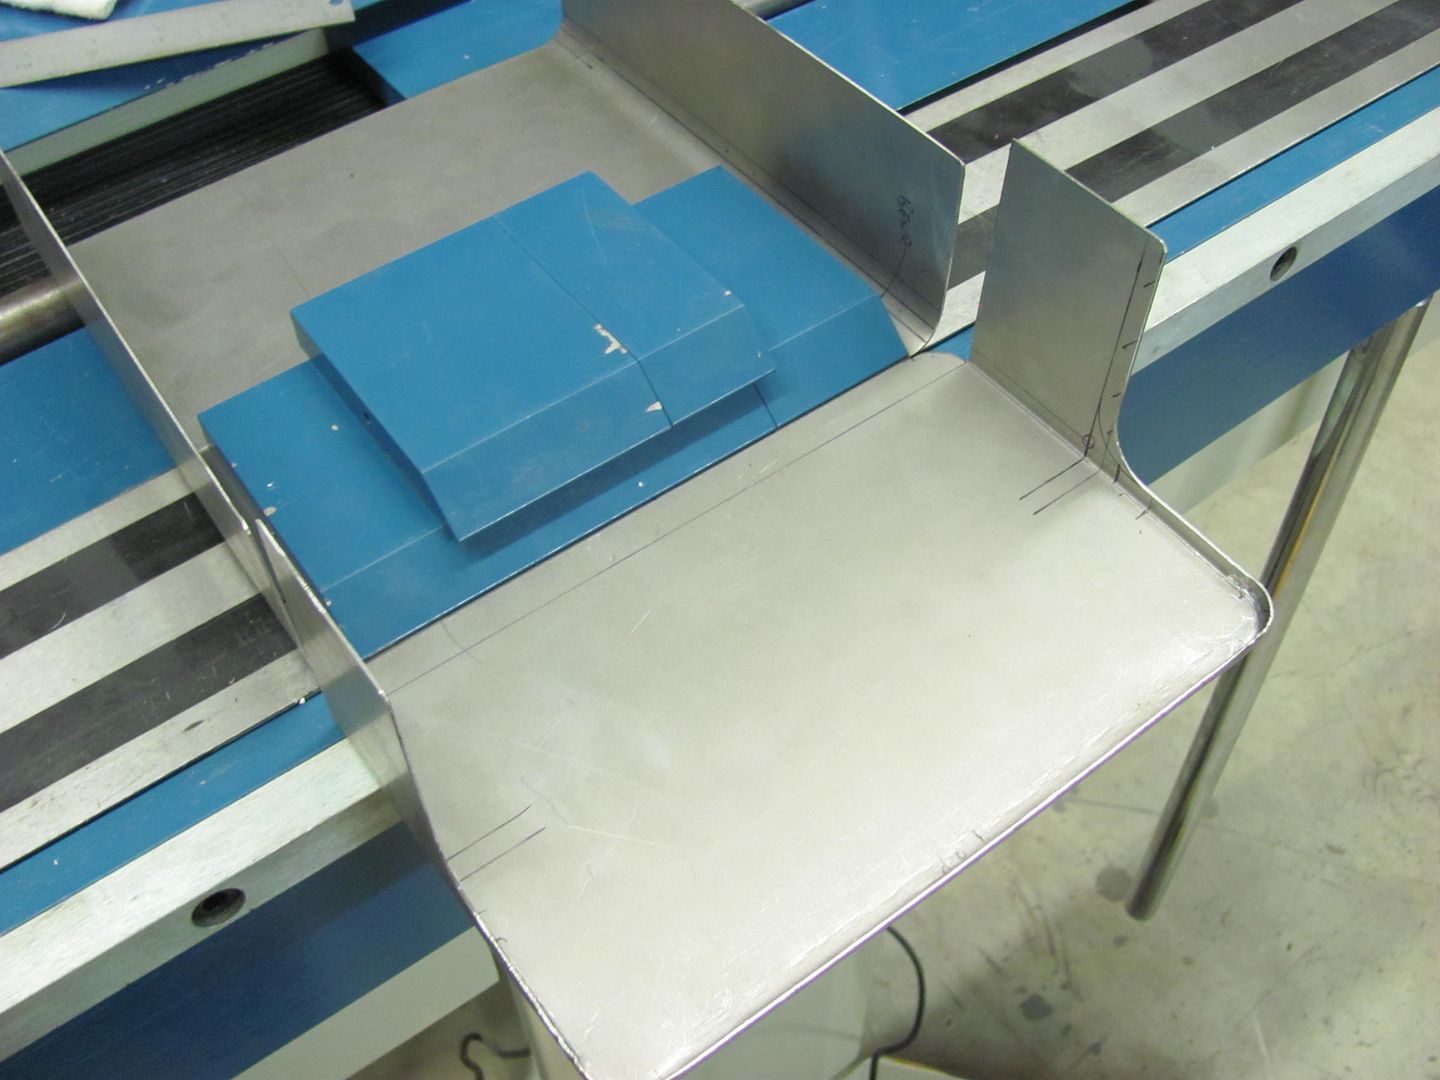
This will replace the original as well as the upper plate we made last year...

The parts will position something like this....
Robert
-
03-17-2013 04:50 PM #23
CHR Member
- Join Date
- Oct 2012
- Location
- Narberth
- Car Year, Make, Model: 32 Brookville Hi Boy; 95 Toyota Supra
- Posts
- 1,029
Beautiful craftsmanship, Robert. Even if I had all your tools I'd end up fumbling around with them. The imagination, creativity, skill, and experience you bring to the project are what make your work stand out. I'm going to head over to check out more of your threads. Thanks.
-
03-18-2013 06:38 PM #24
CHR Member
- Join Date
- Jun 2008
- Location
- Leonardtown
- Car Year, Make, Model: Walking
- Posts
- 1,228
Thanks Nick!
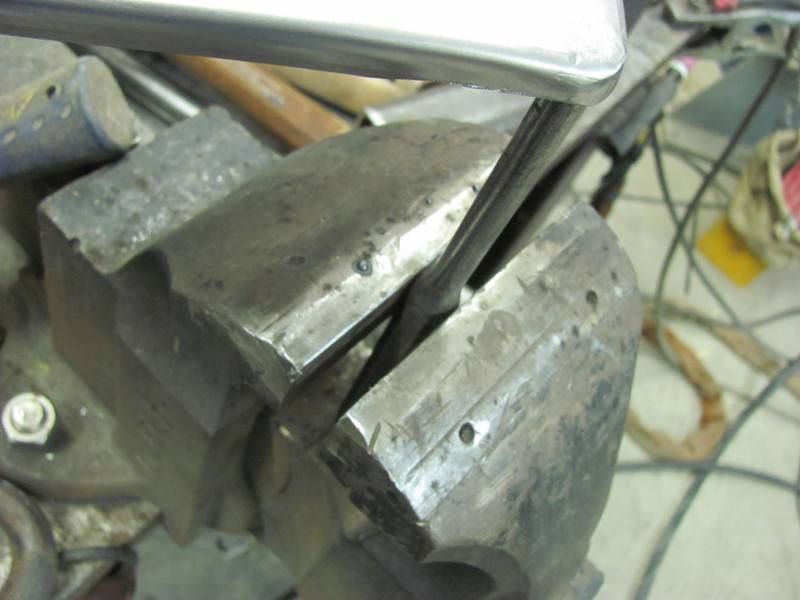
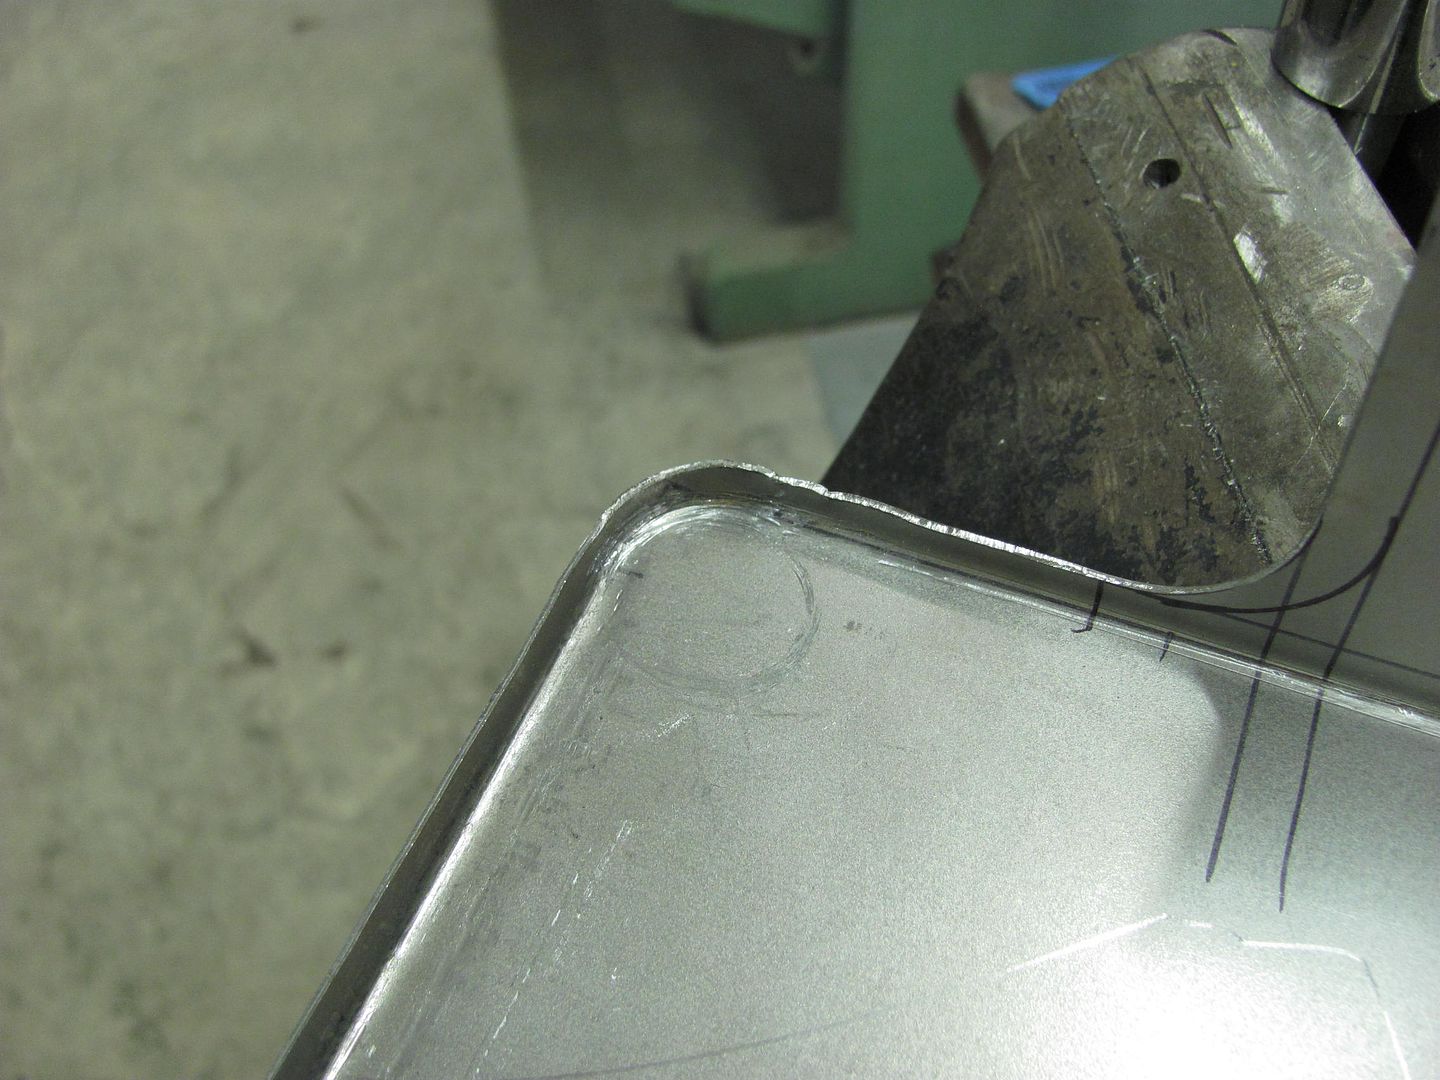
I had a request to show how the "unwelded" corners were formed, so I did another sample. The flanges were marked the same as the last version, just under 1/4"
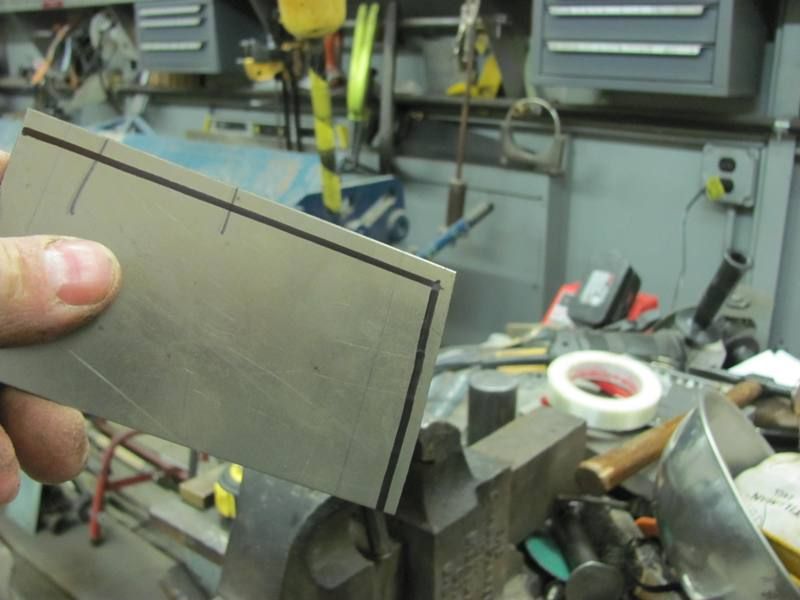
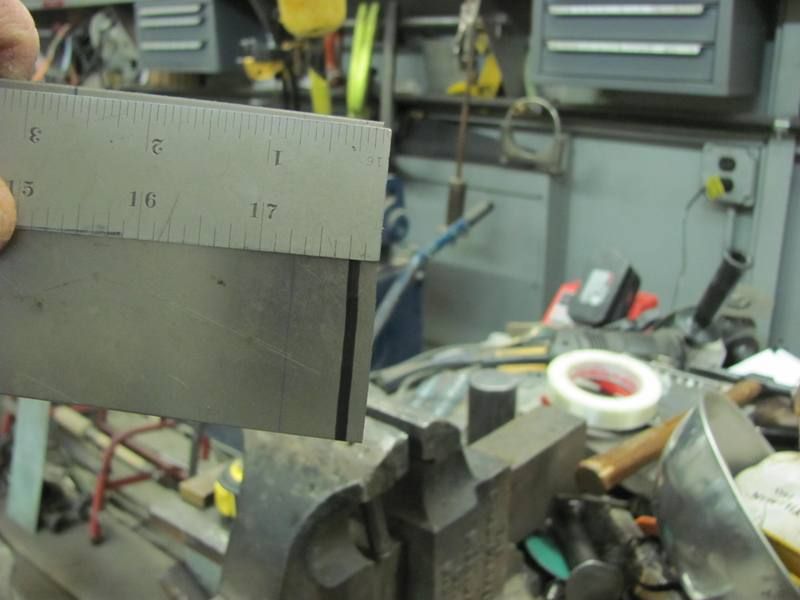
The corner is trimmed at the corner to a radius to get rid of some of the excess metal...
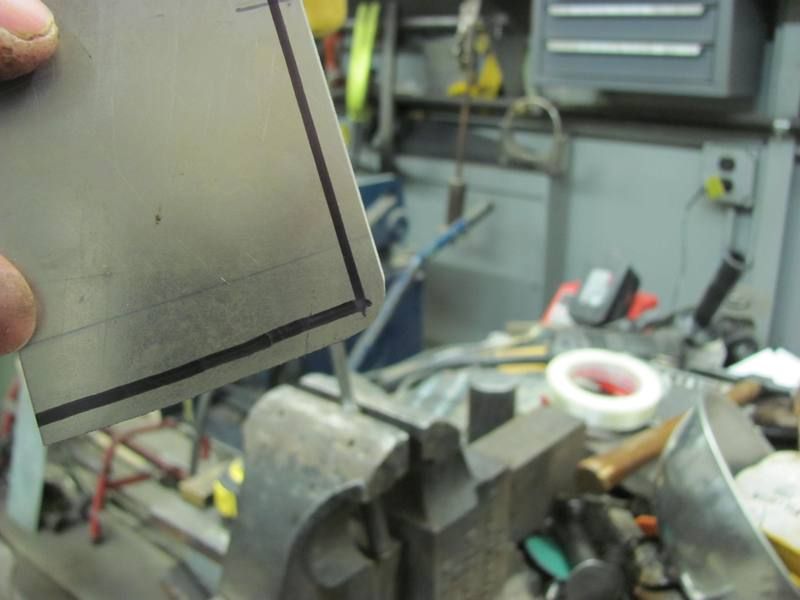
Flanges folded to just up to corner, leaving a tuck ready for shrinking...

Video of the hammering process:
Video158.mp4 Video by rmccartney | Photobucket
Please excuse my lack of camera location awareness, my first feature film...
Robert
-
11-11-2013 05:06 PM #25
CHR Member
- Join Date
- Jun 2008
- Location
- Leonardtown
- Car Year, Make, Model: Walking
- Posts
- 1,228
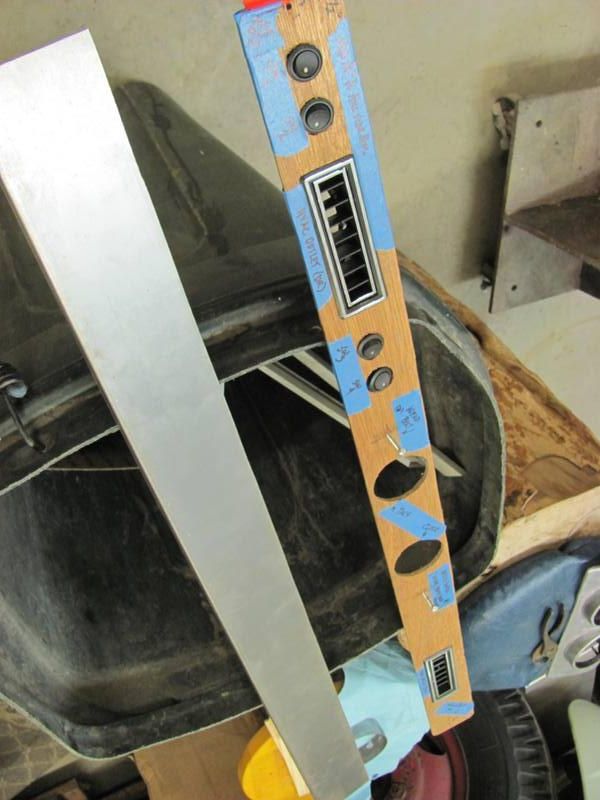
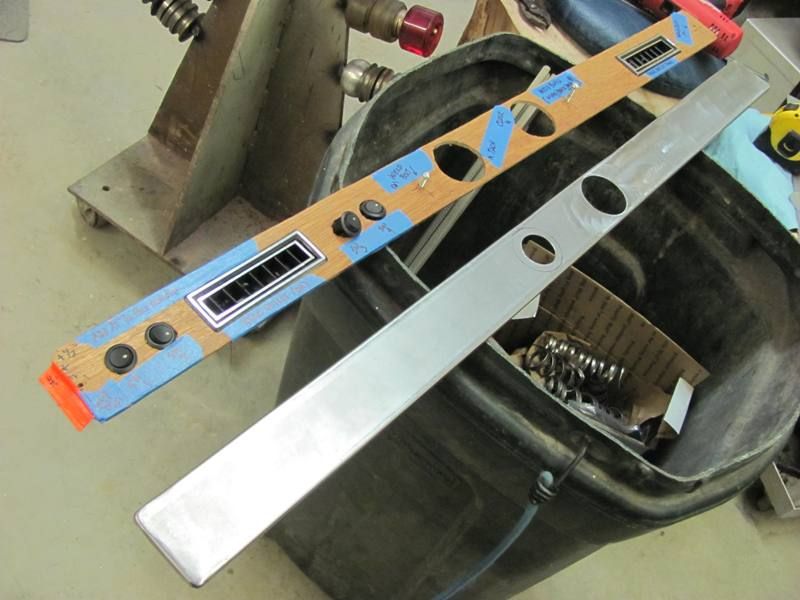
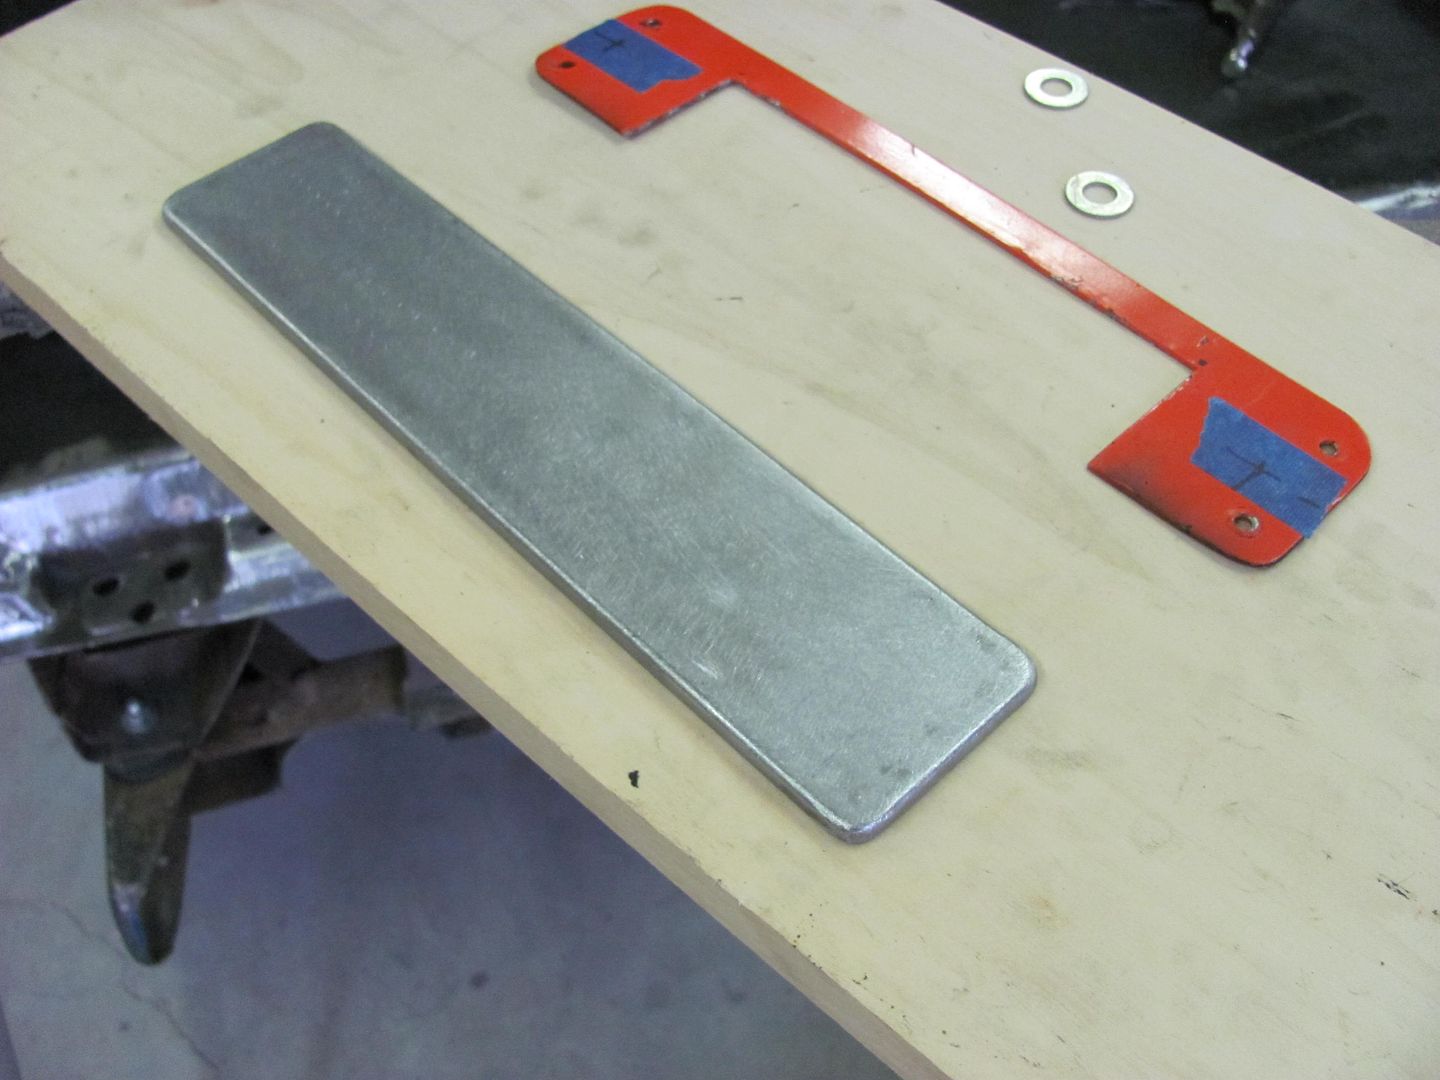
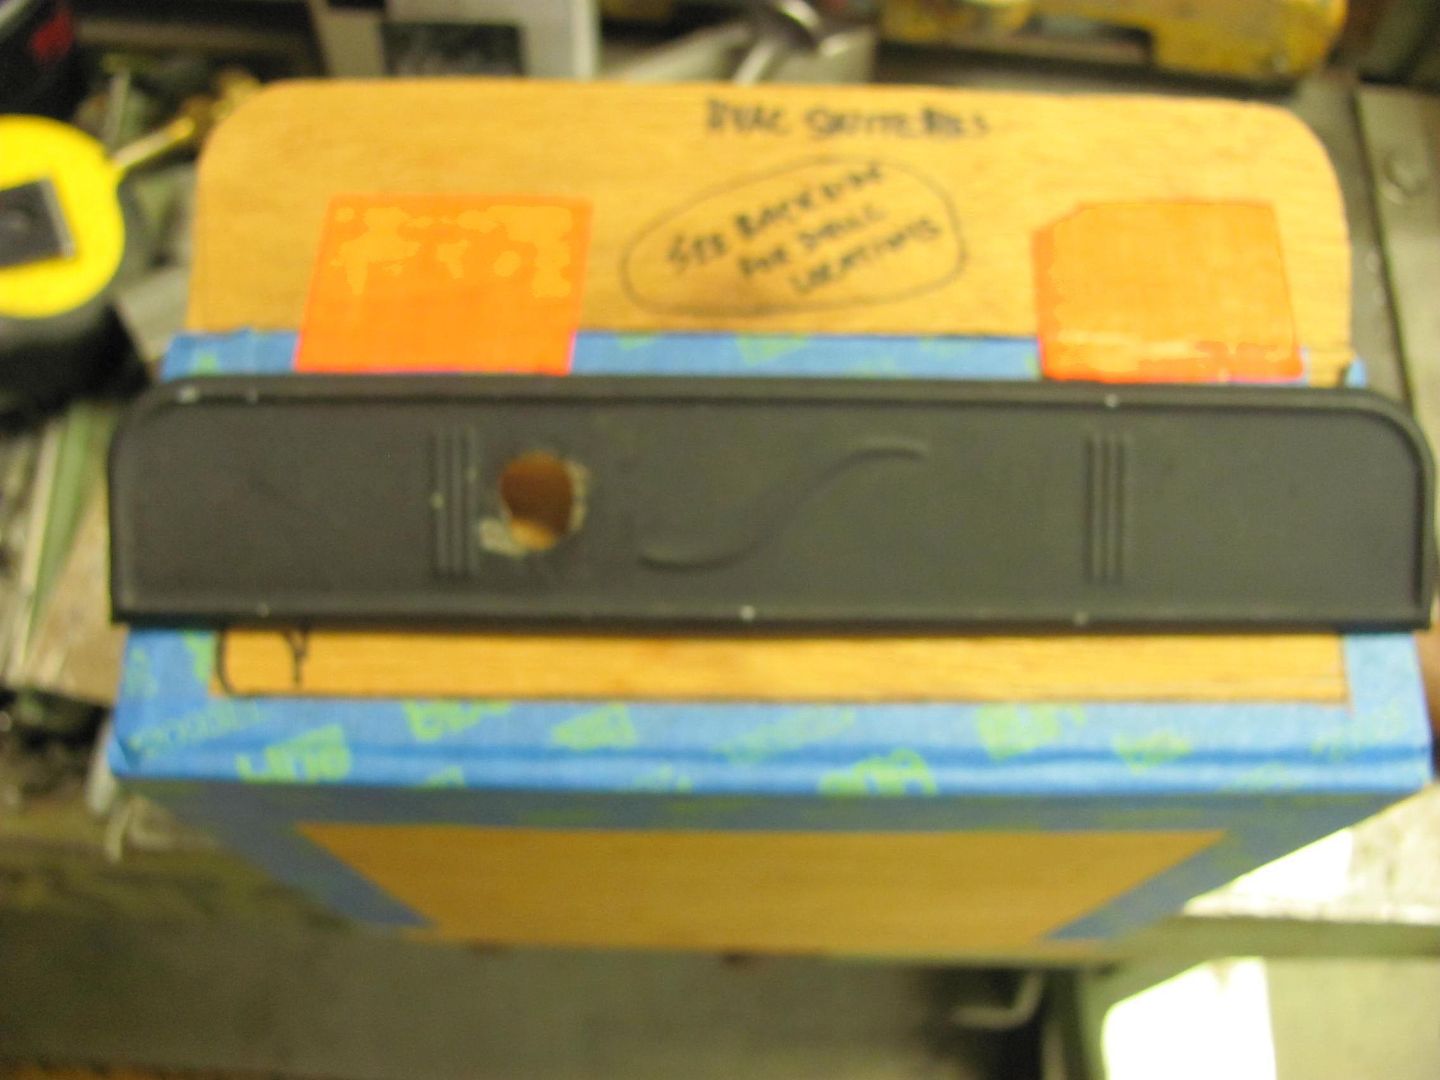
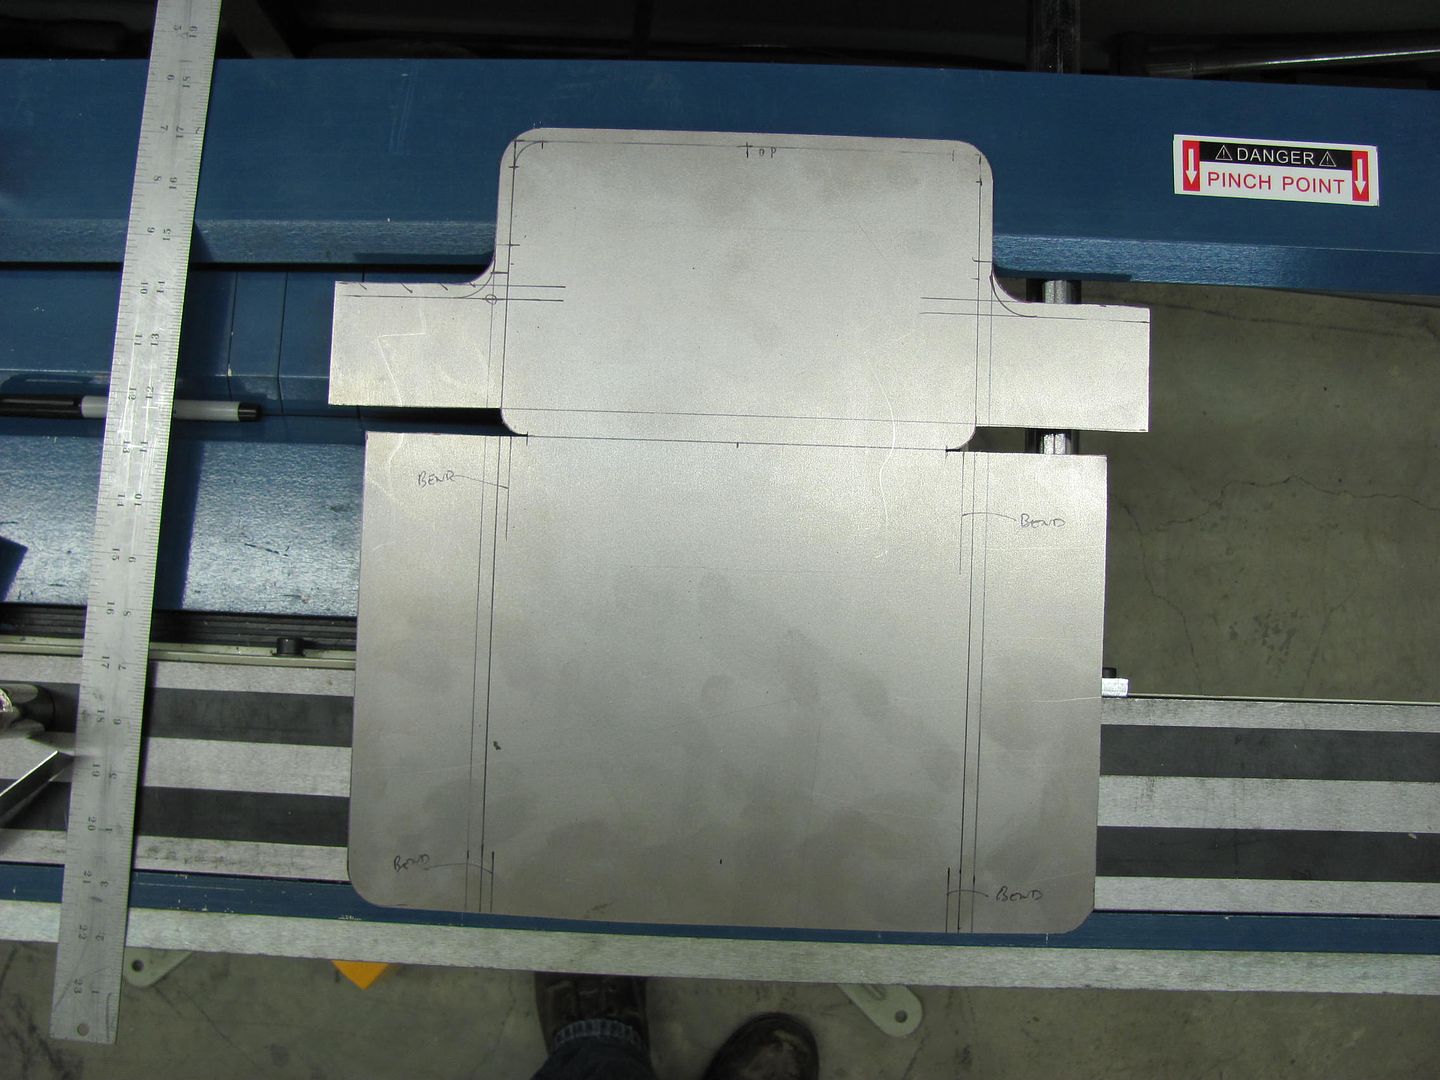
Today I finished up the last piece for the Studebaker truck; this piece was to hold the heater/AC controls and DIN radio. The owner had made up a sample piece to make it from:
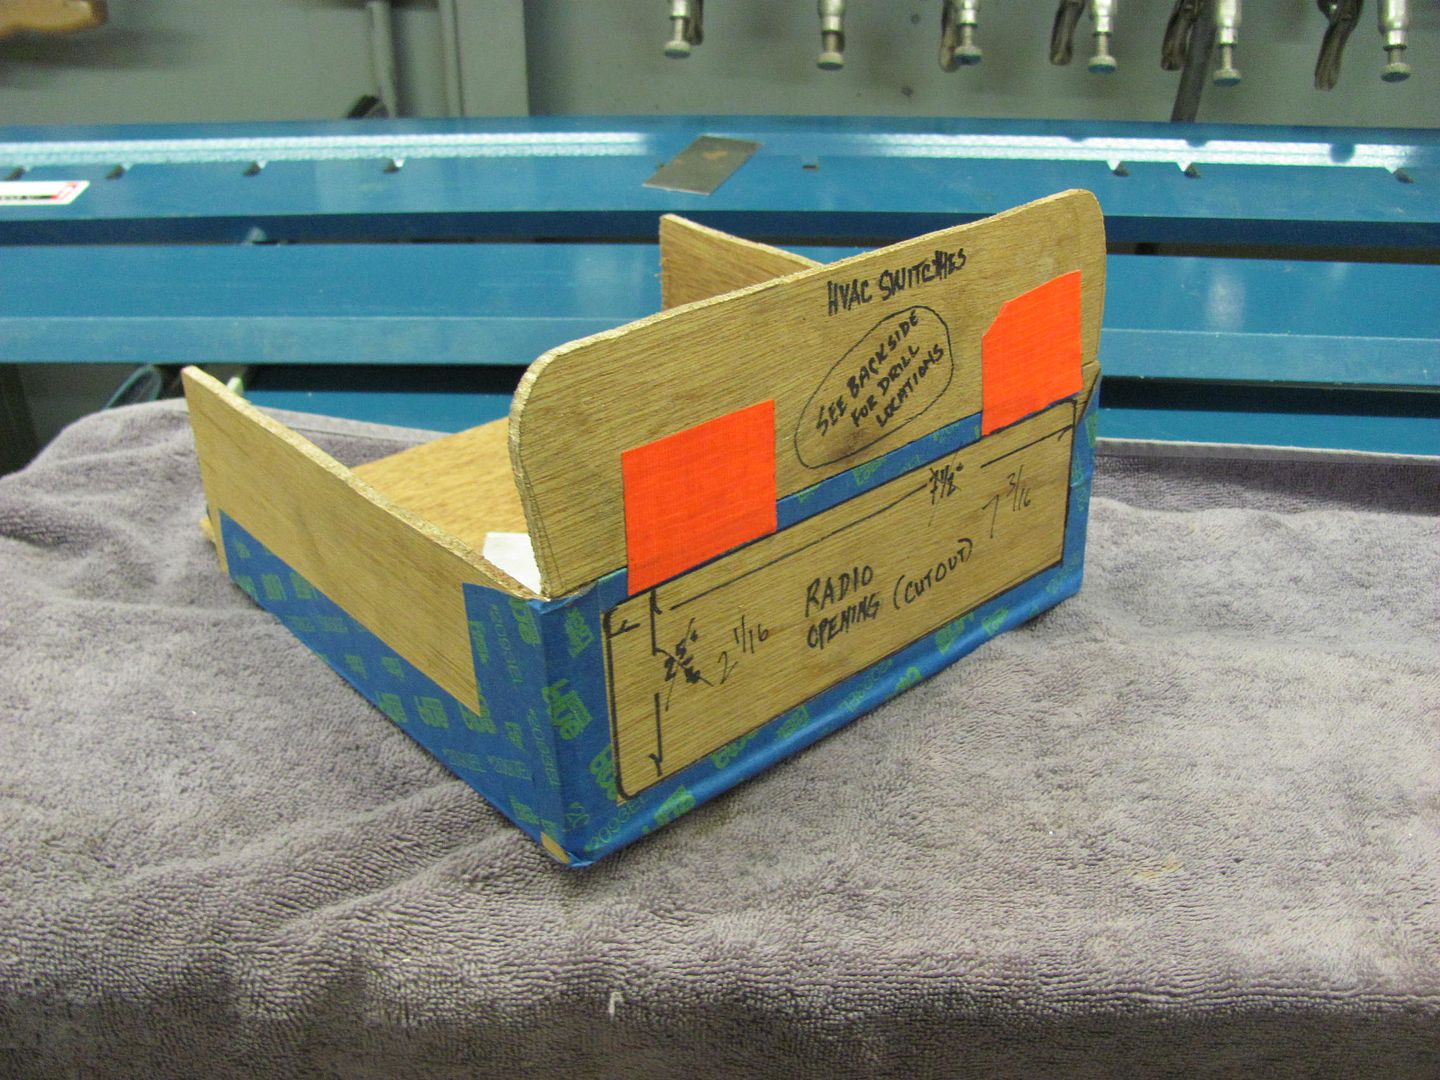
I wasn't too comfortable making something to match this piece as I didn't think these corners and the elliptical radius was correct. This is what I get for someone not wanting to bring over the truck to work from..
Looking at the picture he had sent of the dash, the piece this was replacing appeared to have straight sides and about a 1/2" radius.... (the piece under the orange panel)
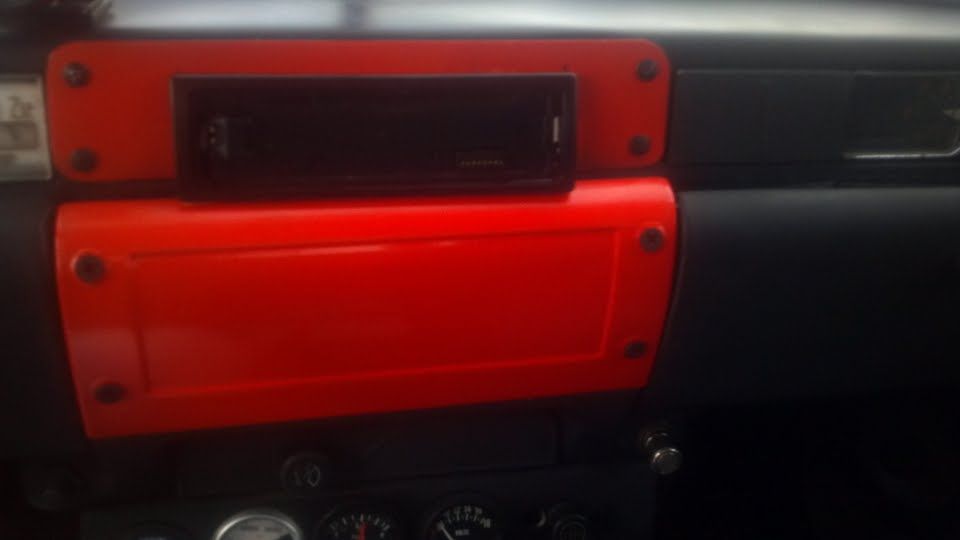
So I had him bring that panel over today to have a "more accurate" sample so my work will have a better chance of fitting.. a bit different from his sample...
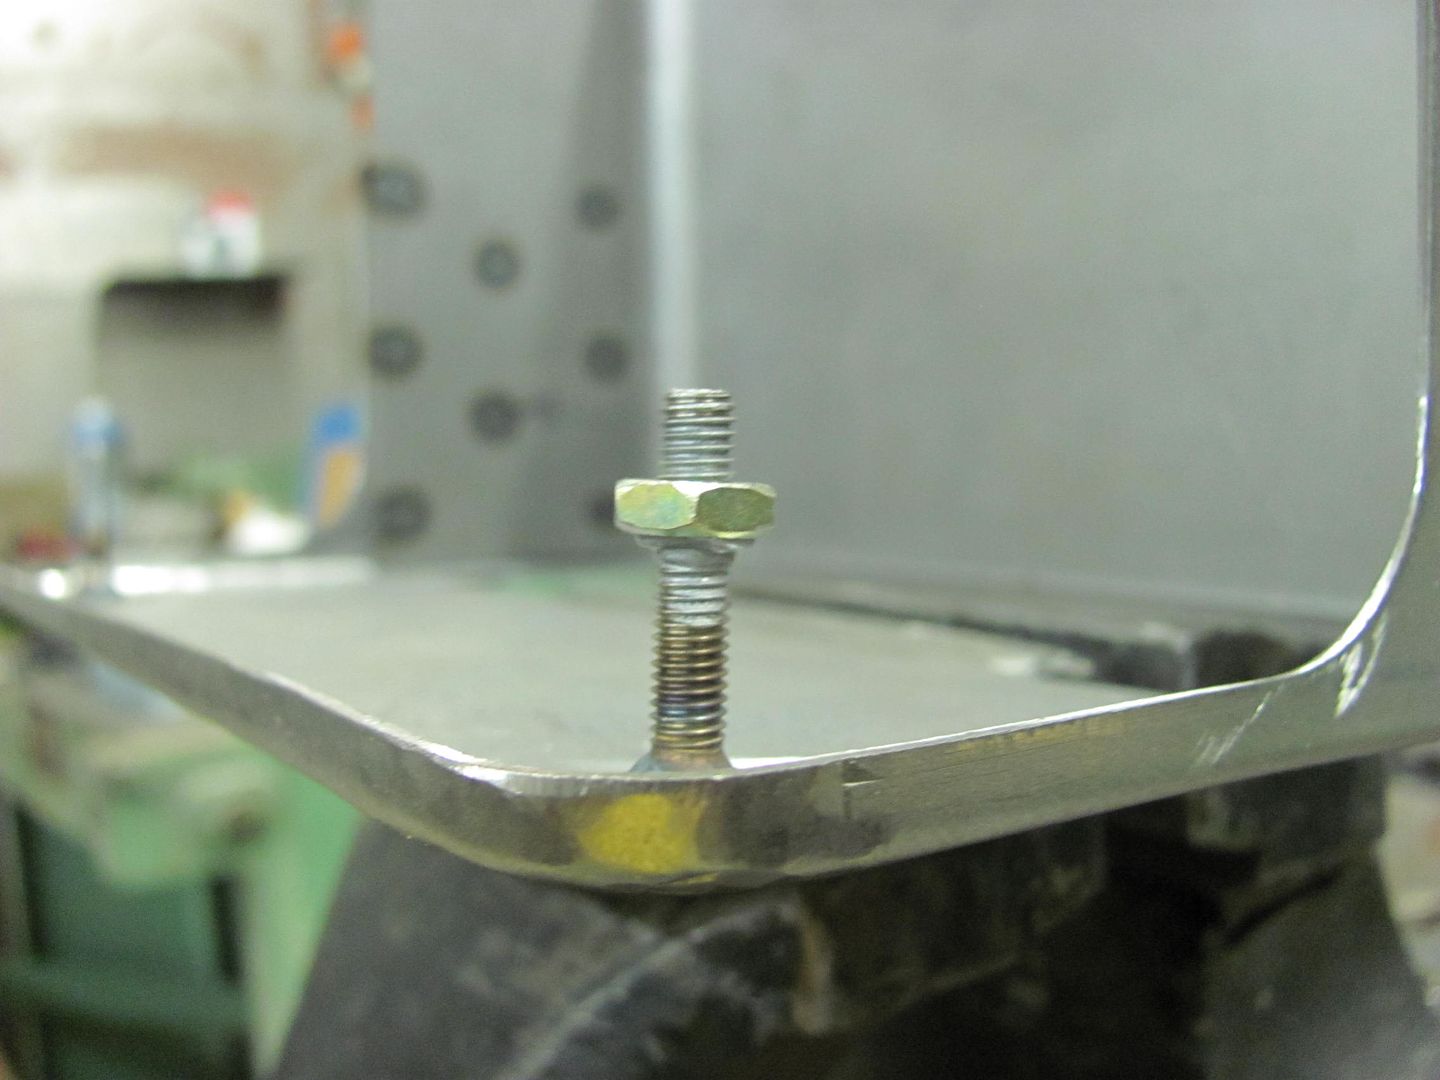
What I could only guess was him wanting 3/8 hardware, was actually 10-24 studs with a 3/8 nut.
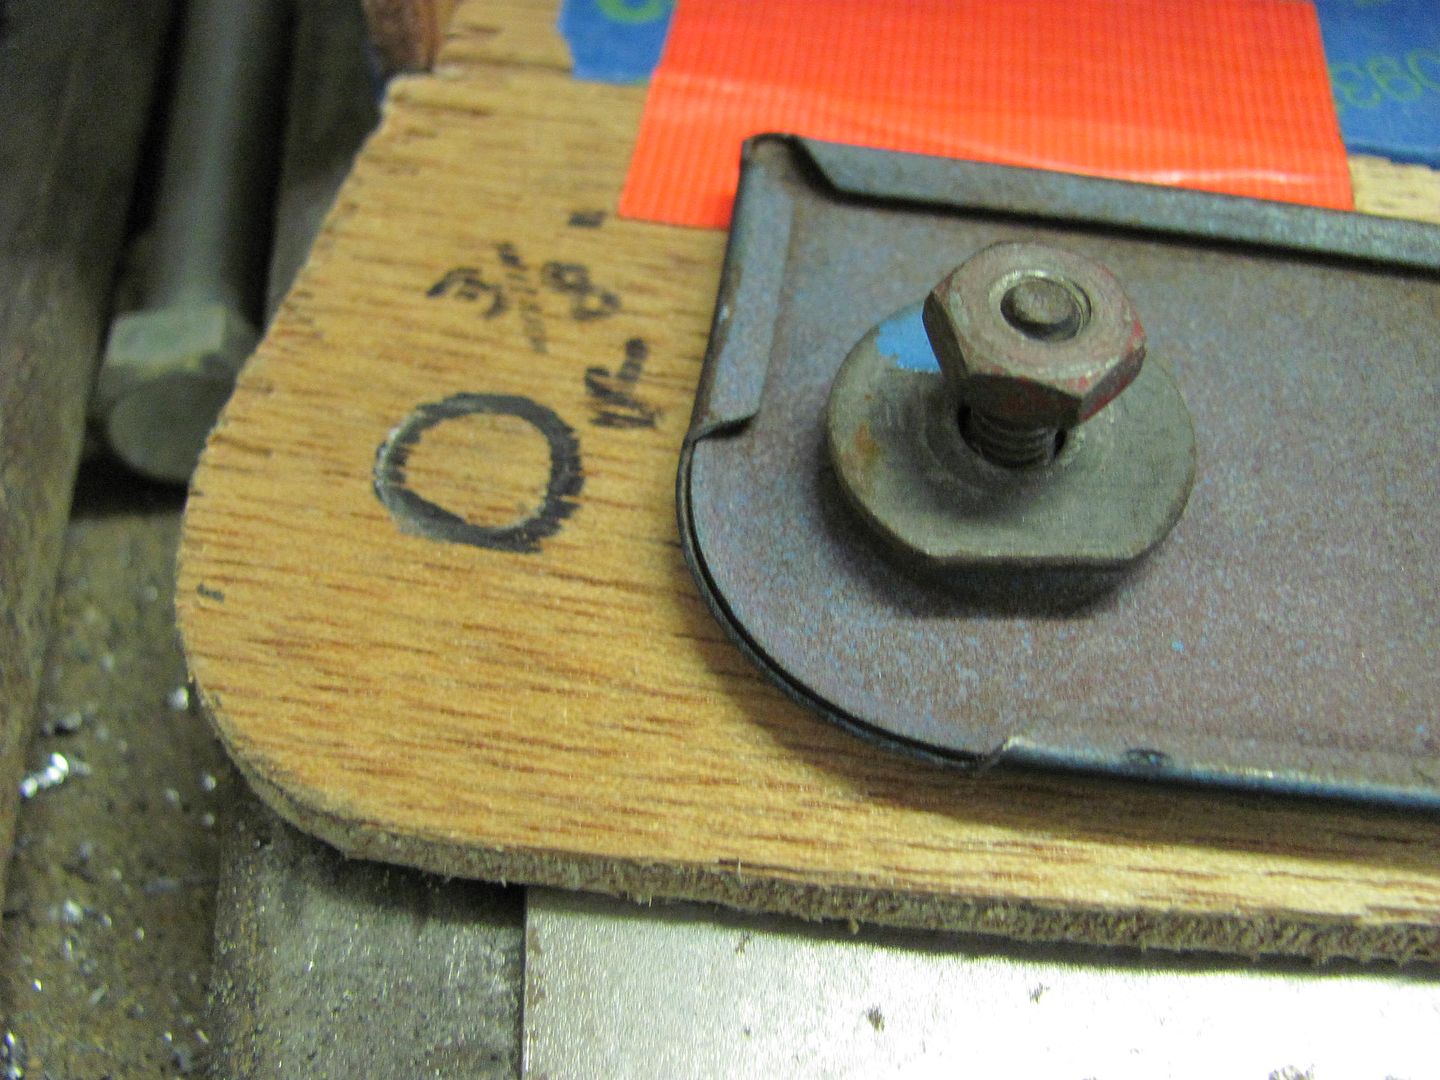
You've got to love it!
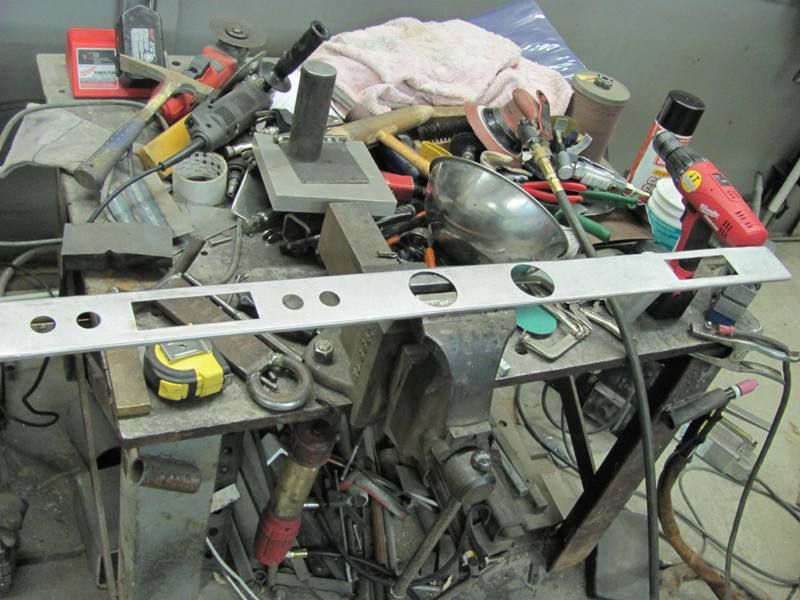
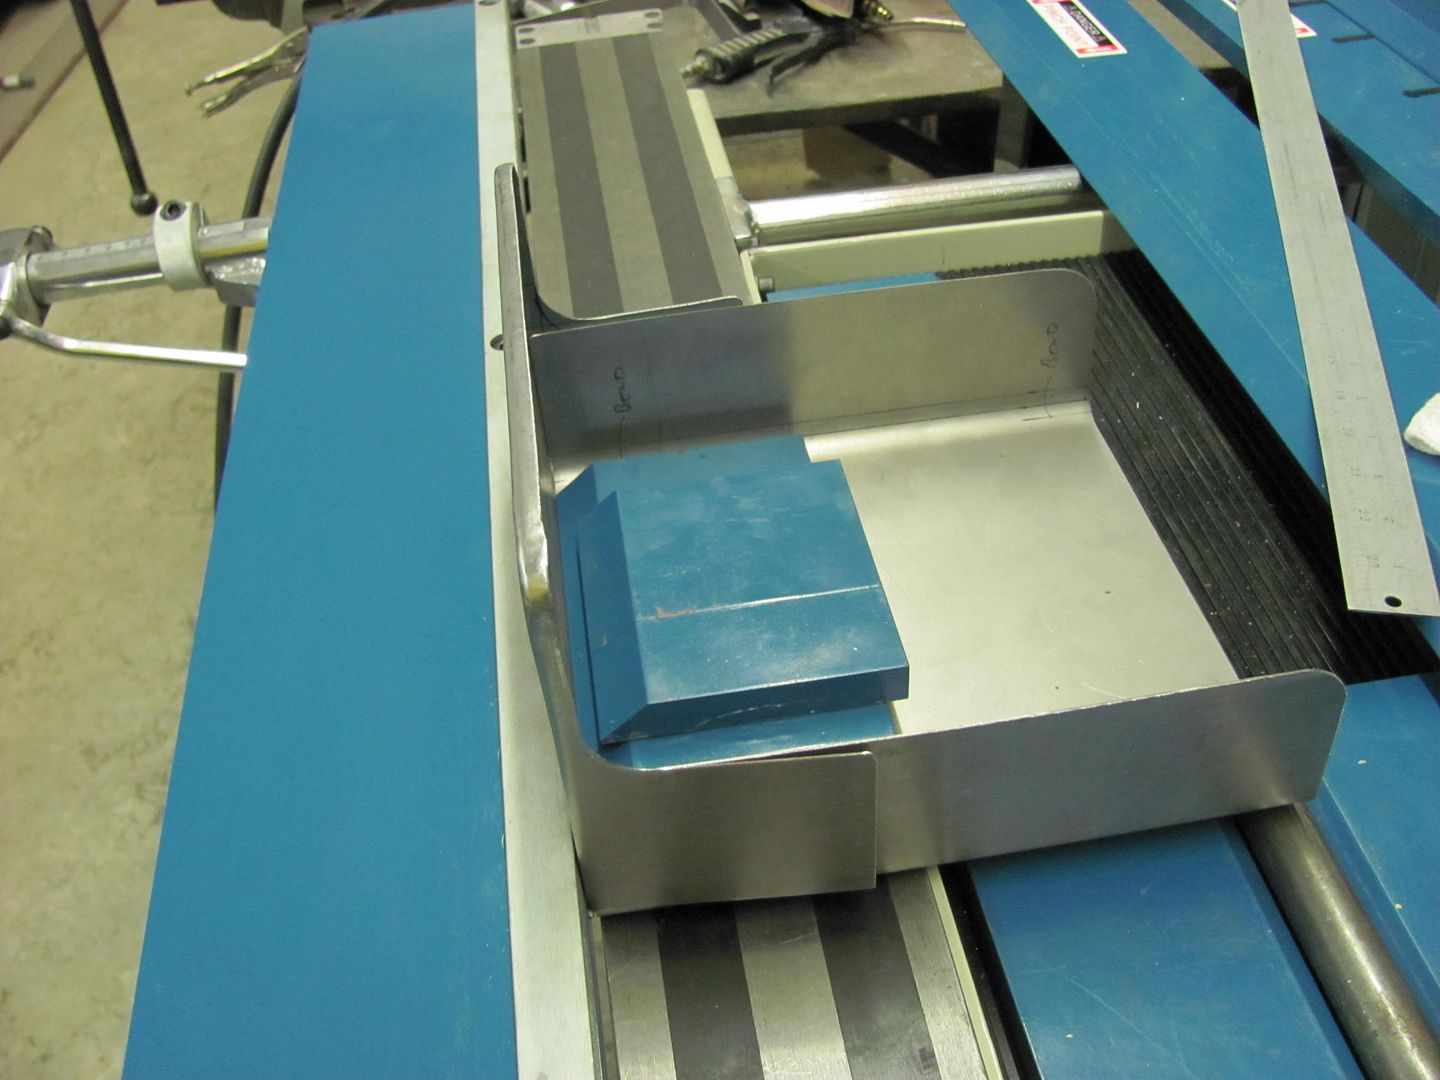
Here's the layout, and cut out on the band saw....
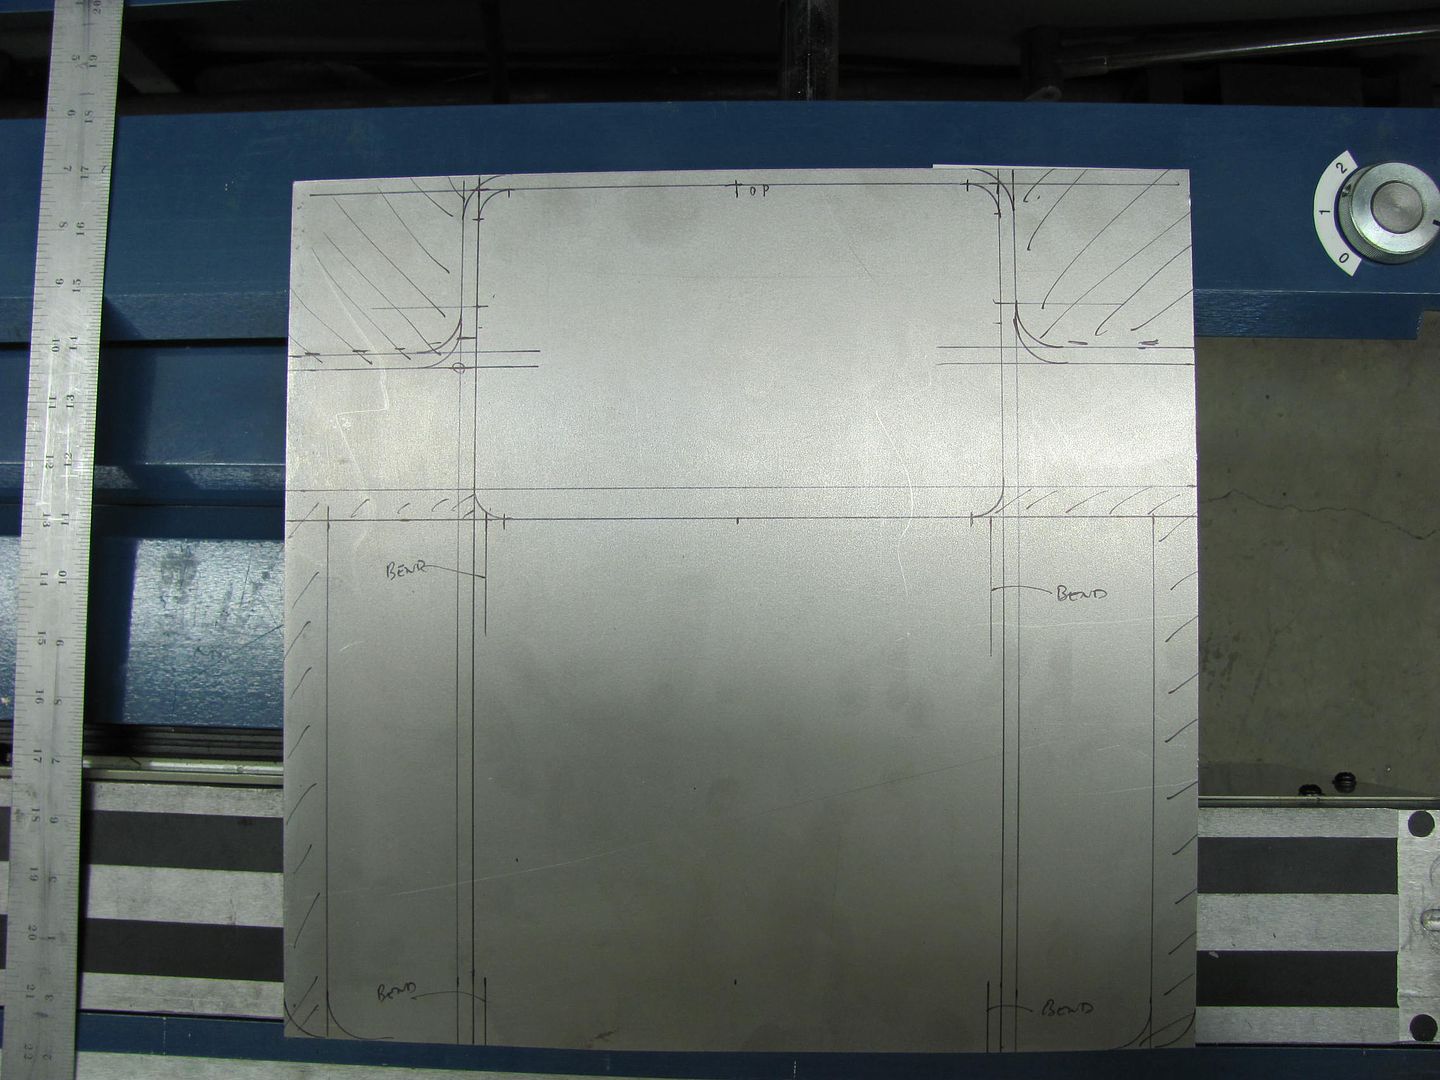
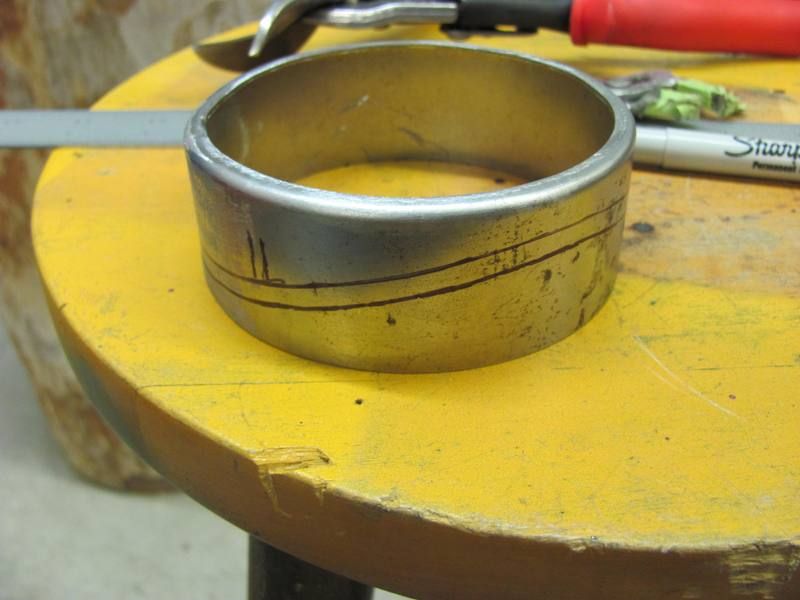
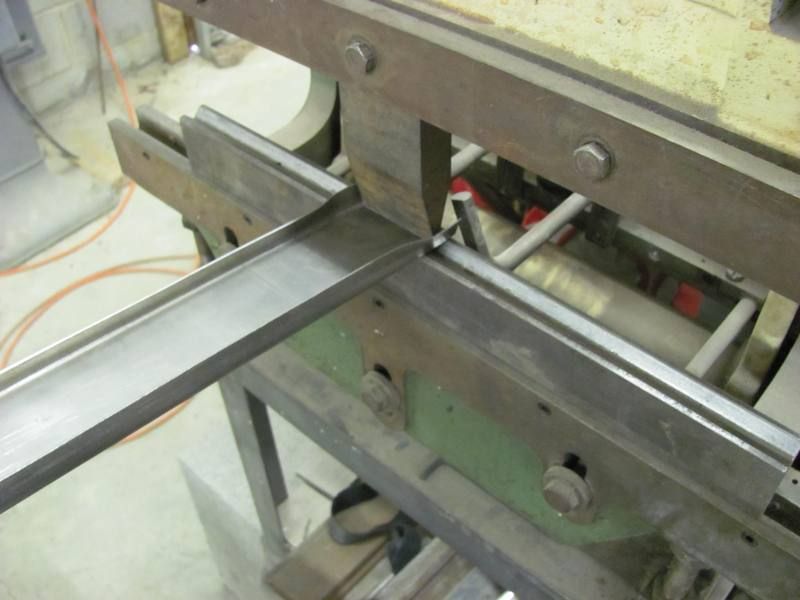
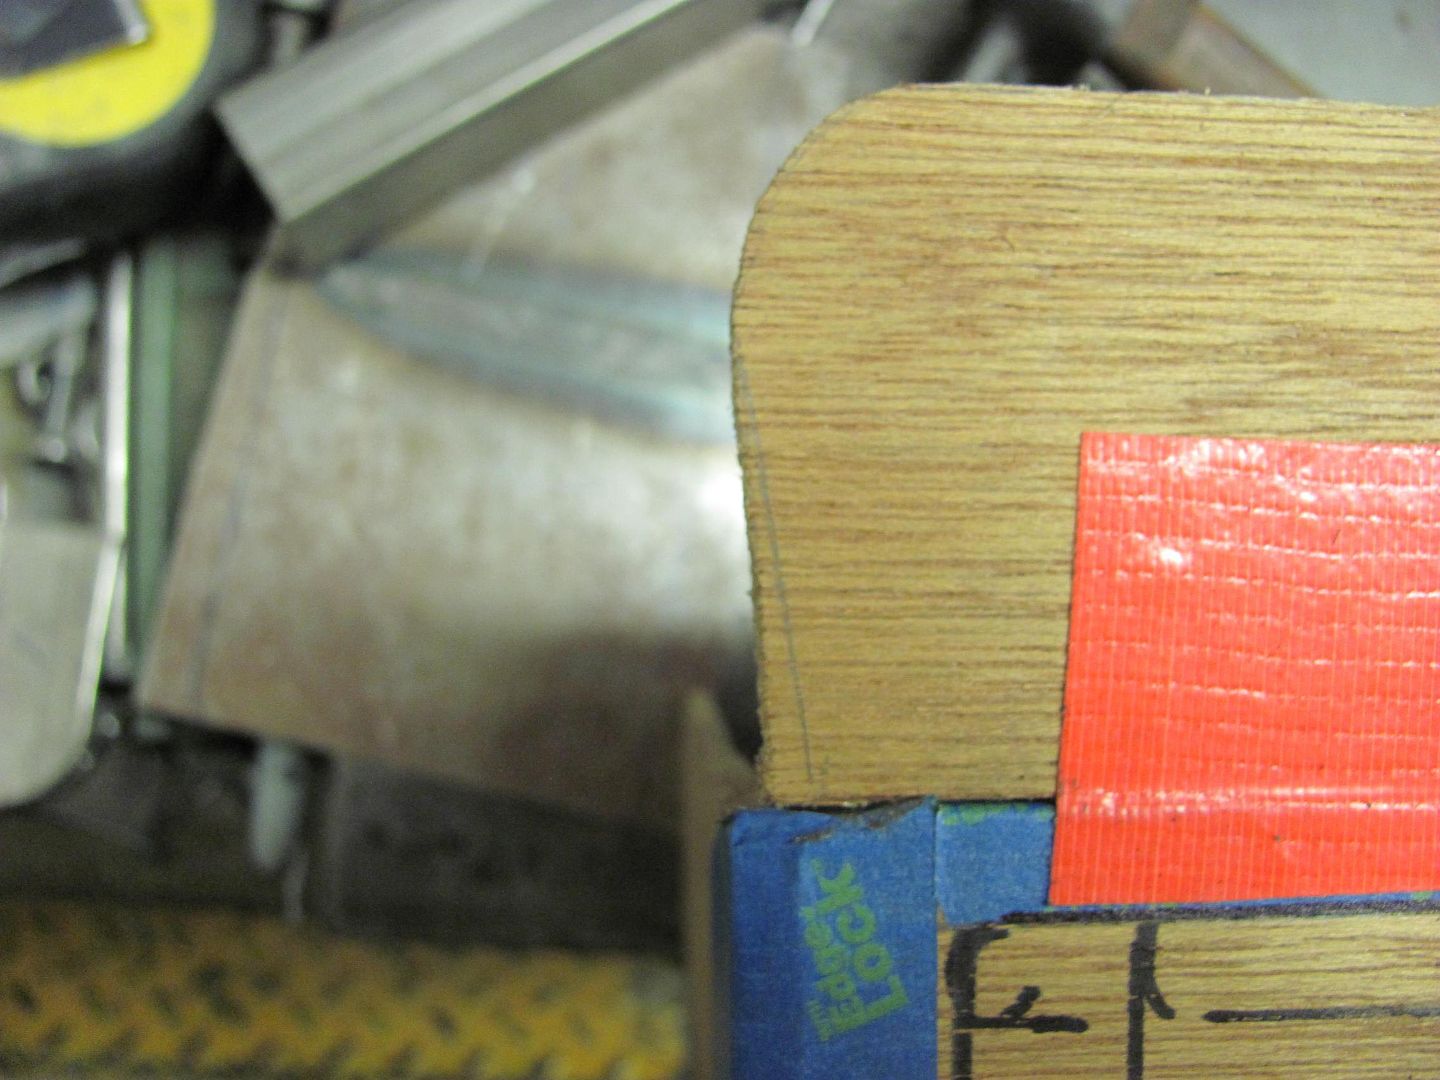
I use some modified lower dies in the press brake to fold the 1/4" flanges around the perimeter....
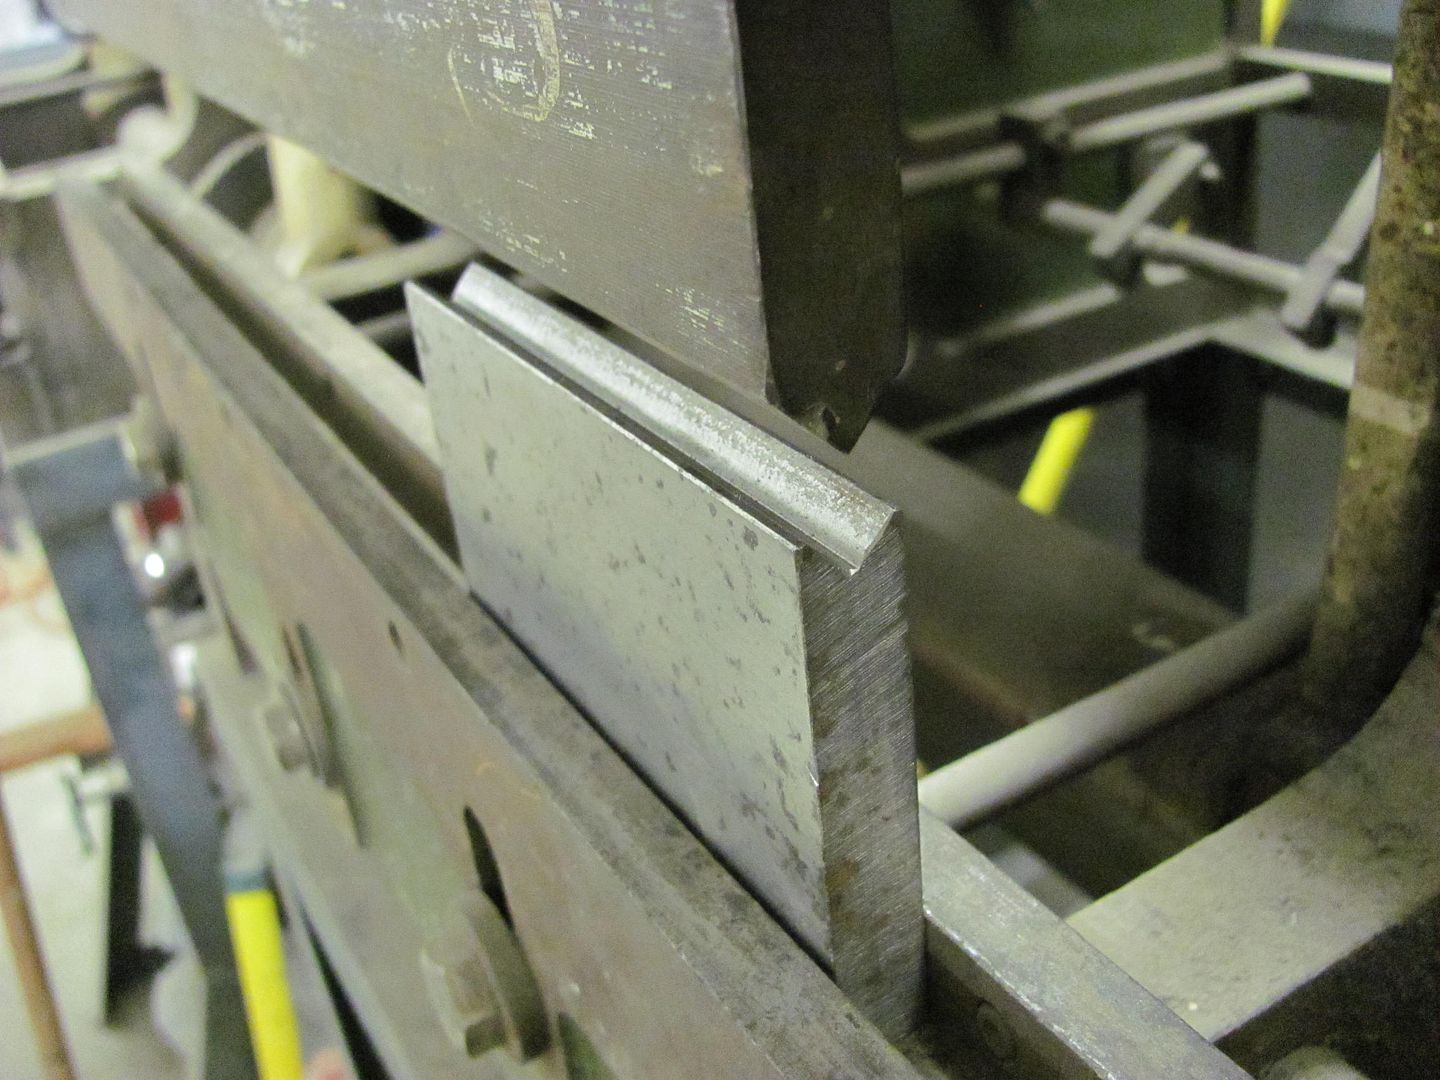

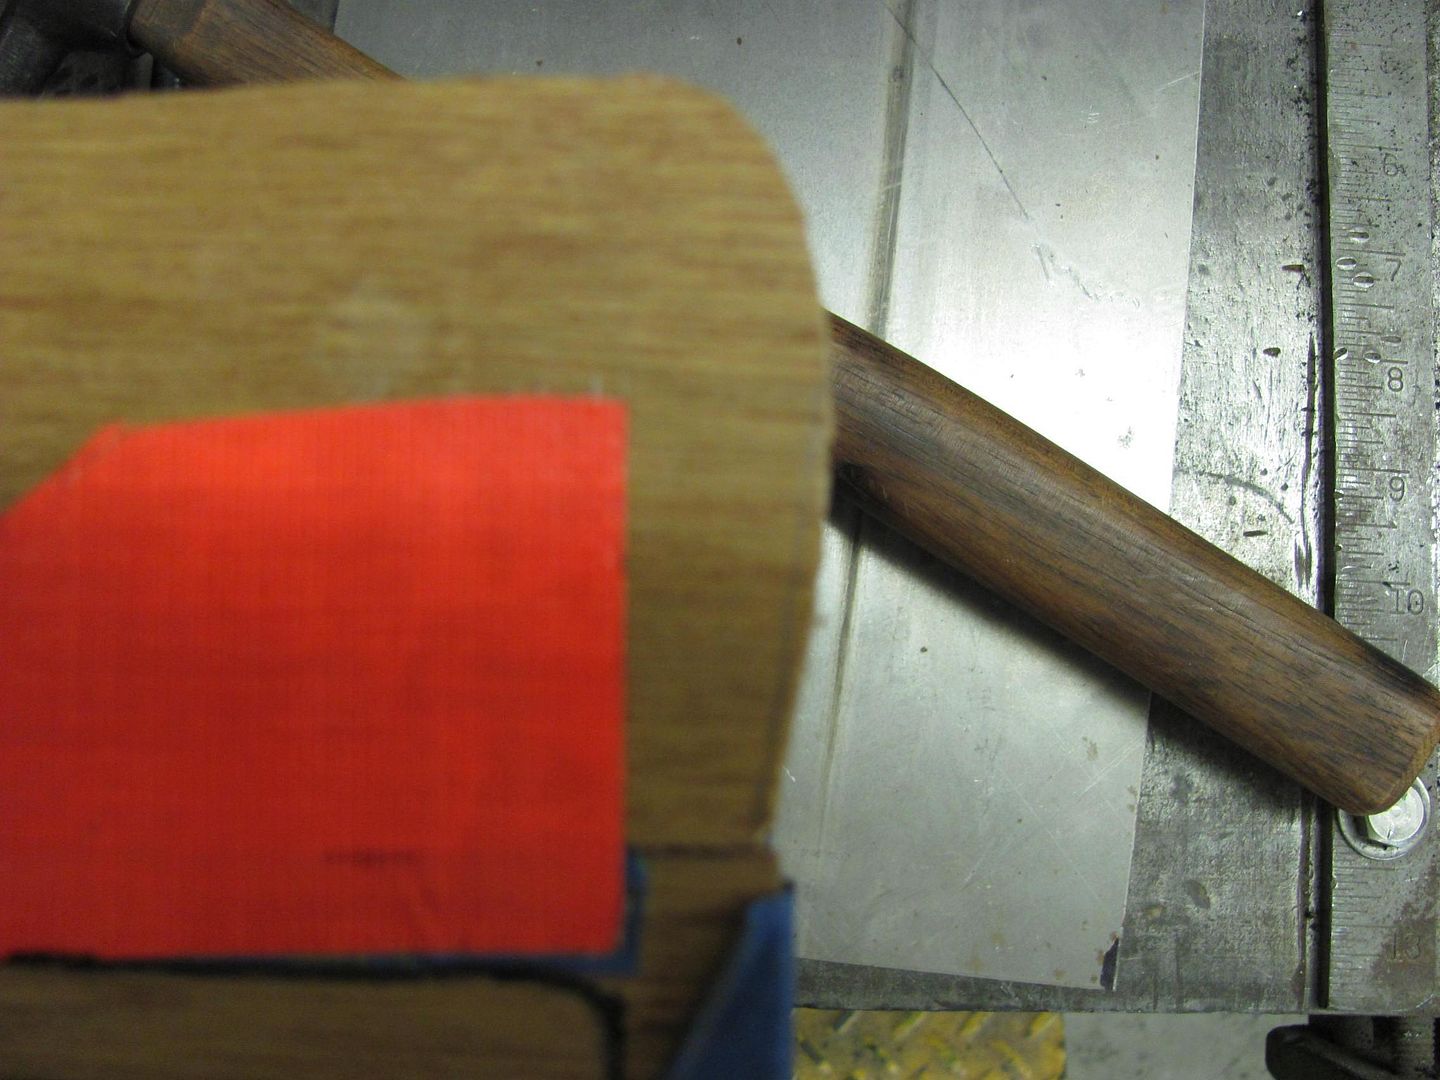
The folds were stopped shy of the corners, and a 1" diameter "anvil" was used to form each corner radius.
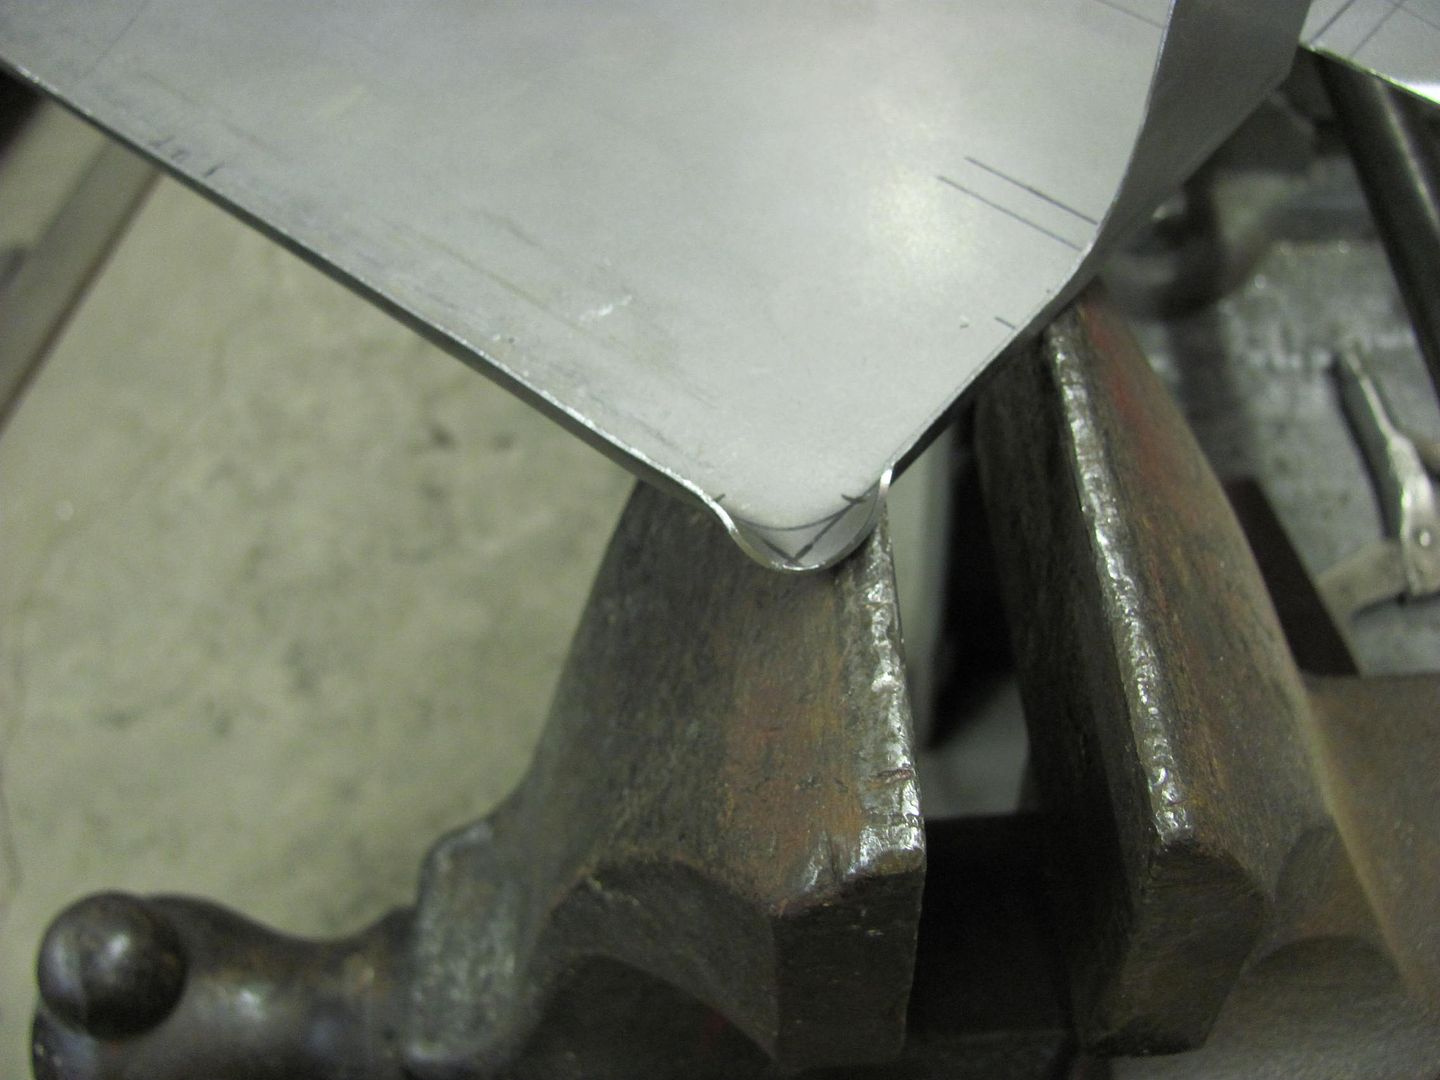
The process is shown in this video on a similar piece....
Video158.mp4 Video by rmccartney | Photobucket
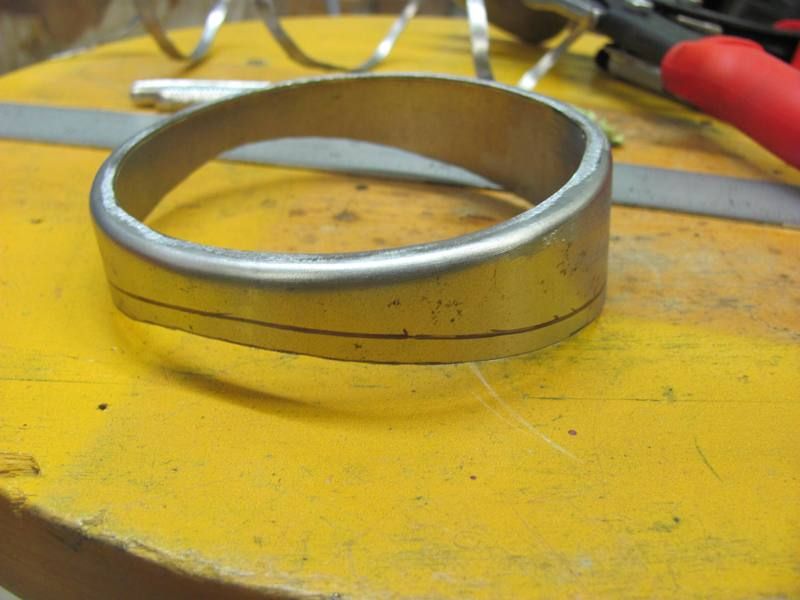
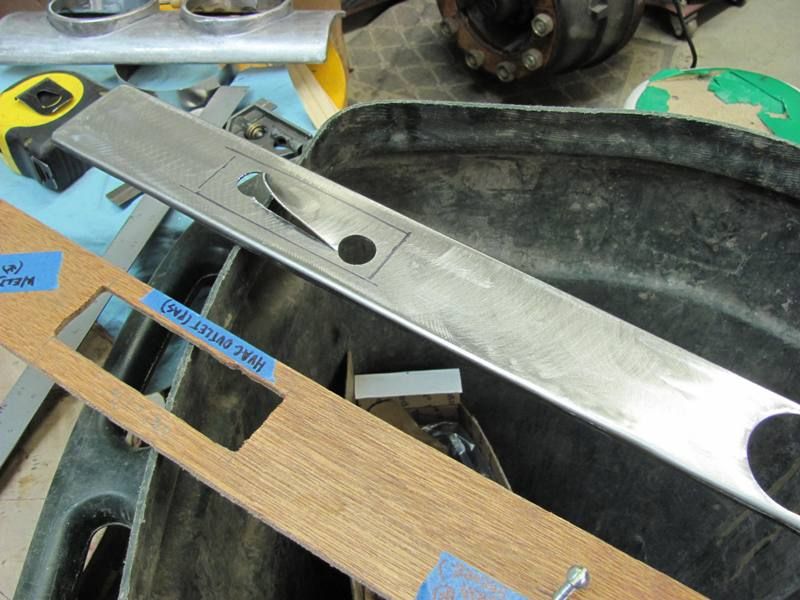
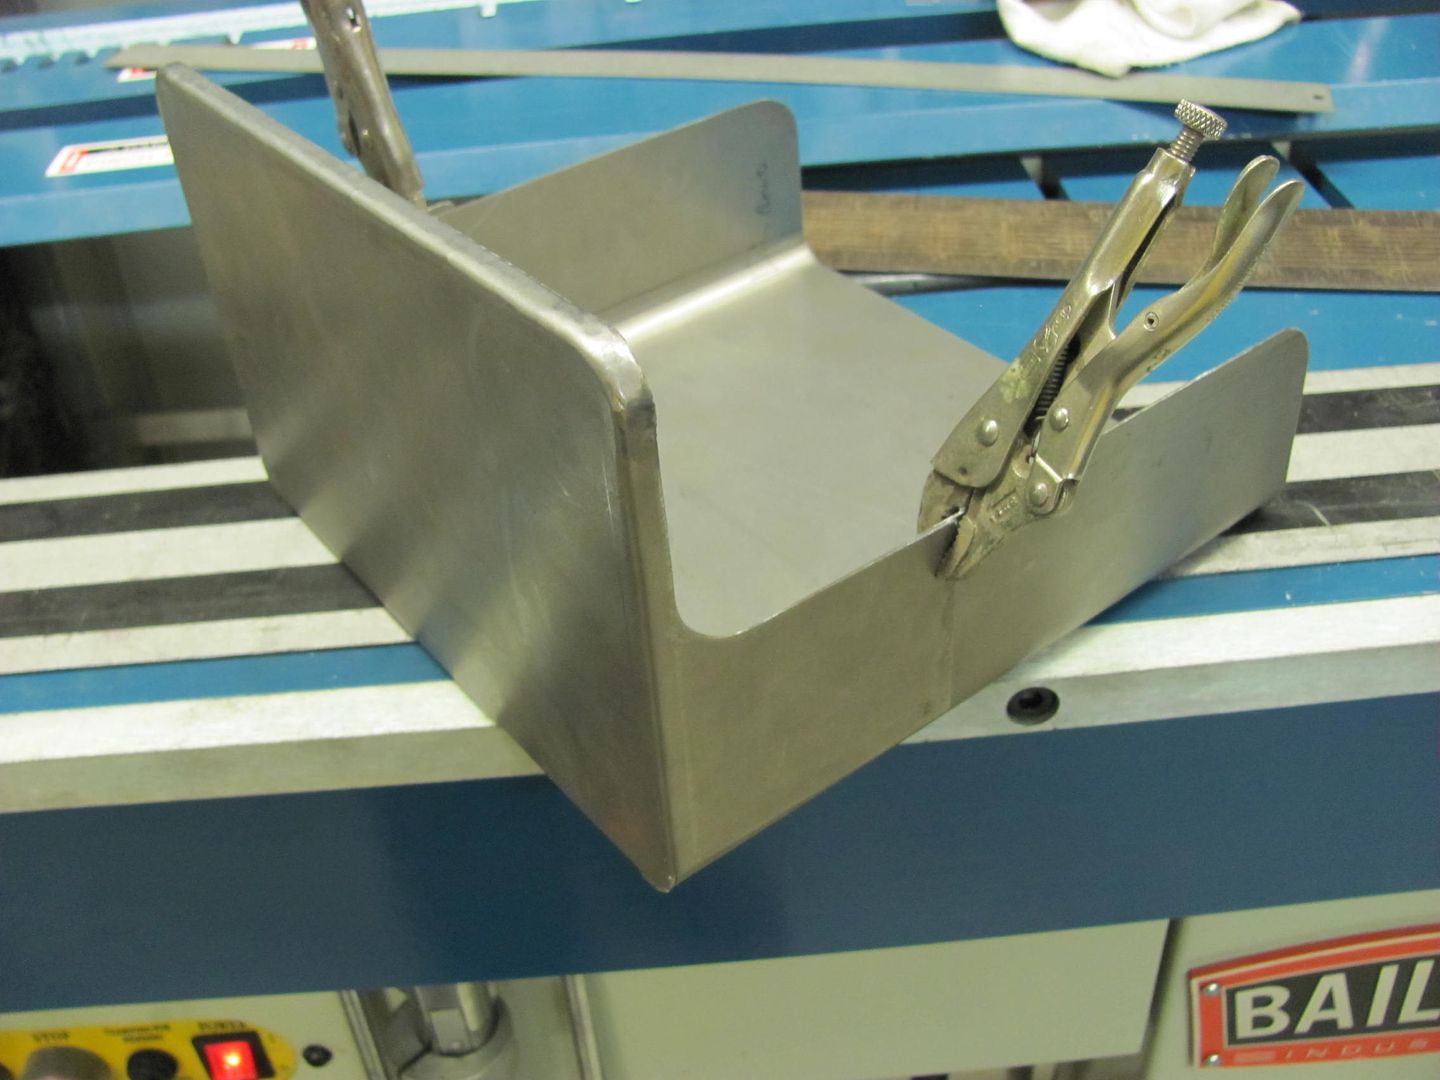
Finished radius....

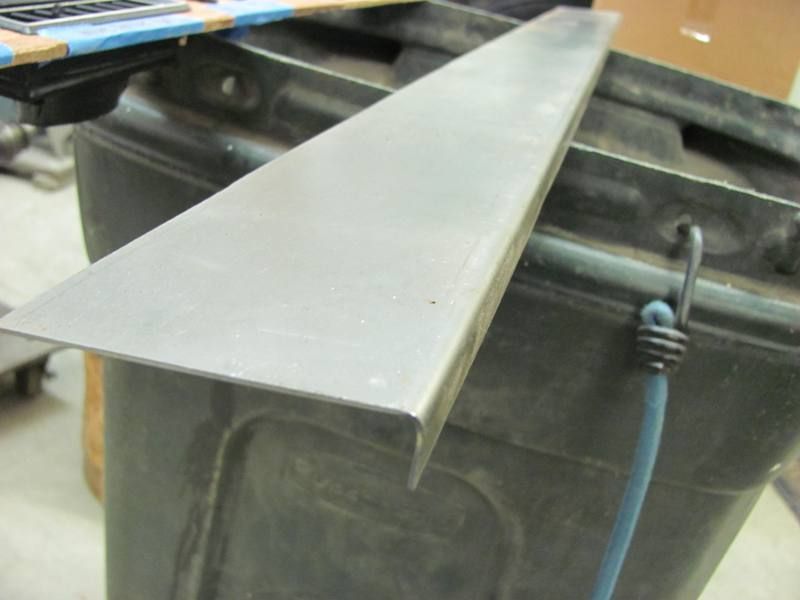
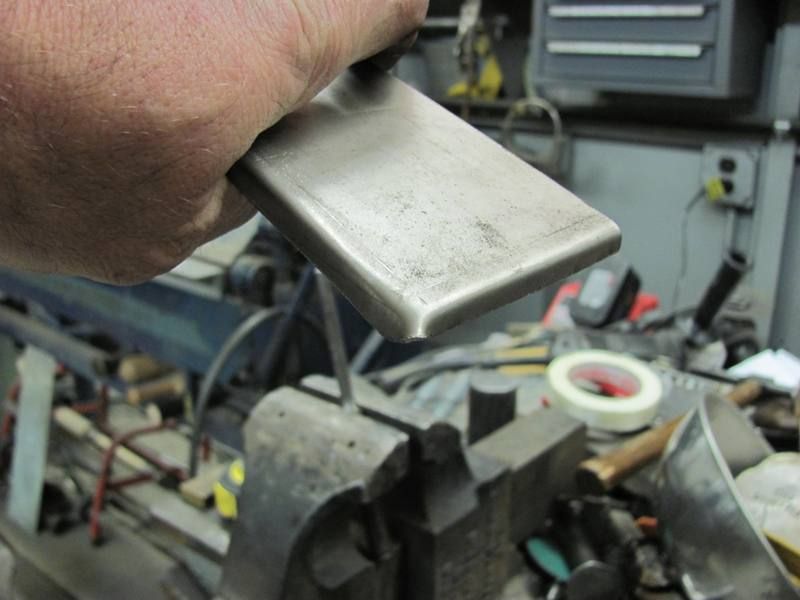
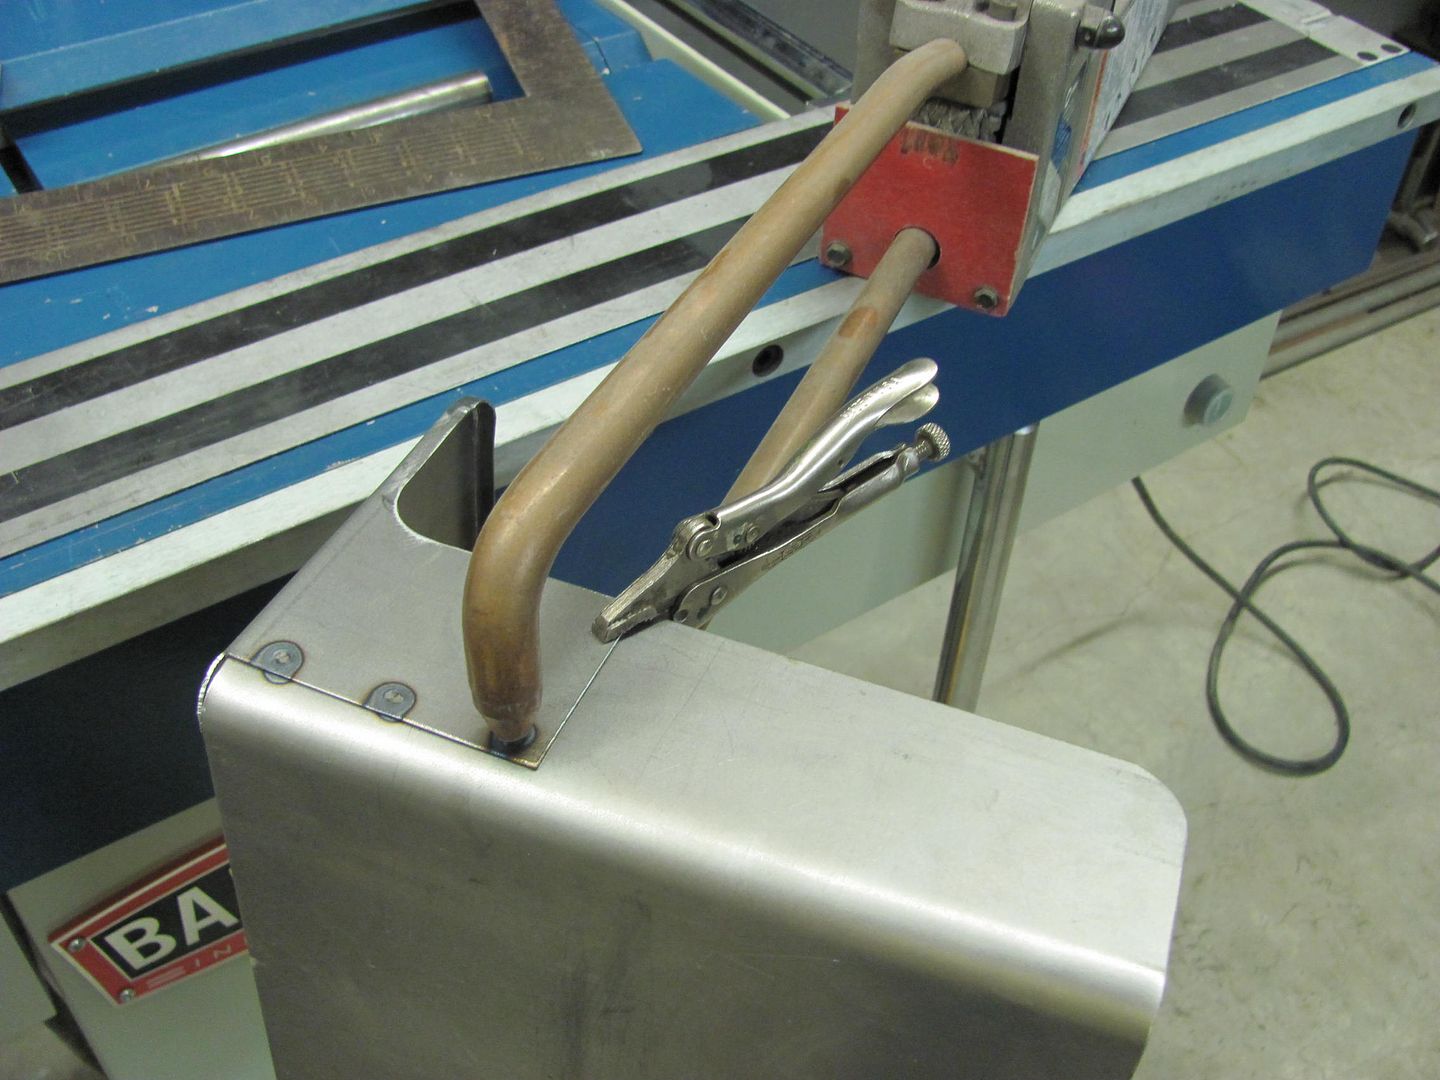
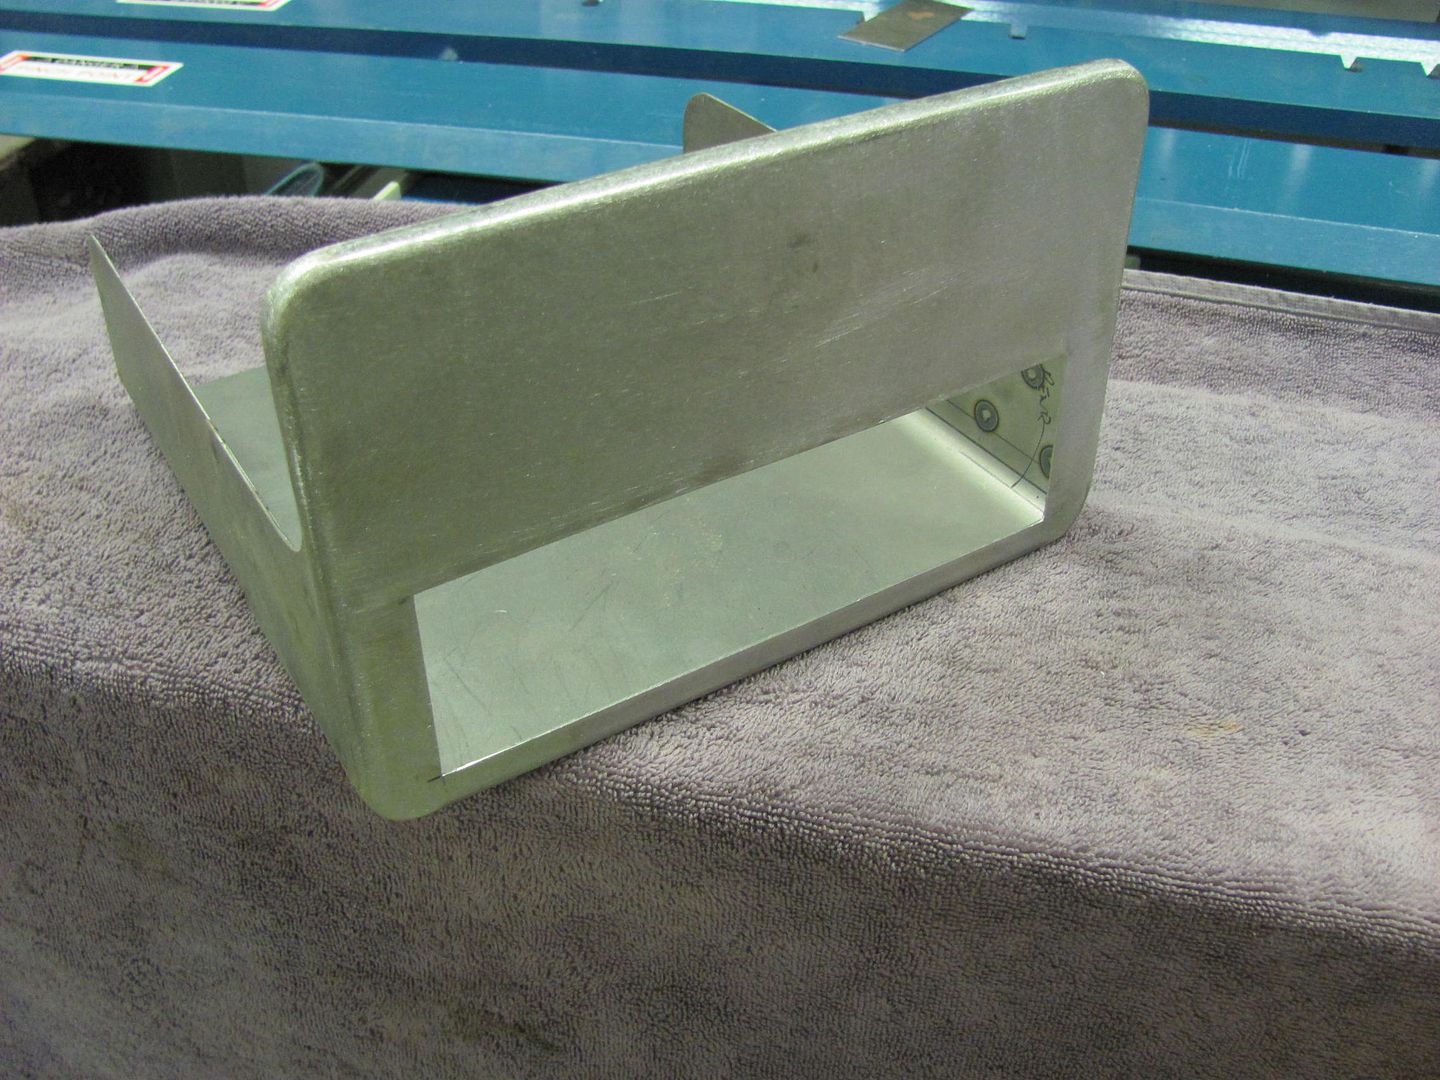
Then, to add a radius along the bottom, I used the Baileigh magnetic brake, adding a 7/8" steel rod to form the radius...
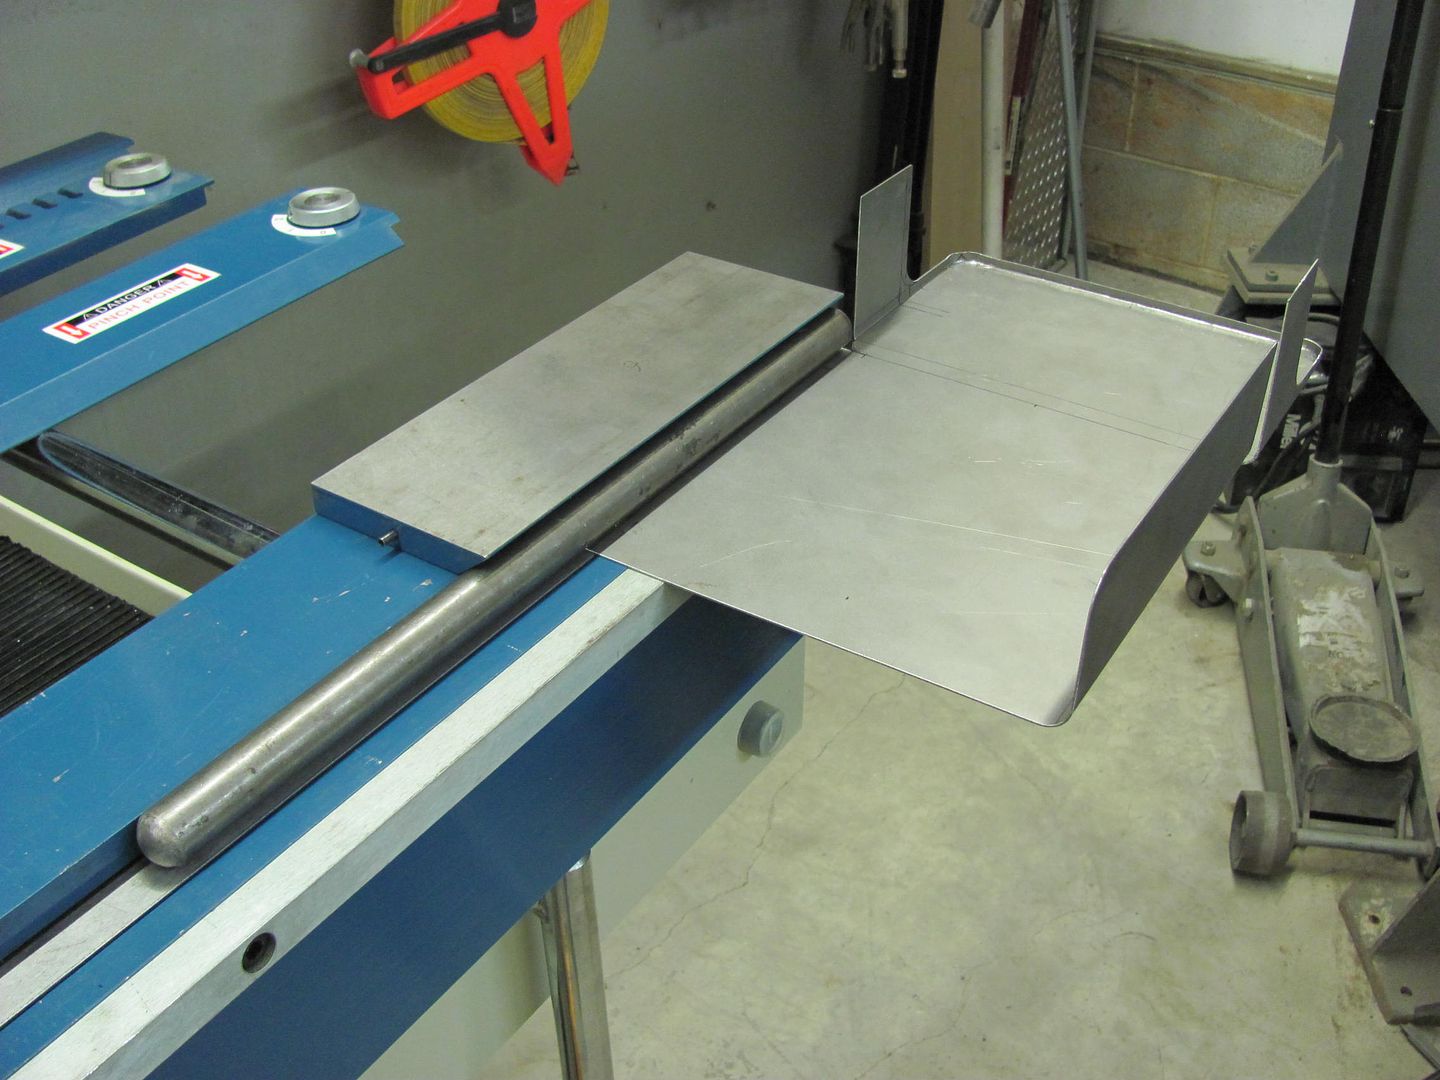
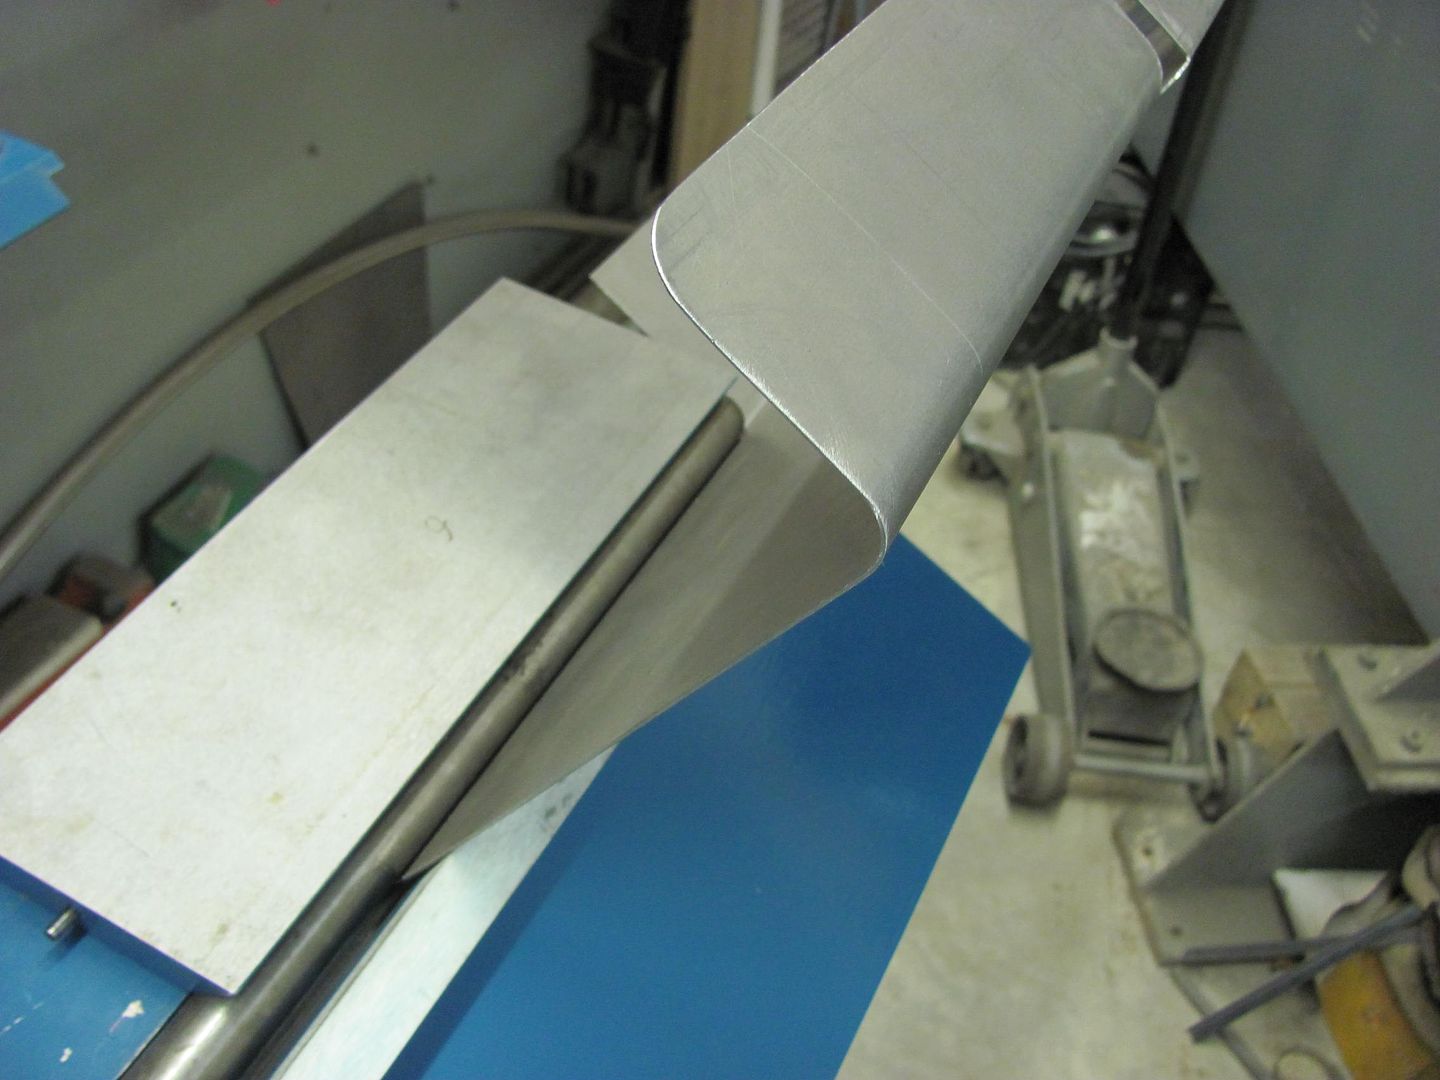
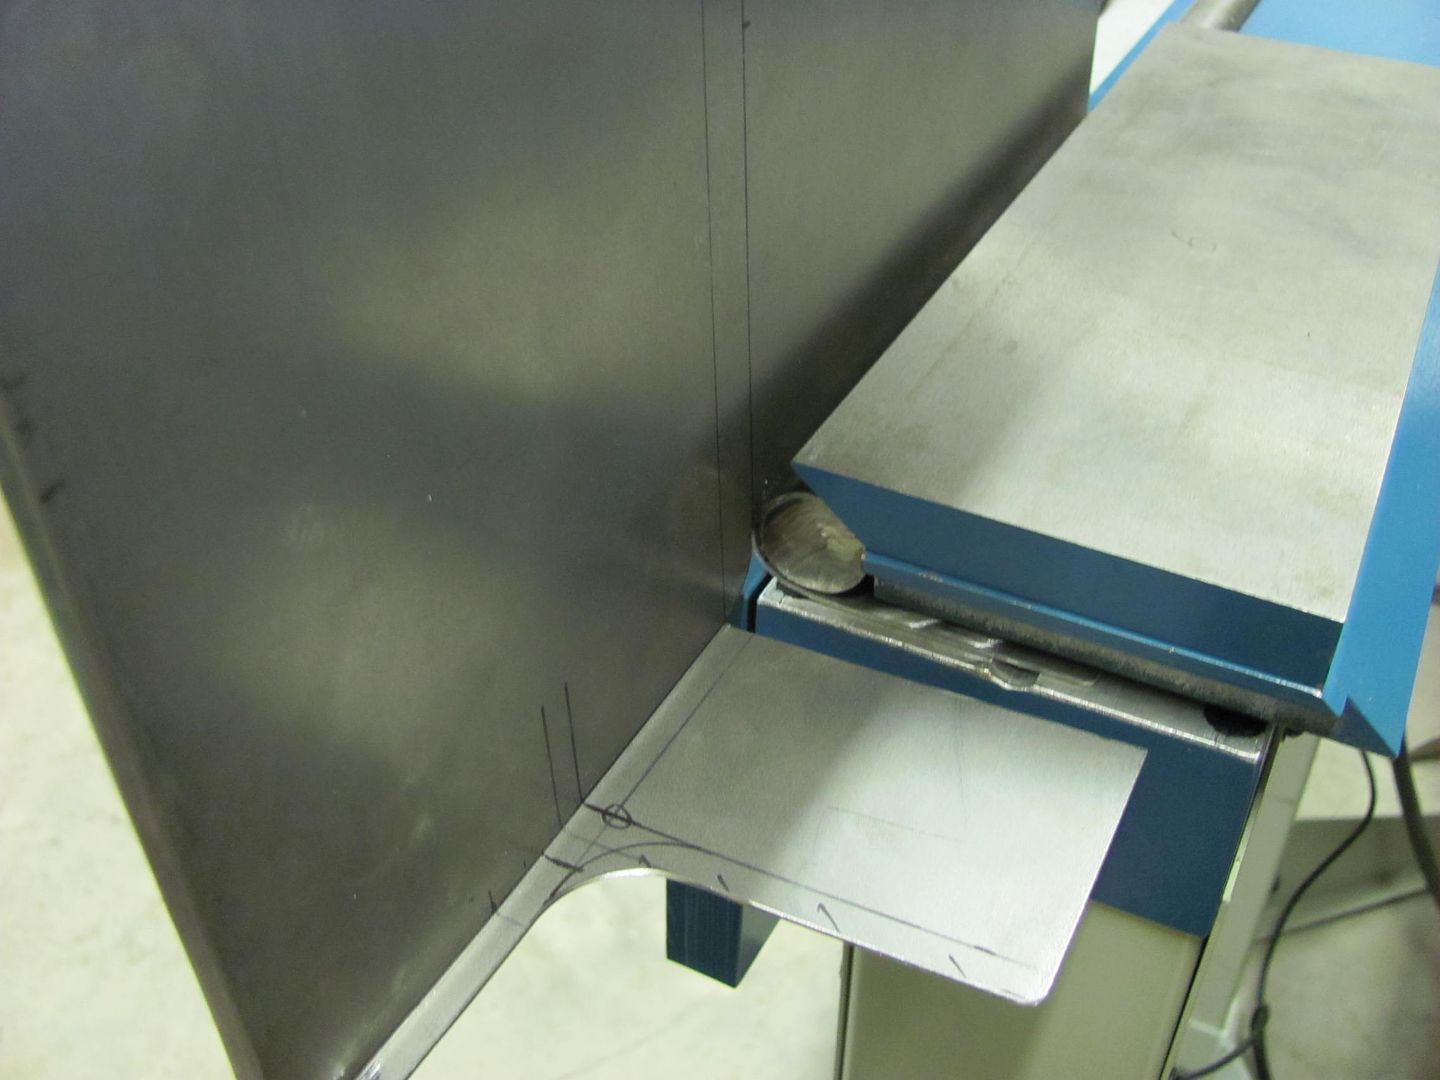
....and then the front was folded up...

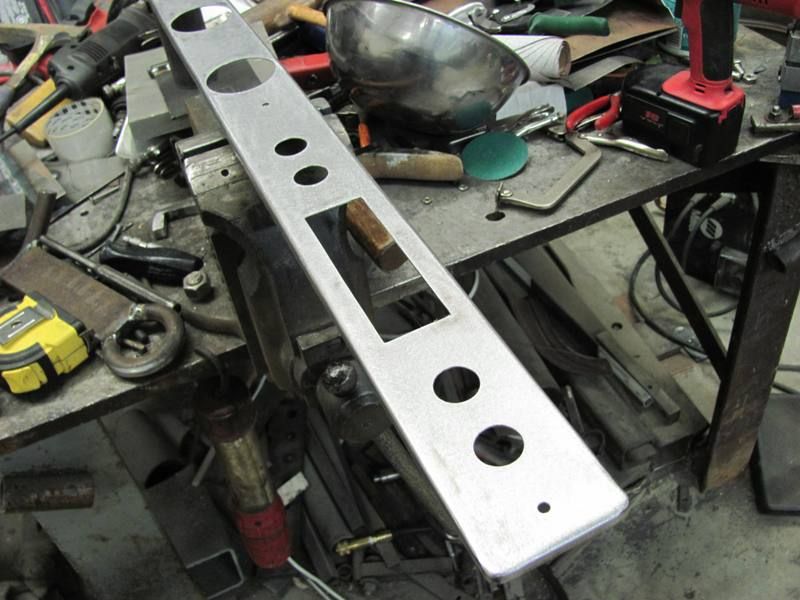
The front was squared up, then sides were clamped, and spot welded in place....
Din hole cut in place..
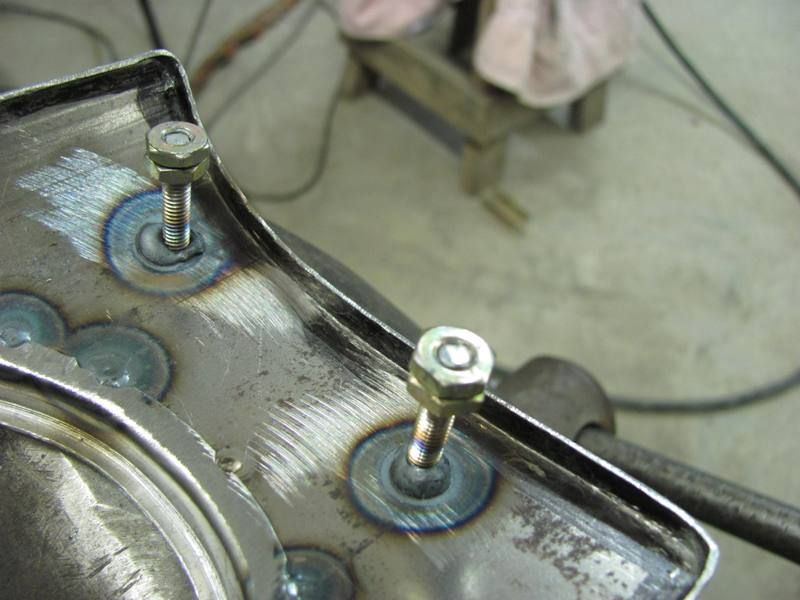
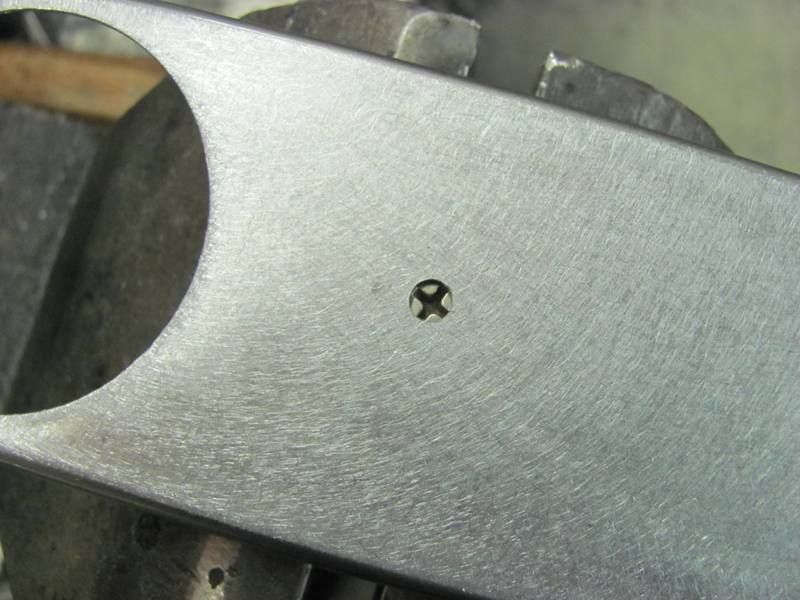
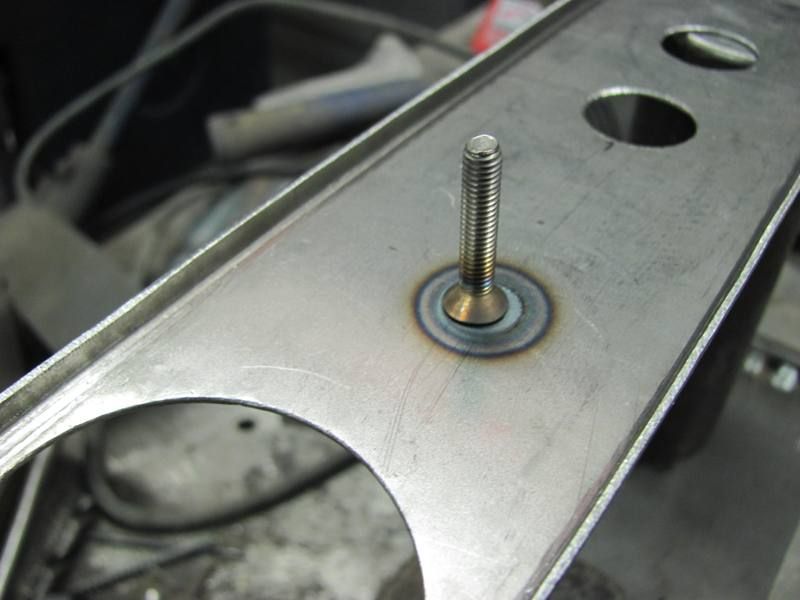
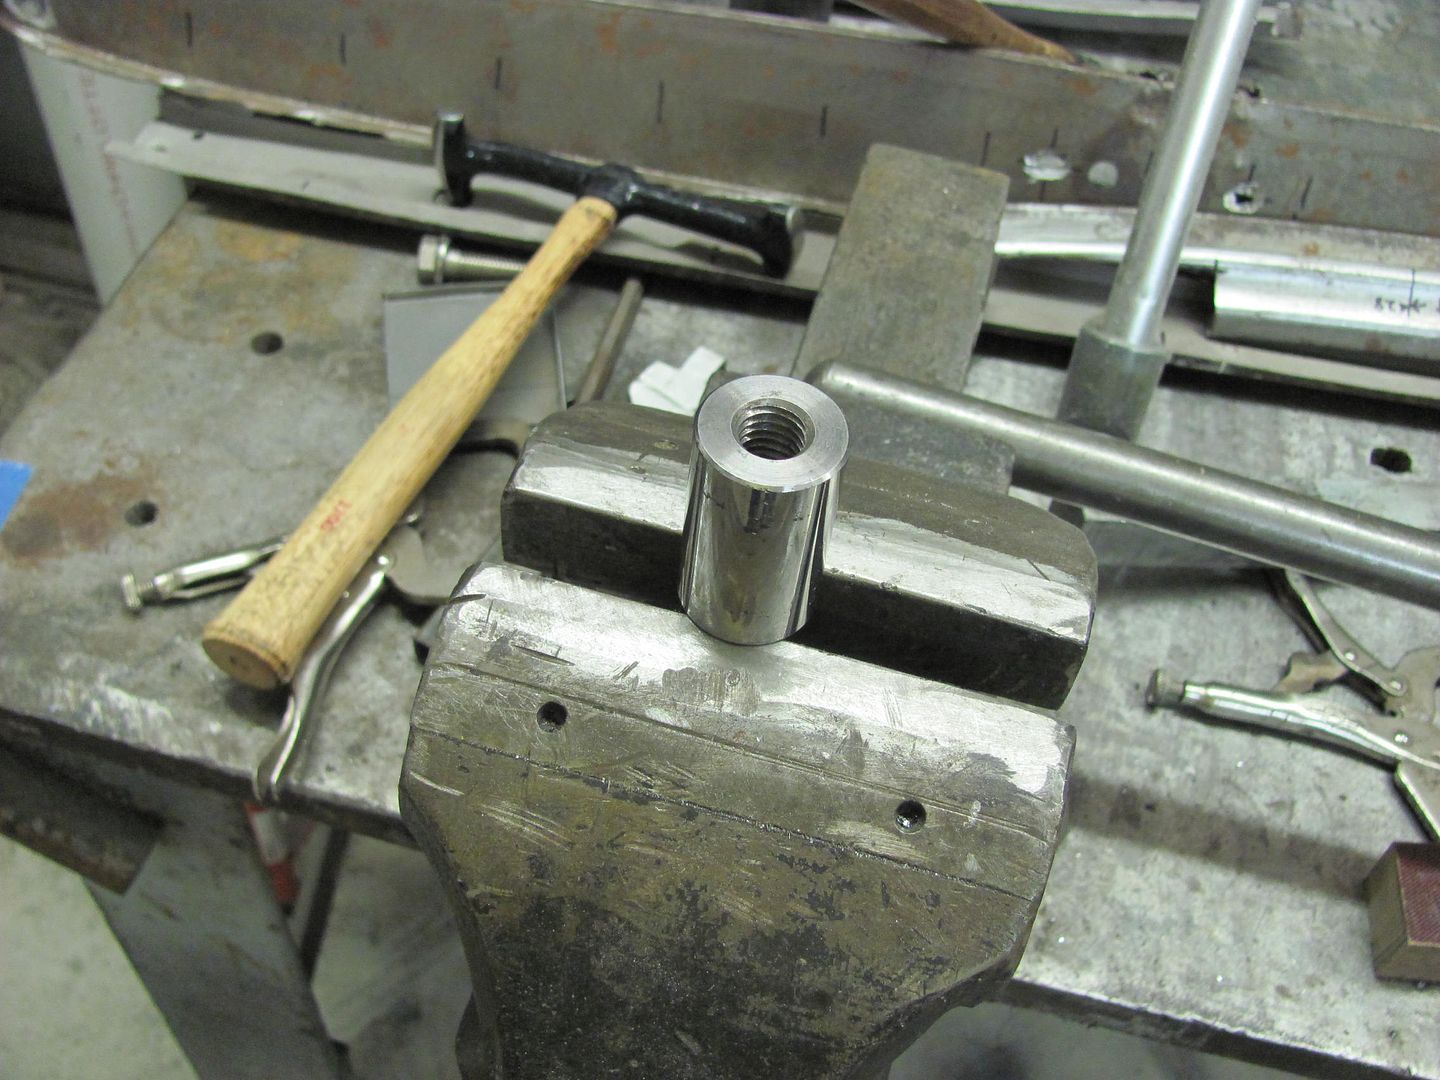
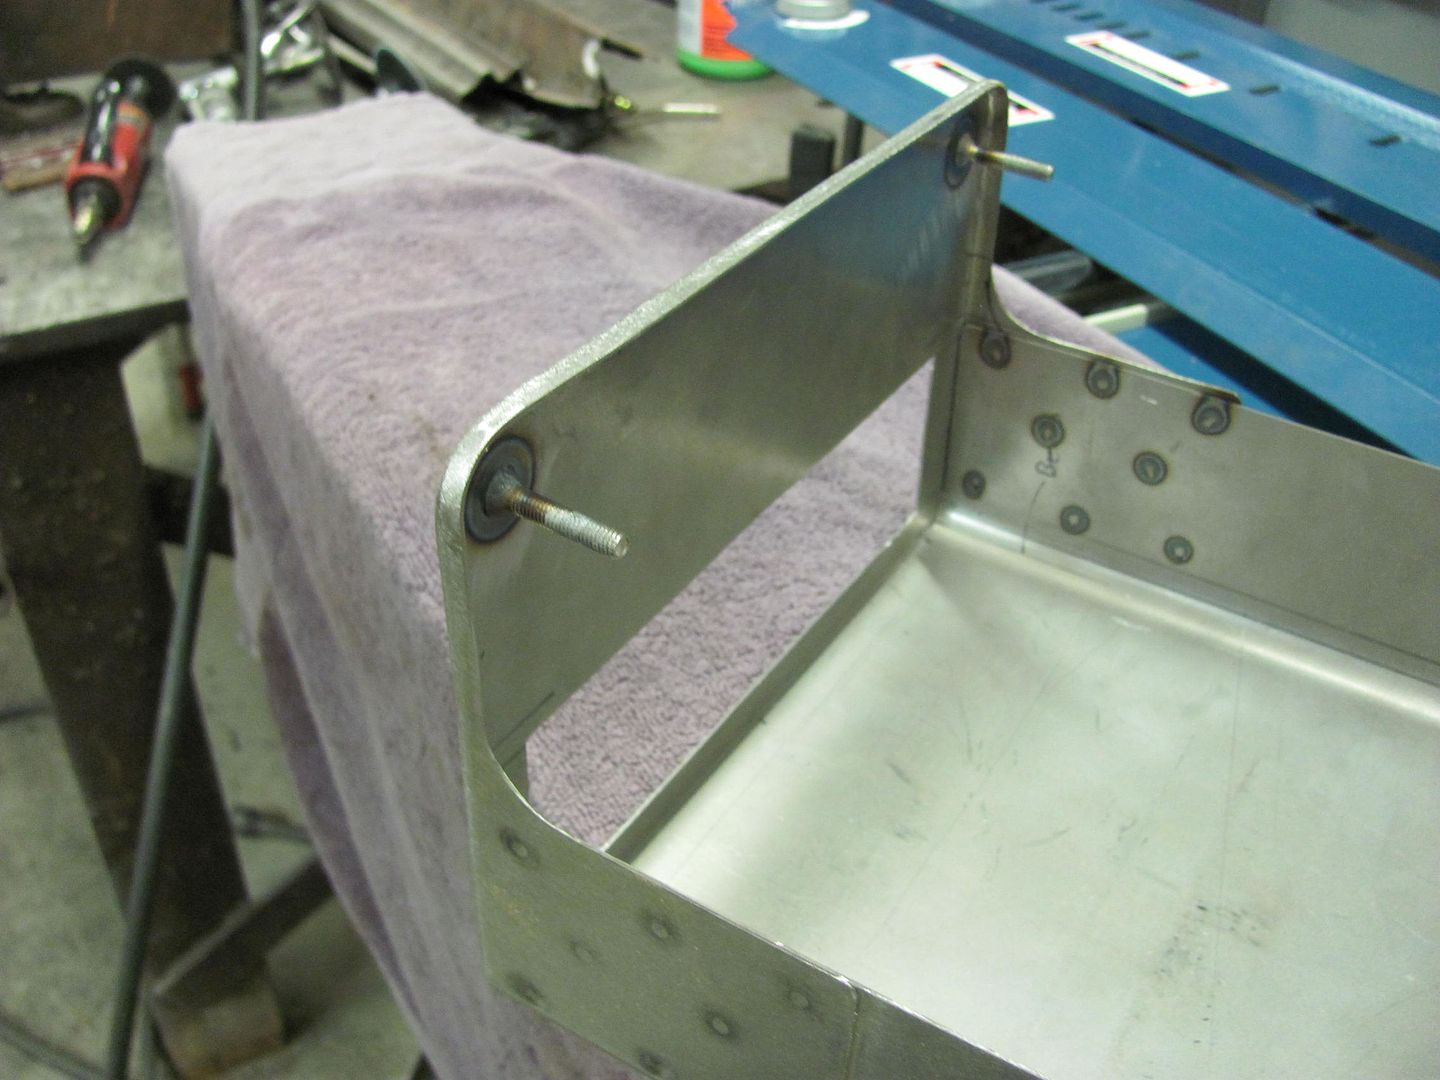
Hidden studs added....
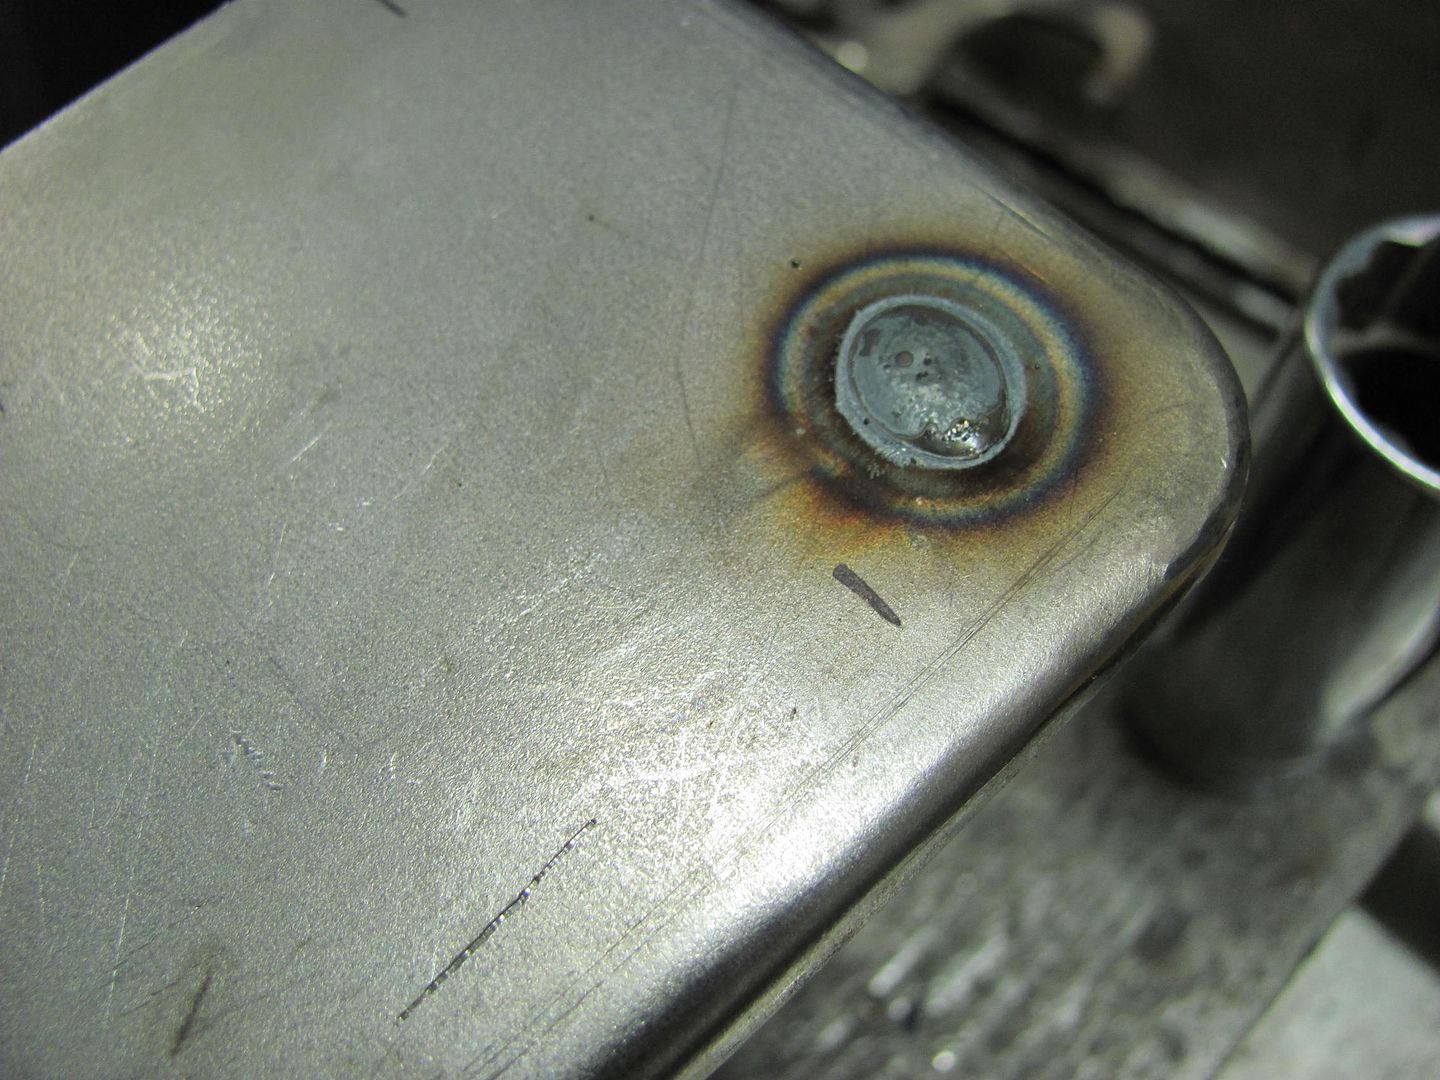
Note anti-seize on threads to prevent galling/stripping of the threads while the nut held the studs in the vise during welding.
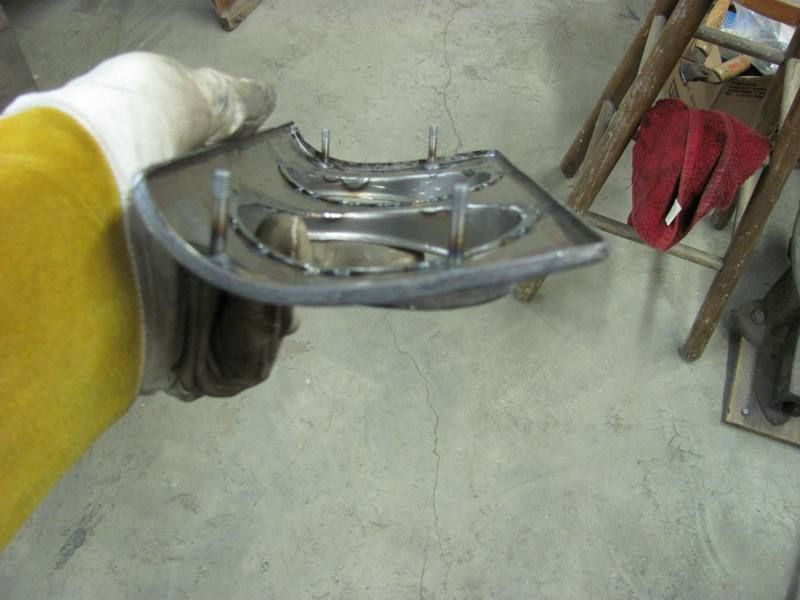
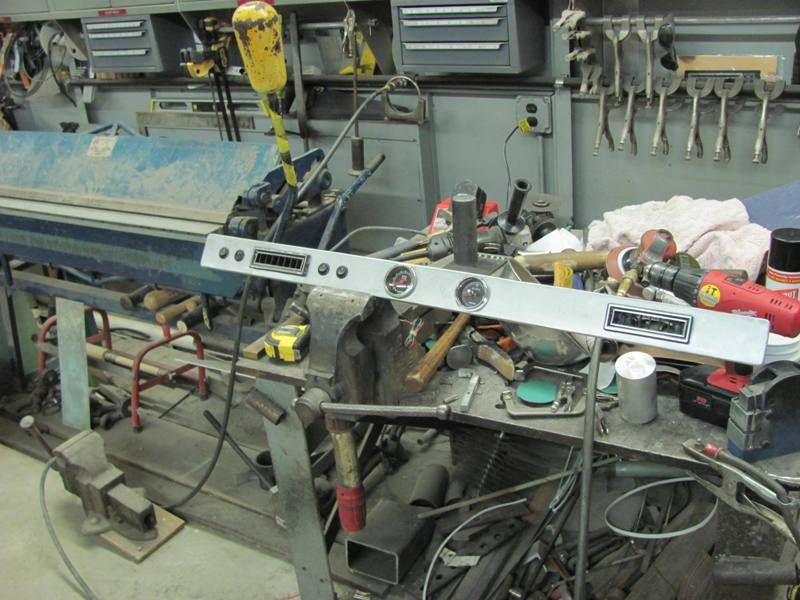
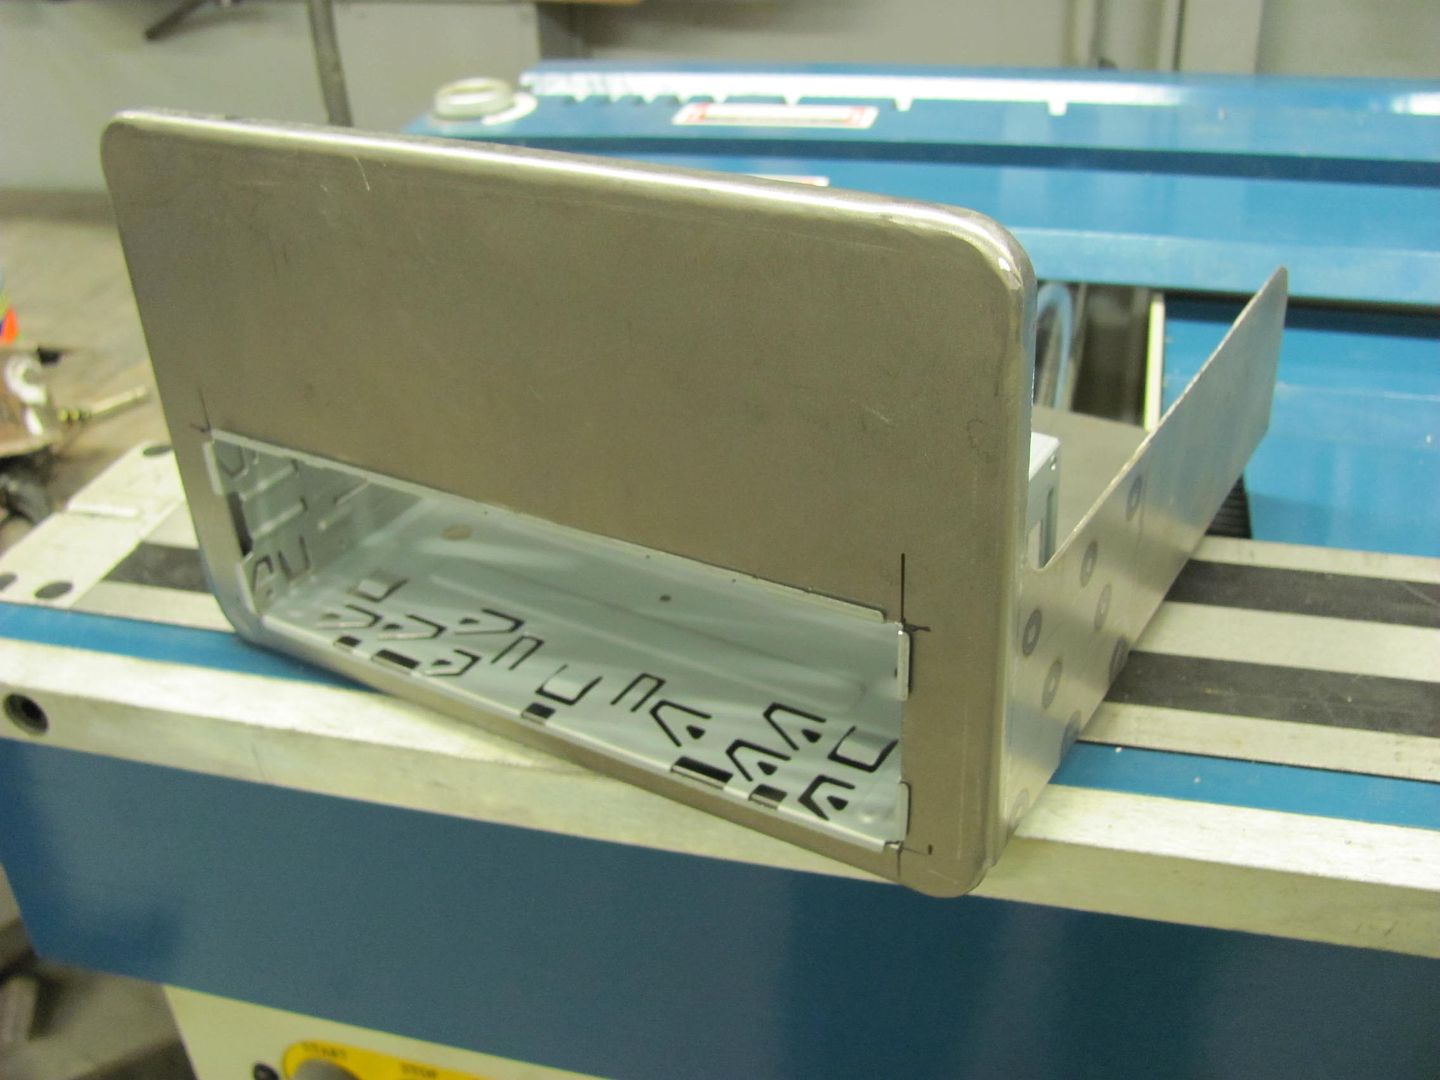
Welds for the studs cleaned up, and the radio test fit...
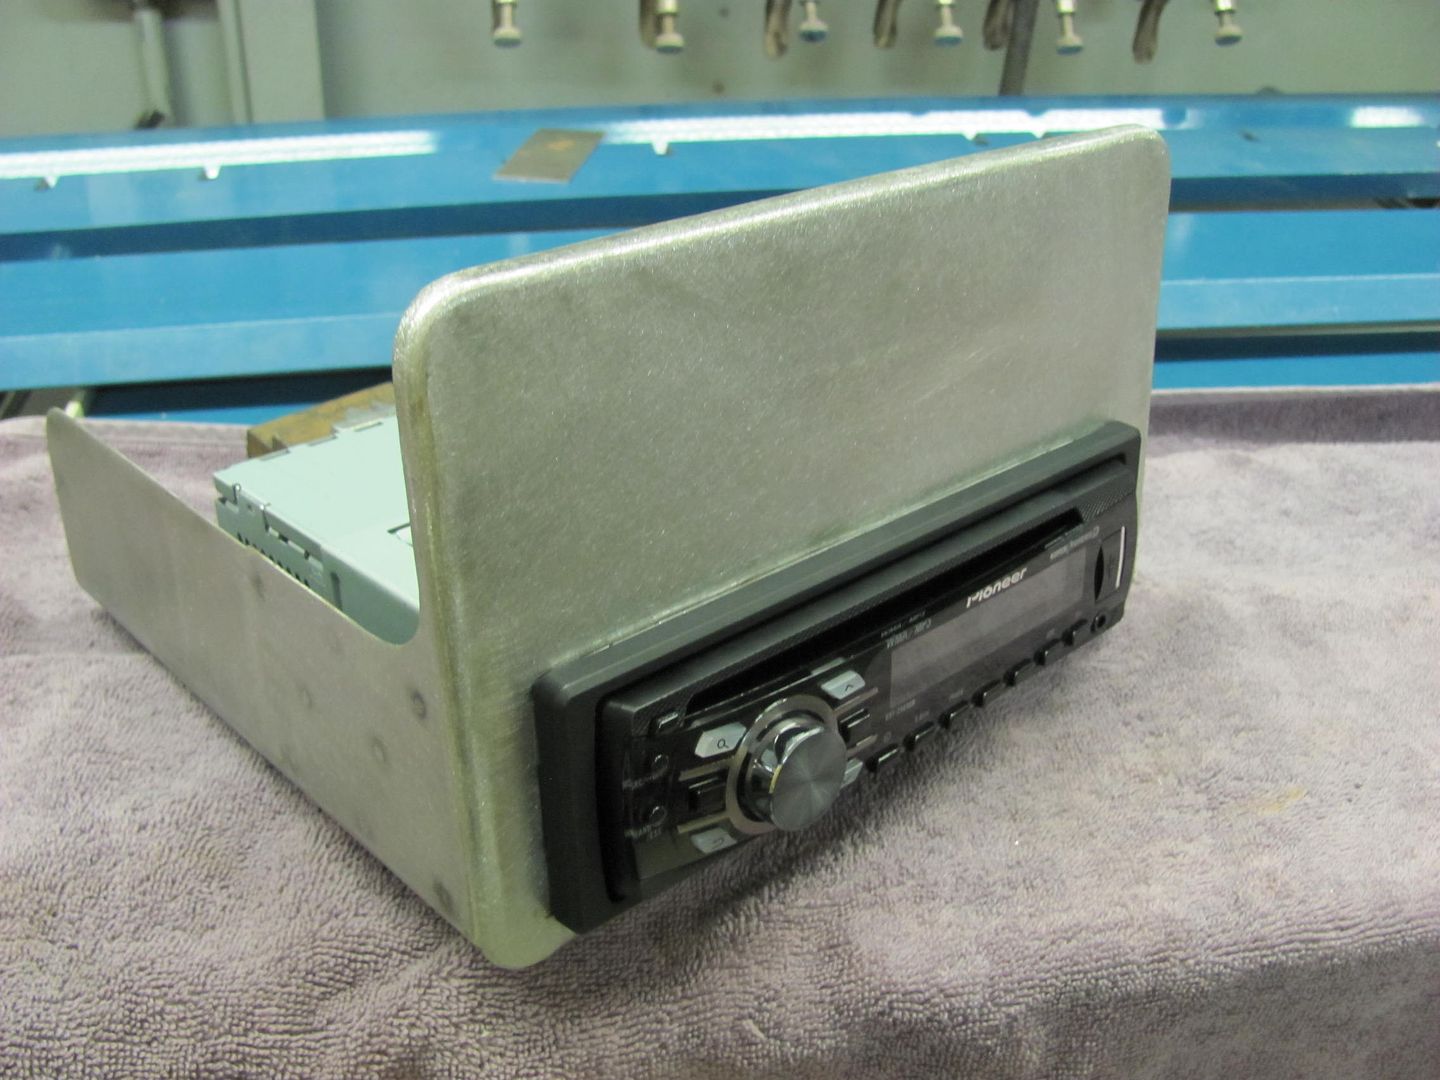
Some holes will be added to the rear of the side panels to attach support straps for the rear up to the dashboard during install... For now, All ready to go!!Robert
-
11-11-2013 06:44 PM #26
CHR Member
- Join Date
- Sep 2007
- Location
- New Bedford
- Car Year, Make, Model: 34 Ford 3W Coupe Replica
- Posts
- 14,754
As always, thanks for the lesson and the pictures!
-
11-11-2013 07:11 PM #27
CHR Member/Contributor
- Join Date
- Sep 2007
- Location
- Gardner, KS
- Car Year, Make, Model: '33 HiBoy Coupe, '32 HiBoy Roadster
- Posts
- 11,245
X2. Great detail work and pictures. Originally Posted by 34_40
Roger
Enjoy the little things in life, and you may look back one day and realize that they were really the BIG things.
-
11-12-2013 09:37 AM #28
CHR Member
- Join Date
- Jan 2004
- Location
- Macomb
- Car Year, Make, Model: '32 Ford 3W Coupe, 383 sbc
- Posts
- 1,593
Nice work. I have always been impressed by guys who can form metal like you do. You make it look so easy.
Lynn
'32 3W
There's no 12 step program for stupid!
http://photo.net/photos/Lynn%20Johanson
-
11-14-2013 05:45 PM #29
CHR Member
- Join Date
- Oct 2012
- Location
- Narberth
- Car Year, Make, Model: 32 Brookville Hi Boy; 95 Toyota Supra
- Posts
- 1,029
Very nice. Now the beauty of fabrication is music to my eyes and then later it could be music to my ears.Nick
Brookville '32 hi-boy roadster
TriStar Pro Star 427 CID
-
11-15-2013 04:00 AM #30
CHR Member
- Join Date
- Apr 2013
- Location
- Pottstown
- Posts
- 169
It is a pleasure to see a true craftsman at work and the finished products they can fabricate...........very nice work.
"good work ain't cheap, and cheap work ain't good"
 Reply With Quote

Posting Permissions
- You may not post new threads
- You may not post replies
- You may not post attachments
- You may not edit your posts

This site is up more often lately, but very little traffic.
Dead!