Welcome to Club Hot Rod!  The premier site for everything to do with Hot Rod, Customs, Low Riders, Rat Rods, and more. 

  •  » Members from all over the US and the world!
  •  » Help from all over the world for your questions
  •  » Build logs for you and all members
  •  » Blogs
  •  » Image Gallery
  •  » Many thousands of members and hundreds of thousands of posts! 

YES! I want to register an account for free right now!  p.s.: For registered members this ad will NOT show


Thread: 
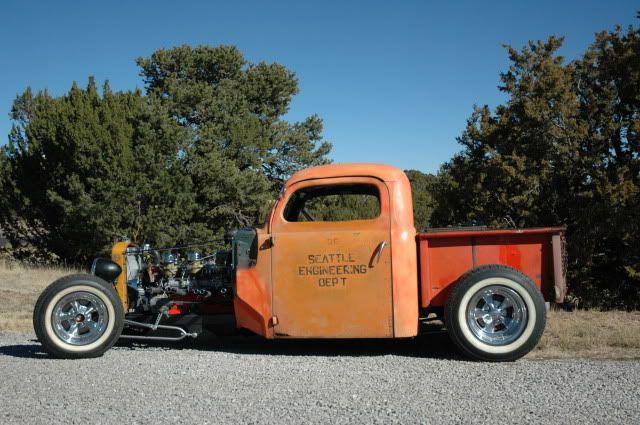
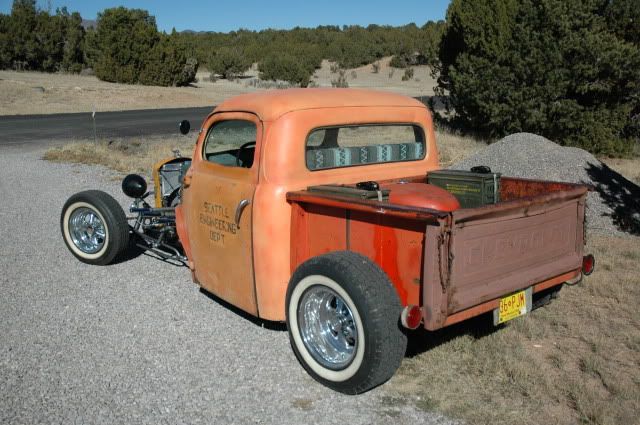
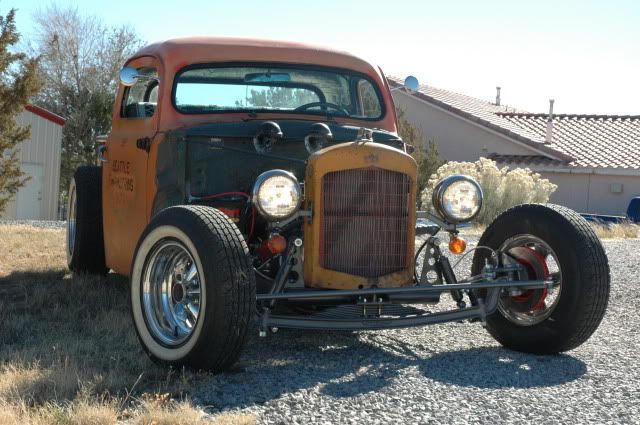
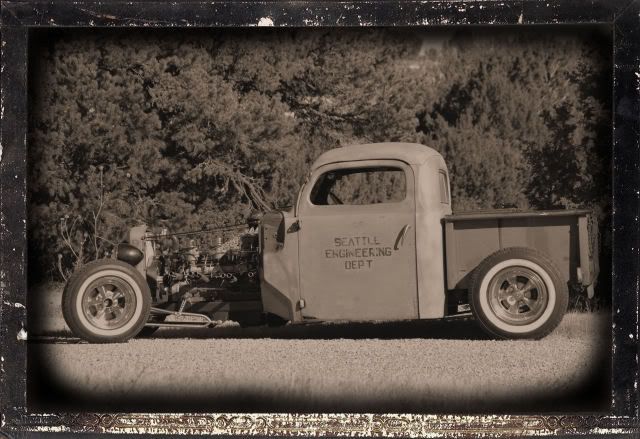
1951 Ford F1 Rat Rod Truck


Reply To Thread
Page 2 of 4 FirstFirst 1 2 3 4 LastLast
Results 16 to 30 of 60
  1. #16
    dmw56's Avatar
    dmw56 is offline CHR Member Visit my Photo Gallery
    Join Date
    Jul 2008
    Location
    Edgewood, New Mexico, United States
    Car Year, Make, Model: 30,34,39,50,54,65,68,70,71,72
    Posts
    571

    After I got the engine in I realized it was way to low. So I went to the hairpins and I have 4" of clearance under the pan. I used a cross member and mounts from Chassis Engineering.


    Livin' on Route 66

  2. #17
    dmw56's Avatar
    dmw56 is offline CHR Member Visit my Photo Gallery
    Join Date
    Jul 2008
    Location
    Edgewood, New Mexico, United States
    Car Year, Make, Model: 30,34,39,50,54,65,68,70,71,72
    Posts
    571

    Radiator is an aluminum universal from Speedway Motors


    Headlights BLC


    Universal weld in battery box from Speedway Motors.


    Made some upper shock mounts out of 3/8".


    Livin' on Route 66

  3. #18
    dmw56's Avatar
    dmw56 is offline CHR Member Visit my Photo Gallery
    Join Date
    Jul 2008
    Location
    Edgewood, New Mexico, United States
    Car Year, Make, Model: 30,34,39,50,54,65,68,70,71,72
    Posts
    571

    Coming up next......the Chop!
    Livin' on Route 66

  4. #19
    Rickomatic's Avatar
    Rickomatic is offline CHR Member Visit my Photo Gallery
    Join Date
    Feb 2007
    Location
    SLC
    Car Year, Make, Model: 52 Chevy 2-door Sedan w/ a 350/350 combo
    Posts
    341

    I can't believe I missed this one. Nice truck. It looks safe and yet still fun. Nice stance and the straight 6 is a thing of beauty. Way to go!


    Pride Runs Deep

  5. #20
    techinspector1's Avatar
    techinspector1 is offline CHR Member Visit my Photo Gallery
    Join Date
    May 2003
    Location
    Zephyrhills, Florida, USA
    Car Year, Make, Model: '32 Henway
    Posts
    12,423

    Those front shock mounts knock me out. You really have an eye for fabricating a beautiful piece.

    The lines are perfect and now you're going to ruin it with a CHOP???

  6. #21
    dmw56's Avatar
    dmw56 is offline CHR Member Visit my Photo Gallery
    Join Date
    Jul 2008
    Location
    Edgewood, New Mexico, United States
    Car Year, Make, Model: 30,34,39,50,54,65,68,70,71,72
    Posts
    571

    Thanks Eddie. Well the chops already been done in the first pictures. It was top heavy without it.

    This was my first attempt to chop a top. I used build my own race cars and cut the tops off to get the roll cages in.
    I decided to take out 4" and leave the rear window the original size just drop it down 4" where its level with the windshield and door windows.


    It was easier for me to do it in 2 parts so I masked out a line to cut the roof in two.

    Livin' on Route 66

  7. #22
    dmw56's Avatar
    dmw56 is offline CHR Member Visit my Photo Gallery
    Join Date
    Jul 2008
    Location
    Edgewood, New Mexico, United States
    Car Year, Make, Model: 30,34,39,50,54,65,68,70,71,72
    Posts
    571

    I cut the roof first with the cut off wheel.


    Then I cut the posts with the Sawzal. If you use a Sawzal start out slow because it will cut through the posts real fast.


    Livin' on Route 66

  8. #23
    dmw56's Avatar
    dmw56 is offline CHR Member Visit my Photo Gallery
    Join Date
    Jul 2008
    Location
    Edgewood, New Mexico, United States
    Car Year, Make, Model: 30,34,39,50,54,65,68,70,71,72
    Posts
    571

    The roof section didn't quite line up with the lower posts so I made a relief cut in the upper corners to spread the upper posts to match the lower. I also had to cut a relief cut to widen the post a bit.


    I actually had to split the post 4 ways to get it to fit


    Livin' on Route 66

  9. #24
    dmw56's Avatar
    dmw56 is offline CHR Member Visit my Photo Gallery
    Join Date
    Jul 2008
    Location
    Edgewood, New Mexico, United States
    Car Year, Make, Model: 30,34,39,50,54,65,68,70,71,72
    Posts
    571

    After I got the front lined up and tacked into place I cut the doors and then the rear roof section. I removed 4" from underneath the rear window to lower it.


    I still need to trim a little of the rear for things line up better. I can use the piece I removed from under the window for the section on the roof. I just mocked up the rear section for now.


    I think it looks great. Not bad for a first timer and a days work. It was very intimidating at first but after I got started it was all that difficult. So if any of you have reservations about doing a chop I'd encourage you to just go for it. Just make sure you do your planning, get Tex Smith's book on "How to Chop a Top", it's invaulable, measure 3 times then measure again before you make any cuts. It wasn't that hard. Not that I'm ready for that Mercury yet! But if you have basic metal working skills its doable!

    Before


    After


    Still need to finish fitting the rear section, the section on the roof, the doors and finish up all the welds.
    Livin' on Route 66

  10. #25
    dmw56's Avatar
    dmw56 is offline CHR Member Visit my Photo Gallery
    Join Date
    Jul 2008
    Location
    Edgewood, New Mexico, United States
    Car Year, Make, Model: 30,34,39,50,54,65,68,70,71,72
    Posts
    571

    I trimmed up the rear section and tacked into place.


    The sides didn't line up there was a gap of about 3/4".


    Made some relief cuts above and below the cut to make everything come together.


    Now I have a 2" gap in the roof to be filled.


    Welded in the side rain gutter pieces. The pieces are from the A pillar with some modifications so the will fit.


    Livin' on Route 66

  11. #26
    dmw56's Avatar
    dmw56 is offline CHR Member Visit my Photo Gallery
    Join Date
    Jul 2008
    Location
    Edgewood, New Mexico, United States
    Car Year, Make, Model: 30,34,39,50,54,65,68,70,71,72
    Posts
    571

    I welded the strip in the roof. and removed all the bracing inside. Finished up some of the welding and slap so Bondo on to how it will look.


    door frames cut and fitted. Still have tons of welding and grinding to do.


    Threw the seat out of 50 Stude in to see if it will fit. It will needs a few modification but will work just fine. I'll need to go to "Old Town" and get some upholstery material (Mexican blankets).

    Livin' on Route 66

  12. #27
    dmw56's Avatar
    dmw56 is offline CHR Member Visit my Photo Gallery
    Join Date
    Jul 2008
    Location
    Edgewood, New Mexico, United States
    Car Year, Make, Model: 30,34,39,50,54,65,68,70,71,72
    Posts
    571

    Used some 16 gauge and the bead roller for the floor.


    Livin' on Route 66

  13. #28
    dmw56's Avatar
    dmw56 is offline CHR Member Visit my Photo Gallery
    Join Date
    Jul 2008
    Location
    Edgewood, New Mexico, United States
    Car Year, Make, Model: 30,34,39,50,54,65,68,70,71,72
    Posts
    571

    Got a free Chevy bed from a friend. Cut it down to 46" and welded it back together.


    Livin' on Route 66

  14. #29
    dmw56's Avatar
    dmw56 is offline CHR Member Visit my Photo Gallery
    Join Date
    Jul 2008
    Location
    Edgewood, New Mexico, United States
    Car Year, Make, Model: 30,34,39,50,54,65,68,70,71,72
    Posts
    571

    Tearing it apart after mock-up and painting the frame.


    Livin' on Route 66

  15. #30
    dmw56's Avatar
    dmw56 is offline CHR Member Visit my Photo Gallery
    Join Date
    Jul 2008
    Location
    Edgewood, New Mexico, United States
    Car Year, Make, Model: 30,34,39,50,54,65,68,70,71,72
    Posts
    571

    Frame paint and putting it all back together.


    Livin' on Route 66

Reply To Thread
Page 2 of 4 FirstFirst 1 2 3 4 LastLast

Posting Permissions

  • You may not post new threads
  • You may not post replies
  • You may not post attachments
  • You may not edit your posts
Links monetized by VigLink