


Results 46 to 60 of 63
 LinkBack URL
 About LinkBacks
-
06-29-2011 09:22 AM #46
 CHR Member

- Join Date
- Sep 2007
- Location
- UPSTATE New York
- Posts
- 4,336
Lookin' good George. One of these days I need to keep my promise and take a drive to see it in person .
.
Dave W
I am now gone from this forum for now - finally have pulled the plug
-
Advertising

- Google Adsense
- REGISTERED USERS DO NOT SEE THIS AD
-
06-29-2011 10:12 AM #47
CHR Member
- Join Date
- Aug 2003
- Location
- CC
- Car Year, Make, Model: 70 Camaro Z-28 Now/40 Chevy Back Then
- Posts
- 4,306
Cool lookin' project. I can empathize with the hinges. As simple as they look when they are done, a lot of head scratching has to go into them for them to work the way they are supposed to. Great Job."PLAN" your life like you will live to 120.
"LIVE" your life like you could die tomorrow.
John 3:16
>>>>>>
-
06-29-2011 10:33 AM #48
CHR Member
- Join Date
- Feb 2007
- Location
- SLC
- Car Year, Make, Model: 52 Chevy 2-door Sedan w/ a 350/350 combo
- Posts
- 341
Love the car, it is really turning out nice. Smoothing a car is very time consuming and yet is make or break when it is finished.
Pride Runs Deep
-
06-29-2011 12:03 PM #49
CHR Member
- Join Date
- Oct 2007
- Location
- Petaluma
- Car Year, Make, Model: 48 Ford F1
- Posts
- 9,795
Very nice job on the paint and body work!"  "No matter where you go, there you are!" Steve.
-
06-29-2011 06:23 PM #50
CHR Member/Contributor
- Join Date
- Jul 2003
- Location
- Madison
- Car Year, Make, Model: '67 Ranchero, '57 Chevy, '82 Camaro,
- Posts
- 21,160
The usual fiberglass body problems to work out. Once the color and clear are on, all the blocking time doesn't seem quite as bad!!!!!! The chassis sure does look nice, anxious to see it with the body back on!Yesterday is history, tomorrow is a mystery, Live for Today!
Carroll Shelby
Learning must be difficult for those who already know it all!!!!
-
07-13-2011 08:57 AM #51
CHR Member
- Join Date
- Jul 2004
- Location
- stillwater
- Car Year, Make, Model: '33 Hot Rod
- Posts
- 45
Got the loose end finished up on the chassis and most of the body parts sanded and buffed so it was time to put the body shell on.

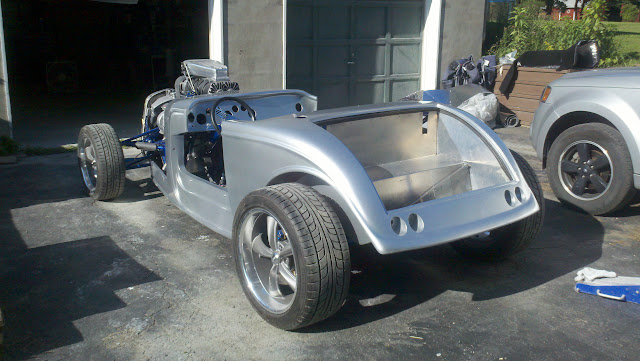

I broke the front suspension down to install the new suspension bolts and to cut he rear lower control arm so I could get less caster.

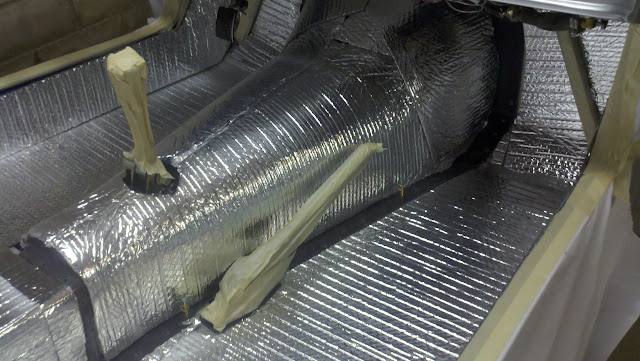
I took a different approach with the insulation and used the foil faced bubble wrap type insulation - I have my reasons and it's not all about price.

-
07-13-2011 08:58 AM #52
CHR Member
- Join Date
- Jul 2004
- Location
- stillwater
- Car Year, Make, Model: '33 Hot Rod
- Posts
- 45
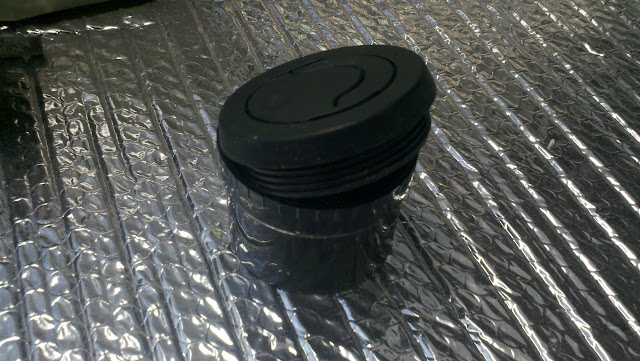
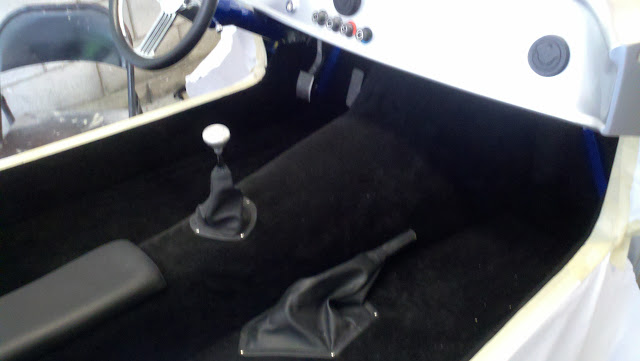
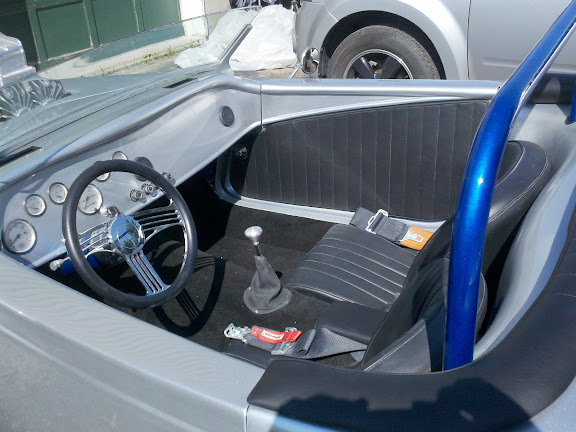
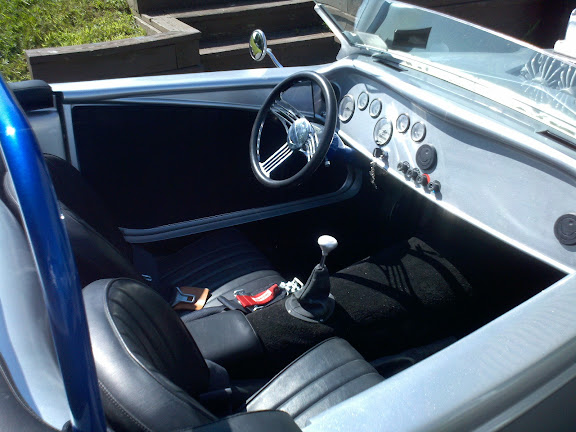
One cool thing I figured out was the A/C vents unscrew so you can attach the tubing to the vent and then stick it though the hole in the dash from he back and then screw the face plate on. Makes it a lot easier than trying to push the duct on with the vent already installed.

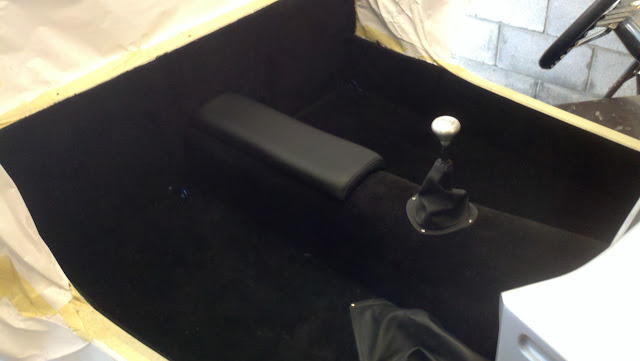
Installed the carpet and boots.

-
07-13-2011 10:09 AM #53
CHR Member
- Join Date
- Jul 2004
- Location
- stillwater
- Car Year, Make, Model: '33 Hot Rod
- Posts
- 45
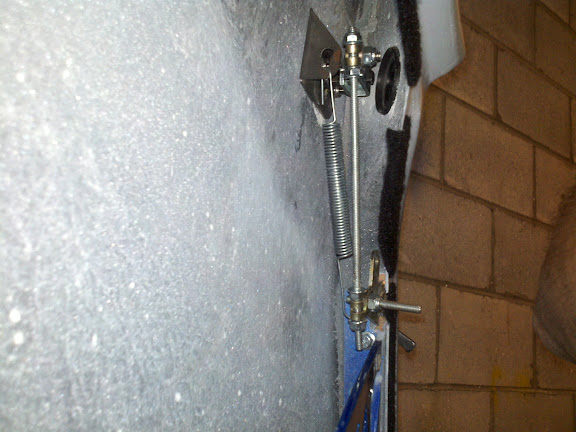
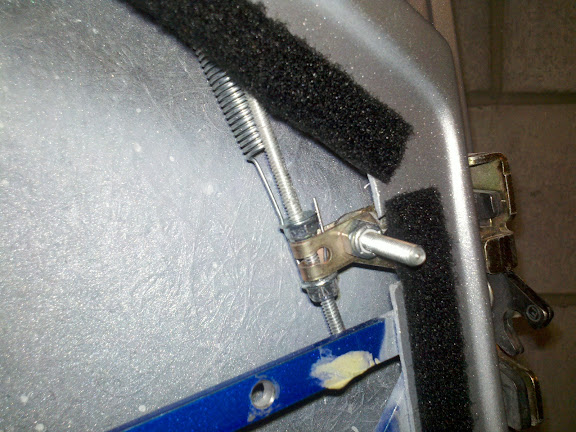
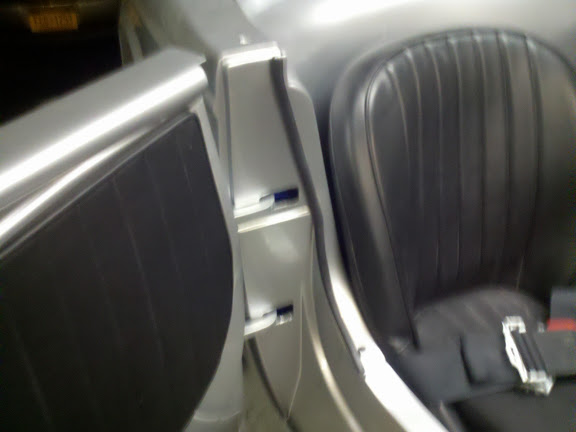
Installed the door panels and used "Neat Knobs" from Watson Street works for the interior latch. After messing with the cable setup, I came up with a rod setup that connects the exterior handle directly to the latch. It work pretty slick and is fully adjustable. The only issue now is I have to push down really hard on the interior knob to release the latch. I'm also not sure if the rod setup will clear the windows when I install them so I might have ot chage it around again.

My solution for the poor fitting water fall was to just cut it off and trim it with windlace.
-
07-13-2011 10:12 AM #54
CHR Member
- Join Date
- Jul 2004
- Location
- stillwater
- Car Year, Make, Model: '33 Hot Rod
- Posts
- 45
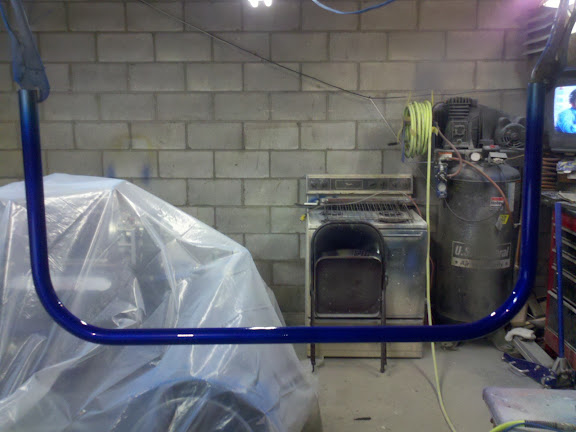
I wanted to install the roll bar but wasn't sure how to go about drilling the holes. I think one of the other builders had posted something about taping around the outline of the rollbar and then using the hole in the tape as a template to locate the holes in the waterfall. I put the rollbar in place and taped around the holes. I removed the roll bar and then carefully slid the waterfall into place without disturbing the tape. Then I could sight down inside the tape and draw the hole locations on the water fall and cut them out. Worked pretty good.
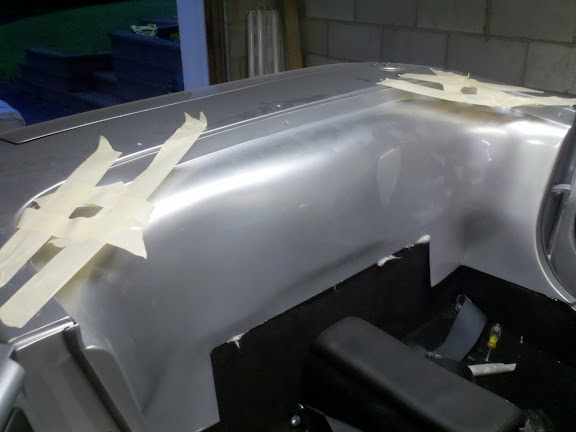
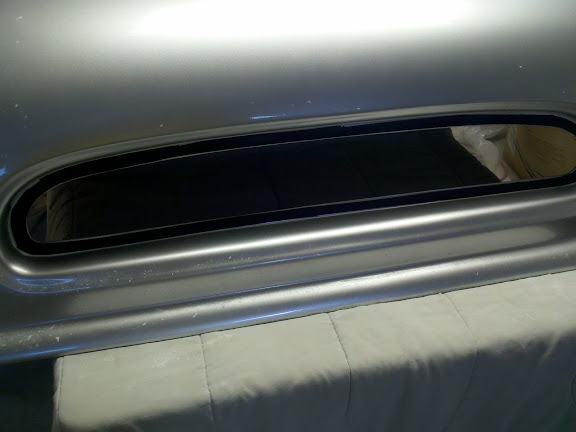
I remeber reading or hearing that you should paint the flange black where the glass sits or the body color will show through so I taped it off and did that.
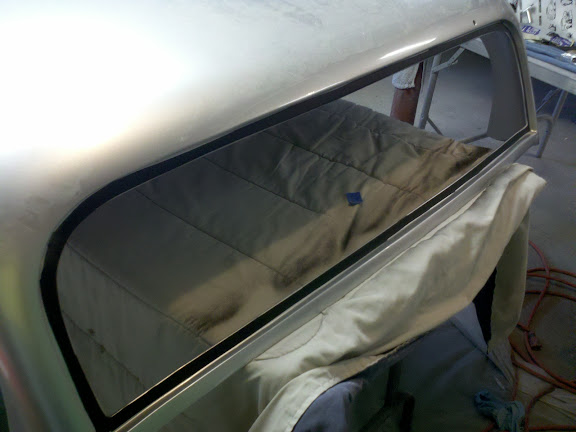
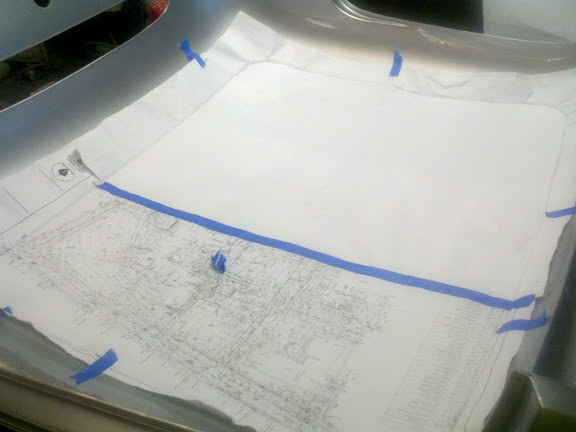
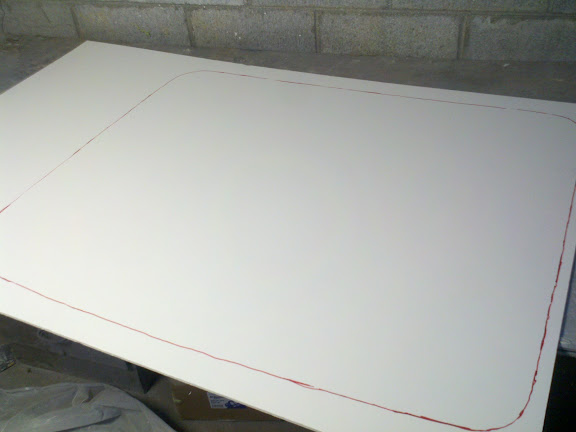
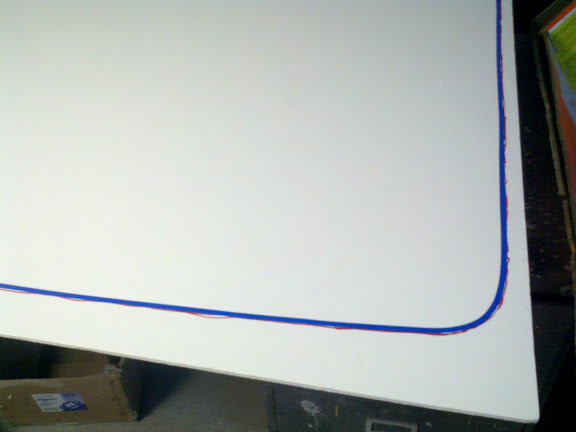
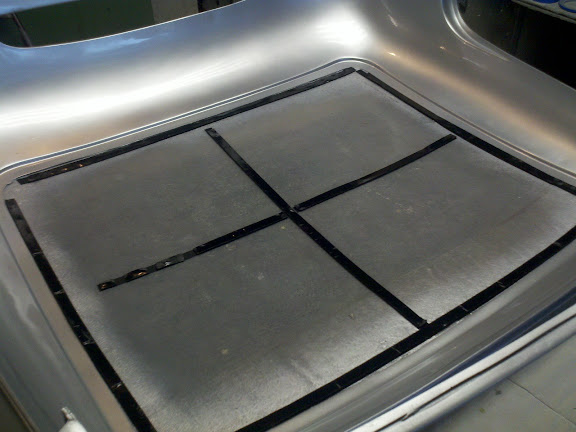
I also made a headliner out of regular auto headliner material and 1/4" poster board. I used velcro to hold it up and I think it came out pretty good. I make a pattern out of paper and then trnasferred it to the posterboard. Then I used 1/4" tape to make the outline smaller so there would be room for the headliner material to wrap around the board.

-
07-13-2011 10:13 AM #55
CHR Member
- Join Date
- Jul 2004
- Location
- stillwater
- Car Year, Make, Model: '33 Hot Rod
- Posts
- 45
Redneck powder coating.
I had not sent the rollbar out for powder coating when I had the chassis done, can't remember why now. But now I had to either powder coat it, paint it or cover it with some thing. I tried covering it with the extra black vinyl that came with the kit, but that turned out horrible. I could have painted it, but that would be process of sanding, priming, blue base, blue candy and clear - it's a formula I had worked out that matches the powder coat color.
It was too big to fit in my oven so power coat at home was out - or was it? I know from powder coating a bunch of small parts that the powder actaully will melt at a pretty low temperature. So I had a redneck moment and got out my torches. Now the powdr is flamable so you can't have an open flame around - but if I can preheat the part, shut off the flame, than I can spray the powder.
So I took about 15 minutes with my torch and heated up the bar evenly to about 200 degrees. I shut the torch off and quick grabbed my powder gun loaded with silver, dusted it on and sure enough it melted right down. I then swapped the blue in quick and dusted that on and it melted just fine too. It didn't flow out nice and smooth, it has more orange peel texture than if it was in an oven, but it looks fine and I'm happy with it.
-
07-13-2011 10:15 AM #56
CHR Member
- Join Date
- Jul 2004
- Location
- stillwater
- Car Year, Make, Model: '33 Hot Rod
- Posts
- 45
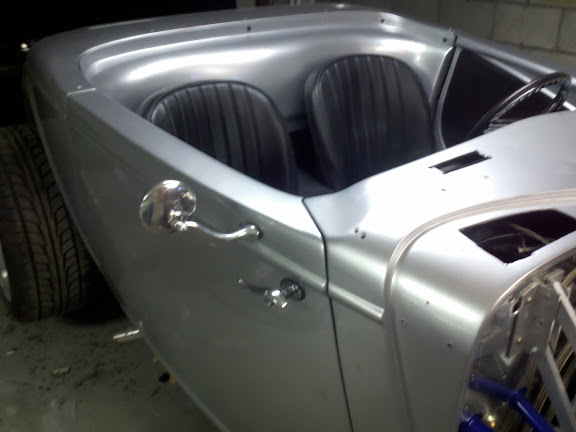
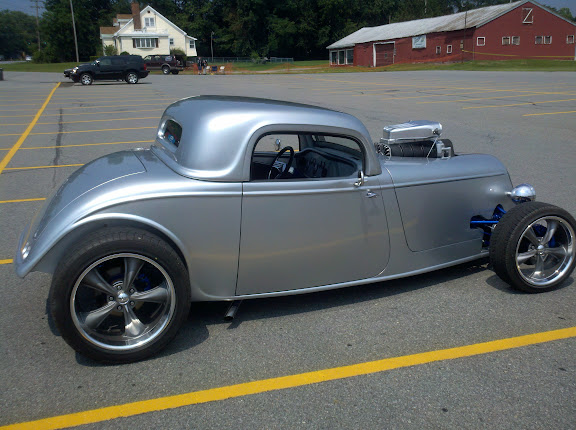
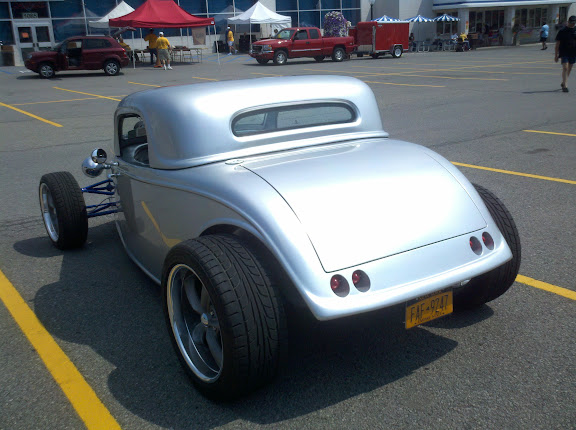
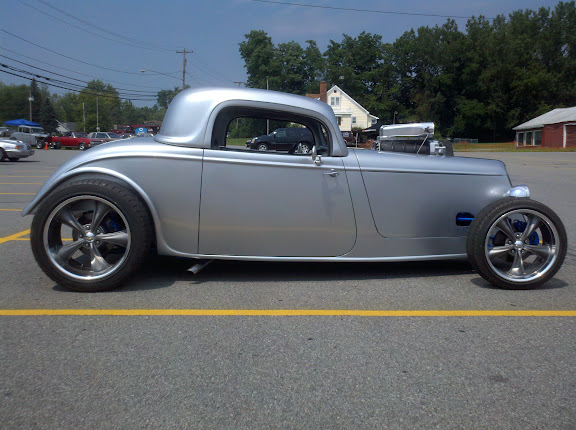
I got the hood and side panels mounted so I rolled it outside and stuck the roadster windshield on for a couple of pictures. I think the hard top will be let on most of the time so I figured I see what it looks like with out it.


Still had to sand and buff the hardtop, that was a lot of work.

-
07-13-2011 10:21 AM #57
CHR Member
- Join Date
- Jul 2004
- Location
- stillwater
- Car Year, Make, Model: '33 Hot Rod
- Posts
- 45
Got it done just in time to make a big local cruise in. Still have a few loose ends t owrap up. Need to install the side windows, final connect the A/C hose and charge and run the exhaust out the rear. Have a few paint blemishes to touch up also. I had a pretty elaborate flame job planned but now I'm not so sure.


-
07-13-2011 03:36 PM #58
CHR Member
- Join Date
- Oct 2005
- Location
- Lawrenceville
- Car Year, Make, Model: 1946 Ford Coupe
- Posts
- 410
Nicely done.
If I can ask ... what kind of money do you have tied up with the finished product??
Thanks.
Ratty 46
-
07-13-2011 05:58 PM #59
CHR Member
- Join Date
- Oct 2007
- Location
- Petaluma
- Car Year, Make, Model: 48 Ford F1
- Posts
- 9,795
Looks great!" "No matter where you go, there you are!" Steve.
-
07-13-2011 07:19 PM #60
CHR Member
- Join Date
- Aug 2003
- Location
- CC
- Car Year, Make, Model: 70 Camaro Z-28 Now/40 Chevy Back Then
- Posts
- 4,306
cool
"PLAN" your life like you will live to 120.
"LIVE" your life like you could die tomorrow.
John 3:16
>>>>>>
 Reply With Quote

Posting Permissions
- You may not post new threads
- You may not post replies
- You may not post attachments
- You may not edit your posts

i've enjoyed the years here . made a lot of friends. most who have left. i see no reason to continue with this so hope to see you somewhere else. i dont think this site will ever be back. it's lived...
Dead!