-
04-15-2009 01:44 AM #46
Wow brian nice job. It's hard to even see them in there. I bet your in for a warm trip. Have fun it sounds like a blast. I can't wait to get my truck on the pavement. Thanks for this post. I like seeing creative solutions that members post."  "No matter where you go, there you are!" Steve.
-
Advertising

- Google Adsense
- REGISTERED USERS DO NOT SEE THIS AD
-
04-15-2009 06:43 AM #47
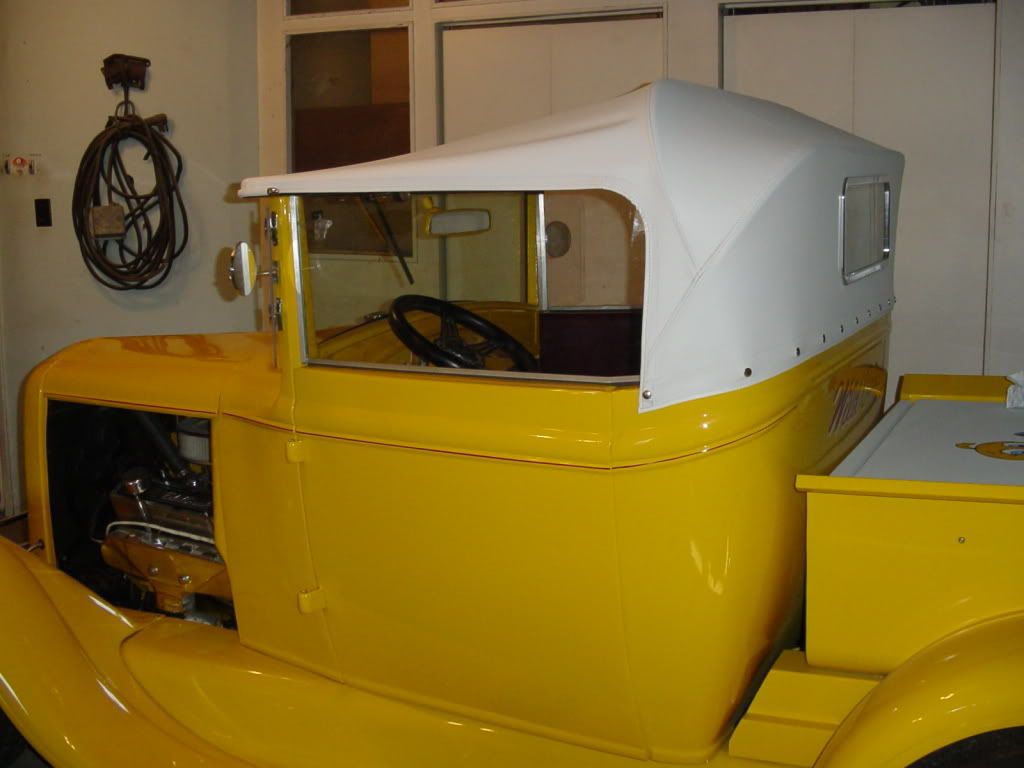
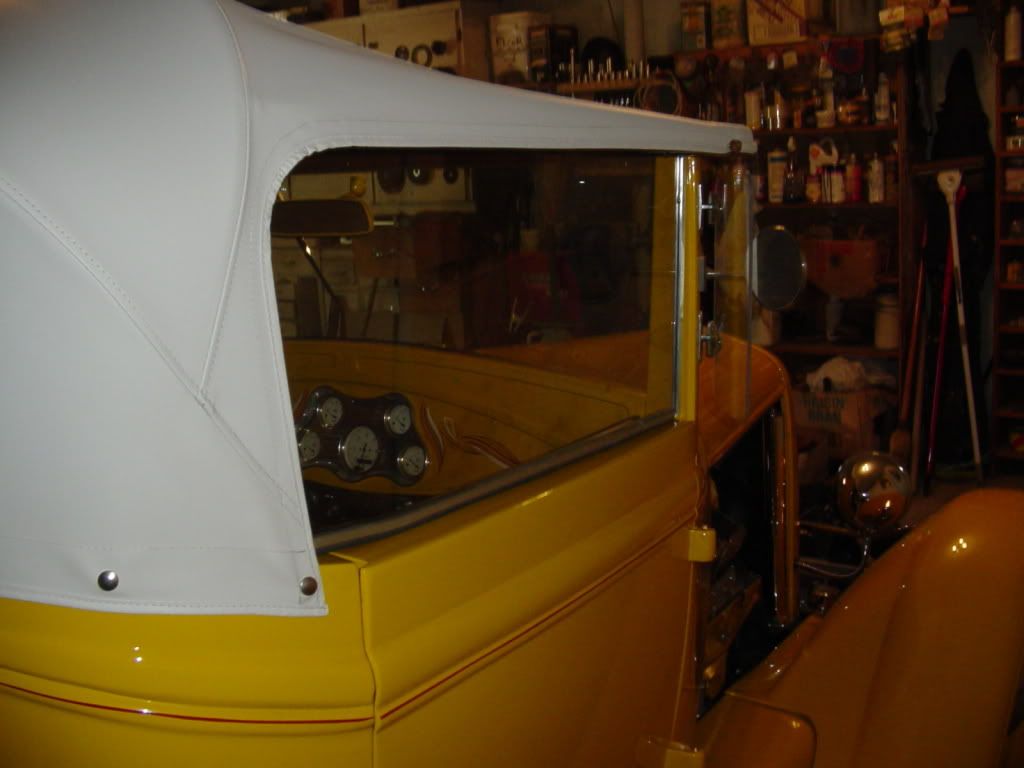
Well, we have windows. The operation was a success. I left the furnace on in the garage overnite to cure the silicone, and this morning I glued the 3/8" wide x 1/4" thick closed cell foam weatherstripping onto the aluminum bottom channel. I had to make a few last minute adjustments to the Marguard with my trusty Dremel tool, but now the windows slide into place very easily, and the foam seals the gap at the bottom of the window very well. This has been a very good project, in that I didn't scratch any paint, didn't mark up the top material in any way, and didn't break anything.
 My total cost for the project, including taxes amounted to about $230 for everything. These windows are never going to be equivalent to roll up windows mounted in the doors, but they will be darn close. I think my 2500 mile round trip to the Atlantic nationals just got a lot more comfortable. I hope that all who followed this post enjoyed it.---Brian
Old guy hot rodder
-
04-15-2009 09:44 AM #48
They look great!!! Job done well as usual.
-
04-30-2009 04:23 PM #49
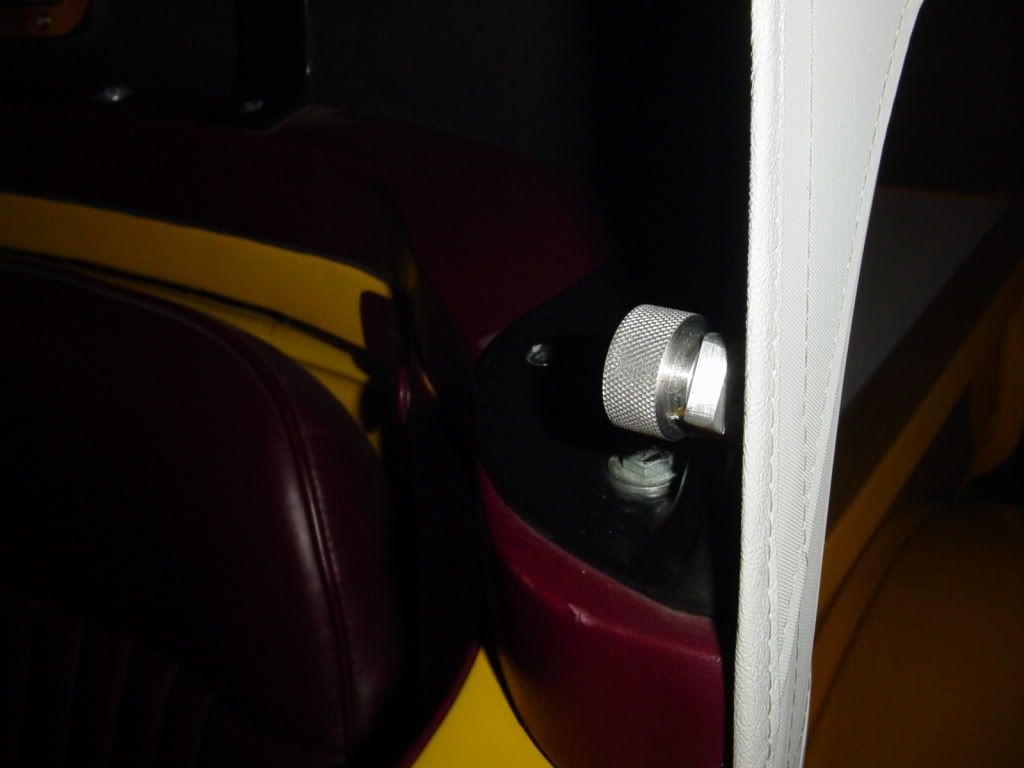
And, as a finishing shot, here are the knurled knobs installed, as seen from inside the car, and from outside when the windows are not in place.

Old guy hot rodder
-
04-30-2009 08:40 PM #50
As usual.....A beautiful job.
-
05-07-2009 03:46 PM #51
So---Today we had the real "test" of the new side windows. I went to see a new customer in Bradford, about 25 miles from my place. I went down Hwy 400 (Which for you American boys is similar to one of your "interstate" highways. The windows kept most of the wind out, but they were flexing bad in the center at the top.--Not enough to break them, but enough to make me a bit nervous. (The top of the side windows is not attached to anything.) The bottom of the window where I siliconed the aluminum channel onto were solid as a rock. On the way home I got caught in one of those pop up thunderstorms---the kind where the rain drops are bouncing three foot up of the pavement. I stayed dry as could be, and thank the Lord for RainX I was able to see out the windshield with no problem. When I got back into Barrie I stopped at the glass shop and bought another length of the same aluminum channel and siliconed it onto the top of each side window. This job is still evolving, but I feel good about doing all my testing close to home, instead of finding soomething out 500 miles away from home and all my tools.Old guy hot rodder
-
05-12-2009 04:58 AM #52
Brian,
In retrospect, is there any way you could have fabricated them so that the top edge sliped up between the top and the bow over the door?...to prevent the top of the lexan from flexing. By the way, thank you SO much for the drawing of the extended rear spring hanger...
Last edited by 345 DeSoto; 05-12-2009 at 05:00 AM.
-
05-12-2009 06:13 AM #53
Yes, I suppose anything is possible. The issue is that I was working with a finished top frame and top. Although the top tube and the glass are "in line" at the rear of the window opening, by the time you get up to the front of the window opening where the side-window tucks in behind the windshield post, the tube is 2 1/2" further out away from the top of the sidewindow. I could have remedied this by peeling back the top material and welding a wedge shaped peice of #14 ga. sheet metal horizontally to the inside edge of the top frame tube, repainted everything, then fixed the canvas top material.---However, that was far more work than I wanted to get involved in. I have had the car for a test drive with the additional peice of aluminum channel siliconed to the top edge of the side window, and that fixes about 95% of the flex anyways.---BrianOld guy hot rodder
-
05-12-2009 06:56 AM #54
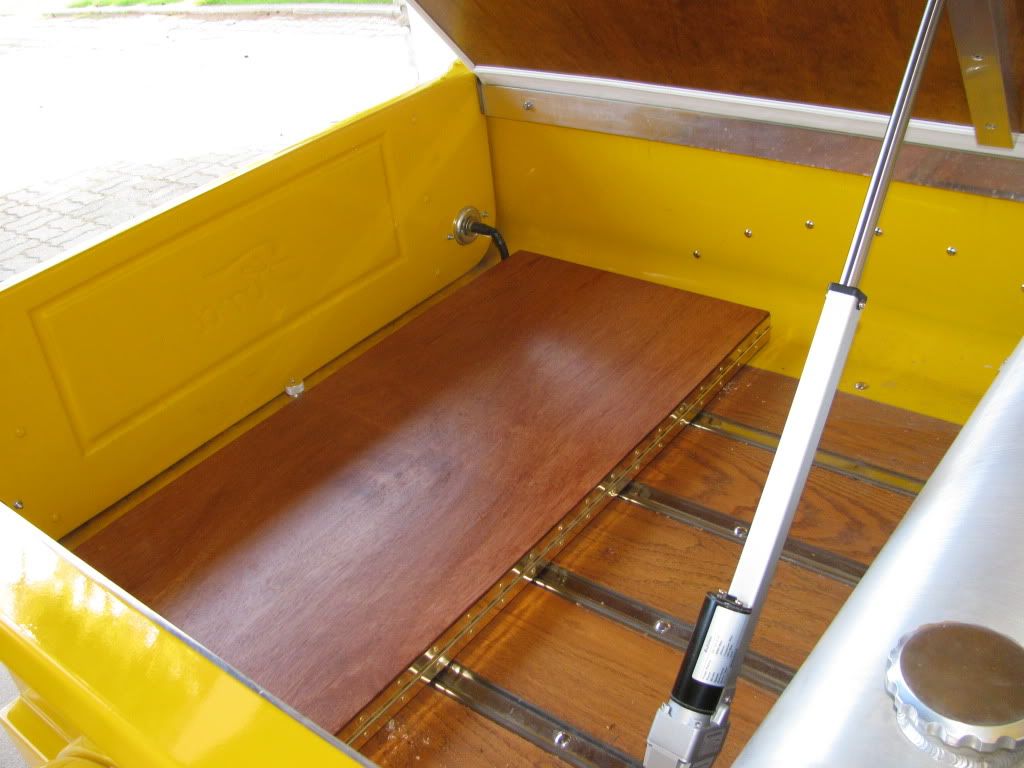
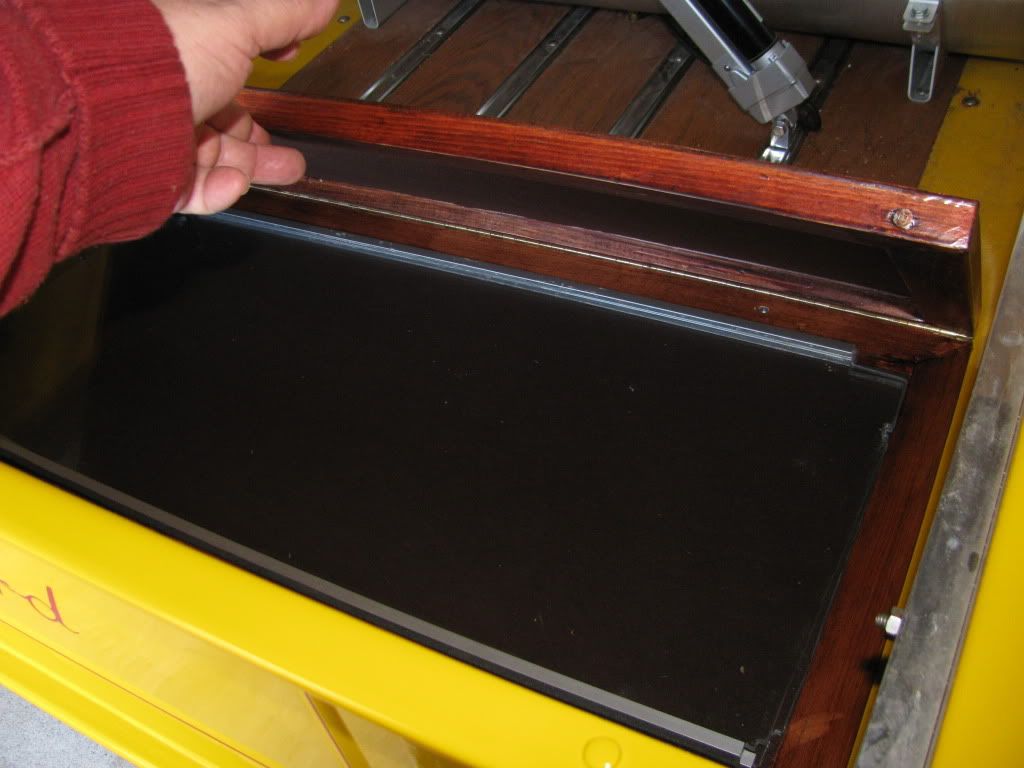
Well boys---Thats all she wrote!!! The project is finished. The storage box for my sidewindows is built, lined with felt, and screwed to the hardwood floor of the truck. Now when I take those big jaunts away from home, I don't have to worry quite so much about inclement weather on my trip home. This has been a kind of "instant gratification" project, as it has went quickly and succesfully. Total cost, storage box included has been about $300.
Last edited by brianrupnow; 05-12-2009 at 07:01 AM.
Old guy hot rodder
-
05-12-2009 03:31 PM #55
Brian, Beutiful work that looks great for a long trip. I am facing a similar situation but for local driving how do you open the door or feed coins to a toll booth? Another problem which you avoided is that with a chopped windshield there is not room for much more on the vertical supports or stanchions to attach the front edges of cloth side curtains. After thinking about it I sort of favor zipper closure along the upper edge and back edge with just a flap over the top of the door similar to what is on Jeeps. My chopped stanchions are pretty short and I do not relish drilling more threaded holes into the stainless stanchions for snaps on the front edge of the side curtains so I think I can just use the slack I presenty have filled with angle-cut tubing for cloth side curtains, although that means taking off the two acorn nuts for the wind wings when I put on the side curtains. As with your clean setup it will be a sort of summer/winter arrangement but I think I can secure the front edge of the curtains with only the two acorn nuts on each side on the shortened stanchions and then use a zipper around the top and rear of the side curtain. When I come to a toll booth I can just unzip the lower rear corner of the curtain. As others have said, your work is beautiful and the finishing touch for the storage box in the bed is a master touch. Thanks for allowing me to rethink this and now I think I have my own solution using the two acorn nuts and a zipper. The top shop I have chatted with says they can sew up whatever I can draw up so all it takes money and I will work this summer for the cost. In the accompanying picture you can see my much lower quality workmanship on the chopped stanchions where I had a real hassle drilling through the stainless but now I can turn the dumb angle-cut hose spacers to good advantage by using the slack for the side curtains. Thanks for sharing your excellent design concepts and stimulating my thinking on this.
Don Shillady
Retired Scientist/teen rodder
-
05-12-2009 04:33 PM #56
Hi Don---Nice to hear from you, and thanks for the kind words. I am very pleased with the way my side windows worked out, and even more pleased that I get to carry them with me. Fortunately, we don't have many toll highways to contend with here in Ontario. We have one major east/west toll highway here, the 407, but there are no toll booths to contend with---there are overhead video cameras that snap a picture of your car license plate automatically when you enter the highway, and the cameras are tied into the government license data base, so you recieve a bill in the mail for your toll. People who frequently use this toll highway can get a free transponder to stick on their car windshield, which automatically triggers a sensor when you enter the highway, and the toll is cheaper because they don't have to use the video camera system. My windows are only for long trips and emergency rainstorms, as they are not terribly convenient. I thought that there would probably be many roadster owners out there who would be able to learn something from how I did my installation.---BrianOld guy hot rodder
-
05-12-2009 08:28 PM #57
I have Bookmarked this thread for my 32 Roadster...
-
05-12-2009 09:29 PM #58
Great job on those sidewindows!
I am doing a '32 roadster for a customer, and he is so tired of hasseling with the side curtains that he had me fill the holes. .....of course the weather IS slightly different here. :-)
Welcome to Club Hot Rod! The premier site for
everything to do with Hot Rod, Customs, Low Riders, Rat Rods, and more.
- » Members from all over the US and the world!
- » Help from all over the world for your questions
- » Build logs for you and all members
- » Blogs
- » Image Gallery
- » Many thousands of members and hundreds of thousands of posts!
YES! I want to register an account for free right now! p.s.: For registered members this ad will NOT show


 LinkBack URL
 About LinkBacks
 Reply With Quote


To the top
Where is everybody?