Welcome to Club Hot Rod!  The premier site for everything to do with Hot Rod, Customs, Low Riders, Rat Rods, and more. 

  •  » Members from all over the US and the world!
  •  » Help from all over the world for your questions
  •  » Build logs for you and all members
  •  » Blogs
  •  » Image Gallery
  •  » Many thousands of members and hundreds of thousands of posts! 

YES! I want to register an account for free right now!  p.s.: For registered members this ad will NOT show


Thread: Some progress on a Ye' Olde '31 Ford


Reply To Thread
Page 1 of 2 1 2 LastLast
Results 1 to 15 of 23
  1. #1
    monstergarage87's Avatar
    monstergarage87 is offline CHR Member Visit my Photo Gallery
    Join Date
    Dec 2006
    Location
    BRANCHVILLE
    Car Year, Make, Model: 27 Ford Sedan
    Posts
    45

    Some progress on a Ye' Olde '31 Ford


    NOTE:: I just copied and pasted this so its really chopped up. sorry, too lazy to fix it, deal with it. Haha

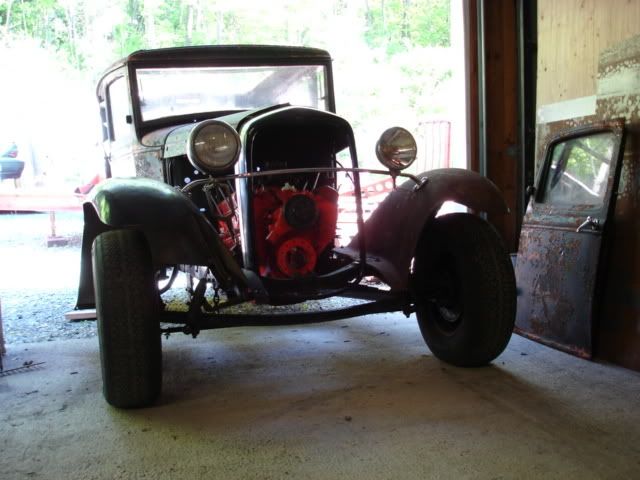
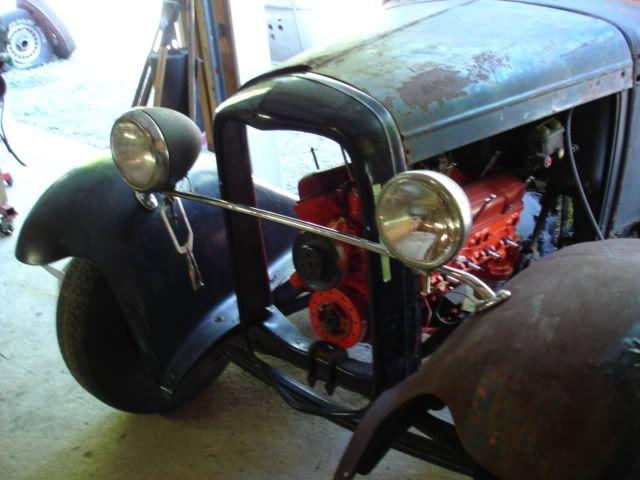
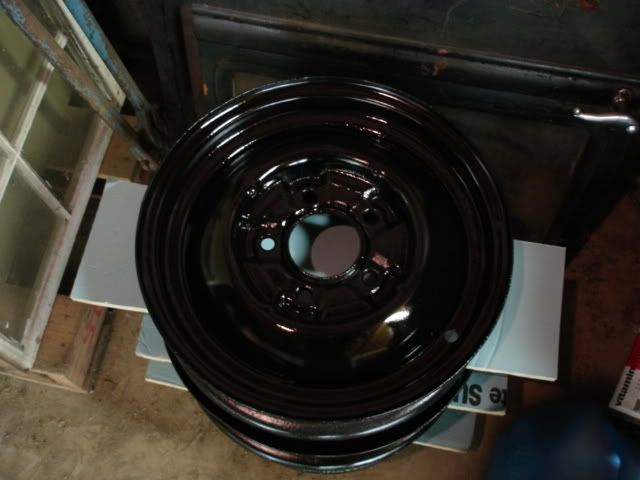
    Got power about 2 weeks ago so ive been at the barn every night after work. Havent done much but i have done alittle. Stripped my wheels and gave them a nice coat of paint. Threw in the 327 and trans, just need to get a mount for the trans and pull the body to get it all in. And tomorrow i think ill get to patching the floor and cowl.

    And this past week i splurged and bought a whole bunch of parts. Just waiting on my steel 32 shell and some special parts.

    Heres some pics of what the car looks like now, not much different than when i posted last.


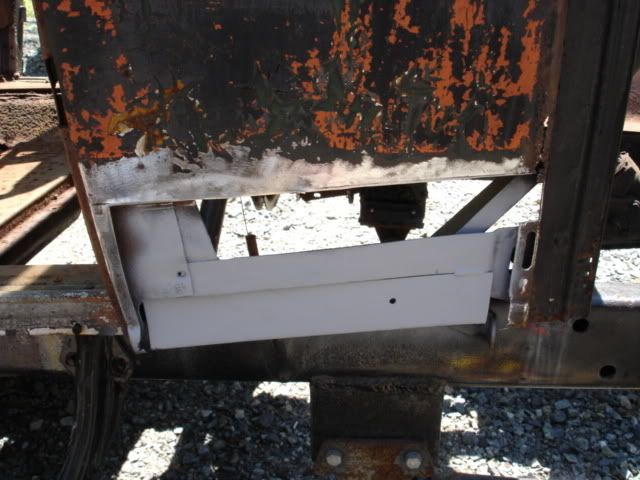
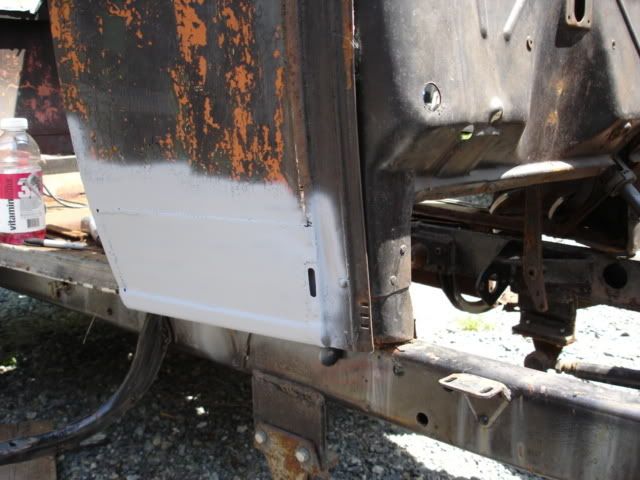
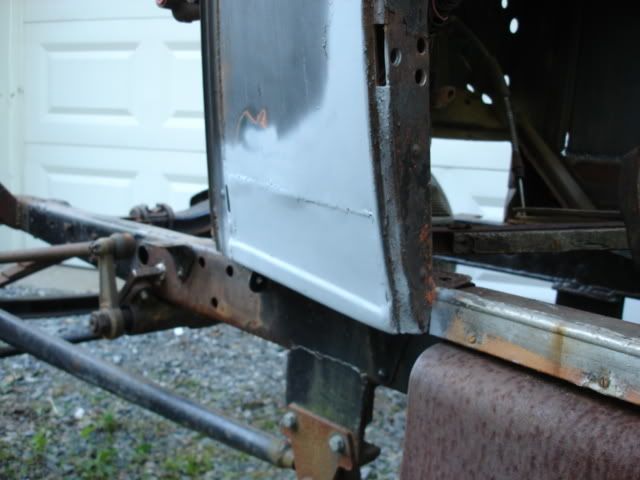
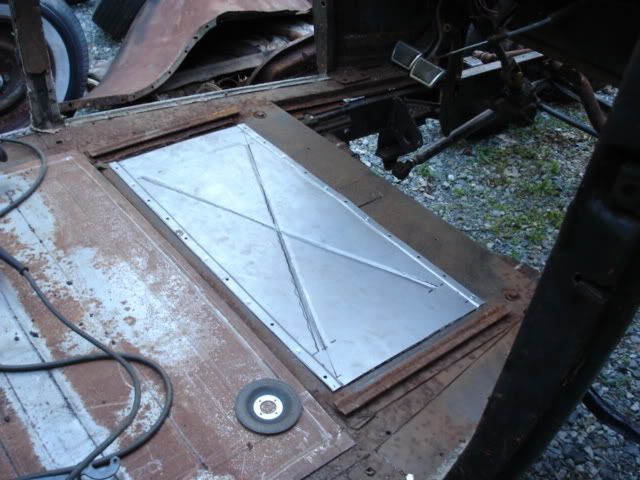
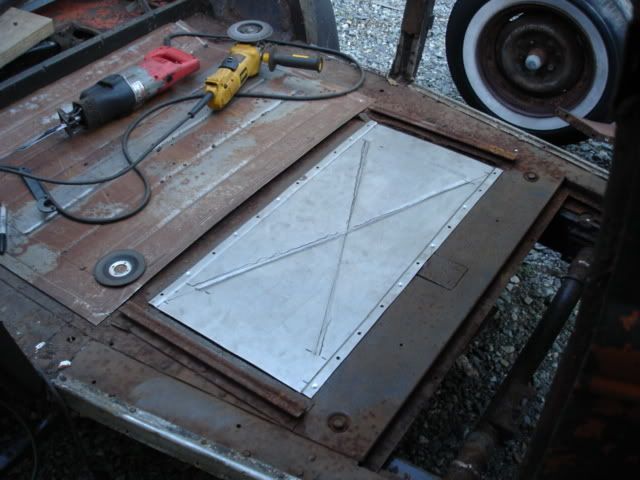
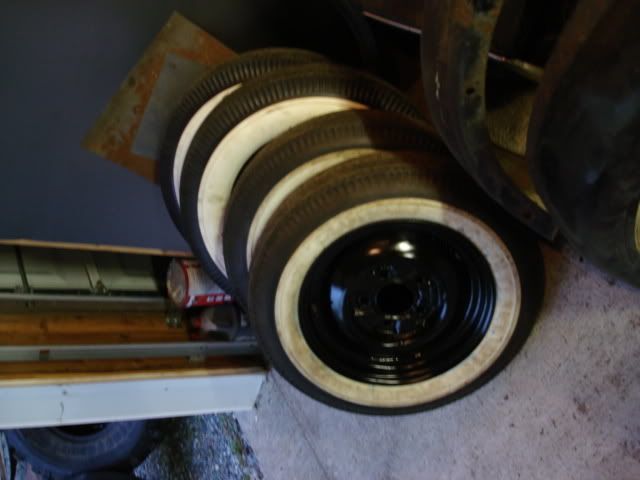
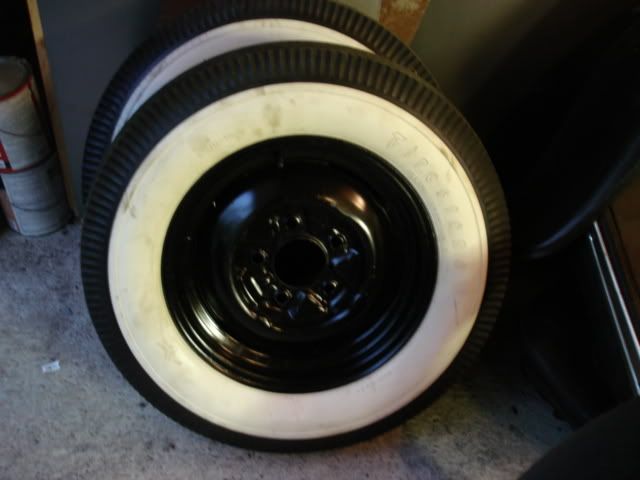
    Well.. got some more work done this past week. Monday i put in new cowl patches, and got a lovely sunburn. They turned out pretty crappy but theyll work. Forgot i had the long reach clamps at the barn... duh. Made some floor patches yesterday since it was raining and couldnt weld outside. I think they came out pretty nice. And today got a late start so i cut out the old front section and tacked in the new section. Got my tires mounted today too. So im moving along and should have the rear in this weekend if things go as planned.


  2. #2
    Dave Severson is offline CHR Member/Contributor Visit my Photo Gallery
    Join Date
    Jul 2003
    Location
    Madison
    Car Year, Make, Model: '67 Ranchero, '57 Chevy, '82 Camaro,
    Posts
    21,160

    Looking good, keep us updated on the progress!!!!
    Yesterday is history, tomorrow is a mystery, Live for Today!
    Carroll Shelby

    Learning must be difficult for those who already know it all!!!!

  3. #3
    flh4speed's Avatar
    flh4speed is offline CHR Member Visit my Photo Gallery
    Join Date
    Oct 2006
    Location
    Tupelo
    Car Year, Make, Model: 50 Ford , 55 Chevy
    Posts
    852

    me like!


    Age and treachery will always overcome youth and enthusiasm.

    Kenny

  4. #4
    Don Shillady's Avatar
    Don Shillady is offline CHR Member Visit my Photo Gallery
    Join Date
    May 2004
    Location
    Ashland
    Car Year, Make, Model: 29 fendered roadster
    Posts
    2,160

    Real Steel! I wish I had real steel but I am committed to 'glass now. I wanted to ask about your plans for a radiator fan. Looking at where your crank pulley is through the empty radiator shell it looks essentially the same as my 350 in a Brookville frame. That puts the water pump shaft 8" or less above the bottom of the radiator (Walker 487-1 in my case) so even with a small 15" diameter fan, a shroud will not be able to cover the bottom of the radiator. The easy answer is to use an electric fan but that draws at least a surge of 70-80 amps on start up and maybe 30 amps while running. I am trying to figure out how to use just a mechanical fan, but I am wondering what your plans are for the fan in the hope that I can find a way to avoid the electric surge with a small 15" flex fan?

    Don Shillady
    Retired Scientist/teen rodder

  5. #5
    BradC's Avatar
    BradC is offline CHR Member Visit my Photo Gallery
    Join Date
    Feb 2006
    Location
    Sparta
    Car Year, Make, Model: 31 Ford Model A
    Posts
    541

    Looking good, keep us updated.
    BradC
    Some days it's not even worth chewing thru the restraints !

  6. #6
    monstergarage87's Avatar
    monstergarage87 is offline CHR Member Visit my Photo Gallery
    Join Date
    Dec 2006
    Location
    BRANCHVILLE
    Car Year, Make, Model: 27 Ford Sedan
    Posts
    45

    Quote Originally Posted by Don Shillady
    Real Steel! I wish I had real steel but I am committed to 'glass now. I wanted to ask about your plans for a radiator fan. Looking at where your crank pulley is through the empty radiator shell it looks essentially the same as my 350 in a Brookville frame. That puts the water pump shaft 8" or less above the bottom of the radiator (Walker 487-1 in my case) so even with a small 15" diameter fan, a shroud will not be able to cover the bottom of the radiator. The easy answer is to use an electric fan but that draws at least a surge of 70-80 amps on start up and maybe 30 amps while running. I am trying to figure out how to use just a mechanical fan, but I am wondering what your plans are for the fan in the hope that I can find a way to avoid the electric surge with a small 15" flex fan?

    Don Shillady
    Retired Scientist/teen rodder
    Well i swapped to a short water pump. I think this will set the fan back far enough to where itll clear the front crossmember. If not, ill cut it down, just for looks of a mechanical fan and install an electric fan in front between the insert and radiator.

  7. #7
    monstergarage87's Avatar
    monstergarage87 is offline CHR Member Visit my Photo Gallery
    Join Date
    Dec 2006
    Location
    BRANCHVILLE
    Car Year, Make, Model: 27 Ford Sedan
    Posts
    45

    Got some more done this past week. Kept forgetting my camera so ive got these crappy cell phone pics. Last weekend i stripped and cleaned the engine. Got rid of the chevy orange along with the 20 other layers of paint. Painted it a nice gloss black. Threw on the new water pump and pulleys. Painted the ram horns white and slapped those on to see what it would look like (sorry, no pics of that) And i got some early chrome chevy stamped valve covers that look o so good against the black. Been getting more parts this week from The Hot Rod Company and Riley Auto, thanks guys, was great dealing with you. Took the body off on thursday night. Yesterday i put the front end together with my new drop axle. Put my f100 spindles on. Then today, stripped the front fenders getting them ready for some repairs. Then it got too hot around 3ish so i went inside and stripped more paint off some of the smaller parts and painted those. Heres the crappy pictures of the progress but ill get some better ones tomorrow.


  8. #8
    monstergarage87's Avatar
    monstergarage87 is offline CHR Member Visit my Photo Gallery
    Join Date
    Dec 2006
    Location
    BRANCHVILLE
    Car Year, Make, Model: 27 Ford Sedan
    Posts
    45

    Well ive been working a little every nite on the murray and ive gotten a bit done since i last posted. Been stripping the panels pretty much every nite this week and painting a few odds and ends when i had nothing else to do. Also painted the trans and cleaned it up good. Tried to attempt to install the lockup kit but that was a no go. And i put my axle together for the final time, this time with backing plates and i clearenced for the brake cylinders since im using the earlier round spindles. Otherwise thats been all ive been up to. Heres some pictures of most of everything that ive gotten done.


  9. #9
    Itoldyouso's Avatar
    Itoldyouso is offline CHR Member Visit my Photo Gallery
    Join Date
    Jan 2006
    Location
    fort myers
    Car Year, Make, Model: '27 ford/'39 dodge/ '23 t
    Posts
    11,033

    Wow, coming along very well. That body looks really solid and rustfree, and I like the fact it is a fordor.

    Good job.

    Don

  10. #10
    Don Shillady's Avatar
    Don Shillady is offline CHR Member Visit my Photo Gallery
    Join Date
    May 2004
    Location
    Ashland
    Car Year, Make, Model: 29 fendered roadster
    Posts
    2,160

    My first car was a '31 Fordor and for a family the extra room in the back could be useful. Let me give my usual comment while the roof hole is open. If you wanted an open car now is the time to plan for a slide back soft top from an early VW or a soft snap-on top or a green plastic insert. Learning from my Sand Rover dune buggy, all you need for a snap-on top is to weld a strip of steel about 1/2" wide across the top of the front edge of the hole. Then you make a top with a lot of Dzus fasteners or snaps along the edges but in the front edge you sew in a strip of aluminum or other metal. When you put the top on you insert the part of the front edge of the the top and face the strip in backwards so the front edge is wedged in to the welded strip on the roof metal. That is the way some dune buggy tops are fastened to the windshield without a top bow and the back cloth is held by a few Dzus fasteners and snaps. I really enjoy an open top or sunroof so I am always sorry to see the work put into finding a piece of sheet metal to weld into the hole. Your metal is in really good shape, I would respect the metal if you decide to chop it. If you have access to a restorers book you could look up the "A-400" model which had a sliding cloth roof and abbreviated rear quarter panel windows. One of my fantasies has been to convert a sedan to a fake A-400 because I am a fanatic about an open car in the summer. On the other hand with a closed roof you can chop it and add air conditioning for a truly cool rod. Hey a green plastic insert with air conditioning is an option also! You might also look up the 1954 Ford Sunliner model to see what a green plastic roof looks like!

    Don Shillady
    Retired Scientist/teen rodder

  11. #11
    monstergarage87's Avatar
    monstergarage87 is offline CHR Member Visit my Photo Gallery
    Join Date
    Dec 2006
    Location
    BRANCHVILLE
    Car Year, Make, Model: 27 Ford Sedan
    Posts
    45

    Hmm.. like the idea of the plastic insert but that may be something for my T sedan. This ones getting a stock type vinyl roof.

    And i thought the sunliners had a glass roof?

    But.. heres some progress from today. Finished stripping the body and ended up getting it in primer. But i still need to do the fenders though. Ill save those for another day.. haha.


    Haha.. and i was cleaning out the loft this morning before it got too hot and found a whole box of brande new screws and handles for the interior along with a whole bunch of odd and end crap that i wont have to spend a bagillion dollars on.

  12. #12
    monstergarage87's Avatar
    monstergarage87 is offline CHR Member Visit my Photo Gallery
    Join Date
    Dec 2006
    Location
    BRANCHVILLE
    Car Year, Make, Model: 27 Ford Sedan
    Posts
    45

    Got bored last night so i threw the body on the frame. Set the column in to see how it fit and seems i need some more steering shaft a couple u joints to bring the column up and back. Other wise thats about it... still waiting on parts so i cant do much accept keep working on the body and possibly paint it. Heres some more pics...


  13. #13
    bluestang67's Avatar
    bluestang67 is offline CHR Member Visit my Photo Gallery
    Join Date
    Sep 2006
    Location
    New Lenox
    Car Year, Make, Model: 67 Mstg cpe , 37 Ford Coupe
    Posts
    2,787

    Nice progress and a clean looking sedan . Would have liked to go this route myself just so the inlaws could get in easy . Grand babies can climb well LOL there's no problems .

  14. #14
    monstergarage87's Avatar
    monstergarage87 is offline CHR Member Visit my Photo Gallery
    Join Date
    Dec 2006
    Location
    BRANCHVILLE
    Car Year, Make, Model: 27 Ford Sedan
    Posts
    45

    Well ive gotten alot done.. but i just copied my latest post from other forums that i visit more frequently. Alot more has been done than what i described.

    Well didnt get much else done but it looks more like a car. Found flexplate bolts while i was cleaning up so i got the motor and trans together. Put that in and redrilled holes for the trans mount. Mounted my shifter to get the linkages made and make sure it works before i set the body on and mounted the ebrake handle. Ran the rear cables too, just waiting on the ebrake arms that go inside the drums and i can hook it all up. Thats about it.. hopefully ill get some more done after i get back from the jalopydrags.. haha


  15. #15
    stovens's Avatar
    stovens is offline CHR Member Visit my Photo Gallery
    Join Date
    Oct 2007
    Location
    Petaluma
    Car Year, Make, Model: 48 Ford F1
    Posts
    9,778

    Looking good!
    " "No matter where you go, there you are!" Steve.

Reply To Thread
Page 1 of 2 1 2 LastLast

Posting Permissions

  • You may not post new threads
  • You may not post replies
  • You may not post attachments
  • You may not edit your posts
Links monetized by VigLink