


 322Likes
Thread: '37 Dodge sedan


Results 16 to 30 of 195
 LinkBack URL
 About LinkBacks
-
12-20-2017 09:33 PM #16
 CHR Member

- Join Date
- Dec 2017
- Location
- Stanwood
- Car Year, Make, Model: '37 Dodge sedan
- Posts
- 104
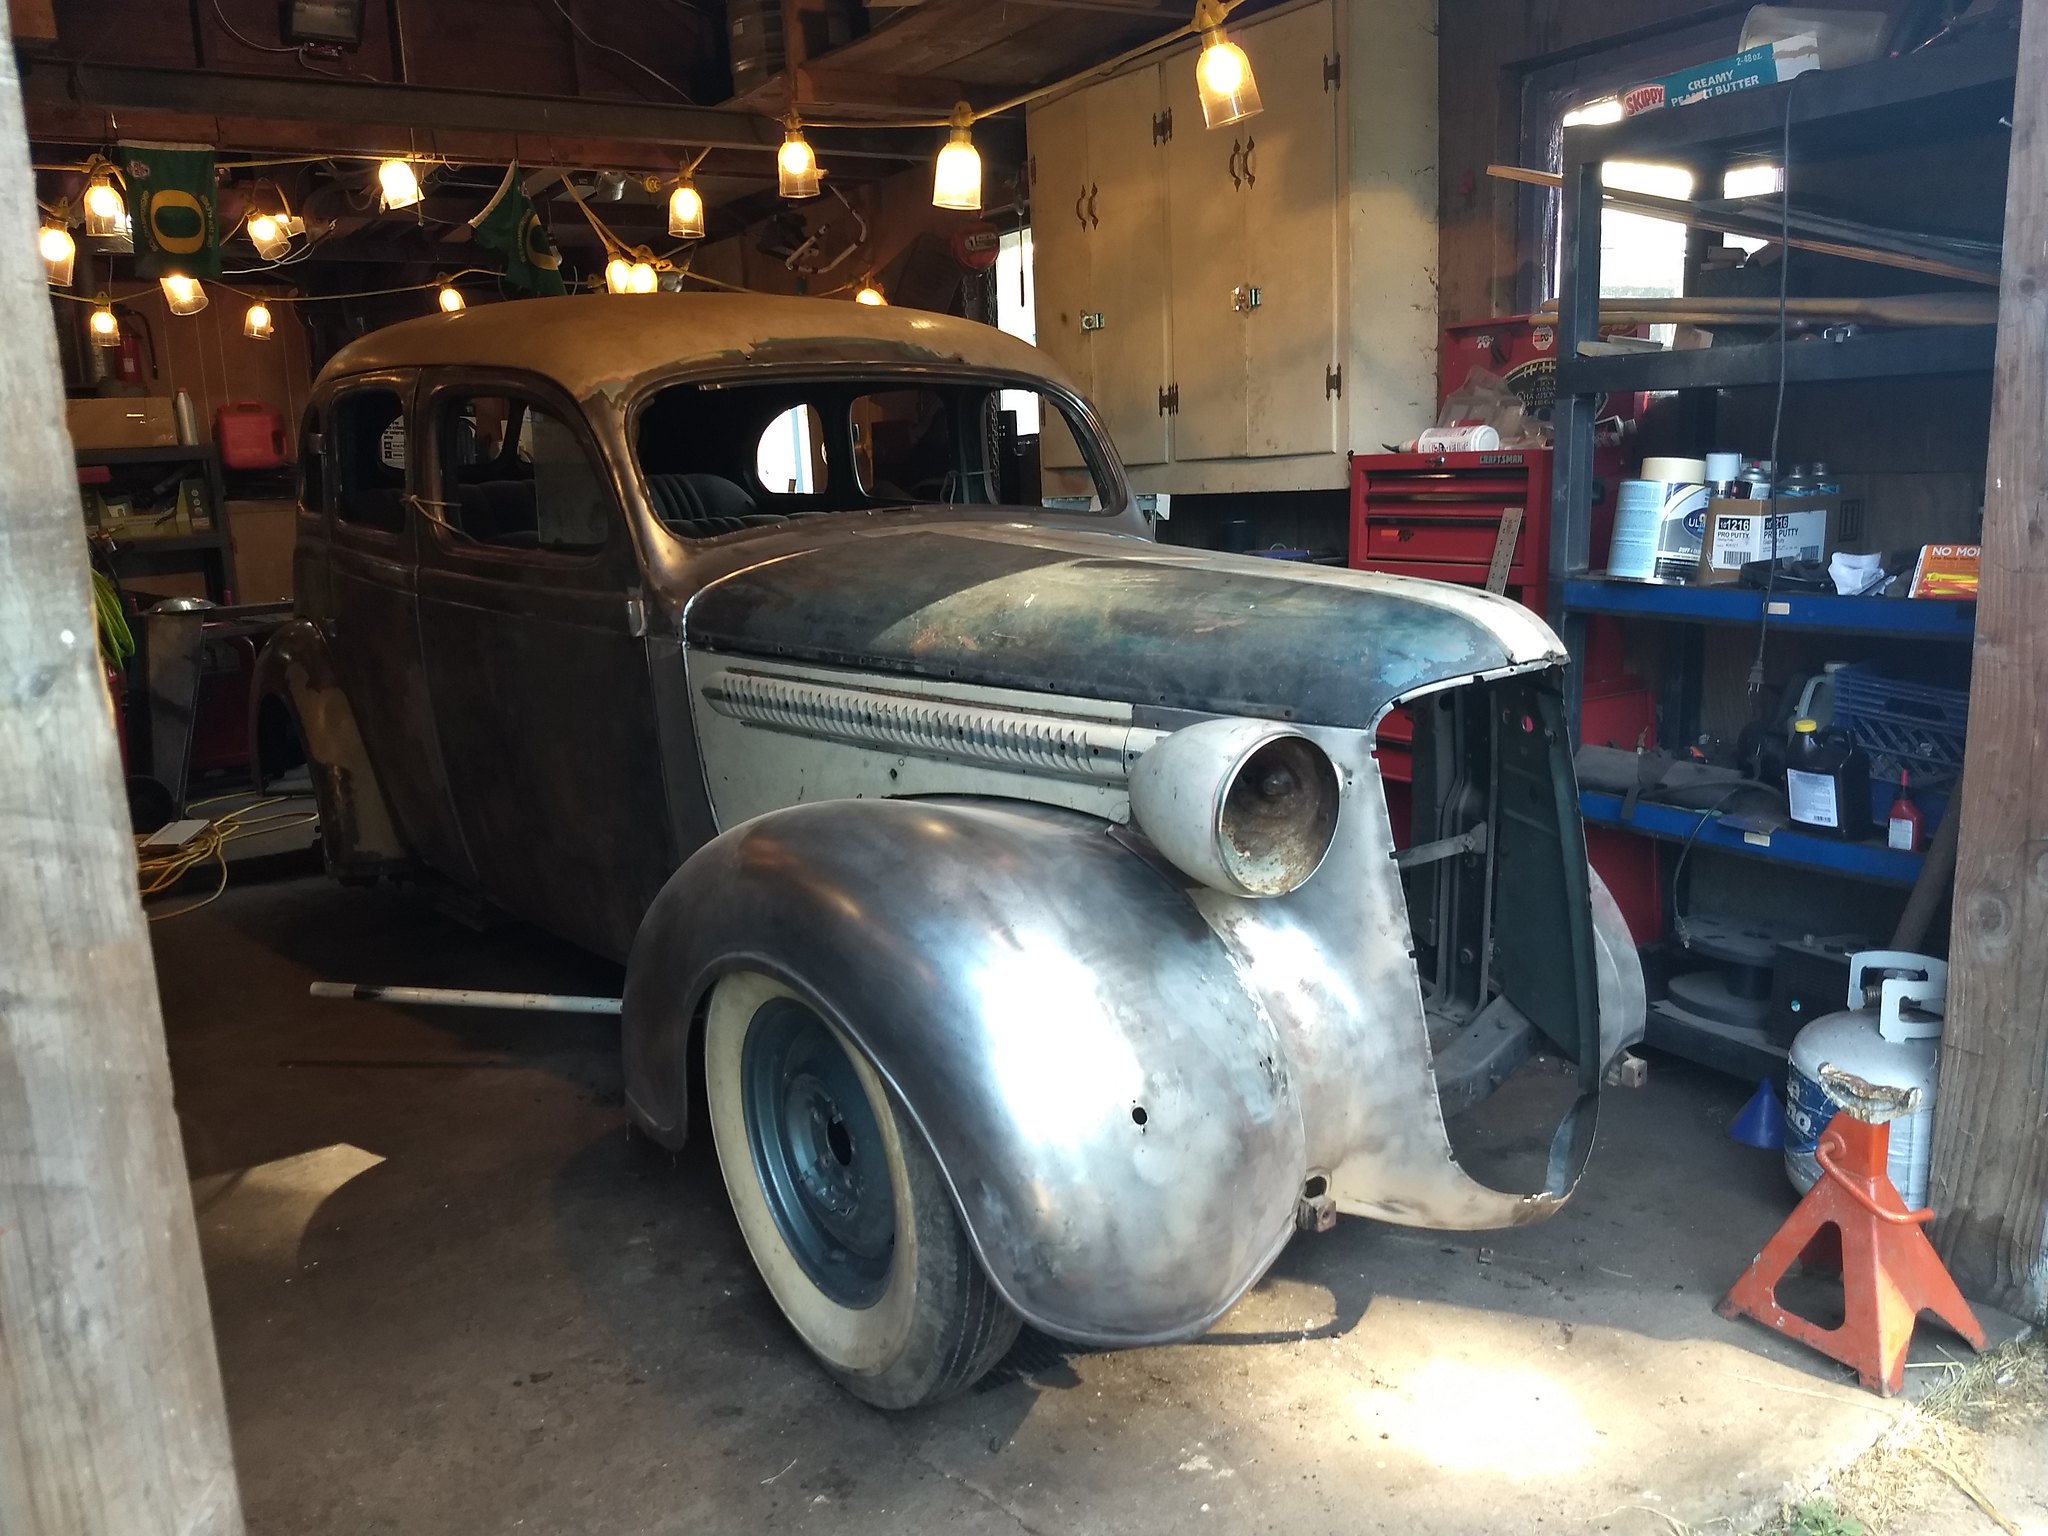
It was very well taken care of for most of it's life. Very little rust anywhere, there isn't even surface rust on the floor boards. All in all, it's one of the cleanest unrestored 80 year old cars I've ever seen. I was pretty happy to find it in such great shape. Originally Posted by johnboy

-
Advertising

- Google Adsense
- REGISTERED USERS DO NOT SEE THIS AD
-
12-21-2017 03:49 AM #17
CHR Member
- Join Date
- Mar 2007
- Location
- festus
- Car Year, Make, Model: 48 Plymouth, 48,54 Heap
- Posts
- 3,407
Very true; I used GM's cam from the LS6 with the matching springs. Great street manners and great off the line power. Originally Posted by techinspector1
1 Corinthians 1:27
-
12-21-2017 10:53 AM #18
CHR Member
- Join Date
- Dec 2017
- Location
- Stanwood
- Car Year, Make, Model: '37 Dodge sedan
- Posts
- 104
Let's get into the build. From the pictures you'll notice I've begun stripping off the 7 layers of paint and primer on the body panels. I figured it's a tedious job that has to be done, and I have no interest in doing it all at once, nor the funds to have the whole car dipped or blasted. The money that would cost is better spent spoiling my daughter anyhow. So that job has become my "waiting for parts to arrive" time killer. I do a little at a time when I can't move forward until something else arrives, or when I'm not in the mood to do anything that requires thinking.
I knew I wanted a Mustang 2 front end, so I started my research there. Turns out, there's not a lot of info on the web for installing the kits on the old Mopars, so the information was very sparse, usually vague, and mostly only pictures with no explanation. I did a lot of measuring and head scratching before I settled on a plan, then I remeasured and scratched my head some more and put it into action. I started by hanging the fenders and front sheet metal on the body and determining the ride height and getting the front tire centerline marked on the frame rails.
 IMG_20170824_155337538 by Ryan Mazingo, on Flickr
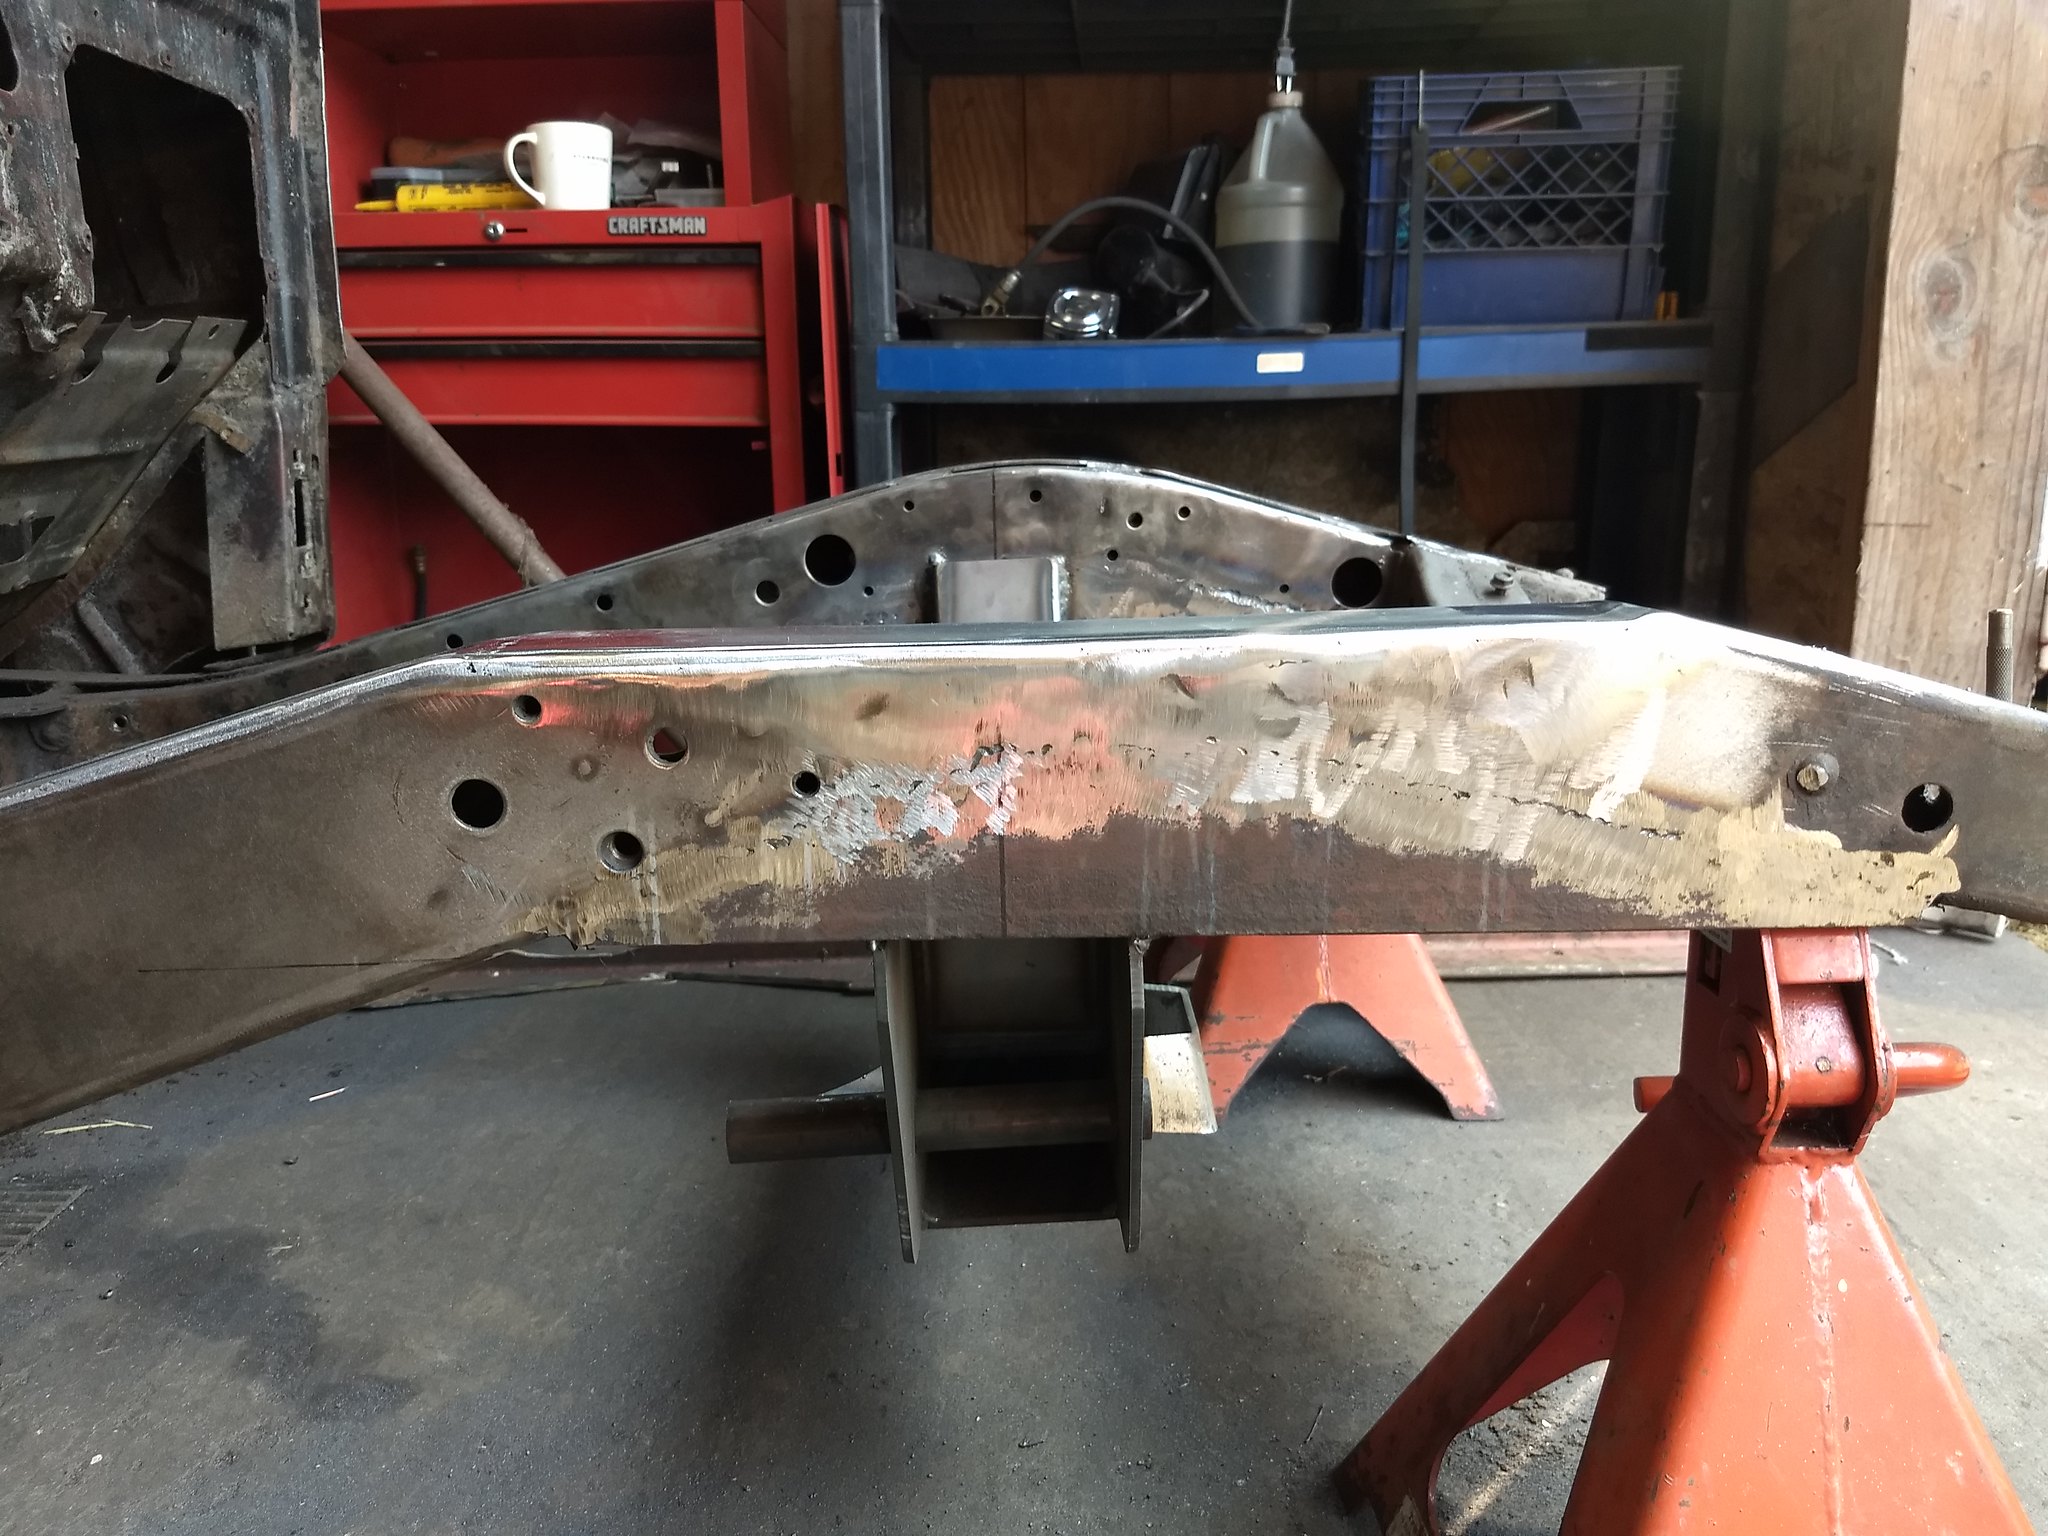
The next step was to remove all of the front sheet metal and weld in a piece of angle iron. The Dodge frame has a hump to clear the original tube axle, but the hump is so high that mounting the new cross member and the hats is impossible without first modifying the rails to run more parallel with the rest of the frame. I also tacked in the cross member at this point to determine the position of the spring hats, because the hat's position ultimately determined how much of the top of the humps would have to be removed. With the angle iron added, as well as a plate on the inside to fully box in the new piece, the tops of the humps we're cut off and a plate welded on to cover the hole.
 IMG_20170903_150446003 by Ryan Mazingo, on Flickr
Next, I notched the hat's to slide over the top of the rails, making sure to tip them back 3° for anti-dive. In this picture I had loosely installed both control arms to verify everything works as designed before welding. Check clearance for adjustment, ensure the control arms swing up and down without binding up, ect. I also rounded the corners of the hat's with the grinder before installing them: might save me from scraping up my knuckles somewhere down the line doing maintenance on the car.
 IMG_20170903_172118746 by Ryan Mazingo, on Flickr
With everything tacked in place I stopped all work and broke out the tape measure. I verified all previous measurements and double checked that the car was still sitting level. With the knowledge that everything was as it should be, I finished up the install by welding everything up solid and mounted most of the moving parts.
 IMG_20170904_161718420 by Ryan Mazingo, on Flickr
-
12-21-2017 11:15 AM #19
CHR Member
- Join Date
- Dec 2017
- Location
- Stanwood
- Car Year, Make, Model: '37 Dodge sedan
- Posts
- 104
Strange, I can see it. But thanks!
-
12-21-2017 11:33 AM #20
CHR Member
- Join Date
- Apr 2011
- Location
- Prairie City
- Car Year, Make, Model: 40 Ford Deluxe, 68 Corvette, 72&76 K30
- Posts
- 7,301
- Blog Entries
- 1
Nice work! It looks really nice. At least you didn't have to mess with notching the rails for the rack to pass through.Ryan
1940 Ford Deluxe Tudor 354 Hemi 46RH Electric Blue w/multi-color flames, Ford 9" Residing in multiple pieces
1968 Corvette Coupe 5.9 Cummins Drag Car 11.43@130mph No stall leaving the line with 1250 rpm's and poor 2.2 60'
1972 Chevy K30 Longhorn P-pumped 24v Compound Turbos 47RH Just another money pit
1971 Camaro RS 5.3 BTR Stage 3 cam, SuperT10
Tire Sizes
-
12-21-2017 12:30 PM #21
CHR Member
- Join Date
- Dec 2017
- Location
- Stanwood
- Car Year, Make, Model: '37 Dodge sedan
- Posts
- 104
When I started researching the installation on these cars one of the first things I stumbled upon was that I'd have to fill the humps, but nobody mentioned how much or why. Quickly became apparent that it was to get the suspension low enough that the nose of the car wouldn't become a road plow. Originally Posted by 40FordDeluxe
The best part was that this was a universal kit which, roughly translated, means "there's no instructions of any kind, good luck!" Took some serious thinking, but I managed to make it all work.
-
12-21-2017 03:02 PM #22
CHR Member
- Join Date
- May 2003
- Location
- Zephyrhills, Florida, USA
- Car Year, Make, Model: '32 Henway
- Posts
- 12,423
It's what hot rodders do, make it all work. Originally Posted by PNW Rodder

.PLANET EARTH, INSANE ASYLUM FOR THE UNIVERSE.
-
01-13-2018 09:02 PM #23
CHR Member
- Join Date
- Dec 2017
- Location
- Stanwood
- Car Year, Make, Model: '37 Dodge sedan
- Posts
- 104
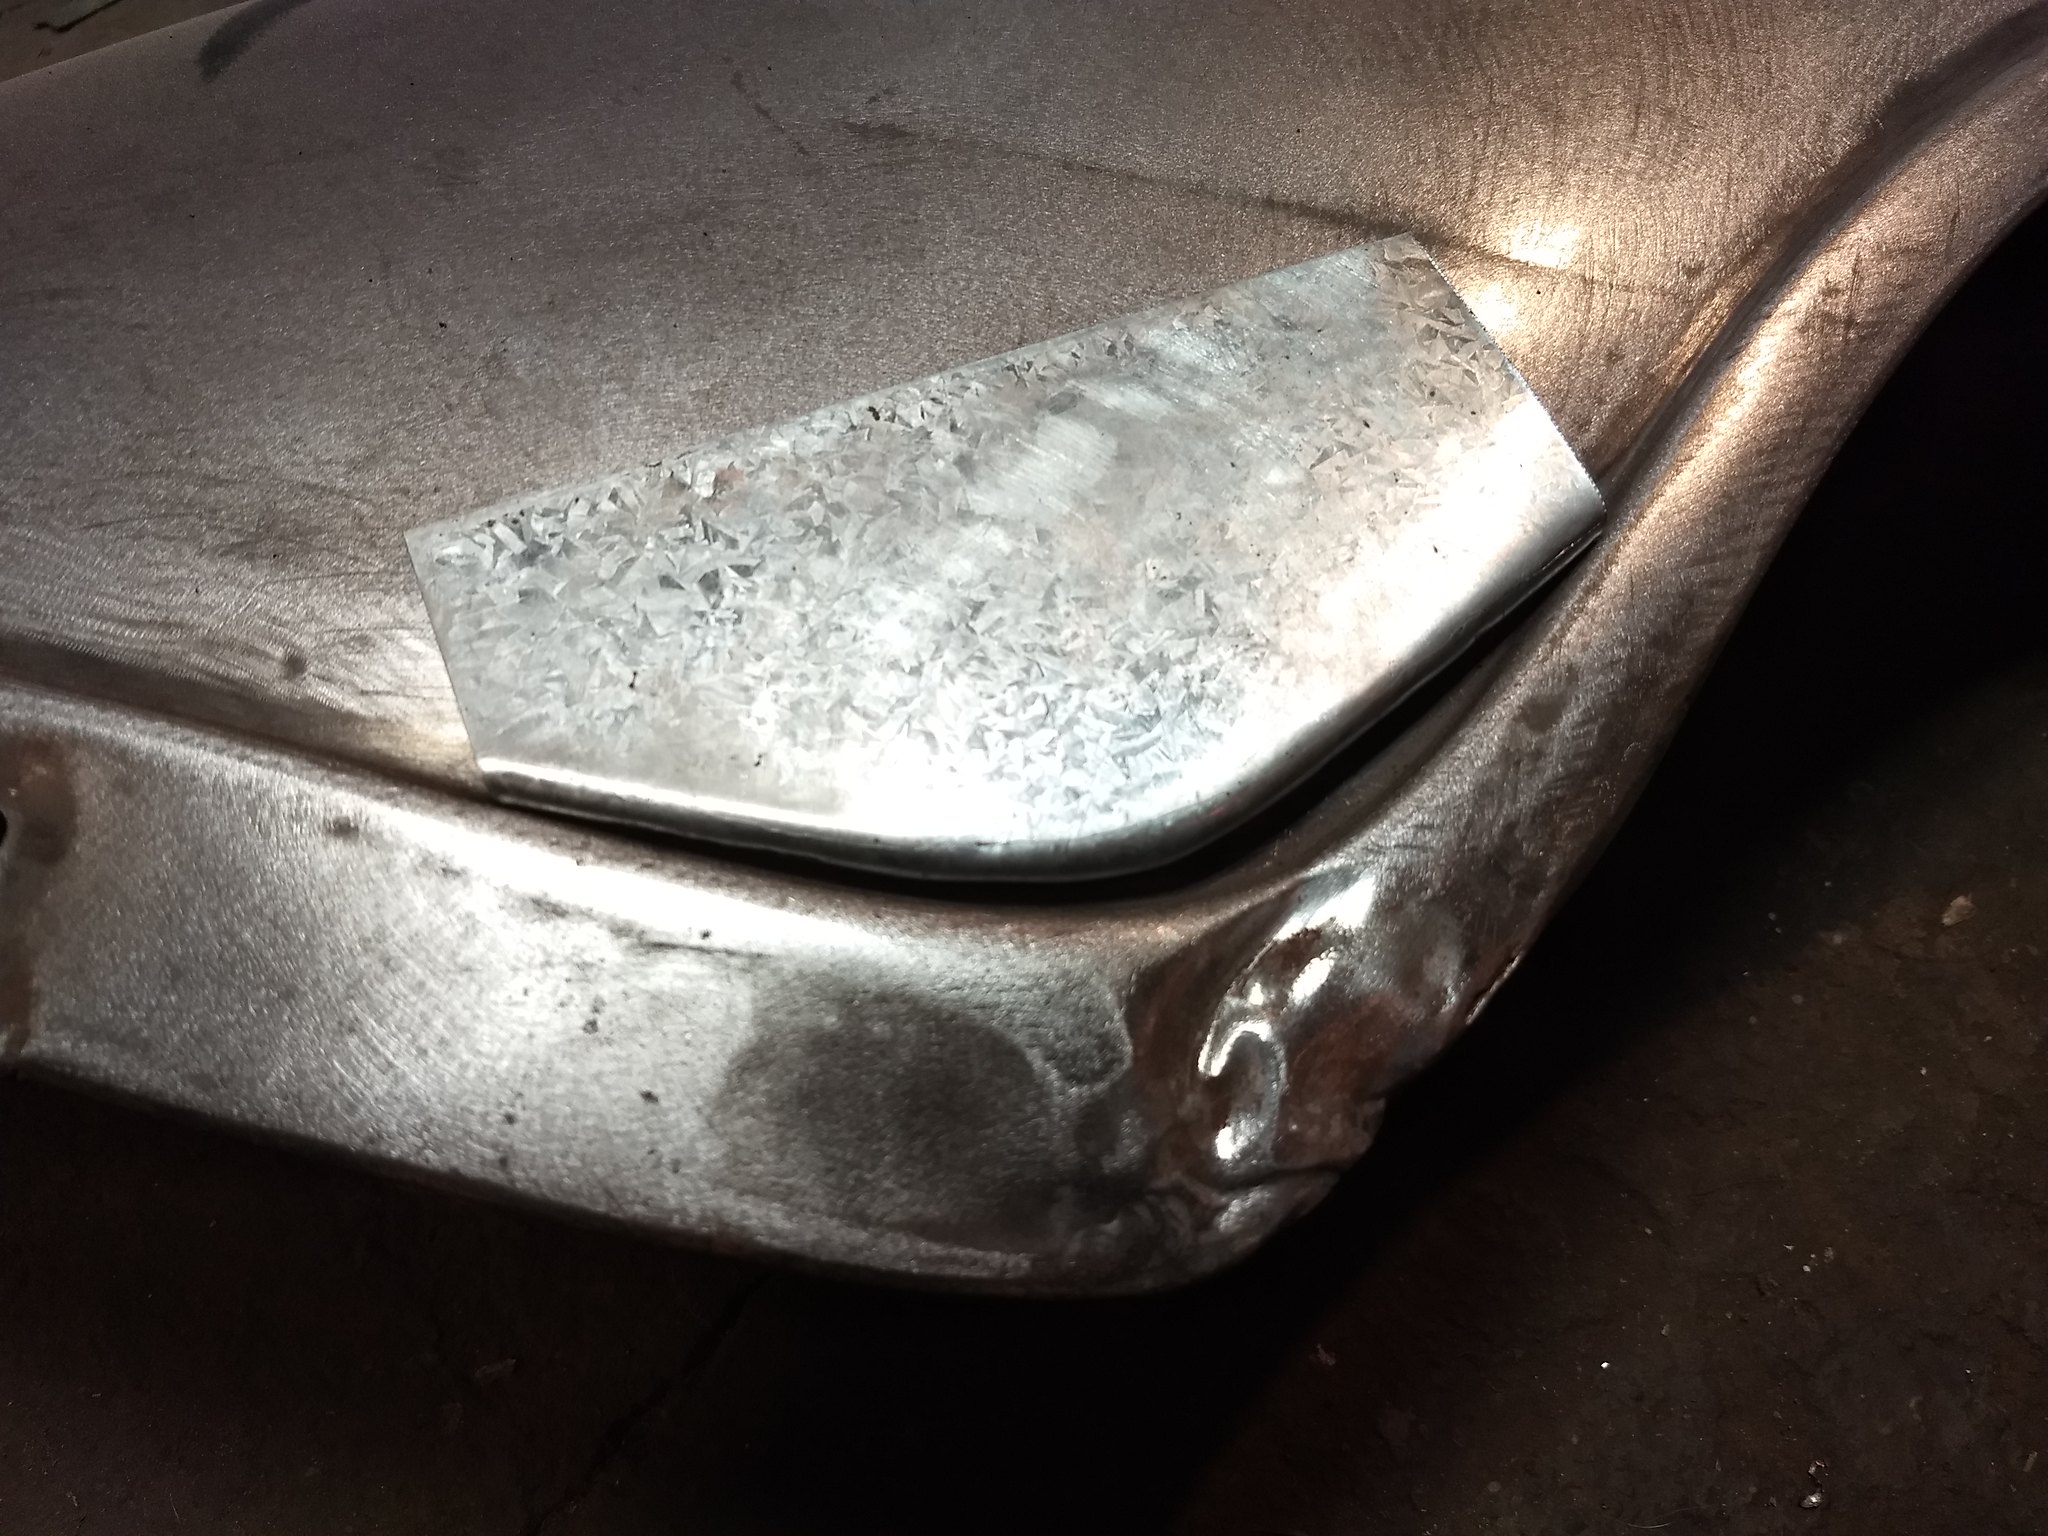
Started repairing some of the damage I found in the rear fenders. Patch panels are hard to come by for these old Mopars, and usually pretty expensive, so I decided to try my hand at making my own. I'm pretty proud of this one, as I've been dreading it since I discovered the lead that was piled up thick on top of it.
 IMG_20180113_154126594 by Ryan Mazingo, on Flickr
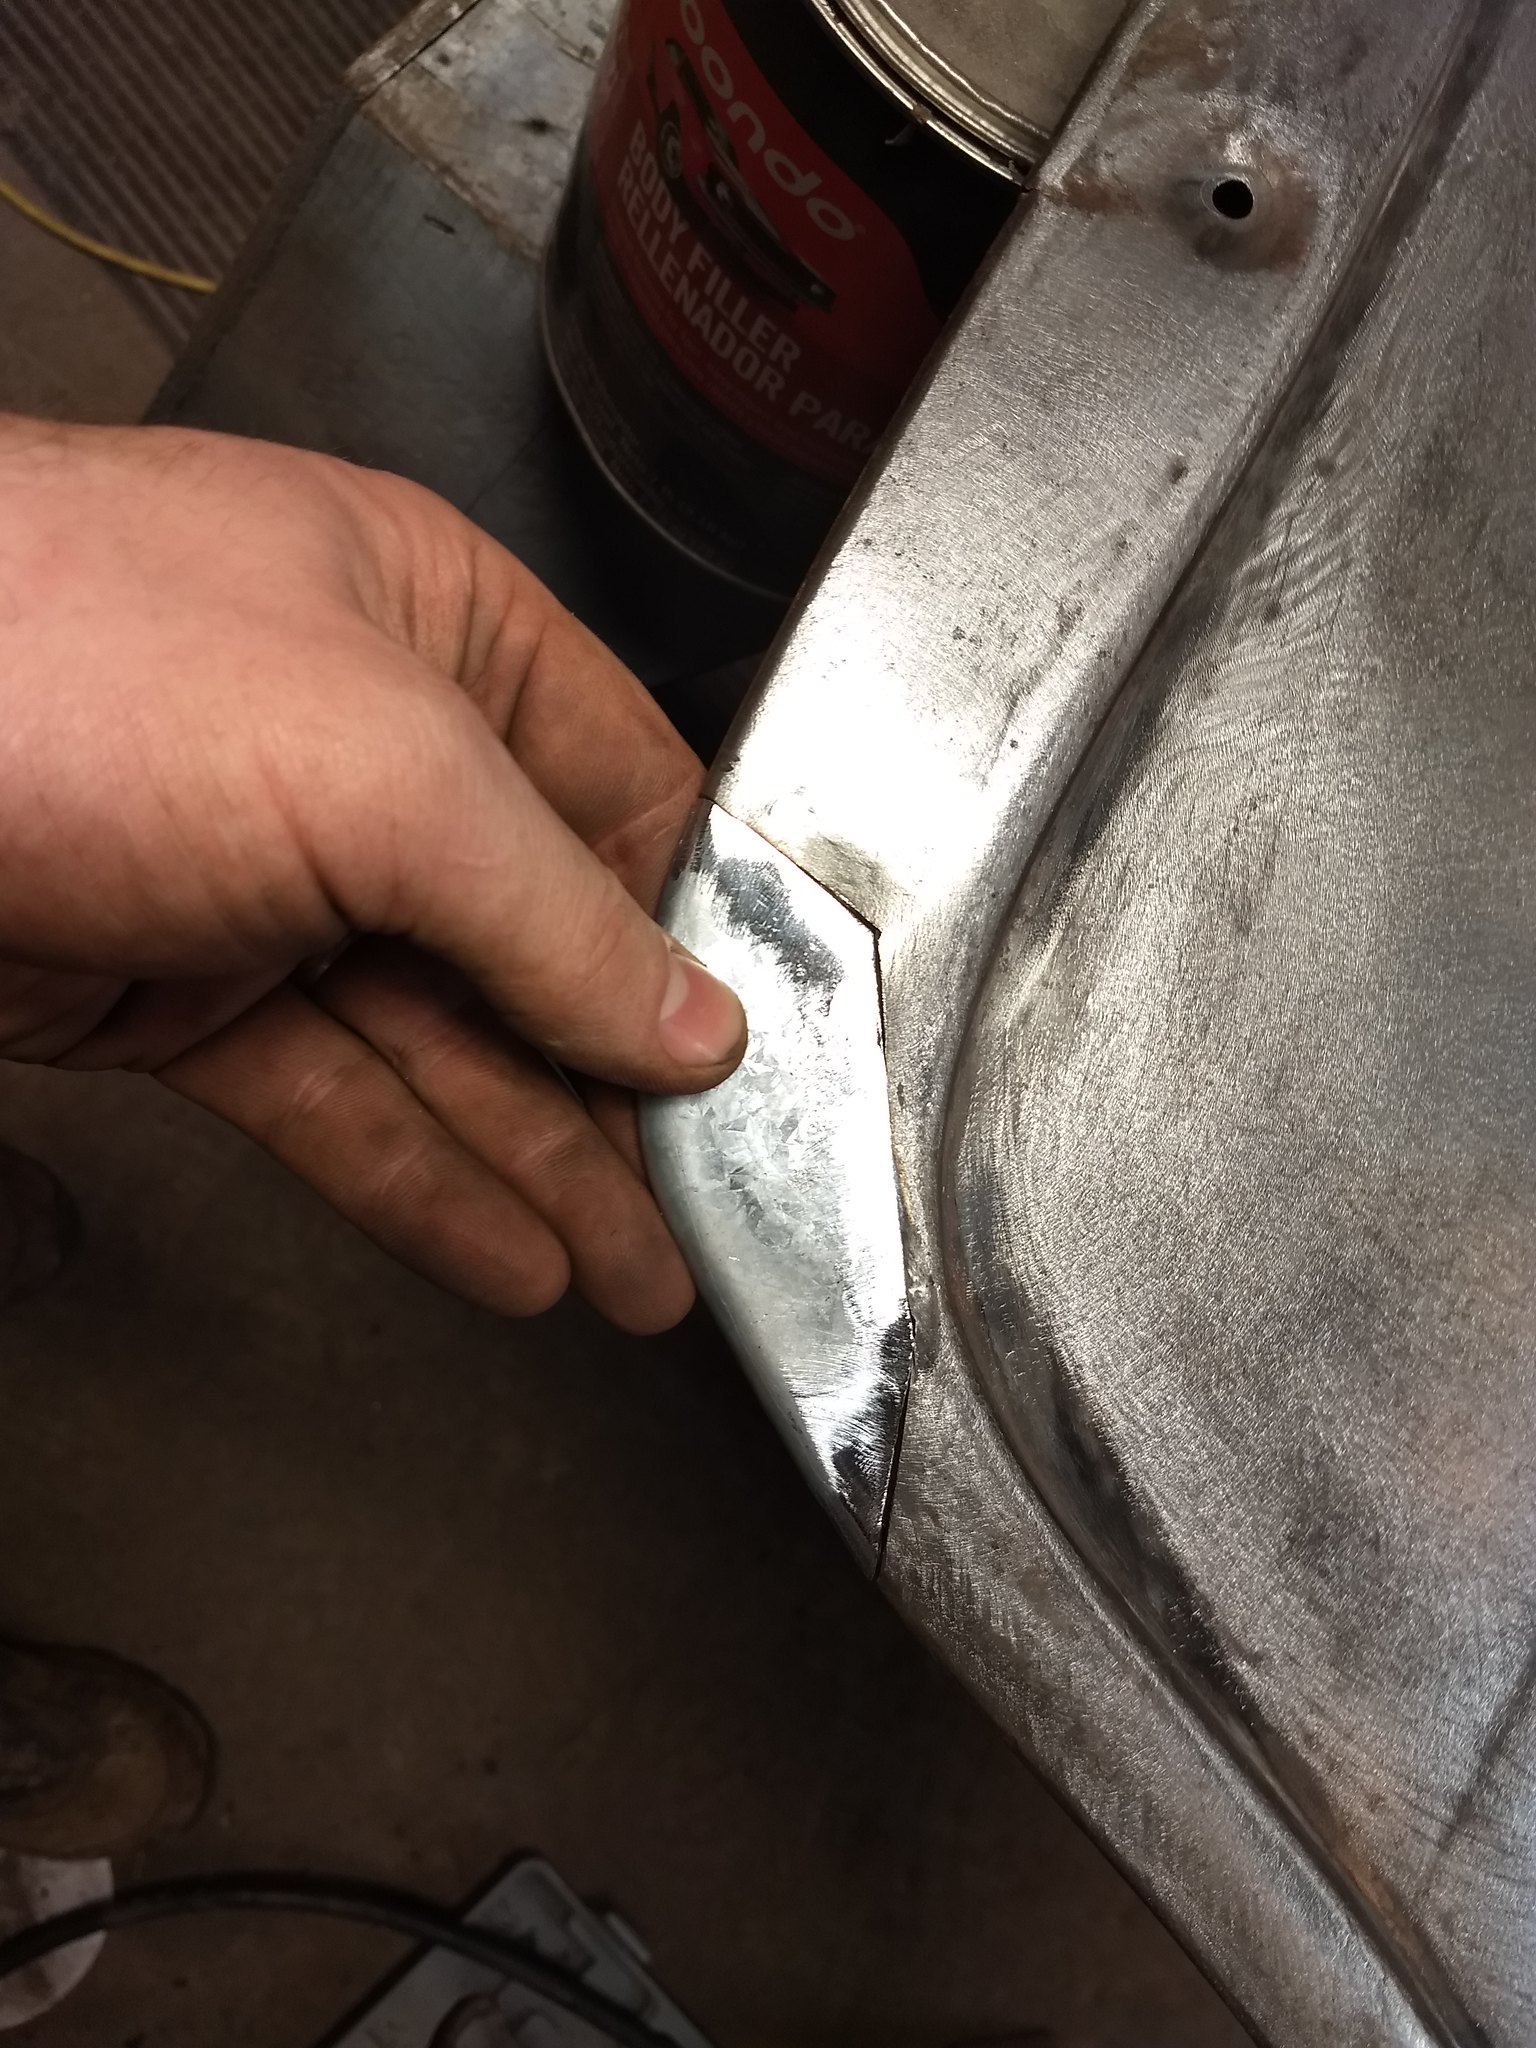
I had to make the patch 3 different times in order to get it right without damaging it beyond repair. I first held the flat sheet metal up to the opposite fender to trace the shape I needed. I then cut the patch about 3/4" oversized and went to work with various body hammers, dollies and my wooden work bench. This is the wheel arch of the fender, so the edge has to be rolled over itself. Once I got the basic curve hammered to about 30° or so I stuck it in my shrinker to take up some of the bend that was created in the flat portion forming the roll. I used the shank of a Phillips screwdriver to imitate the wire inside the roll and hammered the remaining metal down while keeping the rolled edge. The reason it took me 3 attempts to get it right is that I knew I had to shrink through the curve, because the panel naturally wants to curve where it has to end up flat, but I didn't know at what point I'd run out of room to fit it in the shrinker without dimpling the flat part of the patch. At some point I knew I'd reach a point where I couldn't access it inside the rolled edge, so the shrinking had to be done before then. With all that complete, I removed the offending portion of fender, scribed my patch to fit the hole and filed the edges for a perfect fit.
 IMG_20180113_162144303 by Ryan Mazingo, on Flickr
All that was left to do is weld it in and grind the welds flush. Unfortunately, the motor on my compressor is crapping out on me, so I wasn't able to finish grinding before the overload tripped it and I couldn't grind anymore. Decided a hot shower and a cold drink sounded better than cussing about a compressor, so I'll finish it up tomorrow.
 IMG_20180113_170012545 by Ryan Mazingo, on Flickr
Last edited by PNW Rodder; 01-14-2018 at 03:32 PM.
-
01-15-2018 08:58 AM #24
CHR Member
- Join Date
- Nov 2016
- Location
- rocklin
- Posts
- 656
Does your compressor freeze up when it starts sometimes? Mine used to do that and it would trip the breaker, I just had to change it's start capacitor and it was good again.
-
01-15-2018 11:13 AM #25
CHR Member
- Join Date
- Dec 2017
- Location
- Stanwood
- Car Year, Make, Model: '37 Dodge sedan
- Posts
- 104
Sometimes it struggles to get the pump spinning on start up, but usually it builds pressure until the tank is nearly full pressure and it trips the breaker at that point. If I let it sit for a while it will usually start right back up after resetting the breaker. Originally Posted by v8nutz
I'm fairly certain the cap is weak, but the motor is from '84, if it's the original motor, so I'm thinking it's just time to replace it all together.
-
01-15-2018 12:54 PM #26
CHR Member
- Join Date
- Dec 2017
- Location
- Stanwood
- Car Year, Make, Model: '37 Dodge sedan
- Posts
- 104
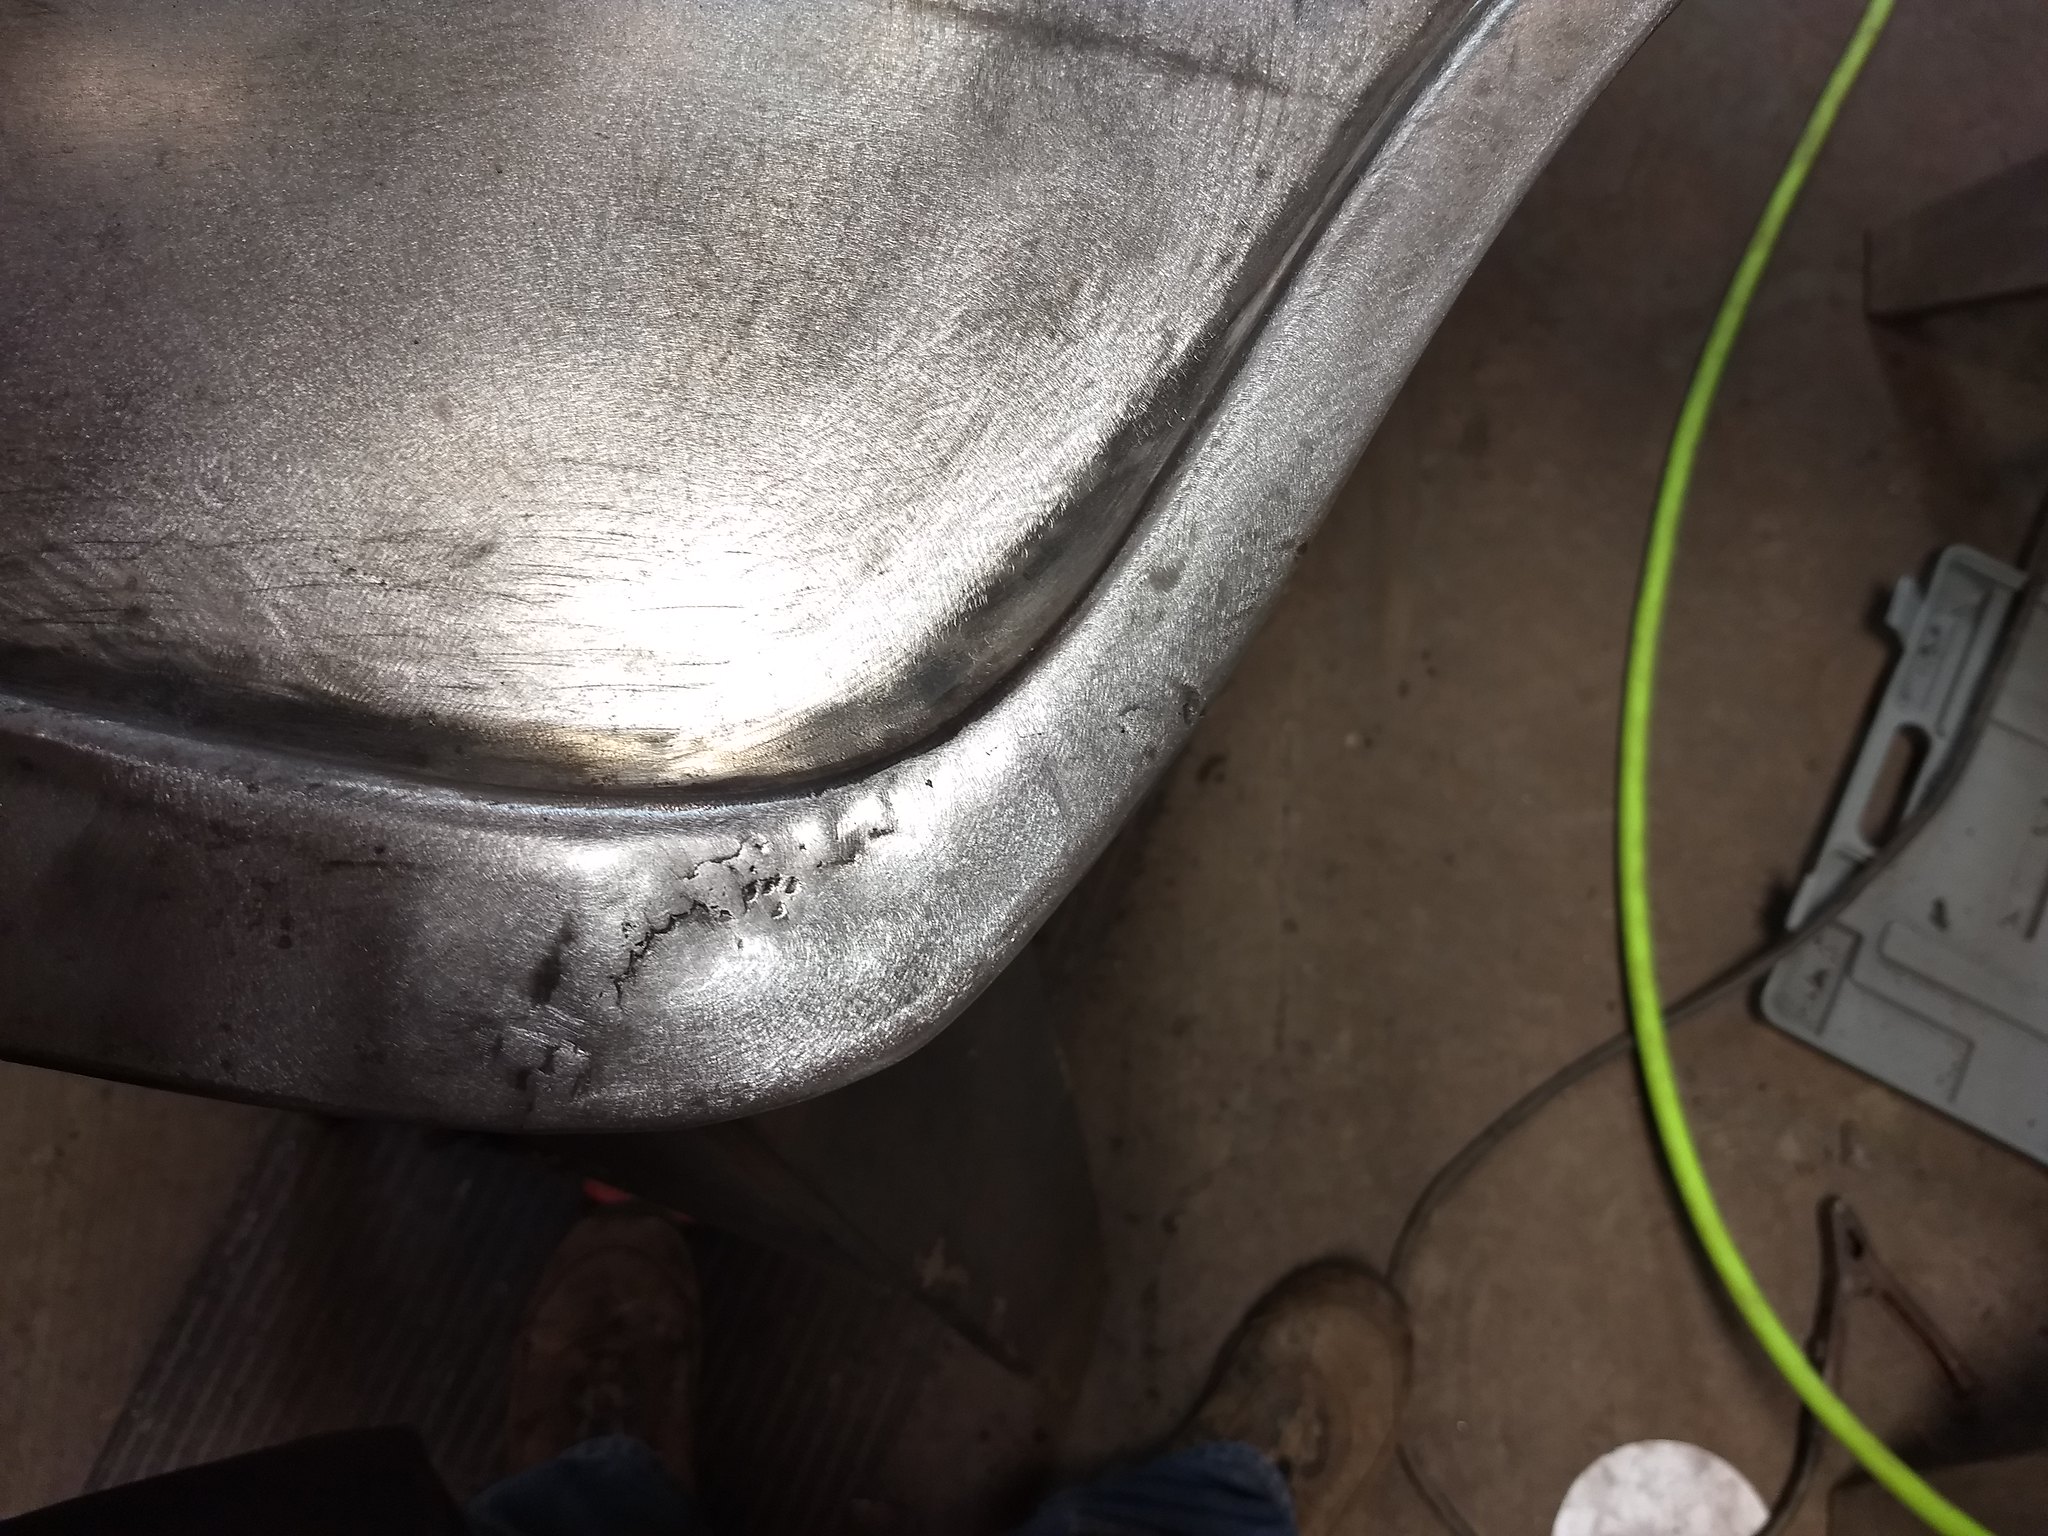
Apart from the obvious, these pictures show just how bad the damage really was. The original body work only masked the problem, which also caused it to get worse. I hated finding more repairs that I had to do, but these types of discoveries also force you to realize that doing the work right the first time will eventually save you from redoing it down the road. Don't let your current knowledge of any process stop you from trying to do it right, instead of just slapping a band-aid on it and hoping for the best.
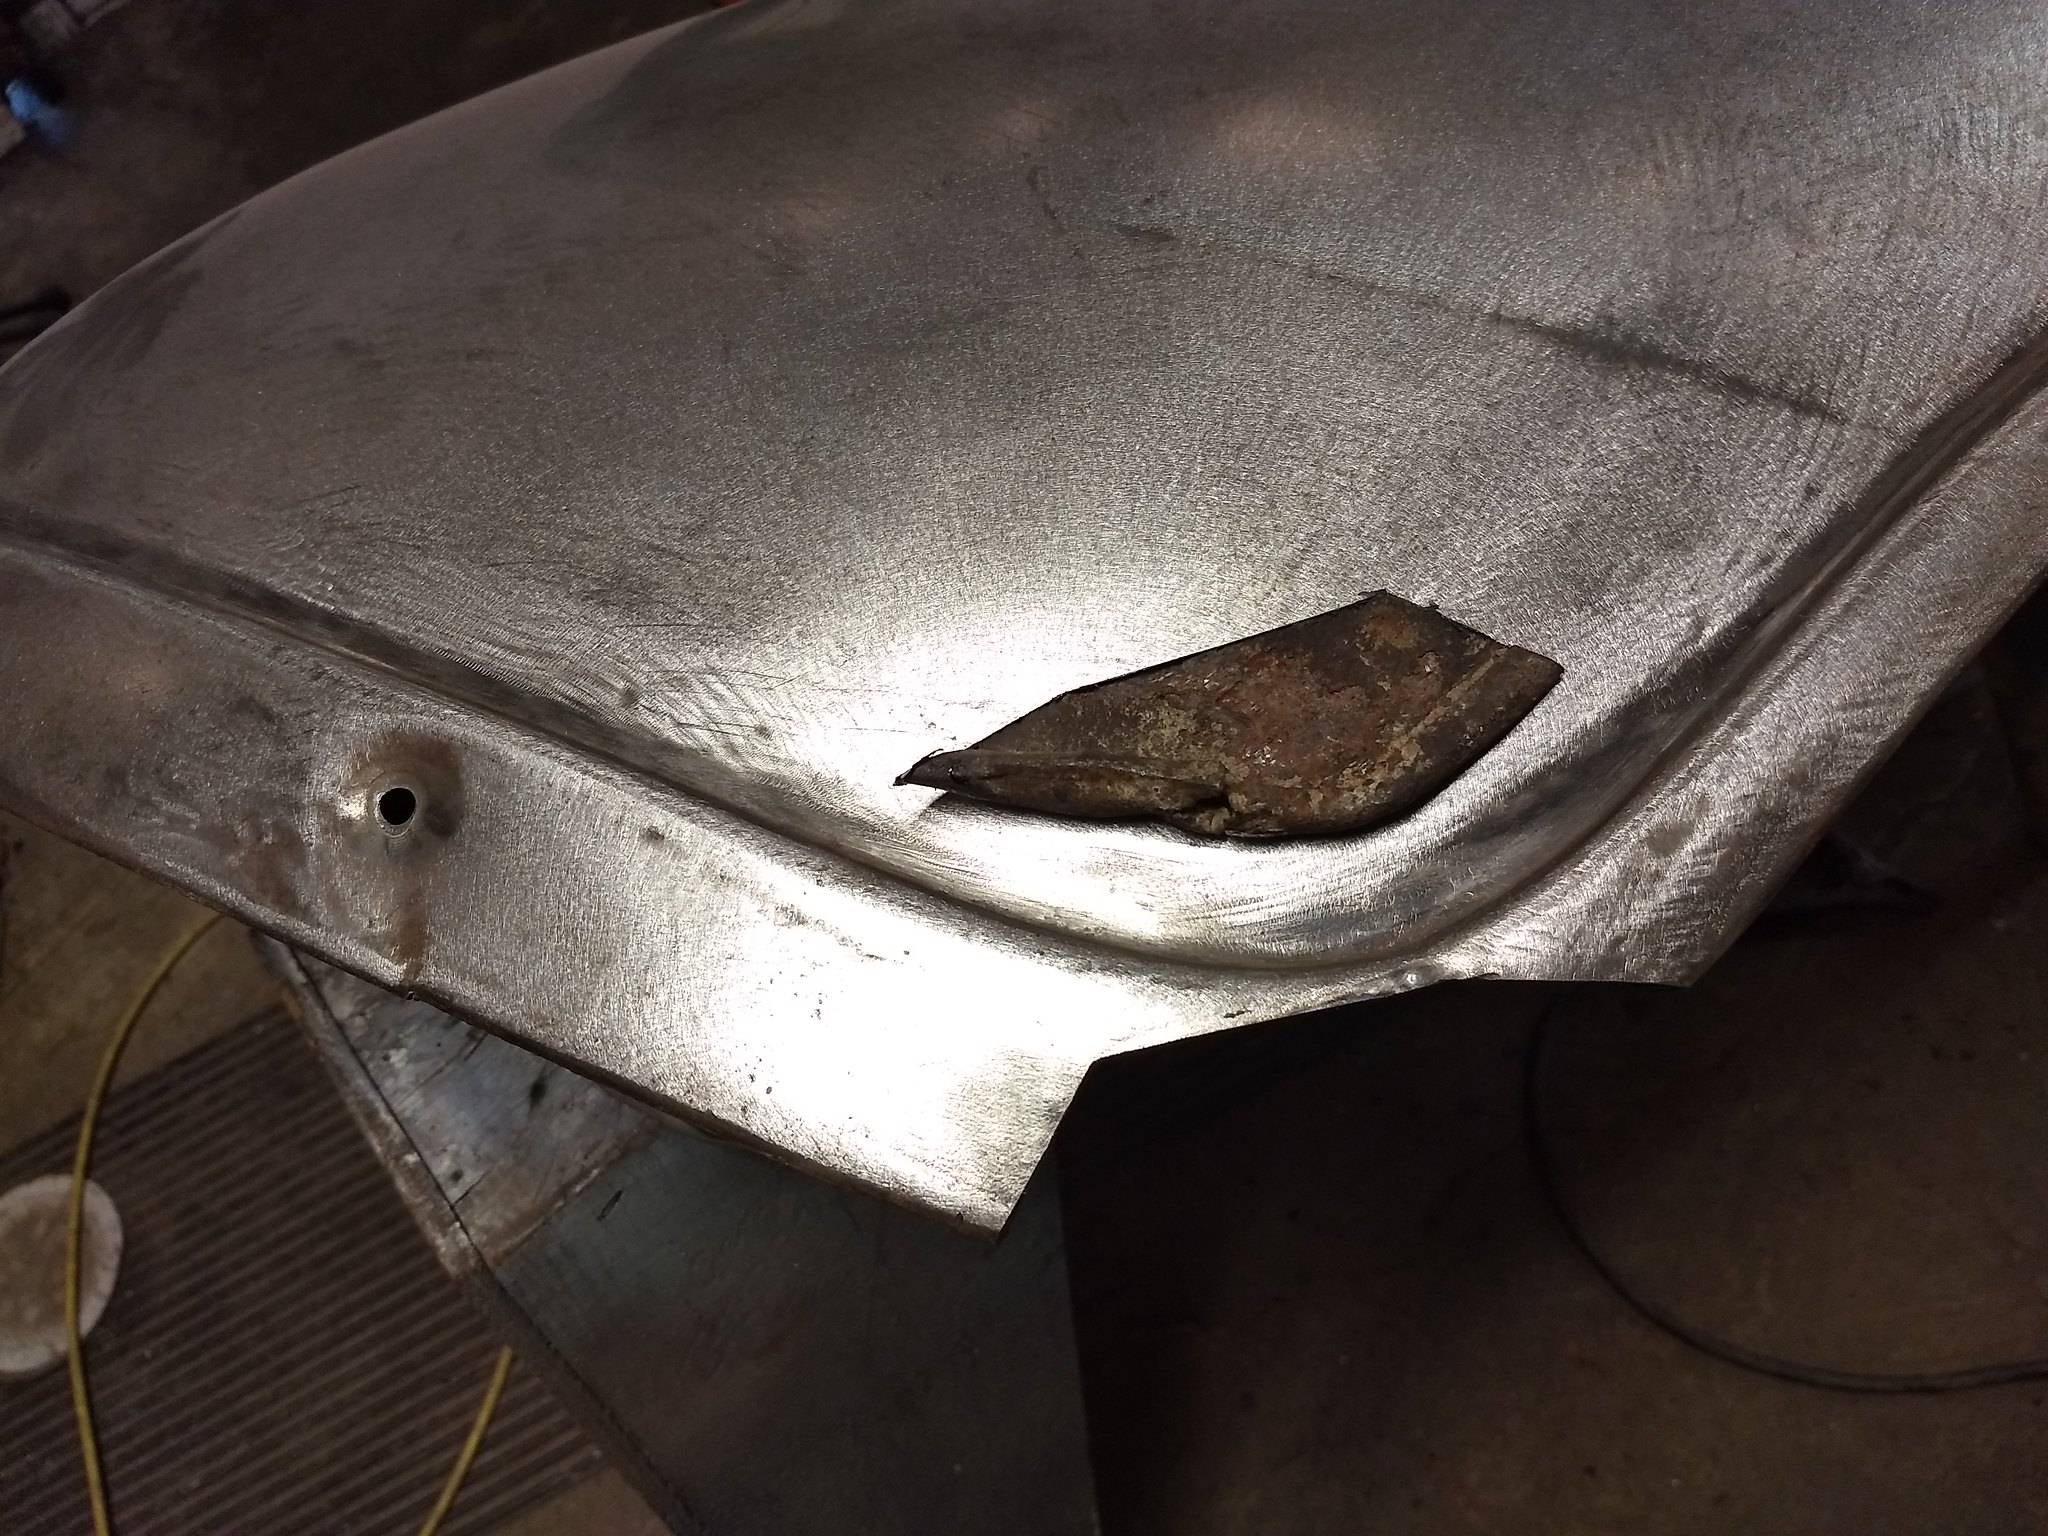 IMG_20180113_155332314 by Ryan Mazingo, on Flickr
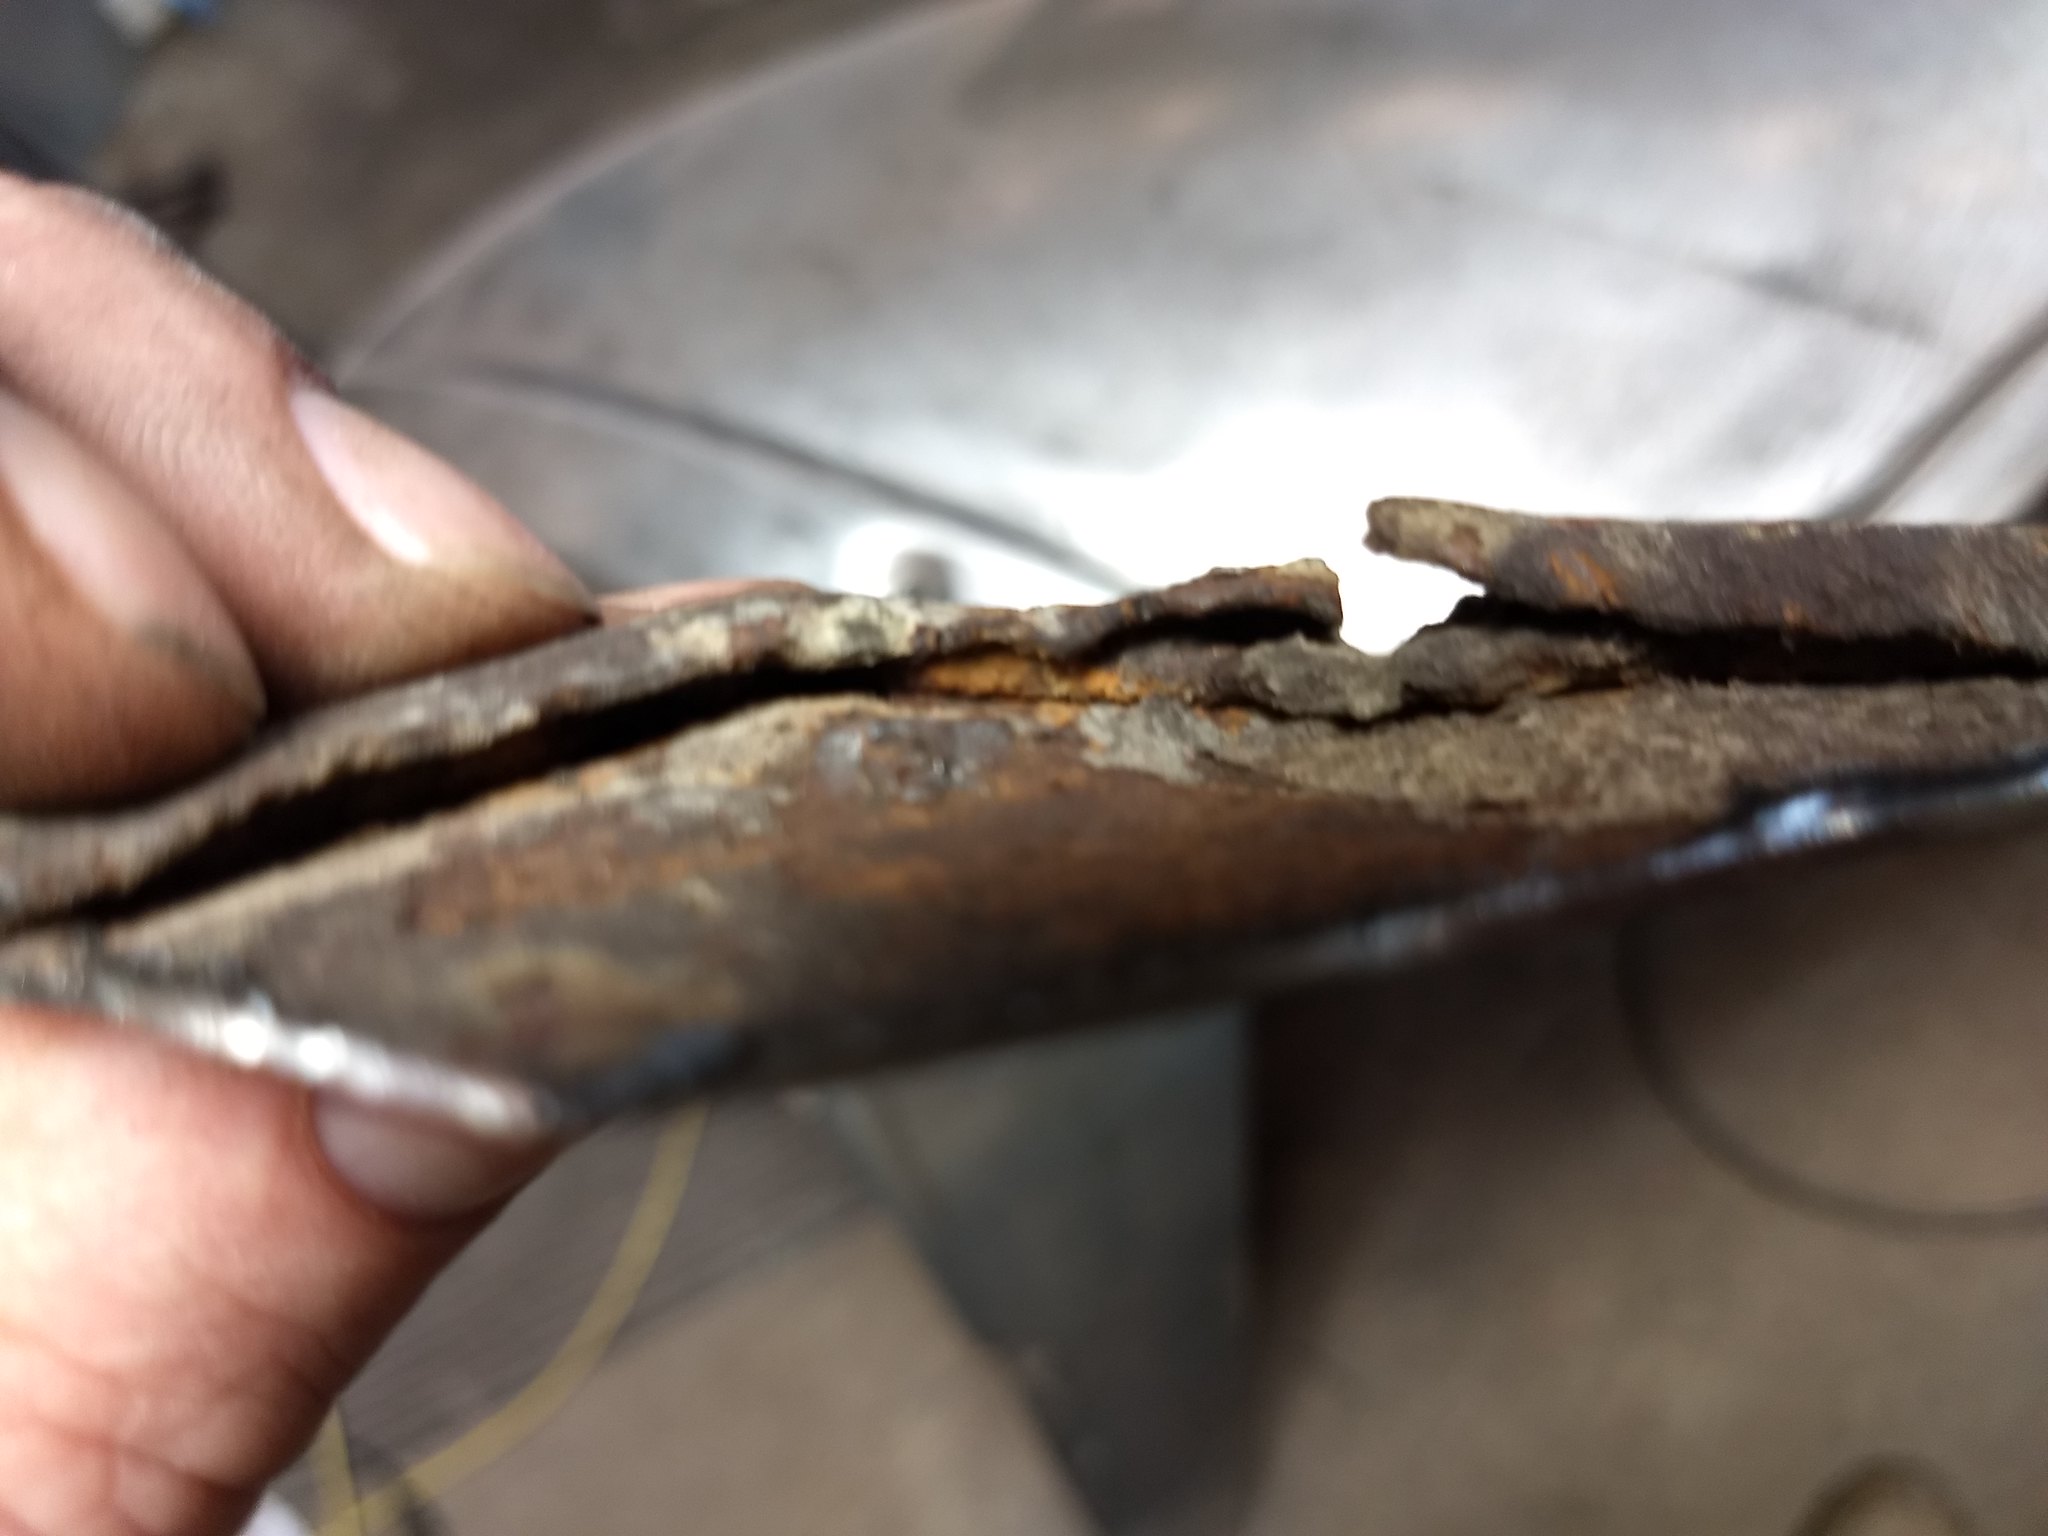 IMG_20180113_155349054 by Ryan Mazingo, on Flickr
-
01-15-2018 06:12 PM #27
CHR Member
- Join Date
- Sep 2007
- Location
- New Bedford
- Car Year, Make, Model: 34 Ford 3W Coupe Replica
- Posts
- 14,754
That sounds like the un-loader valve. It should allow the motor to come up to speed before engaging the pump head. Originally Posted by PNW Rodder
-
01-15-2018 06:15 PM #28
CHR Member
- Join Date
- Nov 2016
- Location
- rocklin
- Posts
- 656
That's going to be a very cool car, I like the front end especially. I'm doing the same engine trans as you too in my old stude.
-
01-15-2018 06:59 PM #29
CHR Member
- Join Date
- Dec 2017
- Location
- Stanwood
- Car Year, Make, Model: '37 Dodge sedan
- Posts
- 104
I love the fat fender sedans, especially the 4 doors. Something about the suicide doors, the big bug eyed headlights and those big sweeping fenders just gets my blood pumping. Originally Posted by v8nutz
It's funny, I always wanted a '36 Plymouth sedan, but this one has made me a little biased for the '37, and now I prefer the Dodges over the Plymouths.
-
01-15-2018 08:36 PM #30
CHR Member
- Join Date
- Jan 2005
- Location
- Doon, Ia
- Car Year, Make, Model: 53 Chevy 3100
- Posts
- 2,716
Rust is always worse than it looks, although yours in one of the nicest I've seen. The patch looks good!Seth
God cannot give us a happiness and peace apart from Himself, because it is not there. There is no such thing. C.S.Lewis
 Reply With Quote

Posting Permissions
- You may not post new threads
- You may not post replies
- You may not post attachments
- You may not edit your posts

This site is up more often lately, but very little traffic.
Dead!