


 126Likes

Results 46 to 60 of 151
 LinkBack URL
 About LinkBacks
-
01-18-2017 05:33 PM #46
 CHR Member

- Join Date
- Oct 2007
- Location
- Petaluma
- Car Year, Make, Model: 48 Ford F1
- Posts
- 9,795
I agree with the other guys, nice work, and a great old lathe! When in comes to heavy tools I find the quality from the past much supperior to what you will pay for anything new these days. I do wood working and really like pre-chinese stuff!"  "No matter where you go, there you are!" Steve.
-
Advertising

- Google Adsense
- REGISTERED USERS DO NOT SEE THIS AD
-
01-20-2017 04:25 PM #47
CHR Member
- Join Date
- May 2015
- Location
- South East
- Posts
- 318
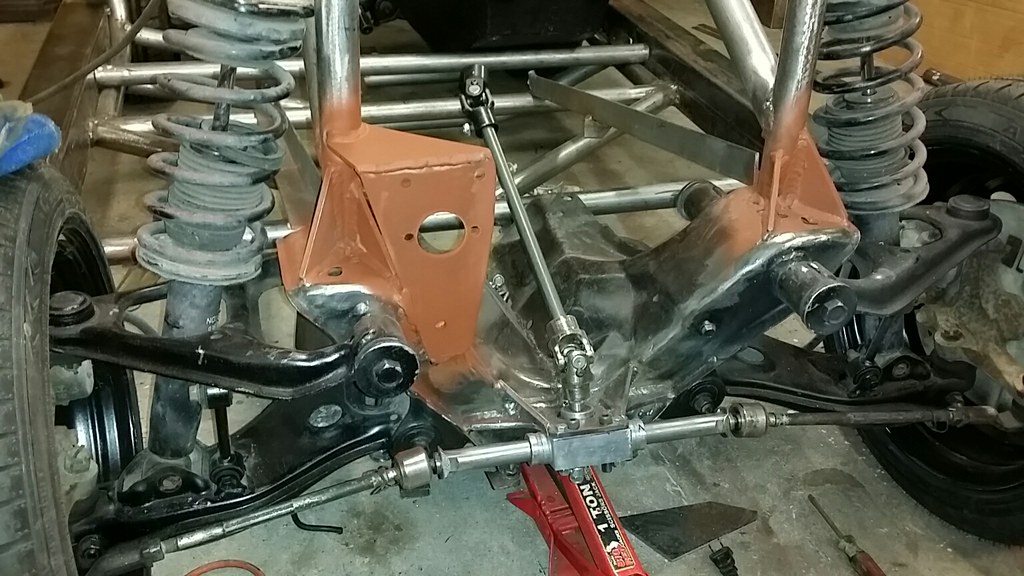
Progress on suspension. Made upper spring/shock mounts from 1/4" thick 6" wide flat bar. In the front, tubing comes up from the subframe to a brace that will bolt in place. It will be removable to extract the struts without separating ball joints and tie rods.
[IMG]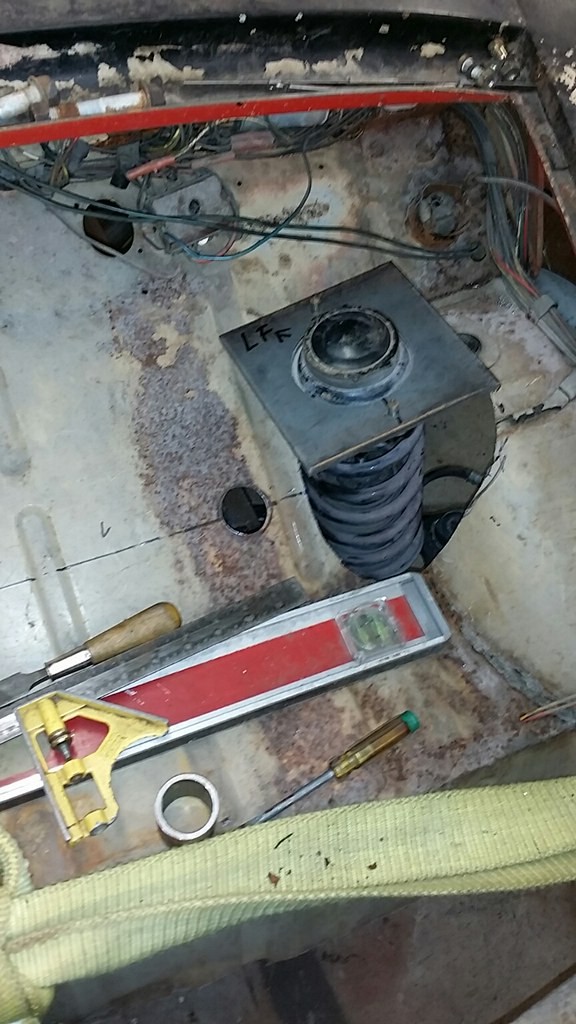 20170119_093043_resized by Ben Modified, on Flickr[/IMG]
[IMG]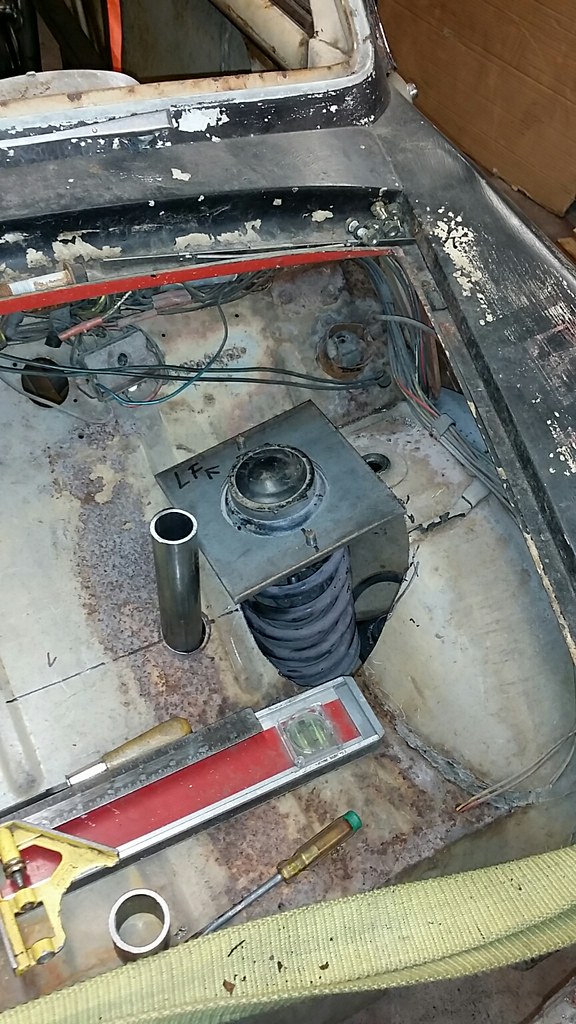 20170119_094333_resized by Ben Modified, on Flickr[/IMG]
The brace will be clamped in place temporarily to determine proper ride height.
Once determined, a flange nut will be welded into the top of the trimmed off tube. Will also weld a plate over the 1 1/2" hole thru which the bolt will go.
[IMG]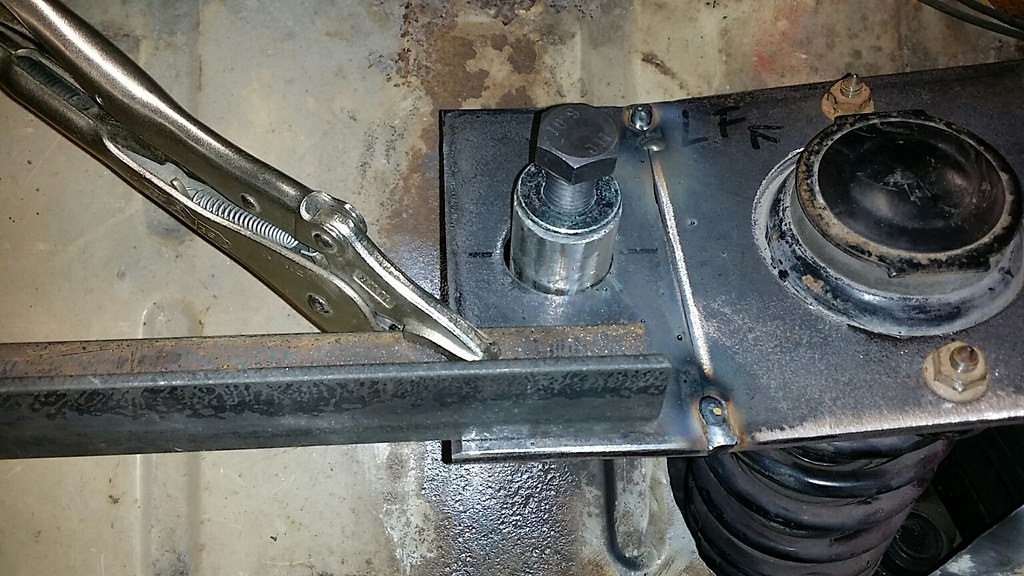 20170120_093328_resized by Ben Modified, on Flickr[/IMG]
[IMG]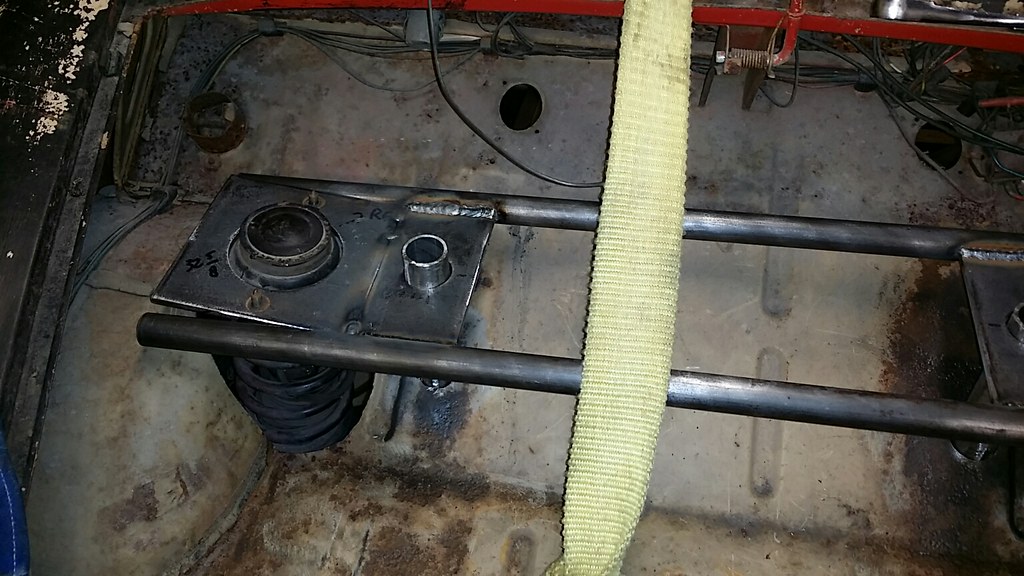 20170120_102302_resized by Ben Modified, on Flickr[/IMG]
Heated and bent the ends of the tubes to match the strut angle
[IMG]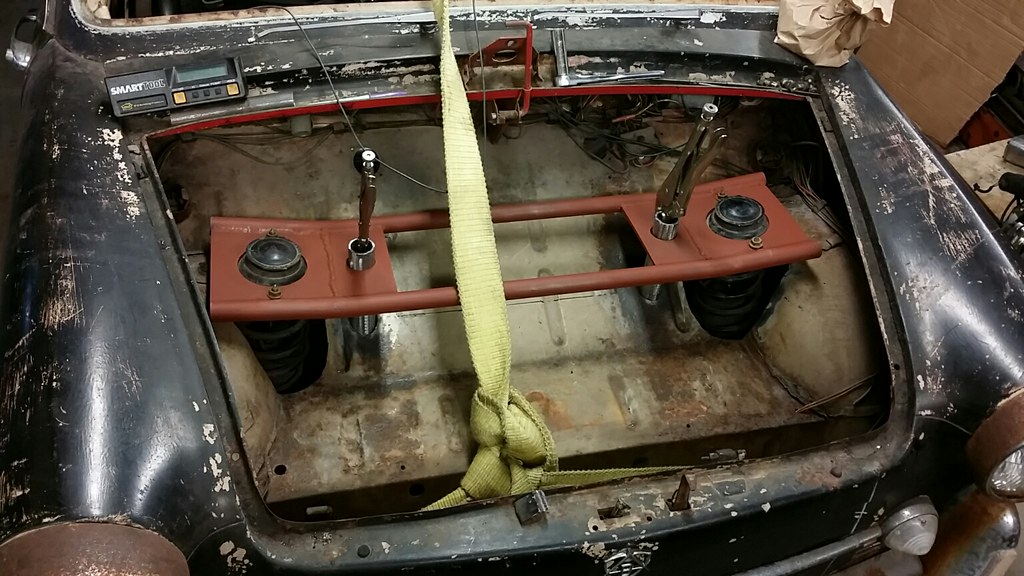 20170120_123356_resized by Ben Modified, on Flickr[/IMG]
Started on the rear supports also. Mostly done, just need a couple of gussets.
[IMG]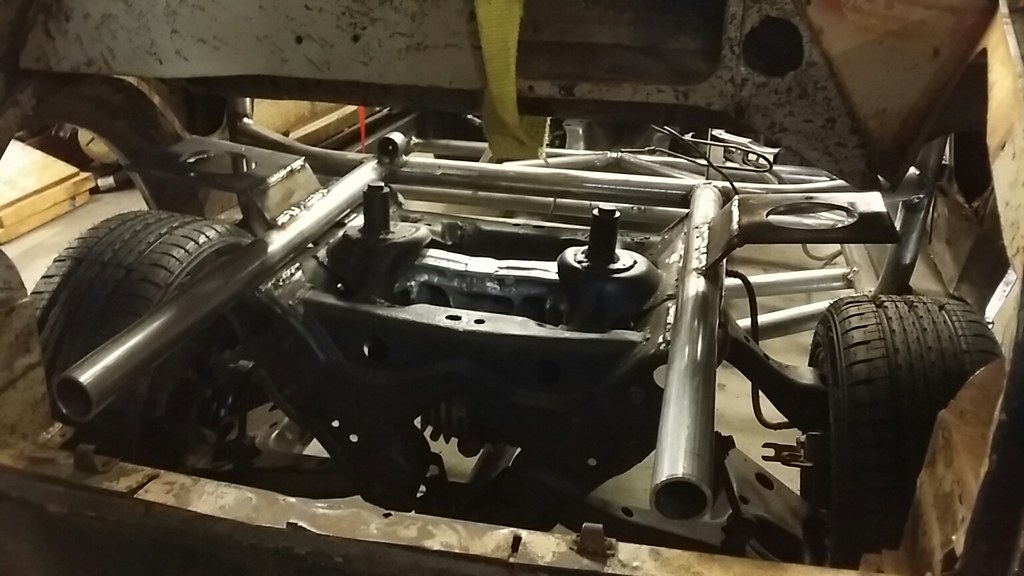 20170120_171918_resized by Ben Modified, on Flickr[/IMG]
The supports are out from under the car. The front is on its wheels and the rear in on a floor jack waiting for the gussets.
[IMG]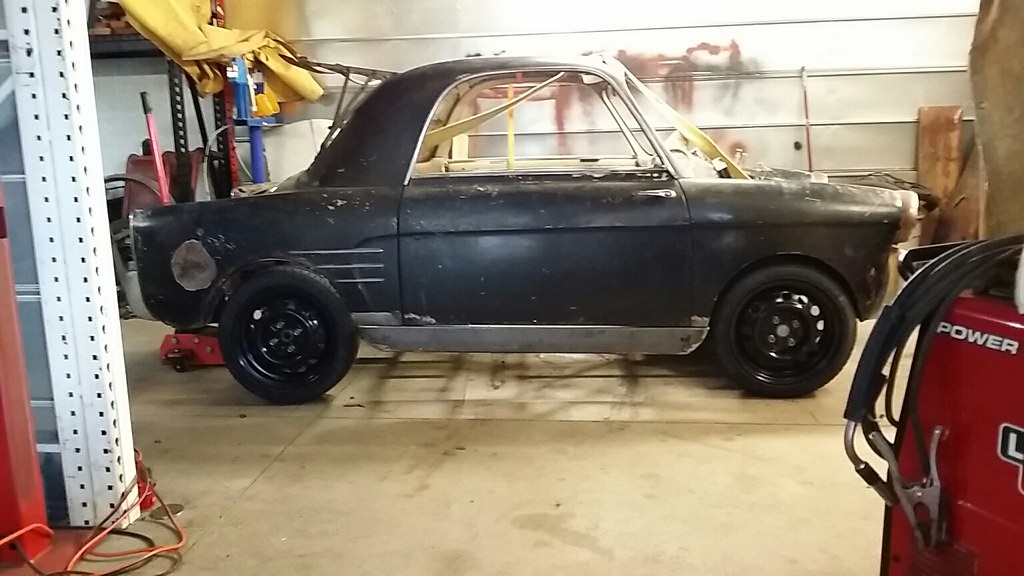 20170120_124742_resized by Ben Modified, on Flickr[/IMG]
http://www.BenModified.com
-
01-22-2017 12:14 PM #48
CHR Member
- Join Date
- May 2015
- Location
- South East
- Posts
- 318
Part 3 is on YouTube
https://www.youtube.com/watch?v=h25zc-lF1bc
-
01-24-2017 04:41 PM #49
CHR Member
- Join Date
- May 2015
- Location
- South East
- Posts
- 318
The steering is coming together. I wound up using a center steer box from a sand rail with the steering arms from the gen 1 honda crx and the tie rod ends from the miata. Here is the original sand rail setup
[IMG]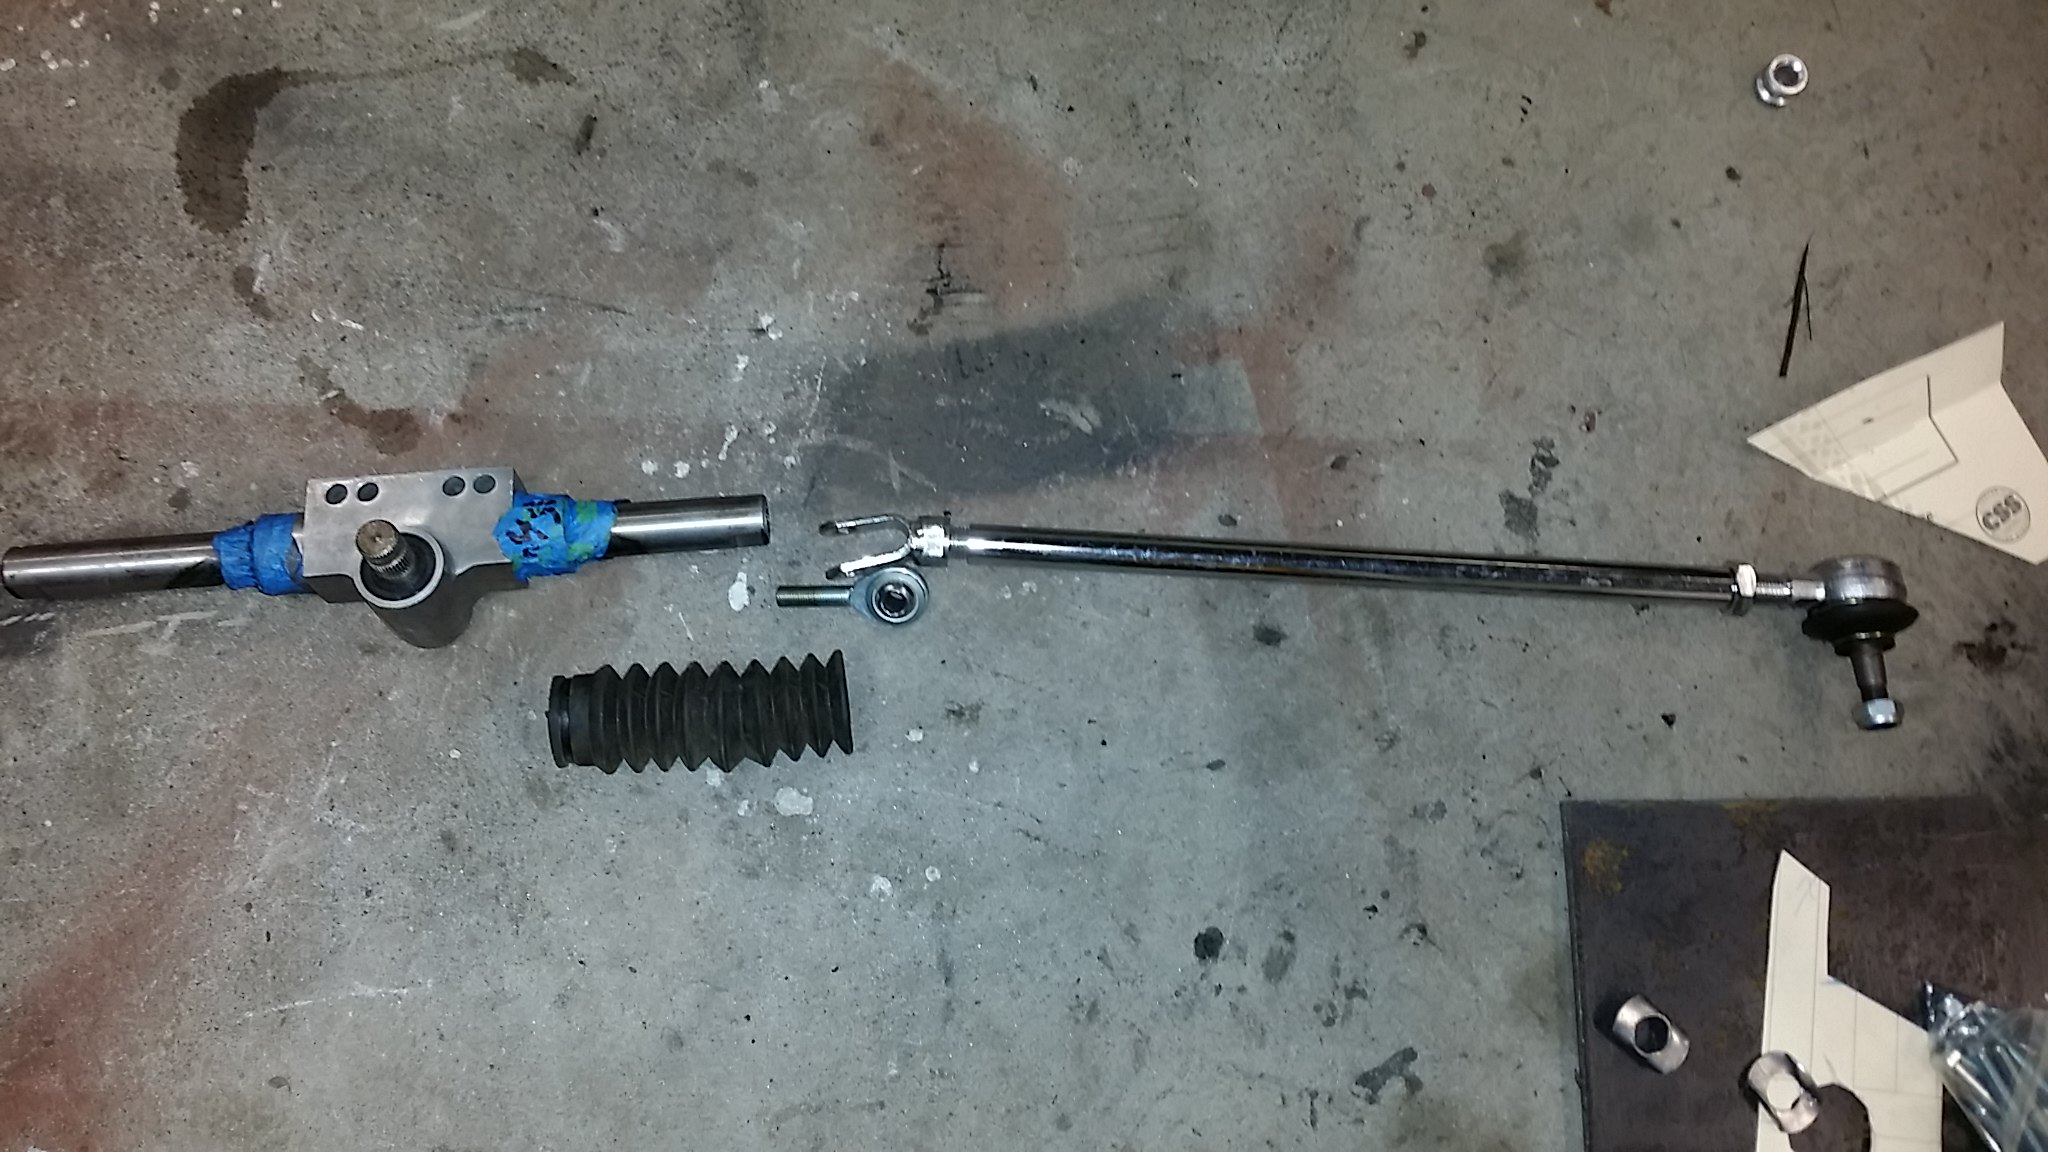 20170123_145418 by Ben Modified, on Flickr[/IMG]
The new arrangement
[IMG] 20170123_145415 by Ben Modified, on Flickr[/IMG]
Had to open up the holes in the ends of the rack and rethread to fit the honda pieces.
[IMG]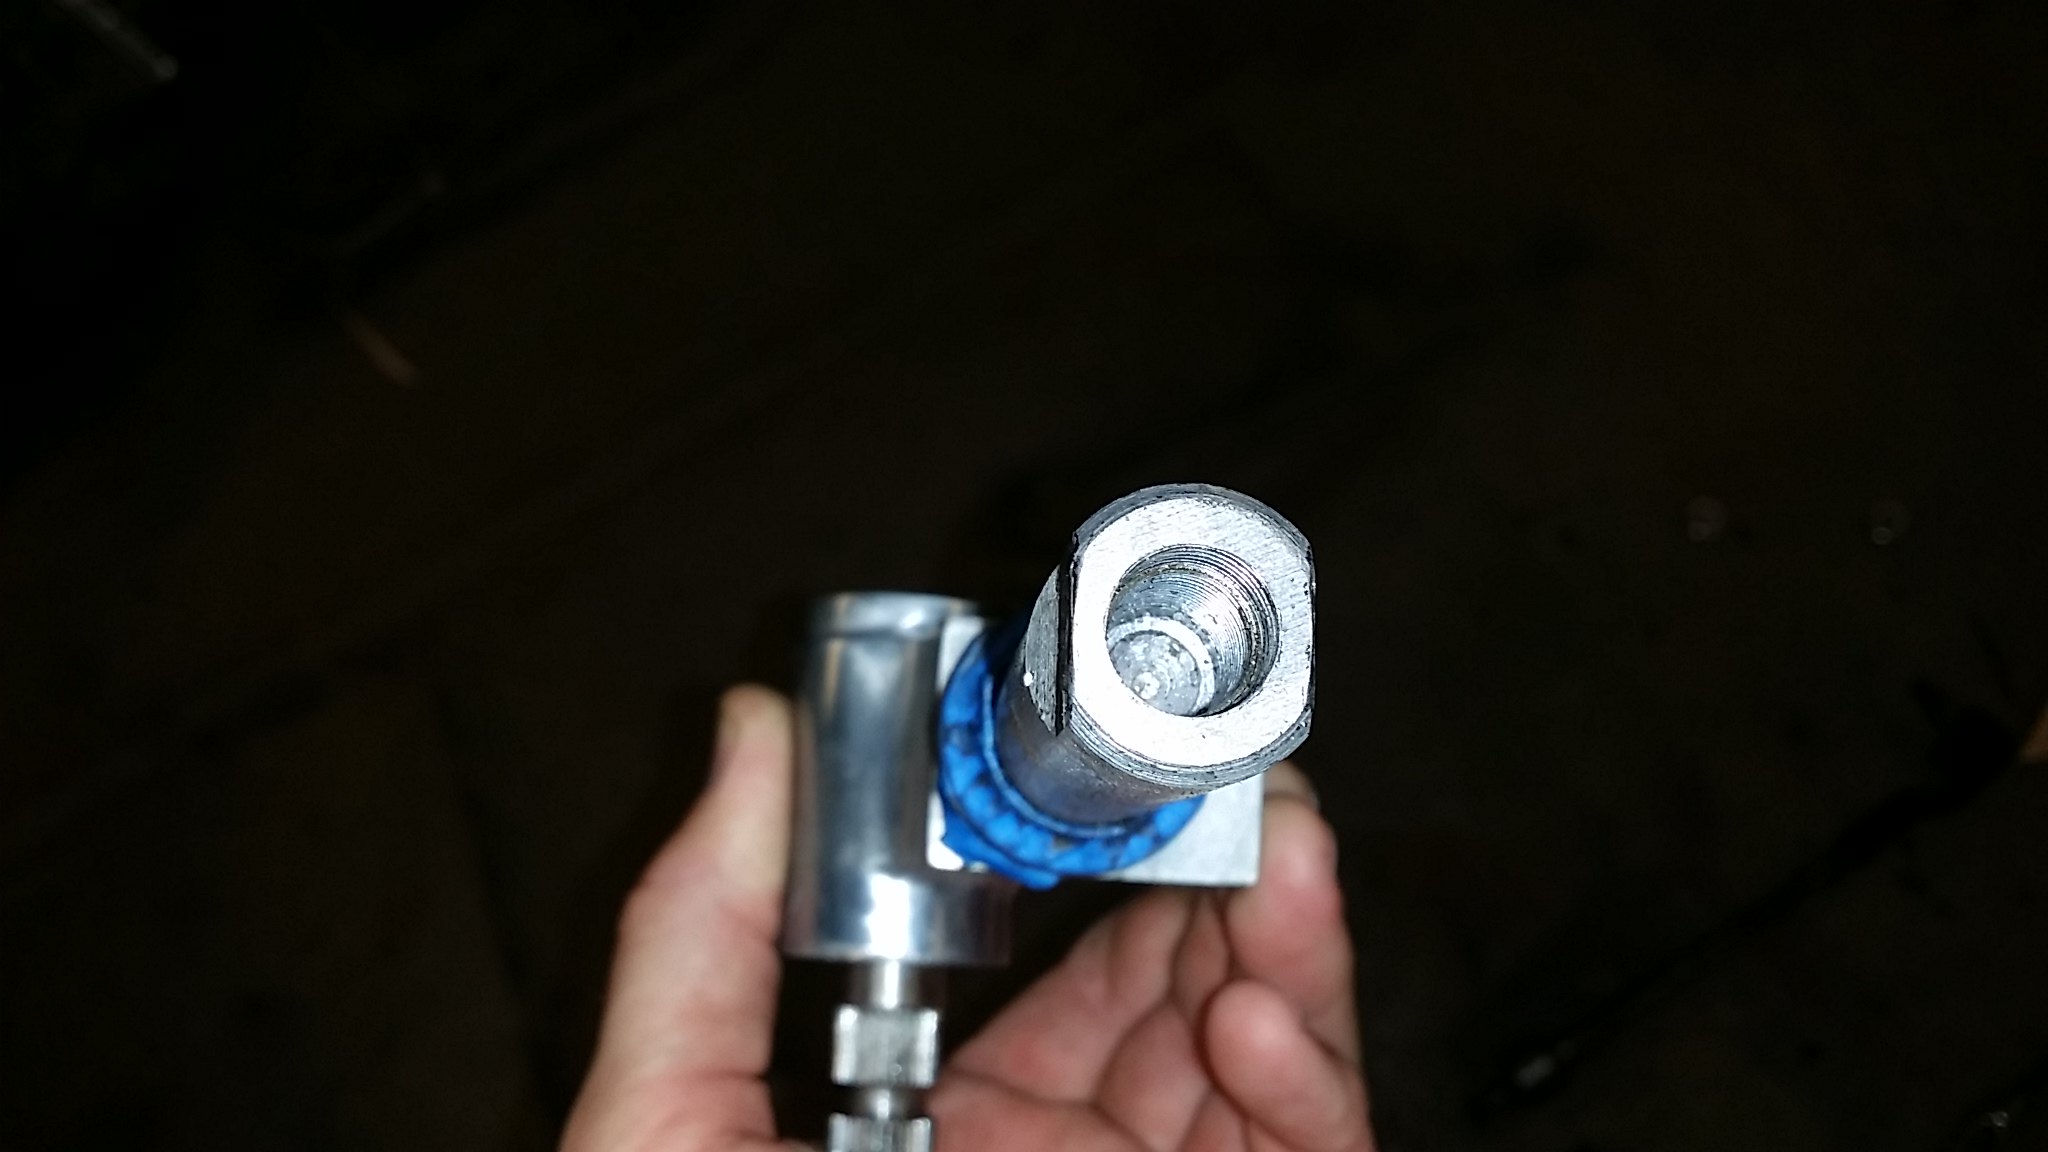 20170123_145438 by Ben Modified, on Flickr[/IMG]
Assembled with the beginnings of a mounting bracket. I believe that shock boots from a golf cart shock will work on this unit.
[IMG]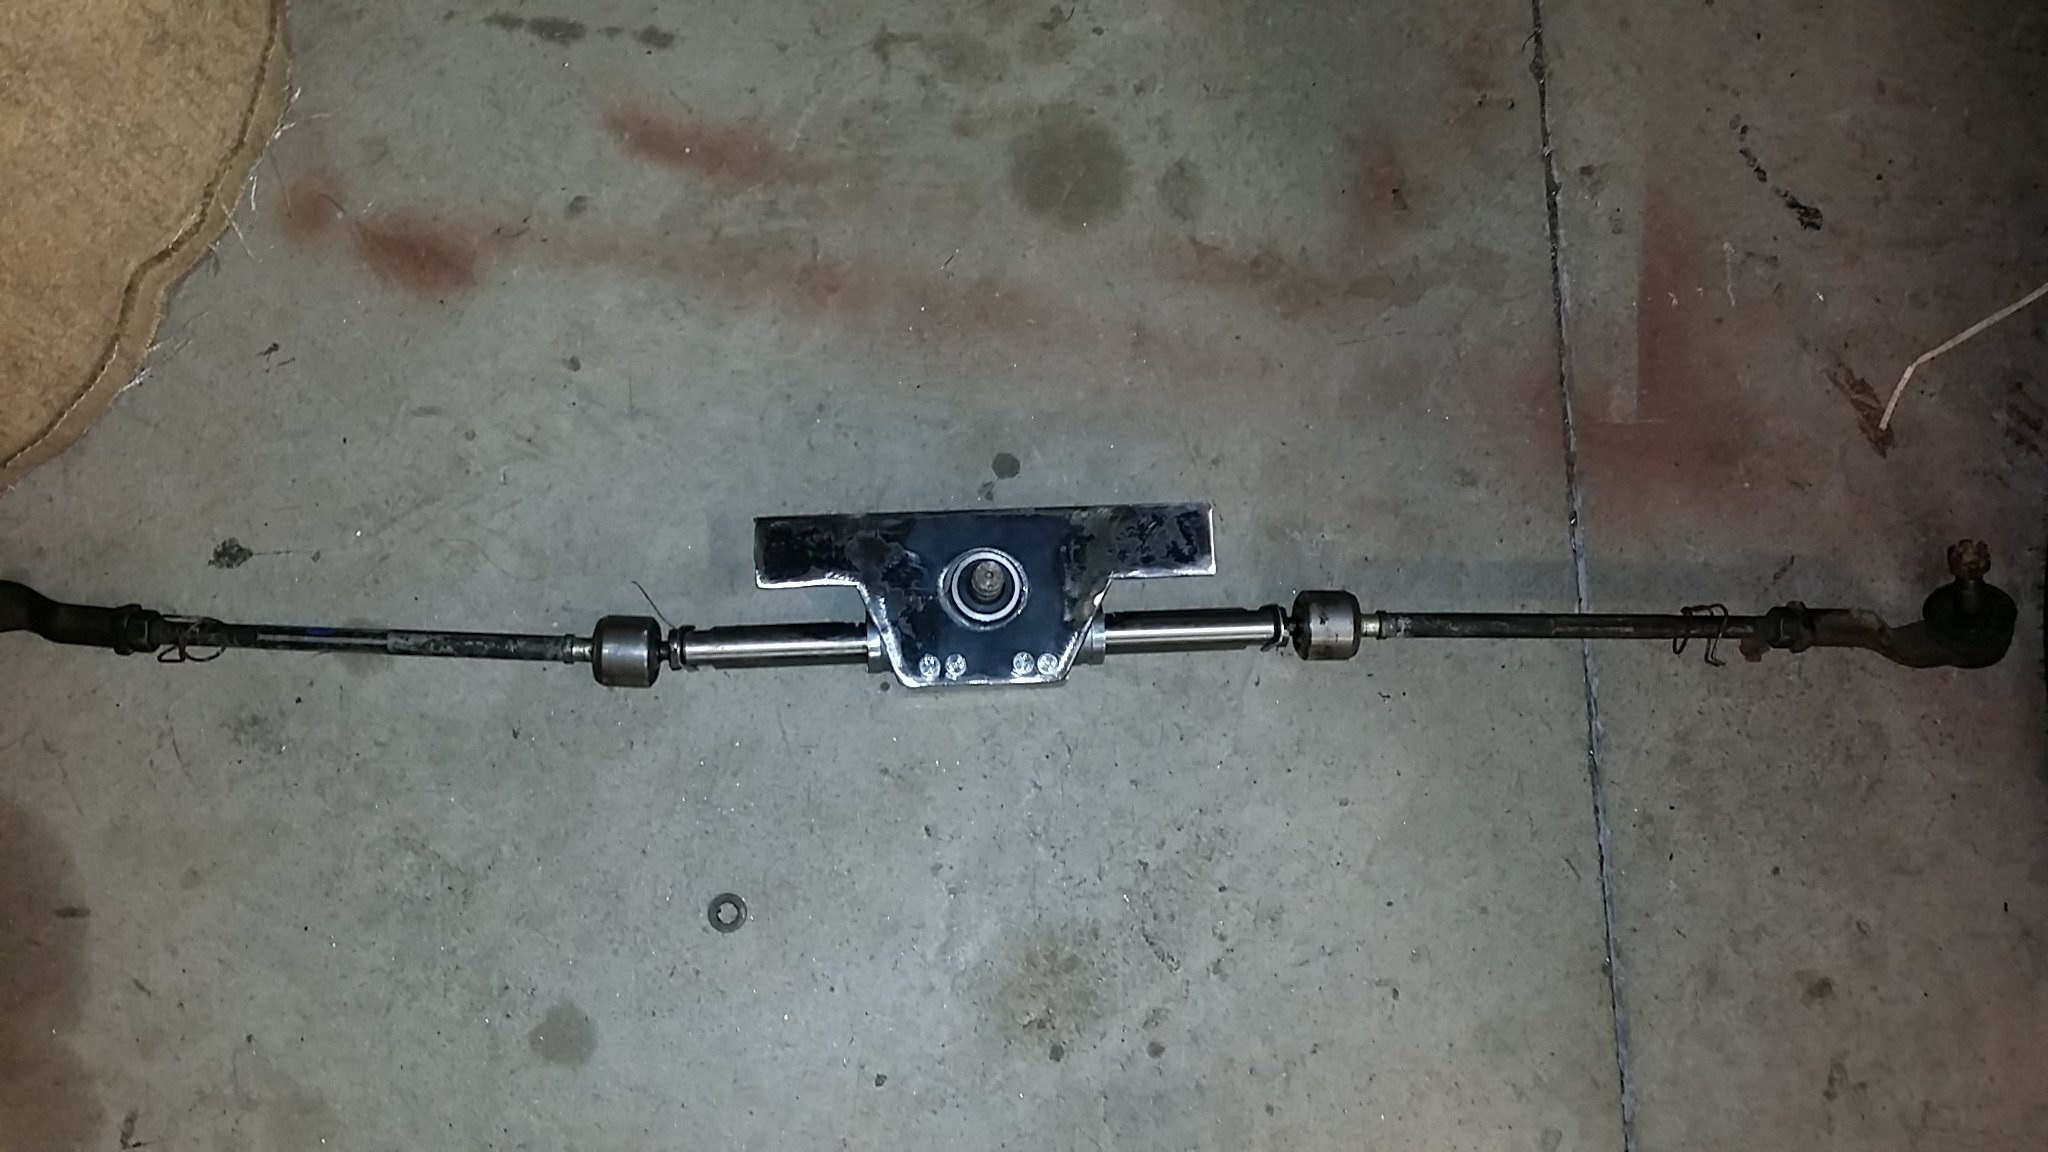 20170124_151839 by Ben Modified, on Flickr[/IMG]
The joints are in the original miata location. With any luck, no bump steer. I will cycle the suspension thru its range before welding everything in
[IMG]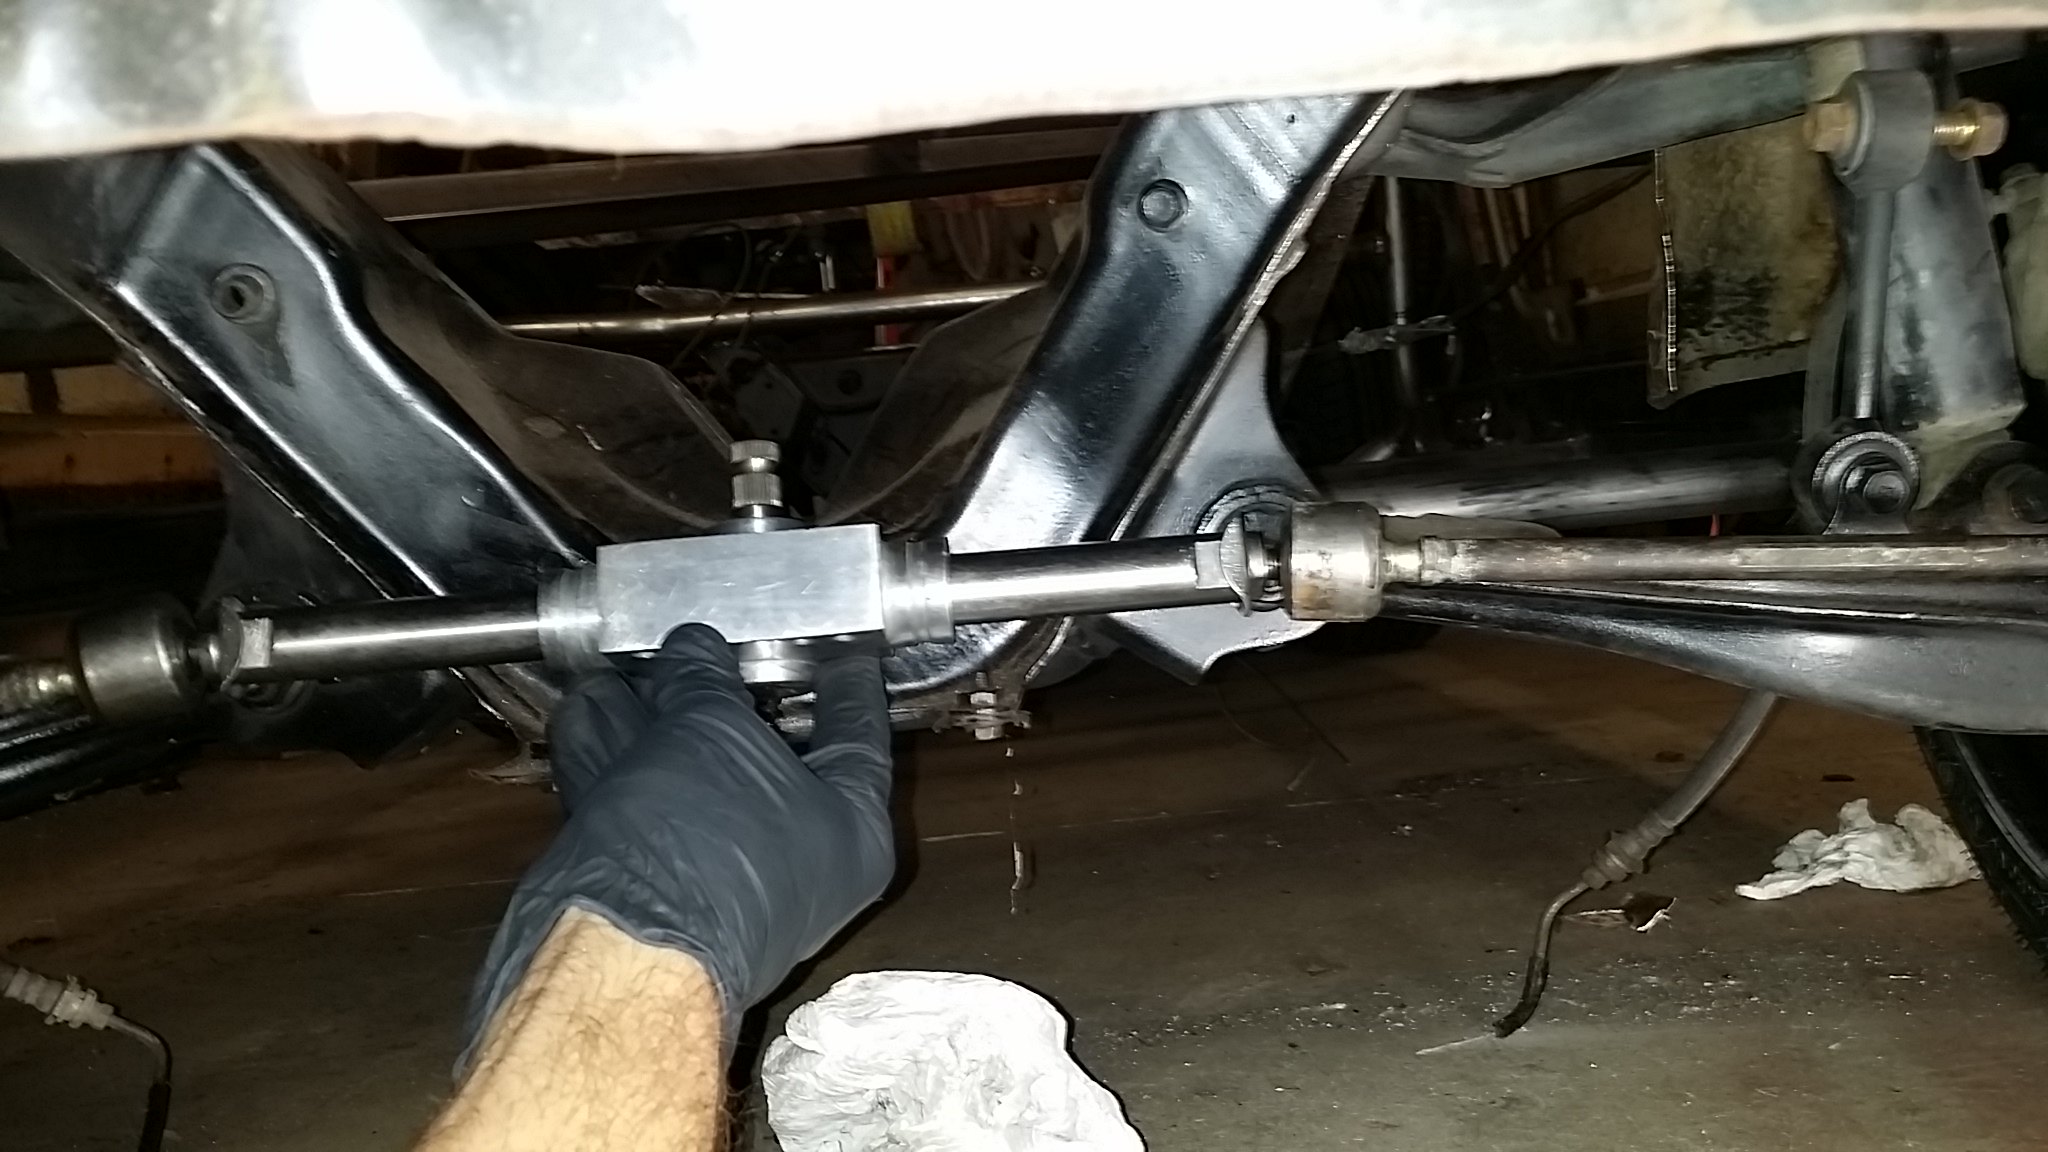 20170124_125238 by Ben Modified, on Flickr[/IMG]
Also machined some collars to splice the rear axles
[IMG]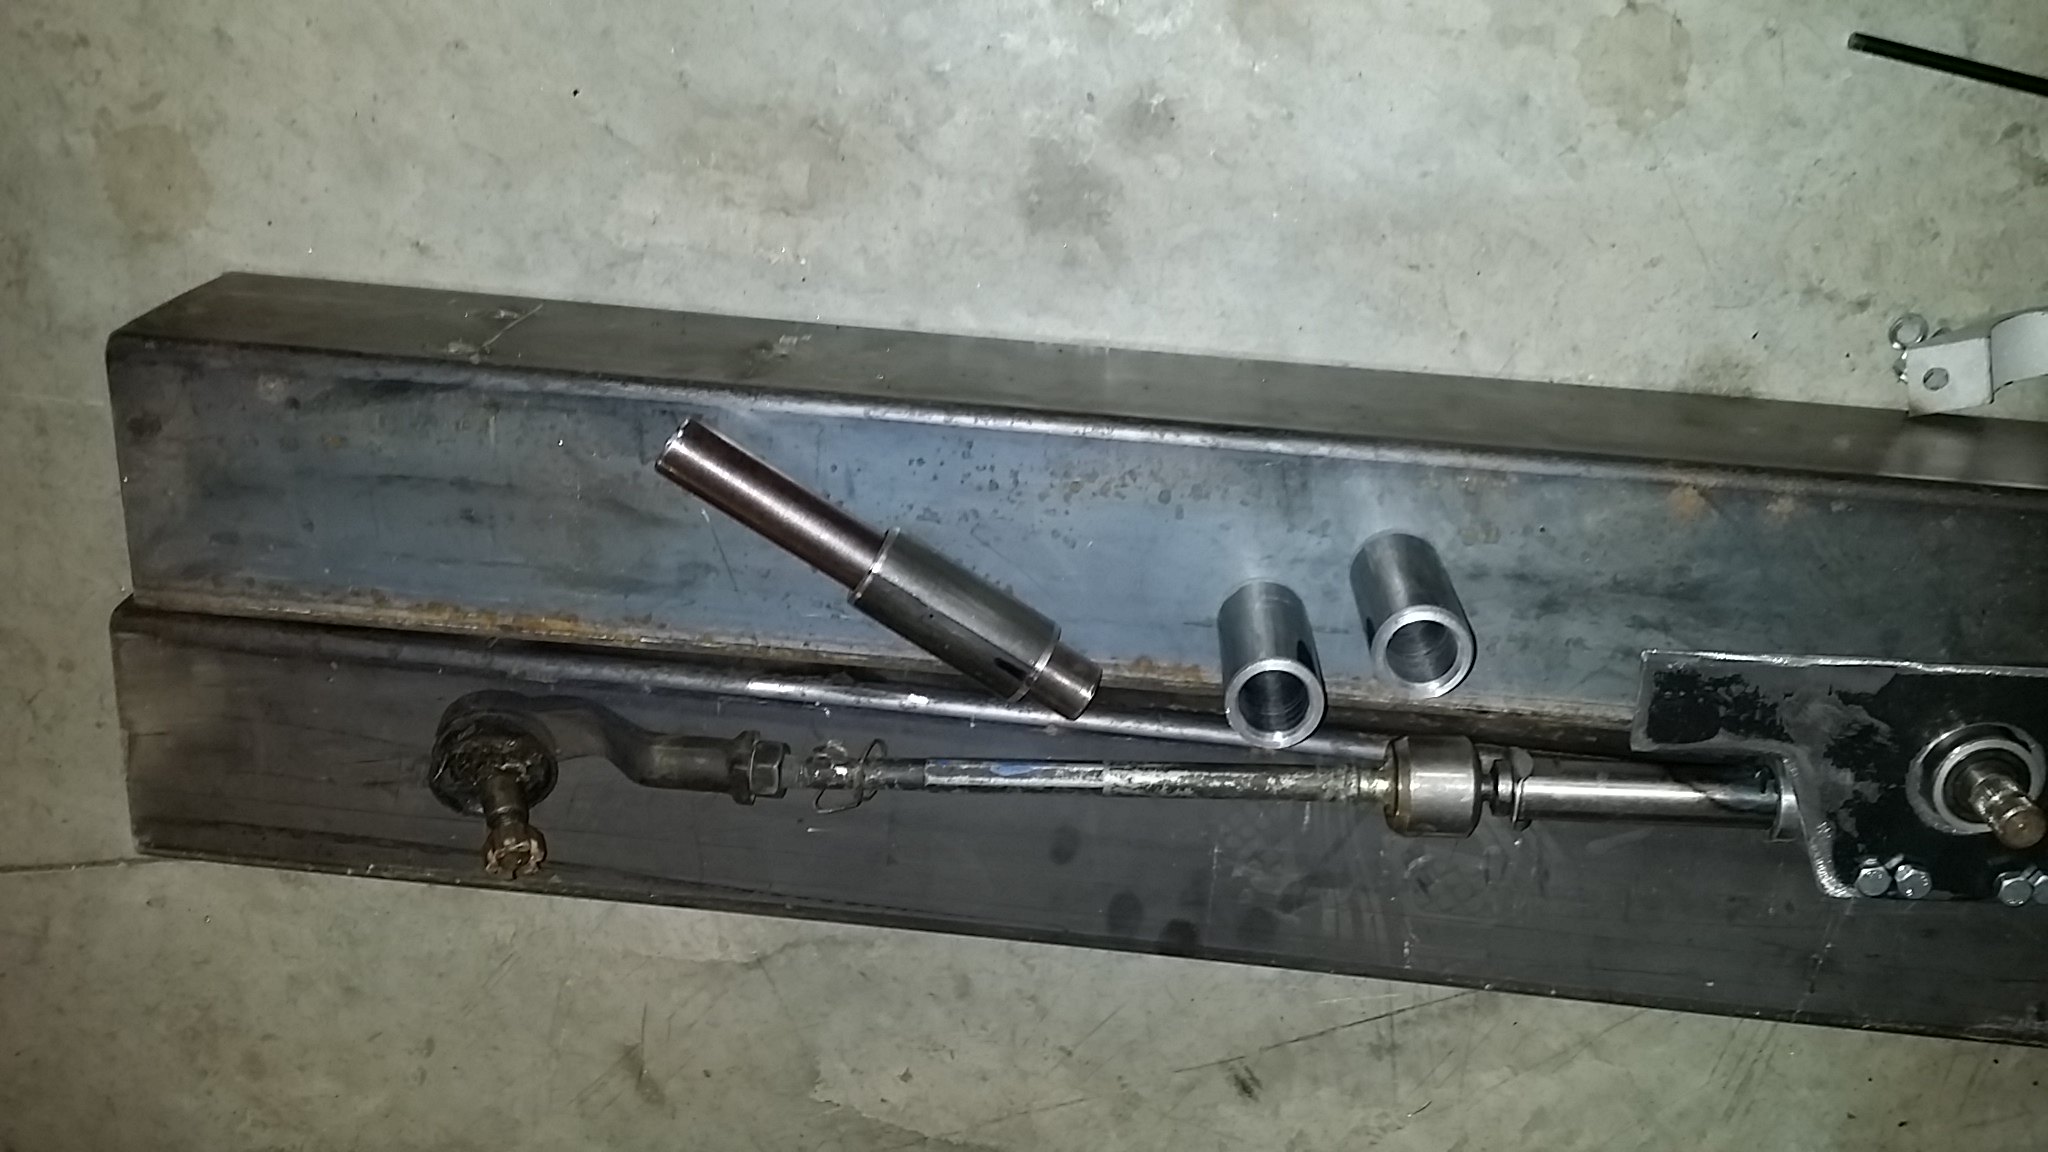 20170124_161452 by Ben Modified, on Flickr[/IMG]
And welded in a couple of pieces of tubing for the cage
[IMG]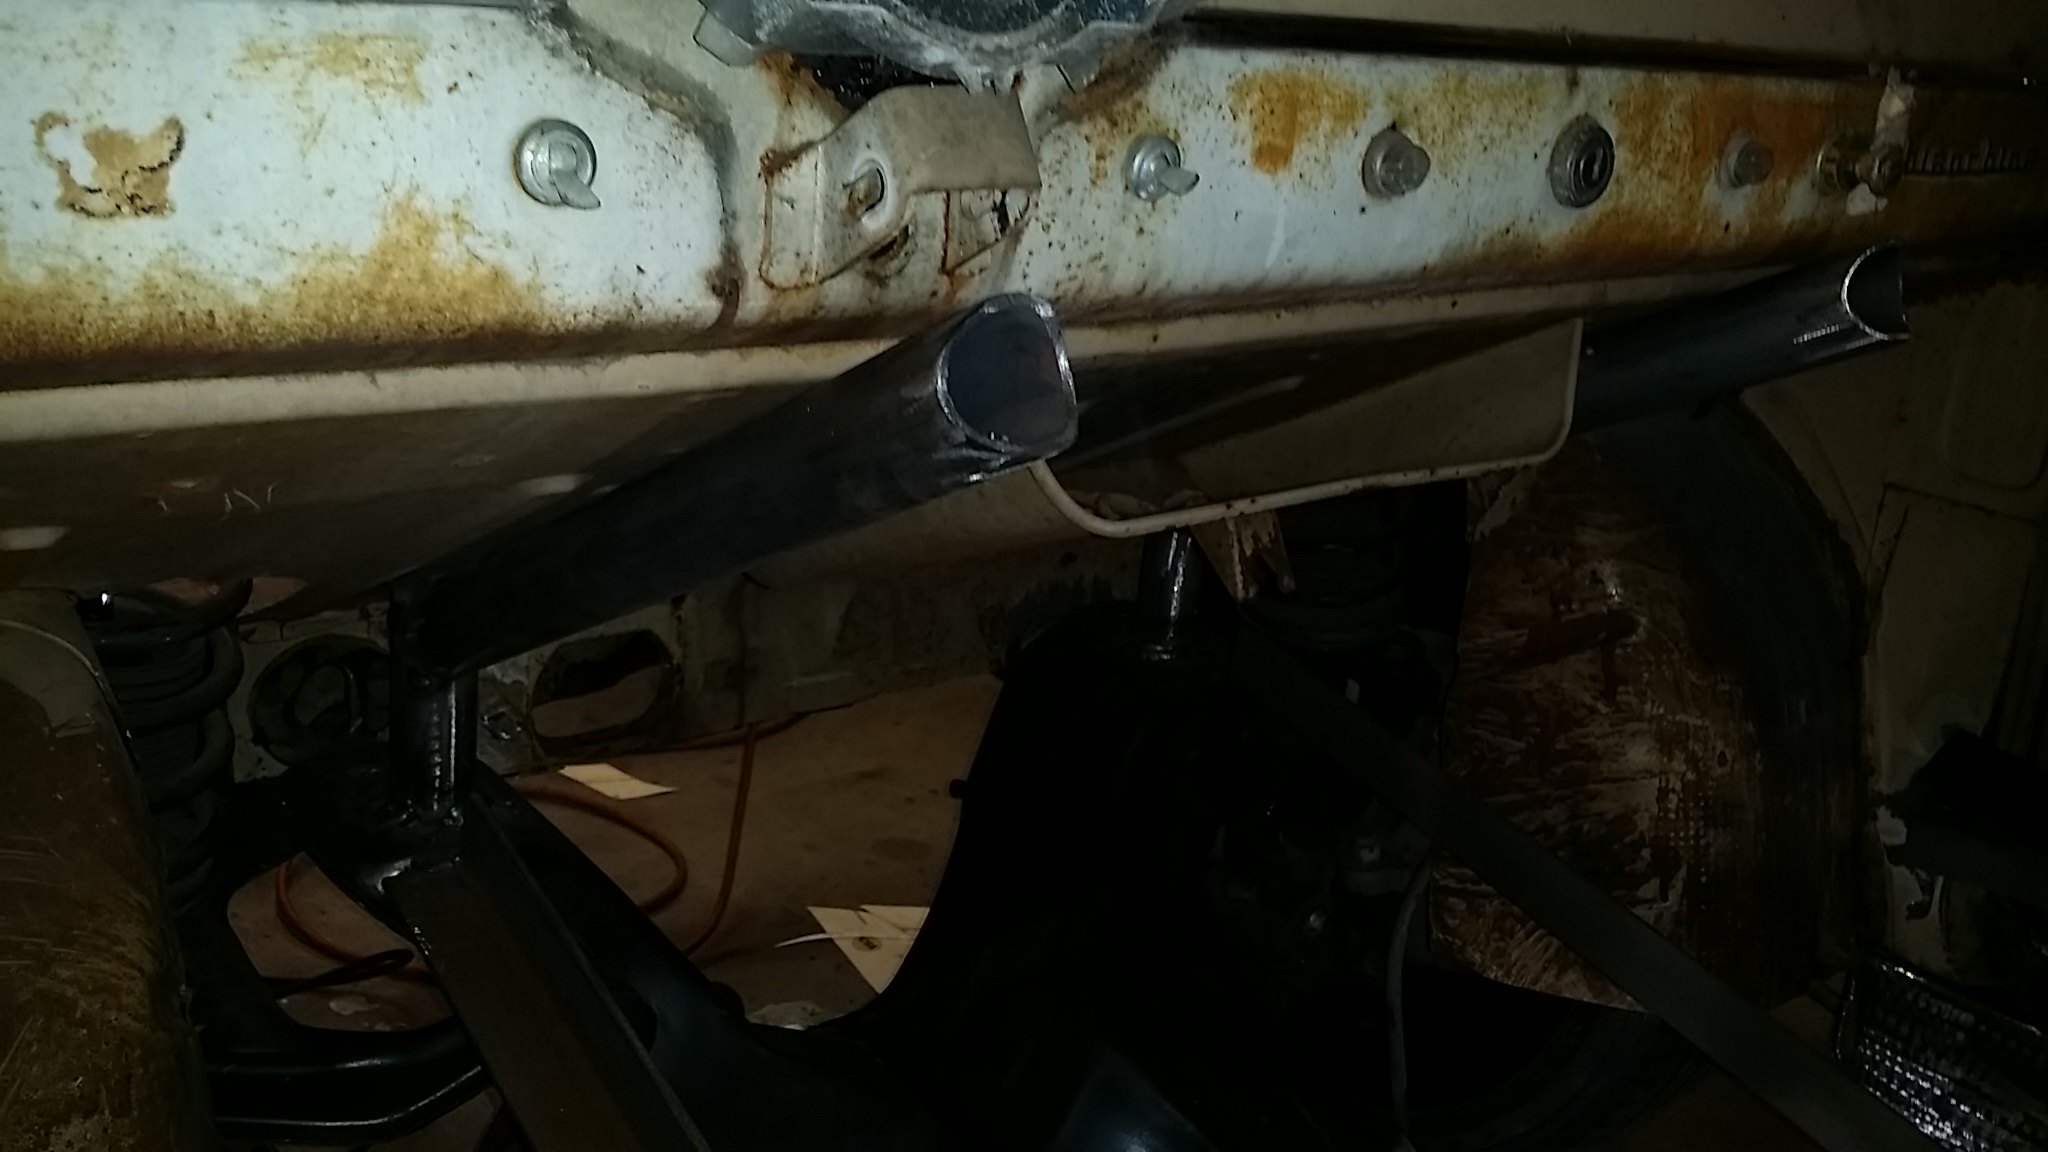 20170124_160122 by Ben Modified, on Flickr[/IMG]
http://www.BenModified.com
-
01-25-2017 04:41 PM #50
CHR Member
- Join Date
- May 2015
- Location
- South East
- Posts
- 318
Took the body off again today to get to a few spots for welding and steering work.
[IMG]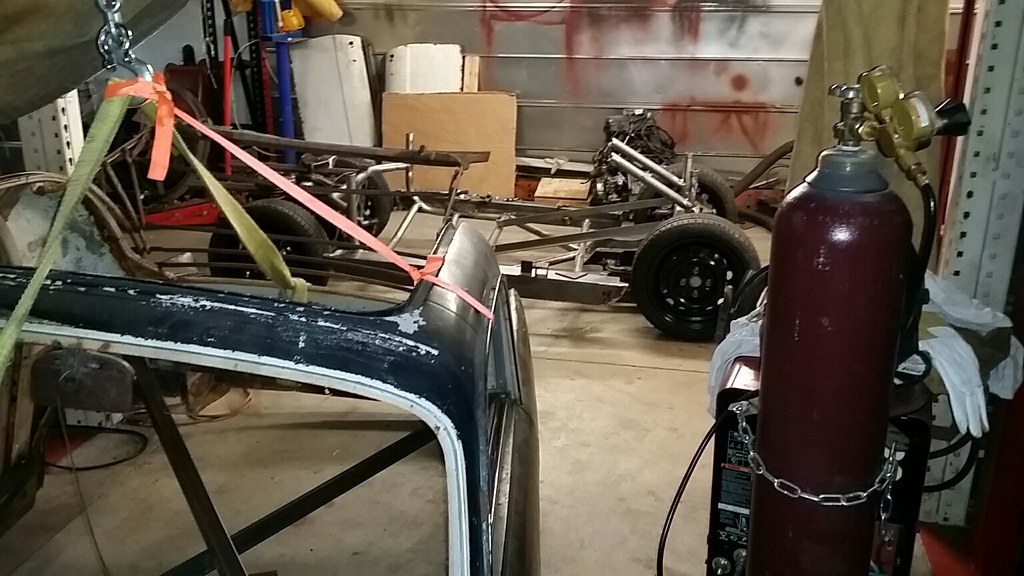 20170125_172248_resized by Ben Modified, on Flickr[/IMG]
Added a few gussets to the uprights that support the front spring upper brace.
[IMG]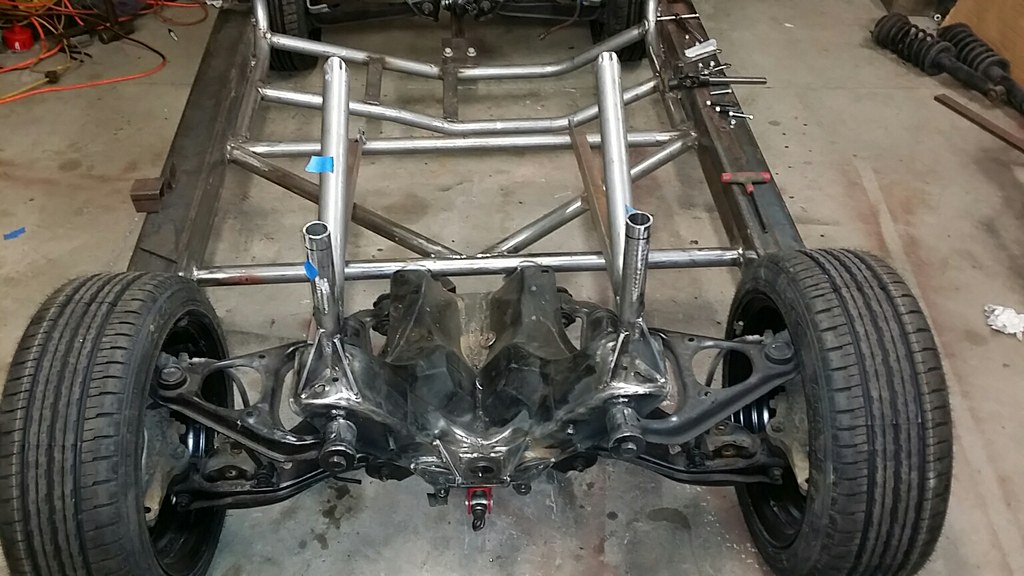 20170125_172209_resized by Ben Modified, on Flickr[/IMG]
Center steer mount
[IMG]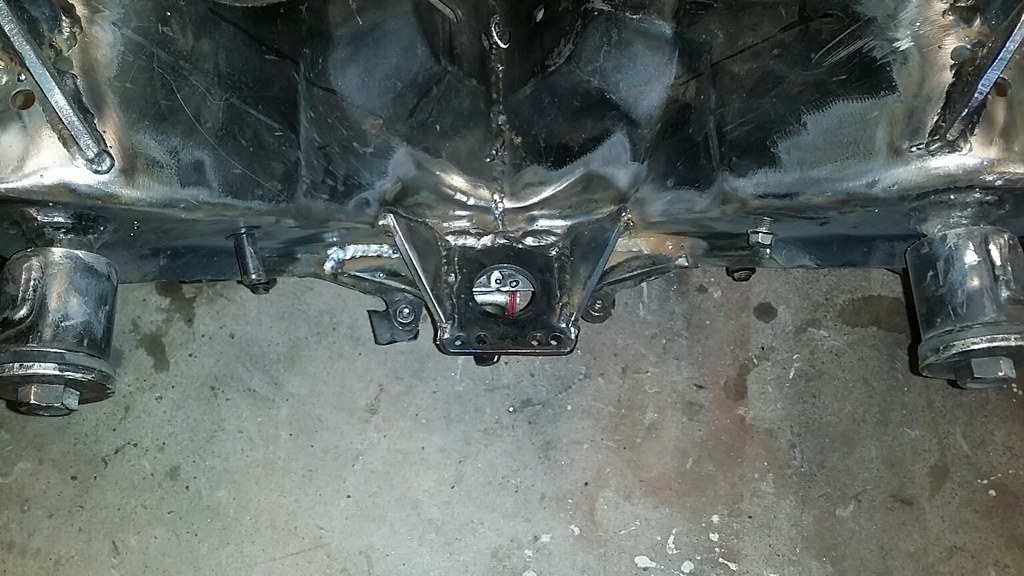 20170125_172216_resized by Ben Modified, on Flickr[/IMG]
I bolted in the rack system and ran the front suspension thru its travel range with no perceptible bump steer! Sorry, no photo
http://www.BenModified.com
-
01-25-2017 08:39 PM #51
CHR Member
- Join Date
- Apr 2011
- Location
- Prairie City
- Car Year, Make, Model: 40 Ford Deluxe, 68 Corvette, 72&76 K30
- Posts
- 7,301
- Blog Entries
- 1
Very nice work!Ryan
1940 Ford Deluxe Tudor 354 Hemi 46RH Electric Blue w/multi-color flames, Ford 9" Residing in multiple pieces
1968 Corvette Coupe 5.9 Cummins Drag Car 11.43@130mph No stall leaving the line with 1250 rpm's and poor 2.2 60'
1972 Chevy K30 Longhorn P-pumped 24v Compound Turbos 47RH Just another money pit
1971 Camaro RS 5.3 BTR Stage 3 cam, SuperT10
Tire Sizes
-
01-26-2017 05:42 AM #52
CHR Member
- Join Date
- Mar 2007
- Location
- festus
- Car Year, Make, Model: 48 Plymouth, 48,54 Heap
- Posts
- 3,407
Very cool; great fab work!1 Corinthians 1:27
-
01-26-2017 05:12 PM #53
CHR Member
- Join Date
- May 2015
- Location
- South East
- Posts
- 318
 Originally Posted by 40FordDeluxe
 Thanks! Here is todays progress Originally Posted by falconvan
Temporarily installed the rack today. Still need to find some properly sized bellows.
[IMG]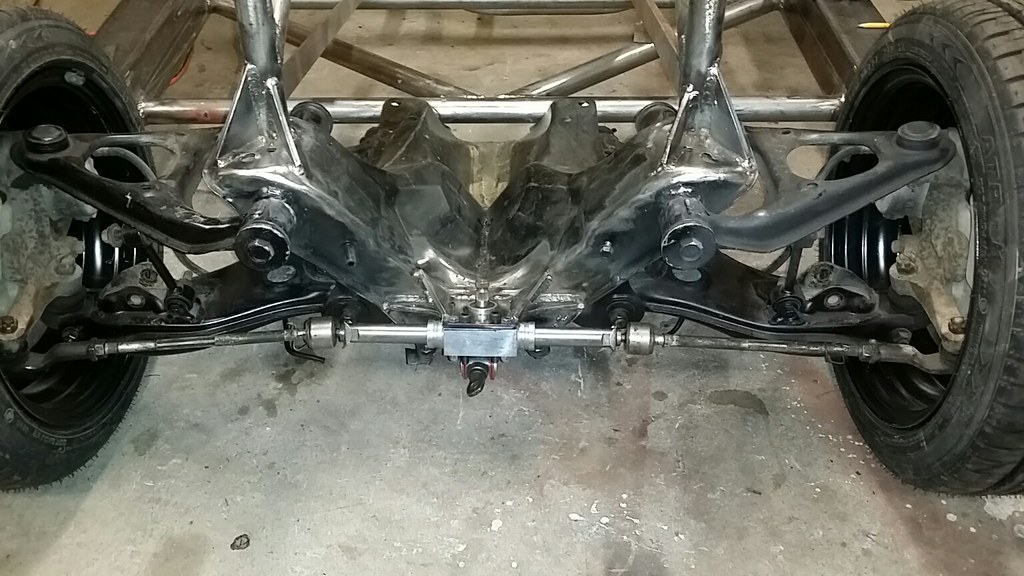 20170126_084449_resized by Ben Modified, on Flickr[/IMG]
[IMG]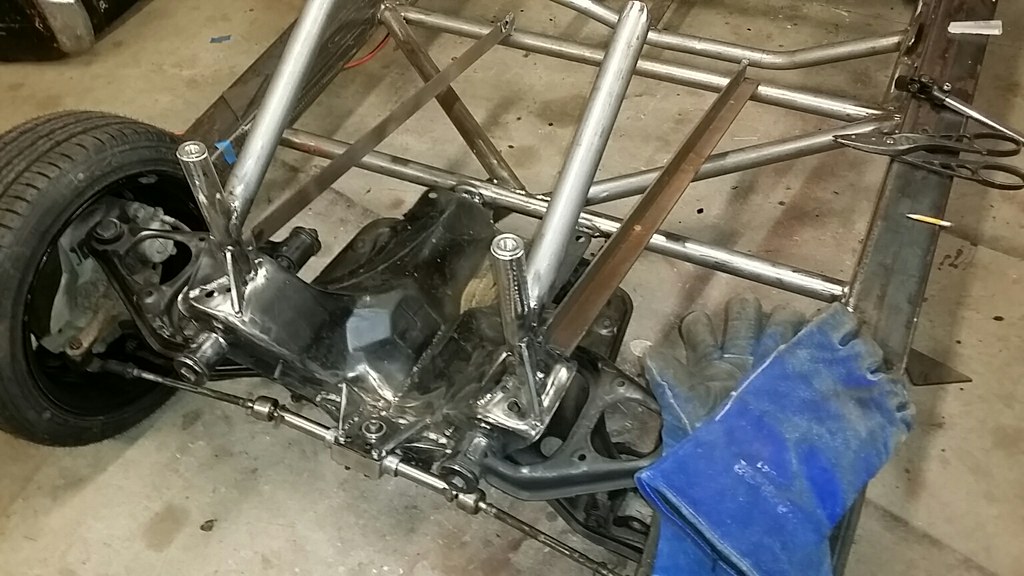 20170126_084711_resized by Ben Modified, on Flickr[/IMG]
Also did some work on the braking setup. I am taking advantage of the extra room with the body off to locate and install the pedal assembly. I am using the originals from the car and adapting a 1970 VW Bug master cylinder. This mc is intended for four wheel drums, but I have used them before on 4 wheel discs with good results.
[IMG]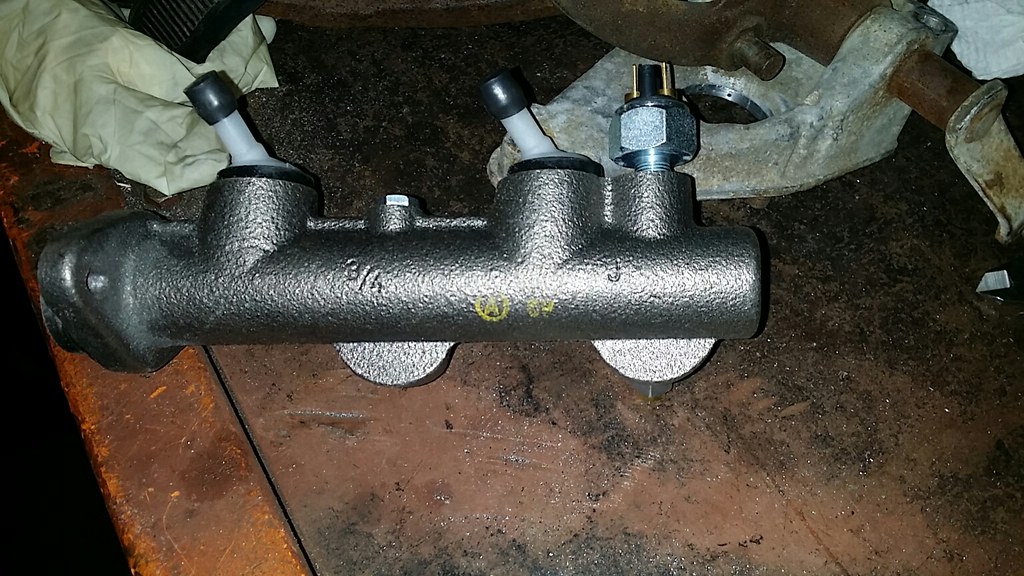 20170126_085456_resized by Ben Modified, on Flickr[/IMG]
It only required elongating the mc mounting holes and a little filing to open up the opening on the pedal assembly.
[IMG]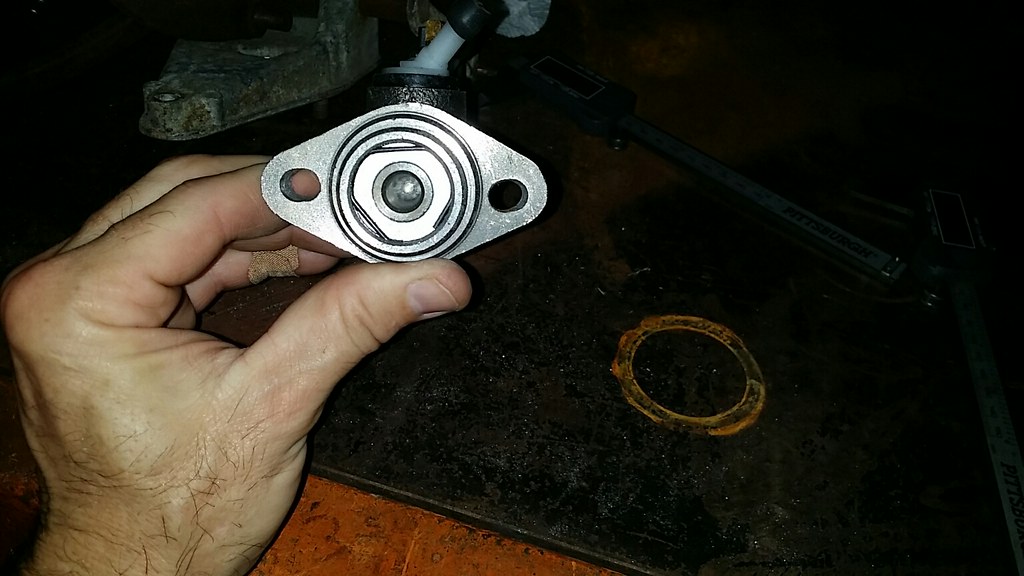 20170126_085506_resized by Ben Modified, on Flickr[/IMG]
[IMG]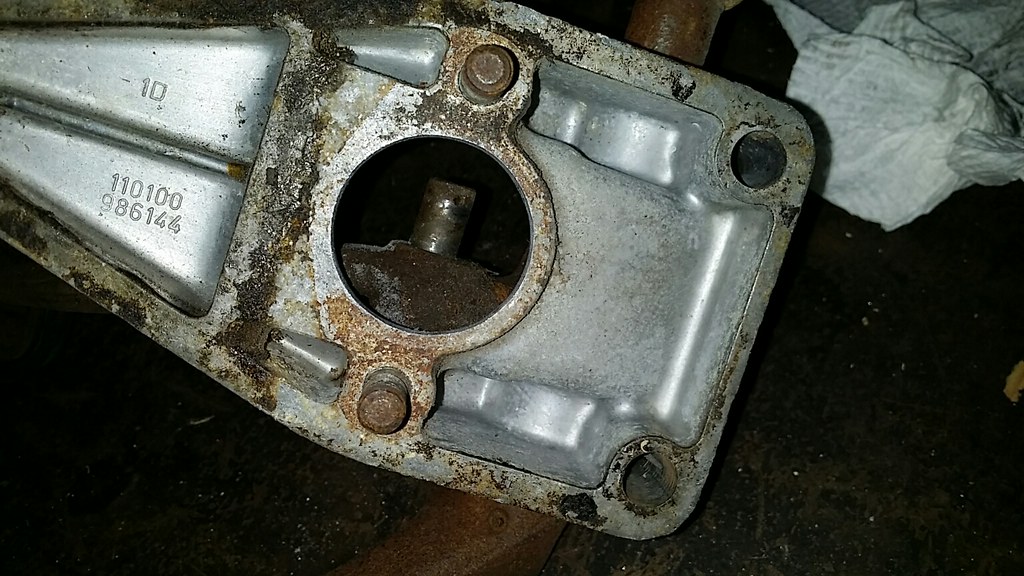 20170126_085515_resized by Ben Modified, on Flickr[/IMG]
I sandwiched a piece of 3/16" metal plate between the two to create a mounting system
[IMG]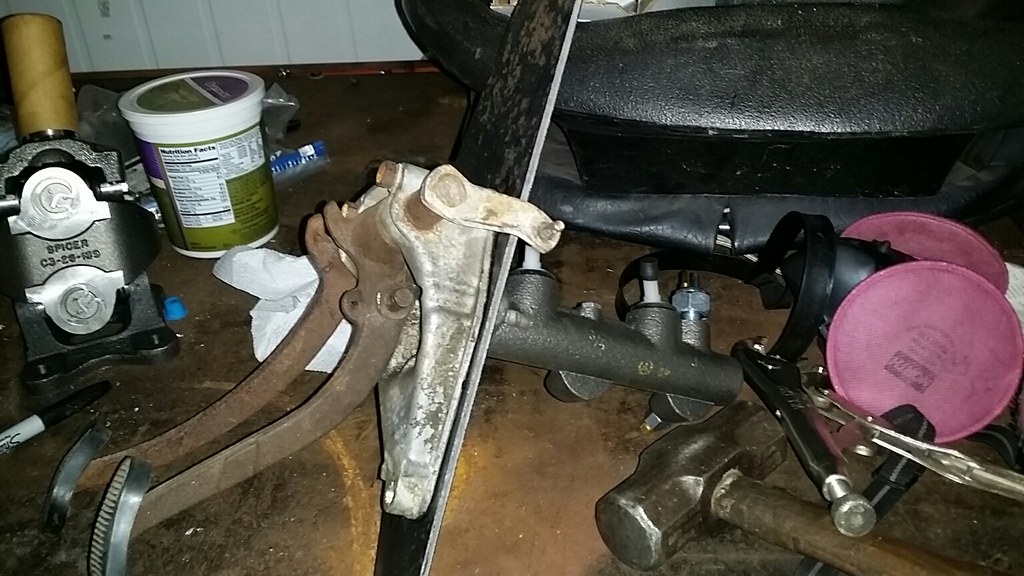 20170126_140805_resized by Ben Modified, on Flickr[/IMG]
Only needed slightly longer mounting studs
Also cut a couple of strips of metal to sandwich the body sheet metal. The roll cage tubing is located beneath these strips. The holes are for welds to the tubing. The uprights that hold the upper strut mount come up thru these strips and will be welded together.
[IMG] 20170126_152624_resized by Ben Modified, on Flickr[/IMG]
http://www.BenModified.com
-
01-26-2017 07:18 PM #54
CHR Member
- Join Date
- Jan 2005
- Location
- Doon, Ia
- Car Year, Make, Model: 53 Chevy 3100
- Posts
- 2,716
You are rollin on this thing, thanks for the updates !
-
01-27-2017 10:16 AM #55
CHR Member
- Join Date
- Nov 2016
- Location
- rocklin
- Posts
- 656
Nice rack! Never seen one so tiny. You're doing some wild engineering on that thing.
-
01-27-2017 03:33 PM #56
CHR Member
- Join Date
- May 2015
- Location
- South East
- Posts
- 318
Here is todays progress
Welded in the master cylinder brackets
 20170127_144303_resized by Ben Modified, on Flickr
Finished the upper strut brace
[IMG]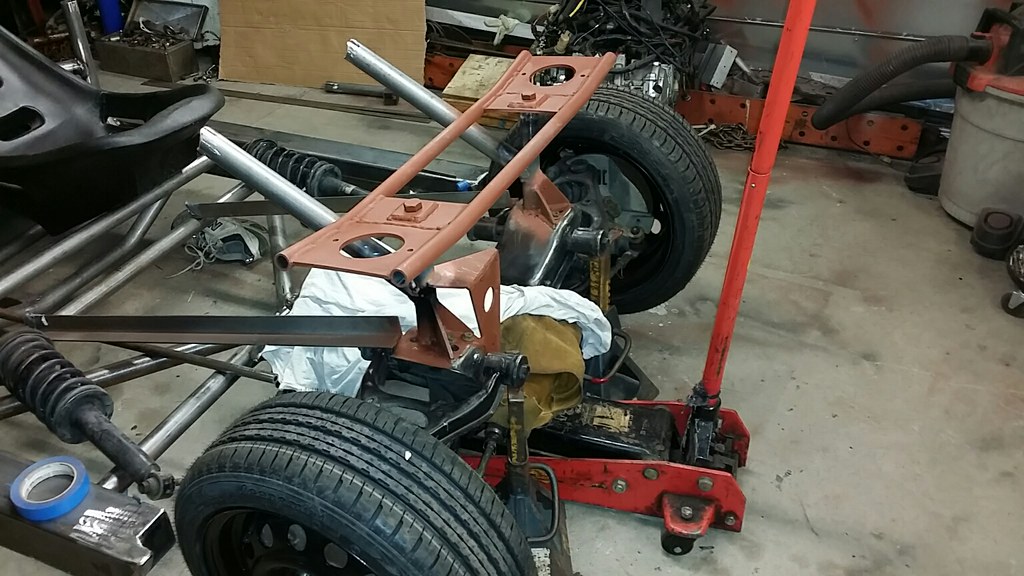 20170127_165958_resized by Ben Modified, on Flickr[/IMG]
http://www.BenModified.com
-
01-28-2017 05:48 PM #57
CHR Member
- Join Date
- May 2015
- Location
- South East
- Posts
- 318
Started piecing together the steering column. Welded on some heim joint mounting bosses.
[IMG]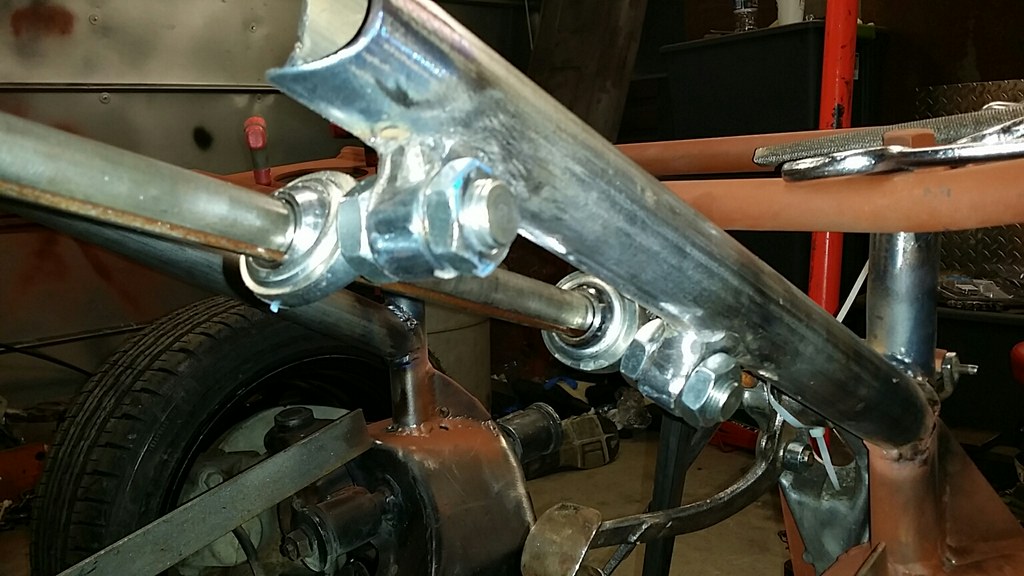 20170128_184956_resized by Ben Modified, on Flickr[/IMG]
I am using a piece of 3/4" shaft with a keyway temporarily. I left it very long and made up an adaptor to the steering wheel so that I can slide the wheel to different positions on the shaft for the best position
[IMG]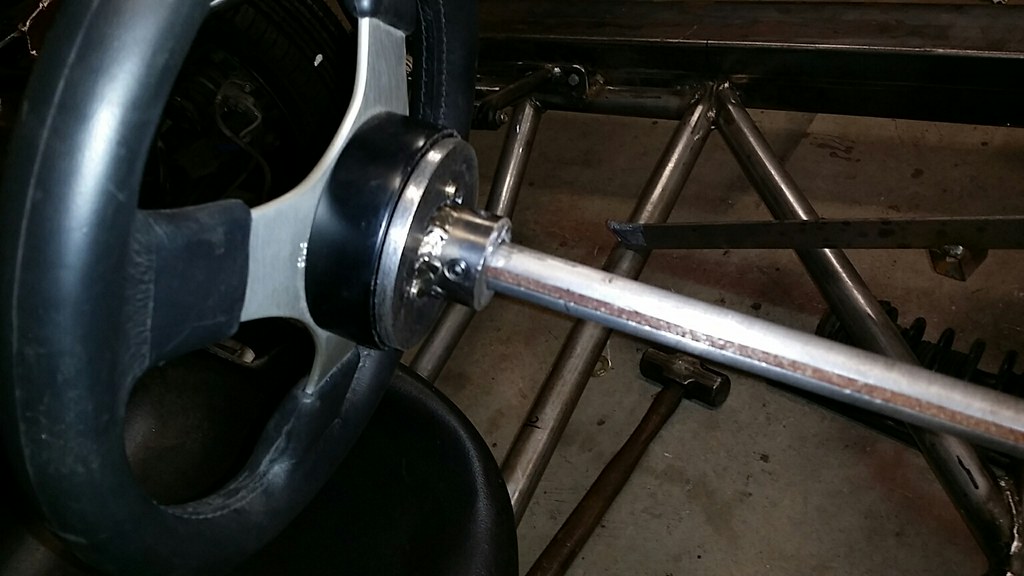 20170128_182418_resized by Ben Modified, on Flickr[/IMG]
[IMG]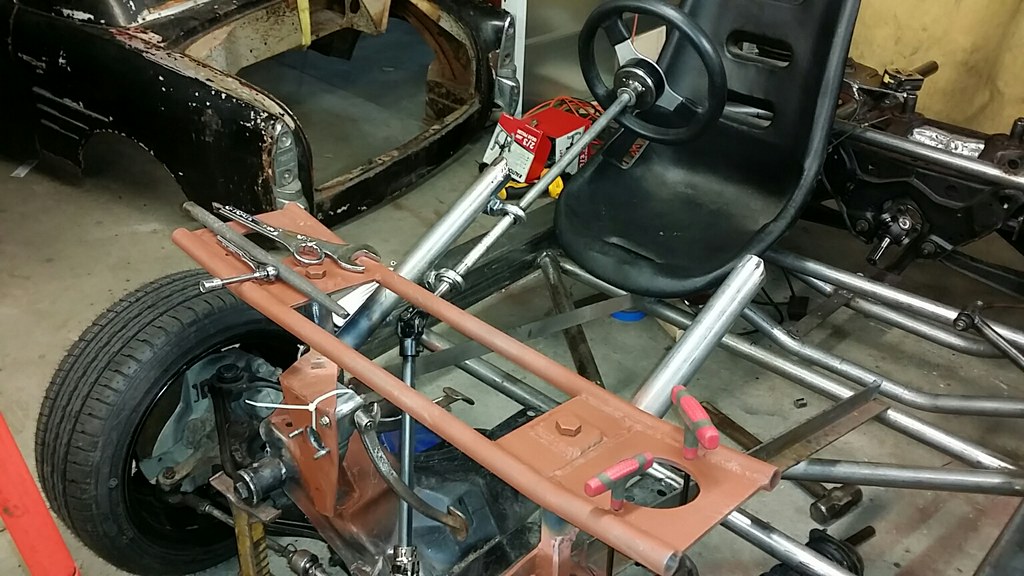 20170128_182324_resized by Ben Modified, on Flickr[/IMG]
[IMG]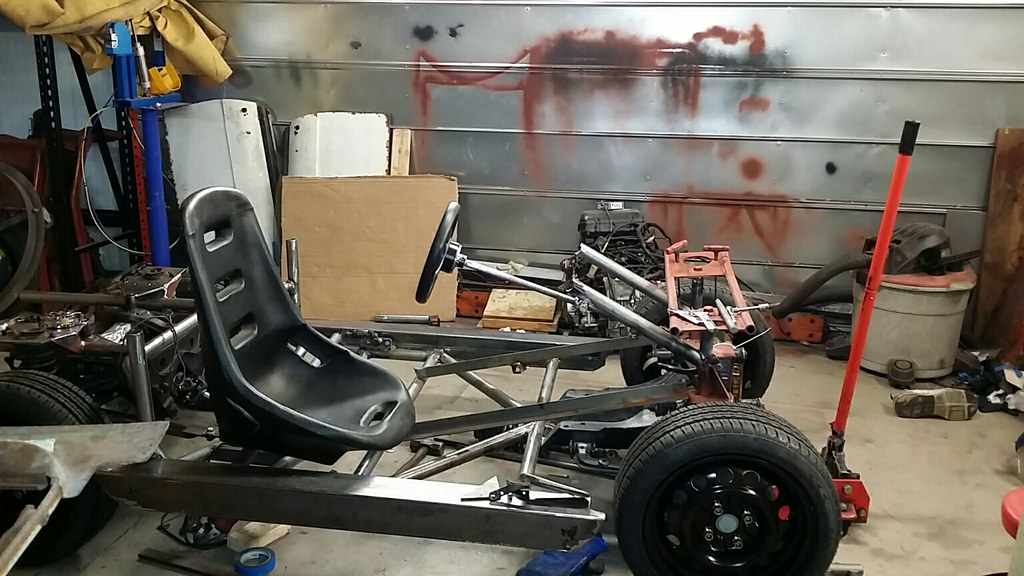 20170128_182310_resized by Ben Modified, on Flickr[/IMG]
http://www.BenModified.com
-
01-29-2017 11:30 AM #58
CHR Member
- Join Date
- May 2015
- Location
- South East
- Posts
- 318
Part 4 is on YouTube
https://www.youtube.com/watch?v=-gSnb3W55wo
-
01-30-2017 04:55 PM #59
CHR Member
- Join Date
- May 2015
- Location
- South East
- Posts
- 318
I put the body back on the chassis today and started welding the two together.
[IMG]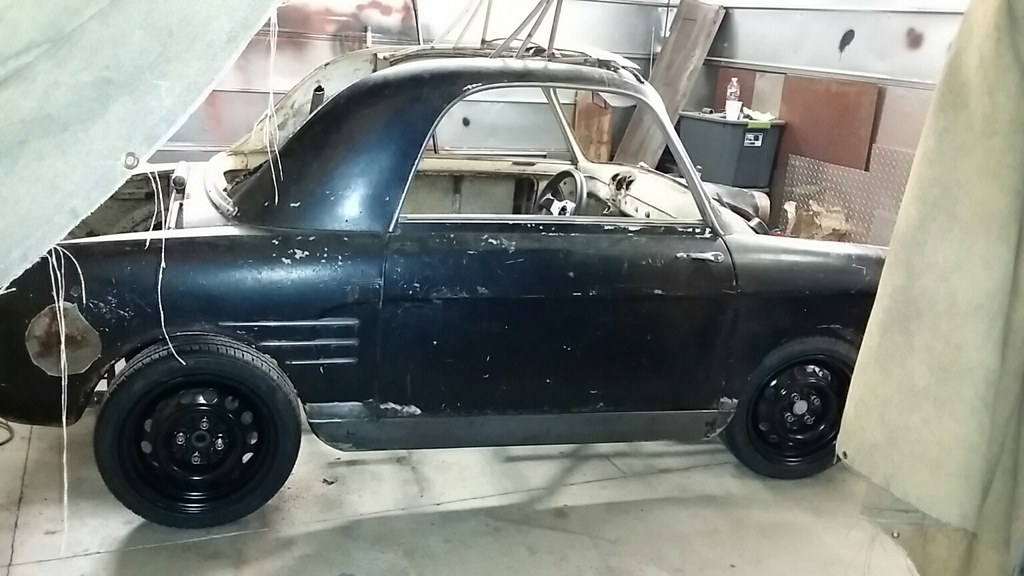 20170130_175810_resized by Ben Modified, on Flickr[/IMG]
The front braces are welded together with the cage tubes under the dash
[IMG]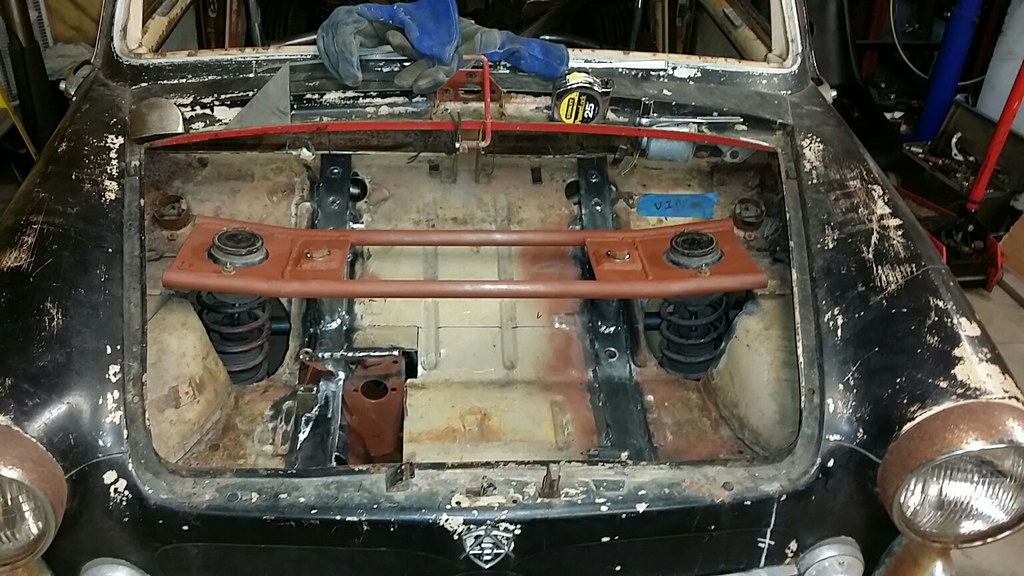 20170130_143112_resized by Ben Modified, on Flickr[/IMG]
[IMG]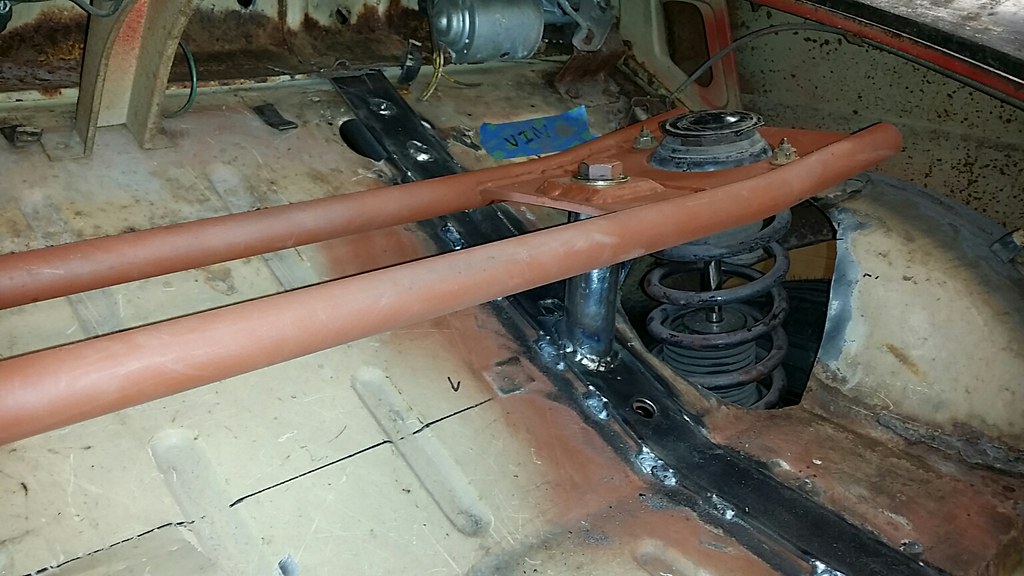 20170130_143054_resized by Ben Modified, on Flickr[/IMG]
Working on connection on the rear of the car
[IMG] 20170130_175844_resized by Ben Modified, on Flickr[/IMG]
http://www.BenModified.com
-
01-30-2017 06:56 PM #60
CHR Member
- Join Date
- Jan 2005
- Location
- Doon, Ia
- Car Year, Make, Model: 53 Chevy 3100
- Posts
- 2,716
"I put the body back on the chassis today and started welding the two together."
Uh oh, now your commited for sure, cant wait to see this thing in motion !
 Reply With Quote

Posting Permissions
- You may not post new threads
- You may not post replies
- You may not post attachments
- You may not edit your posts

Even though I know he won't see this, I still want to wish a Happy Birthday to my best friend, Richard Moore aka techinspector1
Happy Birthday techinspector1