


 128Likes

Results 1 to 15 of 74
 LinkBack URL
 About LinkBacks
-
04-23-2016 08:18 PM #1
 CHR Member

- Join Date
- Apr 2016
- Location
- Whetstone
- Posts
- 58
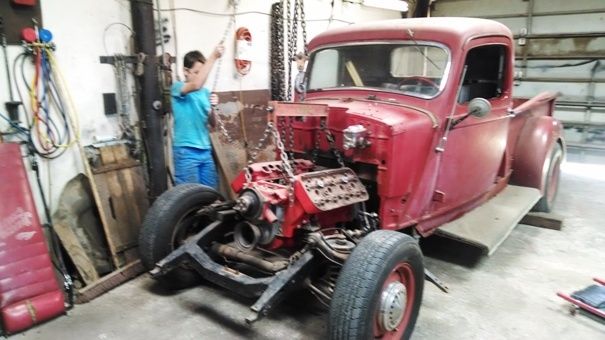
1955 Chrysler 331 Hemi build for '34 Plymouth Coupe
After getting the hemi to the shop, it was time to start cleaning things up, but this time for myself. One head cleaned up just fine, and finished up the block on Friday. It was a little rough, but I think it will work out just fine, especially at the price of replacements, lol. I already rebuilt the rocker assemblies, and they turned out nicely. Well, this is going to be a long thread as I am just getting started.
Last edited by 69Bee; 04-23-2016 at 08:33 PM.
-
Advertising

- Google Adsense
- REGISTERED USERS DO NOT SEE THIS AD
-
04-23-2016 08:20 PM #2
CHR Member
- Join Date
- Apr 2016
- Location
- Whetstone
- Posts
- 58
These are going to be a little out of order at first as I can only do five at a time, and need to catch up...
-
04-23-2016 08:24 PM #3
CHR Member
- Join Date
- Apr 2016
- Location
- Whetstone
- Posts
- 58
Rocker arm assemblies
-
04-23-2016 08:30 PM #4
CHR Member
- Join Date
- Apr 2016
- Location
- Whetstone
- Posts
- 58
Crankshaft (10/10), rods, and parts pile
-
04-23-2016 08:39 PM #5
CHR Member
- Join Date
- Apr 2016
- Location
- Whetstone
- Posts
- 58
Block and modified water crossover
-
04-24-2016 03:08 AM #6
CHR Member
- Join Date
- Apr 2013
- Location
- Pottstown
- Posts
- 169
Looks like things are progressing nicely. It takes lots of time to get things done right and you are doing it the proper way.......hope everything continues to go your way.
-
04-24-2016 03:43 AM #7
CHR Member
- Join Date
- Sep 2007
- Location
- New Bedford
- Car Year, Make, Model: 34 Ford 3W Coupe Replica
- Posts
- 14,754
Hello 69Bee, it's good to see you here and even better? Your doing a build thread!
And even BETTER? it'sa HEMI!

Thanks for making the time to share.
-
04-24-2016 05:04 AM #8
CHR Member
- Join Date
- Mar 2003
- Location
- SW Arizona
- Car Year, Make, Model: 68 Ply Valiant, 83 El Camino
- Posts
- 3,872
Well, let me make an introduction here. 69Bee here is my friend Dave who runs the machine shop up the road. I’ve know Dave for I guess going on 30 years now. We were both assigned to Ft Huachuca back in the late 80s and also neighbors a couple of blocks apart. I was building my 58 Chevy at the same time Dave was building his 69 Super Bee and we ended up becoming pretty good friends because of a common automotive interest.
Dave Got reassigned and moved on for a while and I ending up retiring here and eventually opening up my own garage. After Dave got out of the service he moved back and opened his first machine shop. After a few years he moved to Colorado and eventually Florida but came back here and reopened his machine shop.
Dave is the machinist I have been using ever since he moved back. I don’t use him because he’s a friend, of close, or an honest business man……..I use him because he is simply the best damn machinist I know (no offence meant to the other machinists on the board).
Let me provide a little history on the pile of parts Dave is working on. That is my old mockup/parts Hemi I traded Dave for the transmission that is going in my 37 Dodge. While it looked pretty on the outside if you look close you can see the insides were pretty weathered.
That old engine was actually my first Hemi. I picked it up in the early 90s…..before I even had a computer. A long story short it had been taken apart and left outside for at least a few years. All the major casting were there, but absolutely no hardware or small parts. I got it basically for hauling it off. After getting it home and doing a visual inspection (as best I could) I decided to just sandblast the outside, throw some paint on it and set it up as a display engine until I could get the parts together to have Dave do the machine work and I could built it.
As I said I got this engine in my pre computer days and at the time support for the first generation Hemis was very minimal. Hot heads was just starting up, PAW (remember them) had a few pats but had not gotten into doing the HEMI kits yet. E Bay was even a few years off. You’re options were basically buying parts when and where you could find them and Egge’s. So basically the old Hemi was definitely going to be a looooong term project. As luck would have it within a short period of time I ended up with 2 more complete HEMIs and another parts engine. So this engine became a really back burner project and was relegated to being a display engine and eventually the mockup motor in the 37. As I have 2 running HEMIs I figured I’d keep it around primarily as just a parts engine in case I had a catastrophic failure on the other ones.
When Dave asked about it probably about a year ago I told him I wasn’t interested in selling it but would trade it for the transmission I needed for the 37. So that is how Dave ended up with the engine and I got my transmission.
Here’s a little history on the water crossover Dave is showing, which to me looks great now! I got into the HEMIs just as parts were starting to become available again. One day I saw an advertisement for a company who had just developed adapters to put a BBC water pump on an early HEMI. Up to that point the only choice you had was sending out an original pump to be rebuilt. These adapters were basically the hand made prototypes and the guy wanted $90 for them. That was high even at the time, but it opened up a lot of different water pump options. I went ahead and bought a pair because I didn’t know if they would ever be available again (as it turns out they became hugely popular and with mass production the price dropped to about $35 at one point).
Now this was before I had a computer or E Bay and after I got the adapters I needed a water crossover/thermostat housing. The later HEMIs had a separate water crossover, but I couldn’t locate one locally. Soooooo, I figured I could just cut off and seal the crossover from an original water pump.

I rough cut the crossover off (I'm talking chop saw rough cut here) and brazed the bottom water passage closed. It’s kind of hard to tell from this picture, but there was a lot of material that needed cleaned up on the bottom of the housing.
I eventually found a factory crossover that didn’t need any work other than to bolt it on so I never got back around to this part.
I really like what Dave was able to do with it…..it makes a neat custom one off part.
.Last edited by Mike P; 04-24-2016 at 05:35 AM.
I've NEVER seen a car come from the factory that couldn't be improved..... 
-
04-24-2016 06:33 AM #9
CHR Member
- Join Date
- May 2003
- Location
- Zephyrhills, Florida, USA
- Car Year, Make, Model: '32 Henway
- Posts
- 12,423
I built a 392 in the mid-70's and talked on the phone several times with Racer Brown, ordering cam, lifters, adjustable pushrods and so forth. I still have the 3/8" wrench that I heated and bent to make a tool to adjust the pushrods. One of the things he taught me was to make tubing spacers to replace the springs on the rocker tubes, leaving about 0.010" sliding clearance on each tube for temp growth. I'm just throwing this out there for your information, otherwise it will die with me. He's the same fellow who did tests in his lab that showed the rollers of the (then new) roller rocker arms skidding across the valve stem tip rather than rolling across. He said that the rollers were to small in diameter to effect a mechanical couple with the valve stem tip. You young fellows should know that it was Racer Brown who ground all the horsepower cams for Chrysler Corporation in the horsepower wars of the 60's.
.Last edited by techinspector1; 04-24-2016 at 06:40 AM.
PLANET EARTH, INSANE ASYLUM FOR THE UNIVERSE.
-
04-24-2016 07:01 AM #10
CHR Member
- Join Date
- Mar 2003
- Location
- SW Arizona
- Car Year, Make, Model: 68 Ply Valiant, 83 El Camino
- Posts
- 3,872
I remember Racer Brown. back in the late 60s he was also doing traveling HP seminars for Chrysler (mostly providing info on the RB (440) engines).
Yeah those push rods are fun to adjust aren't they. I built the 354 in the Plymouth at the same time as I did the 331 for the 37. I did the push rod adjustment on both engines at the same time. I don't know what felt worse after I was done my hands or my eyes.
As far the the tubes to replace the springs I think someone was offering them as a kit at one point. From a performance standpoint they might not be a bad idea but not so much from a serviceability standpoint.
The problem with them is if you have to replace a lifter, valve spring or valve seals, you end up having to remove the rocker shafts. That in and of itself is not a big deal EXCEPT the bolts that retain the the rocker shafts are the head bolts. Chances are once the head bolts are removed the gasket seal between the head and block will be broken necessitating removing the heads to replace the head gaskets.
.I've NEVER seen a car come from the factory that couldn't be improved.....
-
04-24-2016 07:05 AM #11
CHR Member
- Join Date
- Feb 2006
- Location
- Bartlett
- Posts
- 6,831
Guess I'll throw out a couple things on early hemis---------and this isn't about slamming anything said here but to put it out for others that want to do some early hemi stuff and actually the desire to do that seems to be growing but since there aren't many cores------
First thing is bores--------Most people will tell you not to run more sleeves than one on each side--I have run with all 8 bores sleeved-----only precaution is not too much interference fit which will cause some stress issues-------
We only used Summers Bros angle bolted center maincaps
Like tech said-bushings instead of springs on the rocker shafts , but the Donovan stands, needle bearing shafts came with bushings
For rods-lots of people wanting to use steel rods (boats, street ,etc) used 426 rods instead of the welded up plate box reinforced stockers
use adjustable pushrods for setting valve clearance-----takes a couple bent wrenches---
Donovan type gear drive for cam can be adjusted for clearance after align bore/hone
we used bolt in freeze plugs
don't forget the oil diverter above the filter housing
In todays parts for a higher performance rod I'd probably build it with a Barnes internal drysump set up
-
04-24-2016 08:34 AM #12
CHR Member
- Join Date
- Feb 2006
- Location
- Bartlett
- Posts
- 6,831
In reply to Mike about push rod adjustment and the spacers--------take this one from me as a gift---its more likely that with the springs you will have more oppurtunities to replace pushrods or lifters out of the hole than if you have the spacer tubes. If you use the same head on the same side of the block you can use the gasket over.
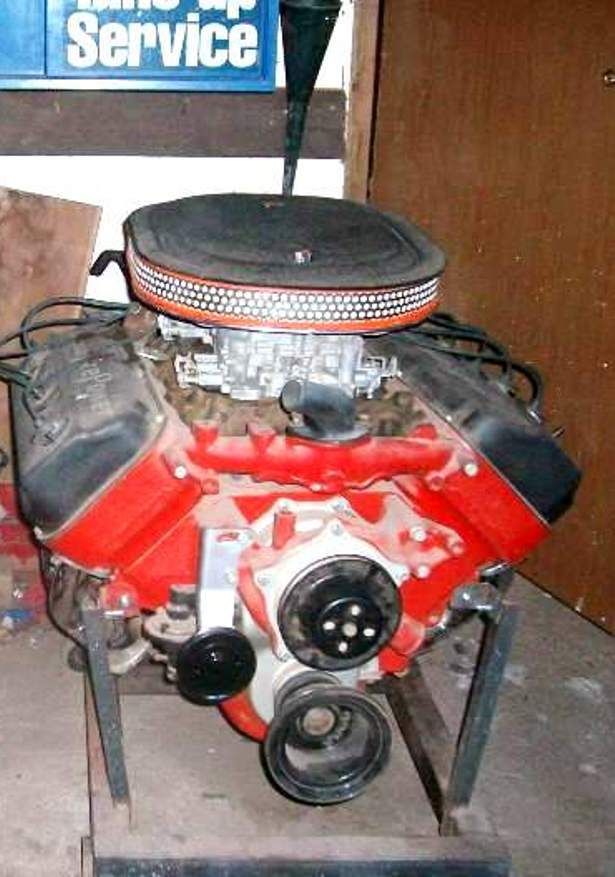
In regards to the pic of the intake manifold and the adapter plates-are the 2 carbs far enough apart for dual Hollys????????Might be a choice for me in addition to the 8>71
-
04-24-2016 11:33 AM #13
CHR Member
- Join Date
- Apr 2016
- Location
- Whetstone
- Posts
- 58
Thanks for the replies guys. Thanks Mike for the intense detail of your story, but you forgot the best part; sitting down with a 6-pack watching the idiot on the roof with a garden hose in his hand...
I have seen the spacers, and even Hot Heads has them. I would not be afraid to sleeve all 8 holes as long as you do it correctly. I did a GM DZ302 motor out of a numbers matching 69 Z28. It was already 0.060" over, and we needed to sleeve all 8 hole to std. and start over. First install the sleeves, then align hone/bore to re-establish main alignment, then square the block to index the decks to each other, and establish parallelism with the crankshaft, then bore the cylinders to ensure they are perpendicular to the deck. Even though the bores might be rough, they are std, so hopefully a 0.030" or 0.040" will clean it up.
The manifold is a factory 392 manifold from 57, and was set up for AFB's. My plan is to use Edelbrock AFB's with the larger bolt pattern, requiring the adapters. I haven't used a holly since the late 80's.
Interference fit for most sleeves for the average automotive engine will be about 0.001" to 0.003". I use moly lube to aid installation, and now that I am older (rusty shoulders I think, LOL), I made this installation tool. I works better than using a BFG like I used to.
http://s37.photobucket.com/user/69Be...lotrz.mp4.htmlLast edited by 69Bee; 04-24-2016 at 11:50 AM.
-
04-24-2016 01:08 PM #14
CHR Member
- Join Date
- Feb 2006
- Location
- Bartlett
- Posts
- 6,831
Sleeve installer made out of an axle?
I thought the Edelbrock carbs had dual bolt pattern?
That block angled deck? 409 or Lincoln?
Your going to be some nice company for me nd Pat
-
04-24-2016 01:27 PM #15
CHR Member
- Join Date
- Apr 2016
- Location
- Whetstone
- Posts
- 58
Front axle hub to be exact, with a piston pin welded on to wail on with a hammer. Since I already had that, I figured I would use it. The angled block is a 430 Ford/Lincoln that I am finishing. Carbs do, so it more of an isolation situation.
 Reply With Quote


Posting Permissions
- You may not post new threads
- You may not post replies
- You may not post attachments
- You may not edit your posts

i've enjoyed the years here . made a lot of friends. most who have left. i see no reason to continue with this so hope to see you somewhere else. i dont think this site will ever be back. it's lived...
Dead!