


 11Likes
Thread: My 26T Coupe build thread
Results 1 to 15 of 426
 LinkBack URL
 About LinkBacks
Threaded View
-
08-22-2010 03:27 AM #11
 CHR Member

- Join Date
- Apr 2009
- Location
- watford
- Car Year, Make, Model: 26T Coupe, 32 Roadster, 41 Willys Coupe
- Posts
- 2,363
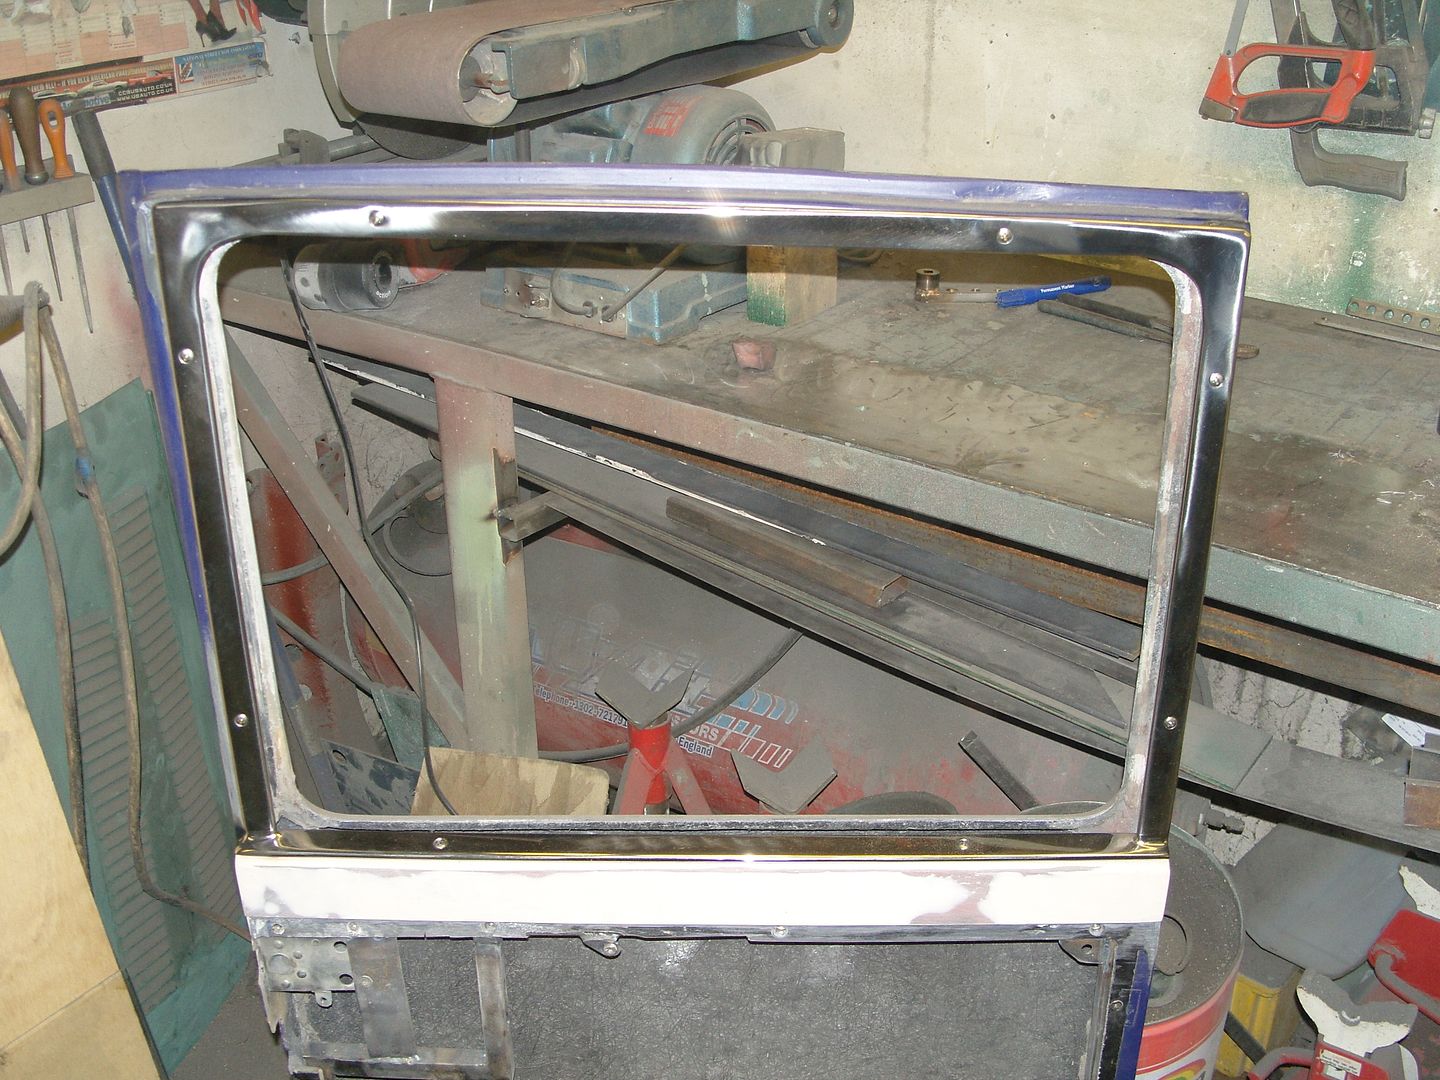
While i had the doors on the bench i though i might as well look for garnish moulding as my body had none with it.
Did a bit of digging around and it turned out that there was a restorer guy doing a 27T coupe only 3 miles from my house, result
He kindly came over with his garnish's but as my body is grp it was a no go, it meant a lot of tweaking and as my car is hopefully gonna look like a 60's car i decided to make some custom mouldings, I'm sure my new friends 27T will be handy for reference though
First job was to key up the area that i had straightened at the top of the door and skim with some filler, It didn't need much and the Rage filler i use is so easy to rub down, its excellent stuff.
Then i cut some 6mm x 25mm stainless flat bar to the lengths needed, The bottom bar now sits at a slight angle compared to the stock flat, I think it looks better. Had to notch each end so it sat flush with the window opening so it will look tidy when i add a rubber finisher (I hate it when you can see the inside of the door through the window slot, looks untidy)
All the edges were radiused to look rolled.

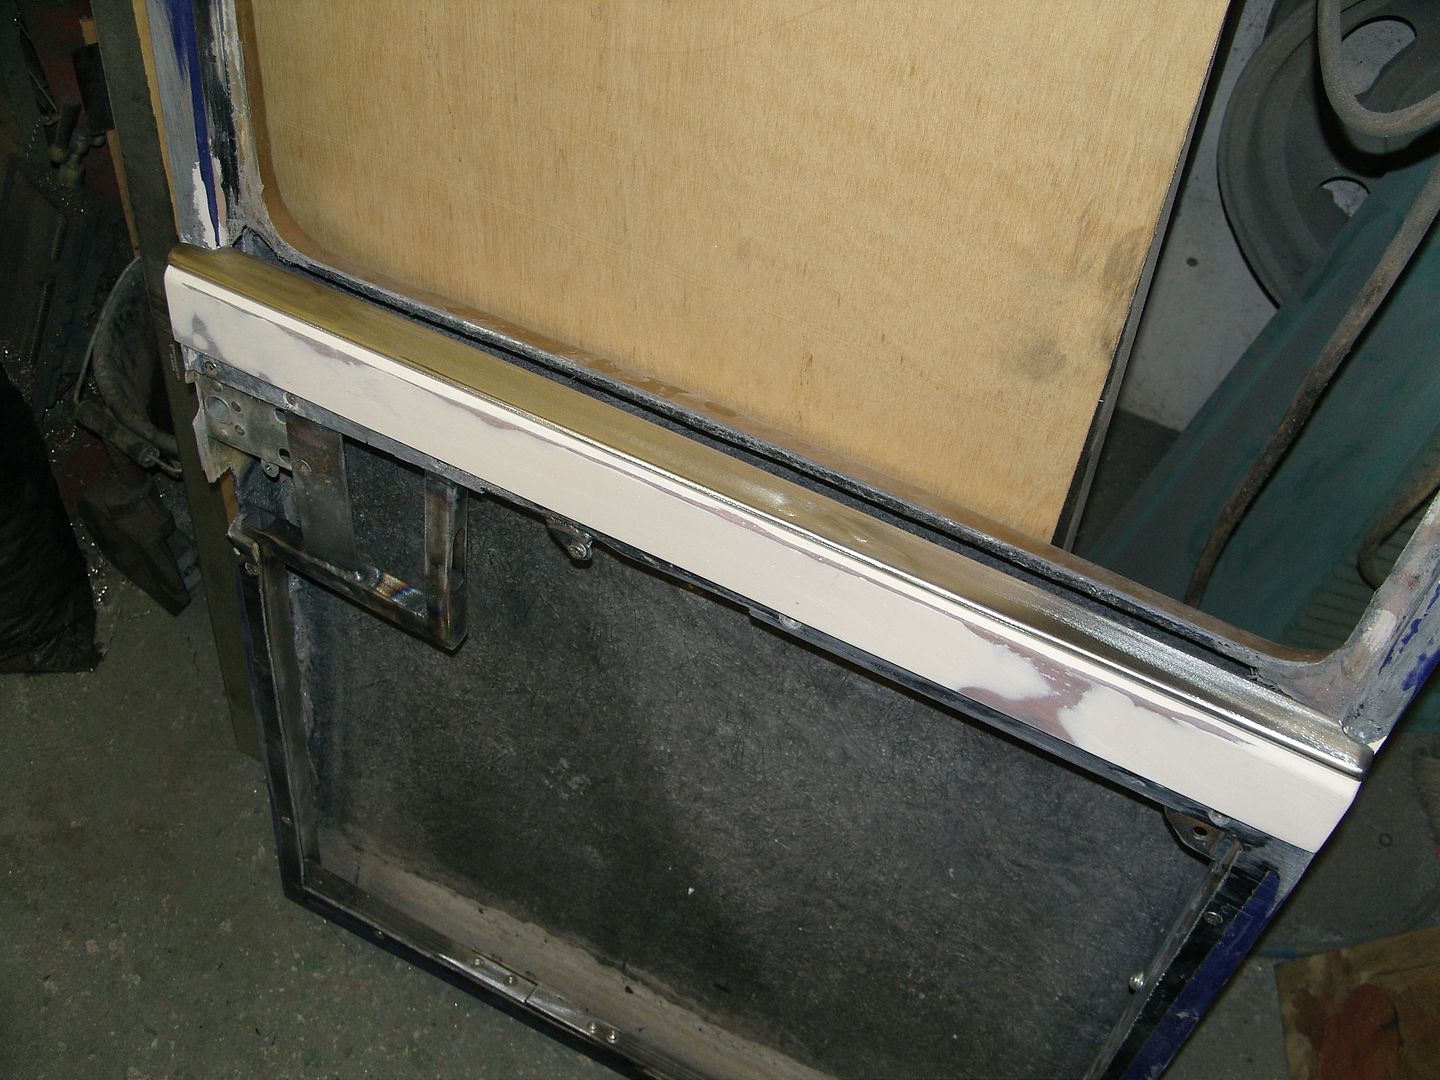
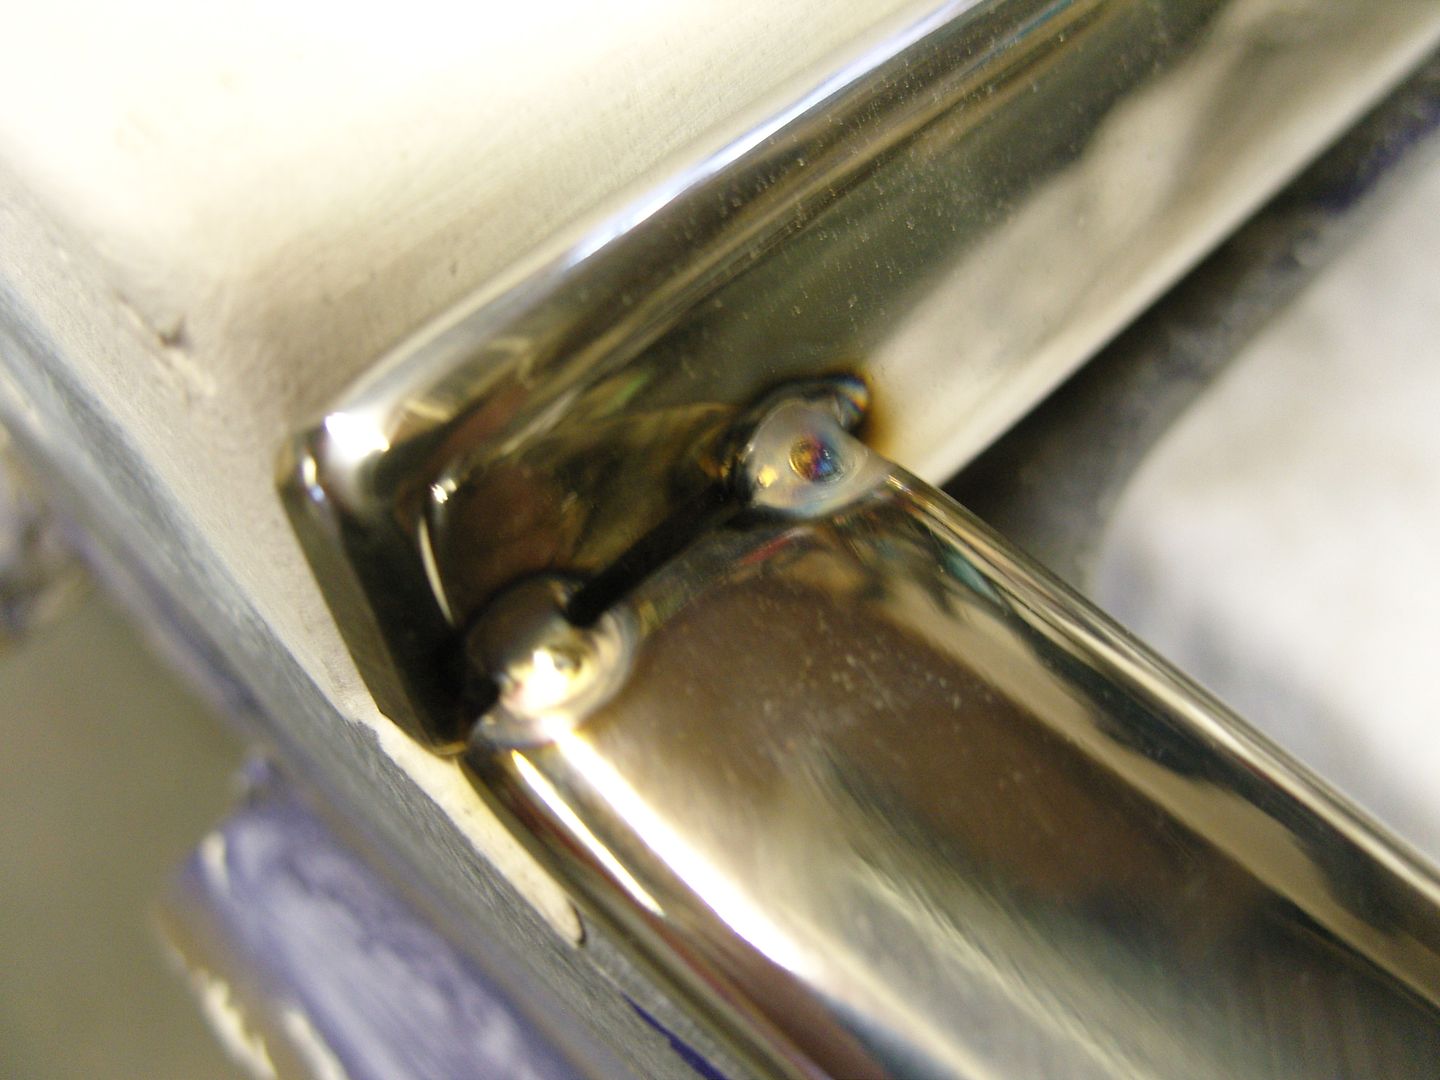
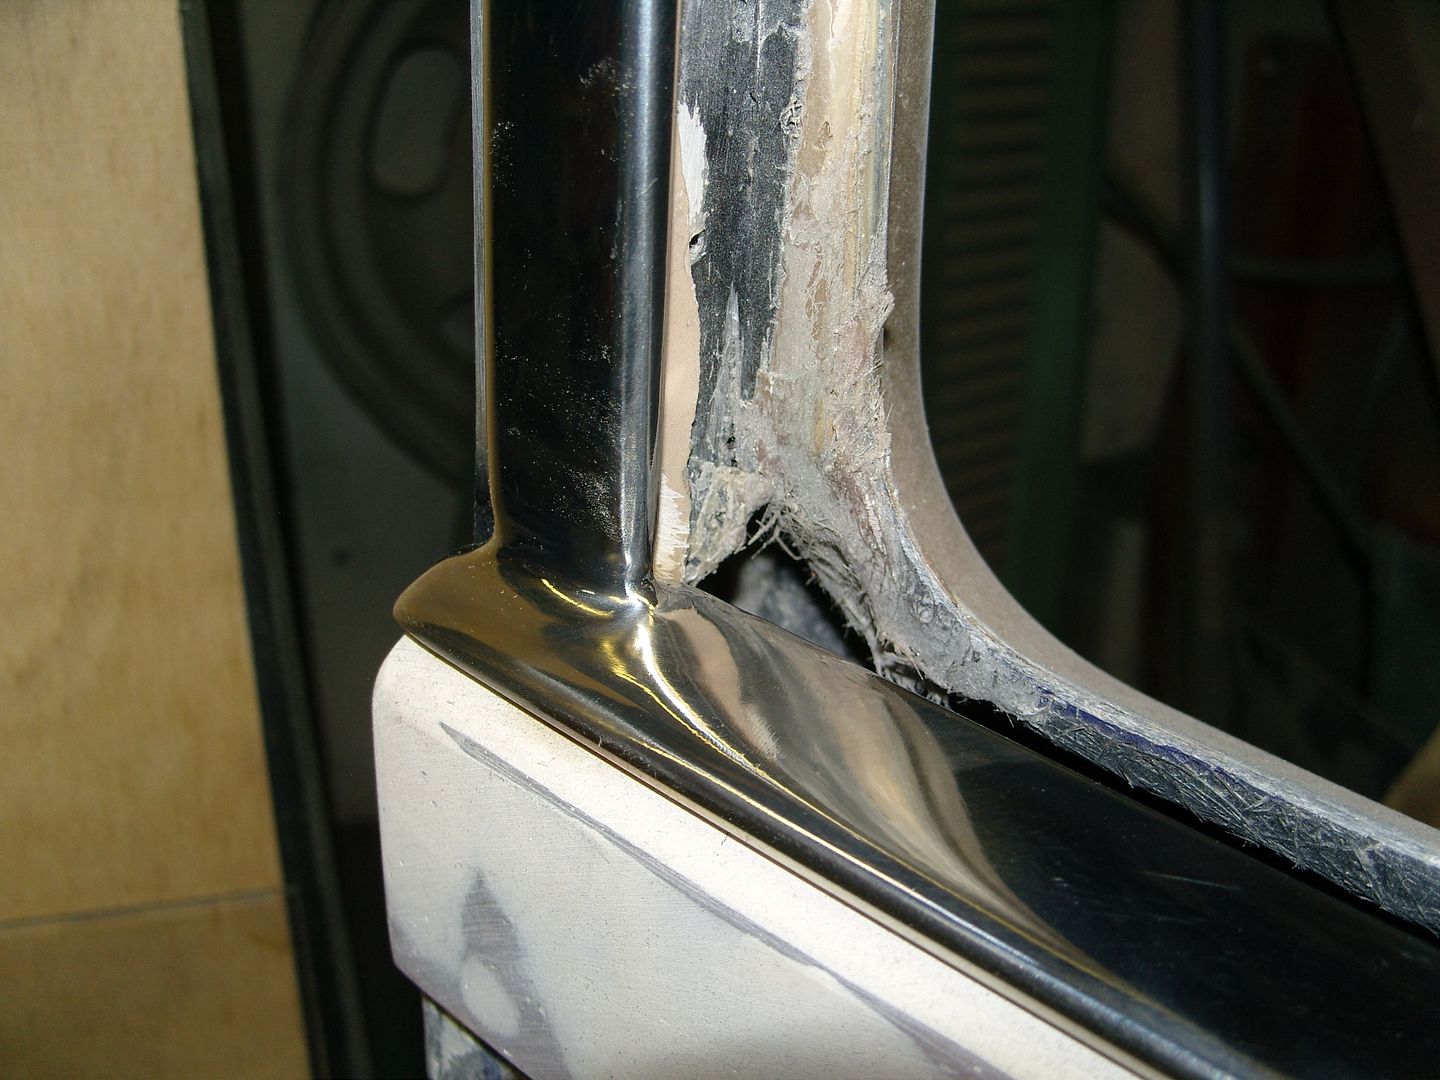
The 4 parts were then attached to the door with countersunk screws ready for tack welding, had to be careful with the tacks as the GRP can catch light pretty easily
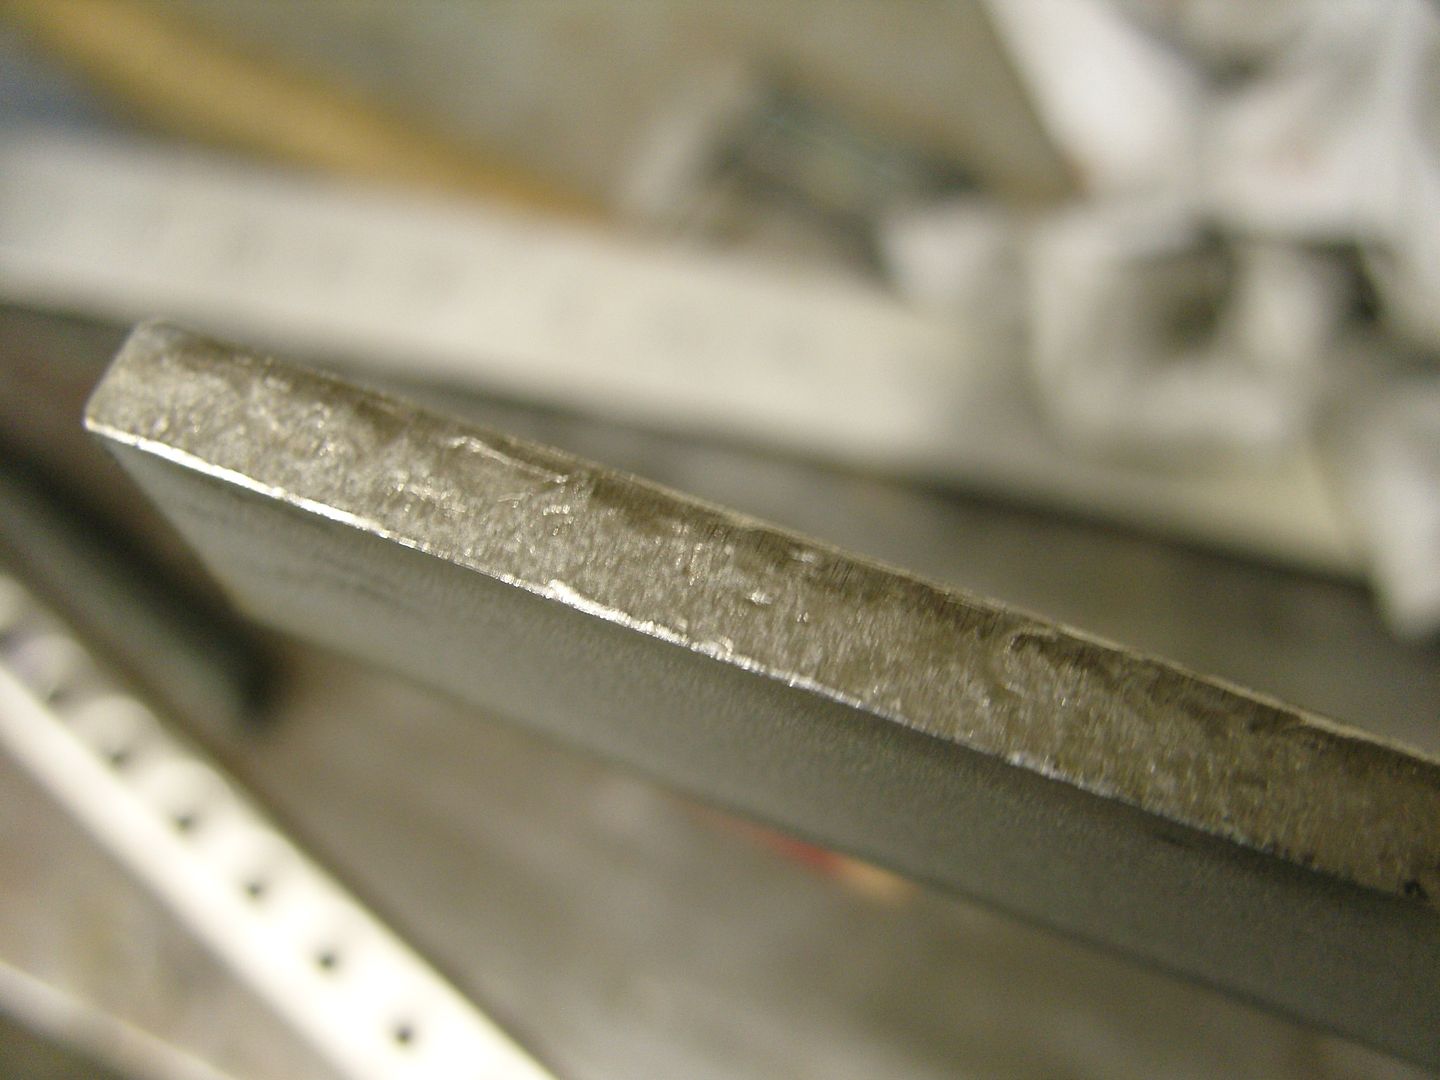
All the parts were rough polished before so to make the final polish easier.
the stainless i had wasn't the best so a fair bit of sanding was needed
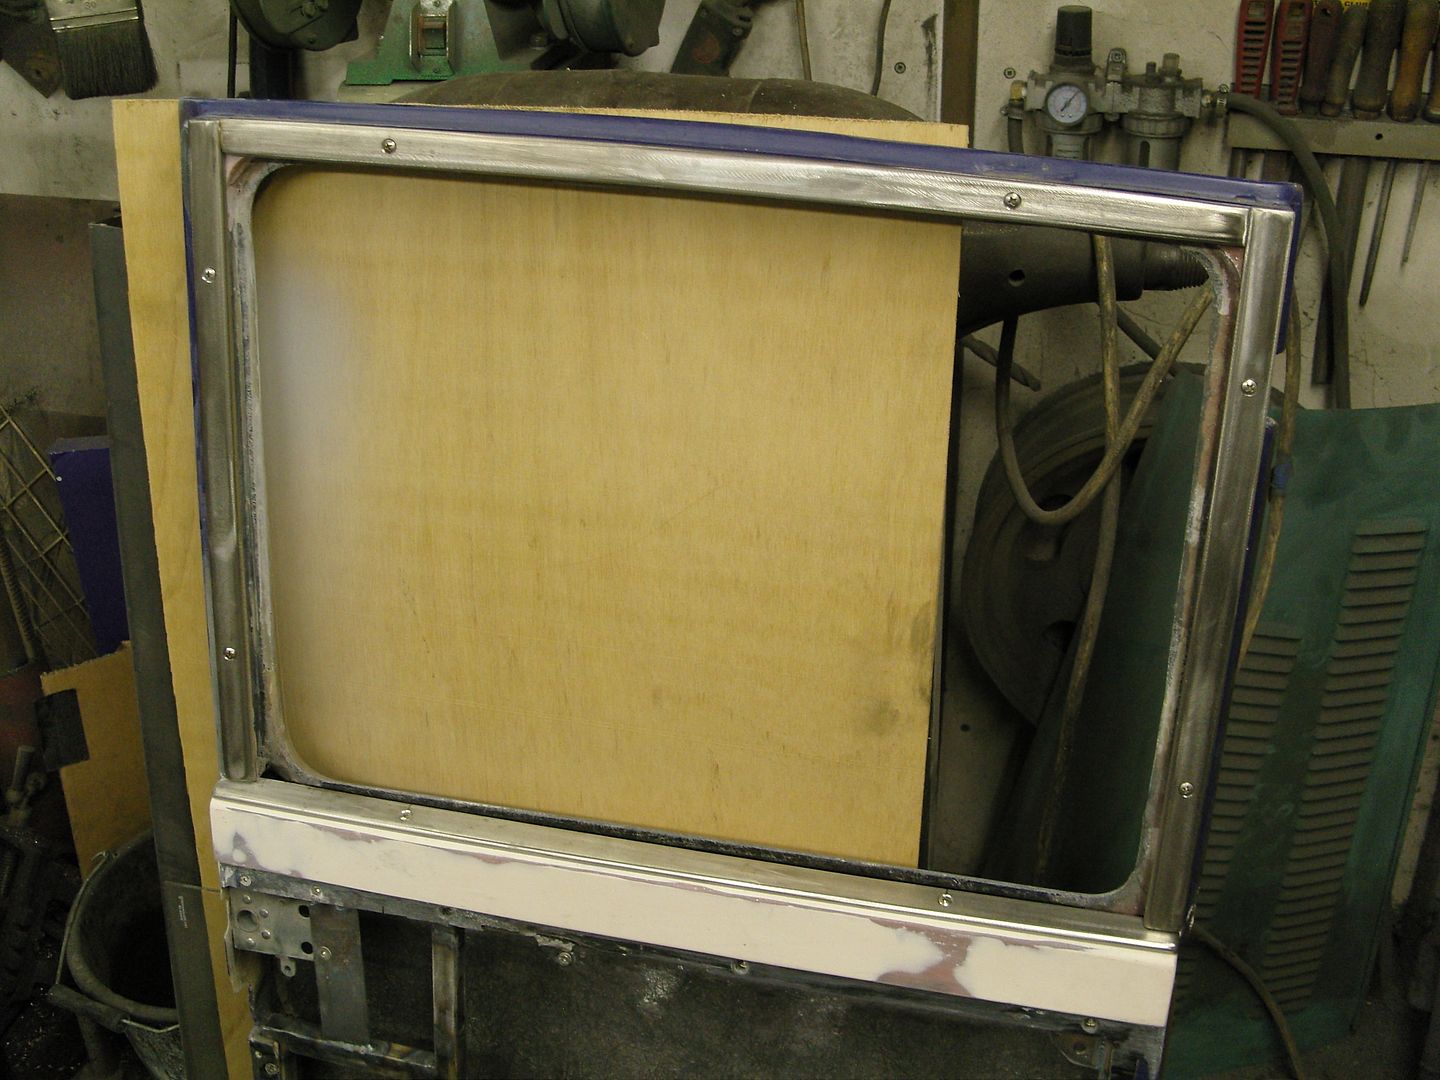
Small tacks were done to keep it all together then it was clamped down to my welding bench for finish welding.
While on the bench clamped flat i decided to add rounded corners at the top of the moulding, I think it looks better.
Heres the finished job after the welds were polished out, they still need a bit more polishing work but i'm pretty pleased how they came out
.Last edited by roadster32; 08-22-2010 at 08:38 AM.
Its aweful lonesome in the saddle since my horse died.

 Reply With Quote
Posting Permissions
- You may not post new threads
- You may not post replies
- You may not post attachments
- You may not edit your posts

I saw last night on fb about John. The world sure lost a great one. I'm going to miss his humor, advice, and perspective from another portion of the world. Rest in Peace Johnboy.
John Norton aka johnboy